
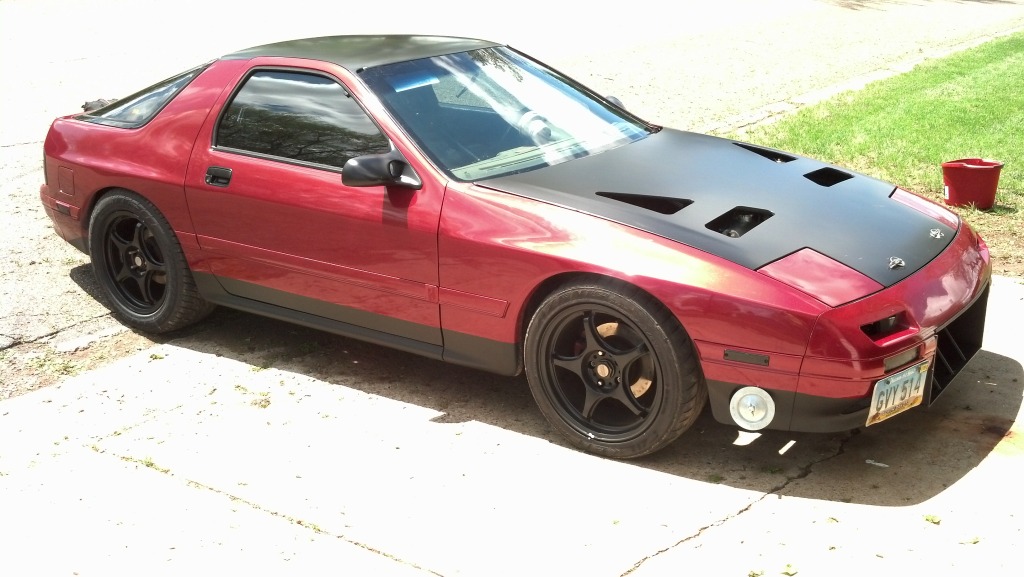
She Followed Me Home, Honest

While cleaning up the garage I found another chunk of ABS, so the panel work continued.
Unfortunately, it wasn't big enough to redo the whole thing as one piece (which is the ultimate goal but only after I get some Aerocatch hood latches and eliminate the hood catch and release lever), so the panel is now scabbed together from four pieces.
It'll be good as a template for whenever I make the final part.
The biggest problem I've been having is the intake snorkel and how the panel has to rise up to cover it. This bows the trailing edge and makes it look uneven (it's not)... it's been driving me crazy.
Since I'd already decided that this part was only a template/practice piece, I felt free to try a different approach and I may be on to something.
Here's the snorkel with the panel removed, showing the airpath over the radiator:

It certainly won't be ramming air into the box but it does have a clear(ish) path from the nose of the car.
It's not pulling from the engine bay at least.
I then cut the main panel away from the edge of the snorkel to the outside edge of the upper rad hose bung...these were the two things that really caused the panel to bow up. The hole extends forward past the radiator support beam so air can climb over and reach the snorkel.
Then made a separate piece to cover the hole and lock the snorkel in place.
Like so:

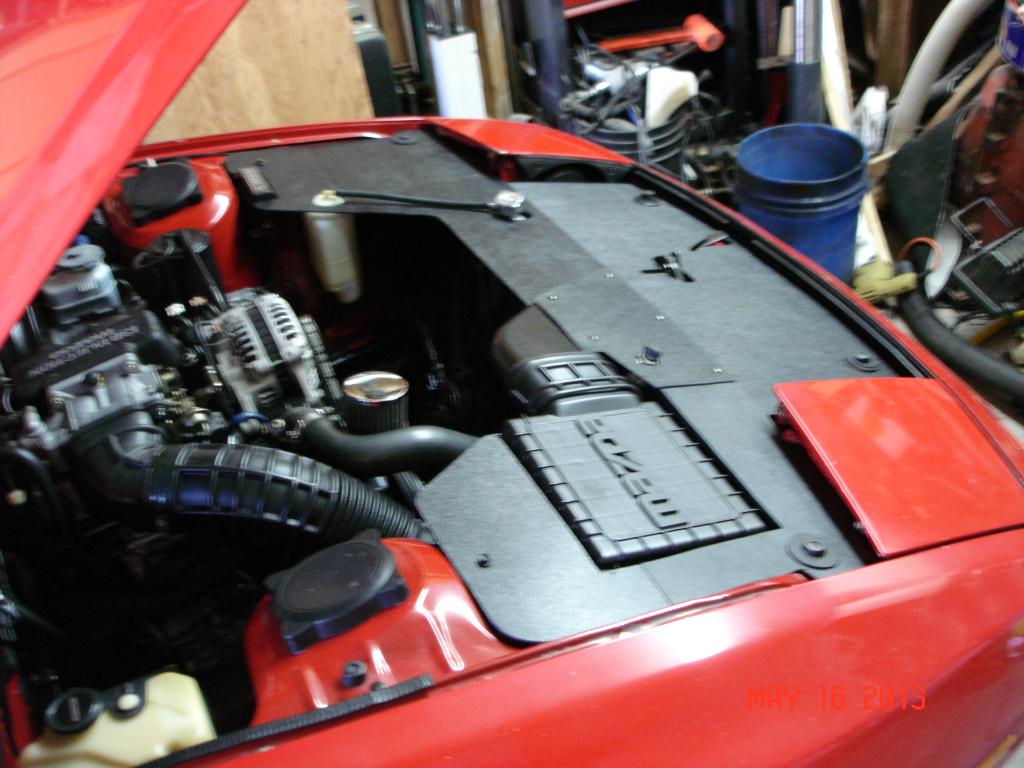
The camera makes the color appear uneven, it looks pretty good in person, the different pieces are not so distinct, a casual glance and it appears as one piece:

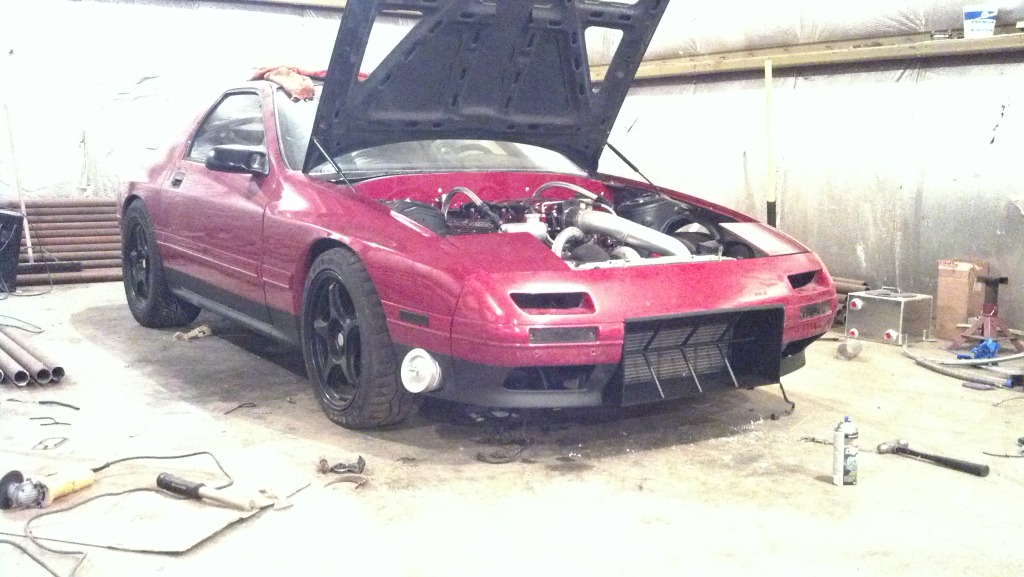
The two ears (from the back of the lights to the strut towers) have also grown in size, there's just an amazing amount of dead space in a FC engine bay.
The panel can be removed in seconds, there are only two screws holding it in, mostly it's anchored by the four rubber hood bumpers (two in the very front and two behind the headlights). The overflow bottle can be examined and filled in situ and both the fill and bleed for the rad are accessible as well.
I'm almost hesitant to say it, but it really did happen...
Took it for a shakedown run, 26 miles in mostly city driving (stop & go, mostly sub-45mph) in 80� ambient temps.
Water temp never breached 190�, nor did the fan ever come on.
I really don't know if this was just a fluke or will be repeatable because I can't see how the panel could have caused this (excellent) performance.
I guess we'll see.
Unfortunately, it wasn't big enough to redo the whole thing as one piece (which is the ultimate goal but only after I get some Aerocatch hood latches and eliminate the hood catch and release lever), so the panel is now scabbed together from four pieces.
It'll be good as a template for whenever I make the final part.
The biggest problem I've been having is the intake snorkel and how the panel has to rise up to cover it. This bows the trailing edge and makes it look uneven (it's not)... it's been driving me crazy.
Since I'd already decided that this part was only a template/practice piece, I felt free to try a different approach and I may be on to something.
Here's the snorkel with the panel removed, showing the airpath over the radiator:

It certainly won't be ramming air into the box but it does have a clear(ish) path from the nose of the car.
It's not pulling from the engine bay at least.
I then cut the main panel away from the edge of the snorkel to the outside edge of the upper rad hose bung...these were the two things that really caused the panel to bow up. The hole extends forward past the radiator support beam so air can climb over and reach the snorkel.
Then made a separate piece to cover the hole and lock the snorkel in place.
Like so:


The camera makes the color appear uneven, it looks pretty good in person, the different pieces are not so distinct, a casual glance and it appears as one piece:

The two ears (from the back of the lights to the strut towers) have also grown in size, there's just an amazing amount of dead space in a FC engine bay.
The panel can be removed in seconds, there are only two screws holding it in, mostly it's anchored by the four rubber hood bumpers (two in the very front and two behind the headlights). The overflow bottle can be examined and filled in situ and both the fill and bleed for the rad are accessible as well.
I'm almost hesitant to say it, but it really did happen...
Took it for a shakedown run, 26 miles in mostly city driving (stop & go, mostly sub-45mph) in 80� ambient temps.
Water temp never breached 190�, nor did the fan ever come on.
I really don't know if this was just a fluke or will be repeatable because I can't see how the panel could have caused this (excellent) performance.
I guess we'll see.


I in the process of ordering a sheet of 32" x 12" x 1/8" ABS plastic to mimic your panel that goes in front of the radiator. I figure spending ~$10 on that and hacking on it for a little while is smarter than buying a $70+ pre-fabricated panel. May I ask what tools you used to keep the edges and holes on your panels so clean cut? Any tips for constructing it?
Sure, Brett...
-TEMPLATE(s)!!!. The most important part is to start with a good template. I used a variety of different materials, mostly posterboard and foamcore. I made these in sections to work on specific areas and taped them together to get a final piece. I then made another final part out of one chunk of foamcore to make sure it was right.
-The ABS is very easy to work with but you need to be careful about cutting tool speed. Too fast and it'll melt. For the holes I used wood spade bits and an adjustable circle cutter in a drill press but a hand drill would work too. I used a cheapshit jig saw for the straight cuts with a medium metal cut blade. You don't want a real coarse or fine tooth...too coarse and it vibrates/rips the material, too fine and it clogs and melts behind the cut. Files and sandpaper will dress your cut edges if you're a real perfectionist and because it's so soft, it doesn't take much work.
-Even with all the prep I usually figure my first attempt will be practice and don't worry too much if I decide to redo it. In this case, the openings for the hood latch and release lever became increasingly smaller in every version I made. Mine could be even smaller still but I plan on going to Aerocatch hood pins (someday!) and deleting those openings altogether.
I like having the textured side of the ABS be the "top" as it conceals scratches, water stains, etc. better than the shinier smooth side.
Good luck.
Minor update, prompted by nit-picky nonsense.
Car in general is running/driving fine but there have been a few things that popped up requiring investigation.
-This one is just odd and only happened once...
Car is low on fuel- maybe 3 gals.- and fuel gauge is reading correctly.
Car sits undriven for three days and suddenly (not yet started, so no ignition power) the gauge reads full.
Never seen the gauge to just wander of it's own accord and was at a loss to explain, so I thought to open the gas cap, see if maybe it was under pressure or something.
Yeah, no real ideas yet, so just guessing.
Anyway, gas door refuses to release with the lever.
This too is new, never thought of it before because it always worked.
Removed the required trim and removed the door hasp to service...clean and lube.
Dribbled oil into the cable end, everything seems fine, so reassemble and ah, no.
Had to tweak the "kicker spring" thingy and it now opens nicely.
See how long that lasts.
Anyway, the tank wasn't pressurized and when the car was started, the fuel gauge slowly returned to the correct read.
That was just mildly irritating and slightly odd.
-This next incident was much more serendipitous and fortunate.
Although the cooling system has been working fine in terms of controlling temp, it's been consistently losing coolant, always to the same level below the fill cap.
Since I do not blow smoke and pass the champagne test, I assume I have some sort of external leak, one that leaves no evidence on the ground.
My first and most likely suspect is the Godspeed radiator, I'm guessing a pinhole that gets worse as it's pressurized.
The rad passes a pressure test (1/2 hour at 10 psi) but I don't believe it.
A few days later, still fixated on the rad, I pull it entirely and do an immersion/bubble test, which it also passes.
Issue persists and I've now removed all the shrouding, bellypan and airbox so I can observe the whole radiator (front and back) as the engine runs. Several runs up to 195� ( trigger point for fan LOW speed) followed by shutdown and not a drop that I can see.
Until about five minutes later when a drop appeared on the swaybar.
Turned out to be from the heater return hose on the lower bung, the clamp was shockingly loose.
I'd installed with a screwdriver but a socket was required to get some proper squeezage.
I was optimistic and a few short drives seemed to bear it out.
Feeling rather pleased with myself (although why is a good question...the problem was of my own making) I made a quick check of things...plug wires, electrical connectors, basically anything within easy reach.
And got water.
From the heater supply hose beneath the oil pressure sending unit (or "switch" as they like to call it).
If the hose was twisted it spurted from the hose end under the clamp (the clamp being the original wire bale type)...twist it back and it was fine.
A disaster waiting to happen, fer sure.
I had seriously considered replacing that hose last fall but budgetary constraints precluded it and I've had no reason to suspect it till now.
I have temporarily trimmed 1" from the hose end- removing the deeply incised groves left by the old clamp- and used a worm drive clamp.
Everything hunky dory now but new hoses will be ordered soon (certainly before the big trip in late summer) just because.
I really hate not trusting my car.
Of course, there is an upside.
Watching the recovery tank like a hawk lead me to question its location...just not loving it.
In fact, it violates one of my stated precepts for the bay...minimize hose runs and hose draping.
I made several attempts at relocation before the simplest and (so far) most elegant solution presented itself:
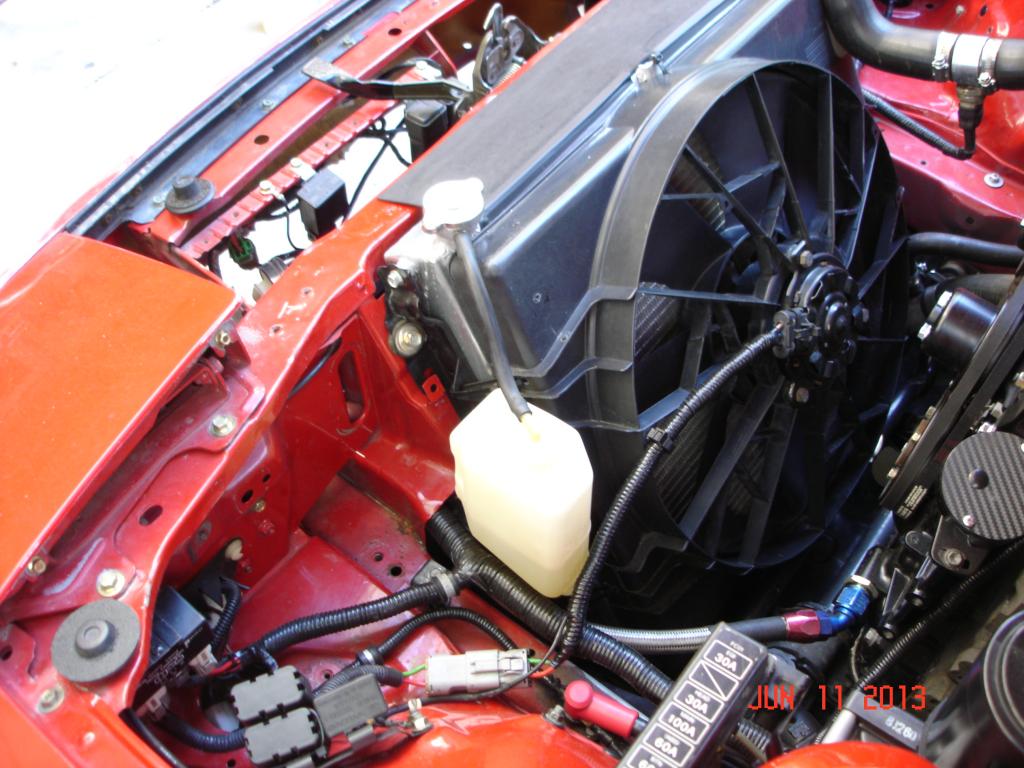
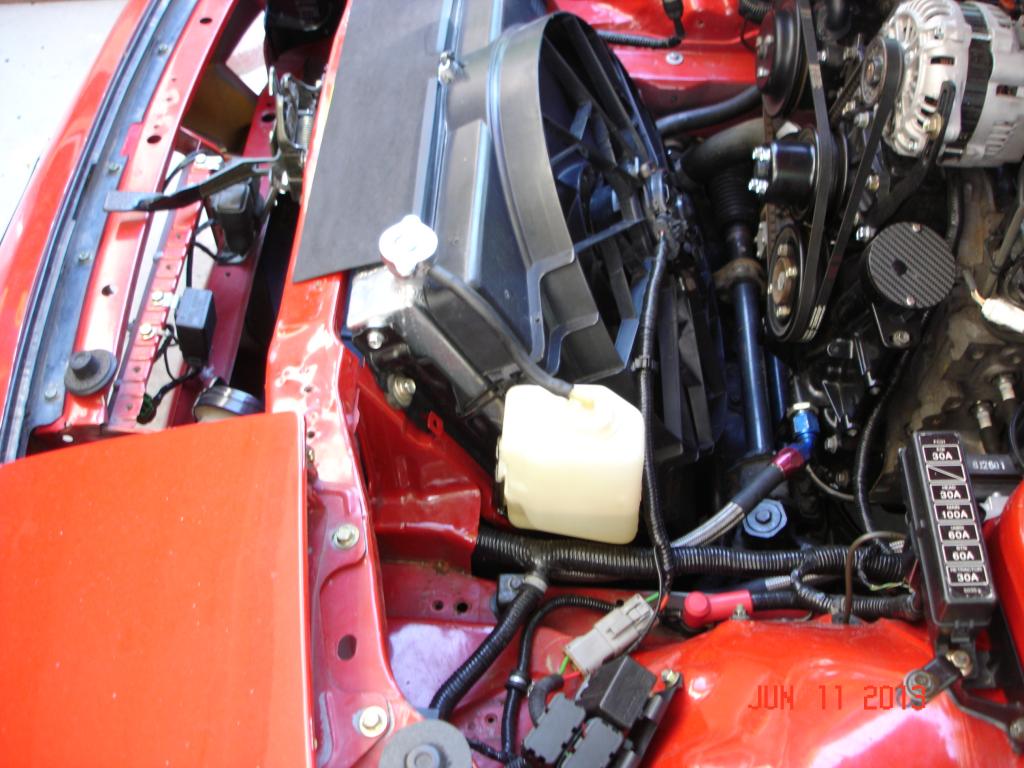
Of all the iterations, this is my fave so far...it's a keeper.
Note that the upper panel(s) is not in place, that is being totally reevaluated and will reappear in a more evolved form soon.
And just to top it all off, the clock has started spontaneously resetting.
Time for some soldering action apparently.
In a more theoretical vein, I really like a lot of things on this car, especially the concept (if not the execution) of the ducting...


Joined: Mar 2001
Posts: 31,859
Likes: 3,243
From: https://www2.mazda.com/en/100th/
Anyway, gas door refuses to release with the lever.
This too is new, never thought of it before because it always worked.
Removed the required trim and removed the door hasp to service...clean and lube.
Dribbled oil into the cable end, everything seems fine, so reassemble and ah, no.
Had to tweak the "kicker spring" thingy and it now opens nicely.
See how long that lasts.
MECP Certified Installer
Joined: Feb 2009
Posts: 3,176
Likes: 3
From: Mesquite, TX-DFW

Minor detail since we're on the subject cuz the pic reminded me.
You know how some cars have the gas cap tied in with a wire to the neck and/or a rest on the filler? Never lost a gas cap, but I've thought of doing this. Something for me to keep in mind next time scouring for parts.
edit: noticed the french warning on the inside of the filler cap. Was the car from Canada by any chance?

Joined: Mar 2001
Posts: 31,859
Likes: 3,243
From: https://www2.mazda.com/en/100th/
Minor detail since we're on the subject cuz the pic reminded me.
You know how some cars have the gas cap tied in with a wire to the neck and/or a rest on the filler? Never lost a gas cap, but I've thought of doing this. Something for me to keep in mind next time scouring for parts.
edit: noticed the french warning on the inside of the filler cap. Was the car from Canada by any chance?
You know how some cars have the gas cap tied in with a wire to the neck and/or a rest on the filler? Never lost a gas cap, but I've thought of doing this. Something for me to keep in mind next time scouring for parts.
edit: noticed the french warning on the inside of the filler cap. Was the car from Canada by any chance?
I've yet to lose one but do carry a spare, just in case.
I've not explored the lanyard approach but have looked at few that clip the (untethered) cap to the back of the door. I assume the door wouldn't close with the cap thus attached, saving you from embarrassment.
I've not explored the lanyard approach but have looked at few that clip the (untethered) cap to the back of the door. I assume the door wouldn't close with the cap thus attached, saving you from embarrassment.
Yesterday Sweetheart and I endured a forced death march, 11 miles down Colorado Blvd. in 100� ambient temp, all heavy stop/go traffic.
The cooling system worked very well with no apparent loss of volume (still too soon to really say, though).
Now that I'm actually driving my "dream spec" car (very modest dreams, I'll grant you) and livin the manual lifestyle, I find I still instinctively go for the power window switch and think the passenger door has a follow lock.
I do miss those conveniences- more than I thought, but not enough to actively do anything about it. Were the necessary parts to drop from the sky into my lap, I'd consider it but for now I think I should just continue to retrain the muscle memory.
It took a while to grab the door handle when I first went from the 240Z to the FC...the Z's handle is at the bottom of the door and that's where I always reached first.
And I still don't like my steering wheel option(s).
MECP Certified Installer
Joined: Feb 2009
Posts: 3,176
Likes: 3
From: Mesquite, TX-DFW
I feel so, so stupid. I didn't realize that was a spring, lol!
Clokker, I hear ya on the "dream spec" car thing. Everyone always tells me "you should go turbo!" but I really don't want a turbo. I love how reliable the NA engine is, and don't like how finicky the turbos can be. The NA cars are pretty ******* fast for a 20yr old plus car.
As far as steering wheel option...god! My ******* airbag doesn't even work. The code the airbag light flashes is "airbag module mulfuntion". Really, your broke but you work well enough to tell me your broken?! I have looked everywhere for steering wheels, but yet to find something that doesn't need a stupid hub.
Two things make the FC a cranky candidate for wheel replacement:
- The large diameter (380mm) is necessary to provide a clear view of the entire gauge cluster.
- The hub offset (@13mm) also aids in gauge clearance.
Many Mazda wheels can be adapted to fit, difficulty depends on whether they were airbagged or not. Bagged wheels need a horn slipring installed to make the horn work.
Some wheels need the T/S adaptor holes redrilled (ours are at 12 & 6, some wheels have them at 9 & 3).
I just found and installed this Mazda Millennia wheel yesterday:

Granted, it's not the most stylish of designs but the leather is in outstanding condition and feels great, the rim is a good thickness and it was basically a bolt on. The ergonomics are on par with the FD wheel, so far my favorite.
The airbag exploder thing has been removed but the bag frame was retained as it's required to mount the center pad section.
I know nothing of the details but suspect that if left intact, this airbag would have plugged into your stock system. Just a hunch...
I made it.
Second gen (electronic speedo) Miata cluster, oil pressure and water temp gauges replaced with VDO, grafted onto a FC front plate, bolts in and connects like stock.
Better gauge layout (IMHO) and much better lighting than stock.
Second gen (electronic speedo) Miata cluster, oil pressure and water temp gauges replaced with VDO, grafted onto a FC front plate, bolts in and connects like stock.
Better gauge layout (IMHO) and much better lighting than stock.
I used a FD VSS which bolted right into the FC trans speedo cable drive (Thanks to Ben/Rotary Evolution for the heads up on that).
Had to swap the driven gear for the FC one, but otherwise it's a bolt in proposition.
Speedo is dead accurate up to @60mph, at an indicated 80, she's actually doing 76mph (checked on a State Patrol radar gun...).
Tach is right on the money, fuel gauge is close enough to be semi-useful.
Had to swap the driven gear for the FC one, but otherwise it's a bolt in proposition.
Speedo is dead accurate up to @60mph, at an indicated 80, she's actually doing 76mph (checked on a State Patrol radar gun...).
Tach is right on the money, fuel gauge is close enough to be semi-useful.
I do likes me some junkyard swappin.
Most of my stuff is pretty esoteric and not likely to be of much general use though.
Landon's (potential?) sunroof interchange is a better example of smart junkyard sleuthing.
Most of my stuff is pretty esoteric and not likely to be of much general use though.
Landon's (potential?) sunroof interchange is a better example of smart junkyard sleuthing.
That setup is really cool. The S5 water temp and oil pressure gauges are basically useless indicators. Makes more sense than auxiliary gauges under the stereo head unit. Do you have a write-up or photos on the dash build - maybe earlier in this tread?

So I now have a gas cap restrained by a lanyard and two spares as backup.
All for a problem I'd not considered till you guys brought it up.
Peer pressure, it's a hell of a drug.
On a more frivolous note, while (semi) aimlessly walking the yard today I happened upon a 740 Volvo with a fairly intact lip and that started me thinking about lips and the various different ones people had tried.
Seemed like the 740 had worked out for some, so I snagged a better version a few cars down the line.
Passed a Volkswagon Jetta on the way out and its lip looked reasonable too, so I grabbed it as well.
Haven't done much fitting yet but they both look promising.
I paid $5 each for the lips (which I described at the counter as "bumper trim") and $2 for the gas cap.