
She Followed Me Home, Honest

She Followed Me Home, Honest
Can I keep her Mom, can I....pleeeeeze?
OK, it didn't really follow me home, the real story is less poignant.
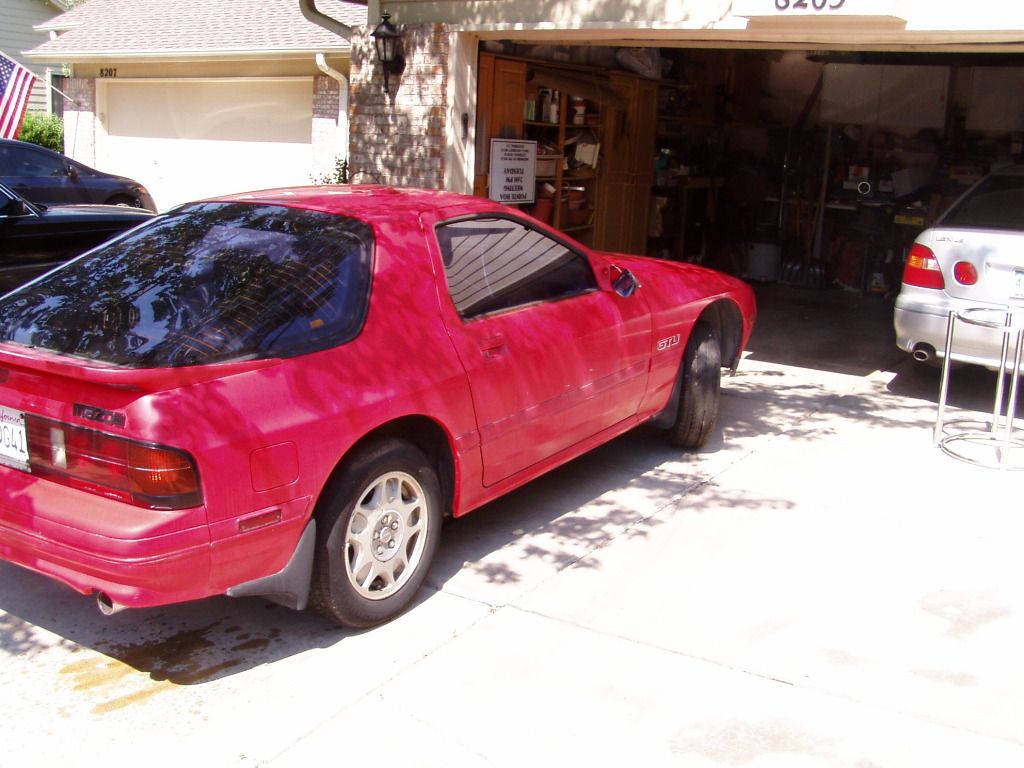
Last titled in 2007, this is a 1990 GTU that sat after failing emissions.
Somewhat later the owner discovered that rabbits had dined out on the engine wiring and the car was ceded to my friends at Precision Import Repair here in Denver.
They had designs on a few parts (armrest console, PS pump, brake booster and engine/transmission but the rolling chassis was completely surplus to them.
But not to me.
Over the past few years, my DD 1991 Coupe has suffered the slings and arrows of outdoor living/parking lots/road debris and the final straw came when someone scraped up the rear quarterpanel pretty good. Prior to that, I'd consoled myself by saying the worst of the dings/dents were on replaceable panels (if I got motivated) but that comfort was gone.
I was casually looking at other cars, but then saw this one.
It pushed all my buttons.
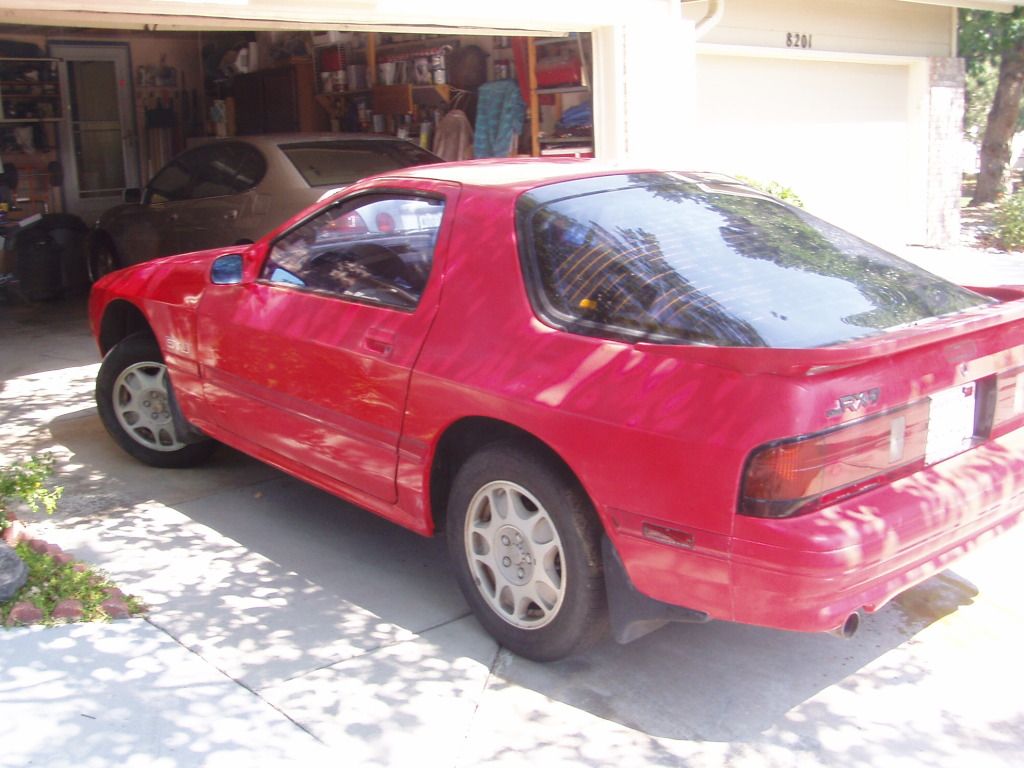
Manual windows, no sunroof, no real dings or dents to speak of, a flawless undercarriage (perfectly straight pinch welds, undented frame rails, no rust whatsoever) and, the icing on the cake, a very nice set of OEM mud guards.
The interior is remarkably fine, not a single cracked vent/plastic piece, the whole thing exceptionally clean, even the driver seat shows no wear/scuffs.
All the electrics- even the clock- are fully functional, I doubt the ashtray has ever even been open.
Odometer shows 139K miles.
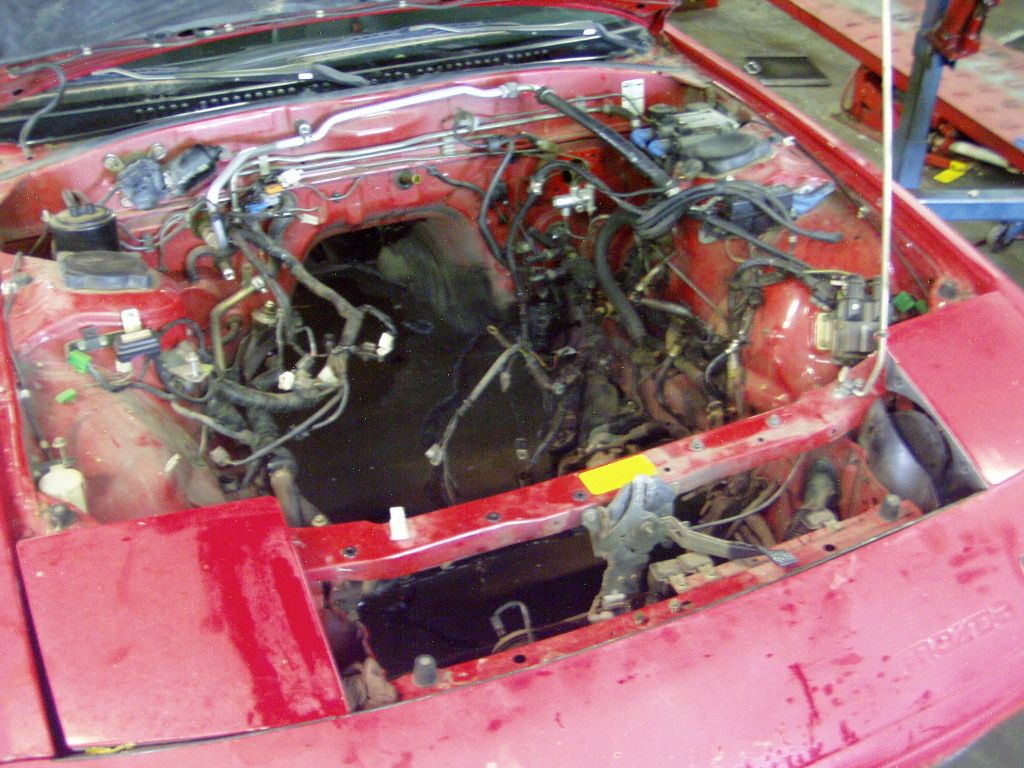
When I first saw it with the engine still in place, I was amazed by how unmolested the bay was, every clip/clamp/bracket and shield just as Mazda intended.
Because the guys at Precision are going to carb/dizzy the motor (it's going in a 1st gen racecar), they weren't interested in the intake, so I harvested all that gaining an untouched throttle body and intake, AFM, airbox, injectors...basically the whole thing save the lower manifold (they want the aux ports).
I traded them some computer/electrical labor for the rolling chassis and had to pull the motor/trans myself.
The registration/emissions on my 91 are good till March, so I have several months to play with this chassis before swapping in my drivetrain.
First up is to strip her down and see how clean I can get it.
I'll be pulling all the body panels forward of the doors and basically doing at all once the mods I've done to the current car over several years.
There will be electrical work but I haven't decided yet how extensive.
At the minimum there'll be significant pruning and tucking or I may jettison the Mazda harness entirely and start from scratch.
The interior will be gutted entirely.
This will be necessary to work on the wiring anyway but I also want to pull the carpet for a power wash and detail the dash (clean/reseal all the ducts mainly).
Both of the mousetracks are trash, the belts will be replaced with manuals.
Although the exterior is in very nice condition, the paint itself is not.
Quite dirty and oxidized (but zero rust), it'll be interesting to see how it responds to clay/polish/wax.
I already did a little test patch on the roof (again, YAY!, no sunroof!) and it looks promising.
I'll be removing the wing as it's in bad shape but whether or not I just put my good one back on is undetermined.
I really like the FC wingless but am unsure how well I can deal with the holes.
I don't want to weld/touch up, which is the right way, because starting on the paint is a very slippery slope with a car this old.
I'd also like to obtain a wipered hatch.
I figure that around January I'll swap over all the goodies from my current car to the (hopefully) renovated GTU chassis. The suspension, cooling, brakes and wheels will all make the journey.
Assuming my engine is still purring along (and I haven't hit the lottery), I'll put a new clutch in, clean it up, maybe put headers on and install it as is.
So, this should be fun.
Note:
Experienced engine pullers may wonder and chuckle about the engine harness still being in place.
I am aware that pulling the harness from the cabin side and leaving it attached to the engine is the easy, fast way.
I had to wait (as it turned out, three days) to gain access to inside shop space.
So I just started idly removing bits of the intake, broiling out in the sun, using just my junkyard toolbox.
Not only did I want to carefully remove these bits but I was curious about the extent of the rabbit damage.
At the end of day 3, I was down to the bare keg top and the harness already free of the engine, so I just left it.
Funny thing about the rabbits.
They didn't touch the harness side of the wiring at all but inhaled the wiring from the plugs to the components. They got the TPS and the OMP (bastards! I wanted both of those...) and that's about it.
With a little luck in the classifieds, I'd bet the car would have run for less than $100.
OK, it didn't really follow me home, the real story is less poignant.
Last titled in 2007, this is a 1990 GTU that sat after failing emissions.
Somewhat later the owner discovered that rabbits had dined out on the engine wiring and the car was ceded to my friends at Precision Import Repair here in Denver.
They had designs on a few parts (armrest console, PS pump, brake booster and engine/transmission but the rolling chassis was completely surplus to them.
But not to me.
Over the past few years, my DD 1991 Coupe has suffered the slings and arrows of outdoor living/parking lots/road debris and the final straw came when someone scraped up the rear quarterpanel pretty good. Prior to that, I'd consoled myself by saying the worst of the dings/dents were on replaceable panels (if I got motivated) but that comfort was gone.
I was casually looking at other cars, but then saw this one.
It pushed all my buttons.
Manual windows, no sunroof, no real dings or dents to speak of, a flawless undercarriage (perfectly straight pinch welds, undented frame rails, no rust whatsoever) and, the icing on the cake, a very nice set of OEM mud guards.
The interior is remarkably fine, not a single cracked vent/plastic piece, the whole thing exceptionally clean, even the driver seat shows no wear/scuffs.
All the electrics- even the clock- are fully functional, I doubt the ashtray has ever even been open.
Odometer shows 139K miles.
When I first saw it with the engine still in place, I was amazed by how unmolested the bay was, every clip/clamp/bracket and shield just as Mazda intended.
Because the guys at Precision are going to carb/dizzy the motor (it's going in a 1st gen racecar), they weren't interested in the intake, so I harvested all that gaining an untouched throttle body and intake, AFM, airbox, injectors...basically the whole thing save the lower manifold (they want the aux ports).
I traded them some computer/electrical labor for the rolling chassis and had to pull the motor/trans myself.
The registration/emissions on my 91 are good till March, so I have several months to play with this chassis before swapping in my drivetrain.
First up is to strip her down and see how clean I can get it.
I'll be pulling all the body panels forward of the doors and basically doing at all once the mods I've done to the current car over several years.
There will be electrical work but I haven't decided yet how extensive.
At the minimum there'll be significant pruning and tucking or I may jettison the Mazda harness entirely and start from scratch.
The interior will be gutted entirely.
This will be necessary to work on the wiring anyway but I also want to pull the carpet for a power wash and detail the dash (clean/reseal all the ducts mainly).
Both of the mousetracks are trash, the belts will be replaced with manuals.
Although the exterior is in very nice condition, the paint itself is not.
Quite dirty and oxidized (but zero rust), it'll be interesting to see how it responds to clay/polish/wax.
I already did a little test patch on the roof (again, YAY!, no sunroof!) and it looks promising.
I'll be removing the wing as it's in bad shape but whether or not I just put my good one back on is undetermined.
I really like the FC wingless but am unsure how well I can deal with the holes.
I don't want to weld/touch up, which is the right way, because starting on the paint is a very slippery slope with a car this old.
I'd also like to obtain a wipered hatch.
I figure that around January I'll swap over all the goodies from my current car to the (hopefully) renovated GTU chassis. The suspension, cooling, brakes and wheels will all make the journey.
Assuming my engine is still purring along (and I haven't hit the lottery), I'll put a new clutch in, clean it up, maybe put headers on and install it as is.
So, this should be fun.
Note:
Experienced engine pullers may wonder and chuckle about the engine harness still being in place.
I am aware that pulling the harness from the cabin side and leaving it attached to the engine is the easy, fast way.
I had to wait (as it turned out, three days) to gain access to inside shop space.
So I just started idly removing bits of the intake, broiling out in the sun, using just my junkyard toolbox.
Not only did I want to carefully remove these bits but I was curious about the extent of the rabbit damage.
At the end of day 3, I was down to the bare keg top and the harness already free of the engine, so I just left it.
Funny thing about the rabbits.
They didn't touch the harness side of the wiring at all but inhaled the wiring from the plugs to the components. They got the TPS and the OMP (bastards! I wanted both of those...) and that's about it.
With a little luck in the classifieds, I'd bet the car would have run for less than $100.
lol, first thing i saw was the rare mud guards also.
$
sold a set instantly for $150. not my cup of tea but they are hard to find.
for the engine harness.. i see many people talk about it being much easier to pull with the engine, i personally find it much simpler to strip down the engine and leave it in the engine bay, i get a wierd look when i see people claim it's easier to yank out, when in reality it requires about 15 minutes to pull the interior apart and get to the ECU and do some fishing. the intake is as easy to install on an engine stand as it is with the engine in the bay, so no time lost.
many cars like the FD and FC with ABS it's a royal pain to fish the ECU harness in and out of the firewall, so... efficiency being my concern i just do them all the same.
Last edited by RotaryEvolution; Aug 8, 2012 at 06:26 PM.

We were having a particularly snowy winter that year and I came to suspect that the guards promoted snowpack in the wheelwells.
One day as spring arrived, I decided to remove them and see how it looked.
After figuring out the egregiously weird mounting system, I removed them and stashed them in the back of my workplace. By hook, crook or just simple mischance, they disappeared.
Somewhat later I discovered the value/rarity of the guards and have been obsessed ever since.
Funny thing is, I'm still not sure I really like 'em.
I'll be removing these while I polish the body (oh boy, get to deal with the ancient, impervious body tape!) and looking into ways to spiff up their finish, then I can decide if they're going back on or being converted to funds.
They would also make excellent trade bait for some of the other things I'd like (manual mirors w/interior triangle, hatch w/ wiper and good heating element- that will have to be local, I'm sure- T2 sideskirts, etc.).
for the engine harness.. i see many people talk about it being much easier to pull with the engine, i personally find it much simpler to strip down the engine and leave it in the engine bay, i get a wierd look when i see people claim it's easier to yank out, when in reality it requires about 15 minutes to pull the interior apart and get to the ECU and do some fishing. the intake is as easy to install on an engine stand as it is with the engine in the bay, so no time lost.
many cars like the FD and FC with ABS it's a royal pain to fish the ECU harness in and out of the firewall, so... efficiency being my concern i just do them all the same.
many cars like the FD and FC with ABS it's a royal pain to fish the ECU harness in and out of the firewall, so... efficiency being my concern i just do them all the same.
Plus, I was dirty and sweaty and the interior is so nice I was sure I'd get a nice big grease stain on something precious.
Originally Posted by rotary_bunta
nice find Clokker. cant wait to find out what you turn it into.
Beyond that, I don't really know yet.
Obviously, this is an almost perfect scenario for an engine swap.
That would leave my current car practically intact and more viable to sell.
Sadly, I have more time than money, so the swap option is a bit remote for now.

it took me about15 minutes to yank the engine harness out of the interior to go with the engine. then when reinstall another 15 mintues., and that was my first engine swap
not sure if leaving it on the car would be easier, might try it next time.
not sure if leaving it on the car would be easier, might try it next time.


Joined: Mar 2001
Posts: 31,851
Likes: 3,239
From: https://www2.mazda.com/en/100th/
ive done it both ways, the simple way is to just unbolt the vacuum rail, and put it on the window, harness goes with it... now a days though, i usually unplug the ECU, in my turd polishing i like to put every clamp and bolt back in the same place it came from (the clamps are all oriented a certain way from the factory)
nice car! my experience with the red, is that if its factory paint, it'll shine up to look new.
nice car! my experience with the red, is that if its factory paint, it'll shine up to look new.
Trending Topics

Today was the first full day of whatever this project is and I decided to start by dropping the exhaust.
I'll be putting the RB catback from the other car on and just out of curiosity, I checked RBs catalog for hanger prices. $168 for the full set, thank you very much.
The GTU still had the full factory exhaust (in pretty nice shape, too) and all the hangers looked good, so I endeavored to save them.
What a PITA those rubber doughnuts are.
Did it though.
I also learned that the factory exhaust has a ground strap on it...seems kinda weird.
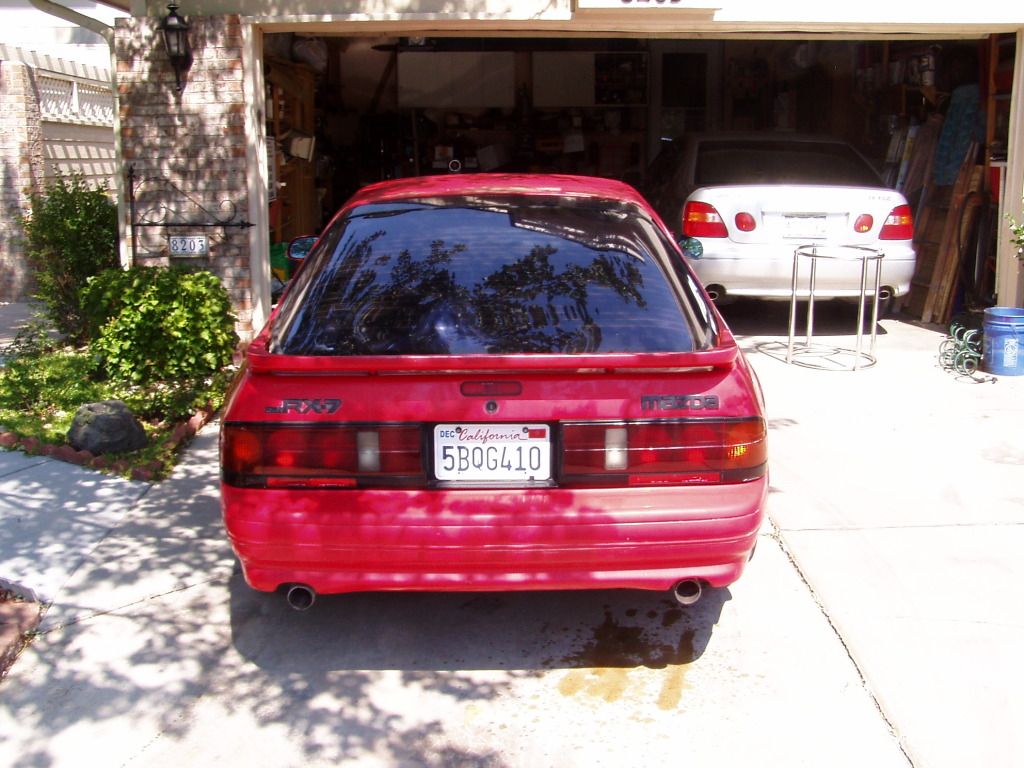
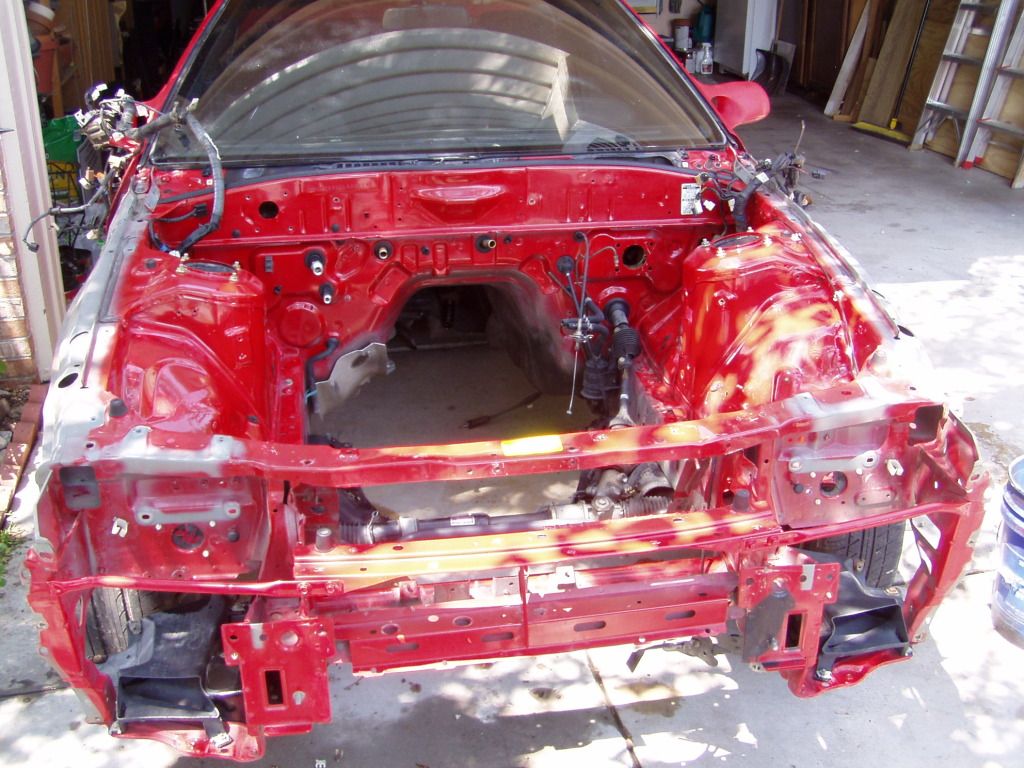
While I was buried up her ***, the GTU sneezed and her nose fell off:
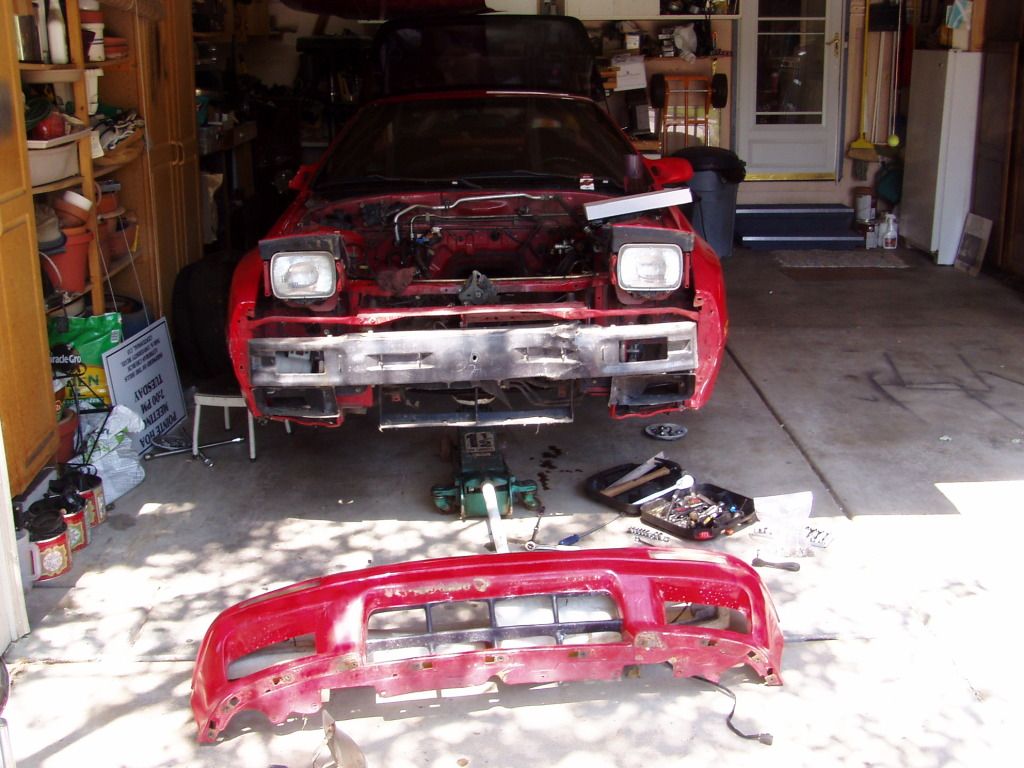
She has a deviated septum:
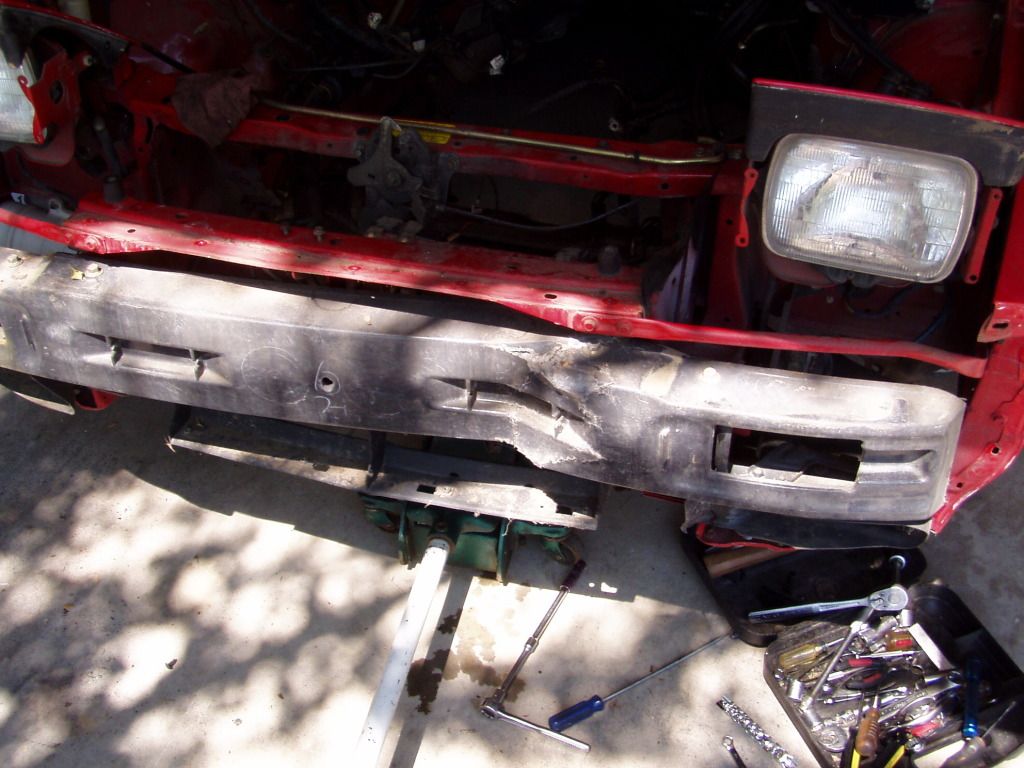
Clearly, she's been hit and only partially repaired.
The bumper cap must be a replacement (new or used, I dunno) because it shows absolutely no evidence of a hit big enough to break the bumper core. The box the core mounts to is somewhat tweaked but the frame that bolts to is fine. Damage is very minimal, so congrats Mazda, the parts worked as designed. If I don't decide to ditch all that stuff outright, I can just bolt up the parts from the old chassis and be done.
Then, parts just started falling off :
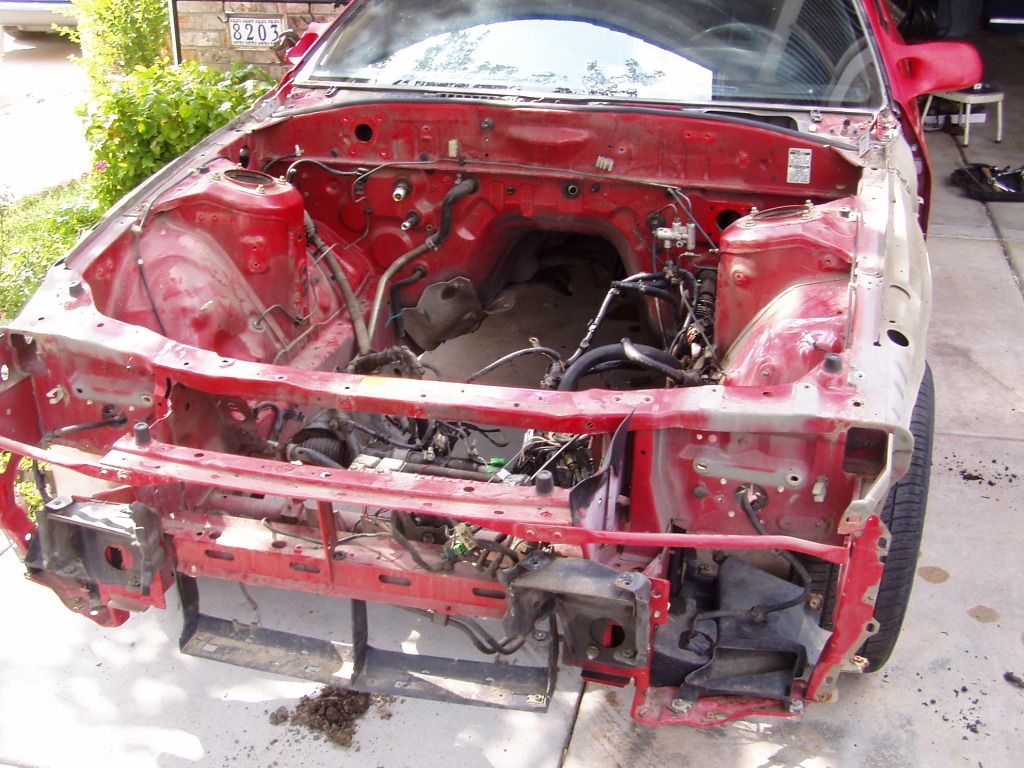
First wash of the (mostly) naked bay:
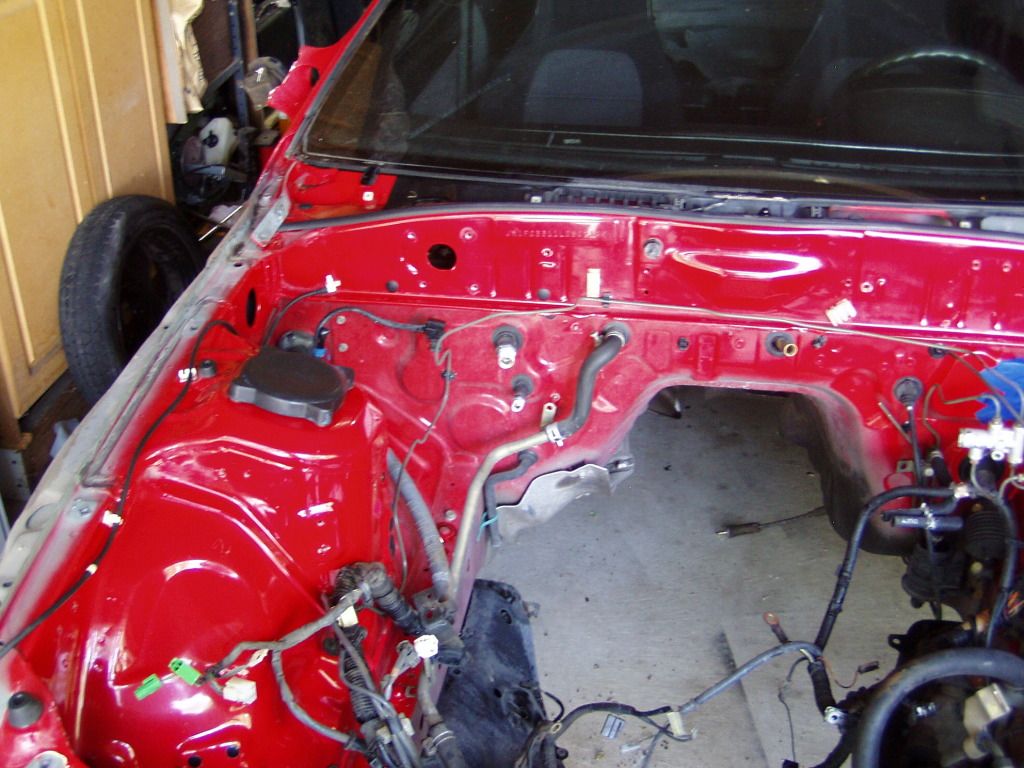
She cleans up pretty good.
There's still some stuff to remove and a few grimy spots (I think the PS leaked at some point) but all in all, it's in very nice shape.
Tomorrow I'll do a more comprehensive clean and there are two broken bolts to repair.
Before I began the exhaust, I took advantage of the cool morning and washed the car again, did the door and hatch jambs (had to prong the hatch drains to clear debris) and clay barred everything from the windshield back (including glass).
I'm more and more optimistic that some serious polish/wax action will make her shine again.
Once the major cleaning of the bay and wheel wells is done, I'll get back on the paint.
I've now been pretty much all over/under the car and am very pleased at the condition.
I couldn't find a single scratch on the tail lights, after vacuuming the interior it looks brand new and with the exception of the two broken bolts (one on each side, the lower fender flange), everything has come apart easily.
Hopefully, the worst of the dirty, crappy work will be done by Saturday and I can do some fun stuff.
I'll be putting the RB catback from the other car on and just out of curiosity, I checked RBs catalog for hanger prices. $168 for the full set, thank you very much.
The GTU still had the full factory exhaust (in pretty nice shape, too) and all the hangers looked good, so I endeavored to save them.
What a PITA those rubber doughnuts are.
Did it though.
I also learned that the factory exhaust has a ground strap on it...seems kinda weird.
While I was buried up her ***, the GTU sneezed and her nose fell off:
She has a deviated septum:
Clearly, she's been hit and only partially repaired.
The bumper cap must be a replacement (new or used, I dunno) because it shows absolutely no evidence of a hit big enough to break the bumper core. The box the core mounts to is somewhat tweaked but the frame that bolts to is fine. Damage is very minimal, so congrats Mazda, the parts worked as designed. If I don't decide to ditch all that stuff outright, I can just bolt up the parts from the old chassis and be done.
Then, parts just started falling off :
First wash of the (mostly) naked bay:
She cleans up pretty good.
There's still some stuff to remove and a few grimy spots (I think the PS leaked at some point) but all in all, it's in very nice shape.
Tomorrow I'll do a more comprehensive clean and there are two broken bolts to repair.
Before I began the exhaust, I took advantage of the cool morning and washed the car again, did the door and hatch jambs (had to prong the hatch drains to clear debris) and clay barred everything from the windshield back (including glass).
I'm more and more optimistic that some serious polish/wax action will make her shine again.
Once the major cleaning of the bay and wheel wells is done, I'll get back on the paint.
I've now been pretty much all over/under the car and am very pleased at the condition.
I couldn't find a single scratch on the tail lights, after vacuuming the interior it looks brand new and with the exception of the two broken bolts (one on each side, the lower fender flange), everything has come apart easily.
Hopefully, the worst of the dirty, crappy work will be done by Saturday and I can do some fun stuff.

I got lucky, very lucky as it turns out, when this fell into my hands.
Today I did more of the same as yesterday- stripping/cleaning/inspecting.
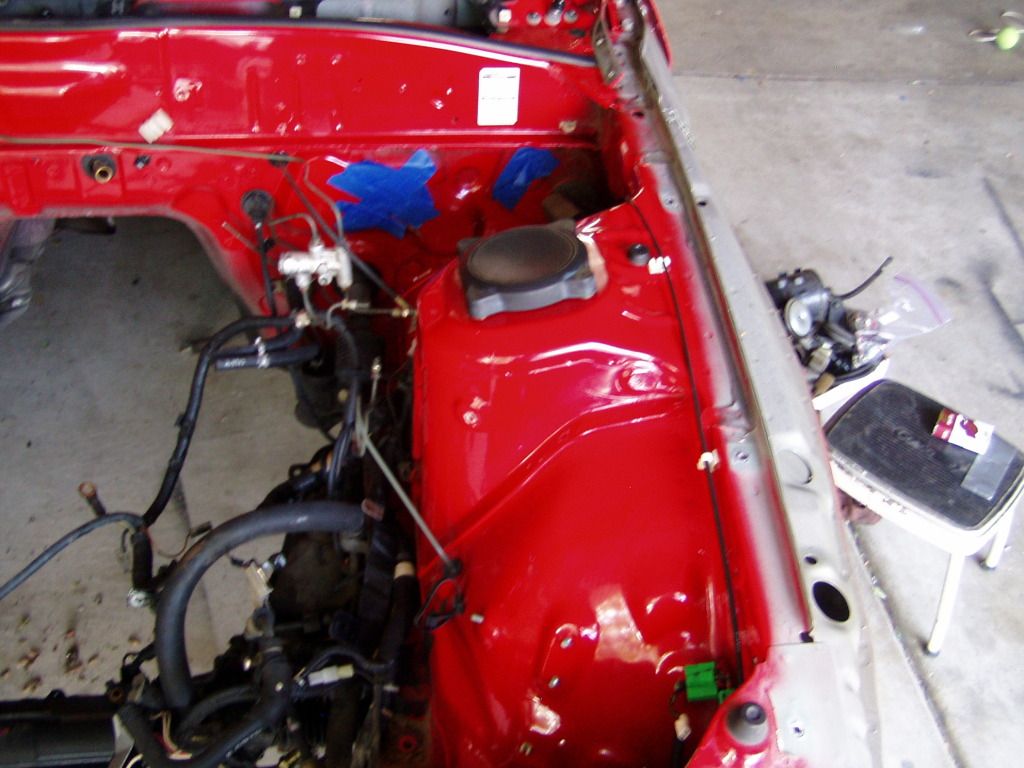
The bay is as naked as it need be and washed yet again.
It's deceptive when wet, trying to determine if the spot is dirt or just another of the areas that Mazda didn't paint and is showing primer.
The factory must have had the paint allotted by the gram because if they didn't think you'd notice, it didn't get painted.
I think it's rather chintzy.
Anyway, the bay is pretty much done with Stage !:
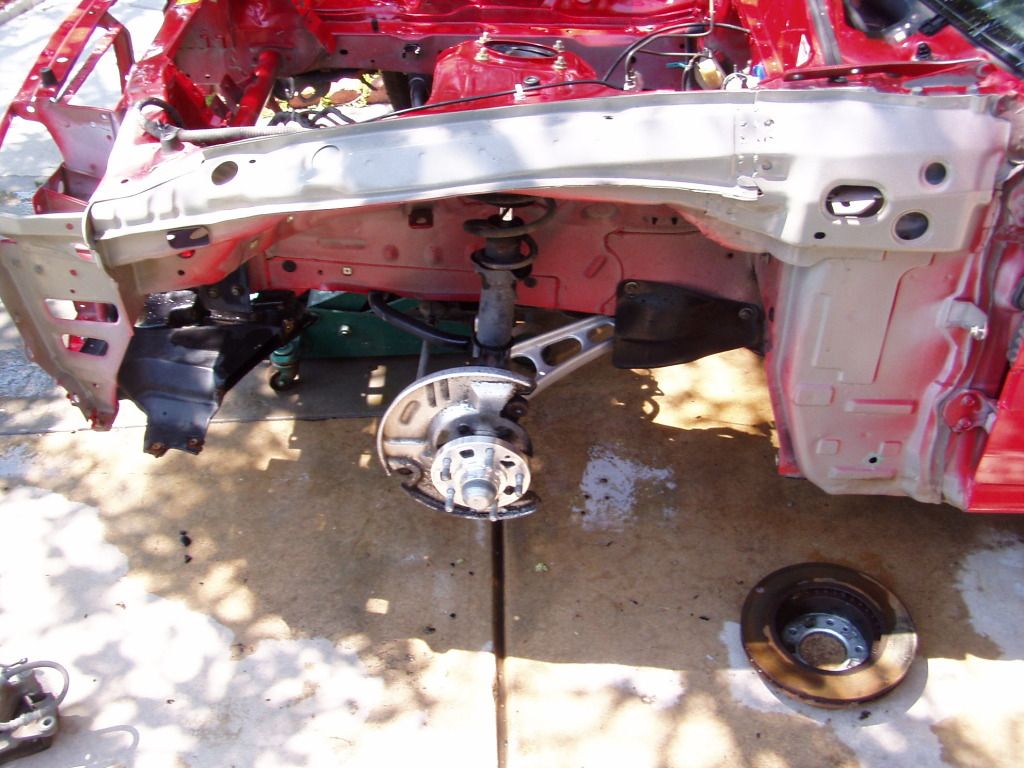
After that I did the wheelwells.
The calipers and rotors are totally gone (not to return) and what remains is pretty clean.
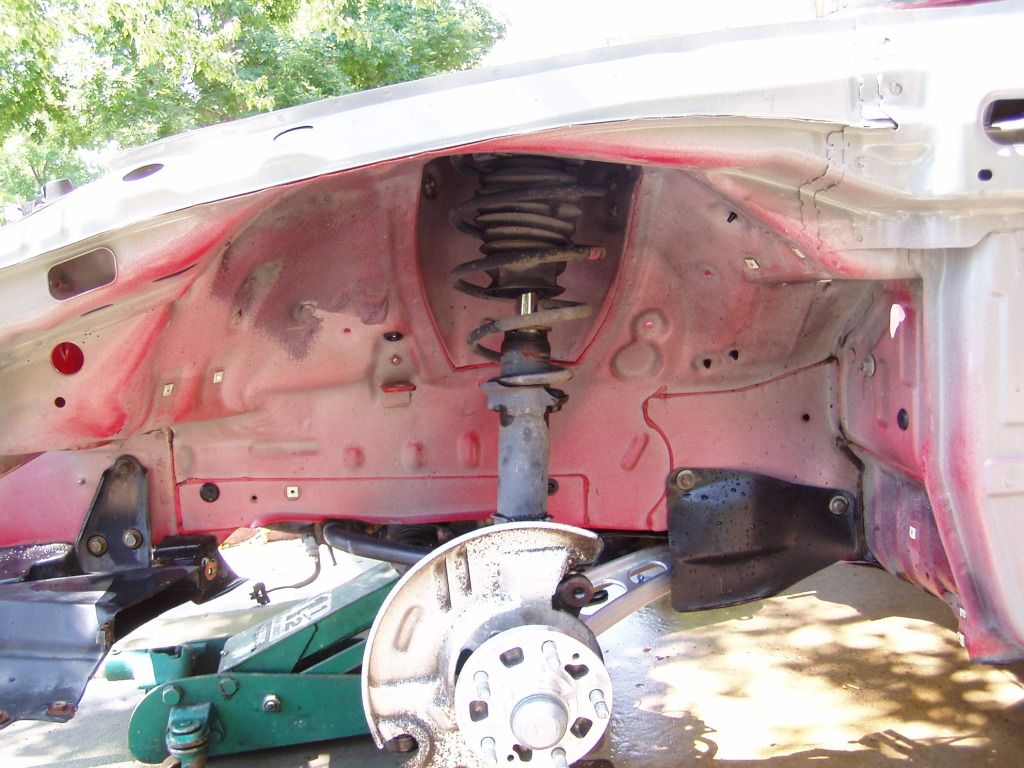
Continuing with the "I can't believe how original this car is!" meme- With the hub stripped down, I thought it'd be clever to check the wheel bearing grease...just see what it looked like.
Spun the hub looking for a spot on the grease cover where previous prying had occurred...and there wasn't one.
Not a single ding/dent/scratch.
First amazed, then suspicious ("What if the grease has never been checked?"), I popped the cover off (as stealthily as possible) and the grease was abundant and clean.
So, even the damn wheelbearing grease looks brand new.
I'm making a list of physical mods that need doing- enlarge the speedo cable hole to accept the FD sensor grommet, drill the extra hole to mount the hood strut...little **** like that.
Way easier to do now.
I'll also be fixing those two broken bolts and then running a tap through every capture nut I can find.
Pics will be scarce for a day or two because freshly chased threads aren't very photogenic.
Now I have a question for the gallery.
I'm considering ditching the "crash bar" assembly altogether but is that even possible with the stock bumper cover? It seems so flimsy and malleable, will it hold shape without all that crap behind it?
Today I did more of the same as yesterday- stripping/cleaning/inspecting.
The bay is as naked as it need be and washed yet again.
It's deceptive when wet, trying to determine if the spot is dirt or just another of the areas that Mazda didn't paint and is showing primer.
The factory must have had the paint allotted by the gram because if they didn't think you'd notice, it didn't get painted.
I think it's rather chintzy.
Anyway, the bay is pretty much done with Stage !:
After that I did the wheelwells.
The calipers and rotors are totally gone (not to return) and what remains is pretty clean.
Continuing with the "I can't believe how original this car is!" meme- With the hub stripped down, I thought it'd be clever to check the wheel bearing grease...just see what it looked like.
Spun the hub looking for a spot on the grease cover where previous prying had occurred...and there wasn't one.
Not a single ding/dent/scratch.
First amazed, then suspicious ("What if the grease has never been checked?"), I popped the cover off (as stealthily as possible) and the grease was abundant and clean.
So, even the damn wheelbearing grease looks brand new.
I'm making a list of physical mods that need doing- enlarge the speedo cable hole to accept the FD sensor grommet, drill the extra hole to mount the hood strut...little **** like that.
Way easier to do now.
I'll also be fixing those two broken bolts and then running a tap through every capture nut I can find.
Pics will be scarce for a day or two because freshly chased threads aren't very photogenic.
Now I have a question for the gallery.
I'm considering ditching the "crash bar" assembly altogether but is that even possible with the stock bumper cover? It seems so flimsy and malleable, will it hold shape without all that crap behind it?
Joined: May 2006
Posts: 3,881
Likes: 3
From: Jacksonville, Tampa & Tallahassee
It will hold its shape just fine until you hit 70mph or aome old lady backs into you. That crash bar is very effective and I would just find another one. When some dumb bitch slammed on brakes at a green light that support prevented the damage from being much worse than it could have been. I got a replacement (and a spare) the next weekend. Keep in mind I had to cut out holes in the carbon kevlar support for the the Vmount by hand, so if I didn't see the value I certainly wouldn't have gone through the trouble.
The then metal strips screwed into the top edge of the bumper are acturally more responsible for retaining its shape than anything else, even with two 12"x5" holes cut in the center of the bumper mine still holds its shape. However try removing those strips (3 I believe) from even an unmodified bumper and the center will sag before your eyes.
The then metal strips screwed into the top edge of the bumper are acturally more responsible for retaining its shape than anything else, even with two 12"x5" holes cut in the center of the bumper mine still holds its shape. However try removing those strips (3 I believe) from even an unmodified bumper and the center will sag before your eyes.
Hmm, interesting.
My other car has an intact support/crush box(es), so I can always use that if need be.
The mounting flange for the support on the driver side (which took the hit) is a bit tweaked...maybe 1/4-3/8" out of plane with the untouched side but I could probably shim it out enough to work.
I'll have to think about this.
Here in Denver 90% of the vehicles are either SUVs or pickup trucks, if I got backed into (or rearended someone) they'd override the bumper and be well into the hood before making contact.
I spend most of my driving time looking up at people's differentials...
Joined: Mar 2001
Posts: 31,851
Likes: 3,239
From: https://www2.mazda.com/en/100th/
they probably did have the paint allotted, maybe not to the gram though. mass producing a car is such a huge project, that they probably have to do something like that
I understand that it's the difference between mass producing something (in this case, cars) and building your own but the obvious corner cutting offends me.
Not enough to repaint the bay though.
Not enough to repaint the bay though.
i despise 2 stage paints. the E36 was repainted and i didn't notice some d-bag put a 2 stage on it.. clear is coming off now like toilet paper in a soft breeze. the tonneau vert cover has about half of the clear missing and it was perfect only 6 months ago when i bought it.
Last edited by RotaryEvolution; Aug 10, 2012 at 10:05 PM.
Joined: Mar 2001
Posts: 31,851
Likes: 3,239
From: https://www2.mazda.com/en/100th/
yep, with a few exceptions of which are the white in '88 and the arctic silver. all the rest are either single stage or had decent primer *chuckle*.
i despise 2 stage paints. the E36 was repainted and i didn't notice some d-bag put a 2 stage on it.. clear is coming off now like toilet paper in a soft breeze. the tonneau vert cover has about half of the clear missing and it was perfect only 6 months ago when i bought it.
i despise 2 stage paints. the E36 was repainted and i didn't notice some d-bag put a 2 stage on it.. clear is coming off now like toilet paper in a soft breeze. the tonneau vert cover has about half of the clear missing and it was perfect only 6 months ago when i bought it.
the other crappy part about body shops, they will say "oh i can fix that fender" and then you go, ok, and have them do it, and its NEVER right.
Today's job list was short but boring and tedious.
I chased all the capture nuts in the front clip (I stopped counting the 6mm ones at 74 and there were several 8mm also) and repaired the two fender bolts that snapped off during disassembly.
I know that most of the nuts I threaded probably won't even be reused but I figured in for a penny, in for a pound, so I did every one I saw.
I celebrated the completion of this dreaded task by mounting the headlight assemblies, just so I could say I've started putting things back instead of stripping off for a change.
I went through my extensive junkyard hardware selection and used all new nuts/bolts (with anti-seize), I'd like all the hardware to look new(ish) instead of grimy/corroded.
It's just a fetish of mine.
I couldn't think of an exciting way to frame a pic of threads being chased, so no visuals today, sorry.
Refreshed by a nap (a very civilized activity, I'd encourage anyone to try) and a nice dinner, I cast about for something simple to complete in an hour or so.
Thinking back on past experience and with the headlights fresh on my mind, I decided to remove the headlight covers.
Such a simple task, such a pain in the ***.
Each cover is held by four large flange Philips head screws.
Mazda obviously assembled the car, made necessary adjustments, then painted over everything.
Twenty some years later, your chances of using a screwdriver to break these screws free are about zero.
Can't use an impact driver either because the mount points are too flimsy, they just bend.
The only way I could figure was to get vice grips on the back of the screw shank and break it free, which works but ain't that good for the screws.
The two front screws on either side can be reached with the assembly in place but the to get to the rear screws I had to remove the entire assembly again and partially disassemble the framework.
Like I said, massive PITA.
I ran a 5mm tap through the eight holes and replaced the philips screws with some large flange 7mm hex head bolts, so this problem shouldn't happen again.
Crappy as it was, this is exactly the sort of problem I want to deal with now so the final assembly goes smoothly. Besides, it's easy to remove the retractor motor/light housing with the fenders and nose off.
Boring, I know, but a build is much more than bolting on new fun ****...most of your time and energy is spent dealing with quotidian details just like this and your ultimate success depends on them.
Tomorrow I move to the back of the car.
Carry on.
Passion for Racing
Joined: Aug 2010
Posts: 1,066
Likes: 2
From: Crown Point, Indiana
Congrats on that find though, it is a VERY clean car. Little advice about the Blaze Red, I can't tell for sure the condition of your paint (pictures are always decieving) but it may clean up nice, however in a few months it goes back to how it started. I buffed mine back in March when I got it, and I already had to re do the hoof and bumper last month. It does look phenominal though even after just washes, add in a polish.... The color is definitely an eye catcher
