
She Followed Me Home, Honest

If I'd only had the foresight to install some antlers or a festive wreath...it would be ideal.
After sitting for six days in the frigid weather, she started right up...truly a Christmas miracle.
The clock stopped working- again-but that seems to be the only aftereffect of the exposure.
And I've had it with that stupid clock/warning light cluster anyway, time to figure out an alternative.
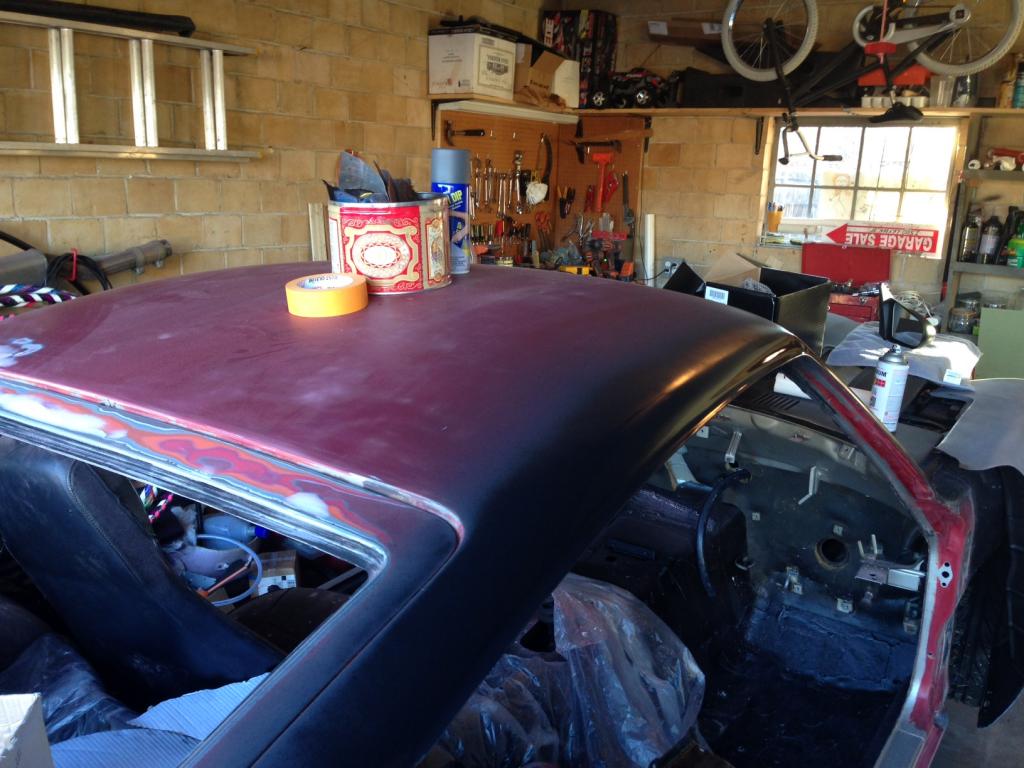
Whilst shuttered in from the cold, I continued to work out the Z's electrical system.
I'm basically ready to start stringing wire.
There are still two components I need to finalize, the efan (if I can make it fit) and the wiper motor.
On the Z forum, Honda is the preferred wiper motor replacement and I had acquired one to try.
I'm not sure why, no one seems to have ever successfully gotten the intermittent function to work* and the motor mounts are completely wrong for the stock bracket.
Unlike the FC (and most other cars), the Z's wiper motor does not bolt to the firewall, it sits on a bracket inside the wiper cavity.
In one of the wiper threads (there are many) there was a passing comment that it looked like a Miata motor might work, the mounting was very similar at least.
I was intrigued and finally got a chance to check the junkyard yesterday and indeed, the Miata motor looks like a much better starting place. So, I now have that.
I had also seen one pic and a very brief description of a single wiper conversion that a guy performed and I'm intrigued.
The first interesting thing is how simple it looks (yeah, I know, "What could possibly go wrong?"). The Z firewall/wiper cavity is stamped for both left and right hand drive markets. Datsun uses the same pivot boxes (the assembly the wiper arm bolts to) and just flips them for the application. One of the RHD mount points is right in the middle of the windscreen, so this is a direct bolt in mod.
The linkage from motor to pivot box would have to be fabricated but he claims it was pretty simple and only took a few tries to make work.
From a purely mechanical standpoint I'm intrigued because this would eliminate the stock linkage arms. I've already "overhauled" ours but it's such a janky design that there is still a lot of slop in the mechanism. I've considered ways to upgrade (read: replace) the linkage, this approach eliminates the need.
It might look weird and I have no idea how the sweep coverage would be, but I'm drawn to the idea.
Further experimentation required.
*This baffles me.
The Z electrical system is dead simple, the wiper motor particularly so.
The Z has a relay box on the wiper motor that handles the intermittent function (which is not variable), the column switch only sends signals.
Modern Honda wiper motors (and pretty much everyone else) do not have this because all the electronics are now incorporated into the switches.
So, if you match the new Honda motor with the old Datsun switch, there are no intermittent electronics anywhere in the circuit.
This seems obvious to me but continues to be a mystery to many.
Fortunately, I'm changing the motor AND the switchgear, so I won't have this particular problem.

After sitting for six days in the frigid weather, she started right up...truly a Christmas miracle.
The clock stopped working- again-but that seems to be the only aftereffect of the exposure.
And I've had it with that stupid clock/warning light cluster anyway, time to figure out an alternative.
Whilst shuttered in from the cold, I continued to work out the Z's electrical system.
I'm basically ready to start stringing wire.
There are still two components I need to finalize, the efan (if I can make it fit) and the wiper motor.
On the Z forum, Honda is the preferred wiper motor replacement and I had acquired one to try.
I'm not sure why, no one seems to have ever successfully gotten the intermittent function to work* and the motor mounts are completely wrong for the stock bracket.
Unlike the FC (and most other cars), the Z's wiper motor does not bolt to the firewall, it sits on a bracket inside the wiper cavity.
In one of the wiper threads (there are many) there was a passing comment that it looked like a Miata motor might work, the mounting was very similar at least.
I was intrigued and finally got a chance to check the junkyard yesterday and indeed, the Miata motor looks like a much better starting place. So, I now have that.
I had also seen one pic and a very brief description of a single wiper conversion that a guy performed and I'm intrigued.
The first interesting thing is how simple it looks (yeah, I know, "What could possibly go wrong?"). The Z firewall/wiper cavity is stamped for both left and right hand drive markets. Datsun uses the same pivot boxes (the assembly the wiper arm bolts to) and just flips them for the application. One of the RHD mount points is right in the middle of the windscreen, so this is a direct bolt in mod.
The linkage from motor to pivot box would have to be fabricated but he claims it was pretty simple and only took a few tries to make work.
From a purely mechanical standpoint I'm intrigued because this would eliminate the stock linkage arms. I've already "overhauled" ours but it's such a janky design that there is still a lot of slop in the mechanism. I've considered ways to upgrade (read: replace) the linkage, this approach eliminates the need.
It might look weird and I have no idea how the sweep coverage would be, but I'm drawn to the idea.
Further experimentation required.
*This baffles me.
The Z electrical system is dead simple, the wiper motor particularly so.
The Z has a relay box on the wiper motor that handles the intermittent function (which is not variable), the column switch only sends signals.
Modern Honda wiper motors (and pretty much everyone else) do not have this because all the electronics are now incorporated into the switches.
So, if you match the new Honda motor with the old Datsun switch, there are no intermittent electronics anywhere in the circuit.
This seems obvious to me but continues to be a mystery to many.
Fortunately, I'm changing the motor AND the switchgear, so I won't have this particular problem.


Joined: Mar 2001
Posts: 31,859
Likes: 3,243
From: https://www2.mazda.com/en/100th/
Unlike the FC (and most other cars), the Z's wiper motor does not bolt to the firewall, it sits on a bracket inside the wiper cavity.
In one of the wiper threads (there are many) there was a passing comment that it looked like a Miata motor might work, the mounting was very similar at least.
I was intrigued and finally got a chance to check the junkyard yesterday and indeed, the Miata motor looks like a much better starting place. So, I now have that.
From a purely mechanical standpoint I'm intrigued because this would eliminate the stock linkage arms. I've already "overhauled" ours but it's such a janky design that there is still a lot of slop in the mechanism. I've considered ways to upgrade (read: replace) the linkage, this approach eliminates the need.
It might look weird and I have no idea how the sweep coverage would be, but I'm drawn to the idea.
Further experimentation required.
It might look weird and I have no idea how the sweep coverage would be, but I'm drawn to the idea.
Further experimentation required.
its kind of pointlessly neat, but might work for you?
I'm not sure the Z windscreen is large enough to justify the more elaborate Merc setup as it seems possible the single pivot arm would cover most of the needed area.
The wiper motor is a very definite go (for now) and as I said, the stock linkage is ready to drop in as well, so I'm not stuck for options.
This single-wiper concept is just an idle exercise.
I mean after all, we don't even have glass at this point so wiping it off is of lower priority now than it will be later.
Manana, dude.

Actually, I haven't done **** all for a couple of weeks now.
Looks like weather and work will align and we'll get back to the Z on Saturday, so that's good.
The scheduling pause did give me some time to ruminate though and I realized that Sweetheart (last time she's called that as she's been elevated to "Sprocket" status) is now a year old.
Since first fire up in mid-December 2012, the RX has run for over 6000 trouble free miles, including 3300 miles in a two week period.
Other than normal maintenance, I've done no "emergency" work, only elective type stuff (rear wheel bearings/DTSS bushings as a precaution before the big trip).
I've had my engine on a deathwatch for over five years now; by all forum standards she should not run at all and yet still functions as a perfectly viable daily driver.
I have given up worrying about her, the data is too confusing to process.
Low compression and oil pressure but also low/stable water temp and a marked increase in fuel mileage (consistent over several months now).
Uses about a quart of oil (10w/30) every 1000 miles but only smokes briefly on cold startup.
Even the six year old Optima redtop exceeds expectations; she recently sat outside for four days in sub-zero weather and fired right up.
The ergonomics are great, I've added some foam pads to the armrest and slightly raised the center console pad; the steering wheel is ugly but feels sweet.
The hunt for the perfect wheel continues but we're fine for now.
Some yobbo decided he wanted my new antenna stalk more than I and unfortunately, rather than unscrew it like a sensible criminal, he snapped it off, ruining the base as well. I have another base but need to redo the connection and install it.
And get a new stalk.
Oh well.
I do miss the power windows and door locks but not the sunroof.
The rear wiper was a worthwhile addition, I've actually used it a few times.
Gonna need new tires soon.
Otherwise, life is good.
Have a fine year, folks.
A happy and prosperous New Year to ya'll, may your apex seals rise to meet you.
Progress on the Z has continued, albeit in fits and starts as weather permits.
Yesterday, Sigfrid and I managed about 10 hours and we plan another full day on Friday (supposed to be 60�!).
Sigfrid has a natural aptitude for bodywork and has taken the lead as I follow along trying to make his lot easier. Accordingly, I spent most of the day prepping the doors, primarily removing the cursed tar that everyone uses to adhere the inner door seals. This summer when the doors were first removed, the tar was very sticky and messy and I admit I just shoved it aside for "later" and "later" ended up being yesterday.
Of course, now the tar was hard and frozen (well, kinda) and took much more effort to remove.
My takeaway lesson here is that **** jobs remain shitty and time doesn't help.
Anyway, all clean now, the jambs are ready for sanding as well.
Although the door glass has been removed, the mechanism is still in place (as is the inner doorhandle/lock) and I'm going to leave it in place during the paint process. It needs removing for cleaning/lubing anyway and I'm afraid of losing stuff in storage, so it'll just get a little more crapped up before removal after paint. After paint I'll gut the door, bedliner the inside skin and install the mechanisms after they've been rehabbed.
This may be a mistake, we'll see.
Note that I said "after paint" above.
S. decided he really wants paint (preferably black) instead of Plastidip.
His money, his car, his decision...so be it.
Not sure who he's been talking to but after the main prep/bodywork has been done and the car is in primer, the Z is getting towed away and painted. The turnaround is two weeks and we'll be responsible for the final wetsand/buffing of the clearcoat.
This is all great but I have a couple of qualms.
First, the color.
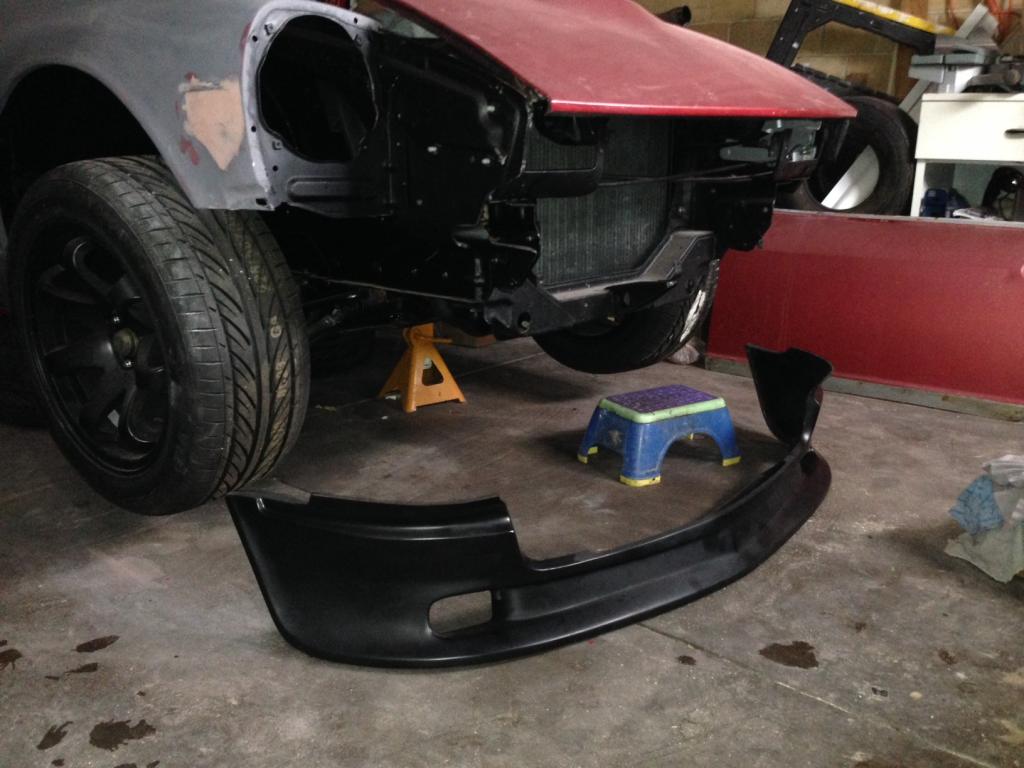
I like black and think the Z would look great that color BUT 90% of the Z's I've seen in black look like crap. The problem is the sheer number of separate pieces, none of which were particularly straight or well aligned to begin with. There are nine panels that make up the nose (2 fenders, 2 inspection panels, 2 sugarscoops (headlight nacelles), the cowl valence, the hood and the lower front airdam (which we just ordered and will be here next week)) and although the overall shape is quite pleasing, the actual fit is not too good.
Black just highlights all these flaws and the amount of bodywork necessary to "fix" it would be enormous and require more skill and experience than either of us possess.
(Plus, I HATE bodywork).
Also, whoever this painter is (and I have no reason to think he's not legit), he wants the car assembled for paint and I say "**** that noise" to that stipulation.
I've spent too much time on chassis prep to get overspray on everything and I feel that things like the doors and hatch can only be properly painted when off the car.
Besides, after the chassis is painted there will be a lot of time spent doing electrical work and actually getting the car running...none of which will require bodywork and indeed, will be easier without it.
We can store the fresh painted bits in the attic where they'll be out of harms way till we are ready for them.
I figure another 3-4 days of us both working should get us to the first primer coat.
That will be interesting.
Progress on the Z has continued, albeit in fits and starts as weather permits.
Yesterday, Sigfrid and I managed about 10 hours and we plan another full day on Friday (supposed to be 60�!).
Sigfrid has a natural aptitude for bodywork and has taken the lead as I follow along trying to make his lot easier. Accordingly, I spent most of the day prepping the doors, primarily removing the cursed tar that everyone uses to adhere the inner door seals. This summer when the doors were first removed, the tar was very sticky and messy and I admit I just shoved it aside for "later" and "later" ended up being yesterday.
Of course, now the tar was hard and frozen (well, kinda) and took much more effort to remove.
My takeaway lesson here is that **** jobs remain shitty and time doesn't help.
Anyway, all clean now, the jambs are ready for sanding as well.
Although the door glass has been removed, the mechanism is still in place (as is the inner doorhandle/lock) and I'm going to leave it in place during the paint process. It needs removing for cleaning/lubing anyway and I'm afraid of losing stuff in storage, so it'll just get a little more crapped up before removal after paint. After paint I'll gut the door, bedliner the inside skin and install the mechanisms after they've been rehabbed.
This may be a mistake, we'll see.
Note that I said "after paint" above.
S. decided he really wants paint (preferably black) instead of Plastidip.
His money, his car, his decision...so be it.
Not sure who he's been talking to but after the main prep/bodywork has been done and the car is in primer, the Z is getting towed away and painted. The turnaround is two weeks and we'll be responsible for the final wetsand/buffing of the clearcoat.
This is all great but I have a couple of qualms.
First, the color.
I like black and think the Z would look great that color BUT 90% of the Z's I've seen in black look like crap. The problem is the sheer number of separate pieces, none of which were particularly straight or well aligned to begin with. There are nine panels that make up the nose (2 fenders, 2 inspection panels, 2 sugarscoops (headlight nacelles), the cowl valence, the hood and the lower front airdam (which we just ordered and will be here next week)) and although the overall shape is quite pleasing, the actual fit is not too good.
Black just highlights all these flaws and the amount of bodywork necessary to "fix" it would be enormous and require more skill and experience than either of us possess.
(Plus, I HATE bodywork).
Also, whoever this painter is (and I have no reason to think he's not legit), he wants the car assembled for paint and I say "**** that noise" to that stipulation.
I've spent too much time on chassis prep to get overspray on everything and I feel that things like the doors and hatch can only be properly painted when off the car.
Besides, after the chassis is painted there will be a lot of time spent doing electrical work and actually getting the car running...none of which will require bodywork and indeed, will be easier without it.
We can store the fresh painted bits in the attic where they'll be out of harms way till we are ready for them.
I figure another 3-4 days of us both working should get us to the first primer coat.
That will be interesting.
Yesterday was 60� and sunny, this morning it's 25� and preparing to snow.
This whiplash weather makes planning a challenge, we did take advantage though and the project lurches forward.
Sigfrid is driving the bus through this stage, I just do what he tells me and hope for the best.
I find this stage of paint prep to be very confusing.
It all basically looks like hell until the first primer coat is applied and I haven't the experience to know what "good enough" is, so he is handling the big stuff and I'm doing the scutwork.
Yesterday, "scutwork" = the hatch jamb and the hatch itself.
After eight hours I'm about 75% done, it's absurdly time consuming (better tooling would help) but coming along nicely, I think.
Two things make it difficult...the jamb itself is very convoluted and complex, so lots of hand sanding is required and the multiple coats of paint are in every crevice and crack and must be removed.
I also found the first (and only) evidence of rust repair as I worked on the bottom of the jamb (the part above the taillamps). The drainage of the hatch is terrible originally and the fact that water pools right where there are overlapping panels just invites rot.
I was finding bondo where it wasn't expected and further sanding exposed a patch panel had been cut in and welded. It's not really a bad repair (could have been riveted/glued) and it's not structural, so we'll just skim over it again and carry on.
A half day or so should wind the jamb up.
Meanwhile, Sigfrid has been concentrating on the two main problem areas of the main chassis...the rear valence and the drip rails.
The rear valence:

This area was originally hidden by the elephantine safety bumper (seriously, the bumper and it's shocks/mounts had to weigh 75lbs. at least) and Datsun made absolutely no effort to make it look good, so there is a lot of covering up to be done.
Serious guys would cut that valence out and fab in a whole new unmarked panel but since we're just two shadetree rubes, it's JB weld and bondo for us.
If it looks too crappy, there are aftermarket rear bumper/valence panels that cover the whole area and could hide our incompetence.
We shall see.
The drip rails have always been a focal point for Sigfrid and they are finally shaping up.
Originally there was a stainless trim strip clipped to the rail but that sort of trim really dates the car we think, so it's gone. The rails were ground down as far as possible (there are spot welds holding the roof panel to the doorframes) and then bondo was filleted in to make a smooth transition.
Again, this is a "wait and see" kinda thing.
I hope it works out but fear that body flex might pop the filler right out.
I'm sure it'll be fine for a while.
So, the main body is about 75% done, the fenders and inspection panels are done, the hood is half finished (the underside is bedlinered, the top hasn't been touched), the windshield valence has been stripped but needs sanding and the sugarscoops haven't been touched.
The new front airdam/valence is scheduled to arrive today.
Of the remaining panels, the sugarscoops will probably take the longest because they'll require mostly hand sanding.
We figure three more days to paint.
Of course, between the weather and Sigfrid's return to a normal work schedule, those three days may be spread over a month or so.
I'm going to try to expedite this as much as weather (and my tolerance for sanding) allows.
I'd like the car at the paint shop by Feb. 1 if possible.
Probably won't happen.
This whiplash weather makes planning a challenge, we did take advantage though and the project lurches forward.
Sigfrid is driving the bus through this stage, I just do what he tells me and hope for the best.
I find this stage of paint prep to be very confusing.
It all basically looks like hell until the first primer coat is applied and I haven't the experience to know what "good enough" is, so he is handling the big stuff and I'm doing the scutwork.
Yesterday, "scutwork" = the hatch jamb and the hatch itself.
After eight hours I'm about 75% done, it's absurdly time consuming (better tooling would help) but coming along nicely, I think.
Two things make it difficult...the jamb itself is very convoluted and complex, so lots of hand sanding is required and the multiple coats of paint are in every crevice and crack and must be removed.
I also found the first (and only) evidence of rust repair as I worked on the bottom of the jamb (the part above the taillamps). The drainage of the hatch is terrible originally and the fact that water pools right where there are overlapping panels just invites rot.
I was finding bondo where it wasn't expected and further sanding exposed a patch panel had been cut in and welded. It's not really a bad repair (could have been riveted/glued) and it's not structural, so we'll just skim over it again and carry on.
A half day or so should wind the jamb up.
Meanwhile, Sigfrid has been concentrating on the two main problem areas of the main chassis...the rear valence and the drip rails.
The rear valence:
This area was originally hidden by the elephantine safety bumper (seriously, the bumper and it's shocks/mounts had to weigh 75lbs. at least) and Datsun made absolutely no effort to make it look good, so there is a lot of covering up to be done.
Serious guys would cut that valence out and fab in a whole new unmarked panel but since we're just two shadetree rubes, it's JB weld and bondo for us.
If it looks too crappy, there are aftermarket rear bumper/valence panels that cover the whole area and could hide our incompetence.
We shall see.
The drip rails have always been a focal point for Sigfrid and they are finally shaping up.
Originally there was a stainless trim strip clipped to the rail but that sort of trim really dates the car we think, so it's gone. The rails were ground down as far as possible (there are spot welds holding the roof panel to the doorframes) and then bondo was filleted in to make a smooth transition.
Again, this is a "wait and see" kinda thing.
I hope it works out but fear that body flex might pop the filler right out.
I'm sure it'll be fine for a while.
So, the main body is about 75% done, the fenders and inspection panels are done, the hood is half finished (the underside is bedlinered, the top hasn't been touched), the windshield valence has been stripped but needs sanding and the sugarscoops haven't been touched.
The new front airdam/valence is scheduled to arrive today.
Of the remaining panels, the sugarscoops will probably take the longest because they'll require mostly hand sanding.
We figure three more days to paint.
Of course, between the weather and Sigfrid's return to a normal work schedule, those three days may be spread over a month or so.
I'm going to try to expedite this as much as weather (and my tolerance for sanding) allows.
I'd like the car at the paint shop by Feb. 1 if possible.
Probably won't happen.
At long last, a front airdam/valence:
The body is now complete although we're considering some add-ons like fender flares and rocker trim.
We'll see once she's in one piece how things might go.
Still way too frigid for bodywork, hope we get a warming trend soon.
The body is now complete although we're considering some add-ons like fender flares and rocker trim.
We'll see once she's in one piece how things might go.
Still way too frigid for bodywork, hope we get a warming trend soon.

Some may find bodywork dull, but i quite like it, more accurately, i like taking a turd and making it a diamond....
If it's not too much trouble, more pics would be appreciated.
If it's not too much trouble, more pics would be appreciated.
Feel free to come over and indulge yourself to your heart's content.
There is quite enough sanding to go around.
I understand and appreciate the zing that pics add to a thread but all my recent shots look exactly the same, semi-sanded paint with bondo splotches sprinkled all over.
Pics of "nearly ready" and "just started" look pretty much identical.
Of course, my ancient camera and non-existent skills tend to make every shot look bad no matter what, so there's that.
As I await the return of survivable temps (two or three more days, I hear), I'm pursuing little side jobs that are not directly related to the bodywork.
One of these is the gas filler neck.
Our car came with a locking gas cap.
The key was/is in very dubious condition and I wanted it gone anyway, so it was one of those things that's been in the back of my mind as I've cruised the junkyard, lo these many months.
Not only was the cap keyed, it was also the old "cam lock" style (like a radiator cap) instead of the more modern screw thread fastening, which I prefer.
I devoted a whole yard trip to the search but nothing really came close enough to warrant further pursuit, so I put it back into the nebulous "Maybe Later" file and carried on.
Until this week when I had sort of an epiphany as I fueled up the FC.
If you've never really looked at it (and really, why would you?), the filler neck tube has a flange towards the end which is bolted/screwed to the filler cavity floor.
Most newer cars use a three bolt pattern on this flange but the Z has four.
Coincidentally, so does the FC.
Even more coincidentally, the bolt pattern (which is almost trapezoidal, not square) is seemingly identical between the two cars. At least as close as I can tell without actually having the parts in hand.
I'm not going to rip my car apart to see, so the hunt for a FC filler neck has begun.
Anyone with a spare shell or a partout, please let me know if you have the filler neck available.
T'would be much appreciated.
And dhennessey, here's a picture just for you.

It's either a cat undergoing a medical procedure or being tortured, not really sure.
There is quite enough sanding to go around.
I understand and appreciate the zing that pics add to a thread but all my recent shots look exactly the same, semi-sanded paint with bondo splotches sprinkled all over.
Pics of "nearly ready" and "just started" look pretty much identical.
Of course, my ancient camera and non-existent skills tend to make every shot look bad no matter what, so there's that.
As I await the return of survivable temps (two or three more days, I hear), I'm pursuing little side jobs that are not directly related to the bodywork.
One of these is the gas filler neck.
Our car came with a locking gas cap.
The key was/is in very dubious condition and I wanted it gone anyway, so it was one of those things that's been in the back of my mind as I've cruised the junkyard, lo these many months.
Not only was the cap keyed, it was also the old "cam lock" style (like a radiator cap) instead of the more modern screw thread fastening, which I prefer.
I devoted a whole yard trip to the search but nothing really came close enough to warrant further pursuit, so I put it back into the nebulous "Maybe Later" file and carried on.
Until this week when I had sort of an epiphany as I fueled up the FC.
If you've never really looked at it (and really, why would you?), the filler neck tube has a flange towards the end which is bolted/screwed to the filler cavity floor.
Most newer cars use a three bolt pattern on this flange but the Z has four.
Coincidentally, so does the FC.
Even more coincidentally, the bolt pattern (which is almost trapezoidal, not square) is seemingly identical between the two cars. At least as close as I can tell without actually having the parts in hand.
I'm not going to rip my car apart to see, so the hunt for a FC filler neck has begun.
Anyone with a spare shell or a partout, please let me know if you have the filler neck available.
T'would be much appreciated.
And dhennessey, here's a picture just for you.
It's either a cat undergoing a medical procedure or being tortured, not really sure.
haha, clocker... well, for what it's worth, i didn't specify WHAT pics...
I totally understand what you mean about the bodywork, it's just years (seems like) of sanding, filling, re-sanding, filling and re-sanding.... I guess i'm a little weird, maybe because i've done quite a bit of that myself on all my projects, i appreciate it...
I await something you deem picture worthy as always
Keep up the Great, and thorough work!! It keeps the bar high for the rest of us

Senior Member
Joined: Apr 2009
Posts: 311
Likes: 2
From: Lynchburg, VA
After reading this from start to finish, I have a suggestion on the Z wiper motor. Look at a VW Golf/Jetta from say 99-05 even a beetle from the same year span. Wiper motor and Tranmission/linkage bolt into the cowl pannel recess and really only wiper transmission/linkage is what gets bolted down, the motor is bolted to the linkage.
Nicely done on the 7 by the way. I only have one question, your hood strut setup, what did you/where did you get it from/off of? Would love to get the hood prop out of my way while working on the car.
Nicely done on the 7 by the way. I only have one question, your hood strut setup, what did you/where did you get it from/off of? Would love to get the hood prop out of my way while working on the car.
We bumble forward, oblivious to both weather and lack of facilities.
After two weeks of frigid cold, Denver is back to more normal winter weather and Sigfrid and I took full advantage.
Speaking as a paint/bodywork ignoramus...
This **** be hard.
Not only are we woefully underequipped for the job but we lack the experience necessary to properly parse our progress. How good is good enough, what does this actually look like?
Uncertainty has reignited our discussion of final finish...basically, are we capable of (and willing to) prep to the level necessary for a dark gloss paint?
I've always thought NO, we are not, which is why I advocated for the Plastidip.
The thick(er) matte finish would hide a multitude of flaws and it's much easier to remove if we later decide to upgrade to real paint.
Sigfrid has always thought YES, we can, citing several cars he's already worked on.
We needed to find out and decided on a test panel.
We chose the windshield valence panel (it covers the wiper/fresh air intake cavity between the windshield base and the end of the hood) because it is the absolute worst case body panel being curved in every plane and stamped full of louvers.
It's also very visible and any flaws are constantly on display to both the driver and any onlookers.
We spent several hours, mostly on the louvers, and got it stripped nearly to bare metal.
To the touch, it felt very good.
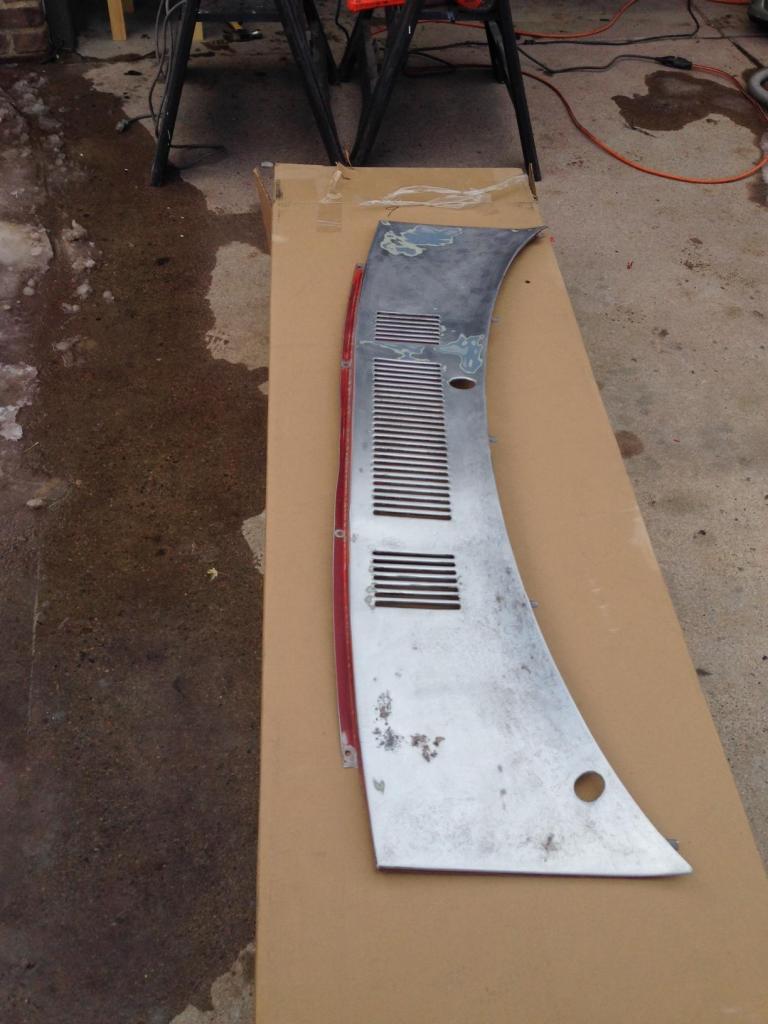
It was not:
This pic, shot soon after the final wet coat, does not accurately show how crappy the panel really looks. There are waves, micro-dings and wrinkles that suddenly jump out and plainly show how much further we'd have to go to achieve even a bad paint job.
But wait an hour and let the paint dry:

Things get a lot better.
With a flat/satin finish the damn thing looks great.
Well, maybe not great but certainly acceptable.
To me, at least.
I'll be moving on to part two of the experiment this week.
I've brought the two inspection panels home with me and will spray them both in black primer.
One will then get several coats (apparently, seven is the preferred number) of Plastidip and we'll see what it looks like finally.
I'll eventually try to peel the dip off, to confirm it actually works as advertised.
We sanded and painted the hood:
...because once Sigfrid gets going, he's hard to stop.
The sugarscoops are also sanded, leaving the doors as the last parts to deal with.
I changed my mind and decided to fully strip the doors now, attempting to minimize handling post-paint. We've begun the hole repair process where the mirrors used to mount and the jambs have been wirebrushed. The insides of the doors were remarkably clean and all the drain holes were clear...I have no idea why or how.
Should we decide on Plastidip, our prep is well on the way to completion.
If we want paint, we've barely started.
Discounting the amount of labor involved (hard to do...) and the extra cost (even harder...), I object to paint right now as it completely warps the parameters we'd set for this first stage of the project.
Remember, we've never had the car fully assembled and in running condition and given Sigfrid's penchant for power, I'd say it's a certainty that a swap of some sort is imminent. Plus, we're not sure what we're going to do with the body in terms of styling...flares, skirts, wings, bumpers...have no idea yet.
To invest a big(ger) chunk of cash into paint right now and then have to tippytoe around "good" paint as we continue the mechanical work just doesn't make sense to me.
Besides, I've always kind of seen the car as a "gentleman's rat rod" anyway.
I want her clean, straight and functional more than I want shiny. The freedom from worry that a finish like platidip can provide is quite liberating.
It's a freedom that extends beyond the obvious like rock chips and door dings, what it really is is an admission and acceptance that there will be a stage two, what we do now is neither final nor irrevocable.
(Or terribly expensive...)
No matter what we finally decide, yesterday's paint playtime was fun and instructive, a welcome break from the tedium of sanding.
After two weeks of frigid cold, Denver is back to more normal winter weather and Sigfrid and I took full advantage.
Speaking as a paint/bodywork ignoramus...
This **** be hard.
Not only are we woefully underequipped for the job but we lack the experience necessary to properly parse our progress. How good is good enough, what does this actually look like?
Uncertainty has reignited our discussion of final finish...basically, are we capable of (and willing to) prep to the level necessary for a dark gloss paint?
I've always thought NO, we are not, which is why I advocated for the Plastidip.
The thick(er) matte finish would hide a multitude of flaws and it's much easier to remove if we later decide to upgrade to real paint.
Sigfrid has always thought YES, we can, citing several cars he's already worked on.
We needed to find out and decided on a test panel.
We chose the windshield valence panel (it covers the wiper/fresh air intake cavity between the windshield base and the end of the hood) because it is the absolute worst case body panel being curved in every plane and stamped full of louvers.
It's also very visible and any flaws are constantly on display to both the driver and any onlookers.
We spent several hours, mostly on the louvers, and got it stripped nearly to bare metal.
To the touch, it felt very good.
It was not:
This pic, shot soon after the final wet coat, does not accurately show how crappy the panel really looks. There are waves, micro-dings and wrinkles that suddenly jump out and plainly show how much further we'd have to go to achieve even a bad paint job.
But wait an hour and let the paint dry:
Things get a lot better.
With a flat/satin finish the damn thing looks great.
Well, maybe not great but certainly acceptable.
To me, at least.
I'll be moving on to part two of the experiment this week.
I've brought the two inspection panels home with me and will spray them both in black primer.
One will then get several coats (apparently, seven is the preferred number) of Plastidip and we'll see what it looks like finally.
I'll eventually try to peel the dip off, to confirm it actually works as advertised.
We sanded and painted the hood:
...because once Sigfrid gets going, he's hard to stop.
The sugarscoops are also sanded, leaving the doors as the last parts to deal with.
I changed my mind and decided to fully strip the doors now, attempting to minimize handling post-paint. We've begun the hole repair process where the mirrors used to mount and the jambs have been wirebrushed. The insides of the doors were remarkably clean and all the drain holes were clear...I have no idea why or how.
Should we decide on Plastidip, our prep is well on the way to completion.
If we want paint, we've barely started.
Discounting the amount of labor involved (hard to do...) and the extra cost (even harder...), I object to paint right now as it completely warps the parameters we'd set for this first stage of the project.
Remember, we've never had the car fully assembled and in running condition and given Sigfrid's penchant for power, I'd say it's a certainty that a swap of some sort is imminent. Plus, we're not sure what we're going to do with the body in terms of styling...flares, skirts, wings, bumpers...have no idea yet.
To invest a big(ger) chunk of cash into paint right now and then have to tippytoe around "good" paint as we continue the mechanical work just doesn't make sense to me.
Besides, I've always kind of seen the car as a "gentleman's rat rod" anyway.
I want her clean, straight and functional more than I want shiny. The freedom from worry that a finish like platidip can provide is quite liberating.
It's a freedom that extends beyond the obvious like rock chips and door dings, what it really is is an admission and acceptance that there will be a stage two, what we do now is neither final nor irrevocable.
(Or terribly expensive...)
No matter what we finally decide, yesterday's paint playtime was fun and instructive, a welcome break from the tedium of sanding.
Joined: Mar 2001
Posts: 31,859
Likes: 3,243
From: https://www2.mazda.com/en/100th/
i had a similar experience when i painted my FC last year, i sanded it, and took it to Maaco (miracle/earl scheib, etc), and while one color looks way better than the previous "urban camouflage" scheme, every time i look at it i think about redoing the body work and paint, again.
good news is that the paint was cheap, $400, so i actually still feel like i got good results (ive seen a lot worse, for a lot more money)
as i'm sure you know, dark colors show more dents/dings etc� so black is the hardest color, and white hides everything, so its the best, white also fades to white, so its also the best color.
i don't know what i'd do with that Z if it was mine
Shoot it?
Our choices seem quite clear to me, the trick is convincing Sigfrid.
Either we accept a less than ideal finish (plastidip) or we pay someone to properly paint the car.
I think Sigfrid has consistently underestimated the scope of the job (we've been "three or four days" away from finishing since last August) and the wet paint test just demonstrated how far we'd have to go if gloss black was the final choice.
The situation- as usual- is fluid.
Joined: Mar 2001
Posts: 31,859
Likes: 3,243
From: https://www2.mazda.com/en/100th/
with paint. i'd strip it down, and do all the big prep, but then pay to have someone straighten it, and actually paint it, ideally.
what color you pick? i dunno� black is ok plastidipped, but for actual paint, blah
The battle for Ratchet's soul rages on although I'm having misgivings about my advocacy.
I don't want my logic to overwhelm Sigfrid's "want"...he might agree just because I outargue him, and then hate it later.
Really, I'm just tired of sanding and hate the conditions we're doing it in.
I've shot the two inspection panels with plastidip.
They were both sprayed with black primer, then one was painted gunmetal grey dip with no sanding beforehand.
The second was wetsanded to 400 then shot with black dip.
Both got 5 good coats.
I was thinking that the thick, slightly textured plastidip surface would render sanding to a nice surface unnecessary, that we might be ready to dip right now.
I'll find out tomorrow after it has cured a while and can be viewed in daylight.
I much prefer the black to the gunmetal grey.
The grey is so dark that to me it reads as faded black, probably exaggerated by the matte finish.
It's dull where the black is just satin.
Again, this may change in good light.
We work again this Saturday, with any luck our mirrors will have arrived.
Well, it's Sunday morning and as I prepare to watch the Broncos/Patriots I thought I'd bring y'all up to speed.
Yesterday went swimmingly.
Neither Sigfrid nor his wife. Alex were terribly impressed with my dipped samples.
Alex, who is amazingly cooperative with our garage adventures but at the same time totally uninterested, only likes "shiny" paint.
Fair enough, I'd like that too.
Sigfrid could see the advantages but still harbored hopes of a driveway done gloss coating, was harder to convince.
So, while Sigfrid prepped the doors (the final major pieces to be done), I performed a more direct experiment.
This was my hypothesis:
-Given our equipment and facilities (very little and the driveway) we are not capable of prepping to an acceptable level. We can get things clean and smooth but not straight and the darker the color and higher the gloss, the more critical "straight" becomes.
-All of our work to date -and it's quite a lot, really- has brought the chassis to a level perfectly suitable for a thick, slightly textured, matte finish like Plastidip but not even close for a "real" paint.
-If one can ignore the custom/conditioning of what a car is supposed to look like (i.e., "bright and shiny"), a matte finish can be just as attractive as regular paint and in fact, has several advantages.
More about that later.
I decided to take the car just as she sat and spray two test panels on it.
I wanted a spot that covered some of our bodyfiller work, some contouring and would be fairly easy to remove afterwords.
Here is the side with gunmetal plastidip:
This covers where we deleted a sidemarker light and filled a bumper mount capture nut.
The space got 5 coats of dip.
It had been sanded to 150 grit only and washed before paint.
The other side (which has the identical deletions/filler) was sanded (albeit quickly) up to 600 grit, sprayed with a dust coat of black primer and then gloss black (rattle can).
It looked so obviously terrible that I stopped after one gloss coat.
(I did take a picture but my terrible camera and skills somehow combined to make that test panel look good...way better than in real life. It would almost be deceptive to show it, so I won't)
Sigfrid immediately agreed that gloss wasn't gonna happen.
We removed the gloss test panel (basically wiped off with thinner) and let the dip side dry for a few hours and then...attacked it.
We keyed the dip, intentionally scratched through the coating (surprisingly difficult to do) and then sprayed over the damage with a few heavy coats. Plastidip melts into itself and after about an hour of dry time, the scratch was basically invisible from a slight distance. Careful examination shows the outline of the damage (because there is a difference in coating thickness) but the matte finish hides it very convincingly. If one built up the scratch/ding with a brush and then sprayed a final coat over the whole area, it'd be damn near invisible.
A few hours later we peeled the whole thing off and yes, it actually does remove as easily as the videos show. Pretty ******* incredible.
Keep in mind that Plastidip is supposed to cure for a day before handling and we only gave it a few hours before attempting to destroy it...and it still worked very well.
Sigfrid and I are finally on the same page...it's black dip for now.
Here's the plan.
We moved all the removable body panels into the attic. They have all (except the doors) been sanded,cleaned, bedlinered (on the inside) and primered. This frees up a lot of space, means we needn't tiptoe around finish painted panels and isolates the chassis as a "long term" test bed for the dip. As we continue work we can monitor how the finish looks and holds up to casual abuse.
In spring, as the weather warms and the car has neared assembly completion (he says optimistically), we can paint and install all the panels individually and maybe even a fresh touch up spray of the chassis.
My local Ace carries a full range of Plastidip (they just put in a standalone display) and sells gallons for $90.
We're told we need between 3-4 gallons for the car.
Sigfrid went online and ordered a four gallon pack (with extra prepaint "conditioner", whatever that is) for $226 shipped and it'll be here this week.
Sorry, Ace.
We'll spend a day on a few minor detail areas and get her cleaned up, then wait for a nice day to shoot the dip. I'm hoping to finish by end of this month.
Meanwhile, the mirrors showed up.
These are cheap (which is why I felt comfortable gambling on 'em), eBay "Spoon style"(no clue what that means) mirrors for a Honda Civic. Some rough measuring in the junkyard showed that the triangle corner of the window frames was very close between the two cars and the whole thing was under $25, so what the hey?
Mounting them should be technically straightforward but I have no idea how they'll look or what visibility will be like...we'll just have to see.
Finally, here is a terrible and not very useful shot of Sigfrid's favorite spot:
He's worked so hard on this driprail area and it's turning out very well.
It should completely disappear when finished and that is the whole idea.
Good job, S.
After the dip is sprayed I'm going to go over the interior with a coat of bedliner to make it all pretty black again, then the car will sit and cure for a while as I gear up for the electrical work.
After the cabin wiring is done, we'll layer the interior with Fatmat or Dynamat or something and begin interior install.
We'd both really like a Megasquirt and hope we can score a good deal before it's time for engine wiring but we can deal with the stock ECU if necessary at the beginning.
Our long malaise has ended and we're moving again.

Rotary Enthusiast

Joined: Jan 2002
Posts: 845
Likes: 38
From: Oscoda, MI
For sound deadening, I went to RAAMaudio - Automotive sound deadening products
I used their ensolite foam and BXTMat (that was a few years ago). Cheaper than Dynamat too. For thicker closed cell foam, I used Second Skin Audio Luxuryiner Pro foam. I used one of their thermal mats to redo the hood mat on a Z32 300ZX.
A little tidbit for FC owners. The insulating mat in the hatch area uses jute backing. I tore all that off the panel it attached to and replaced it with a layer of Luxuryliner Pro foam and one layer of Ensolite foam. The resulting thicking was the same as the original jute backing. I also replaced the cardboard jack/wrench cover with a sheet of aluminum cut to the original shape with the plastic hold-downs and covered on both sides with Ensolite foam. They're both still in the car and in good shape.
I have been following on your thread and just realized you're in Denver, haha
I have a 89 GTU like yours in great shape I'm cleaning her up to be a weekend/track car. My other gem is another red S5 TII all original. If you ever need parts let me know, I have a few hard to find stuff in box from Mazda and some random stuff.
I would love to check your project out.
I have a 89 GTU like yours in great shape I'm cleaning her up to be a weekend/track car. My other gem is another red S5 TII all original. If you ever need parts let me know, I have a few hard to find stuff in box from Mazda and some random stuff.
I would love to check your project out.