
My build up thread!

Full Member
Joined: Jul 2007
Posts: 67
Likes: 0
From: NW PA
Just try and mist the clear where you think it needs more then feather it out from the middle spraying less as you go out. You are just trying to blend it in with the rest of the panel.
It really doesn't matter how long it has been as long as the surface its still clean. Hell my bus has the original paint and I just blended in some new paint on the side. Once I re buff the OG paint again and give it a good wash you'll never be able to tell the difference.
Last edited by gmag69; Sep 8, 2007 at 05:37 PM.
Thread Starter
Joined: Jan 2005
Posts: 4,658
Likes: 0
From: ludlow, pa
you do the body work, i am not the best at it.
i dont even know where you live?
Just try and mist the clear where you think it needs more then feather it out from the middle spraying less as you go out. You are just trying to blend it in with the rest of the panel.
It really doesn't matter how long it has been as long as the surface its still clean. Hell my bus has the original paint and I just blended in some new paint on the side. Once I re buff the OG paint again and give it a good wash you'll never be able to tell the difference.
It really doesn't matter how long it has been as long as the surface its still clean. Hell my bus has the original paint and I just blended in some new paint on the side. Once I re buff the OG paint again and give it a good wash you'll never be able to tell the difference.
Insane Burning Diarrhea
Joined: Apr 2005
Posts: 1,796
Likes: 0
From: Noo Yawk City / San Diego
Doesn't need much body work. Only a few dings here and there. I'll see if i can dig something up online so i can learn a little about it. I only have a small driveway (located in NYC fyi) and i don't have a good working environment.
Thread Starter
Joined: Jan 2005
Posts: 4,658
Likes: 0
From: ludlow, pa
well today i put in the headliner ran the wires for my fuel pump and ran the battery cable better. i didnt take pics cause i ran out of time. tommorow ill take pics of the paint job, running of the wires and the progress that will happen tommorow.
im thinking since the lack of clearcoat isnt as bad as i thought i may just leave it alone.
im thinking since the lack of clearcoat isnt as bad as i thought i may just leave it alone.
Winter sucks
Joined: Jan 2004
Posts: 3,083
Likes: 0
From: Newberg, Oregon
My dad has a HVLP gun but I use his old school one instead. I just can't get the HVLP gun to spray right. I'm used to using a $500 dollar guns that they had in school and not a Harbor freight special. The old school gun is working great for me. Use what ya got man. I painted my old car with a $30 Walmart gun. It turned out ok. Had a bit of orange peel but no big.
Yesterday I broke down and bought two new DeVilbiss guns with an assortment of tips...
Full Member
Joined: Jul 2007
Posts: 67
Likes: 0
From: NW PA
I stopped and looked at that Vert today. It's an '88 and they want $2,000 obo. The top is shot and there is a dent in the front of th Pass. side fender. It has a Pacesetter exhaust on it. Doesn't look to bad overall. Would make someone a nice ride.


Thread Starter
Joined: Jan 2005
Posts: 4,658
Likes: 0
From: ludlow, pa
sorry for the delay in pics and progress....been pretty busy....
heres the pics of the paint job turn out. it is dusty since i live right next to a busy highway but nuthin to worry about.,...
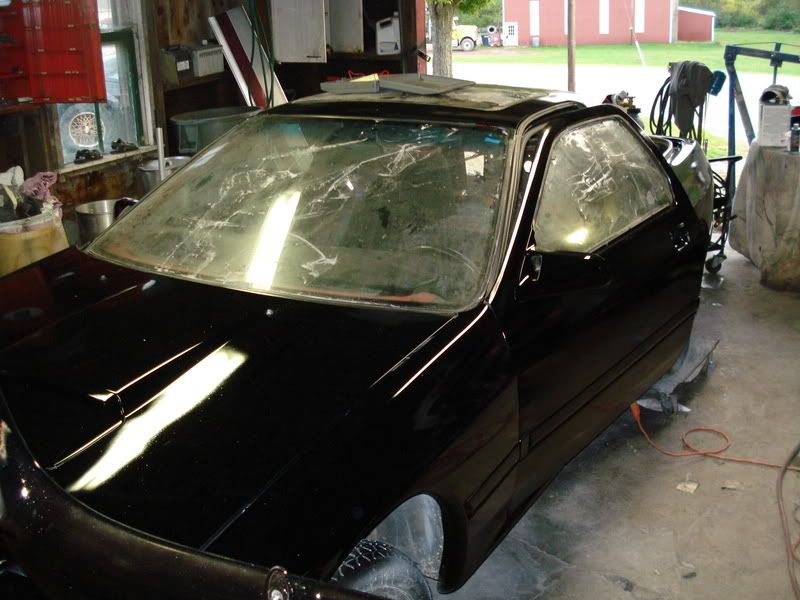
heres the pics of the paint job turn out. it is dusty since i live right next to a busy highway but nuthin to worry about.,...
Thread Starter
Joined: Jan 2005
Posts: 4,658
Likes: 0
From: ludlow, pa
hahaha, no mang. thats from wet sanding the primer. i just havent cleaned the windows...no i havent wet sanded the clear yet. im not sure how i go about doing it??
i know you use like 1000 and up grit but i never done it before. of course i never rebuilt a car like this before either!!
i know you use like 1000 and up grit but i never done it before. of course i never rebuilt a car like this before either!!
Winter sucks
Joined: Jan 2004
Posts: 3,083
Likes: 0
From: Newberg, Oregon
hahaha, no mang. thats from wet sanding the primer. i just havent cleaned the windows...no i havent wet sanded the clear yet. im not sure how i go about doing it??
i know you use like 1000 and up grit but i never done it before. of course i never rebuilt a car like this before either!!
i know you use like 1000 and up grit but i never done it before. of course i never rebuilt a car like this before either!!
But, I know there's also an issue with letting it cure all the way before doing it.... Dunno. I'll be crossing that bridge when I get to it.
Looks like you beat me to color! good job! You win............ absolutely nothing.

EDIT: maybe I should start my own build thread instead of constantly invading yours.
Thread Starter
Joined: Jan 2005
Posts: 4,658
Likes: 0
From: ludlow, pa
love the build so far. what wheels do you have lined up for the beast?
Looks like you beat me to color! good job! You win............ absolutely nothing.
EDIT: maybe I should start my own build thread instead of constantly invading yours.
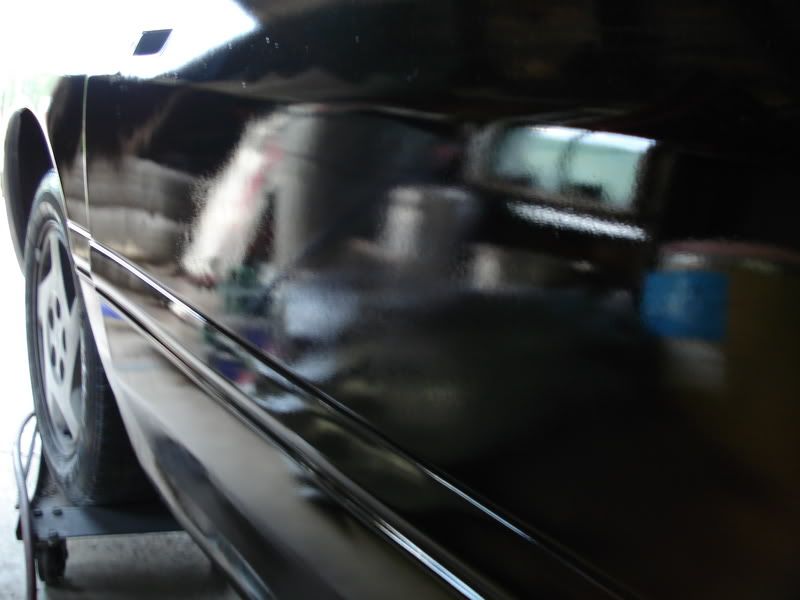
heres another shot of the paint.....


Thread Starter
Joined: Jan 2005
Posts: 4,658
Likes: 0
From: ludlow, pa
hahahah, i took shots of the good side of it...
1 last pic for the nite....
this is the begining of the haltech e6K wiring i know the wire is WAY over kill for the fuel pump but i got a great price on 75 feet of it!!
here is the wire (red) coming from the haltech relay going to the fuel pump. the black is the ground which i cut and RE-gounded to the chassis and the remaining wires are for the sending unit. i didnt feel the need for a SUPER clean install on this but i may just find a way to route that pump wire of a "just in case" scenario....

tonite i put the "bracket" for the storage bins in place and began thinking on how i may install my battery.i have a marine box but its to big (to tall) so i may leave it exposed (inside the bin) and use the "J" bolts and somehow keep it firmly attached to the chassis and still be able to close it....im going to search and look for other ideas on this...
1 last pic for the nite....
this is the begining of the haltech e6K wiring i know the wire is WAY over kill for the fuel pump but i got a great price on 75 feet of it!!
here is the wire (red) coming from the haltech relay going to the fuel pump. the black is the ground which i cut and RE-gounded to the chassis and the remaining wires are for the sending unit. i didnt feel the need for a SUPER clean install on this but i may just find a way to route that pump wire of a "just in case" scenario....
tonite i put the "bracket" for the storage bins in place and began thinking on how i may install my battery.i have a marine box but its to big (to tall) so i may leave it exposed (inside the bin) and use the "J" bolts and somehow keep it firmly attached to the chassis and still be able to close it....im going to search and look for other ideas on this...
Winter sucks
Joined: Jan 2004
Posts: 3,083
Likes: 0
From: Newberg, Oregon
Thread Starter
Joined: Jan 2005
Posts: 4,658
Likes: 0
From: ludlow, pa
im going to take pics of the spots i dont like so you can see its not all that....its an OK paint job and i thank you for the compliments...im happy with my 2ND paint job but its not near as perfect as it tunred out in that pic!
i got 1 run on the passenger rear QP above the gas tank door...turned out the cheap *** gun i used decided to leak from the tip as i was spraying the clear on the rear hatch seal area. and the spots that dont have enough clear...im sure you all know what it looks like on a black car...the passnger door is just HORRIBLE IMHO......my body work skills showed there....and theres another spot back by the left badge that i could have done a better job on...luckily the badges and wing will take your eyes from it but the passenger door is gonna stick out like a sore thumb!
my plan is that next summer ill find a passenger door thats in GOOD shape and send it off to a shop since i feel they will have better luck matching the paint i hope....the hood has spots of paint that clumped and are driving me CRAZY but i didnt spot them untill AFTER i cleared it....im being real picky about it but i was expecting a better turn out.....its def. not a proffesional job but i think it will do.
this is what i get for deciding to paint one of the hardest colors!!LOL

Full Member
Joined: Jul 2007
Posts: 138
Likes: 0
From: North Carolina
wow man i havent seen ur thread in a while and the car looks great you have made alot of progress since the last time i seen it keep up the good work and gl with the rest of the build and again it looks great!!
Thread Starter
Joined: Jan 2005
Posts: 4,658
Likes: 0
From: ludlow, pa
thanks guys for the compliments!
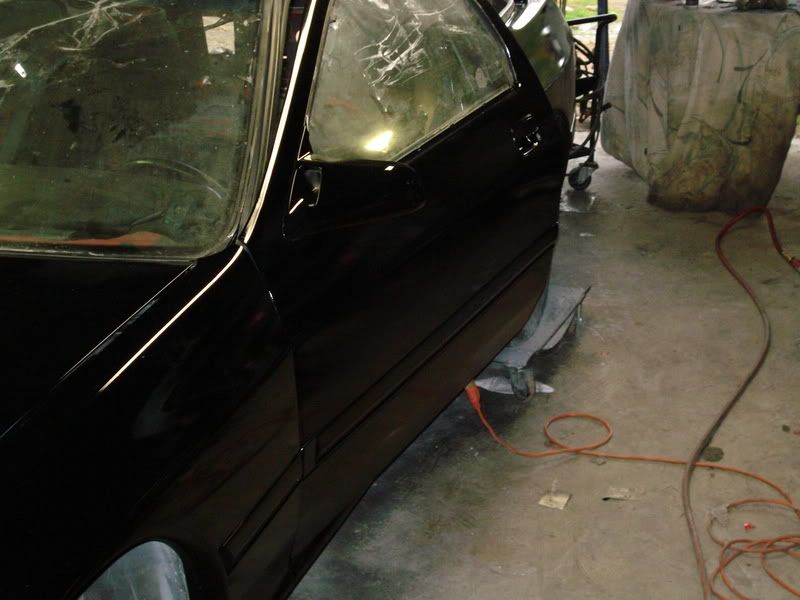
heres a couple pics of the passenger door and fender. its really hard to get a shot of a black car!!
thats the door, if you look right below the door handle you can see it somewhat....i took MANY pics and these were the best i can get....

here is the other QP....although you cant see the run its there,
heres a couple pics of the passenger door and fender. its really hard to get a shot of a black car!!
thats the door, if you look right below the door handle you can see it somewhat....i took MANY pics and these were the best i can get....
here is the other QP....although you cant see the run its there,
Yea she's a little peeley......
Bust out the wet paper and you'll smooth it up considerably. You may have mentioned, but how many coats of clear (medium wet coats...don't count a tack coat) did you apply? That will play a role in determining how much wet sanding you'll be able to do. If you've got 3 at the minimum, give it a thorough sanding with 1500 and buff. You'll be able to see the peel as you sand (the low spots will be shiny, the matte, sanded areas will not ) and with 3 coats I wouldn't try to take it ALL out, may cut through and end up re-shooting a panel or two...not that its the end of the world either though
You can see a little body work, but hey, the thing is a thousand times better then before. Great for a first timer. Congratulations, its coming great!
Bust out the wet paper and you'll smooth it up considerably. You may have mentioned, but how many coats of clear (medium wet coats...don't count a tack coat) did you apply? That will play a role in determining how much wet sanding you'll be able to do. If you've got 3 at the minimum, give it a thorough sanding with 1500 and buff. You'll be able to see the peel as you sand (the low spots will be shiny, the matte, sanded areas will not
) and with 3 coats I wouldn't try to take it ALL out, may cut through and end up re-shooting a panel or two...not that its the end of the world either though You can see a little body work, but hey, the thing is a thousand times better then before. Great for a first timer. Congratulations, its coming great!
Thread Starter
Joined: Jan 2005
Posts: 4,658
Likes: 0
From: ludlow, pa
thanks classic. is there a certain time period when i can wet sand and re clear if i had to?? i thought about waiting untill next summer but i wasnt sure if i could??
and heres a pic of the downpipe i got from himiniracing...it took them 2 weeks from the time i sent them money, to the time it reached my door...they wouldnt hardly answer my emails. i got there phone # from paypal and called them a few times with no answer and no reply (after leaving a message and phone #) i tried to call another time and the phone was disconnected!!!
 i was getting worried that i got ripped off....but anyways, i decided to order the 4 inch since it was only a few dollars more than a 3. its a 3 inch V band for the turbo..then it goes back to 3 inch again at the mid pipe end....its pretty damn good quality!!
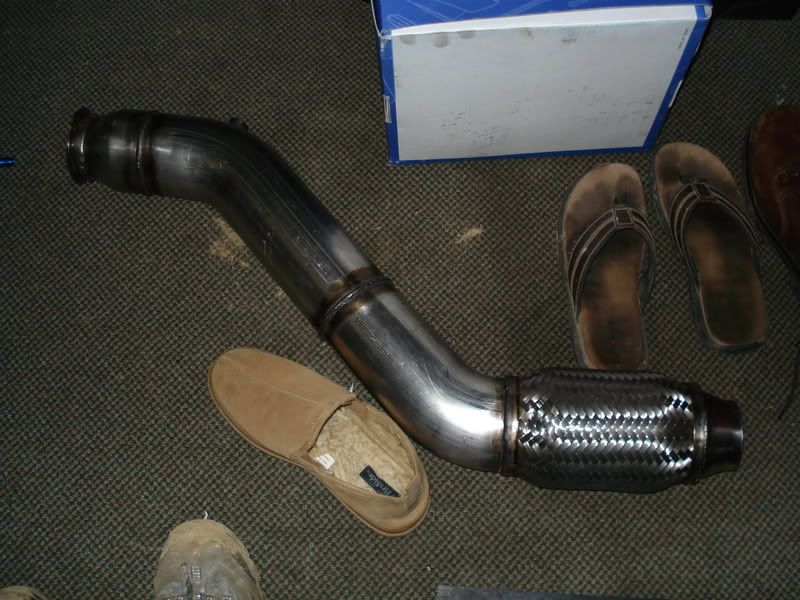
i took the pic next to my slipper (size 10.5) so you can see the size of this thing!! its made for the HKS "log" type manifold.
and heres a pic of the downpipe i got from himiniracing...it took them 2 weeks from the time i sent them money, to the time it reached my door...they wouldnt hardly answer my emails. i got there phone # from paypal and called them a few times with no answer and no reply (after leaving a message and phone #) i tried to call another time and the phone was disconnected!!!
i was getting worried that i got ripped off....but anyways, i decided to order the 4 inch since it was only a few dollars more than a 3. its a 3 inch V band for the turbo..then it goes back to 3 inch again at the mid pipe end....its pretty damn good quality!!i took the pic next to my slipper (size 10.5) so you can see the size of this thing!! its made for the HKS "log" type manifold.
Full Member
Joined: Jul 2007
Posts: 67
Likes: 0
From: NW PA
I found that the hardest part of bodywork is feathering out old paint so you don't see it when you shoot new over it. I have decided that I'd rather strip the whole panel then feather it out. At least with the doors and stuff. I didn't strip my hatch on my bus the whole way and resprayed it and you can see the paint edge.
I'm not going for a show winner so I'm not worried about it but the rest of my doors are getting stripped to bare metal before they get painted.
Glad to see it coming along. I'll have to stop down and check it out.
I'm not going for a show winner so I'm not worried about it but the rest of my doors are getting stripped to bare metal before they get painted.
Glad to see it coming along. I'll have to stop down and check it out.
Winter sucks
Joined: Jan 2004
Posts: 3,083
Likes: 0
From: Newberg, Oregon
I found that the hardest part of bodywork is feathering out old paint so you don't see it when you shoot new over it. I have decided that I'd rather strip the whole panel then feather it out. At least with the doors and stuff. I didn't strip my hatch on my bus the whole way and resprayed it and you can see the paint edge.
I'm not going for a show winner so I'm not worried about it but the rest of my doors are getting stripped to bare metal before they get painted.
Glad to see it coming along. I'll have to stop down and check it out.
I'm not going for a show winner so I'm not worried about it but the rest of my doors are getting stripped to bare metal before they get painted.
Glad to see it coming along. I'll have to stop down and check it out.

Somewhat depends on the paint....but generally speaking, in 3-6weeks the solvent has fully evaporated from the paint (again, dependant on material, weather, etc.) and you won't experience any shrinking/sinking after re-coating. Some top-of-the-line stuff such as our DC92 clear can be re-shot the next day however...so for a more accurate answer on your specific product I'd contact the jobber you purchased it from.