
Project Keiko Part XI - Another Engine, Ready to Start

Thread Starter
Joined: May 2002
Posts: 5,972
Likes: 37
From: Ottawa, Soviet Canuckistan
Project Keiko Part XI - Another Engine, Ready to Start
Hey Guys,
Time again for the 11th Chapter in Project Keiko. I want to start off by thanking everyone who rallied and sent me PMs not to give up on the project. It's tough working on extra projects in this economy, especially with heavy setbacks (read: engine failure) and it's good to see folks are actually enjoying this project as much as I am
Seeing as I took this week off, I've got an eventful week's worth of happenings to share with you guys, so here we go!
---Edit: Here are the other chapters of the project, for easy reference---
Project Keiko - Helping a friend
Project Keiko Part II - Exterior, Seals, and Engine Bay Teardown
Project Keiko Part III - Engine Removals
Project Keiko Part IV - Tri-Engine Teardowns I
Project Keiko Part V - Tri-Engine Teardowns II
Project Keiko Part VI - Engine Build I
Project Keiko Part VII - Rotor Seals Assembly
Project Keiko Part VIII - Week Of Crazyness
Project Keiko Part IX - End of Season Update
Project Keiko Part X - Spring 2009 Update
Project Keiko Part XI - Another Engine, Ready to Start
---/Edit---
As I covered in the last thread, I pretty much called that engine dead. I'm sure that if I had clutch and brakes and had been able to push start it I -might- have gotten it started, but it had way too many problems for me to be comfortable with using it. The pilot bearing was forked, one of the rear stat gear bolts had a head broken off, the iron had cracked around one of the bolt holes when bolting it to the transmission, and of course it was built entirely with below-spec parts, so I said forget it.
Thanks to forum member DarkFrost who PM'd me and offered to sell me a 12a he had leftover from his TII-into-FB swap for a price that made it worth my while to travel the 5hrs to Mississauga, ON to go get it. I also want to take a sec to thank my friend Sam (dj55b) who was also looking into engine possibilities, and has been a great encouragement through the project. He's also the guy who recommended Classicauto to Marc (the new, kickass paint shop, not the first/bad one), having had his FB painted there in the same way (inside, outside, upside down and engine bay!)
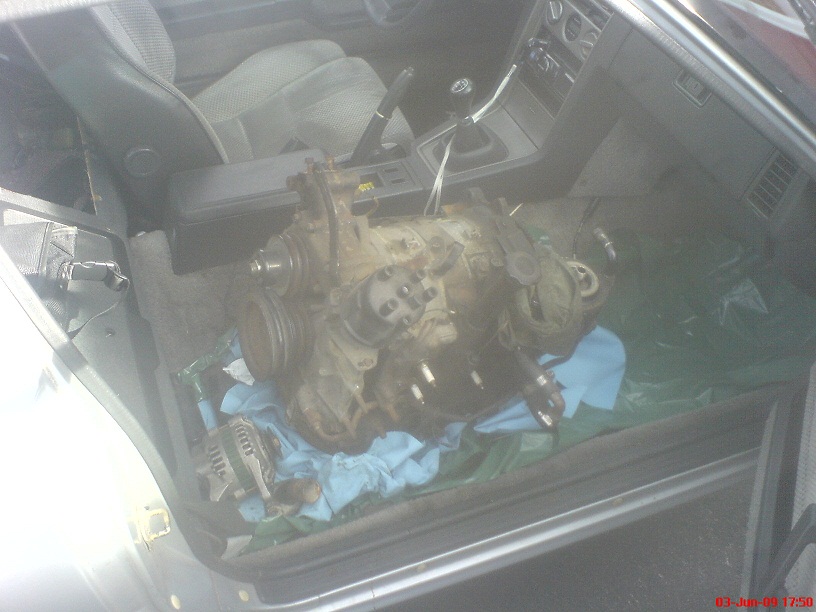
I tried to look for a friend with a van or truck or even a station wagon that I could borrow but when that didn't pan out, I took the passenger seat out of my 7, grabbed a bottle of Pepsi and a bag of beef jerky, and hopped on the highway headed towards Mississauga on Wednesday.
Since DarkFrost wasn't going to be home until the evening, and Marc's car is in another paint shop about 1.5hrs past there, I decided to leave early and check out how Marc's car was coming along before doubling-back to pick up the 12a.
Around 3pm I rolled into Classicauto in Hagersville, ON (a little outside Hamilton) and got a pleasant surprise. Marc's car's paint is done. All the body-coloured items are painted from the body to the doors, the hood, the bumpers... everything They had just finished laying the last few layers on the hood and bumpers when I arrived.
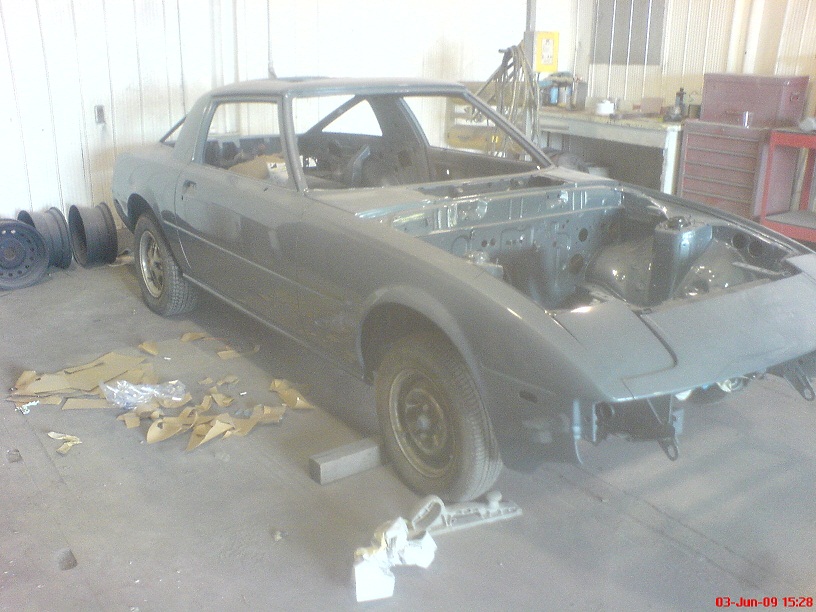
My camera-phone used to take pretty good pictures... until I broke the lens. It wasn't the main one, it was the polarizing one, so you guys will have to forgive how bright and washed-out the pics look. They *really* don't do the new paint job justice at all, but it's an awesome Tender Blue Metallic (V3) paintjob and really looks great.
Here's one picture of the car itself. Like I said this REALLY doesn't do the car justice.. once he's got it all reassembled I'll borrow a really good digital camera for a better photo shoot.
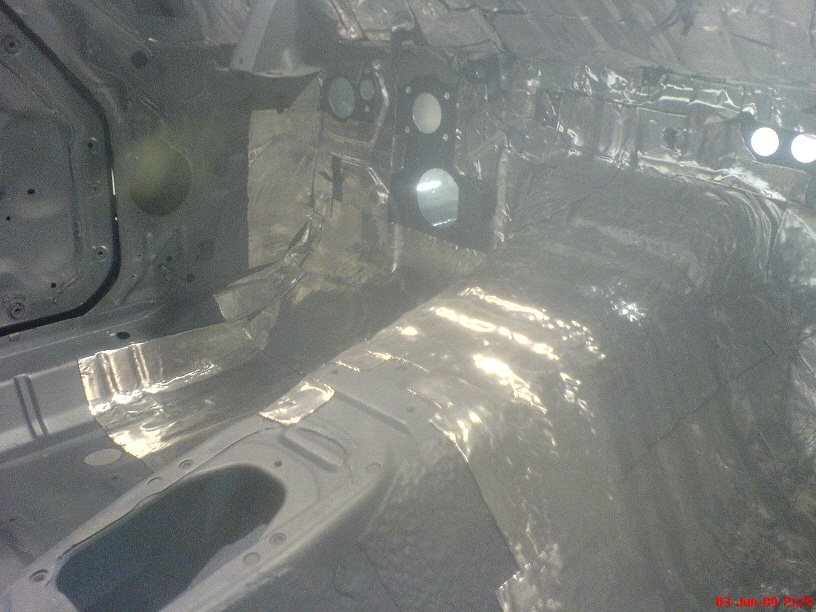
He is also having soundproofing installed at the same time. It makes the most sense, since the dash and interior is out it's the perfect time to install it. We're using "Damplifier Pro" from a company called Second Skin. It's a Butyl-based sound dampening material that gets very good ratings. There *was* a "Sound Deadener Showdown" website up for a while with an amazing article with everything you wanted to know about sound deadeners but were afraid to ask... but the site no longer has the info. Basically it comes down to Butyl: Good, Ashphalt: Bad.
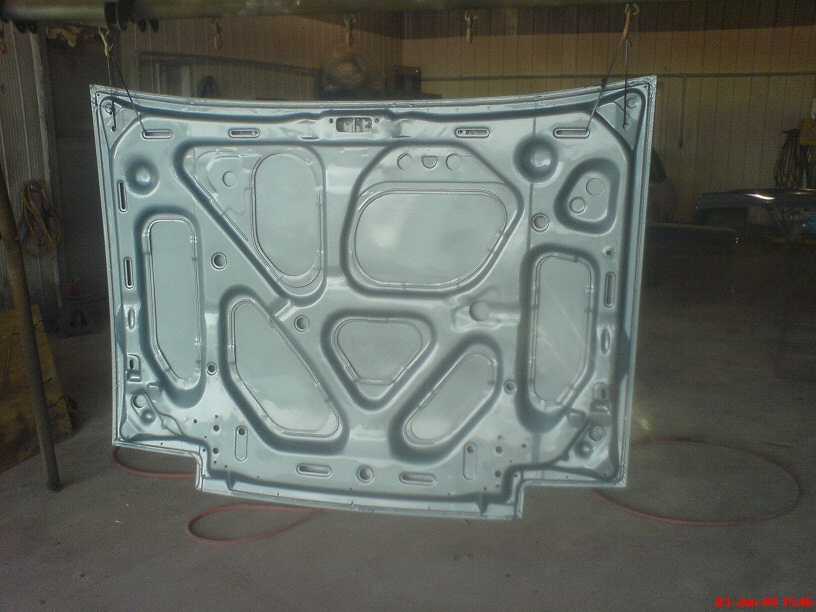
The hood gives a slightly better idea of what the colour looks like, but it's still off by quite a bit compared to seeing it in person.
Now remember, this isn't Keiko, but this car was the reason for Project Keiko's existance. The failure of a shop (which will continue to remain unnamed until Marc's car is reassembled and returned) to adhere to their contract is what prompted me to try and build Keiko for him. It's starting to look like the project may not beat Marc's car to the finish line, but we'll keep going for now. Who knows? If any of the three shops involved in Marc's car have misplaced things, we can "borrow" from Keiko to get it finished if need be.
Once I saw the progress on Marc's car (and got Joe to take a look at my car for a ballpark figure about doing that same thing to Naomi) I got back on the road and headed for DarkFrost's place
I got to his place and we loaded the 12a into the passenger's seat area of my 7
He's a really awesome guy. We chatted about FBs for a bit and his TII swap project (Good luck dude!) and then I took off.
Before coming back to Ottawa I hit up a really awesome Indian restaurant that I tend to go to whenever I'm in Mississauga. I highly recommend it for anyone who's in the area. It's Bombay Bhel at the corner of Hurontario and Eglinton. Damn that stuff is tasty!
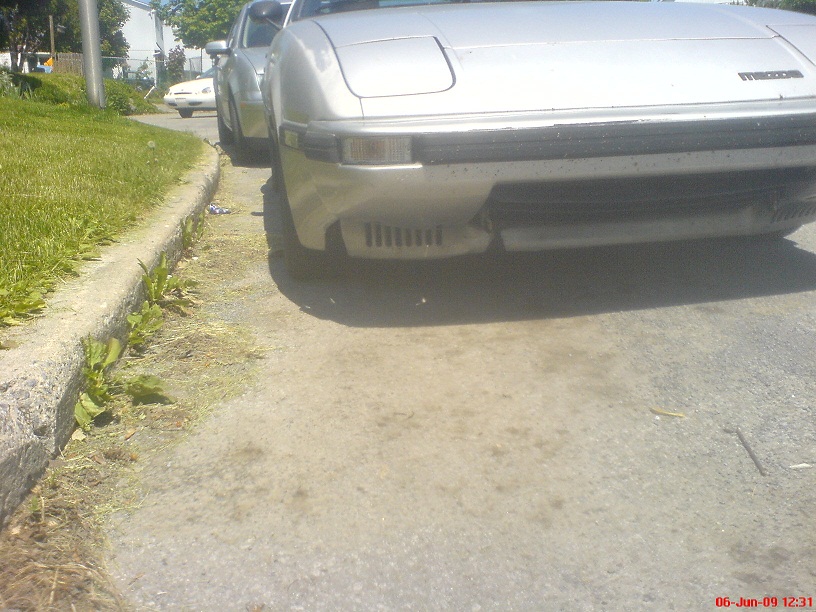
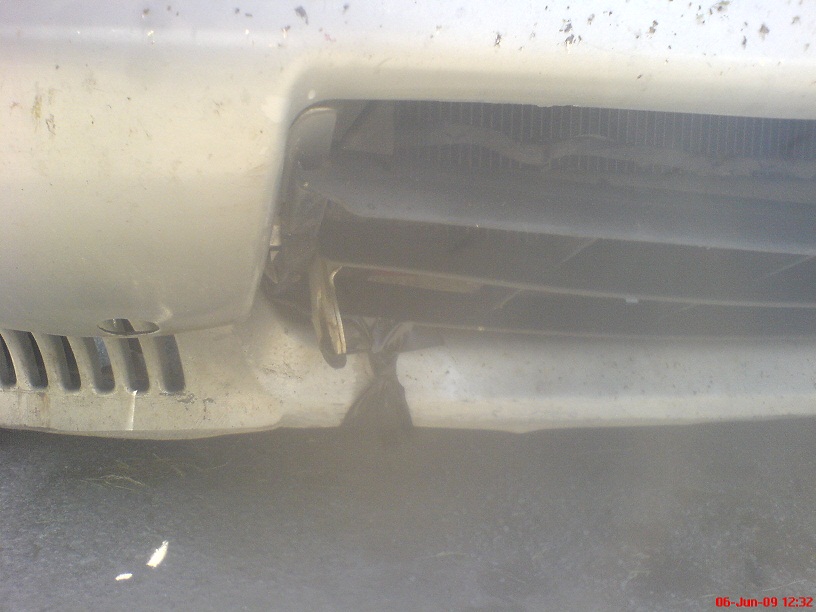
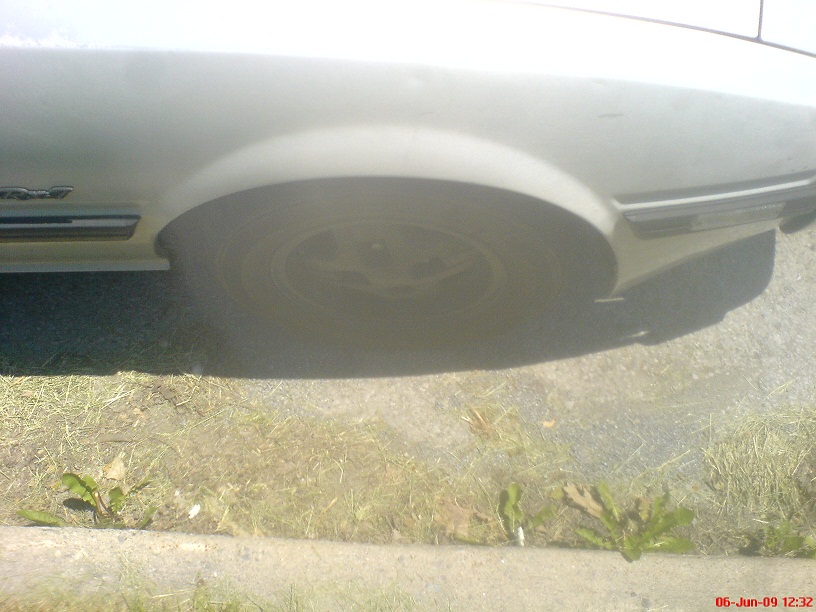
Finishing off supper (and taking some Naan and Butter Chicken to go) I started my trek back home. 4ish hours into the drive back I was nearing Brockville on Hwy 401 and it was dark. I was cruising along at about 120km/h with a truck in front of me, one to my right and a guardrail to my left. All of a sudden a groundhog ran onto the road. I did what I could, my driving skills kicking in to apply as much pressure to the brakes as possible without causing the wheels to lock up or the car to lose control but it was to no avail. The groundhog hit the lower part of the bumper on the passenger's side, where the vent is for the brakes. The lower part of the bumper separated from the upper part and from the fender. The fender bent, the brake duct bent and the lower half of the bumper slid under the car.
I pulled the car to a stop and started to assess the damage. I was able to temporarily re-secure it with electrical tape I had in my glovebox and took a few pics the next day
Time again for the 11th Chapter in Project Keiko. I want to start off by thanking everyone who rallied and sent me PMs not to give up on the project. It's tough working on extra projects in this economy, especially with heavy setbacks (read: engine failure) and it's good to see folks are actually enjoying this project as much as I am
Seeing as I took this week off, I've got an eventful week's worth of happenings to share with you guys, so here we go!
---Edit: Here are the other chapters of the project, for easy reference---
Project Keiko - Helping a friend
Project Keiko Part II - Exterior, Seals, and Engine Bay Teardown
Project Keiko Part III - Engine Removals
Project Keiko Part IV - Tri-Engine Teardowns I
Project Keiko Part V - Tri-Engine Teardowns II
Project Keiko Part VI - Engine Build I
Project Keiko Part VII - Rotor Seals Assembly
Project Keiko Part VIII - Week Of Crazyness
Project Keiko Part IX - End of Season Update
Project Keiko Part X - Spring 2009 Update
Project Keiko Part XI - Another Engine, Ready to Start
---/Edit---
As I covered in the last thread, I pretty much called that engine dead. I'm sure that if I had clutch and brakes and had been able to push start it I -might- have gotten it started, but it had way too many problems for me to be comfortable with using it. The pilot bearing was forked, one of the rear stat gear bolts had a head broken off, the iron had cracked around one of the bolt holes when bolting it to the transmission, and of course it was built entirely with below-spec parts, so I said forget it.
Thanks to forum member DarkFrost who PM'd me and offered to sell me a 12a he had leftover from his TII-into-FB swap for a price that made it worth my while to travel the 5hrs to Mississauga, ON to go get it. I also want to take a sec to thank my friend Sam (dj55b) who was also looking into engine possibilities, and has been a great encouragement through the project. He's also the guy who recommended Classicauto to Marc (the new, kickass paint shop, not the first/bad one), having had his FB painted there in the same way (inside, outside, upside down and engine bay!)
I tried to look for a friend with a van or truck or even a station wagon that I could borrow but when that didn't pan out, I took the passenger seat out of my 7, grabbed a bottle of Pepsi and a bag of beef jerky, and hopped on the highway headed towards Mississauga on Wednesday.
Since DarkFrost wasn't going to be home until the evening, and Marc's car is in another paint shop about 1.5hrs past there, I decided to leave early and check out how Marc's car was coming along before doubling-back to pick up the 12a.
Around 3pm I rolled into Classicauto in Hagersville, ON (a little outside Hamilton) and got a pleasant surprise. Marc's car's paint is done. All the body-coloured items are painted from the body to the doors, the hood, the bumpers... everything
They had just finished laying the last few layers on the hood and bumpers when I arrived.My camera-phone used to take pretty good pictures... until I broke the lens. It wasn't the main one, it was the polarizing one, so you guys will have to forgive how bright and washed-out the pics look. They *really* don't do the new paint job justice at all, but it's an awesome Tender Blue Metallic (V3) paintjob and really looks great.
Here's one picture of the car itself. Like I said this REALLY doesn't do the car justice.. once he's got it all reassembled I'll borrow a really good digital camera for a better photo shoot.
He is also having soundproofing installed at the same time. It makes the most sense, since the dash and interior is out it's the perfect time to install it. We're using "Damplifier Pro" from a company called Second Skin. It's a Butyl-based sound dampening material that gets very good ratings. There *was* a "Sound Deadener Showdown" website up for a while with an amazing article with everything you wanted to know about sound deadeners but were afraid to ask... but the site no longer has the info. Basically it comes down to Butyl: Good, Ashphalt: Bad.
The hood gives a slightly better idea of what the colour looks like, but it's still off by quite a bit compared to seeing it in person.
Now remember, this isn't Keiko, but this car was the reason for Project Keiko's existance. The failure of a shop (which will continue to remain unnamed until Marc's car is reassembled and returned) to adhere to their contract is what prompted me to try and build Keiko for him. It's starting to look like the project may not beat Marc's car to the finish line, but we'll keep going for now. Who knows? If any of the three shops involved in Marc's car have misplaced things, we can "borrow" from Keiko to get it finished if need be.
Once I saw the progress on Marc's car (and got Joe to take a look at my car for a ballpark figure about doing that same thing to Naomi) I got back on the road and headed for DarkFrost's place
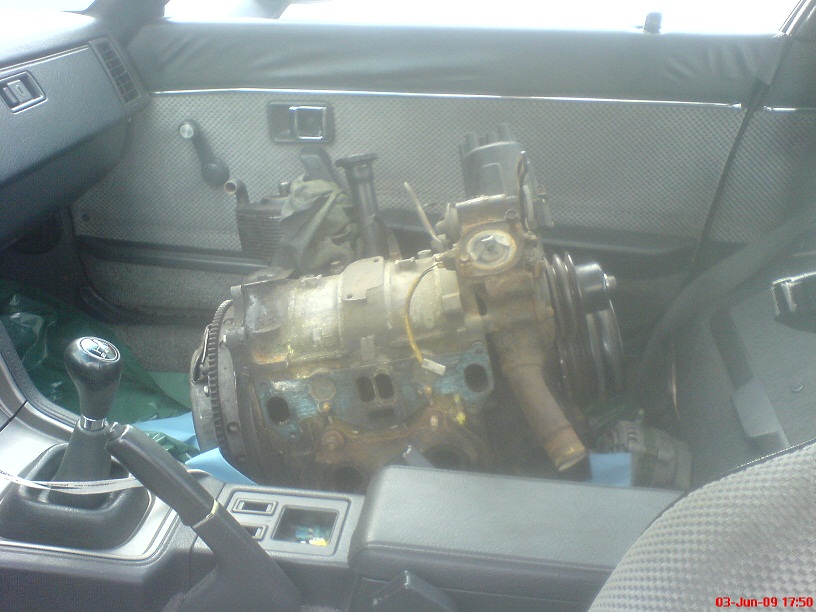
I got to his place and we loaded the 12a into the passenger's seat area of my 7
He's a really awesome guy. We chatted about FBs for a bit and his TII swap project (Good luck dude!) and then I took off.
Before coming back to Ottawa I hit up a really awesome Indian restaurant that I tend to go to whenever I'm in Mississauga. I highly recommend it for anyone who's in the area. It's Bombay Bhel at the corner of Hurontario and Eglinton. Damn that stuff is tasty!
Finishing off supper (and taking some Naan and Butter Chicken to go) I started my trek back home. 4ish hours into the drive back I was nearing Brockville on Hwy 401 and it was dark. I was cruising along at about 120km/h with a truck in front of me, one to my right and a guardrail to my left. All of a sudden a groundhog ran onto the road. I did what I could, my driving skills kicking in to apply as much pressure to the brakes as possible without causing the wheels to lock up or the car to lose control but it was to no avail. The groundhog hit the lower part of the bumper on the passenger's side, where the vent is for the brakes. The lower part of the bumper separated from the upper part and from the fender. The fender bent, the brake duct bent and the lower half of the bumper slid under the car.
I pulled the car to a stop and started to assess the damage. I was able to temporarily re-secure it with electrical tape I had in my glovebox and took a few pics the next day
Last edited by vipernicus42; Jun 6, 2009 at 11:43 PM.
Thread Starter
Joined: May 2002
Posts: 5,972
Likes: 37
From: Ottawa, Soviet Canuckistan
Here are more pictures of the damage.... Since it ripped the vented half of the bumper free from the bolts that held it to the top, I'm not sure how I'm going to reattach it. The brake duct is in such bad shape that I'm not sure I can re-shape it and the fender is bent more than a little out of place with a lovely new crack in it.
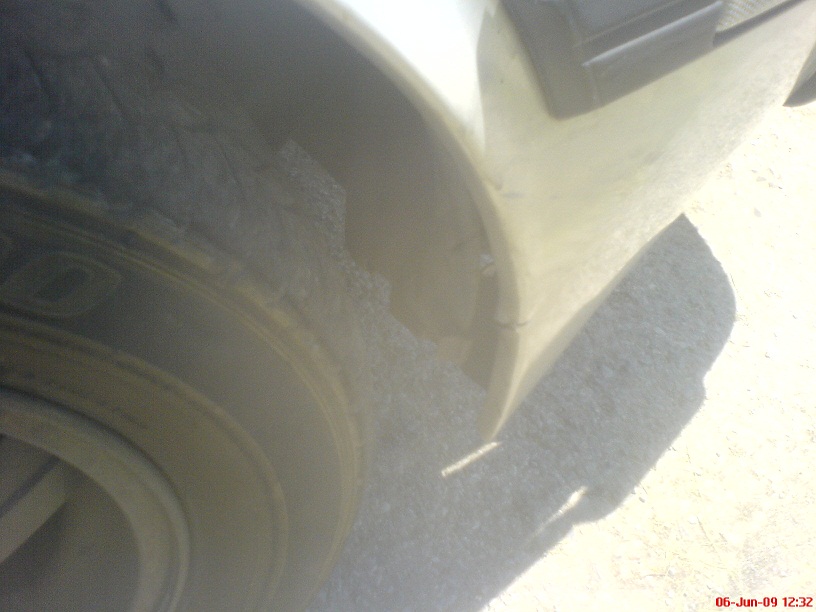
I guess it could have been worse. It could have been something much larger than a groundhog, and/or the damage could have been more severe. I was lucky that I happened to have plenty of electrical tape and that it was able to hold it on there for the last 150km of the journey home. The repair is going to have to wait though, I can't afford replacement parts and a paint job right now, so we'll concentrate on one project at a time.
I got home around midnight so I hit the sac and the next morning I picked up my friend Chris who lives about 45mins away to help me with the engine swap.
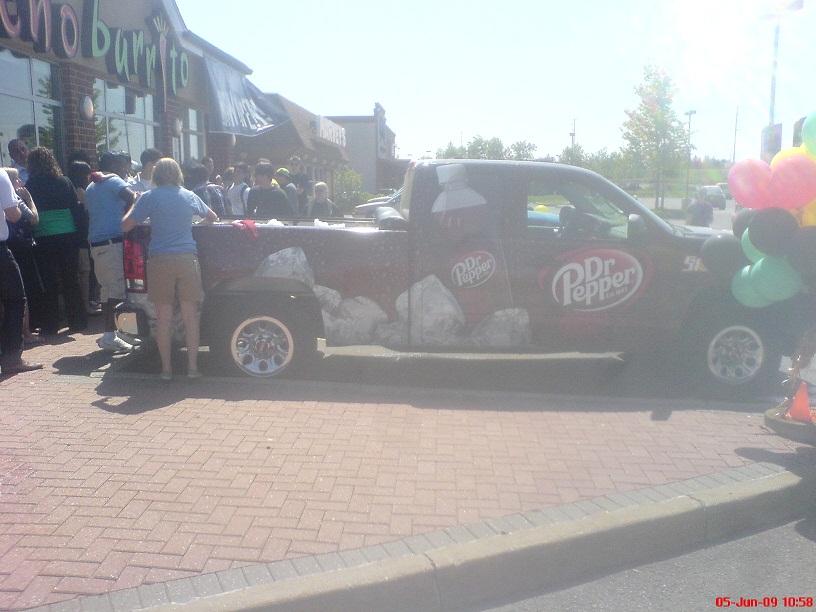
On the way back to my place from picking him up we decided to check out this new Burrito place called Mucho Burrito. We didn't know it but they were having a promo, opening day celebration. There was a truckfull of Dr. Pepper (we figured out that it had 5,400 bottles of Dr. Pepper in it while standing in line) and the Burritos were free for everyone that day.
Not only that, but the first 50 people in when it opened got free burritos for a year. Guess who now has 52 free Burrito vouchers? lol.. having never won anything like it before, it was a cool way to bring up my spirits after the groundhog damage.
So we got to work on Keiko...
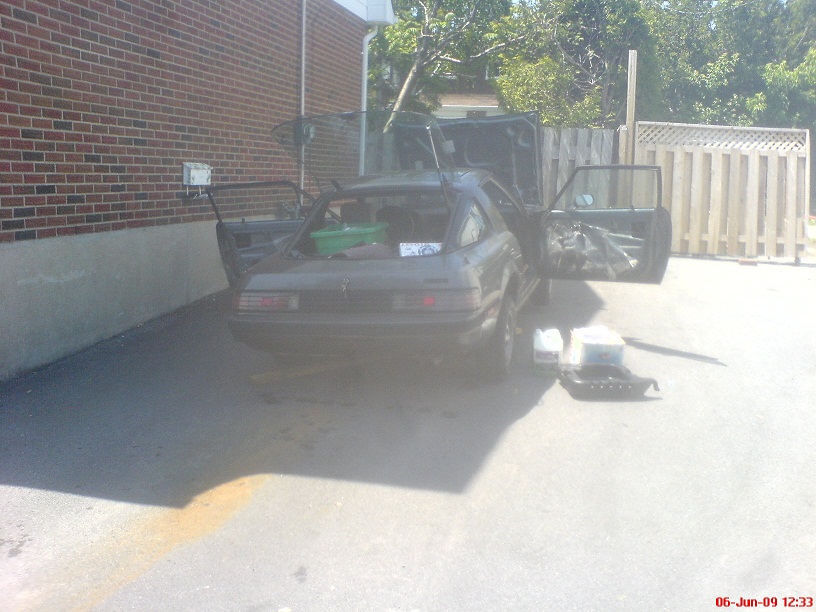
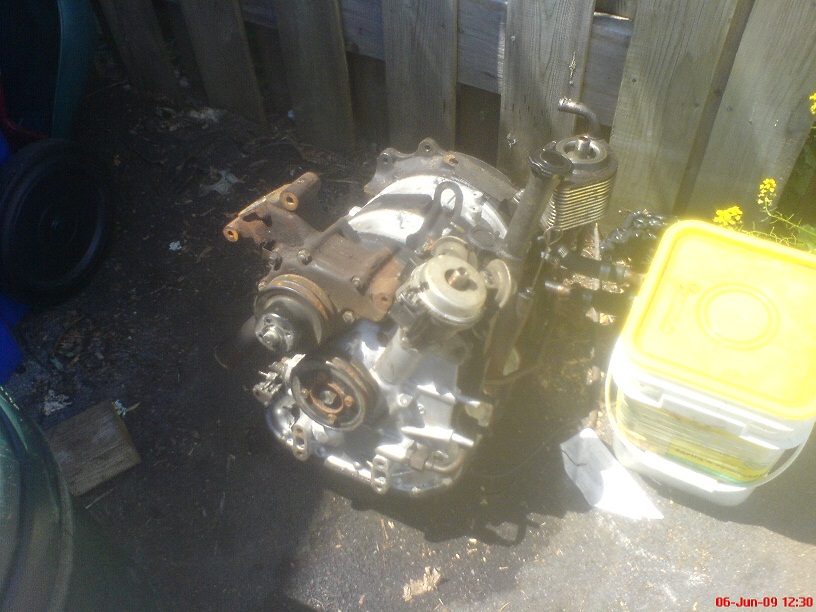
... and took out the nice-looking-but-crappy engine
I guess it could have been worse. It could have been something much larger than a groundhog, and/or the damage could have been more severe. I was lucky that I happened to have plenty of electrical tape and that it was able to hold it on there for the last 150km of the journey home. The repair is going to have to wait though, I can't afford replacement parts and a paint job right now, so we'll concentrate on one project at a time.
I got home around midnight so I hit the sac and the next morning I picked up my friend Chris who lives about 45mins away to help me with the engine swap.
On the way back to my place from picking him up we decided to check out this new Burrito place called Mucho Burrito. We didn't know it but they were having a promo, opening day celebration. There was a truckfull of Dr. Pepper (we figured out that it had 5,400 bottles of Dr. Pepper in it while standing in line) and the Burritos were free for everyone that day.
Not only that, but the first 50 people in when it opened got free burritos for a year. Guess who now has 52 free Burrito vouchers? lol.. having never won anything like it before, it was a cool way to bring up my spirits after the groundhog damage.
So we got to work on Keiko...
... and took out the nice-looking-but-crappy engine
Thread Starter
Joined: May 2002
Posts: 5,972
Likes: 37
From: Ottawa, Soviet Canuckistan
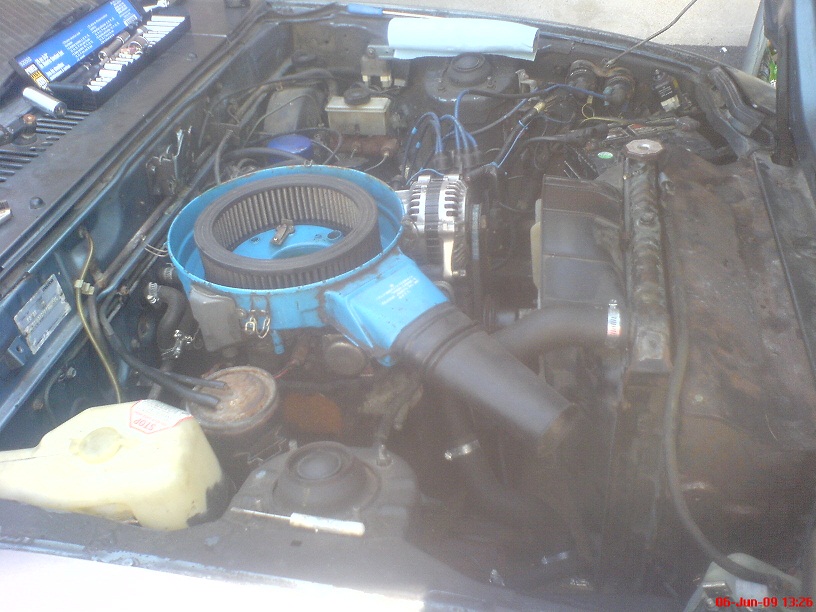
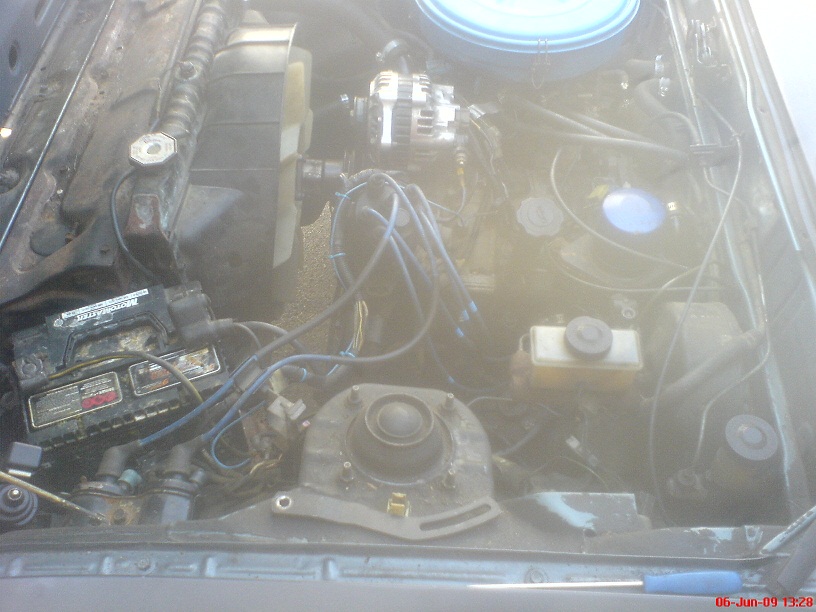
I didn't take many pictures of the engine swap itself because we've already been through one in this project but basically here's where we ended up after about 4hrs of work between 3 guys. This time we only swapped the engine, leaving the transmission in place. I usually pull both at the same time because it's easier to separate and re-mate the engine and tranny with them out of the car, but since we had so much trouble with the transmission bolt holes last time I decided to try it this way. I had never done it before, but it went alright.
My suggestion is to make sure your hoist has a long enough boom that it can reach all the way to the back of the engine bay. Ours didn't and it was a bugger trying to -swing- the engine into place to mate it with the tranny.
Once everything was back together (with ignition coils and ignitors also provided by DarkFrost, thank you!) I found out that the battery was dead and the neighbors had parked their car in a spot that made it impossible to boost Keiko, then they took off for the weekend in their other vehicle.
So I cleaned out a bunch of junk from the car, found a bunch of crap to throw out, some extra stuff that's up for grabs, and some parts that I still need.
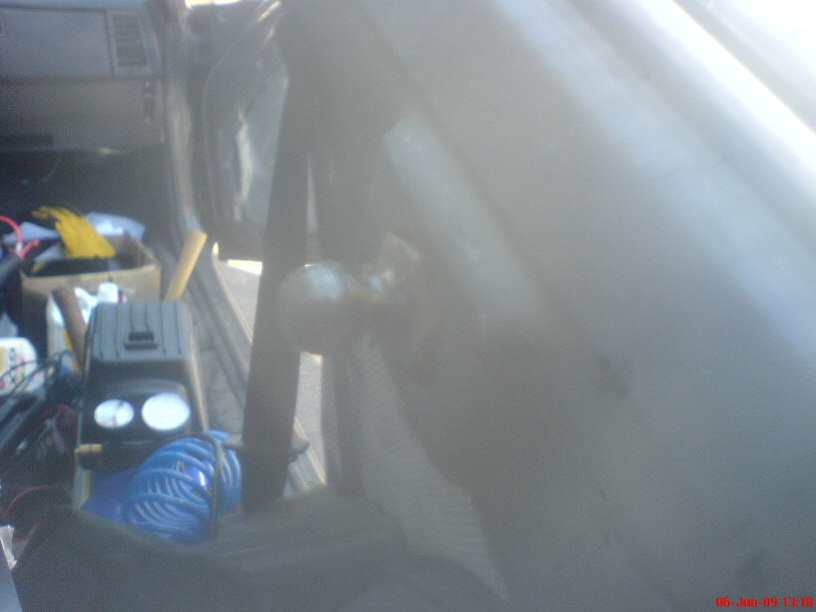
This is the toughest one to explain to people so I took a picture. I need this bolt with a round head that the rear hatch-lifting piston clips onto. I have one, but need another.
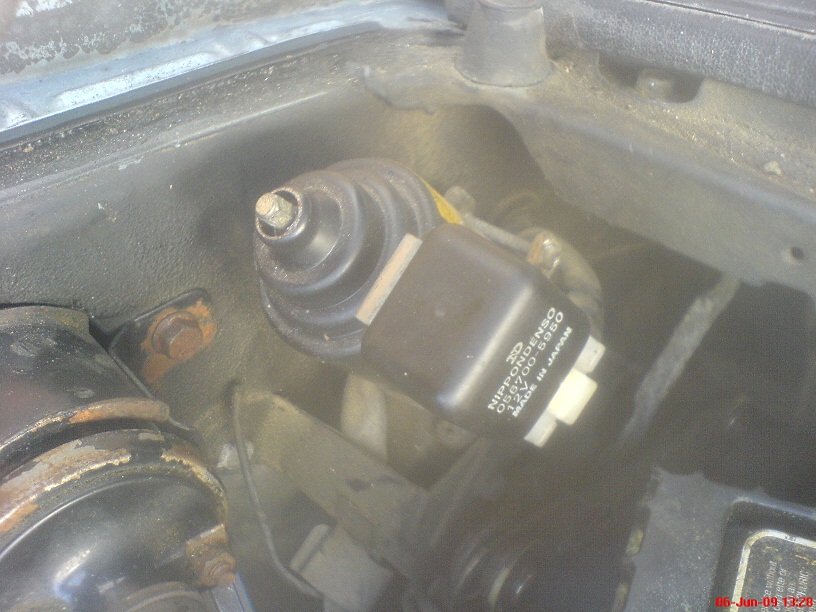
I also need a headlight motor relay, which looks like this (when its protective boot is removed)
Other than that, if anyone has any front brake rotors, rear drums, pads or shoes in good condition to part with, that's next up on the list after the engine is started.
After having the battery on my 2A charger for a few hours I tried to start it, but the battery drained after like two rotations of the engine. It was, however, enough to cause a very impressive backfire which I assume was from igniting all the gas and starter fluid I dumped into the exhaust manifold with the other engine. It sounded like a shotgun and made a large puff of burnt-smelling smoke.
Tomorrow we will try to start it again. It's on the 2amp charger overnight which should hopefully be enough to turn it over. If not I'll have to wait until the neighbors return from the cottage so they can move their car.
Oh, here's the picture of the extra stuff if anyone wants it. I've got
- an oil cooler (unknown origin, methinks an S1 or S2)
- a spare blue air filter canister (the lid's seal is a bit messed up but it can be glued back in place)
- a K&N filter (yes a SPARE K&N. Keiko and Naomi both have one already)
- an intake manifold with an Racing Beat ACV blockoff plate that I'd be willing to remove and send separately
- a signal-light relay (I didn't end up needing it for Naomi after all)
- a fuel level sender for an S3
- an FB alt
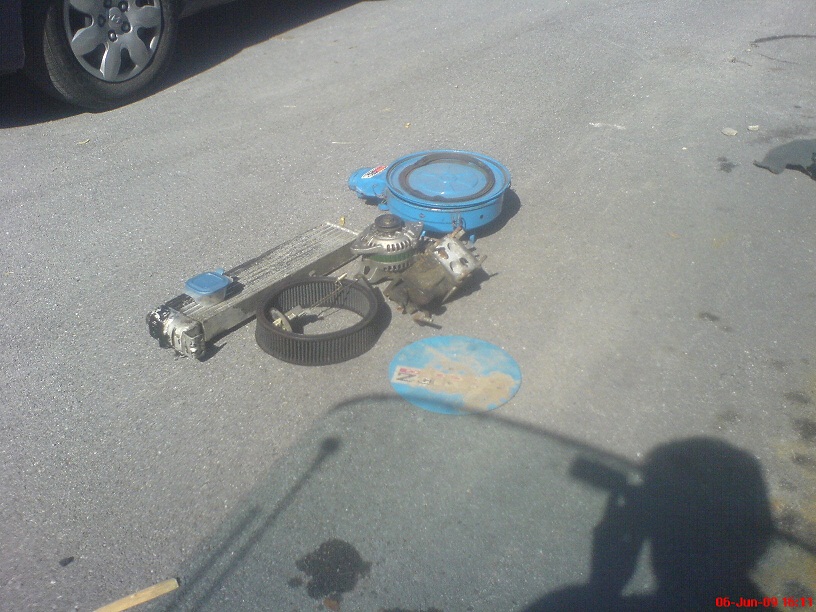
Just PM me if anyone wants any of it. I could use the extra cash for this project. I'd be willing to trade for some of the stuff I mentioned that I needed above, as well as other items of interest to me (some 12a engine parts like in-spec apex seals or a fender or lower bumper piece to fix Naomi)
Wish me luck tomorrow with the start-up If that works then I just have to bleed the clutch, cap the rear brake spot on the master cylinder, bleed the front brakes and I should be able to move it in and out of the driveway under its own power.
Jon
My suggestion is to make sure your hoist has a long enough boom that it can reach all the way to the back of the engine bay. Ours didn't and it was a bugger trying to -swing- the engine into place to mate it with the tranny.
Once everything was back together (with ignition coils and ignitors also provided by DarkFrost, thank you!) I found out that the battery was dead and the neighbors had parked their car in a spot that made it impossible to boost Keiko, then they took off for the weekend in their other vehicle.
So I cleaned out a bunch of junk from the car, found a bunch of crap to throw out, some extra stuff that's up for grabs, and some parts that I still need.
This is the toughest one to explain to people so I took a picture. I need this bolt with a round head that the rear hatch-lifting piston clips onto. I have one, but need another.
I also need a headlight motor relay, which looks like this (when its protective boot is removed)
Other than that, if anyone has any front brake rotors, rear drums, pads or shoes in good condition to part with, that's next up on the list after the engine is started.
After having the battery on my 2A charger for a few hours I tried to start it, but the battery drained after like two rotations of the engine. It was, however, enough to cause a very impressive backfire which I assume was from igniting all the gas and starter fluid I dumped into the exhaust manifold with the other engine. It sounded like a shotgun and made a large puff of burnt-smelling smoke.
Tomorrow we will try to start it again. It's on the 2amp charger overnight which should hopefully be enough to turn it over. If not I'll have to wait until the neighbors return from the cottage so they can move their car.
Oh, here's the picture of the extra stuff if anyone wants it. I've got
- an oil cooler (unknown origin, methinks an S1 or S2)
- a spare blue air filter canister (the lid's seal is a bit messed up but it can be glued back in place)
- a K&N filter (yes a SPARE K&N. Keiko and Naomi both have one already)
- an intake manifold with an Racing Beat ACV blockoff plate that I'd be willing to remove and send separately
- a signal-light relay (I didn't end up needing it for Naomi after all)
- a fuel level sender for an S3
- an FB alt
Just PM me if anyone wants any of it. I could use the extra cash for this project. I'd be willing to trade for some of the stuff I mentioned that I needed above, as well as other items of interest to me (some 12a engine parts like in-spec apex seals or a fender or lower bumper piece to fix Naomi)
Wish me luck tomorrow with the start-up
If that works then I just have to bleed the clutch, cap the rear brake spot on the master cylinder, bleed the front brakes and I should be able to move it in and out of the driveway under its own power.Jon
Thread Starter
Joined: May 2002
Posts: 5,972
Likes: 37
From: Ottawa, Soviet Canuckistan
Had to work late today, didn't get a chance to start it. The suspense is killing even me!
Ray Green hooked me up with the headlight relay, now I'm just looking for that bolt with the round head for the hatch lifter!
Jon
Ray Green hooked me up with the headlight relay, now I'm just looking for that bolt with the round head for the hatch lifter!
Jon

Thread
Thread Starter
Forum
Replies
Last Post
trickster
2nd Generation Specific (1986-1992)
25
Jul 1, 2023 04:40 PM