
Project Keiko Part II - Exterior, Seals, and Engine Bay Teardown

Thread Starter
Joined: May 2002
Posts: 5,972
Likes: 37
From: Ottawa, Soviet Canuckistan
Project Keiko Part II - Exterior, Seals, and Engine Bay Teardown
Hey Guys,
Well it's time for part II of Project Keiko, started here:
---Edit: Here are the other chapters of the project, for easy reference---
Project Keiko - Helping a friend
Project Keiko Part II - Exterior, Seals, and Engine Bay Teardown
Project Keiko Part III - Engine Removals
Project Keiko Part IV - Tri-Engine Teardowns I
Project Keiko Part V - Tri-Engine Teardowns II
Project Keiko Part VI - Engine Build I
Project Keiko Part VII - Rotor Seals Assembly
Project Keiko Part VIII - Week Of Crazyness
Project Keiko Part IX - End of Season Update
Project Keiko Part X - Spring 2009 Update
Project Keiko Part XI - Another Engine, Ready to Start
Project Keiko Part XII - Up For Sale
---/Edit---
Since I made the original post almost 3 weeks ago I've spent most of my time amassing parts and preparing for various things. Friday was my last day of work before having a week off (10 actual days because of Civic Holiday next Monday) so this week is the week I really dig into the car.
Saturday I drove down to get the registration for the car from the previous owner. I hadn't picked it up at the time of purchase because I basically bought the car from Rob as a parts car for $150 and he didn't know exactly where the papers were so I didn't worry about it. When I got there, he asked me what parts I was still waiting for. I said there was a Gas Tank coming form BC and a Muffler coming from Toronto and he said "I've got a gas tank and a muffler, want it?".
So I got a perfect condition gas tank and an awesome condition mystery muffler. It isn't stock, it looks like it might be a little loud, but I guess we'll see. So once the muffler and gas tank that I already bought off of other forum members get here I'll pick the ones I want and sell the other two in the classifieds since I don't need two sets of those!
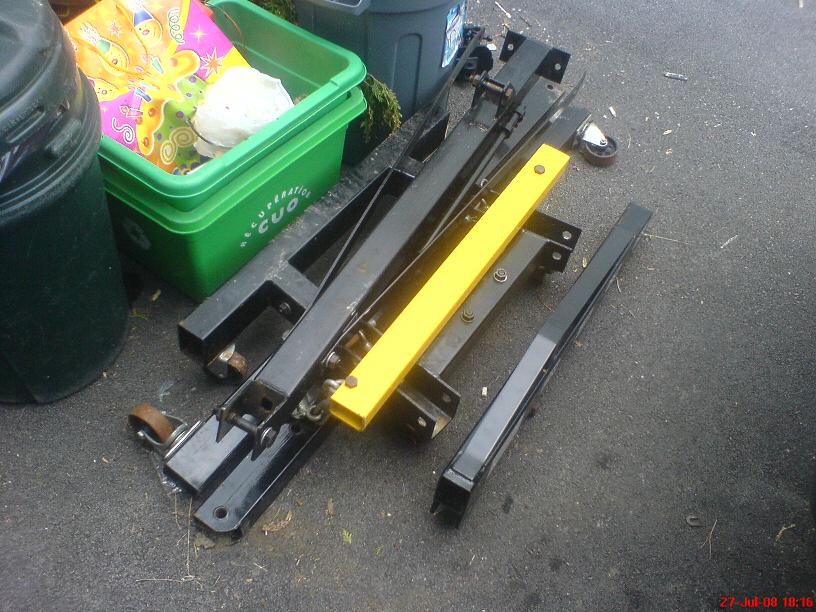
I also picked up an engine hoist on Saturday which will be used for removing the engine.
Without further ado, here are the pictures.
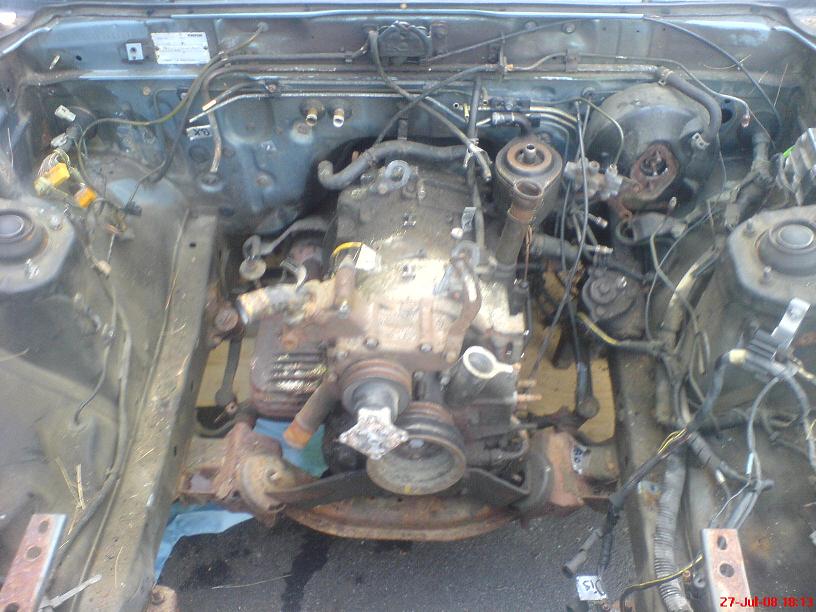
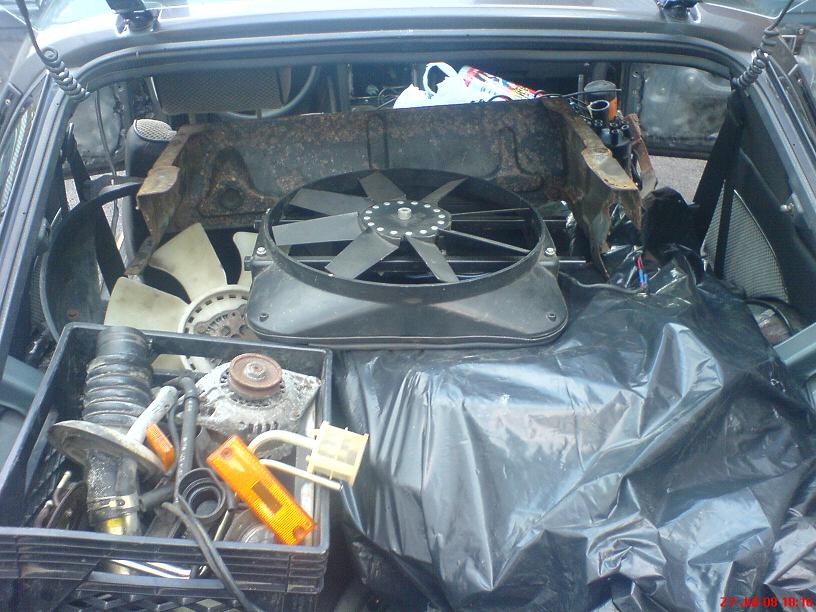
Mid-morning the engine bay looked like this. It still had the intake manifold on it, so a few more things came out as the day went on, but the main goal for myself today was to prep the engine for removal.
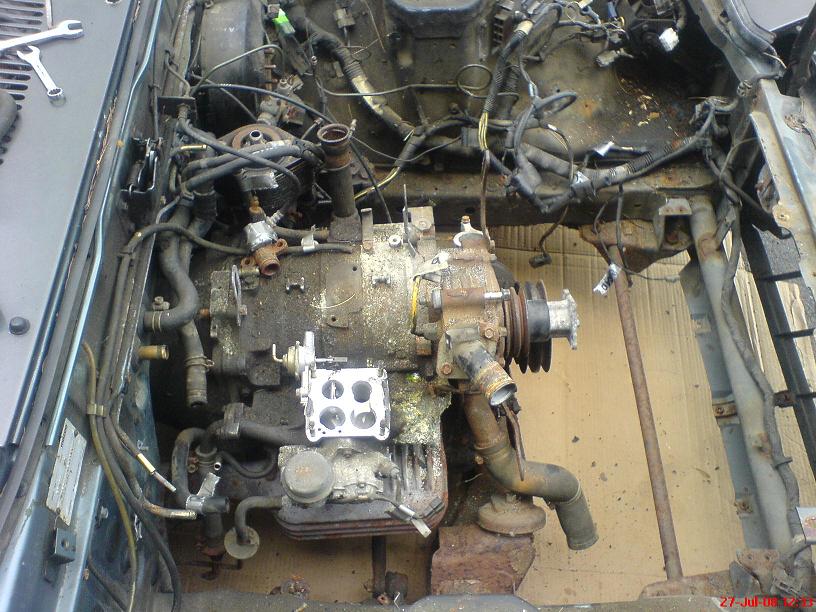
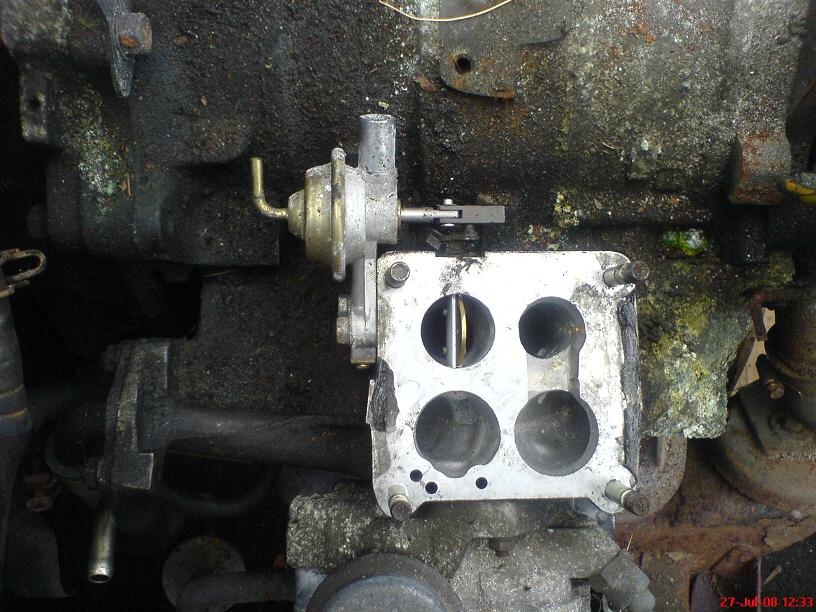
Amazingly I found an almost *brand new* shutter valve had been installed. In fact it may have been purchased new from Mazda or Mazdatrix a few years ago before the car went off the road. I could tell it was newer than everything around it because a) it was so shiney b) it wasn't siezed like 90% of the shutter valves out there and c) one of the two bolts holding it in place wasn't stock.
If anyone wants it, let me know. I'm just taking it off and JBWelding the holes since we have no emissions control tests here and I don't find it helps much at all for anything.
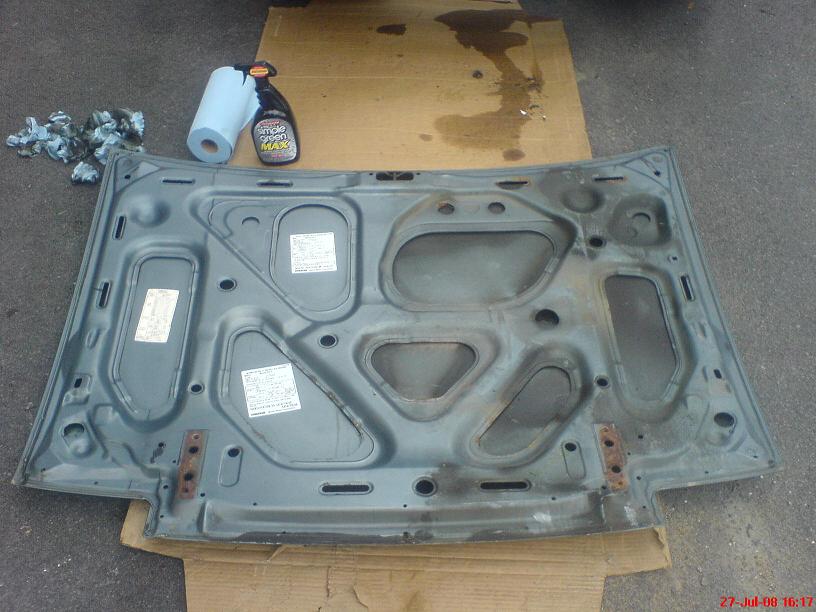
Simple Green and Shop Towels are AWESOME! This isn't a new revelation for me, but something I had to re-share with anyone who doesn't yet know. This is less than 5min of work on the hood. Obviously you can see which side was cleaned.
Here's more engine bay progress. You can see that here I've removed the intake manifold.
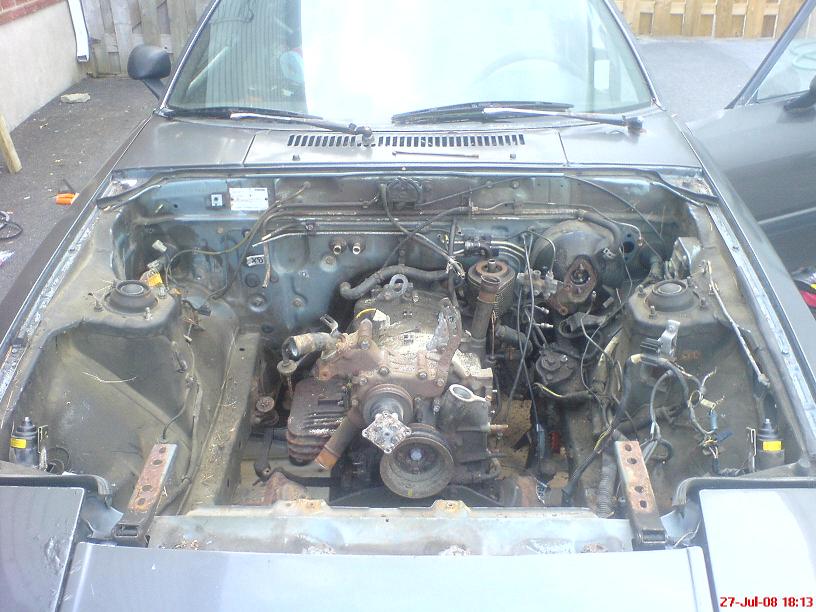
Here's another shot of the engine bay. Basically I just have to unbolt the exhaust manifold, unbolt the transmission mount and pull it out. The front mount nuts are off and everything else is clear of the engine except the battery cables.
More pics in a sec
Well it's time for part II of Project Keiko, started here:
---Edit: Here are the other chapters of the project, for easy reference---
Project Keiko - Helping a friend
Project Keiko Part II - Exterior, Seals, and Engine Bay Teardown
Project Keiko Part III - Engine Removals
Project Keiko Part IV - Tri-Engine Teardowns I
Project Keiko Part V - Tri-Engine Teardowns II
Project Keiko Part VI - Engine Build I
Project Keiko Part VII - Rotor Seals Assembly
Project Keiko Part VIII - Week Of Crazyness
Project Keiko Part IX - End of Season Update
Project Keiko Part X - Spring 2009 Update
Project Keiko Part XI - Another Engine, Ready to Start
Project Keiko Part XII - Up For Sale
---/Edit---
Since I made the original post almost 3 weeks ago I've spent most of my time amassing parts and preparing for various things. Friday was my last day of work before having a week off (10 actual days because of Civic Holiday next Monday) so this week is the week I really dig into the car.
Saturday I drove down to get the registration for the car from the previous owner. I hadn't picked it up at the time of purchase because I basically bought the car from Rob as a parts car for $150 and he didn't know exactly where the papers were so I didn't worry about it. When I got there, he asked me what parts I was still waiting for. I said there was a Gas Tank coming form BC and a Muffler coming from Toronto and he said "I've got a gas tank and a muffler, want it?".
So I got a perfect condition gas tank and an awesome condition mystery muffler. It isn't stock, it looks like it might be a little loud, but I guess we'll see. So once the muffler and gas tank that I already bought off of other forum members get here I'll pick the ones I want and sell the other two in the classifieds since I don't need two sets of those!
I also picked up an engine hoist on Saturday which will be used for removing the engine.
Without further ado, here are the pictures.
Mid-morning the engine bay looked like this. It still had the intake manifold on it, so a few more things came out as the day went on, but the main goal for myself today was to prep the engine for removal.
Amazingly I found an almost *brand new* shutter valve had been installed. In fact it may have been purchased new from Mazda or Mazdatrix a few years ago before the car went off the road. I could tell it was newer than everything around it because a) it was so shiney b) it wasn't siezed like 90% of the shutter valves out there and c) one of the two bolts holding it in place wasn't stock.
If anyone wants it, let me know. I'm just taking it off and JBWelding the holes since we have no emissions control tests here and I don't find it helps much at all for anything.
Simple Green and Shop Towels are AWESOME! This isn't a new revelation for me, but something I had to re-share with anyone who doesn't yet know. This is less than 5min of work on the hood. Obviously you can see which side was cleaned.
Here's more engine bay progress. You can see that here I've removed the intake manifold.
Here's another shot of the engine bay. Basically I just have to unbolt the exhaust manifold, unbolt the transmission mount and pull it out. The front mount nuts are off and everything else is clear of the engine except the battery cables.
More pics in a sec
Last edited by vipernicus42; Aug 25, 2009 at 07:47 PM.
Thread Starter
Joined: May 2002
Posts: 5,972
Likes: 37
From: Ottawa, Soviet Canuckistan
The other major concentration for today was getting the weatherstripping for the doors, sunroof and rear hatch all set so that rain didn't get in
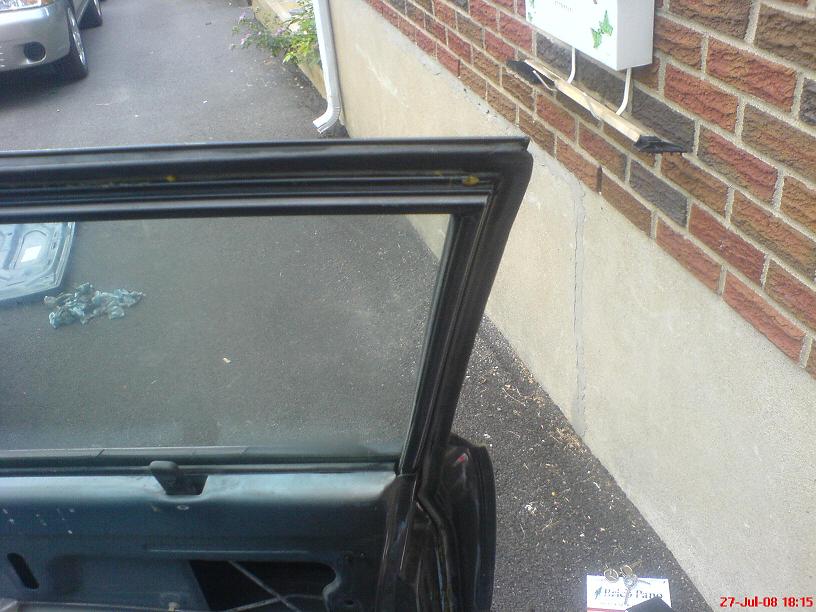
Since most of the little plastic clips were busted or the holes in the weatherstripping ripped, we used some "weatherstrip adhesive" from Permatex to hold it in place. Little did we know it was yellow, yuck.

One of the parts I managed to get my hands on was a spare 12a. I'm going to take the 12a out of this car, this spare I picked up, and another blown one that my friend Eric is giving me and use the 3 to make one good engine. I'm using the $265 Atkins Rebuild Kit "A". It doesn't have any apex seals, side seals or corner seals, but it has all the springs, oil control rings and soft seals/gaskets. I should be able to measure out all the apex and corner seals with my vernier caliper and choose the best ones and go with it
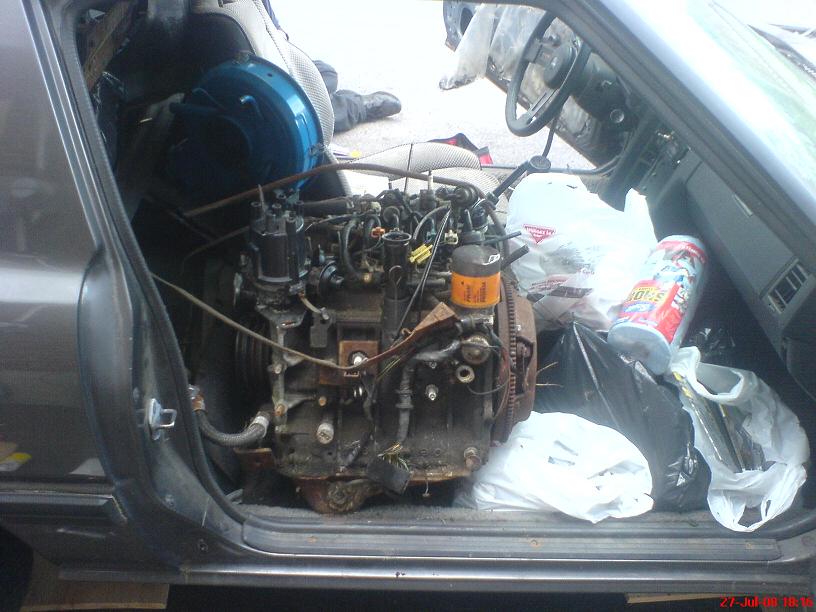
Here's the engine hoist I borrowed from Dave (misterstyx69 on the forum). I have to give it back later this week so I'm going to try and pull the engine tomorrow, and on Tuesday I'm helping Eric swap his blown engine for his good one so I can have the blown one.
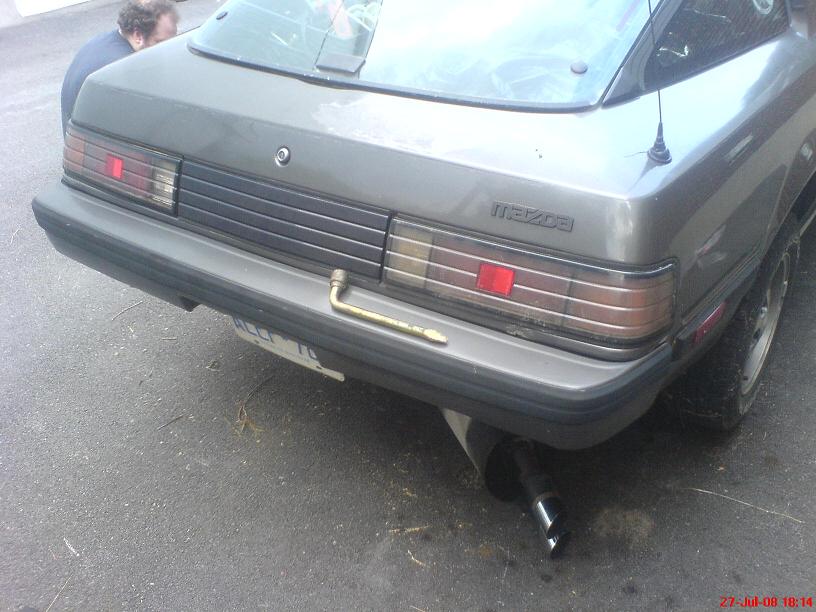
Here's that bonus muffler I was talking about. If anyone can identify it let me know. It's hard to see in the pic but it's much narrower top-to-bottom compared to stock.

One more set coming.
Jon
Since most of the little plastic clips were busted or the holes in the weatherstripping ripped, we used some "weatherstrip adhesive" from Permatex to hold it in place. Little did we know it was yellow, yuck.
One of the parts I managed to get my hands on was a spare 12a. I'm going to take the 12a out of this car, this spare I picked up, and another blown one that my friend Eric is giving me and use the 3 to make one good engine. I'm using the $265 Atkins Rebuild Kit "A". It doesn't have any apex seals, side seals or corner seals, but it has all the springs, oil control rings and soft seals/gaskets. I should be able to measure out all the apex and corner seals with my vernier caliper and choose the best ones and go with it
Here's the engine hoist I borrowed from Dave (misterstyx69 on the forum). I have to give it back later this week so I'm going to try and pull the engine tomorrow, and on Tuesday I'm helping Eric swap his blown engine for his good one so I can have the blown one.
Here's that bonus muffler I was talking about. If anyone can identify it let me know. It's hard to see in the pic but it's much narrower top-to-bottom compared to stock.
One more set coming.
Jon
Last edited by vipernicus42; Jul 28, 2008 at 12:40 AM.
Thread Starter
Joined: May 2002
Posts: 5,972
Likes: 37
From: Ottawa, Soviet Canuckistan
I've picked up *plenty* of parts. Here's a picture of the hatch. In the garbage bag is the gas tank, and this pic doesn't include two garbage bags full of interior bits plus a set of door panels that are in the house!
With the weather stripping on the doors having been so ratty and gone the storage bin collected some water. We fixed the door stripping, fixed the hand-crank thing for the sunroof so it would open and close properly, and hopefully this bin won't fill with water again
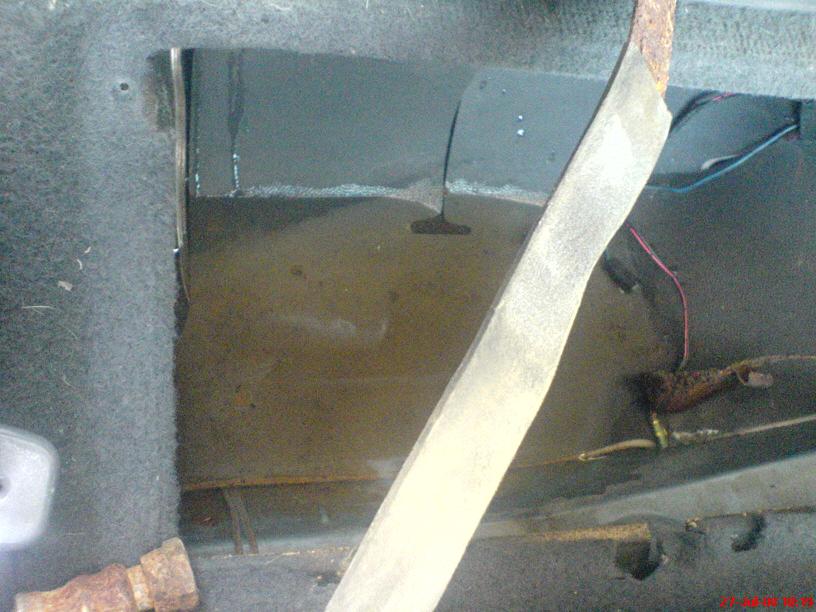
TailLights also help to keep water from getting in. We didn't have any before, but now we do!
And we also got side marker lights and bulbs to go with the collection
Jon
With the weather stripping on the doors having been so ratty and gone the storage bin collected some water. We fixed the door stripping, fixed the hand-crank thing for the sunroof so it would open and close properly, and hopefully this bin won't fill with water again
TailLights also help to keep water from getting in. We didn't have any before, but now we do!
And we also got side marker lights and bulbs to go with the collection
Jon
Thread Starter
Joined: May 2002
Posts: 5,972
Likes: 37
From: Ottawa, Soviet Canuckistan
So for the exterior all that's left is to sand all the rust spots and touch-up-paint them, and fix the rubber side molding on the driver's door.
The weatherstripping for the driver's door was bad and the one we got from the parts car was *also* bad so I'm looking for a rubber weatherstrip for the driver's door still.
Tomorrow's project is to get the engine out, clean out the engine bay, get the car's registration transferred, and remove the exhaust.
New Parts I've Found I Need:
- Driver's Door Weatherstripping
- E-brake "Y" Cable (found it was snapped)
So far, not bad.
Jon


Trending Topics
Jon, that is DEFINITELY the muffler from the Black Dragon catalog. It is actually a Pacesetter Monza muffler, and is the same one that goes with the Pacesetter header. My first Rx7 came with one of those on it, and it was loud and HEAVY. I ended up ditching it for an OEM walker muffler.
Project looks great! Way to post the progress. Keep it up!
Jamie
Project looks great! Way to post the progress. Keep it up!
Jamie
Thread Starter
Joined: May 2002
Posts: 5,972
Likes: 37
From: Ottawa, Soviet Canuckistan
Thanks Jamie. Yeah I took a look at Black Dragon and noticed that it looked pretty much identical. It's fairly light though, but I'm comparing that to my RB one so I would assume RB is always heavier since they make virtually indestructable parts.
Today I got the registration officially signed over in my name. It was pretty easy since it was crossing provincial borders (that actually makes it easier since both parties don't have to go to the license office. You just bring the registration which the previous owner signed the back of and they register it). In capital letters on the registration it says "VEHICLE INSPECTION REQUIRED" meaning that it'll have to pass safety/inspection before it can be licensed for the road, but that's expected. At least it's officially *my* car now, and not just a parts car that's still "owned" by a guy 4 'owners' ago.
Due to time restrictions we didn't get much else done today. Headlights got installed (a few of the screws had seized in yesterday) and we took some simple green and shop towels to the engine bay. We found out that there's thick rustproofing tar all over the place so it won't look nearly as clean as I was hoping since that stuff is near impossible to remove, but meh. As long as it's "clean enough" we'll work with it.
The engine didn't come out today since I have to wait until payday (tomorrow) to buy myself an electric impact wrench (240ft/lbs, not bad for an electric!) so that I can take off the exhaust. The keg comes out tomorrow and I go to Eric's place to take the blown engine out of his car too. So that will be 3 engines.
If I'm really lucky the Atkins rebuild kit and the 2 1/8" socket will be in and I'll be able to actually dissasemble these engines and rebuild one in the few days.
Then after engines, we've got exhaust and a gas tank to install before we can start it, then brake pads and shoes to install before we can *try* to drive it. It's wishful thinking but MAYBE if luck is on our side we can have it roll under its own power before next week. Right now though that seems pretty far off.
IF anybody has a driver's door seal, an e-brake Y-cable, a headlight screw (I'm missing one) or the screws to screw in the fuel level sender and fuel tubes (same size as headlight screw actually) let me know!!
Especially the screws for the fuel level sender, fuel tubes and headlight. If someone knows how to source them new I'll buy a small box if you can ship it by the fastest method humanly possible (or tell me where in Ottawa to source them, lol)
Jon
Jon,
Have you tried Mcmaster.com for the fuel sender screws? If they don't have it then it doesn't exist. If you can figure out what thread those things are then just get a box of them from McMaster Carr. Heck, you could even get some hex head cap screws, instead of the regular phillips head ones, to keep them from stripping out down the road. Those fuel sender screws are darn near impossible to get out sometimes.
Jamie
Luckily, my sender and fuel plate screws were easy to get out, so I re-used them. They were like they just went in yesterday. No rust for me. West coast car.
Thread Starter
Joined: May 2002
Posts: 5,972
Likes: 37
From: Ottawa, Soviet Canuckistan
I can't find them anywhere! McMaster-Carr won't ship to Canada, and the local hobby shops don't seem to carry screws for some reason.
Can I get someone to source me a dozen of them and I'll paypal you for them and shipping?
I found a screw that fit, it's actually for the headlight rings, but it seems to fit well. I've included pictures here of the measurements. 4.0x0.7 sounds right because these are basically 3.5x0.75 and they fit a little loose (but nothing a bit of locktite couldn't fix.
The length of the threaded area is 9mm. I'm sure a 10mm one would work as well, worst case I'd need washers which are much easier to find methinks.
Jon
Jon,
Don't worry, I'm on the case! I owe you for that antenna you got for me back in the day. I'll check at Lowe's on my way home. If they don't have 'em then I'll have McMaster Carr ship me some. I'll ship them to you if McMaster won't.
Jamie
Don't worry, I'm on the case!
I owe you for that antenna you got for me back in the day. I'll check at Lowe's on my way home. If they don't have 'em then I'll have McMaster Carr ship me some. I'll ship them to you if McMaster won't.Jamie
Okay,
If I don't find them at Lowe's I'll let you know and you can check your hardware stash. If you don't have any in the stash then I'll go ahead and place and order with McMaster Carr for Jon. Sound good?
Jamie
If I don't find them at Lowe's I'll let you know and you can check your hardware stash. If you don't have any in the stash then I'll go ahead and place and order with McMaster Carr for Jon. Sound good?
Jamie
Sounds like a plan. Haven't looked at Lowe's for metric stuff for awhile. I seem to remember them having 4mm, but nothing smaller than that. Perhaps they do not have the 4mm either anymore..don't know..it has been quite some time since I checked.
I know one guy in the F/S section was looking for these screws also and he found some at a local Mom & Pop hardware store..sometimes the little guys have stuff that the big guys do not.
I know one guy in the F/S section was looking for these screws also and he found some at a local Mom & Pop hardware store..sometimes the little guys have stuff that the big guys do not.
SCORE! Got a dozen socket head cap screws. M4x0.70 x 10. Only $6 each! Just kidding.
Got all 12 of them for $5. They are the kind that use an allen wrench to take in and out. Should work a lot better than those phillips head screws that strip out all the time. These are the shortest ones that Lowe's had, so if they are too long you can shim them with washers. PM me your shipping address and I'll get them out of here tomorrow morning hopefully.

Jamie
Got all 12 of them for $5. They are the kind that use an allen wrench to take in and out. Should work a lot better than those phillips head screws that strip out all the time. These are the shortest ones that Lowe's had, so if they are too long you can shim them with washers. PM me your shipping address and I'll get them out of here tomorrow morning hopefully.
Jamie
Thread Starter
Joined: May 2002
Posts: 5,972
Likes: 37
From: Ottawa, Soviet Canuckistan
Awesome
PM sent. Thanks guys. That's all that was missing to be able to put the tank in. That just leaves the exhaust, the engine rebuild and some interior work.. that I can think of right now.
Jon
PM sent. Thanks guys. That's all that was missing to be able to put the tank in. That just leaves the exhaust, the engine rebuild and some interior work.. that I can think of right now.
Jon
My pleasure. I enjoy being able to contribute to a worthy project such as this one. Especially with all of the detailed updates that you've been posting. I feel like I'm actually there watching the car come together.
Jamie
I feel like I'm actually there watching the car come together.Jamie
Thread Starter
Joined: May 2002
Posts: 5,972
Likes: 37
From: Ottawa, Soviet Canuckistan
Yeah the project is moving fast enough that detailed updates are an easy way of keeping myself on track with progress too.I just spoke to Nick (one of the friends in the pictures) and he's coming over at 10am tomorrow to help me tear apart those 12a blocks
Jon

Thread
Thread Starter
Forum
Replies
Last Post
immanuel__7
2nd Generation Specific (1986-1992)
89
Sep 5, 2015 10:23 AM