
4-Rotor FC Build

Gold Wheels FTW
Joined: Apr 2004
Posts: 458
Likes: 44
From: Nashville, TN
6 rotor thread: https://www.rx7club.com/rotary-car-p...ct-%3B-983404/

Senior Member


Joined: Aug 2010
Posts: 415
Likes: 8
From: Treasure coast
After focussing on the engine bay and everything in it for so long work on the rest of the shell has finally started. 
Took out pretty much everything I could and prepared the chassis for the rollcage. Went pretty well, getting the sound deadening material out and cleaning everything up was a crappy job though.
Took out pretty much everything I could and prepared the chassis for the rollcage. Went pretty well, getting the sound deadening material out and cleaning everything up was a crappy job though.


Thread Starter
Joined: Oct 2010
Posts: 605
Likes: 13
From: The Netherlands
Did some more work on the car, made some adapter plates to mount the sparco seat onto the stock rail for the drivers side. Took way too long to make, but fit and work perfectly.

Also removed some crap from the car and a part of the inner shell on the a-pillar. Even though the seating position is a little bit lower than stock I found that there was very little room between my head and the rollcage. Add in some foam and a helmet and there wouldn't be any room at all. So I took out a piece, this way I can tuck the rollcage in there and get about 2" more headroom.

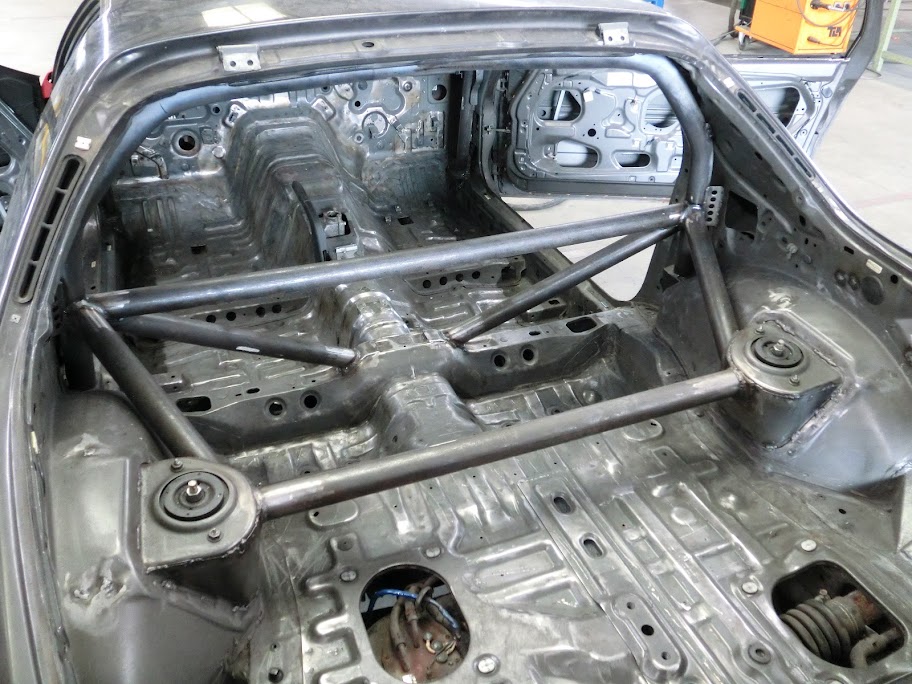
Also did some work on the rollcage, Building a 6-point rollcage with some reinforcing bars here and there

Thread Starter
Joined: Oct 2010
Posts: 605
Likes: 13
From: The Netherlands
6 ft 1 in
Thanks, I took my time making sure the bends were ok so the entire rollcage sits against the shell. I fully welded the main cage to the shell today, because it was so tight I didn't need to use a lot of gussets, I could just stickweld the cage directly to the chassis in most places. I think this will really help making everything stiff, since gussets can flex. I also added some tubes, more will follow soon.

Thanks, I took my time making sure the bends were ok so the entire rollcage sits against the shell. I fully welded the main cage to the shell today, because it was so tight I didn't need to use a lot of gussets, I could just stickweld the cage directly to the chassis in most places. I think this will really help making everything stiff, since gussets can flex. I also added some tubes, more will follow soon.
Thread Starter
Joined: Oct 2010
Posts: 605
Likes: 13
From: The Netherlands


Junior Member
Joined: Mar 2012
Posts: 8
Likes: 0
From: Lombard Il
"I'm not going to do anything outrageous with the chassis, just make sure the suspension and everything is in good condition, maybe remove some of the interior like the back seat's you can't use anyway but that's about it."
lol you said this at the start and look where it is now...
great thread btw I cant wait to see it when its all together
lol you said this at the start and look where it is now...
great thread btw I cant wait to see it when its all together
Thread Starter
Joined: Oct 2010
Posts: 605
Likes: 13
From: The Netherlands
Thanks! That e30 is my daily driver, hugely underpowered but still a great car 
Haha yeah I know, it sortoff got a bit out of control  I think the end result will be better though
Made some more progress, a few pictures of what has been done to the car:
More tubes have been added to the cage, still not done though. I'll have to wait for more seamless tubing to show up before I can finish it


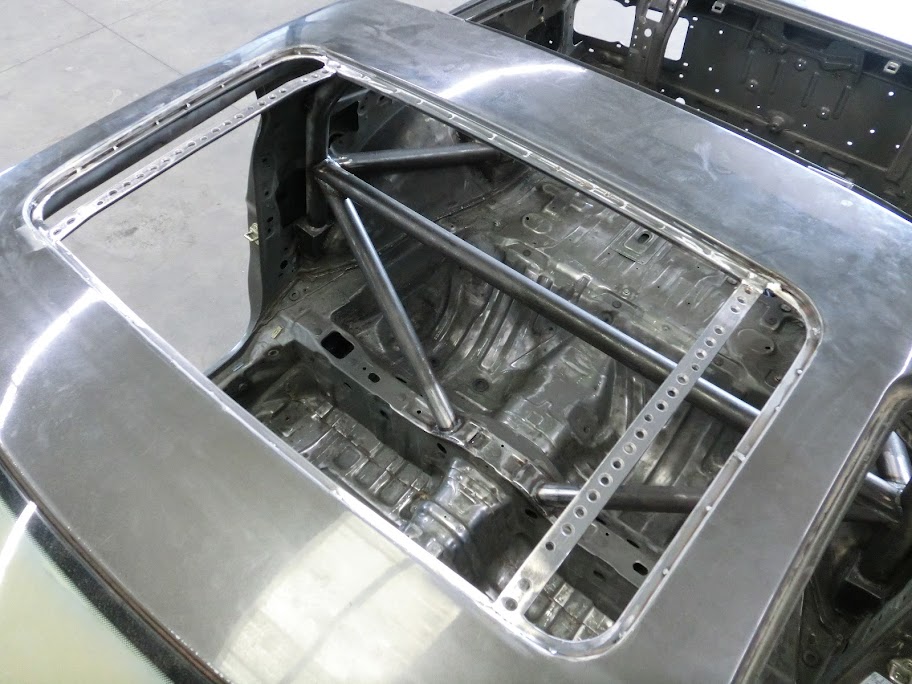
Modified the sunroof. I like having a sunroof so I didn't just want to weld it shut, but I couldn't use the normal opening mechanism either because of the rollcage. I ended up making it removable.

Mounting frame for the passanger seat, this took way too long to make, but fits and works well

Welded some unused holes shut

Removed everything in the engine bay


Now I need to finish the rollcage, when that's done everything can be prepped for paint.
"I'm not going to do anything outrageous with the chassis, just make sure the suspension and everything is in good condition, maybe remove some of the interior like the back seat's you can't use anyway but that's about it."
lol you said this at the start and look where it is now...
great thread btw I cant wait to see it when its all together
lol you said this at the start and look where it is now...
great thread btw I cant wait to see it when its all together
I think the end result will be better though Made some more progress, a few pictures of what has been done to the car:
More tubes have been added to the cage, still not done though. I'll have to wait for more seamless tubing to show up before I can finish it
Modified the sunroof. I like having a sunroof so I didn't just want to weld it shut, but I couldn't use the normal opening mechanism either because of the rollcage. I ended up making it removable.
Mounting frame for the passanger seat, this took way too long to make, but fits and works well
Welded some unused holes shut
Removed everything in the engine bay
Now I need to finish the rollcage, when that's done everything can be prepped for paint.
Damn i was recently in a accident in my rx7 and following your build makes me feel better about deciding to rebuild i just wish you where closer to me so you could give me a hand!! Haha
How thick was the plate that you used to build the boxes at the bottom of the main hoop? I've seen a number of cage builders weld thicker steel plates to the unibody in a couple planes to distribute any loading from the cage to the unibody better so that in the event of a roll or similar, the leg of the cage doesn't just locally deform or punch through the stock body. If you're planning on tracking the car, and with the superb quality of your work, its not a bad thing to consider (if you haven't already - and you probably have)
For example: Matt Powers 2012 Formula D ride Part 2
Keep it up!
For example: Matt Powers 2012 Formula D ride Part 2
Keep it up!
Thread Starter
Joined: Oct 2010
Posts: 605
Likes: 13
From: The Netherlands
All the mounting points where the cage is mounted to the shell either have a box or a plate to spread the load, both the boxes and plates are made out of 3mm thick material, which is the same as the tubing thickness. That cage in the link you posted looks amazing, I'll have to make a few more to be able to make a cage like that but for my first one I think it came out alright. It's almost finished now, doorbars and backstays are in place , Just a few more things to do before I can start prepping the car for the paint I ordered today
, Just a few more things to do before I can start prepping the car for the paint I ordered today