
Mannykillers/ AAPARKAH Street/time Attack/Drift Build (heavy Pics) #Thisisthewolf

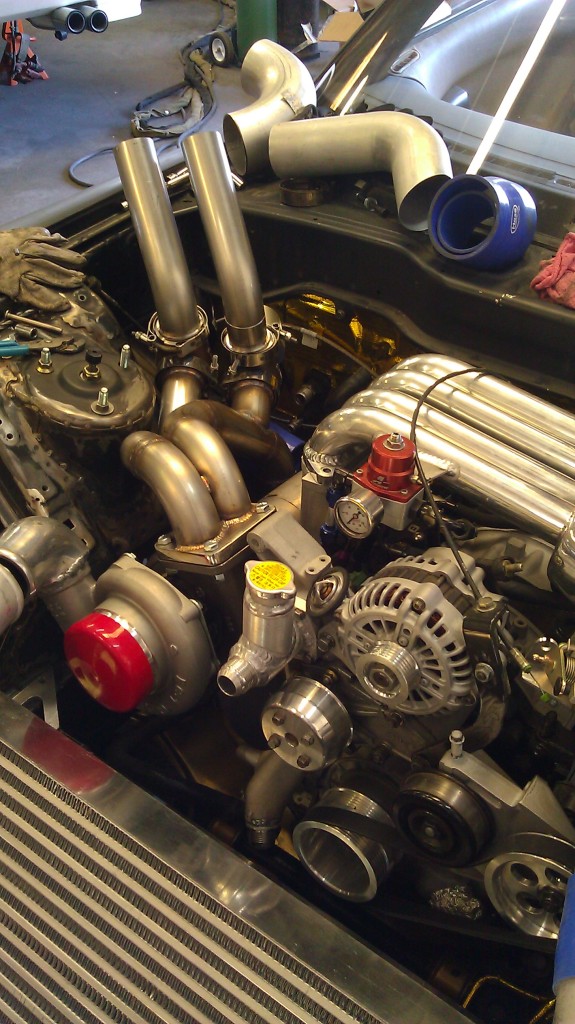
I was at the shop today and I talked to BJ about the manifold and to answer the back purging question. Yes the manifold has been back purged...looks nice and smooth. Only place we need to clean up is the flange areas.
and heres some updates:
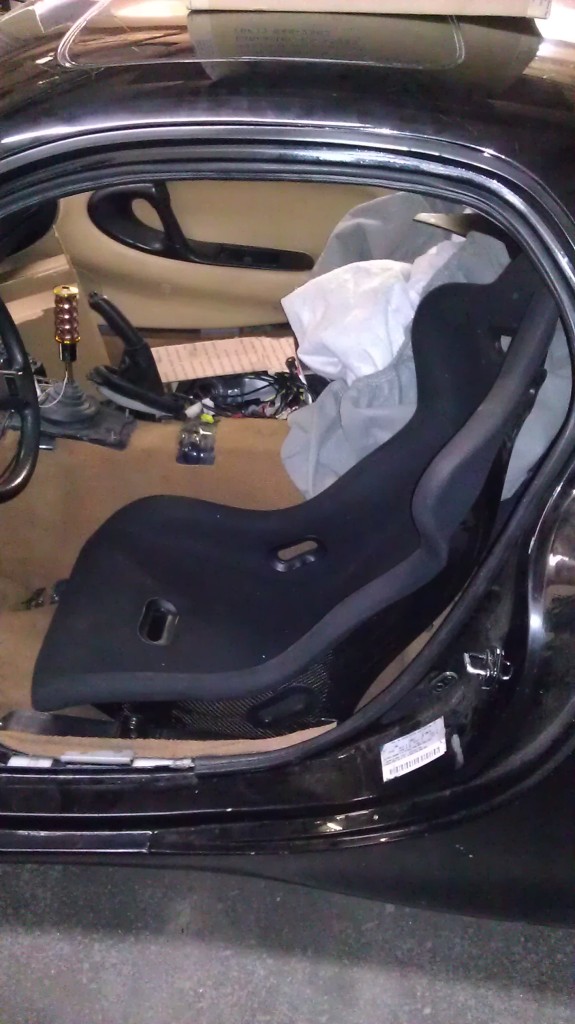
Finally got the seat rail fully welded up. It's been sitting in the corner of the shop for a while now and I almost forgot about it.
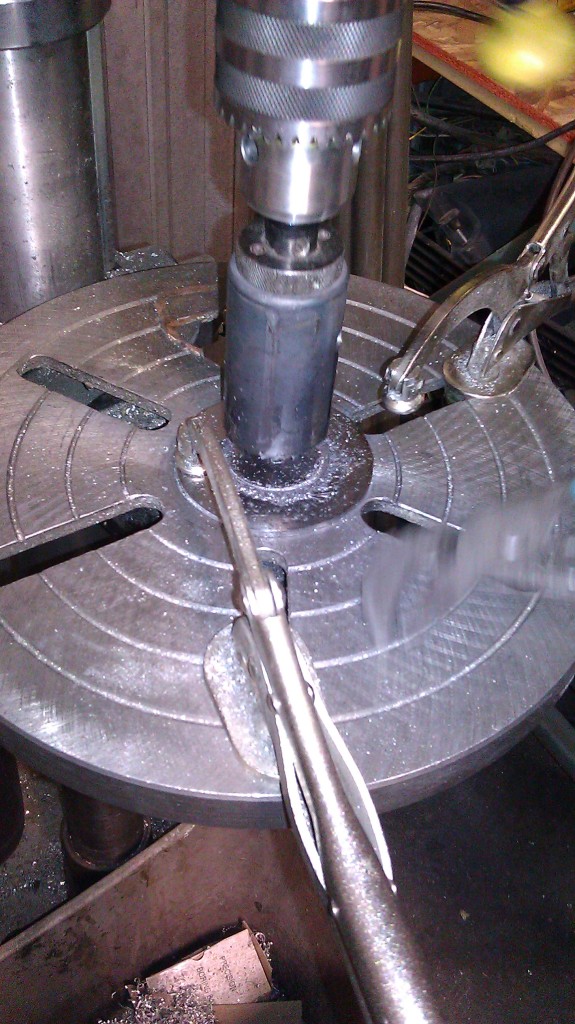
Then I cut a piece of steel for my cannon plug and cleaned it up some. Just need to tack it in
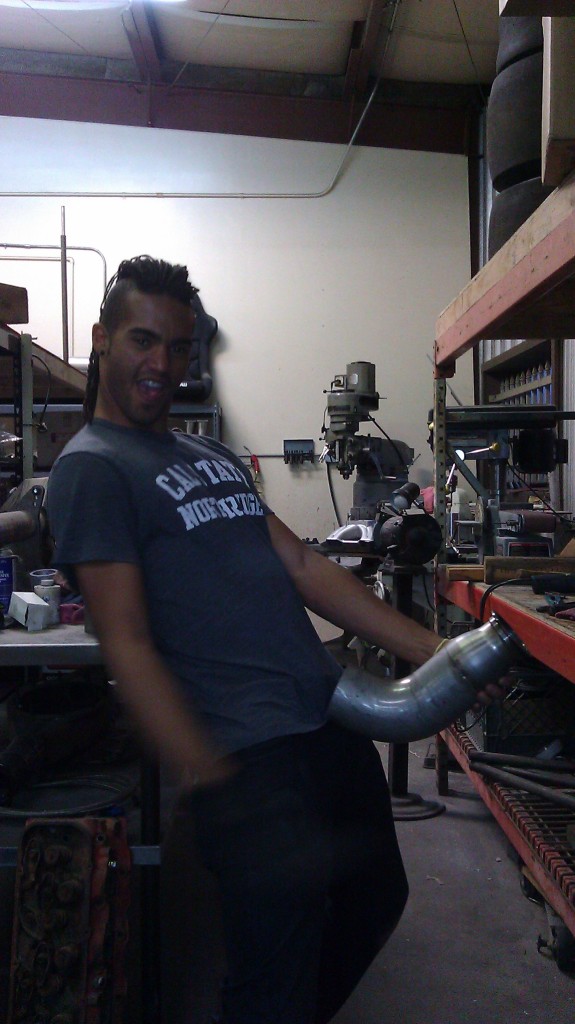
went and got my old 3" exhaust and oil coolers... but decided against using the 3" system all together. For now we'll just dump the 4" under the car until I have enough funds to order some oval 4".
Then we cut and tacked on the screamer pipes. Yes they are going out the hood, and yes they will be cut accordingly.
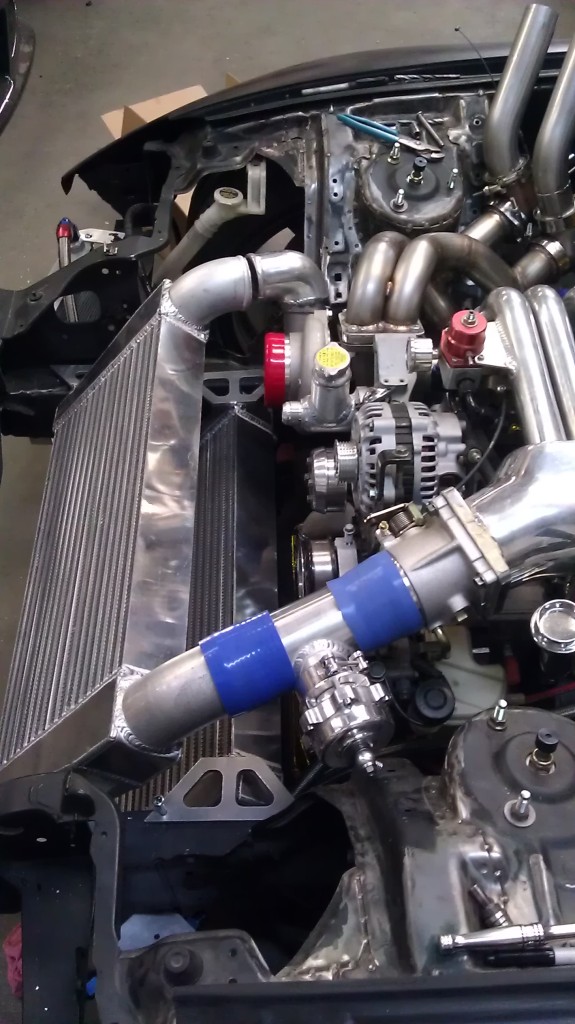
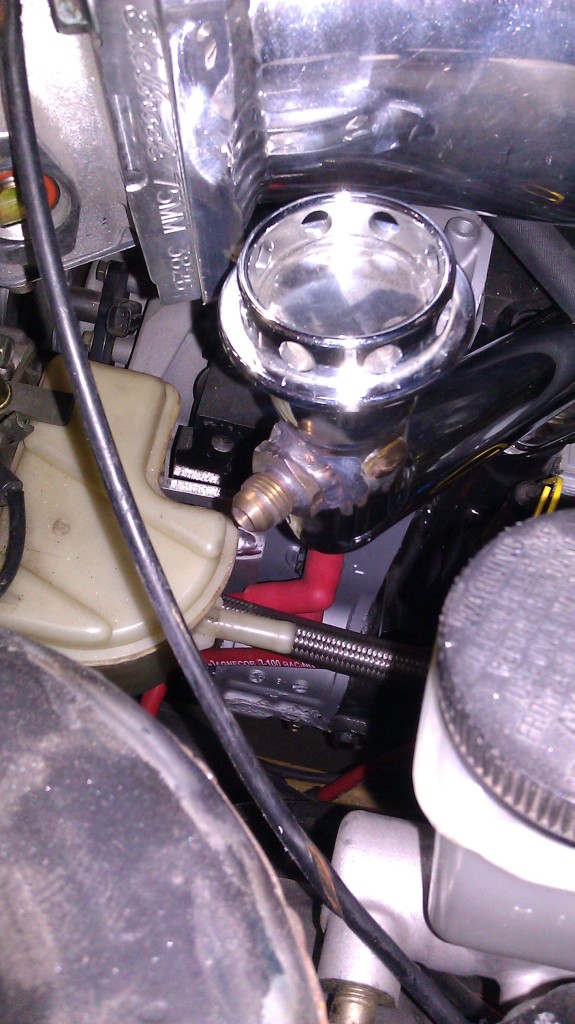
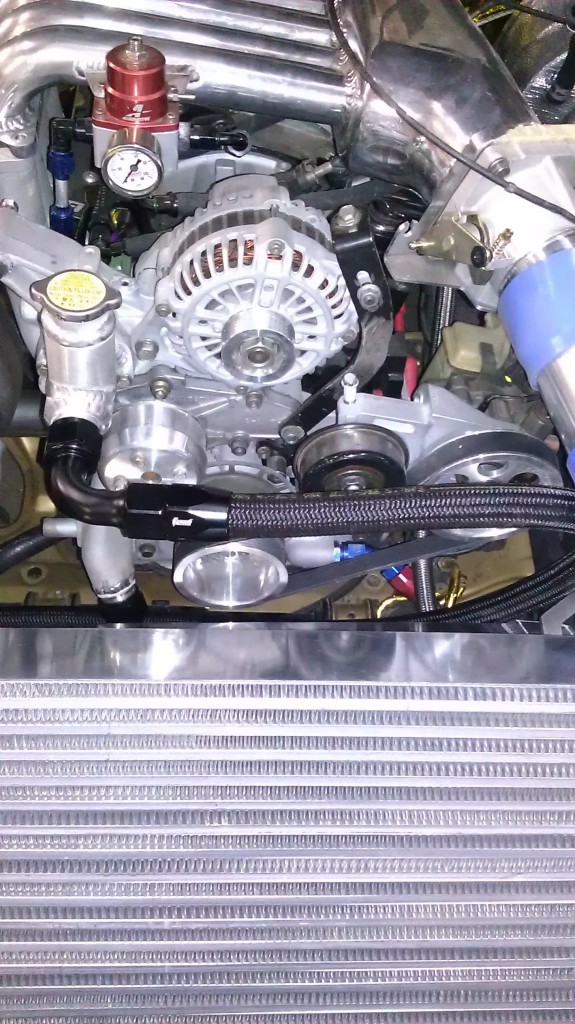
And finally installed my Oil coolers just to make sure they fit. I was certain we'd need to replace some of the lines and re-route them but after test fitting them today.....it's safe to say they're good to go.
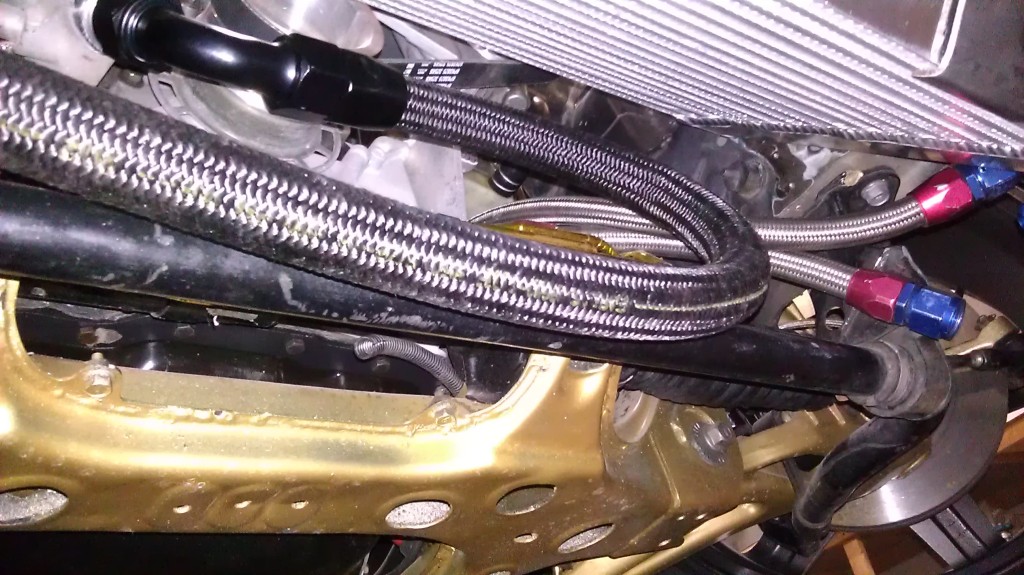
Nice neat and safe place for running a braided oil line
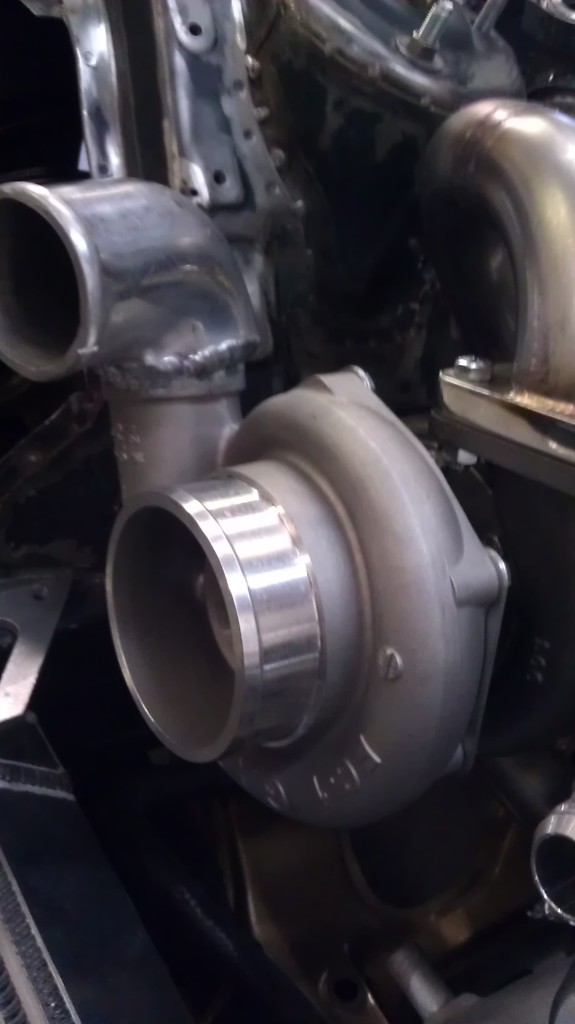
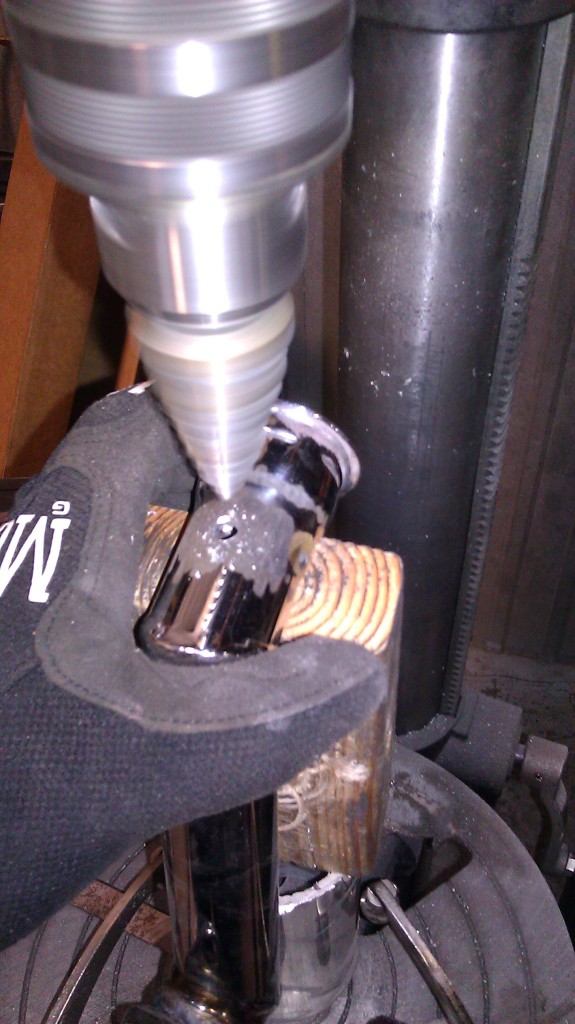
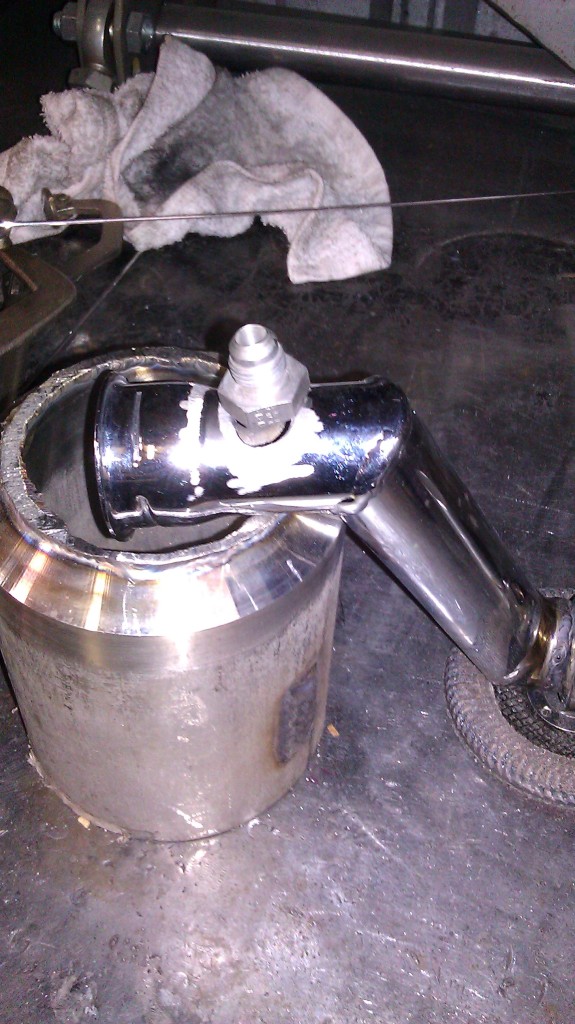
and not sure if I posted this yet but got the 90 welded onto the turbo outlet
Still a bunch of little stuff to get finished before I take the car home and re do some stuff. But I'm kinda happy for the time being... more updates soon! thanks!
and heres some updates:
Finally got the seat rail fully welded up. It's been sitting in the corner of the shop for a while now and I almost forgot about it.
Then I cut a piece of steel for my cannon plug and cleaned it up some. Just need to tack it in
went and got my old 3" exhaust and oil coolers... but decided against using the 3" system all together. For now we'll just dump the 4" under the car until I have enough funds to order some oval 4".
Then we cut and tacked on the screamer pipes. Yes they are going out the hood, and yes they will be cut accordingly.
And finally installed my Oil coolers just to make sure they fit. I was certain we'd need to replace some of the lines and re-route them but after test fitting them today.....it's safe to say they're good to go.
Nice neat and safe place for running a braided oil line
and not sure if I posted this yet but got the 90 welded onto the turbo outlet
Still a bunch of little stuff to get finished before I take the car home and re do some stuff. But I'm kinda happy for the time being... more updates soon! thanks!
 , and I really would like to keep as much room down there as possible. I have an assortment of braces etc that i'd like to be able to run and not worry about any clearance problems. I'll most likely go with whatever is cheaper


I decided to write down some parts/things I have left to do/purchase to get the car going..
I need:
AEM water/meth nozzle.. can't seem to find mine..
Edelbrock TPS (Throttle Position Sensor)
Make idler pulley or buy one
Alternator/water pump/main pulley belt
Fulcrum for Throttle Body and Throttle Cable mount
Add hose mounts for fuel lines in the rear and cut some trunk out for AN fitting clearance
Pull Carpet, and get sound deadening off
Battery Box
Pull motor and trans for Wedge clip and ring Install
Paint Engine Bay
Aluminum Ducting for Radiator, IC, Oil Coolers
Purchase Fans for Radiator if OEM's dont fit...which i'm sure they dont
Find rubber mounts for Radiator & cradle, Intercooler.
3M underbody coat rear fender wells because I don't want anything getting in there.
Install Body Harness
Install motor and set up.
Once, twice,....and triple check all lines gaskets and fluids..
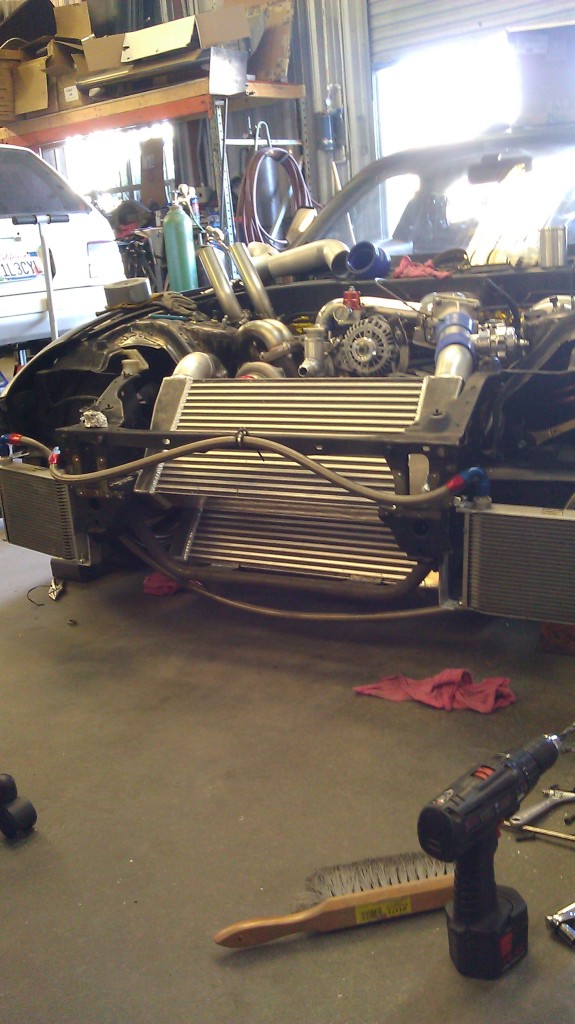
Finish 4" exhaust..and figure out what i'm doing for the rest of the exhaust
and there's a lot more I need to get done..but as far as getting the car running..that is about it.
...in other words, I have a hell of a lot of work to do...
I need:
AEM water/meth nozzle.. can't seem to find mine..
Edelbrock TPS (Throttle Position Sensor)
Make idler pulley or buy one
Alternator/water pump/main pulley belt
Fulcrum for Throttle Body and Throttle Cable mount
Add hose mounts for fuel lines in the rear and cut some trunk out for AN fitting clearance
Pull Carpet, and get sound deadening off
Battery Box
Pull motor and trans for Wedge clip and ring Install
Paint Engine Bay
Aluminum Ducting for Radiator, IC, Oil Coolers
Purchase Fans for Radiator if OEM's dont fit...which i'm sure they dont
Find rubber mounts for Radiator & cradle, Intercooler.
3M underbody coat rear fender wells because I don't want anything getting in there.
Install Body Harness
Install motor and set up.
Once, twice,....and triple check all lines gaskets and fluids..
Finish 4" exhaust..and figure out what i'm doing for the rest of the exhaust
and there's a lot more I need to get done..but as far as getting the car running..that is about it.
...in other words, I have a hell of a lot of work to do...

I'm going to drag Jaime with me to Willow Springs when all our cars are finished, so we can all tear up the track. Even if we are all building our cars for different things. Haha
i see one of your plans is to use the 3M undercoating. you just using the can spray or have you found a larger amount that can be used with a spray gun?
i wanna do the same thing but, dunno if i wanna use a few cans or try and find a larger amount that i can use with a spray guy.
i wanna do the same thing but, dunno if i wanna use a few cans or try and find a larger amount that i can use with a spray guy.
I'll have to check it out, thanks man!
ohhhh fooooo shooooo!!!
You know what... even if I had to do it all again I would use the cans again. They're easy and I really don't like having to clean up a bunch of a mess. The cans are just spray and throw away.
i see one of your plans is to use the 3M undercoating. you just using the can spray or have you found a larger amount that can be used with a spray gun?
i wanna do the same thing but, dunno if i wanna use a few cans or try and find a larger amount that i can use with a spray guy.
i wanna do the same thing but, dunno if i wanna use a few cans or try and find a larger amount that i can use with a spray guy.
Update:
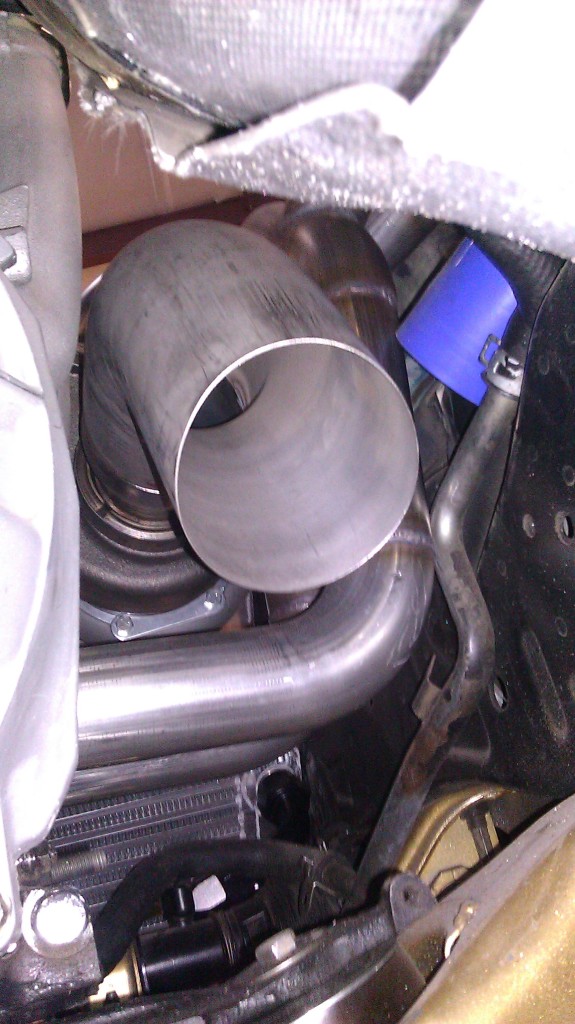
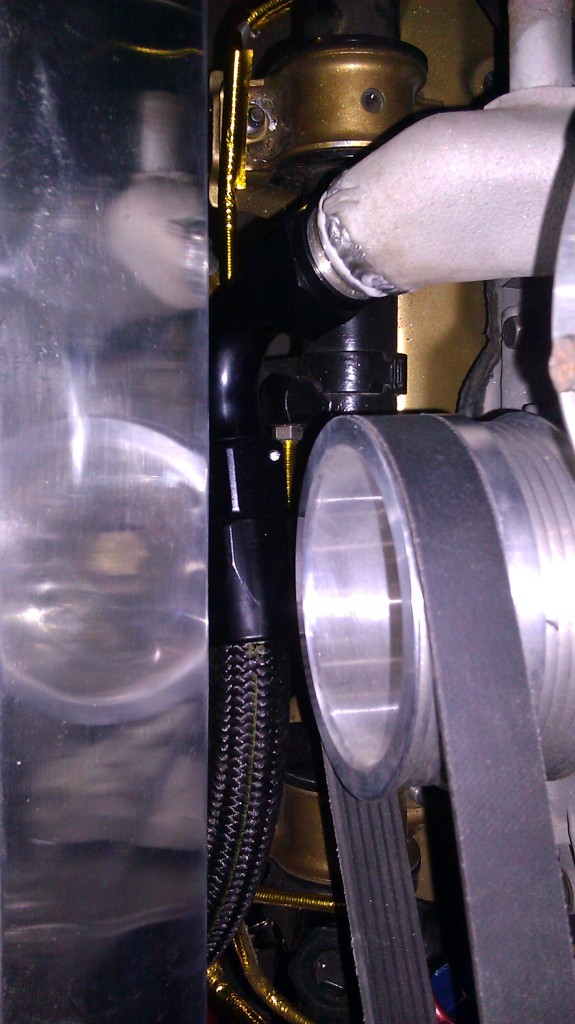
Started planning for the 4" exhaust routing... Gonna be toite like a tiger...but it'll fit. It's hard to see but i have about a quarter inch of clearance on the LIM side. After wrapping the Down Pipe...it'll most likely be a 16th if that away from the LIM.. so we may kick it over a little more depending..
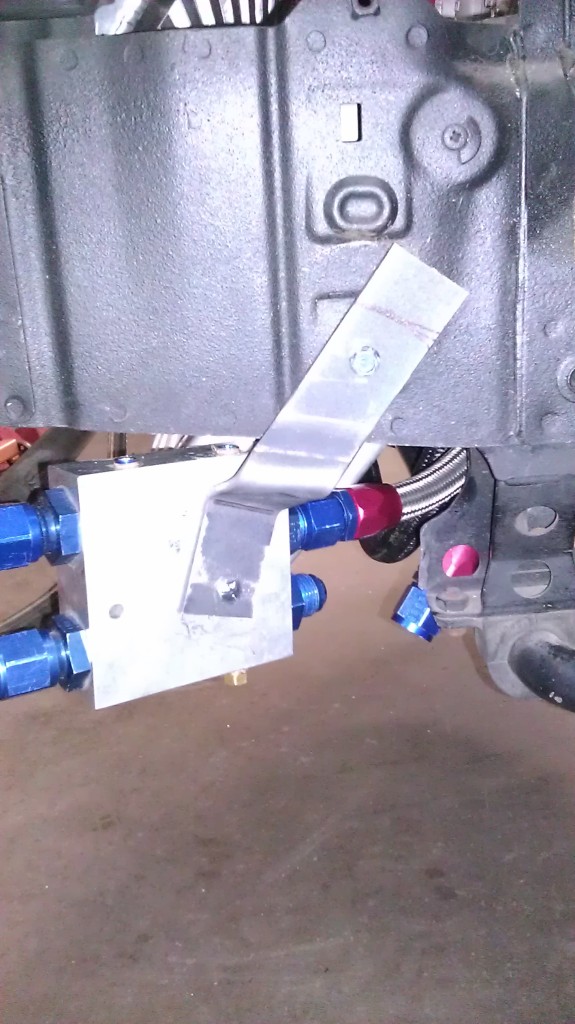
Then realized that my tire would be running into my thermostat blockfor my oil coolers if I left it in it's previous location.. so I decided to re-do one of the lines..the one coming from the front cover and lay the block sideways instead of flat against the frame. The bracket is a simple piece of flat steel bent using the air bender. going to slot the mounting holes for a little adjustability and clean up the metal to make it a little prettier but it's strong, clears the tires even when I get my PBM modded angle knuckles.
Before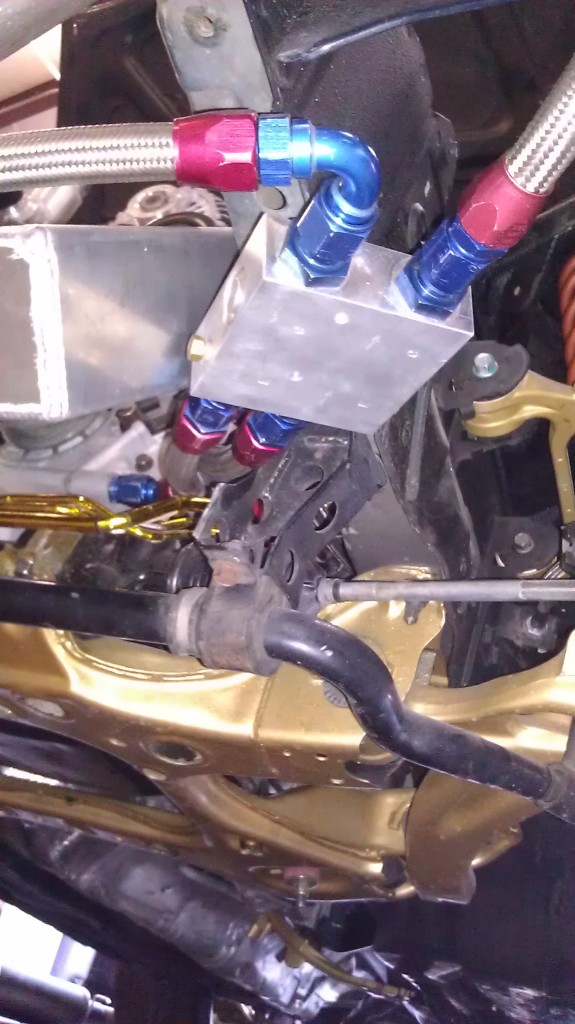
After
Then realized my Oil filler neck needed to be modded slightly for the -6AN fitting for the oil catch can...so I cut the old weiner looking slip on and grinded it down a little. Drilled a new nice hole where it needed to be... And bj welded the steel -6AN fitting on there and filled the other hole in.
I'll post more pics of how I'm going to route the line later when I make it =-) I really wanted the Clear line that all the sweet Japs use.. but believe it or not it's a little difficult to find... anyone know a place i could order it from?
After that me and Johnny decided to make the -16AN Coolant lines... I forgot what brand I used.. i'll have to look at it again..but it was expensive...but well worth it.. was a breeze to make..

lower radiator out to motor line
upper into radiator line. Decided just to loop it all the way around to make way for the fans and the ducting work. Dont want to have to cut a huge hole in the ducting to make way for such a small line.
more routing
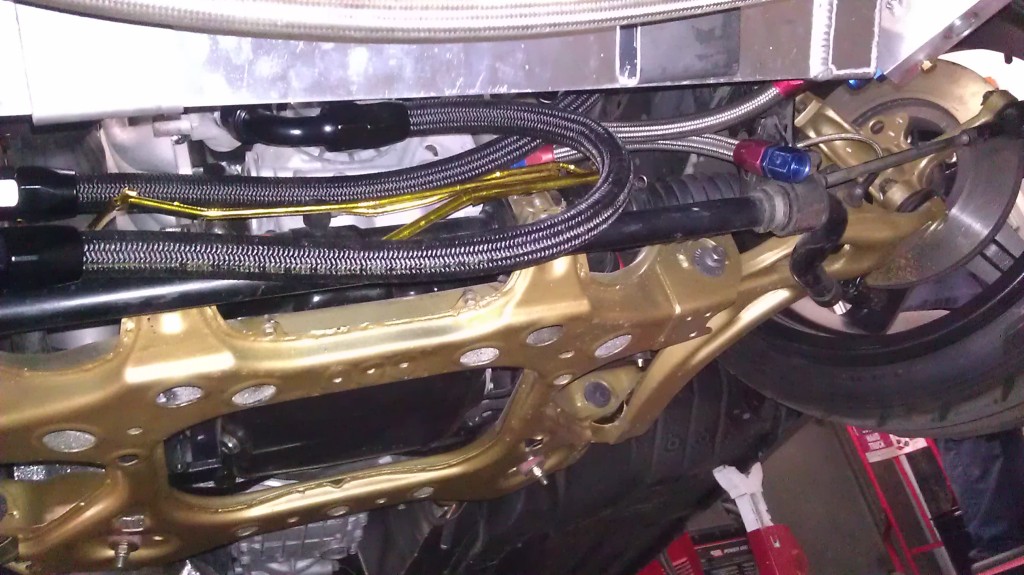
Going to use some nice mounts to secure them a little bit and some zip ties to tie them together so they won't move around but this is pretty much where they'll end up! More updates soon....stay tuned! tidying up little tid-bits and working on bash bar today!
Started planning for the 4" exhaust routing... Gonna be toite like a tiger...but it'll fit. It's hard to see but i have about a quarter inch of clearance on the LIM side. After wrapping the Down Pipe...it'll most likely be a 16th if that away from the LIM.. so we may kick it over a little more depending..
Then realized that my tire would be running into my thermostat blockfor my oil coolers if I left it in it's previous location.. so I decided to re-do one of the lines..the one coming from the front cover and lay the block sideways instead of flat against the frame. The bracket is a simple piece of flat steel bent using the air bender. going to slot the mounting holes for a little adjustability and clean up the metal to make it a little prettier but it's strong, clears the tires even when I get my PBM modded angle knuckles.
Before
After
Then realized my Oil filler neck needed to be modded slightly for the -6AN fitting for the oil catch can...so I cut the old weiner looking slip on and grinded it down a little. Drilled a new nice hole where it needed to be... And bj welded the steel -6AN fitting on there and filled the other hole in.
I'll post more pics of how I'm going to route the line later when I make it =-) I really wanted the Clear line that all the sweet Japs use.. but believe it or not it's a little difficult to find... anyone know a place i could order it from?
After that me and Johnny decided to make the -16AN Coolant lines... I forgot what brand I used.. i'll have to look at it again..but it was expensive...but well worth it.. was a breeze to make..
lower radiator out to motor line
upper into radiator line. Decided just to loop it all the way around to make way for the fans and the ducting work. Dont want to have to cut a huge hole in the ducting to make way for such a small line.
more routing
Going to use some nice mounts to secure them a little bit and some zip ties to tie them together so they won't move around but this is pretty much where they'll end up! More updates soon....stay tuned! tidying up little tid-bits and working on bash bar today!


Joined: Aug 2004
Posts: 4,786
Likes: 146
From: Colorado Springs, CO
I'm not sure if it's the same clear line, but Lowe's sells transparent line that would probably work. I'm also not sure on temperature limitations either. I've thought about swapping mine to that stuff too lol.
Thanks guys! i'll look for some reviews of lines and go from there...but hopfully I can find some cool clear rienfoced stuff that lasts descently long.
anyways Everyday I try to get at least one thing done to ensure the forward motion of the project. Eventually it'll be completed....but with these projects....they're really never completely complete hah.
So!!..Small update:
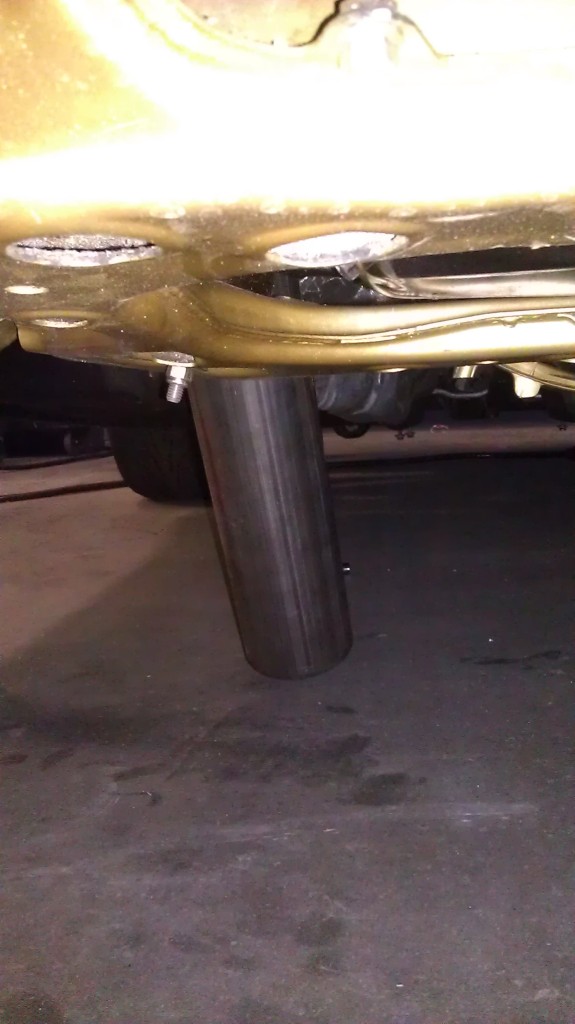
cut the down-pipe and realized i'll need another 90 degree piece to bend down and go into the straight under the car.
added some straight just to get as far as we could before we need to "90" and cut it.
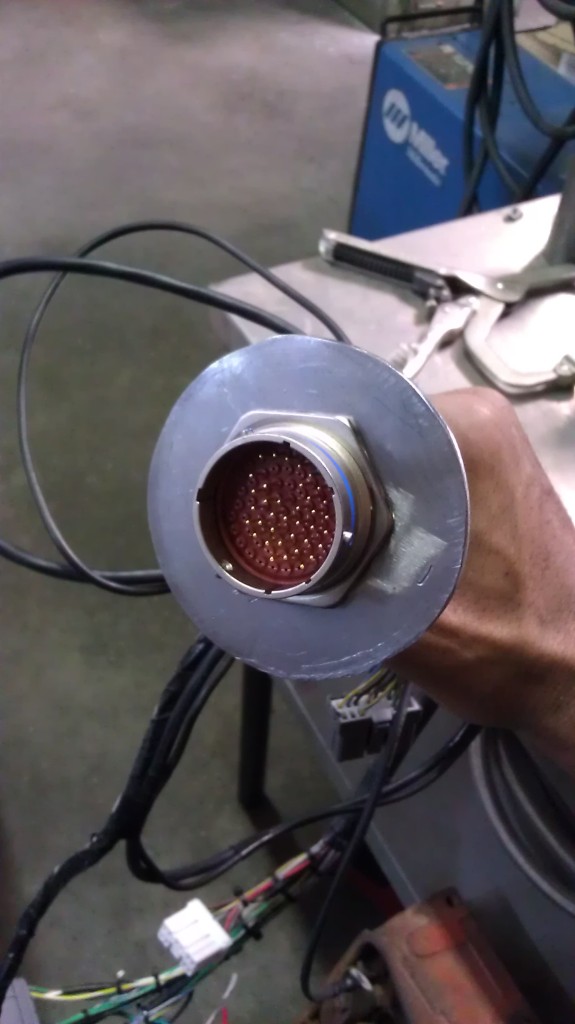
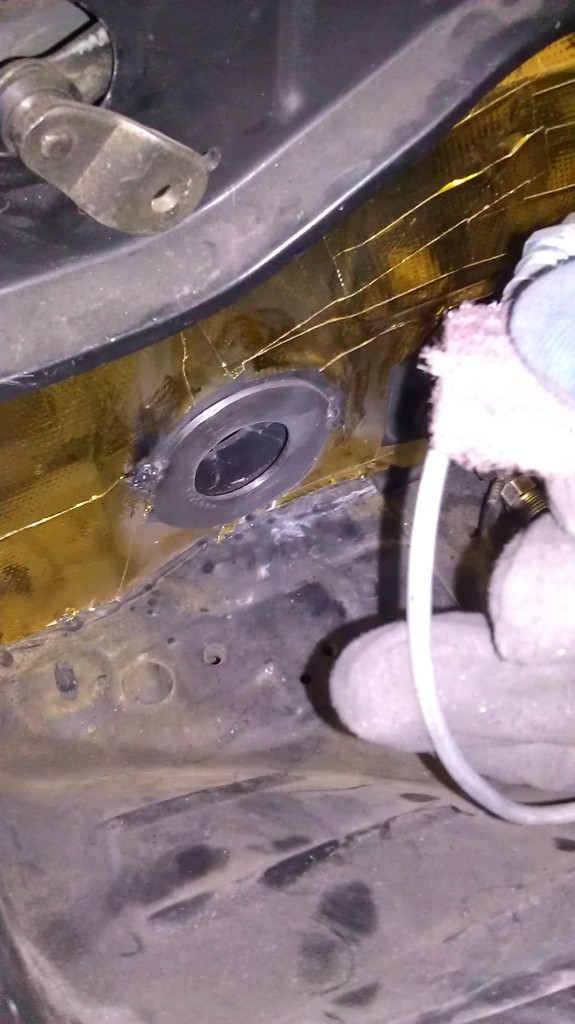
and had johnny tack my cannon plug bulkhead for my rywire quick disconnect onto the fire-wall. Going to cut some more gold and nicely cover the edges so it looks a little cleaner, but you get the idea. Going to need some fire-sleeve over the harness to keep her from getting insinerated haha
and all set up

I'm thinking I'll run my boost control solenoid through one of the ac line holes.
anyways Everyday I try to get at least one thing done to ensure the forward motion of the project. Eventually it'll be completed....but with these projects....they're really never completely complete hah.
So!!..Small update:
cut the down-pipe and realized i'll need another 90 degree piece to bend down and go into the straight under the car.
added some straight just to get as far as we could before we need to "90" and cut it.
and had johnny tack my cannon plug bulkhead for my rywire quick disconnect onto the fire-wall. Going to cut some more gold and nicely cover the edges so it looks a little cleaner, but you get the idea. Going to need some fire-sleeve over the harness to keep her from getting insinerated haha
and all set up
I'm thinking I'll run my boost control solenoid through one of the ac line holes.
Aaron,
I figured out a way to delete AC core and still keep that box all sealed up. Next time I make it down to Palmdale to pick up that water pump pulley, I'll bring the box with me so you can see what I did.
I figured out a way to delete AC core and still keep that box all sealed up. Next time I make it down to Palmdale to pick up that water pump pulley, I'll bring the box with me so you can see what I did.