Kilo Racing 3 Rotor FD Conversion

 03-21-14, 12:40 PM
#4027
David you should really try that midsection like I have. You have the outputs on your Haltech to control it. If you set the RPM and load points correctly, it won't effect spool plus there's really no need to run all that rotary exhaust through a cat full time since you only need to clean the exhaust at certain times (light loads and cruising). I mean for aftermarket purposes, the cat needs to do its job and then get out of the way to allow your engine to make max power.

Edit: I forgot, did you ever get your omp set up correctly?
03-22-14, 08:26 AM
#4028
^ Trey, my setup currently has the waste gate dumping to atmosphere under WOT. Doesn't this bypass the cat and do something similar to what you've done? I used to have an e-cutout installed that activated under boost but wanted to keep things a simple as possible, hence the current setup.
On the OMP side, yes, problems solved. The OMP was wired incorrectly making it operate in the "full on" position all the time.
On the OMP side, yes, problems solved. The OMP was wired incorrectly making it operate in the "full on" position all the time.
03-22-14, 12:07 PM
#4029
^ Trey, my setup currently has the waste gate dumping to atmosphere under WOT. Doesn't this bypass the cat and do something similar to what you've done? I used to have an e-cutout installed that activated under boost but wanted to keep things a simple as possible, hence the current setup.
On the OMP side, yes, problems solved. The OMP was wired incorrectly making it operate in the "full on" position all the time.
On the OMP side, yes, problems solved. The OMP was wired incorrectly making it operate in the "full on" position all the time.
Nothing wrong with keeping it simple.
Your wastegate dumps more exhaust the less boost you try to run (post spring pressure). The bleed off is what's controlling the turbine. What doesn't get dumped still goes through the cat and out the muffler. Once you start tuning for peak power, your wastegate will dump less as its being forced to bypass less so all your exhaust hits the turbine. Any exhaust past your turbine will be going through that cat and out the exhaust. That's alot of exhaust energy an heat for a single cat to handle at the power levels your engine is sure to make. I figured bypassing the cat altogether under full load may help you extend it's life.
03-23-14, 07:41 AM
#4030
^ I sort of get it now. Thanks for the deals. Should have thought through what you describe.
On a turbo application (with a waste gate), how do you envision your setup being controlled with the key being using the cat to remove the smell during normal driving (cruise)? Exhaust would flow through the cat side until what? I would guess I'd look at load and under higher load, divert to the secondary non-cat side?
The other idea I had - and taking directly from RotorMotor - is to use two cats and split the mid-pipe into two sections, with a cat being on each of the sections. So, the down pipe would "y" off into two mid-pipes and then those would "y" back into a single pipe for the muffler. In this way, I'd divert 1/2 of the flow (in theory) to each of the cats. So, less air flow to each cat and they would be operational all the time.
03-23-14, 11:53 AM
#4031
Well for me, I would control it exactly the way I have it set up now. My activation rpm is at 2,200. From there my valve will open depending on throttle input. The haltech is nice in the since that you can fine tune the load points to your liking. Tuning is a piece of cake as light loads are very easy to tune. Mine stays shut as long as I'm easy on the throttle. A little bit more throttle and she opens so I can make power when I need to make power. Mine is vacuum actuated (no electric motor) so it opens instantly. Since I'm running the fd front cover, I was able to reuse the fd vacuum chamber in the same location and a check valve to store vacuum so the actuator can work under atmosphere (our in your case positive manifold pressure) conditions. The sooner you go to free flow mode, the faster the response as all rotarys (na or turbo) love a free flow exhaust. This would help your turbo spool sooner. I found in my application that the sooner it opened, the sooner I had more power. In the very beginning of my experiments, I had rpm only activation at 3,100. I found that acceleration suffered below that point and there was a noticeable stumble when it opened. Not anymore.
Now your second ideal is fantastic if your trying to clean the exhaust full time. Flowing through 2 cats would be the equivalent of a v8 doing the same thing. If your making 800hp, then each cat only has to deal with half the flow.
Now your second ideal is fantastic if your trying to clean the exhaust full time. Flowing through 2 cats would be the equivalent of a v8 doing the same thing. If your making 800hp, then each cat only has to deal with half the flow.
 03-24-14, 04:44 PM
#4033
^ I was kidding too (not the DGGR part).
On the subject of turbo coatings, In addition to conversations with SE Power, spent some time on the phone with the guys at Engine Armor Performance Coatings of Tampa FL. Really knowledgable "coatings" specialists. Give Sean a call at (813) 685-8333.
For those of you that know this stuff, come back in a few days for turbo updates. For those of you that are considering using coatings on your turbo, this is a "Coatings 101" primer, with a lot of the information coming from Engine Armor:
Engine Armor Automotive Performance Coatings | Coatings 101
Read that if you want more details, but I was interested in using thermal coatings this time on the turbo versus a turbo blanket, you know, the ones that degrade over time and fall apart. The question I had was "what are my options" and what works best for each part of the turbo?
You have two options - three if you include powder coating but that really is not a good option for a turbo so I'll exclude it - to consider for use on a turbo, 1( thermal barriers, and 2) thermal dispersants. Thermal "barriers" are ceramic coatings that are applied to hold in heat and thermal "dispersants" are ceramic coatings that help to remove or dissipate heat.
So, how can you use these two coating options to your advantage? Consider using a thermal dispersant on turbo parts that need to shed heat, or those parts that would benefit from keeping the air charge as cool as possible. So, you'd use a ceramic thermal dispersant on your bearing housing (the section most guys don't address with anything) and on the compressor "snail" housing. Both of these parts, according to Engine Armor, benefit from shedding heat versus keeping it in (the bearings can "boil" from excessive heat and the compressor housing should serve to get rid of heat and not trap it in so the air stays as cool as possible). From what I've seen, most guys powder coat the compressor or use a ceramic product that acts as a heat barrier versus shedding the heat. Powder coating too acts as a barrier which is the opposite of what you want. Use a ceramic dispersant instead on both parts for improved results.
For the most bang for the buck and the top priority, use a ceramic "barrier" coating on the turbo housing, or the "hot side". In this case, you want to trap the heat in and move it through the turbo and out through the exhaust. So, it is ideal to focus on this part first and to ceramic barrier coat it.
All in all, there are some pretty effective ways to use ceramic coatings for turbo thermal management. Just make sure you are achieving what you wish as each option has a unique purpose. So, instead of powder coating your compressor housing for aesthetics, use a ceramic barrier to achieve a better result with a cool look too.
I did also ask about engine coolant parts and Sean shared they have had some really good success with using ceramic thermal dispersants on radiators and intercoolers as well as piping. He states they've achieved a 10 -15% or so reduction in coolant temps just by spraying on a dispersant on radiators, with similar results on intercoolers and piping.
Finally, the cost is reasonable too. I don't know the cost for the turbo coatings, but he stated a typical radiator or intercooler (front and back) costs about $100.
Food for thought as you consider your turbo setup.
03-24-14, 05:24 PM
#4034
Wastegate John
iTrader: (13)
Join Date: Feb 2008
Location: Long Island NY 11746
Posts: 2,979
Likes: 0
Received 9 Likes
on
9 Posts
David, can you explain how these coatings work? How does a ceramic coating help a metal part dissipate heat? Ceramics are great insulators, I dont see how a coating that utilizes ceramics can help dissipate heat.
So coating an aluminum part, which is known for its ability to conduct heat, with a ceramic coating does not make sense if you are trying to dissipate heat faster.
I looked at that website and it does not explain how it works, unless I missed it. I dont even see any case studies or example of their product working (ie thermal imaging camera images).
03-24-14, 05:50 PM
#4035
Yep, John A. is correct. I just got one of my new Borg Warner turbos delivered the other day. It had the same coating done at the same time at the same place. Don't want to take your thread on a tangent and I'm not really supposed to talk about the details of how I got my new turbo anyway
 ...you know what it's like having friends in the right places so I'm sure you understand. As I mentioned before, still trying to figure out which turbo to use for the 20B build but connections have been suggesting I go with the EFR so maybe I'll end up with the model you decided not to use.
We'll have to compare data down the road.
03-24-14, 06:57 PM
#4036
David, can you explain how these coatings work? How does a ceramic coating help a metal part dissipate heat? Ceramics are great insulators, I dont see how a coating that utilizes ceramics can help dissipate heat.
So coating an aluminum part, which is known for its ability to conduct heat, with a ceramic coating does not make sense if you are trying to dissipate heat faster.
I looked at that website and it does not explain how it works, unless I missed it. I dont even see any case studies or example of their product working (ie thermal imaging camera images).
So coating an aluminum part, which is known for its ability to conduct heat, with a ceramic coating does not make sense if you are trying to dissipate heat faster.
I looked at that website and it does not explain how it works, unless I missed it. I dont even see any case studies or example of their product working (ie thermal imaging camera images).
I'll try to find out more.
Thanks for sharing your thoughts.
Yep, John A. is correct. I just got one of my new Borg Warner turbos delivered the other day. It had the same coating done at the same time at the same place. Don't want to take your thread on a tangent and I'm not really supposed to talk about the details of how I got my new turbo anyway...you know what it's like having friends in the right places so I'm sure you understand. As I mentioned before, still trying to figure out which turbo to use for the 20B build but connections have been suggesting I go with the EFR so maybe I'll end up with the model you decided not to use.
We'll have to compare data down the road.
Yep, John A. is correct. I just got one of my new Borg Warner turbos delivered the other day. It had the same coating done at the same time at the same place. Don't want to take your thread on a tangent and I'm not really supposed to talk about the details of how I got my new turbo anyway
...you know what it's like having friends in the right places so I'm sure you understand. As I mentioned before, still trying to figure out which turbo to use for the 20B build but connections have been suggesting I go with the EFR so maybe I'll end up with the model you decided not to use.We'll have to compare data down the road.
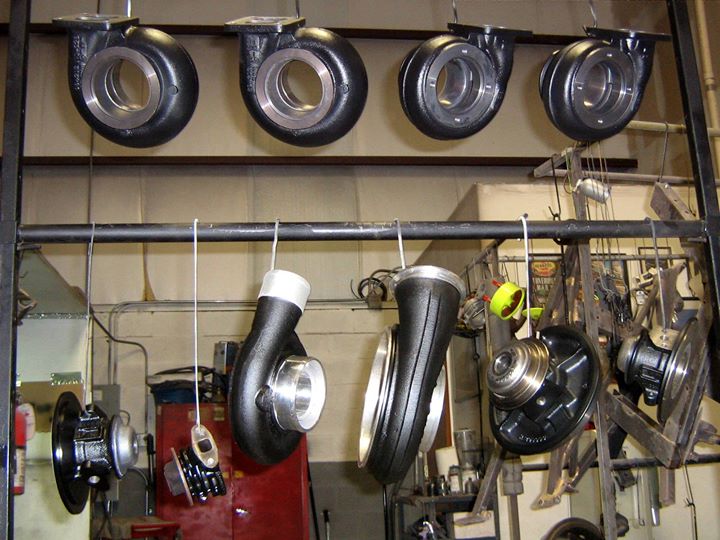
Regarding the turbo shot, that pic is one of turbos sent over by SE Power Systems, including mine, and "sprayed" last Tuesday. If you are working with them, then it's possible yours was in the pic but they just sent out those turbos today. So, what type of coatings did you use and what parts are coated? Have any pics of how it turned out?
03-25-14, 09:17 AM
#4037
Regarding the turbo shot, that pic is one of turbos sent over by SE Power Systems, including mine, and "sprayed" last Tuesday. If you are working with them, then it's possible yours was in the pic but they just sent out those turbos today. So, what type of coatings did you use and what parts are coated? Have any pics of how it turned out?

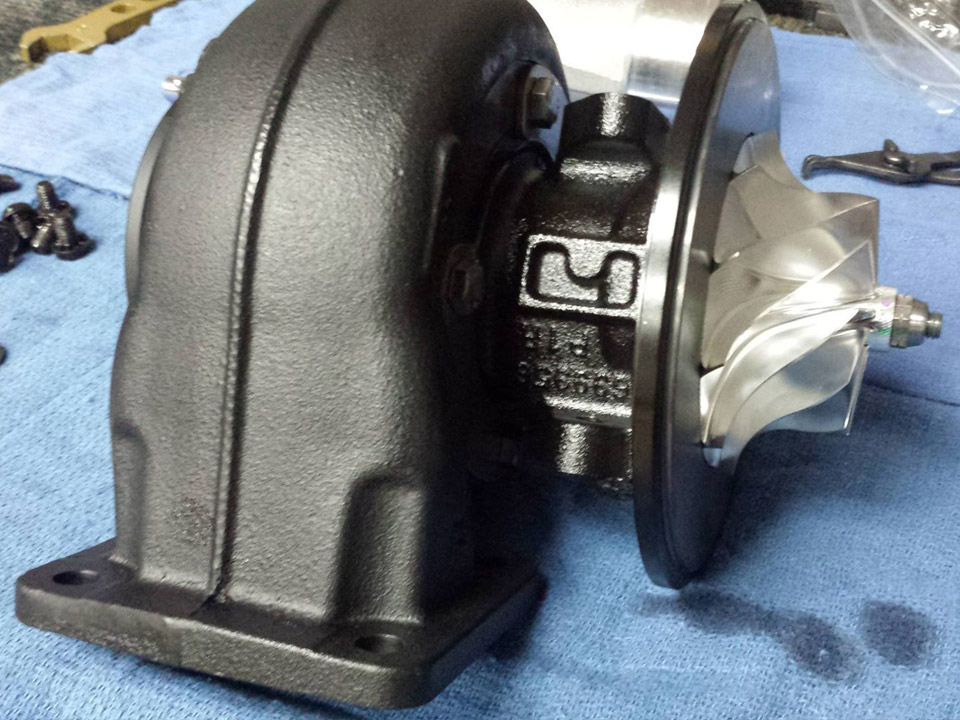
Here's another photo of the coated hot side with a billet wheel (the one I was gonna get before). They actually switched it back to a cast wheel after that photo was taken - because there is a newly designed billet wheel going on once they are available (I didn't want to wait for the new wheel to arrive...wanted my fabricator to get started right away on making the manifold).
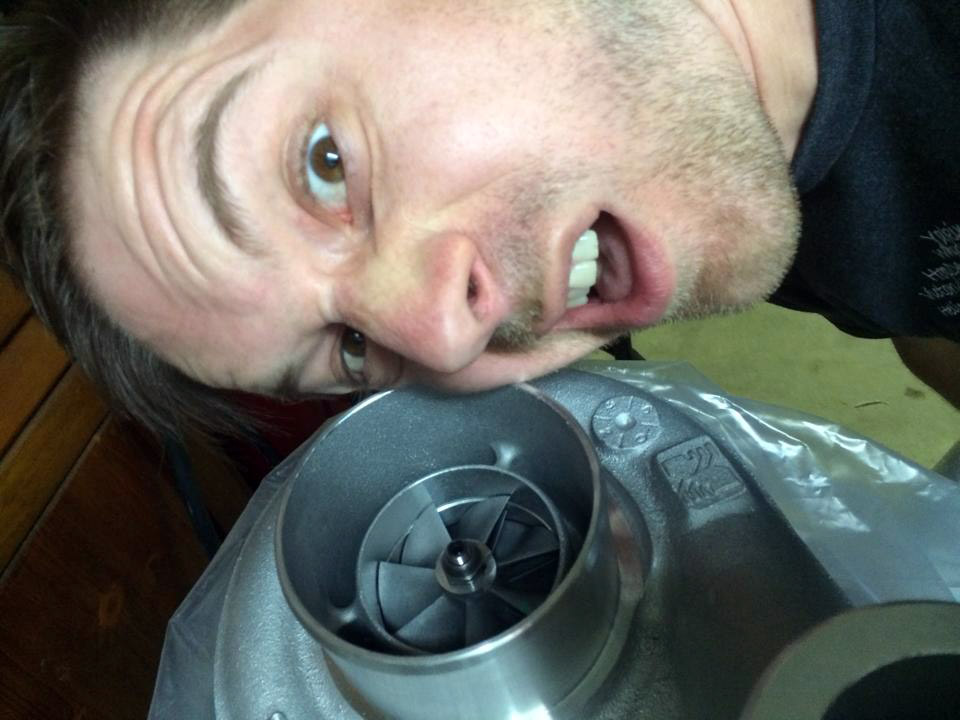
Also here's another photo of scrub with the 90degree compressor cover they installed - he was in town and popped by my garage after I got the turbo.
Looking forward to running this Borg Warner turbo on my black car and also whatever BW turbo I end up with for my silver car.
03-25-14, 12:31 PM
#4038
David, can you explain how these coatings work? How does a ceramic coating help a metal part dissipate heat? Ceramics are great insulators, I dont see how a coating that utilizes ceramics can help dissipate heat.
So coating an aluminum part, which is known for its ability to conduct heat, with a ceramic coating does not make sense if you are trying to dissipate heat faster.
I looked at that website and it does not explain how it works, unless I missed it. I dont even see any case studies or example of their product working (ie thermal imaging camera images).
So coating an aluminum part, which is known for its ability to conduct heat, with a ceramic coating does not make sense if you are trying to dissipate heat faster.
I looked at that website and it does not explain how it works, unless I missed it. I dont even see any case studies or example of their product working (ie thermal imaging camera images).
"TLTD (Techline Thermal Dispersant) is a thermally cured heat emitting coating designed to accelerate the heat transfer ability of the coated surface. TLTD makes use of several factors in managing heat flow. The coating is applied in a thin film, so as not to fill in the surface porosity, thus not reducing surface area. It also coats the surface with ingredients that enhance the flow of heat. These features are combined with a black pigment, making use of the black body radiation theory. TLTD also provides excellent corrosion protection which not only enhances the appearance, but extends the functional life of the coating. TLTD also has a lubricant included in the formulation that makes the surface very easy to clean. TLTD is a good oil shedding material and enhances cooling through improved heat transfer to oil and other coolants. TLTD can withstand temperatures in excess of 2000şF and survives extreme thermal shock.
Applications: TLTD is a high temperature thermal dispersant coating with good corrosion and chemical resistance. May be used on cylinder barrels, springs, elements, brake calipers, discs, oil pans, radiators, intercoolers and parts which need to release heat."
And more:
"Being able to move and control heat is of tremendous importance. Excessive temperature can lead to metal fatigue, boiling fluids, damaging metal expansion, reduce electrical efficiency and a host of other problems. Traditionally dealing with heat has been handled by expanding the radiating surface, constructing parts from materials that are more heat conductive and using the color black.
With advances in thermal management methods additional ways of enhancing heat transfer now exist. TECH LINE™ has developed a Thermal Management System™. Individual products such as TLTD can be utilized by themselves or in conjunction with other coatings to manage the flow of heat. TLTD is capable of transferring heat faster than the bare metal surface. While TLTD does make use of the color black, TLTD is more than a simple "black body" heat emitting coating."
And the MSD for the product:
http://www.techlinecoatings.com/msds/hhtdmsds.pdf
Scott at Engine Armor Performance Coatings says to think of this as applying a base ceramic coat and then changing the properties of what goes on top. So, for barriers, the chemical makeup has properties that hold in heat and for dispersants, the mixture contains components that help remove heat.
So, we shall see as its now on my bearing housing. Franky I have no way of knowing how well it works as I won't be able to do any before/after measurements so I'll have to trust the experts in its performance. Found some cheesy Youtube videos that briefly describe the product but not in any more detail than this.
I also got that photo last week, plus this one (attached), from my contacts who provided me with the turbo for my build. I'm not "working" with SE Power Systems - my contacts that provided this turbo had SE Power Systems do the coating before delivering it to me...
Looking forward to running this Borg Warner turbo on my black car and also whatever BW turbo I end up with for my silver car.
Looking forward to running this Borg Warner turbo on my black car and also whatever BW turbo I end up with for my silver car.
You've also commented that you want to powder coating the compressor side in the future. Consider instead using a ceramic dispersant. You'll get the same look but better performance by not trapping in the heat. Talk to Scott at Engine Armor when you are ready to do this.
Glad to see you are moving forward with using Borg Warner turbos. They make some really nice products and I look forward to seeing your results. For your 20B, I'll have my results available including dyno runs with different ARs as well as back pressure measurements. Should be useful to you if you are considering a BG S400SX3.
03-25-14, 02:49 PM
#4039
Coating and that is where the pic was from. The guys you are working with, I believe it is Boost Lab, do use Engine Armor also for their coating needs so it will be the same stuff. Scott at Engine Armor says the pic does contain my stuff and Boost Lab components so it appears both of our turbos where in that pic. Shocking our turbo components didn't try to "internet" beat each other up isn't it?
You've also commented that you want to powder coating the compressor side in the future. Consider instead using a ceramic dispersant. You'll get the same look but better performance by not trapping in the heat. Talk to Scott at Engine Armor when you are ready to do this.
Glad to see you are moving forward with using Borg Warner turbos. They make some really nice products and I look forward to seeing your results. For your 20B, I'll have my results available including dyno runs with different ARs as well as back pressure measurements. Should be useful to you if you are considering a BG S400SX3.
Regarding the "ceramic dispersant" - that is already on the agenda. They offered to do it initially but I said to hold off for now because I wanted the turbo delivered asap. After the manifold is made, I'll return the turbo to have the new billet wheel installed and they'll also be coating the compressor cover, intake manifolds, waterpump housing, etc. at the same time. Having it all done at once to save time.
I was actually planning to use one of the BW S366 turbos on my silver car, when I started to single-turbo it almost 2 years ago. After I bought the 20B longblock, I got rid of the S366 since I knew I would need something different. Of course since then I've picked up another FD (the one this turbo is going on) so I've come a full 360 on the S366. It's certainly been a lot easier getting the ducks in a row thanks to the hook-ups I got from my new contacts this time around.
03-28-14, 10:01 AM
#4041
^ Well said and thanks for the post.
In an effort to get back to the build, Kilo Racing now has the Borg Warner S400SX3 turbo in hand. It's all nicely ceramic heat treated (both as a barrier and as a thermal dispersant) and I'll post up pics when Kilo sends me some.
SE Power Systems shipped the turbo with a 1.10 AR and has asked us to do initial tuning and testing with it. We will then swap out the 1.10 AR for the smaller 1.0 and 0.90 ARs and do testing with those to see the performance differences and what happens with back pressure on the car. My money is on a smaller housing than the 1.10 being ideal for my setup and needs - I want quick spool up and around 700 WHP at 18 PSI. Based on the design of my runners (long), we (Kilo) thinks the smaller ARs will work better but we will see how that turns out and post up the results. For those of us that are not turbo experts, this info should help think through how to go about selecting the right turbo for your application.
The question is when will this happen? The car now needs the v-mount setup to be fabbed up and the wiring to be completed. We are also doing some exhaust work so I have to guess the car won't be done in time for DGRR so it is likely I'll be driving the father in law's BMW Z4 to the event. One way or the other, I want to get down to Kilo's to be there for the tuning and testing and I want the work to be done to a high quality so I won't rush Kilo. Better to have it done correctly now.
Will post more...
03-28-14, 11:58 AM
#4043
03-29-14, 09:59 AM
#4044
RX-7 Bad Ass
iTrader: (55)
To get back on topic...
I have always used good ol' R12. You can still buy it on Ebay, you may need an EPA license to buy it though. No biggie there, I got mine online years ago with a 30 minute online test.
It's usually around $30 a can or so, 2-3 cans will usually do it.
If it was converted to 134a, you will need to get all the compressor oil out and switch back to the old R12 mineral oil. I don't believe the 134a oil is compatible.
You should be able to find some backwoods AC shop that will still do R12 stuff.
Dale
03-29-14, 11:31 AM
#4045
Thanks Dale. The AC system did work a lot better with the original R12 in it. AC is not as important up in NC as it was in FL so I don't know.
Does the R12A stuff work well? I had that put into the car a few years back but frankly never really got a chance to drive it during the heat.
Now some turbo eye candy. Shots of the turbo from Kilo Racing. You'll see Kilo's sexy man leg in one of the shots
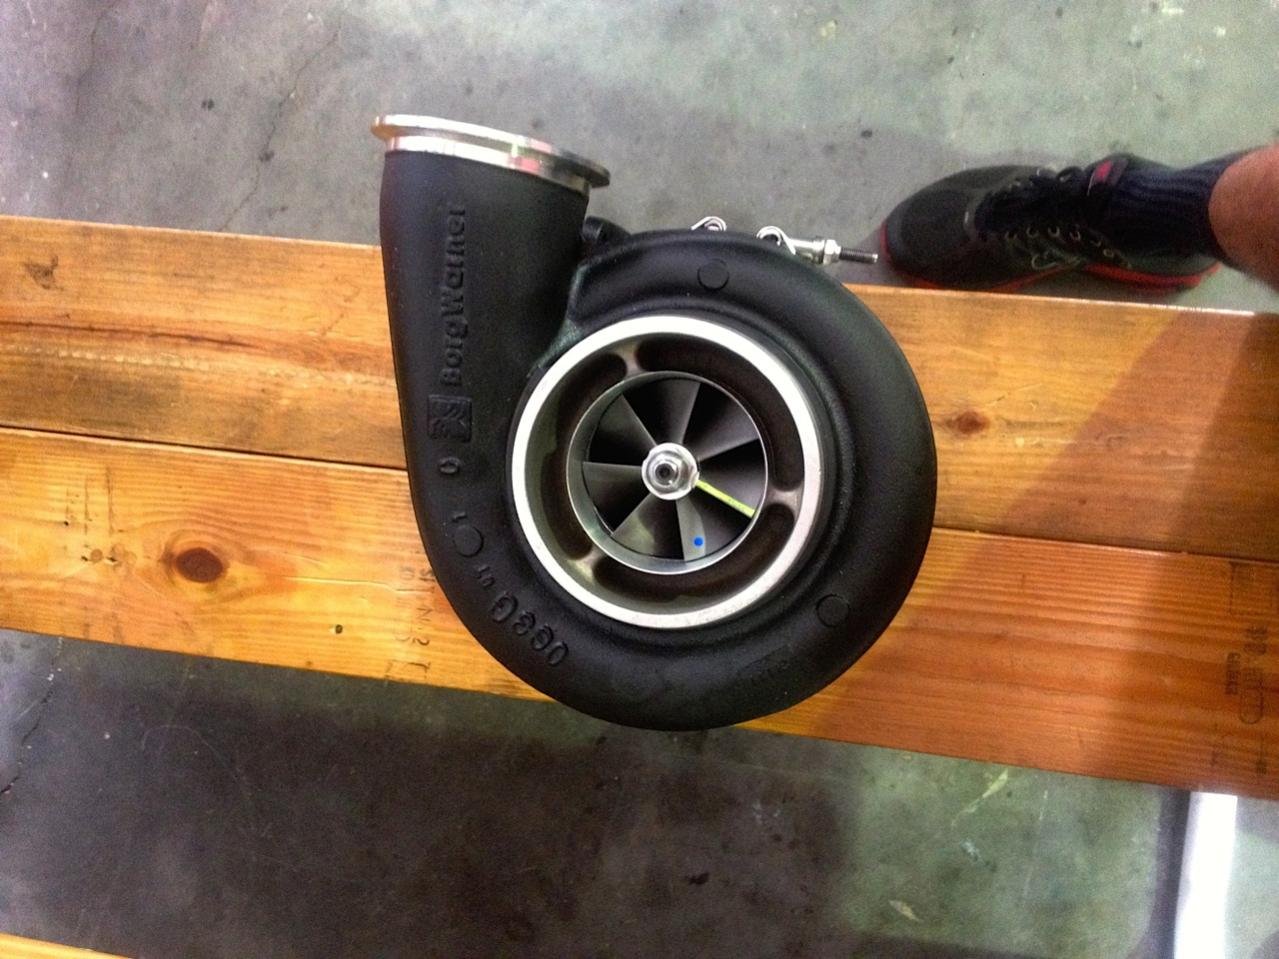
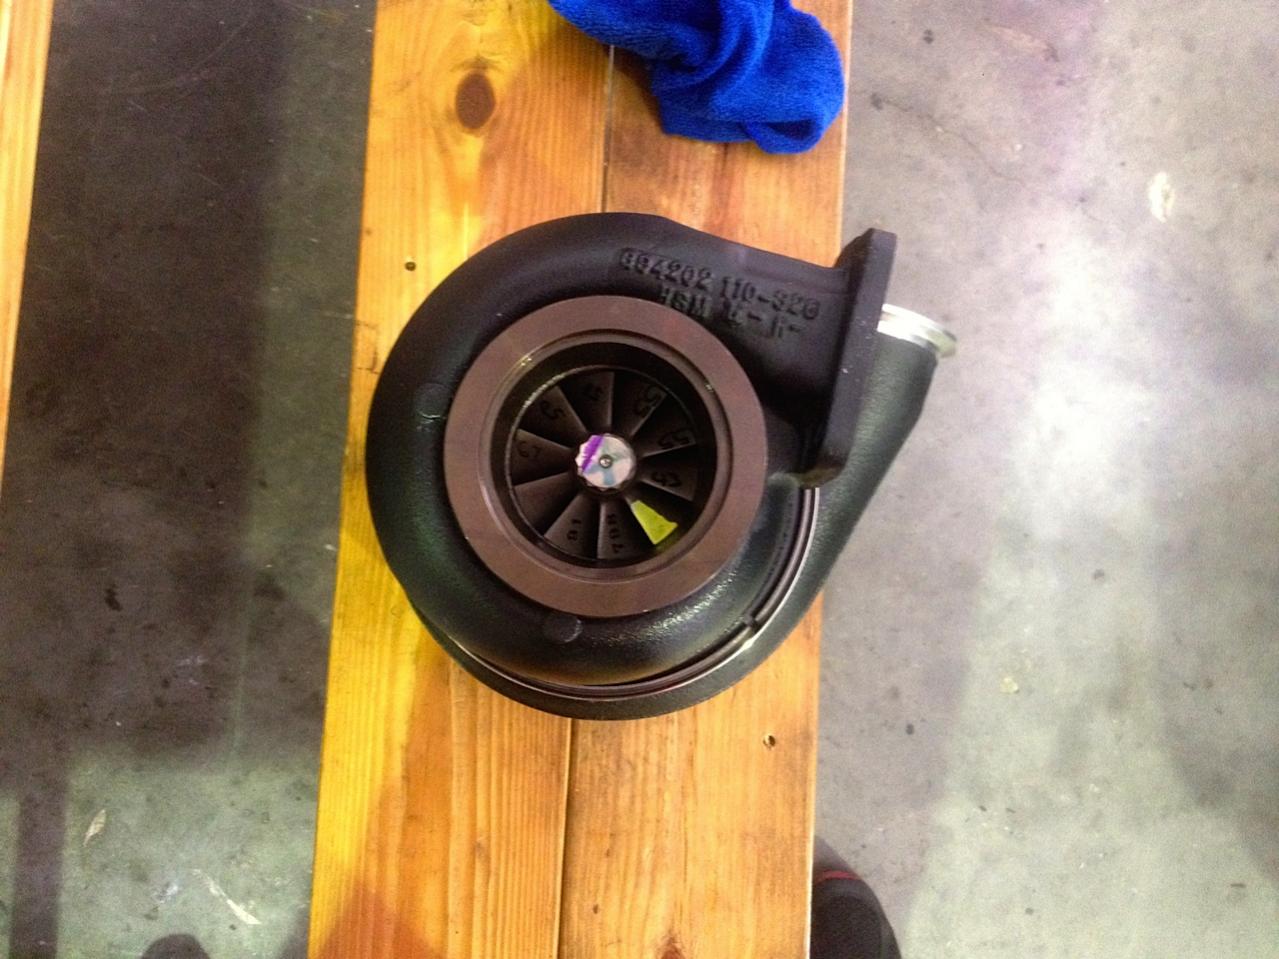

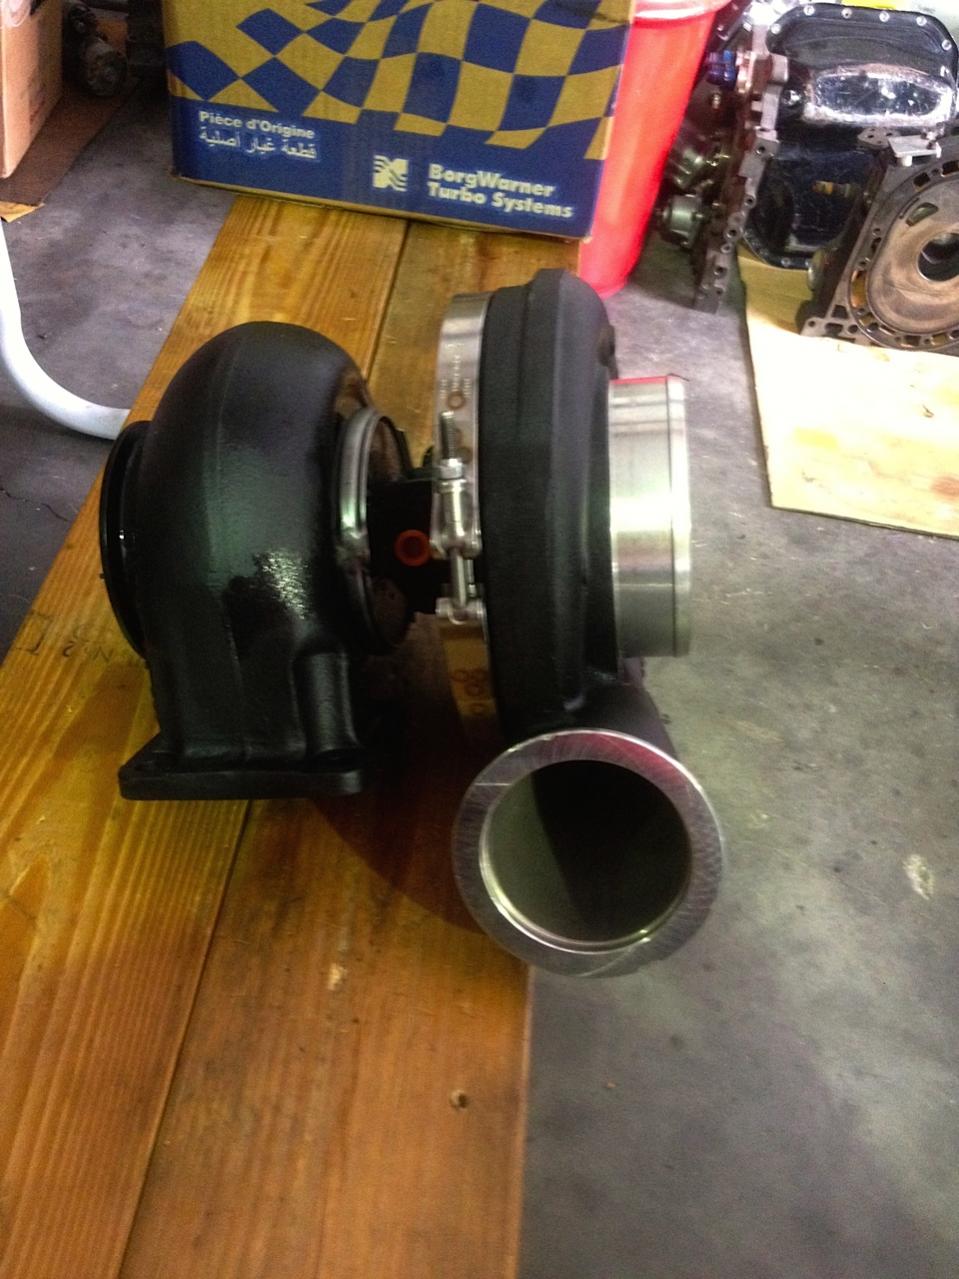
The cover and the center bearing sections are coated in a ceramic thermal dispersant and the AR is treated with a ceramic heat barrier. I hope this means no ugly turbo blanket that will fall apart.
Does the R12A stuff work well? I had that put into the car a few years back but frankly never really got a chance to drive it during the heat.
Now some turbo eye candy. Shots of the turbo from Kilo Racing. You'll see Kilo's sexy man leg in one of the shots
The cover and the center bearing sections are coated in a ceramic thermal dispersant and the AR is treated with a ceramic heat barrier. I hope this means no ugly turbo blanket that will fall apart.
03-29-14, 11:48 AM
#4047
Rotor or no motor
iTrader: (24)
My car came With r134 so my observation may not be as Accurate For your case. Ac works unbelievably well but yet again my system wasnt converted. Thats how It comes from the factory
03-29-14, 01:45 PM
#4048
Tom, thanks for the post. Let's agree to disagree at this point and move on.
I am going to post up "performance" and "back pressure" data as I think it will help others on the forum to make better decisions. As you have a 2 rotor (and a 3 rotor in the works) I'd recommend you do the same so the community has good information in which to make decisions. There are some awesome Borg Warner products from which to choose so it can only help. If you'd like, we can make a new thread with this info and combine it together. If not, no problems, I'll post it here.
I am going to post up "performance" and "back pressure" data as I think it will help others on the forum to make better decisions. As you have a 2 rotor (and a 3 rotor in the works) I'd recommend you do the same so the community has good information in which to make decisions. There are some awesome Borg Warner products from which to choose so it can only help. If you'd like, we can make a new thread with this info and combine it together. If not, no problems, I'll post it here.
03-29-14, 01:54 PM
#4049
Tom, thanks for the post. Let's agree to disagree at this point and move on.
I am going to post up "performance" and "back pressure" data as I think it will help others on the forum to make better decisions. As you have a 2 rotor (and a 3 rotor in the works) I'd recommend you do the same so the community has good information in which to make decisions. There are some awesome Borg Warner products from which to choose so it can only help. If you'd like, we can make a new thread with this info and combine it together. If not, no problems, I'll post it here.
I am going to post up "performance" and "back pressure" data as I think it will help others on the forum to make better decisions. As you have a 2 rotor (and a 3 rotor in the works) I'd recommend you do the same so the community has good information in which to make decisions. There are some awesome Borg Warner products from which to choose so it can only help. If you'd like, we can make a new thread with this info and combine it together. If not, no problems, I'll post it here.
03-29-14, 02:08 PM
#4050
^ Thanks.
As we have some progress, I'll update the thread. Will probably be several weeks as it's in the hands of Kilo now.
To recap, we need to fab up the v-mount and intercooler setup. "Gato" in Orlando will do that. After speaking with Engine Amor Performance Coatings in Tampa FL, I think I will have them (or someone in Orlando if they exist) spray the entire setup, including the piping, with a ceramic thermal dispersant. I supposedly can get a 10-15% drop in coolant temps so on the 3 rotor that can't be a bad thing. Plus the flat black will look nice and stealth if nothing else.
Gato is also taking a look at the exhaust setup and will enlarge that was well. I've discussed the "Rotormotor" idea of installing a Y-pipe after the down pipe and then using two cats in parallel, going back to one pipe for the exhaust. We'll see on that one.
From there the car needs to be wired up for the PS2000 and we will then be able to fire it back up. Need to address a few other nagging bugs as well but really looking forward to getting in and just driving.
Zoom zoom!