She Followed Me Home, Honest
 10-28-12, 04:56 PM
#276
I didn't mean to overstate my concerns, it's just that to this point everything has gone so smoothly.
Except for the logicon, of course (and even that wasn't too terrible).
The vac spider was removed basically intact, so very few connections to make.
I'm hoping your trick OMP lines will encourage the pump to work fine.
Although progress has been slow of late, things will improve shortly.
Strangely, with almost no effort on my part, the temp job I've sporadically had seems to be morphing into a full time position.
Fingers are crossed.
If that happens, the future of this chassis will change dramatically.
 10-29-12, 10:11 AM
#278
No pistons baby
Join Date: Feb 2011
Location: Edmonton, Alberta, Canada
Posts: 171
Likes: 0
Received 0 Likes
on
0 Posts
This thread is true car ****. I watch in feverish excitement as a stranger on the Internet does to his car all the things I want to, but never get to do, on MY car.
10-29-12, 06:22 PM
#279
There are so many beautiful builds and clever projects on this forum, you'll need to be very careful.
If this thread gets you feverishly excited, they will probably kill you.
So far all I've done is a pretty thorough examination and clean...well within the budget and capabilities of the average wrench.
Hell, the single costliest item I've bought was the Zymol wax (actually, this isn't true, the Hawks cost more...).
When all is said and done, I anticipate the total expenditure to be right around a grand.
Although the bulk of that money will be bolted to the engine (clutch, headers, oil lines, etc.), the majority of the time and effort went to ensuring that the platform was in good shape.
Frankly, I don't expect the motor to last much more than a year and I'll be happy to get that.
I'm just trying to get the chassis ready for whatever comes next.
10-31-12, 09:44 AM
#288
REAL QUESTION!
A matter of life or death...well, not really but somewhat pressing anyway.
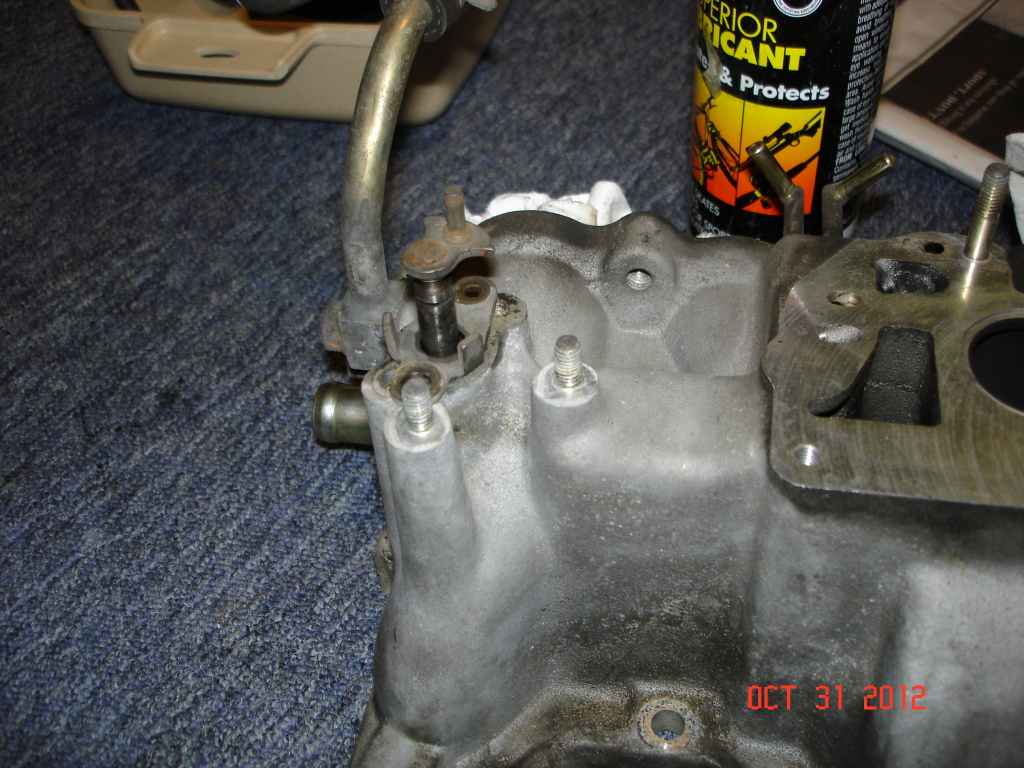
Finally got around to the lower intake manifold and as expected, some cleaning is required.
The aux. ports both seemed to work fine but I want to disassemble as far as possible to clean all the crap from the intake.
The actuators came off fine but the rod that goes through the manifold is fighting back.
I can't see well from the engine side of the manifold (the passage is all gunked up) and don't know what the bearing/seal arrangement might be but it seems obvious it's all removed from the outer side of the manifold.
Should this slip out or what?
Is there a trick, like some hidden retaining ring, or shouldn't they be removed at all?
I'm hesitant to apply force till I know what I'm dealing with.
A matter of life or death...well, not really but somewhat pressing anyway.
Finally got around to the lower intake manifold and as expected, some cleaning is required.
The aux. ports both seemed to work fine but I want to disassemble as far as possible to clean all the crap from the intake.
The actuators came off fine but the rod that goes through the manifold is fighting back.
I can't see well from the engine side of the manifold (the passage is all gunked up) and don't know what the bearing/seal arrangement might be but it seems obvious it's all removed from the outer side of the manifold.
Should this slip out or what?
Is there a trick, like some hidden retaining ring, or shouldn't they be removed at all?
I'm hesitant to apply force till I know what I'm dealing with.
10-31-12, 10:33 AM
#289
No bearings, no seals other than the intake manifold gasket to the block. It's just a metal tube that slips in there. It should rotate and slip in and out very easily. The actuator rod simply engages the pin with no retainer or anything at all.
EDIT: that hole is going right into the intake/combustion chamber... as so be weary what you put in there.
EDIT: that hole is going right into the intake/combustion chamber... as so be weary what you put in there.
 10-31-12, 11:42 AM
#291
Moderator
iTrader: (3)
Join Date: Mar 2001
Location: https://www2.mazda.com/en/100th/
Posts: 30,844
Received 2,606 Likes
on
1,849 Posts
the rod is mounted in a brass/bronze bushing that is pressed into the manifold casting. there is also an O ring under that 2 bolt retainer flange.
i took one apart that was so stuck i ended up pulling out the brass bushing with the rod!
i took one apart that was so stuck i ended up pulling out the brass bushing with the rod!
10-31-12, 11:52 AM
#292
rod, c-clip washer, seal and ring. once the 2 phillips screws are removed and c-clip it all should slide out. try some rust penetrant or MMO on the bushings/seal along with a twisting pulling motion.
the seals should be replaced, they usually are hard and brittle and cause some vacuum leaks whenever i check that area.
reason they bind up is carbon builds up on the rod just past the bushing so you are trying to scrape it off while pulling it out and it winds up inside the bushing grabbing the pin. carb cleaner in the mix will help loosen up the carbon. you may want to tap the pin back in, apply some lubricant/cleaner to the inside part of the rod and try pulling it out in a few series of attempts.
if the rods spin freely you should be ok with some effort, if they are bound up i have had to remove the pin along with the brass bushing to get them out.
Last edited by RotaryEvolution; 10-31-12 at 11:58 AM.
10-31-12, 01:08 PM
#295
Passion for Racing
Join Date: Aug 2010
Location: Crown Point, Indiana
Posts: 1,066
Likes: 0
Received 2 Likes
on
2 Posts
That's what I meant. I simply polished the actuator rods to allow them to spin more freely. It really makes a difference on all rotating parts. Which is why I also polished the outside of my Atkins port rods.
10-31-12, 06:09 PM
#296
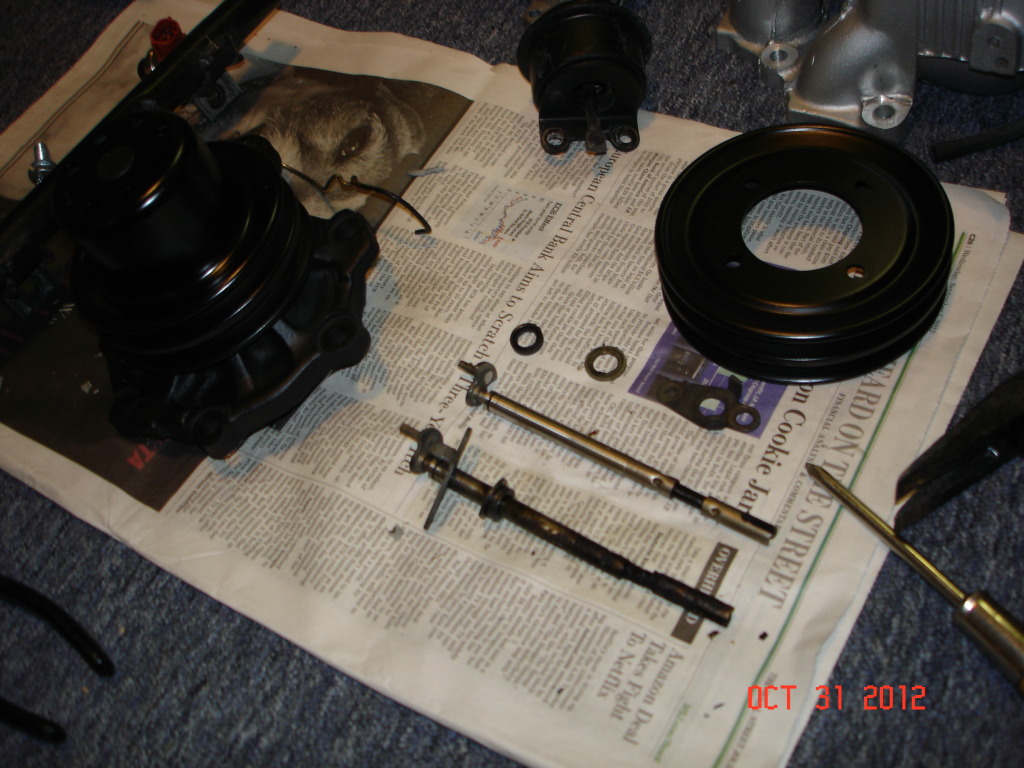
While waiting for y'all to edumacate me, and aware that nice days like today will become a rarity soon, I reopened the paint booth.
This was not a spur of the moment decision, I've been thinking of it ever since I painted the dynamic chamber...so it was a two spur moment deal.
Everything had been painted before and was already clean, so prep was minimal.
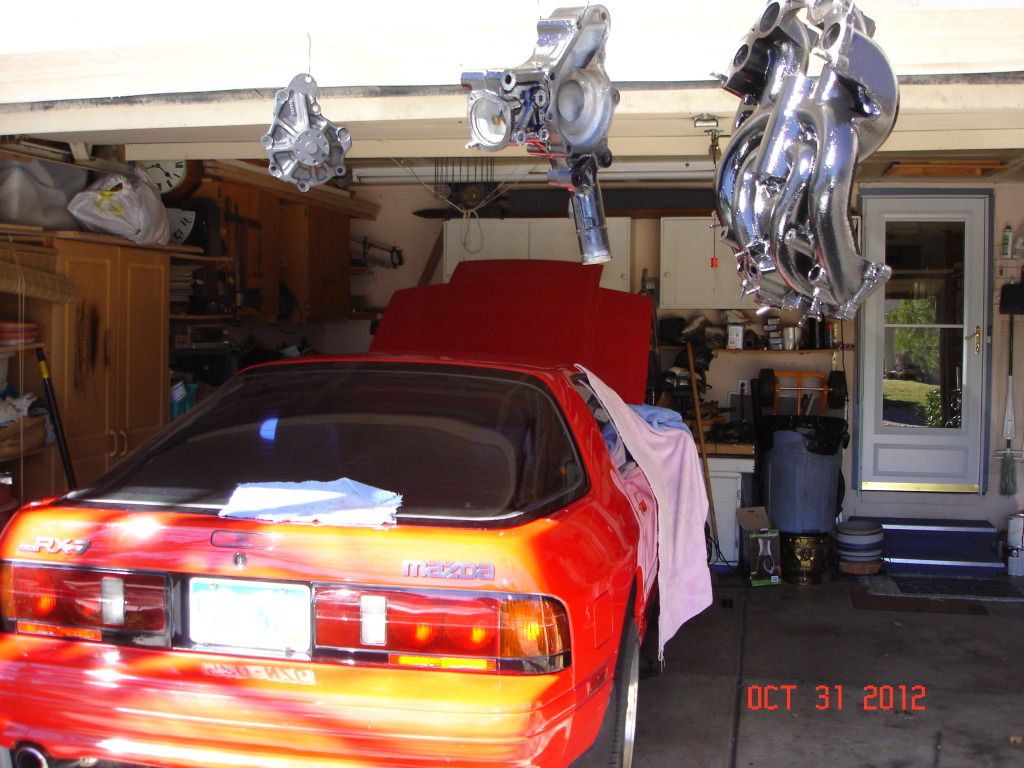
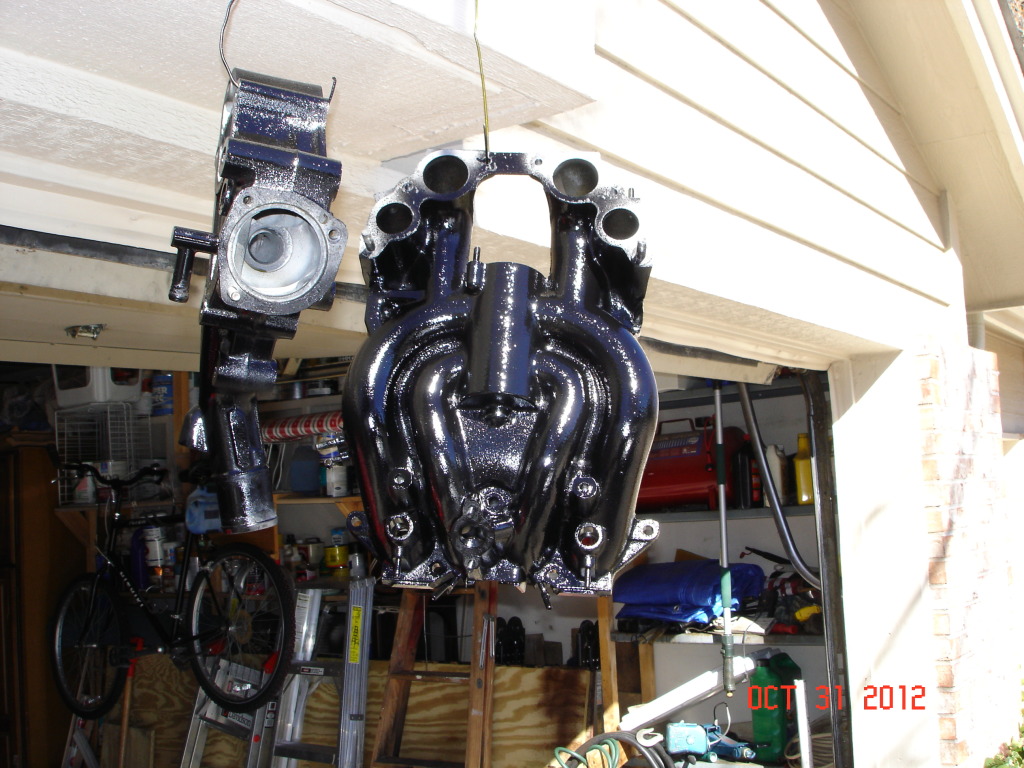
I've opted for an all black scheme with a variety of blacks.
The dynamic chamber is already a satin wrinkle, for contrast the VDI manifold is gloss black.
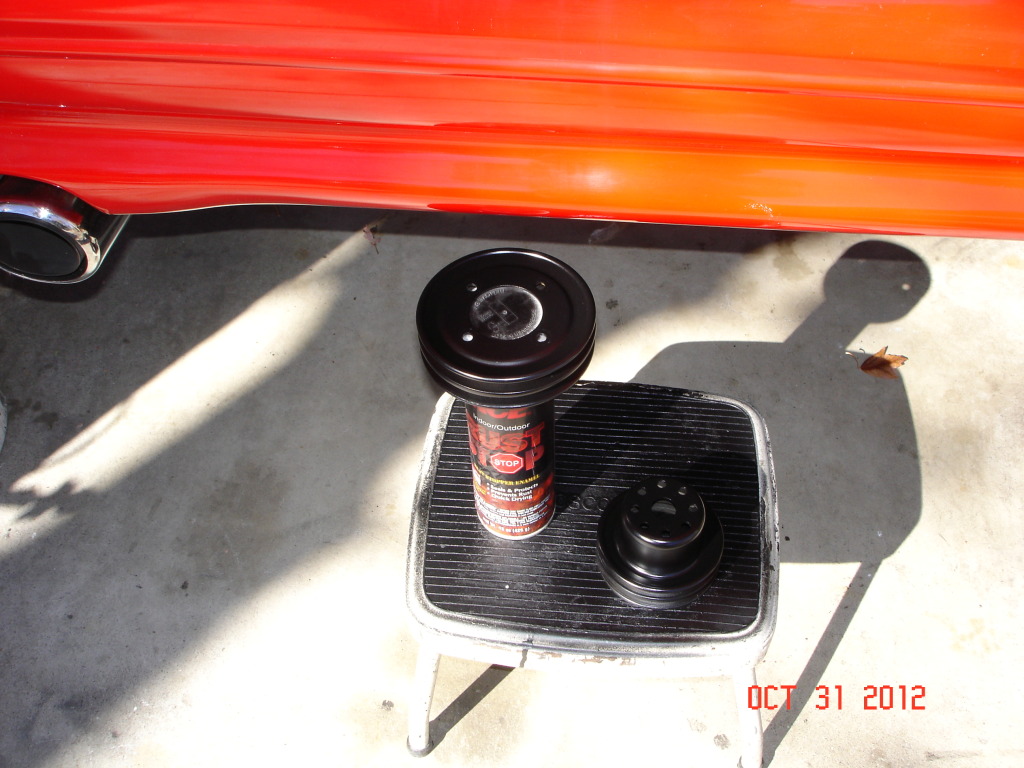
The waterpump housing is also gloss black while the waterpump itself is flat.
The pulleys are satin black.
The pics exaggerate the gloss, it's not so garish IRL and anyway, both gloss parts are significantly obscured when all is installed, so the shiny bits shouldn't be dominant.
I guess I'll get back to the actuator rods tonight, see if I can remove without disaster. This commits me to another $20 or so for new seals but what the hell.
I'm considering the money spent on the engine (which is at the end of it's lifespan and I don't particularly want) as a parting gift, recognition for outstanding service.
If I can get everything working optimally and add a few enhancements, maybe this last year will be it's most glorious.
Besides, the rest of the engine bay looks so good, it'd be a shame not to tart up the motor just a little bit.
This was not a spur of the moment decision, I've been thinking of it ever since I painted the dynamic chamber...so it was a two spur moment deal.
Everything had been painted before and was already clean, so prep was minimal.
I've opted for an all black scheme with a variety of blacks.
The dynamic chamber is already a satin wrinkle, for contrast the VDI manifold is gloss black.
The waterpump housing is also gloss black while the waterpump itself is flat.
The pulleys are satin black.
The pics exaggerate the gloss, it's not so garish IRL and anyway, both gloss parts are significantly obscured when all is installed, so the shiny bits shouldn't be dominant.
I guess I'll get back to the actuator rods tonight, see if I can remove without disaster. This commits me to another $20 or so for new seals but what the hell.
I'm considering the money spent on the engine (which is at the end of it's lifespan and I don't particularly want) as a parting gift, recognition for outstanding service.
If I can get everything working optimally and add a few enhancements, maybe this last year will be it's most glorious.
Besides, the rest of the engine bay looks so good, it'd be a shame not to tart up the motor just a little bit.
10-31-12, 06:38 PM
#297
Moderator
iTrader: (3)
Join Date: Mar 2001
Location: https://www2.mazda.com/en/100th/
Posts: 30,844
Received 2,606 Likes
on
1,849 Posts
N225-13-188A is the part number
 11-01-12, 07:14 PM
#299
There are so many beautiful builds and clever projects on this forum, you'll need to be very careful.
If this thread gets you feverishly excited, they will probably kill you.
So far all I've done is a pretty thorough examination and clean...well within the budget and capabilities of the average wrench.
Hell, the single costliest item I've bought was the Zymol wax (actually, this isn't true, the Hawks cost more...).
Or maybe we all just wish we took the time to make our cars look that good, or wish that you lived next door and wanted to clean our cars as well?