She Followed Me Home, Honest
 11-15-12, 06:26 PM
#351
Two hours!!!?!? wow, I'm super impressed.
I dont drink, I dont go out... For fun I sit at home in my engine bay with a toothbrush, rag, and some showroom shine.
(Looking at the photo again I've realized I forgot to put my shock tower boots back on... gotta search for them when I go home tonight.)
I want a black manifold now though.... To-do list updated.
 11-15-12, 07:13 PM
#352
So, here's what's going on...
I pick up the engine from Precision tomorrow.
Flywheel has been resurfaced and new clutch installed.
New pilot bearing/seal, rear main seal and o-ring.
Pulled the front cover to check the o-ring...sadly, it was intact and properly installed, so that's not the cause of the low pressure.
Oh well, new ring and teflon washer installed along with cover oil seal.
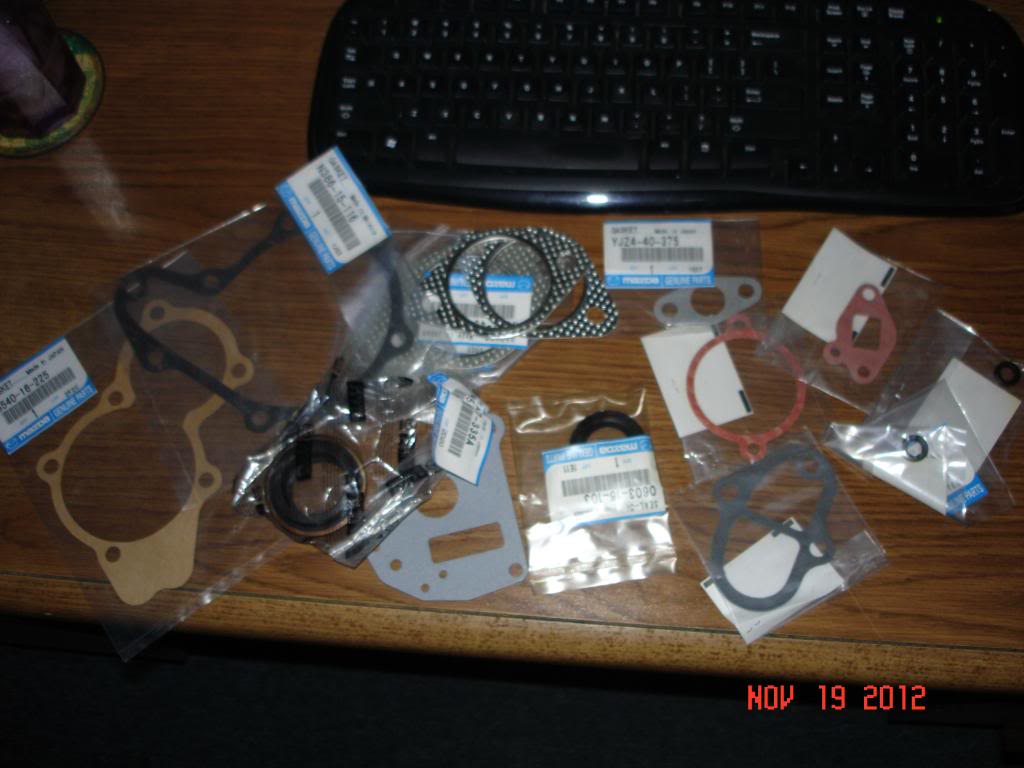
I placed the final gasket/seal order, which will arrive Monday.
I'm having difficulty finding Right Stuff sealant, at least the slow set formula (and to be honest I've only checked two places) but once obtained I can at least get the oil pan put on.
A marathon hardware hunt turned up twenty one large flange 6mm bolts for the pan.
These are from at least two different cars (some are black, some are red) and are commonly used on upper fender flanges. Not pretty but I hope more effective clamping the pan down.
On the verge of getting something done again.
I pick up the engine from Precision tomorrow.
Flywheel has been resurfaced and new clutch installed.
New pilot bearing/seal, rear main seal and o-ring.
Pulled the front cover to check the o-ring...sadly, it was intact and properly installed, so that's not the cause of the low pressure.
Oh well, new ring and teflon washer installed along with cover oil seal.
I placed the final gasket/seal order, which will arrive Monday.
I'm having difficulty finding Right Stuff sealant, at least the slow set formula (and to be honest I've only checked two places) but once obtained I can at least get the oil pan put on.
A marathon hardware hunt turned up twenty one large flange 6mm bolts for the pan.
These are from at least two different cars (some are black, some are red) and are commonly used on upper fender flanges. Not pretty but I hope more effective clamping the pan down.
On the verge of getting something done again.
11-18-12, 04:40 PM
#353
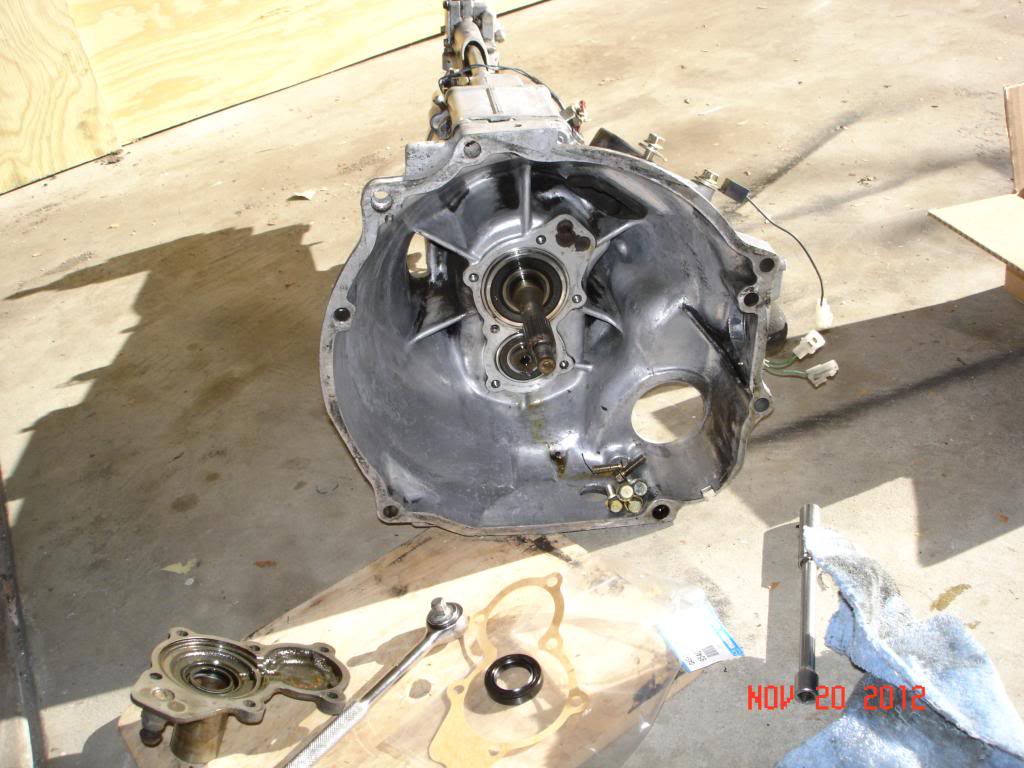
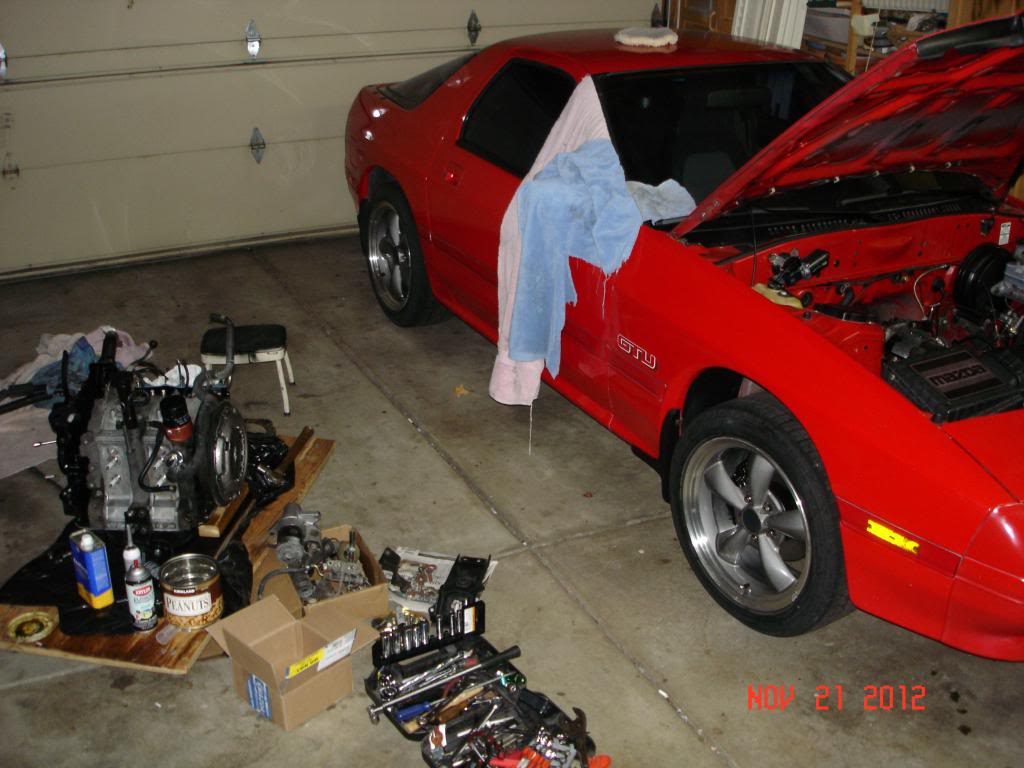
I didn't get the engine till yesterday, the extra day allowed me to clean/paint the front cover.
Also painted the CAS and laid some DiNoc on the cover.
While I await the gasket delivery, about the only thing I could do was install the oil pan:
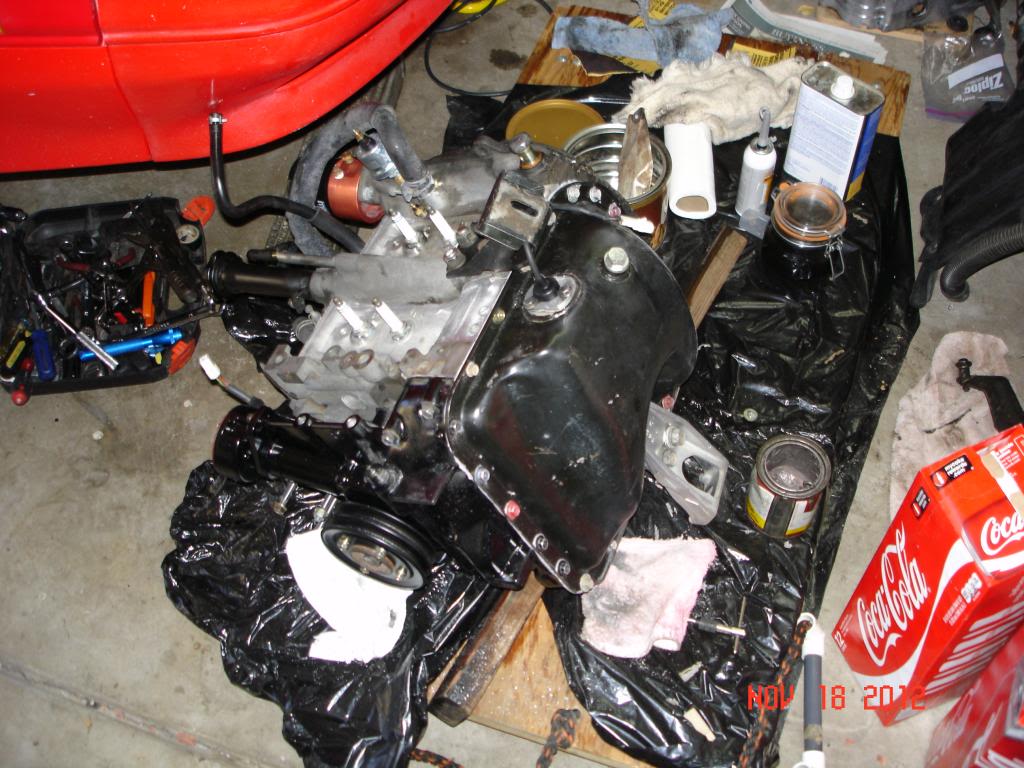
Rather incomprehensible photo, I admit.
Also painted the CAS and laid some DiNoc on the cover.
While I await the gasket delivery, about the only thing I could do was install the oil pan:
Rather incomprehensible photo, I admit.
11-18-12, 10:22 PM
#354
Passion for Racing
Join Date: Aug 2010
Location: Crown Point, Indiana
Posts: 1,066
Likes: 0
Received 2 Likes
on
2 Posts
Speaking of oil pan, I wish the motor mount wasn't integrated into it so it wouldn't be a hassle to, I don't know, repair a leaking gasket or install a baffle? Sometimes mazda makes me shake my head... Aside from that though, I am excited for you to get it all installed and see how your cleaned engine bay looks.
11-19-12, 10:36 AM
#356
Moderator
iTrader: (3)
Join Date: Mar 2001
Location: https://www2.mazda.com/en/100th/
Posts: 30,832
Received 2,603 Likes
on
1,847 Posts
so far the Rx8 seems like its not as easy as i should be under the hood, Mr Ko and i spent 2 hours changing the thermostat.
i do like the Rx8 interior way better though, i can have the whole thing out of the car and ready to get cleaned (people are DIRTY) in about 20 minutes
11-19-12, 10:49 AM
#357
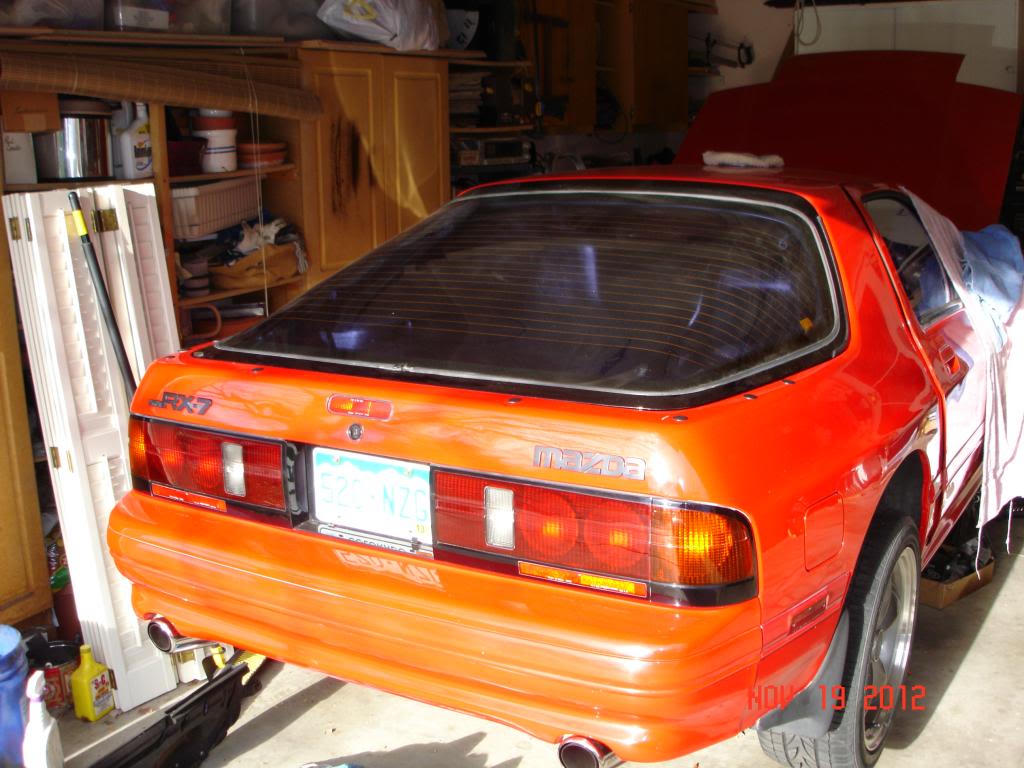
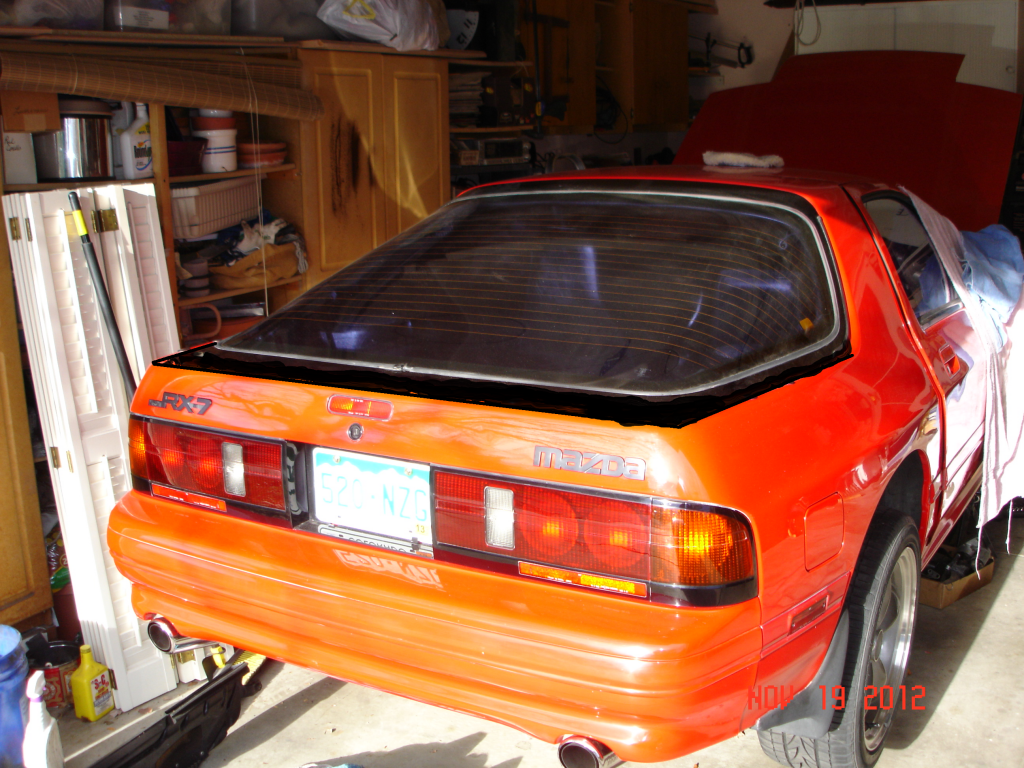
Mindful that the unseasonably warm weather we're having is but a fleeting thing, I forced myself to make a decision on one of the last pressing chassis projects- the holes left by the wing.
I am still in need of a sport (duckbill) spoiler should anyone have one for donation/sale...
The solution had to be:
-not permanent/disfiguring
-capable of sealing the holes well
-not aesthetically hideous
I had narrowed my concepts down to three (all of which would use the same body plugs):
-paint the body plugs red and install
-cover the affected area (essentially, the top of the rear body around the hatch) with black vinyl, then use the body plugs in the holes (plugs left their natural black)
-install plugs first then paint over the area with PlastiDip.
The first option was the easiest but least satisfying.
A perfect color match would be unlikely and the heads of the plugs would cast shadows, thus calling attention to themselves. Seemed probable that it would look like I really tried but came up short.
The last two approaches were my favorites, mainly because they also deal with the paint flaws left by the wing.
The PlastDip won out for a couple of reasons...completely reversible and potentially better sealing being the main ones.
I bought the plugs (commonly referred to a "christmas trees") from a specialty supplier in town. I did not want the ones commonly found in interiors that have a leather embossed pattern...mine should be smooth.
Ran a bead of Right Stuff sealant (same as I used for the oil pan) around the stem of the plug and inserted it. Pressing firmly, I spun the plug in the hole till a thin bead of sealant spooged out the circumference of the head, then wiped off the excess.
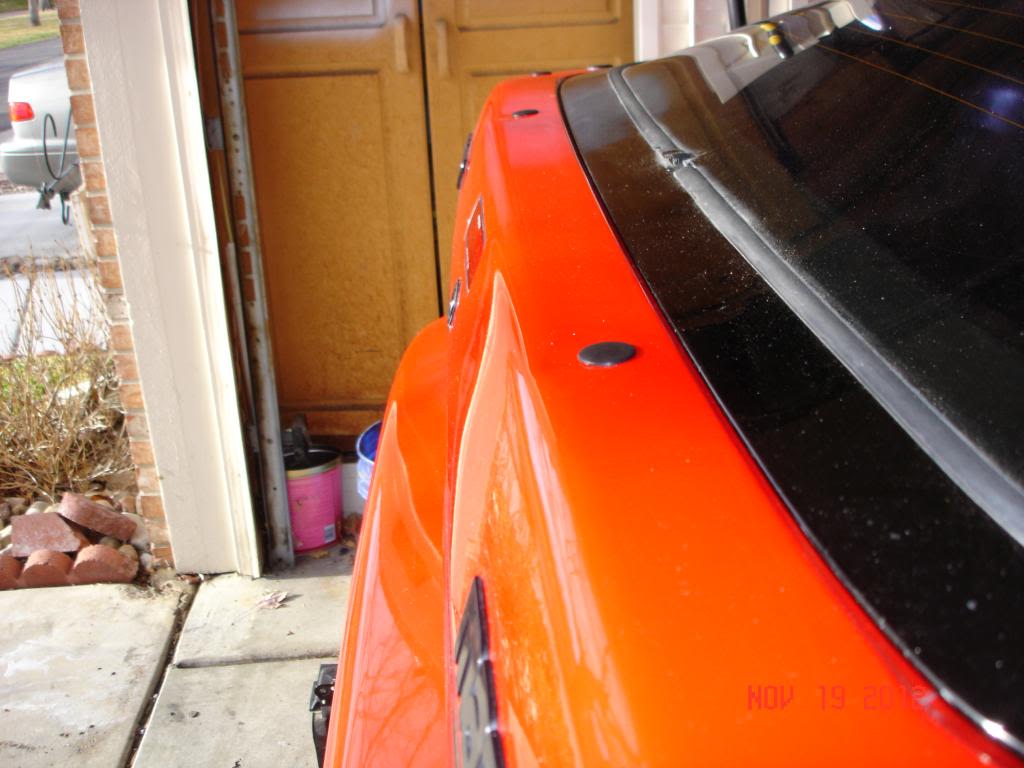
So, I'm fairly confident the holes are watertight, time will tell.
Here's a quick sketch of how I'm considering painting:
It's basically as though the hatch surround was stretched a few inches, from the side and back there should be minimal visual impact.
At least, that's the operating theory.
The plug sealant needs to cure for 24 hrs, so this will simmer for a while but as she sits now, the first two conditions I'd set have been met and the jury is out on #3.
I am still in need of a sport (duckbill) spoiler should anyone have one for donation/sale...
The solution had to be:
-not permanent/disfiguring
-capable of sealing the holes well
-not aesthetically hideous
I had narrowed my concepts down to three (all of which would use the same body plugs):
-paint the body plugs red and install
-cover the affected area (essentially, the top of the rear body around the hatch) with black vinyl, then use the body plugs in the holes (plugs left their natural black)
-install plugs first then paint over the area with PlastiDip.
The first option was the easiest but least satisfying.
A perfect color match would be unlikely and the heads of the plugs would cast shadows, thus calling attention to themselves. Seemed probable that it would look like I really tried but came up short.
The last two approaches were my favorites, mainly because they also deal with the paint flaws left by the wing.
The PlastDip won out for a couple of reasons...completely reversible and potentially better sealing being the main ones.
I bought the plugs (commonly referred to a "christmas trees") from a specialty supplier in town. I did not want the ones commonly found in interiors that have a leather embossed pattern...mine should be smooth.
Ran a bead of Right Stuff sealant (same as I used for the oil pan) around the stem of the plug and inserted it. Pressing firmly, I spun the plug in the hole till a thin bead of sealant spooged out the circumference of the head, then wiped off the excess.
So, I'm fairly confident the holes are watertight, time will tell.
Here's a quick sketch of how I'm considering painting:
It's basically as though the hatch surround was stretched a few inches, from the side and back there should be minimal visual impact.
At least, that's the operating theory.
The plug sealant needs to cure for 24 hrs, so this will simmer for a while but as she sits now, the first two conditions I'd set have been met and the jury is out on #3.
11-19-12, 11:12 AM
#358
Eek, I'm a fan of just keeping the plugs as is or your first option and trying to paint to match, as hard as that may be. IMHO, I think "painting" the black to cover looks bad. But hey, that's the beauty of Plasti-dip, it's temporary. Just be sure to follow directions, I saw that stuff pull up somebodies clear coat on here; granted they did something wrong.... can't remember exactly what though.
As for Thanksgiving slowing you down, just have dinner in the Garage!!
As for Thanksgiving slowing you down, just have dinner in the Garage!!
 11-20-12, 09:28 AM
#366
Just preparing for today's task(s), waiting for it to warm up a bit.
The primary aim is to get new seals in the transmission and install it in the chassis.
I found a rubber body plug thats a perfect "snap fit" into the rear main seal and will be able to fill the tranny before jacking it up...I hope.
Assuming that goes well, the driveshaft and catback will go on and she'll be down on her wheels again after 7 weeks.
A month or so ago, I went to Triple R Racing in search of some banjo crush washers (which they had) and it was just by chance that they were offloading the K-Pax Racing support trailers.
All the spare consumables were being sold off at heavily discounted prices...I got a gallon of Red Line trans fluid for $20.
Unfortunately it was straight MT-90 instead of the recommended MT 75/90, so I'll just have to see how the trans likes the heavier oil.
Fingers are, as usual, crossed.
 11-20-12, 11:59 AM
#369
+1 try doing an engine in a BMW!
so far the Rx8 seems like its not as easy as i should be under the hood, Mr Ko and i spent 2 hours changing the thermostat.
i do like the Rx8 interior way better though, i can have the whole thing out of the car and ready to get cleaned (people are DIRTY) in about 20 minutes
so far the Rx8 seems like its not as easy as i should be under the hood, Mr Ko and i spent 2 hours changing the thermostat.
i do like the Rx8 interior way better though, i can have the whole thing out of the car and ready to get cleaned (people are DIRTY) in about 20 minutes
the renesis is crammed in there, the factory recommended way of doing it is dropping the front subframe off the chassis. while i still think it's easier to do a manual engine by pulling it out of the engine bay(through the top, this of course requires stripping the engine down almost completely in the engine bay) it still takes me longer than a completely stock 13B-REW and also why it is the most costly R+R i have listed at $1100 including install kit. the n/a early 13Bs range from $650-750.
what is the gasket on the far left? looks like transmission nose cover gasket, never bothered dissecting an n/a transmission yet.
Last edited by RotaryEvolution; 11-20-12 at 12:09 PM.
11-20-12, 02:39 PM
#370
I was replacing the cover oil seal anyway, so why not?
About the amount of trans oil required...
The FSM calls for 2.6 qts to fill to the upper drain hole.
With the trans on the ground and rolled on it's side, I filled just that amount but when rolled into normal position, oil gushed out.
Easily a couple of pints before the flow stopped, I figure there's prolly about 2 qts. left in the case.
What's up with that?
11-20-12, 03:13 PM
#371
the FSM is a little overbearing with the transmission and diff capacities. even the TIIs with much bigger case barely get over 2 quarts.
they may take into account filling the shifter housing, i always fill them half way up the shifter bore which is about another 1/4 quart.
they may take into account filling the shifter housing, i always fill them half way up the shifter bore which is about another 1/4 quart.
11-20-12, 04:45 PM
#372
Well, it is what it is, I suppose...it won't hold any more.
As promised, things actually did start to happen:
Preparing to install the new front trans cover oil seal and gasket.
Quickly followed by the throwout bearing/arm and slave cylinder.
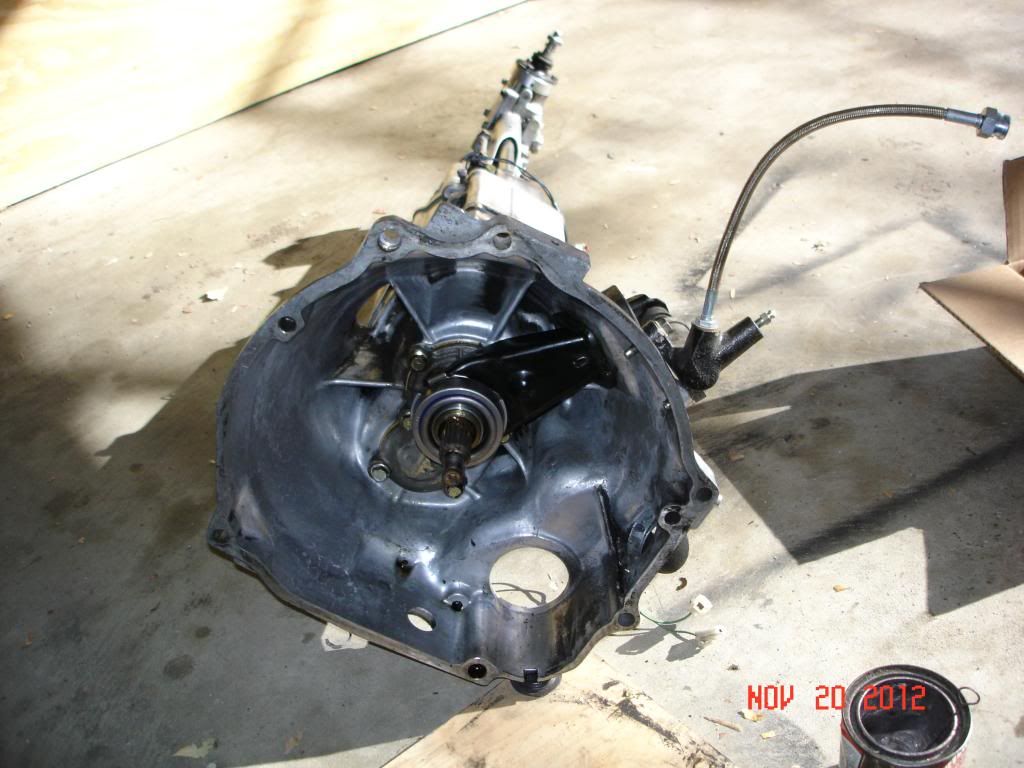
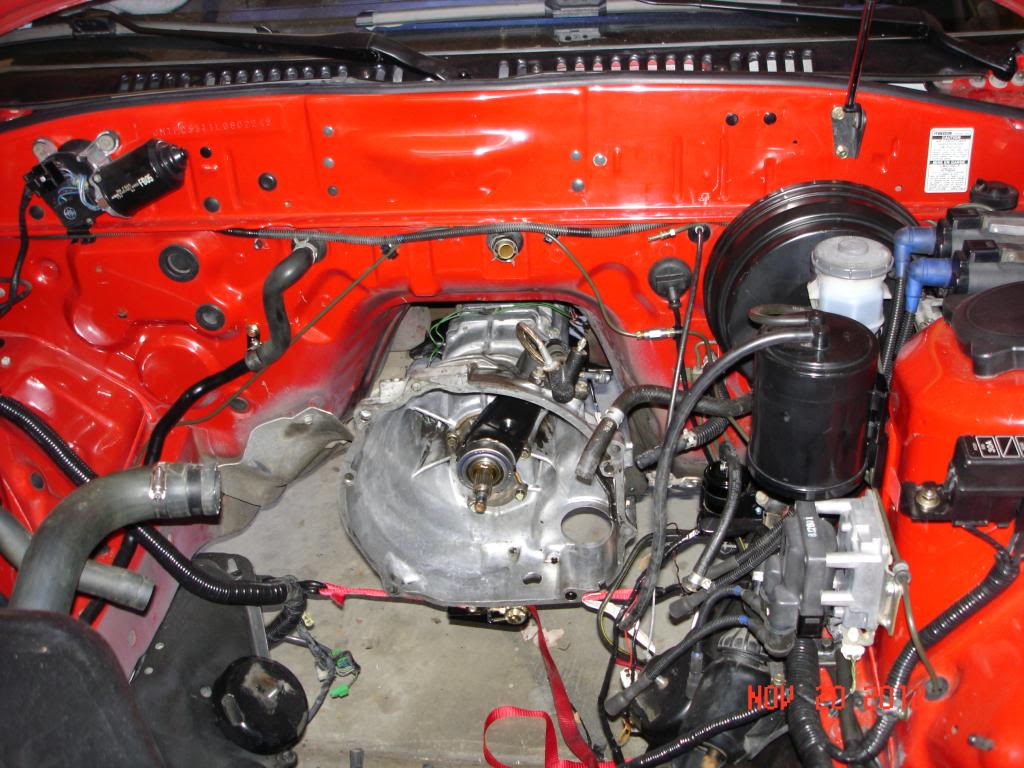
And, as if by magic, the trans is installed:

Driveshaft as well.
I need some hardware to do the exhaust, so that will probably happen tomorrow.
I did succumb to the lure of bling...if only a little:

It feels good to make some obvious progress.
As promised, things actually did start to happen:
Preparing to install the new front trans cover oil seal and gasket.
Quickly followed by the throwout bearing/arm and slave cylinder.
And, as if by magic, the trans is installed:
Driveshaft as well.
I need some hardware to do the exhaust, so that will probably happen tomorrow.
I did succumb to the lure of bling...if only a little:
It feels good to make some obvious progress.
11-21-12, 06:44 PM
#373
Man, it was 70-something degrees here today, I was basking in the sunshine like a walrus.Well, if walruses were thinner and smoked more...
Let's say goodbye to the undercarriage, shall we?
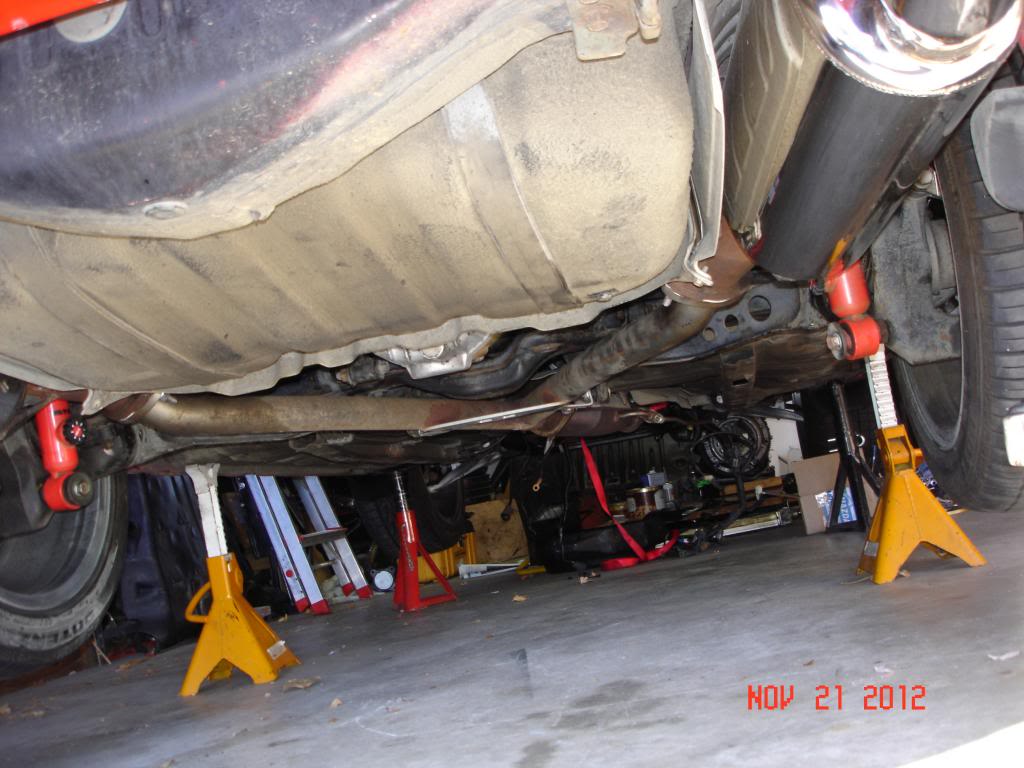
Can't say I'm sorry, spent way too much time under there...including a stupid amount fiddlefucking the mufflers into alignment:
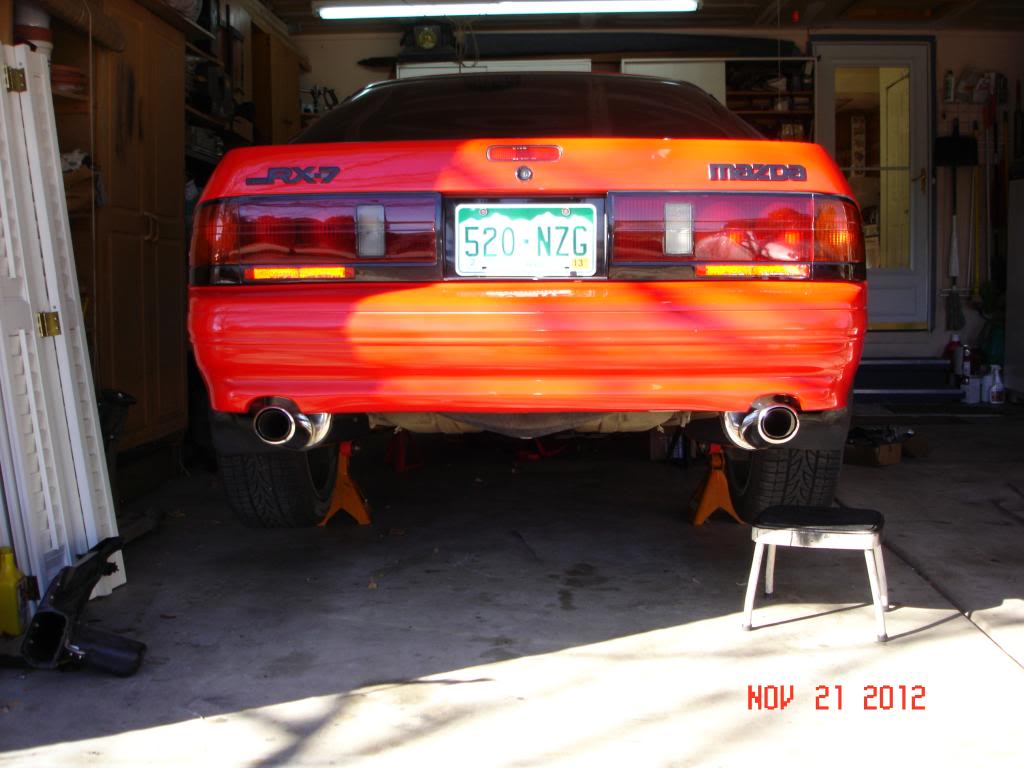
She fought back so I grounded her.
Then started to dress the shortblock:
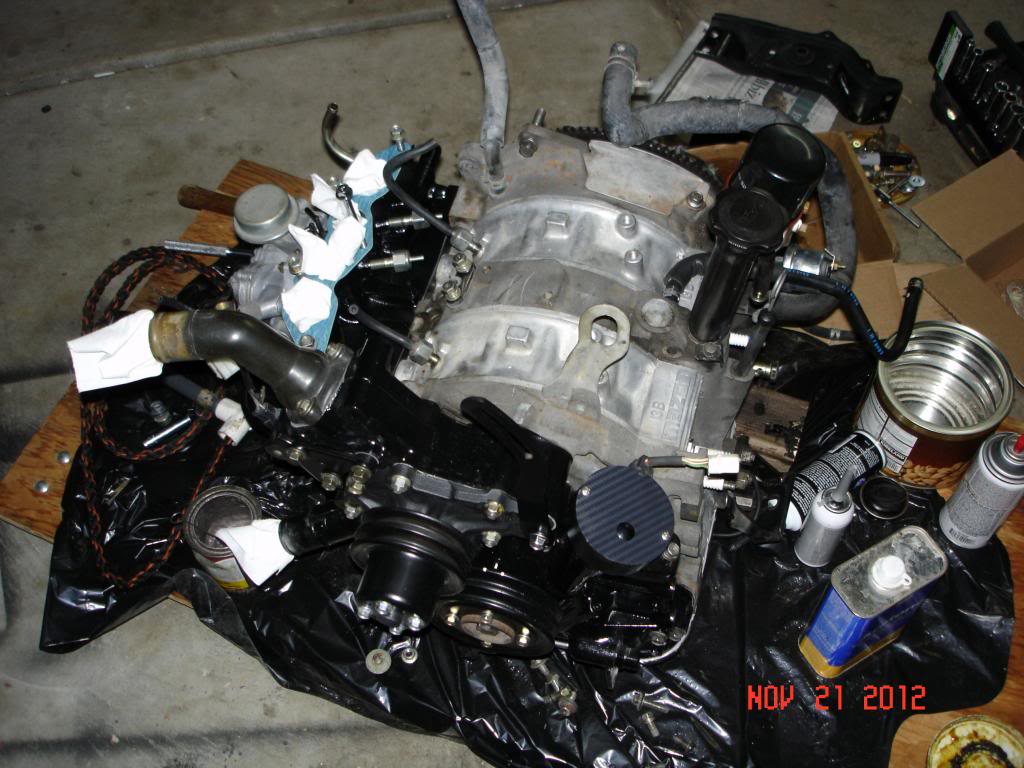
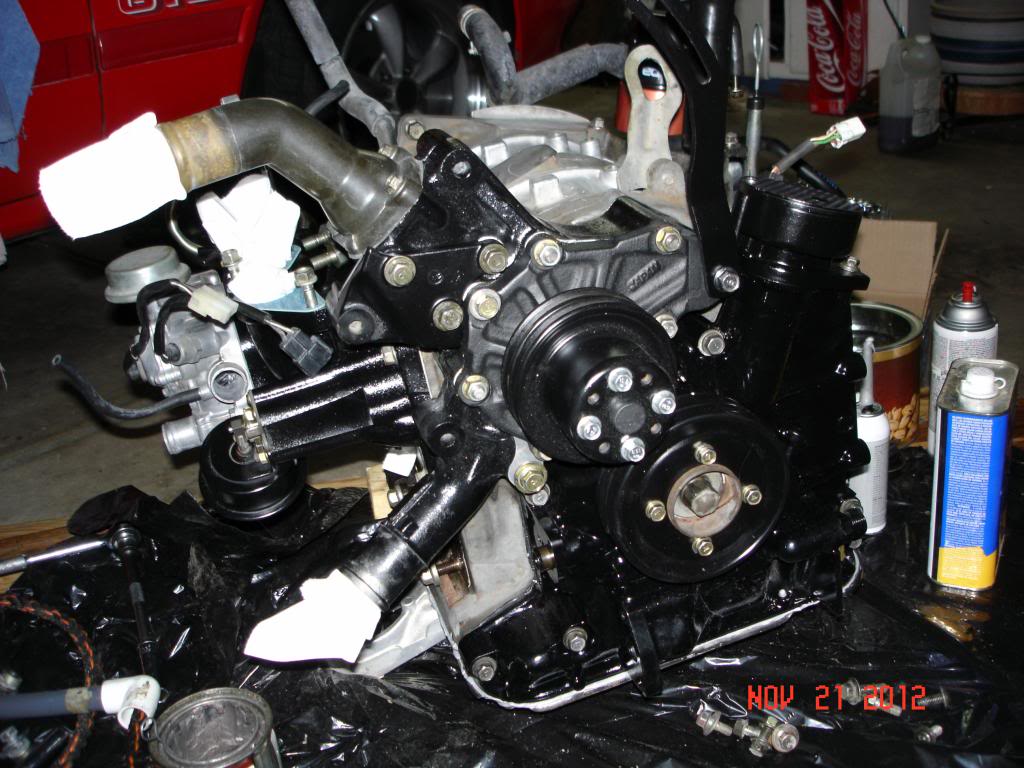
The motor gets ever closer to the chassis:
Tonight I have two pies to make and then start proofing the rolls.
I shall dine well on the morrow, happy Thanksgiving to all.
Let's say goodbye to the undercarriage, shall we?
Can't say I'm sorry, spent way too much time under there...including a stupid amount fiddlefucking the mufflers into alignment:
She fought back so I grounded her.
Then started to dress the shortblock:
The motor gets ever closer to the chassis:
Tonight I have two pies to make and then start proofing the rolls.
I shall dine well on the morrow, happy Thanksgiving to all.
11-22-12, 11:48 AM
#374
OK, another real question!
During a break in the cooking schedule, I began to mock up the OMP lines.
I have a new set of Rotary Evolution's braided lines, so they are slightly thicker and not preformed like the originals.
Currently, I have the lines attached a routed per the FSM (and Ben, for that matter) but would like to play around with them a bit.
So, here's the question:
Does it really matter which port on the pump goes to which injection port?
Do the ports on the intake get more/less oil than the two on the keg?
Can I arrange these at my whim or must I adhere to the Mazda layout?
Why is there air?
11-22-12, 12:15 PM
#375
i'm fairly sure they all see the same amount of oil but honestly i have never looked that far into it. i know the lines are a little thicker and takes a little work to fit behind the smog pump belt, some tie wires help keep them out of the way of the belt.