
How to remove your FB windshield without breaking


How to remove your FB windshield without breaking
This thread is for people who have broken at least one windshield during removal, as I have.
First throw the instructions and special tools you bought in the trash, they are dangerous.
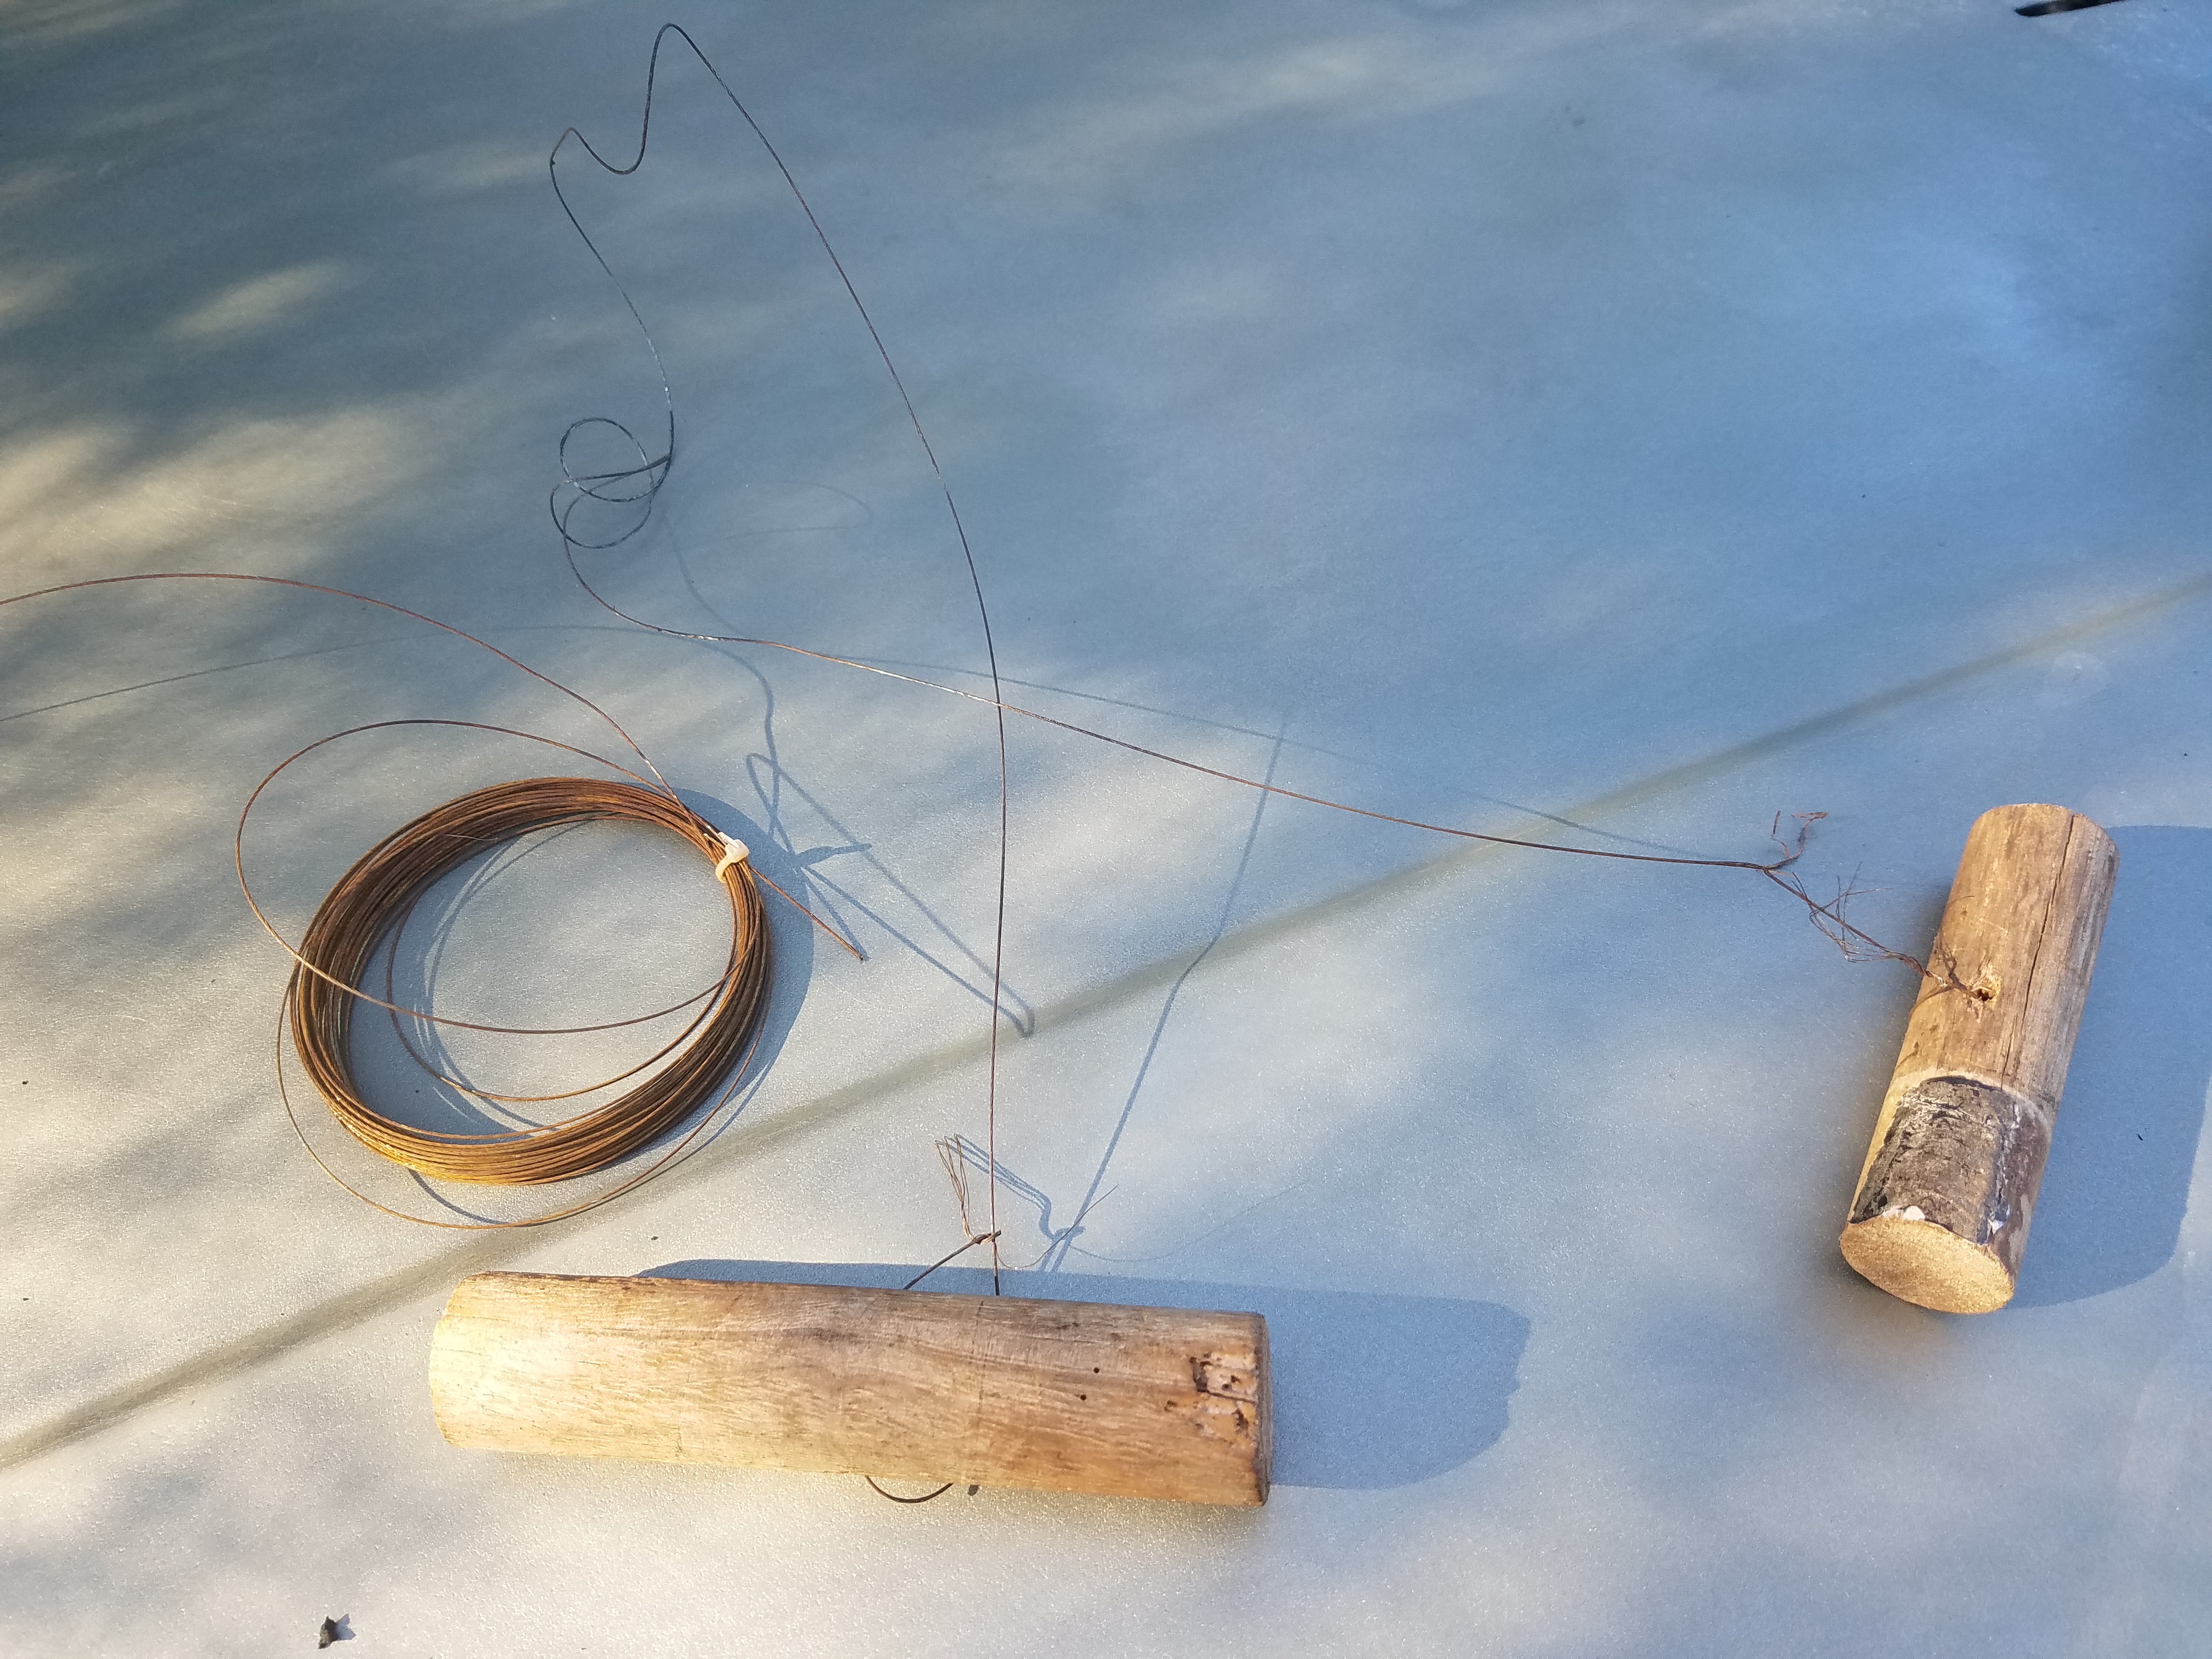
Second get a very thin braided wire, the thinner the better, plus two 5" handles cut from a broomstick.
Piano wire or a guitar string works well, use the G string.
The thin wire will cut through the seal like butter, this is the fun part.
A thicker wire cuts like a 2x4 through a corn field, which will make you mad and then you'll break the windshield.
Third drill two starter holes, without touching the glass, which will be certain glass death.
Good hole locations are the middle of the windshield at the top and bottom edges from inside.
Use a 1-1.5 mm drill bit, parallel to the glass face and flush against the body metal.
Then slip the wire through the hole and saw back and forth pulling towards the outside.
The actual cutting should take less than 5 minutes per side.
It's a one person job, most of the work is removing the trim bits.
First throw the instructions and special tools you bought in the trash, they are dangerous.
Second get a very thin braided wire, the thinner the better, plus two 5" handles cut from a broomstick.
Piano wire or a guitar string works well, use the G string.
The thin wire will cut through the seal like butter, this is the fun part.
A thicker wire cuts like a 2x4 through a corn field, which will make you mad and then you'll break the windshield.
Third drill two starter holes, without touching the glass, which will be certain glass death.
Good hole locations are the middle of the windshield at the top and bottom edges from inside.
Use a 1-1.5 mm drill bit, parallel to the glass face and flush against the body metal.
Then slip the wire through the hole and saw back and forth pulling towards the outside.
The actual cutting should take less than 5 minutes per side.
It's a one person job, most of the work is removing the trim bits.

ancient wizard...
Joined: Sep 2014
Posts: 2,335
Likes: 262
From: Maryland
Subscribed here,Ray. Done all my own glass on my Ramcharger restoration. Front/Rear rubber gasketed. Large rear 1/4 windows glued in with urethane. Yep,broke replacement on 1st attempt. Ended up using Dodge oe gasket and windshield,better fit. In a 1/2 hr installed.
OE Dodge Windshield/gasket$760. One i broke w gasket $420. Upgraded rear hatch glass to defroster grid unit.Cost more than windshield. Again Dodge oe stuff. Ramcharger rear hatch is fibreglass.. Broke the original purposely as rubber had petrified and didn't want to break hatch on removal. Installing new was little stressful. Did it on 95 degree day,went right in. Sounds fibreglass makes pulling it in are unsettling.
Would like to do my own windshield removal/install. Glass remove/install quotes not too unreasonable,not sure about installer. Keeping oe windshield intact is desired,i want to seal/prime/paint windshield opening and slip old windshield back in hole for painting car and put new one in after paint.
Didja take any pics?

Full Member
Joined: Jun 2019
Posts: 65
Likes: 9
From: Tassie
You can buy the wire tool from ebay for around $10.
a few things to be aware of tho (i used to fit screens a long time ago), be real careful of the wire taking off the paint, and also chipping the edge of the screen, as this too can cause it to crack, remember, its laminated glass and does not like any uneven stress.
start at the top and sides, leave the bottom till last and be careful of the dash, its way easier with 2 ppl, one inside and one out.
we used to use a long knife for the bottom and use it to slice the seal from the glass, thats easier than actually trying to cut through the seal.
the cutout tool with the blade and handle are designed to slice the seal from the glass, it glides along the glass and when you have your technique right, its really easy, a lot of ppl struggle as they try to simply cut the seal itself!!
krem


You know how I feel about Chrysler products Mike, owner's beware.
My wife's Jeep Wrangler is the only Chrysler product I'll work on and I'm cursing from beginning to end with that one.
Unfortunately I didn't take pictures of the project as I did it but I'll post some after stuff here.
Krem is right on about the skills part, there's a bunch of ways to mess up your windshield, not to mention the finish and dash.
And none of the instruction sheets and youtube videos come close to telling you what you really need to know about removing a windshield without breaking it or wrecking your finish or interior.
That's why I made this post, hopefully the collective wisdom of us Rotor Heads will quickly exceed the entire information on the internet. Which it may have already done.
So I'm offering my experience with breaking windshields and how to avoid breaking them, others please add your wisdom.
Rule #1 - don't let anything metal touch the glass.
Here's how I know this, I think it's the cutting tool Krem is talking about and in the right hands I'm sure it works great.

But in my hands it breaks windshields really fast, that's how I broke my first FB windshield.
So if anyone wants one of these, that one's for sale for the price of a small flat rate box, send my a shipping address.
Rule #2 - use a really thin wire to cut through the urethane bonding the glass to the body, a wire that can't possible damage the glass.
I figured this out after I used a heavy wire on the second FB windshield. Which I also broke.
It cut like a 2x4 through a corn field and after "sawing" for a half hour and getting no where but sore arms, I got frustrated and managed to contact the glass and break it.
So again, don't let anything metal touch the glass unless it's a really thin wire.
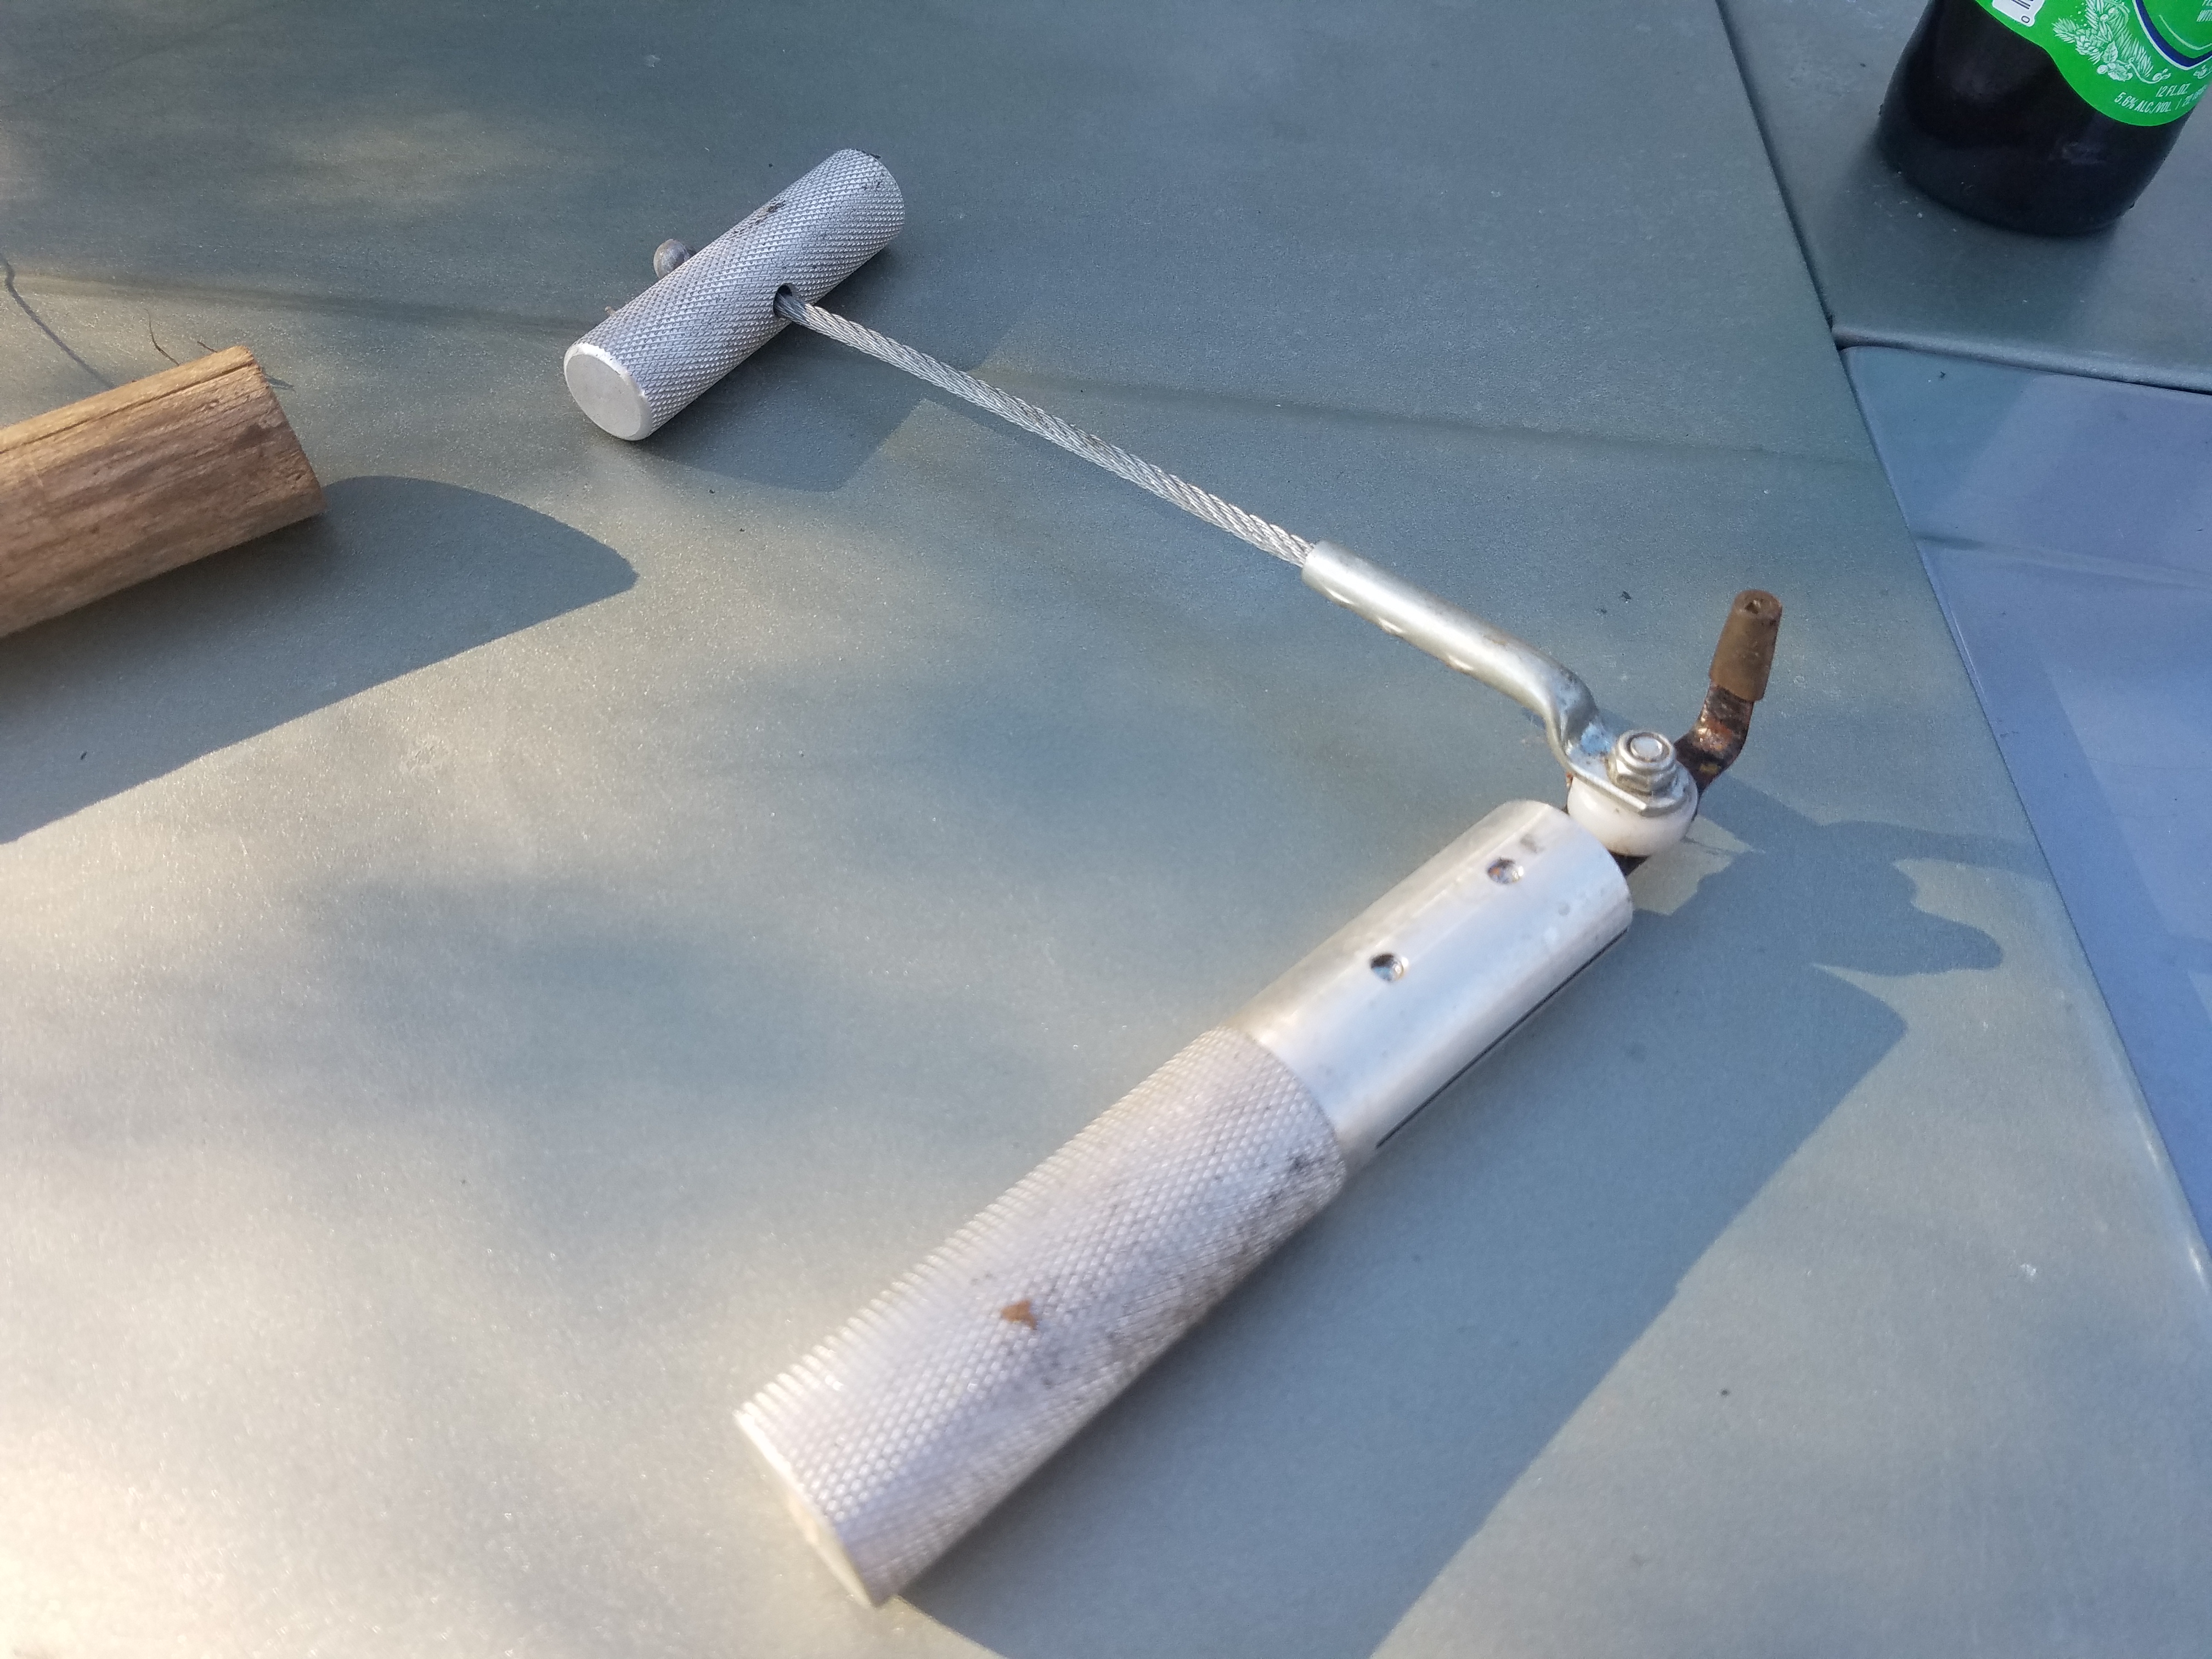
So for my third attempt I went with a thin cutting wire, which I found in my shed. Here's my tool I made:
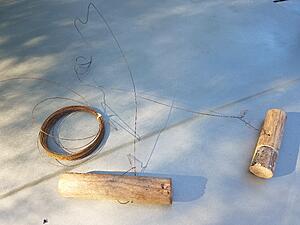
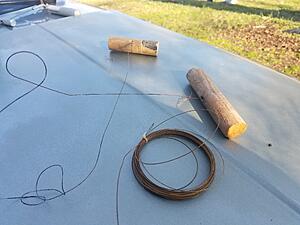
Like I said above, it worked great, a totally satisfying experience.
And then when Krem mentioned you can get something similar on ebay for $10 I remembered that's exactly what I did.
Except when it arrived from China a month later I took one look at it, figured it was useless Chinese junk, threw away the handles and hung the wire in the shed.
Which is the wire I used two years later. So yeah, I now highly recommend this tool:
https://www.ebay.com/itm/Car-Windshi...IAAOSwm8Zd7j1W
So now I'm confident I can remove an FB windshield in less than an hour without a break or scratch.
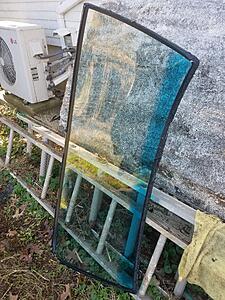
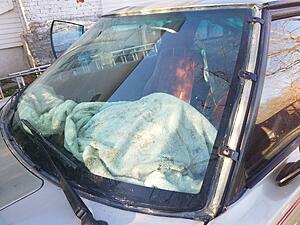
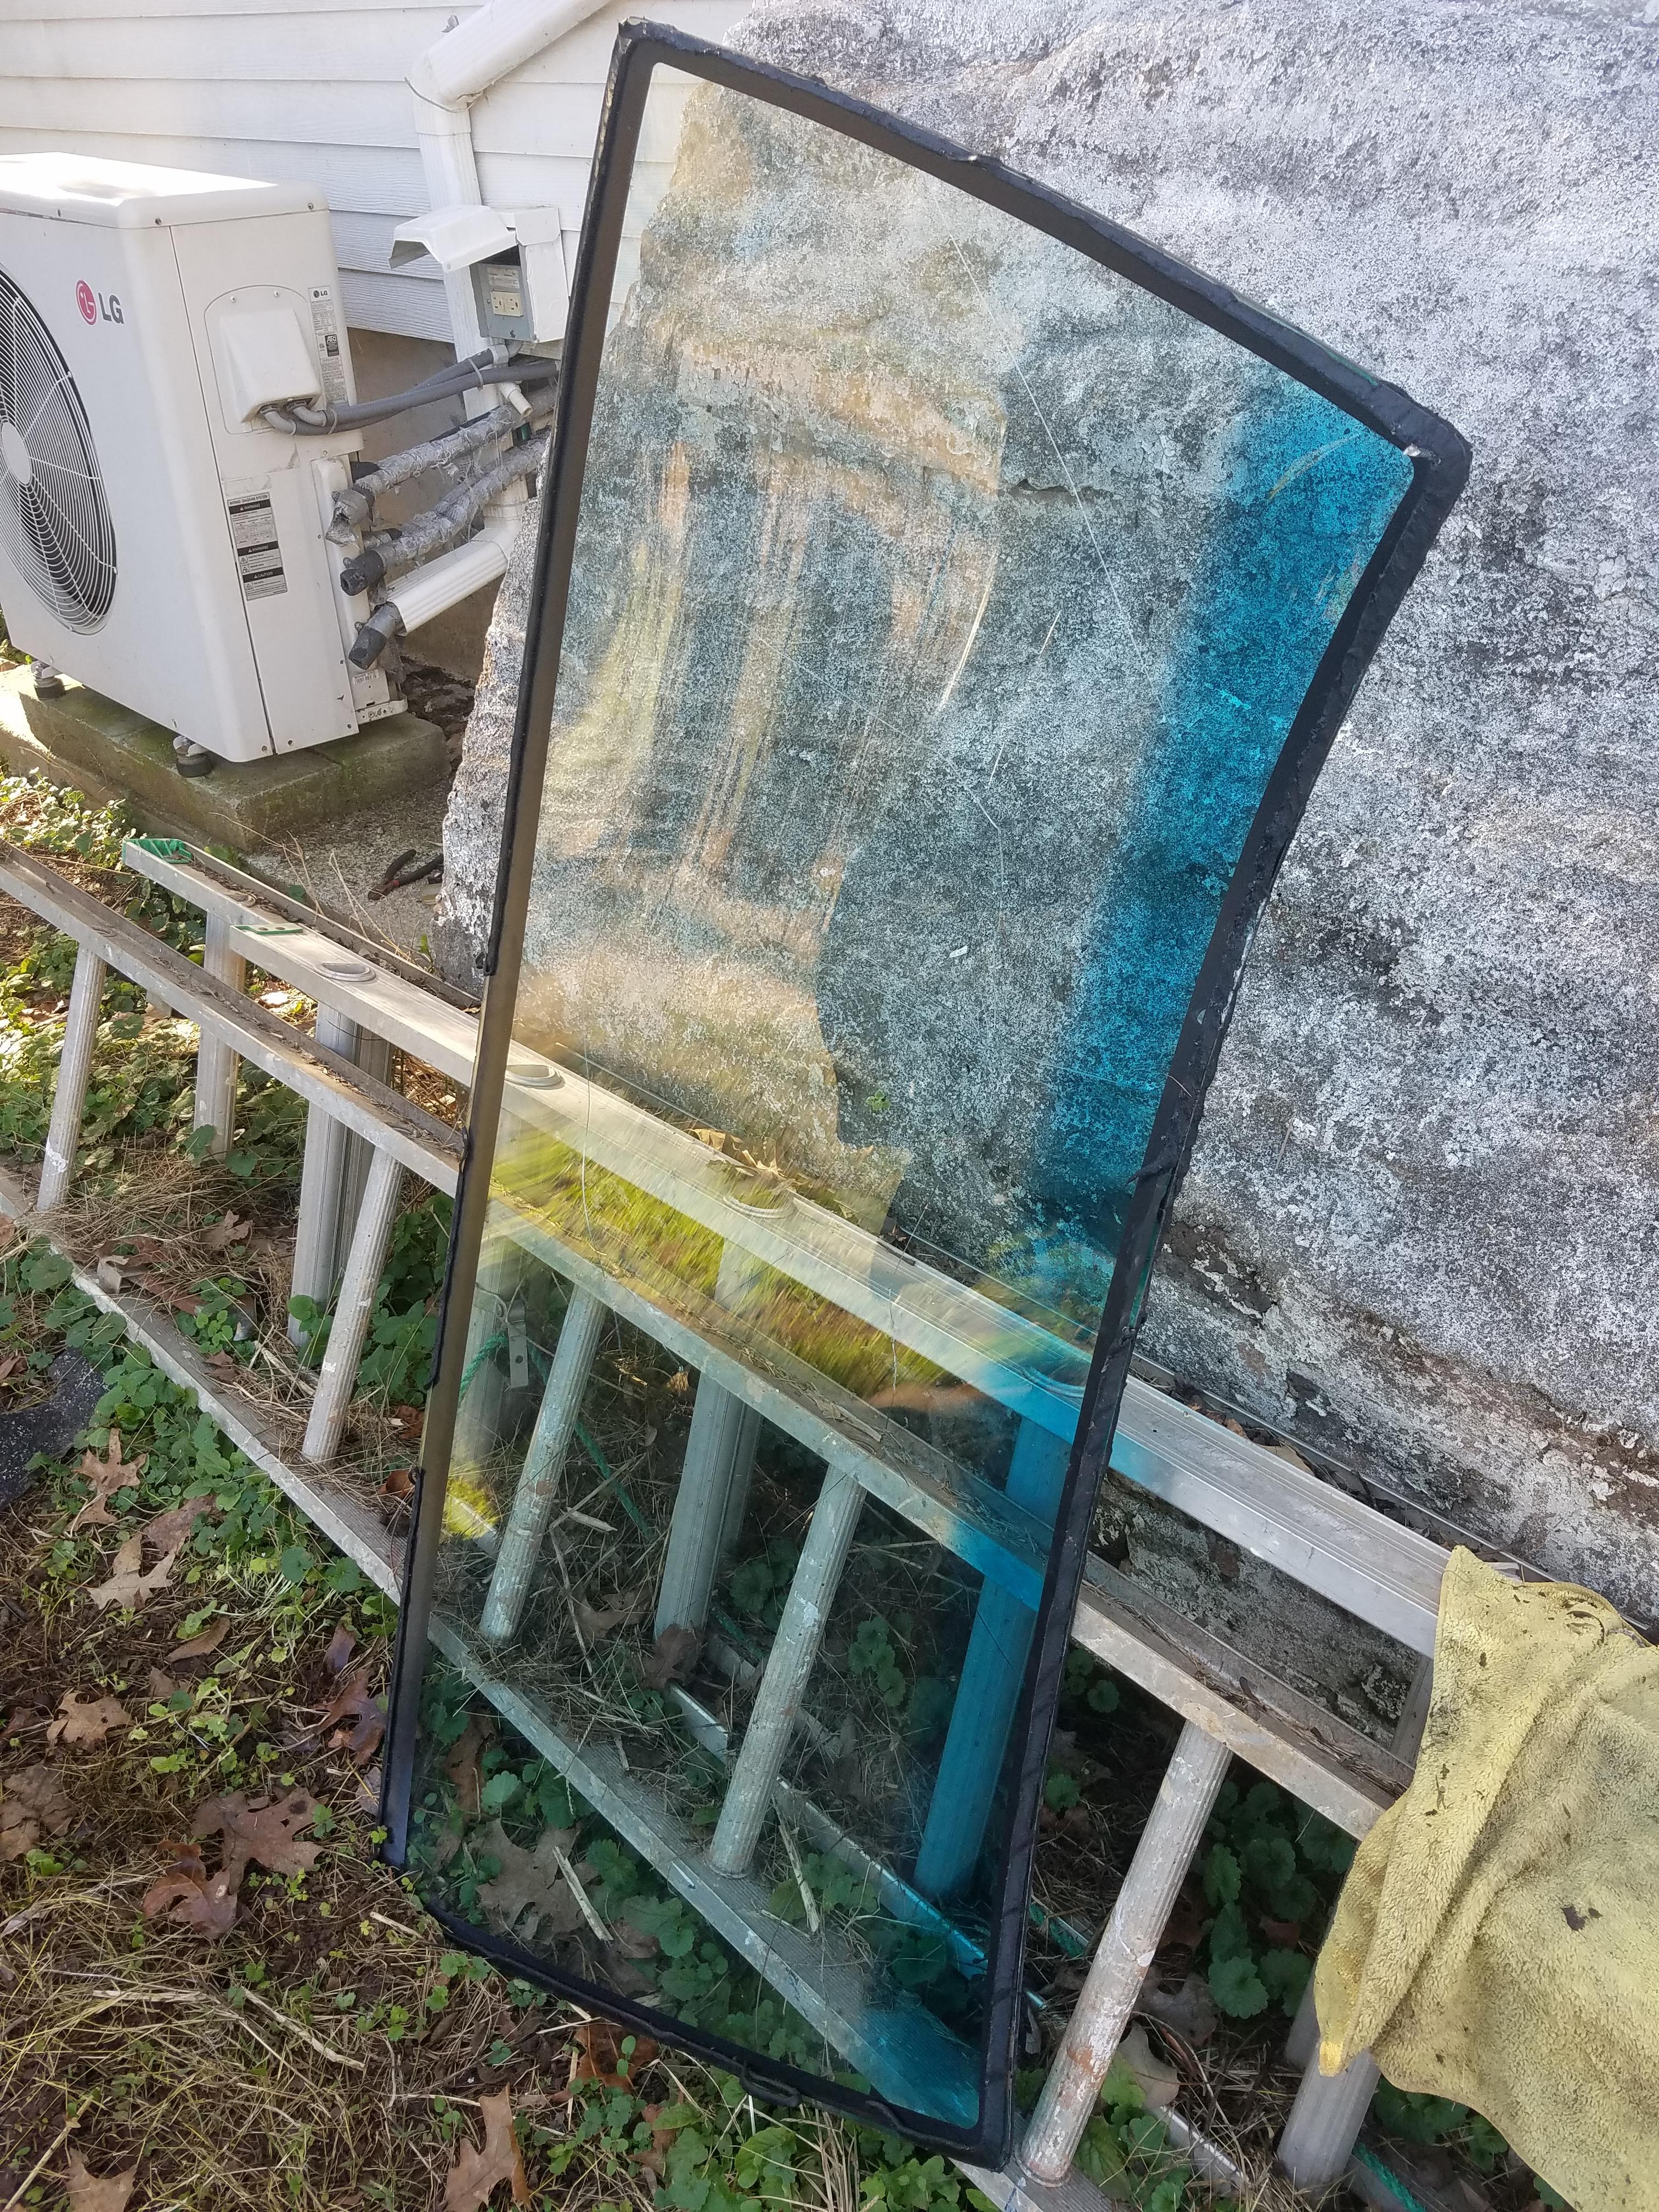
Here's the "practice unit" I removed, it was already cracked, a walnut fell on it, but it came out without any additional damage:
For installation of the new shield I combined FSM instructions with instructions from the Window-Weld ribbon sealer I bought on amazon:
The FSM called for sealing around the ribbon sealer (which the FSM calls a "dam") with adhesive silicone, so I got some of this:
Except amazon sent the clear stuff, which still worked great.
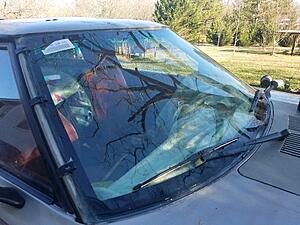
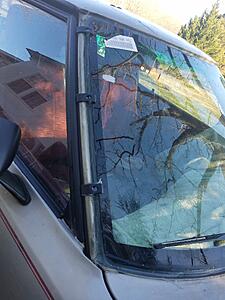
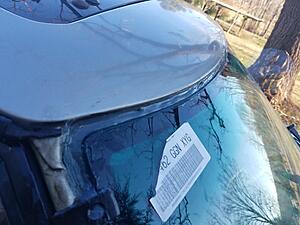
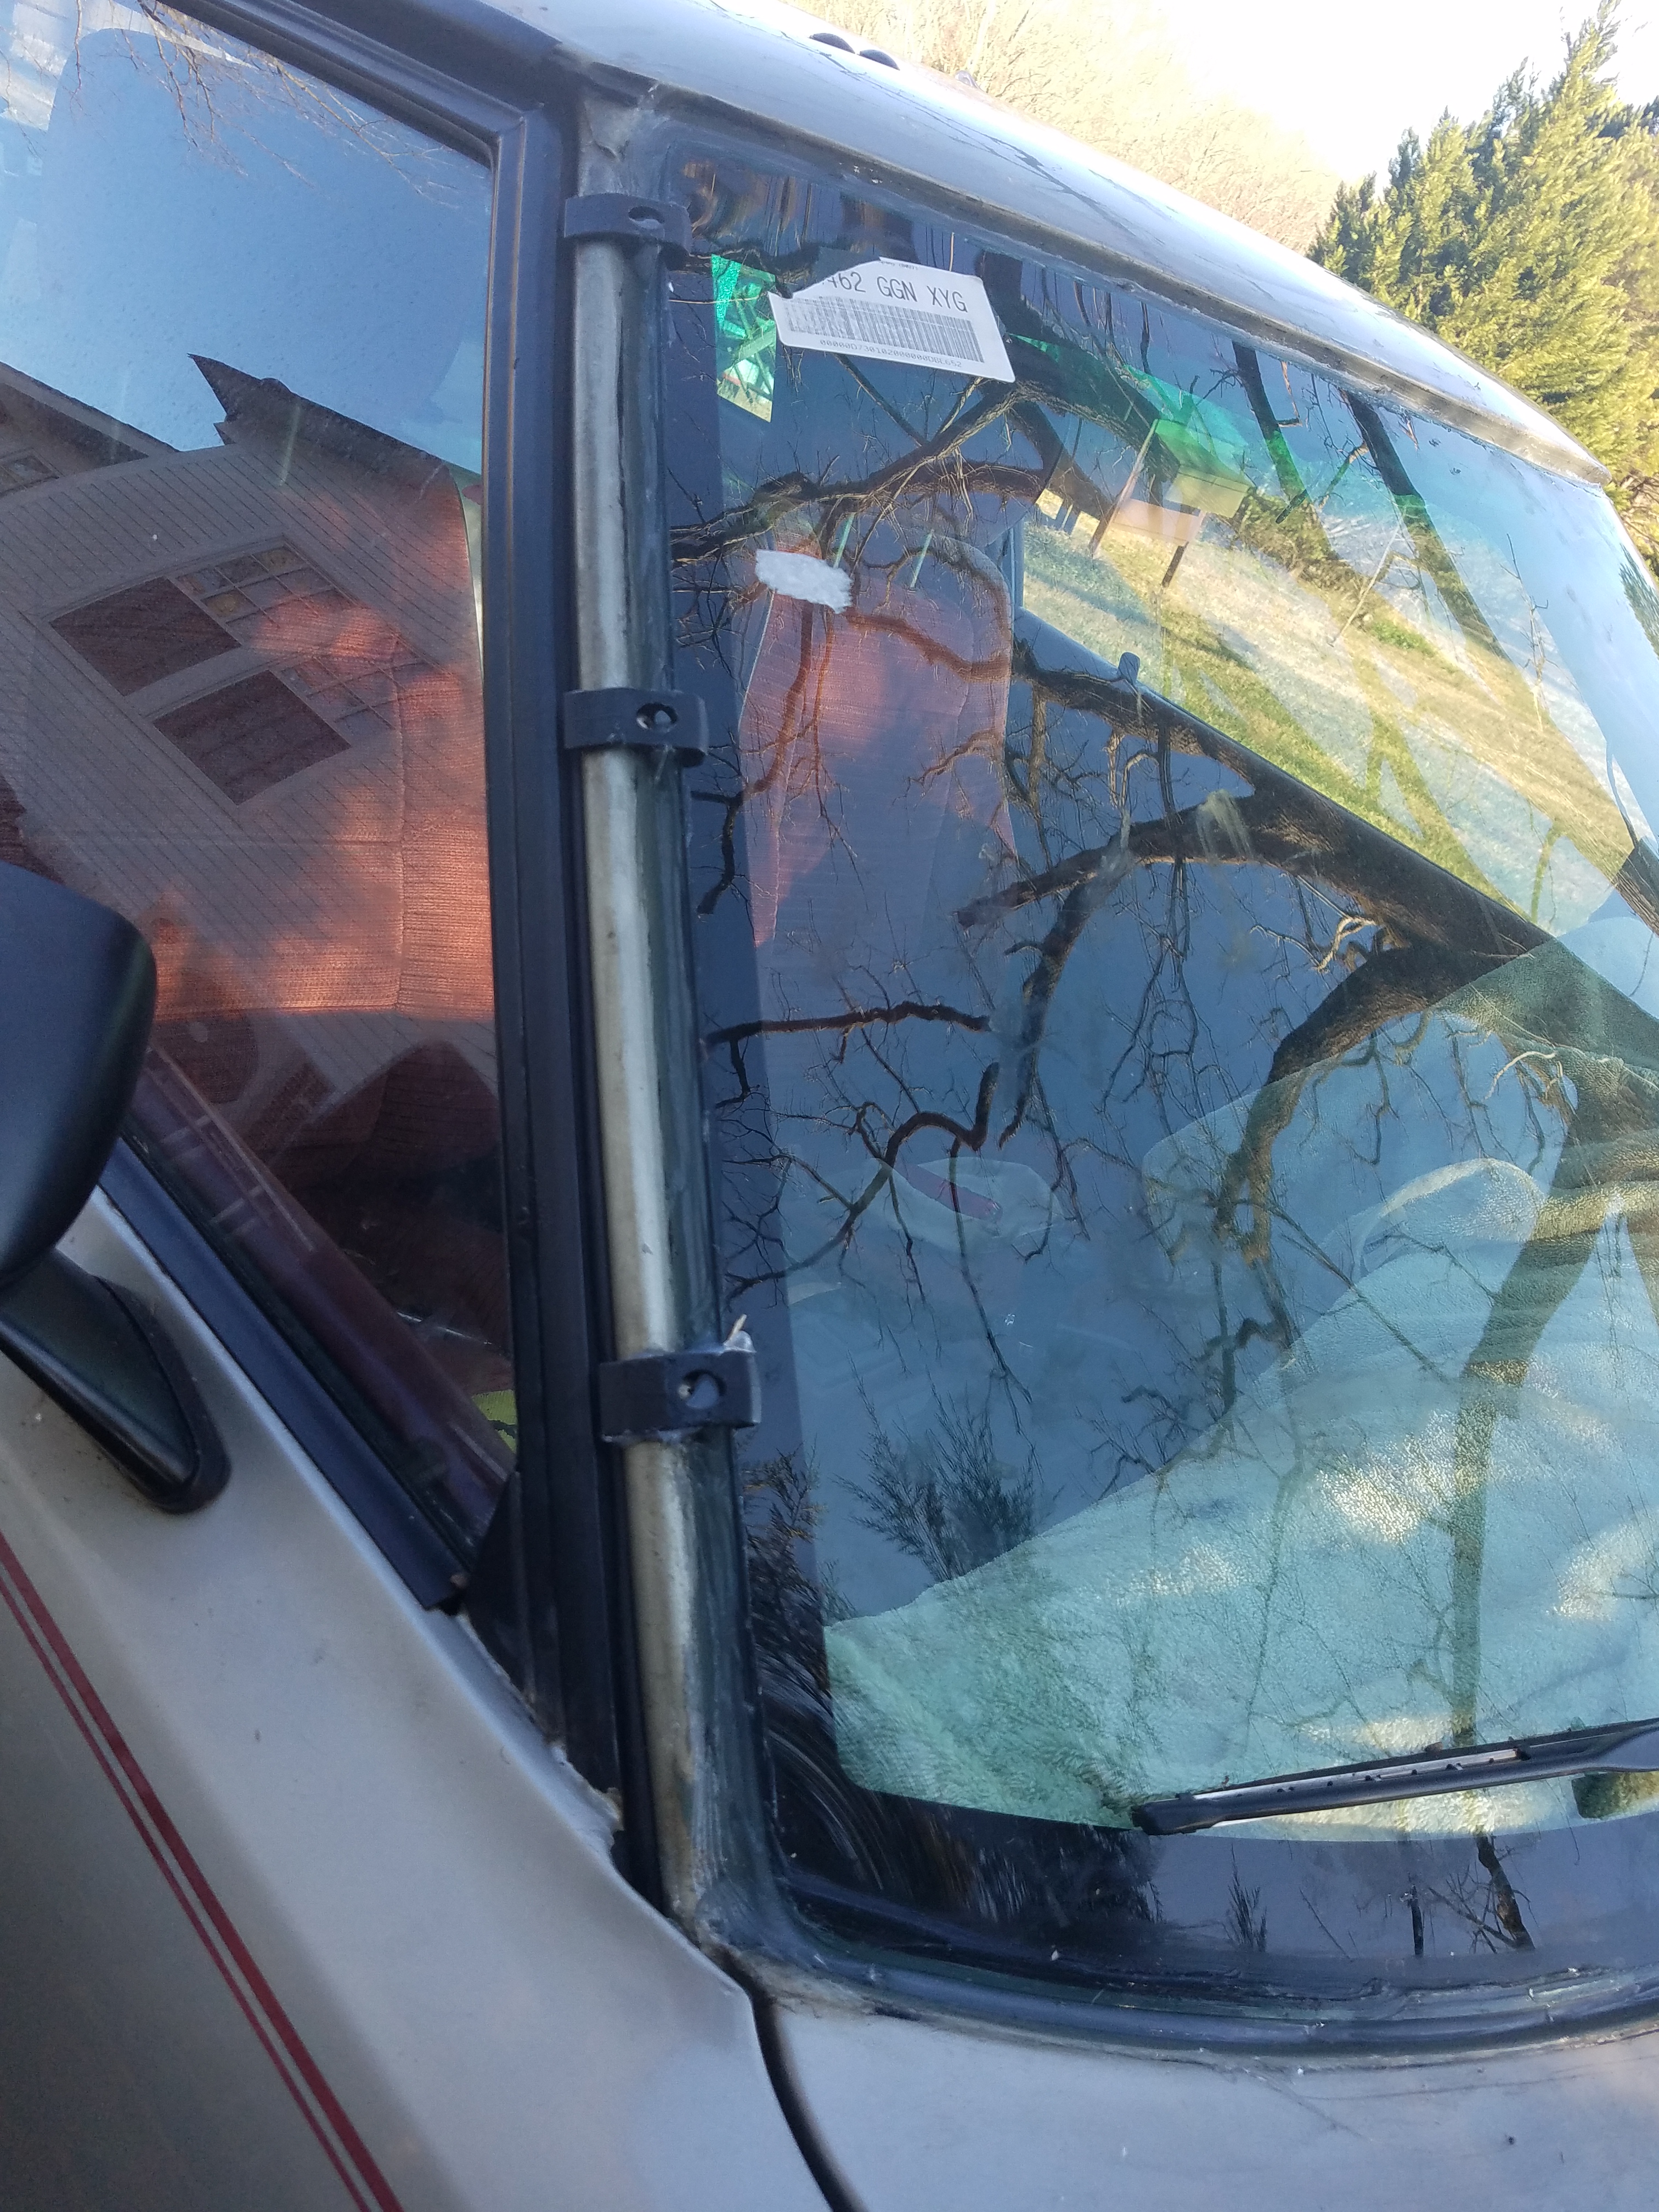
Here's some pics of the installation, rain tested and ready to go, waiting for the freshly refinished black trim to be installed:
My wife's Jeep Wrangler is the only Chrysler product I'll work on and I'm cursing from beginning to end with that one.
Unfortunately I didn't take pictures of the project as I did it but I'll post some after stuff here.
Krem is right on about the skills part, there's a bunch of ways to mess up your windshield, not to mention the finish and dash.
And none of the instruction sheets and youtube videos come close to telling you what you really need to know about removing a windshield without breaking it or wrecking your finish or interior.
That's why I made this post, hopefully the collective wisdom of us Rotor Heads will quickly exceed the entire information on the internet. Which it may have already done.
So I'm offering my experience with breaking windshields and how to avoid breaking them, others please add your wisdom.
Rule #1 - don't let anything metal touch the glass.
Here's how I know this, I think it's the cutting tool Krem is talking about and in the right hands I'm sure it works great.
But in my hands it breaks windshields really fast, that's how I broke my first FB windshield.
So if anyone wants one of these, that one's for sale for the price of a small flat rate box, send my a shipping address.
Rule #2 - use a really thin wire to cut through the urethane bonding the glass to the body, a wire that can't possible damage the glass.
I figured this out after I used a heavy wire on the second FB windshield. Which I also broke.
It cut like a 2x4 through a corn field and after "sawing" for a half hour and getting no where but sore arms, I got frustrated and managed to contact the glass and break it.
So again, don't let anything metal touch the glass unless it's a really thin wire.
So for my third attempt I went with a thin cutting wire, which I found in my shed. Here's my tool I made:

Like I said above, it worked great, a totally satisfying experience.
And then when Krem mentioned you can get something similar on ebay for $10 I remembered that's exactly what I did.
Except when it arrived from China a month later I took one look at it, figured it was useless Chinese junk, threw away the handles and hung the wire in the shed.
Which is the wire I used two years later. So yeah, I now highly recommend this tool:
https://www.ebay.com/itm/Car-Windshi...IAAOSwm8Zd7j1W
So now I'm confident I can remove an FB windshield in less than an hour without a break or scratch.
Here's the "practice unit" I removed, it was already cracked, a walnut fell on it, but it came out without any additional damage:
For installation of the new shield I combined FSM instructions with instructions from the Window-Weld ribbon sealer I bought on amazon:
The FSM called for sealing around the ribbon sealer (which the FSM calls a "dam") with adhesive silicone, so I got some of this:
Except amazon sent the clear stuff, which still worked great.
Here's some pics of the installation, rain tested and ready to go, waiting for the freshly refinished black trim to be installed:


Last edited by ray green; Dec 19, 2019 at 03:26 PM.
ancient wizard...
Joined: Sep 2014
Posts: 2,335
Likes: 262
From: Maryland
Ray,it was the aftermarket windshield gasket that caused me to break the windshield.
Once I got the oem Dodge gasket I could see the difference. Oem Dodge windshield and gasket went in much easier and faster than what I started with-why I didn�t bother with aftermarket rear hatch glass and gasket.
Same with sheet metal,bought and returned fender and 1/4 panels,would have taken huge amount of labor to make those pieces fit right.
Good relations with a body shop I helped fix electrical/mechanical problems in hard hits as a side job. Got fender,1/4 panels thru them at their cost at Dodge Dealer. Still a big chunk of change. Ever see size of 1/4 panels on a Ramcharger? Lotta real estate. Got all my trim,emblems,weatherstrips,door window gaskets and seals from Dodge too. All looked like originals did when installed-1st time.
What did metal look like in windshield frame,any rust? What did you use to clean off old sealant?
Last edited by GSLSEforme; Dec 19, 2019 at 05:05 PM.
Dodge, you've gotta love 'em.
The windshield frame on the LE was in good shape, it's a mostly garage kept 83.
I can imagine some rust issues on other FBs however, must be depressing.
To prep the frame I removed the remnants of the old sealant with a utility knife and some fingernail action.
Then I wire brushed the frame, hit it with some 300 wet sand followed by an isopropanol wash.
Last a coat of auto primer, it looked as clean as a baby's butt. Which I wiped with an isopropanol soaked rag.
Then I seated the window-weld ribbon to the windshield frame and cleaned the glass with some isopropanol.
Next, with the help of wife Cathy, we positioned the windshield. This was the only two person part of the job.
Finally I added a liberal bead of the adhesive silicone all around the outside, according to the FSM.
It's a seal on steroids, I wouldn't want to be a raindrop trying to get in.
I didn't use the fancy 3 MM Window-Weld Primer they call for in the Window-Weld instructions.
It costs $25-30 for an 8 oz bottle and I didn't have any, sounds like the usual marketing ploy to me.
Trending Topics
ancient wizard...
Joined: Sep 2014
Posts: 2,335
Likes: 262
From: Maryland
There is a cutoff year with Dodge products regarding quality on their trucks. 2nd gen 81-93 built like tanks. Changed with 94 model year and went downhill from there-all their products,Cars,Jeeps,Trucks. When it comes to aftermarket parts for 2nd gen Dodge trucks there is nowhere near as much support for them like you find for Chevy,Ford trucks of same vintage. Owned a couple Dodge trucks of this era, Big Block Gtx,Roadrunner. Dodges,old ones,i love em. I will never buy another truck new or otherwise. This one will last the rest of my life.
Re: windshield adhesive. Curious to how thick sealant is on your install. I've seen a couple 1st gens that windshield trim doesn't fit properly when too thick an amount of sealer used on windshield.
Re: windshield adhesive. Curious to how thick sealant is on your install. I've seen a couple 1st gens that windshield trim doesn't fit properly when too thick an amount of sealer used on windshield.
On the sealant thickness, the FSM calls for 8 mm.
The Windo-Weld ribbon I used was 9.5 mm diameter, made of a sticky pliable polybutylene compound that stuck nicely to the window frame.
Then with the window in place it compressed to the specified 8 mm and was held firmly in place by the six plastic clips running up the windshield side pillars.
This left a gap around the outer edge of the ribbon sealer of 3-4 mm which I sealed up with the adhesive silicone sealer, filling all the space between the windshield and the body frame.
So in essence it's a double seal, the Windo-Weld ribbon, which according to their packaging is sufficient, and an outer seal of adhesive silicone, which is specified by the FSM to seal behind the "dam", whatever that is.
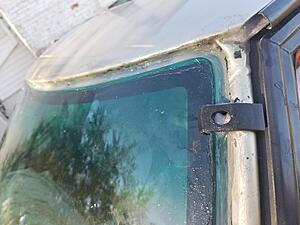
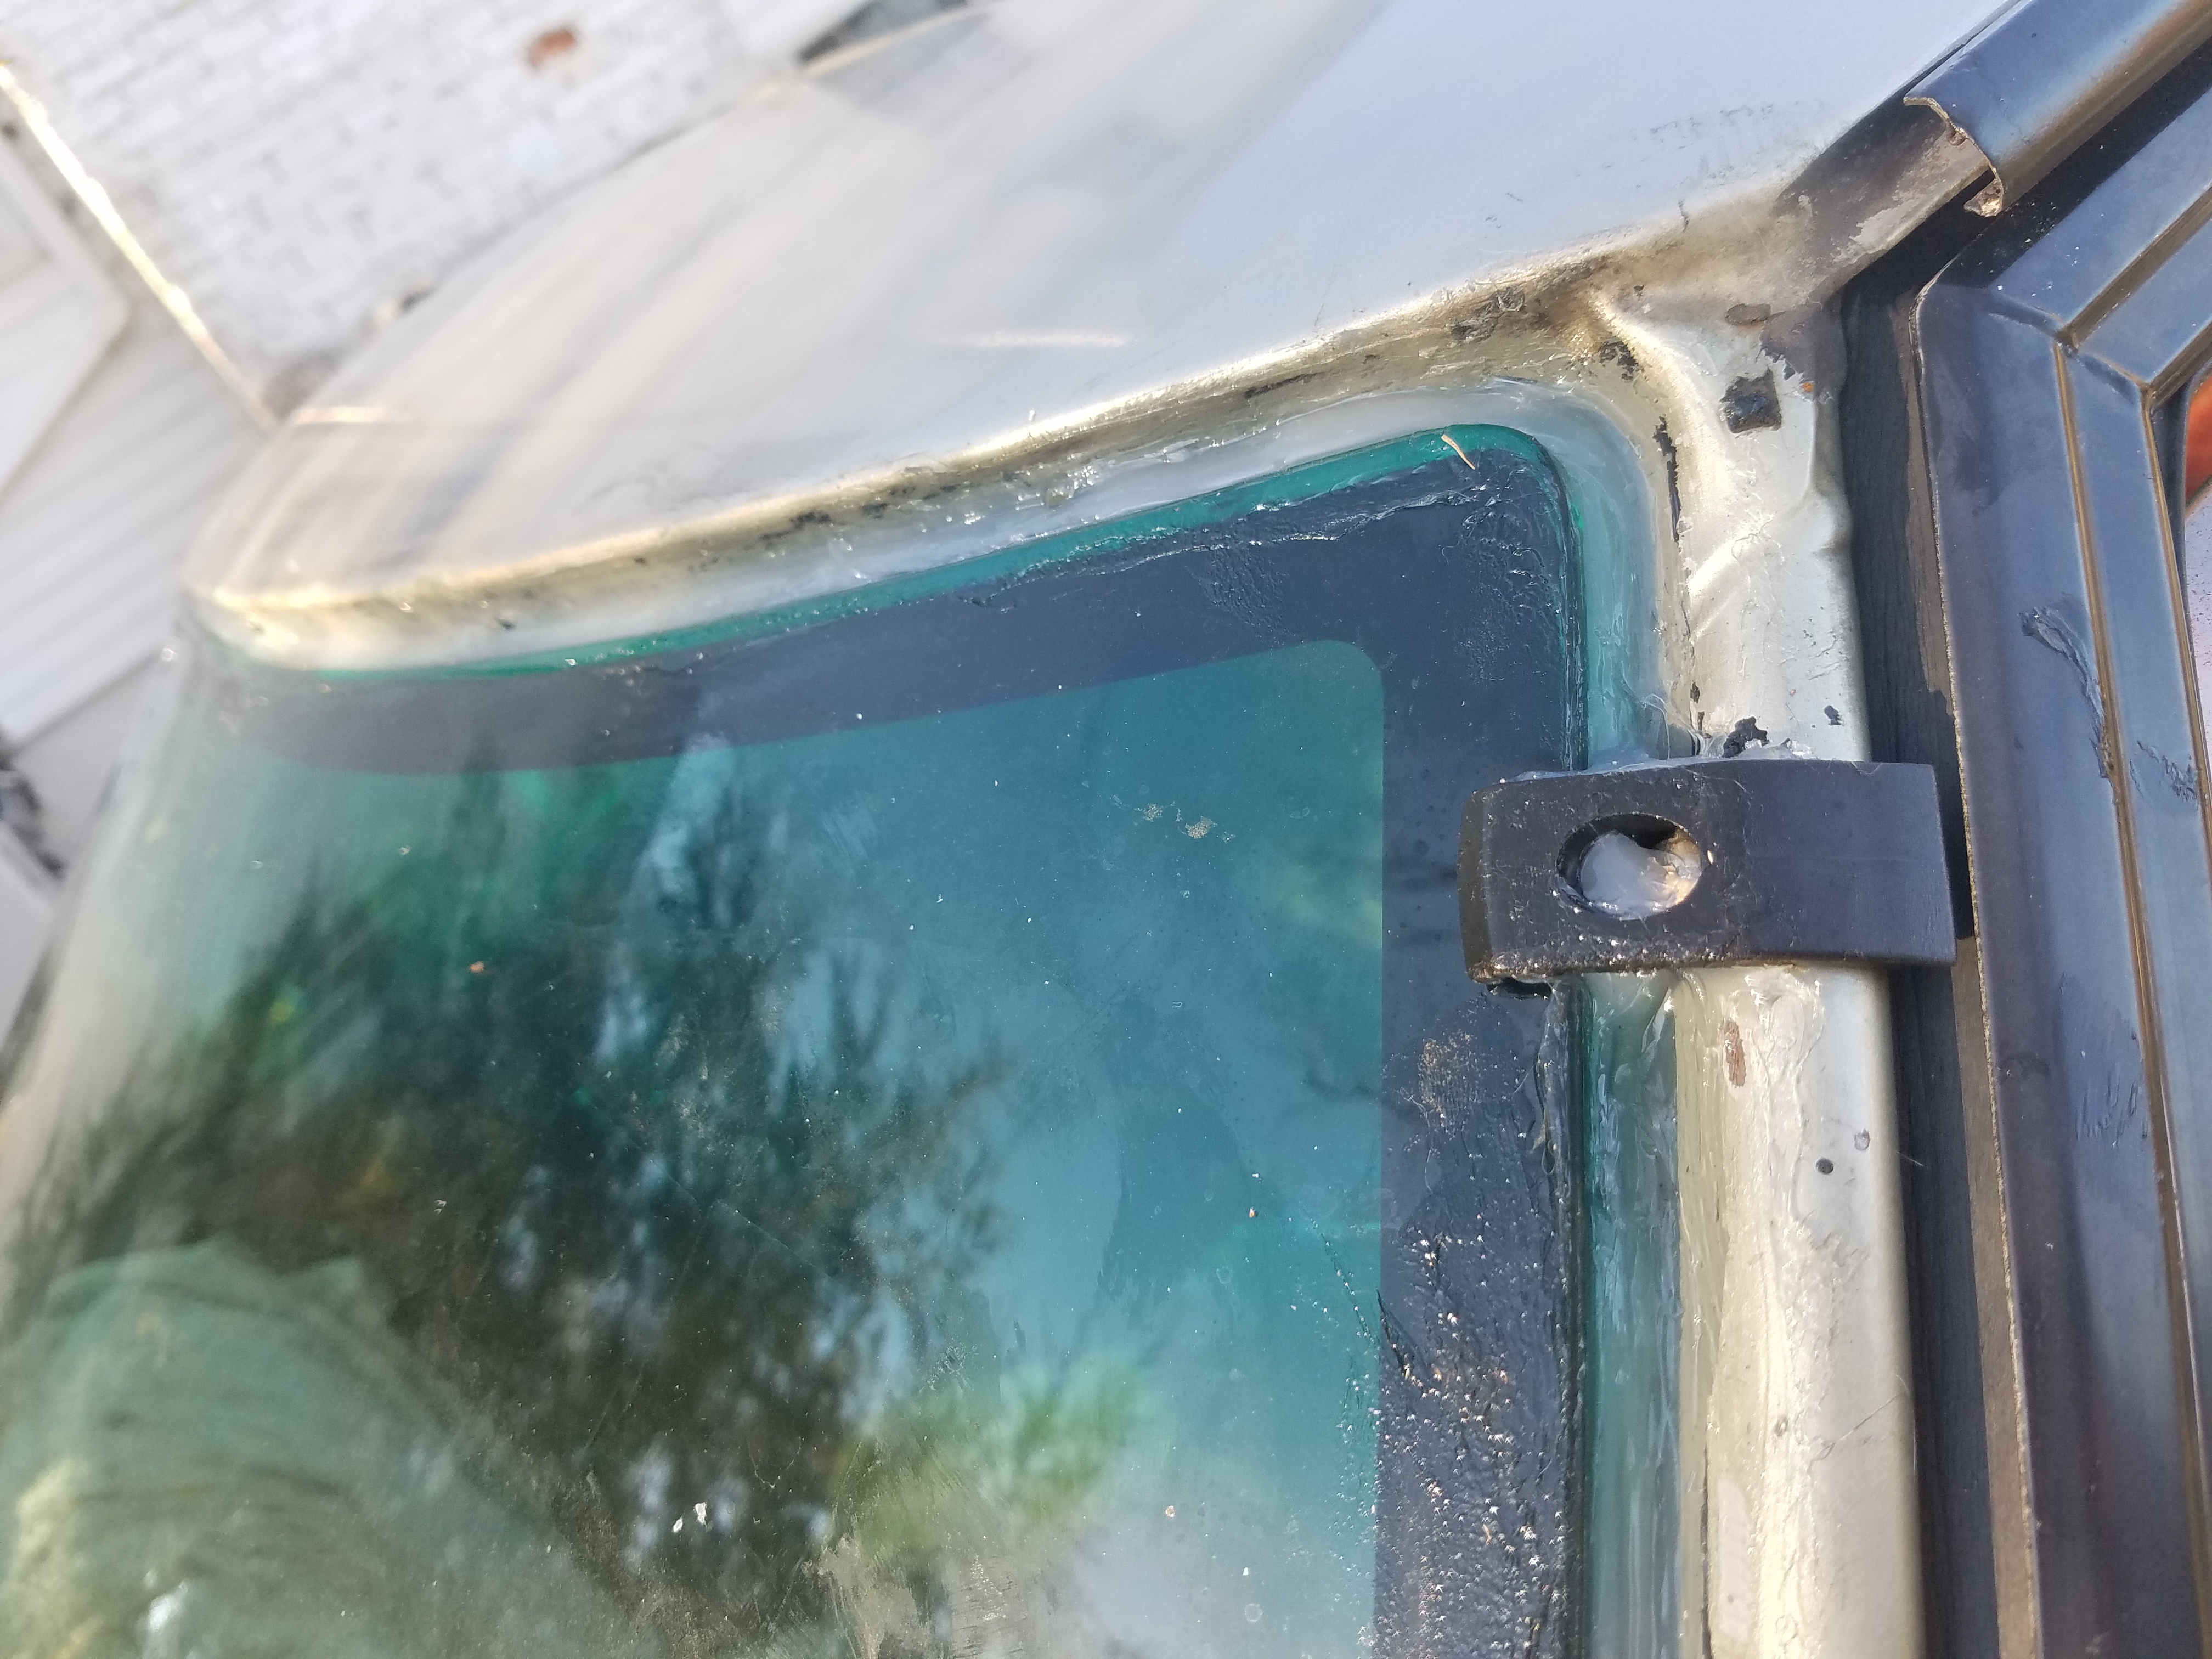
This picture shows it best, although you don't see the ribbon sealer hidden behind the silicone.

The Windo-Weld ribbon I used was 9.5 mm diameter, made of a sticky pliable polybutylene compound that stuck nicely to the window frame.
Then with the window in place it compressed to the specified 8 mm and was held firmly in place by the six plastic clips running up the windshield side pillars.
This left a gap around the outer edge of the ribbon sealer of 3-4 mm which I sealed up with the adhesive silicone sealer, filling all the space between the windshield and the body frame.
So in essence it's a double seal, the Windo-Weld ribbon, which according to their packaging is sufficient, and an outer seal of adhesive silicone, which is specified by the FSM to seal behind the "dam", whatever that is.
This picture shows it best, although you don't see the ribbon sealer hidden behind the silicone.

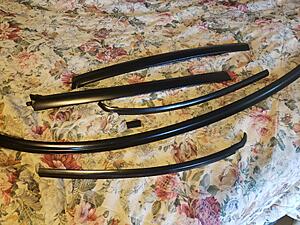
Not yet, I want to put some miles on it before mounting the trim to be 110% sure there are no issues.
The trim mounting tabs are a one way street, once the trim is on you can't remove it without breaking the mounting tabs.
But I do have the trim all painted up pretty and ready to go:
The trim mounting tabs are a one way street, once the trim is on you can't remove it without breaking the mounting tabs.
But I do have the trim all painted up pretty and ready to go:


Thread
Thread Starter
Forum
Replies
Last Post