What did you do to your FB today?
 03-19-13, 07:55 AM
#2451
 03-19-13, 10:07 AM
#2452
Last night I assembled the newly painted shift boot surround and painted the center console trim. Too tacky to move and take photos of that so it will wait. This turned out really well. A little armor all on the shift boot and good to go!
03-19-13, 11:13 AM
#2454
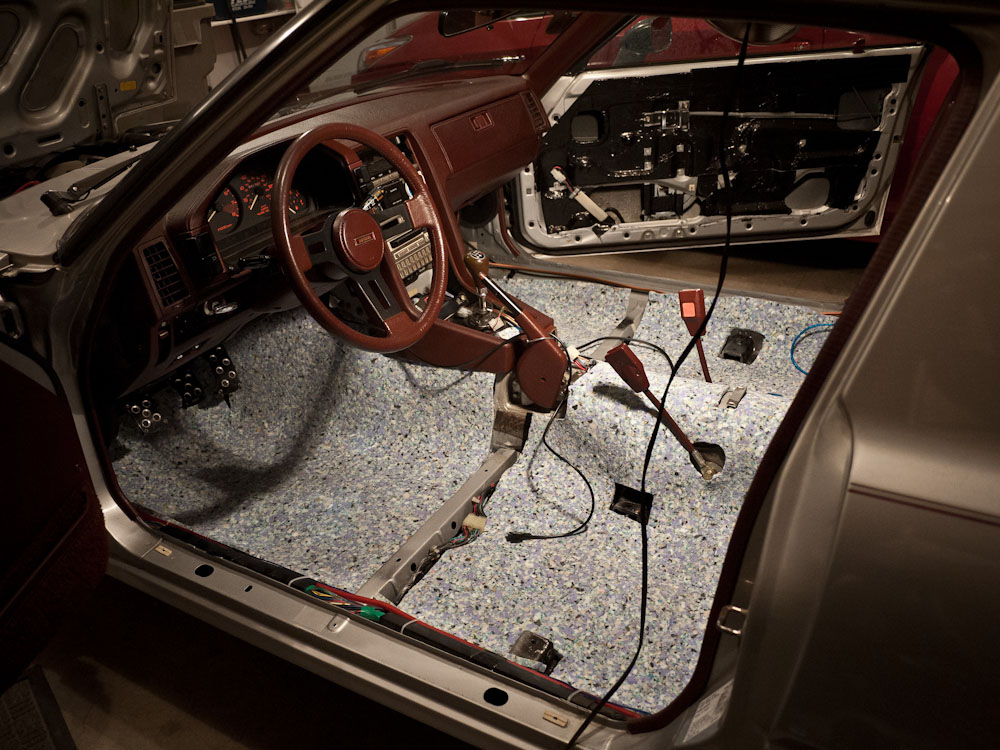
 on that note, here are some more pics of the interior restoration:
---
Door cards before resto - and back-side of rear wheel cover to compare to stock color:

Here they are, restored

For comparison - the indentation part with the holes is the factory OEM color - i did not paint this part - only the visible parts surrounding it. if you look reaaaaly close under juuust the right light you can see that the factory color is a slight red-shift hue

Now that everything else is done - I can come up with no further excuses and its now time to cut fresh carpet liner and re-install carpets:

 03-19-13, 09:13 PM
#2458
Ready or not...
Join Date: Dec 2009
Location: Taos, NM
Posts: 261
Likes: 0
Received 0 Likes
on
0 Posts
 03-19-13, 10:20 PM
#2461
For my shift boot surround all I ended up doing was wiping it down with 91% isopropyl alcohol to remove grease and wax and then sprayed it with 4 light coats and let dry 24 hours. The ashtray was worse and I scuffed it with a foam sanding block and then a scotchbright pad and then wiped it down with Alcohol. I over did the paint on it though and came close to having runs. I put the center console bits back on this evening and I am fitting the carbon panel to cover the opening under the stereo. I need a warm day to run the wires before I will put it back in the car but I need a couple more days to let all the paint smell go away anyhow.
03-19-13, 10:29 PM
#2462
Rust-oleum 249130 Satin Nickel Metallic.
There are 6 colors in this line, one lighter and two darker. I think the next darker one would probably work as well. The color is called Dark Steel. They also have a Copper and Gold version.
I got mine at Lowes. It looks like Home Depot carries it and I found it easily on Amazon for those who like ordering online.
It covers really well, I only put three mist coats on the center trim itself. I think I am like a lot of people that I find it difficult to restrain myself when spray painting. If I did a couple more pieces I would probably end up doing just 2 light mist coats and it would look better.
03-19-13, 10:37 PM
#2463
Senior Member
iTrader: (2)
Join Date: Nov 2007
Location: Augusta, Ga.
Posts: 356
Likes: 0
Received 0 Likes
on
0 Posts
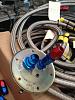
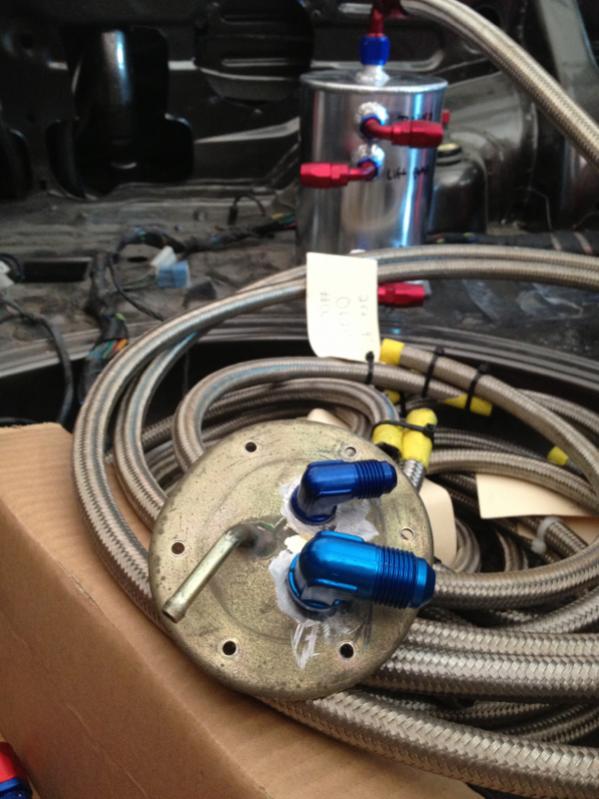
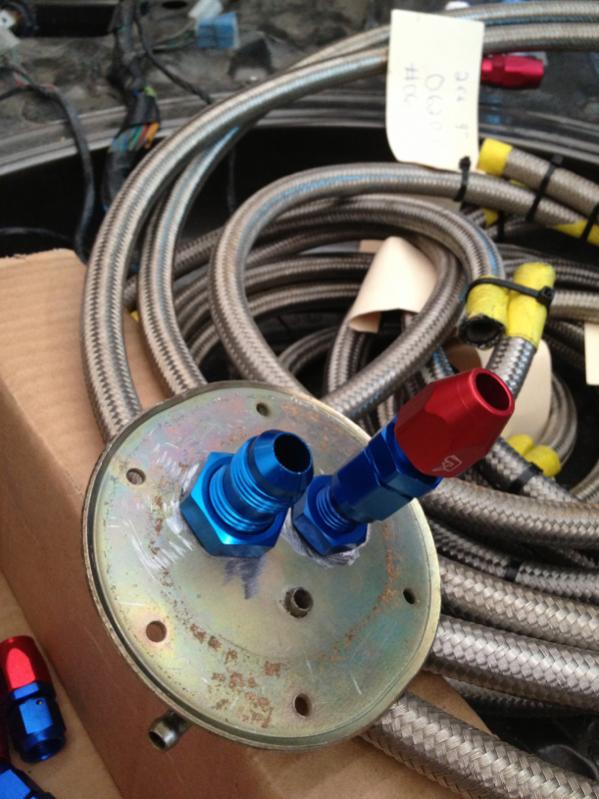
I made a little progress on the upgraded fuel system. Now its time to gouge my hands, making these braided lines and add some blood in with the sweat and tears!

 03-19-13, 10:44 PM
#2464
I thought I was making progress on my way from 2gdfis to tfidfis. Wired in a GM 4 pin to replace the 109, and was running on trailing alone. Swapped wires around, no help. I think my ground is good but that's what I'll approach tomorrow, weather permitting.
Last edited by Cookboy; 03-19-13 at 10:48 PM. Reason: Big thumbs, tiny phone.
03-20-13, 10:07 AM
#2466
Also, remember that the gasket faces on the rotor housings are just soft aluminum. You don't want to make them non-flat or get gouges in one by too much scraping.
03-20-13, 11:47 AM
#2467
Ummm where to start, so after topping off all the fluids I found out that my car leaked from absolutely everywhere. From the oil pan, the tranny, the diff, a fuel line, and a heater hose.
After I got those all those fixed I tried to start the car and the battery died after turning the motor over three or four time. I was a little bitter that I had to go out and bu a new battery but this one was about 12 years old so it did last quite a while.
Once I installed the battery it started on the 3rd try but now I have a new problem I cant get the car to idle. I recently did the rats nest removal and I followed the tutorial posted by Rx7Carl and I also installed a new fuel pressure regulator.
I cant get the car under 2500rpm with out it wanting to die also looking through both of the sight glasses both fuel bowls are almost filled to the top. Does anyone know if these are these symptom of the fuel pressure being to high or a large vacuum leak???
03-20-13, 05:33 PM
#2468
Fuel pressure too high will flood the engine; it will either choke out, run horribly rich (fouling plugs) or simply not run.
High idle is generally a symptom of a vacuum leak - - especially when it happens right after making several modifications to the vacuum system, which is in reality what a rat's nest removal is.
High idle is generally a symptom of a vacuum leak - - especially when it happens right after making several modifications to the vacuum system, which is in reality what a rat's nest removal is.
03-20-13, 07:06 PM
#2469
There are gasket stripper sprays and gels available (CRC, Loctite, Permatex, others) that softens old gaskets and makes them easier to remove. I'd be cautious with it around the seams between housings and irons, though - wouldn't want it to wick in & reach the water seals.
Also, remember that the gasket faces on the rotor housings are just soft aluminum. You don't want to make them non-flat or get gouges in one by too much scraping.
03-21-13, 10:18 AM
#2471
Oh, and the "fuel bowls nearly to the top" probably means your floats need adjusting. Should be mid-window within the index line. A finicky and frustrating job to do, but without proper float levels nothing else much is going to go right with mixture adjustments.
03-21-13, 10:32 AM
#2472
Since she's my daily for the time being, I can only do little things with her now. But this little thing was a big win. I got a new set of OEM door weatherstripping in the mail yesterday, so I installed the driver's door side. It was a real PITA to get those little clips out of the door, but with patience and a little swearing, I got them all out. The new stripping popped right in.
Took her to work this morning and am glad to report that it no longer sounds like the wind is going to rip the windows off the regulators
fm
Took her to work this morning and am glad to report that it no longer sounds like the wind is going to rip the windows off the regulators
fm
03-21-13, 01:25 PM
#2474

fm
03-21-13, 02:18 PM
#2475
Yes, that is what I ended up doing. Getting needle-nose pliers on those little buggers was still a PITA, but I survived. It didn't help that I was out in the garage after midnight. Only to check out the weatherstripping, but not intending to swap it. I tugged at the weatherstripping, popped it off the t-clip and was committed. Spent the next 20 minutes in my jammies with a screw driver, pliers, and a bad attitude pulling that weatherstripping off.
fm