What did you do to your FB today?

 03-12-13, 07:26 PM
#2402
Best I can do with my rudimentary knowledge of this modern internet thing:
Check out this video on Telly - Telly Video
Check out this video on Telly - Telly Video
I hope it works. And you're using a powerful 5.1 sound system.
Check out this video on Telly - Telly Video
Check out this video on Telly - Telly Video
I hope it works. And you're using a powerful 5.1 sound system.
03-12-13, 07:31 PM
#2403
I continued this afternoon my radical tank cleaning method of a new fuel filter every 300 miles. I think it's working. Only 1/3 full of sludge this time. This is No. 4 since I bought her last summer. And the acceleration is so nice. Like a kid with a fresh diaper.
03-12-13, 08:08 PM
#2404

Best I can do with my rudimentary knowledge of this modern internet thing:
Check out this video on Telly - Telly Video
Check out this video on Telly - Telly Video
I hope it works. And you're using a powerful 5.1 sound system.
Check out this video on Telly - Telly Video
Check out this video on Telly - Telly Video
I hope it works. And you're using a powerful 5.1 sound system.
03-12-13, 08:09 PM
#2405
I do have something brewing. It'll take time due to funds but it will come together.
Modifications are those that Sterling did to his carburetor long ago.
The carb will be powder coated a matte black but I can't decide what the other parts should be, hot pink, candy purple.
I'll throw up a poll next week and have the forum decide.
Modifications are those that Sterling did to his carburetor long ago.
The carb will be powder coated a matte black but I can't decide what the other parts should be, hot pink, candy purple.
I'll throw up a poll next week and have the forum decide.
03-12-13, 08:21 PM
#2406
seattle seven
lights
Well I fixed the door pins that control the dome light, Then went for a drive in the rain. Sideways fun!! After I pulled stock radio to see if I could get it to work. No luck....
03-12-13, 11:20 PM
#2408
Lets see... looks like you welded a mount to the chassis for the rear subframe mounting. Did the front mount line up with an existing hole or bolt?
Spliced the FB and FC steering columns together, no prob there, but did you know that GSL-SE columns actually have a joint just past the firewall? That's why the original rack-and-pinion conversion from that goober in Canada specified a GSL-SE column. Easier to fit a custom shaft.
Any track width issues? I presume the Nissan 240 wheels there tuck in a bit better than the FC wheels, reducing that problem. Wheel adapters on the back, or GSL-SE?
At any rate, nifty. I've heard about such a conversion off and on, but pictures and it actually being done seem to be rare. I believe I'll try this on my '79 eventually. The steering box is getting loose, and no replacements to be found.
03-13-13, 12:46 AM
#2409
not so much today, but a general update since i havent been on in a while. got my idle issue fixed, turns out a cheap aluminum bolt broke off in the intake. luckily i was able to get it out with no issue, cleaned up the metal gasket that was on there, put everything back on. had to "modify" the manifold with a grinder to get the proper bolt in the top right hole. runs perfect now. got my a/c bolted in and hooked up but the pump sounds like it is on its way out :/ fixed my vibrating speaker. now i need to get going on the interior, at least get the seats redone and then a dash cover from black dragon, since they have a brown one. also still need to wire up my 2gcdfis, have everything ready to go. starting to see some rust bubbling, mostly in the sunroof area. going to find a drivers side door and stash it away for when i do paint. theres a nice stress crack at the bottom of the window above the doorhandle, and the bottom seam is crumbly. picking up a set of fc vert wheels with tires this weekend. want to see if i can run adapters until i can afford to do a total 5 lug swap, or if the adapters would cause the wheels to stick out too much. there's my essay for the night :P
03-13-13, 12:47 AM
#2410
This evening I decided to chase down the source of some really irritating rattles in the back of the car. The first culprit was my hatch, which wasn't adjusted properly. The latch was set a little to far up, allowing the glass hatch to rattle up and down when I hit bumps. I should have realized this when I popped the hatch and it didn't pop up a little like most hatches do. It just sat there, flaccidly waiting for me to dig my finger under the glass to pull it up. I was concerned it was the weatherstripping, but it was, in fact, in great shape.
Two 10mm bolts loosened, the latch moved down a bit, and voila! Hatch closes tight, no rattles, and it even pops up a little when I release it. I'll have to do the remote hatch release retrofit soon.
The biggest culprit, however, was this:

I'm not sure what it's called, but it's a diffuser like thing that appears to keep air from getting into the cavity where the bumper is, allowing it to become a parachute. It's attached to the inside of the left part of the rear bumper on one end and to a metal shield that goes around the perimeter of the gas tank. It has split completely apart where it attaches to the gas tank. The rattle isn't the diffuser itself, but the metal shield, which bangs against the tank when I hit a bump more substantial than a roll of quarters. Next stop, eBay for a look to see if I can find one of these parts. If not, I'll hit the yards again and hope I can find one intact.
fm
Two 10mm bolts loosened, the latch moved down a bit, and voila! Hatch closes tight, no rattles, and it even pops up a little when I release it. I'll have to do the remote hatch release retrofit soon.
The biggest culprit, however, was this:
I'm not sure what it's called, but it's a diffuser like thing that appears to keep air from getting into the cavity where the bumper is, allowing it to become a parachute. It's attached to the inside of the left part of the rear bumper on one end and to a metal shield that goes around the perimeter of the gas tank. It has split completely apart where it attaches to the gas tank. The rattle isn't the diffuser itself, but the metal shield, which bangs against the tank when I hit a bump more substantial than a roll of quarters. Next stop, eBay for a look to see if I can find one of these parts. If not, I'll hit the yards again and hope I can find one intact.
fm
03-13-13, 12:53 AM
#2411
Best I can do with my rudimentary knowledge of this modern internet thing:
Check out this video on Telly - Telly Video
Check out this video on Telly - Telly Video
I hope it works. And you're using a powerful 5.1 sound system.
Check out this video on Telly - Telly Video
Check out this video on Telly - Telly Video
I hope it works. And you're using a powerful 5.1 sound system.
Todays project:
Got a bunch of electronics wiring goodies today:
- 6-pin DIN empty connector (will tap an RCA output to factory 6-pin for aftermarket amp)
- powered iPhone - to - RCA connector (taps into 12v accessory)
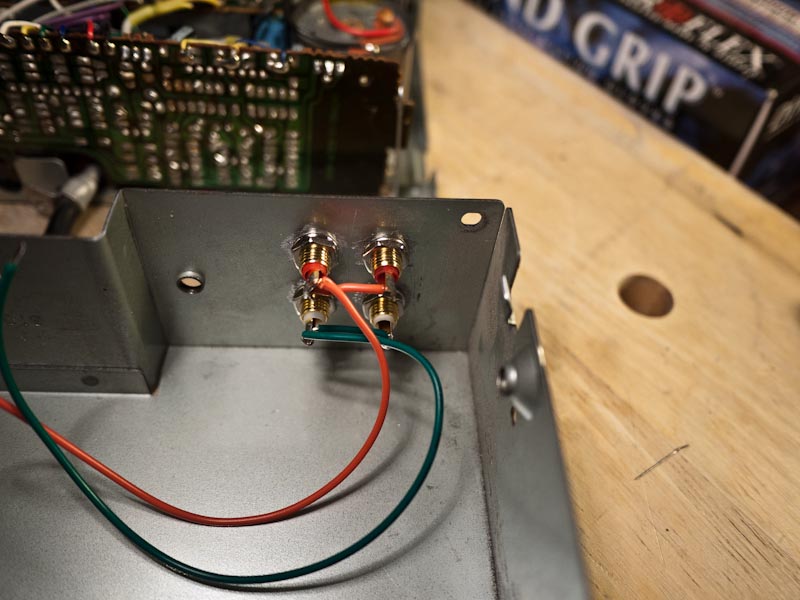
- flush-mount gold RCA connectors
- 15/30w soldering kit
I now have NO excuses to 100% finish my interior / stereo project.
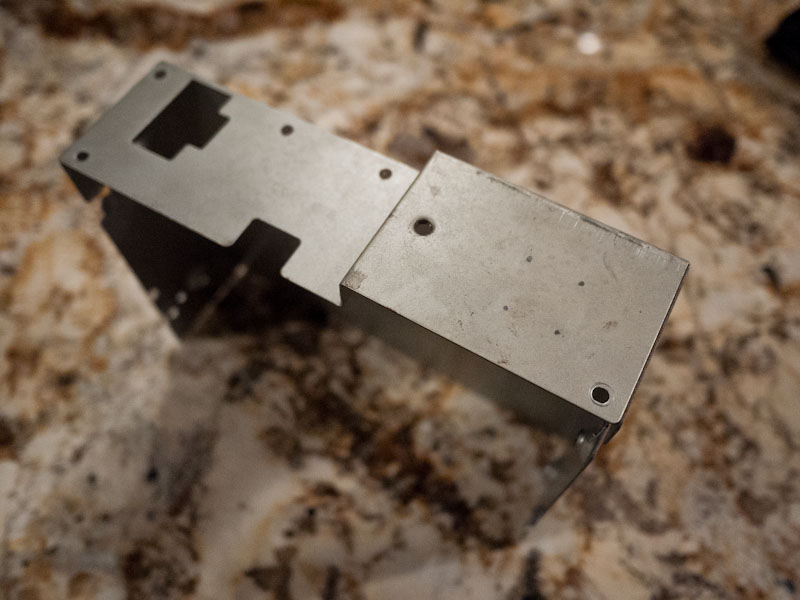
Started with 1/16", then 1/8", then 1/4" drill bit:

I left the outside totally factory finish, and used a dremel to grind away the inside of the chassis for a clean and solid ground (RCA plug itself is ground):

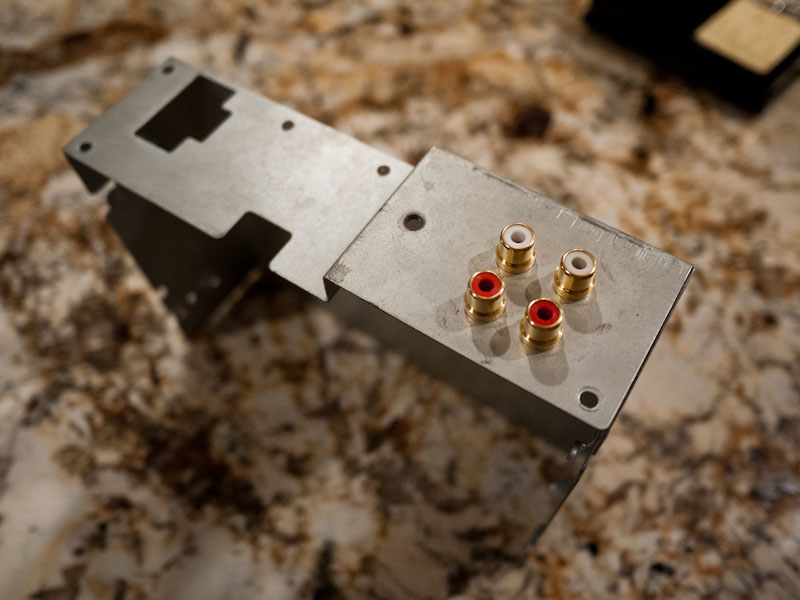
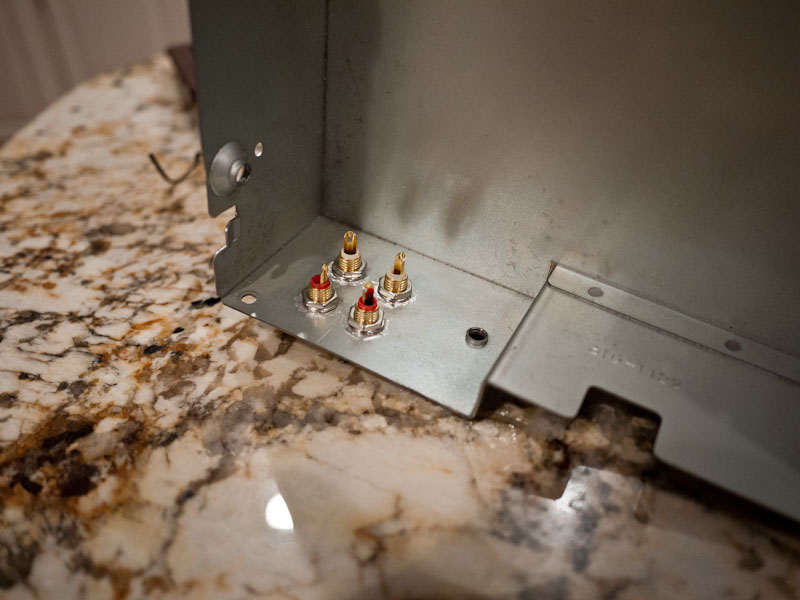
As you can see there is PLENTY of clearance, i'm talking 3-4mm:
We will then be wiring these RCA jacks in parallel to the factory "input" (blue / green) on the tape deck rear PCB:
03-13-13, 01:17 AM
#2412
This evening I decided to chase down the source of some really irritating rattles in the back of the car. .....
I'm not sure what it's called, but it's a diffuser like thing that appears to keep air from getting into the cavity where the bumper is, allowing it to become a parachute. It's attached to the inside of the left part of the rear bumper on one end and to a metal shield that goes around the perimeter of the gas tank. It has split completely apart where it attaches to the gas tank. The rattle isn't the diffuser itself, but the metal shield, which bangs against the tank when I hit a bump more substantial than a roll of quarters. Next stop, eBay for a look to see if I can find one of these parts. If not, I'll hit the yards again and hope I can find one intact.
fm
Honestly I'd probably just get some strips of metal from the hardware store and use those to fasten that piece back to the mount it broke off of - looks like there's enough room... easy fix... supposing there's enough room to get a drill up there.
03-13-13, 02:00 AM
#2413
Yeah I need to get under there and figure out whats rattling on my rig as well. I've got a few mystery buzzes going on for sure.
Honestly I'd probably just get some strips of metal from the hardware store and use those to fasten that piece back to the mount it broke off of - looks like there's enough room... easy fix... supposing there's enough room to get a drill up there.
Honestly I'd probably just get some strips of metal from the hardware store and use those to fasten that piece back to the mount it broke off of - looks like there's enough room... easy fix... supposing there's enough room to get a drill up there.
This thing is held on with a couple of bolts, so tomorrow, after some sheet metal, a drill and pop rivets, that noise will be gone.
fm
03-13-13, 04:06 PM
#2414
"Protector, Fuel Tank"
D-Code 56970
In Section 5360A (SA's)
5370A-1 (81-83's)
5390A-1 (84-85's) in the parts fiche.
Part number has varied over the years on SA's, based on VIN. % different part numbers.
On the 81-83 cars, and the 84-85 cars, it was part number 8871-56-970D
D-Code 56970
In Section 5360A (SA's)
5370A-1 (81-83's)
5390A-1 (84-85's) in the parts fiche.
Part number has varied over the years on SA's, based on VIN. % different part numbers.
On the 81-83 cars, and the 84-85 cars, it was part number 8871-56-970D
03-14-13, 03:03 AM
#2415
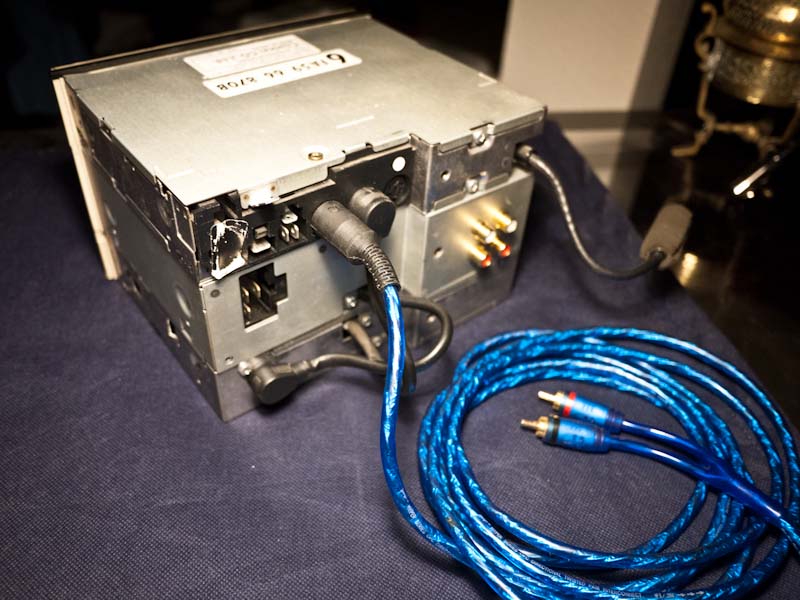
Nearing completion of the stereo install. My goal is to be able to input anything I want into the factory head unit, retaining the OG styling and 9-band EQ.
Honestly Clarion is top-quality stuff, and certainly was in '84. Go to any vintage Hi-Fi shop, and you'll be paying $175-350 for a 70's or 80's amp/receiver in good condition (slight rebuild if needed).
Certain things have changed, but not a lot, in the audio world. Hopefully, we'll be able to get a good sound out of this. Using top quality components throughout.
---
Today's work:
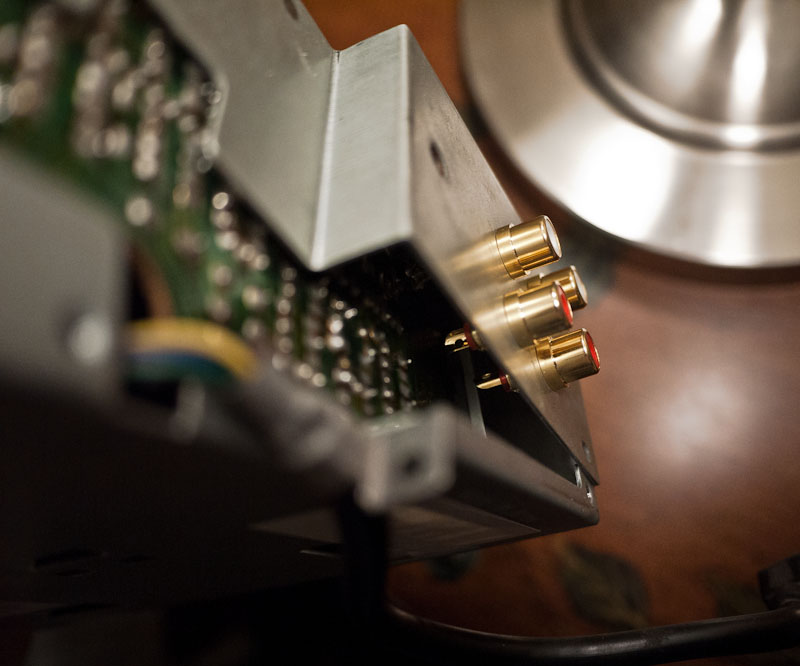
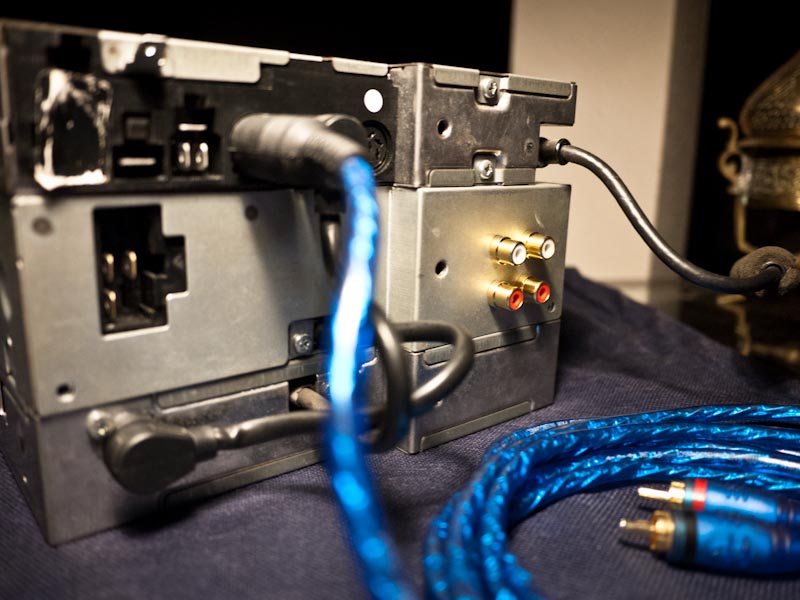
Wired up the aux inputs:
Tapped them onto the blue (right) green (left) wires on the PCB:
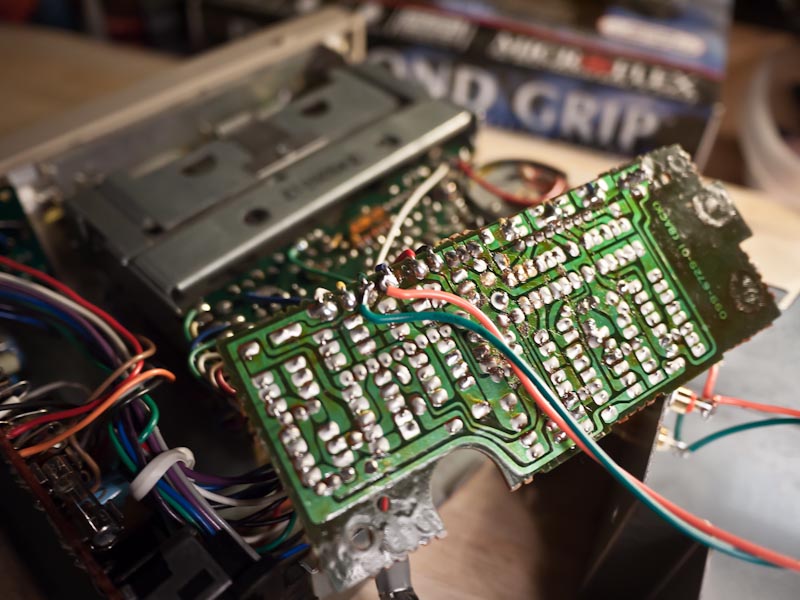
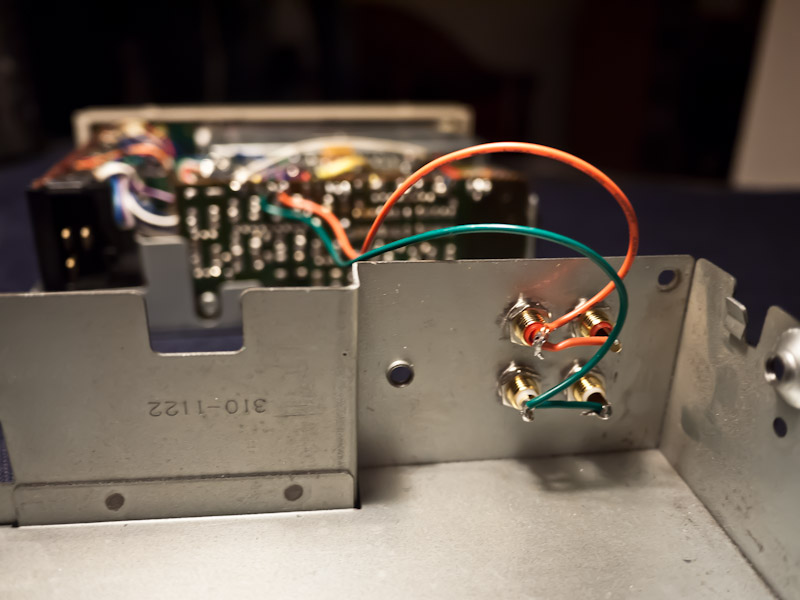
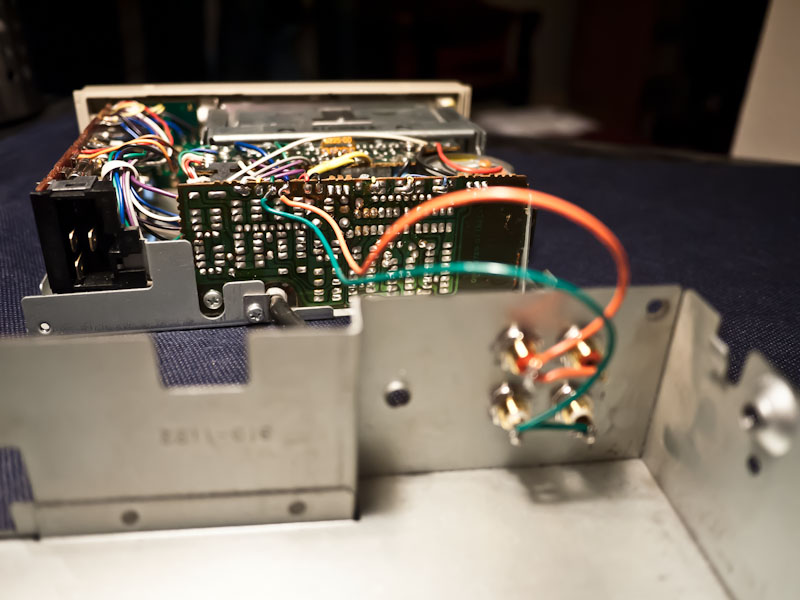
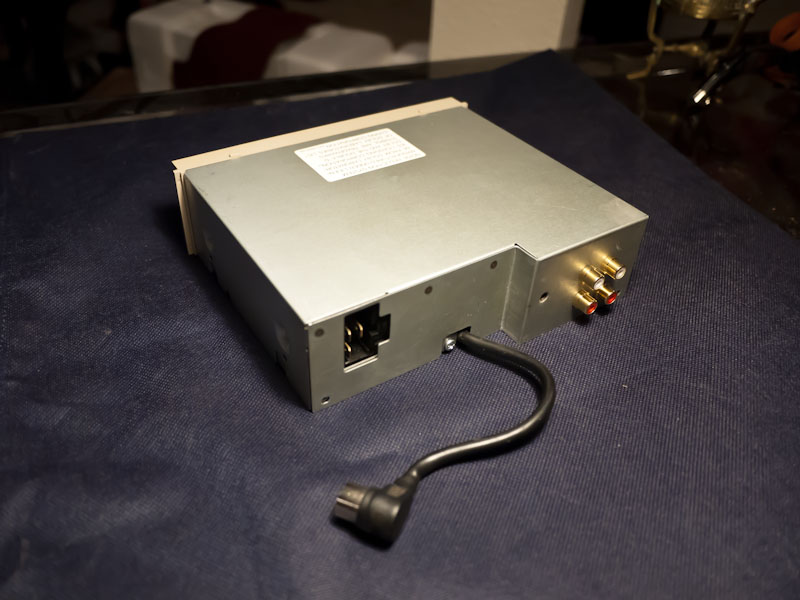
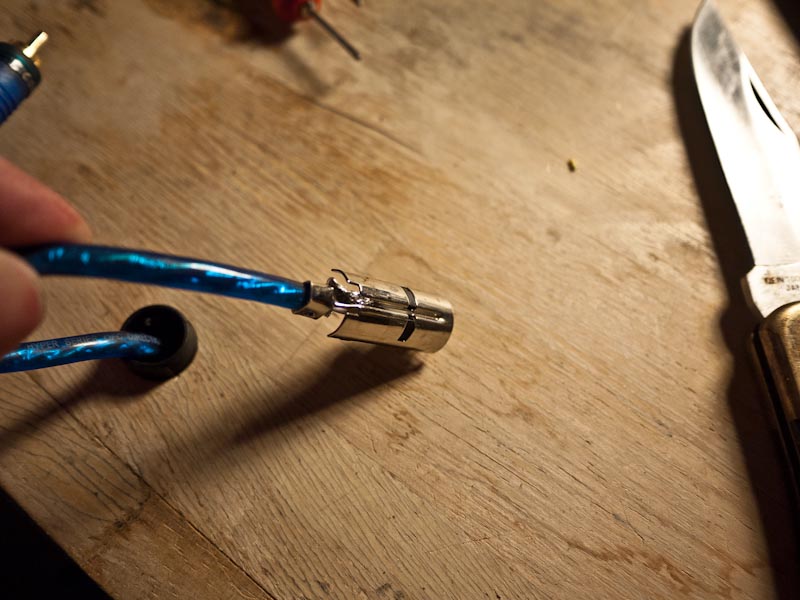
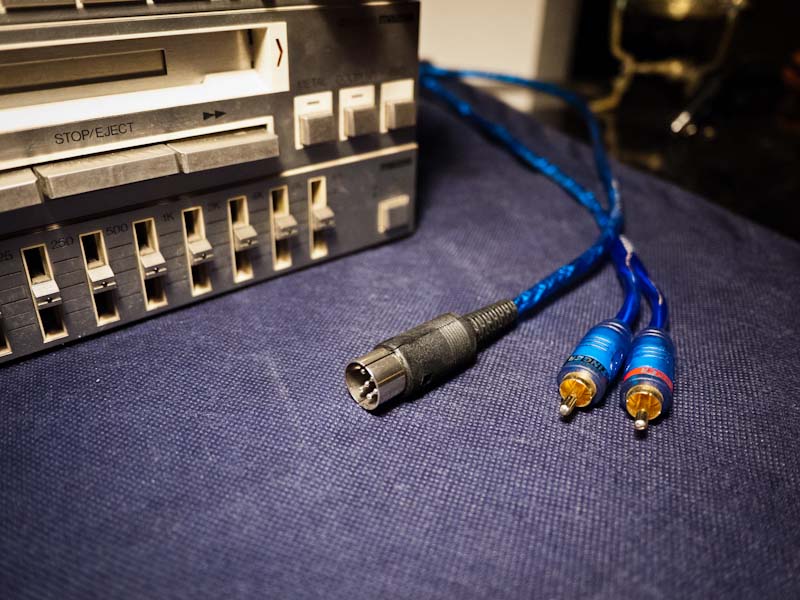
So - we have our inputs, now we can wire up the outputs! We need to go from 6-pin DIN to RCA dual output to hook up to a modern amp. Fortunately the head unit is sending line-level out, so we wont need line-level converters.
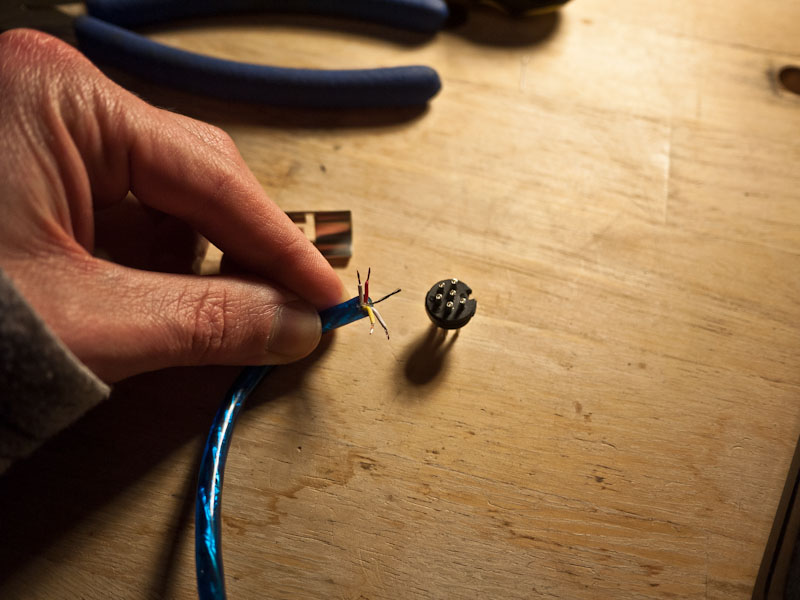
Step one: slice a very expensive RCA cable in half
Pull back the sheath and separate the wires
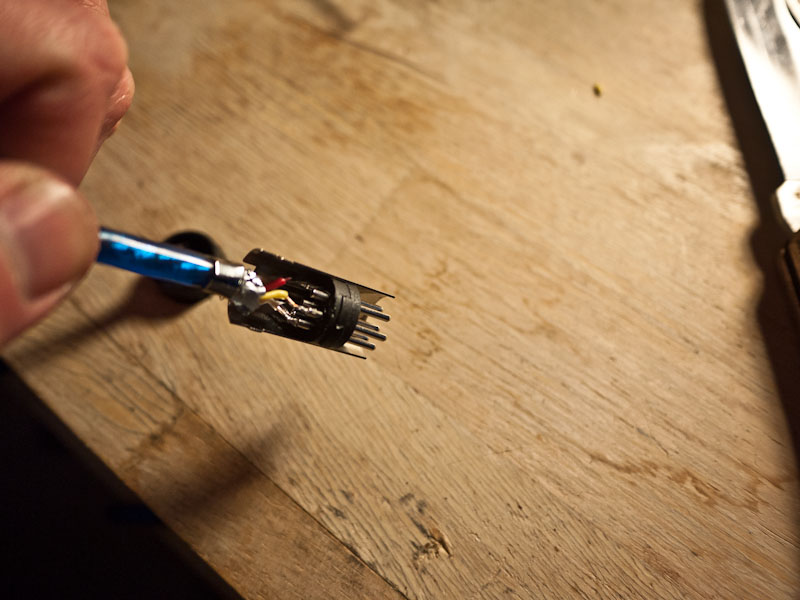
After soldering them onto the 6-pin DIN connector - make sure to double check your work with a multi tester. Glad i did - somehow i managed to get the ( - ) signals reversed for L and R!!! I swore to both the Old Gods and the New.
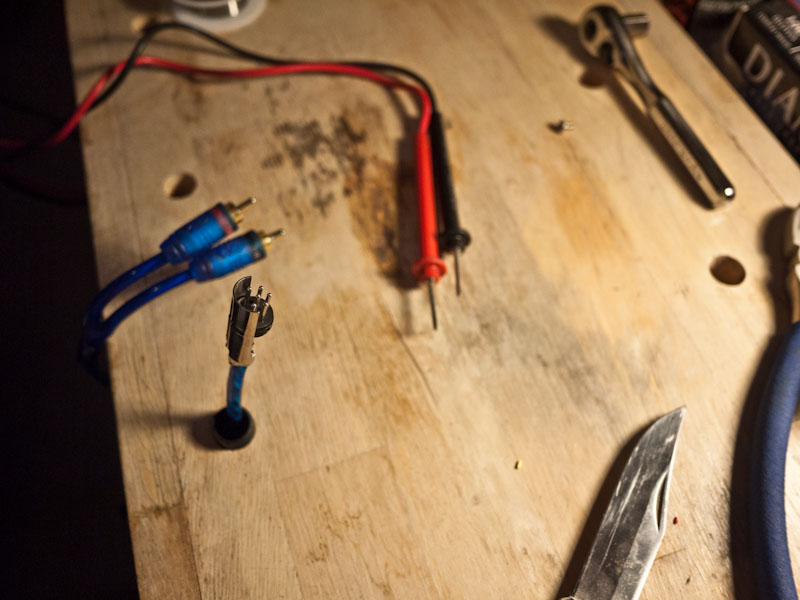
Ground down some of the shielded earth casing and soldered the stuffing wire / sheilding to it
It's a shame i have to tuck this away where nobody can see it - I'm rather pleased with how it turned out!
Honestly Clarion is top-quality stuff, and certainly was in '84. Go to any vintage Hi-Fi shop, and you'll be paying $175-350 for a 70's or 80's amp/receiver in good condition (slight rebuild if needed).
Certain things have changed, but not a lot, in the audio world. Hopefully, we'll be able to get a good sound out of this. Using top quality components throughout.
---
Today's work:
Wired up the aux inputs:
Tapped them onto the blue (right) green (left) wires on the PCB:
So - we have our inputs, now we can wire up the outputs! We need to go from 6-pin DIN to RCA dual output to hook up to a modern amp. Fortunately the head unit is sending line-level out, so we wont need line-level converters.
Step one: slice a very expensive RCA cable in half
Pull back the sheath and separate the wires
After soldering them onto the 6-pin DIN connector - make sure to double check your work with a multi tester. Glad i did - somehow i managed to get the ( - ) signals reversed for L and R!!! I swore to both the Old Gods and the New.
Ground down some of the shielded earth casing and soldered the stuffing wire / sheilding to it
It's a shame i have to tuck this away where nobody can see it - I'm rather pleased with how it turned out!
03-14-13, 10:48 AM
#2416
down, but not out
iTrader: (4)
Join Date: Apr 2011
Location: Santa Barbara, California
Posts: 318
Likes: 0
Received 1 Like
on
1 Post
Been a little while, so I thought Id share tidbits of progress..
After the incident in December, I've decided to do a complete interior restoration alongside and exterior factory Sunrise Red respray. Car has mostly sat for a few months, as works been pretty busy for me.
On Saturday, I gutted the car aside from the dash. I then went to work on the 28 year old dust and grime inside the car.
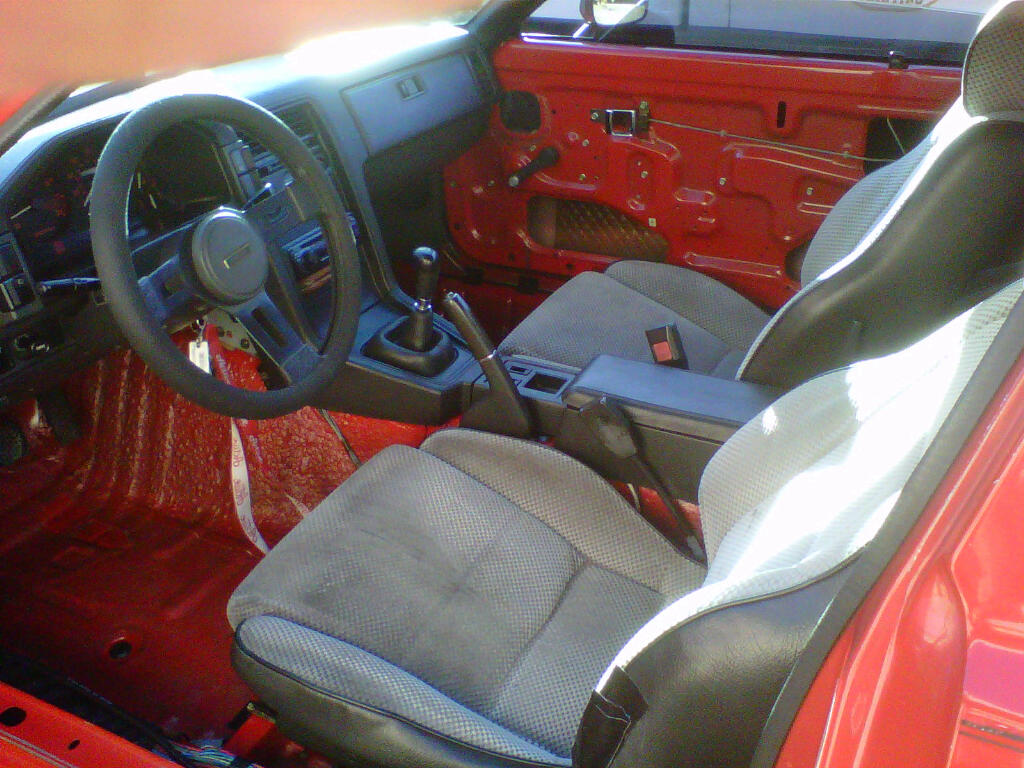
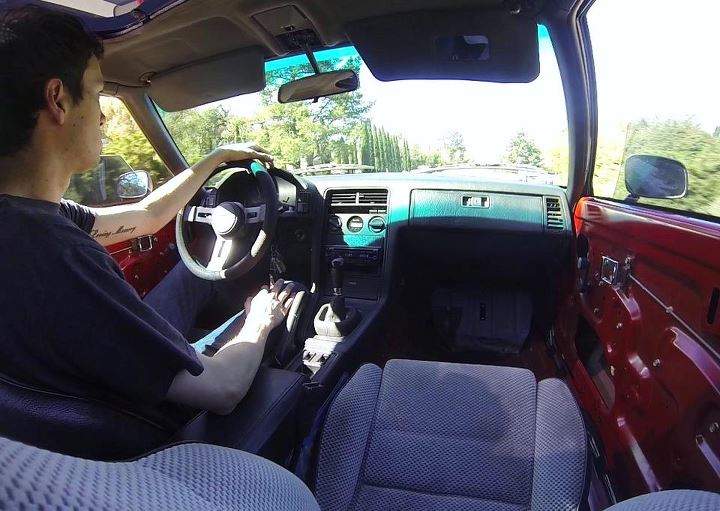
On Sunday, I wiped the old girl off and drove her to work. Kind of fun to drive in her gutted condition
Then Monday afternoon, a buddy and I drove down to Del Mar to pick up a replacement door and fender for my rx7 from a fellow forum member. I think he enjoyed watching us struggle to fit both the door and fender in the backseat of my Infiniti g35! Thanks Michael and Carl!!
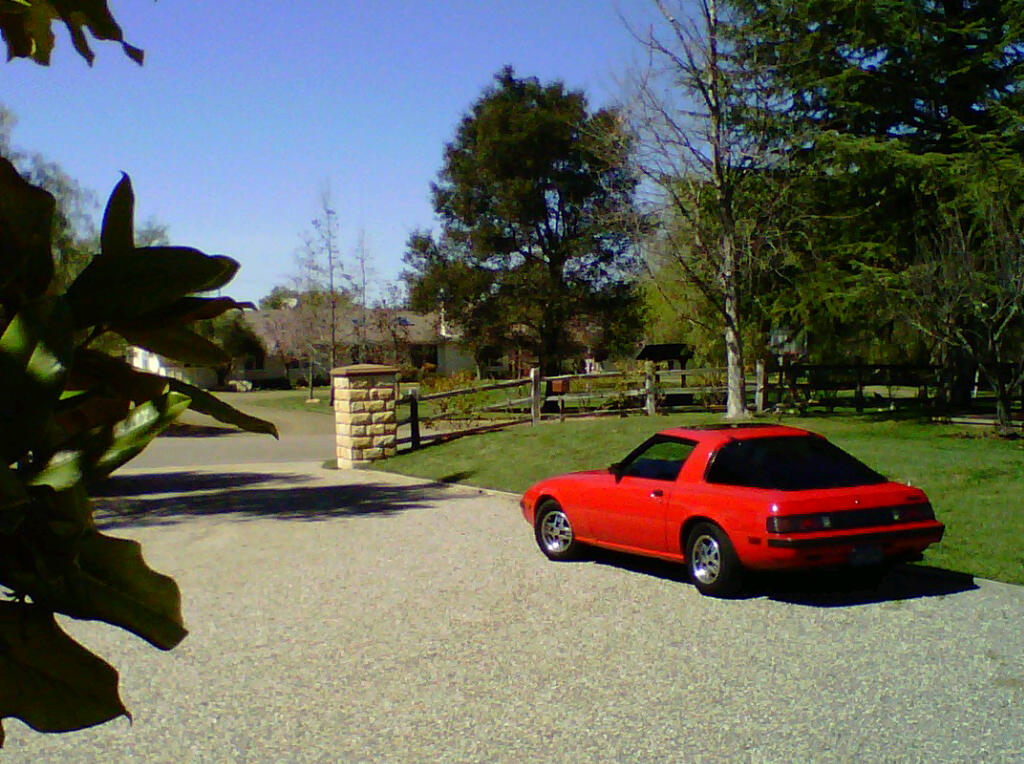
And Yesterday, I yanked off the door and fender, transferred the window glass and mechanism, and swapped on the replacements. Now the car looks more in touch with its racing heritage than ever!

Next up is finding a good shop to address my hatch area rust spots, and deciding where Ill go for paint. Trying to keep the progress rolling!
-RxTex
After the incident in December, I've decided to do a complete interior restoration alongside and exterior factory Sunrise Red respray. Car has mostly sat for a few months, as works been pretty busy for me.
On Saturday, I gutted the car aside from the dash. I then went to work on the 28 year old dust and grime inside the car.
On Sunday, I wiped the old girl off and drove her to work. Kind of fun to drive in her gutted condition
Then Monday afternoon, a buddy and I drove down to Del Mar to pick up a replacement door and fender for my rx7 from a fellow forum member. I think he enjoyed watching us struggle to fit both the door and fender in the backseat of my Infiniti g35!
Thanks Michael and Carl!!And Yesterday, I yanked off the door and fender, transferred the window glass and mechanism, and swapped on the replacements. Now the car looks more in touch with its racing heritage than ever!
Next up is finding a good shop to address my hatch area rust spots, and deciding where Ill go for paint. Trying to keep the progress rolling!
-RxTex
03-14-13, 10:52 AM
#2417
03-14-13, 11:12 AM
#2418

That's an excellent idea on the notebook. I could even do a little iPad demo station with galleries or something.
RxTex thats a super clean ride! I like! You going to paint the whole car or just the fender / door?
03-14-13, 11:22 AM
#2419
EV's are rather thrifty cars to drive. In January I started keeping close track of my daily usage. At the end of January I added a Killawatt meter to keep track of how much it costs me in electricity to charge. Last night I summed the mileage and kwh of energy used and calculated costs. Boiling it down I drove the EV 331.2 miles in February and used 137.03kwh of electricity. Residential electricity costs 11 cents per kwh so this was $15.07 in fuel costs for the month. For comparison the car was getting about 16mpg for my around town driving and gasoline costs here were $3.30 making the cost to drive with gasoline $68.31. Cold days are about the worst for this car. I get better energy efficiency on warm days. 20-30 percent better. I know I have some things to sort out. I think I have a wheel bearing issue in the right rear and the brake pads are dragging. I should repack the front bearings. And change the diff lube. It also need an alignment. I expect all these things to help decrease my energy usage. The conversion to electric of this car was a positive thing because it has more torque (2.6 time more) and is more fun to drive.
As for real work on the cars, I continued working on the car stereo installation in the EV. I need a few hours of warm weather so I can pull out some of the old cables and run new wires to the speakers. I did do the final fit of the head unit in the factory bracket. I just need to hook up the power. I should have worked on this yesterday but instead I went for a 20 mile drive and enjoyed the warm weather with the top open and the windows down.
The 85 GSL-SE: I received my new oil cooler and discovered an issue. Mazda includes the adaptors for the factory hoses. They are using a very tenatious thread sealer which is rock solid and so I was afraid of breaking my new cooler by removing the OEM fittings. I talked to Dave at Mazdatrix who suggested I send it back to him with the fittings for the stainless hoses and he would remove the OEM ones and install the new ones. I boxed that all up and shipped it off. Please let this be the end of my issues with this.
03-14-13, 11:28 AM
#2420
No cringing at all. You did excellent work! I am really glad someone is going to get some good use out of it. I would have put it in the crawlspace and in 10 or 15 years I would have thrown it away. This is far better! Looking forward to hearing how it sounds.
03-14-13, 12:13 PM
#2422
"Protector, Fuel Tank"
D-Code 56970
In Section 5360A (SA's)
5370A-1 (81-83's)
5390A-1 (84-85's) in the parts fiche.
Part number has varied over the years on SA's, based on VIN. % different part numbers.
On the 81-83 cars, and the 84-85 cars, it was part number 8871-56-970D
D-Code 56970
In Section 5360A (SA's)
5370A-1 (81-83's)
5390A-1 (84-85's) in the parts fiche.
Part number has varied over the years on SA's, based on VIN. % different part numbers.
On the 81-83 cars, and the 84-85 cars, it was part number 8871-56-970D
Last night I de-rusted a replacement upper shock mount for my FB (mine has a broken stud). Then I cleaned up the garage so a friend of mine can do some work on his diesel Jetta tonight.
fm
Last edited by Fungus Mungus; 03-14-13 at 12:19 PM.
 03-15-13, 07:05 AM
#2424
It is dependent on Temperature, Terrain, and how much Thrashing you do (three T's). I managed to run out about .1 miles from home on a cold day (high of 20F) driving at highway speeds and generally just having a good time at 28 miles. Without doing those things it looks like a safe range would be 36 miles at present. I say at present because I am adding another battery box under the hood which will add 19 more cells (currently 33 in the back). This should increase the range by about 58 percent. It would be more than that because you gain some efficiency because of the higher voltage but the additional weight will probably cancel that small efficiency gain. So range on my worst day should go up to 44 miles and on a good day to 56 miles. My original estimates seem so far off but I am hoping that the alignment and brakes and bearing repack will improve this by quite a bit. My original estimate was almost 100 miles. EV's are about 8 to 10 times more energy efficient than internal combustion engines and so small changes in drag and rolling resistance make an inordinate difference in economy. Running my heater for example reduces my range by 15 miles per hour of operation. On an ICE powered car you are doing everything you can to get rid of waste heat so heating the passenger compartment is free.
03-15-13, 07:12 AM
#2425
Worked on the GSL-EV stereo yesterday and managed to get enough hooked up so I have sound coming out of the front speakers. Not sure I would call it music though. I have one good speaker on the right and one really poor after market replacement on the left and I think they are out of phase. But there is sound now.