What did you do to your FB today?


 03-06-13, 01:23 AM
#2355
Inspected a 13B engine harness I got in the mail yesterday. Perfect...complete with no cuts anywhere.
Took the FB out this evening as it's going to have to be a daily for me for at least a couple of weeks. Let my friend drive it with me riding shotgun. I was unamused that my passenger door refuses to open. Will have to figure that one out later. Astonishingly, he was able to achieve a 2nd gear scratch on multiple occasions. This a stock 12a with all of the smog equipment on it.
I heard some clunking from under the floorboard upon hard acceleration. Checked out underneath the car and found a couple of possible culprits. The first was some kind of hard line that goes from the engine bay to the middle of the exhaust. Not sure what that is yet, but I'll look into it later this evening. The second was a D-bushing on my RB swaybar that I'd incorrectly installed with the slit end facing towards the back of the car. I suspect upon acceleration, the bar is allowed to move back and hit the subframe. :p The second was the lower grill, which is damaged and about ready to fall off. I'd forgotten about it when I'd done the front suspension rebuild.
Also noticed that the shop that did my alignment didn't put the cotter pins at the end of the tension rods like I told them to. I'll be taking it back to them to re-adjust the alignment and put the $!*@ cotter pins in.
fm
03-06-13, 02:00 AM
#2356
Even more rust removal. I'm going to leave the shifter inner boot bracket bare and see if it rusts up again. rust only grows if you feed it - so we'lll see if it starts up again. Prepped the passenger rear wheel well for chemical filler rust repair - which will be thursday evening.
After I got the dirty work out of the way, I took another look at the stereo system wiring. As I'm pulling all new wires and the entire interior is out, its the perfect opportunity to plan out the system from scratch. Some deep scheming this past week, running through all the possible wire routing options for the signal and power cables. This evening, while I was finally pulling the factory amps and harness, I realized, once again, that the Mazda engineers knew exactly what they were doing.
By routing the signal wires from the amps through the center console and then T out to the speakers, they can completely isolate the signal harness from the power harness, thus eliminating any interference. Brilliant.
So I pulled the speaker wire through the dash and down through the passenger side seat mount. Will route the twisted-pair RCA the same. Power wire runs through factory harness gromet, behind firewall carpet, and follows factory power harness back through the driver storage bin to passenger bin. Zip-tied everything in and its fitting nice and tight.
I will not be cutting any wires at this time as the sound system is in beta phase, and will require much tinkering as the build progresses. I know that for now I will simply be mounting the amplifier with a temporary bracket, and sacrificing the passenger storage bin as a "goodies zone" for whatever may fit in there.... no hints i'm not giving anything away. you'll just have to wait for pics.
Meanwhile still scheming on the factory Clarion Digital Tuner upgrades.
After pulling apart the radio tuner I realize that I won't be able to tap an RCA line-level output directly onto the PCB. The 6pin DIN connectors are soldered directly onto the PCB, so I will instead have to fabricate my own "6-pin DIN - to - RCA twisted pair" wires to connect the factory Clarion up to my new JL 5-channel amp. Stoked, as this will be super clean.
Studying the FSM i'm fairly certain that I figured out why there is a joystick for the sound system that came with an EQ: the EQ can process only one line signal, the front channel. The radio tuner outputs front and rear chanel (fader control ****). So in order to have BOTH an EQ and fader control, you process a 2-channel signal through the EQ and then use some post-processing (joystick) to split the mastered signal between front and rear. So the radio tuner "fader" control should be non-functional with an EQ. I haven't tested this though so I donno.
---
In other news - I'm noticing the smell of raw gas, and the car has been sitting for about a month. I know that she likes to be driven, but I also know for a fact you shouldn't be smelling raw fuel while standing next to a car. Even the '69 Ford 250 holds its own. I'm not liking that
03-06-13, 11:03 AM
#2357
OldNewRX7*****

Join Date: Sep 2012
Location: Dumfries, Virginia
Posts: 20
Likes: 0
Received 0 Likes
on
0 Posts
Bled the clutch line to get her back into the garage before the snowstorm. Purchased a new master cylinder for install this weekend. Researched rear shocks and exhaust system (want to replace the whole shebang with something that 1)eliminates a defunct catalytic converter and 2) returns the engine/exhaust to its original - albeit legally louder - sweet music.
03-06-13, 12:23 PM
#2358
Ready or not...
Join Date: Dec 2009
Location: Taos, NM
Posts: 261
Likes: 0
Received 0 Likes
on
0 Posts
I'm having some fun now!
before adding tranny fluid to newly accomplished pan gasket install... found I could tighten every bolt another quarter turn... added fluid and am watching it run out! I can actually see that the front of this cover is NOT FLAT. Auto Tranny... I feel so alone! Thoughts on finding the part?
You can see my oil pan is a mess too. That later...
You can see my oil pan is a mess too. That later...
Last edited by Ms. DIY; 03-06-13 at 12:45 PM.
03-06-13, 12:30 PM
#2359
Bled the clutch line to get her back into the garage before the snowstorm. Purchased a new master cylinder for install this weekend. Researched rear shocks and exhaust system (want to replace the whole shebang with something that 1)eliminates a defunct catalytic converter and 2) returns the engine/exhaust to its original - albeit legally louder - sweet music.
03-06-13, 07:46 PM
#2362
Old [Sch|F]ool
Drove it to work again because my VW is still a douche. Actually, I've been driving it all week. As soon as the temps stay above freezing, the car is getting a long bath.
But really, let's face the facts. I have at my disposal a 3-linked, Kia geared, FC suspended, fuel injected, bridge ported RX-7.
But really, let's face the facts. I have at my disposal a 3-linked, Kia geared, FC suspended, fuel injected, bridge ported RX-7.
03-06-13, 09:46 PM
#2365
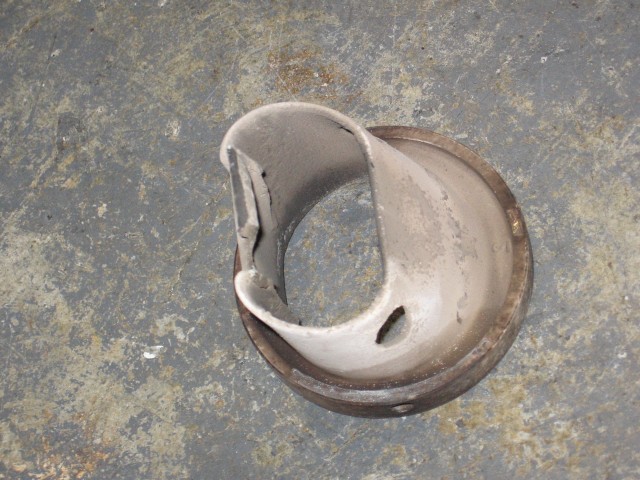
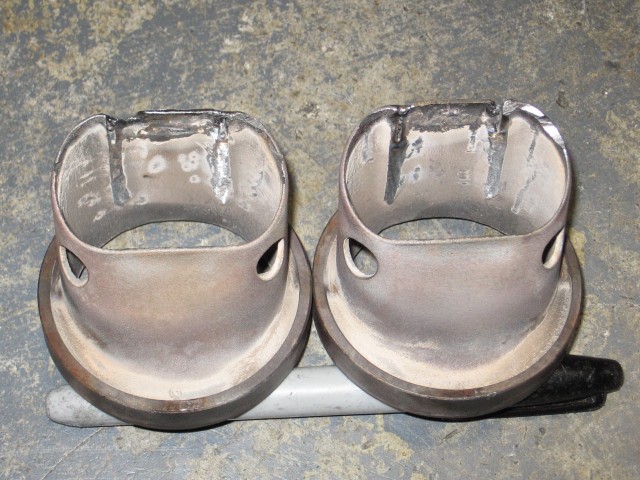
I modded some FC diffuser sleeves to look more like T2 sleeves after the PO damaged them. I did it a little different than how Karack shows in this thread, but similar results:
https://www.rx7club.com/2nd-generati...leeves-986906/
damaged sleeves in need of Karacking:
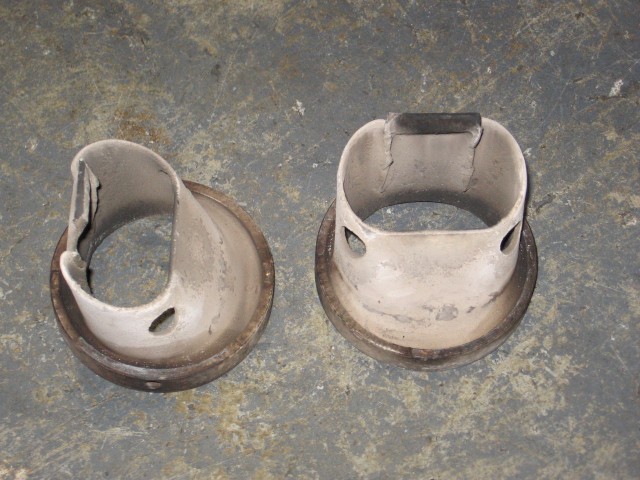
ouch
I also have a set of normal sleeves. Not sure whether to use them or the modded ones.
I'll have to get pics of the fix later.
https://www.rx7club.com/2nd-generati...leeves-986906/
damaged sleeves in need of Karacking:
ouch
I also have a set of normal sleeves. Not sure whether to use them or the modded ones.
I'll have to get pics of the fix later.
03-06-13, 10:39 PM
#2366
What do you guys think?
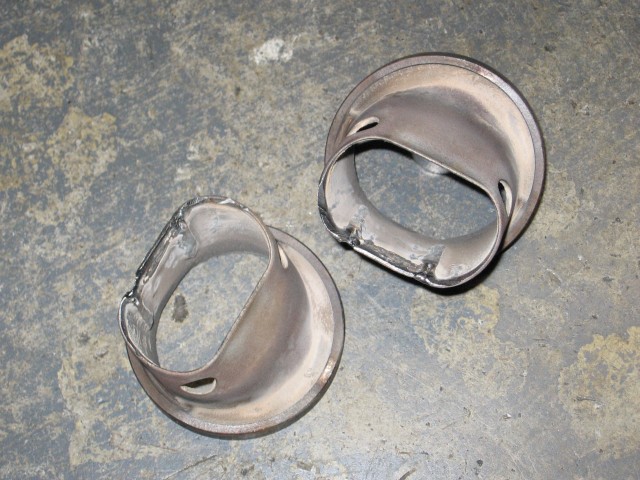
Should I swap these sleeves in? Or give them a little more love/smoothing first?
I was just messing around. I knew I could weld to this material as I had to do it once before. I know Karack just hammers his into submission. I chose to score the angle, then tap it into alignment. Then weld it.
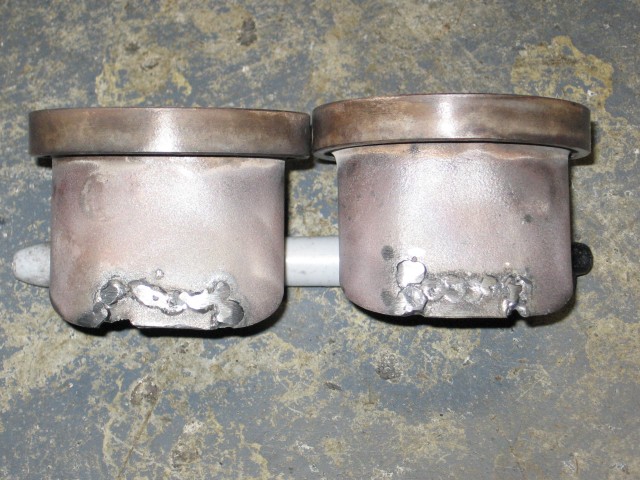
Think these will really outflow stock NA diffuser sleeves? Think 3dB and 3HP are worth it? Or up to 15HP? My intake ports are smoothed but timing is stock. Weber 45DCOE and RB upper manifold are the plan. Stock aux port sleeves for now. Maybe Atkins sleeves later.
Should I swap these sleeves in? Or give them a little more love/smoothing first?
I was just messing around. I knew I could weld to this material as I had to do it once before. I know Karack just hammers his into submission. I chose to score the angle, then tap it into alignment. Then weld it.
Think these will really outflow stock NA diffuser sleeves? Think 3dB and 3HP are worth it? Or up to 15HP? My intake ports are smoothed but timing is stock. Weber 45DCOE and RB upper manifold are the plan. Stock aux port sleeves for now. Maybe Atkins sleeves later.
03-06-13, 11:30 PM
#2367
Someday I'll do the full TII front subframe and rear brake swap - but I think I'll be sticking with the 4x110 and some rare rims until I can afford the whole swap at once.
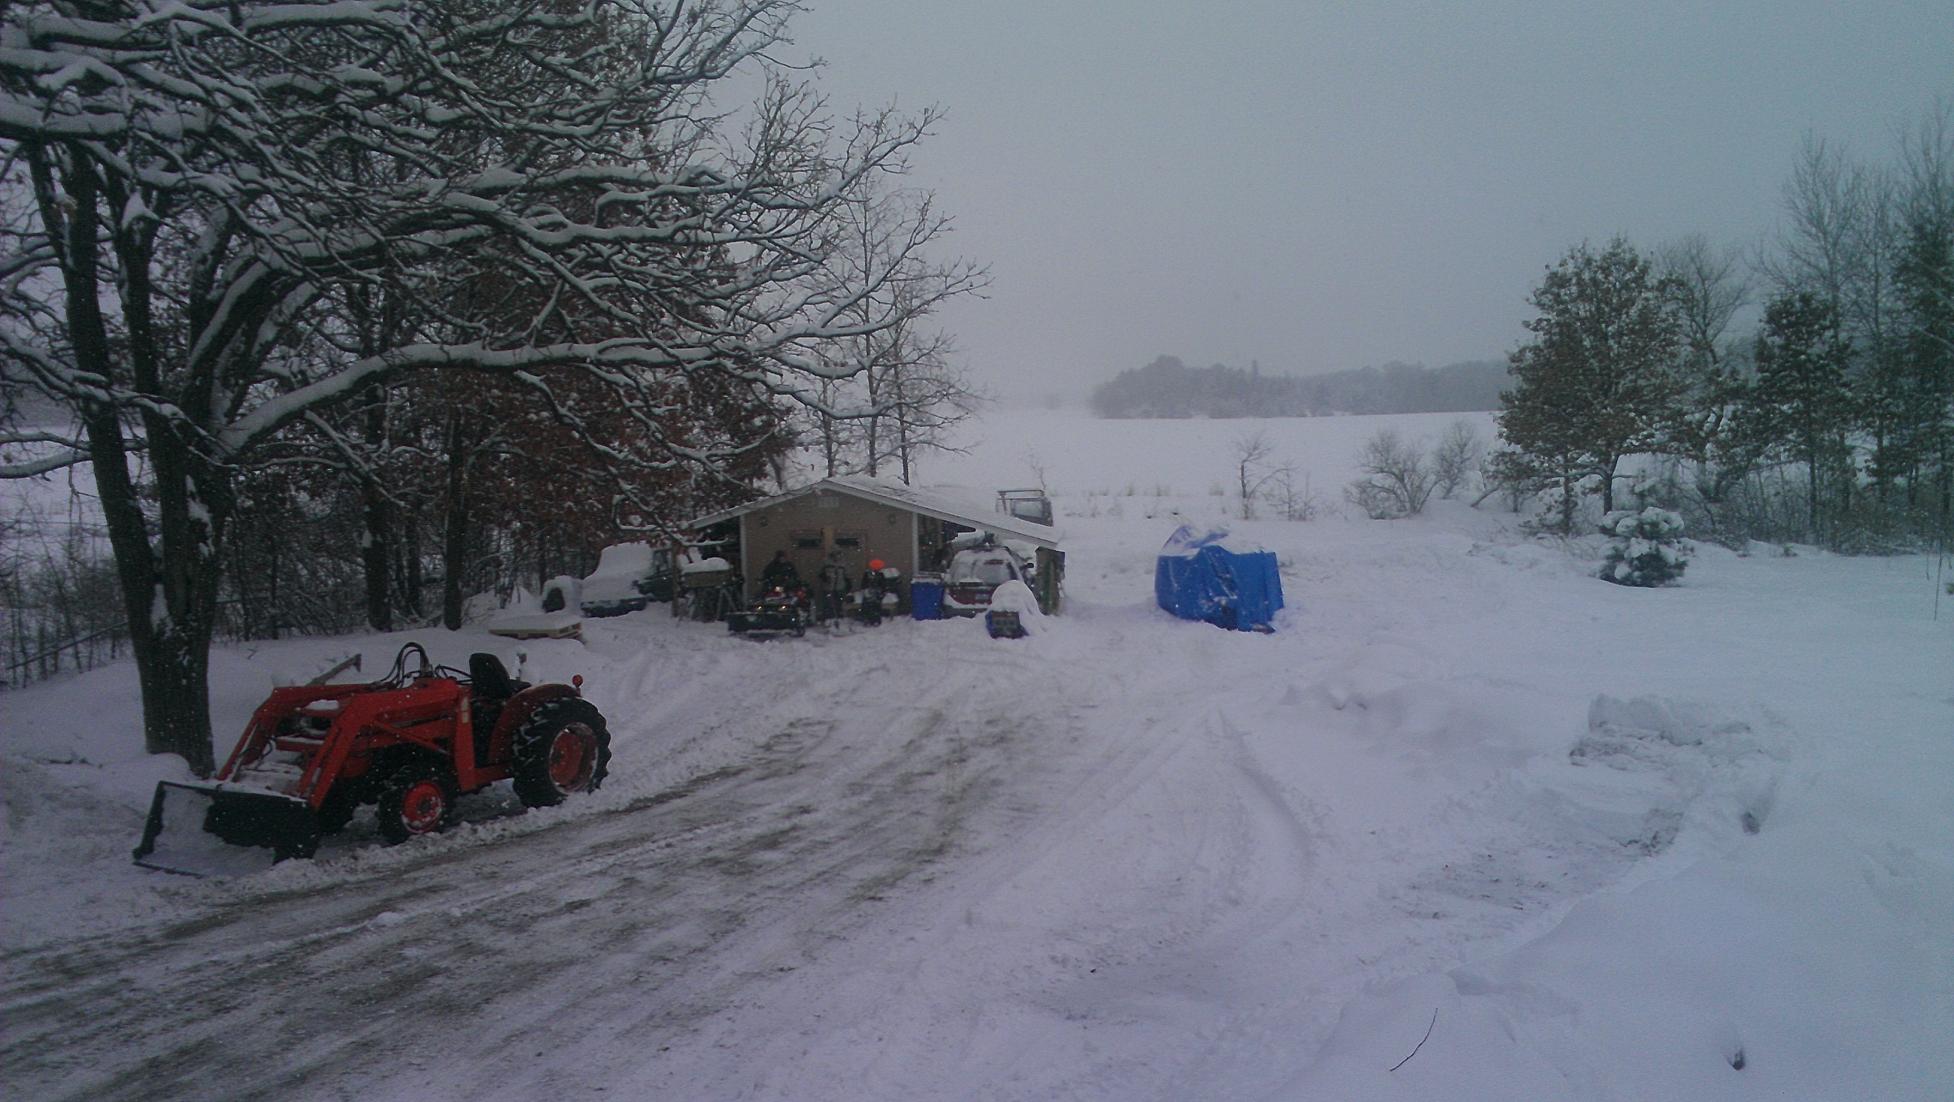
Even though yesterday looked like this:
Today I went out and cleaned out my rear diff and measured for bearing replacements:
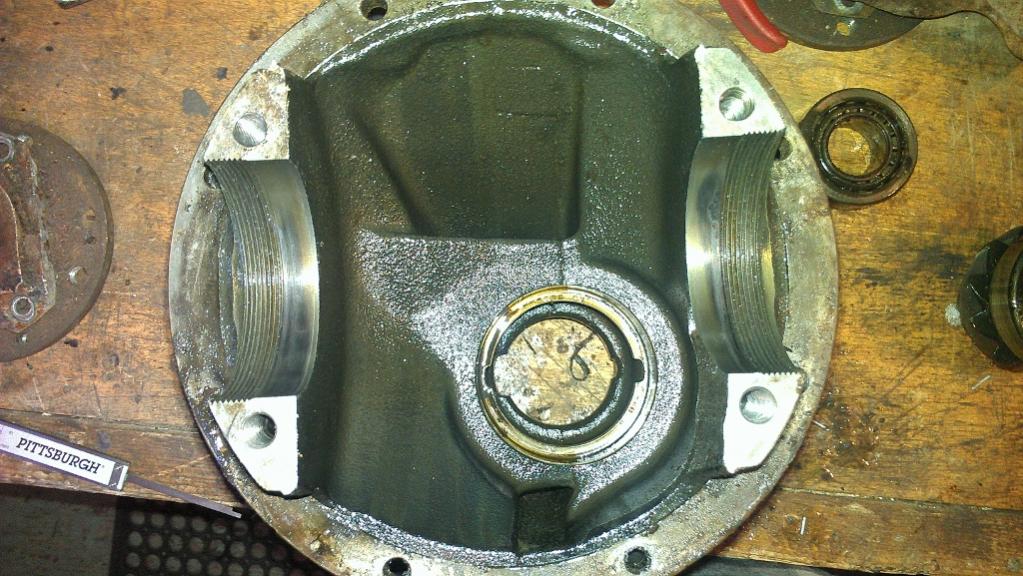
And I just found out that the car I pulled the rear differential from was a 1984 Mazda RX-7 GSL. But the rear axle bearings measure out to be 2.44 instead of the 2.8 that they should be. The 2.44 rear bearings with rear disc brakes were found in the 1981 - 1983 GSL rear ends.
So all along I've thought that I had a 1984 big bearing GSL rear axle when really I have a 1981-3 GSL small bearings GSL rear axle. Not a huge deal, just wish I had the big bearings.
03-07-13, 05:56 PM
#2369
Ready or not...
Join Date: Dec 2009
Location: Taos, NM
Posts: 261
Likes: 0
Received 0 Likes
on
0 Posts
So I have been trying to find the "under cover" for the A/T bell housing where I can see fluid running from. No one laughed exactly...
Robert at Classic Mazda in Denton TX informed me:
It's worth mentioning, this part is an inspection cover only. It is not designed to hold fluid. If you have fluid coming through this cover, you probably have a front pump seal and/or a torque converter seal leaking.
That explains it's whimpy structure... I'm on a new lead.
03-08-13, 01:50 AM
#2371
Took off my broken lower grill. Will be replacing it with another once I get another set of jack stands so I can put my splash pan back on. Also cleaned some muck around the hood hinges. Cleaned some more muck off of a lower intake manifold for the 13B that will go in. Someday.
fm
fm
03-08-13, 02:25 PM
#2373
Doing some plotting and conniving on next steps today. I need to finalize my "how do I reassemble this seamlessly & securely?" plans on my SA cannister refresh, so I can move on with it.


