What did you do to your FB today?
 03-09-13, 10:48 PM
#2376
I have... a plan. Moving forward on it, too. Light bulb went off last night over my head, and I'm into the carving metal phase now. This one's got 'clever' written all over it, heh.
Took some pix but they came out blurry; I'll try to re-shoot them, as explaining what I'm up to without pix would be just about impossible.
Took some pix but they came out blurry; I'll try to re-shoot them, as explaining what I'm up to without pix would be just about impossible.
 03-10-13, 12:35 PM
#2378
^^ agreed. When my Civic turned 300K, I filmed it.  My 7 is over 325K now and has recently become my daily. Probably only for a couple of months, but I would never would have believed that would happen when I first got it.
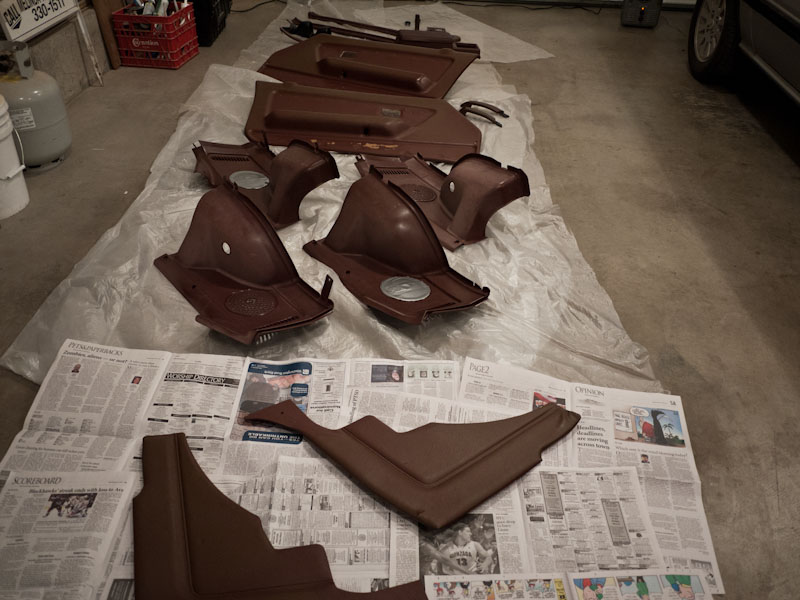
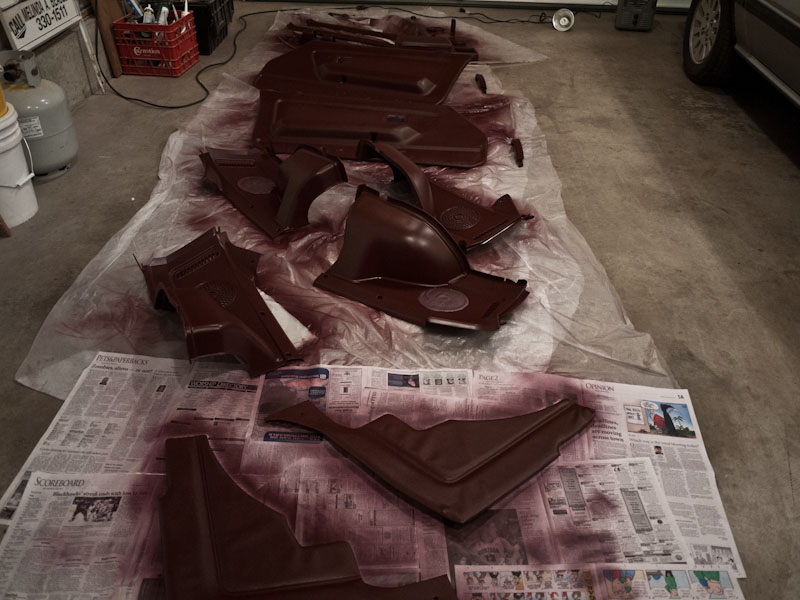
This morning (1am), I pulled off my door panels, re-lubed my door mechanisms with graphite spray so now they lock/unlock without any fuss. It was getting so I was afraid to lock my doors for fear of getting locked out permanently.
Then swapped the old door panels for some leather door panels I picked up from a GSL. Finally, set up a wiring setup to safely do a compression test of a couple of 12As I've got in the garage.
fm
My 7 is over 325K now and has recently become my daily. Probably only for a couple of months, but I would never would have believed that would happen when I first got it. This morning (1am), I pulled off my door panels, re-lubed my door mechanisms with graphite spray so now they lock/unlock without any fuss. It was getting so I was afraid to lock my doors for fear of getting locked out permanently.
Then swapped the old door panels for some leather door panels I picked up from a GSL. Finally, set up a wiring setup to safely do a compression test of a couple of 12As I've got in the garage.
fm
 03-10-13, 06:47 PM
#2381
Discovered my remote filler cap stopped working last night, stopped to fill up - no dice.
No clicking noise, nothing. made it home with the guage on empty for 30km, phew!
Before i start pulling the whole car apart like an idiot, i thought i might as well ask you guys;
can the filler flap solenoid be accessed from inside the car? Or is there a fuse? I think i seem to
recall it can be accessed if you take the taillight out? but cant remember.
Cheers.
03-10-13, 07:10 PM
#2382
Old [Sch|F]ool
Discovered my remote filler cap stopped working last night, stopped to fill up - no dice.
No clicking noise, nothing. made it home with the guage on empty for 30km, phew!
Before i start pulling the whole car apart like an idiot, i thought i might as well ask you guys;
can the filler flap solenoid be accessed from inside the car? Or is there a fuse? I think i seem to
recall it can be accessed if you take the taillight out? but cant remember.
Cheers.
No clicking noise, nothing. made it home with the guage on empty for 30km, phew!
Before i start pulling the whole car apart like an idiot, i thought i might as well ask you guys;
can the filler flap solenoid be accessed from inside the car? Or is there a fuse? I think i seem to
recall it can be accessed if you take the taillight out? but cant remember.
Cheers.
Mine sticks like that sometimes... sometimes it works, sometimes it doesn't, sometimes it works but the door doesn't pop open.
03-10-13, 10:12 PM
#2383
Installed a new brake booster in the SA. I finally have power brakes again! Then I tried to set my ride height and thought I had it spot on...until I realized they were sitting on the bump stops, fail. Now I need to pull it apart and cut the bump stops.
I also installed a new brake master cylinder on the widebody, and out in a sunroof I picked up locally. I am going to have to roll this outside of my garage so I can start working on a camper soon.
I also installed a new brake master cylinder on the widebody, and out in a sunroof I picked up locally. I am going to have to roll this outside of my garage so I can start working on a camper soon.
03-10-13, 11:58 PM
#2384
On the GSL-SE I managed to replace the brake flex line to the differential today. That was the last brake line. Have to wait for a warm day to bleed them. I couldn't get the old line off the splitter and ended up taking the splitter off the car and putting it in a vise.
On the other car I started fitting a carbon fiber trim plate below the car stereo. Real carbon fiber, not vinyl.
Thought more about making molds of the headlight covers and then making a set out of carbon. There is no point other than the bling factor.
On the other car I started fitting a carbon fiber trim plate below the car stereo. Real carbon fiber, not vinyl.
Thought more about making molds of the headlight covers and then making a set out of carbon. There is no point other than the bling factor.
03-11-13, 12:39 AM
#2385
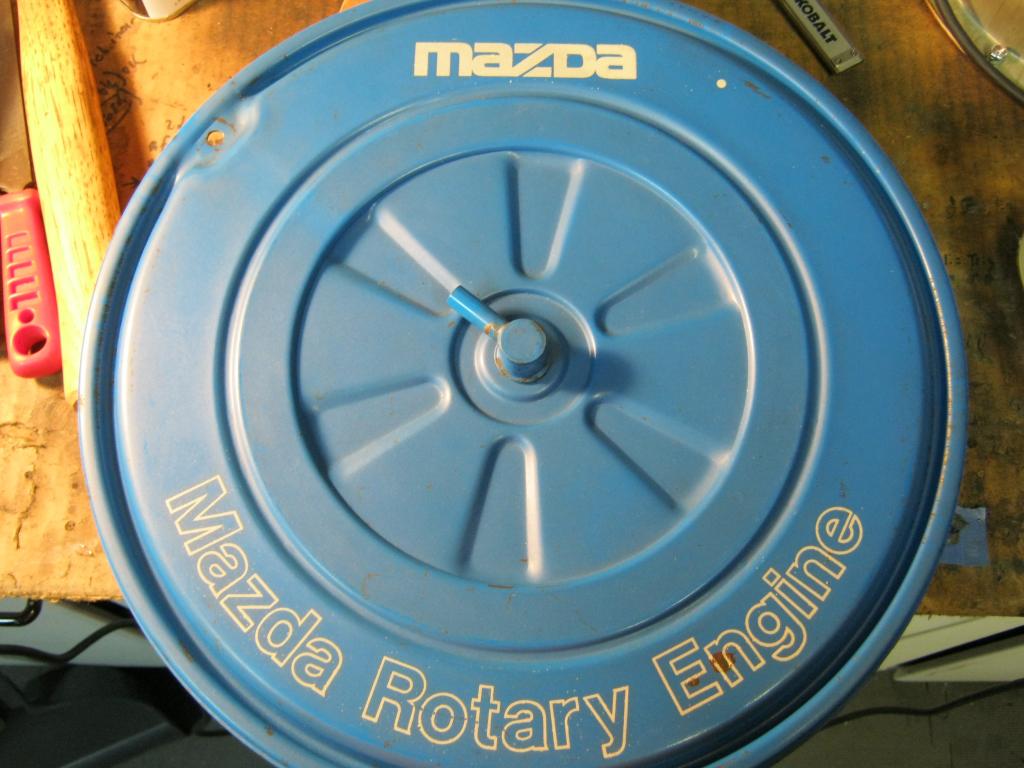
Finalized my method for adding studs to the inside of the SA air cleaner lid, in order to re-install a refurbished charcoal canister.
Goes like this:
After cutting the canister free, there's a retaining ring spot-welded to the inside of the lid. The canister was originally mounted by a lip having been pressed under this ring, and the only way to remove the canister is to cut lip off.
So, there's this ring left inside, already welded to the lid, with a raised lip all around the outside edge.
First, I bought a handful of 8-32 stainless truss head screws. Truss-heads have a nice wide head that's not too thick.
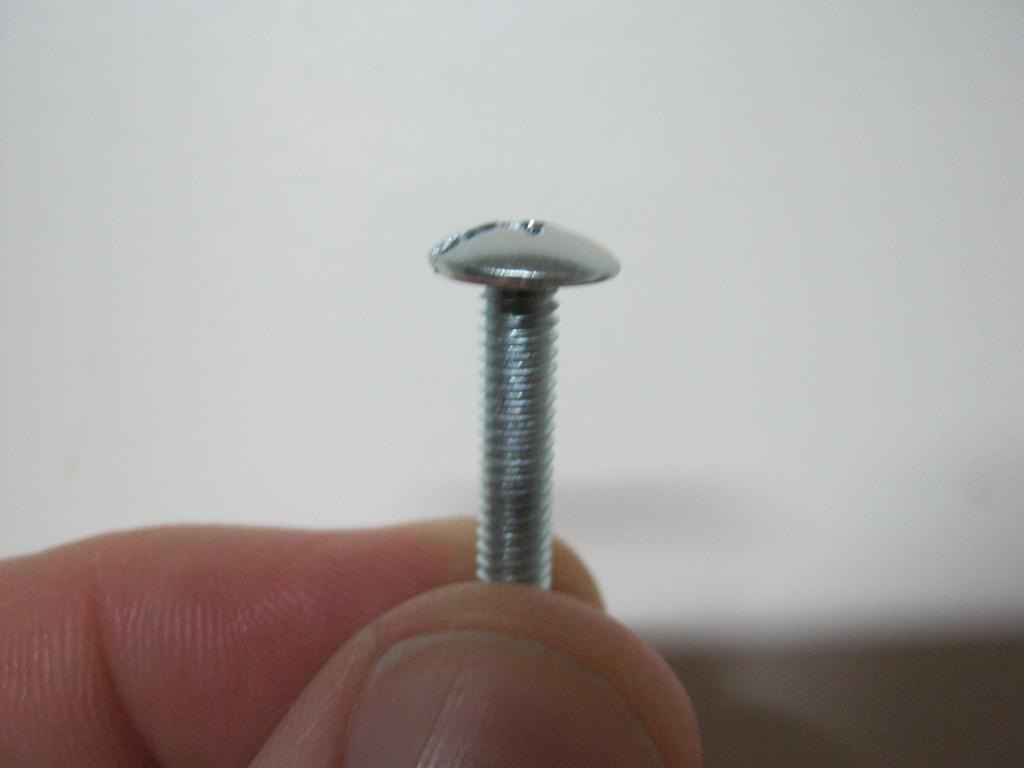
Using a bench grinder, I ground the heads down flat to 0.050" thickness
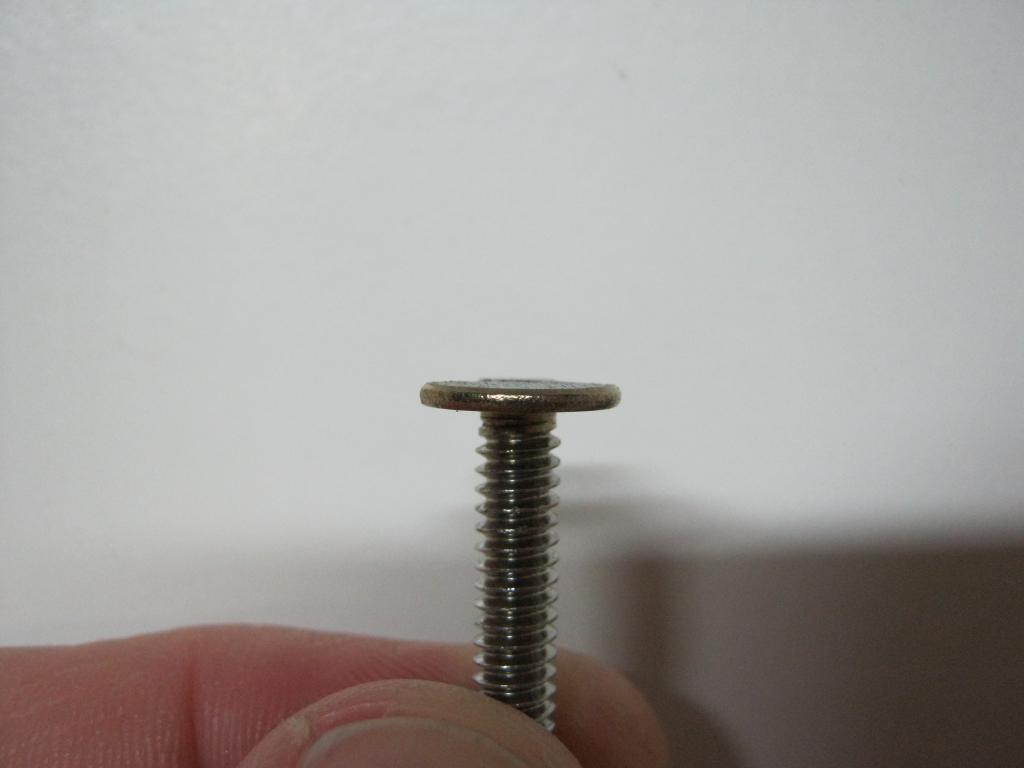
Then, using a dremel and a cut-off wheel, I cut a pair of right-angles into one side of the head, making it a rounded 'T' shape.
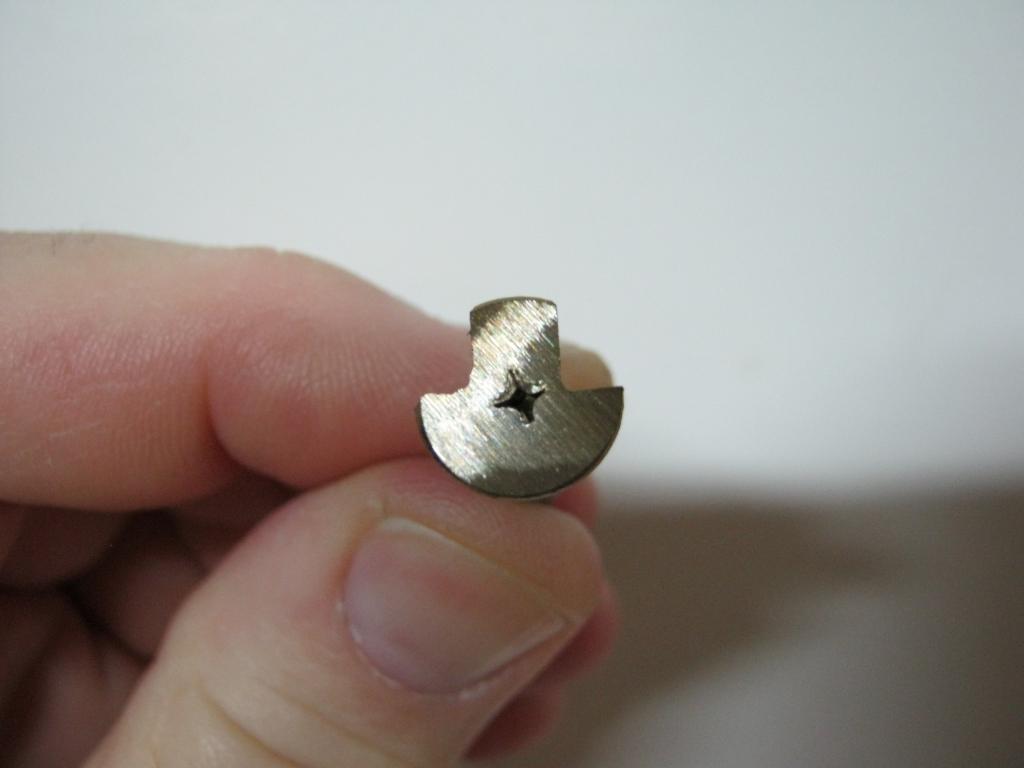
On the retaining ring, I cut a u-shaped slot the same width as the shaft of the screw, and just deep enough into the ring that the shaft will be centered under the raised lip of the ring. I used a tiny high-speed end mill in the dremel for this - it's only about 1/8 of an inch across. Cuts the soft steel like butter.
I then pried the lips of the ring up just enough to make some working space...
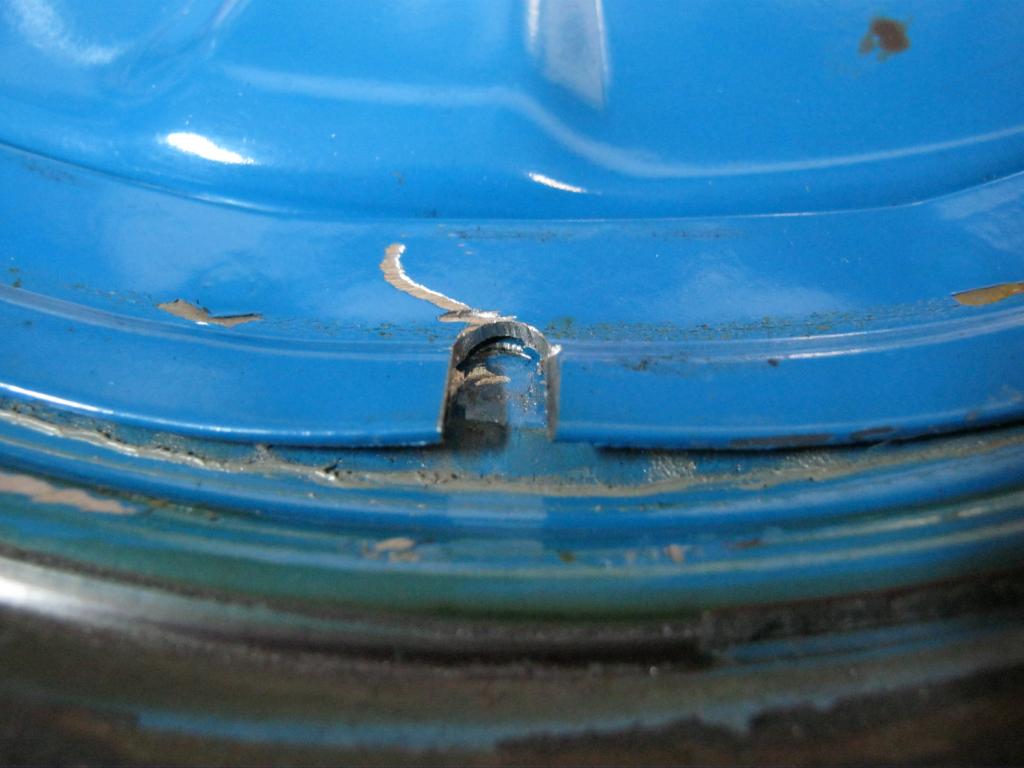
...and using a drift, I drove the rounded part of the head under the tightly-fitted rear half of the ring.
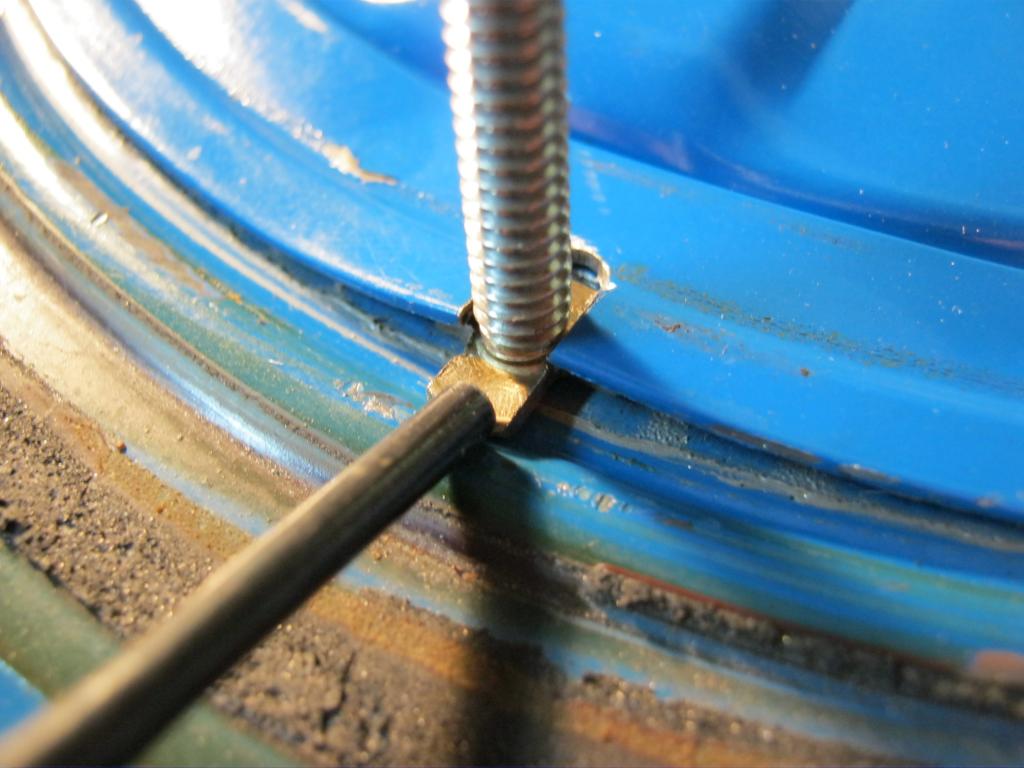
Once the screw's in place, I swaged the two corners of the slot down into the recesses I'd cut into the screw head, locking it in place and preventing rotation

Finished; now, reapeat 5 more times without error, heh.
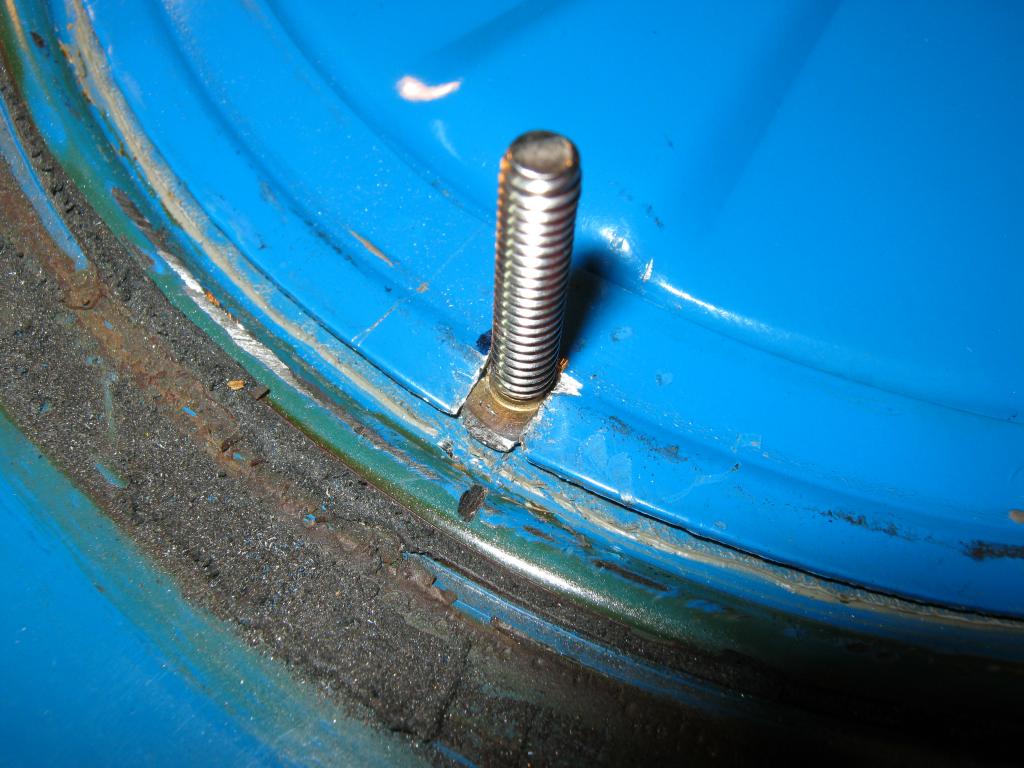
Completely invisible from the outside.
I'm going to strip the paint from the inside and put a small braze dot on each stud to be sure it stays locked in place, but they fit so well that I could probably get by with them just as is.
Clever, yes?
Goes like this:
After cutting the canister free, there's a retaining ring spot-welded to the inside of the lid. The canister was originally mounted by a lip having been pressed under this ring, and the only way to remove the canister is to cut lip off.
So, there's this ring left inside, already welded to the lid, with a raised lip all around the outside edge.
First, I bought a handful of 8-32 stainless truss head screws. Truss-heads have a nice wide head that's not too thick.
Using a bench grinder, I ground the heads down flat to 0.050" thickness
Then, using a dremel and a cut-off wheel, I cut a pair of right-angles into one side of the head, making it a rounded 'T' shape.
On the retaining ring, I cut a u-shaped slot the same width as the shaft of the screw, and just deep enough into the ring that the shaft will be centered under the raised lip of the ring. I used a tiny high-speed end mill in the dremel for this - it's only about 1/8 of an inch across. Cuts the soft steel like butter.
I then pried the lips of the ring up just enough to make some working space...
...and using a drift, I drove the rounded part of the head under the tightly-fitted rear half of the ring.
Once the screw's in place, I swaged the two corners of the slot down into the recesses I'd cut into the screw head, locking it in place and preventing rotation
Finished; now, reapeat 5 more times without error, heh.
Completely invisible from the outside.
I'm going to strip the paint from the inside and put a small braze dot on each stud to be sure it stays locked in place, but they fit so well that I could probably get by with them just as is.
Clever, yes?
03-11-13, 03:18 AM
#2386
Pull the left side rear interior panel off and you can reach the actuator if you sneak your hand into the opening behind the speaker. There's a tab that sticks up (maybe down) that you can push towards the rear of the car to unlack the fuel door.
Mine sticks like that sometimes... sometimes it works, sometimes it doesn't, sometimes it works but the door doesn't pop open.
Mine sticks like that sometimes... sometimes it works, sometimes it doesn't, sometimes it works but the door doesn't pop open.

 03-11-13, 05:24 PM
#2391
Put it back on the ground and went for a drive! New Blues, bushings, bigger front bar, and a set of mildly cut factory springs I've been carrying around since 1988. What with the dampers that actually work I think I'm a tad higher, but it's okay, she drives like a dream.
03-12-13, 11:03 AM
#2393
Just drove home from Toney's Muffler shop. I'd been running an antique Racing Beat road race header with the collector/silencer thru a cobbled together sub 2" midpipe and stock muffler. Now behind the silencer I have a 2" magnaflow 22"x4" acting as a midpipe going into a 2.5" dual outlet Borla. And my stock muffler tips slid on beautifully. The metallic bumblebee has been replaced by the MGM Lion. No louder, 'cept maybe at WOT. Quieter at idle. And just luscious.
03-12-13, 11:48 AM
#2394
Moderator
iTrader: (3)
Join Date: Mar 2001
Location: https://www2.mazda.com/en/100th/
Posts: 30,829
Received 2,597 Likes
on
1,845 Posts
03-12-13, 11:48 AM
#2395
Moderator
iTrader: (3)
Join Date: Mar 2001
Location: https://www2.mazda.com/en/100th/
Posts: 30,829
Received 2,597 Likes
on
1,845 Posts
i walked by mine, and realized i own one!
03-12-13, 11:52 AM
#2396
Just drove home from Toney's Muffler shop. I'd been running an antique Racing Beat road race header with the collector/silencer thru a cobbled together sub 2" midpipe and stock muffler. Now behind the silencer I have a 2" magnaflow 22"x4" acting as a midpipe going into a 2.5" dual outlet Borla. And my stock muffler tips slid on beautifully. The metallic bumblebee has been replaced by the MGM Lion. No louder, 'cept maybe at WOT. Quieter at idle. And just luscious.
I'll be getting an RB downpipe and presilencer (both 2.5" FC turbo) through UPS this week sometime and I'll be going with 2.5" mild steel to a Magnaflow muffler in the rear.
I chuckled out loud
 03-12-13, 12:30 PM
#2399
Just drove home from Toney's Muffler shop. I'd been running an antique Racing Beat road race header with the collector/silencer thru a cobbled together sub 2" midpipe and stock muffler. Now behind the silencer I have a 2" magnaflow 22"x4" acting as a midpipe going into a 2.5" dual outlet Borla. And my stock muffler tips slid on beautifully. The metallic bumblebee has been replaced by the MGM Lion. No louder, 'cept maybe at WOT. Quieter at idle. And just luscious.
03-12-13, 04:02 PM
#2400
Cleaned out a section of the garage for me to work on some stuff.
Started tearing into a carburetor I just got from a forum member, and it is already a pain in the @$$. Overall it's a good carb but super dirty.
Stripped 2 screws in the most hard to reach places while removing all the emissions. Pulled out the good old electric drill and hollowed them out. > Nothing survives once I'm on a mission.
I picked up my rebuild kit by GP Sorensen and tomorrow I should be pulling it apart for cleaning.
Also sent out the money for the grose jets.
Overall a pretty good day.
Started tearing into a carburetor I just got from a forum member, and it is already a pain in the @$$. Overall it's a good carb but super dirty.
Stripped 2 screws in the most hard to reach places while removing all the emissions. Pulled out the good old electric drill and hollowed them out. >
Nothing survives once I'm on a mission. I picked up my rebuild kit by GP Sorensen and tomorrow I should be pulling it apart for cleaning.
Also sent out the money for the grose jets.
Overall a pretty good day.