
Latest Experiment…Failure!


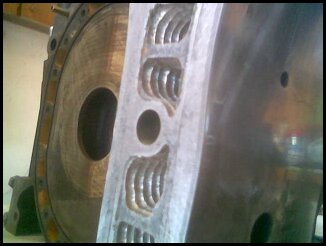
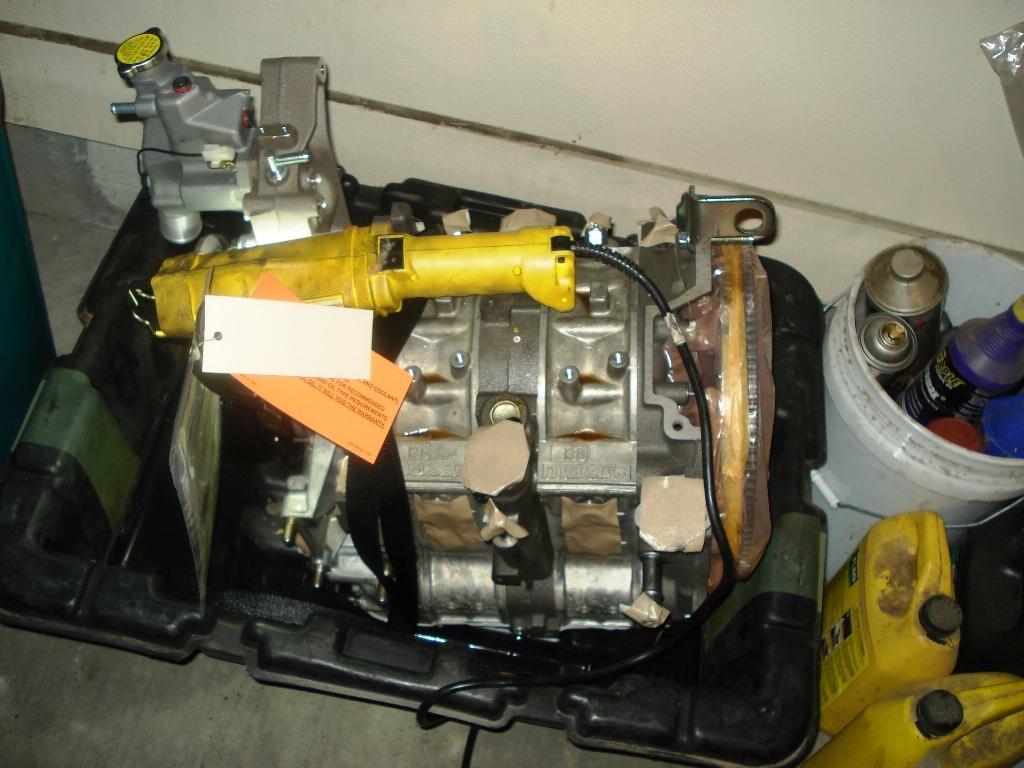
Attached a pic of one of the housings I did for my recent (and first entirely solo) rebuild.
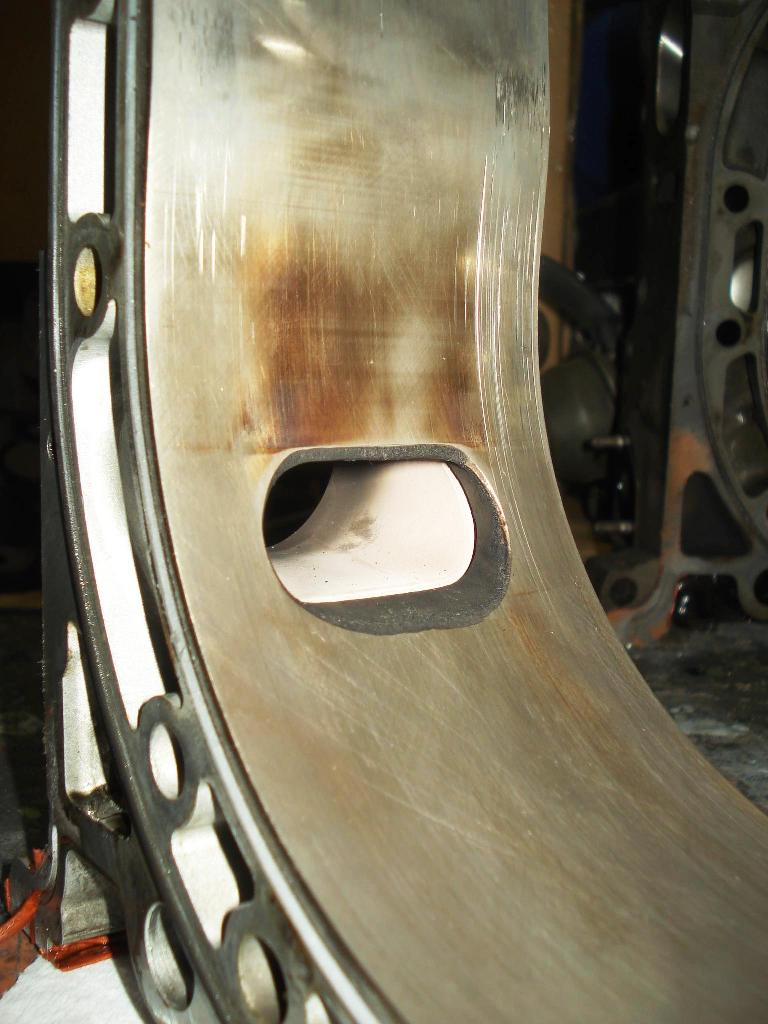
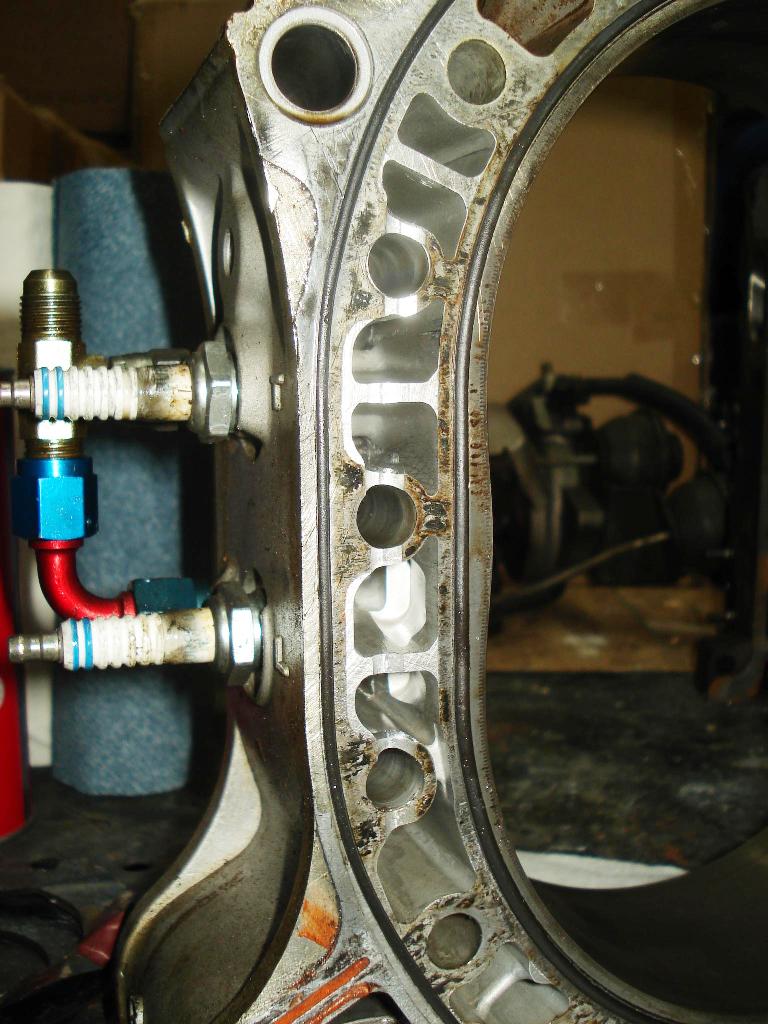
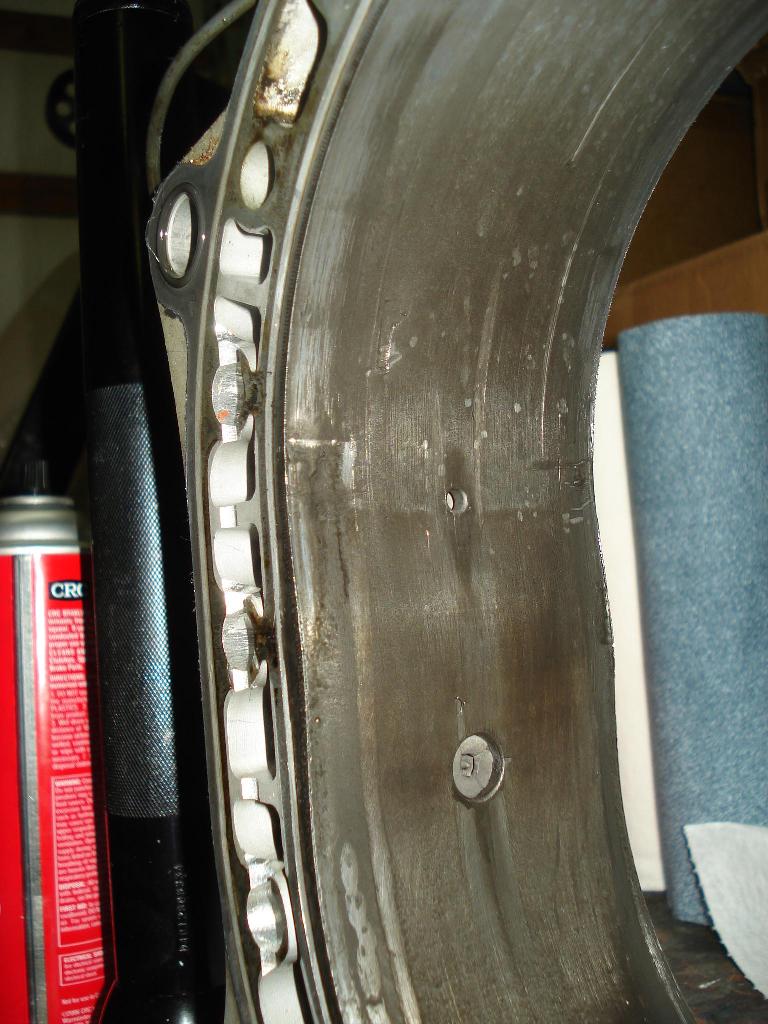
I just did the common jacket mod, nothing super special. Used a dremel engraver bit (#100) on the drill press and went one groove at a time . The only other thing I did thats neat is welded up the EGR holes in the exhaust sleeves and groudn them smooth. Take a good look at a housing next time you get the chance and take note of all the cavities that would be filled with (at WOT +1600F) HOT exhaust gas and soaking into the coolant as a result.
Don't know how effective that mod will be, but I'm giving it a shot nonetheless.
On the rebuild I'll do on the keg I'm swapping this one for, I plan to do similar jacket grooves (done with a dremel engraver bit on the drill press, nothing too special...) but with my newly found thin and LONG end mill I will add a piece of 1/8" AL to either side of the leading plug bore on a diagonal. I'll be cutting out a piece from center of the "divider/support" between the dowel bores and then notching the inside and outside edges (inside on the upper tension bolt hole, outside on the lower) to provide support for the piece. Also, doing it on a diagonal will allow for support/guide notches at the ends of the additional piece without having to cut into the tension bolt land. It will be a minor interferance fit and the sandwiching of the engine will also prevent it from uprooting afterwards.
Keep the discussion/thoughts going
I just did the common jacket mod, nothing super special. Used a dremel engraver bit (#100) on the drill press and went one groove at a time
. The only other thing I did thats neat is welded up the EGR holes in the exhaust sleeves and groudn them smooth. Take a good look at a housing next time you get the chance and take note of all the cavities that would be filled with (at WOT +1600F) HOT exhaust gas and soaking into the coolant as a result.Don't know how effective that mod will be, but I'm giving it a shot nonetheless.
On the rebuild I'll do on the keg I'm swapping this one for, I plan to do similar jacket grooves (done with a dremel engraver bit on the drill press, nothing too special...) but with my newly found thin and LONG end mill I will add a piece of 1/8" AL to either side of the leading plug bore on a diagonal. I'll be cutting out a piece from center of the "divider/support" between the dowel bores and then notching the inside and outside edges (inside on the upper tension bolt hole, outside on the lower) to provide support for the piece. Also, doing it on a diagonal will allow for support/guide notches at the ends of the additional piece without having to cut into the tension bolt land. It will be a minor interferance fit and the sandwiching of the engine will also prevent it from uprooting afterwards.
Keep the discussion/thoughts going

Attached a pic of one of the housings I did for my recent (and first entirely solo) rebuild.
I just did the common jacket mod, nothing super special. Used a dremel engraver bit (#100) on the drill press and went one groove at a time. The only other thing I did thats neat is welded up the EGR holes in the exhaust sleeves and groudn them smooth. Take a good look at a housing next time you get the chance and take note of all the cavities that would be filled with (at WOT +1600F) HOT exhaust gas and soaking into the coolant as a result.
Don't know how effective that mod will be, but I'm giving it a shot nonetheless.
On the rebuild I'll do on the keg I'm swapping this one for, I plan to do similar jacket grooves (done with a dremel engraver bit on the drill press, nothing too special...) but with my newly found thin and LONG end mill I will add a piece of 1/8" AL to either side of the leading plug bore on a diagonal. I'll be cutting out a piece from center of the "divider/support" between the dowel bores and then notching the inside and outside edges (inside on the upper tension bolt hole, outside on the lower) to provide support for the piece. Also, doing it on a diagonal will allow for support/guide notches at the ends of the additional piece without having to cut into the tension bolt land. It will be a minor interferance fit and the sandwiching of the engine will also prevent it from uprooting afterwards.
Keep the discussion/thoughts going
I just did the common jacket mod, nothing super special. Used a dremel engraver bit (#100) on the drill press and went one groove at a time
. The only other thing I did thats neat is welded up the EGR holes in the exhaust sleeves and groudn them smooth. Take a good look at a housing next time you get the chance and take note of all the cavities that would be filled with (at WOT +1600F) HOT exhaust gas and soaking into the coolant as a result.Don't know how effective that mod will be, but I'm giving it a shot nonetheless.
On the rebuild I'll do on the keg I'm swapping this one for, I plan to do similar jacket grooves (done with a dremel engraver bit on the drill press, nothing too special...) but with my newly found thin and LONG end mill I will add a piece of 1/8" AL to either side of the leading plug bore on a diagonal. I'll be cutting out a piece from center of the "divider/support" between the dowel bores and then notching the inside and outside edges (inside on the upper tension bolt hole, outside on the lower) to provide support for the piece. Also, doing it on a diagonal will allow for support/guide notches at the ends of the additional piece without having to cut into the tension bolt land. It will be a minor interferance fit and the sandwiching of the engine will also prevent it from uprooting afterwards.
Keep the discussion/thoughts going
lol, why to which part?
One of the why's would be to try out some new (or at least new to me) things to try and make these engien work a little easier?
But what specifically do you want to know why I'm doing?
One of the why's would be to try out some new (or at least new to me) things to try and make these engien work a little easier?
But what specifically do you want to know why I'm doing?
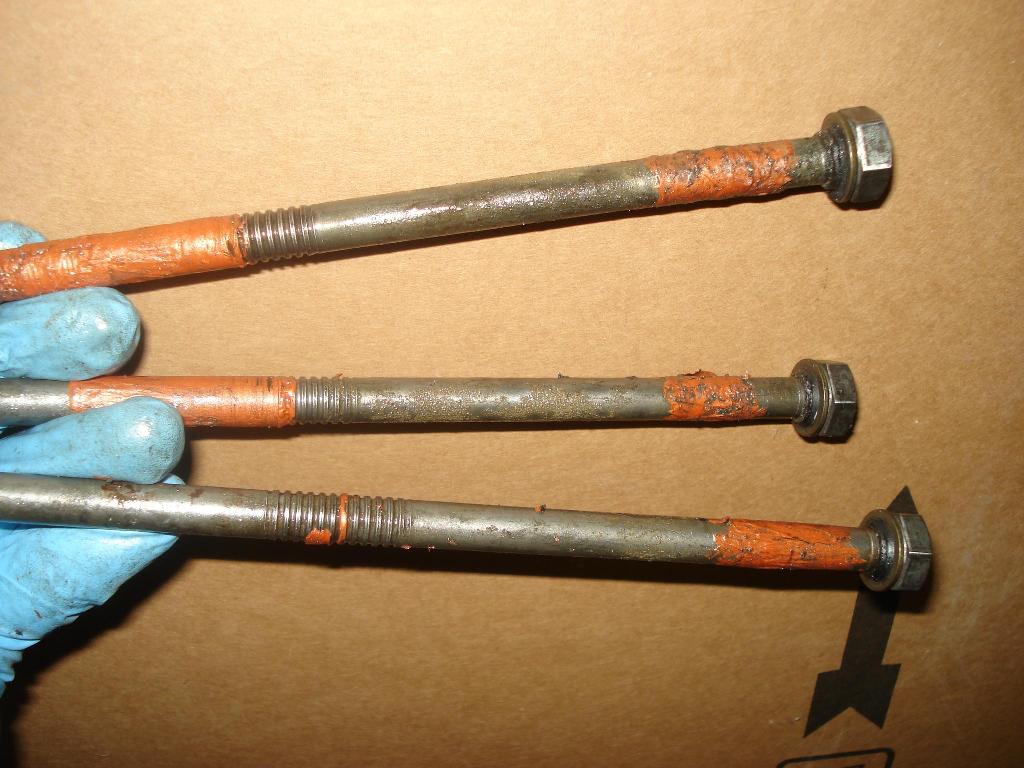
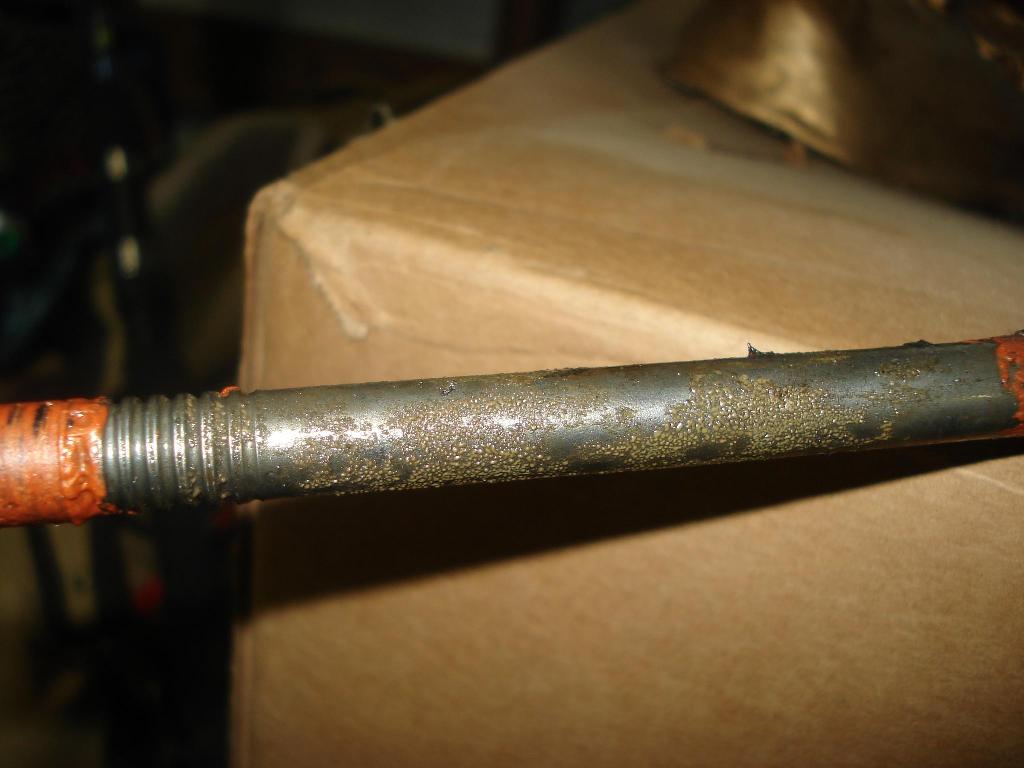
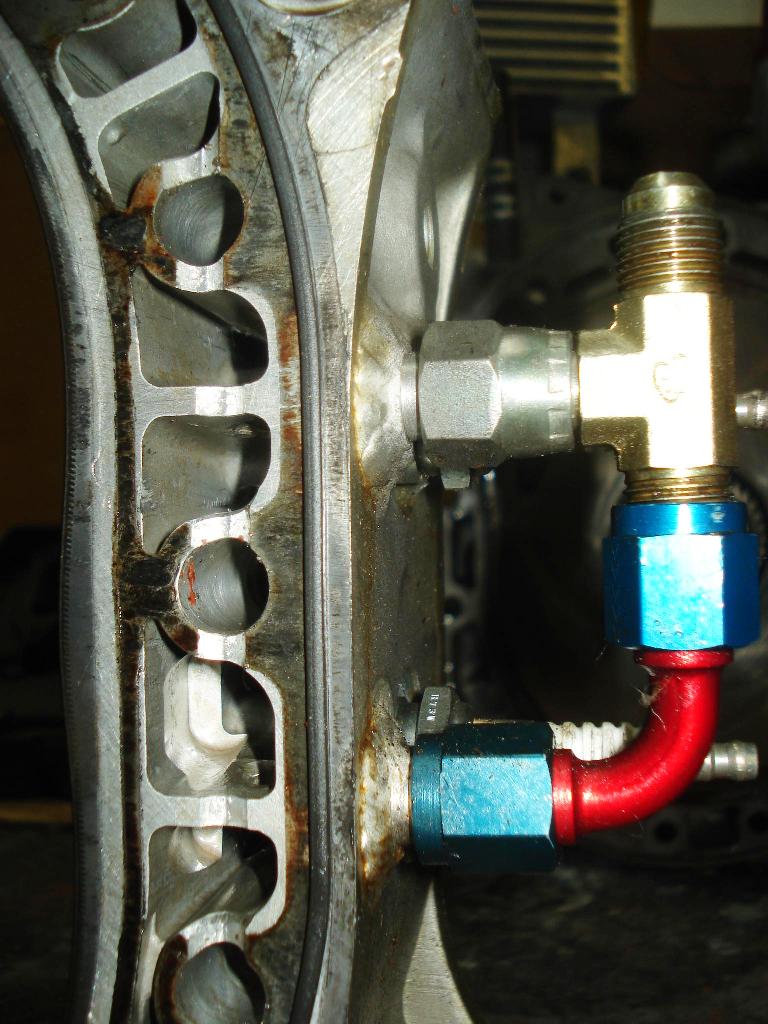
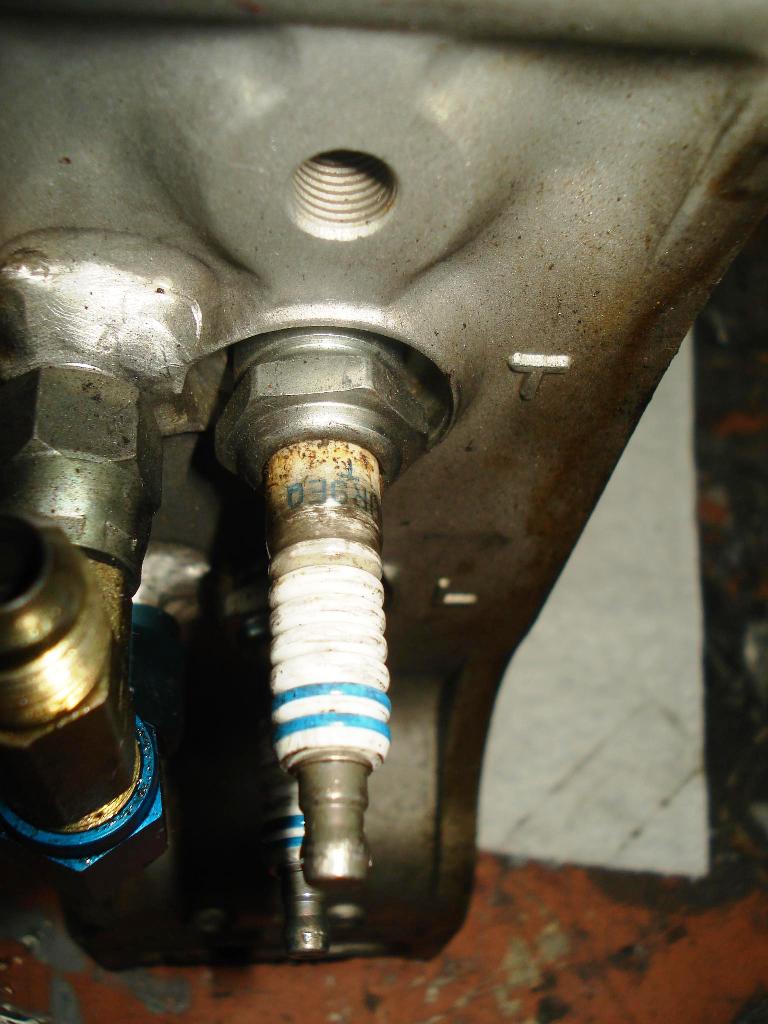
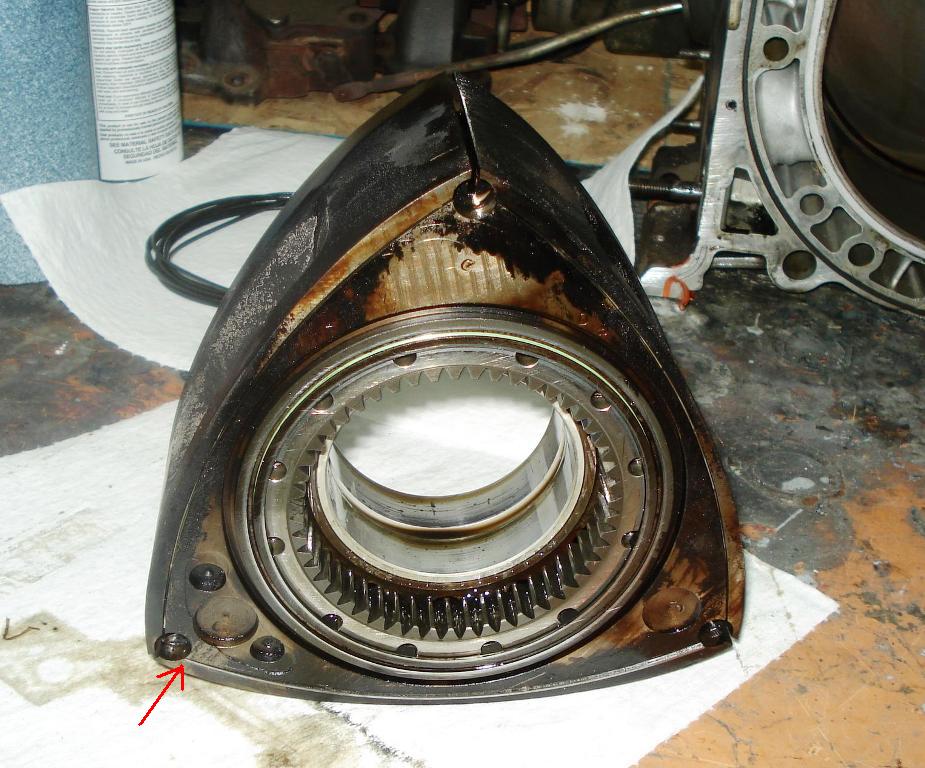
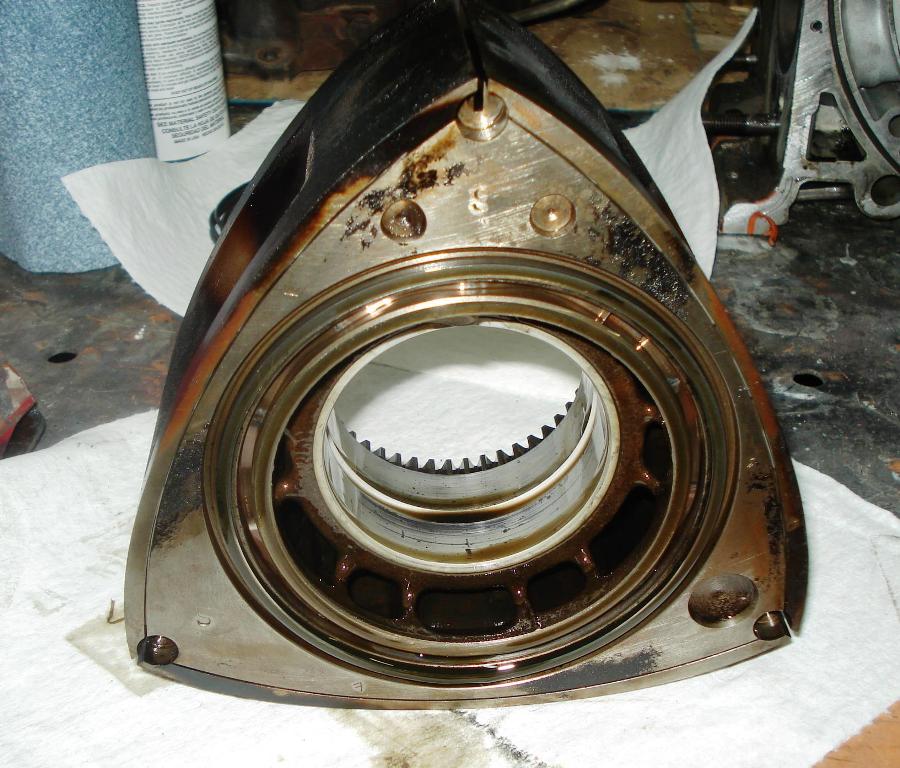
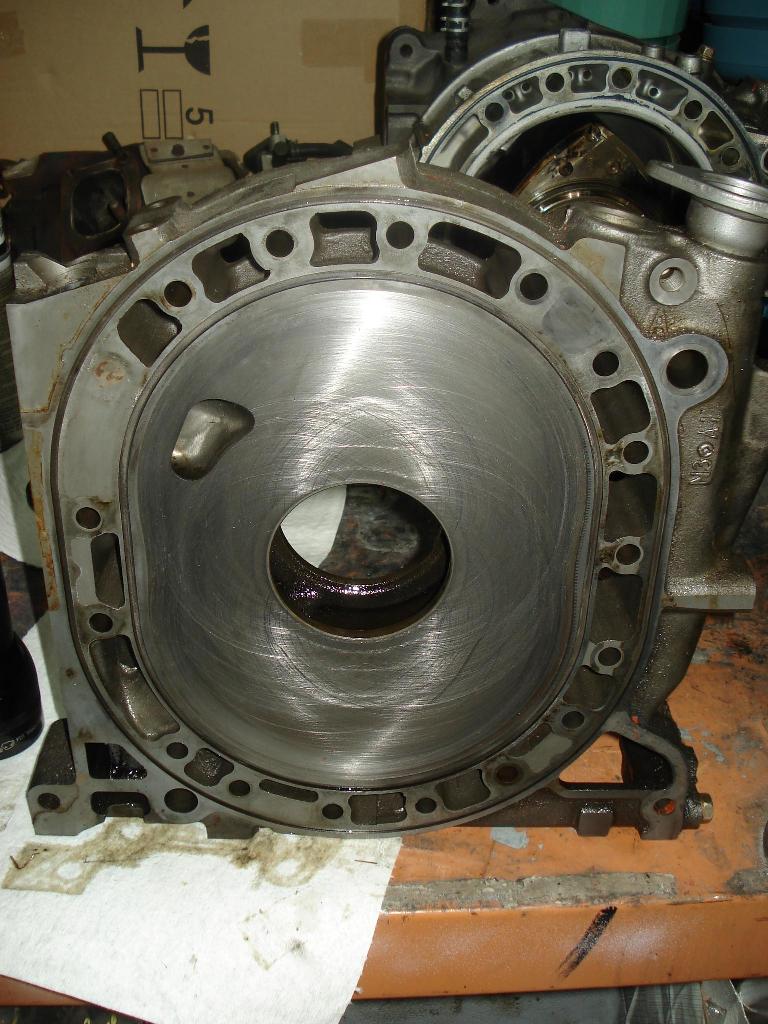
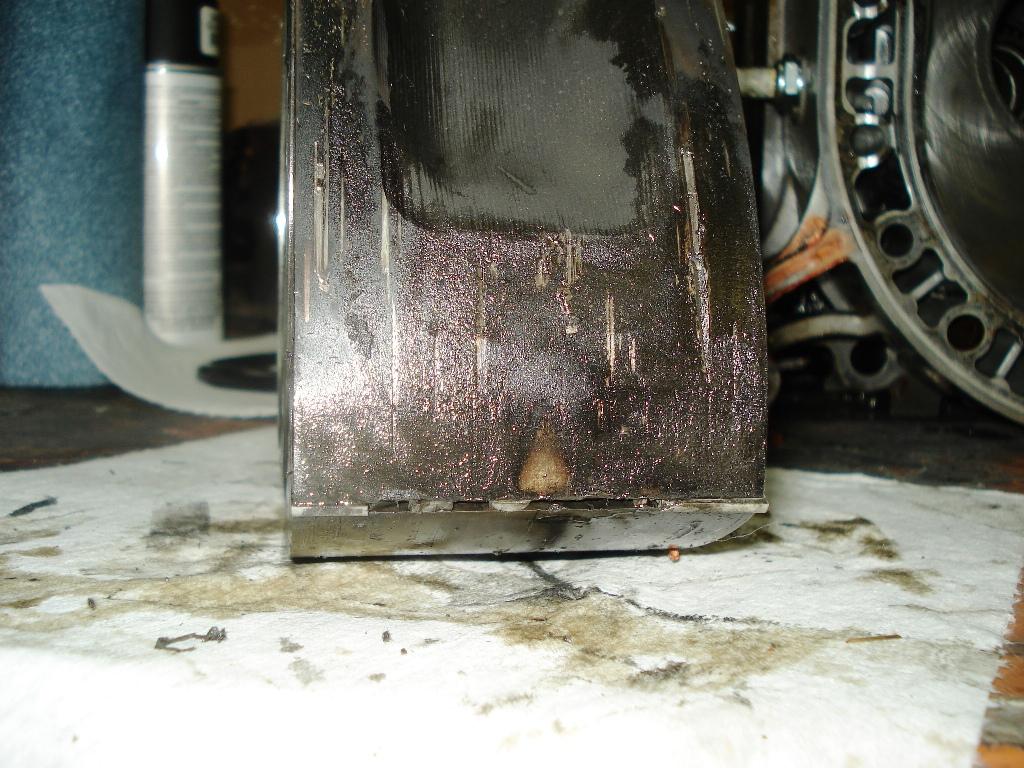
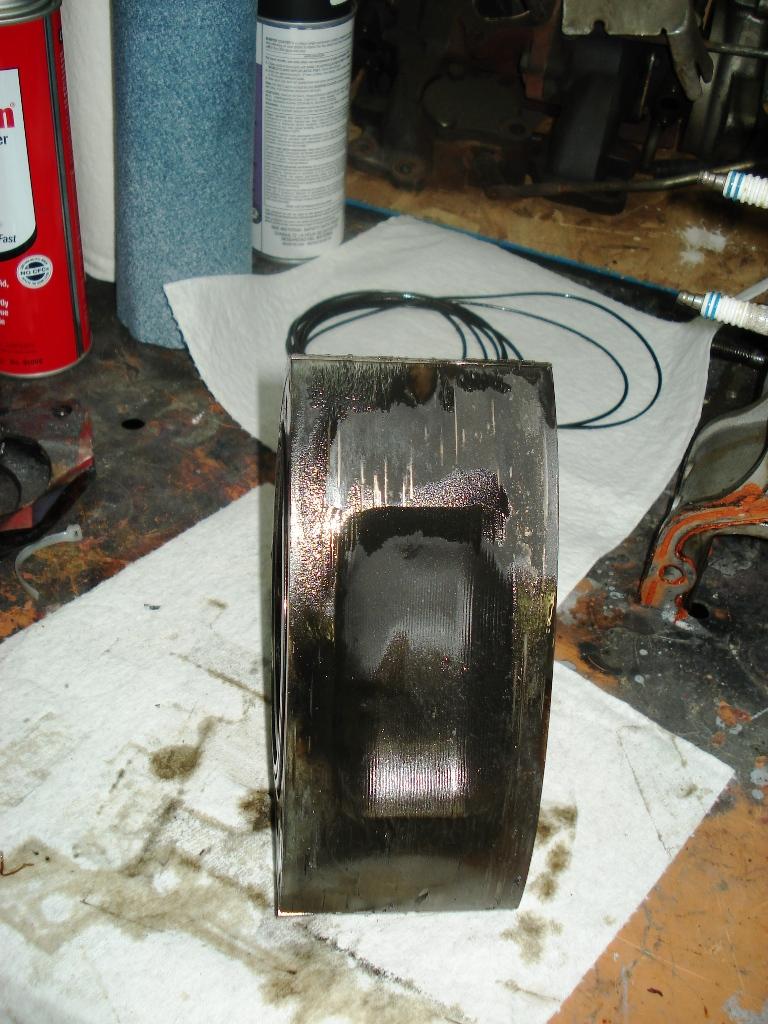
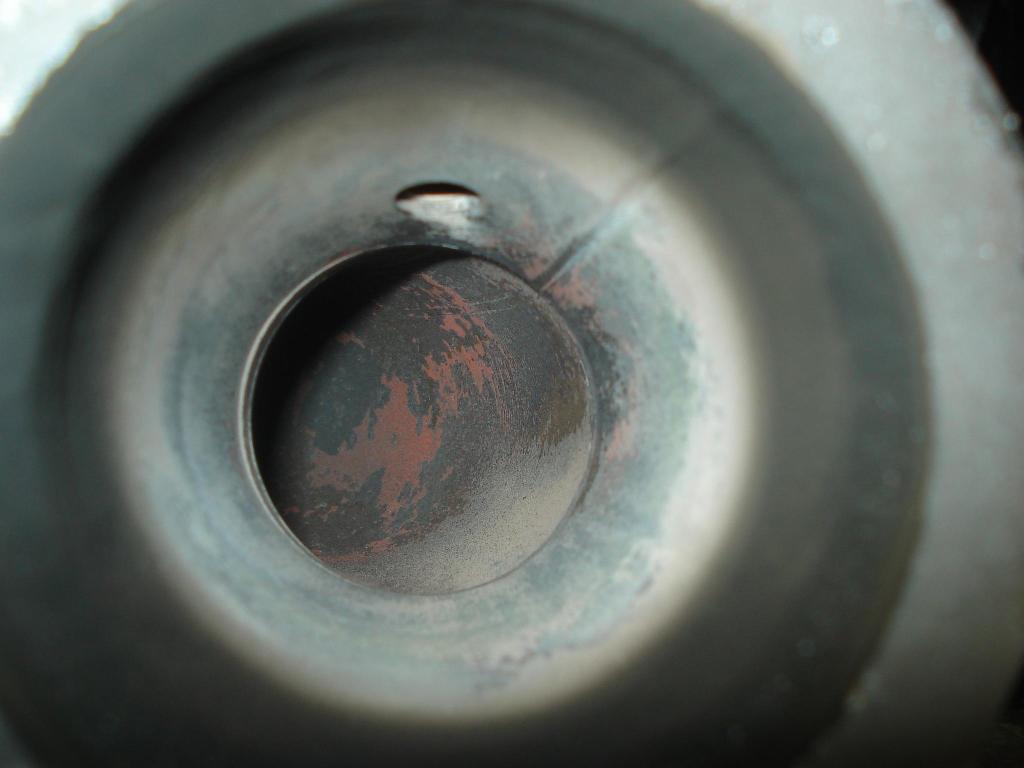
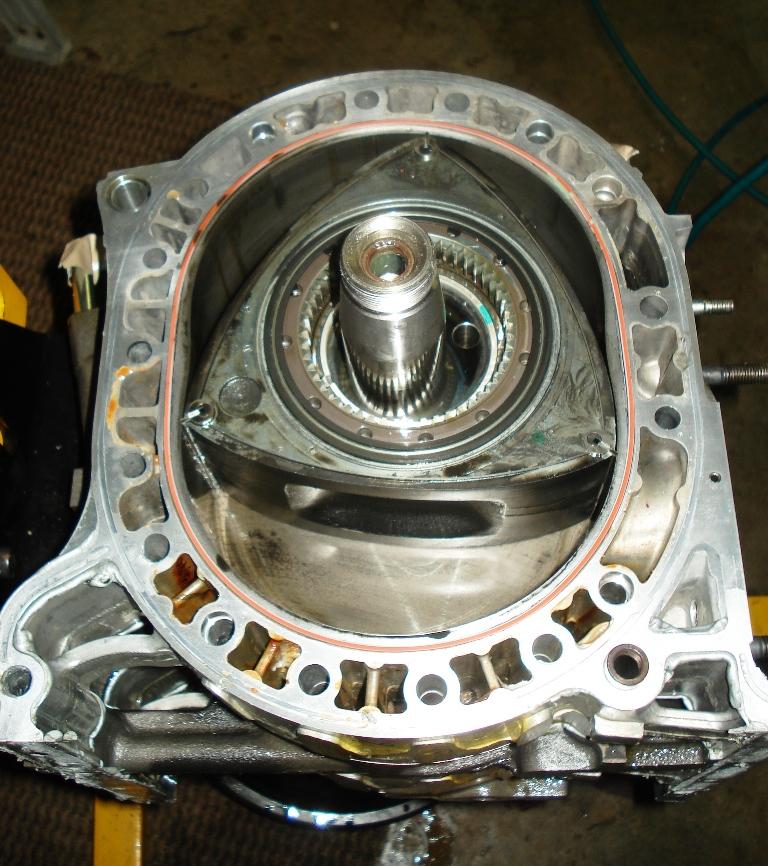
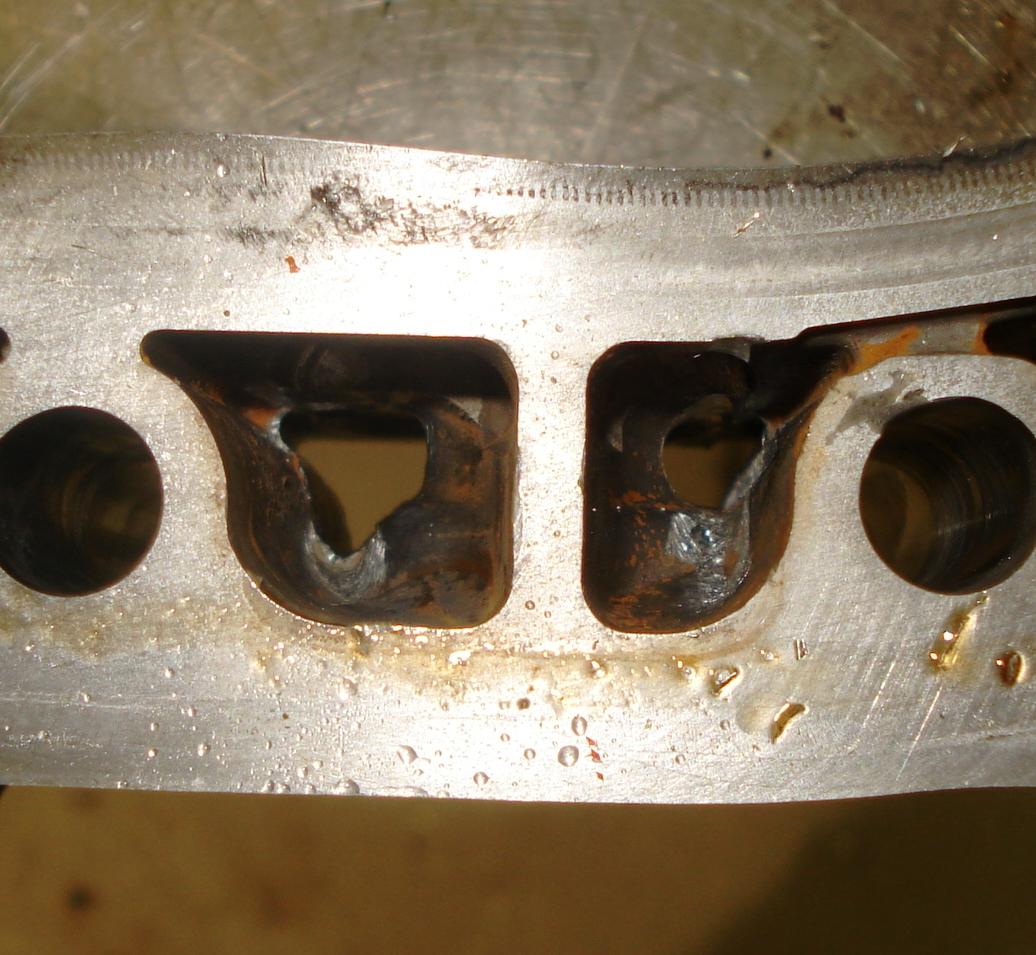
Here are pictures of the blown motor - roughly 5000 miles of usage. Note the plug tips are well used due to fuel economy tune where the car ran at 17:1 AFR during cruising at 3000 rpms - 75mph. Roughly 1500 miles worth.
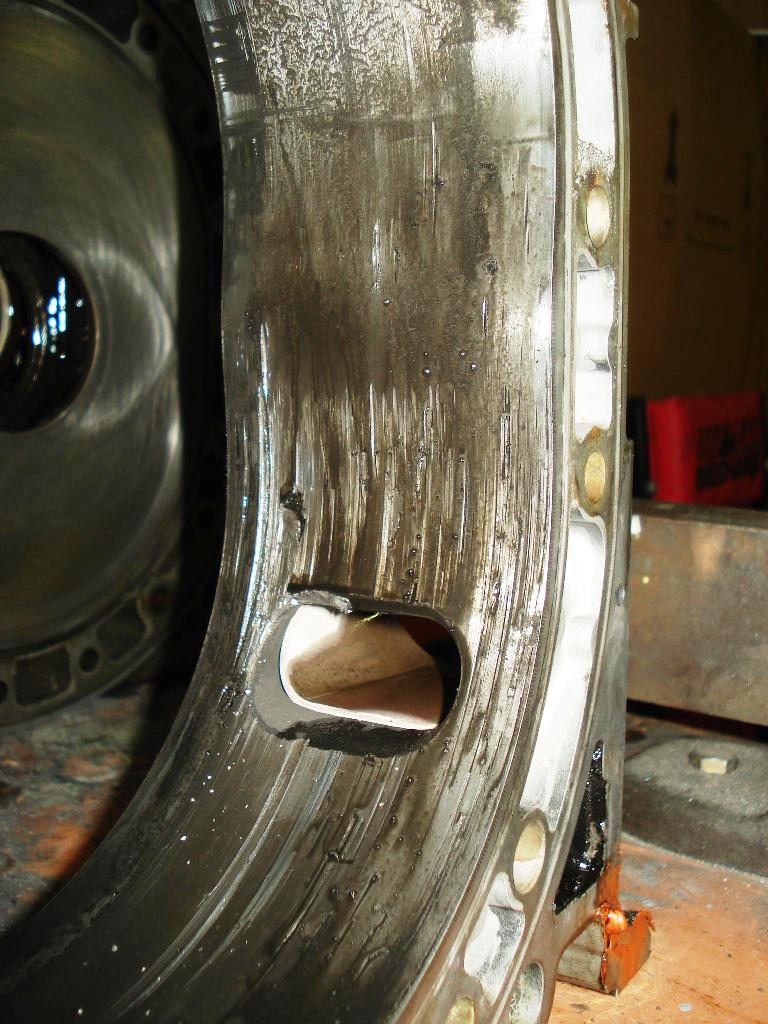
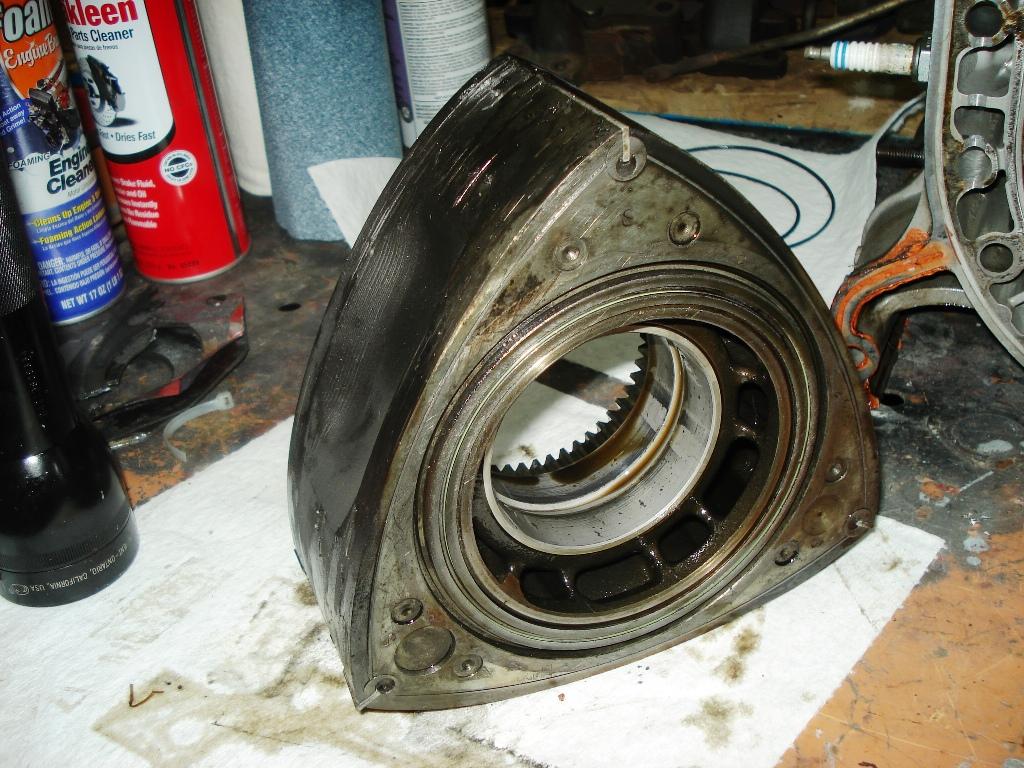
Small amount of calcite forming.
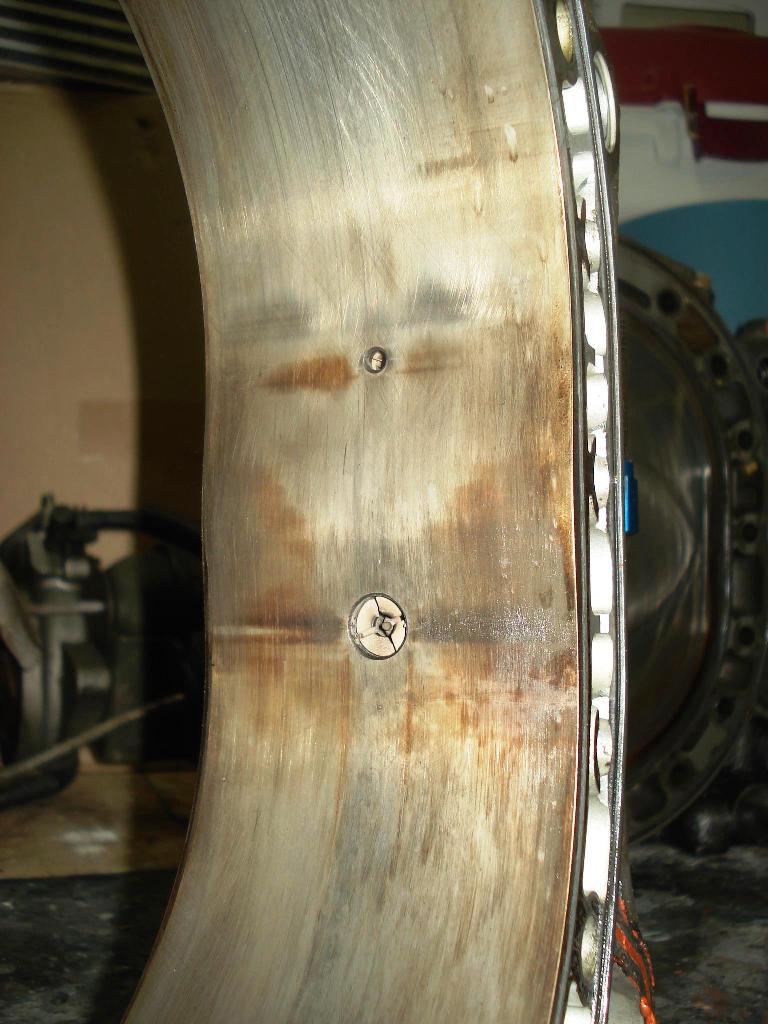
What the rear rotor housing looked like when taken apart.
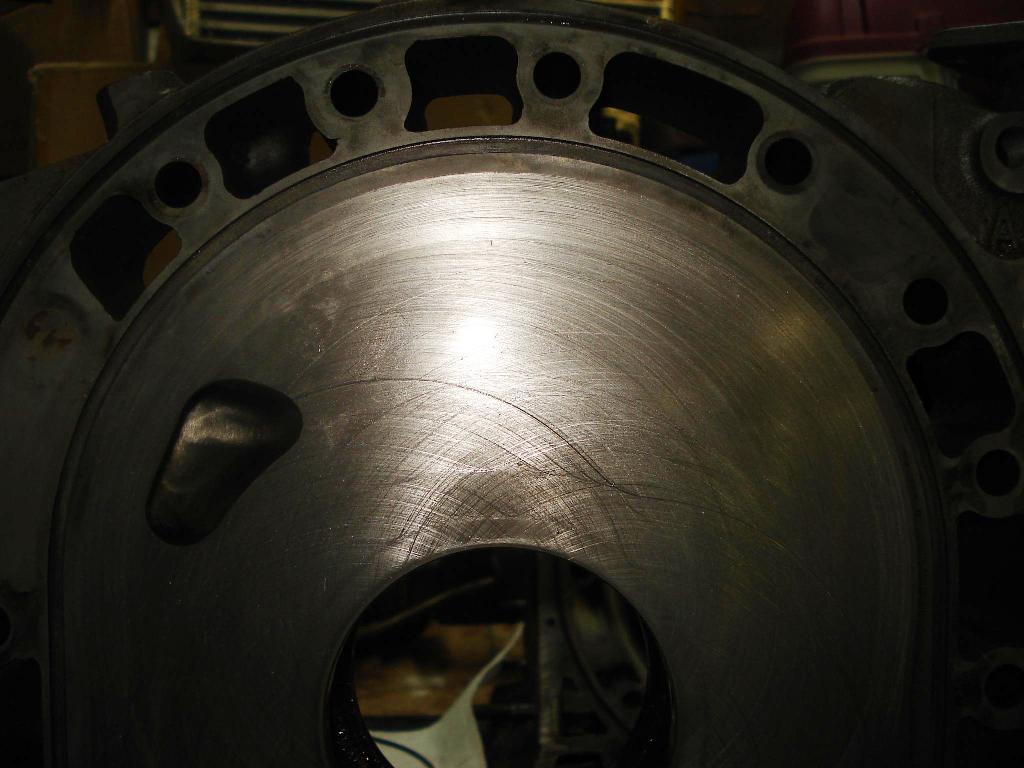
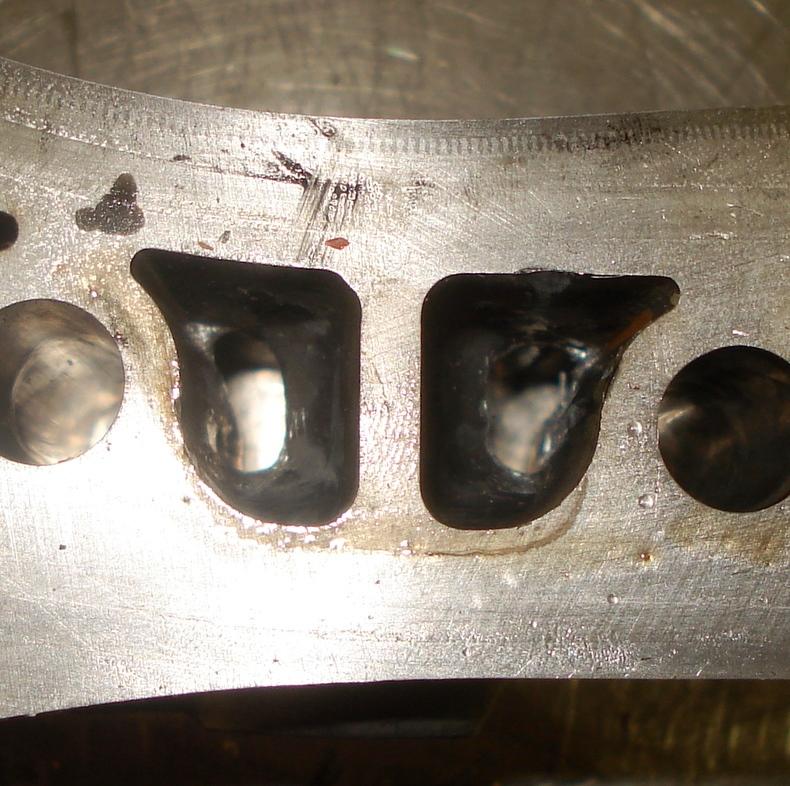
After a wipe with a paper towel.

Small amount of calcite forming.
What the rear rotor housing looked like when taken apart.
After a wipe with a paper towel.
Last edited by afgmoto1978; Oct 31, 2008 at 05:42 PM.


Thread Starter
"Elusive, not deceptive!”
Joined: May 2007
Posts: 930
Likes: 13
From: Slidell, LA
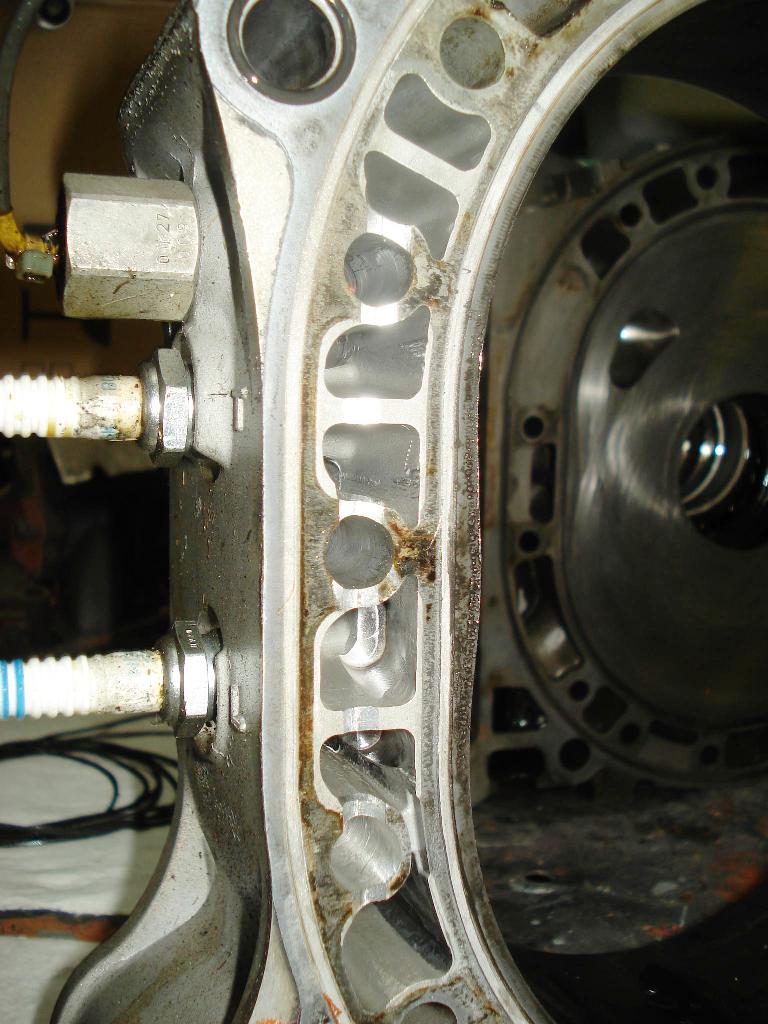
Here are pictures of the blown motor - roughly 5000 miles of usage. Note the plug tips are well used due to fuel economy tune where the car ran at 17:1 AFR during cruising at 3000 rpms - 75mph. Roughly 1500 miles worth.
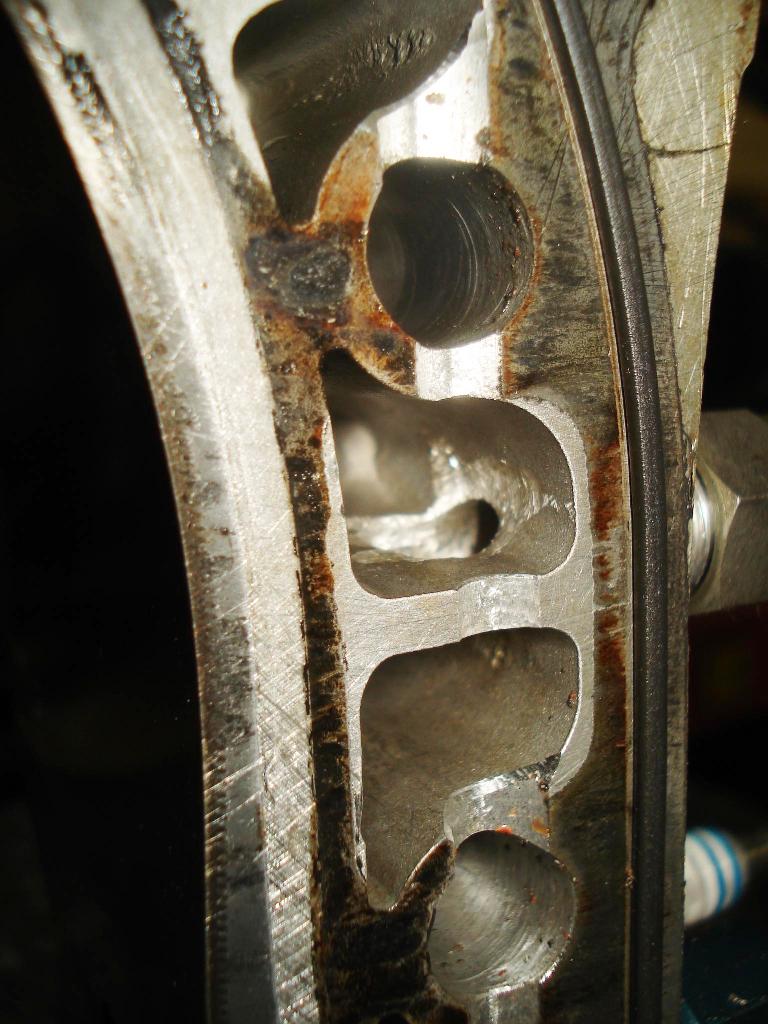
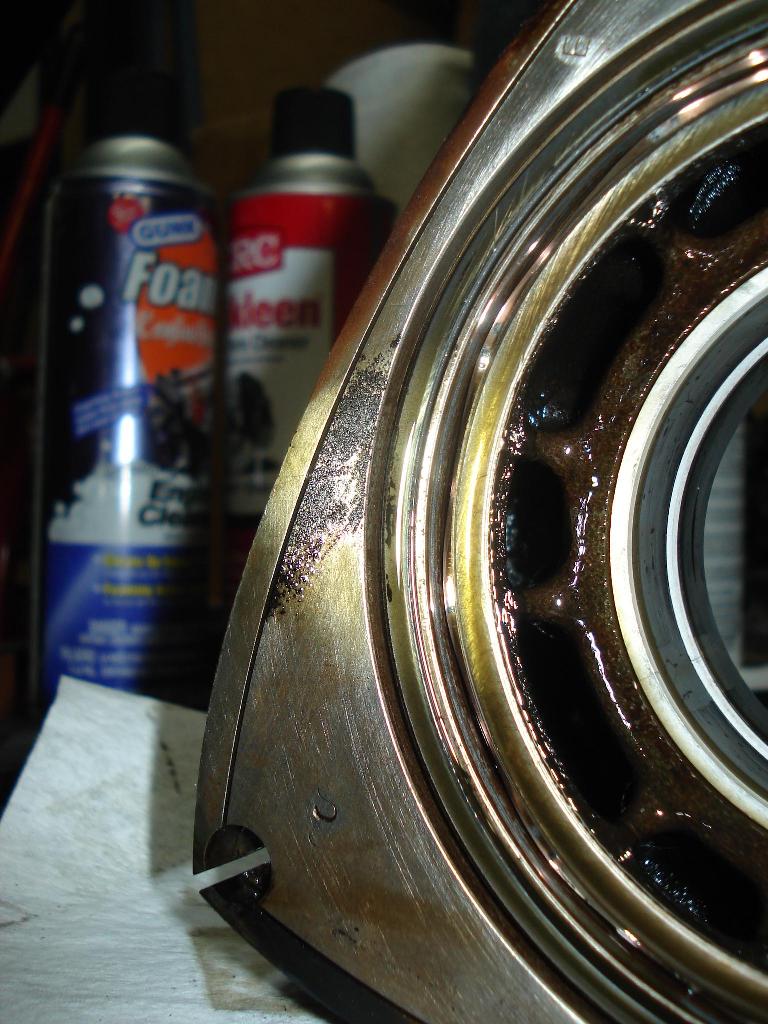
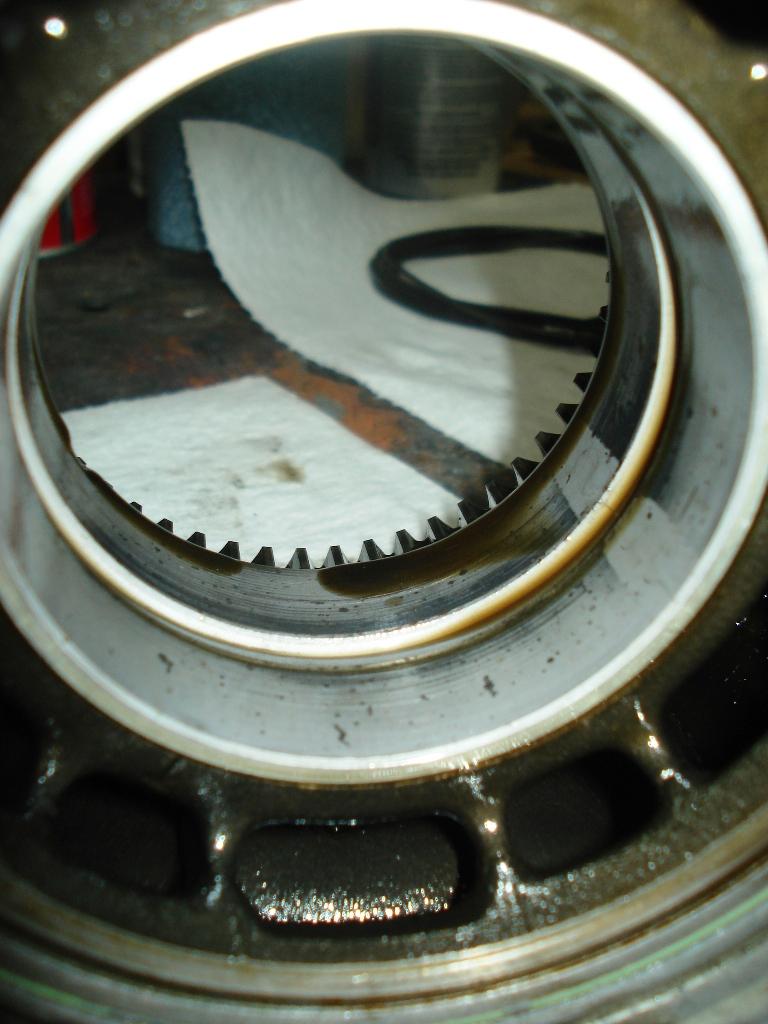
The rear housing appears to still be expanding at the plug bosses and lifting the apex seals as they cross that area. The seal looks like it teeter-totters across the leading plug bore
and maybe snaps on the cracked surface causing it to clean some of the surface carbon on the left hand side of the picture.
Thread Starter
"Elusive, not deceptive!”
Joined: May 2007
Posts: 930
Likes: 13
From: Slidell, LA
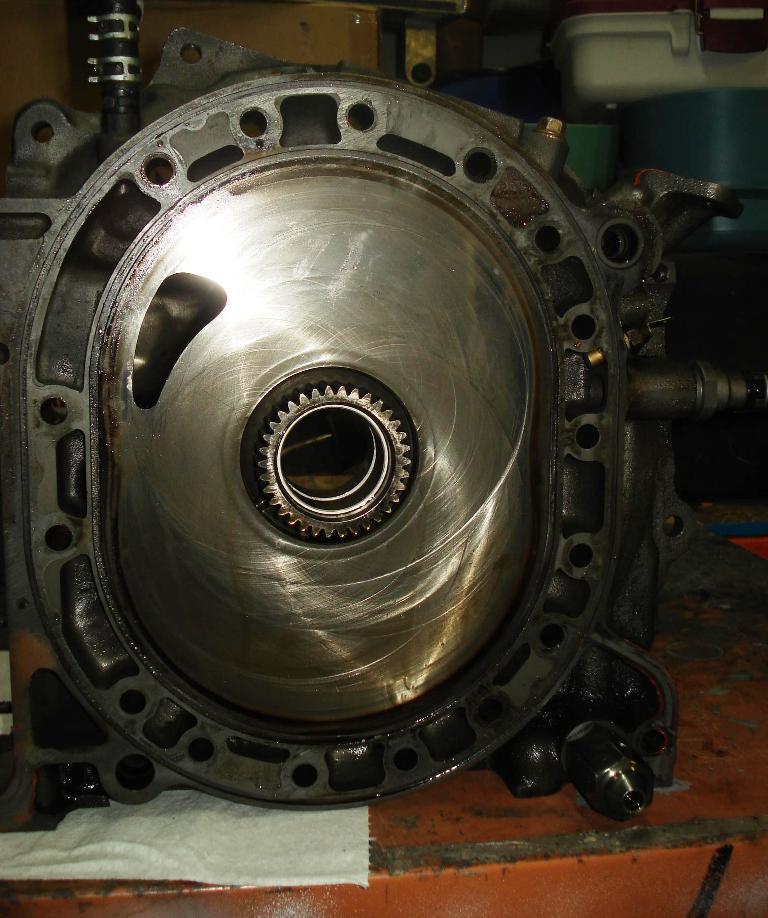
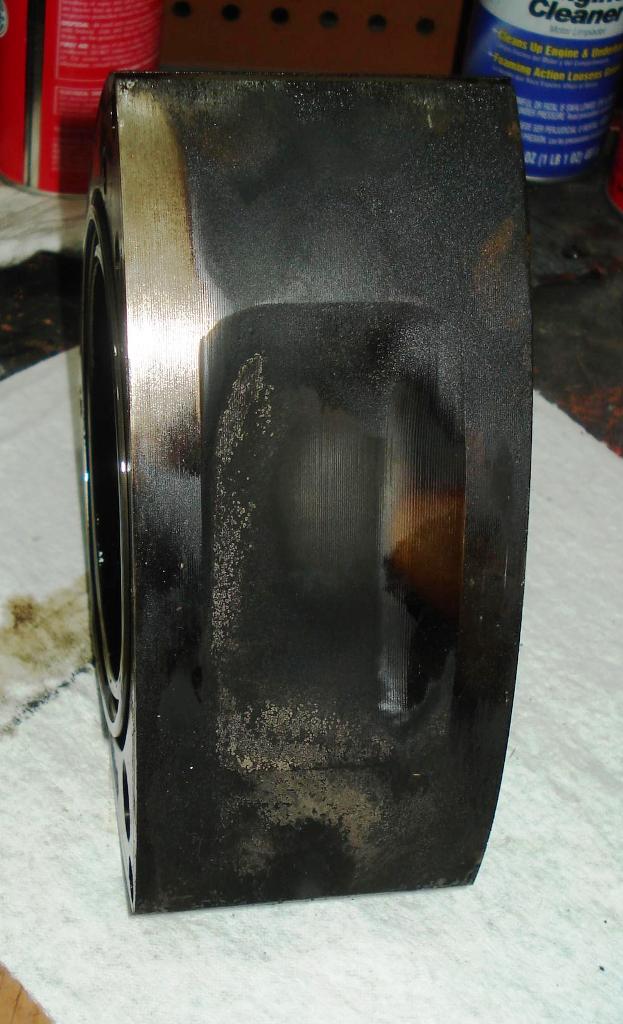
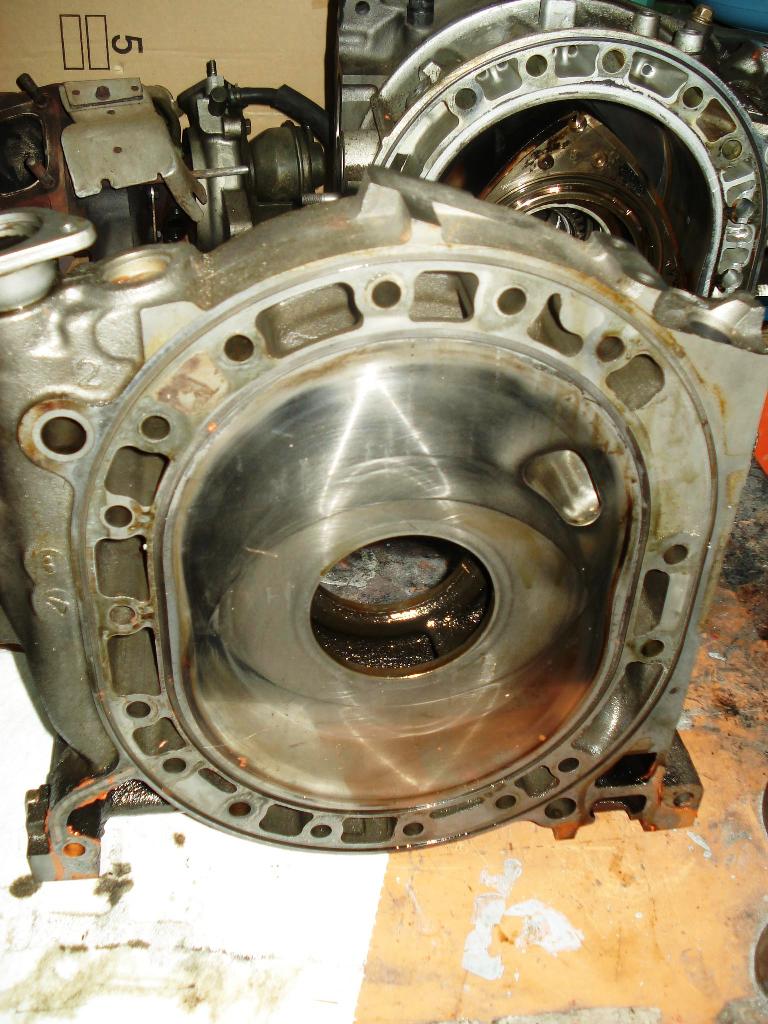
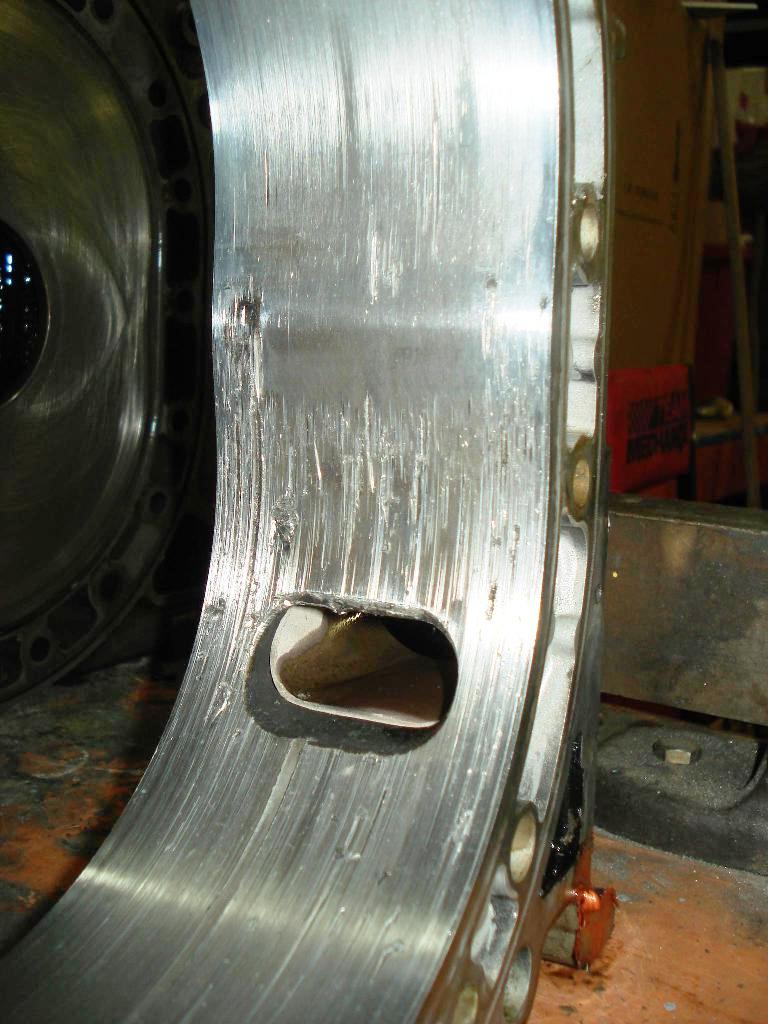
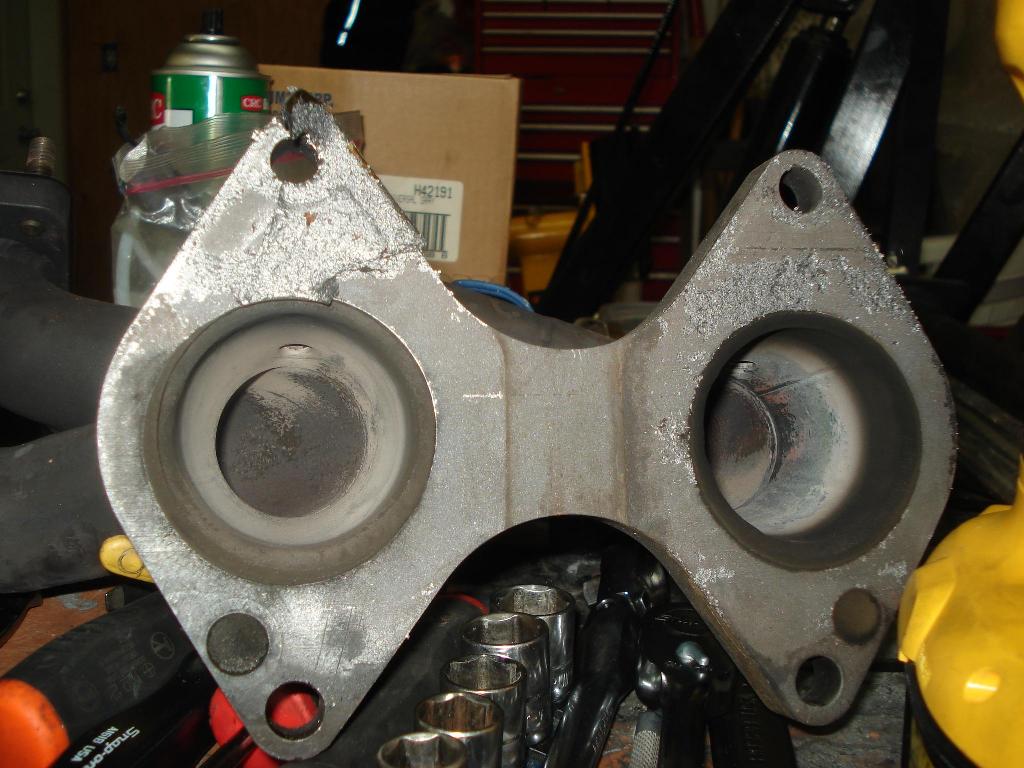
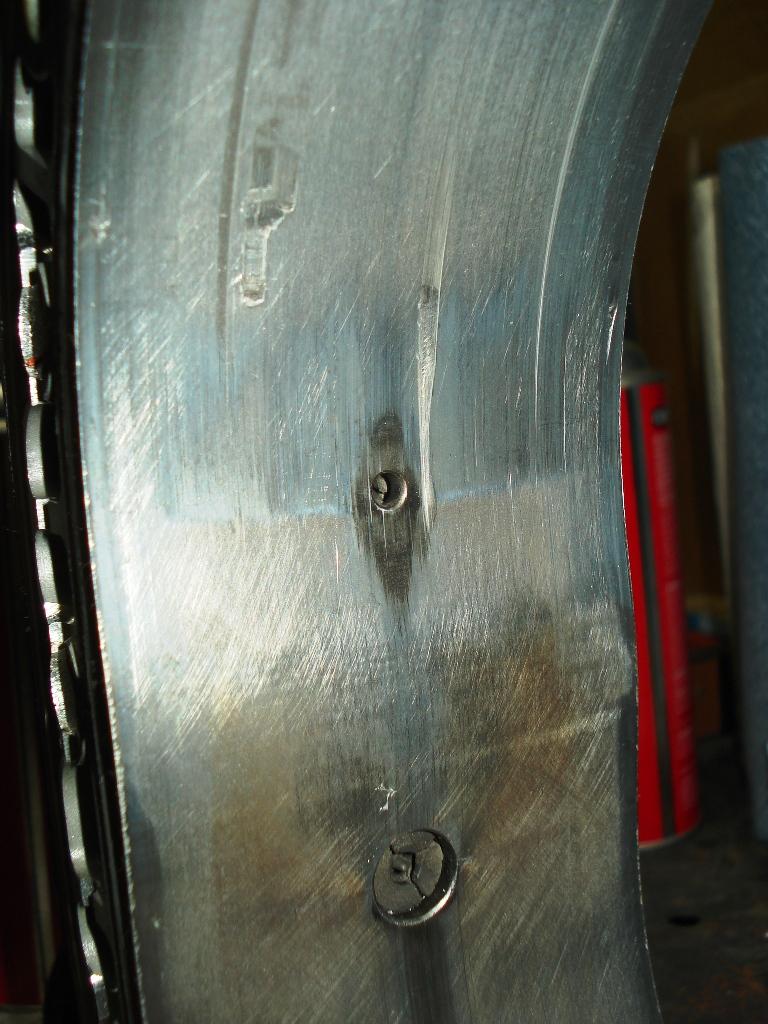
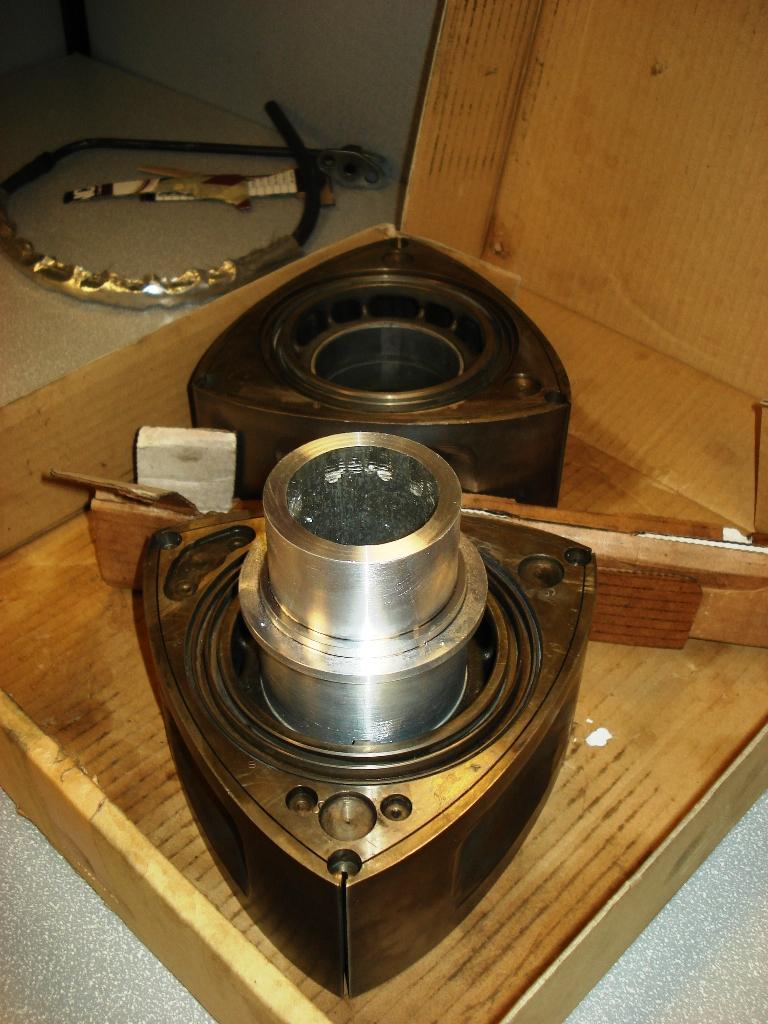
After cleaning
Adam, I am amazed that the front rotor housing looks so good in the area of the plugs! It appears that somehow the apex seal broke and then tried to escape
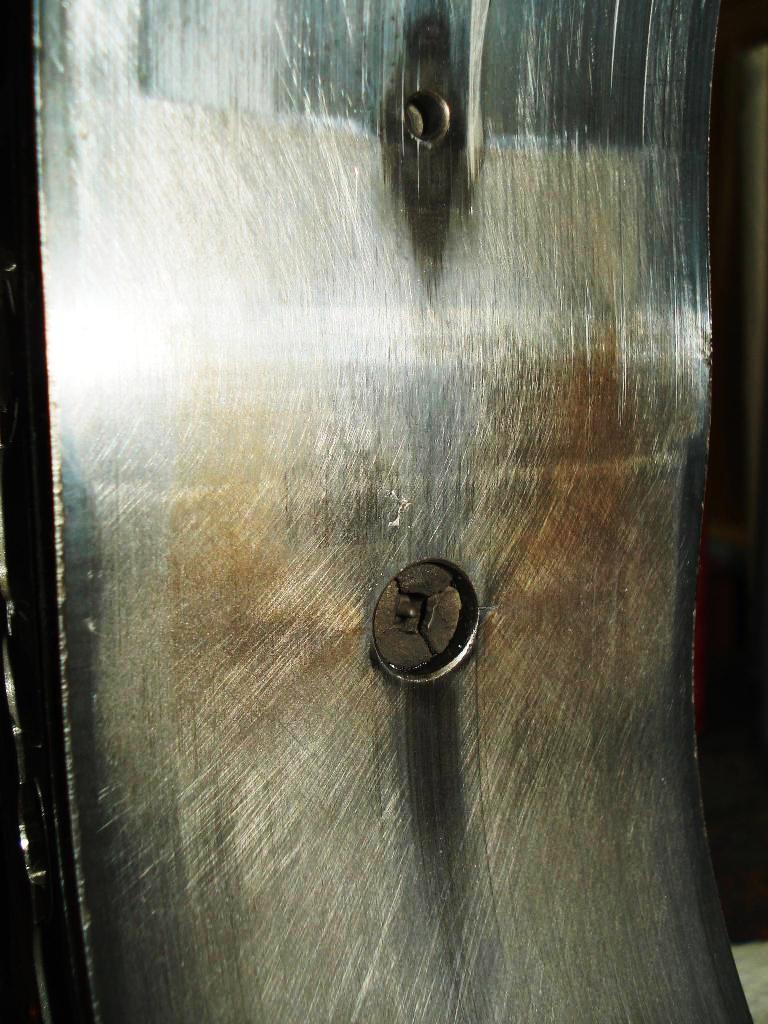
through the exhaust port. The lifting and carbon stains on this rotor housing seem minimal. I would have thought that the rear housing would be more likely to break the apex seal
with its high cracked spark plug boss.
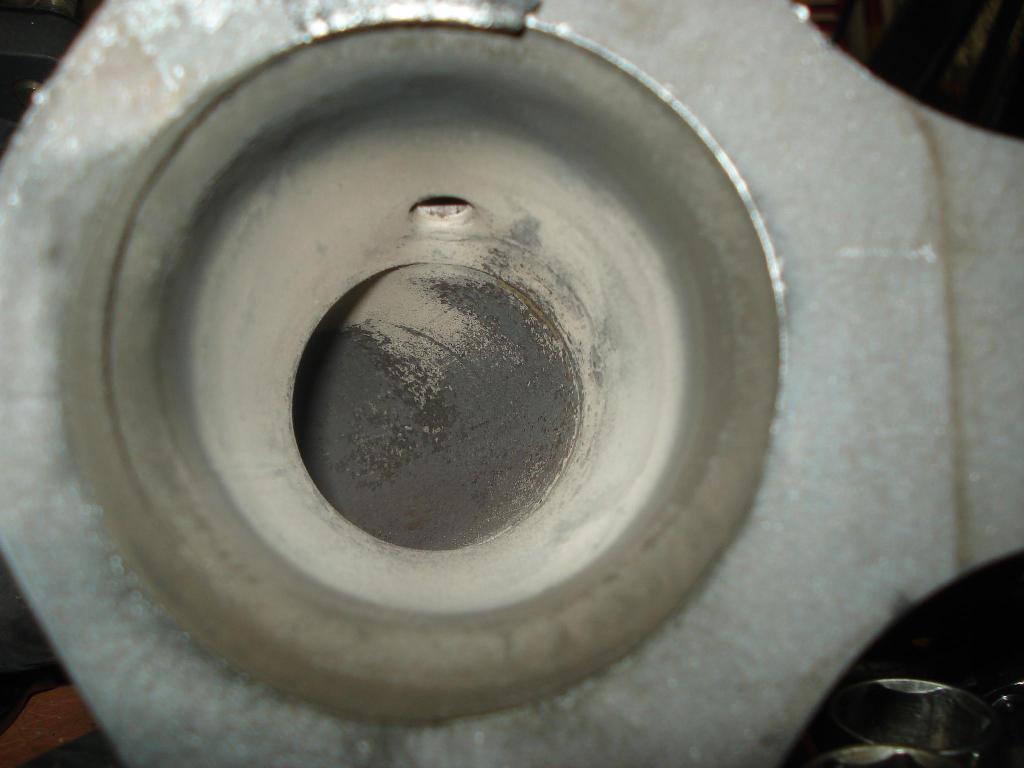
It does have a decent size scuff on the trailing plug boss that may have damaged the apex seal.
Adam, I am amazed that the front rotor housing looks so good in the area of the plugs! It appears that somehow the apex seal broke and then tried to escape
through the exhaust port. The lifting and carbon stains on this rotor housing seem minimal. I would have thought that the rear housing would be more likely to break the apex seal
with its high cracked spark plug boss.
It does have a decent size scuff on the trailing plug boss that may have damaged the apex seal.
After talking to Dr. Iannetti last week about my seals he pointed out the Cermet B retains heat and outside of NA and turbo drag motors is not ideal and recommended I go back to stock chrome rotor housing. So my coolant mod was hampered by the Cermet.
The crack at the plug is raised a few thousanths, so you correct Barry. Jeese and I got a brand new motor as a donor and will be modifying it soon. Currently waiting for Dr. Iannetti's accesment of my undamaged ceramic apex seals.
As far the front blowing instead of the rear is bit of a head scratcher. Though with the XS LIM it helped greatly in equalizing the afrs.
After thinking about it I will be making some modification to my external cooling setup to improve flow. I will update when I get to that point.
Adam
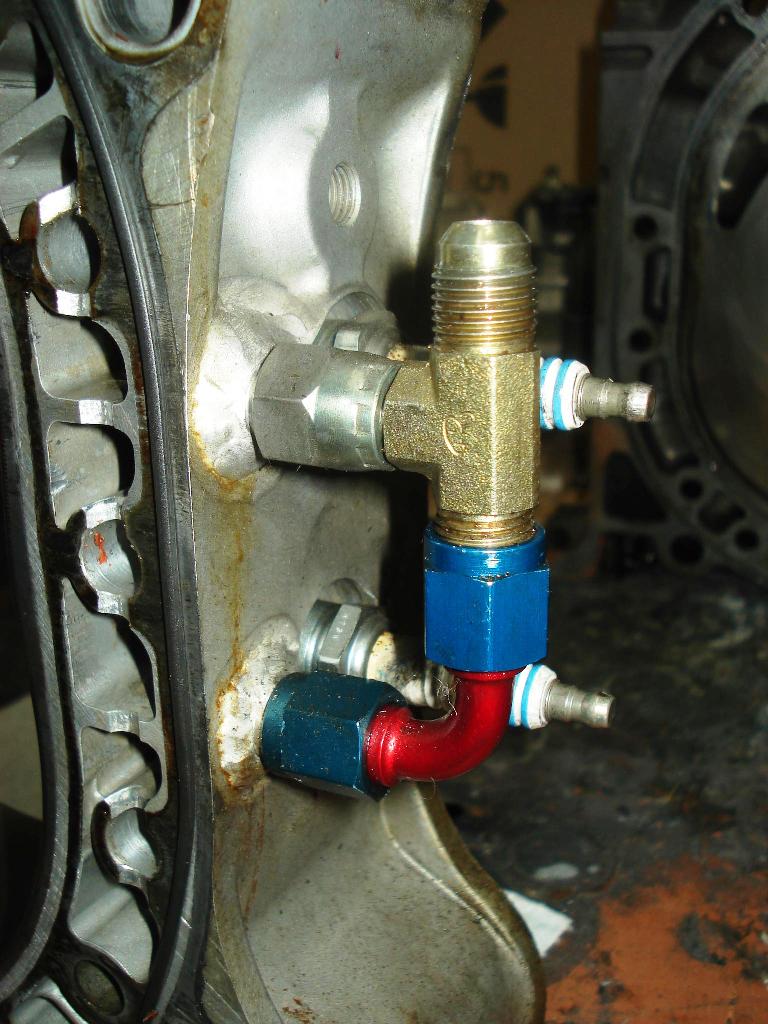
Actually I just started working on the new motor. Will be modifying the rotor housings tomorrow and Friday. In order to address the leaky fittings I had with the last motor I will weld in 1/2" aluminum tubing. I will then provide enough length to the tubing to be able hand the housing flex. I'm still trying to decide to weld in internal nozzles to direct the cooler coolant directly onto the spark plug boss. And on the water pump housing I will add an internal baffle to aid in forcing coolant into the external coolant line.
Going to a larger street port in both the intake and exhaust (forget about passing emission's on this one). I will provide updates later this week once their ported and the rotor housing have been modified.
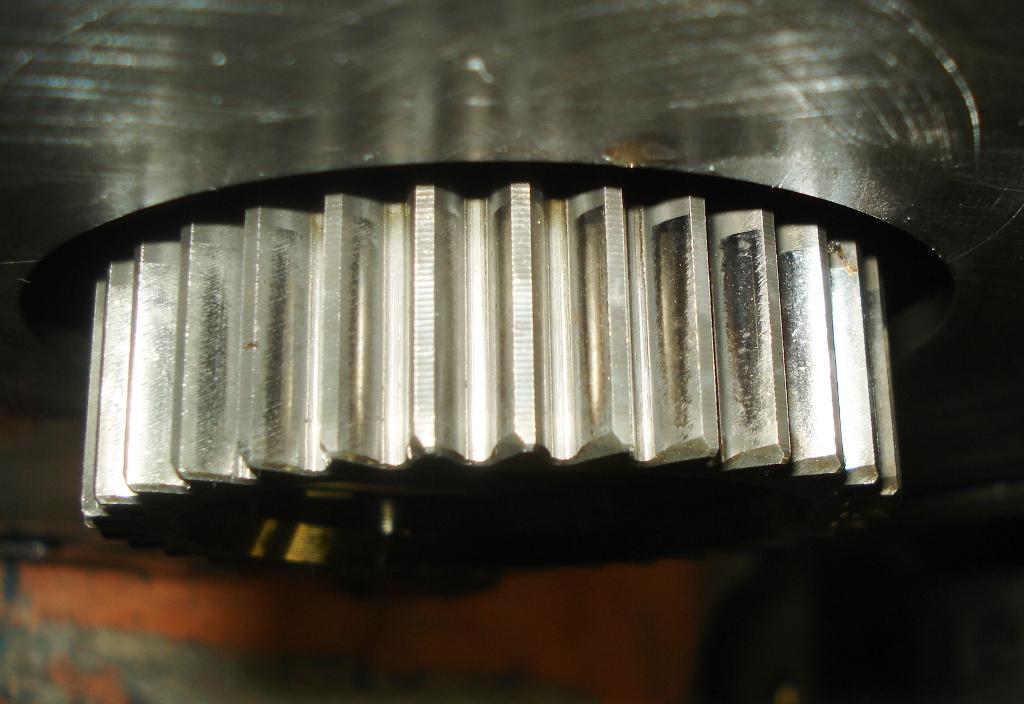
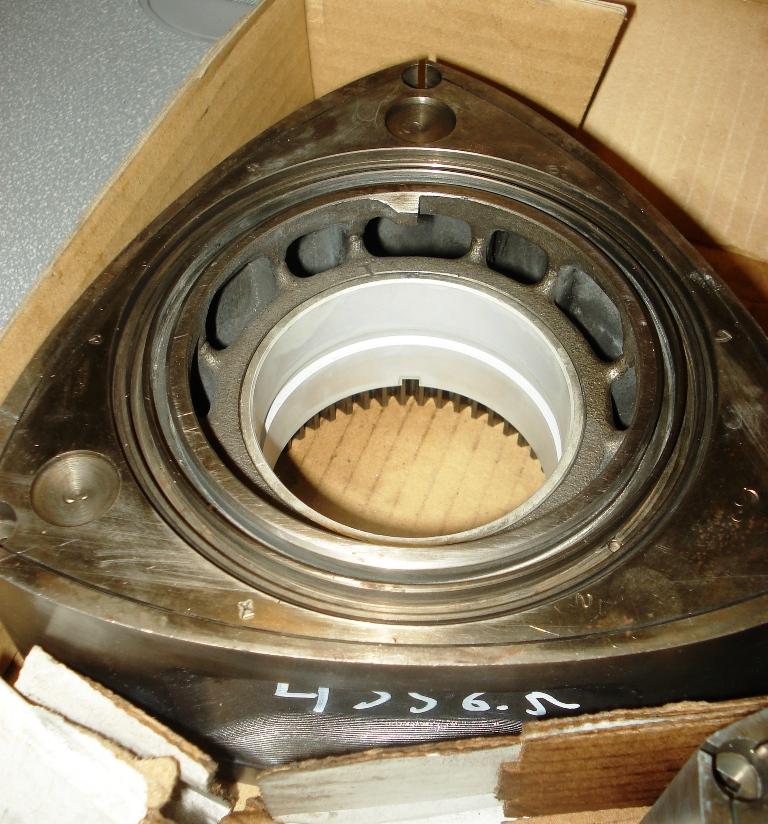
Also, the rotors have the competition bearings in them now. Their weights are4346.5 grams and 4356.5 grams, 10 gram split. Not bad.
Adam
Going to a larger street port in both the intake and exhaust (forget about passing emission's on this one). I will provide updates later this week once their ported and the rotor housing have been modified.
Also, the rotors have the competition bearings in them now. Their weights are4346.5 grams and 4356.5 grams, 10 gram split. Not bad.
Adam
Thread Starter
"Elusive, not deceptive!”
Joined: May 2007
Posts: 930
Likes: 13
From: Slidell, LA
Adam did you notice that the Green Bros. in Oz or NZ are using double end milled relief on their housings in the leading and trailing positions. Looks good.
Barry

Barry
https://www.rx7club.com/rotary-car-performance-77/another-4-rotor-build-788554/
Post #57 has alot of the pics, there's some (little) explanation later on.
Post #57 has alot of the pics, there's some (little) explanation later on.
I like that ^ idea. May steal it.
Phase one of cooling mods done. All the port holes have been drilled out to a larger opening.
Looking forward to getting my micro TIG torch so I can do some cool stuff.
http://www.weldcraft.com/products/wp-series/wp-125/
Adam
Phase one of cooling mods done. All the port holes have been drilled out to a larger opening.
Looking forward to getting my micro TIG torch so I can do some cool stuff.
http://www.weldcraft.com/products/wp-series/wp-125/
Adam
Thread Starter
"Elusive, not deceptive!”
Joined: May 2007
Posts: 930
Likes: 13
From: Slidell, LA
Adam did you also notice that they severed three of the thru-bolt support bosses and the housing! This is for a NA setup. I don't know if anyone is using that part of their mod on boosted engines.
Does anyone know?
Barry
Does anyone know?
Barry
Barry, as pointed out by Crispeed in the 4-rotor thread, those reliefs around the through bolt bosses appear in the FD rotor housings, but only on that lower one near the leading plug. Total speculation here, but the housing flex would be higher in the leading plug area, no? So I'd think first off that the other reliefs would matter less with regards to how they would allow housing flex outward because the pressure in those spots would be lower. However, the cooling needed in those spots is less also......
Thread Starter
"Elusive, not deceptive!”
Joined: May 2007
Posts: 930
Likes: 13
From: Slidell, LA
Barry, as pointed out by Crispeed in the 4-rotor thread, those reliefs around the through bolt bosses appear in the FD rotor housings, but only on that lower one near the leading plug. Total speculation here, but the housing flex would be higher in the leading plug area, no? So I'd think first off that the other reliefs would matter less with regards to how they would allow housing flex outward because the pressure in those spots would be lower. However, the cooling needed in those spots is less also......
I believe that the counter bore milling puts the cooling medium (water) closer to the housing surface enhancing heat transfer.
Barry

Classicauto, I was referring to the slots cut through the bolt bosses as shown below. These are the ones that I am worried about using on boosted applications.
I believe that the counter bore milling puts the cooling medium (water) closer to the housing surface enhancing heat transfer.
Barry
I believe that the counter bore milling puts the cooling medium (water) closer to the housing surface enhancing heat transfer.
Barry
What I was trying to illustrate was that none of those reliefs (I realize they were put into that housing...) appear on a series 5 housing, where as on an FD housing, a small version of those reliefs appears on the leading plug boss area.........and taht is a boosted engine. I wouldn't think it would be a good idea to go too far with it due to pressures, but knowing the OEM added them as tiem went on seems to indicate good things
Thread Starter
"Elusive, not deceptive!”
Joined: May 2007
Posts: 930
Likes: 13
From: Slidell, LA

Classicauto,
The FD and added machined cuts are highlighted in orange. Those are the ones I think you are referring to.
I'm talking about the cut bosses highlighted in black. These are just the opposite of using oversized studs to reinforce the housing on high-boosted engines.
Barry
perhaps it's because i'm not as familiar with the FD rotor housings (i've had an REW for the past 3 years that i have yet to disassemble), but what do the orange areas do to help cooling? i mean, to me, they look smooth as opposed to the ridged/rippled water jacket mods i'm used to seeing.
also, the bosses that you labelled in black, are they similar to the machining that Afgmoto1978 did to his water jacket a few pages back? if not, then how do they help cooling?
on a sidenote, i can't believe that i haven't looked at this thread until now. it's very educational and pointed. i like it. thanks to all.