Old School and Other Rotary Old School and Other Rotary Powered Vehicles including performance modifications and technical support

Tegheim - Home made 4 Rotor Wolvo project

Thread Tools
 
Search this Thread
 
Old 03-28-14, 09:41 AM
  #901  
Rotary Enthusiast
iTrader: (5)
 
kutukutu1's Avatar
 
Join Date: Jan 2008
Location: Southfield, MI
Posts: 1,296
Received 60 Likes on 38 Posts
Very nice!! Thanks
Old 04-04-14, 09:42 PM
  #902  
Rotary Freak

 
WJM ROTARIES's Avatar
 
Join Date: Aug 2012
Location: MELBOURNE AUSTRALIA
Posts: 2,407
Received 306 Likes on 298 Posts
What an incredible build and brilliant engineering .will keep following this one
Old 04-12-14, 01:23 PM
  #903  
Senior Member

Thread Starter
 
tegheim's Avatar
 
Join Date: Nov 2003
Location: Sweden
Posts: 533
Likes: 0
Received 2 Likes on 1 Post
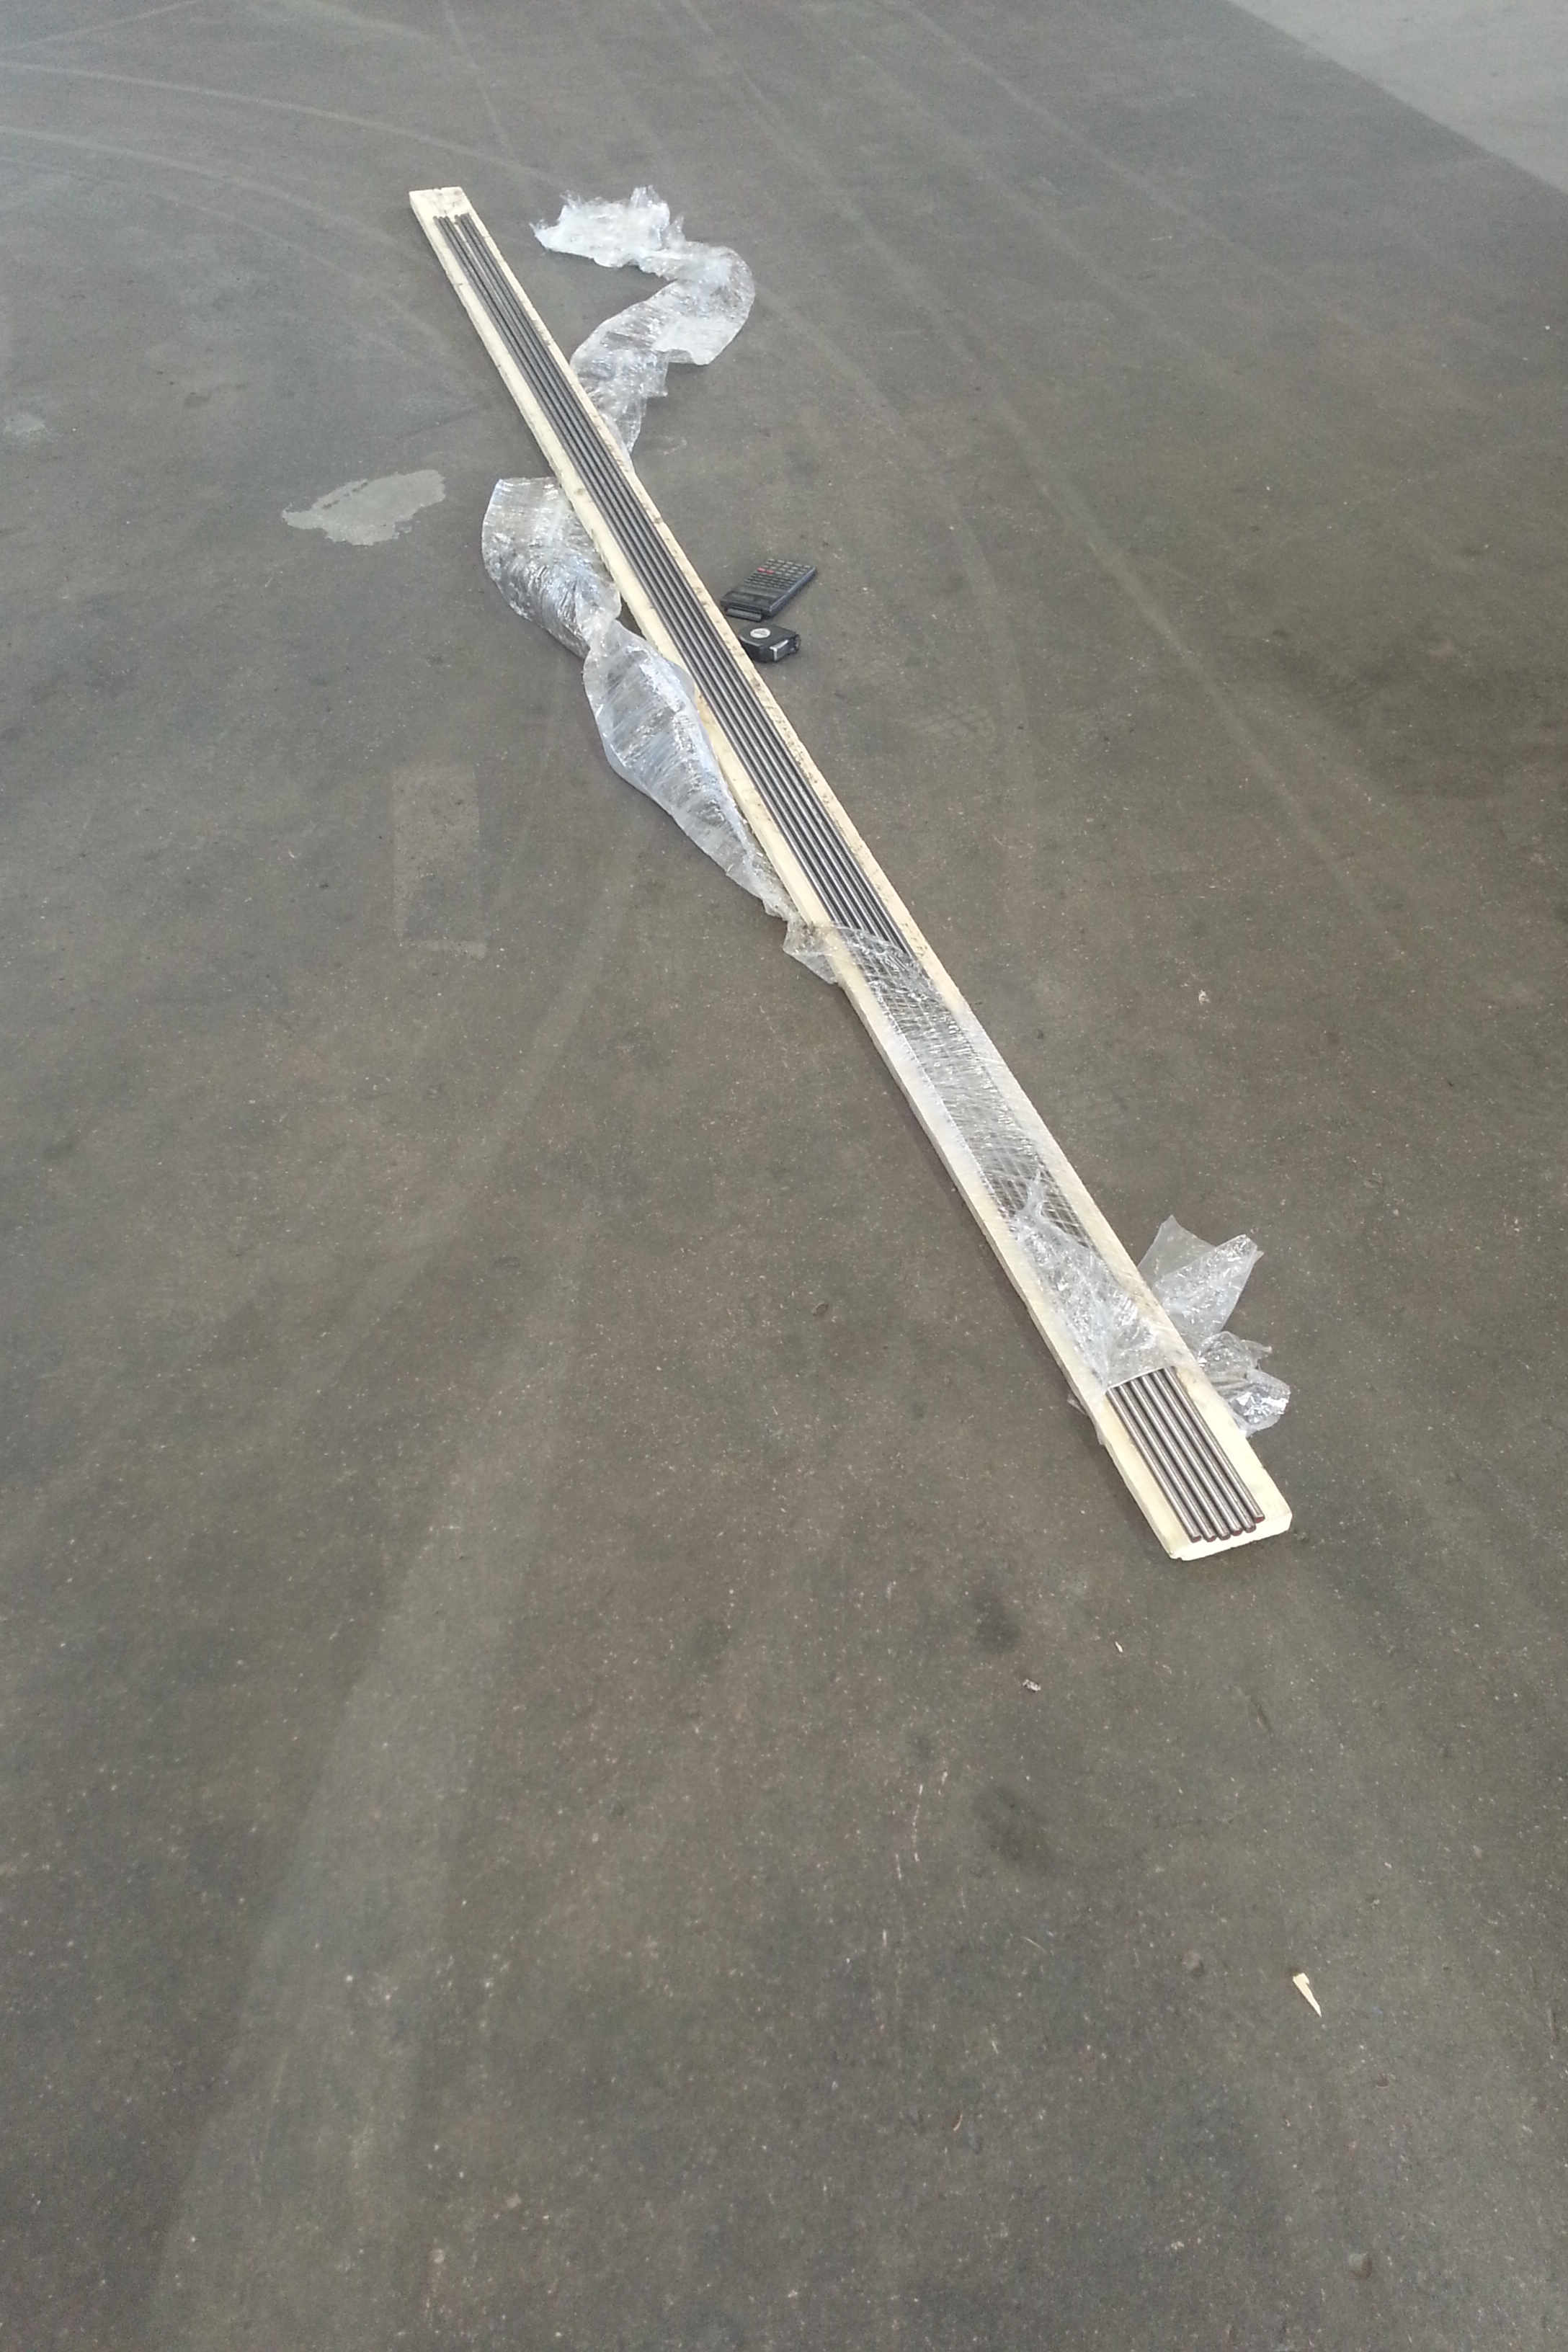
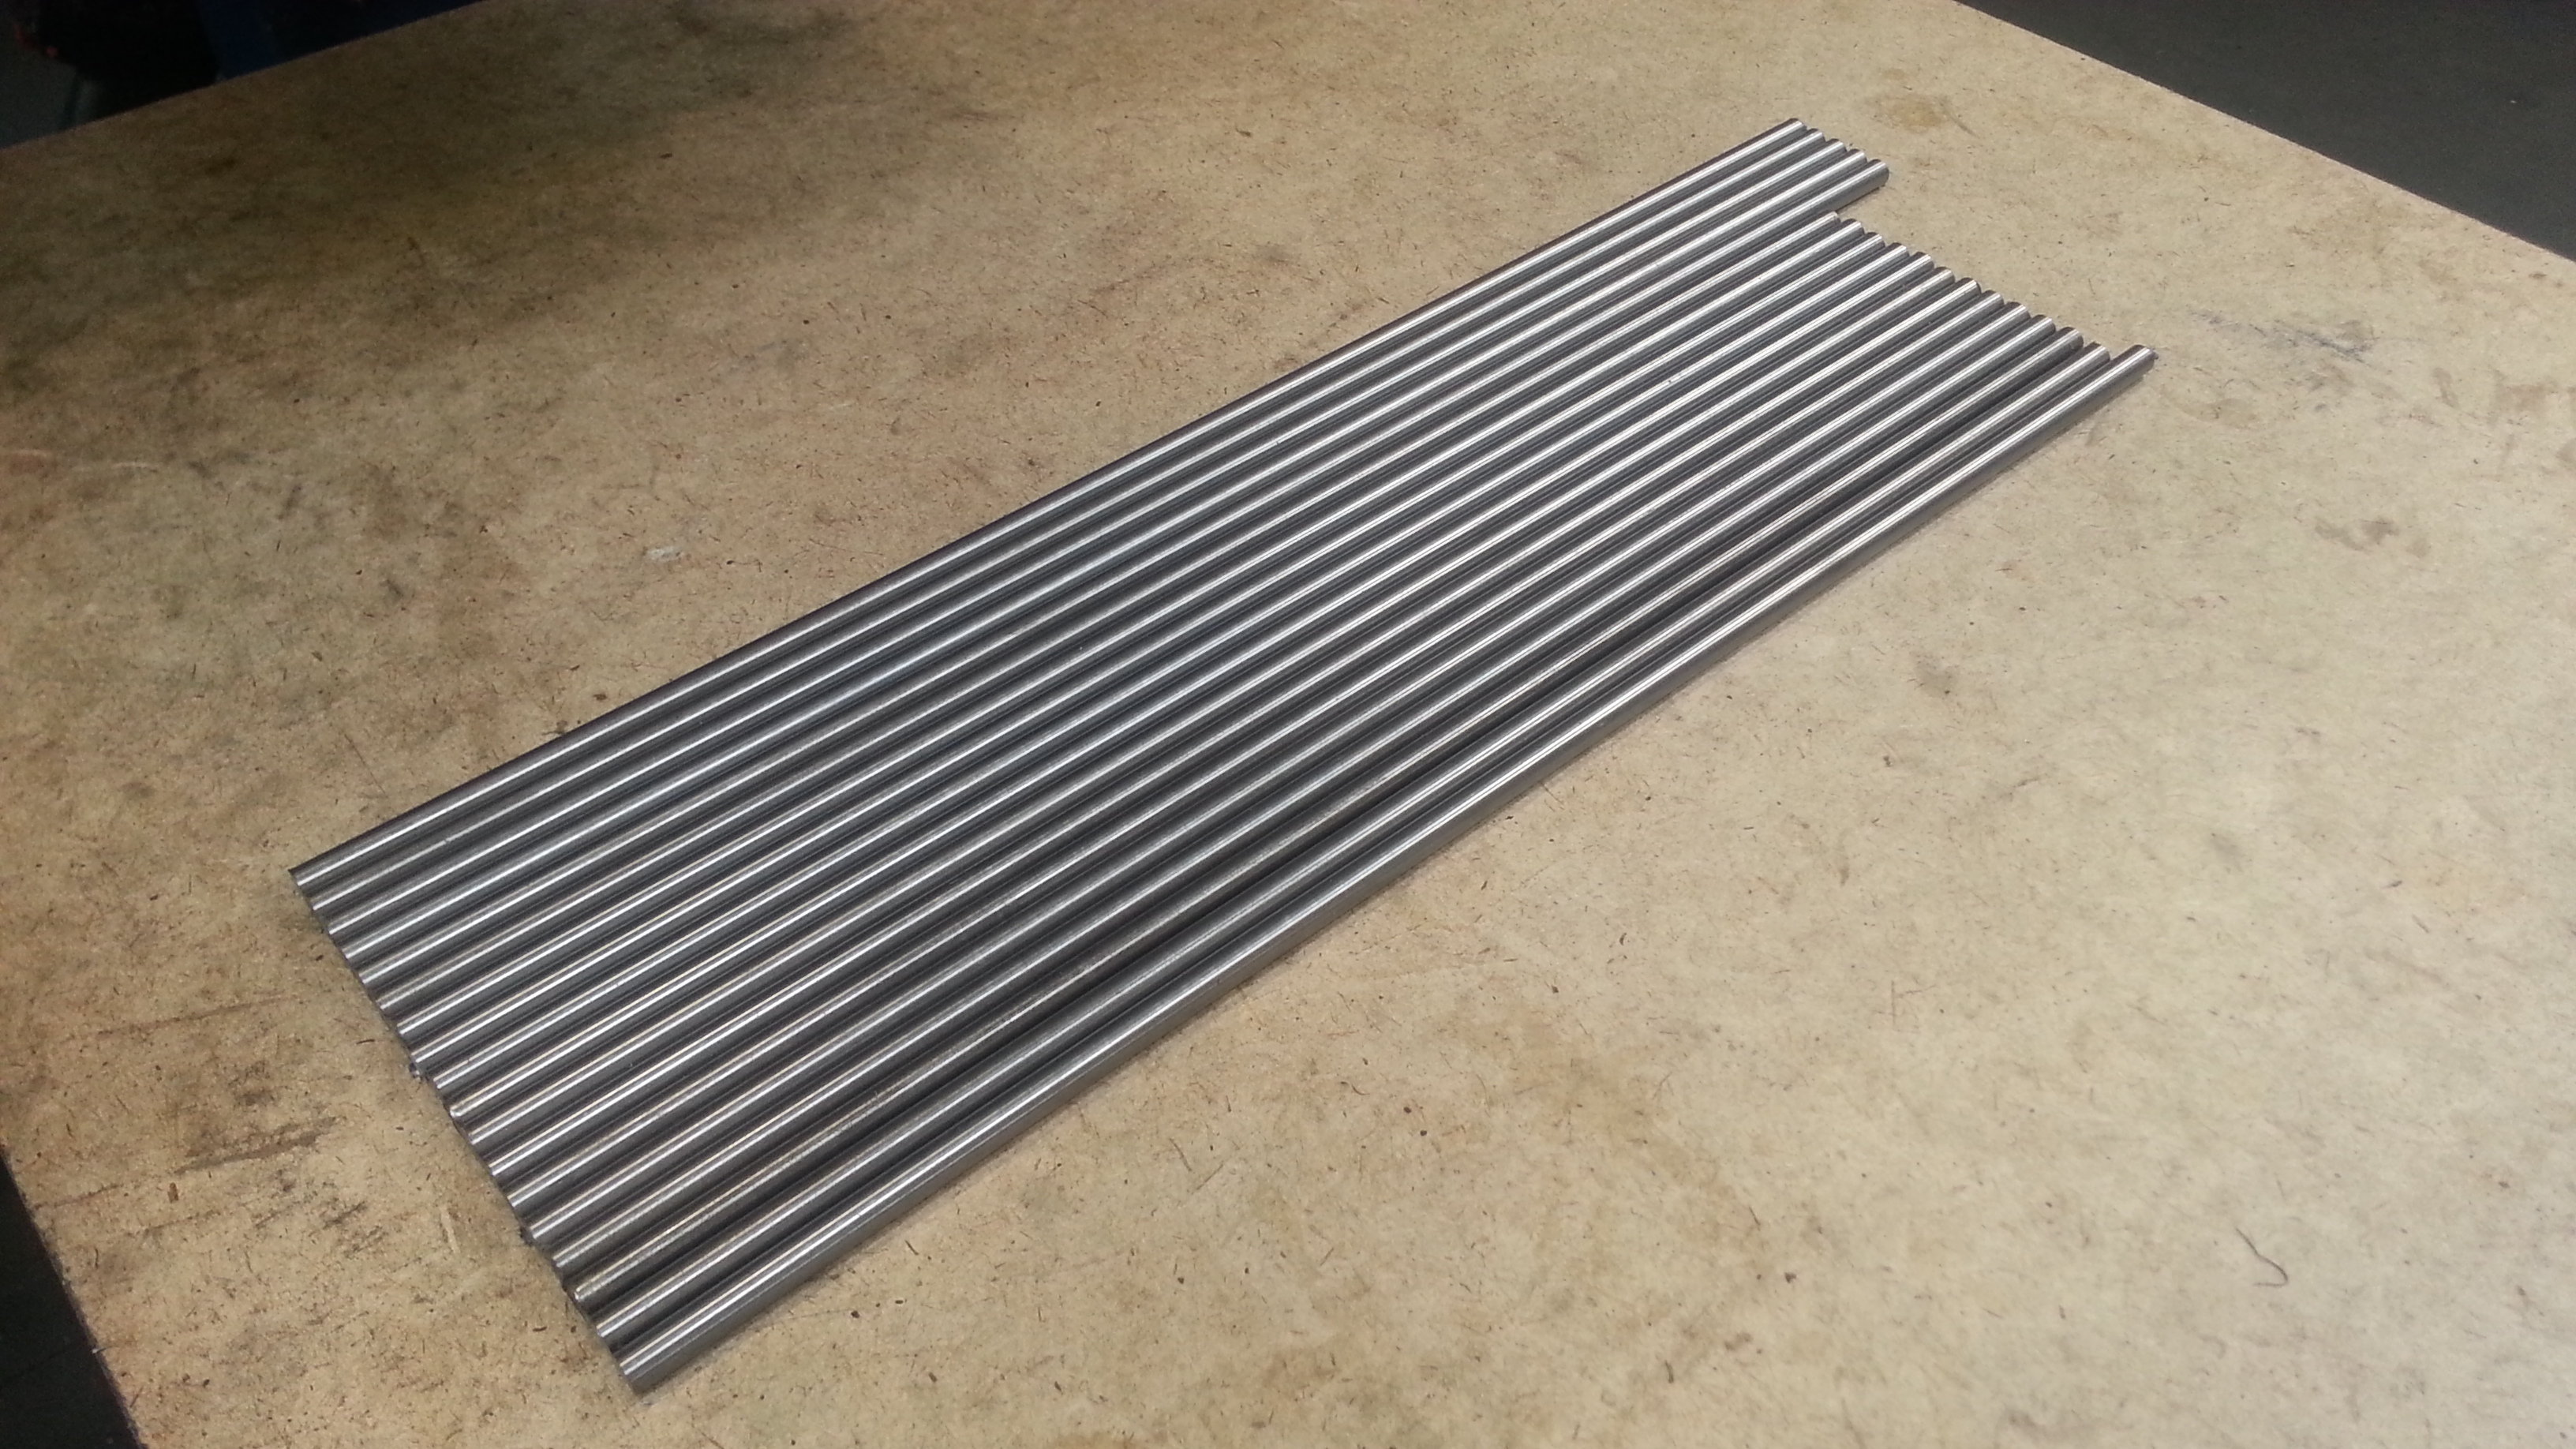
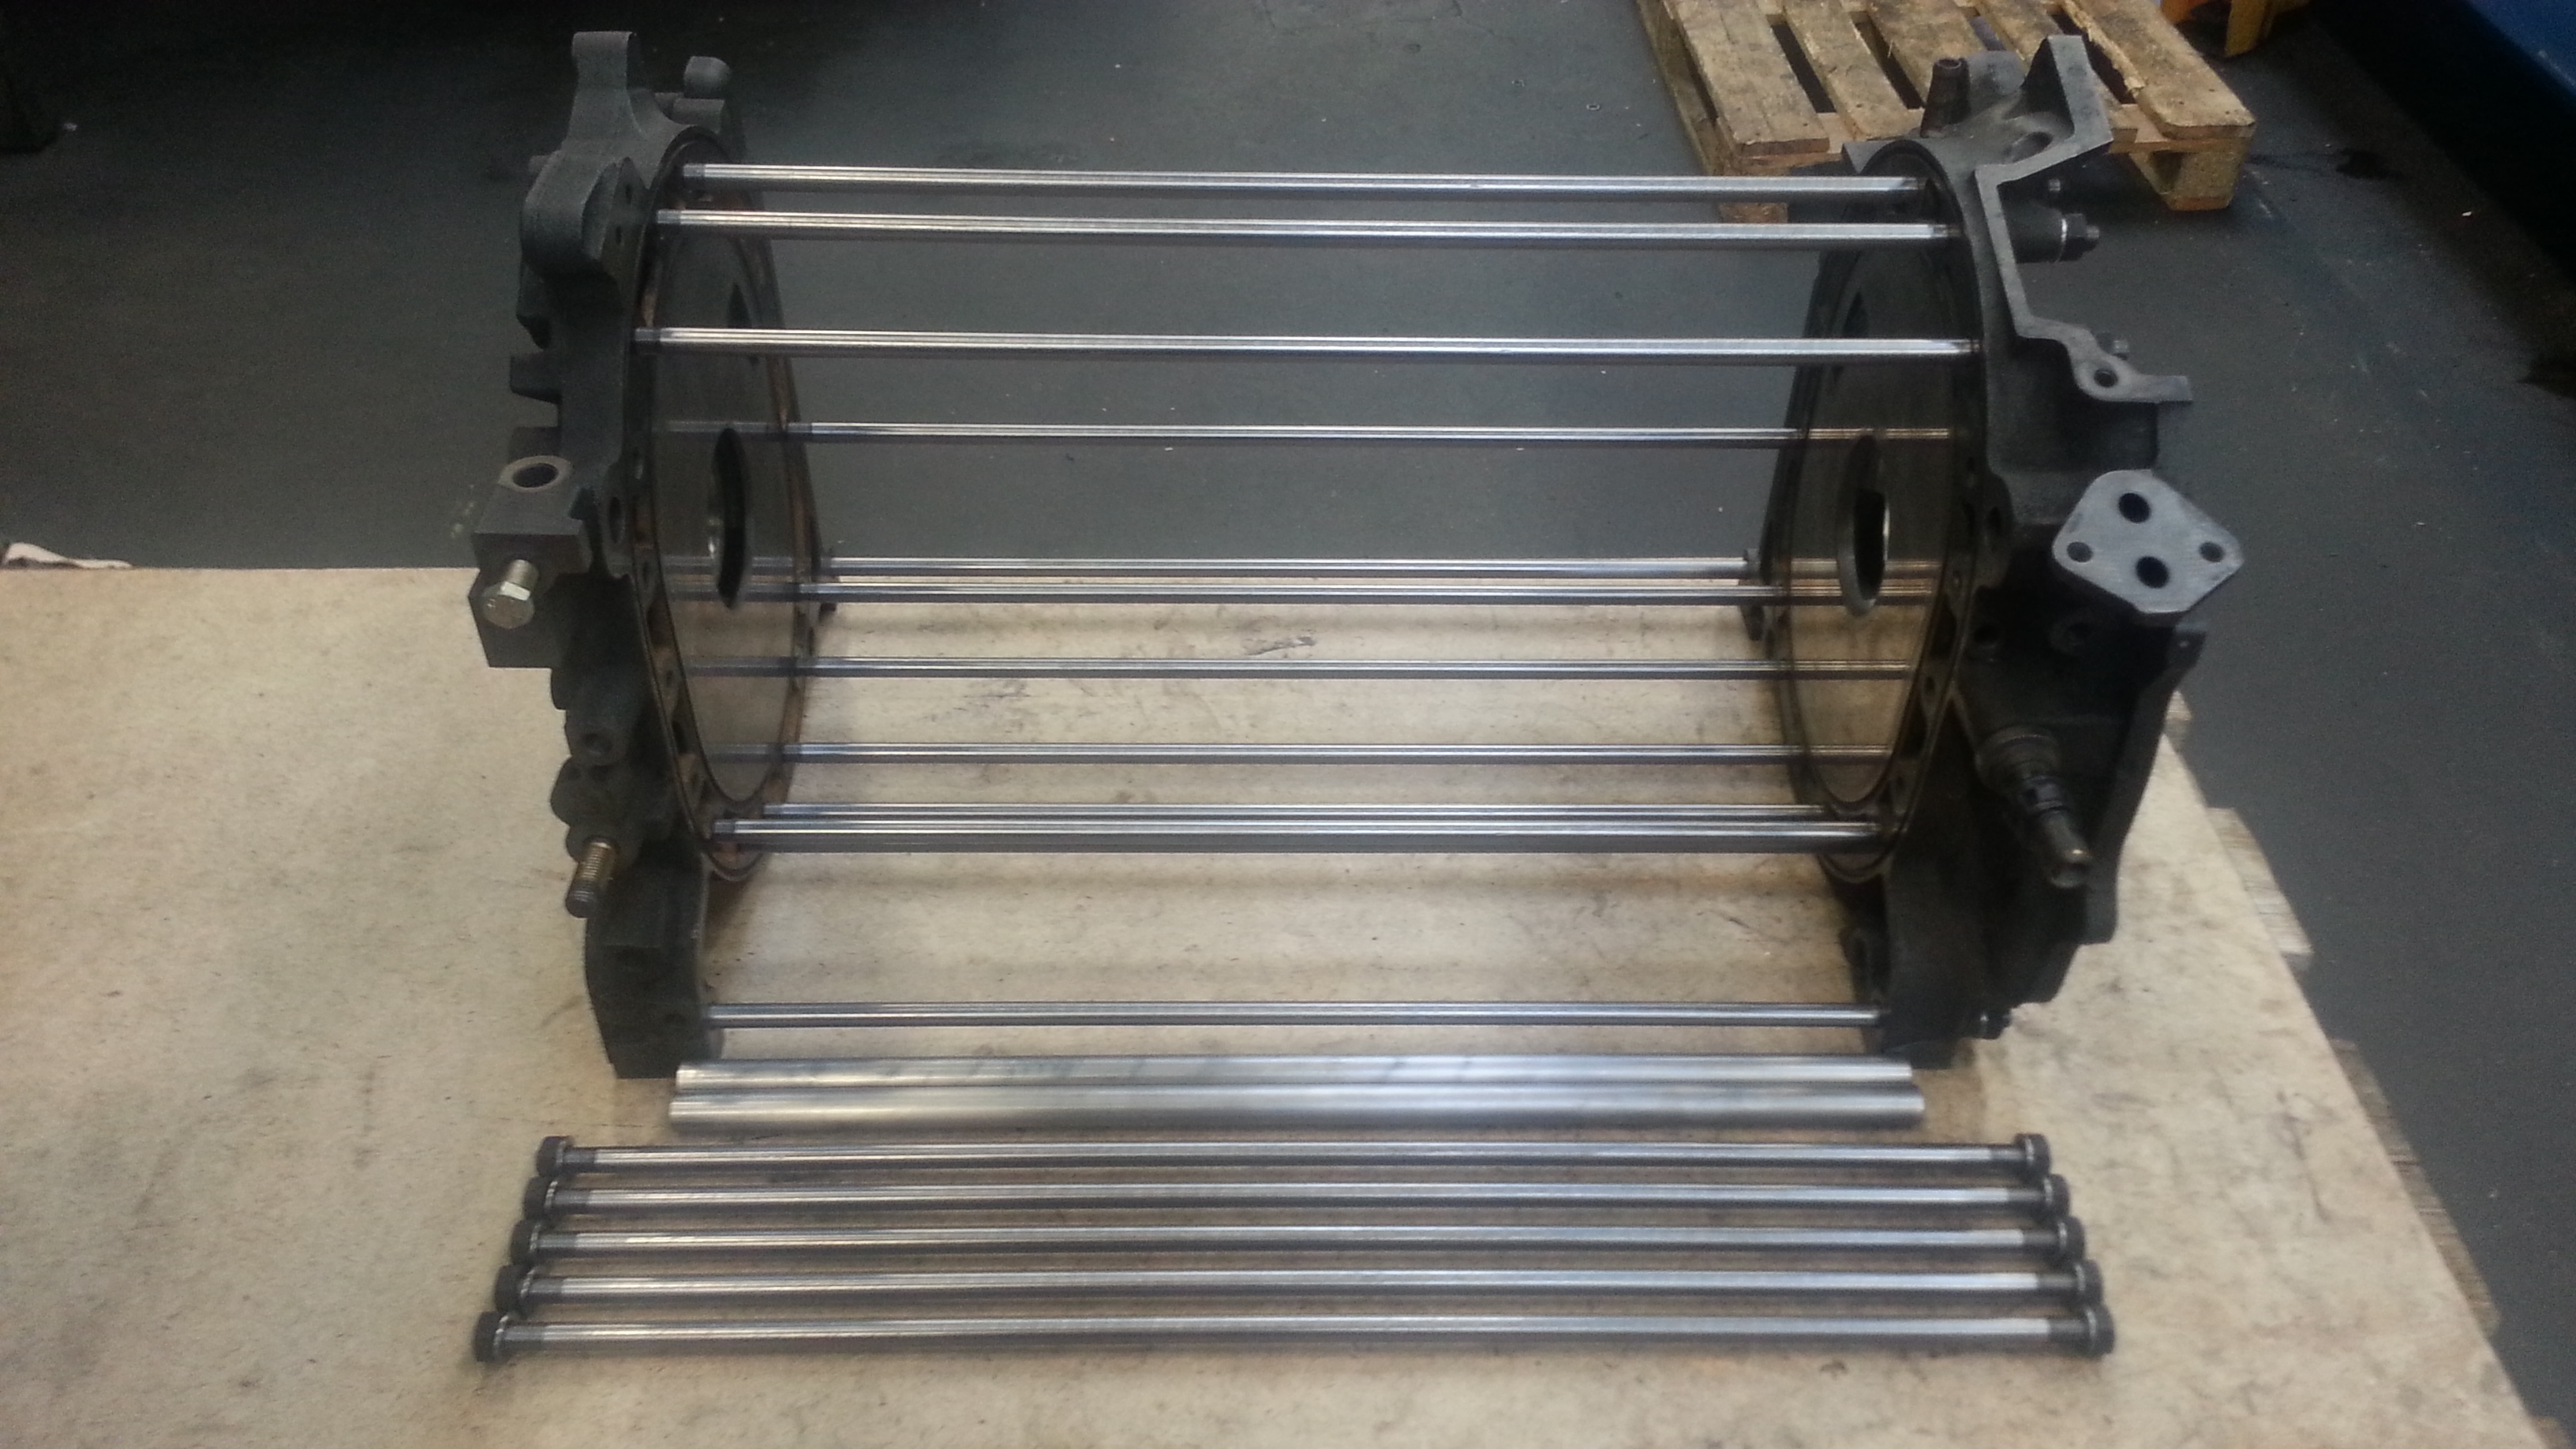
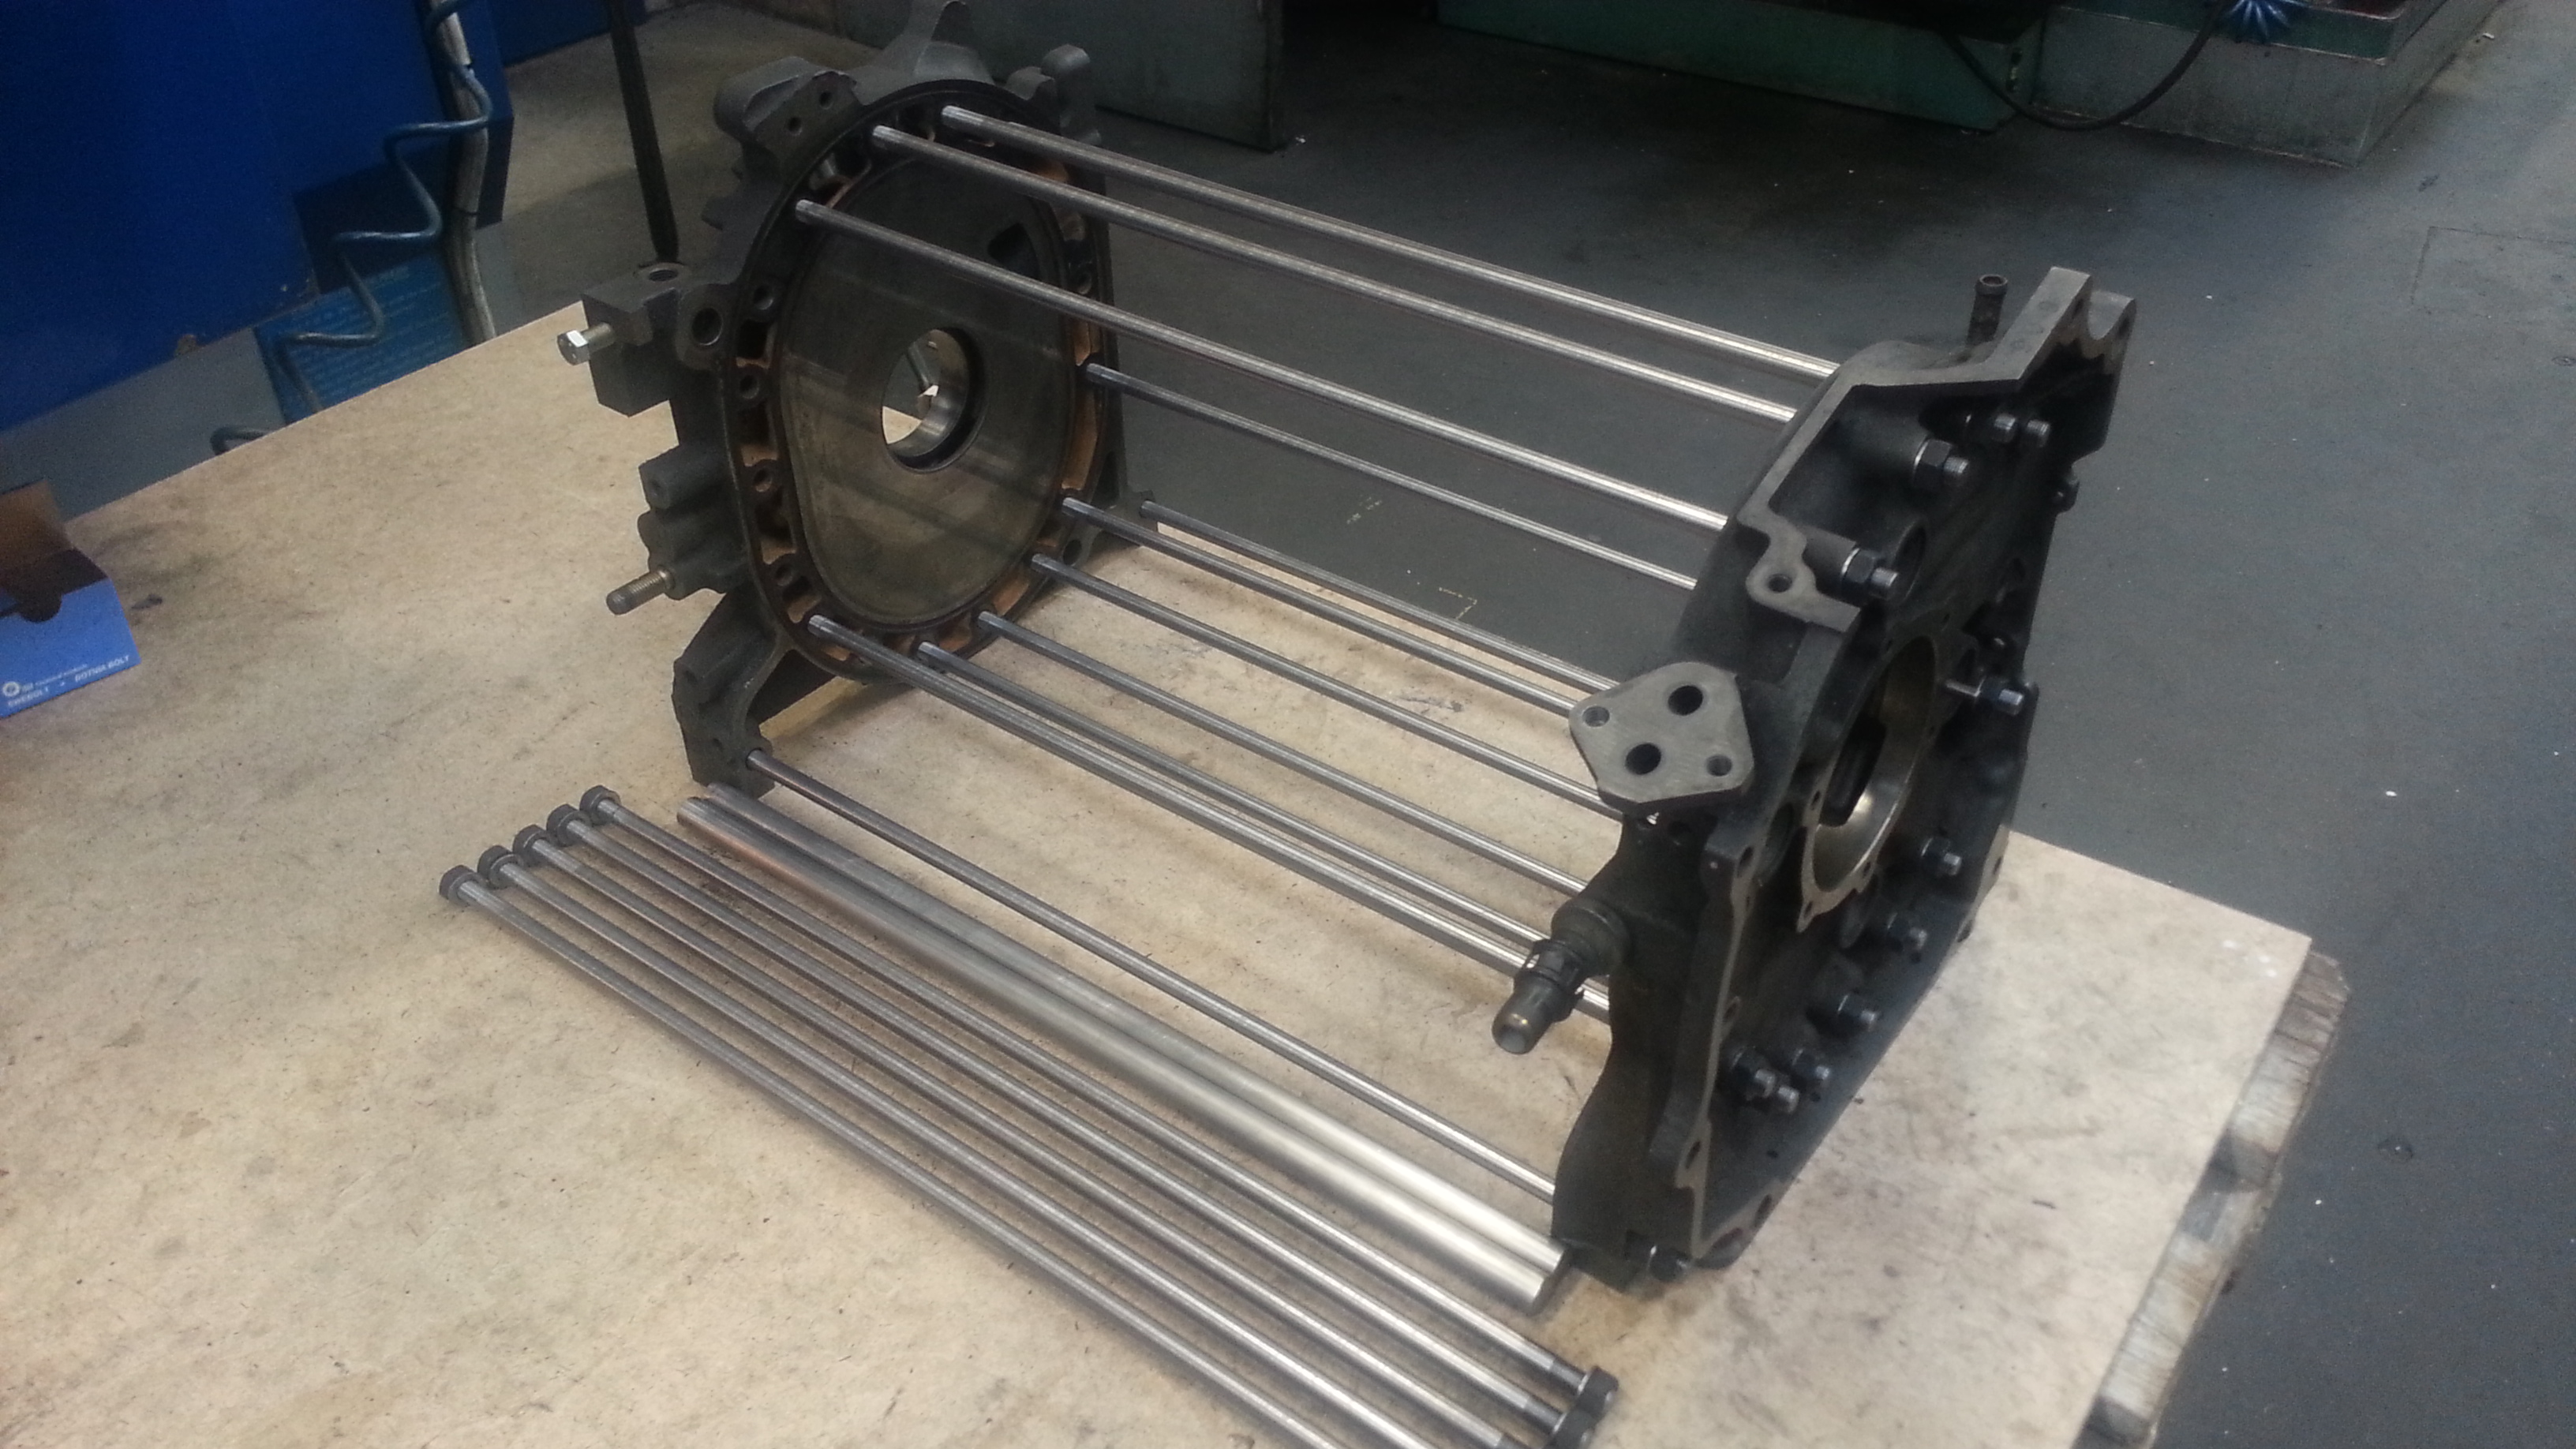
Bought some Ø10.0mm Chromemoly 4340-bars.
Cut them in correct lenght and cnc-turned M10x1 thread in both ends.
I use Grade 10-nuts and harderned washers to hold the engine in place.

Name:  IMG_20140412_100013_zpsvwlrj57y.jpg
Views: 1670
Size:  1.85 MB

Name:  20140412_113449_zpsmuuw7r2h.jpg
Views: 1644
Size:  1.90 MB

Name:  20140412_171131_zpsloahauuf.jpg
Views: 1643
Size:  1.49 MB

Name:  20140412_171146_zpsy5durtxe.jpg
Views: 1687
Size:  1.54 MB
Old 04-13-14, 11:53 AM
  #904  
Senior Member

Thread Starter
 
tegheim's Avatar
 
Join Date: Nov 2003
Location: Sweden
Posts: 533
Likes: 0
Received 2 Likes on 1 Post
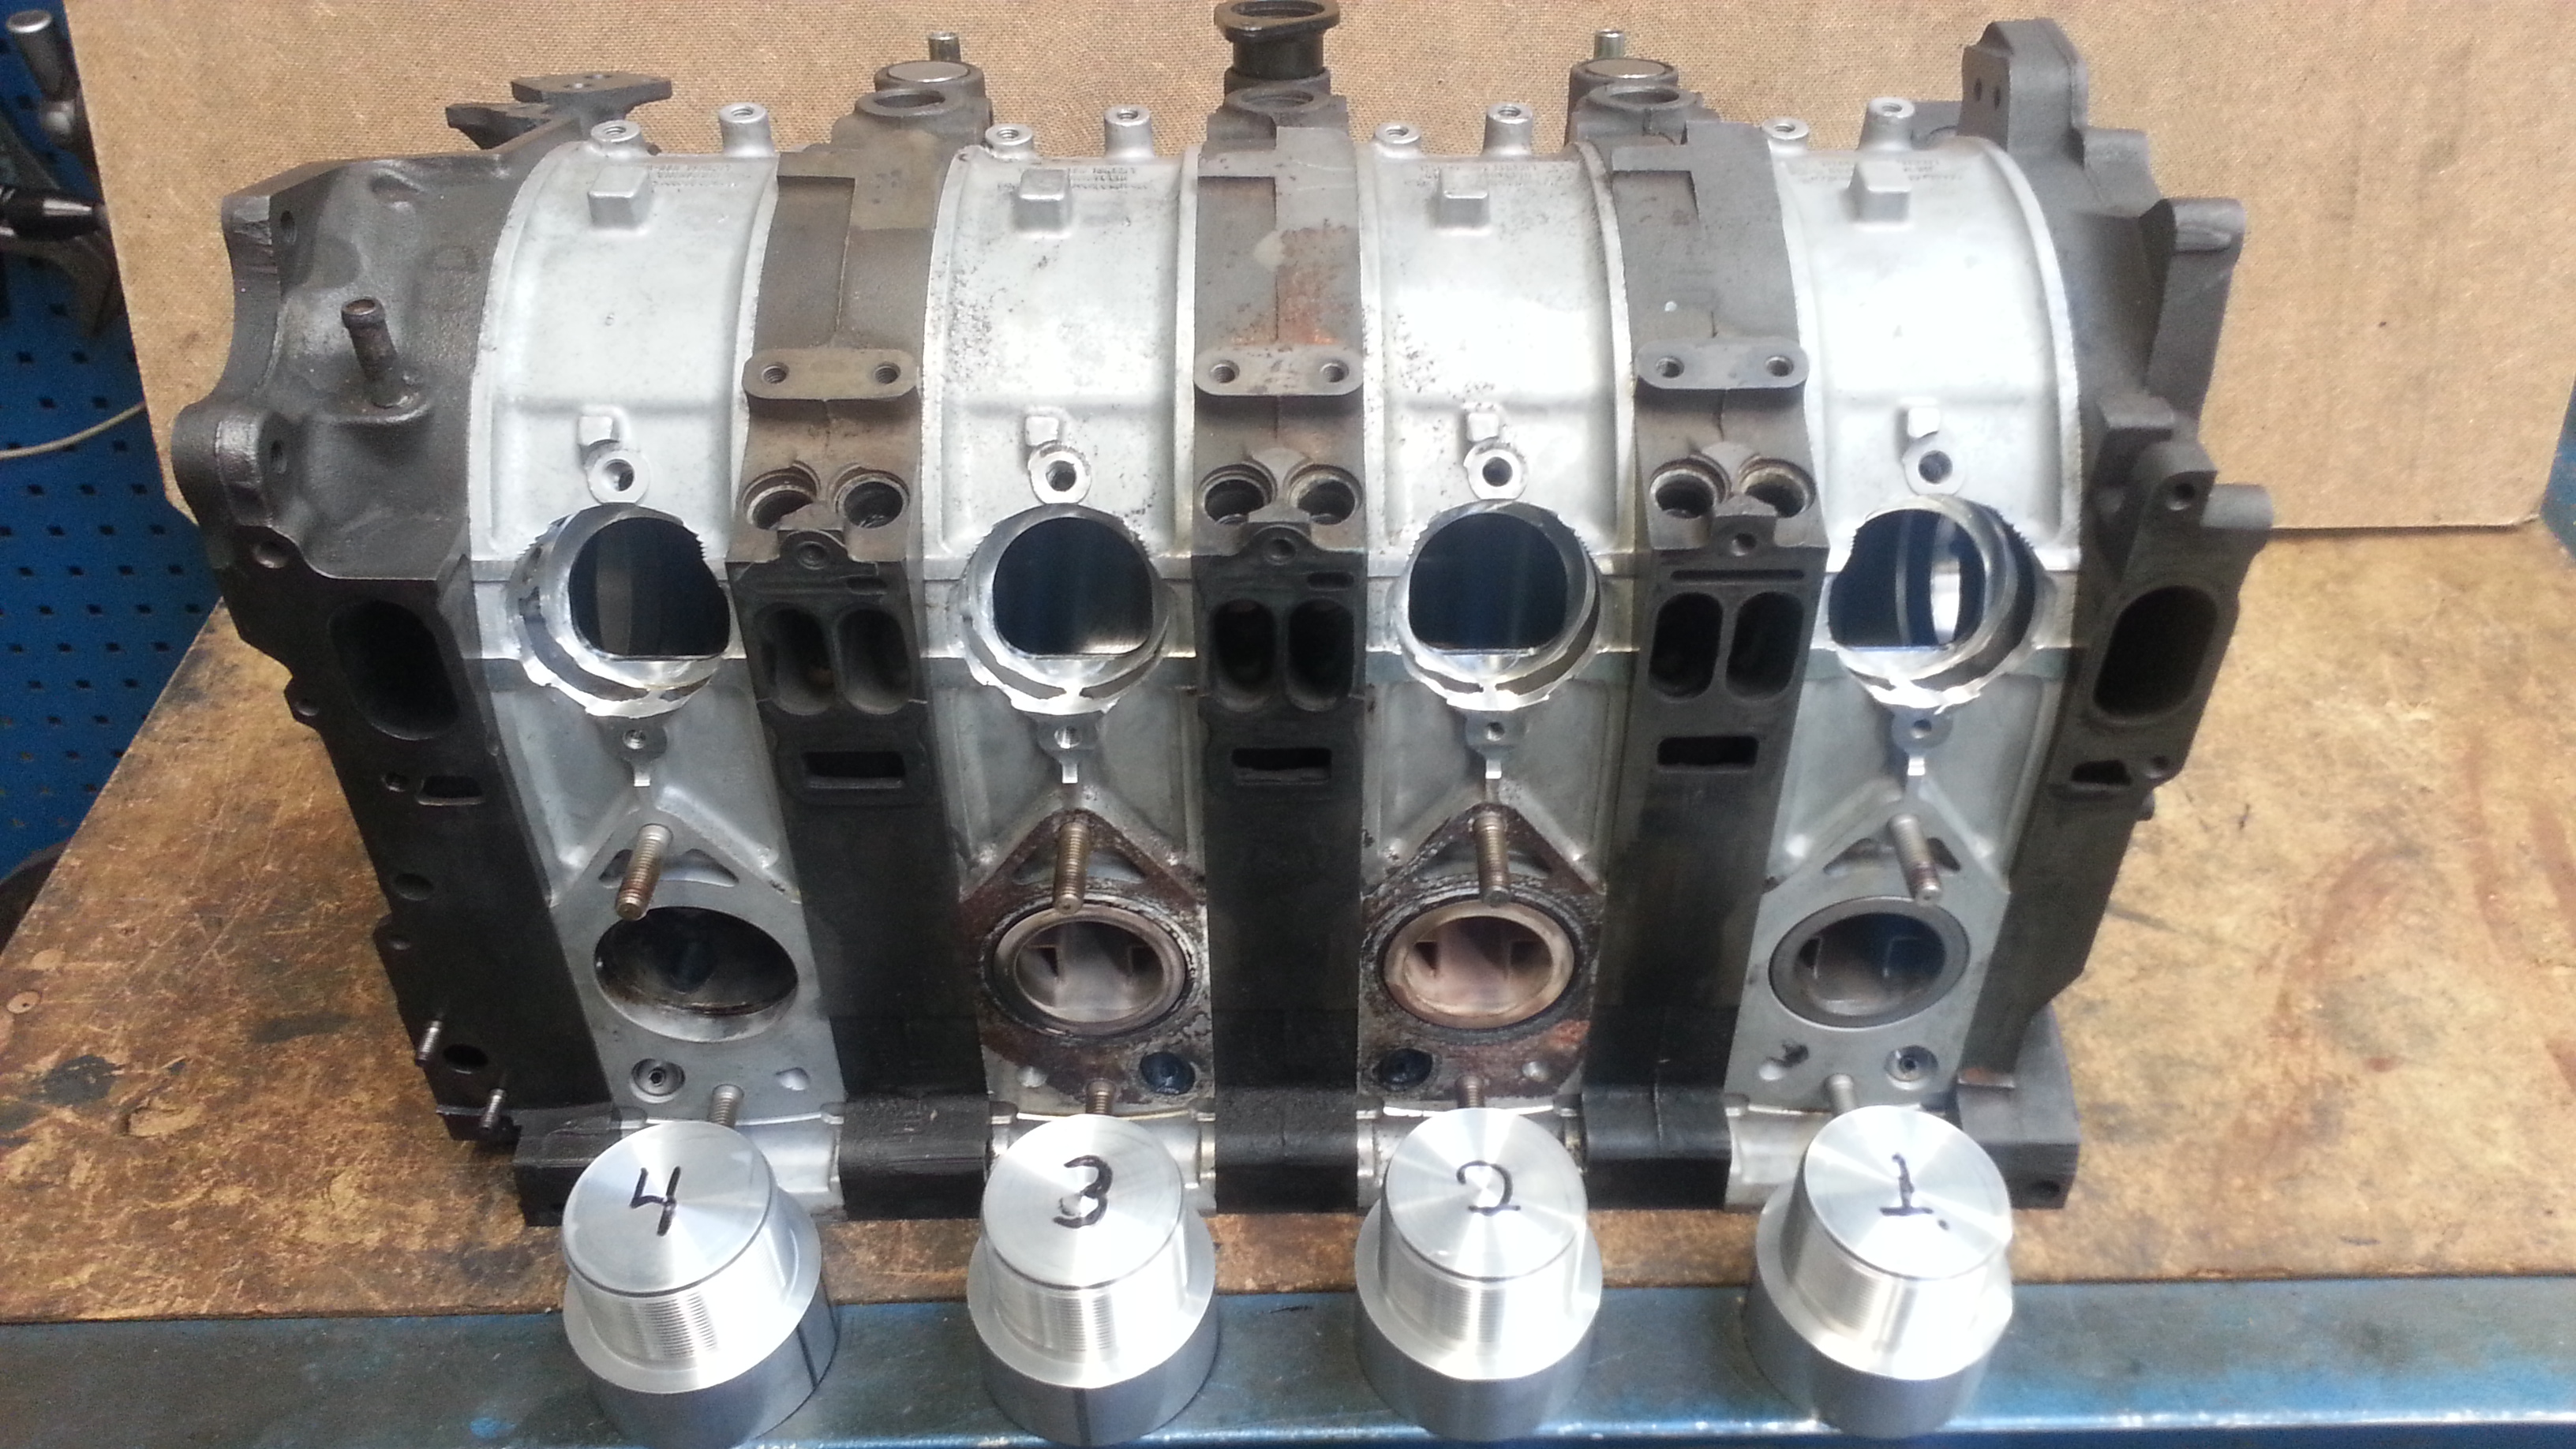
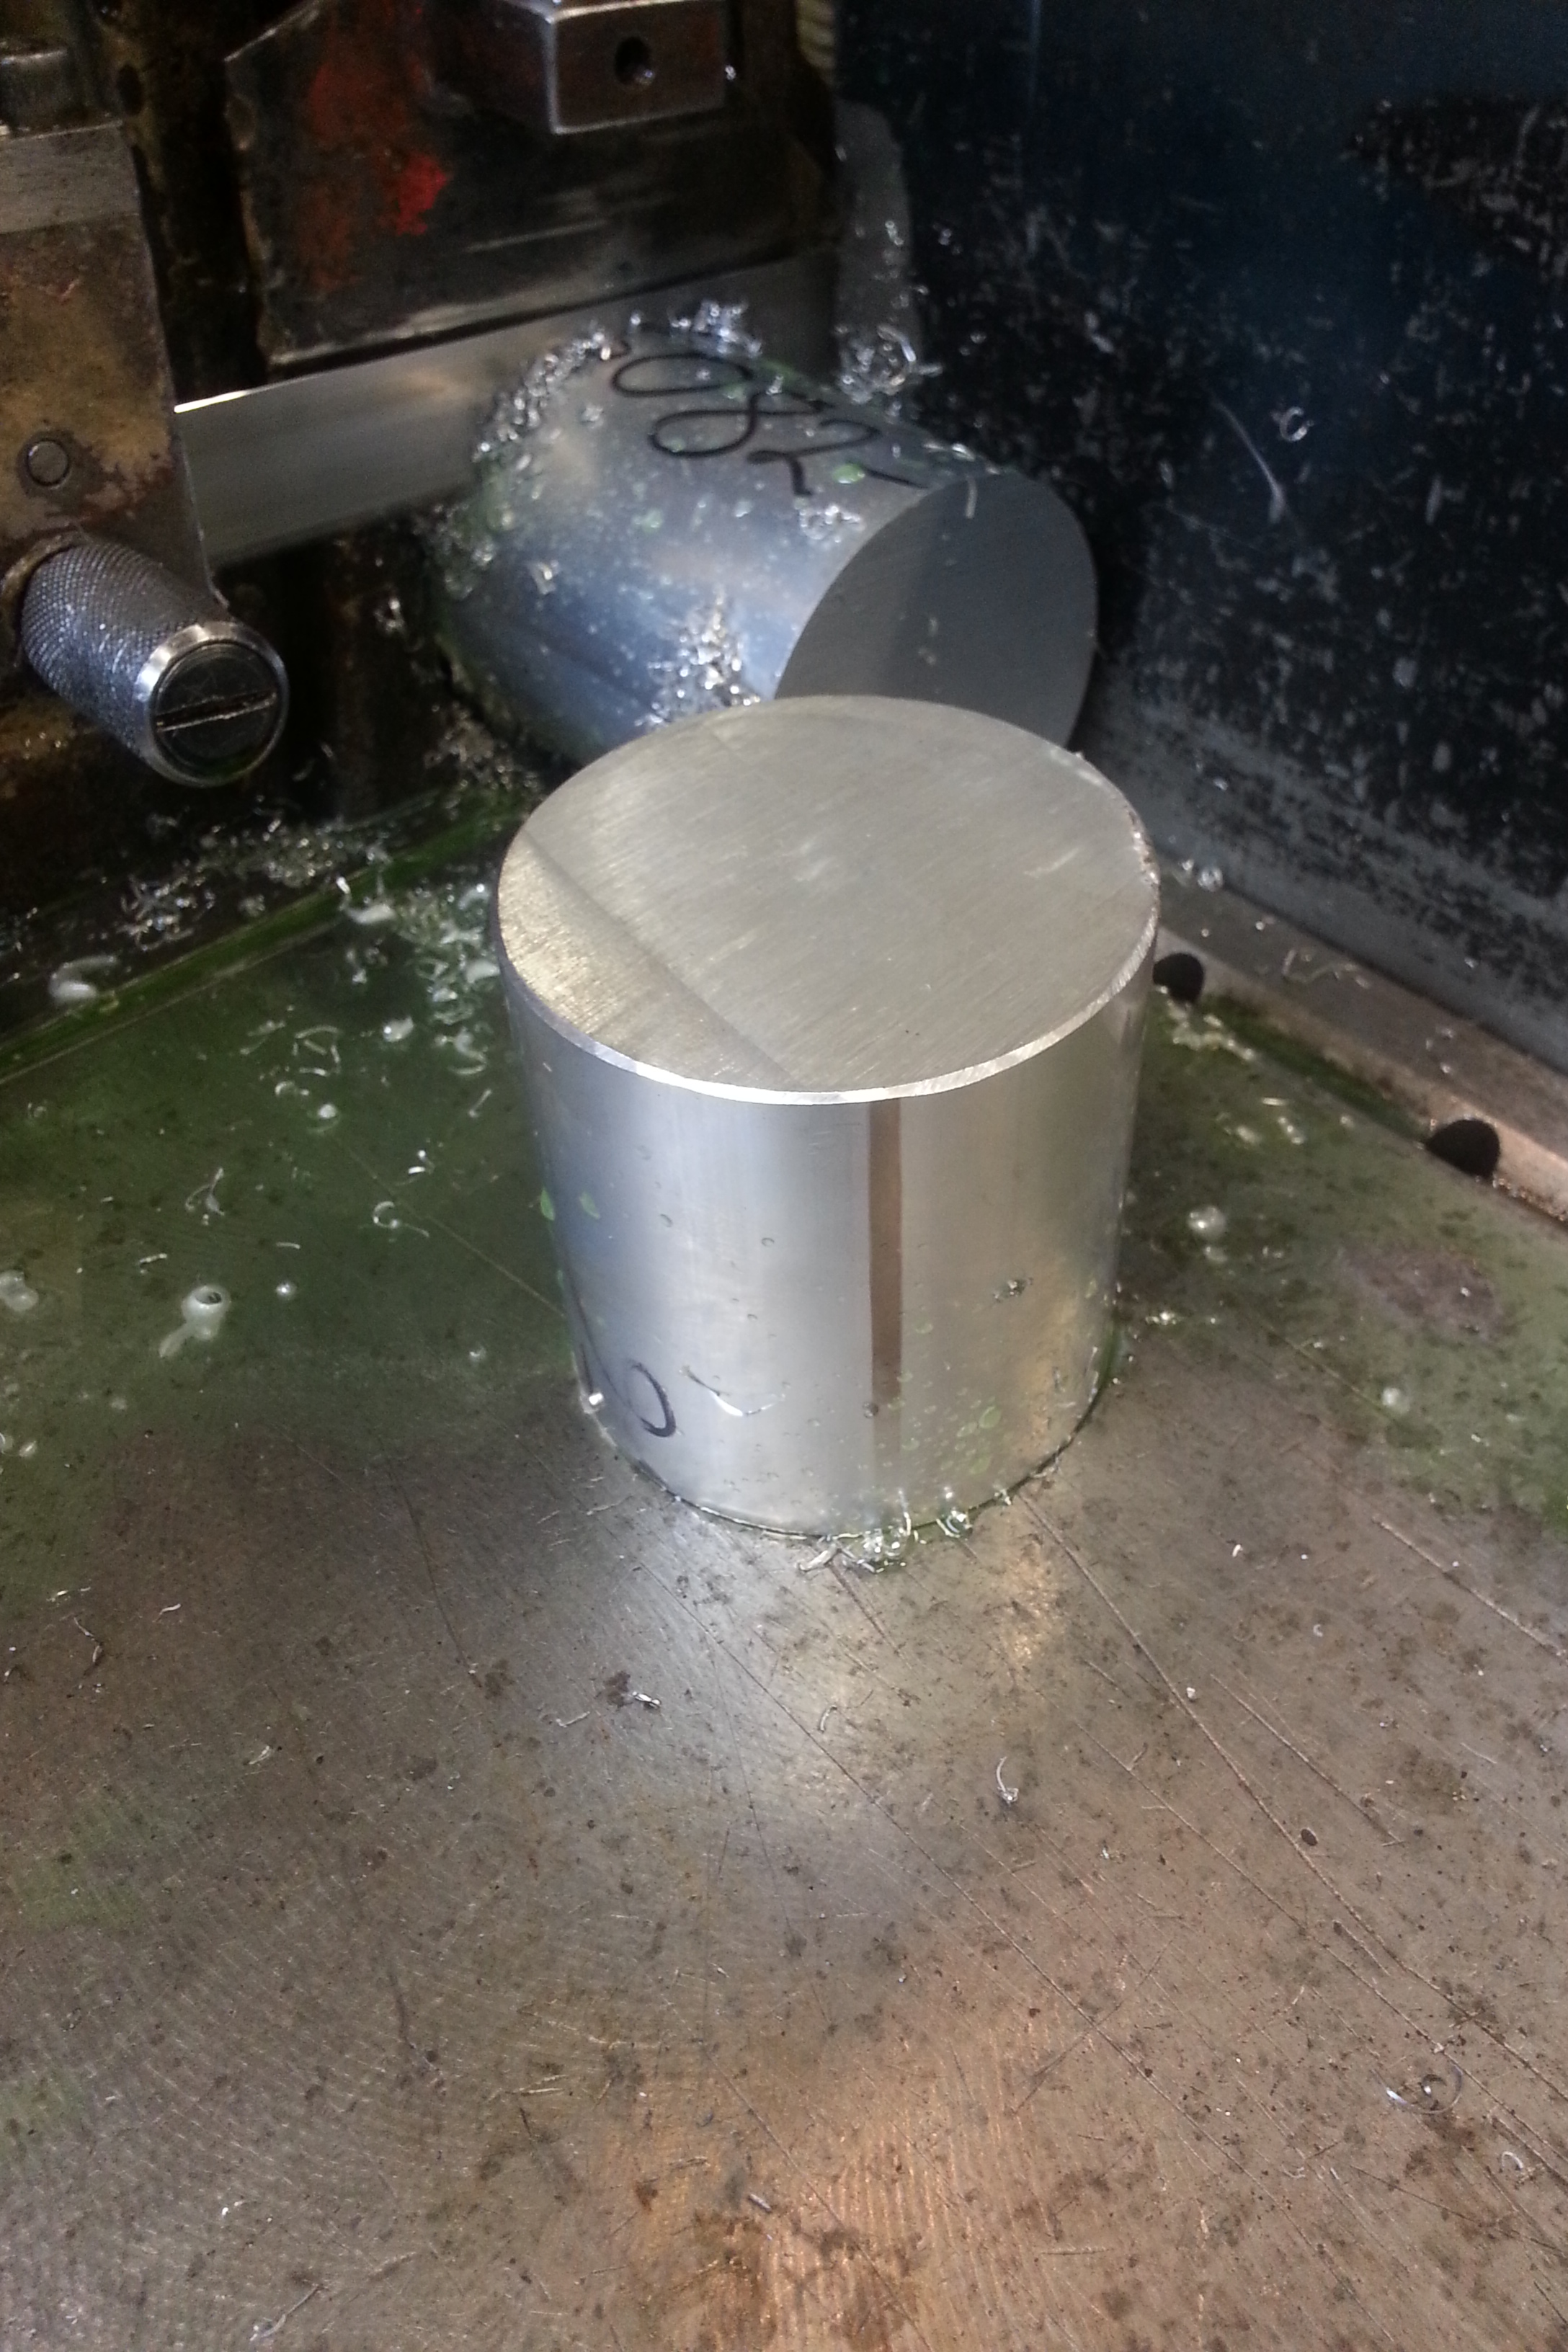
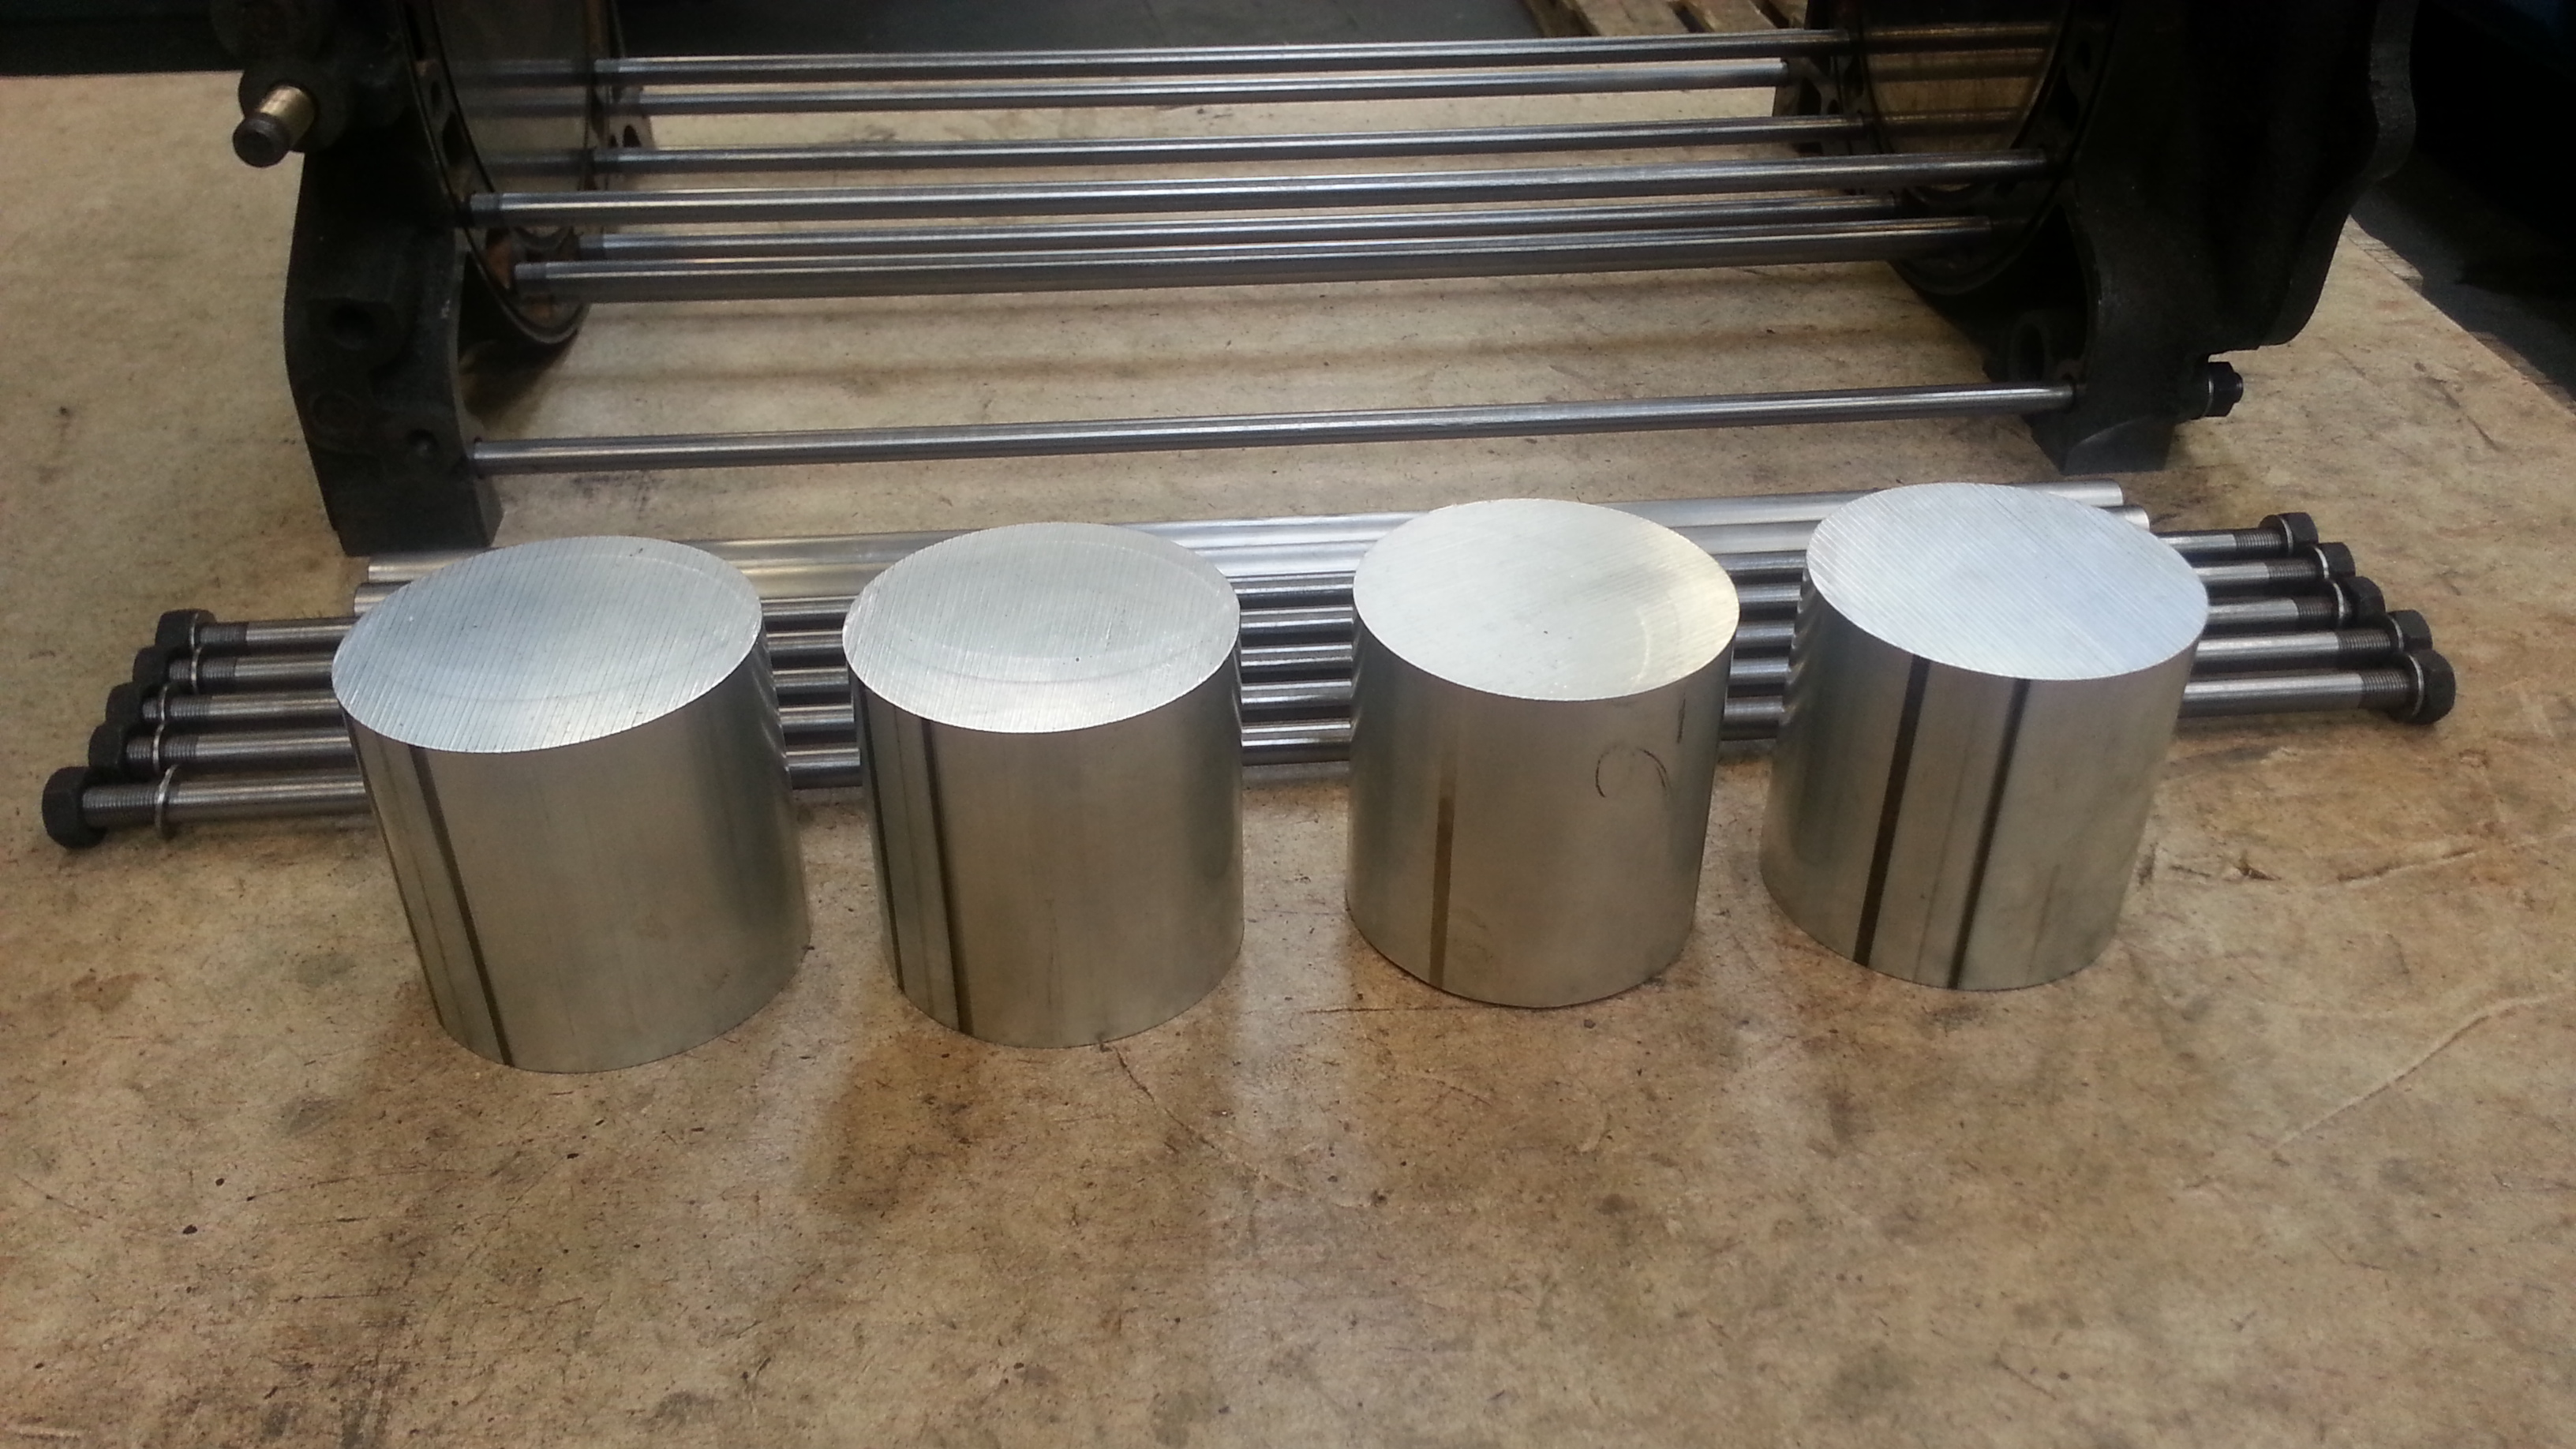
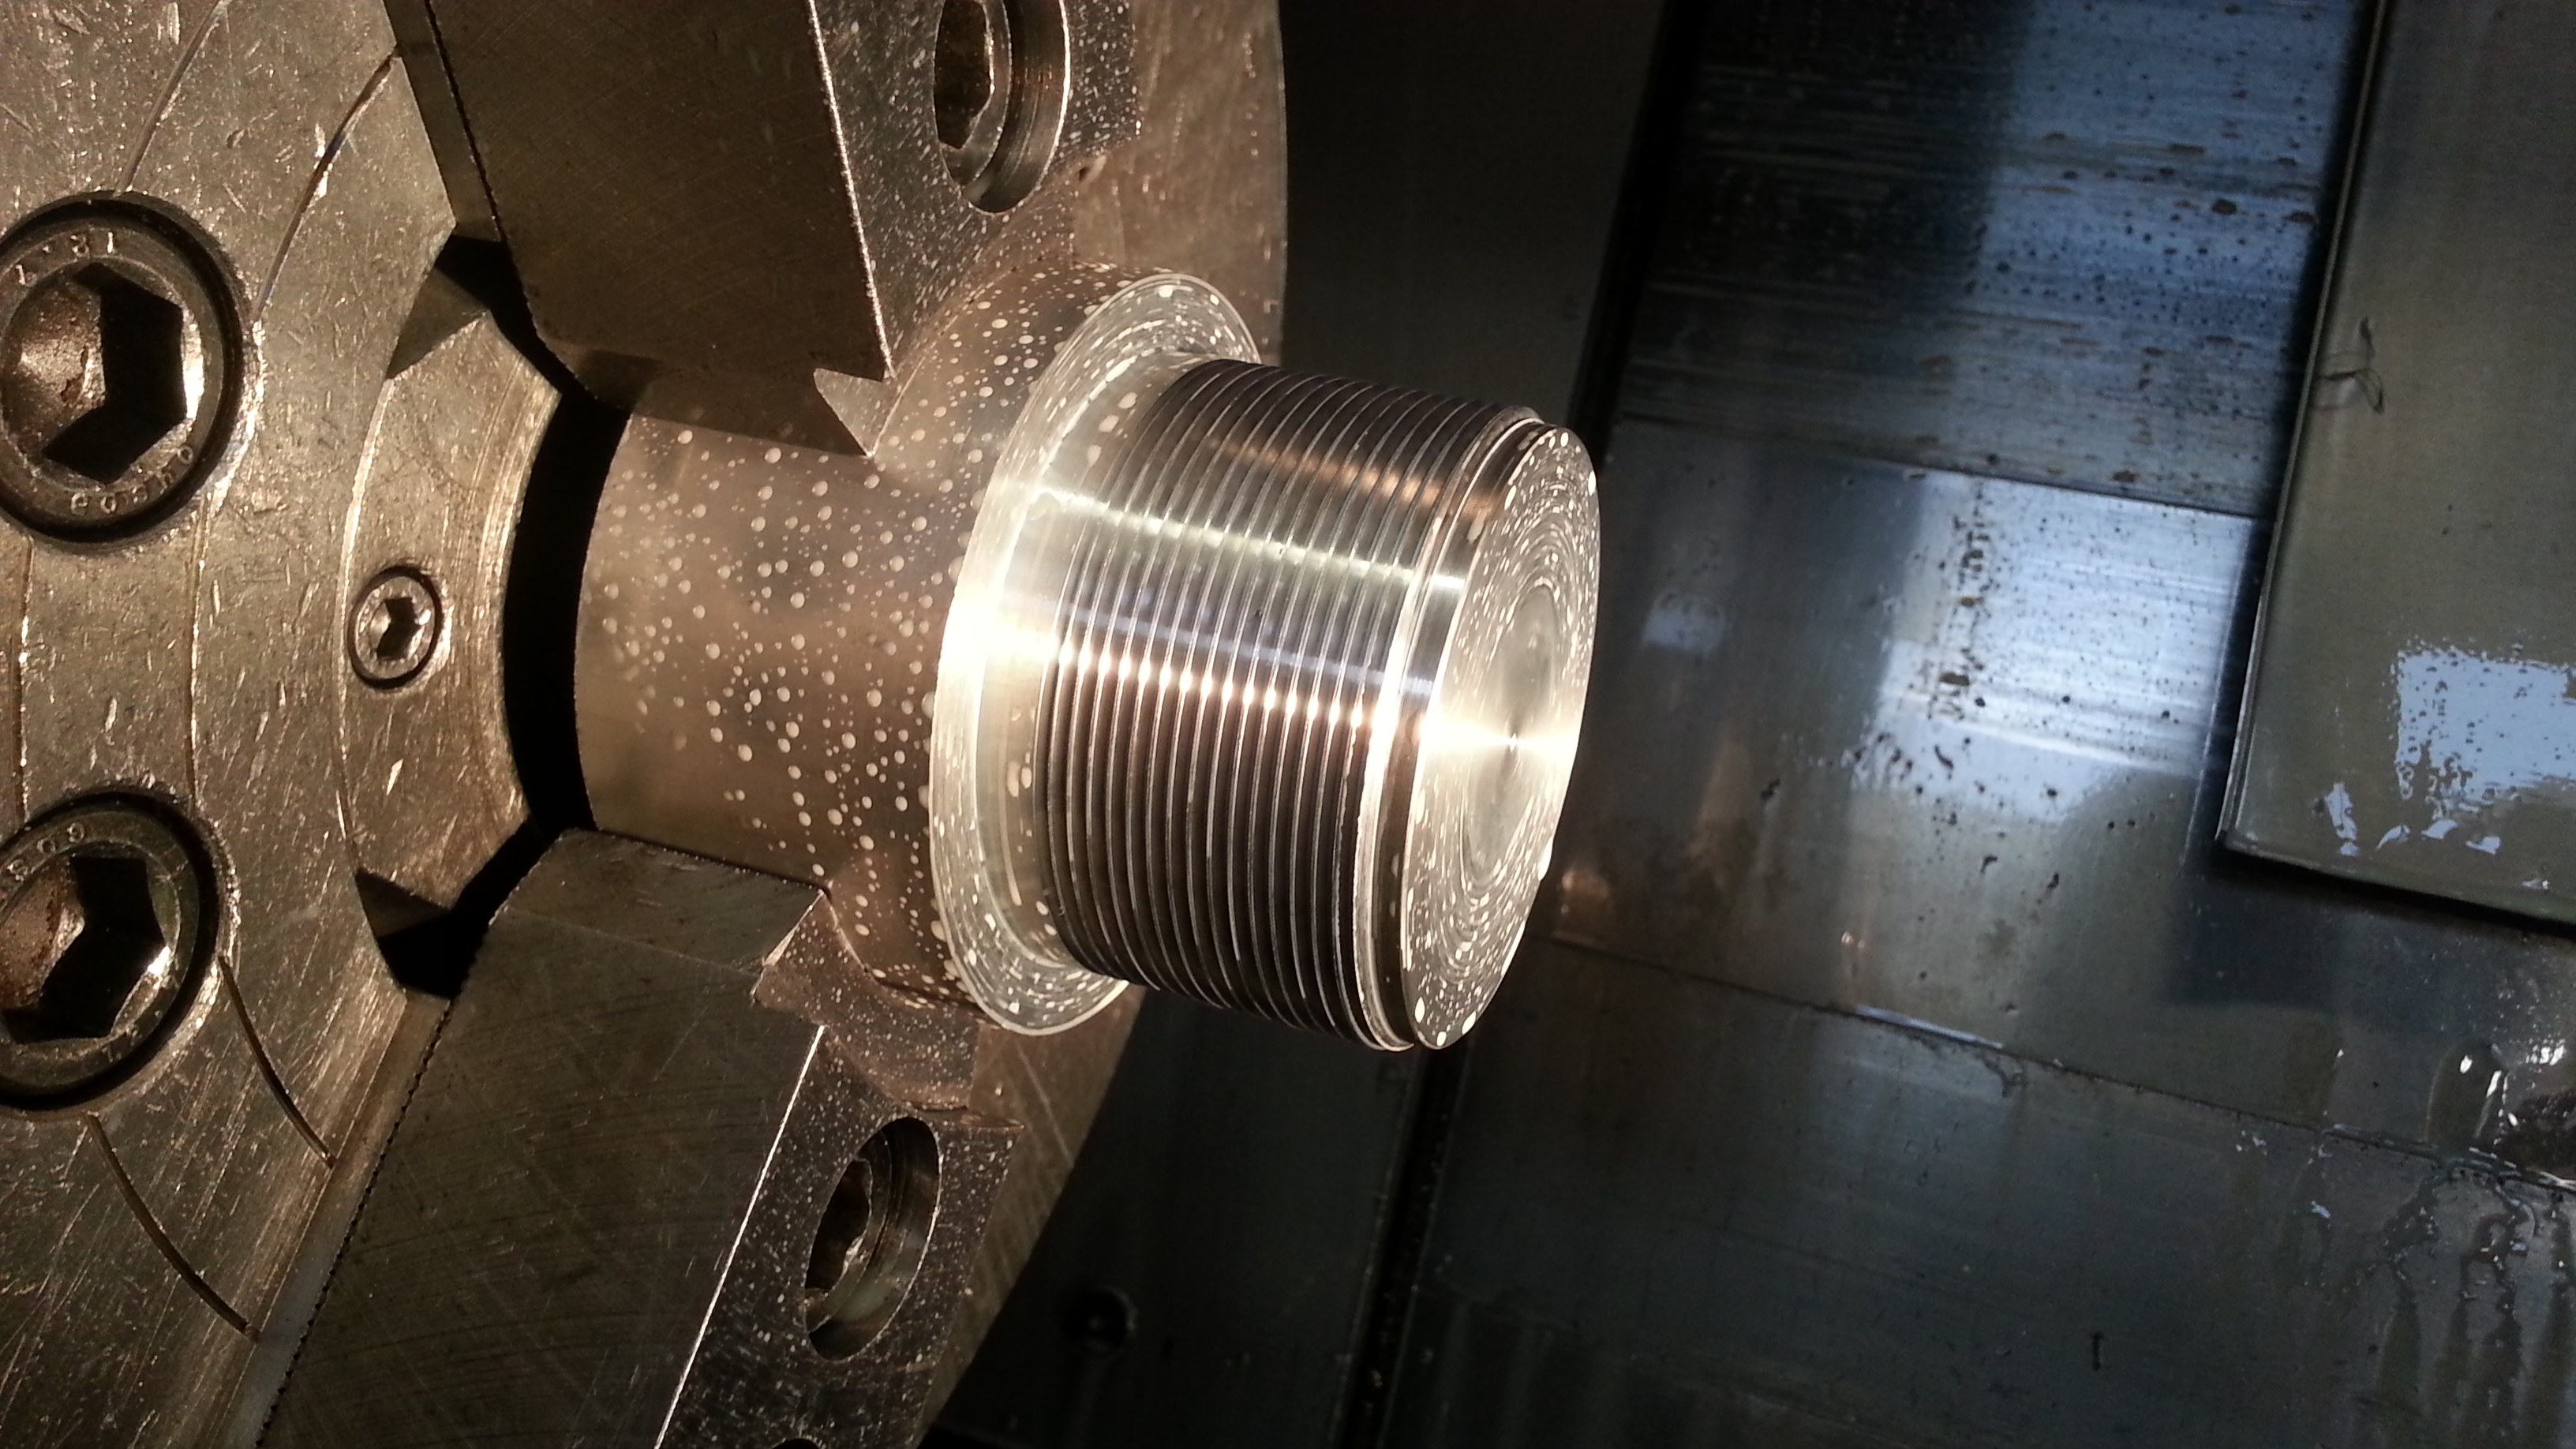
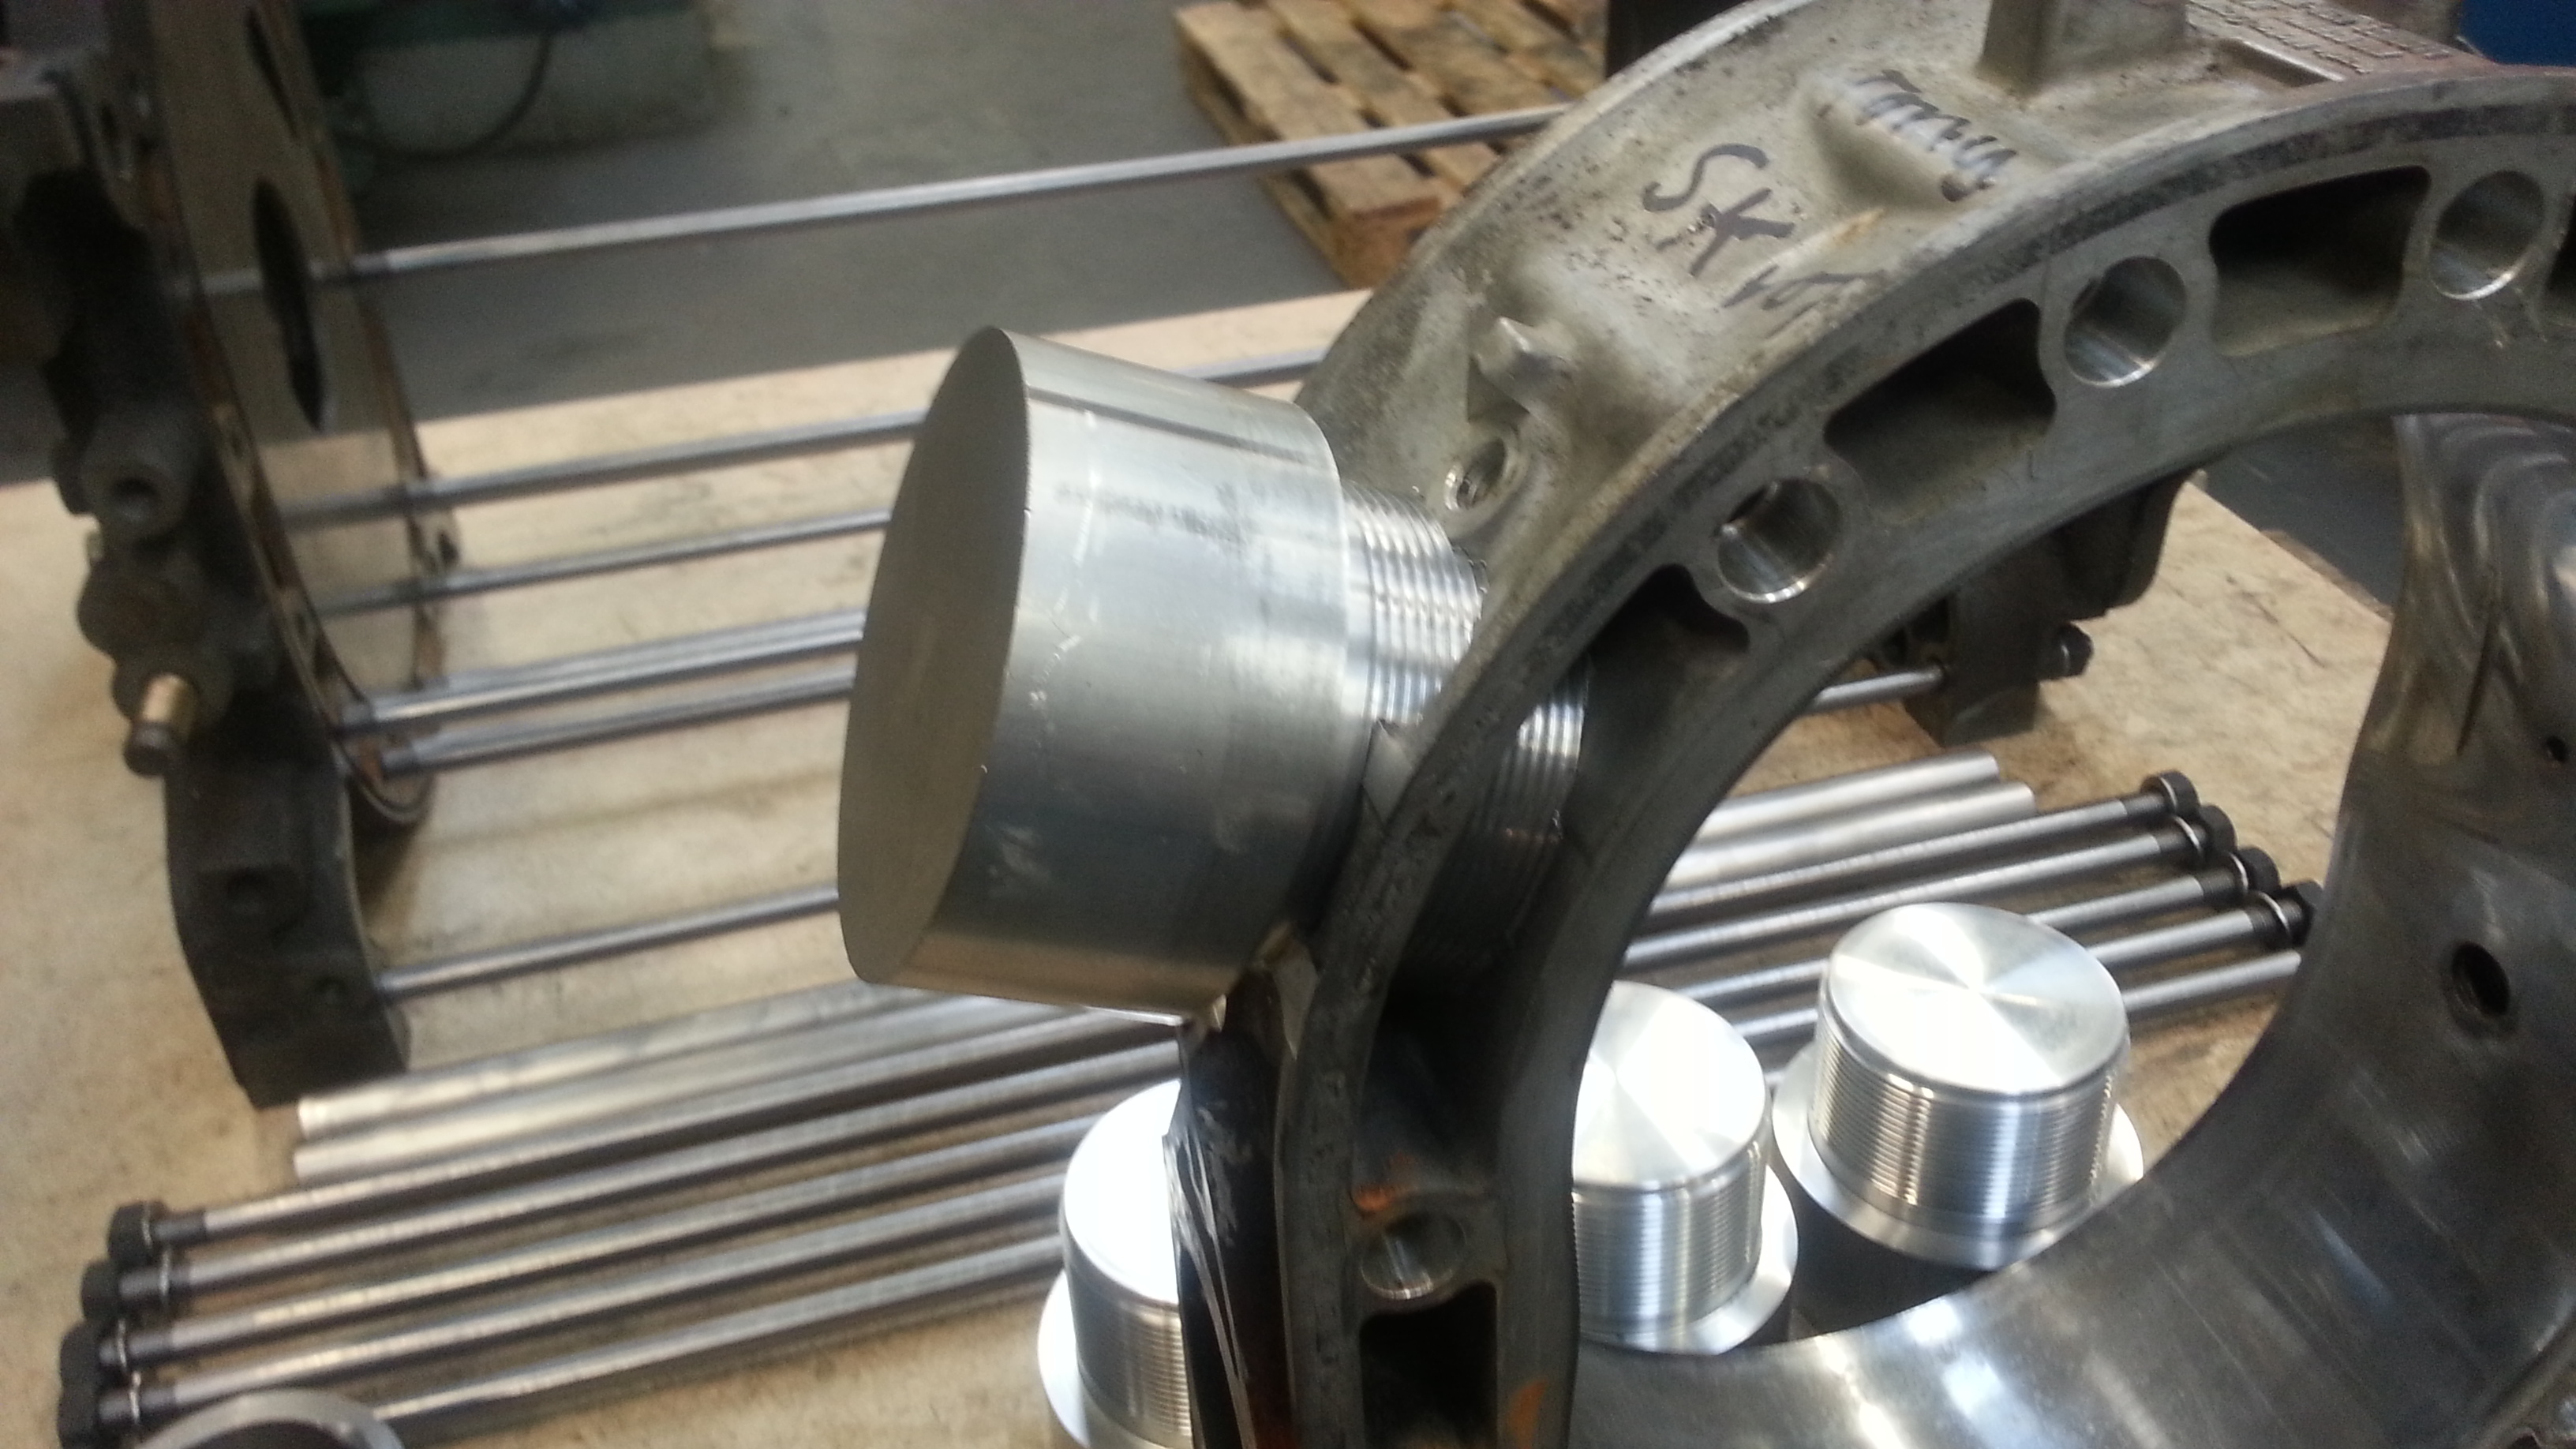
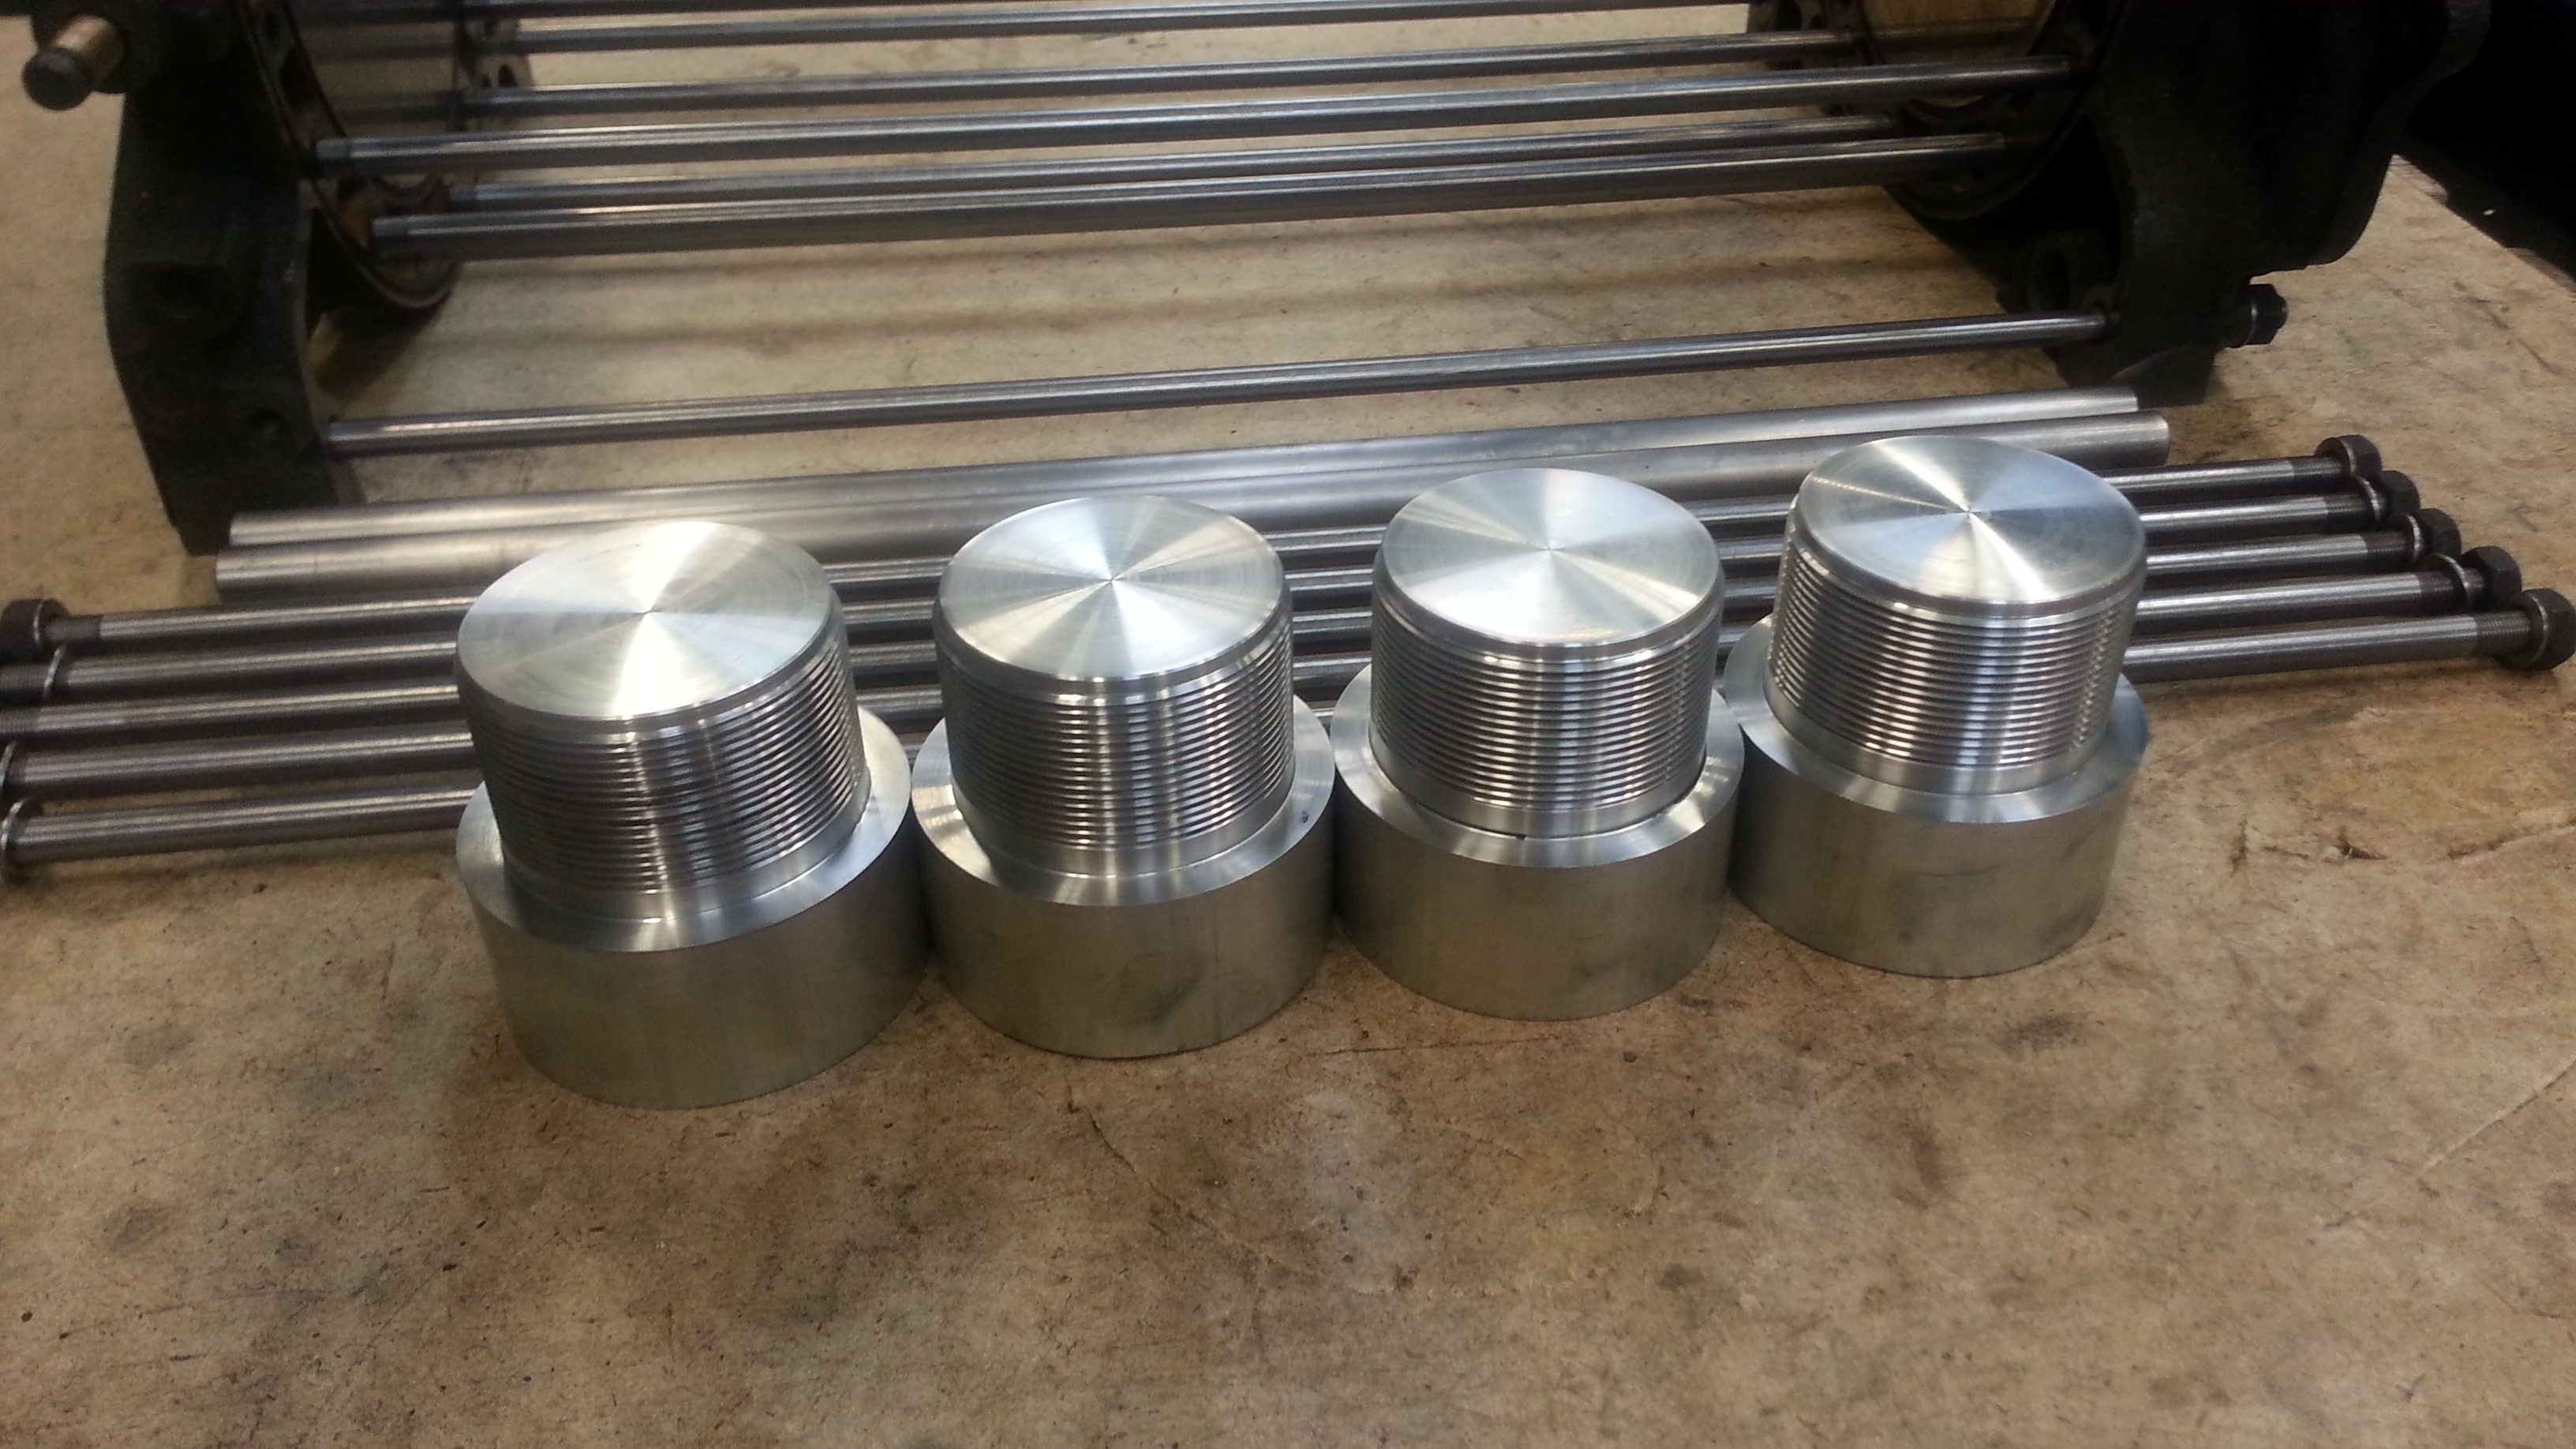
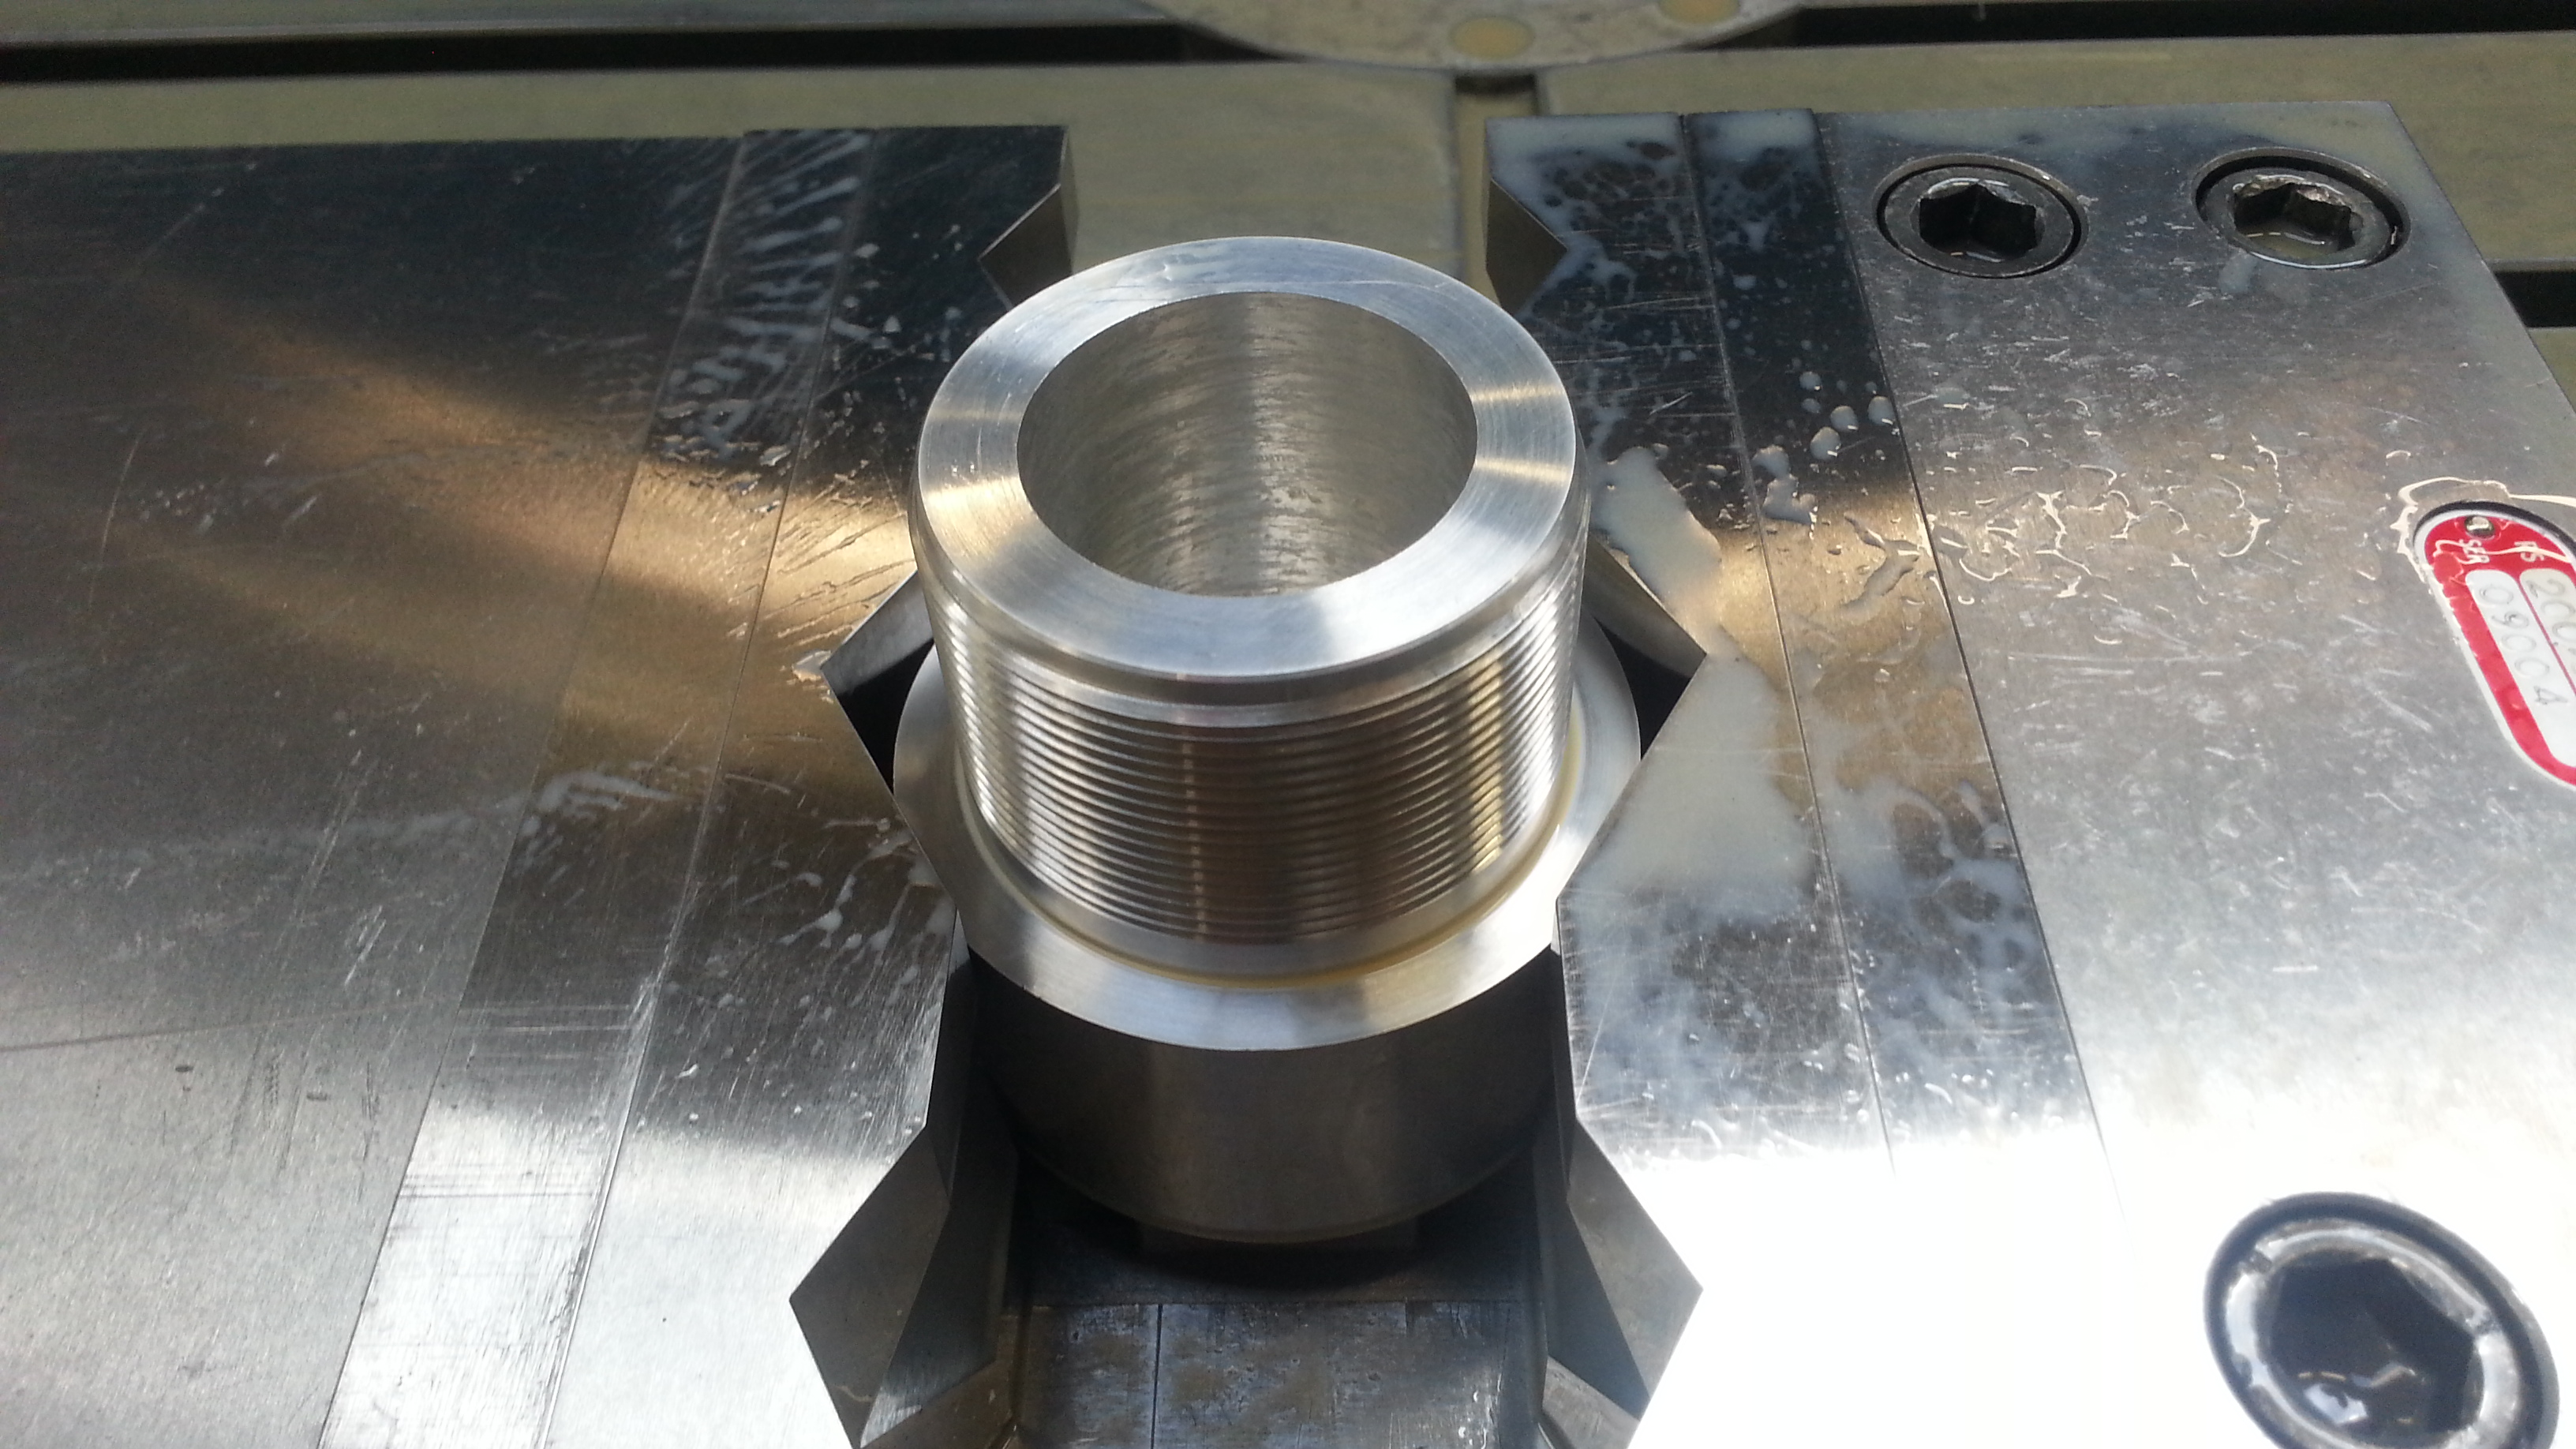
Todays work was the peripheralport-sleeves.
Cut some Ø80mm alu and threaded them M65x2.


Name:  IMG_20140413_133351_zps4w2dnngw.jpg
Views: 1659
Size:  1.87 MB


Name:  20140413_135356_zpsezw7e12t.jpg
Views: 1663
Size:  1.55 MB


Name:  20140413_164122_zpsjamrjjcy.jpg
Views: 1663
Size:  1.65 MB


Name:  20140413_165239_zpsm4vfucdx.jpg
Views: 1687
Size:  1.44 MB


Name:  20140413_171809_zpshm3outra.jpg
Views: 1649
Size:  1.63 MB


Next step is to machine the rotorhousings.
Old 04-14-14, 05:35 PM
  #905  
Senior Member

iTrader: (2)
 
demongo's Avatar
 
Join Date: Jul 2011
Location: CA
Posts: 255
Received 1 Like on 1 Post
Next step is to machine the rotorhousings.
*That's* what I can't wait to see!
Old 04-20-14, 12:06 PM
  #906  
Senior Member

Thread Starter
 
tegheim's Avatar
 
Join Date: Nov 2003
Location: Sweden
Posts: 533
Likes: 0
Received 2 Likes on 1 Post
Moment of truth, or point of no return for these housings...
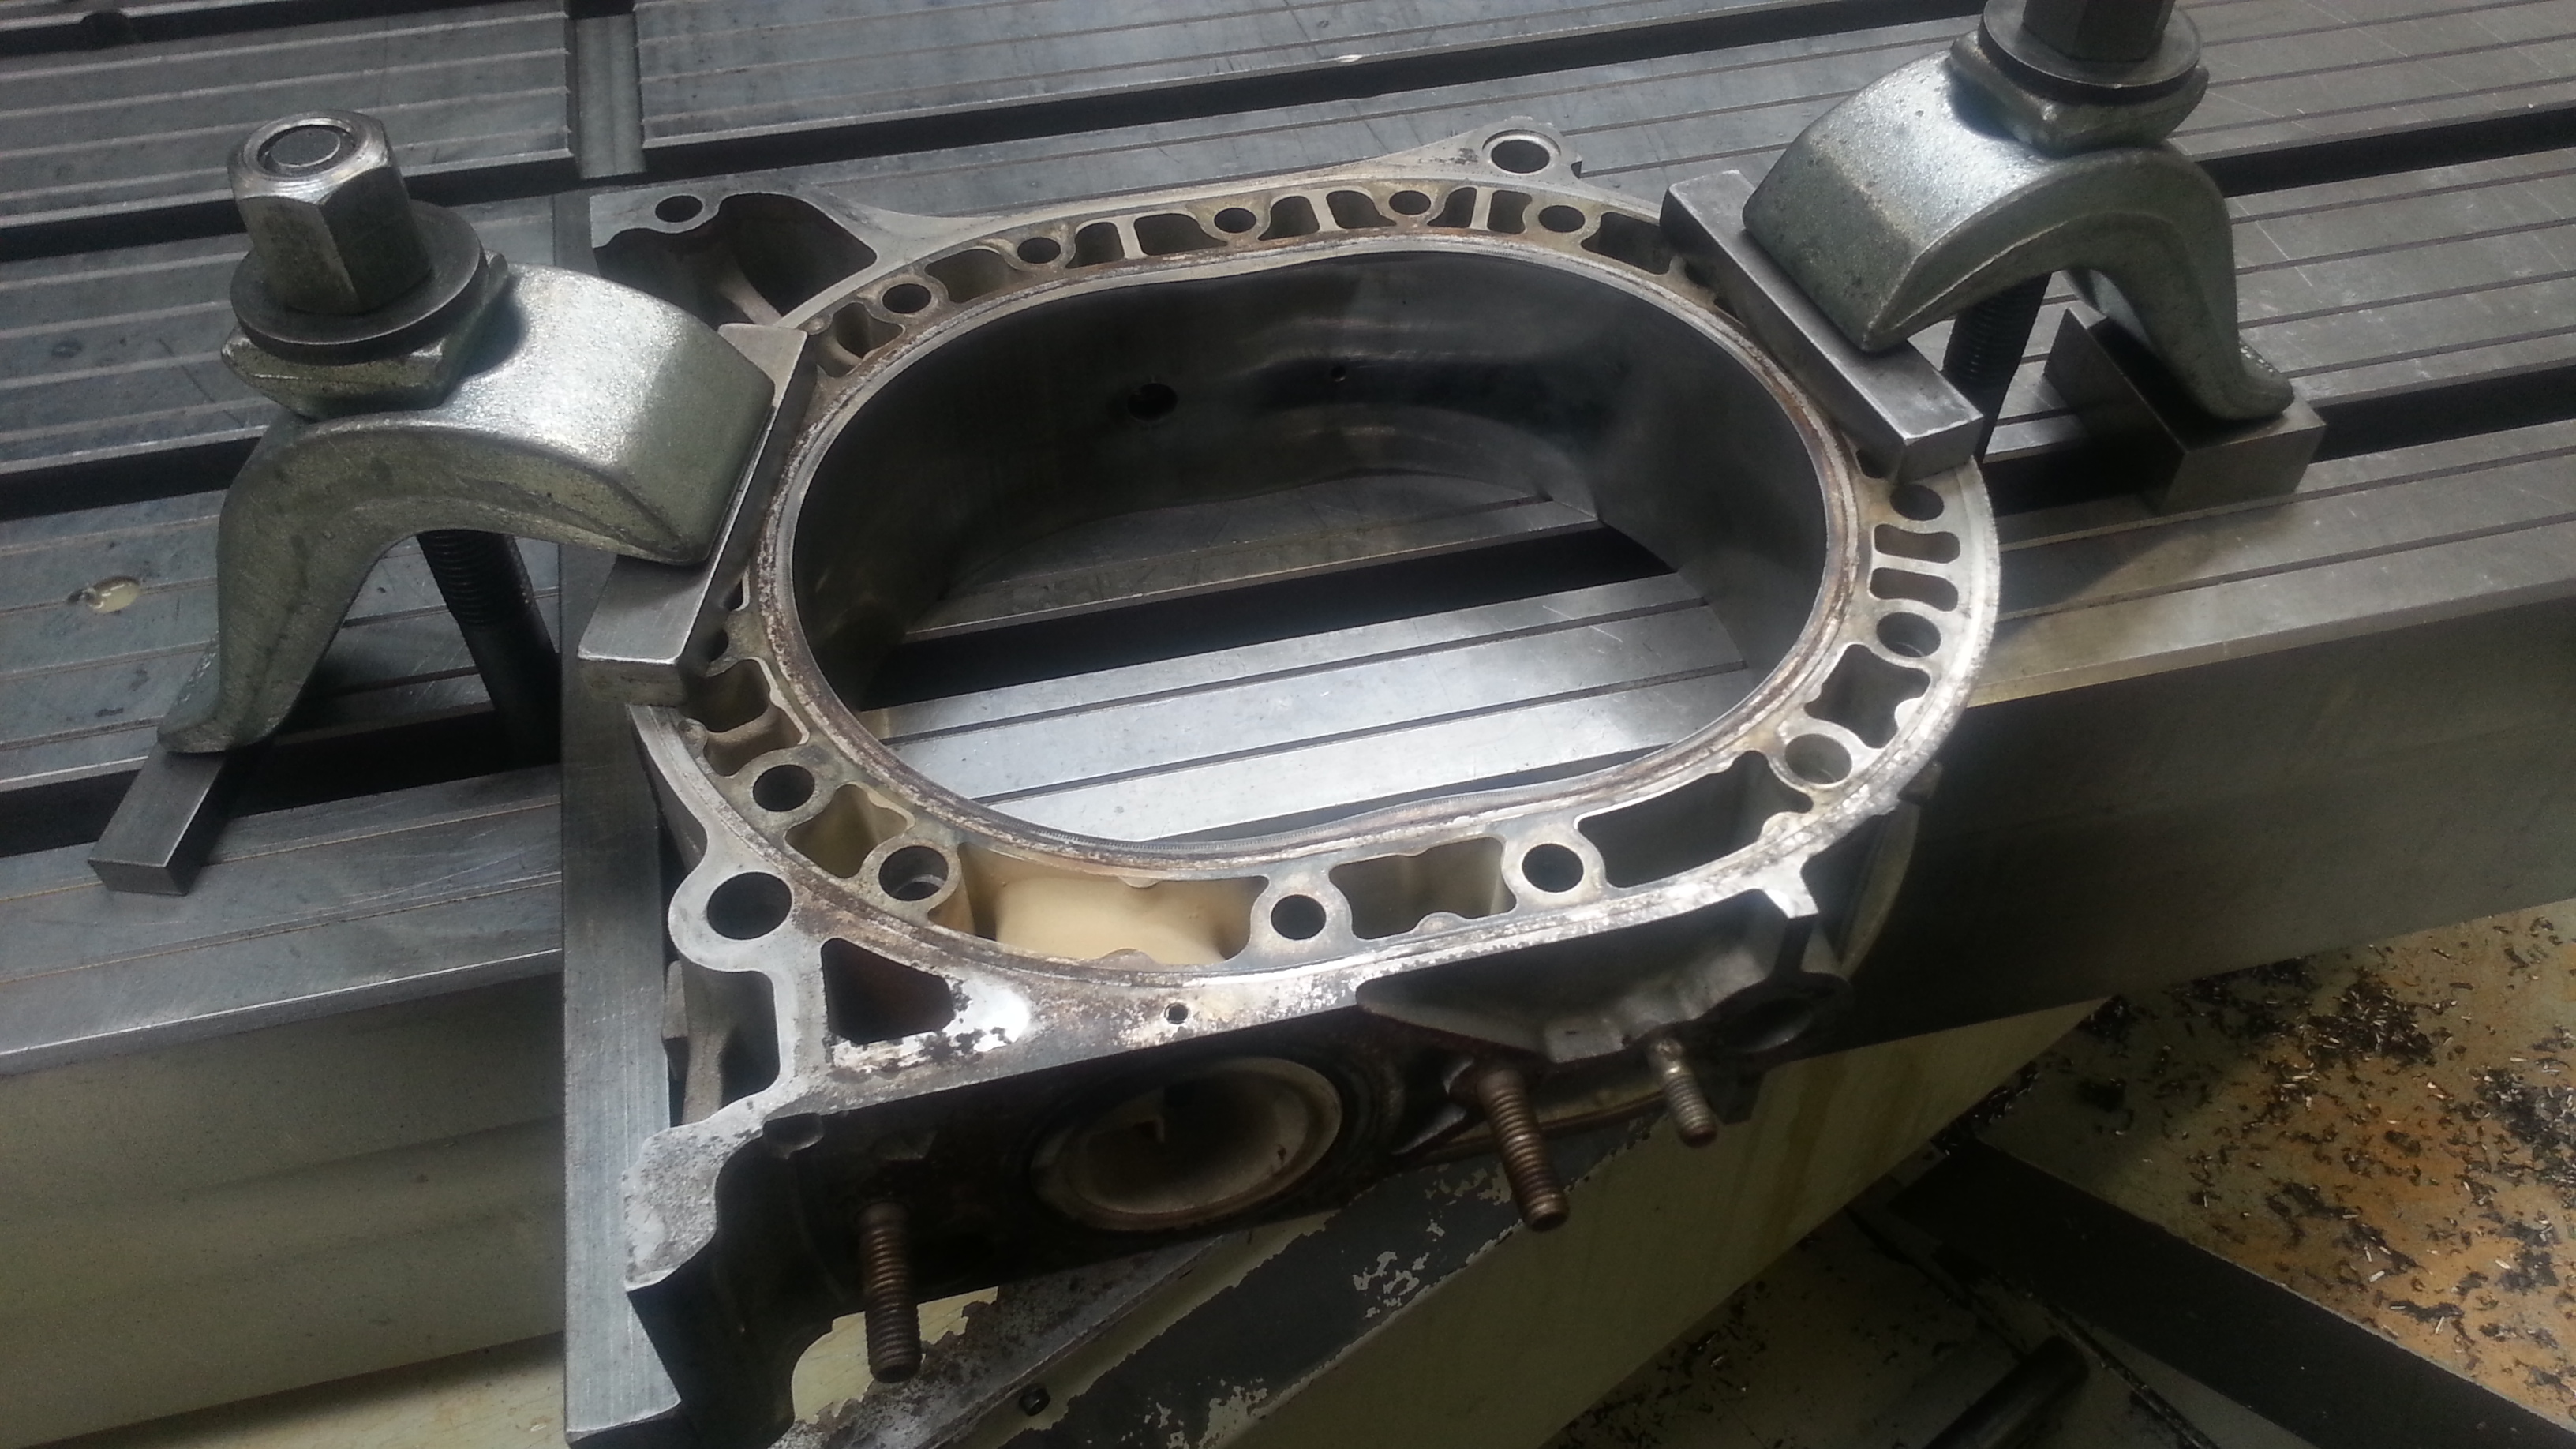
Name:  20140417_141303_zpsdjppmt0m.jpg
Views: 1677
Size:  1.54 MB


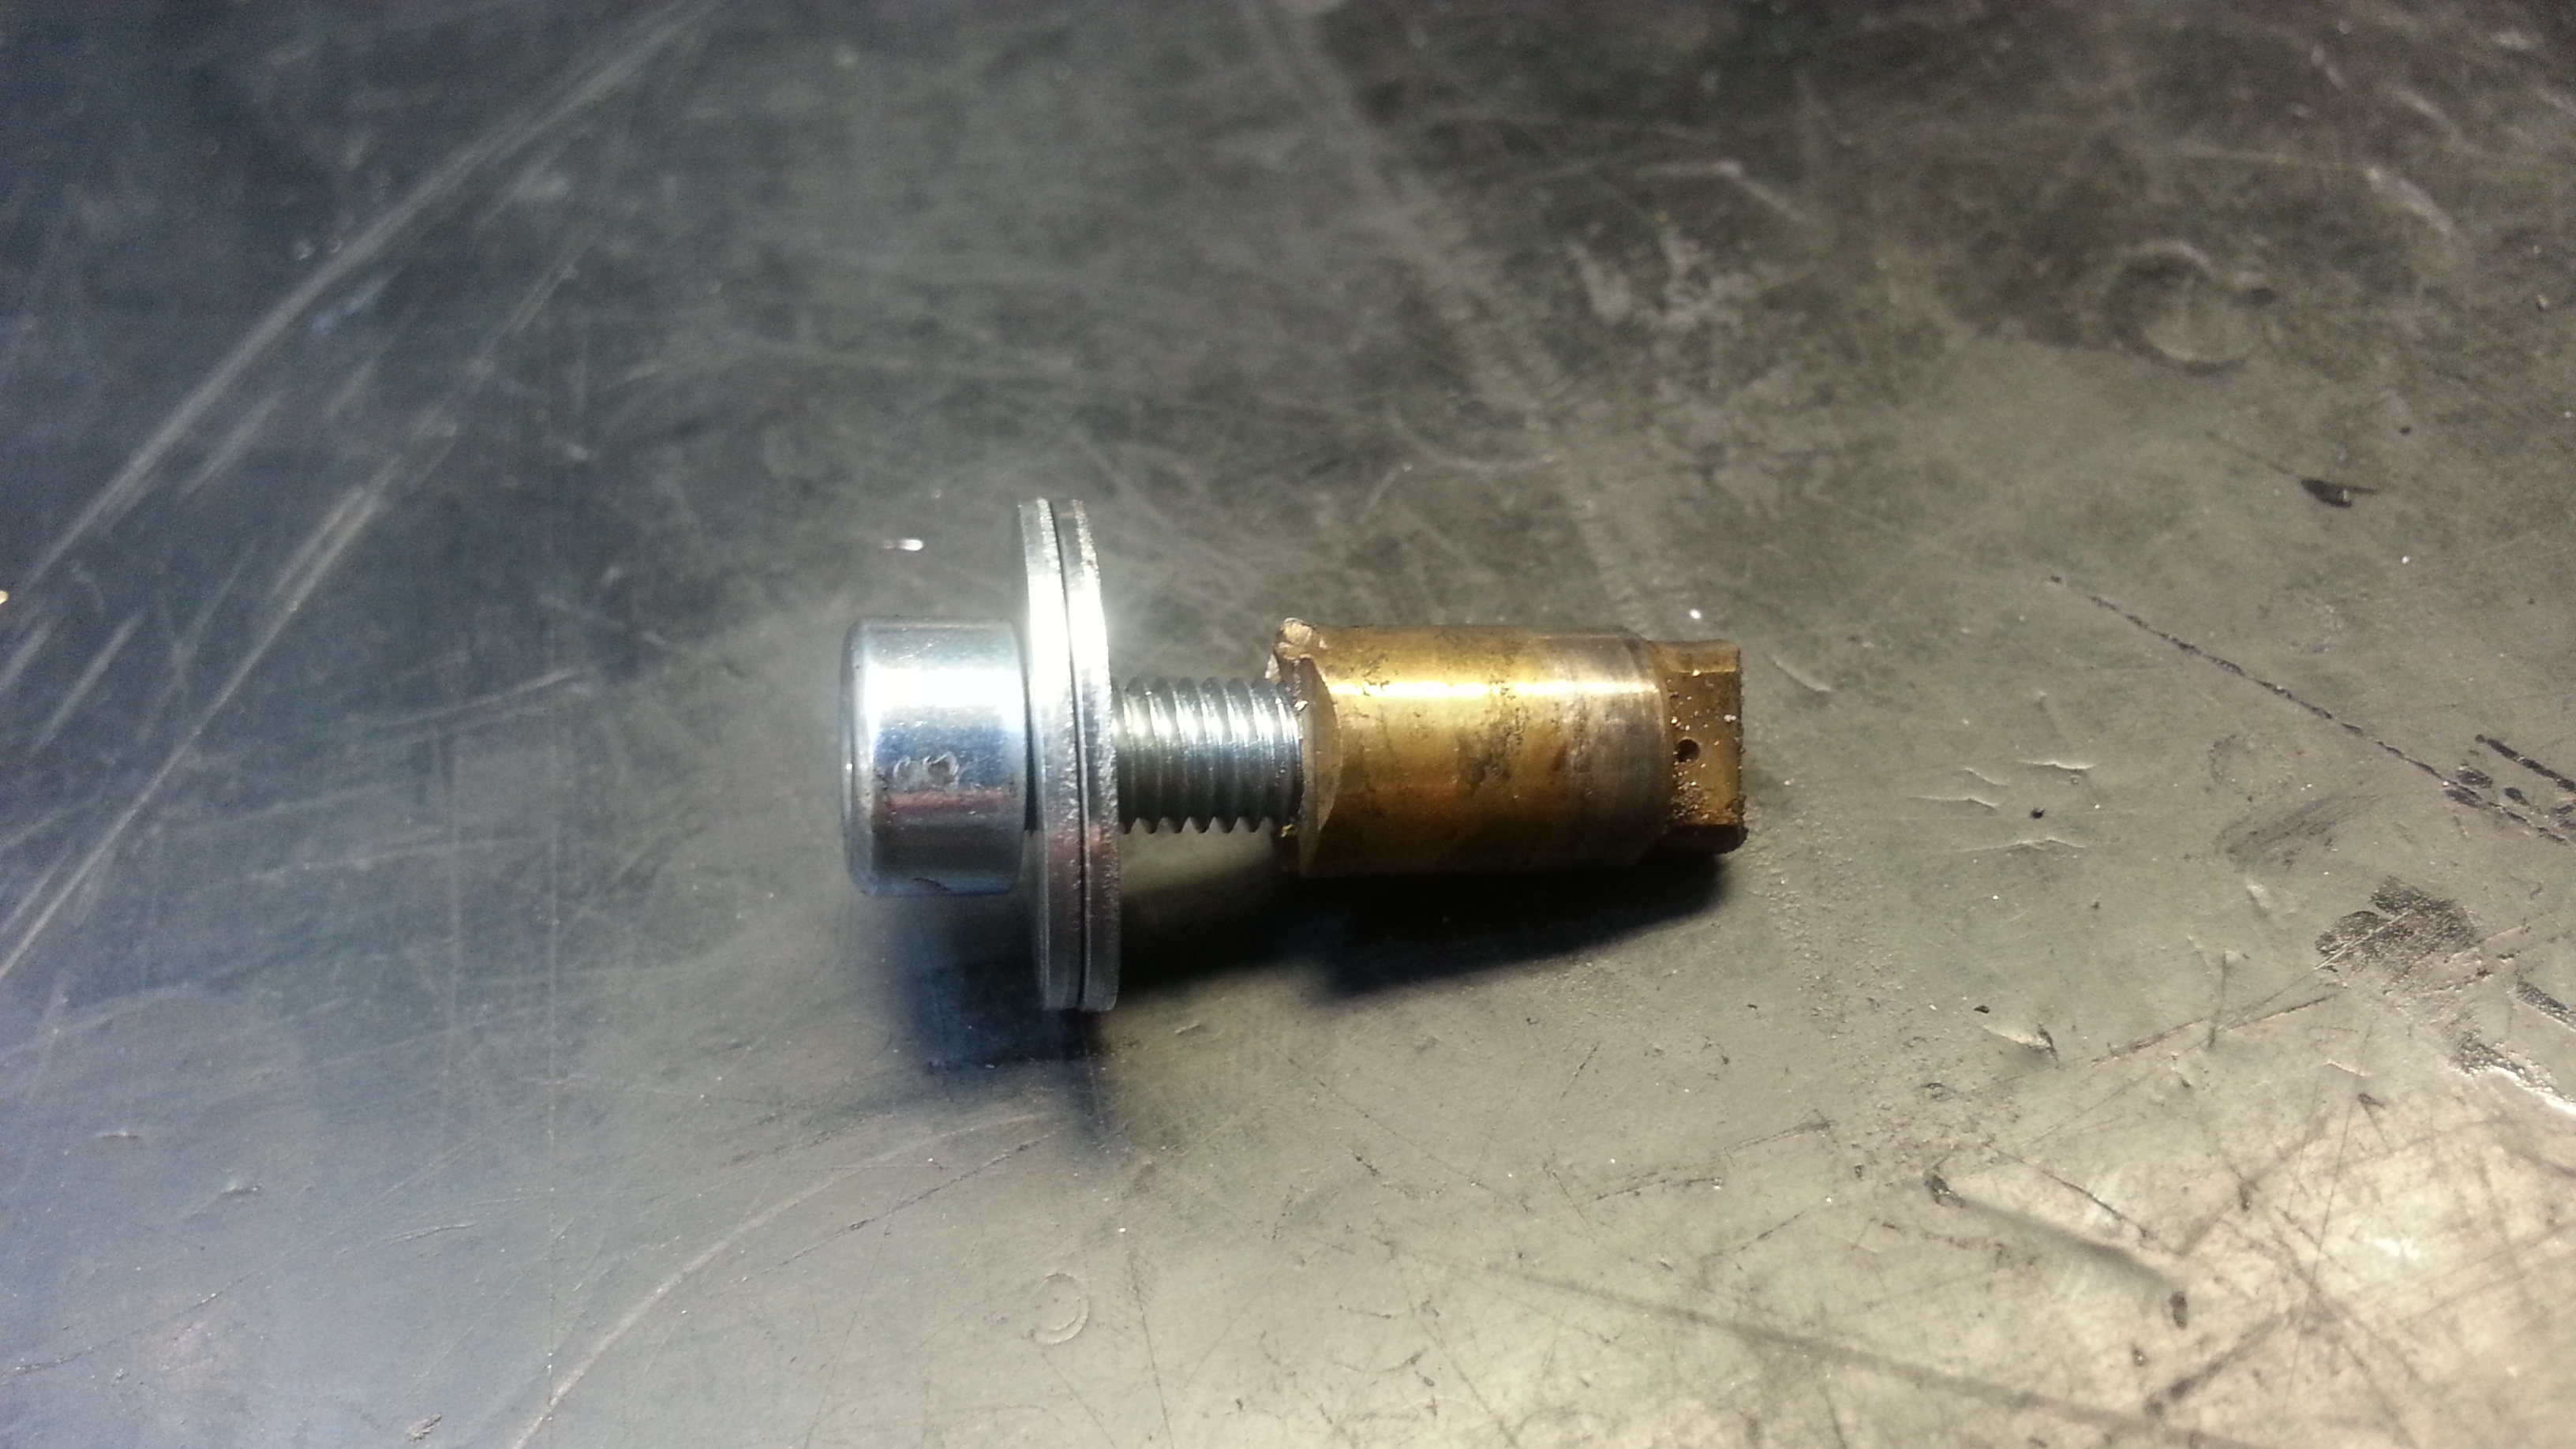
The original "oil-nozzle" must be removed before milling or else my tool, or my housing will be broken.
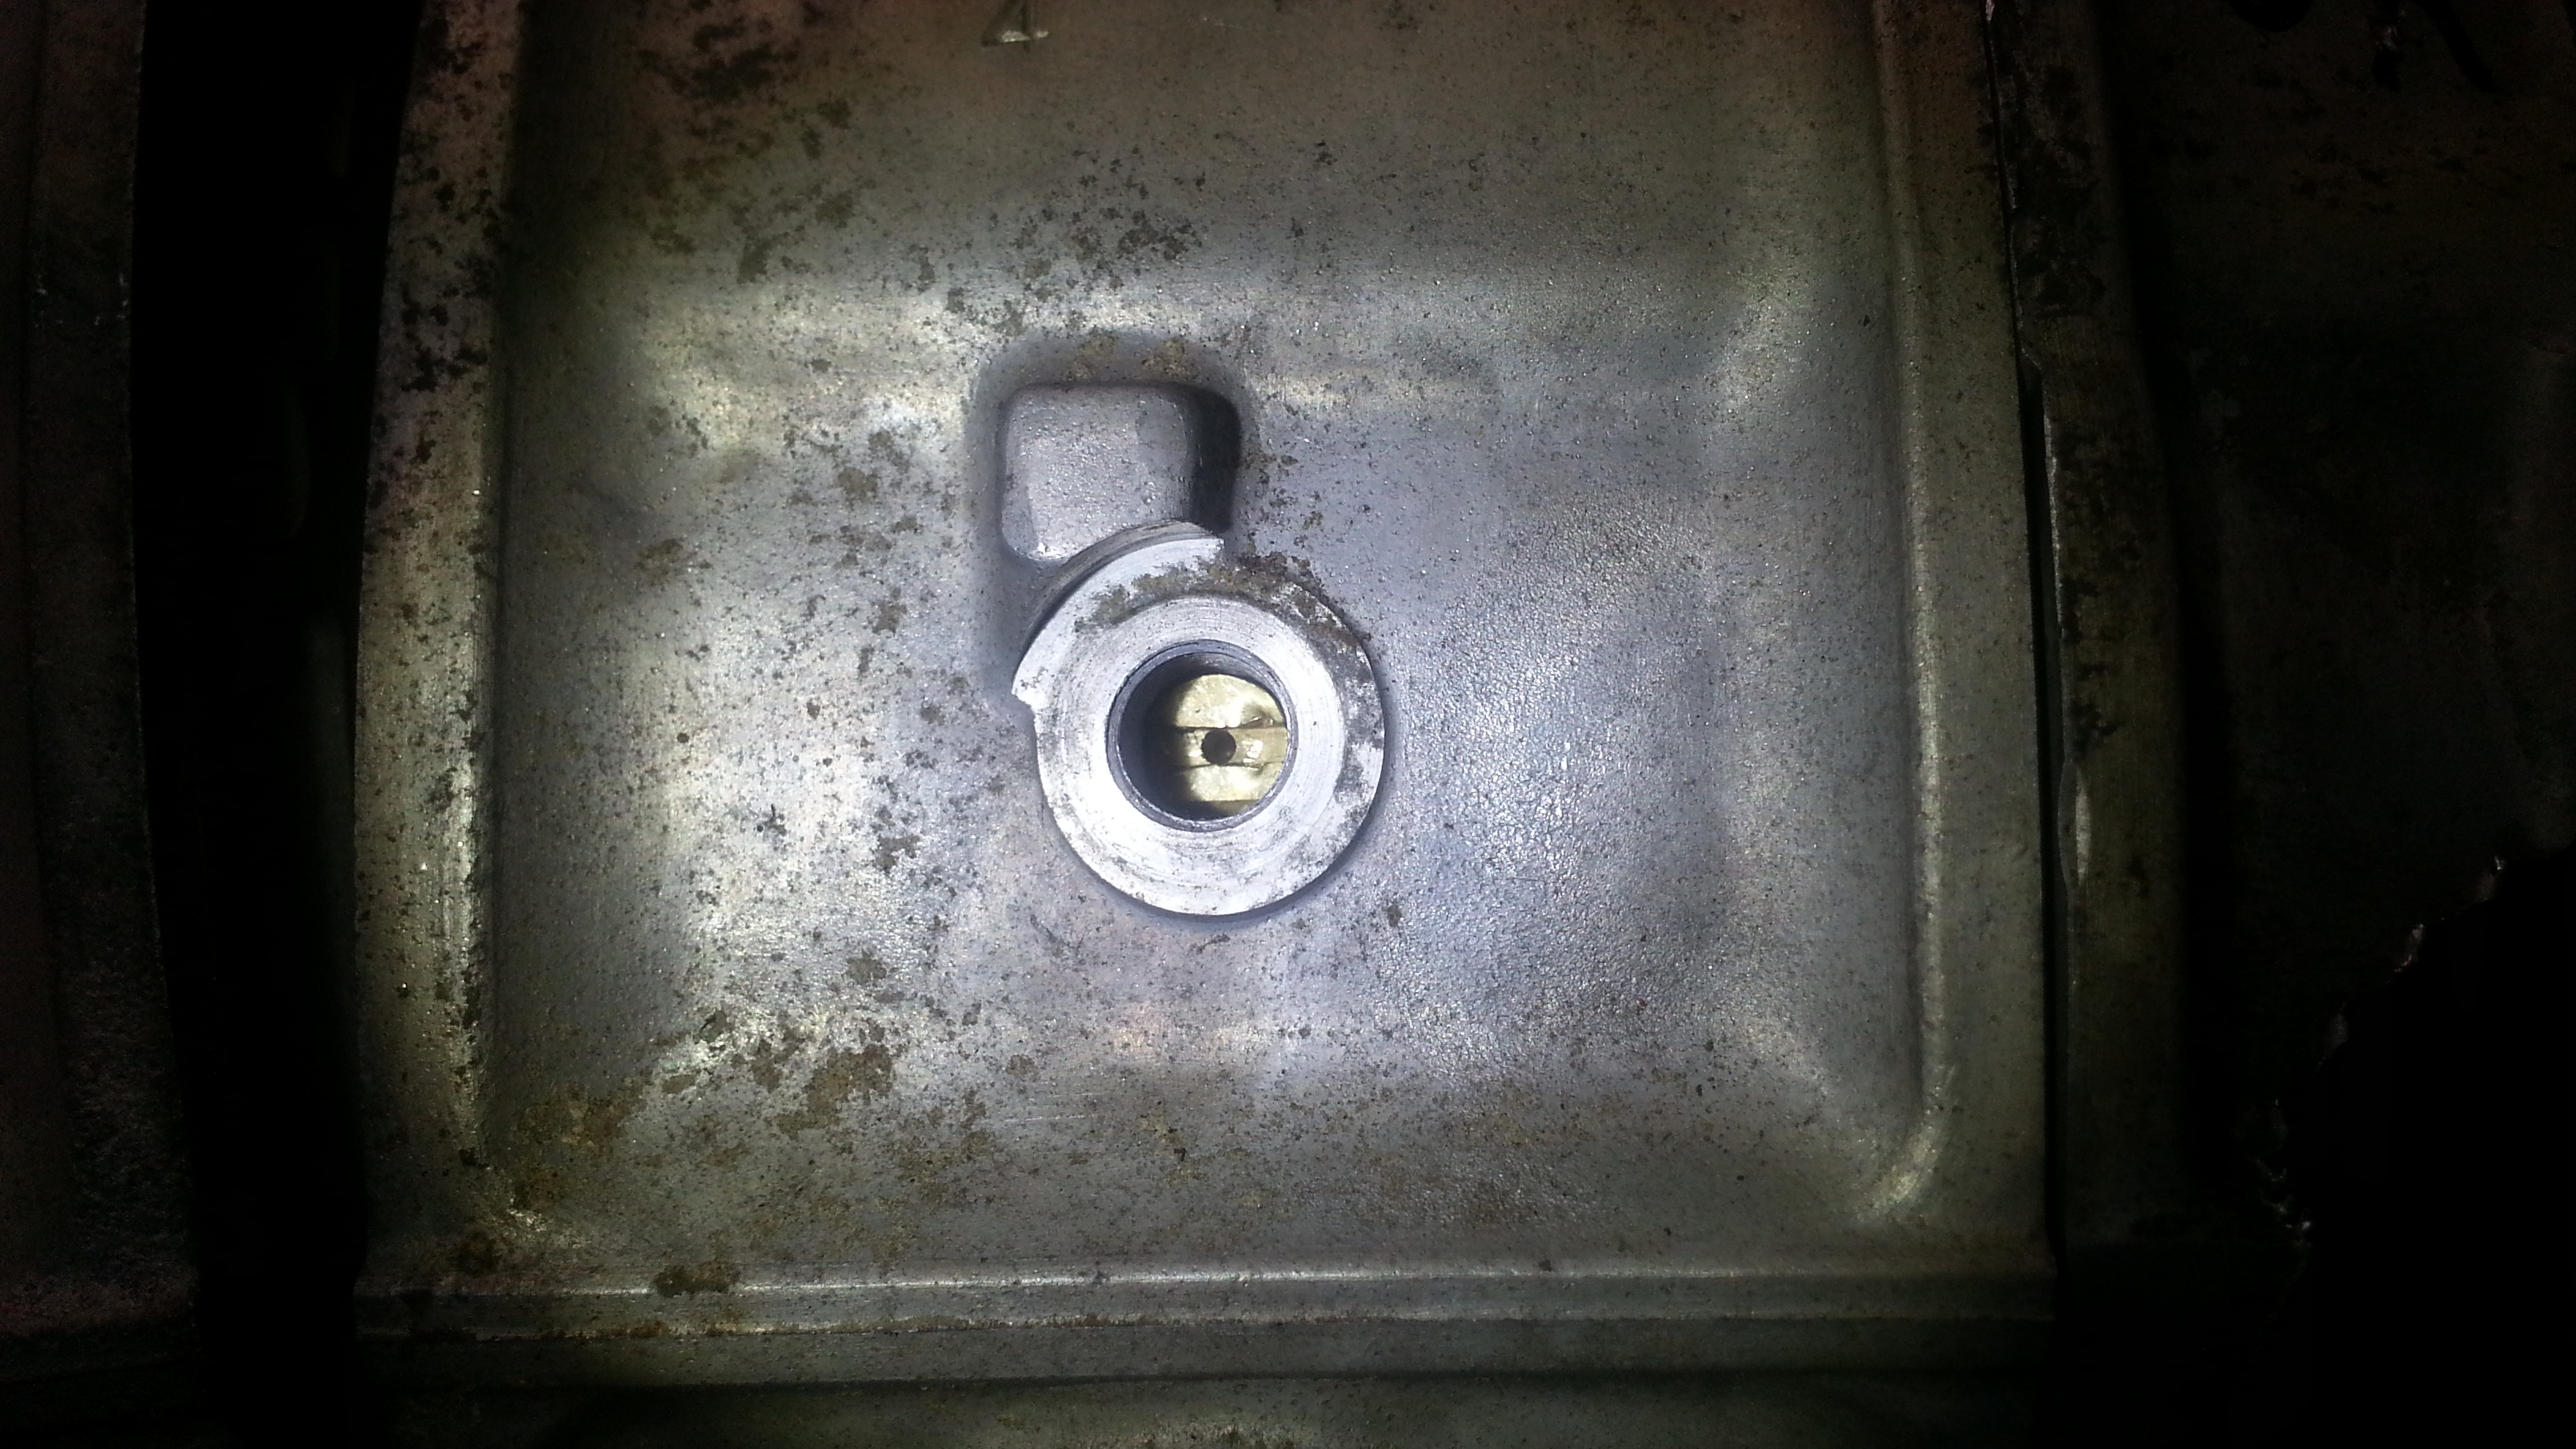
Name:  20140420_110744_zpsrhrit5pr.jpg
Views: 1678
Size:  1.92 MB


Started with a M10-bolt and drilled a Ø4.2mm hole to allign the drill.
Threaded M5, and pulled it out with some washers and a M5-bolt.
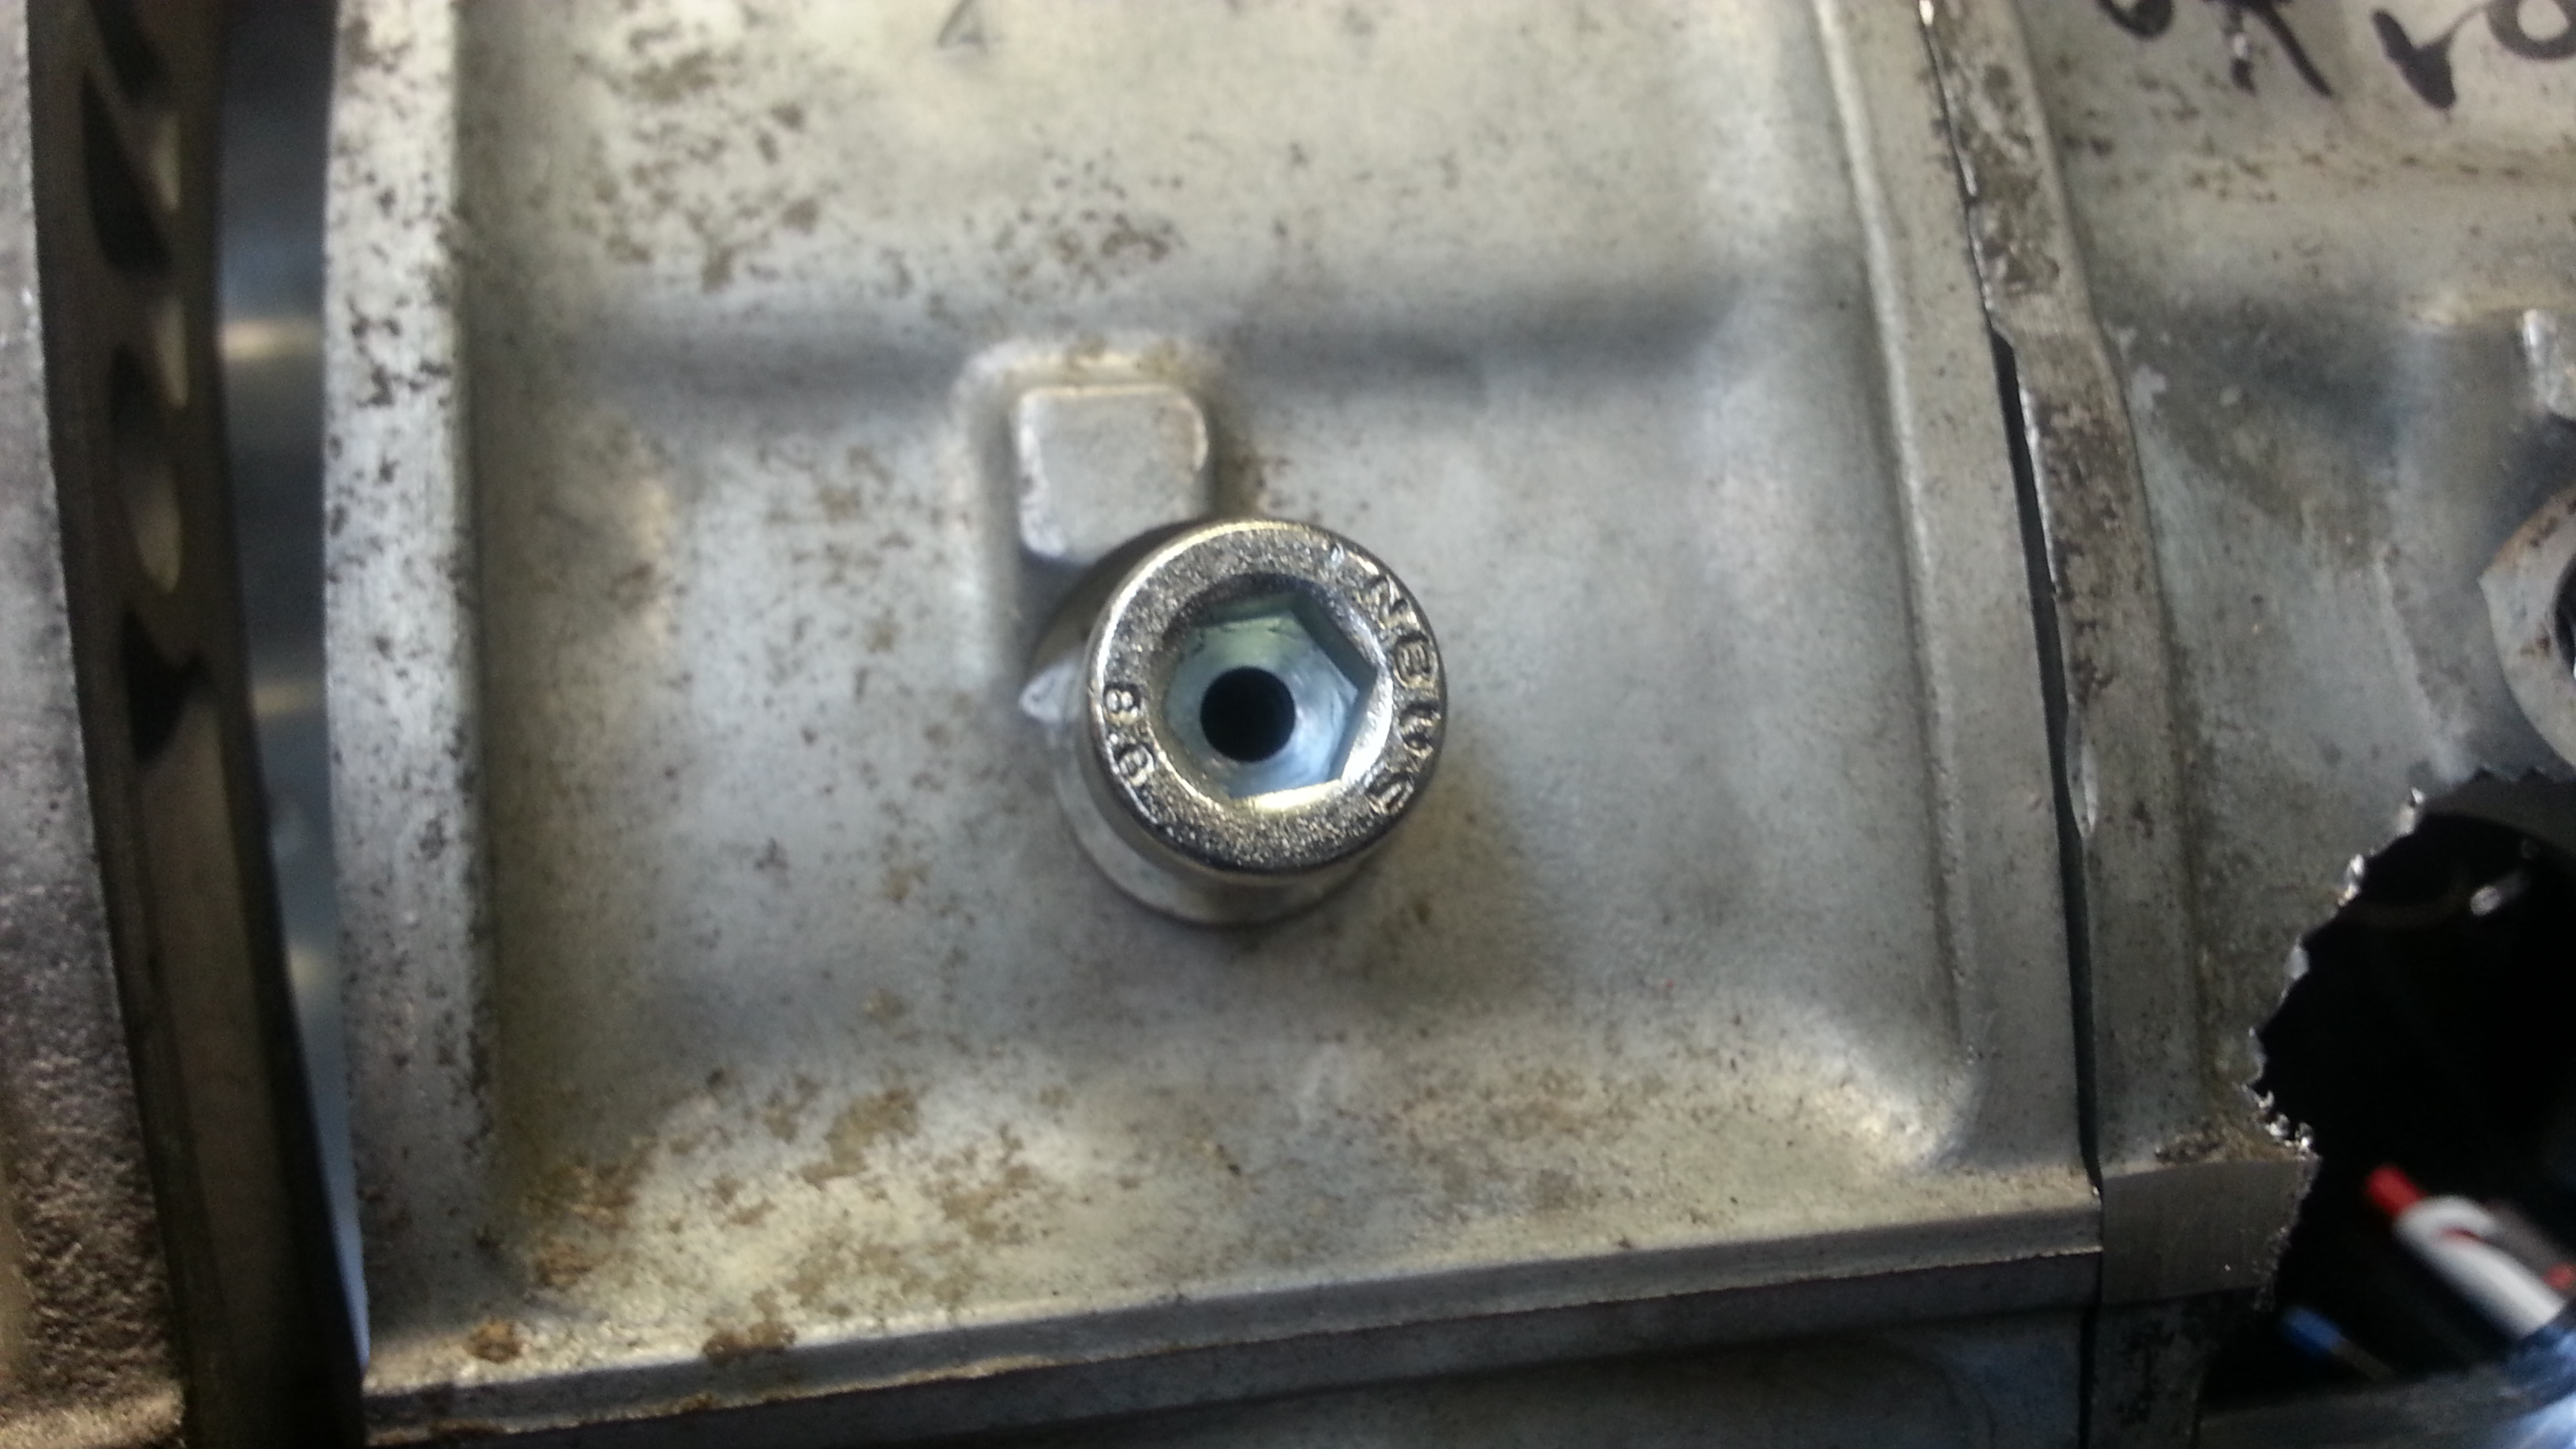
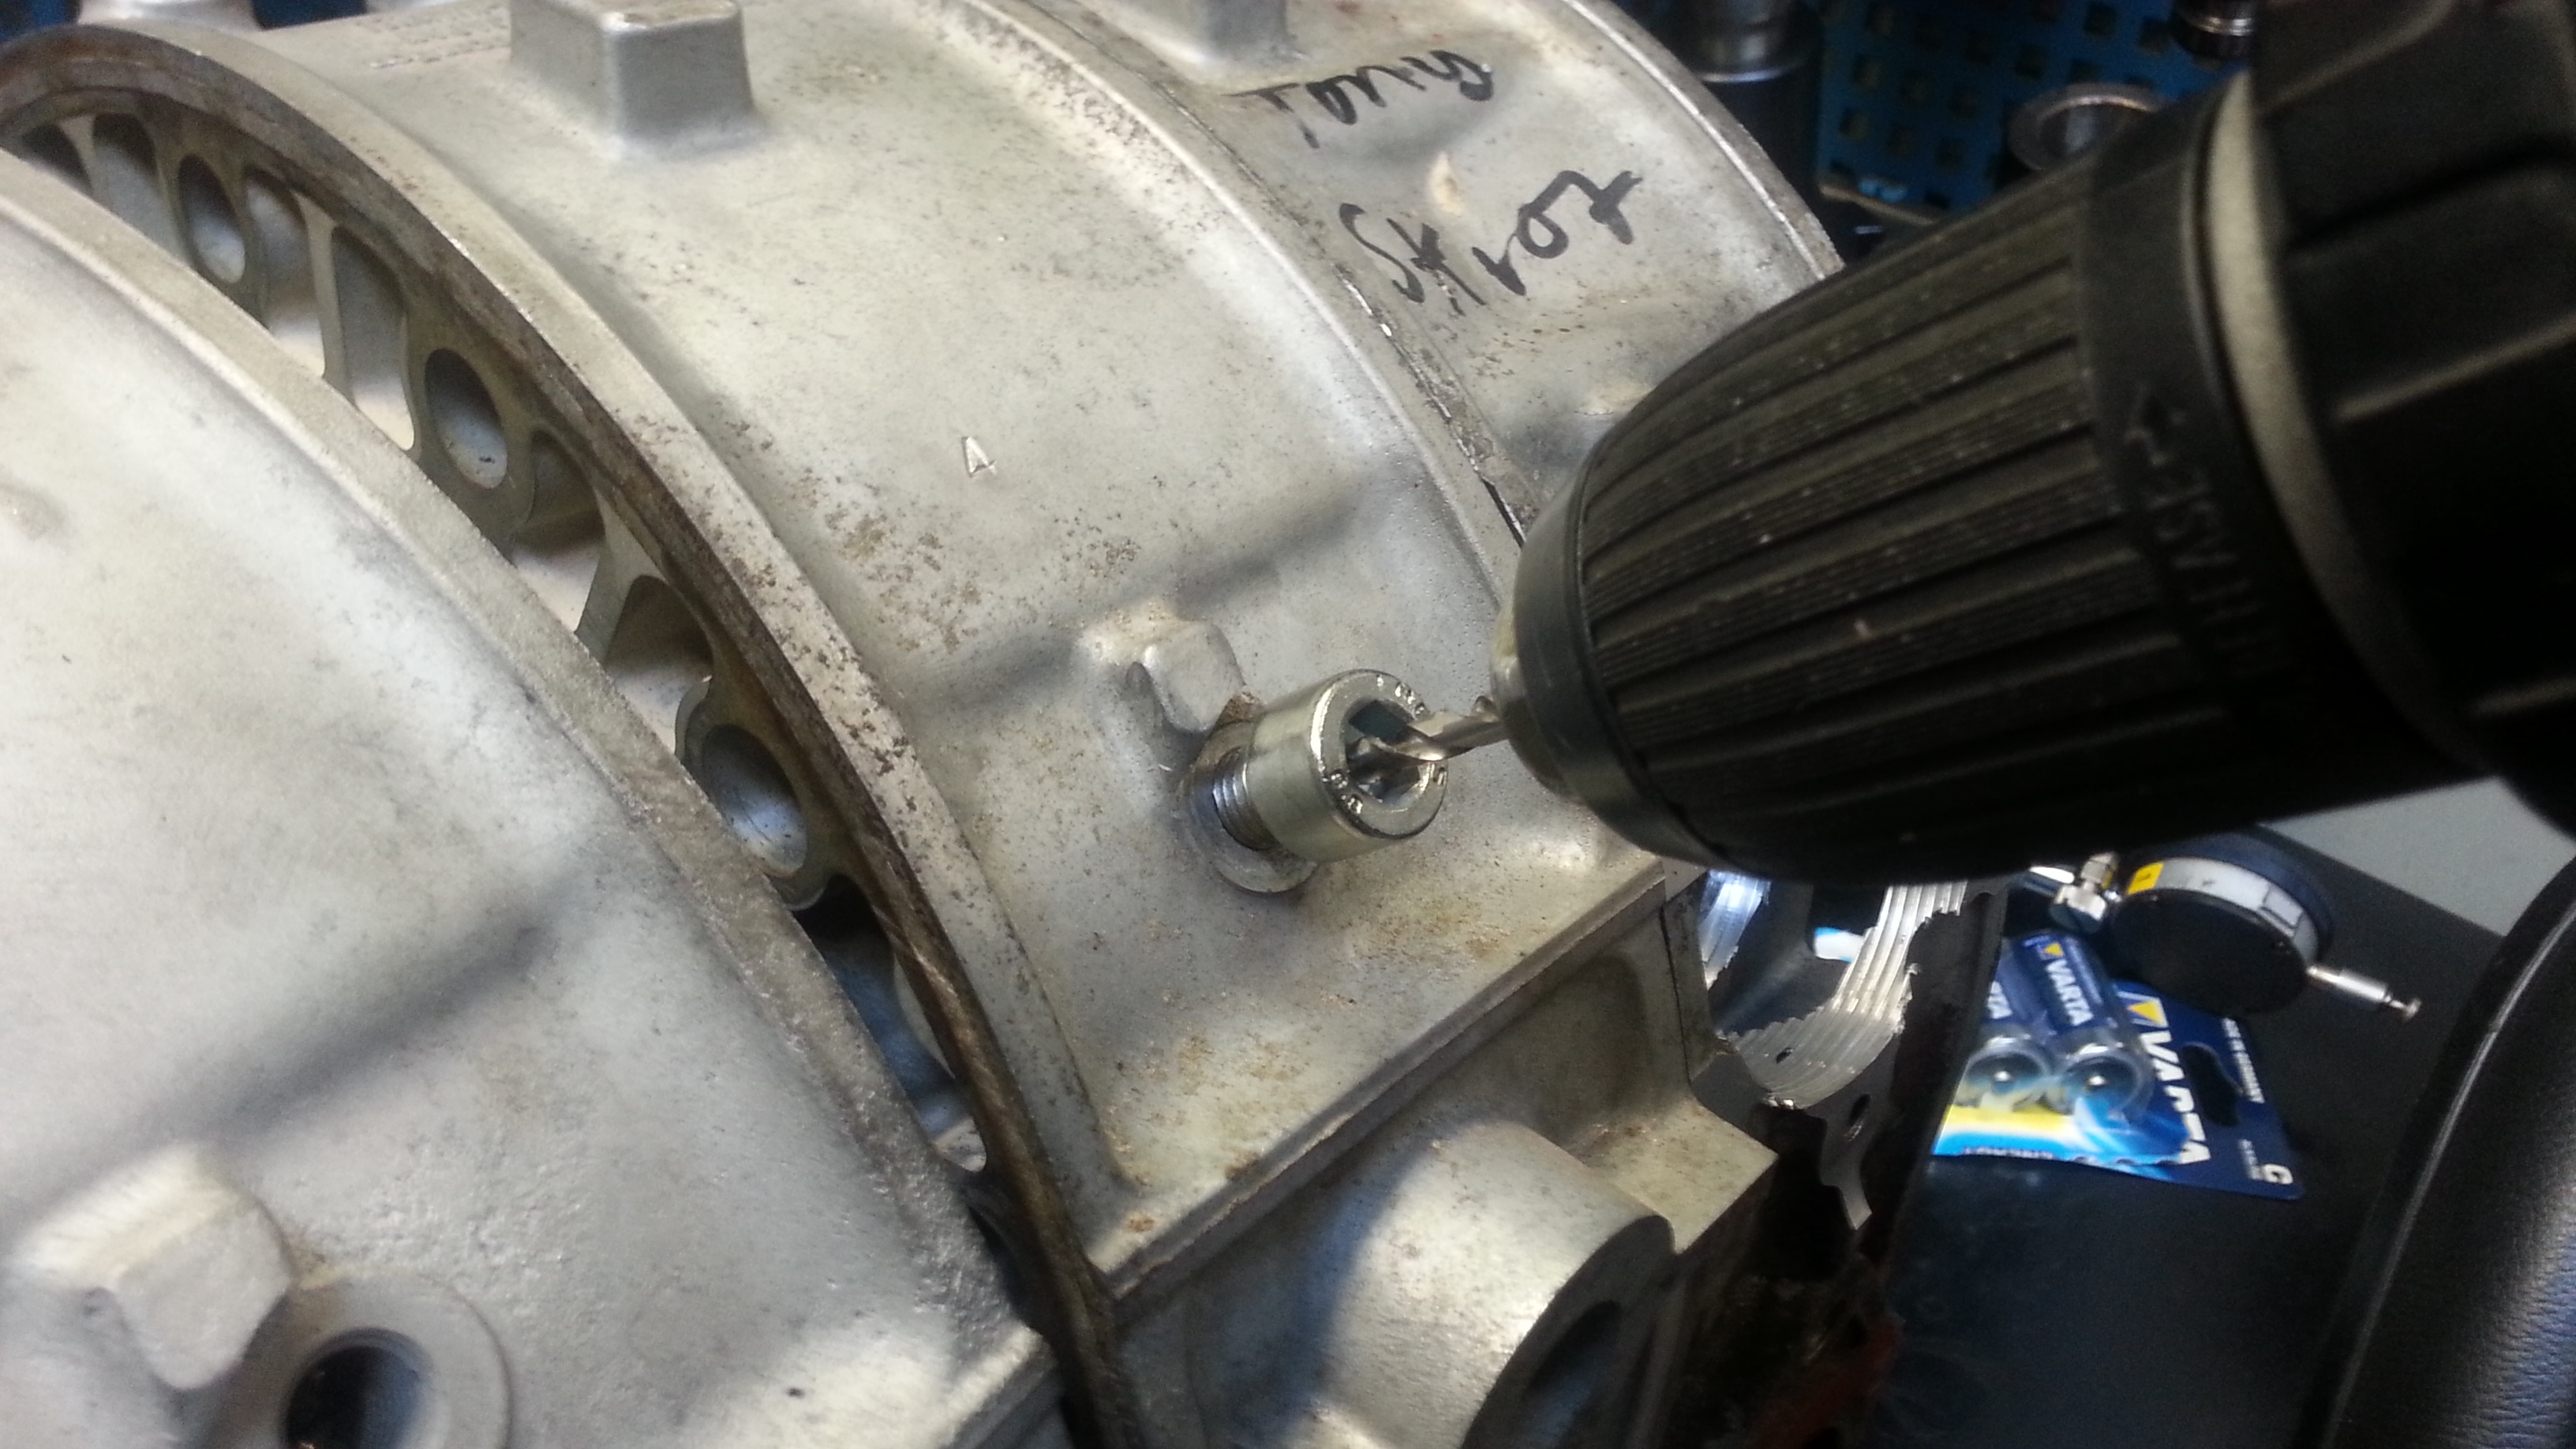
Name:  20140420_110814_zpsa9zw6k7l.jpg
Views: 1684
Size:  1.29 MB
Name:  20140420_110828_zpsh62bcrn2.jpg
Views: 1710
Size:  1.42 MB
Name:  20140420_110547_zpsijncmurh.jpg
Views: 1659
Size:  1.50 MB


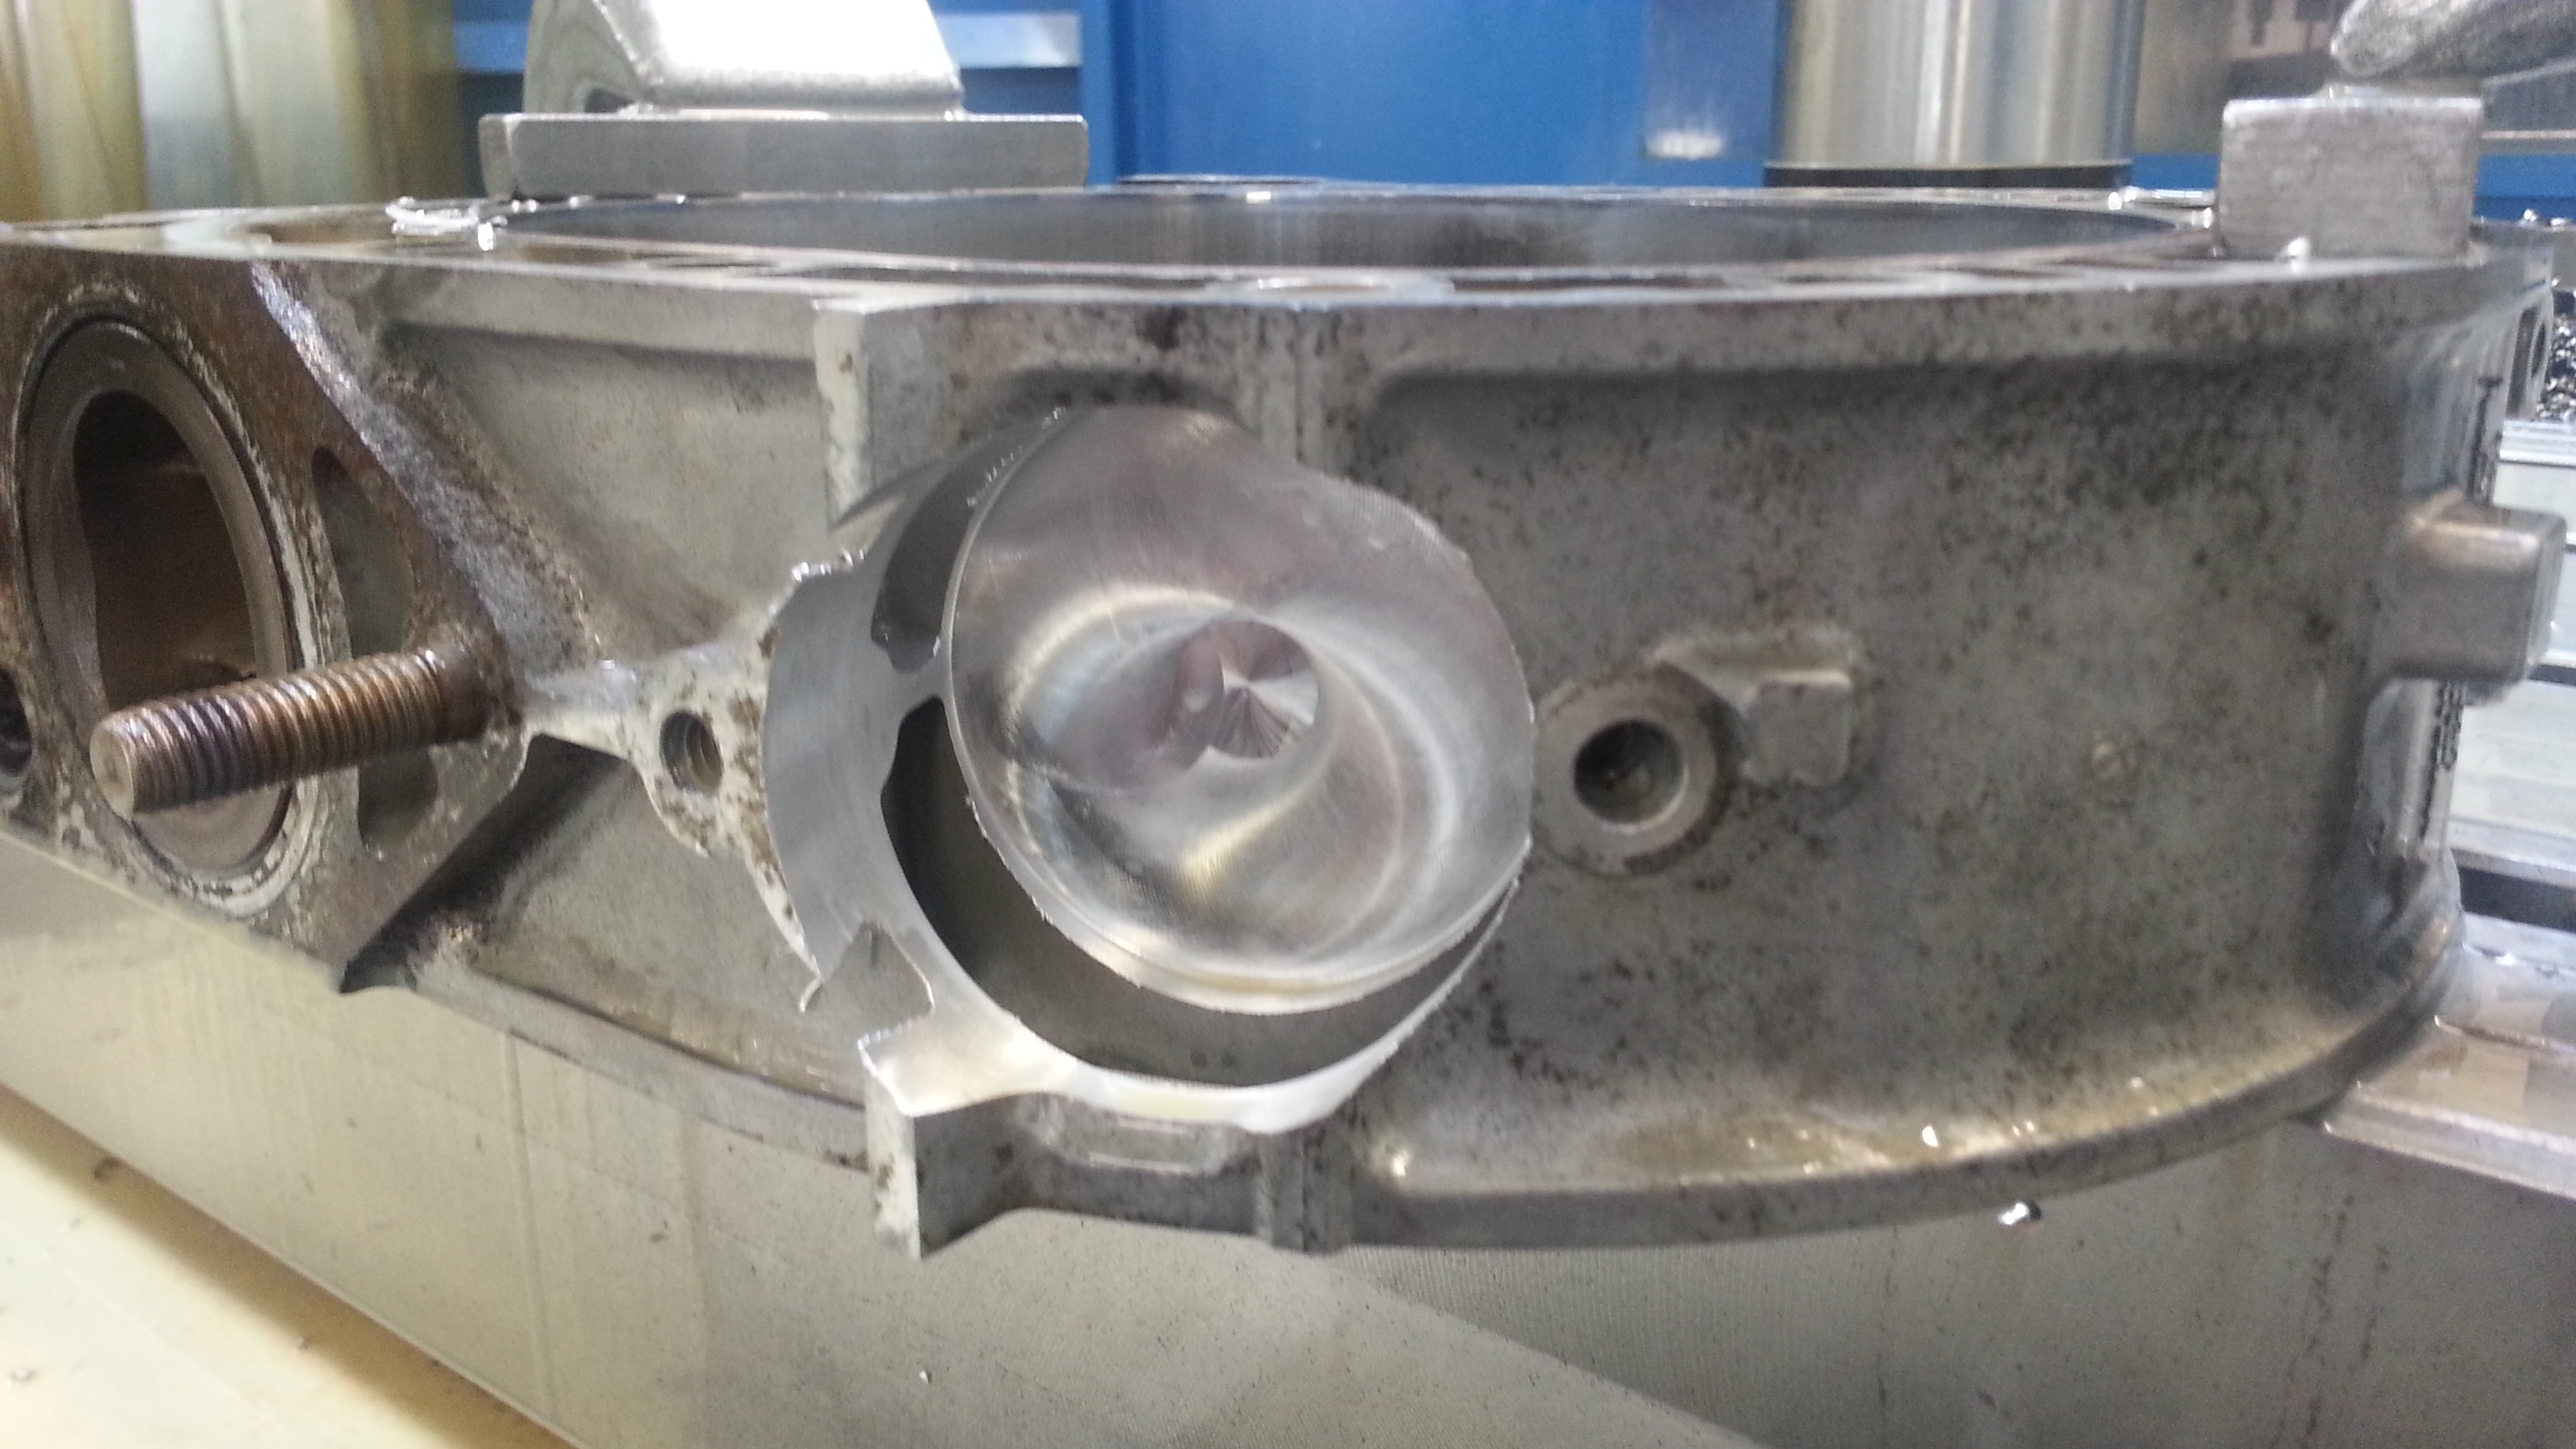
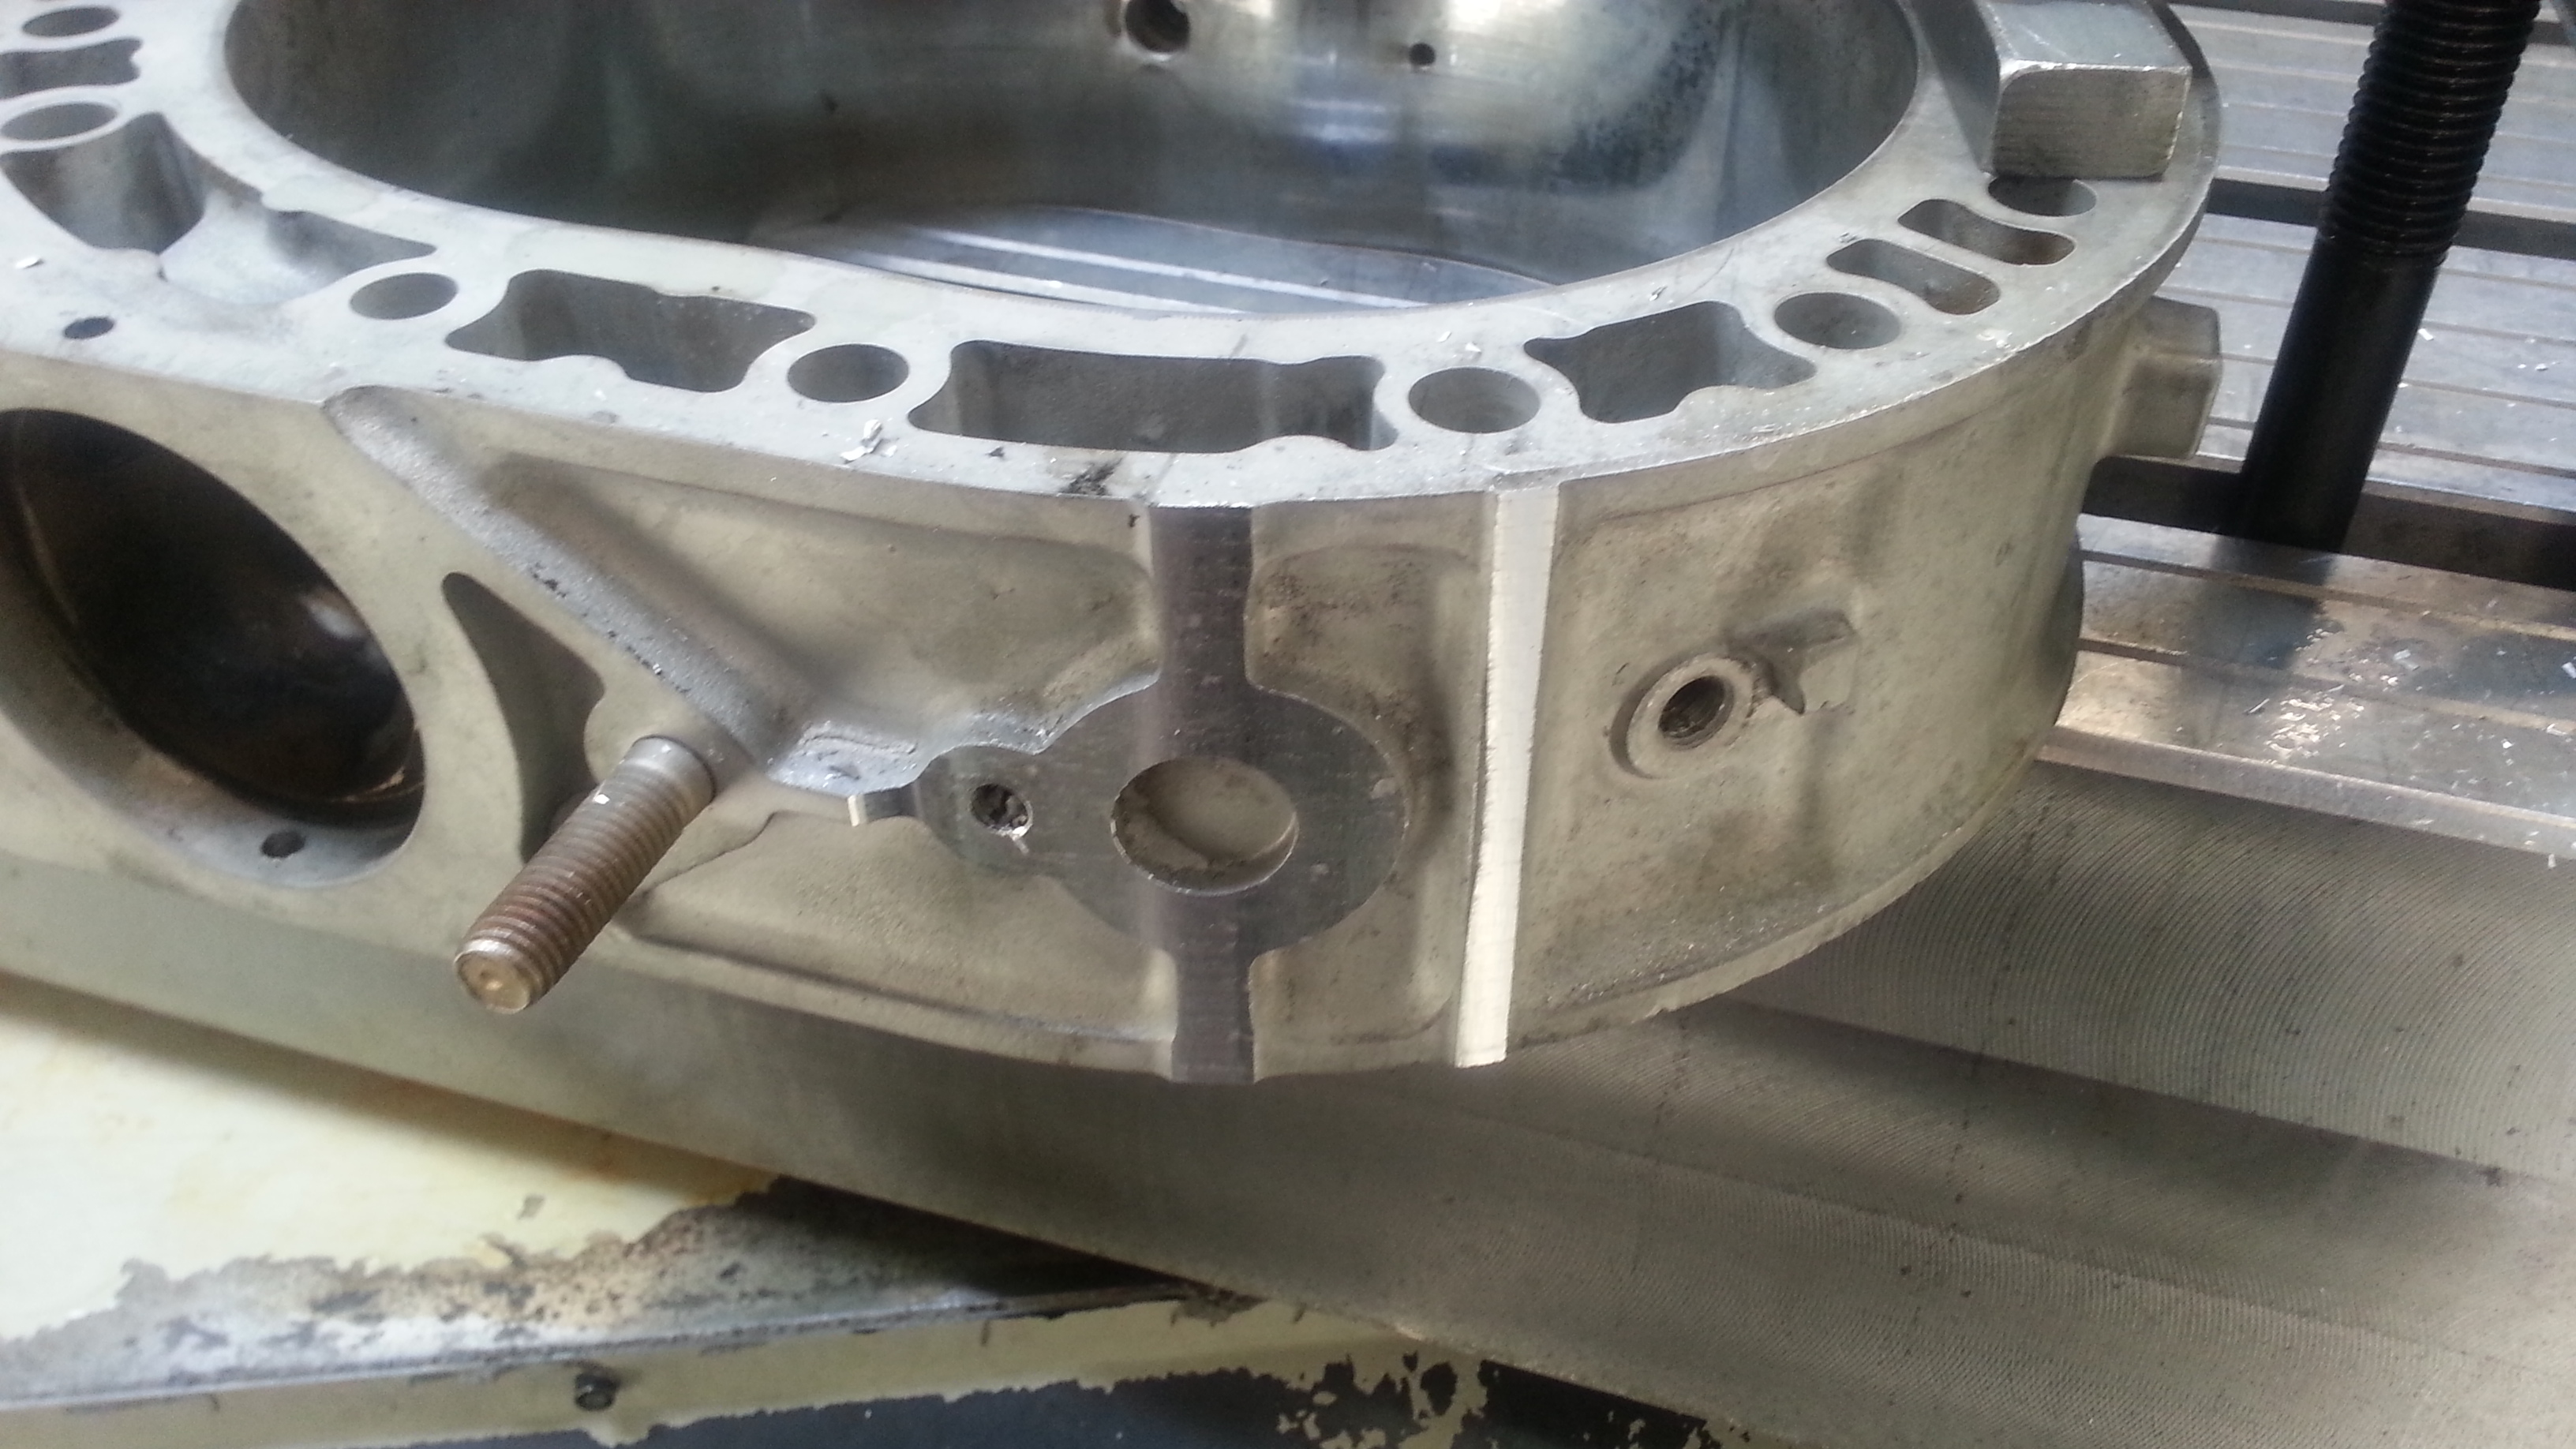
Machined a Ø63mm hole for the thread, and then removed all stuff the pointed out form the housing.
Name:  20140419_153731_zpsespnxl0k.jpg
Views: 1638
Size:  1.44 MB
Name:  20140420_112434_zpsrqejzihw.jpg
Views: 1679
Size:  1.40 MB


All done. Next step is the inserts!

Name:  20140420_151655_zps2ryiichx.jpg
Views: 1700
Size:  1.77 MB
Old 04-21-14, 02:08 AM
  #907  
Full Member

 
CoRDiTe's Avatar
 
Join Date: Aug 2005
Location: Tampa
Posts: 187
Likes: 0
Received 0 Likes on 0 Posts
Finally!!!!! I made it to page 46!! Holy damn that was a lot of reading, scrolling, and damn!!!! What an awesome build so far!!!!!!
Old 04-21-14, 04:38 AM
  #908  
Senior Member

 
damic's Avatar
 
Join Date: Aug 2008
Location: Belgium (2800)
Posts: 493
Received 0 Likes on 0 Posts
Page 46? I only have 37 pages so far (standard settings)
Old 04-21-14, 09:00 AM
  #909  
Rotary Freak

 
WJM ROTARIES's Avatar
 
Join Date: Aug 2012
Location: MELBOURNE AUSTRALIA
Posts: 2,407
Received 306 Likes on 298 Posts
Looking good
Old 04-21-14, 09:23 AM
  #910  
Senior Member

iTrader: (2)
 
demongo's Avatar
 
Join Date: Jul 2011
Location: CA
Posts: 255
Received 1 Like on 1 Post
Any plans to move forward with your aluminum housings?

Will you be finishing them for use in your motor? Or were they just an experiment?
Old 04-22-14, 09:50 AM
  #911  
Senior Member

Thread Starter
 
tegheim's Avatar
 
Join Date: Nov 2003
Location: Sweden
Posts: 533
Likes: 0
Received 2 Likes on 1 Post
They will have to wait. Enough trouble getting the 4rotor going with mazda-parts
But hopefully I live long!
Old 04-27-14, 04:16 AM
  #912  
Senior Member

Thread Starter
 
tegheim's Avatar
 
Join Date: Nov 2003
Location: Sweden
Posts: 533
Likes: 0
Received 2 Likes on 1 Post
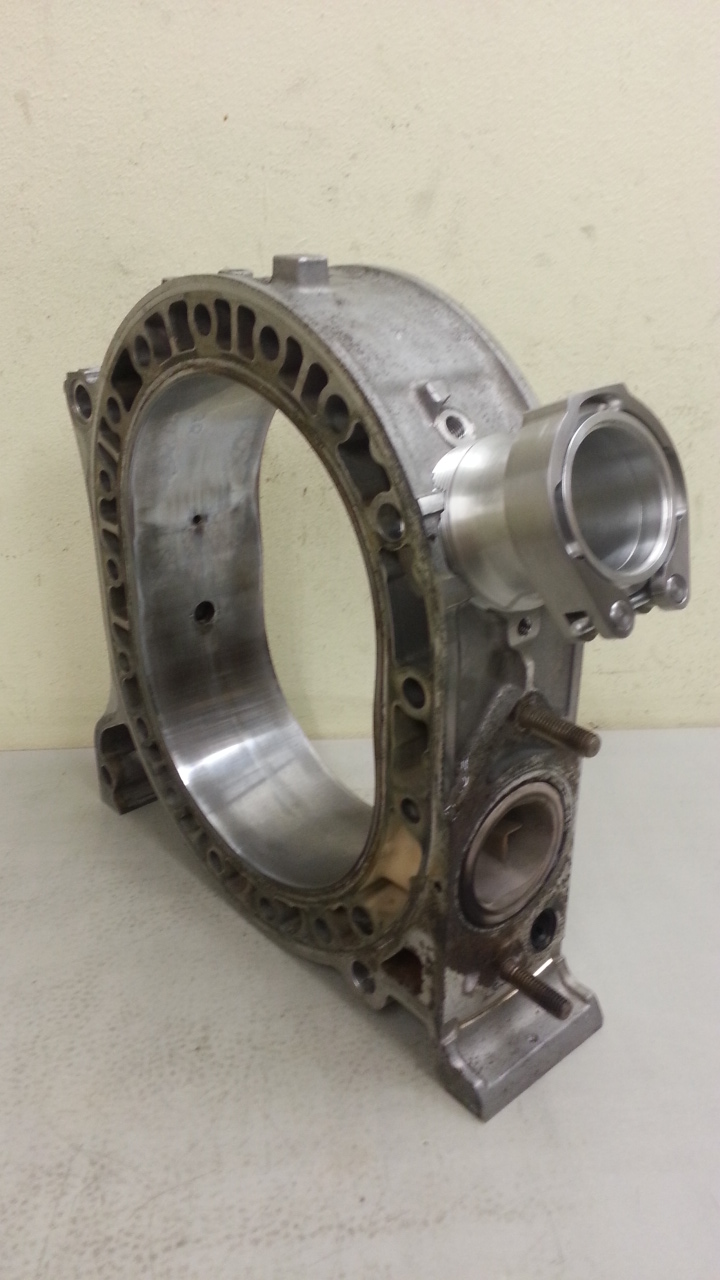
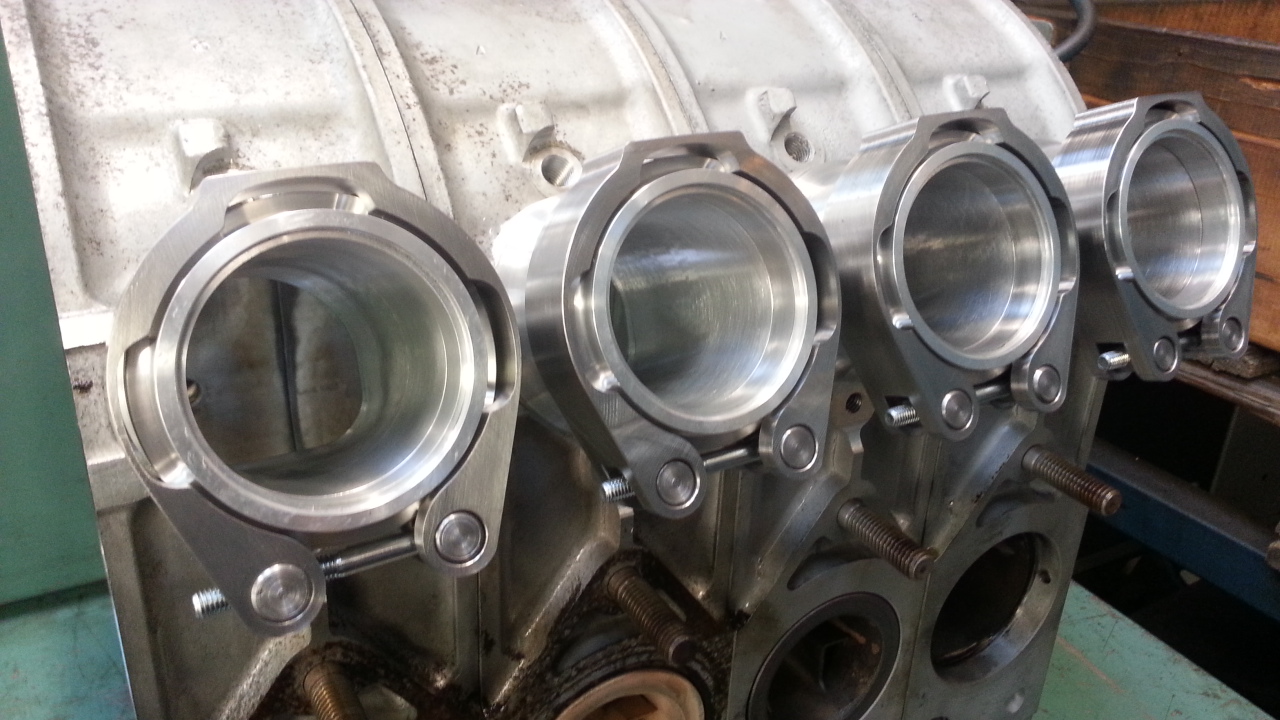
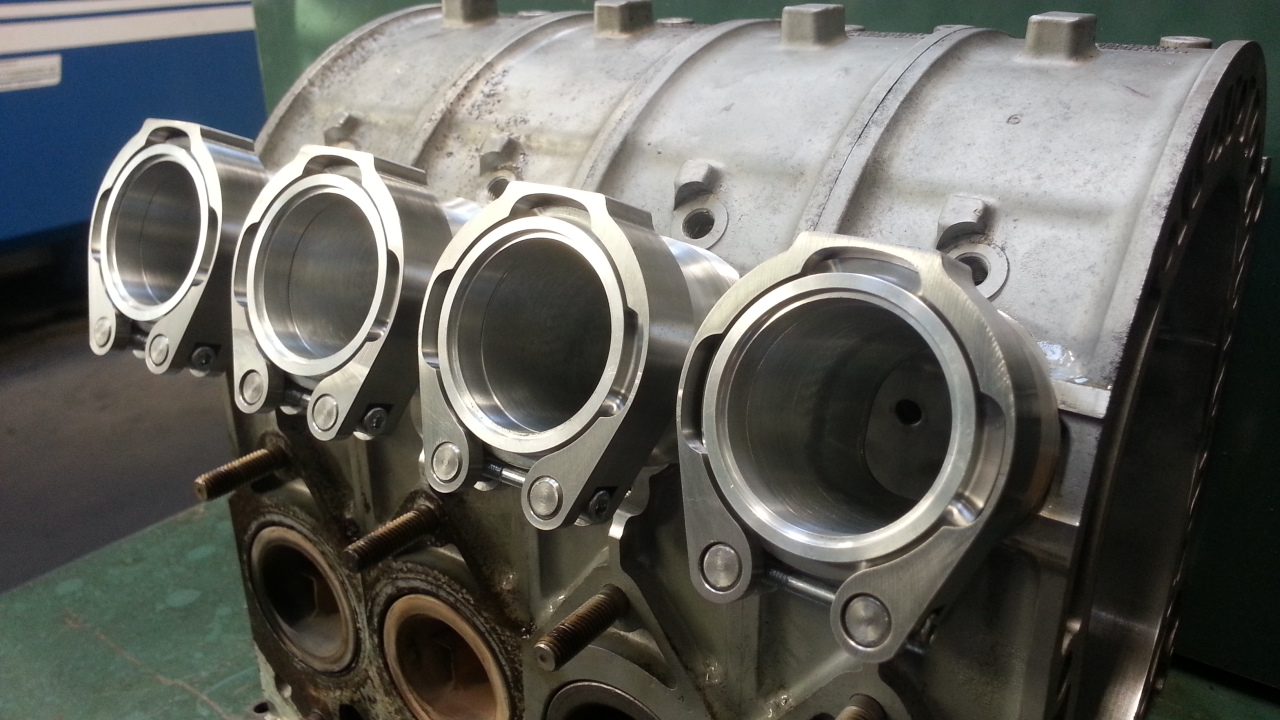
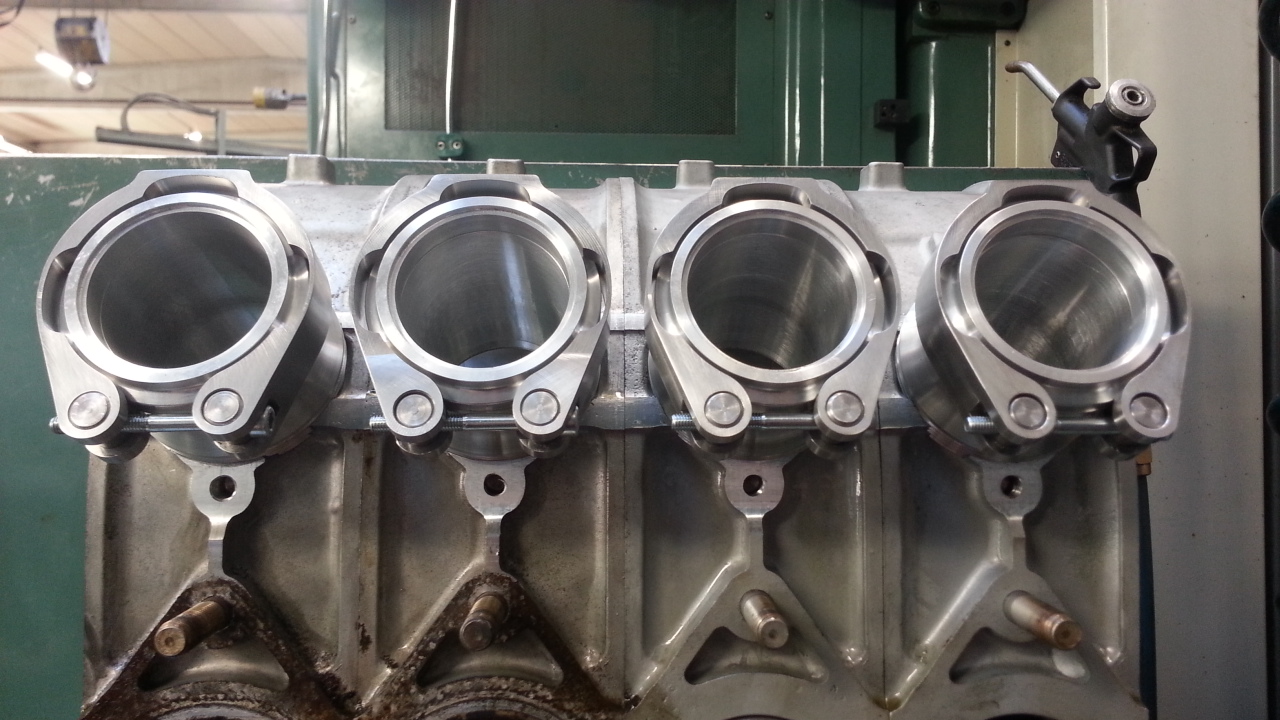
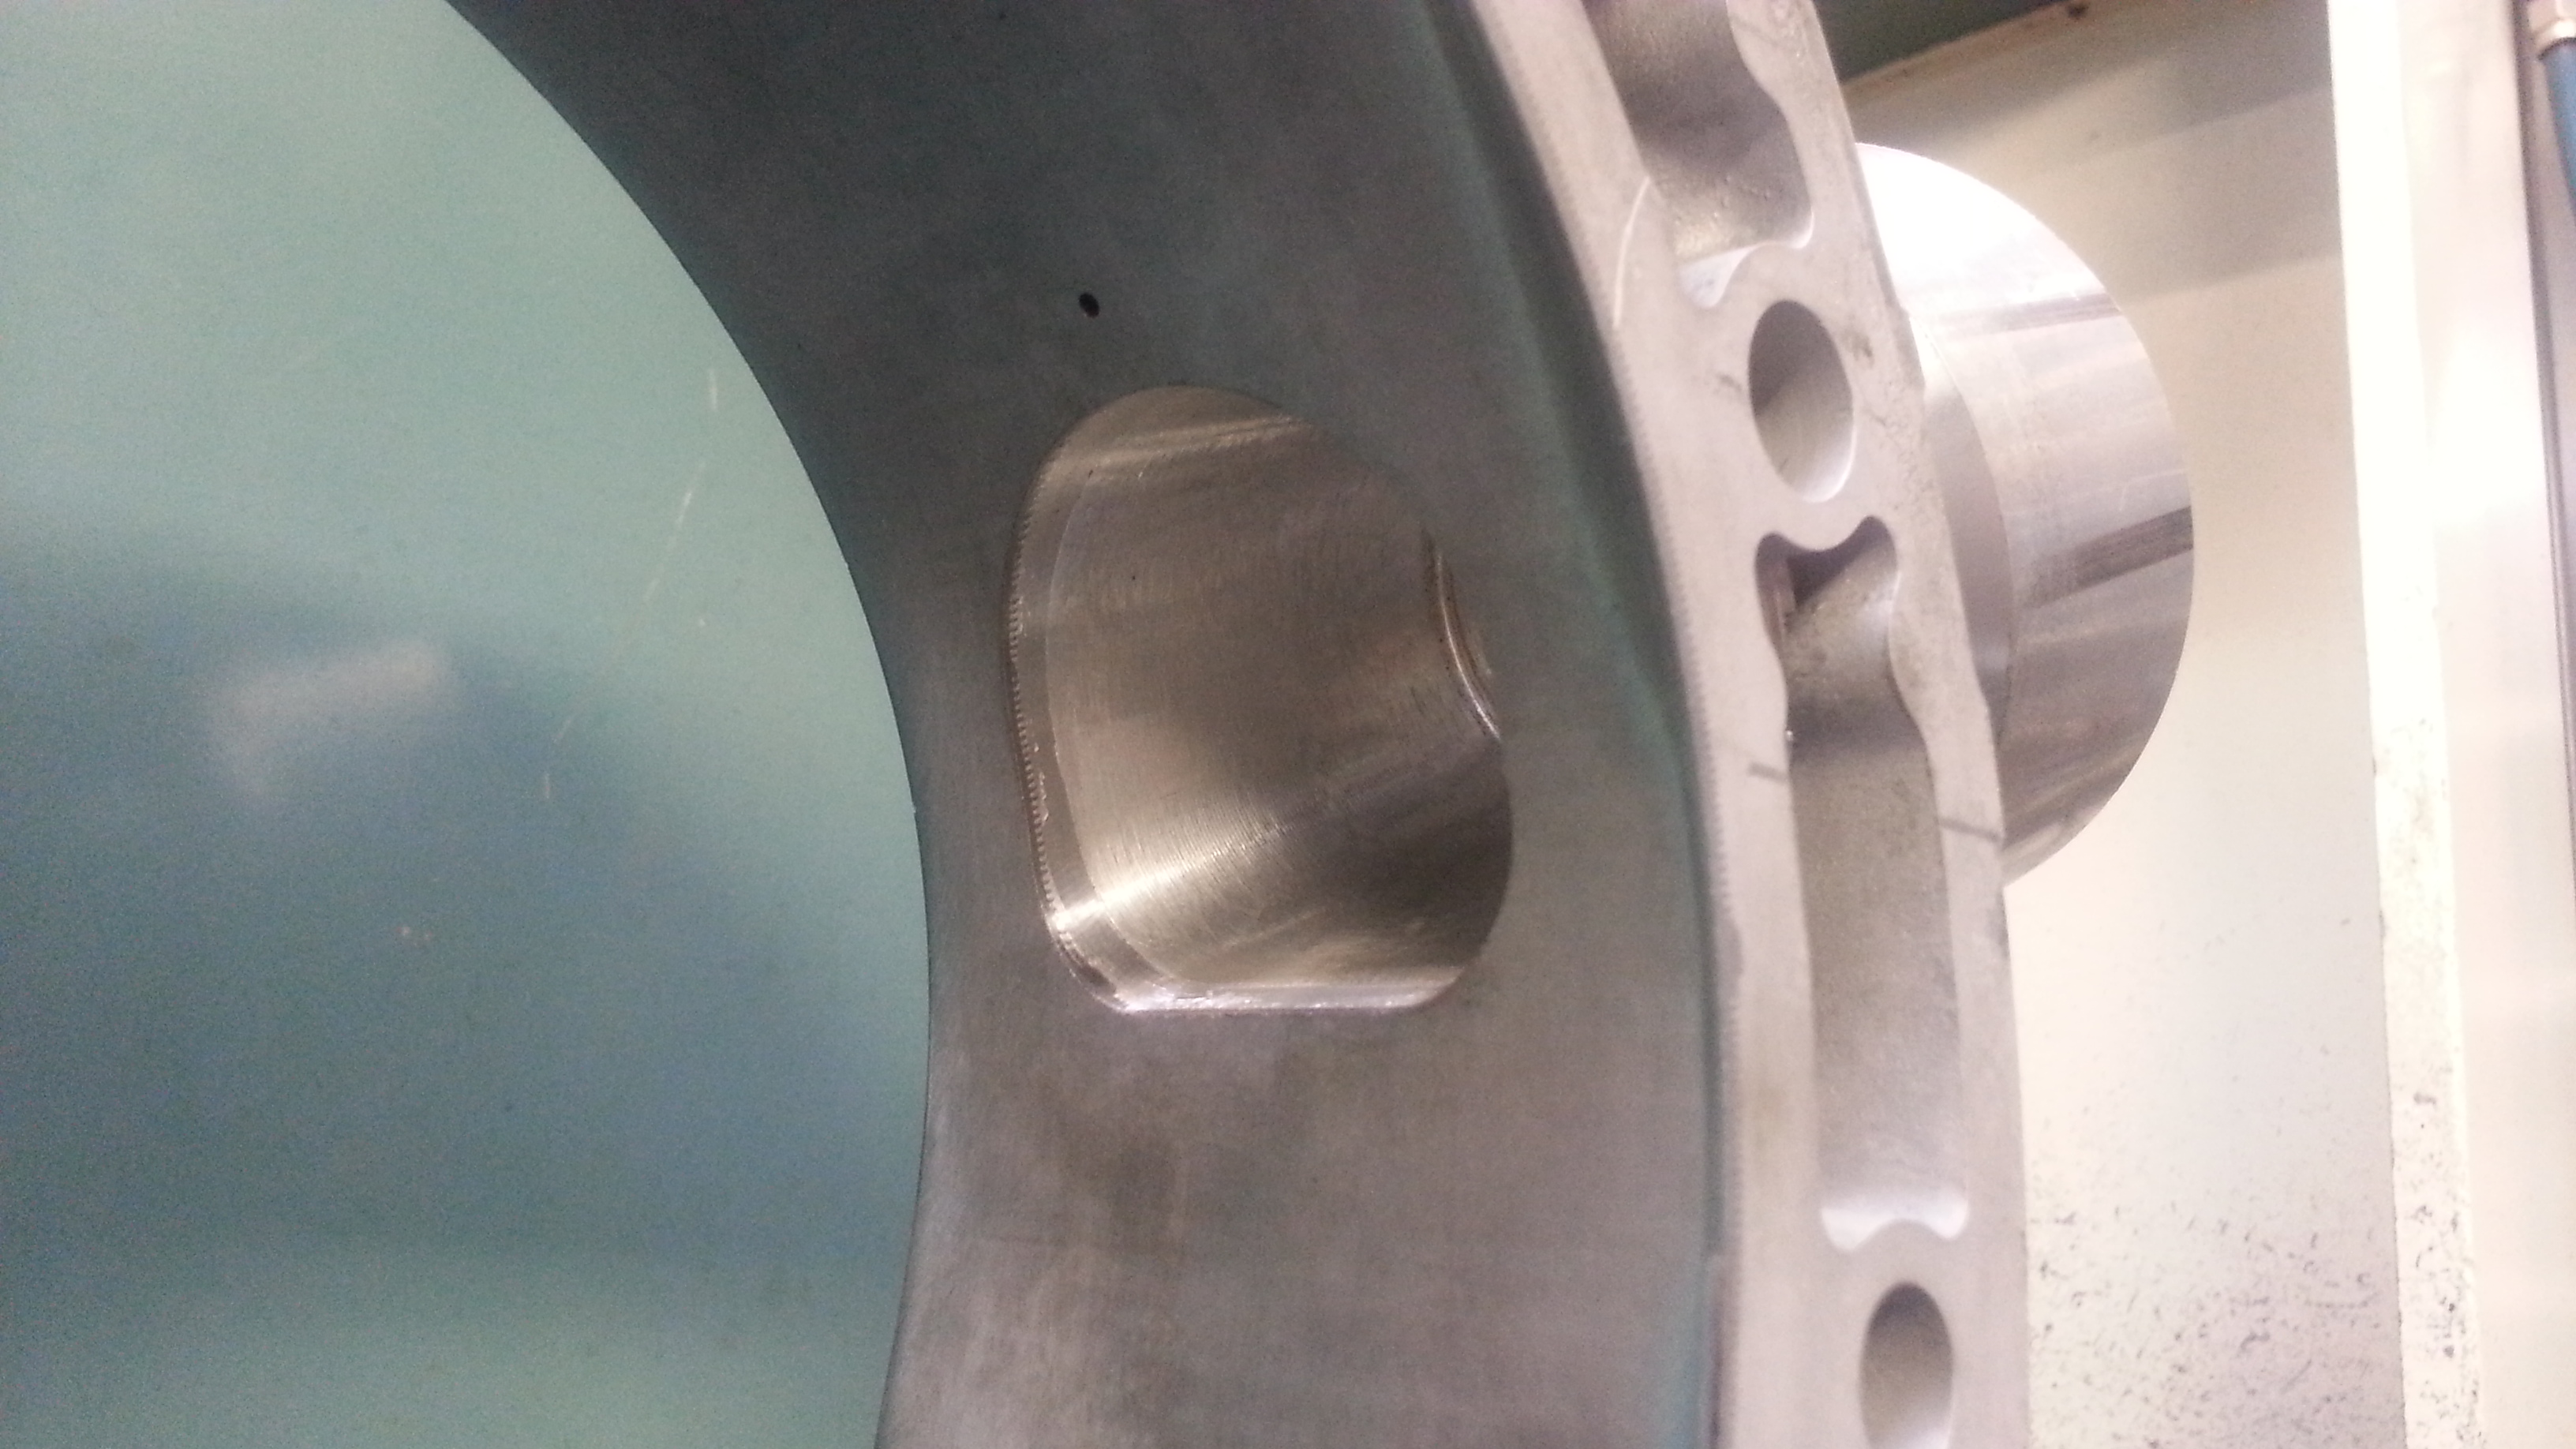
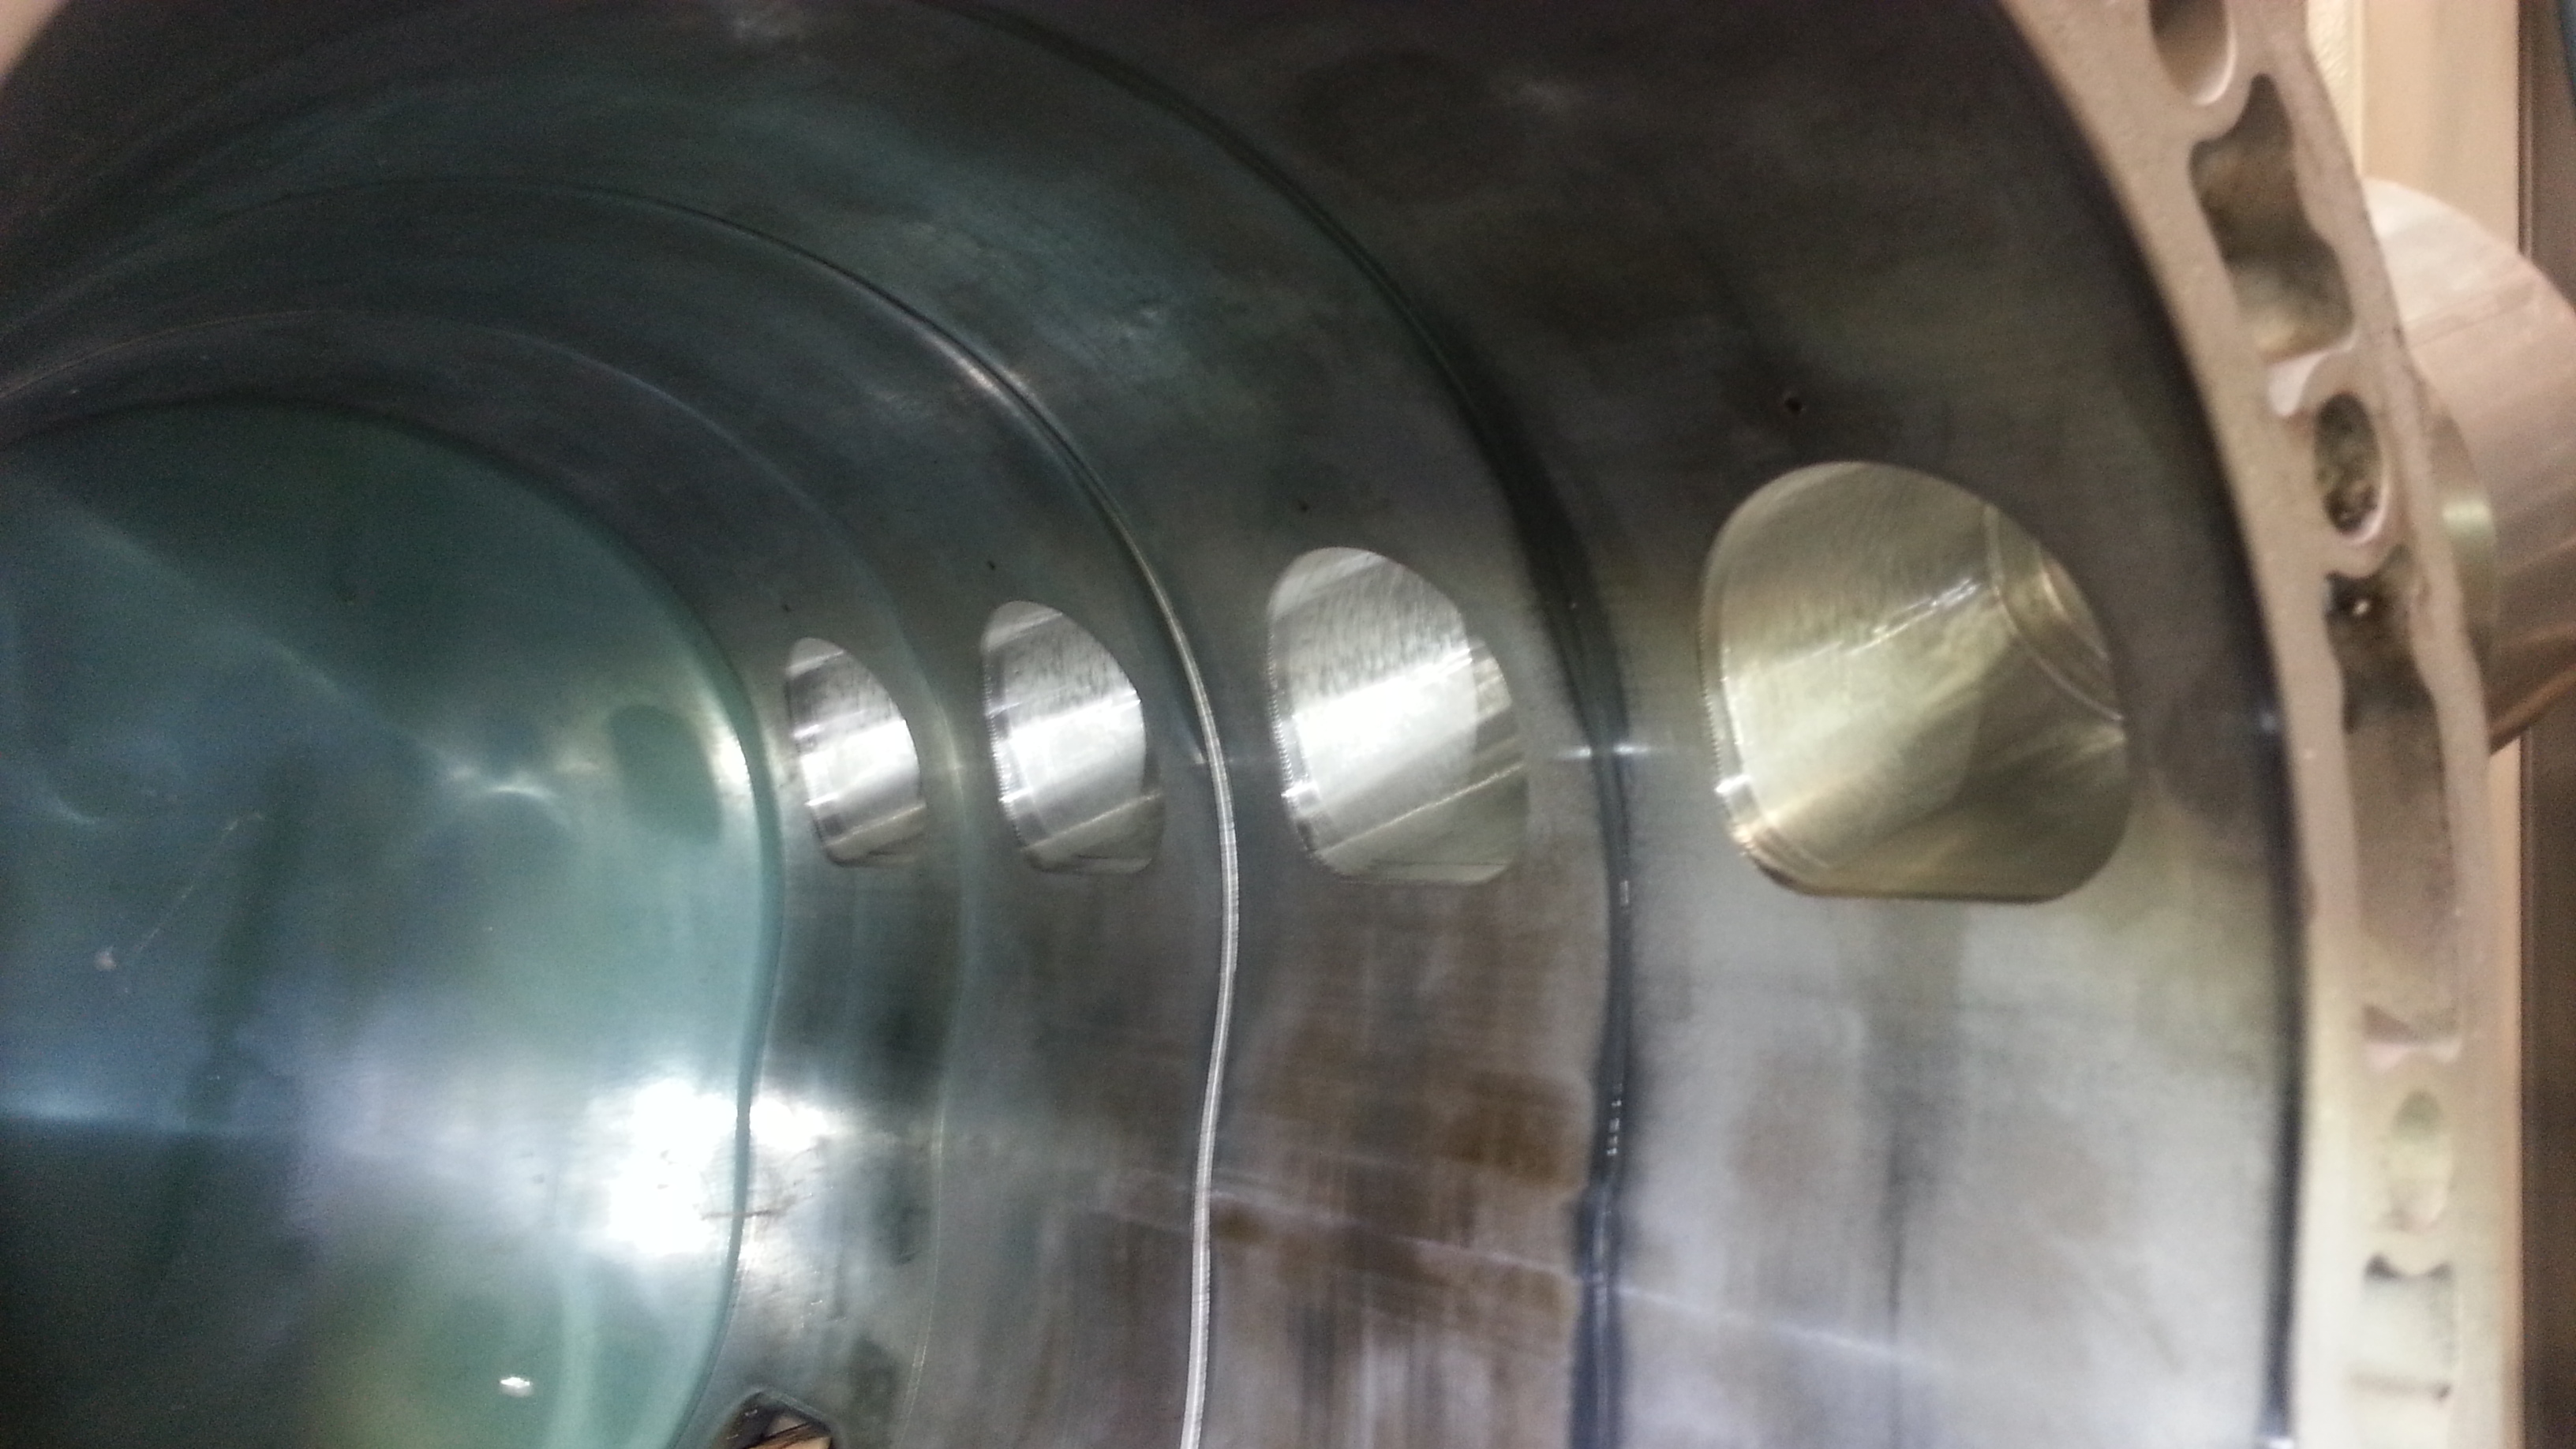
Yesterday I continued with my Peripheral-inserts.
Because they are threaded into the housings there is imported to get the D-shape in the right angle to align with the pre-machined D-shape in the housings.
The D-shape closest to the housing are bigger than the round hole and the runners, so therefore I need to machine this with the inserts on the side.

I could have done a round hole in the center, and port the sleeves by hand. But I'm really not a "handyman" And CNC-port are in my opinion the coolest.

It worked out pretty well! I was really nervous when I mounted the first insert...

I very satisfied.

Next is to deside how to couple the inserts with the runners, and also how my runners will look like, size and lenght. Butterfly-throttles or slides.
Name:  20140426_124721_zpspqmo0fsj.jpg
Views: 1662
Size:  1.58 MB

Name:  20140426_140701_zpsndvduva6.jpg
Views: 1669
Size:  1.29 MB

Name:  20140426_154737_zpse37qcrlb.jpg
Views: 1655
Size:  1.41 MB
Old 04-27-14, 07:06 AM
  #913  
Rotary Freak

 
WJM ROTARIES's Avatar
 
Join Date: Aug 2012
Location: MELBOURNE AUSTRALIA
Posts: 2,407
Received 306 Likes on 298 Posts
That's beautiful work there Tegheim
Old 04-27-14, 11:47 AM
  #914  
Exhaust Manifold Leak

 
Rub20B's Avatar
 
Join Date: Jun 2005
Location: western europe
Posts: 760
Received 18 Likes on 14 Posts
will you keep stock gears in that box? We ran this weekend first time with the samsonas 6 speed dog engagement gearset. I can heavily recommend it. the box also has a overal reduction gear so you can use virtually any rear end ratio you want and order the box with the reduction ratio you want. price is around 4k5 euros. its 50mm longer than stock 5 speed.
Old 04-27-14, 01:38 PM
  #915  
Senior Member

Thread Starter
 
tegheim's Avatar
 
Join Date: Nov 2003
Location: Sweden
Posts: 533
Likes: 0
Received 2 Likes on 1 Post
Yes I will keep stock gears. Will never afford such a gearbox.
Old 04-30-14, 11:05 AM
  #916  
Eats, Sleeps, Dreams Rotary

iTrader: (19)
 
papsmagu's Avatar
 
Join Date: Sep 2004
Location: South Florida
Posts: 3,258
Likes: 0
Received 8 Likes on 8 Posts
Originally Posted by tegheim
Yes I will keep stock gears. Will never afford such a gearbox.
yeah you cant afford but you can make it!!!ahhahahhahaha AWESOME BUILD....keep up the good work. love to watch the amazing skill you have
Old 06-08-14, 04:19 PM
  #917  
Card-carrying Rotorhead

 
Unseen24-7's Avatar
 
Join Date: May 2006
Location: Quebec
Posts: 457
Likes: 0
Received 0 Likes on 0 Posts
Its been over a month, whats going on with this build? I'm loving the mass fabrication here, especially the rotors and cast housings!! How is the small single rotor project going or not going, as the case may be?
Old 06-08-14, 11:08 PM
  #918  
Senior Member

Thread Starter
 
tegheim's Avatar
 
Join Date: Nov 2003
Location: Sweden
Posts: 533
Likes: 0
Received 2 Likes on 1 Post
I havn't done any progress recently. But I'm not giving up :-)
Old 06-21-14, 09:12 AM
  #919  
Senior Member

Thread Starter
 
tegheim's Avatar
 
Join Date: Nov 2003
Location: Sweden
Posts: 533
Likes: 0
Received 2 Likes on 1 Post
Just because it's quiet, doesn't mean it's dead

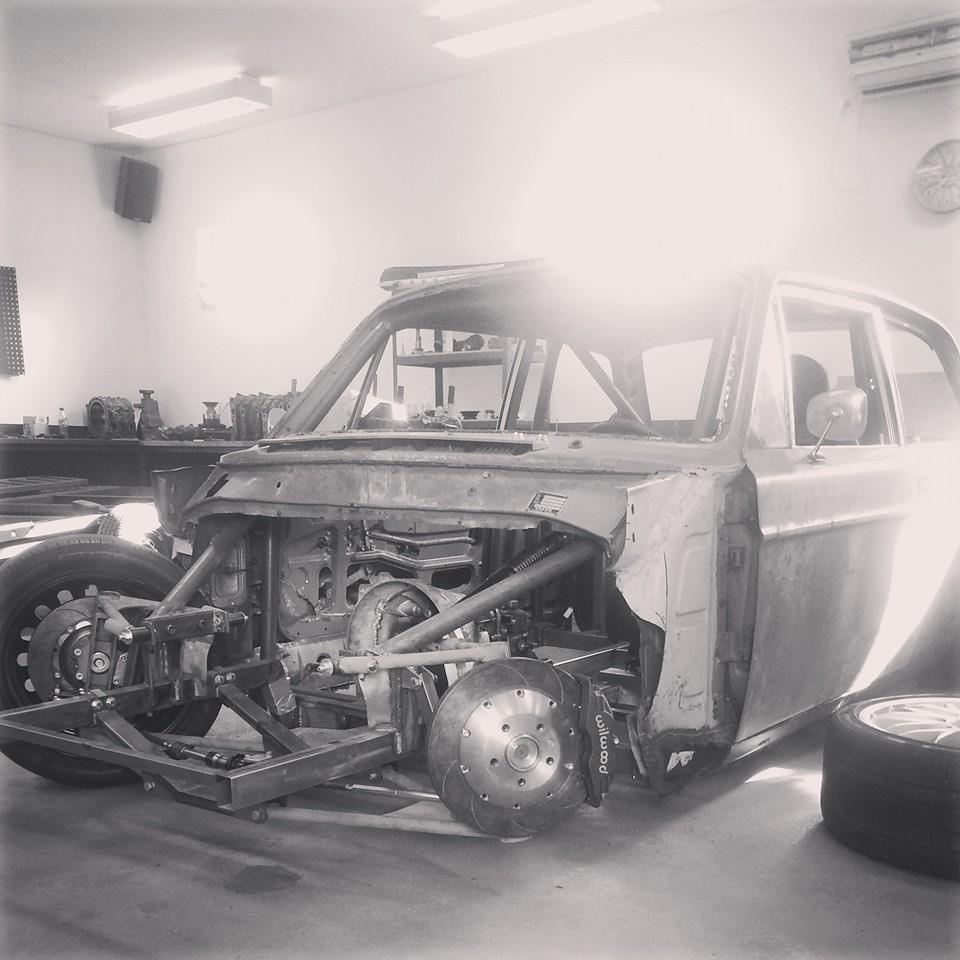
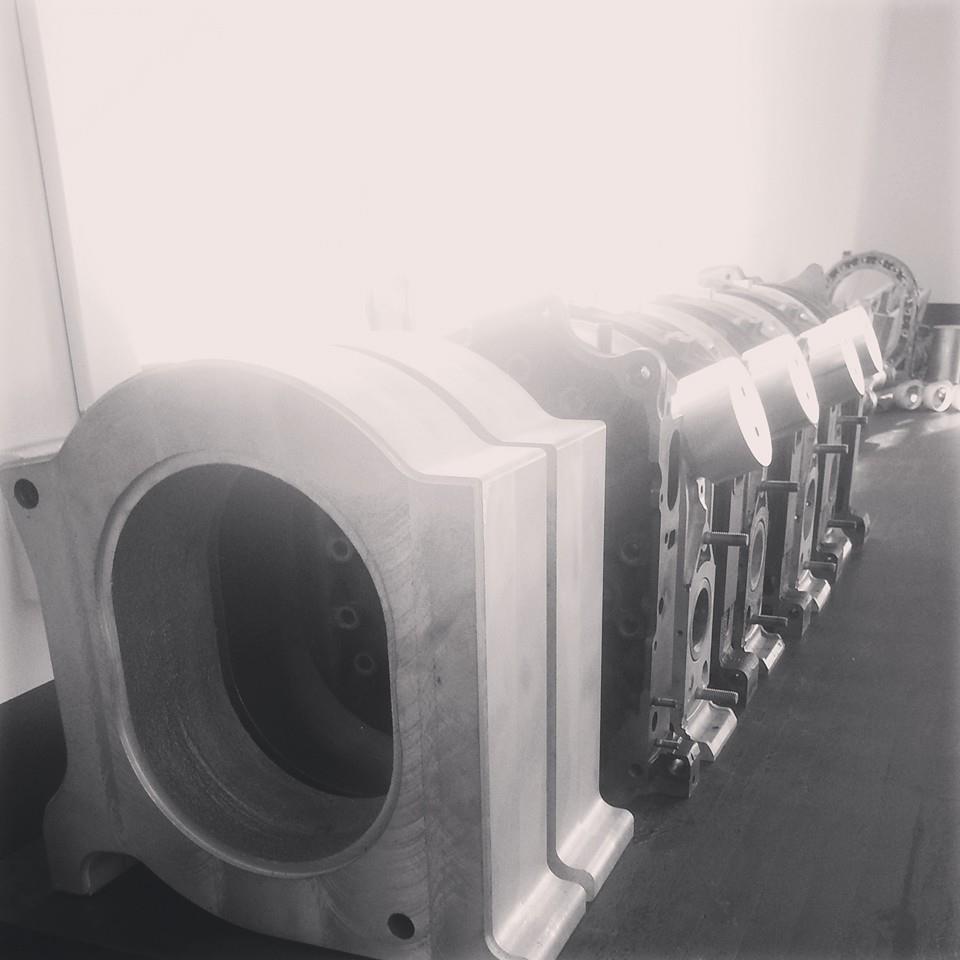
My old teacher called, he had found my website, and wanted to show his friends my build in person. Really fun! Cleaned up and made some coffee.
Name:  WolvoUppstaumlllning_zps9865baa1.jpg
Views: 1572
Size:  82.4 KB
Name:  WolvoUppstaumlllning-02_zpsa9e743b0.jpg
Views: 1579
Size:  53.5 KB

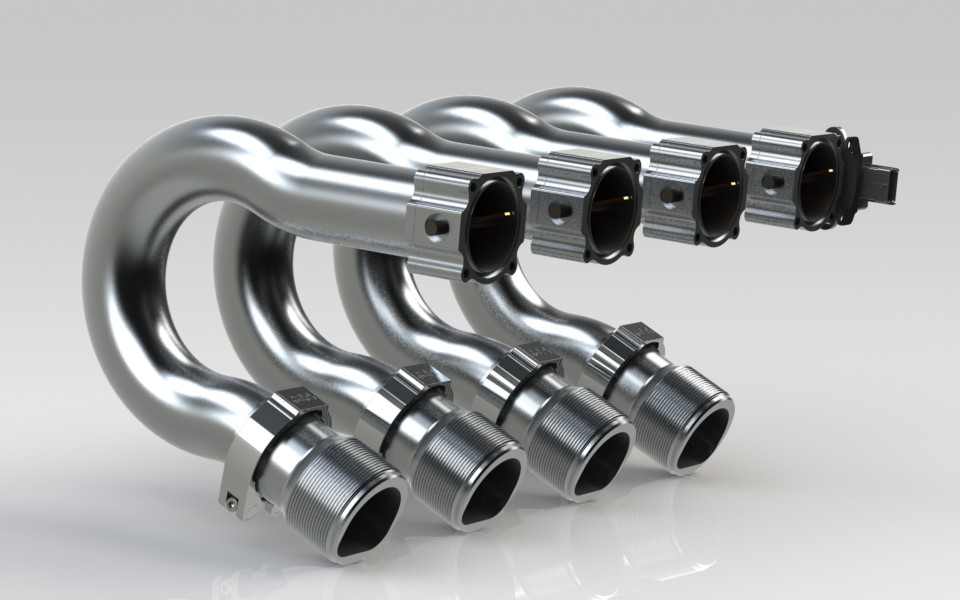
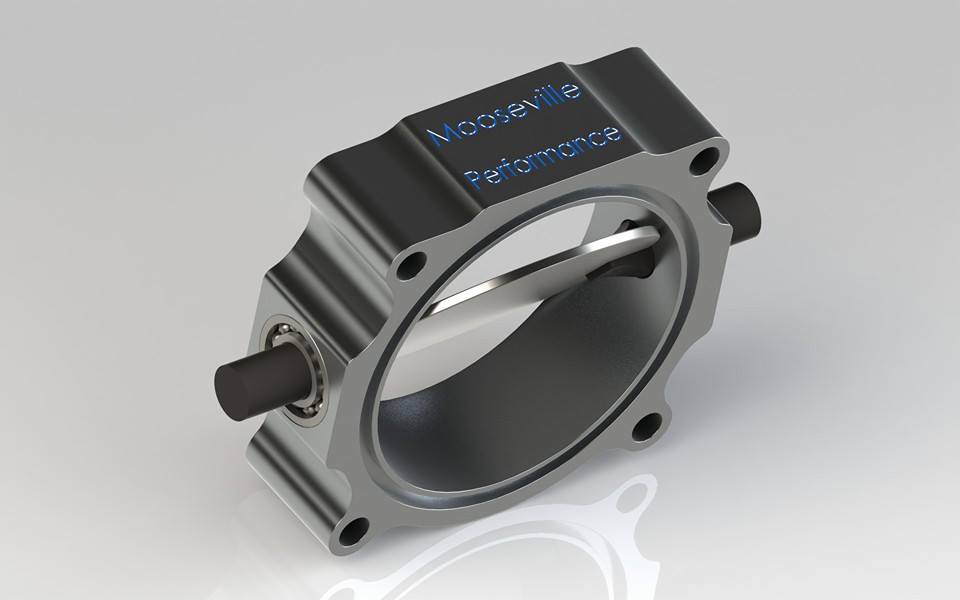
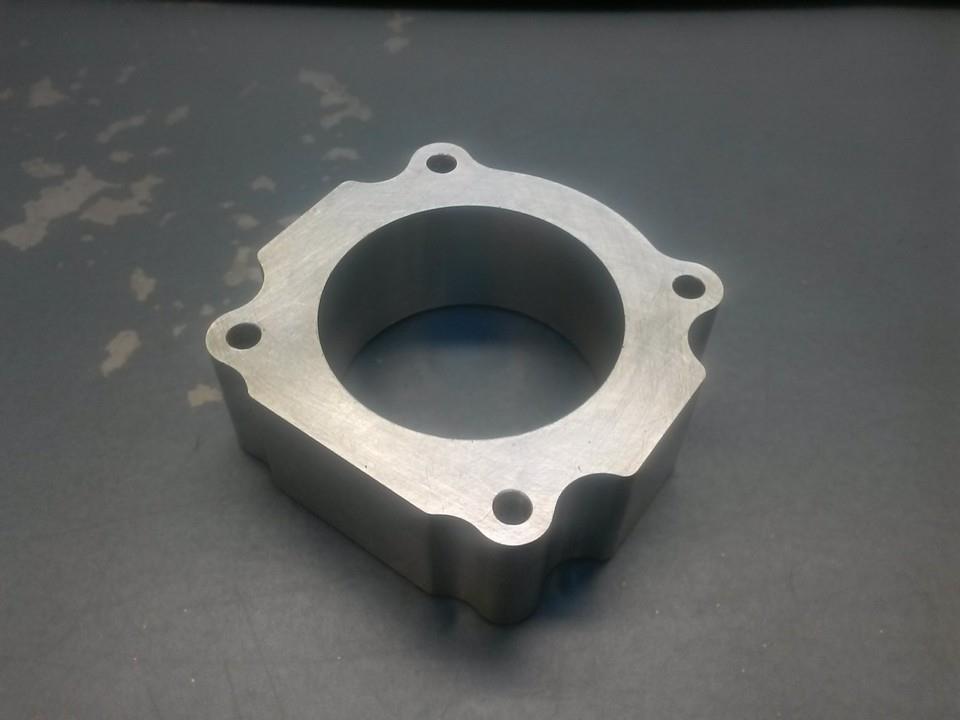
Have been thinking about the intake, and have some ideas of how it will be.

I want thin throttlebodys with no injectors, and also buttefly model.
Something like this...
Name:  Spjaumlllhus-01_zps9382488d.jpg
Views: 1564
Size:  29.4 KB

Started on a prototype of aluminium...
Name:  Spjaumlllhus-02_zps5dcd7956.jpg
Views: 1550
Size:  34.0 KB


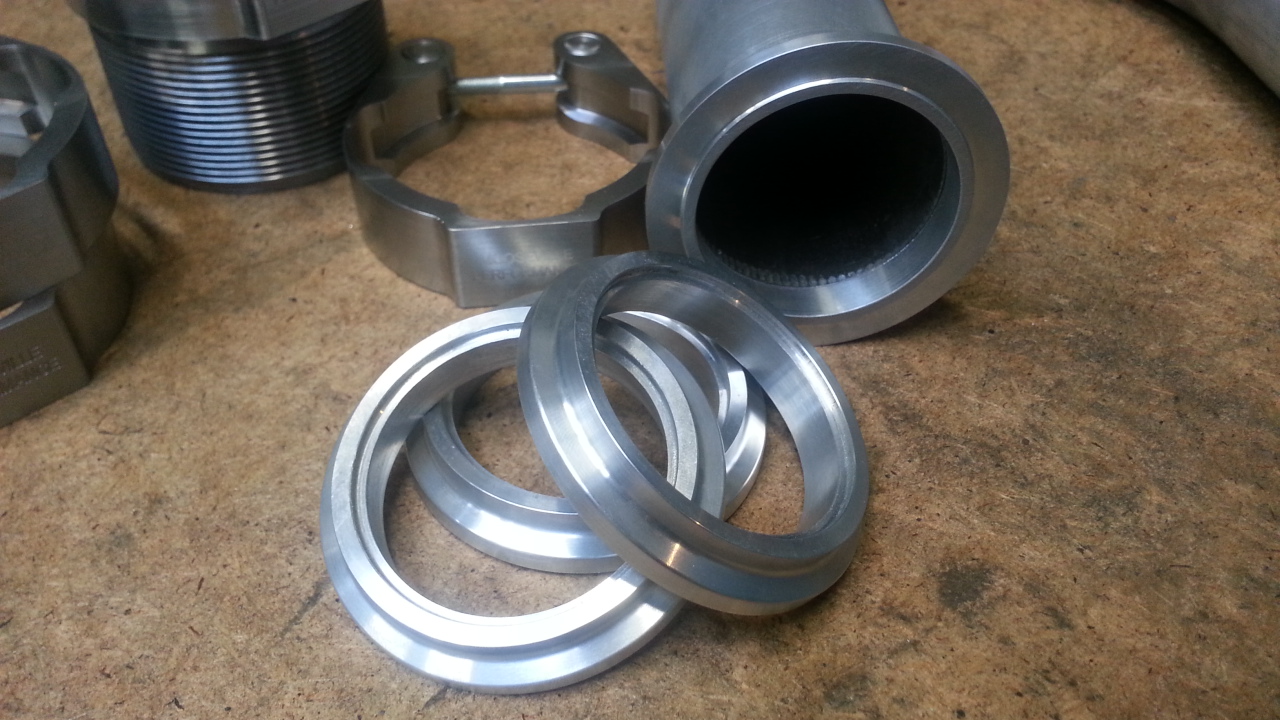
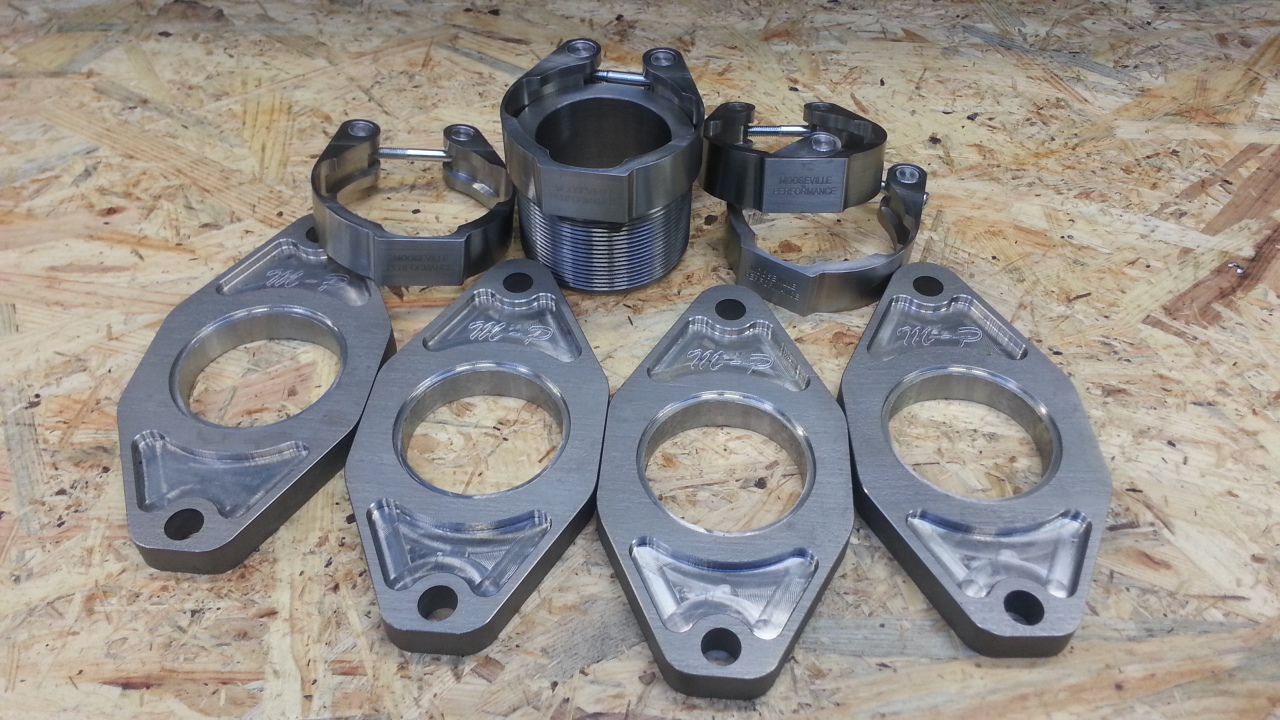
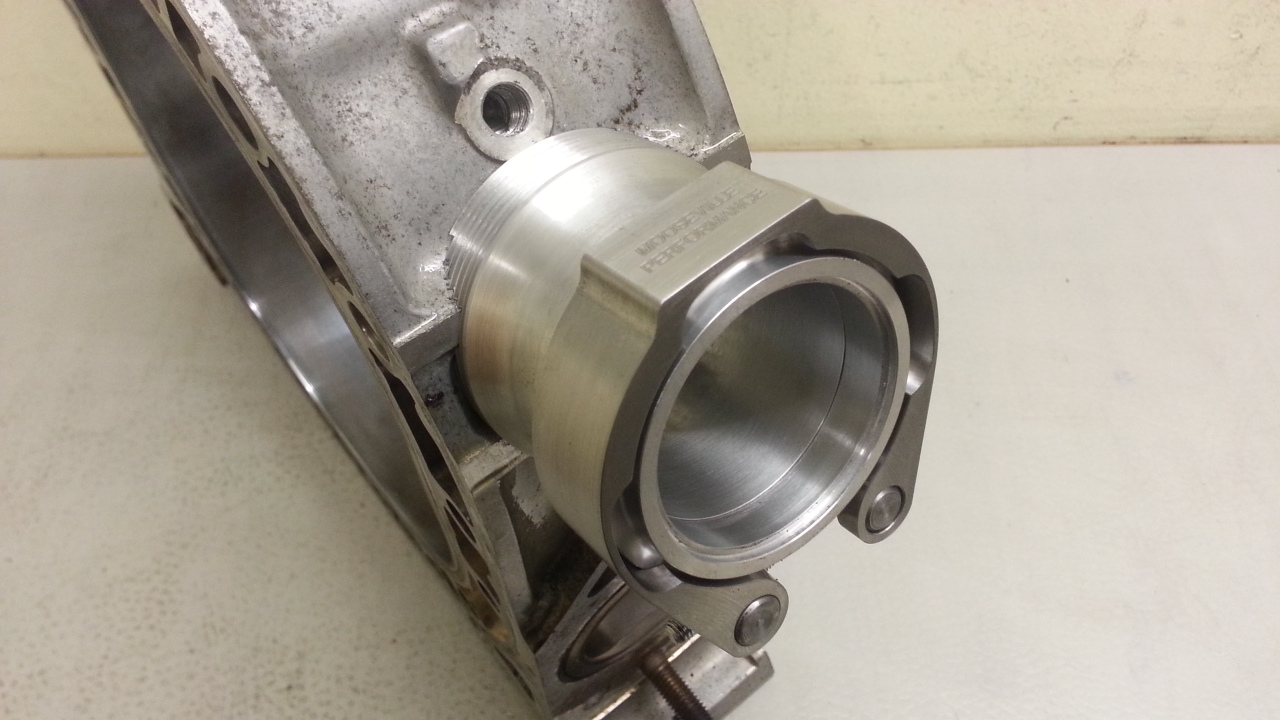
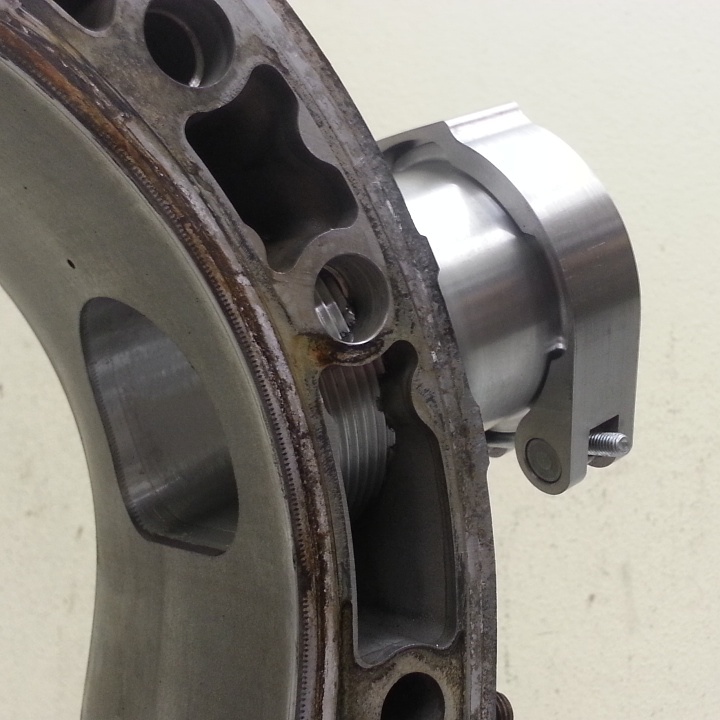
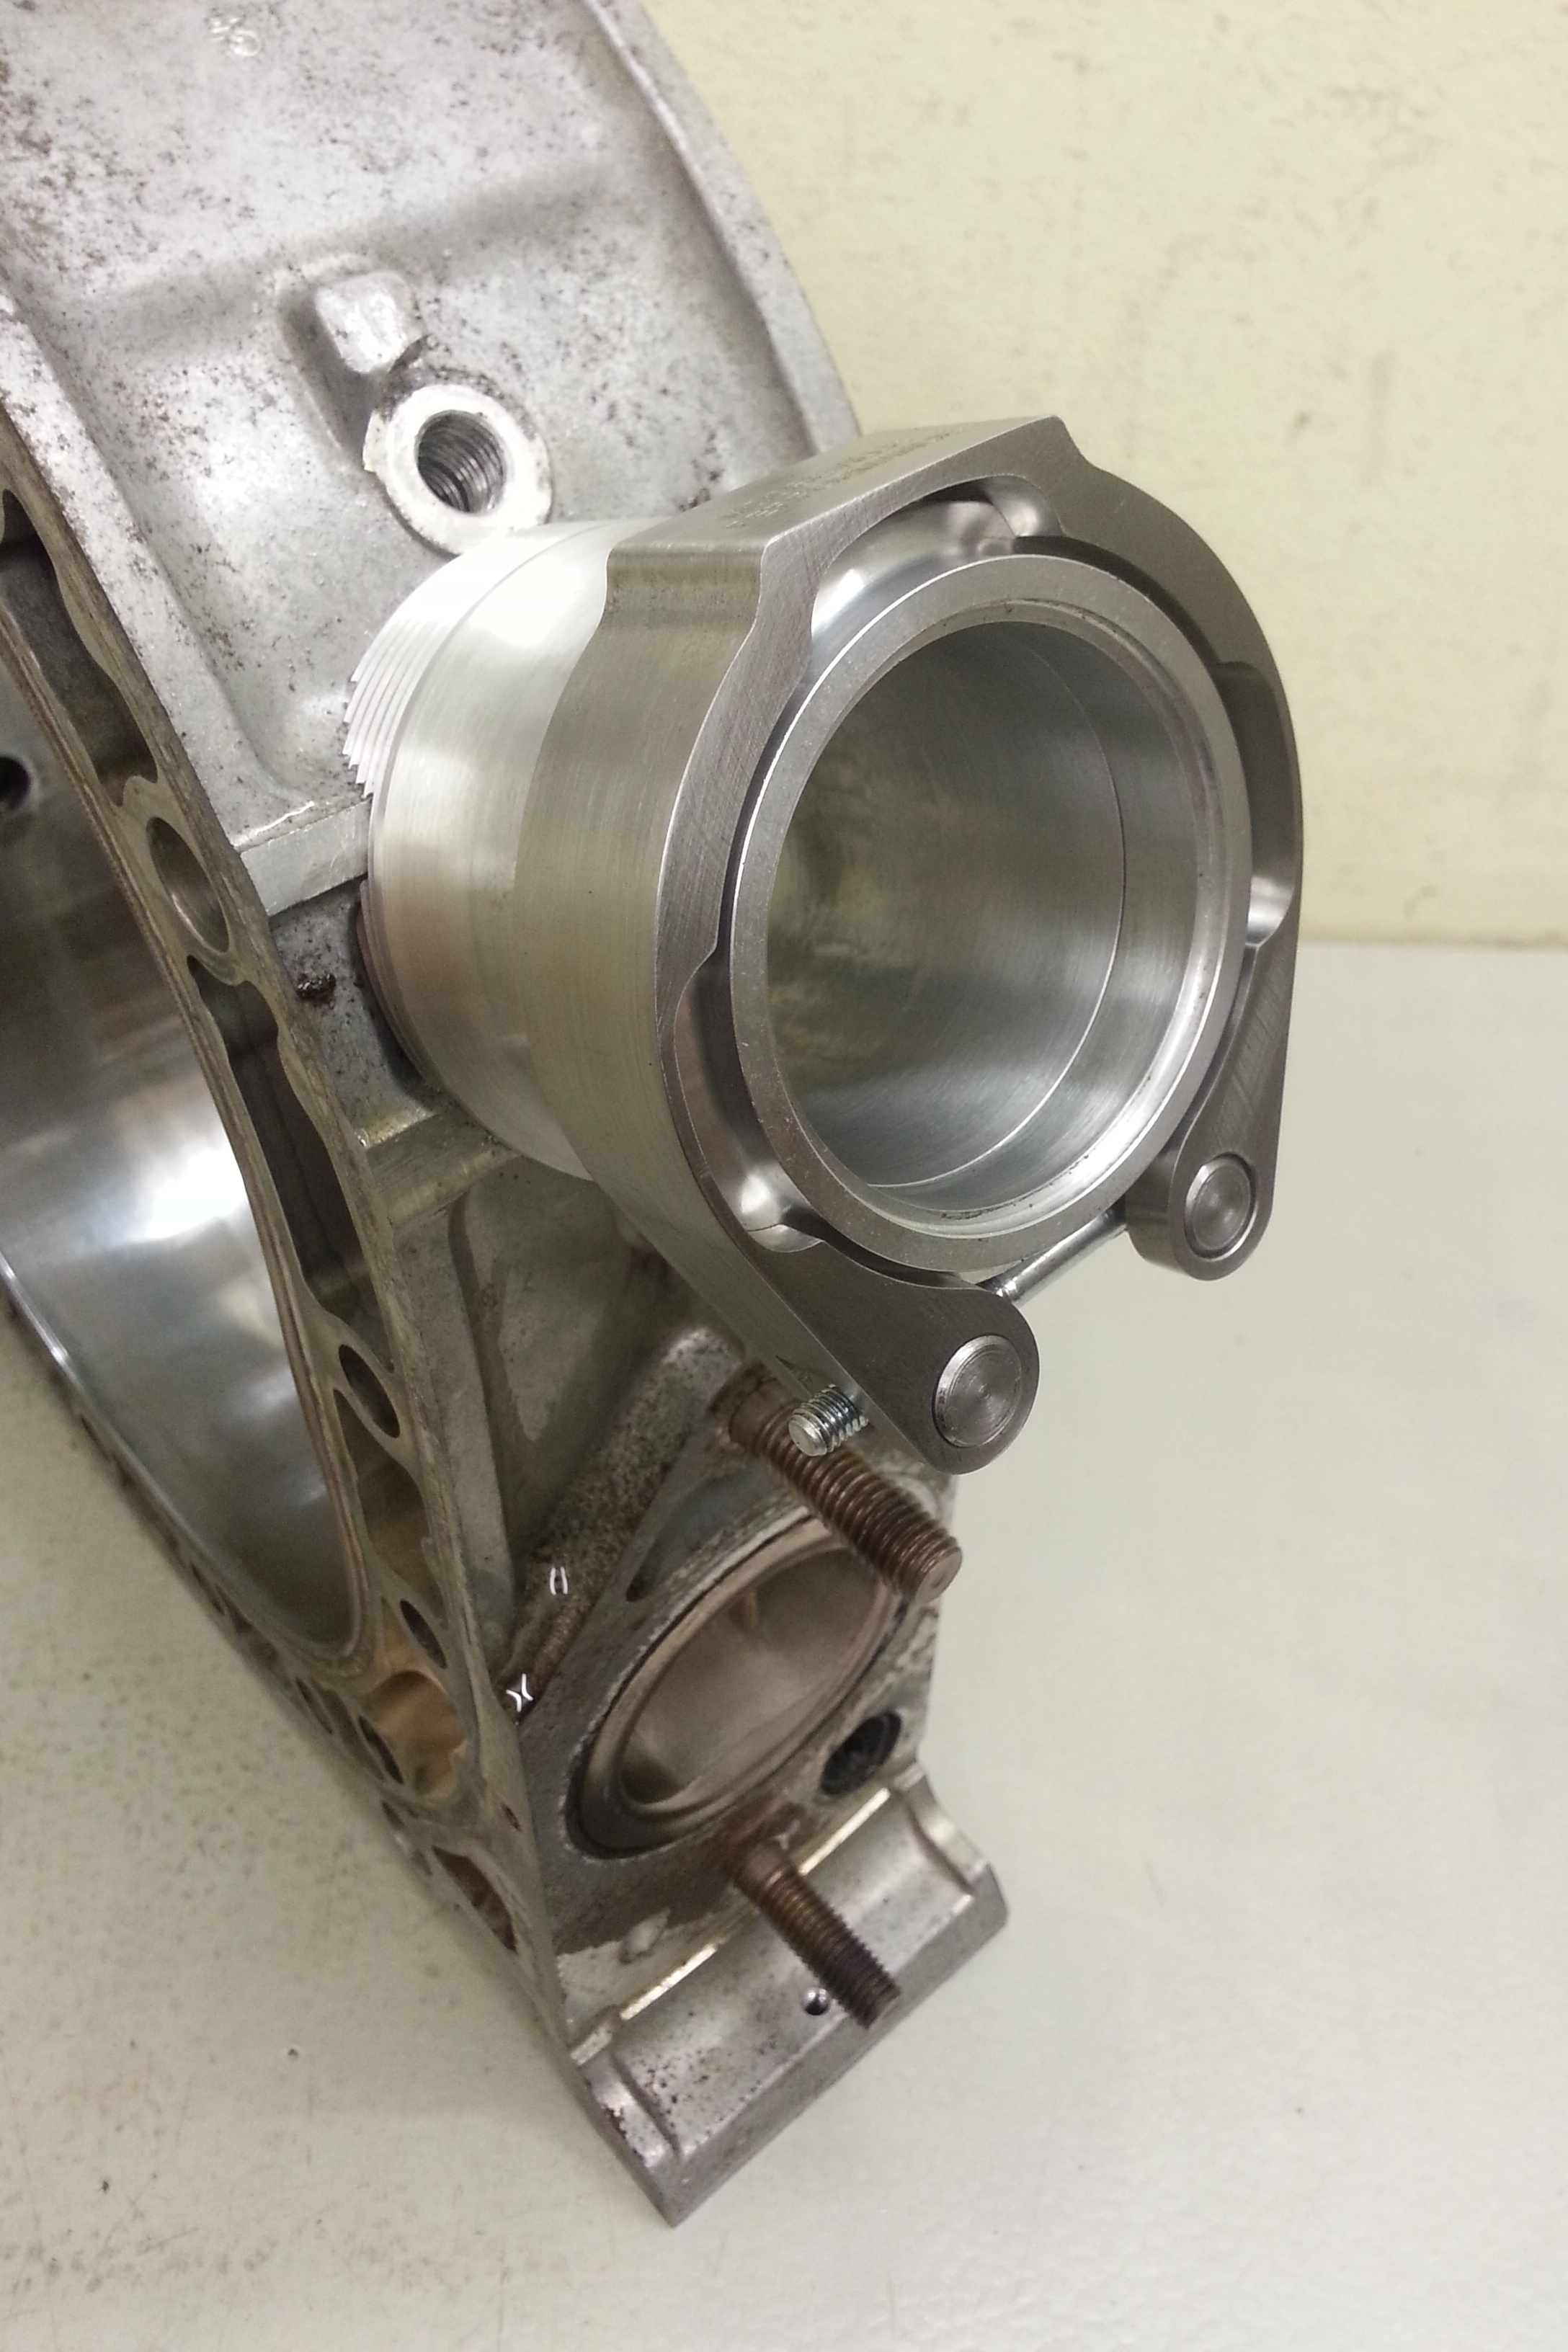
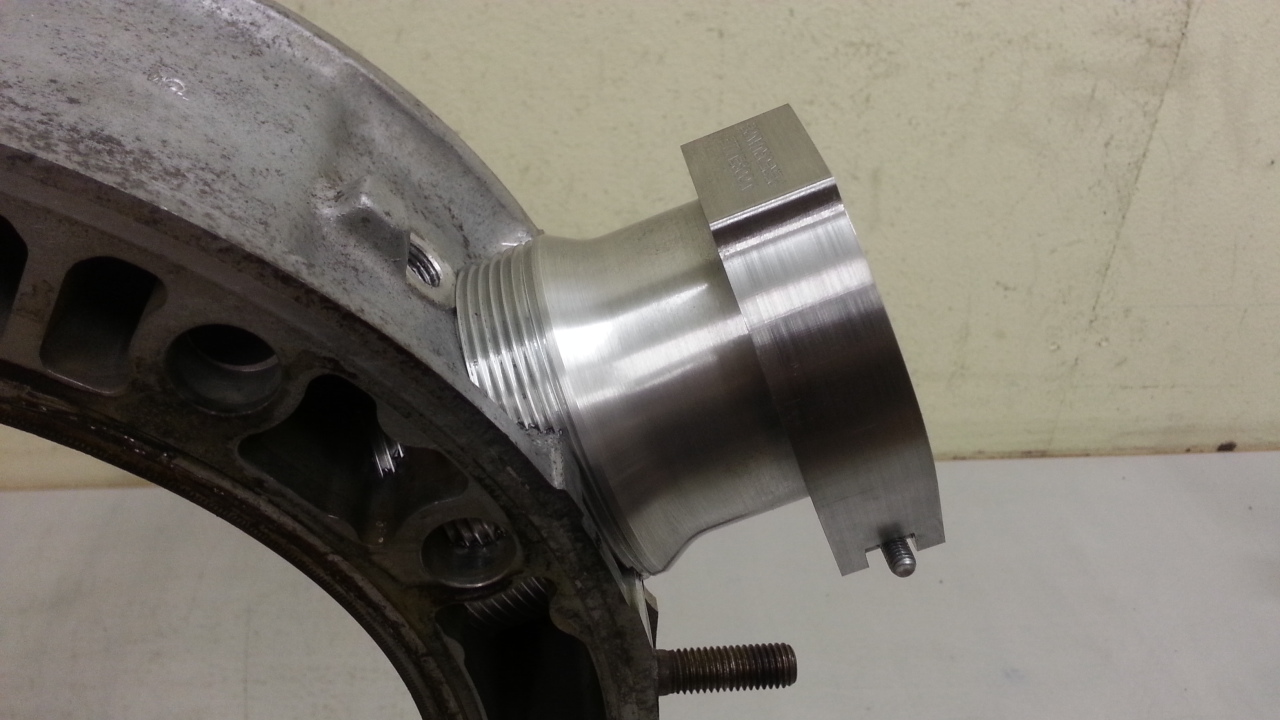
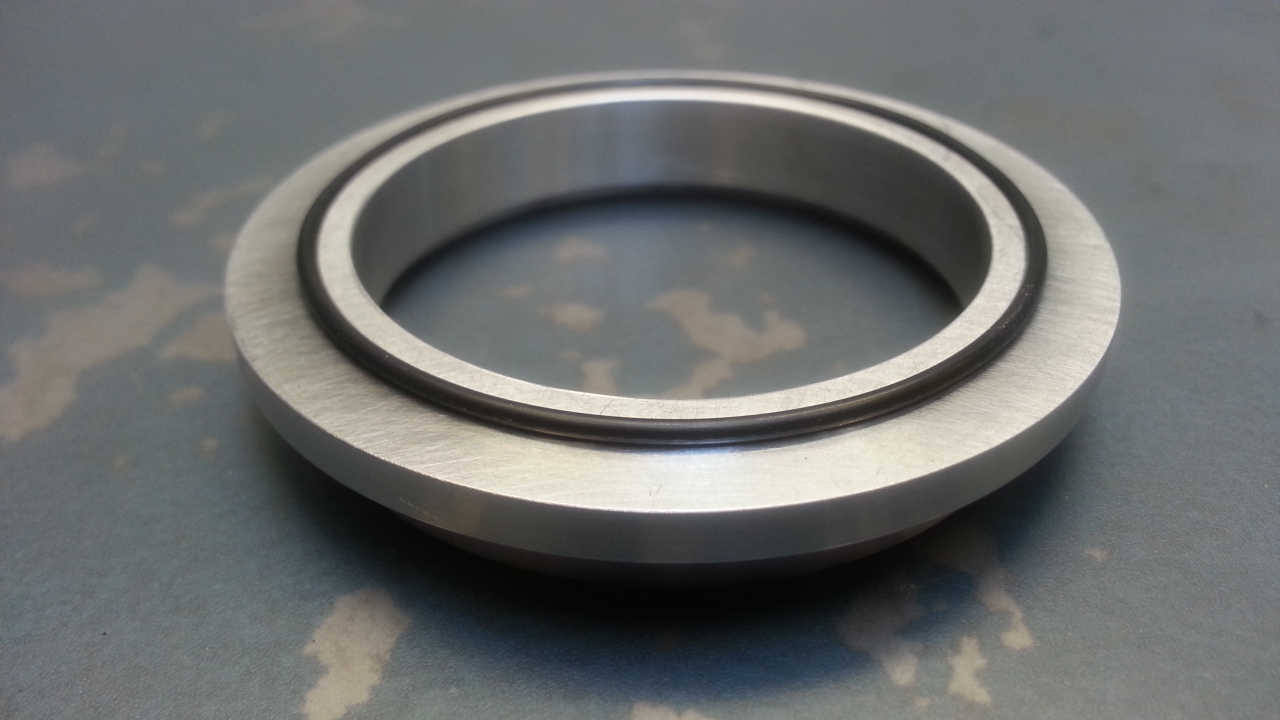
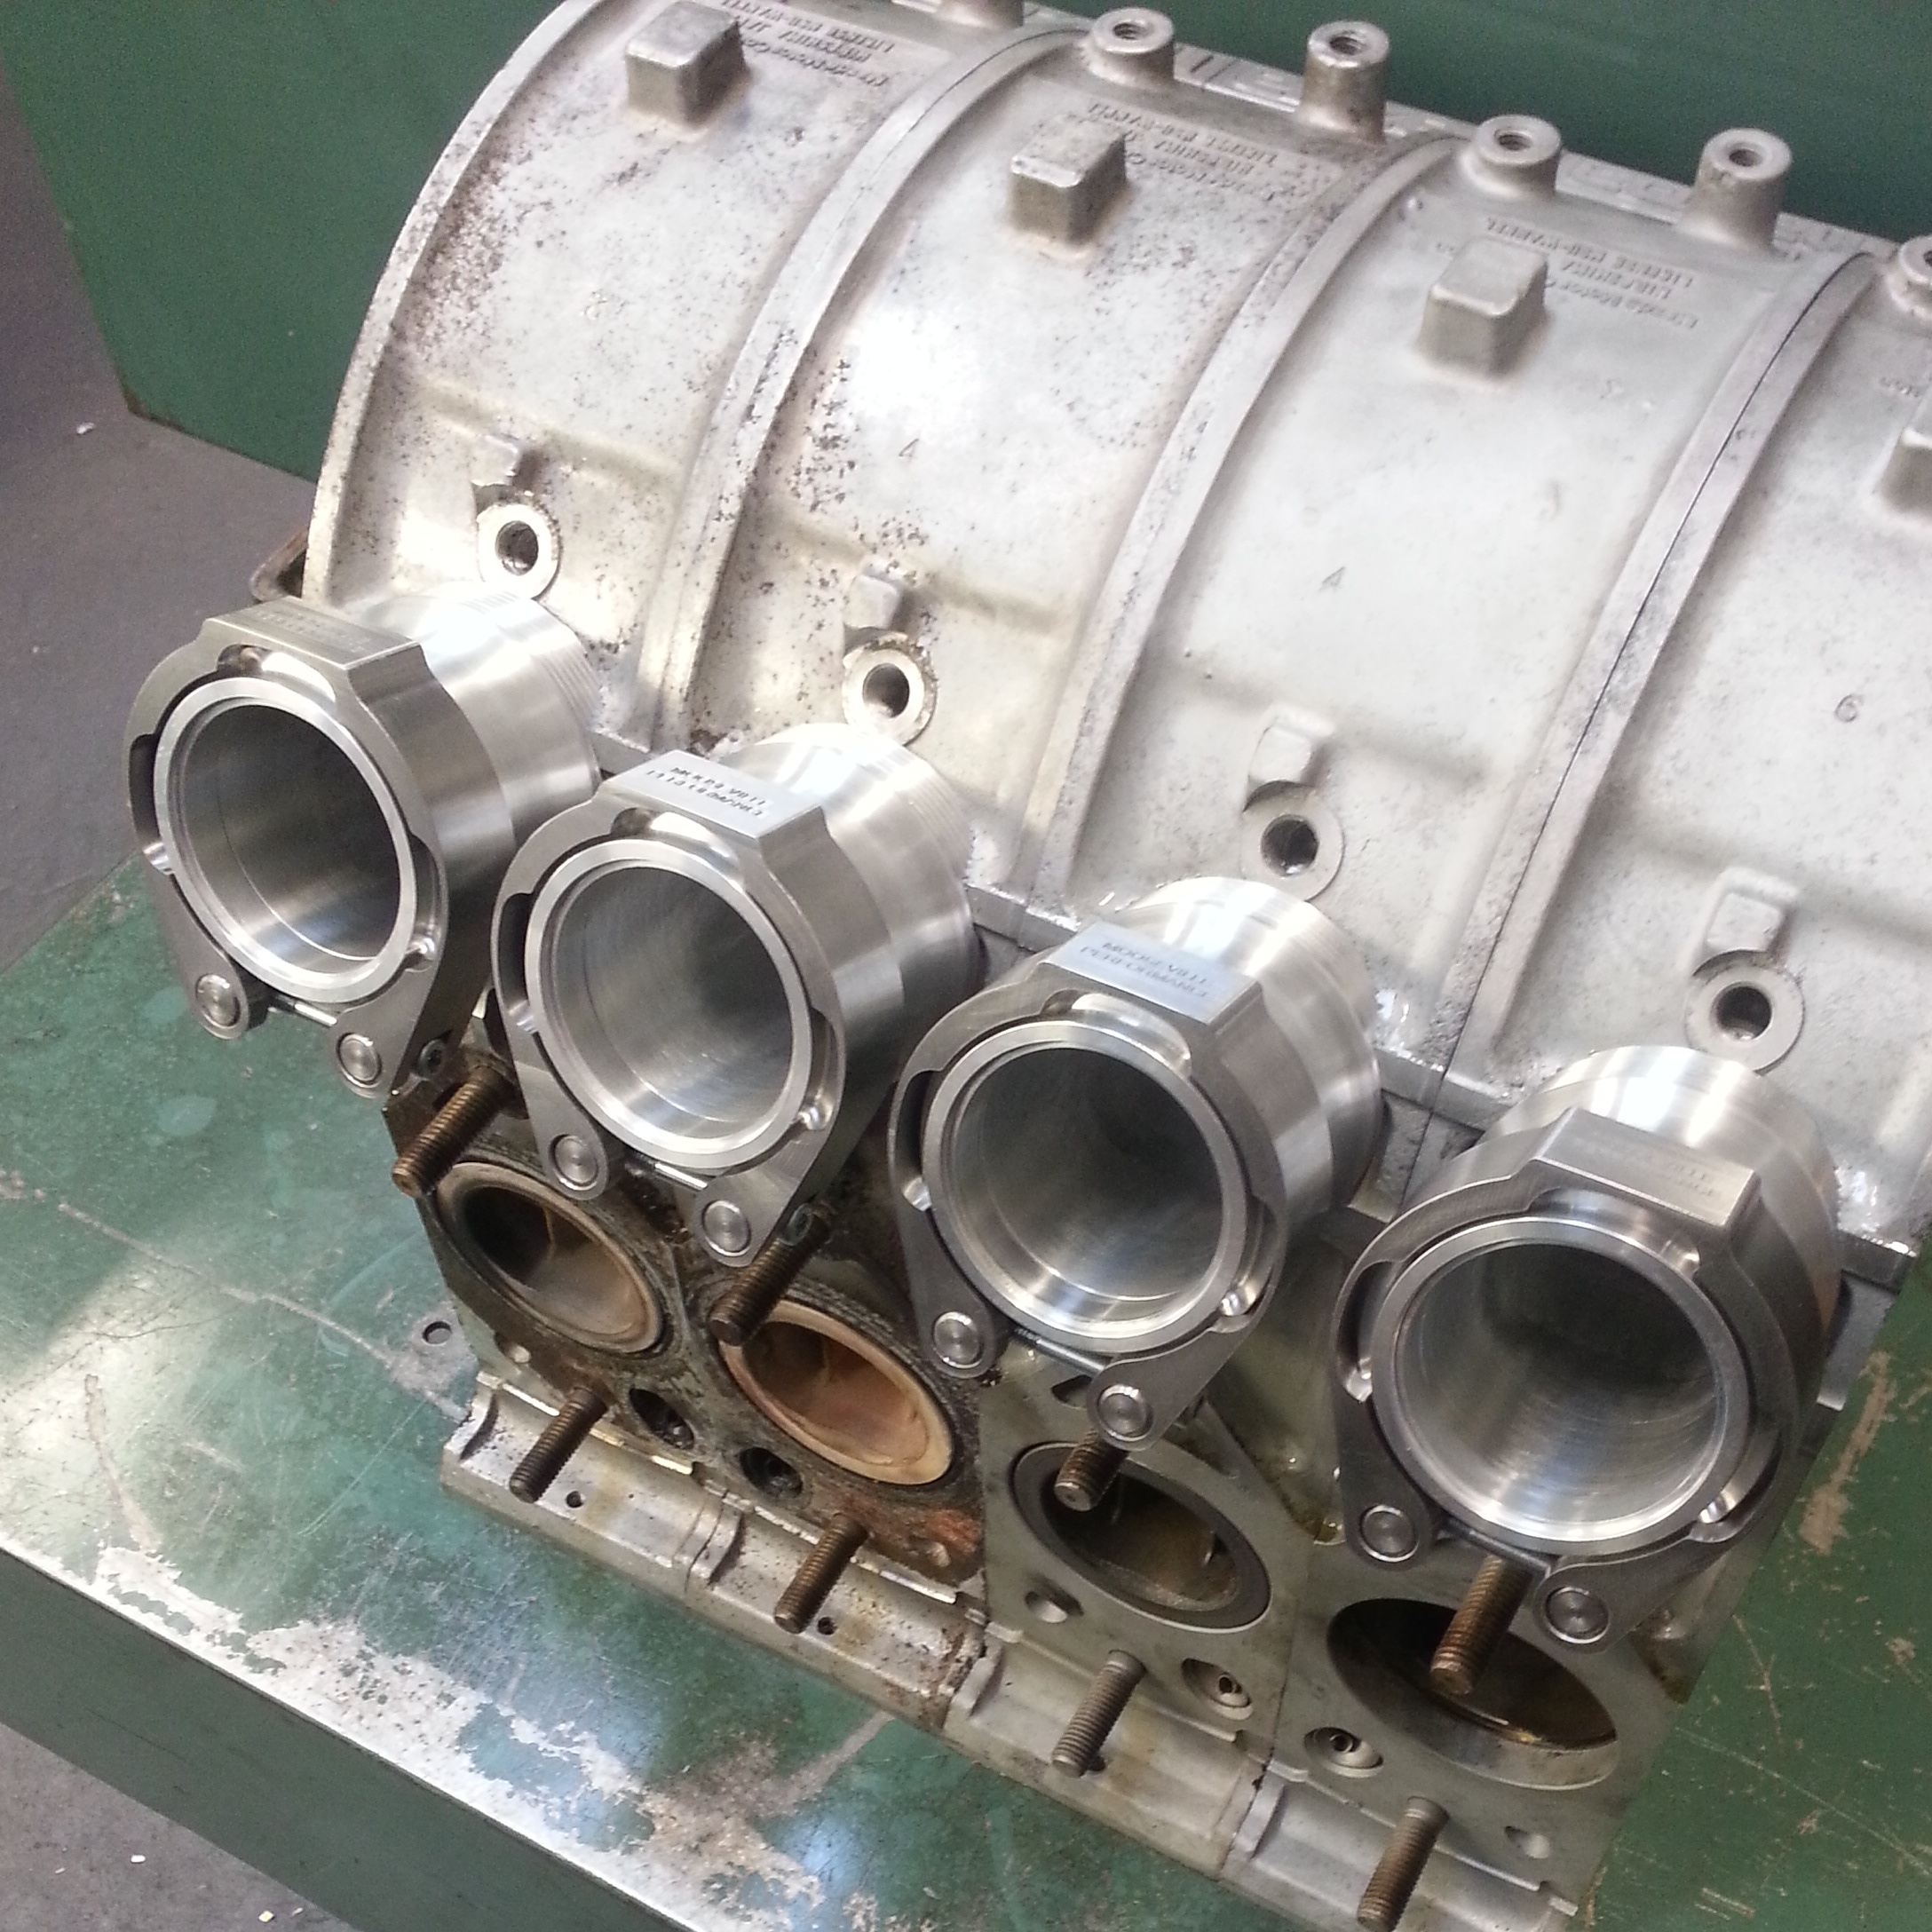
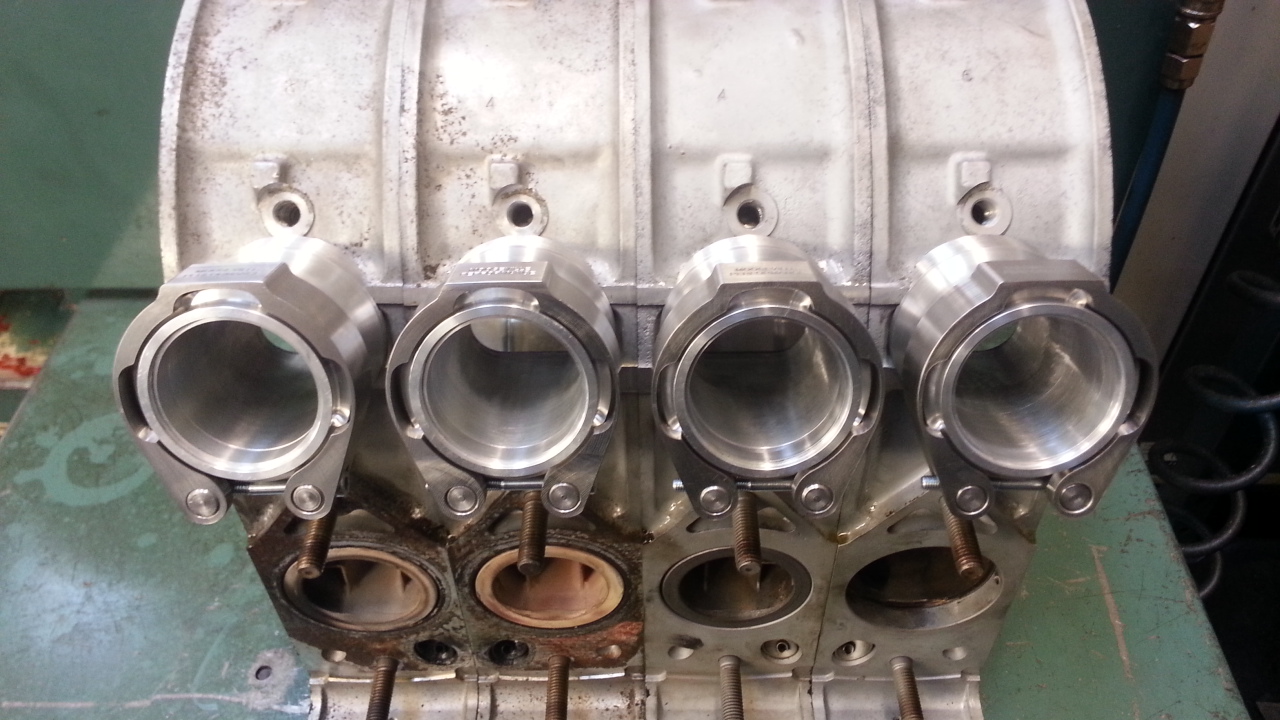
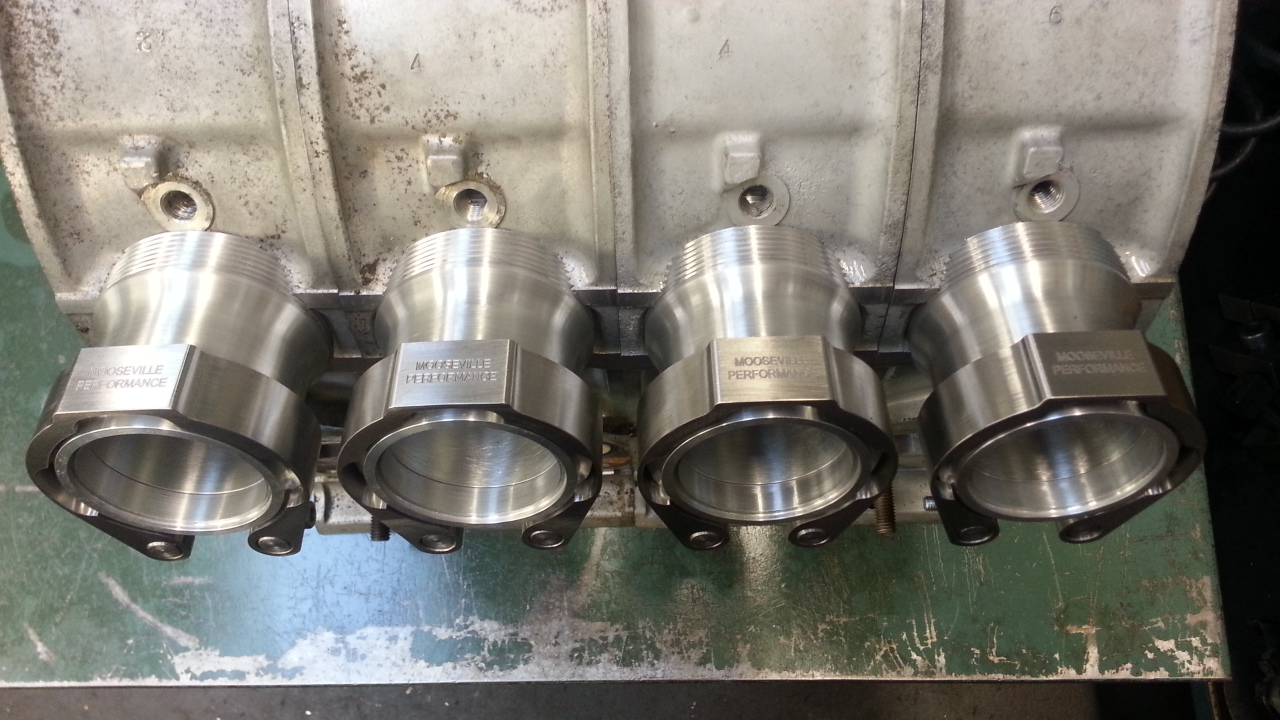
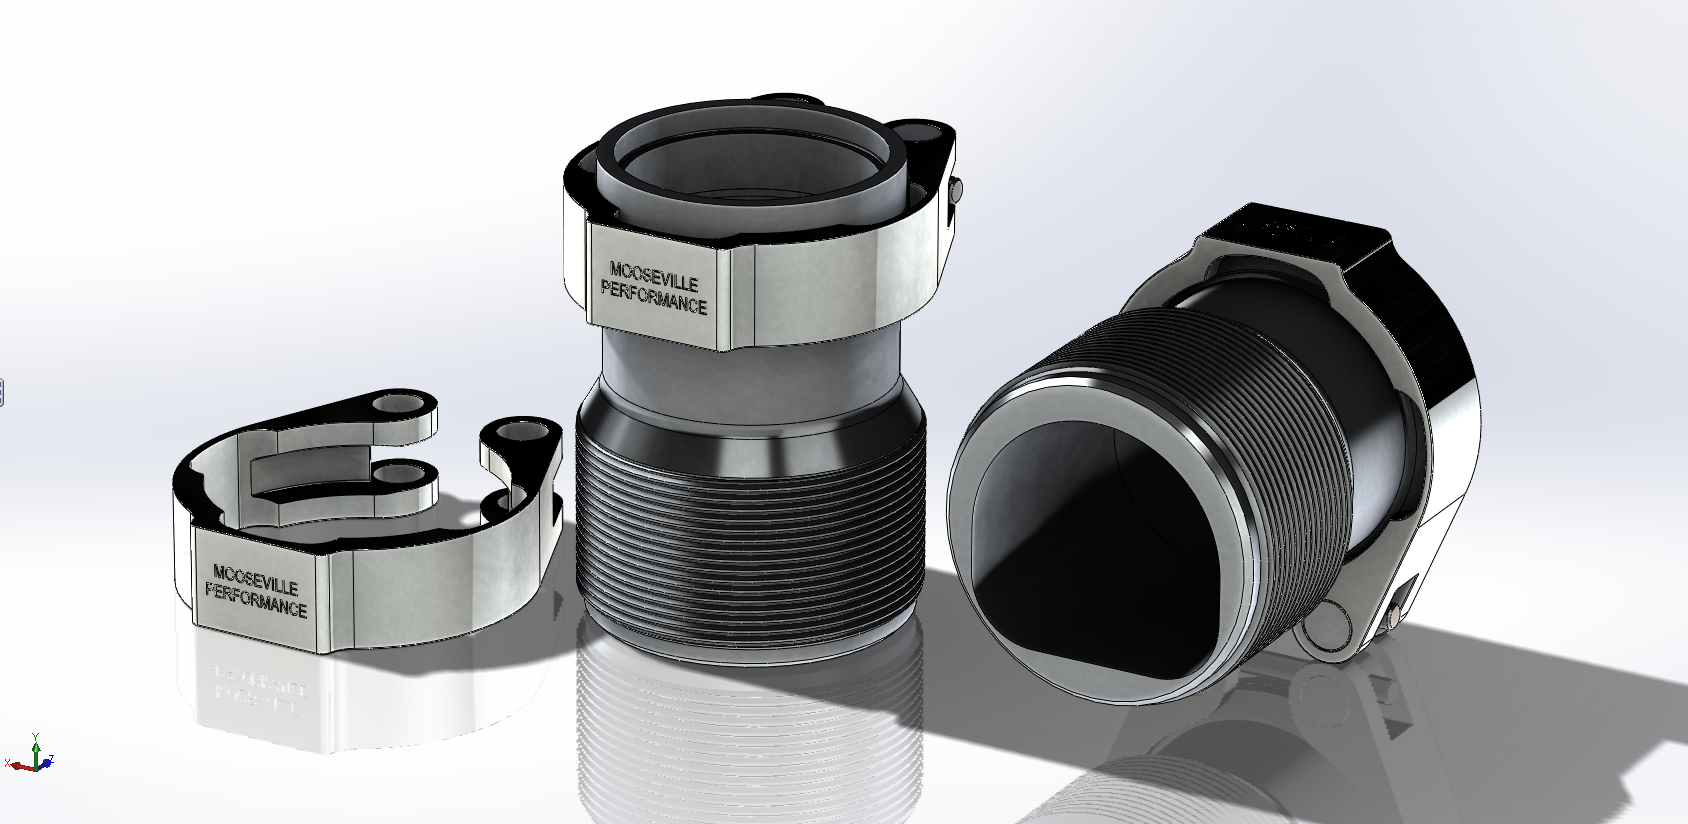
The P-Port-inserts will have V-band to connect the runners, but I wanted a personal touch also.
Name:  Vband%20Print-screen_zpsjbj9gqjl.png
Views: 1613
Size:  1.01 MB

Name:  Intake-02_zpsok2ujnvn.jpg
Views: 1570
Size:  79.7 KB

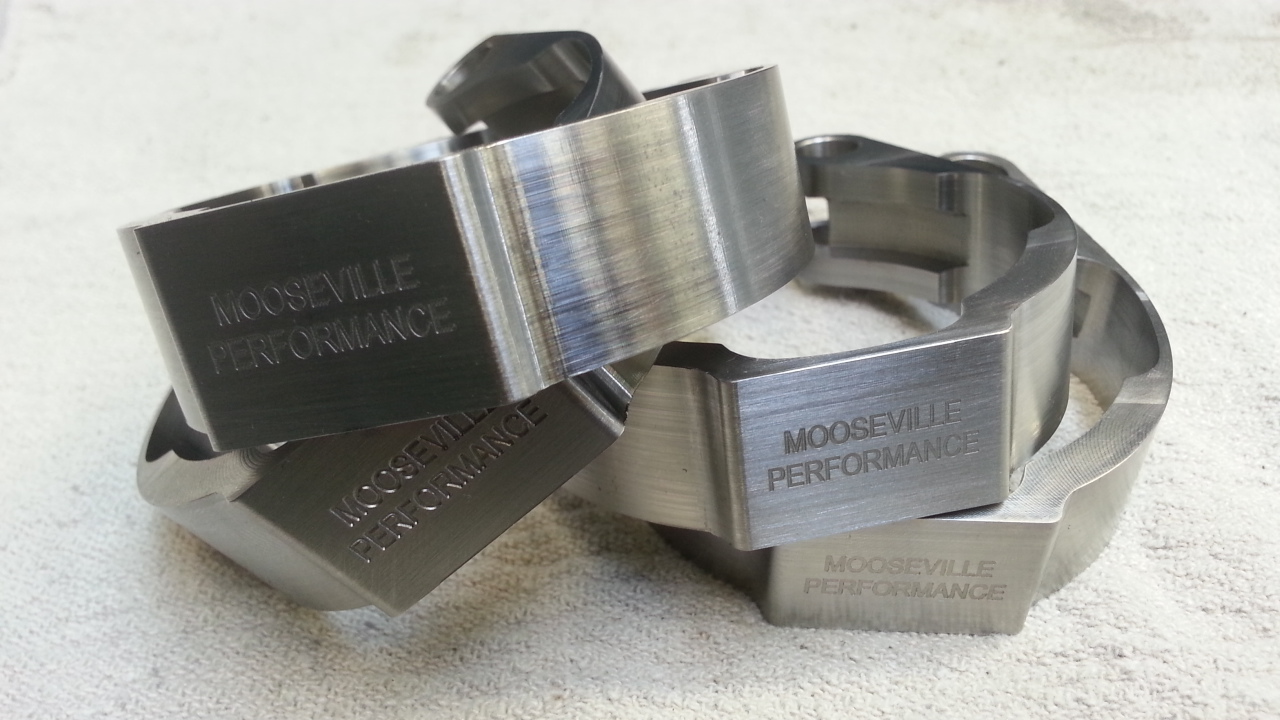
This is how the billet stainless v-band-clamps turned out today. Really happy with them.
Name:  20140621_134648_zps9dviskq5.jpg
Views: 1564
Size:  294.3 KB
Old 06-21-14, 10:01 AM
  #920  
Enthusiast

iTrader: (5)
 
rx7 SE's Avatar
 
Join Date: Aug 2004
Location: Charlotte, NC
Posts: 2,181
Received 1 Like on 1 Post
Man your renderings are fantastic!
Old 06-22-14, 02:56 PM
  #921  
Senior Member

Thread Starter
 
tegheim's Avatar
 
Join Date: Nov 2003
Location: Sweden
Posts: 533
Likes: 0
Received 2 Likes on 1 Post
Name:  20140622_192609_zpsc3btr7dq.jpg
Views: 1559
Size:  452.8 KB


Name:  IMG_20140622_162149_zpswwda1iq8.jpg
Views: 1604
Size:  1.80 MB
Old 06-23-14, 01:06 PM
  #922  
Senior Member

iTrader: (2)
 
demongo's Avatar
 
Join Date: Jul 2011
Location: CA
Posts: 255
Received 1 Like on 1 Post
Very cool. Machining for apex seals next?
Old 06-27-14, 10:59 AM
  #923  
Senior Member

Thread Starter
 
tegheim's Avatar
 
Join Date: Nov 2003
Location: Sweden
Posts: 533
Likes: 0
Received 2 Likes on 1 Post
Originally Posted by demongo
Very cool. Machining for apex seals next?
No, there is alot more to do before that.

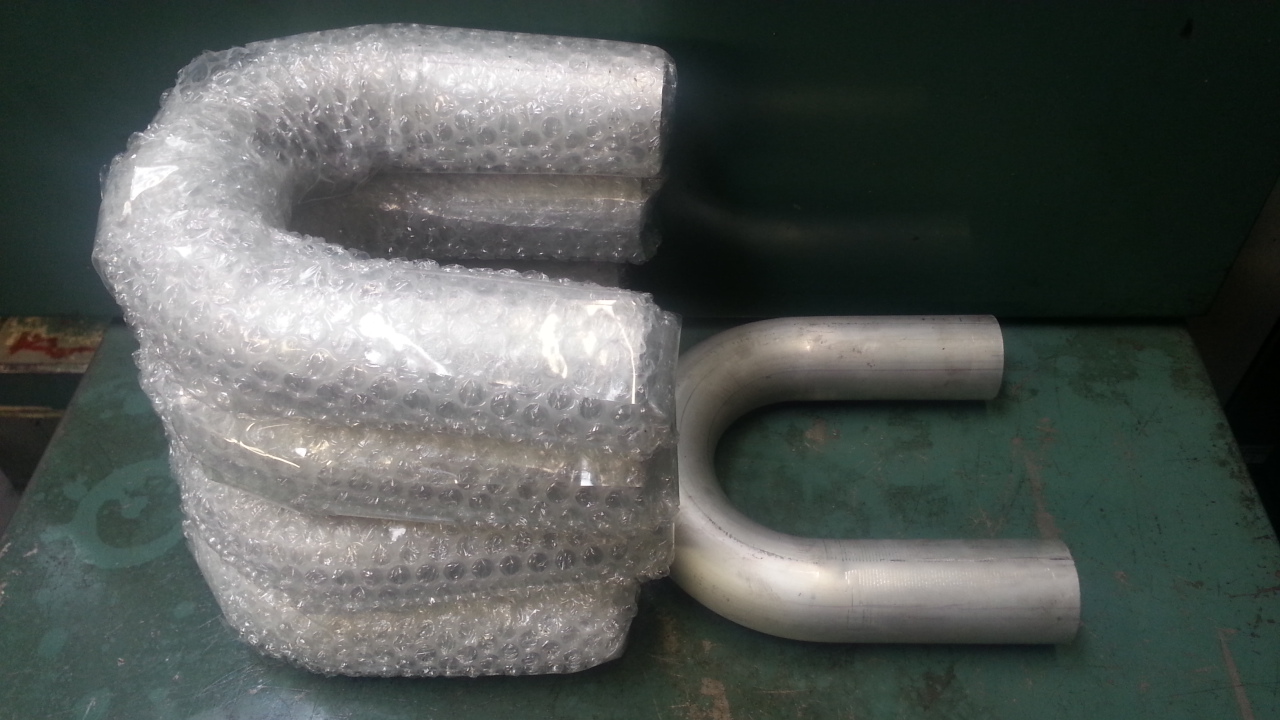
Yesterday I got some mandrels from www.mandrel-bends.com for the intake-

2" 16GA with tight CLR.

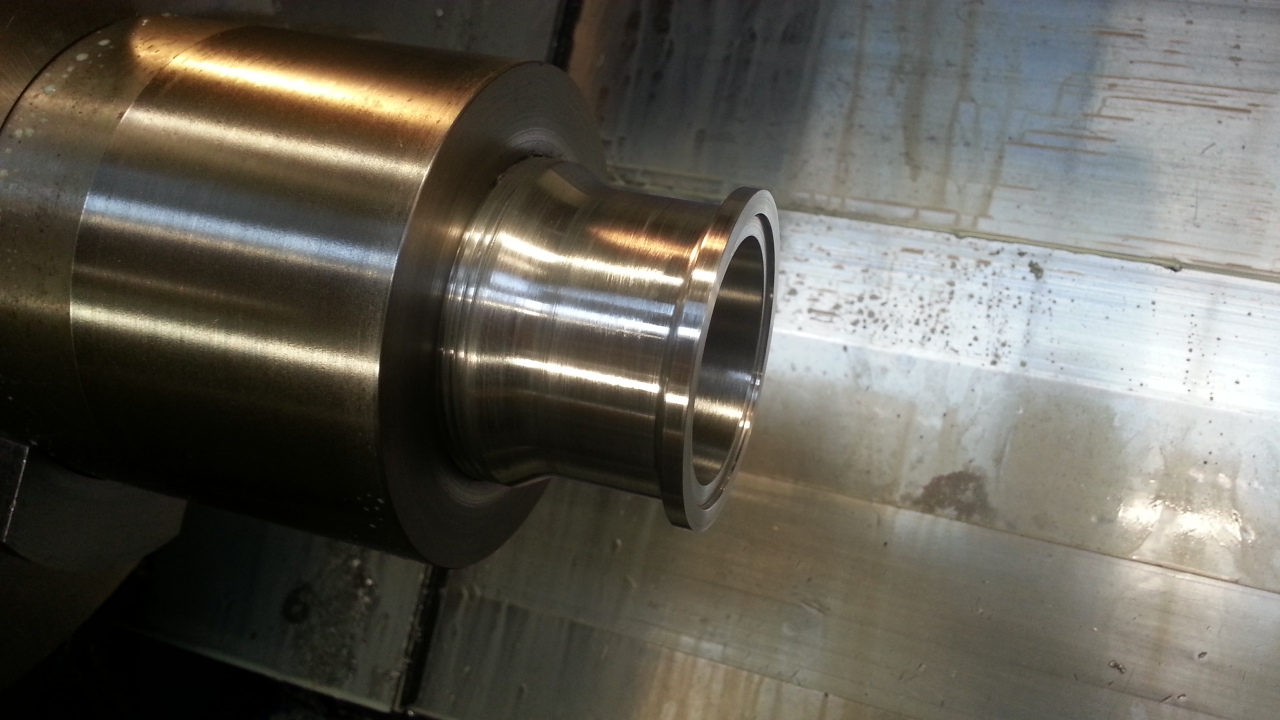
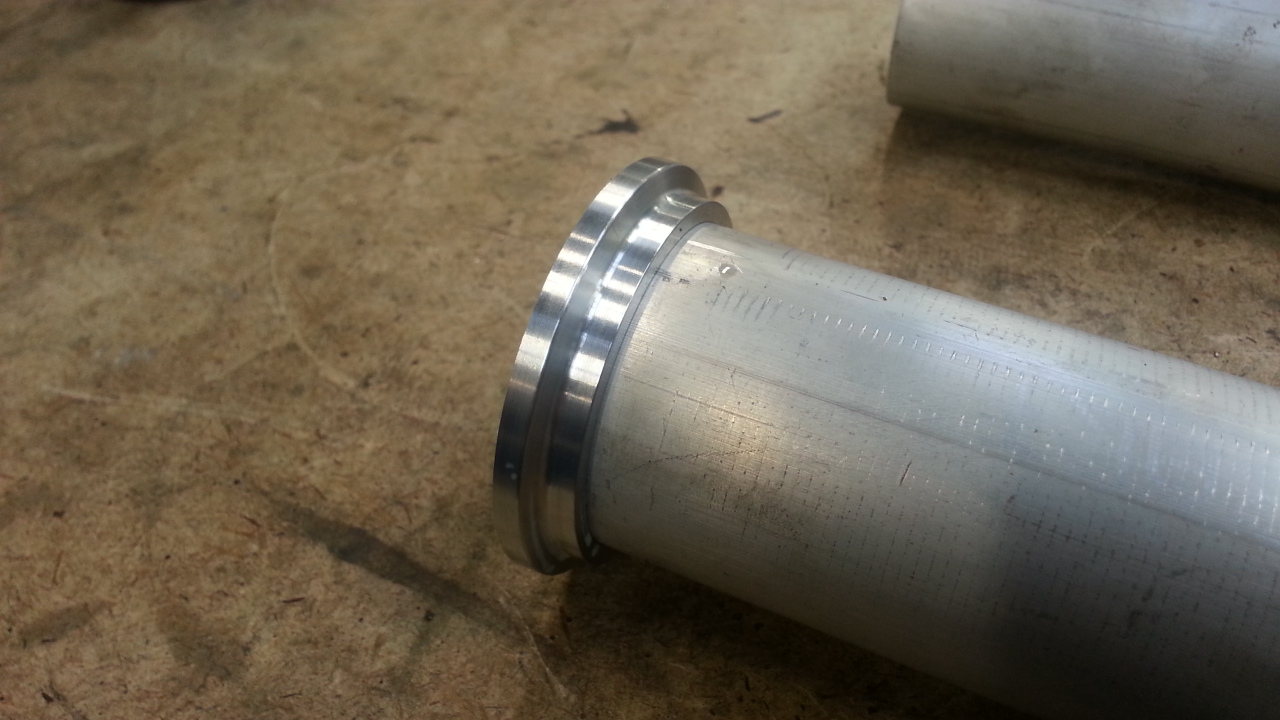
Today I did the V-band-flanges for the runners. With a groove to stay concentric and also a little groove on the other side to fix the pipe in. Only 2mm deep, but tight, so it holds there when trying out the parts. Easier to weld also.
Name:  20140626_143918_zpsqk3idhpi.jpg
Views: 1541
Size:  293.8 KB
Name:  20140627_145229_zpscfmlo2jw.jpg
Views: 1579
Size:  271.5 KB
Name:  20140627_154844_zpsensjpkdd.jpg
Views: 1572
Size:  382.0 KB
Old 07-08-14, 02:07 AM
  #924  
Senior Member

Thread Starter
 
tegheim's Avatar
 
Join Date: Nov 2003
Location: Sweden
Posts: 533
Likes: 0
Received 2 Likes on 1 Post
Name:  20140708_065202_zpskjcrwc9l.jpg
Views: 1585
Size:  253.7 KB

Name:  20140708_065218_zpsjofheor2.jpg
Views: 1551
Size:  273.5 KB

Name:  IMG_20140708_071256_zpsezwih1yc.jpg
Views: 1551
Size:  140.2 KB

Name:  IMG_20140708_065624_zpsoflvalbr.jpg
Views: 1583
Size:  1.46 MB

Name:  20140708_065241_zps92mdeofz.jpg
Views: 1554
Size:  259.4 KB

Name:  20140707_120031_zps5s2jxzym.jpg
Views: 1576
Size:  243.0 KB
Old 07-09-14, 12:00 AM
  #925  
Senior Member

Thread Starter
 
tegheim's Avatar
 
Join Date: Nov 2003
Location: Sweden
Posts: 533
Likes: 0
Received 2 Likes on 1 Post
Got up early today again. Lovely to start the day with some Engine-stuff...

Name:  20140709_062126_zpsbxwqkwpa.jpg
Views: 1594
Size:  275.5 KB

Name:  IMG_20140709_064422_zps1ihvw4kg.jpg
Views: 1605
Size:  1.19 MB

Name:  20140709_064033_zps9vo5iedi.jpg
Views: 1584
Size:  351.4 KB

Name:  20140709_064317_zpswewwltrl.jpg
Views: 1546
Size:  378.3 KB

Name:  20140709_064325_zpsl7u33gp5.jpg
Views: 1592
Size:  356.8 KB

Name:  20140709_064337_zpswpsw8qqp.jpg
Views: 1560
Size:  355.7 KB

Name:  20140709_064354_zpscbr0fc0e.jpg
Views: 1565
Size:  364.8 KB


Quick Reply: Tegheim - Home made 4 Rotor Wolvo project


All times are GMT -5. The time now is 07:23 PM.