
RX-8 13B-RE conversion!


Thread Starter
Rotary Enthusiast
Joined: Oct 2007
Posts: 799
Likes: 3
From: Plymouth, MN
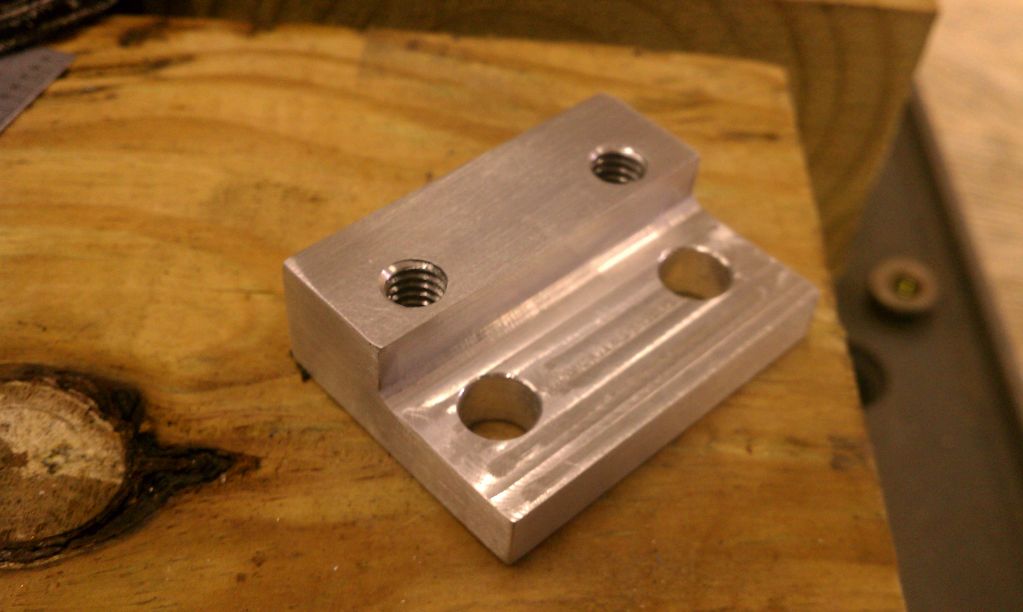
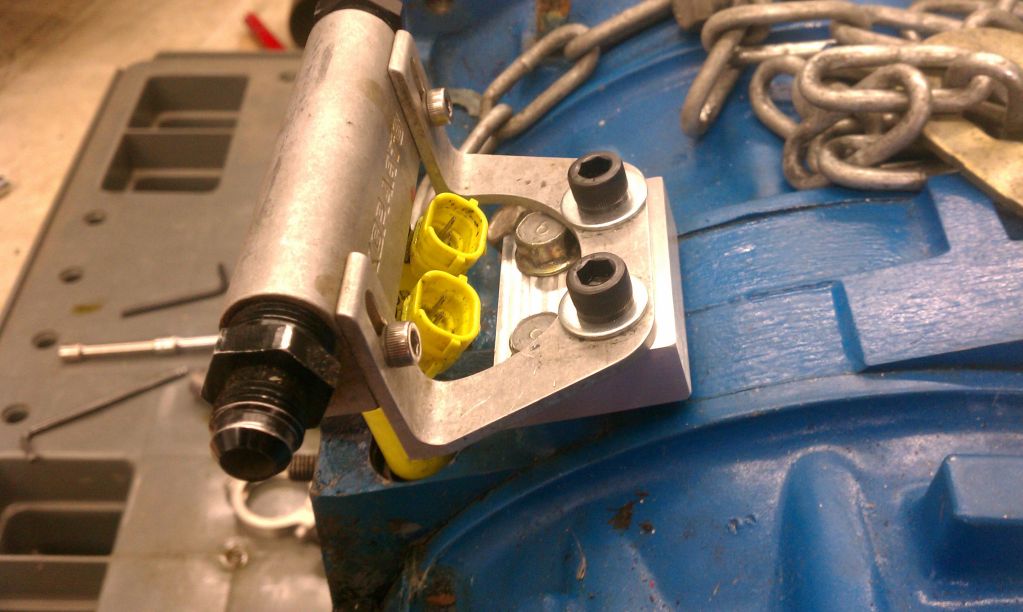
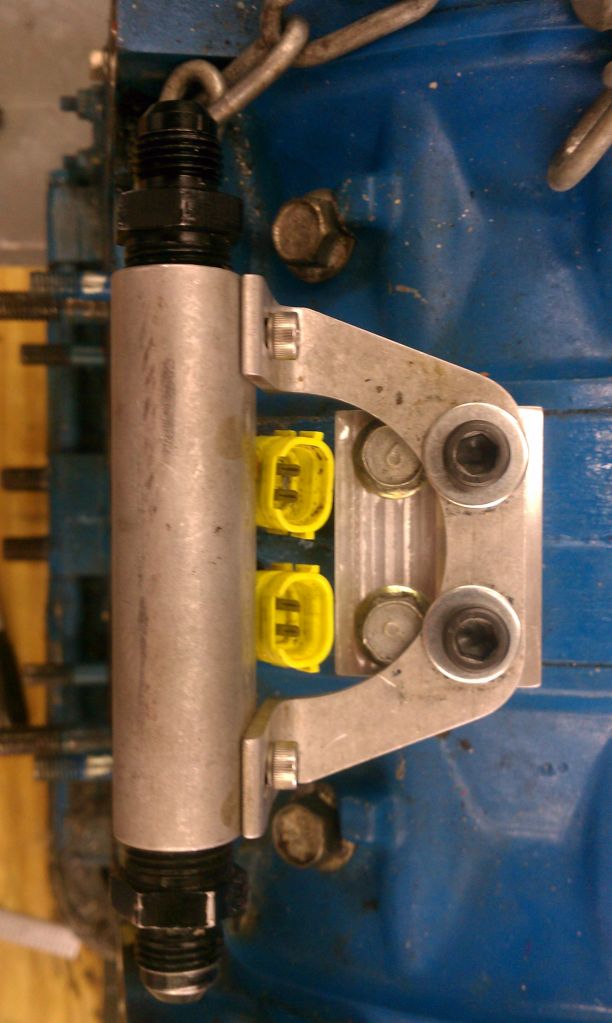
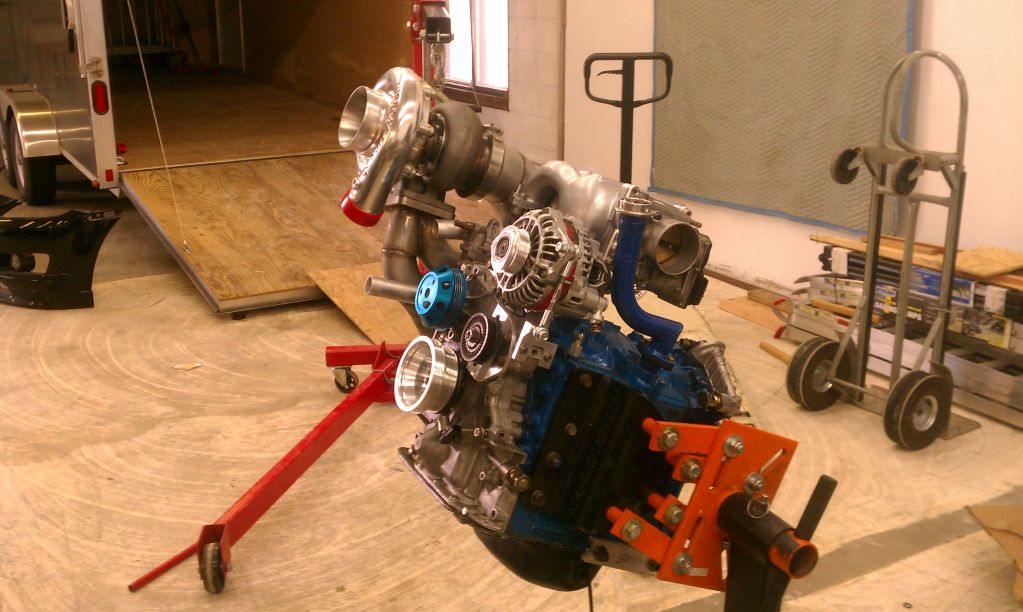
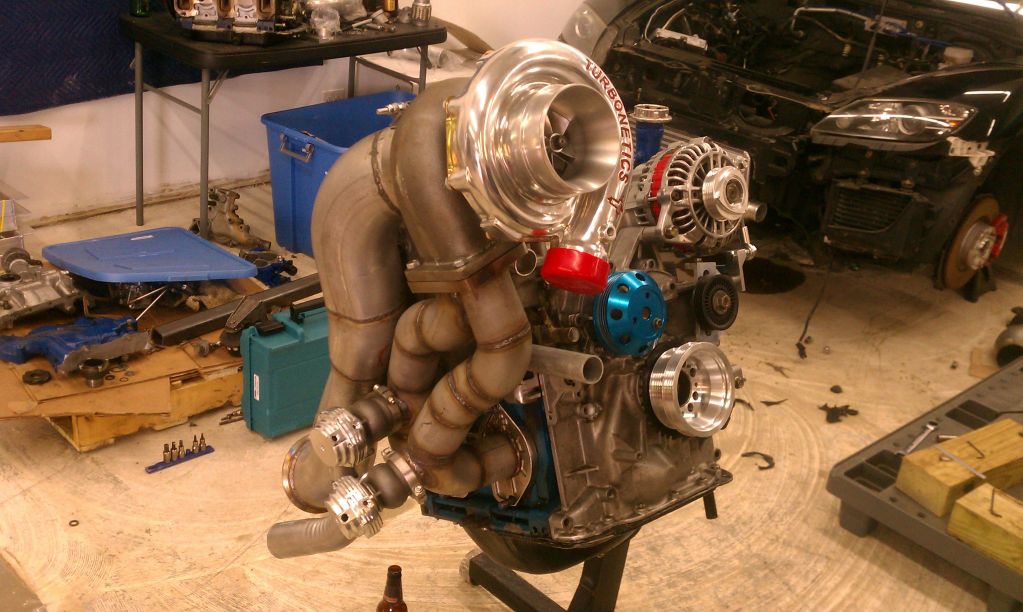
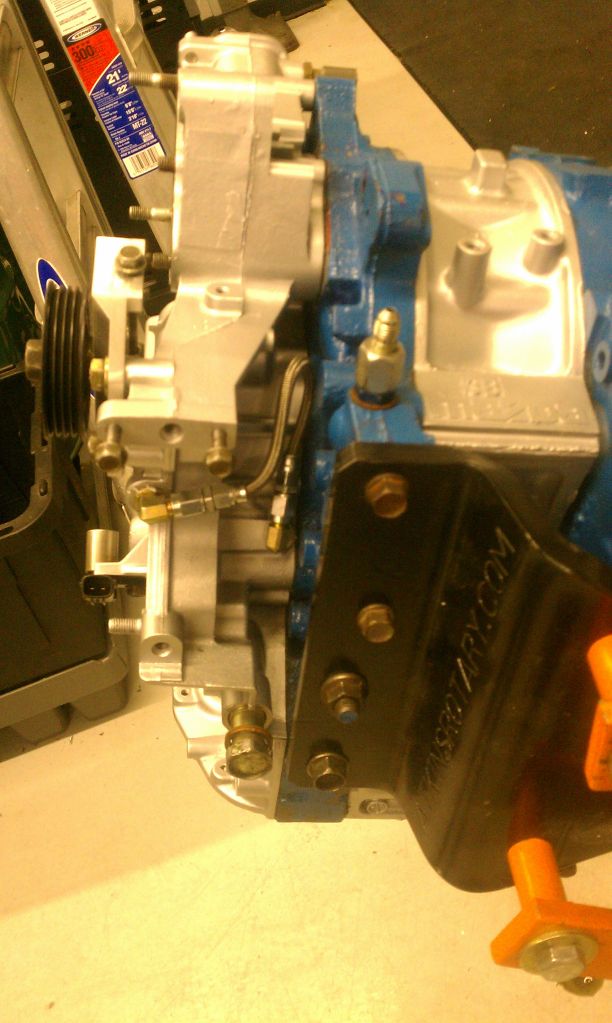
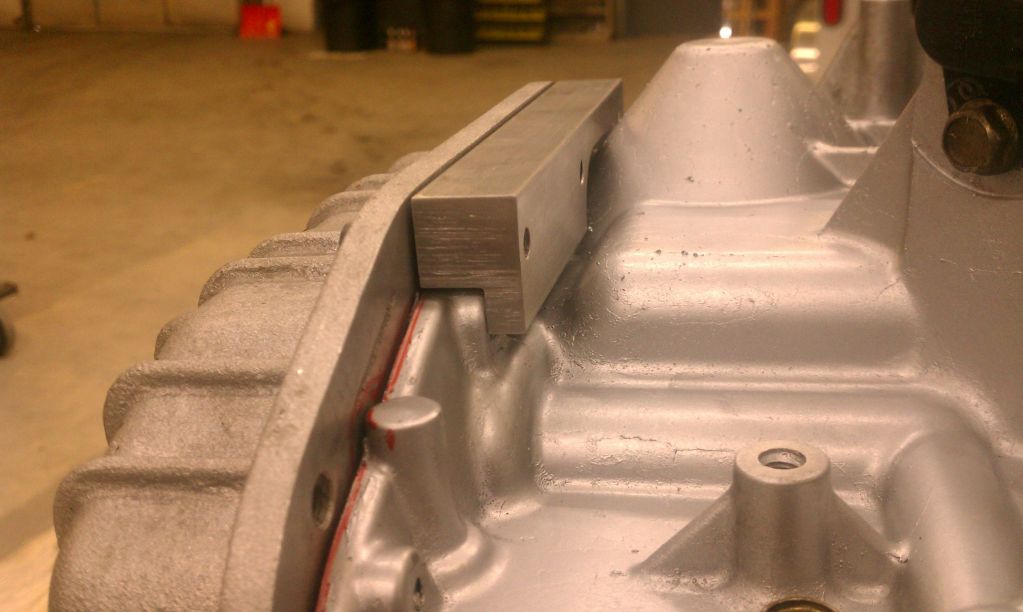
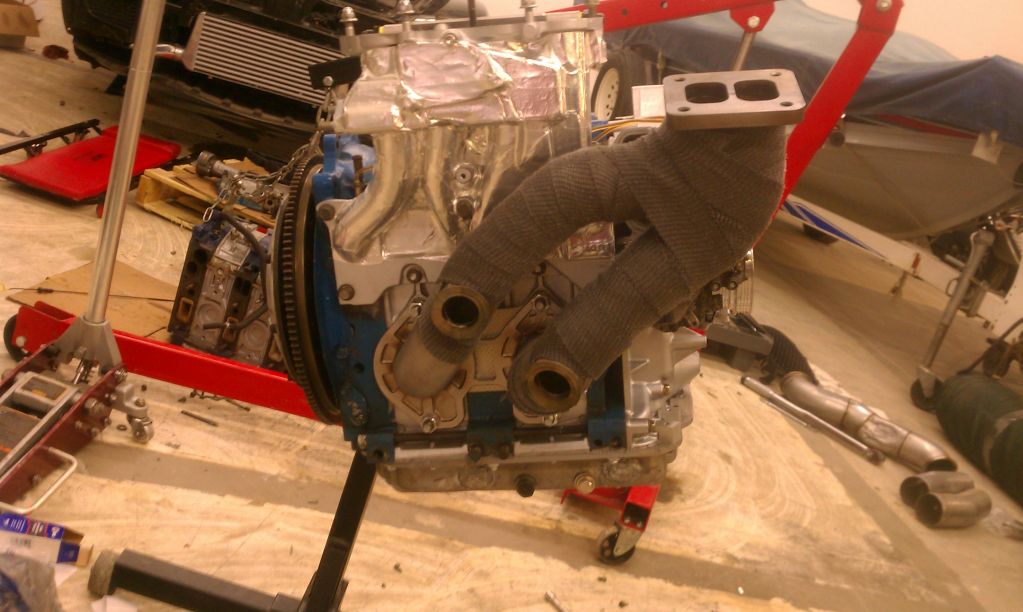
Today I got tons done...I made a bracket for the secondary fuel rail and an adapter to be able to use the RX-8 primary fuel rail on the BRE engine. I also installed the intercooler and started routing the piping. The engine then went on the stand in preparation to being rebuilt and I checked fitment of the front cover which needed a bit of adjusting after all the welding. I then threw everything back on the engine to check fitment one last time. Now I will open the engine to swap the exhaust sleeves and potentially throw a few dowel pins in there although I am undecided on whether I will do that. Enjoy the pics...
Cheers!
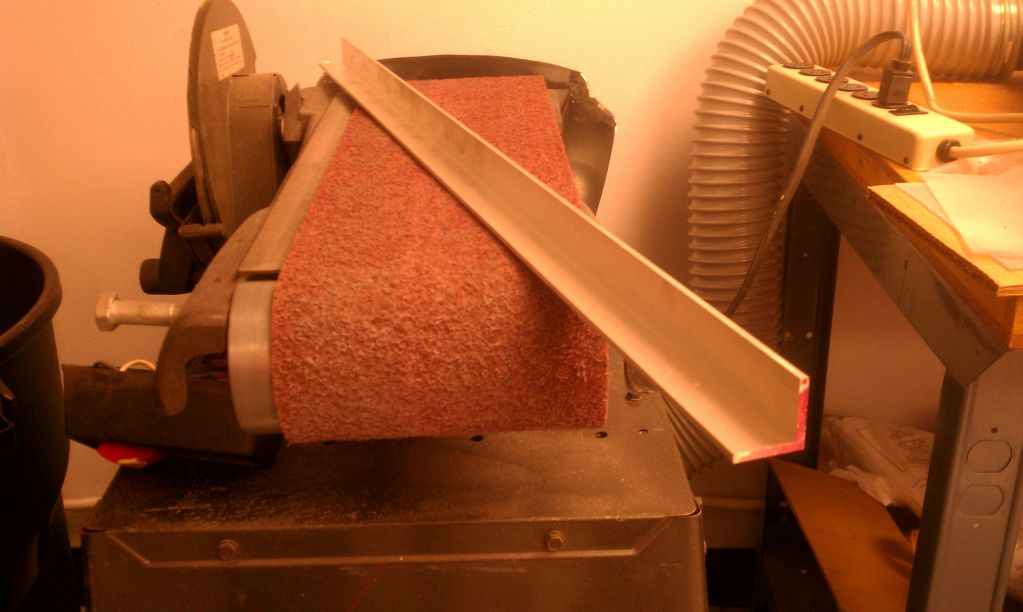
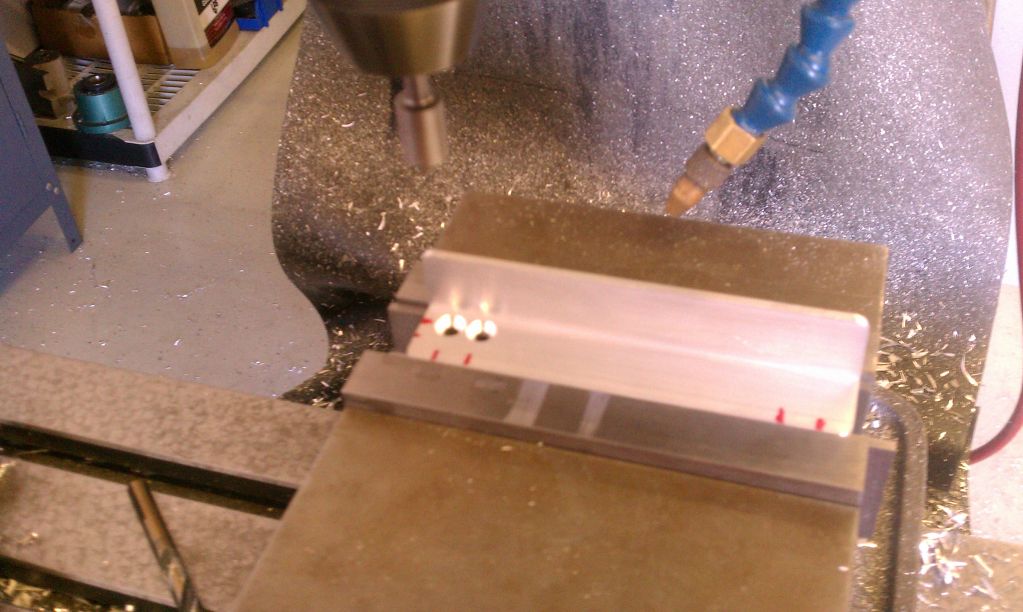
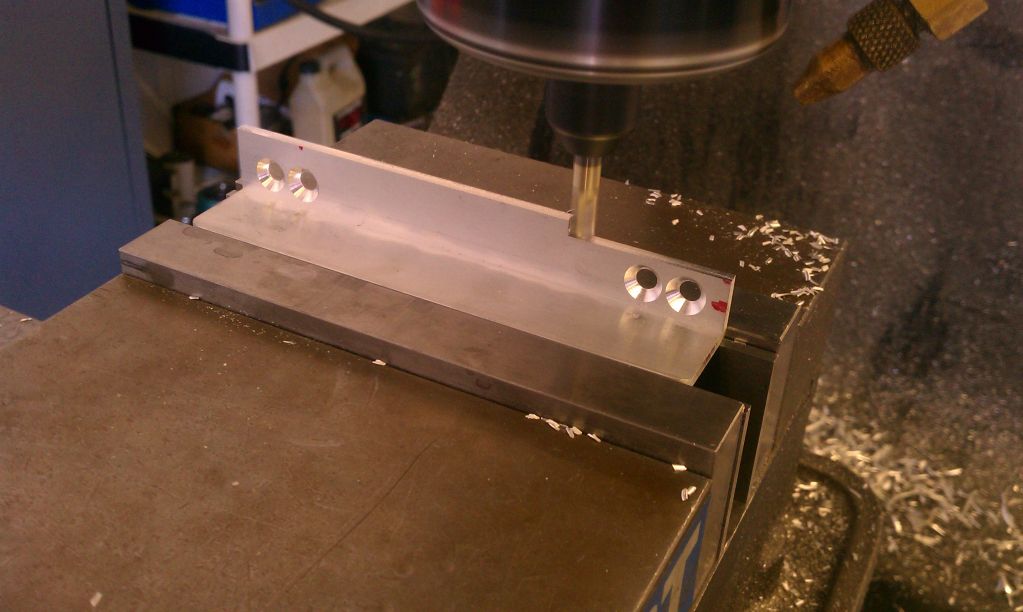
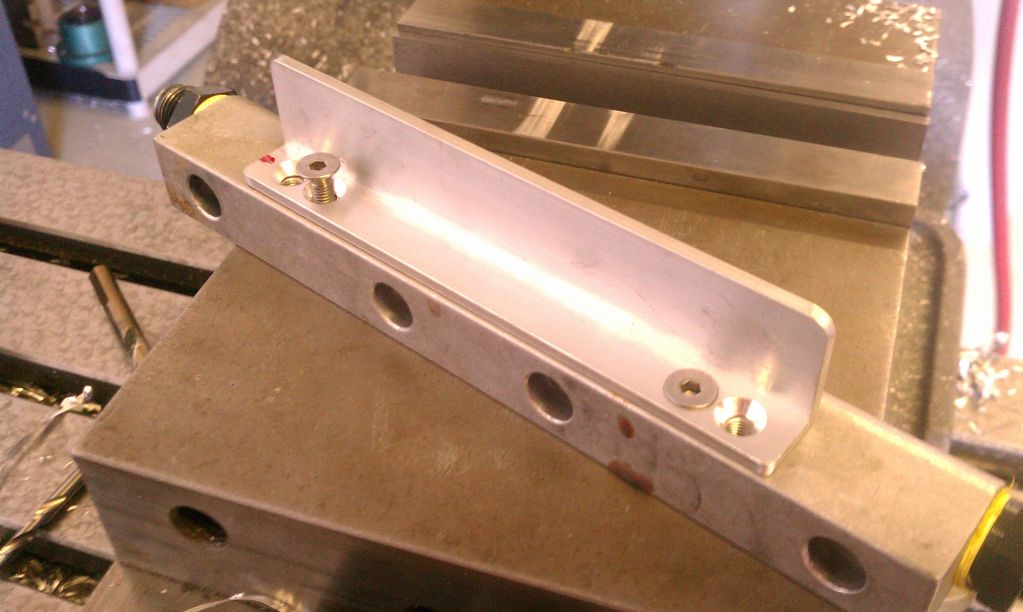
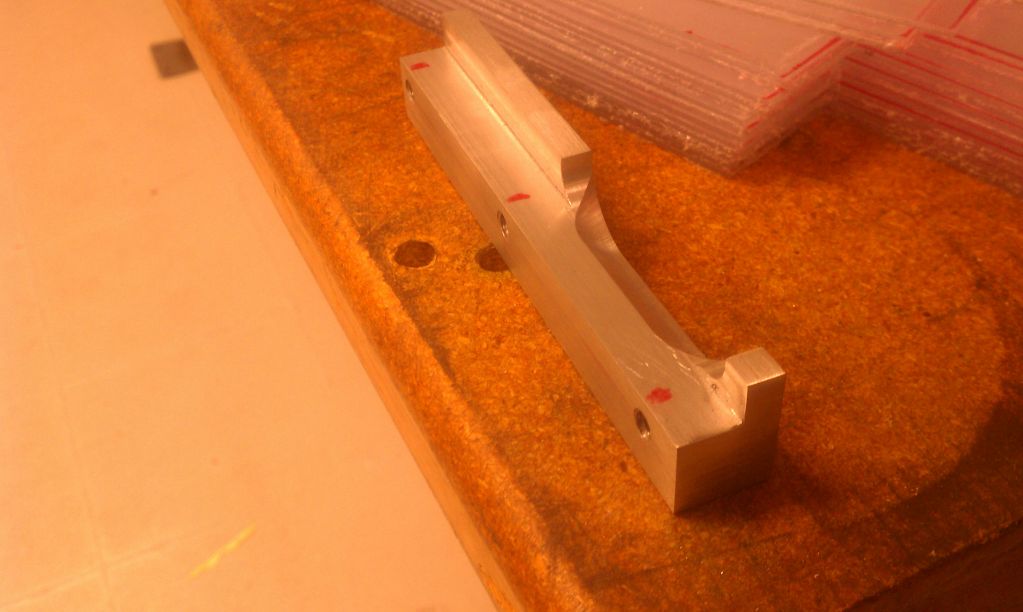
Starting with some angle aluminum...

Cheers!
Starting with some angle aluminum...
will you shield the LIM from heat at all? the DP is awfully close to it and will heat up your intake charge.
Im amazed at all the great work you do Chris, I wish I had the tools you have!
Im amazed at all the great work you do Chris, I wish I had the tools you have!
Junior Member
Joined: Jul 2011
Posts: 6
Likes: 0
From: Barcelona
Woha, great. My renesis is compression ko in the second rotor and goes through my mind to make a swap ... of course no longer seems so easy.
I remember having read in a while SpainRX8 Club.
Regards Chris and Gonza.
Greetings from Barcelona.
PD:Mi english es terrible,lo se.
I remember having read in a while SpainRX8 Club.
Regards Chris and Gonza.
Greetings from Barcelona.
PD:Mi english es terrible,lo se.
Nothing to see here.
Joined: May 2001
Posts: 1,255
Likes: 1
From: Jacksonville, FL
Great read. Thanks for taking the time. Only thing I noticed throughout the build so far were those scary, fragile OMP lines. They might have actually broken while I was looking at them  and I didn't see them on your to-do list. Here's the route I went years ago:
https://www.rx7club.com/showthread.p...&highlight=omp
and I didn't see them on your to-do list. Here's the route I went years ago:https://www.rx7club.com/showthread.p...&highlight=omp
Thread Starter
Rotary Enthusiast
Joined: Oct 2007
Posts: 799
Likes: 3
From: Plymouth, MN
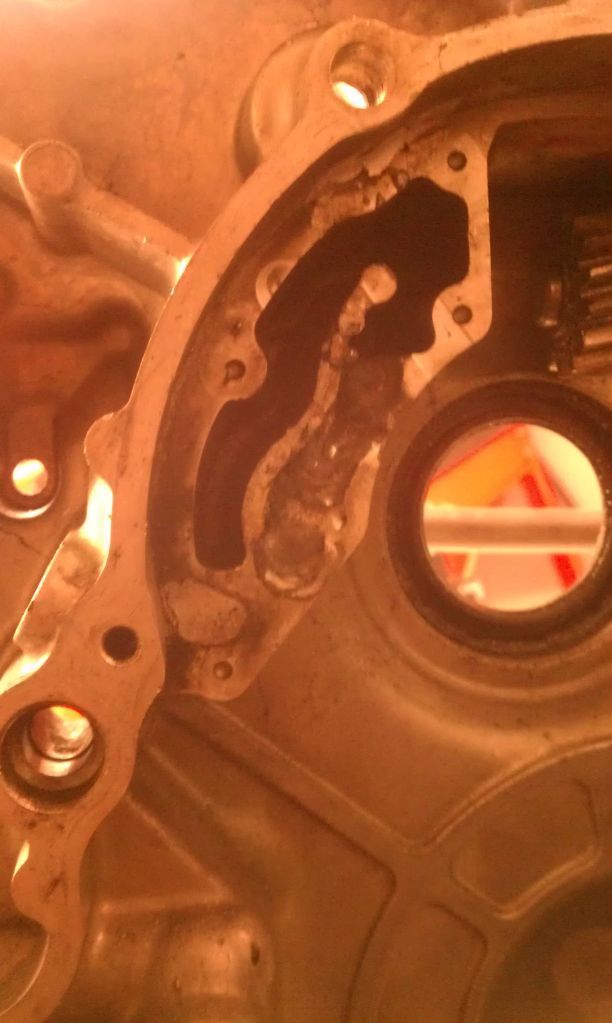
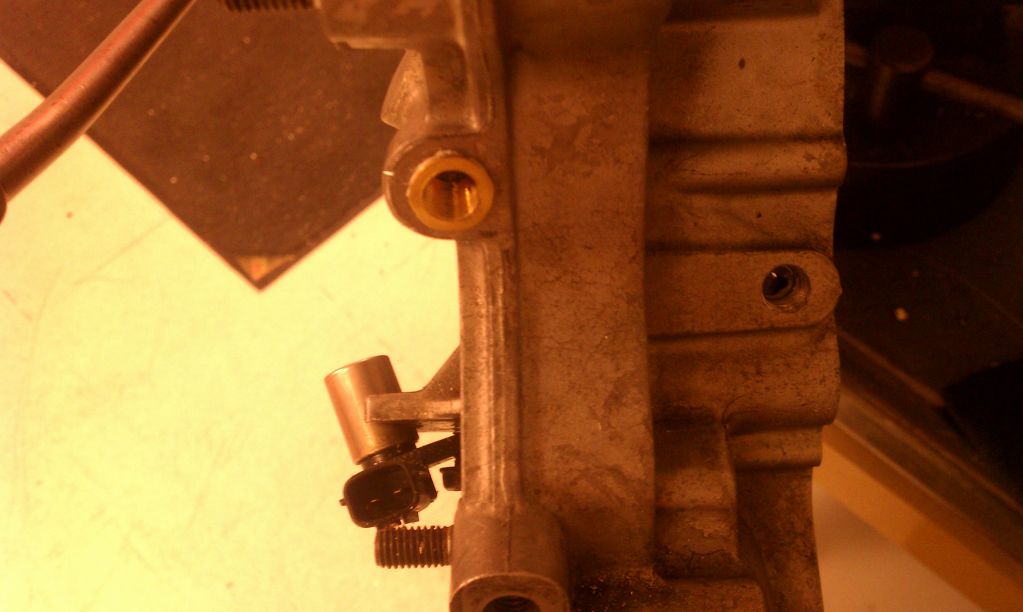
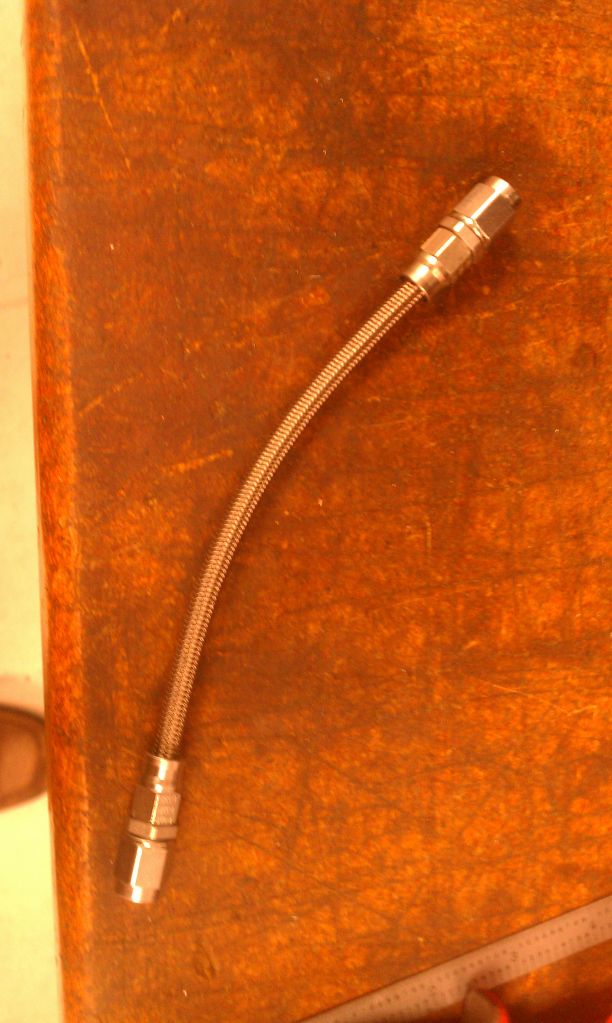
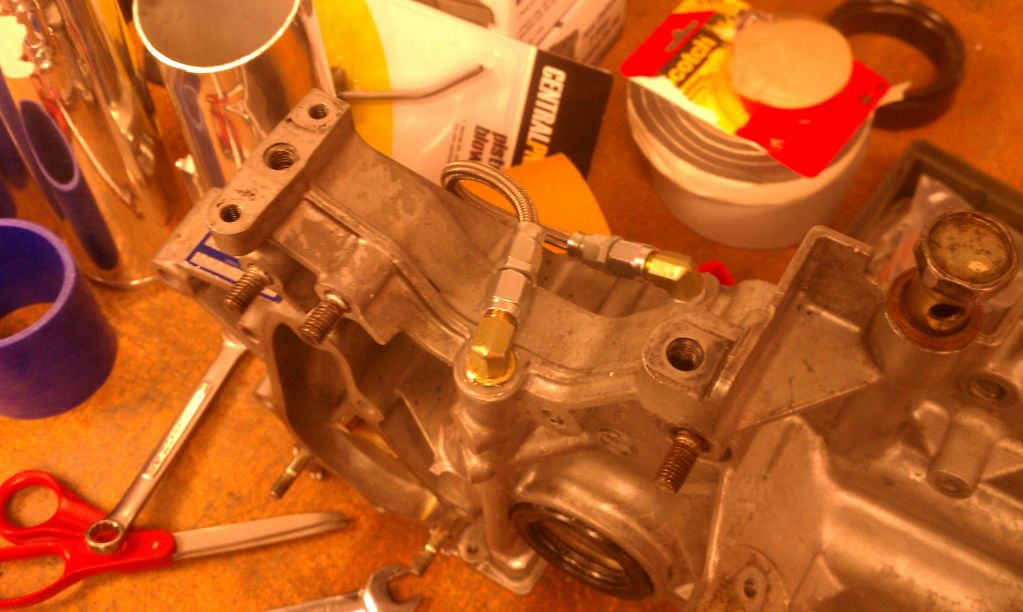
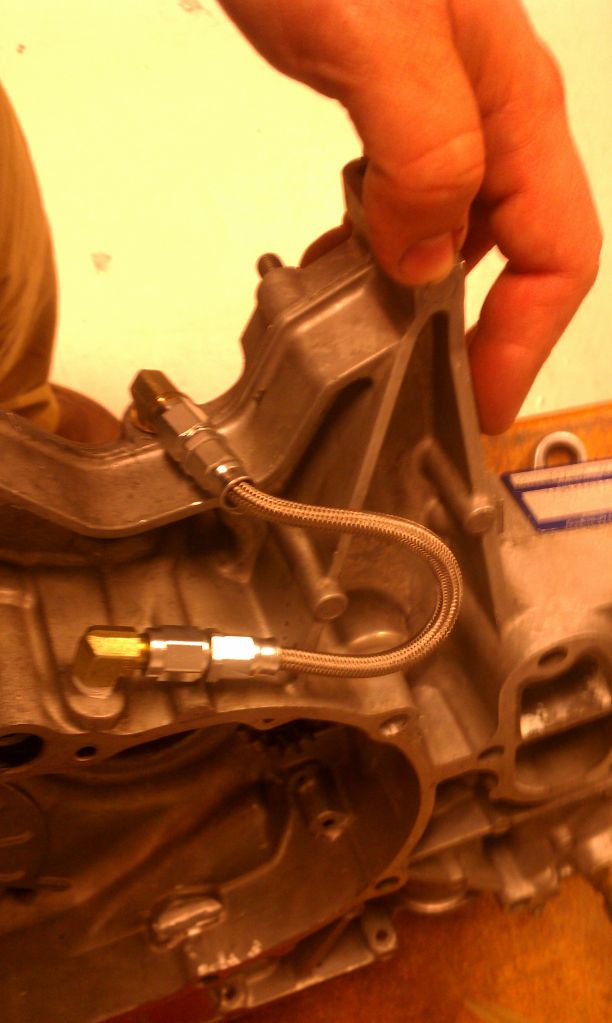
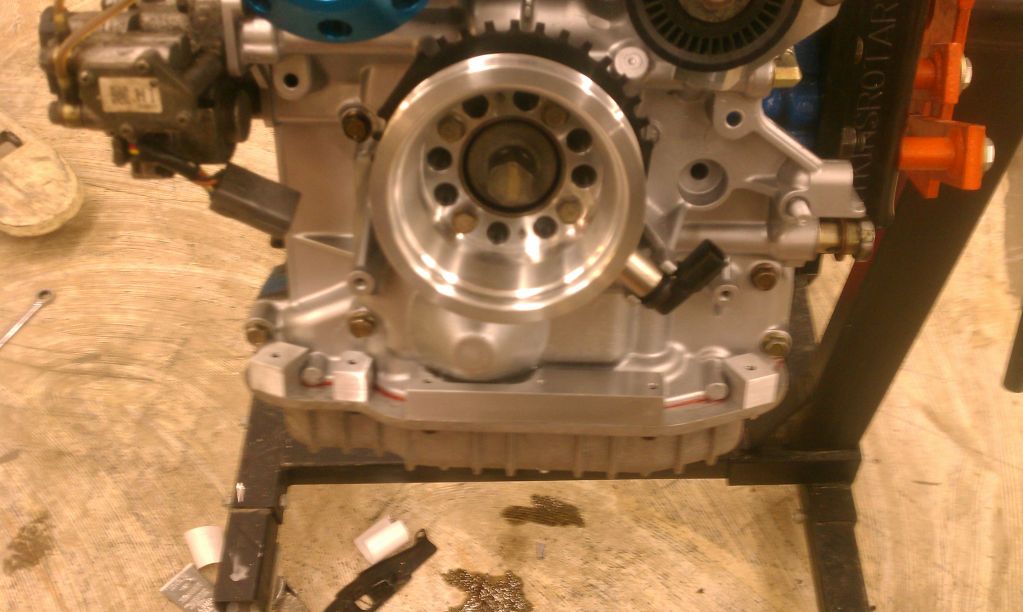
Small Update...after taking the engine apart and realizing that I would need to order a corner seal because one of them was cracked I decided to work on the front cover oil line. Because I machined the "galley" area to make clearance for the counterweight the oil that normally traveled through there could not do so any more. I welded the two ports shut and proceeded to route an external oil line to feeg oil to that small port that squirts at the counterweight/front bearing area. The catch is that it can't stick out too much or it will hit the A/C compressor... (this is a trick I actually learned from Galdi in PR) Now I just need to loop a line from one connector to the other...
Cheers!
Cheers!
Thread Starter
Rotary Enthusiast
Joined: Oct 2007
Posts: 799
Likes: 3
From: Plymouth, MN
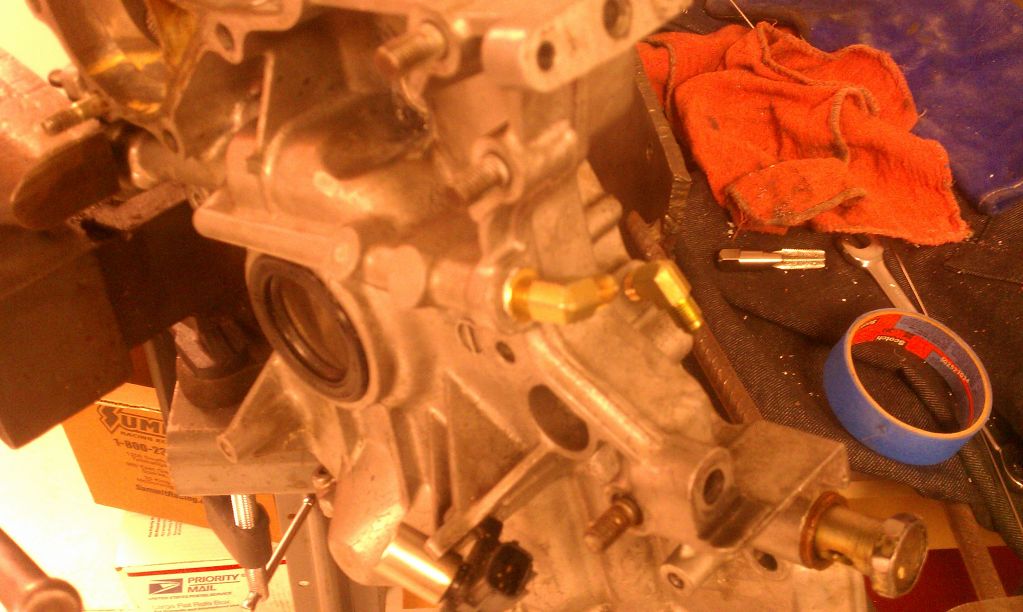
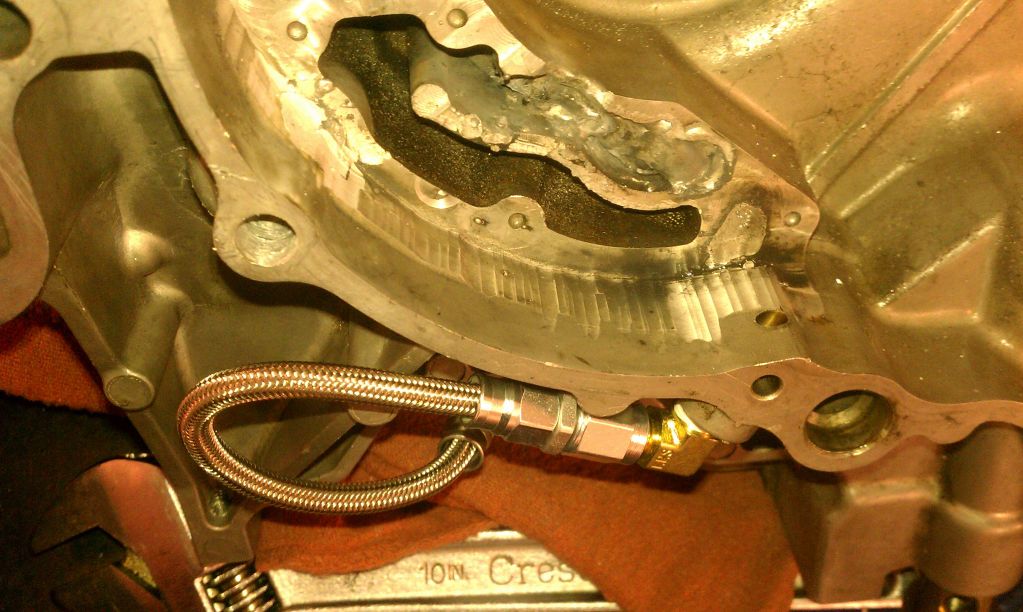
Today I finished the oil line for the front plate and got it all hooked up. Tomorrow I will get a new corner seal to replace the one that was cracked so I can put the engine back together. I'm shooting for an engine start ETA of mid to late next week...
Cheers!
Cheers!
Thread Starter
Rotary Enthusiast
Joined: Oct 2007
Posts: 799
Likes: 3
From: Plymouth, MN
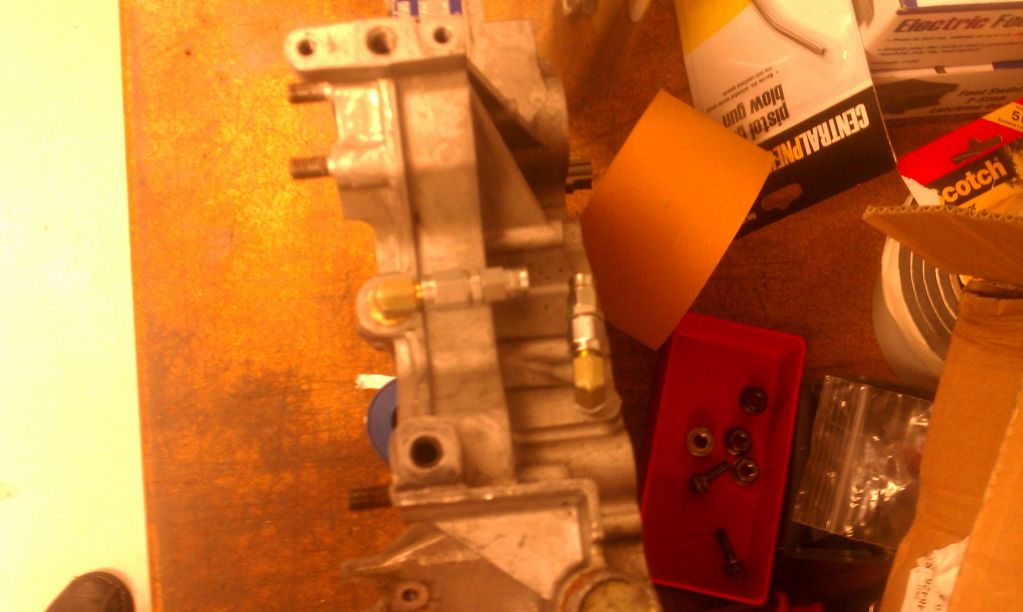
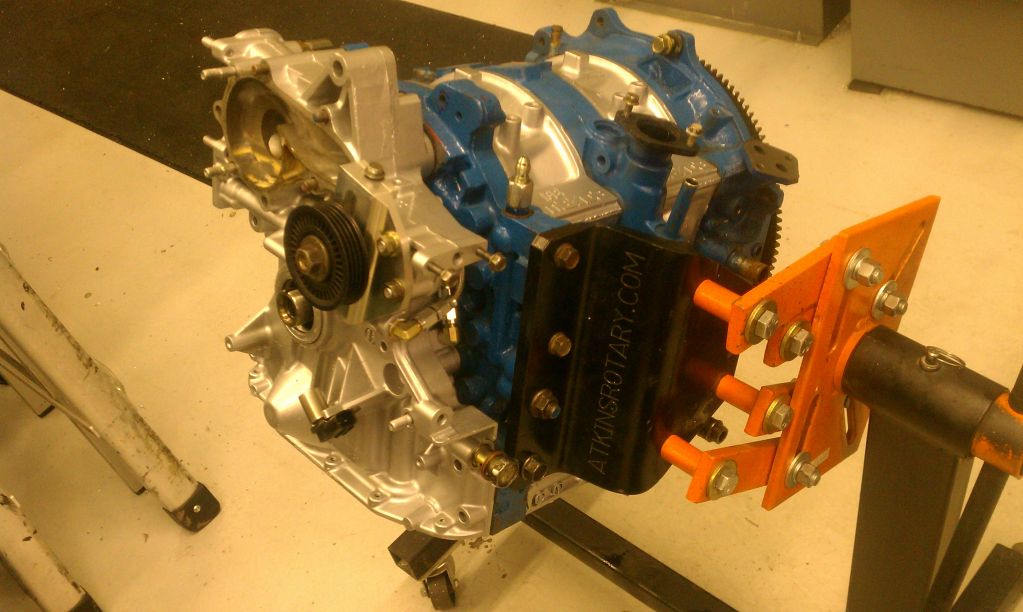
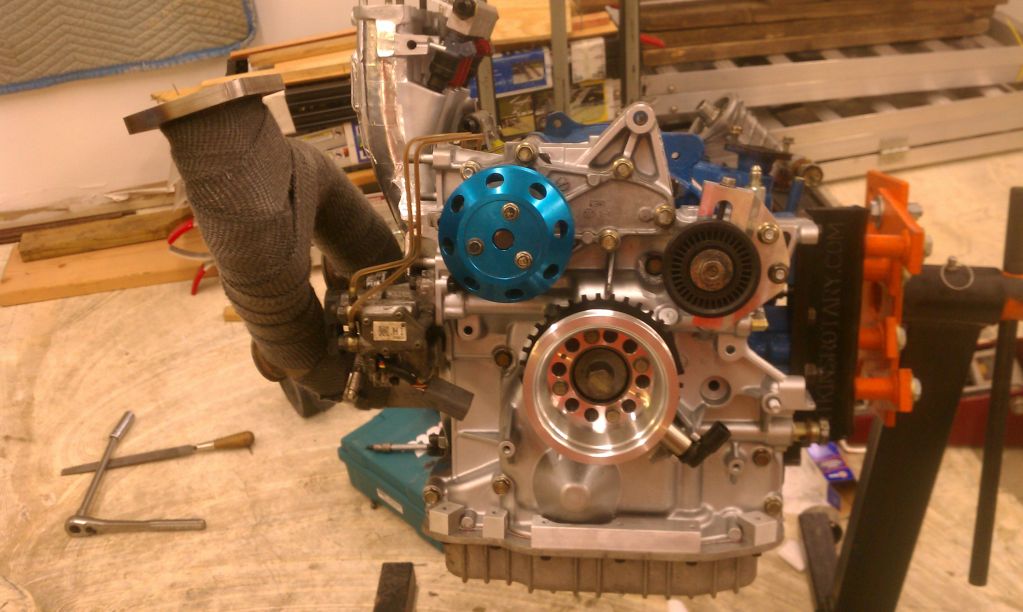
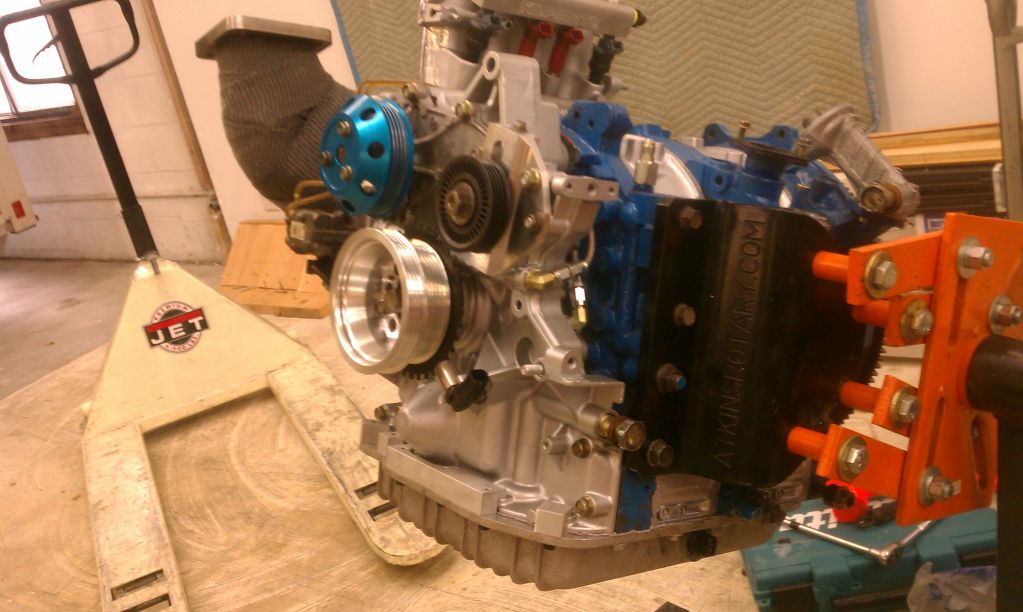
My missing corner seal finally came in and I put the engine together. I then started assembling everything onto it...front cover fit with new oil line perfectly...
The list of To Do's is slowly disappearing and turning into a "to get" list of final things I need before I can start the car (ie. Oil, belts...etc)
Cheers!
The list of To Do's is slowly disappearing and turning into a "to get" list of final things I need before I can start the car (ie. Oil, belts...etc)
Cheers!
Thread Starter
Rotary Enthusiast
Joined: Oct 2007
Posts: 799
Likes: 3
From: Plymouth, MN
Updated list of To Do's and new list of To Get's 
To Do’s
Machine front cover (counterweight/alternator) - DONE
Machine Alternator Spacer to push fwd - DONE
Weld front cover - DONE
Front cover oil line - DONE
Machine front pulley spacer - DONE
Driver engine mount finish - STARTED
Pass engine mount finish - DONE
Finish LIM (cut, weld, holes etc) - DONE
Drill UIM bolt hole - DONE
Make Throttle body adapter-DONE!
Oil filter Pedestal (Used Modified RX-8 one) - DONE
Modify Water Pump Outlet - STARTED
Modify Oil pan
Make Alternator Pulley - DONE
Make Custom water pump Tensioner plate - DONE
Make Alternator Tension Arm - DONE
Relocate OEM ECU to Firewall
Install Wastegates - DONE
Make Downpipe - DONE
Make Wastegate dump - DONE
Fuel rail mod - DONE
Make/Modify Fuel lines - DONE (NOT NEEDED)
Make Turbo Oil lines - STARTED
Make Radiator cover plate
Water reservoir
Make radiator lines
Intercooler mount - DONE
Cut/Tack Intercooler piping - STARTED
Weld Intercooler piping - STARTED
Weld BOV
Replace exhaust sleeves - DONE
Make Ignition Bracket
To Get’s
Nuts/Washers - Manifold
Rubber Plug - water nipple by oil filler neck
O-rings Injector to Manifold
O-rings Injector to fuel rail
Water Hose - Small
Water Hose - Medium
Oil
Anti-Freeze
Alternator-A/C Belt
Water Pump Belt
Thread Starter
Rotary Enthusiast
Joined: Oct 2007
Posts: 799
Likes: 3
From: Plymouth, MN
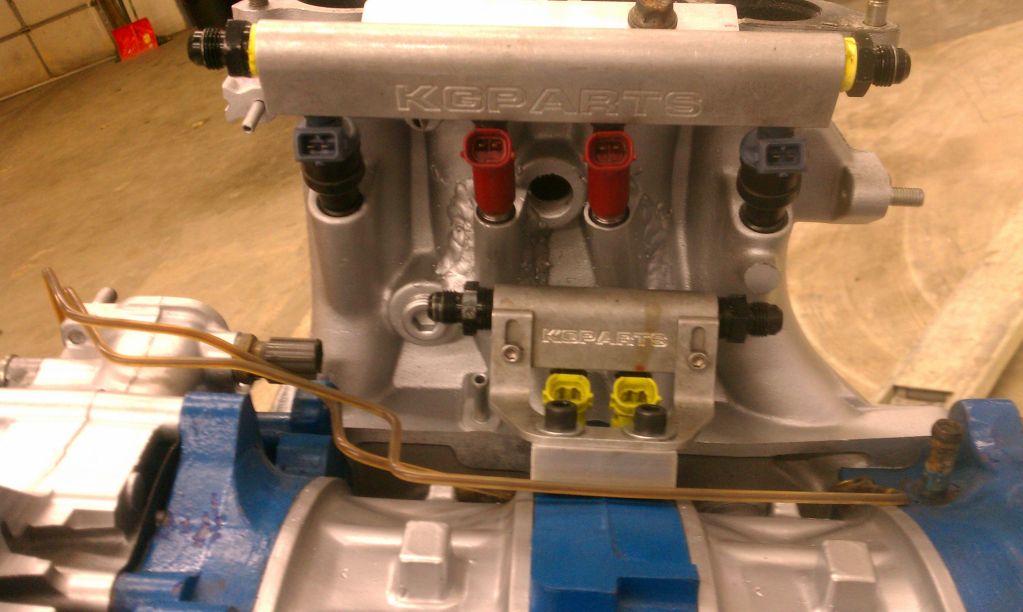
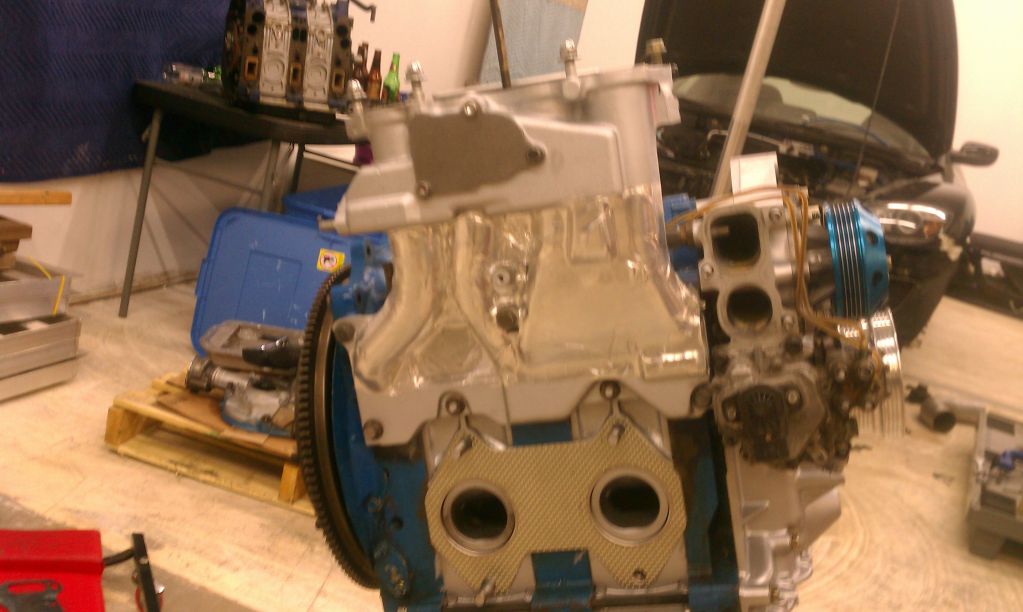
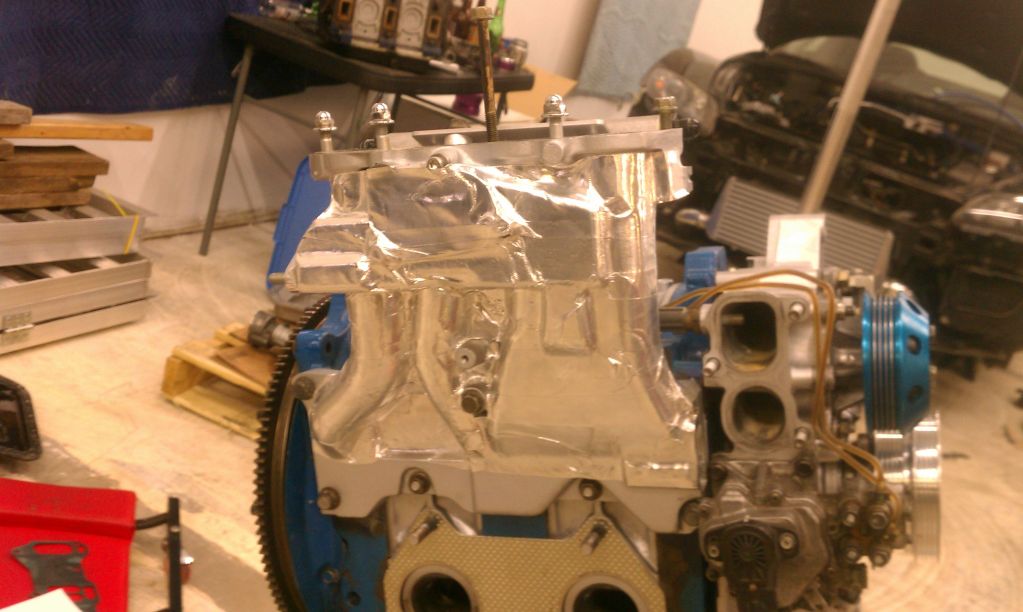
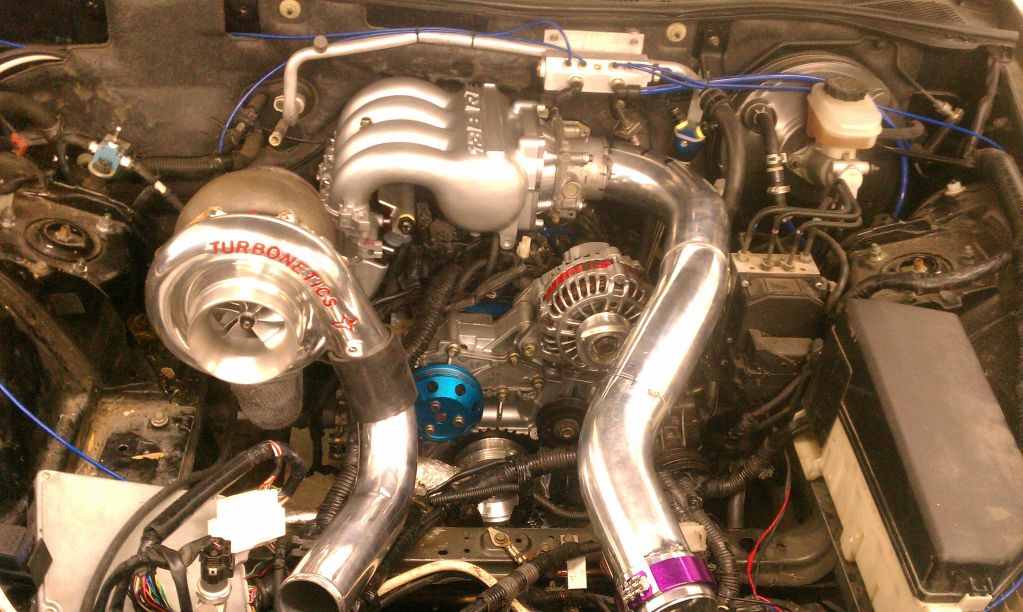
Today I got the injector install worked out and applied the heat shielding to the LIM.
I also finished working on the oil pan. Just as I expected, because the engine is shorter due to the different front cover, the RX-8 oil pan had the right shape but the front stuck out. A quick mock up allowed me to see that the Greddy oil pan has enough sealing area to still work properly so I proceeded to make some aluminum clamps that would essentially sandwich the engine to the oil pan. They came out great and they do their job beautifully, providing a full seal all the way around.
Cheers!
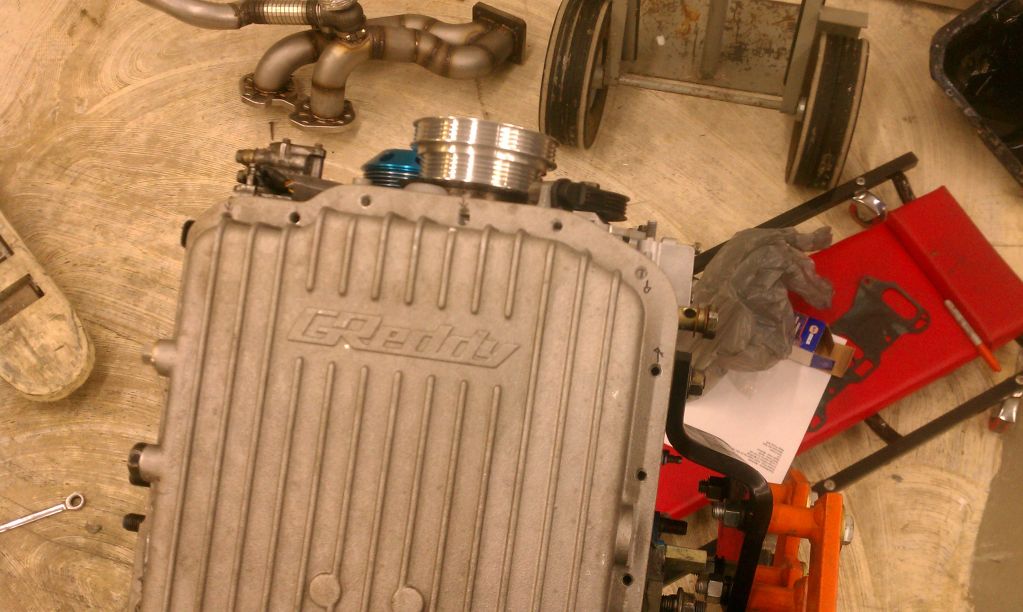
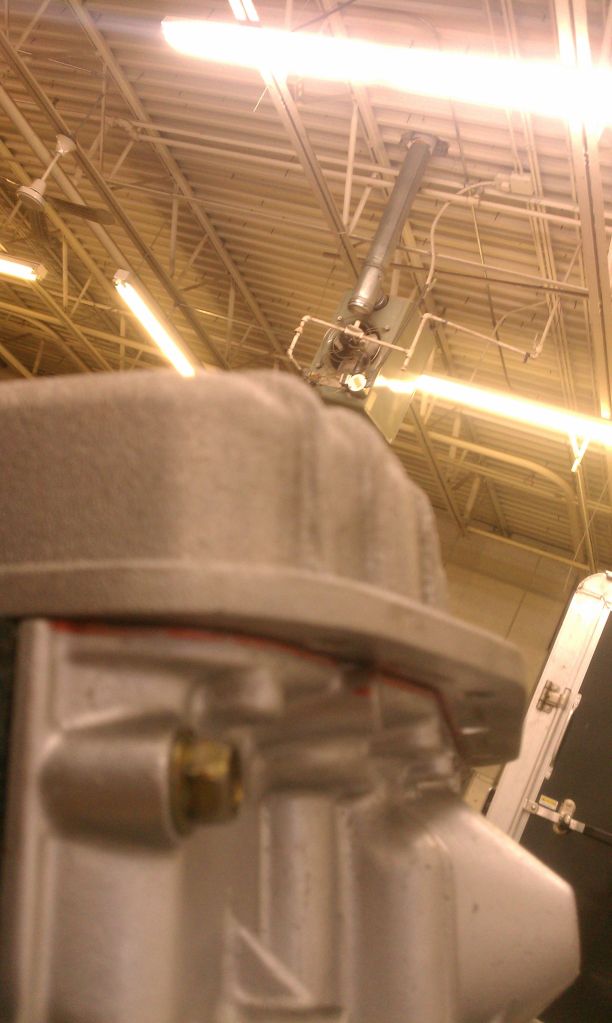
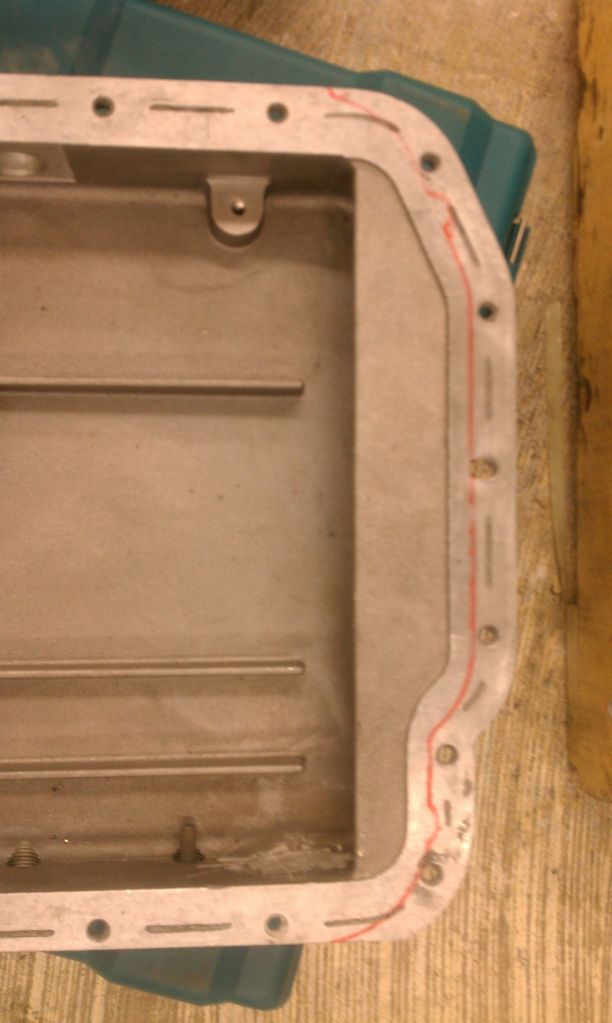
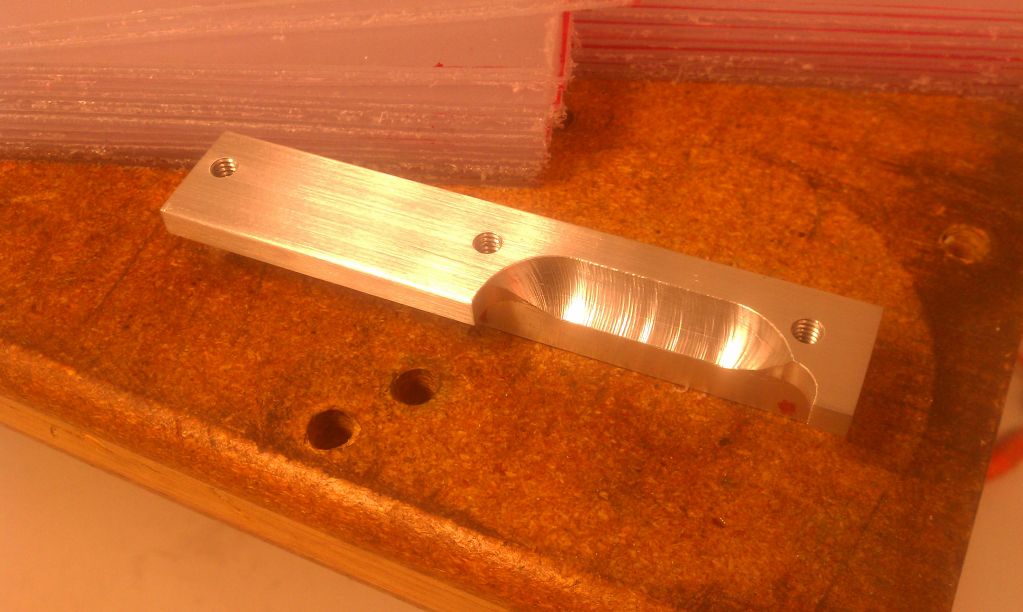


Senior Member
Joined: Aug 2008
Posts: 493
Likes: 0
From: Belgium (2800)
I disagree to that, its a fine build but not the best. Sorry Chris its fine, but the build of John Huijben is better.
Thread Starter
Rotary Enthusiast
Joined: Oct 2007
Posts: 799
Likes: 3
From: Plymouth, MN
Thread Starter
Rotary Enthusiast
Joined: Oct 2007
Posts: 799
Likes: 3
From: Plymouth, MN
I disagree to that, its a fine build but not the best. Sorry Chris its fine, but the build of John Huijben is better.

Chris
I disagree to that, its a fine build but not the best. Sorry Chris its fine, but the build of John Huijben is better.
Thread Starter
Rotary Enthusiast
Joined: Oct 2007
Posts: 799
Likes: 3
From: Plymouth, MN
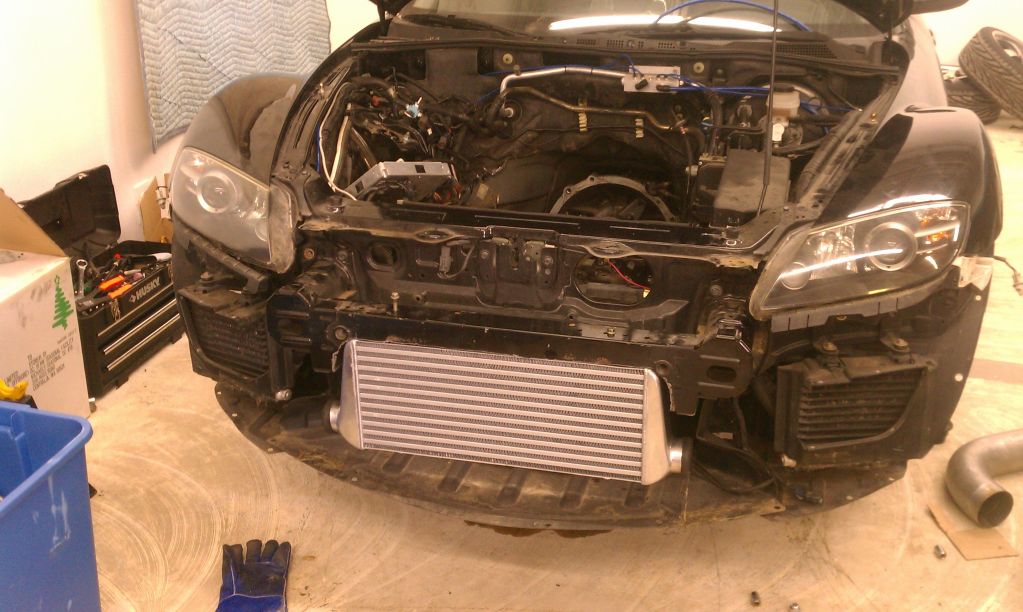
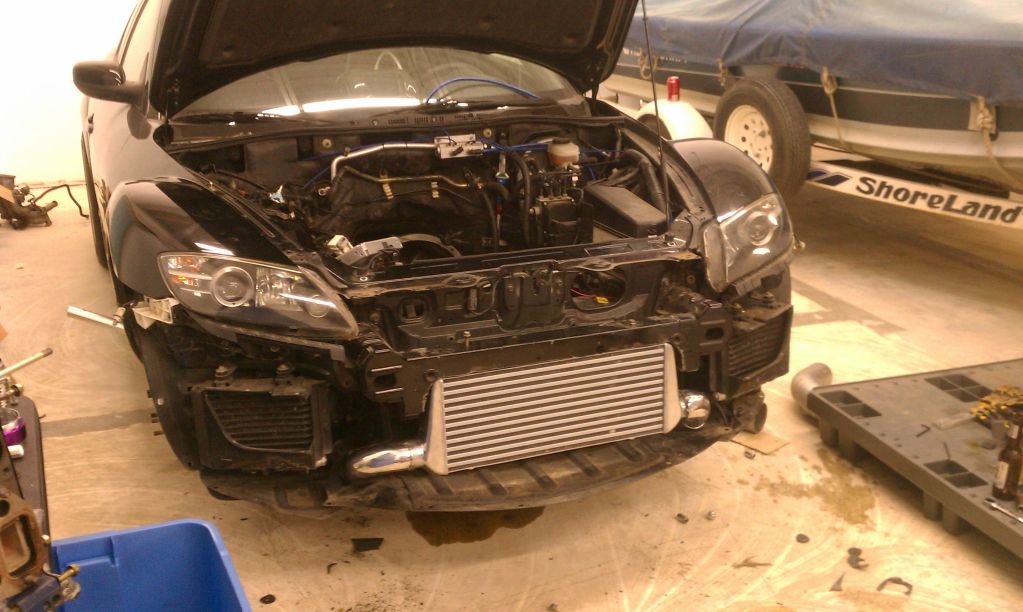
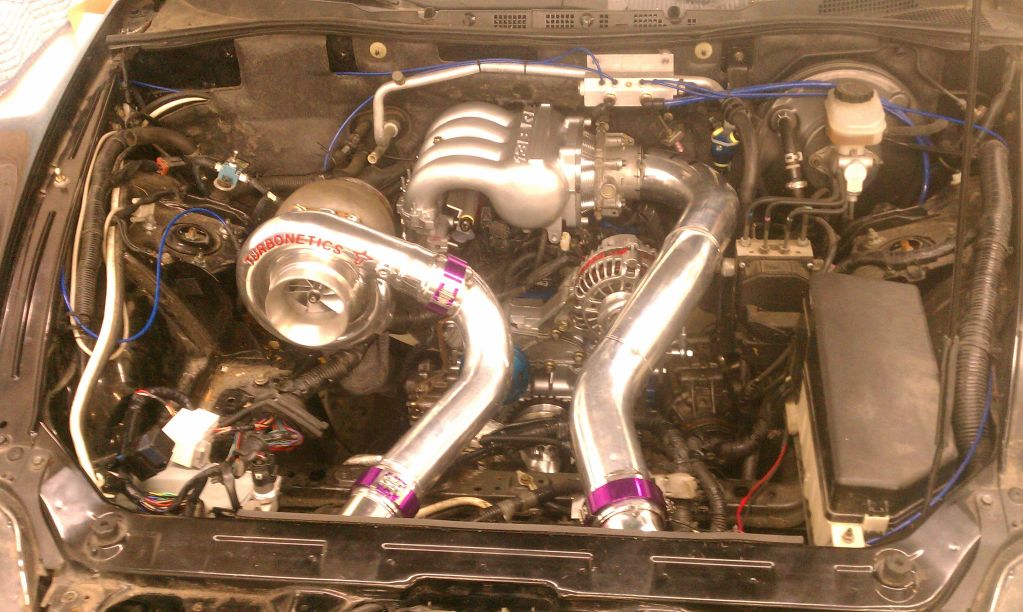
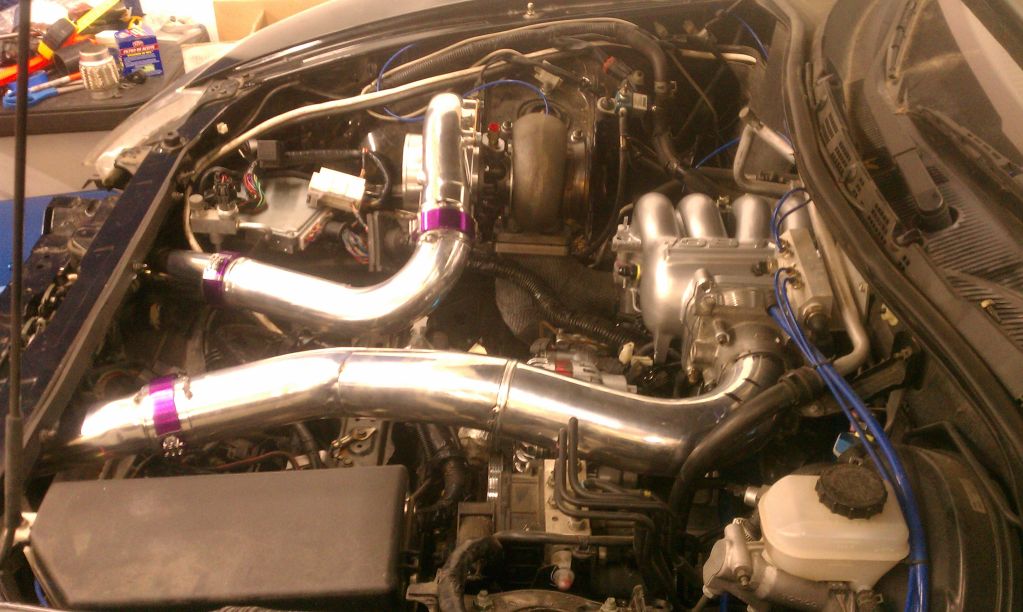
Today I worked some more on the intercooler piping. All that's left is to install the 3" Wiggins Clamp that goes on the throttle body area and the BOV, then I'll be ready to weld all the aluminum. In case you guys haven't noticed, I ended up changing the intercooler to one with two exits on top which will help me keep the pipes relatively short and will also keep me from having to cut up my plastics in the radiator area.
Cheers!
Cheers!

Junior Member
Joined: Oct 2009
Posts: 23
Likes: 0
From: MN
I think he is used to hearing that pop sound from the engine bay under high boost. This way it not only looks nice, but will hold together under high boost.
Thread Starter
Rotary Enthusiast
Joined: Oct 2007
Posts: 799
Likes: 3
From: Plymouth, MN
They also look pretty

Chris