
I Bit Off More Than I Can Chew: A Drift Car


Thread Starter
Senior Member
Joined: Mar 2015
Posts: 335
Likes: 8
From: Vancouver, BC
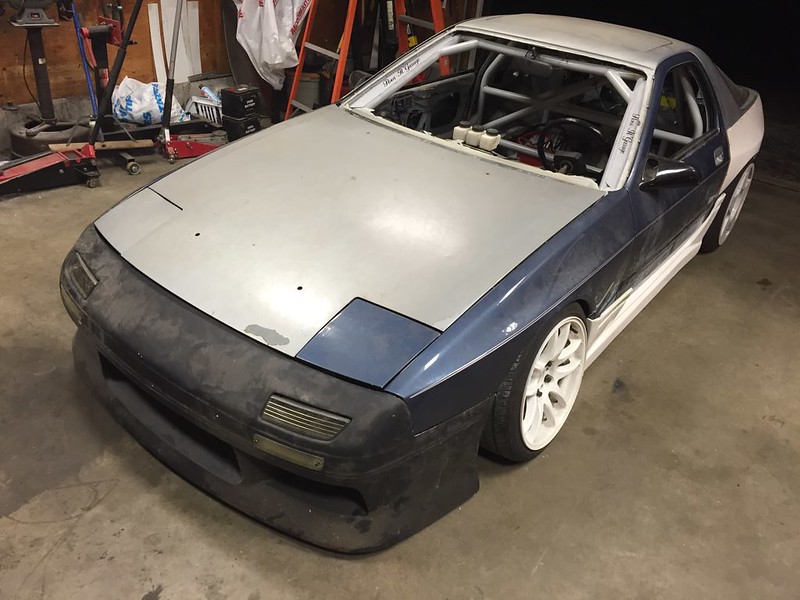
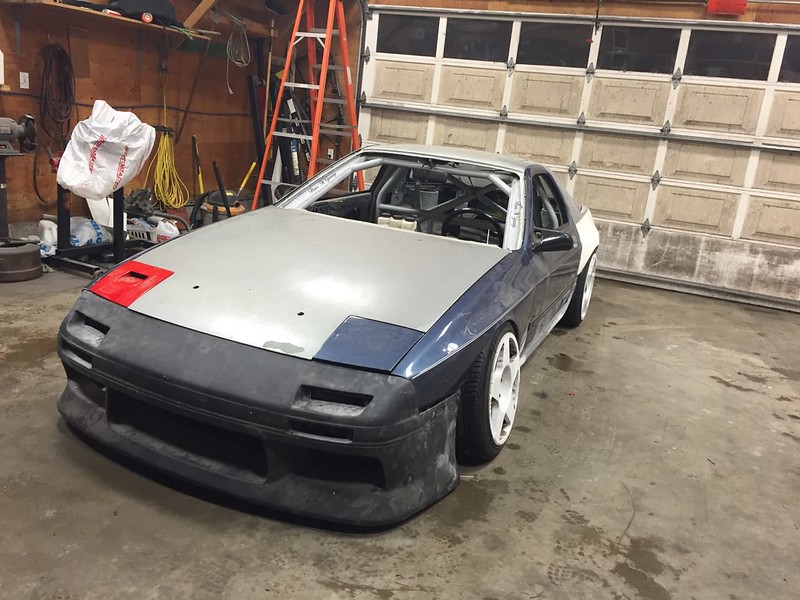
I feel like I start every update with an apology for it being so far apart. I�ve outdone myself this time as its been almost 6 months haha. I�ve been kinda selfishly working on my car instead of taking the time to write an update. But i�ve been taking photos still, at least when my phone lets me. The battery was failing and it was shutting off randomly but got it fixed. I�m busy as ever these days, getting engaged in October didn�t help.. but I�m in the process of getting a garage space thats 5 minutes from my house and that I can leave the car in, no more roll in/roll out so that should speed up the progress.
where we left off:
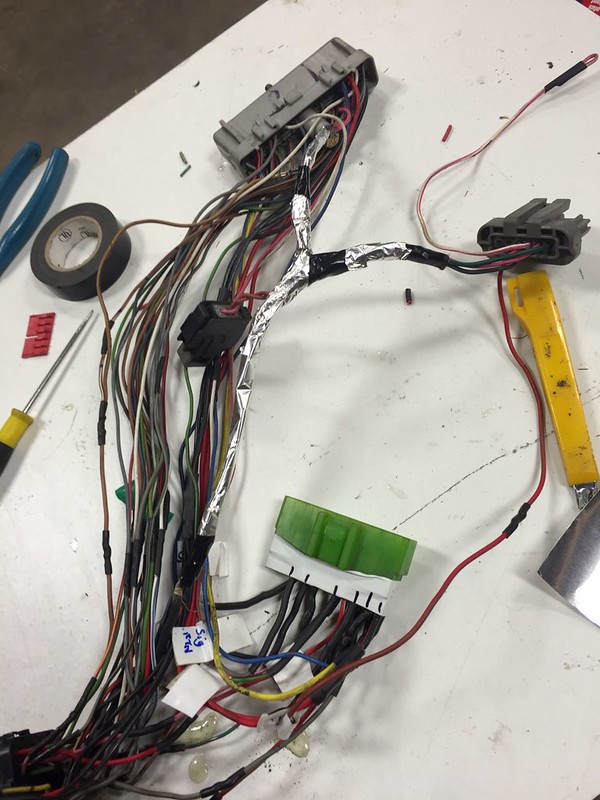
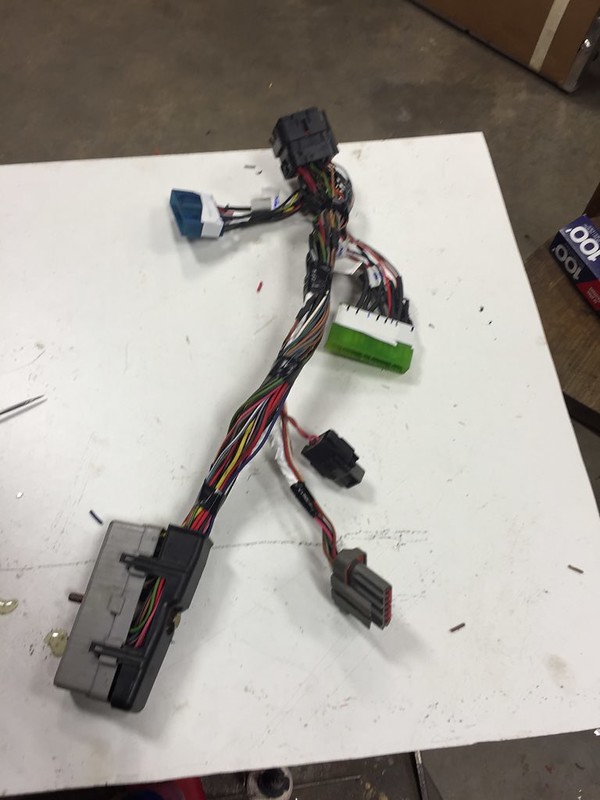
getting the car running in the time span I did meant I had a few things that weren�t ideal. Took some tinfoil (lol thats what it looked like Ford did anyway, work with what ya got) and joined the 2 bits of shield and cleaned up the wiring a little on my ecu patch harness.
I have a debate with myself ongoing with how I do these harnesses, I know each connector is a possible point of failure but its so nice having modular pieces that are easy to remove and service/change. I also have been using a lot more crimps and 3in1 heat shrink this time around compared to last.

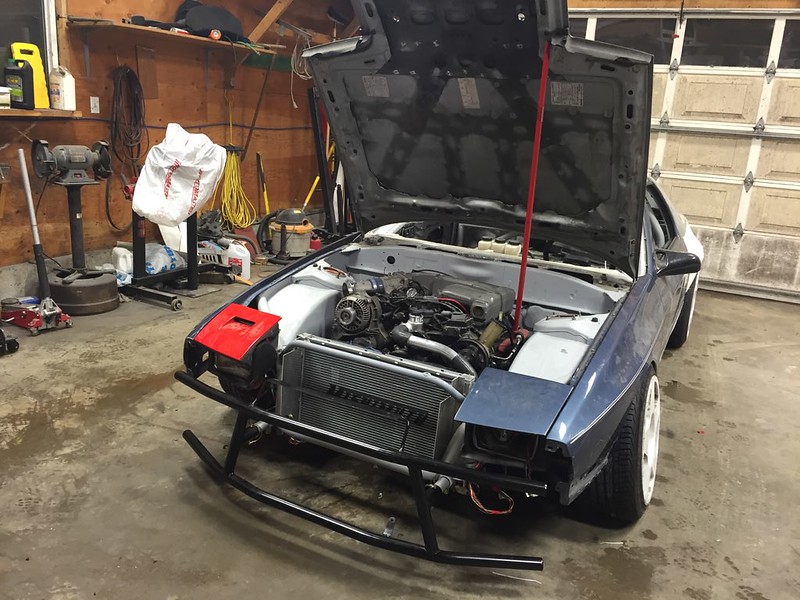
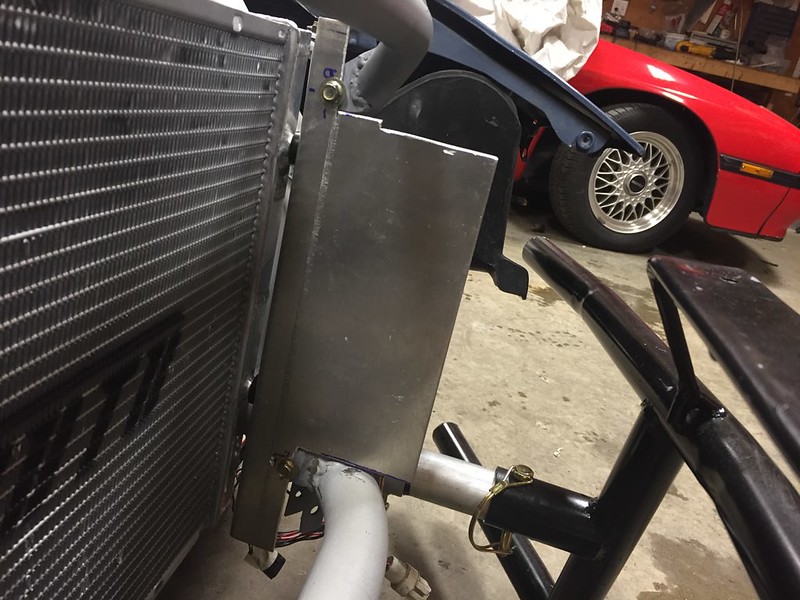
one of the problems I had with the last chassis that I never dealt with was how terrible it was to bleed (this is a 5.0 problem though and I�ll explain why) and how poorly connected the hoses were on a not very efficient old radiator. Remember the goal is hot lapping. The problem being that the water neck puts the hose straight up and on a mustang over the alt, making it the highest point and kinda an air trap in that section of hose. Last time I just made this work but the hose was slightly kinked and hood clearance sucked.
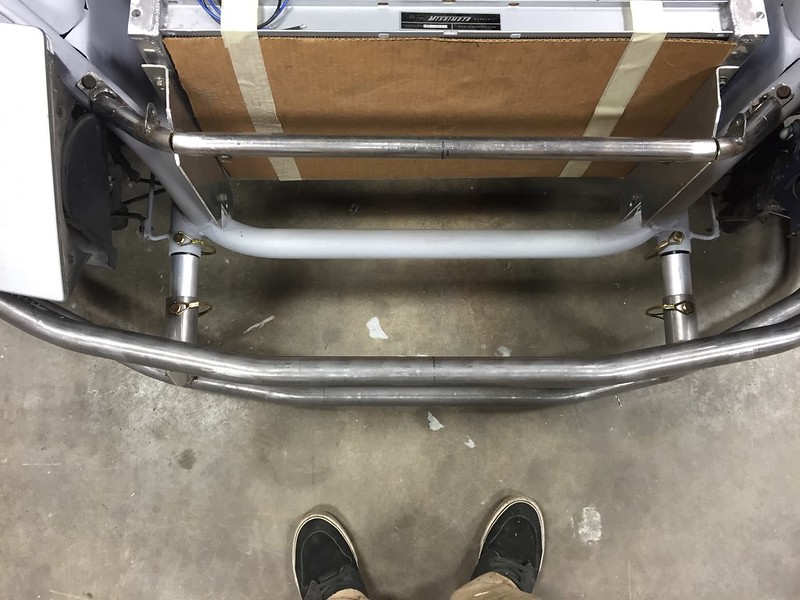
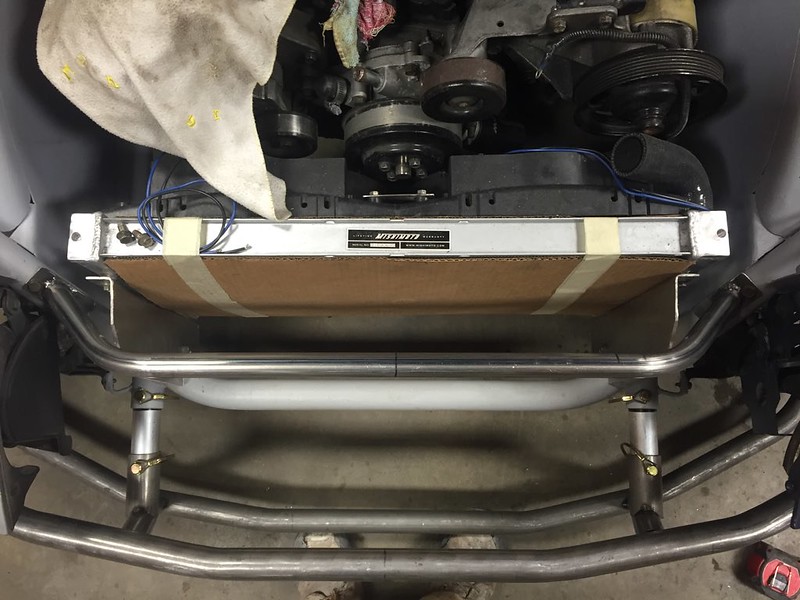
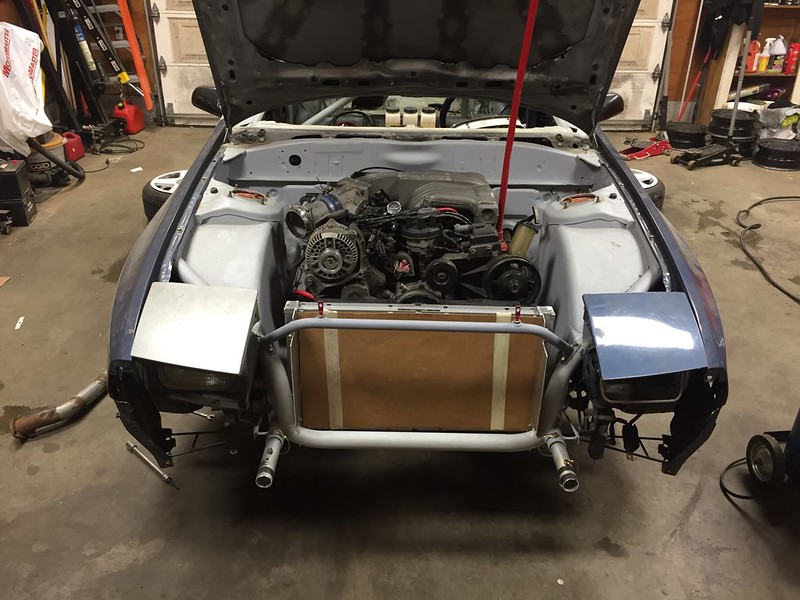
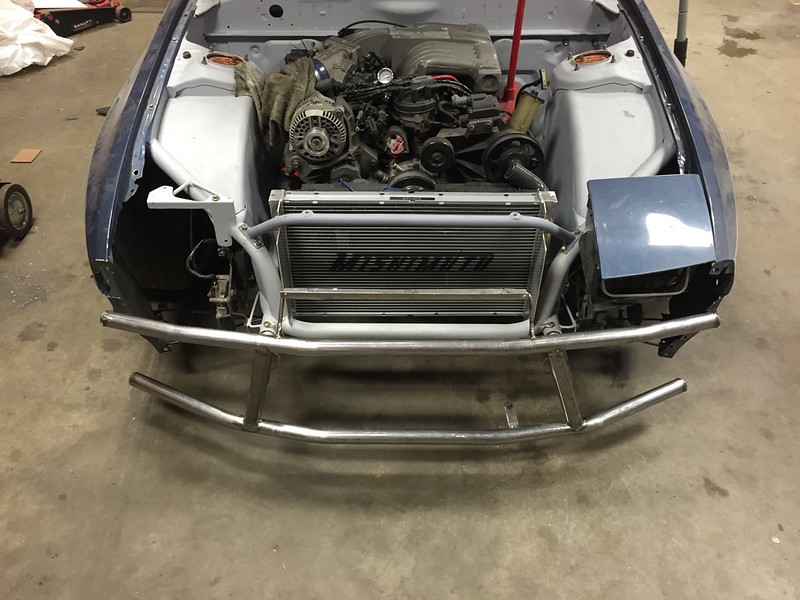
First things first, need to get the rad mounted so I can see how much room I have
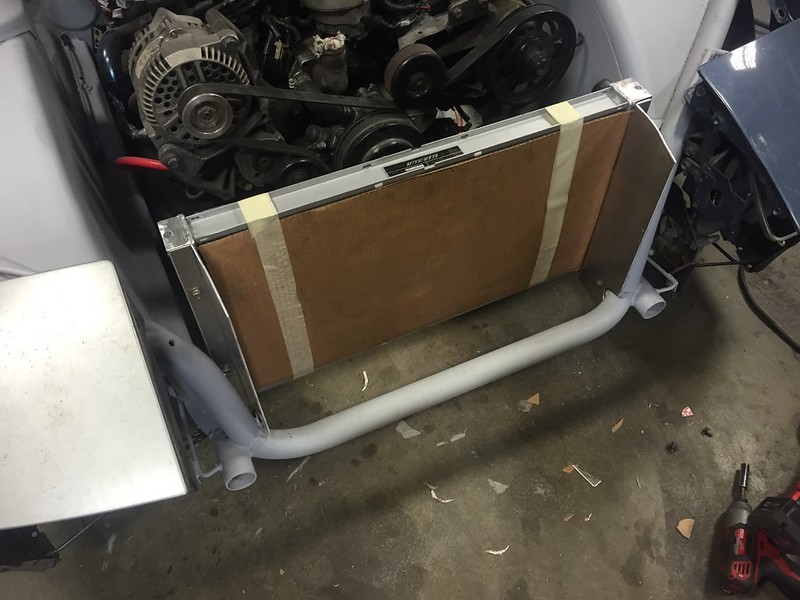
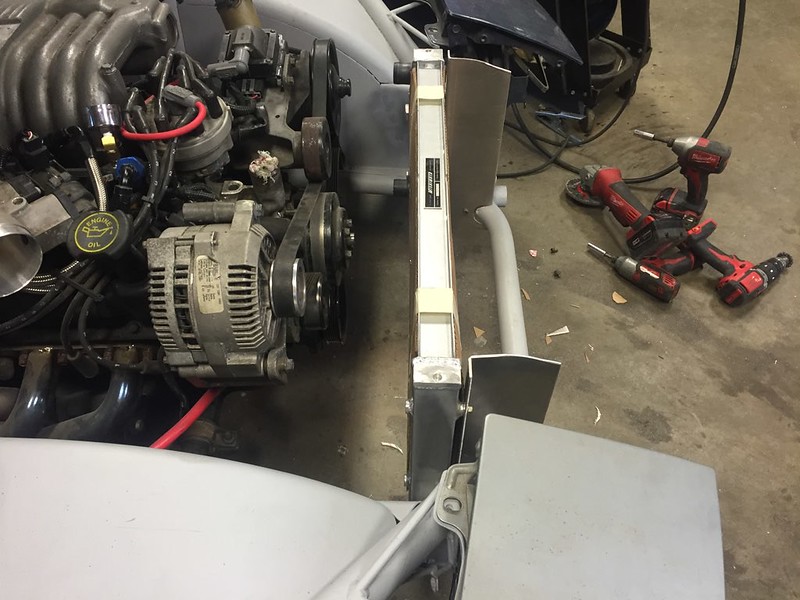
This was my idea from the begginging of doing a tube front. Easy to change, easy to make (once my indecisiveness and need for quality is appeased anyway). It also makes easy ducting and half of its done already. I plan to add rubber washers later for some isolation from vibration.
where we left off:
getting the car running in the time span I did meant I had a few things that weren�t ideal. Took some tinfoil (lol thats what it looked like Ford did anyway, work with what ya got) and joined the 2 bits of shield and cleaned up the wiring a little on my ecu patch harness.
I have a debate with myself ongoing with how I do these harnesses, I know each connector is a possible point of failure but its so nice having modular pieces that are easy to remove and service/change. I also have been using a lot more crimps and 3in1 heat shrink this time around compared to last.
one of the problems I had with the last chassis that I never dealt with was how terrible it was to bleed (this is a 5.0 problem though and I�ll explain why) and how poorly connected the hoses were on a not very efficient old radiator. Remember the goal is hot lapping. The problem being that the water neck puts the hose straight up and on a mustang over the alt, making it the highest point and kinda an air trap in that section of hose. Last time I just made this work but the hose was slightly kinked and hood clearance sucked.
First things first, need to get the rad mounted so I can see how much room I have
This was my idea from the begginging of doing a tube front. Easy to change, easy to make (once my indecisiveness and need for quality is appeased anyway). It also makes easy ducting and half of its done already. I plan to add rubber washers later for some isolation from vibration.
Thread Starter
Senior Member
Joined: Mar 2015
Posts: 335
Likes: 8
From: Vancouver, BC
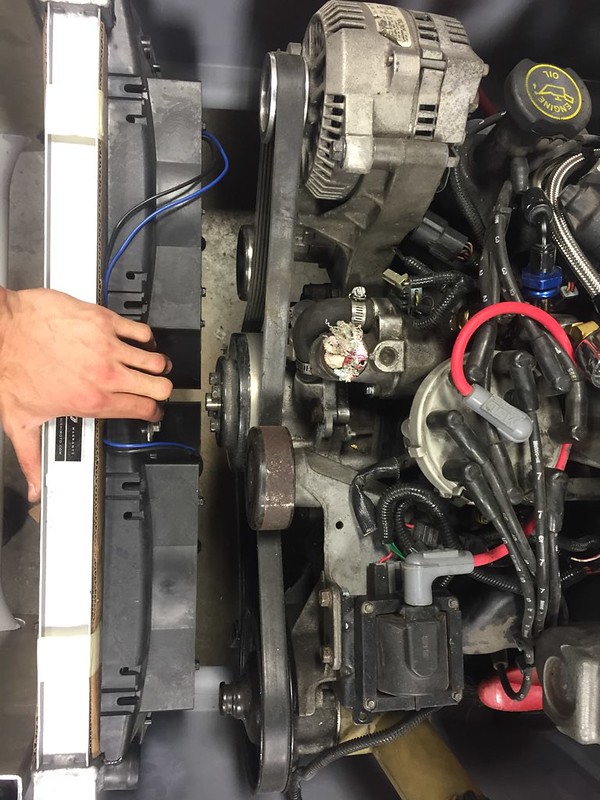
ehhhhhh thats kinda tight. Wouldn�t mind more room to work on stuff but also good for keeping the rad away from anything that could damage it.
SPOILER ALERTN: I later changed my mind, if the front end gets bumped 1. the rad is probably gonna get hit anyway, 2. the thing its attached to will shift and move the rad anyway.
took this ugly thing
and cut it up some. Got the hookups from Andy, helps knowing a welder who frequently goes to a supplier and has a generous heart
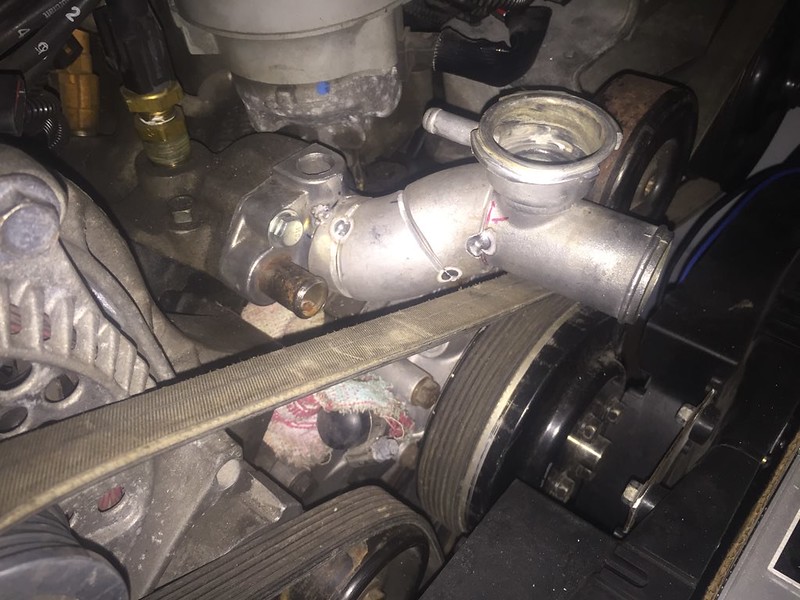
So we have what I call water neck version 1.0
While this raises the fill point highest, not the prettiest thing and Gerard at Serial Nine didn�t like it lol. Gerard�s the kinda guy who when he suggests something is worth heavily considering. He�s a smart guy that has an extremely high regard for quality of design and manufacturing, take a look at Serial Nine�s parts catalogue and you�ll understand. He also explained the water neck they used to do for JZ�s (similar ish to the FD Rx7 AST delete I see many people make, Forcefed for example) and so after I got it back from the welder I dropped it off with to tack it so I could check the fit before he did a final weld, I fully abandoned it lol.
Thread Starter
Senior Member
Joined: Mar 2015
Posts: 335
Likes: 8
From: Vancouver, BC
it fit fine, cleared the hood and would probably have worked ok. I did a ton of reading on swirl pots, header tanks, and breather tanks and worked up a new idea.
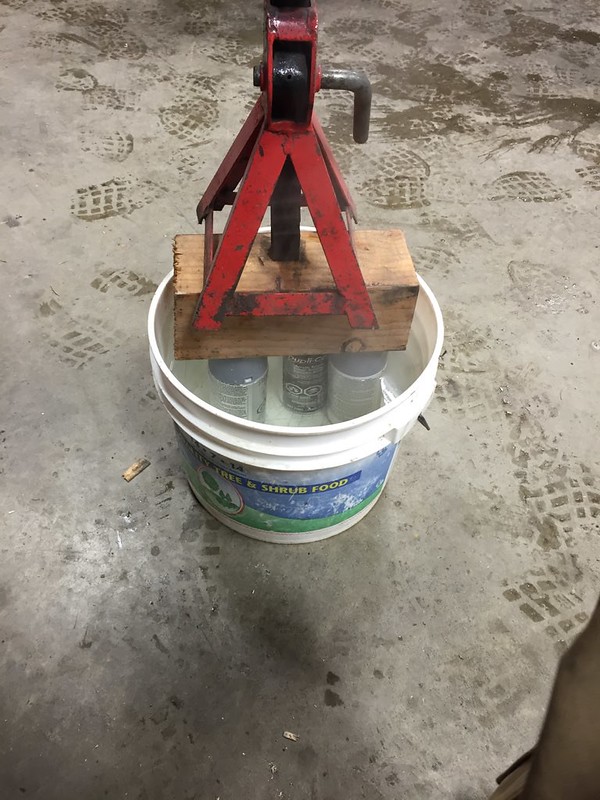
also china a summit came through, except for the part where I ordered the wrong master cylinder rebuild kit.
I’m the kinda guy that plans ahead and doesn’t order until I have enough to get the free shipping lol. Bought some stuff I won’t need for quite a while.
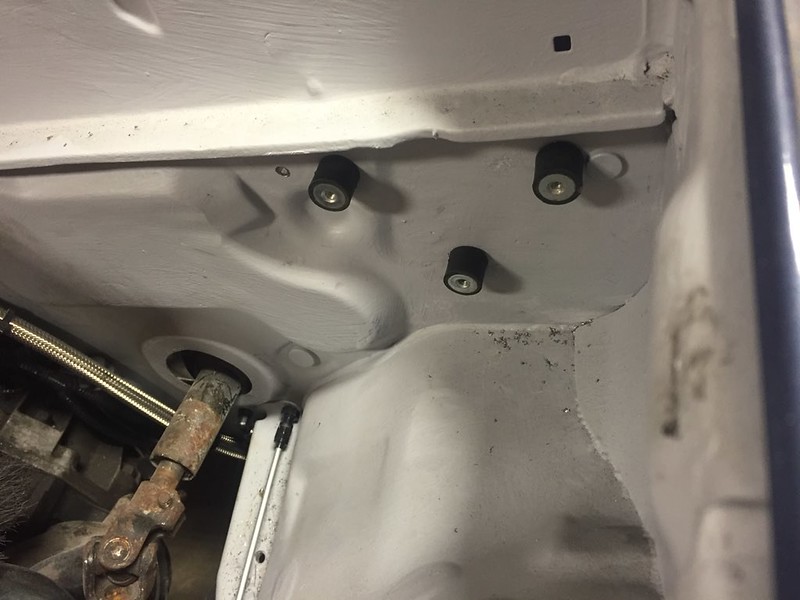
My dad was away for the weekend so I did this
I had told him i wanted to drill 4 holes in the floor long ago and he was ok with it but I knew after I did it he’d have forgotten and say “hey whats these in the floor”.
I was not wrong.
Thread Starter
Senior Member
Joined: Mar 2015
Posts: 335
Likes: 8
From: Vancouver, BC
But took him a while to spot anyway
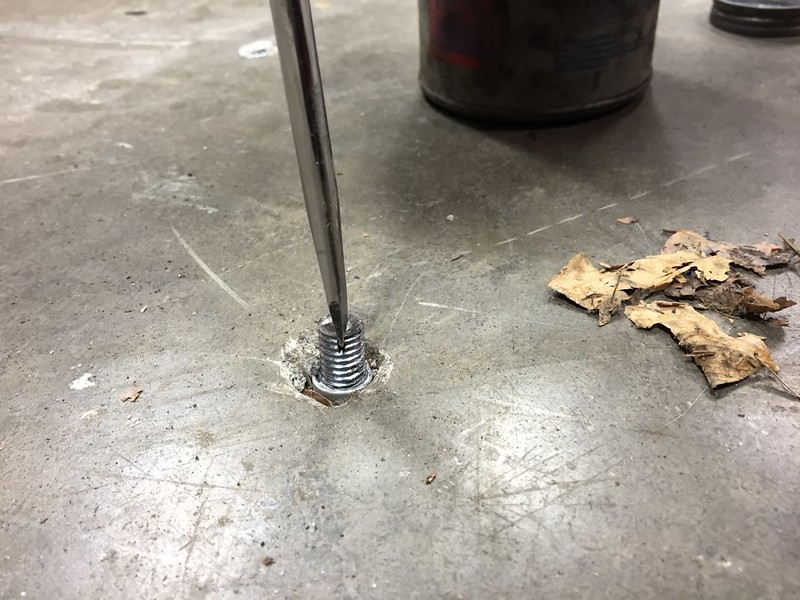
this style of concrete anchor we used to use quite a bit at work, but a few years ago they were kinda frowned upon and wedge anchors took over.
I marked the holes, drilled them in, took a bolt and cut the head off then with a grinder made a slit. This way I can use a flat head to get them in and out. Slather some anti seize in there so they won’t stick and i won’t have any issues with dirt and grit getting in there.
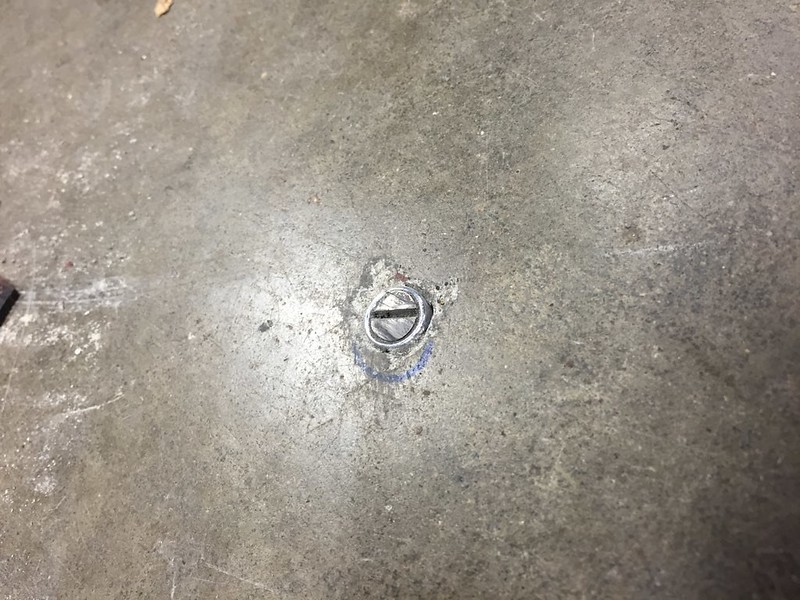
they are pretty flush with the floor, can’t feel them stepping on them or rolling a jack over them. And from a distance you (or old man Floris without his glasses on) can’t see them.
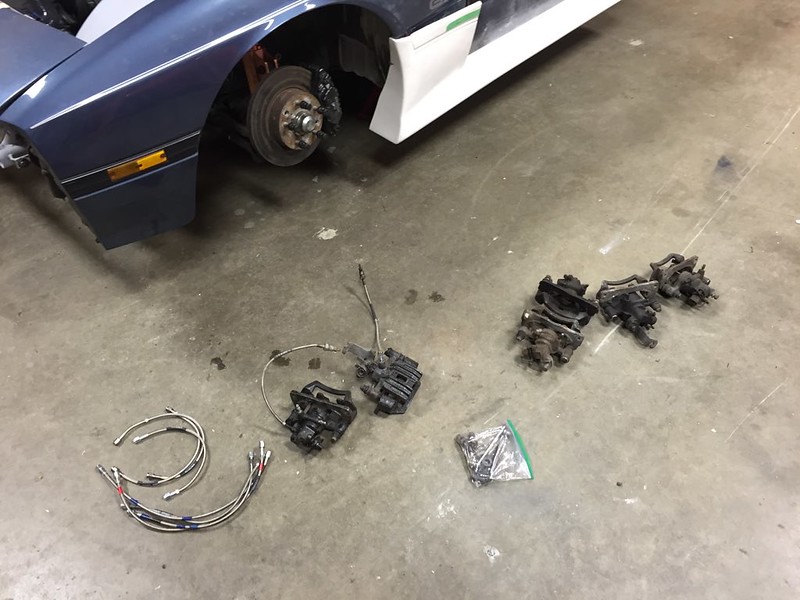
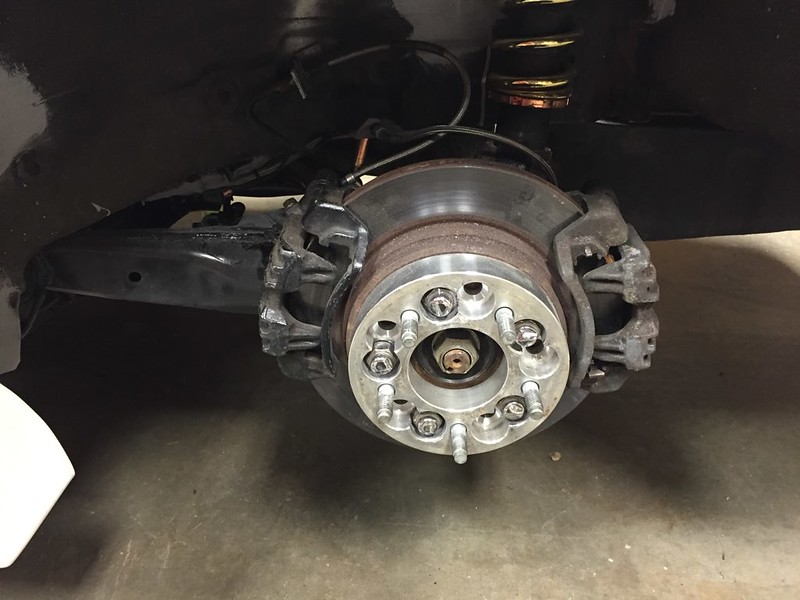
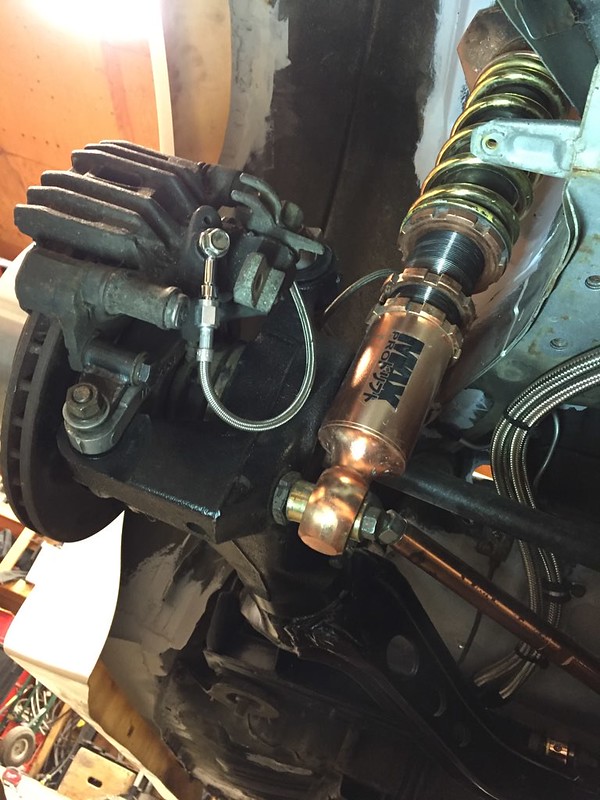
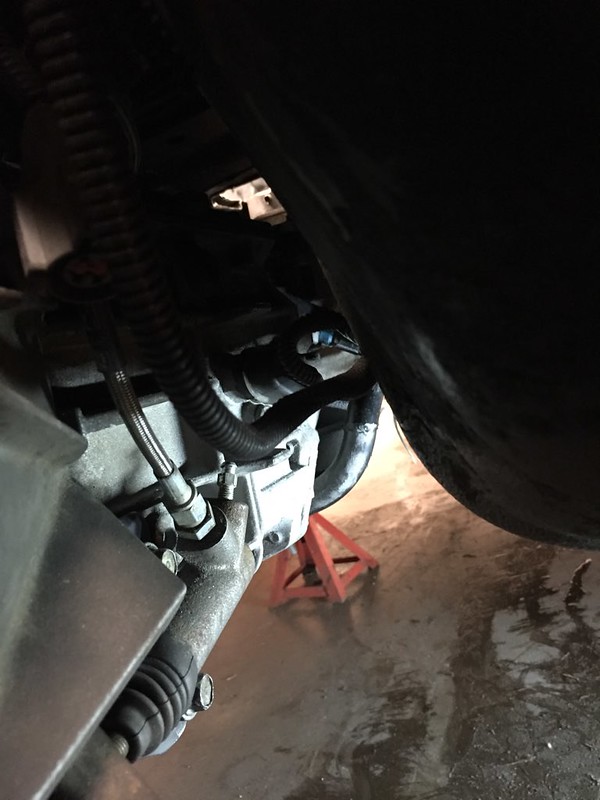
since I got some more brake lines from summit, I put all my calipers on including the hydro e brake ones.
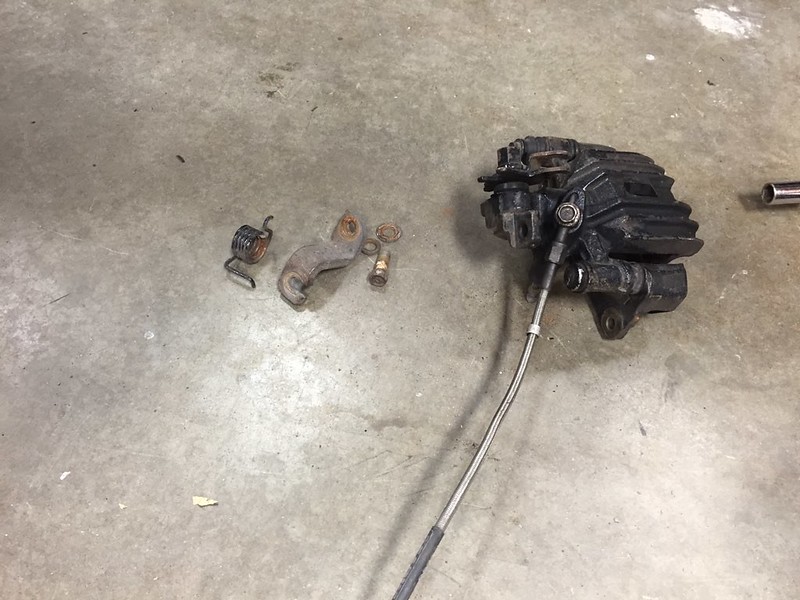
removed as much from them as I could that I don’t need
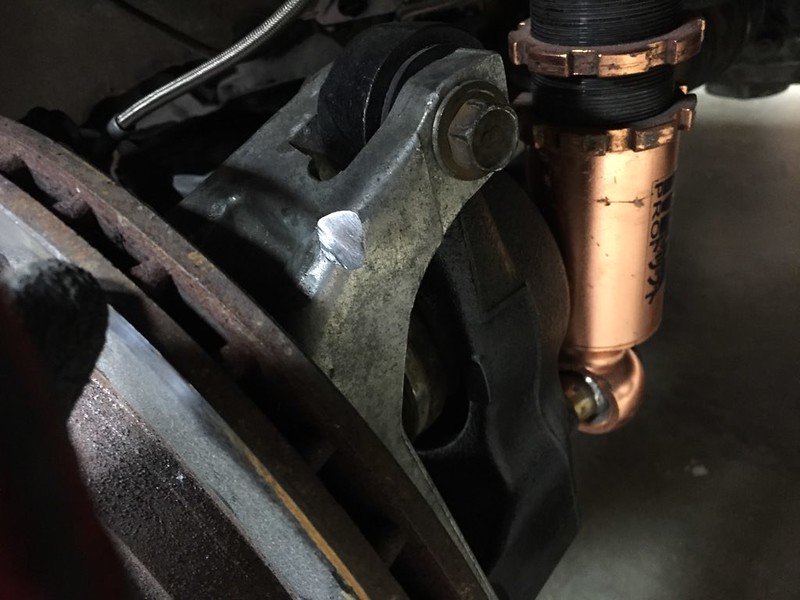
not sure if I did something wrong here but needed to notch the rear of the knuckle a little to fit the bolt. This is using a villains kit, other thing I’m not sure of is if I’m supposed to flip the calipers from side to side or not. Havent spent enough time bleeding them yet, and they could be seized for all I know.
this style of concrete anchor we used to use quite a bit at work, but a few years ago they were kinda frowned upon and wedge anchors took over.
I marked the holes, drilled them in, took a bolt and cut the head off then with a grinder made a slit. This way I can use a flat head to get them in and out. Slather some anti seize in there so they won’t stick and i won’t have any issues with dirt and grit getting in there.
they are pretty flush with the floor, can’t feel them stepping on them or rolling a jack over them. And from a distance you (or old man Floris without his glasses on) can’t see them.
since I got some more brake lines from summit, I put all my calipers on including the hydro e brake ones.
removed as much from them as I could that I don’t need
not sure if I did something wrong here but needed to notch the rear of the knuckle a little to fit the bolt. This is using a villains kit, other thing I’m not sure of is if I’m supposed to flip the calipers from side to side or not. Havent spent enough time bleeding them yet, and they could be seized for all I know.
Thread Starter
Senior Member
Joined: Mar 2015
Posts: 335
Likes: 8
From: Vancouver, BC
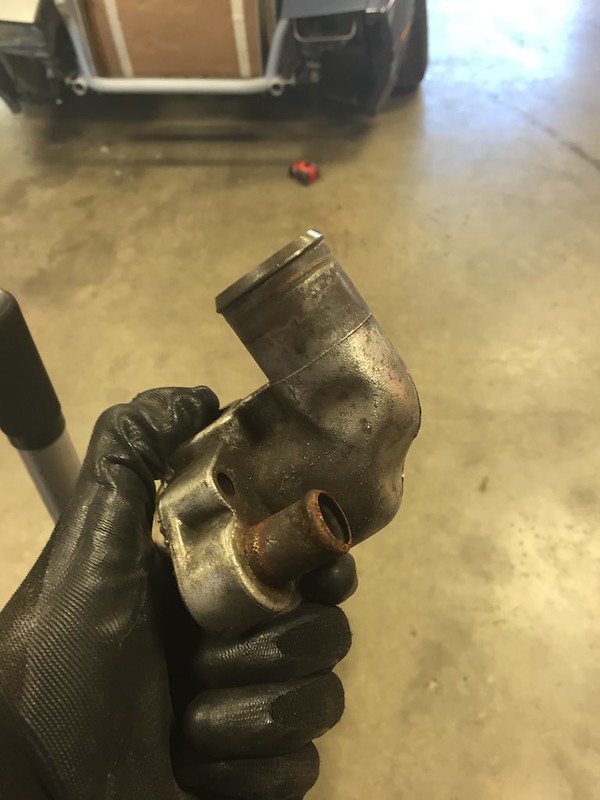
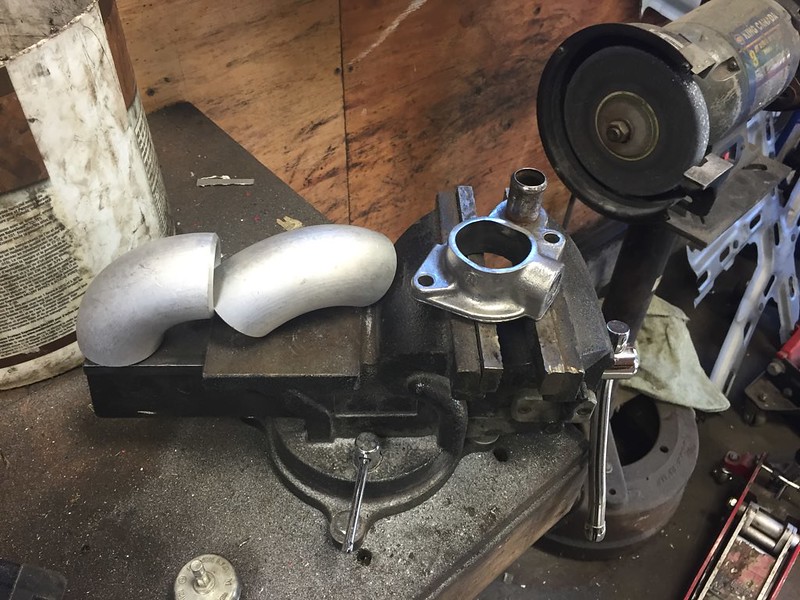
So back to the water neck situation. Spent some time on the internet, spent some time asking a few people who know more than I do, and made a rough idea to start from.
Was on the fence here about using the OEM water neck at all. And after learning about welding aluminum, decided against. Would probably weld terrible and look hokey.
So plan b.
Thread Starter
Senior Member
Joined: Mar 2015
Posts: 335
Likes: 8
From: Vancouver, BC
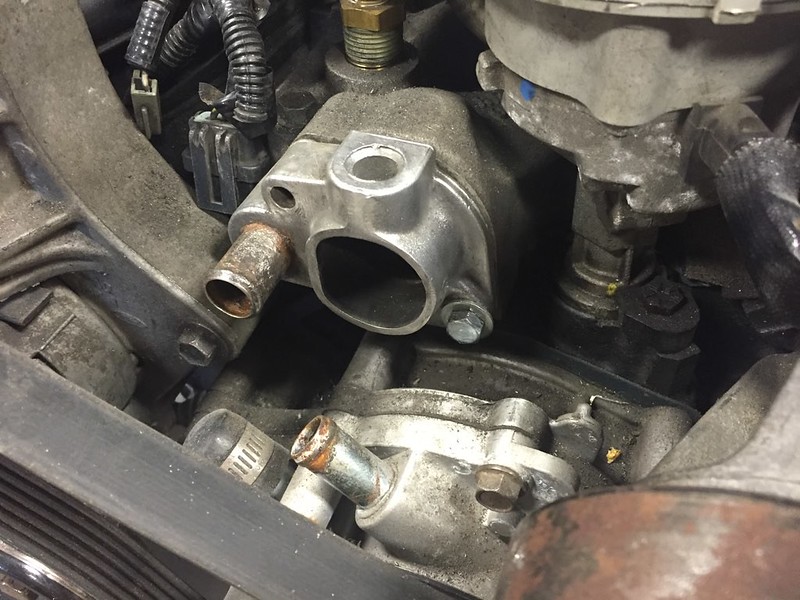
Plan b presents a real problem though, I don�t have a mill, i don�t know anyone with a mill and I didn�t really want to pay for a CNC or anything to make the step for the thermostat. sooooooo I came up with a plan.
Drilled a hole with a hole saw to get the centre, then bought a carbide die grinder bit that cuts flat on the bottom. Tried this twice to get it right but basically used a drill press as a mill. Isn�t the prettiest thing but thankfully its inside the part when its installed and hidden.
Started by tracing and copying the factory neck shape, but quickly didn�t see a need for that and took it down to the minimum for a cleaner look.

Also spent some time sanding the edges flat and making it look better before tapping it for the barb fitting.
Drilled a hole with a hole saw to get the centre, then bought a carbide die grinder bit that cuts flat on the bottom. Tried this twice to get it right but basically used a drill press as a mill. Isn�t the prettiest thing but thankfully its inside the part when its installed and hidden.
Started by tracing and copying the factory neck shape, but quickly didn�t see a need for that and took it down to the minimum for a cleaner look.
Also spent some time sanding the edges flat and making it look better before tapping it for the barb fitting.
Thread Starter
Senior Member
Joined: Mar 2015
Posts: 335
Likes: 8
From: Vancouver, BC
 '
'
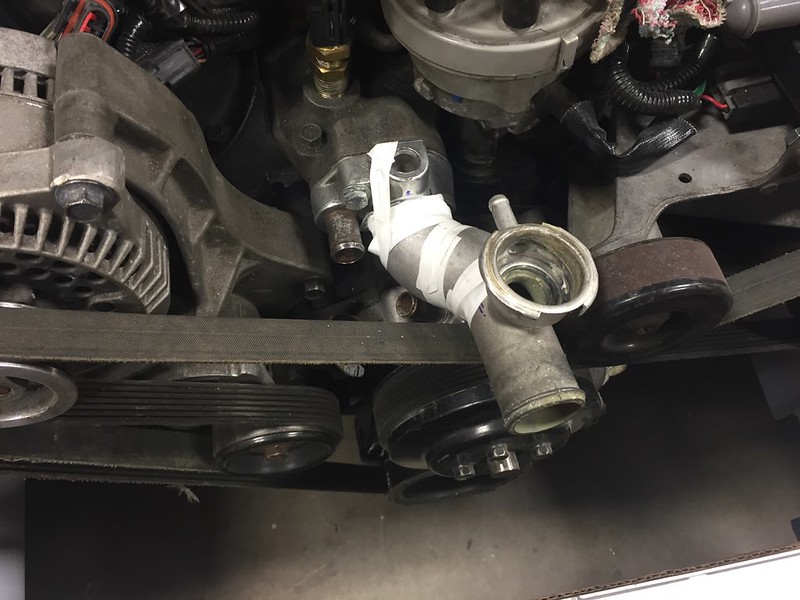
thanks to the magic of free electrical tape from work, I could see it all fitting. Not being able to at least tack the thing was really frustrating. Working with aluminum was quite different than anything I’ve fabricated yet, a good learning experience though. Much different approach to it than steel. and then make it, give it to a guy to tack so I can fit check before final weld, have it sit on a shelf for 2 months before getting it back untouched and without my money. We’ll come back to the water neck again later.
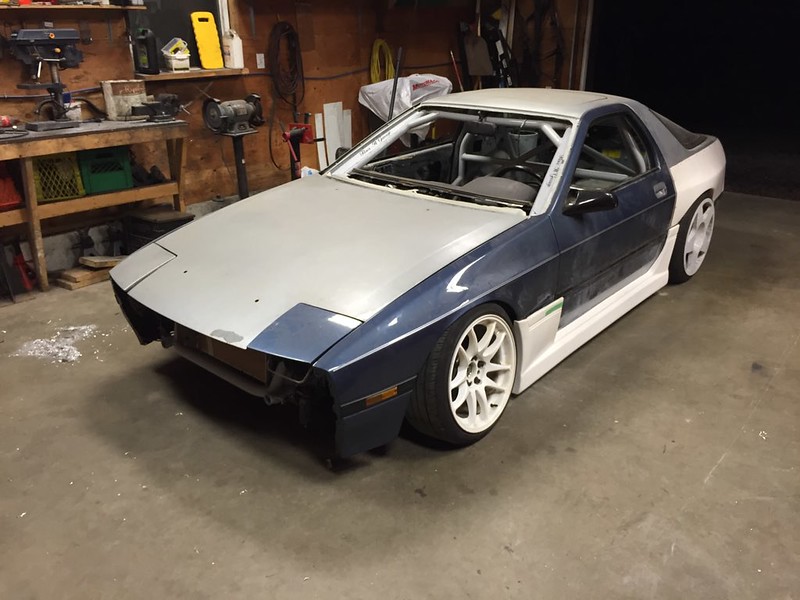
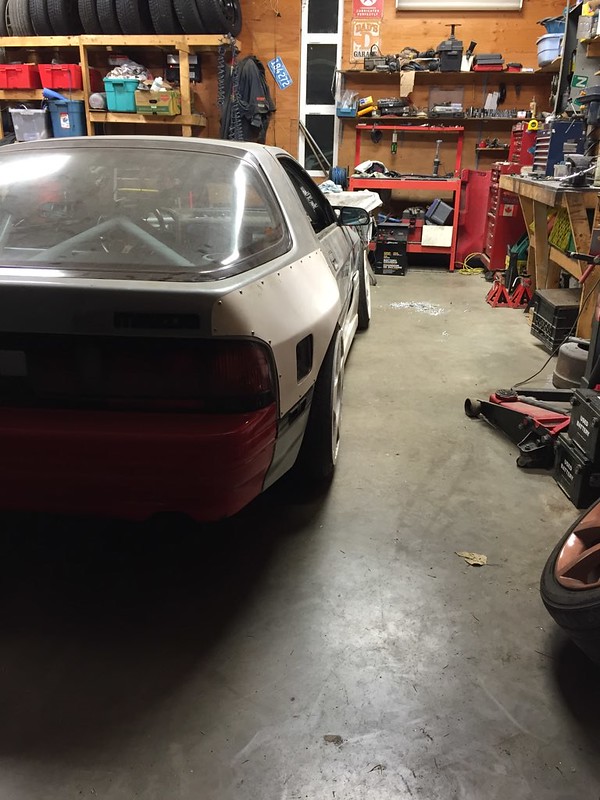
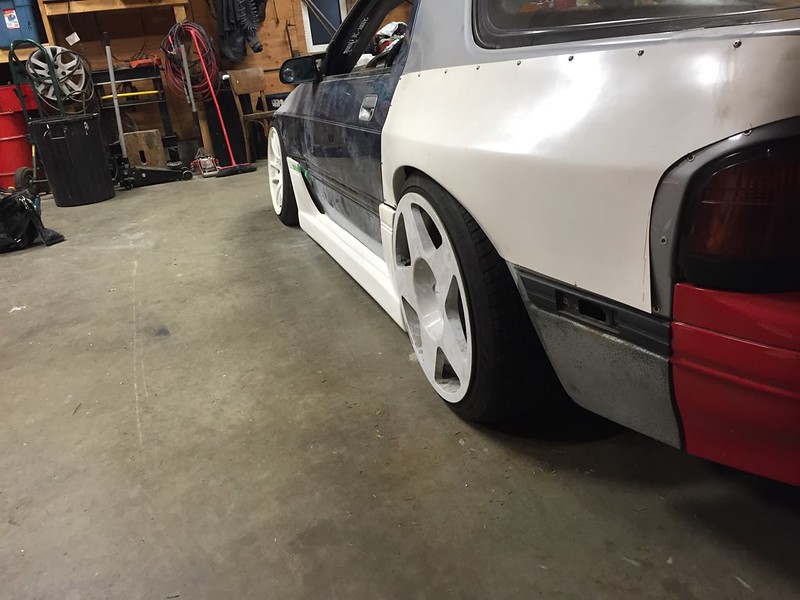
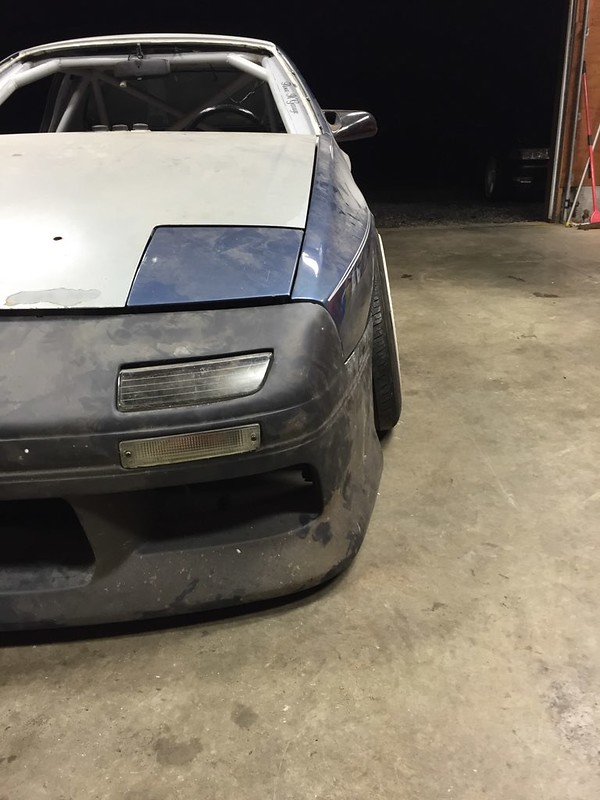
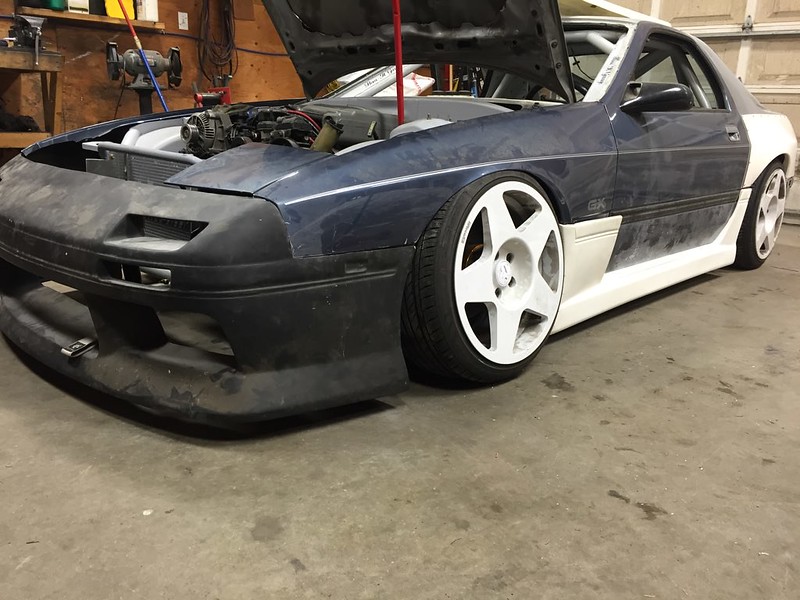
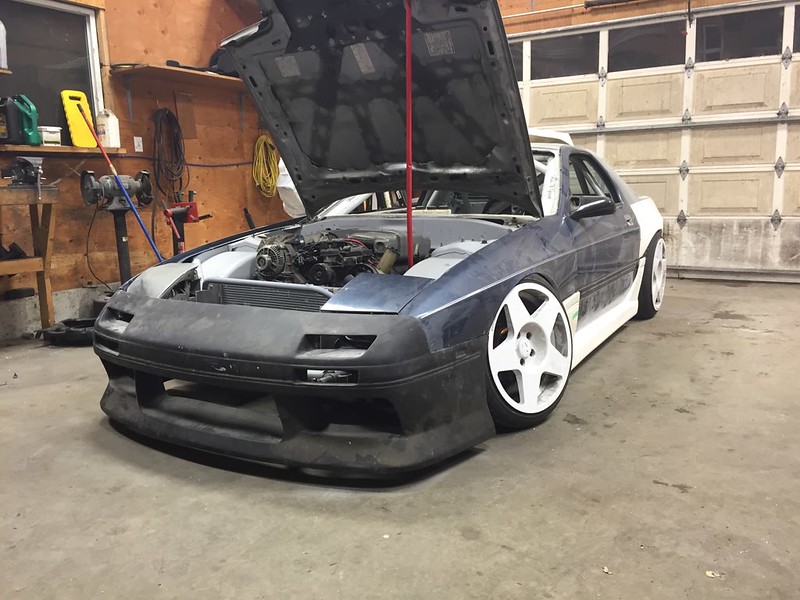
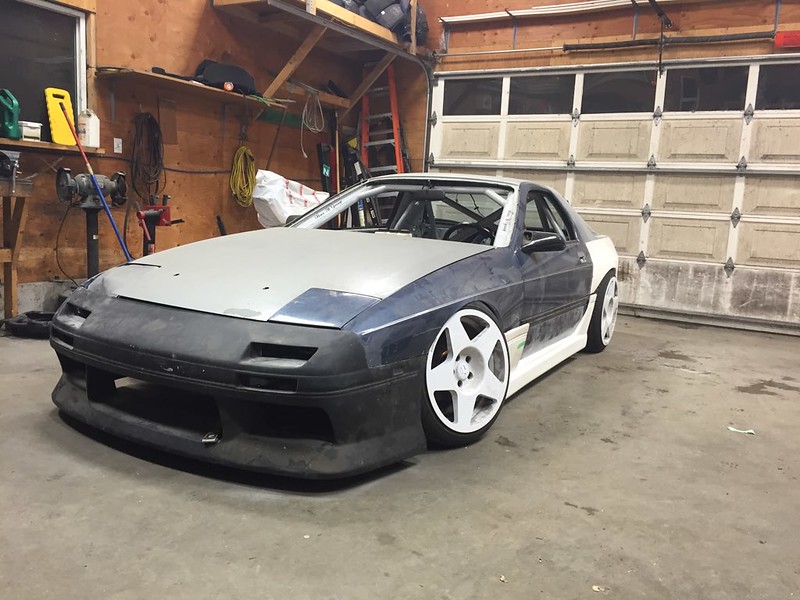
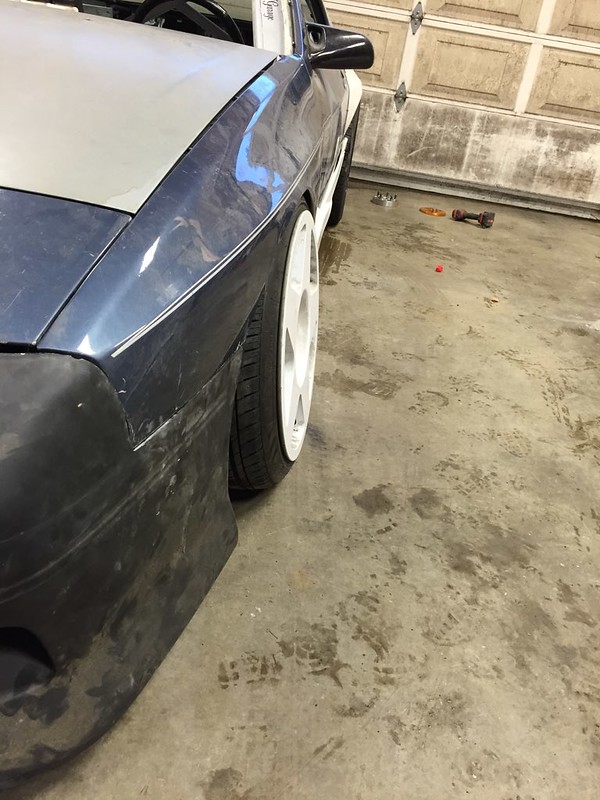
sold the 100 to buy a truck (thats a whole different story) but kept the wheels off it, so played a bit more with wheel fitment. 17/18 is kinda stupid low
Thread Starter
Senior Member
Joined: Mar 2015
Posts: 335
Likes: 8
From: Vancouver, BC
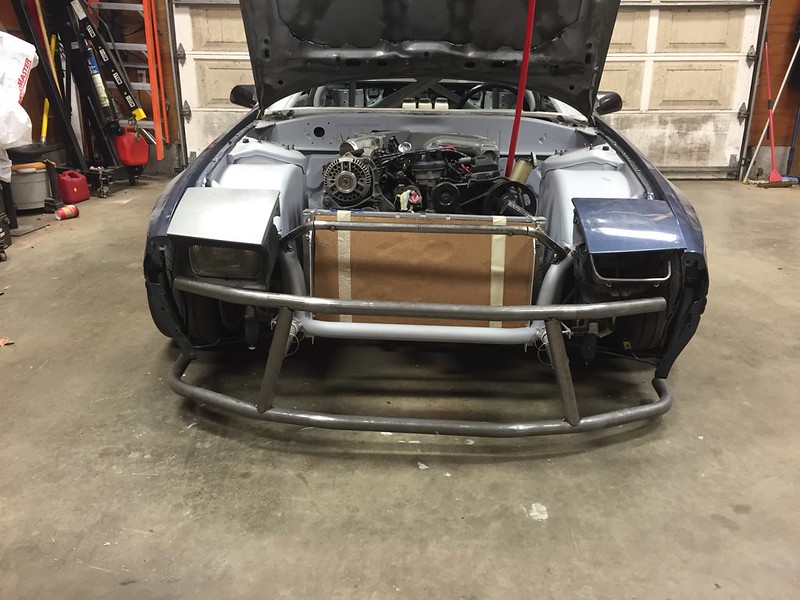
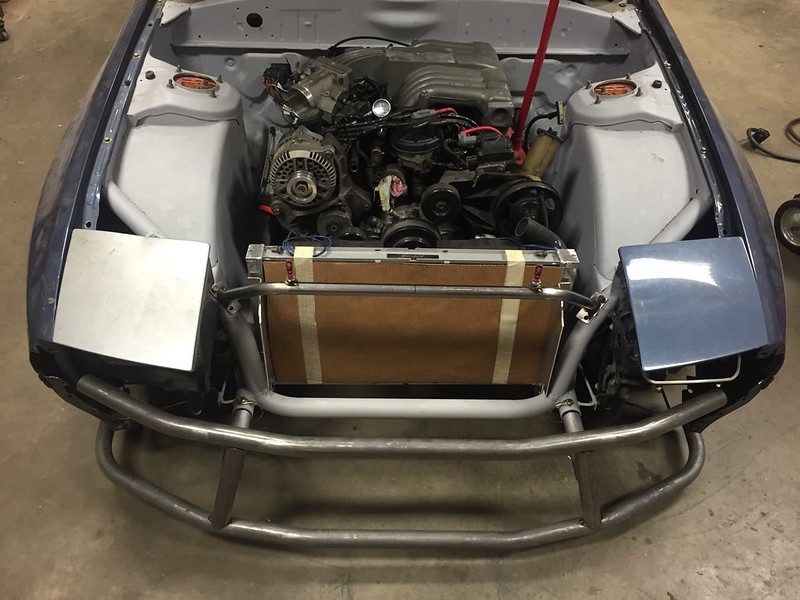
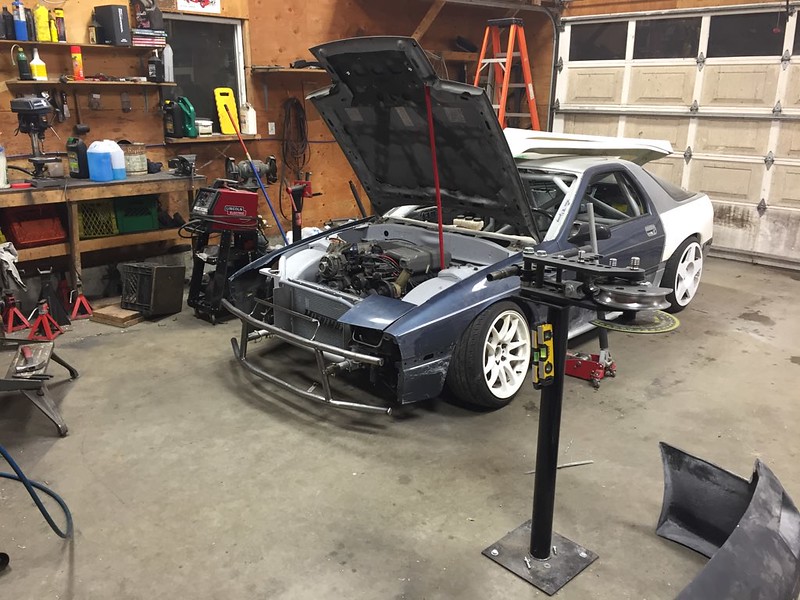
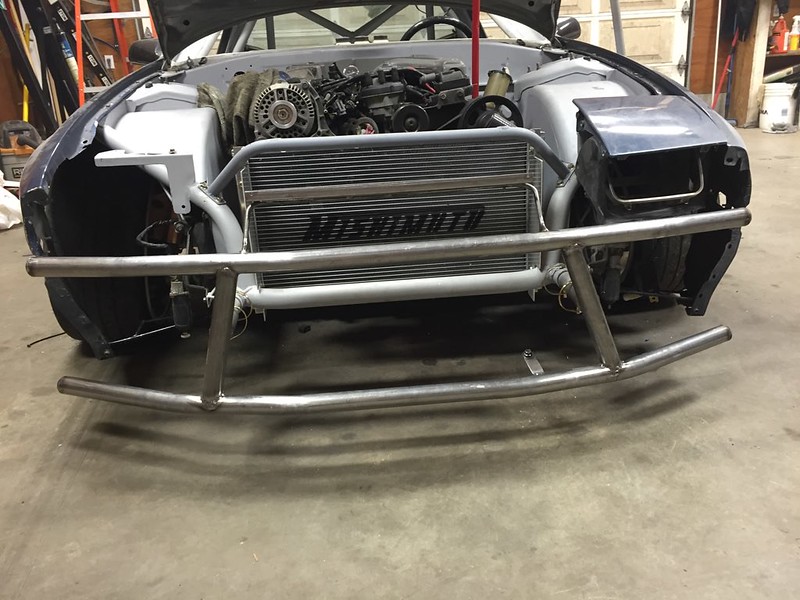
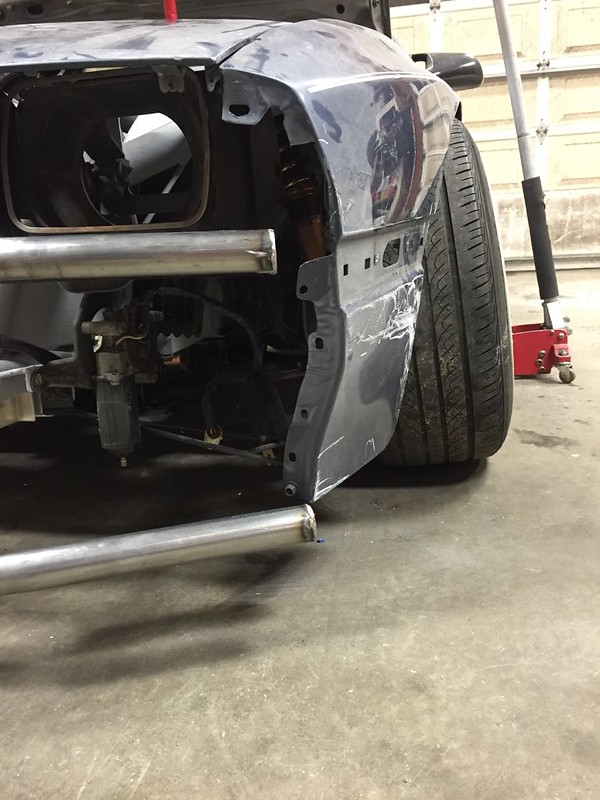
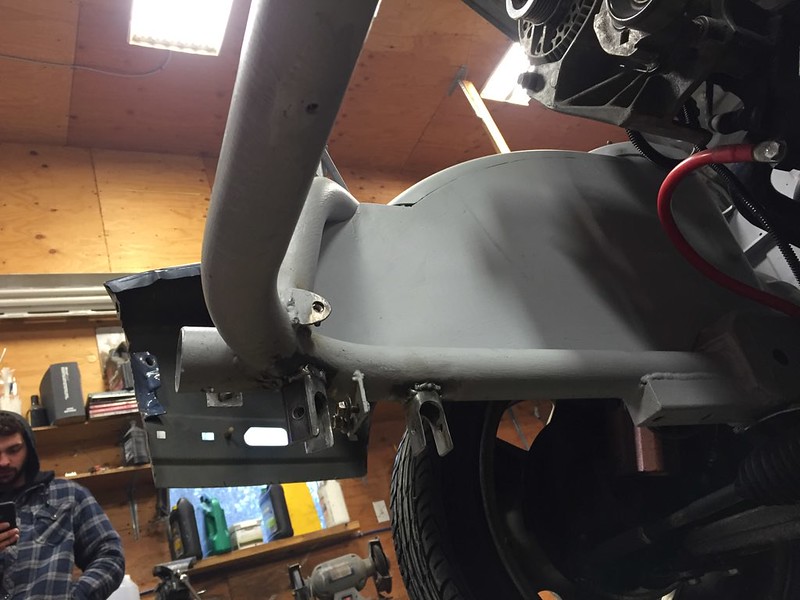
Bent the bash bar and tacked it buuuuut didn’t like how it fit at all. Trimmed the upper bar tube but its too close to the headlight and fender. first tap and it would take out the headlight and frankly thats not the point. Also didn’t like how the lower one sat/looked. Too low and would probably take out the fender.
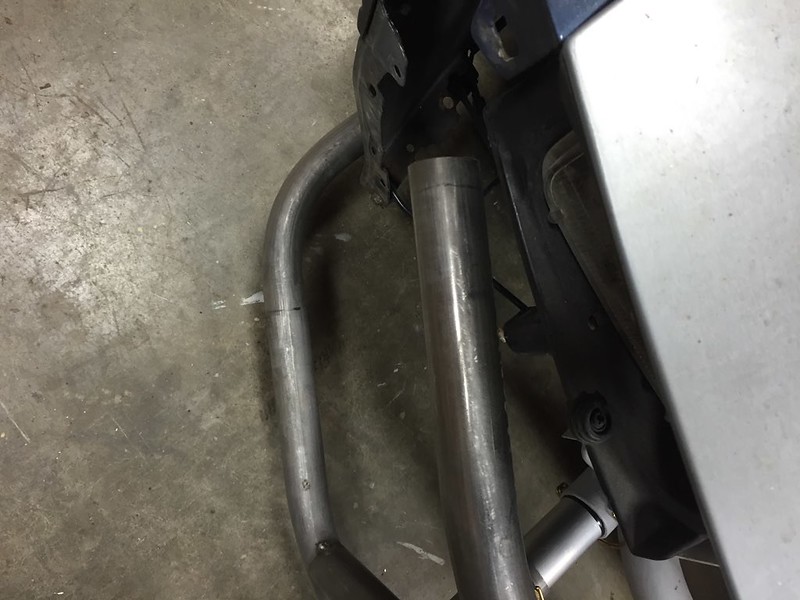
Note in the last picture the rad support, as I completely re did it to sit the radiator forward.
Thread Starter
Senior Member
Joined: Mar 2015
Posts: 335
Likes: 8
From: Vancouver, BC
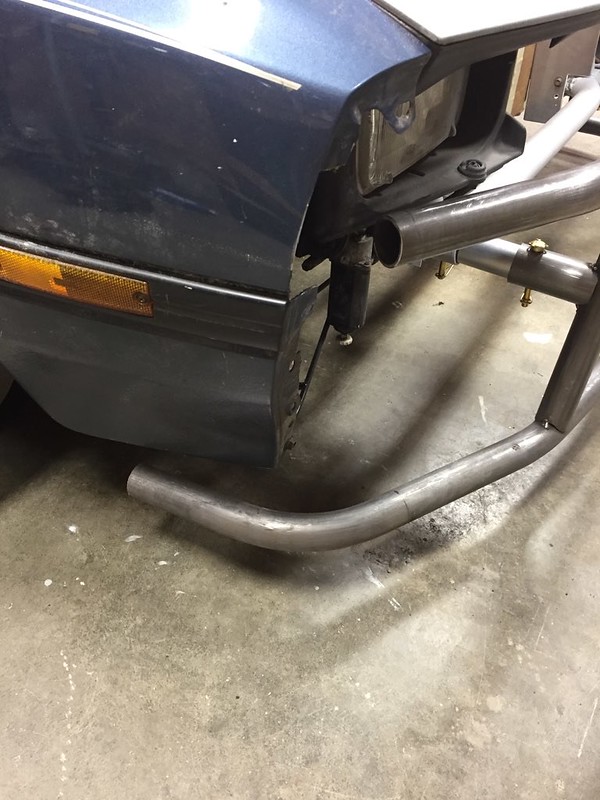
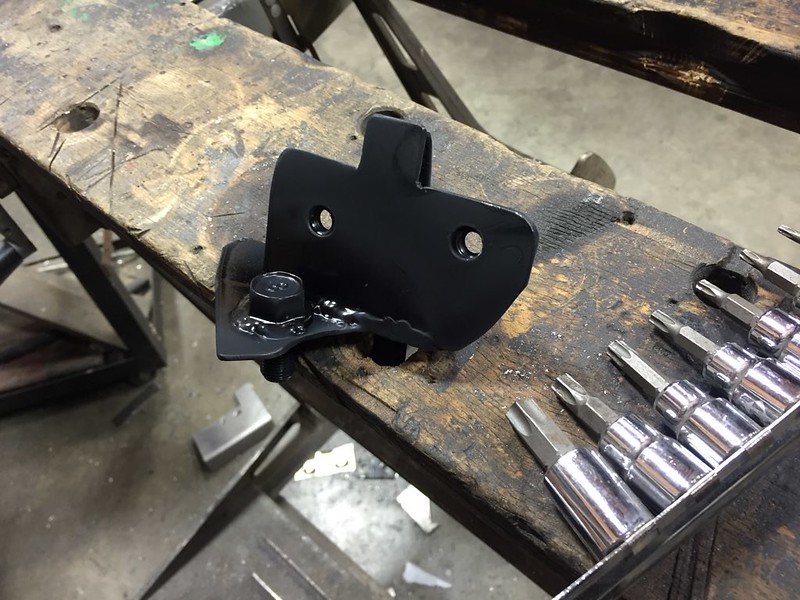
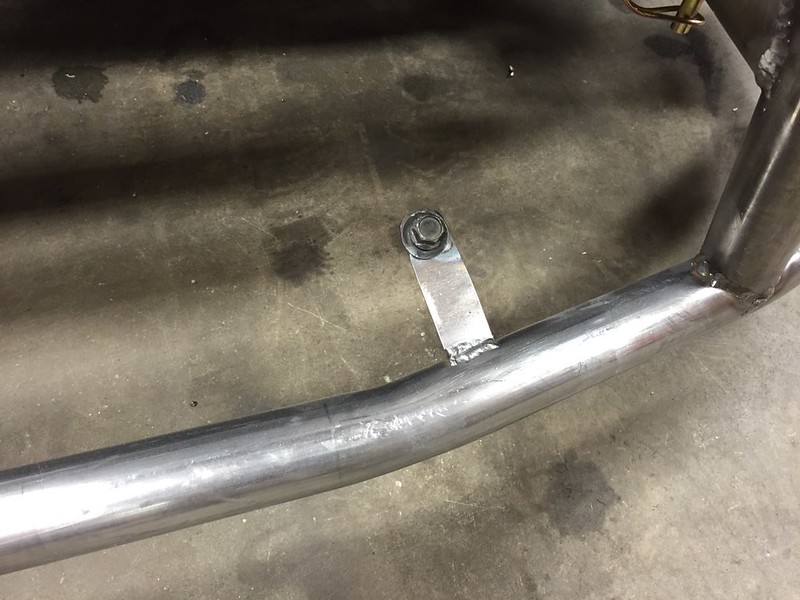
also put some m6 nuts in the bottom so I can attach ducting to it
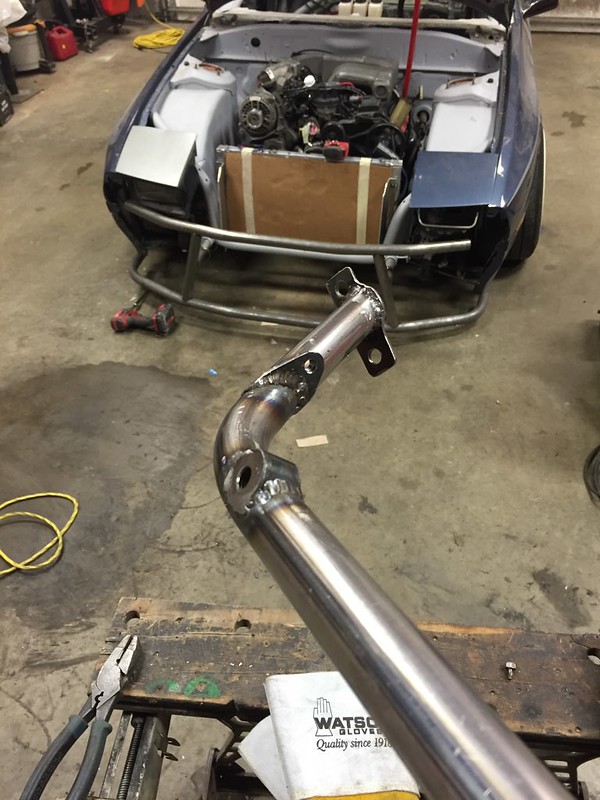
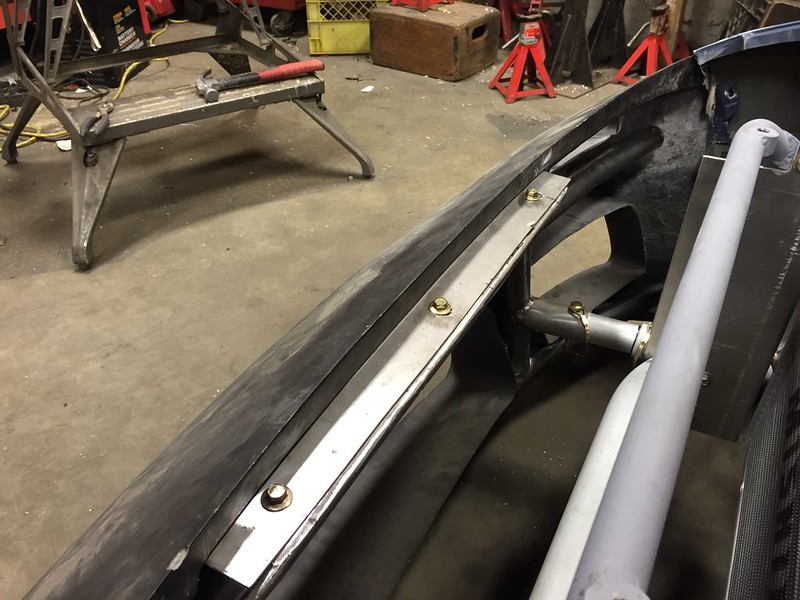
so bashbar version 2 (which is really just a trimmed V1 for now but who cares) has the bumper mount on it finally. well tacked. debated a long time between on the chassis or on the bash bar. On the chassis; in an accident the bumper would crush and so would the bash bar. could maybe put the bumper back on without the bash bar, but pretty good chance the bumper mount would get damaged anyway. On the bas bar; bash bar has to fit decent for the bumper to fit, in an accident the bumper will move with the bash bar but it already would anyway. mount was a little easier to make and looked better. less to no chance of damaging just the mount.
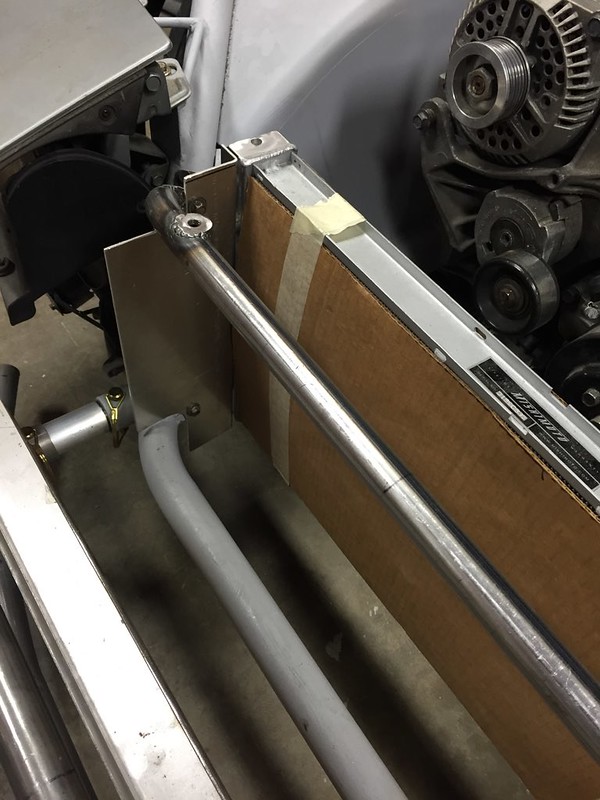
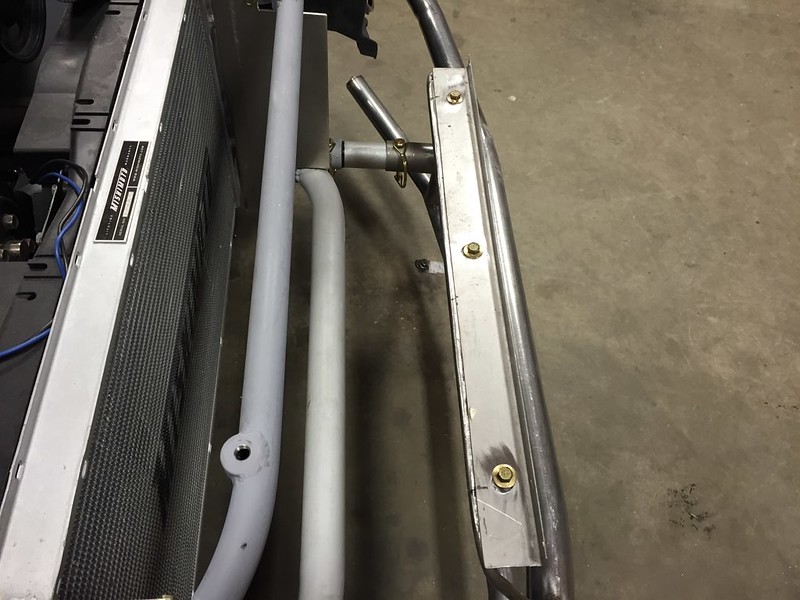
note these are version 2 rad support brackets, but oh yes theres a version 3 coming

this was an idea I have to Anthony Bell for mostly, he suggested a L bracket or angle mount that hooks the bumper to hold it in place. I took that a step further and made the L bracket bolt on and adjustable in height and position.
first time with the bumper properly mounted. yay.
Thread Starter
Senior Member
Joined: Mar 2015
Posts: 335
Likes: 8
From: Vancouver, BC
tacked the nuts in place for these MSD ignition box mounts that Im going to use for a catch can mount later

Finally put the rest of the brakes back together after getting another rebuild kit
Started on an idea I�ve had for a loooong time.
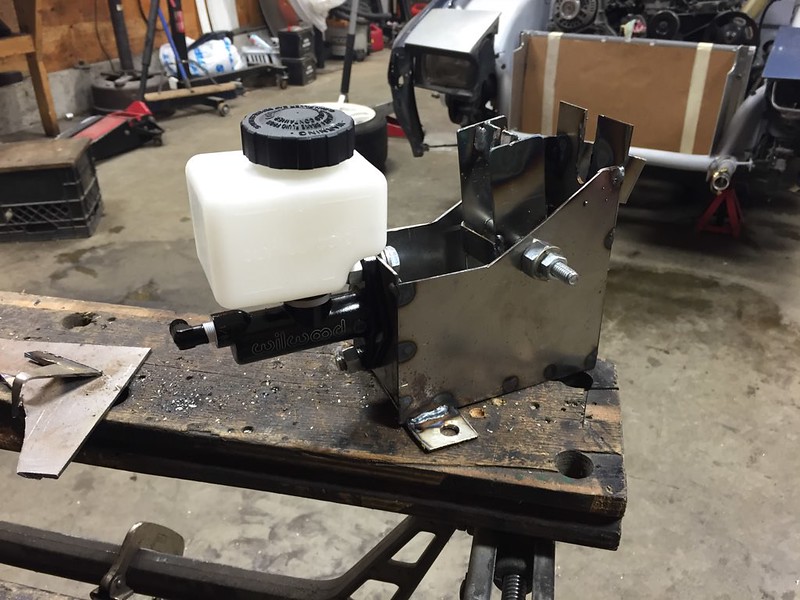
Originally I was thinking a rod into the centre console that would actuate a master turned on its side and the reservoir mounted in the cubby. Even contacted Wilwood to see if this would work. They said once its bled then turn it and it should be fine. But having brake fluid over carpet like that wasn�t appealing. With some more talk at Serial Nine, why not use the factory cable to operate the master?
This first version is pretty ugly, but I wanted a working proof of concept and some messing with the ratio before spending time and money on a final product. So far it works but seems to still have air in it even after bench bleeding. Which leads me to think that the brake calipers are wrong or something along those lines�

Thread Starter
Senior Member
Joined: Mar 2015
Posts: 335
Likes: 8
From: Vancouver, BC
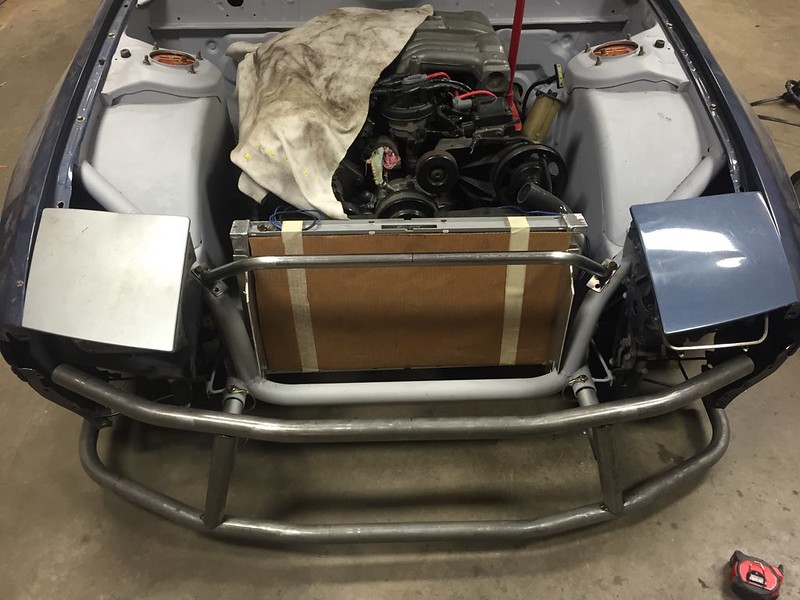
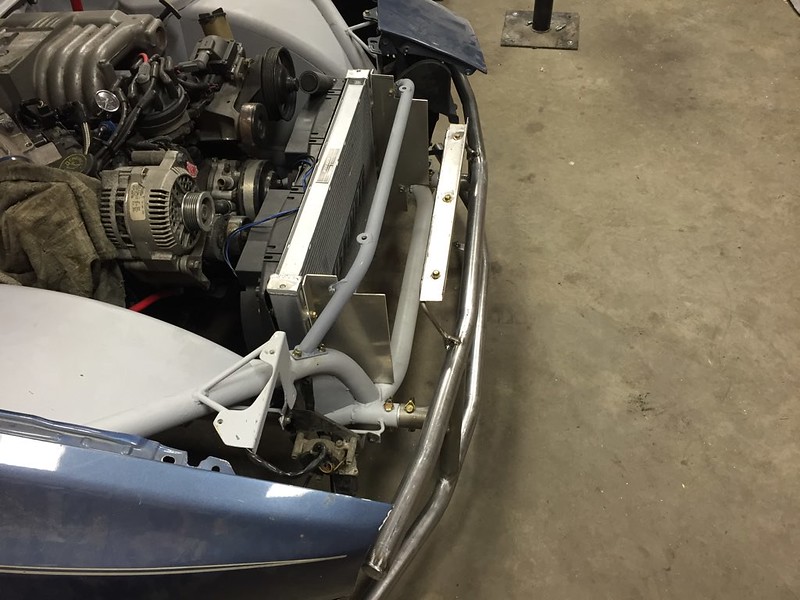
made fan to radiator brackets

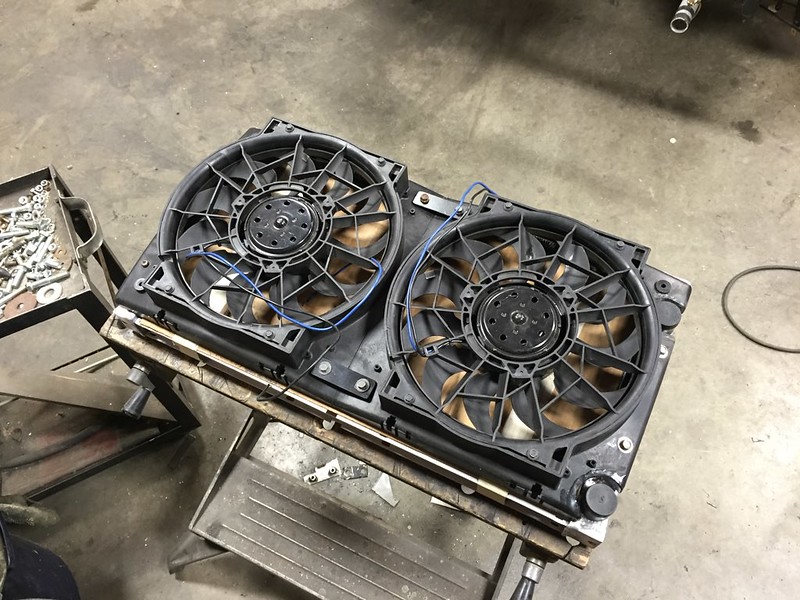
In my head these were supposed to be a lot simpler. But as things always do it wasn’t that straight forward. Forgot to take a pic but made all the hardware match too
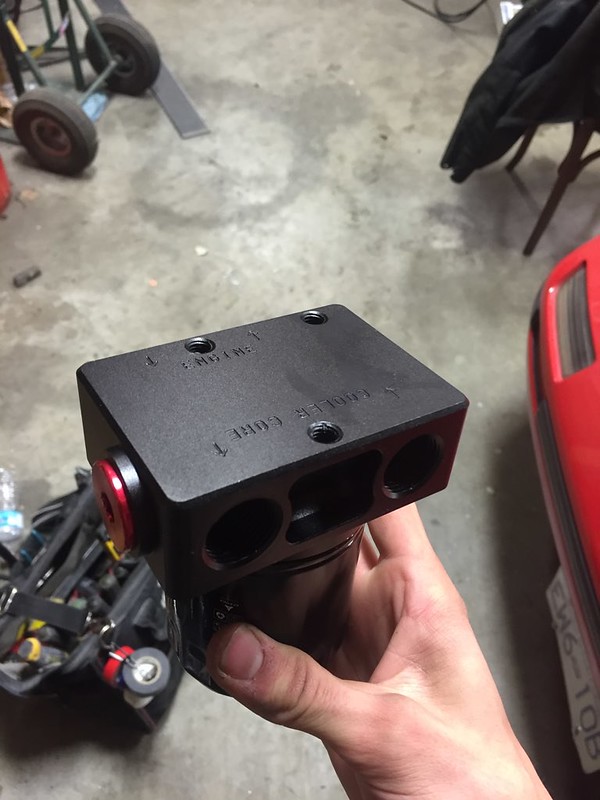
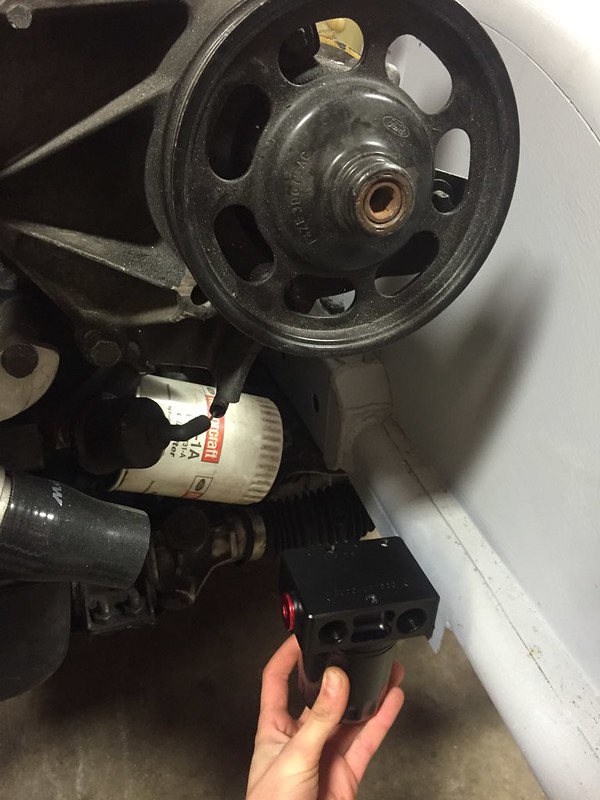
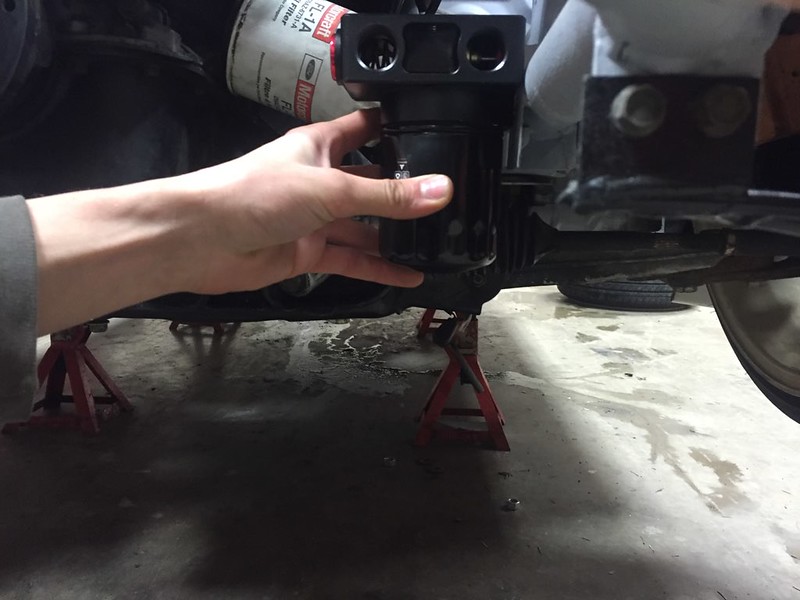
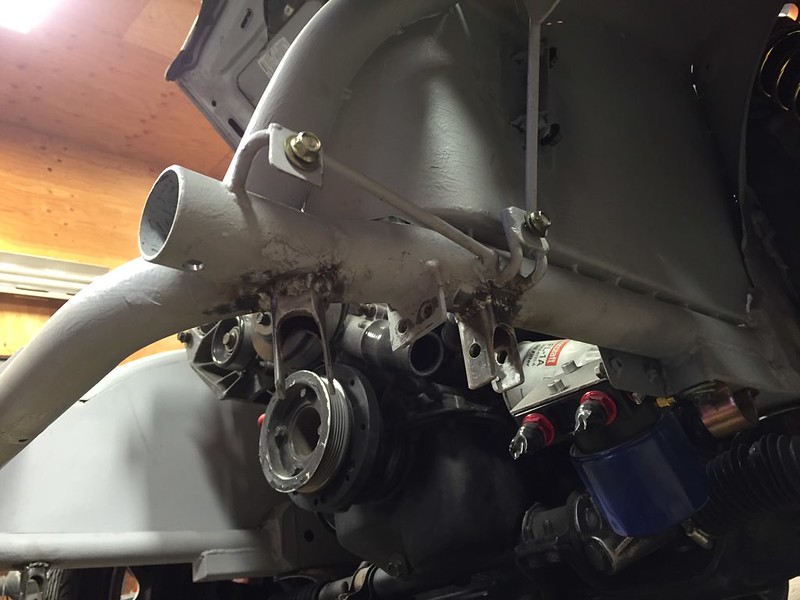
China sent me this. Another remote oil filter mount but this time it has a thermostat.
In my head these were supposed to be a lot simpler. But as things always do it wasn’t that straight forward. Forgot to take a pic but made all the hardware match too
China sent me this. Another remote oil filter mount but this time it has a thermostat.
Thread Starter
Senior Member
Joined: Mar 2015
Posts: 335
Likes: 8
From: Vancouver, BC
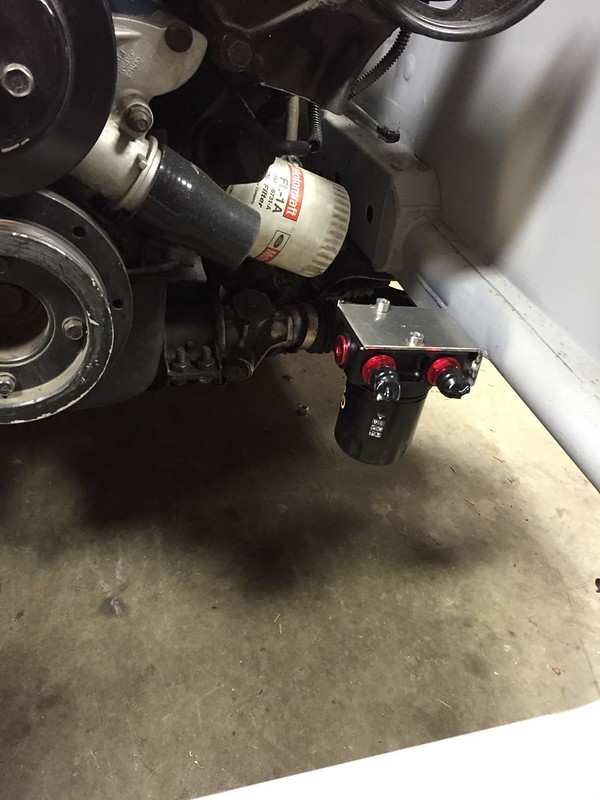
Rough idea of where its gonna go. Have a bunch of stuff to place first. And figure out if i can fit a sender on the back of it.
I was going to use the FC oil cooler buuuuut it kinda disentitgrated so I�m now going with a normal one but need a thermostat. This one happened to come with an adapter for the apparently 2 different types of 3/4x16 thread.
which now makes the one I bought not completely useless. Ahh china�

which brings me to a slight rant about the dangers of buying from china. Bought an oil cool in November trying to beat the rush of the holidays. Well they claim they shipped it, the tracking shows it made it to Canada customs but no further. After it had been in customs for like a month, (usually 2-3 days is all it takes) the seller told me to be patient and wait. So I did for a bit, asked them again in a week or two, gave me the same answer. I persisted that there was a problem, same answer. So called Canada Post, who told me there is definitely a problem but they can�t do anything for me as the shipper needs to open the claim not the receiver. So told the seller, they kinda did nothing until I threatened them with leaving bad feedback and such so they claimed they contacted the shipping company. I have no proof of this and Canada Post has no record. Im past any protection Aliexpress has to offer and I left feedback so the seller doesn�t care. They have my money, they could care less now. So I�m out like $75 cdn. great.
Thread Starter
Senior Member
Joined: Mar 2015
Posts: 335
Likes: 8
From: Vancouver, BC
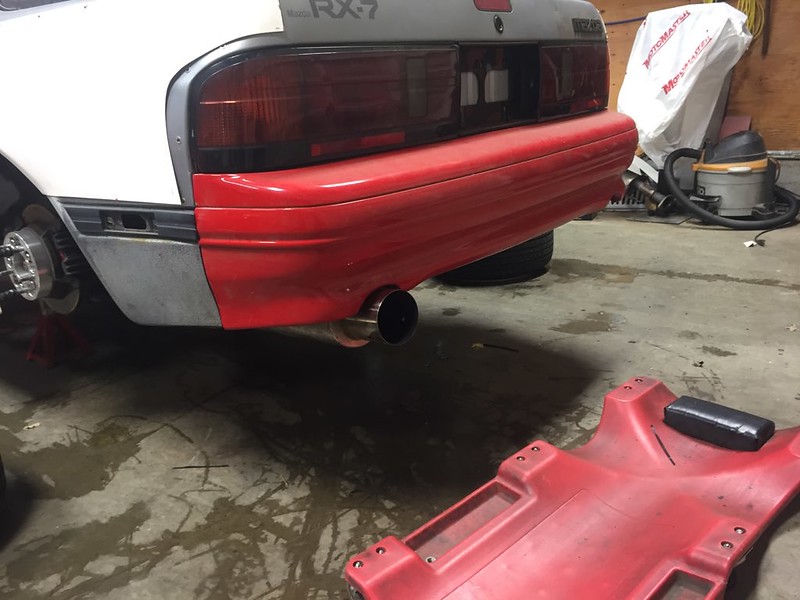
Put the cat back from the blue car on, and the X pipe from the old car. Cut out the X due to it kinda being bashed and destroyed and in a bad place. Le sigh, doing the exhaust for the 3rd time too.
But means theres time to improve.
Version 2.0 of my miata hydraulic slave conversion bracket. Sits much more out of the way now.

so if I’m going to redo the exhaust it ought to be better than before. More room by the slave and the trans mount should tuck it up nicely. Need to make a heat shield for the slave still
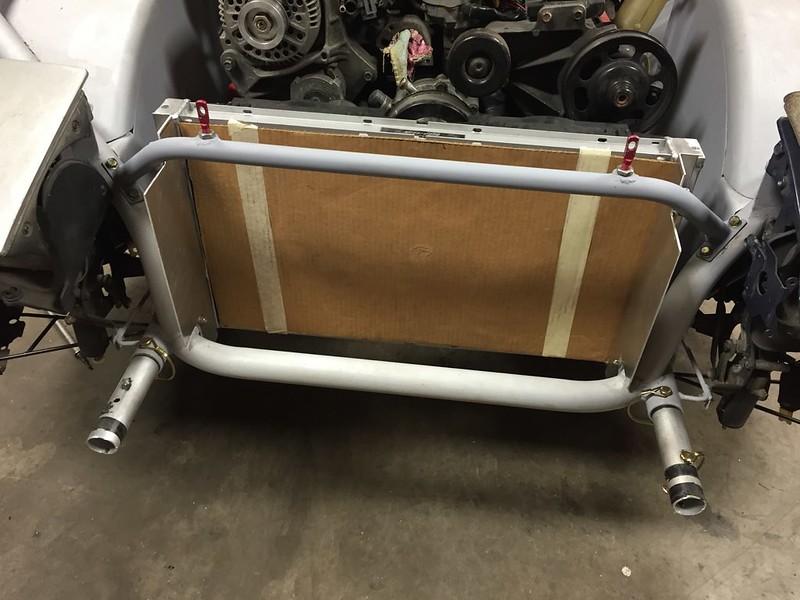

Primed my rad support and put it all back in again. Dont know why that necessitated 3 pics but here ya go.
But means theres time to improve.
Version 2.0 of my miata hydraulic slave conversion bracket. Sits much more out of the way now.
so if I’m going to redo the exhaust it ought to be better than before. More room by the slave and the trans mount should tuck it up nicely. Need to make a heat shield for the slave still
Primed my rad support and put it all back in again. Dont know why that necessitated 3 pics but here ya go.
Thread Starter
Senior Member
Joined: Mar 2015
Posts: 335
Likes: 8
From: Vancouver, BC
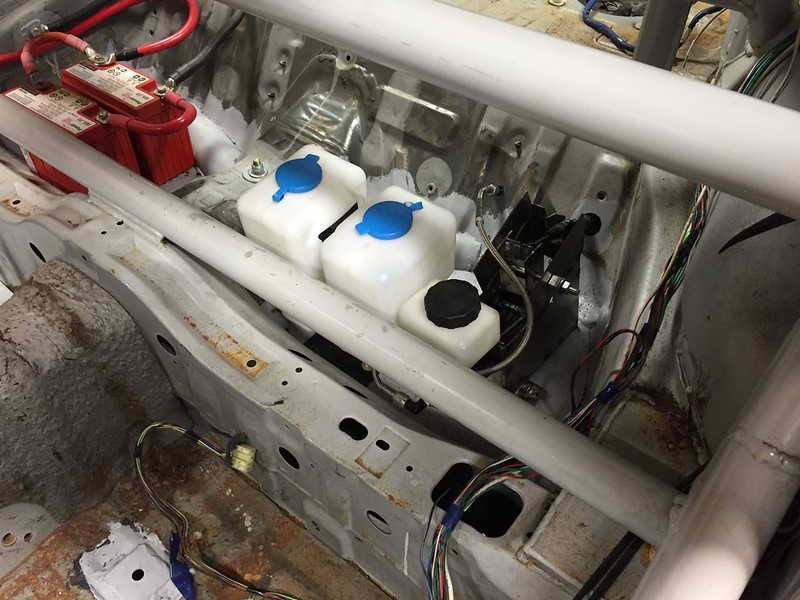
Cozy fit in the back with the washer bottles and hydro
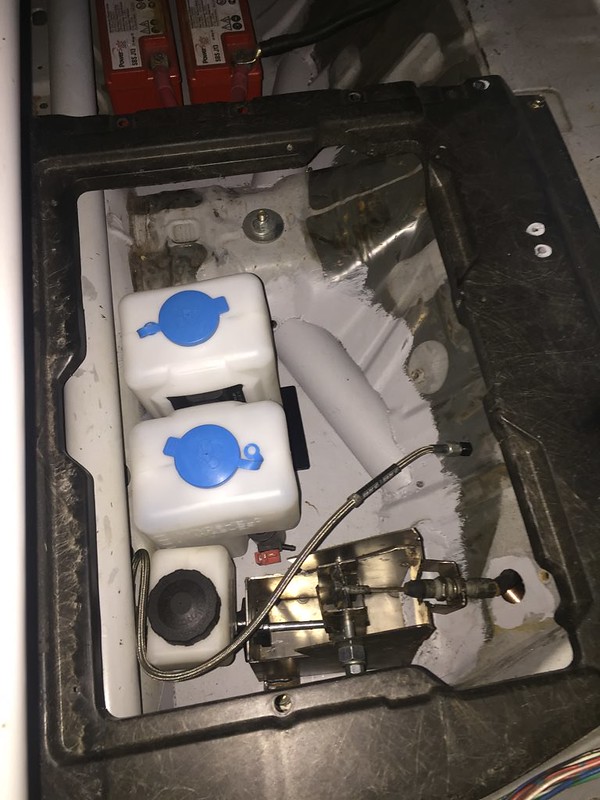
but I have access to it all without removing anything. I can’t recall right now if I can open the lid or not. I think i may have to make the hinge quick release.
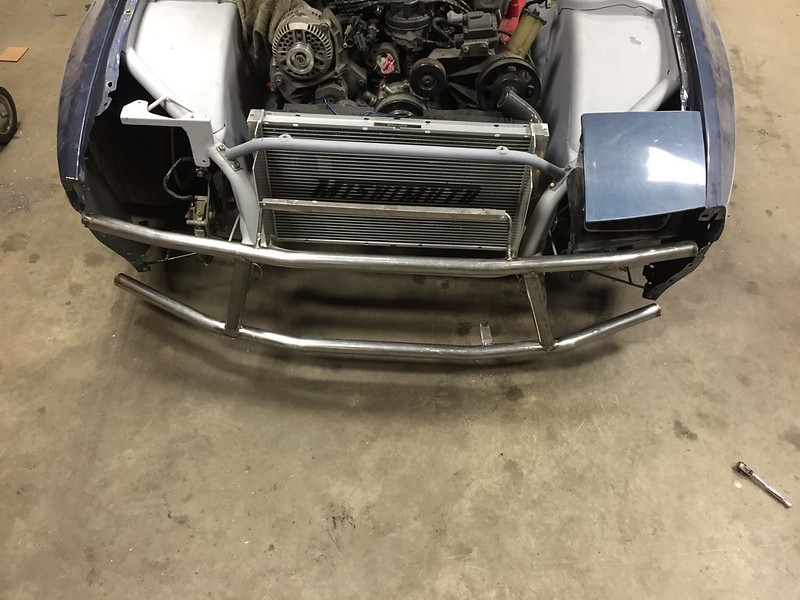
Voila Bashbar version 2.5 or well 3. whatever.
Bent new bars, used ERW instead of DOM.

So this is the fit with the crumple pieces at their full length.
Thread Starter
Senior Member
Joined: Mar 2015
Posts: 335
Likes: 8
From: Vancouver, BC
and here is the fit with the crumple zones fully compressed. leaves a bit of room to spare, bottom bar sits lower
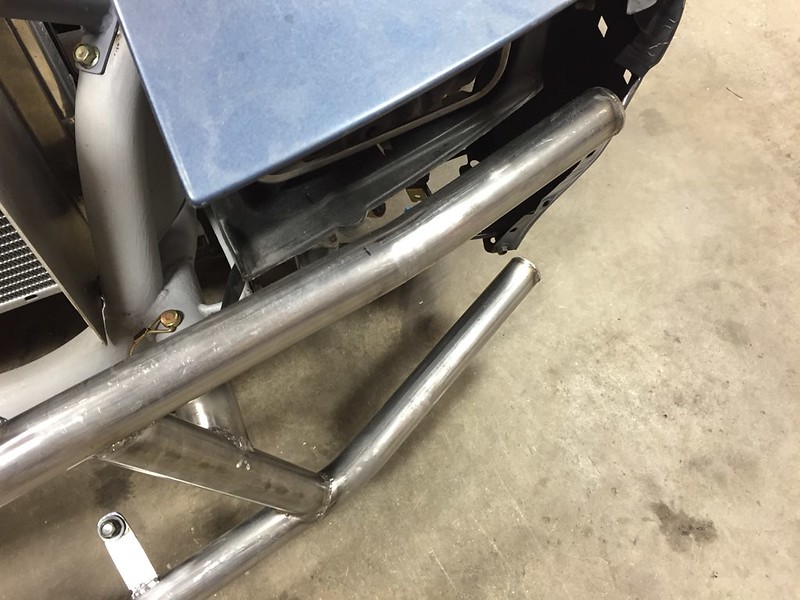
We also have this little tab for possibly the most rice thing I�ve done yet
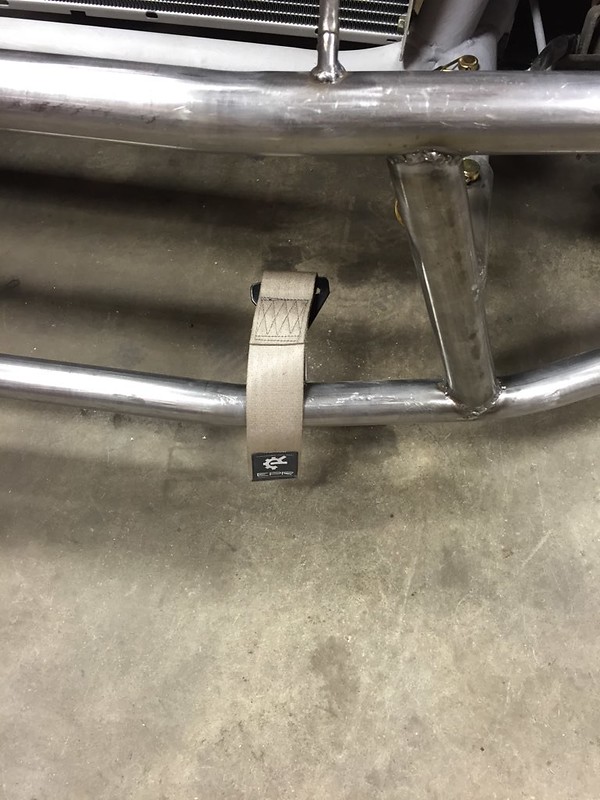
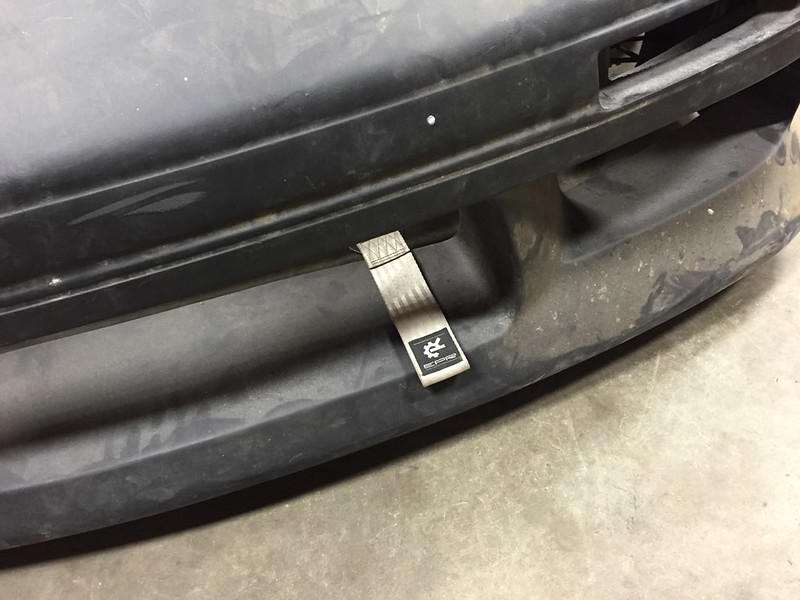
now obviously that isn�t a functional tow strap. But can�t help like the look. Plan is to make a solid metal hook that bolts to the lower tube front bar, just haven�t done it yet.
We also have this little tab for possibly the most rice thing I�ve done yet
now obviously that isn�t a functional tow strap. But can�t help like the look. Plan is to make a solid metal hook that bolts to the lower tube front bar, just haven�t done it yet.
Thread Starter
Senior Member
Joined: Mar 2015
Posts: 335
Likes: 8
From: Vancouver, BC

mounts better now but doesn’t fit the fenders at all.

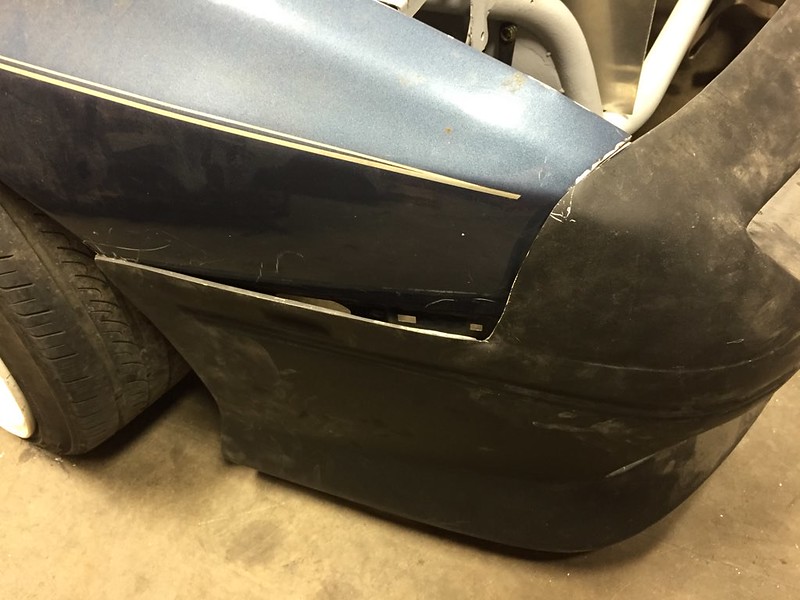

Spent some time messing with it, trim the bumper a little here, bend the fender blah blah barely any better. So my buddy Tito who works at the body shop I got it primed at told me to unbolt the fenders and if that didn’t do it cut them.
Thread Starter
Senior Member
Joined: Mar 2015
Posts: 335
Likes: 8
From: Vancouver, BC
So I did that and it got good. Can zip tie it on and have stay on. But now need to make a different mount of some kind to keep the fender sitting proper. Going to keep the other ones though, that way I can roll fenders or if I ever go to a stock bumper for a time.
one of the next things on the list, speedometer cable. Found the ends of an FC and a 5.0 are pretty similar. Bought a 5.0 cable (lol $27 love it) and put the trans end in, pretty easy cuz thats the trans it goes into. But the cluster end had to be modified a little.

Pulled the cable out of the sheath and plugged it with a piece of rag. Then took and angle grinder and cut it pretty short. Maybe even too short actually, another 1/4” on it wouldnt hurt.


Then the cluster side just needed the relief moved back so the plastic clip can grab it. Haven’t had the car at anything faster than a crawl due to the brakes but spinning the other end seems to move the needle.
Cable is actually a little bit long if anything, but I also filled in the stock hole (by accident) and made a new one a little closer. If you ran it like factory I’ll bet its perfect.
Thread Starter
Senior Member
Joined: Mar 2015
Posts: 335
Likes: 8
From: Vancouver, BC
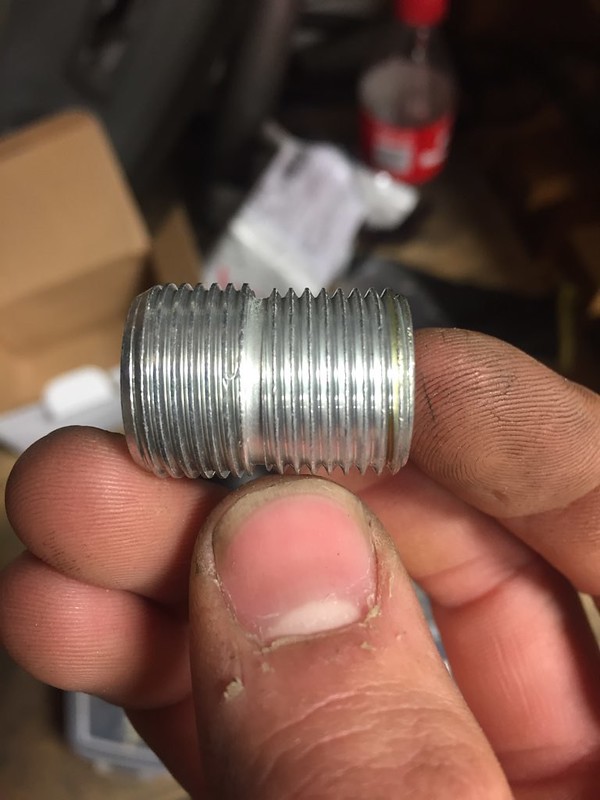
another FC to 5.0 hybrid piece, power steering line. I am debating just buying the AN parts and doing it that way but since I’m cheap I’ll try this first. Its not that pretty which is annoying so I may do that anyway but now I want to know if this will work.
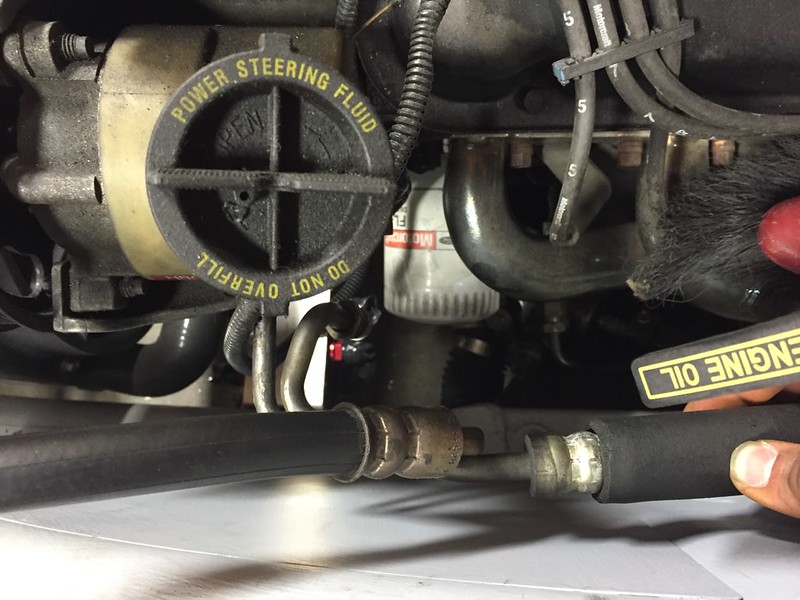
took the 5.0 power steering line and the FC, found a place that I could put a union fitting. Surprisingly the 5.0 line fits a -6 flare prefect.
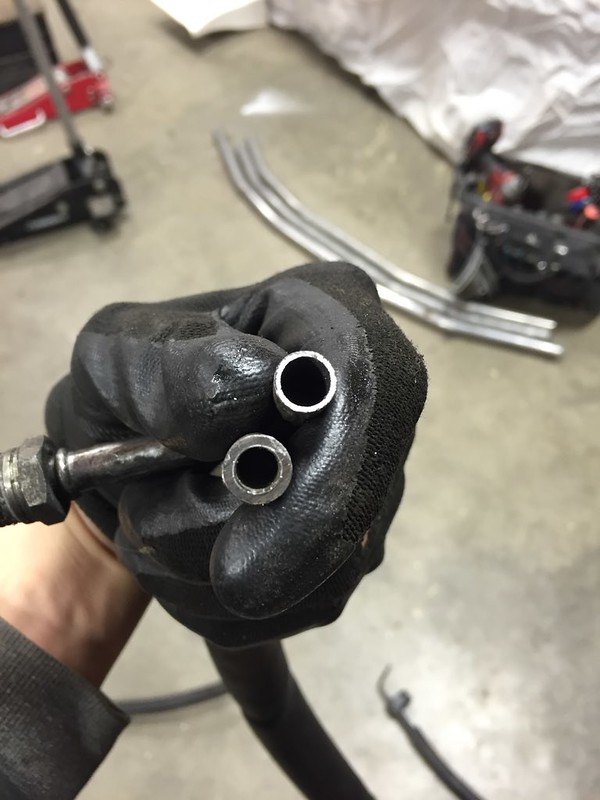
however the FC line (bottom) is considerable thicker wall metal. So after much time wasted grinding it down carefully, then hand sanding to make sure its smooth and somewhat uniform…
lets hope it holds. The union and tube nuts/flare are rated for enough pressure but I’m not sold until I see it work.
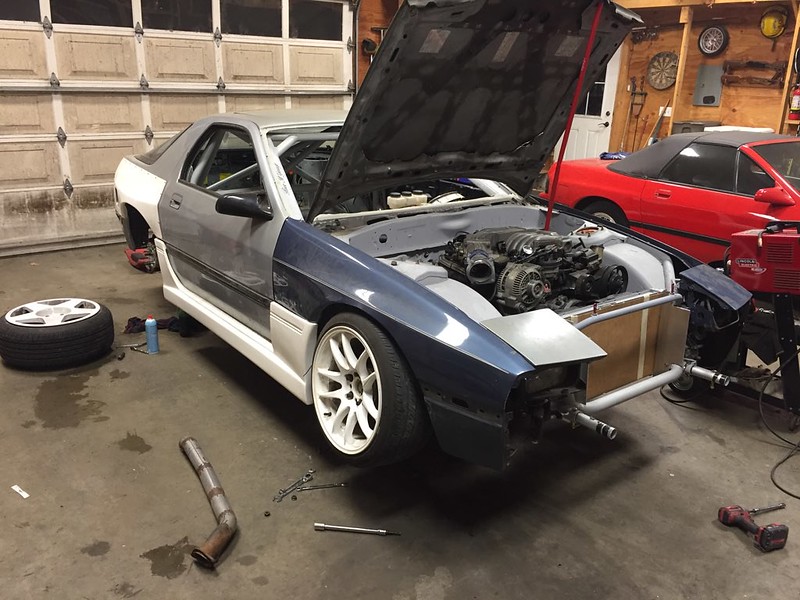
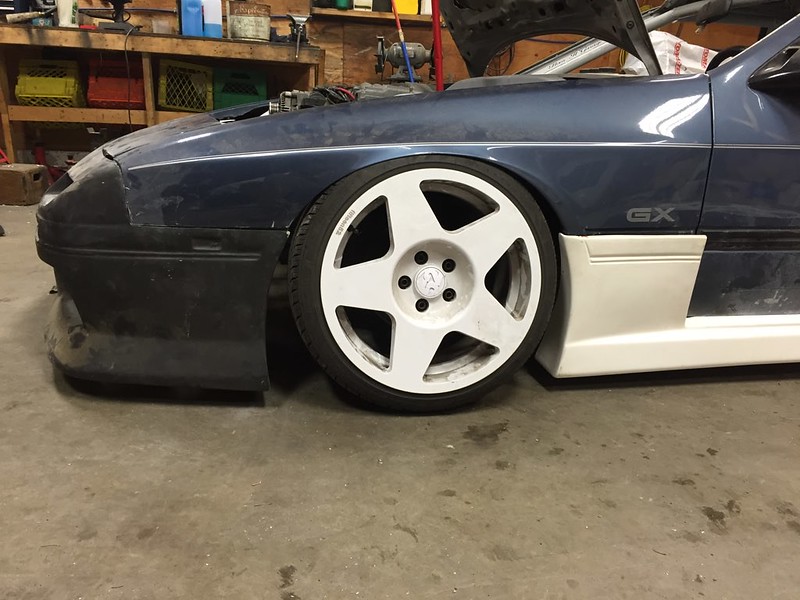
Borrowed s pair of 19” wheels to see how it made my insides feel.
took the 5.0 power steering line and the FC, found a place that I could put a union fitting. Surprisingly the 5.0 line fits a -6 flare prefect.
however the FC line (bottom) is considerable thicker wall metal. So after much time wasted grinding it down carefully, then hand sanding to make sure its smooth and somewhat uniform…
lets hope it holds. The union and tube nuts/flare are rated for enough pressure but I’m not sold until I see it work.
Borrowed s pair of 19” wheels to see how it made my insides feel.
Thread Starter
Senior Member
Joined: Mar 2015
Posts: 335
Likes: 8
From: Vancouver, BC


it
tickles
my
fancy
I think this is 215/40r18 18x9.5 +20 something, 40mm BJ spacers up front (dont quote me on that) and 19x9.5 +10 (also not sure on the offset cuz I messed with spacers a lot that evening) with a 265/35r19. Probably go with a different tire but need to do some trimming of the front of the fender. being that low the trailing arm is pulling it forward. That is if i even go this route. 19 cool and all but at this ride height its not even really functional and 19�s are $$$$. Tire is almost resting on the top of the wheel well. Which makes me think air ride and drifting but later later maybe if even one thing at a time.
Thread Starter
Senior Member
Joined: Mar 2015
Posts: 335
Likes: 8
From: Vancouver, BC
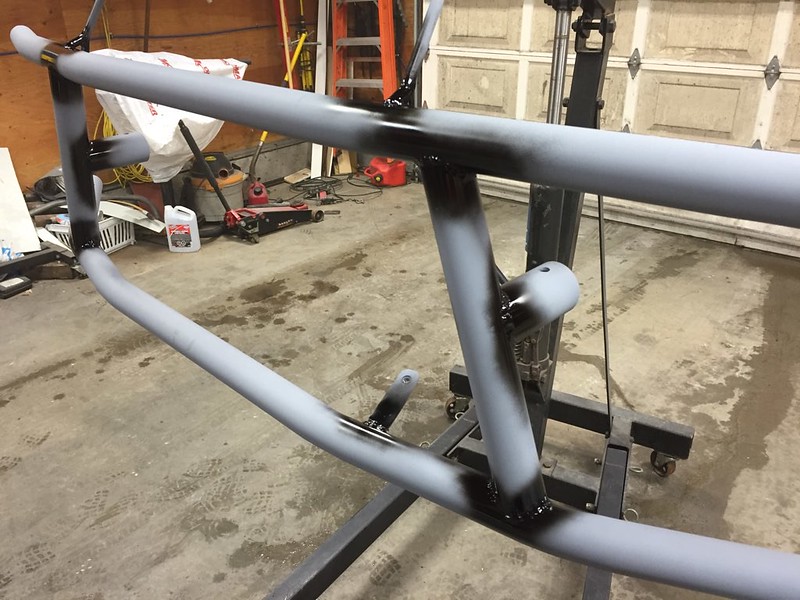
Started on the body mounted splitter. First saw this on Nate from Villains car, but peeping Kam Cadwell’s insta posts gave me more inspiration. I think I’m gonna use wood though, its cheaper and I plan to wreck it quite often. Better than fibreglass. Trying to get my friends on board so I can make a bunch of these things, but lengths will differ from car to car.
welded the mounts on. Thought about making them bolt on, 1 bolt through the middle would do good. Probably go to that if I break on of these but the idea is that the wood breaks, the the tubes break as they are really cheap and easy to make and kinda thin wall.

painted them with a paint called “Chrome Aluminum”, wished I could have made these in alu but close enough I guess.
Also prepped and painted my bash bar
had to warm up the paint, its pretty cold out
welded the mounts on. Thought about making them bolt on, 1 bolt through the middle would do good. Probably go to that if I break on of these but the idea is that the wood breaks, the the tubes break as they are really cheap and easy to make and kinda thin wall.
painted them with a paint called “Chrome Aluminum”, wished I could have made these in alu but close enough I guess.
Also prepped and painted my bash bar
had to warm up the paint, its pretty cold out
Thread Starter
Senior Member
Joined: Mar 2015
Posts: 335
Likes: 8
From: Vancouver, BC
I always like to start with the jams/corners welds just to make sure they get good coverage

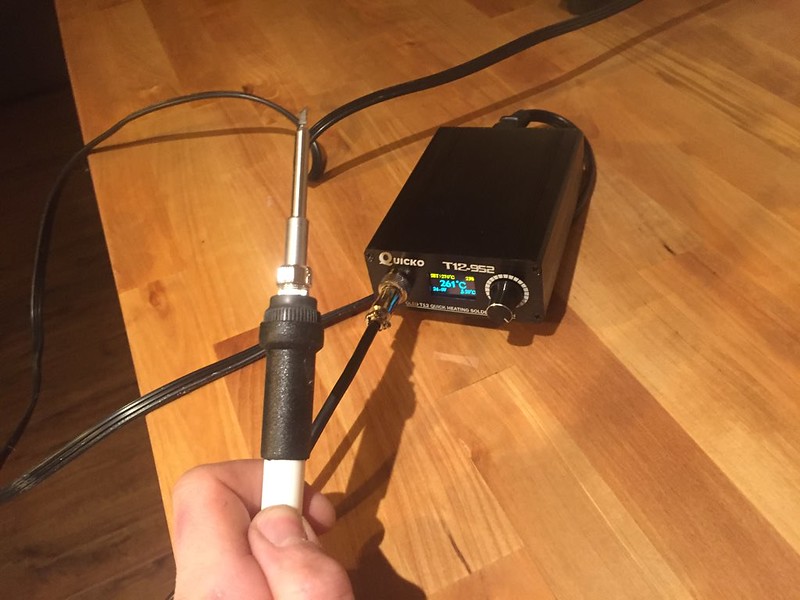
finally got sick and tired of my $150 “snap-on” (weller) butane soldering iron being a pile of garbage and ordered a plug in bench from china for $50. Couldn’t find anything local that was reasonable that got goo reviews, so far its earned it. works well, has a sleep mode to make the tips last longer. wakes up as soon as you bump the pen.
now, I spent too long doing this
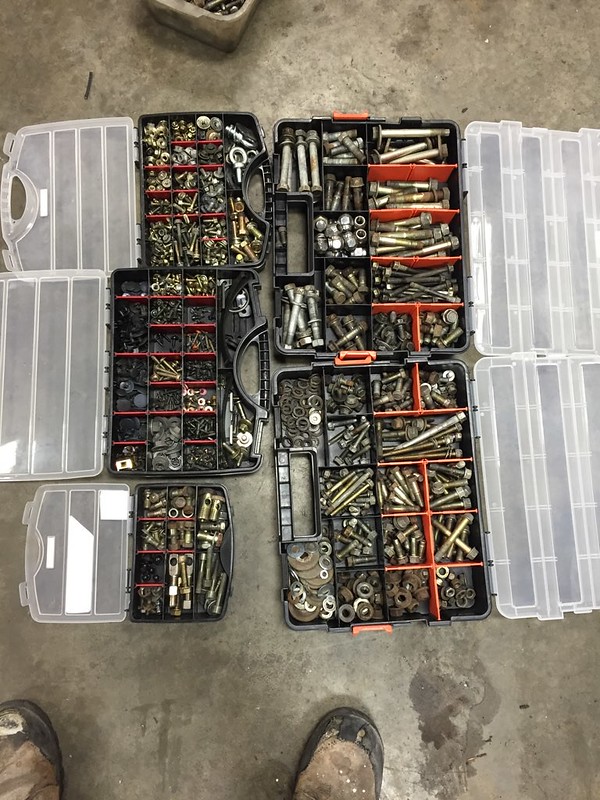
but MAAAN what a feeling. all of it cleaned in solvent and then soapy water. organized all the SAE from the metric, grouped like hardware, grouped bolts that have a specific purpose. organized; love it.
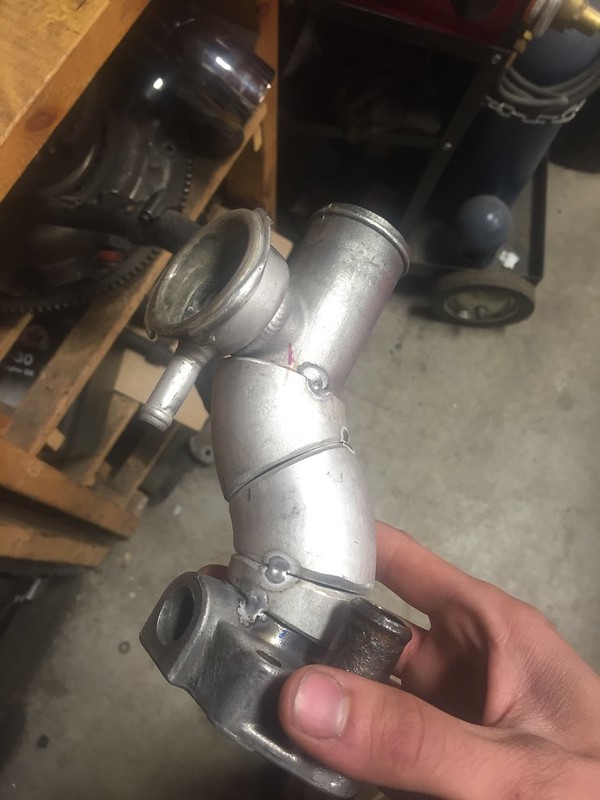
Lets return to the great water neck tale.

The welder helping me out with this (his name is travis) gave me some tips to help improve the weld-ability of this piece. I had made butt joints that are flat but apparently aluminum doesn’t penetrate the material like steel, you have to fill it and it needs a space to be filled. It also will shrink when it cools faster and more than steel so you must use filler.
So he tacked it for me and I took it home to test the fit and make it easier for him to weld where I can. Surface prep is big too, I took acetone with me to clean it right before he worked on it. Was much nicer being where the welder was and being able to help him make sense of my marks and for him to give me the advice he did.
finally got sick and tired of my $150 “snap-on” (weller) butane soldering iron being a pile of garbage and ordered a plug in bench from china for $50. Couldn’t find anything local that was reasonable that got goo reviews, so far its earned it. works well, has a sleep mode to make the tips last longer. wakes up as soon as you bump the pen.
now, I spent too long doing this
but MAAAN what a feeling. all of it cleaned in solvent and then soapy water. organized all the SAE from the metric, grouped like hardware, grouped bolts that have a specific purpose. organized; love it.
Lets return to the great water neck tale.
The welder helping me out with this (his name is travis) gave me some tips to help improve the weld-ability of this piece. I had made butt joints that are flat but apparently aluminum doesn’t penetrate the material like steel, you have to fill it and it needs a space to be filled. It also will shrink when it cools faster and more than steel so you must use filler.
So he tacked it for me and I took it home to test the fit and make it easier for him to weld where I can. Surface prep is big too, I took acetone with me to clean it right before he worked on it. Was much nicer being where the welder was and being able to help him make sense of my marks and for him to give me the advice he did.
Thread Starter
Senior Member
Joined: Mar 2015
Posts: 335
Likes: 8
From: Vancouver, BC
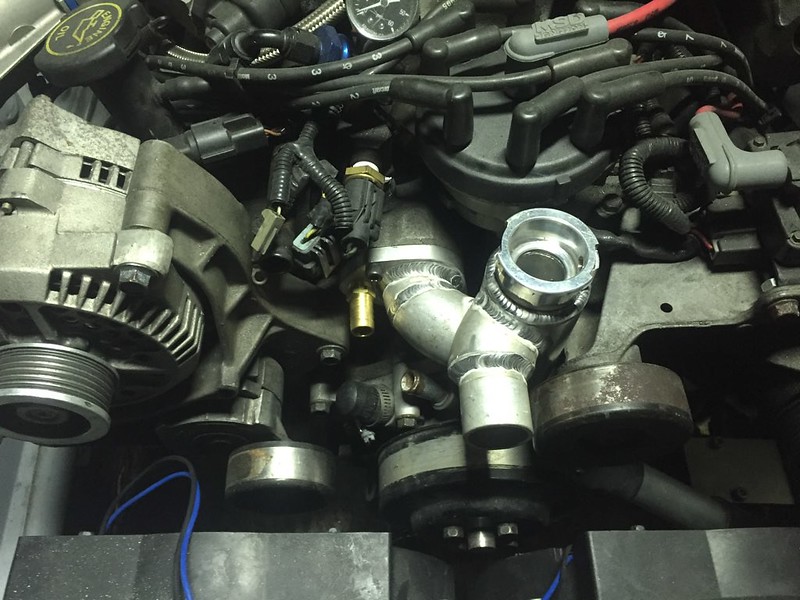
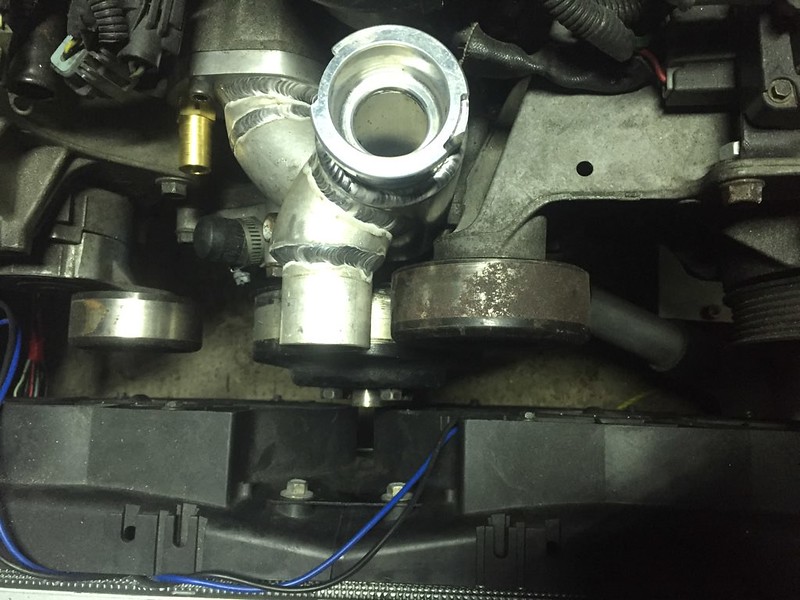
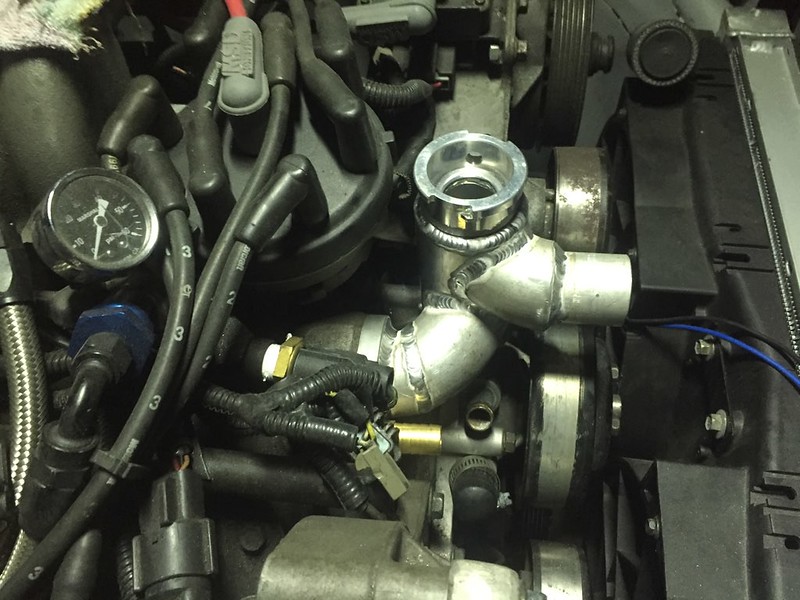

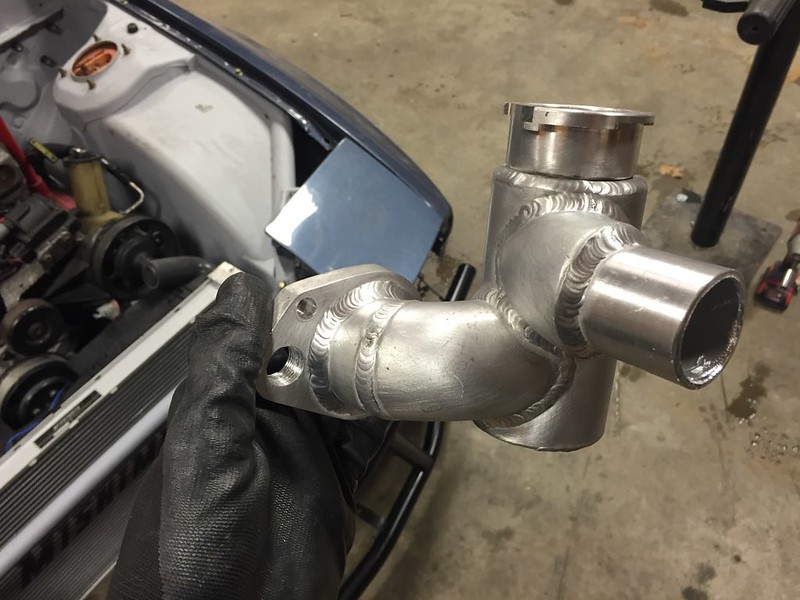
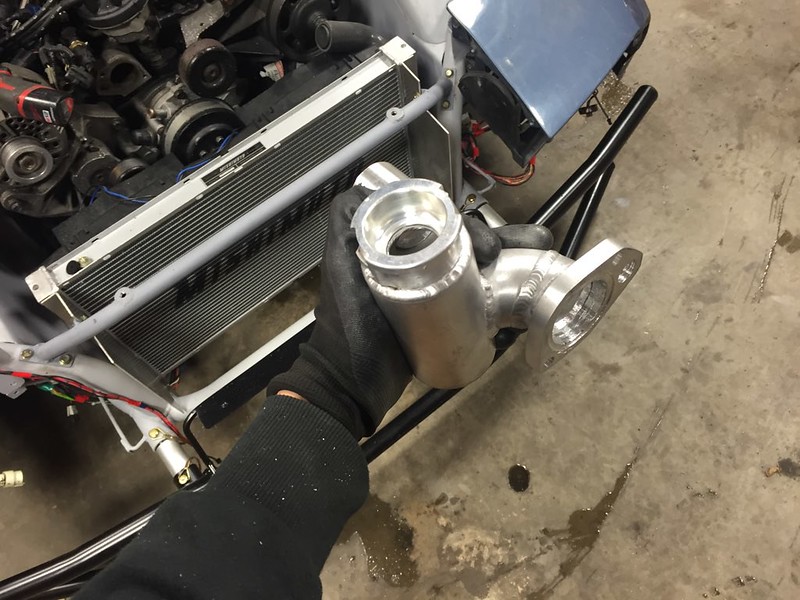
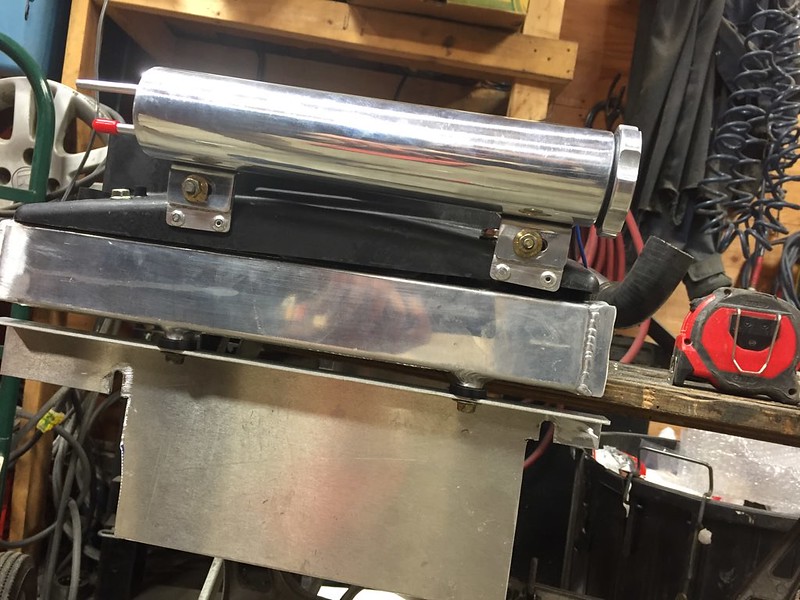
Fits pretty good for welding it off site from the car I�d say. The welds I think are good for what I gave him to work with. The big filled one is somewhat covered by a silicone coupling as well.

Thread Starter
Senior Member
Joined: Mar 2015
Posts: 335
Likes: 8
From: Vancouver, BC
Here it is all cleaned up and gone over with a scotchbrite pad.

however the other win from travis shop was what else had laying around…
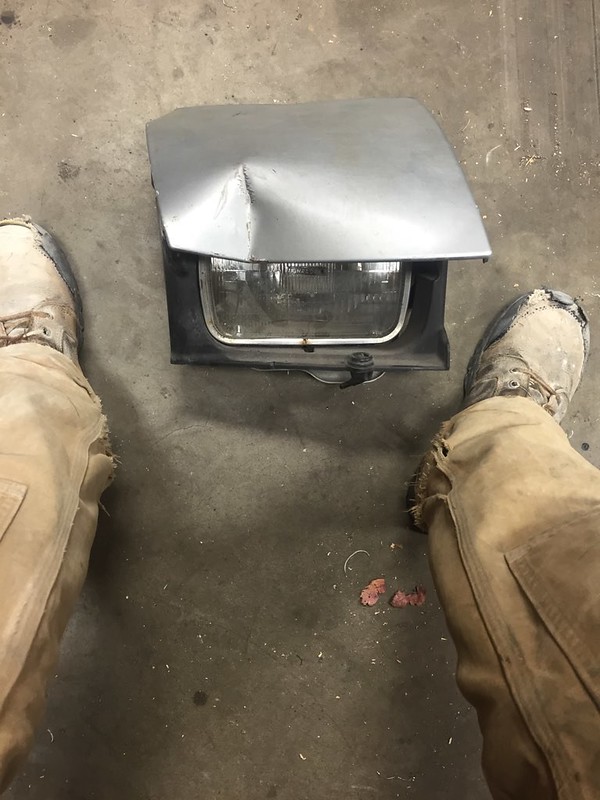
some time along the build, I was pulling the car into the garage and the clutch wouldnt disengage (needed a bleed) and drove straight into a cart and then into the wall. I have no brakes keep in mind… bash bar wasn’t on yet.. still rolling in and out of the garage… it kinda scared me. And pissed me off because now I needed a headlight, thought I had a spare but I did not. Once I calmed down and moved on with my life keeping the bigger picture in mind, was casually looking around while that water neck was being welded. Saw a few FC parts laying around and asked if he happen to have a headlight.
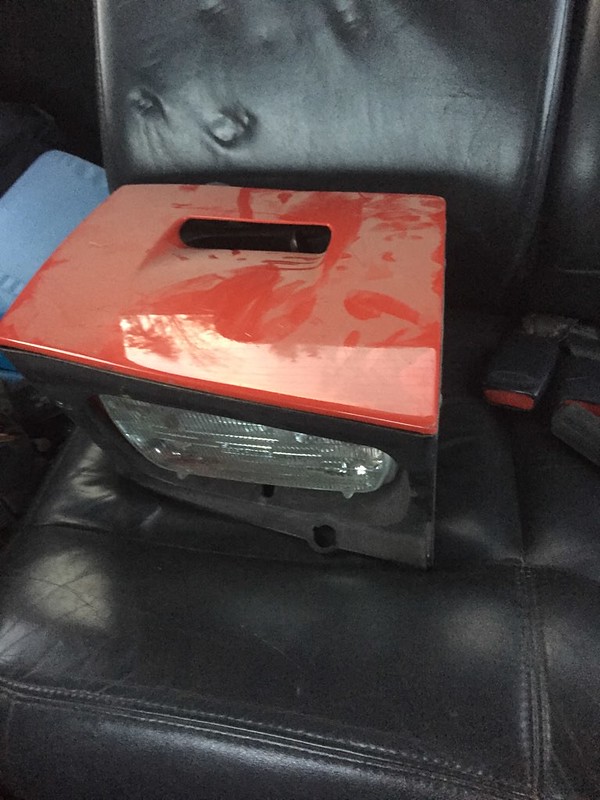
He sold me this for a song. To think the big man upstairs has me covered, taking what seemed like a bad thing and showing me to trust in him even in the small less than important things like a hobby cuz I never would have asked about a headlight unless I needed one and now I have this sick vented one.
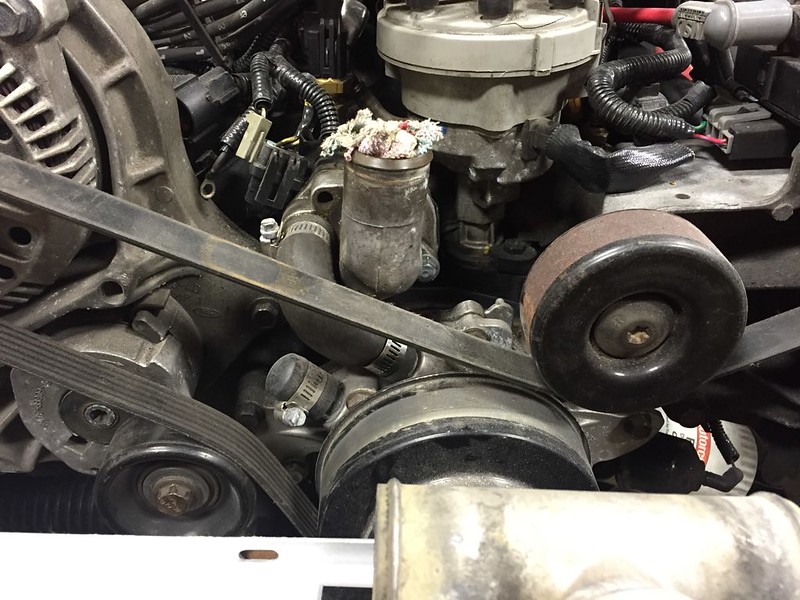
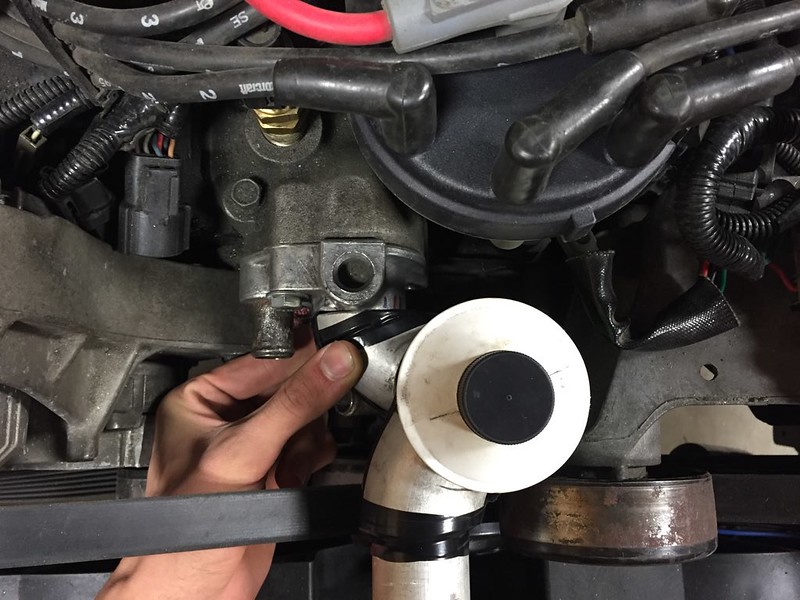
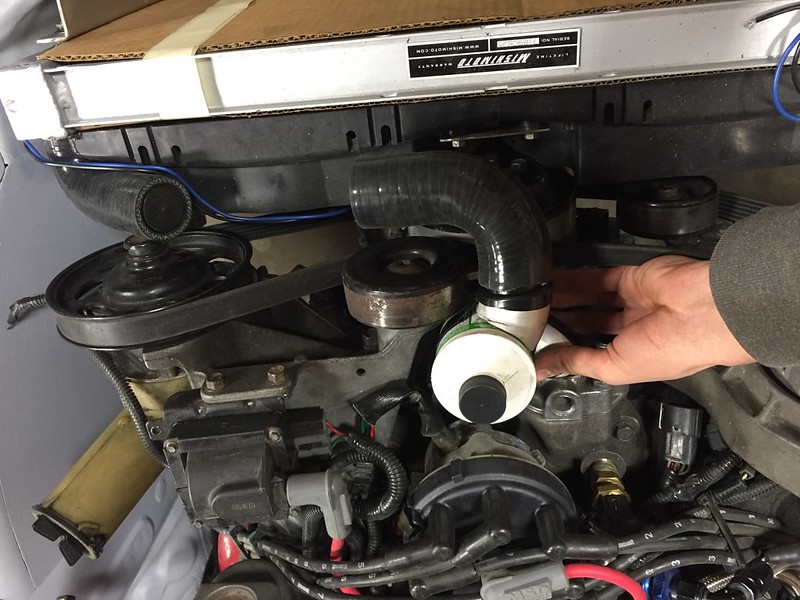
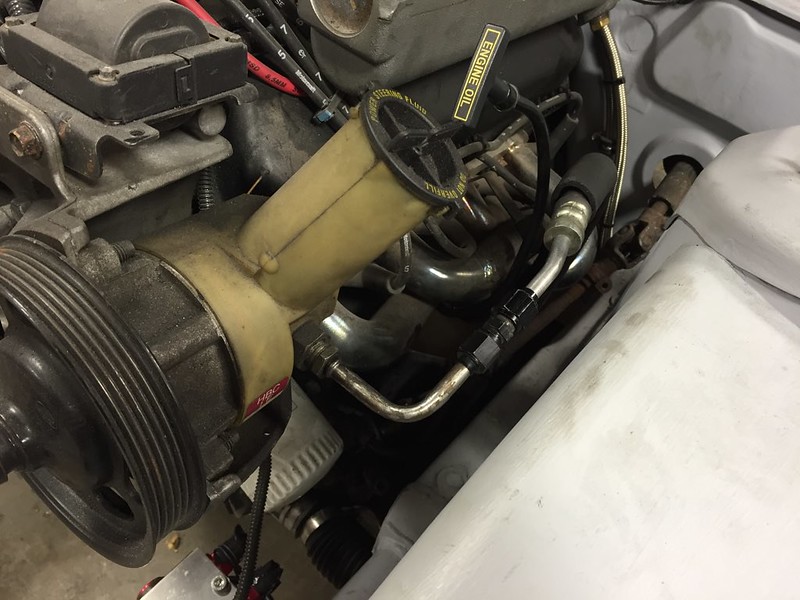
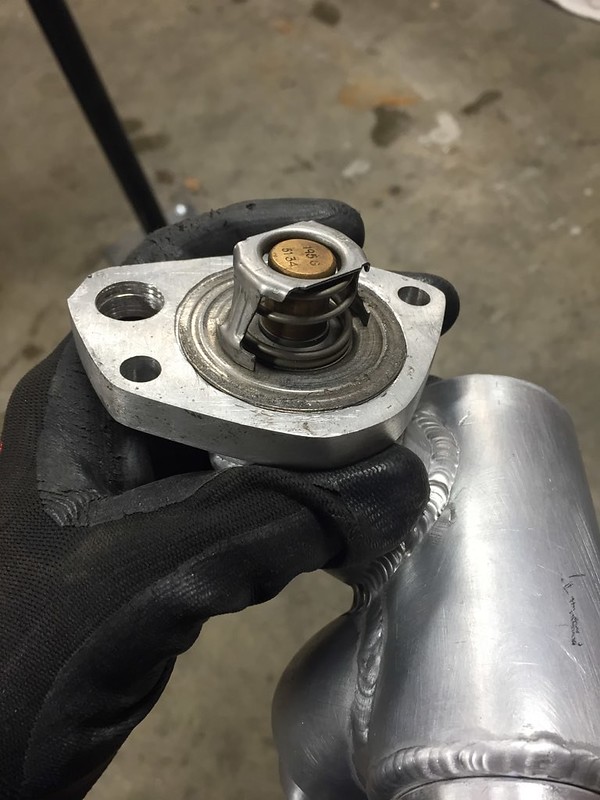
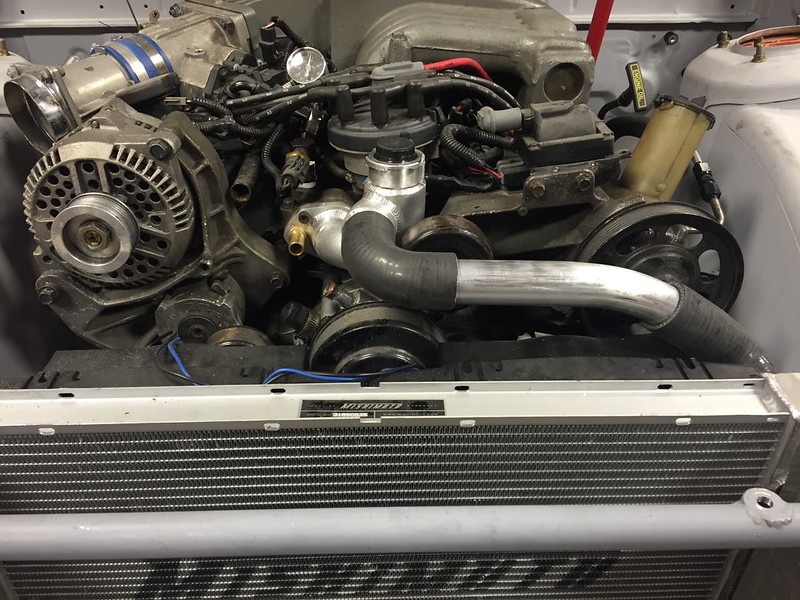
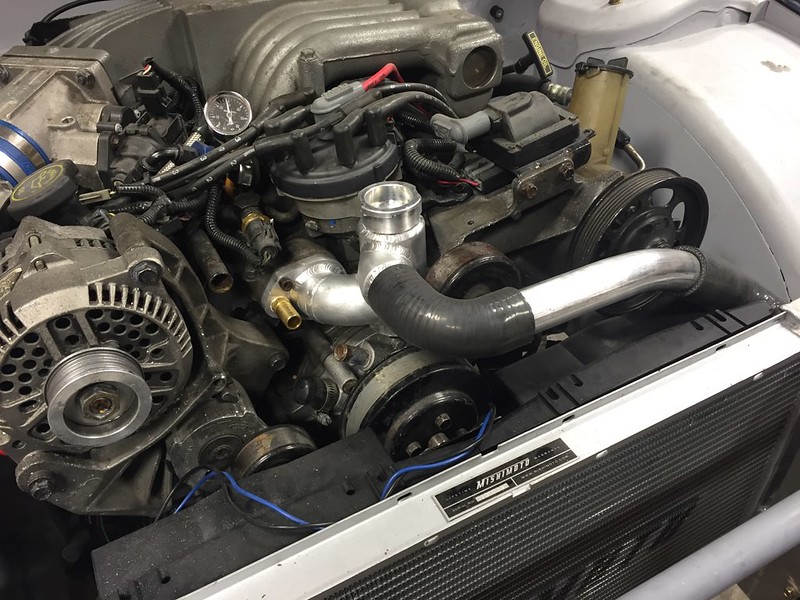
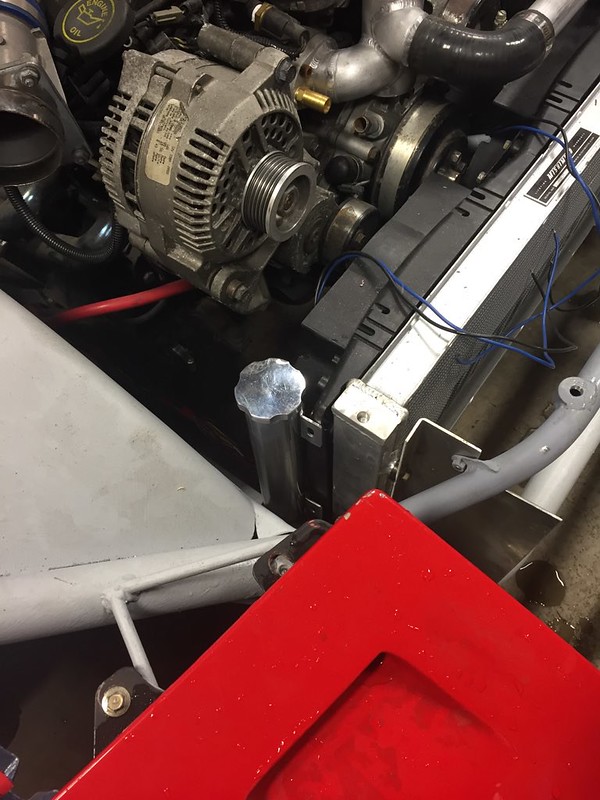
Heres how it the thermostat fits. Dropping the temp from the 190 the mustang is supposed to have to a 170. Was hoping they had a 180 but they didn’t so I’ll try it.
I feel like thats too low and the ECU will stay in cold enrichment but we’ll find out, 190 is too hard for the cooling system to keep up.
however the other win from travis shop was what else had laying around…
some time along the build, I was pulling the car into the garage and the clutch wouldnt disengage (needed a bleed) and drove straight into a cart and then into the wall. I have no brakes keep in mind… bash bar wasn’t on yet.. still rolling in and out of the garage… it kinda scared me. And pissed me off because now I needed a headlight, thought I had a spare but I did not. Once I calmed down and moved on with my life keeping the bigger picture in mind, was casually looking around while that water neck was being welded. Saw a few FC parts laying around and asked if he happen to have a headlight.
He sold me this for a song. To think the big man upstairs has me covered, taking what seemed like a bad thing and showing me to trust in him even in the small less than important things like a hobby cuz I never would have asked about a headlight unless I needed one and now I have this sick vented one.
Heres how it the thermostat fits. Dropping the temp from the 190 the mustang is supposed to have to a 170. Was hoping they had a 180 but they didn’t so I’ll try it.
I feel like thats too low and the ECU will stay in cold enrichment but we’ll find out, 190 is too hard for the cooling system to keep up.
Thread Starter
Senior Member
Joined: Mar 2015
Posts: 335
Likes: 8
From: Vancouver, BC
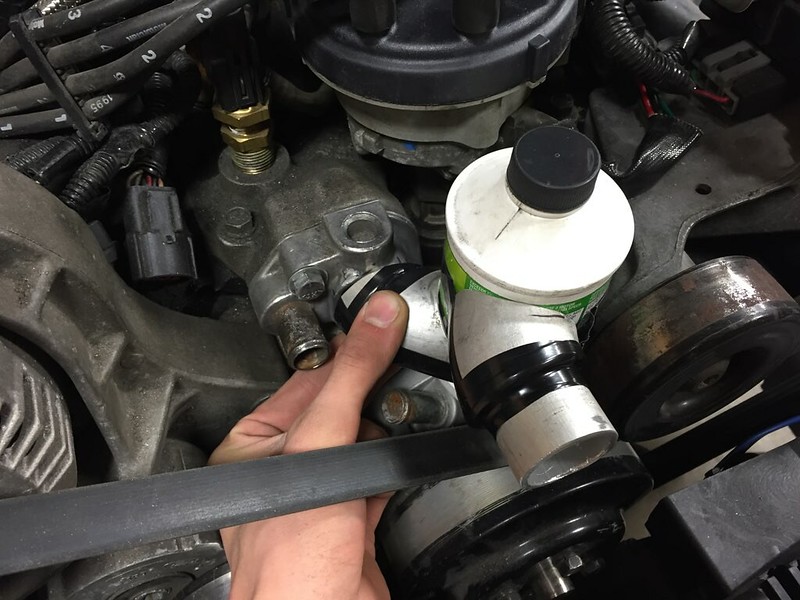
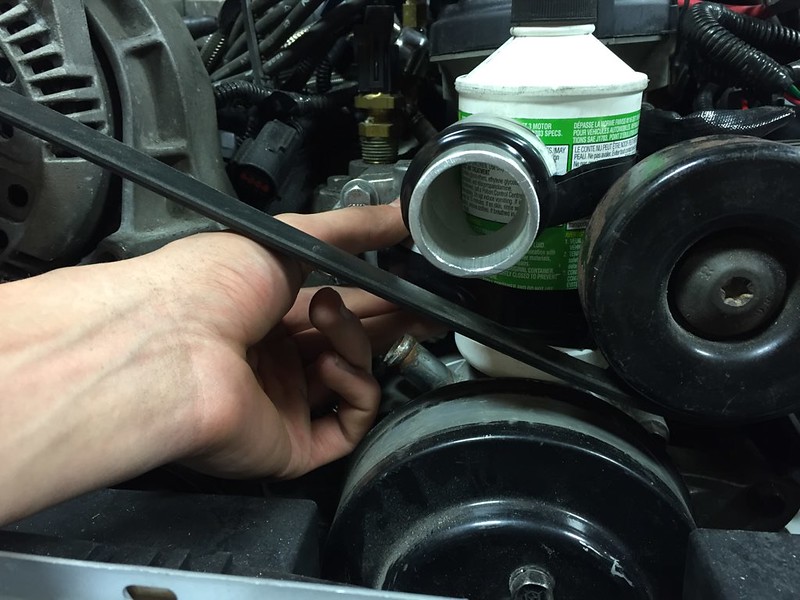
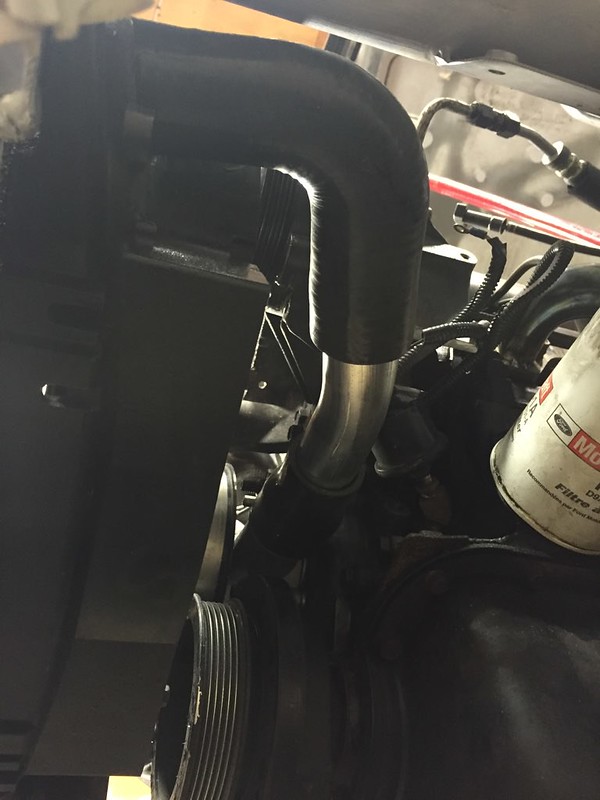
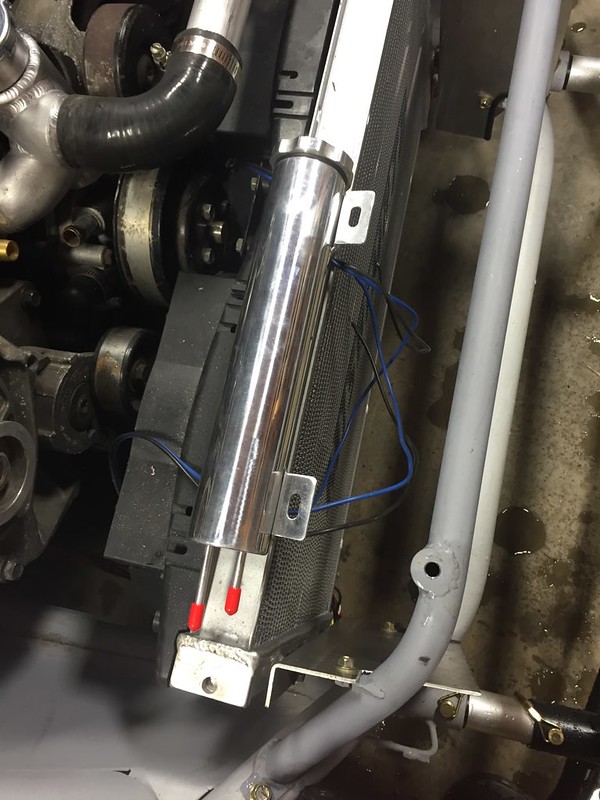
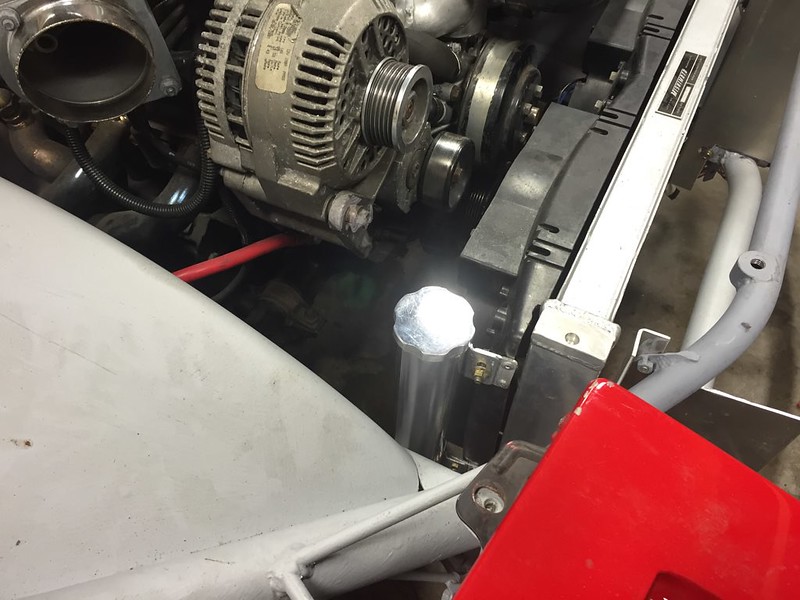
the bottom bolt of the water neck is a bit tricky but far from too difficult with an allen key.

Wised up and bought another WRX drain plug and tapped it this time instead of ghetto fab JB welding the sender in place.
have yet to install though.
me gusta

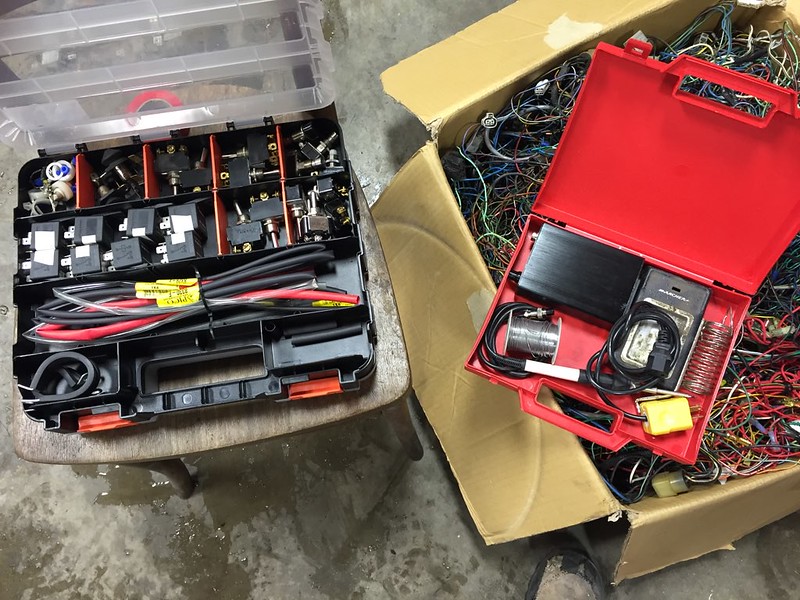
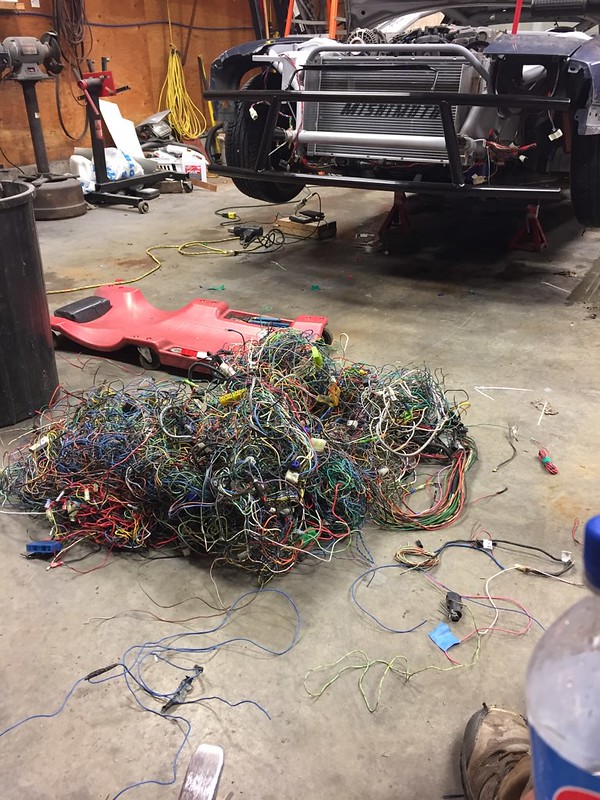
So now that I have a soldering iron that actually works time to go back to wiring. Wiring is particularly interesting to take pics of though


got the signals and headlights working, or so I though. Also had some trouble with the HVAC logicon, but thankfully my dad has a fully stock mostly functional S4 vert in the garage to help me figure it out. And the local RX7 chat I’m involved in.
Wised up and bought another WRX drain plug and tapped it this time instead of ghetto fab JB welding the sender in place.
have yet to install though.
me gusta
So now that I have a soldering iron that actually works time to go back to wiring. Wiring is particularly interesting to take pics of though
got the signals and headlights working, or so I though. Also had some trouble with the HVAC logicon, but thankfully my dad has a fully stock mostly functional S4 vert in the garage to help me figure it out. And the local RX7 chat I’m involved in.
Thread Starter
Senior Member
Joined: Mar 2015
Posts: 335
Likes: 8
From: Vancouver, BC
Mazda�s electrical engineering on this car is terrible. I could do better honestly, and thats a real shot because I�m a lowly electrician with a car audio background who just has an opinion. Theres so much excess wires and weird joints, and extra parts, and things that do nothing, and overly complicated methods of making what should be simple stuff work.
The headlights still don�t make full sense to me, but I really wanted to use aftermarket ice cube relays for them vs mazdas proprietary headlight relays.
but I blew up a light switch first.
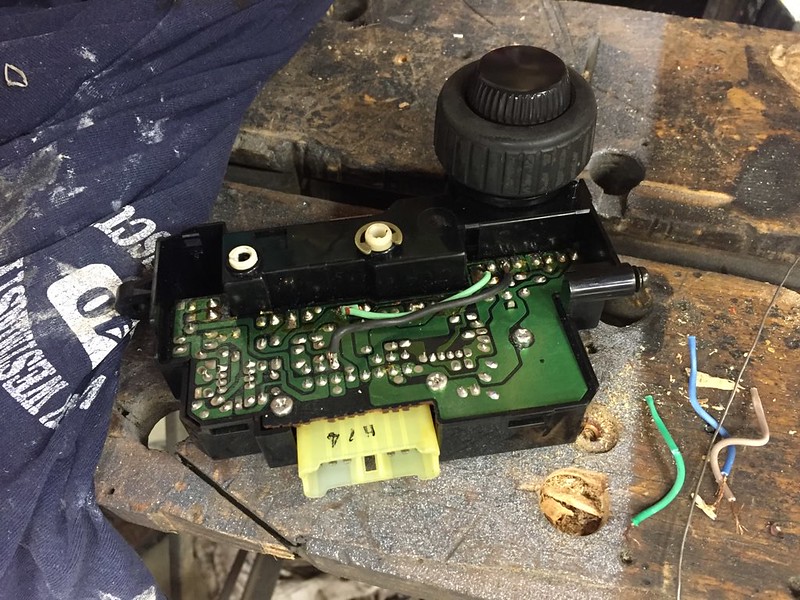
Am trying to keep it so I can use any old jumper harness and switch assemblies, for the wipers too but I don�t think that�s going to happen. Fixed the joint I burned up (green wire, which was a ground) and altered the switch output to an unused pin and changed it on the jumper harness. bleh. aside from the headlights not going up and down with the light switch (but works with the other switch) its all good now. Found a lot of things that didn�t work like I thought they did when I first did the harness in the spring last year. Made a lot of corrections and changes. spent way too much on consumables too.
have a few more connectors to make, need to put the dash in to get lengths correct first. Ordered a crimper for some of the terminals too.

so this is missing something
first one I ordered was too long so I sold it on craigslist and bought the same thing but shorter.
plan was to make it sit like there
against my better judgement I even used their included rivets, which sucked compared to the Pop-rivet brand ones that I couldn�t find.
and then ya know, cut my rad mounts again to make templates for version 3.0
So now you�re caught up. next time I�ll hopefully be in a new garage and actually have bled the brake and put coolant in it and maybe have done a burnout. just a little one tho�
The headlights still don�t make full sense to me, but I really wanted to use aftermarket ice cube relays for them vs mazdas proprietary headlight relays.
but I blew up a light switch first.
Am trying to keep it so I can use any old jumper harness and switch assemblies, for the wipers too but I don�t think that�s going to happen. Fixed the joint I burned up (green wire, which was a ground) and altered the switch output to an unused pin and changed it on the jumper harness. bleh. aside from the headlights not going up and down with the light switch (but works with the other switch) its all good now. Found a lot of things that didn�t work like I thought they did when I first did the harness in the spring last year. Made a lot of corrections and changes. spent way too much on consumables too.
have a few more connectors to make, need to put the dash in to get lengths correct first. Ordered a crimper for some of the terminals too.
so this is missing something
first one I ordered was too long so I sold it on craigslist and bought the same thing but shorter.
plan was to make it sit like there
against my better judgement I even used their included rivets, which sucked compared to the Pop-rivet brand ones that I couldn�t find.
and then ya know, cut my rad mounts again to make templates for version 3.0
So now you�re caught up. next time I�ll hopefully be in a new garage and actually have bled the brake and put coolant in it and maybe have done a burnout. just a little one tho�