
I Bit Off More Than I Can Chew: A Drift Car


Thread Starter
Senior Member
Joined: Mar 2015
Posts: 335
Likes: 8
From: Vancouver, BC

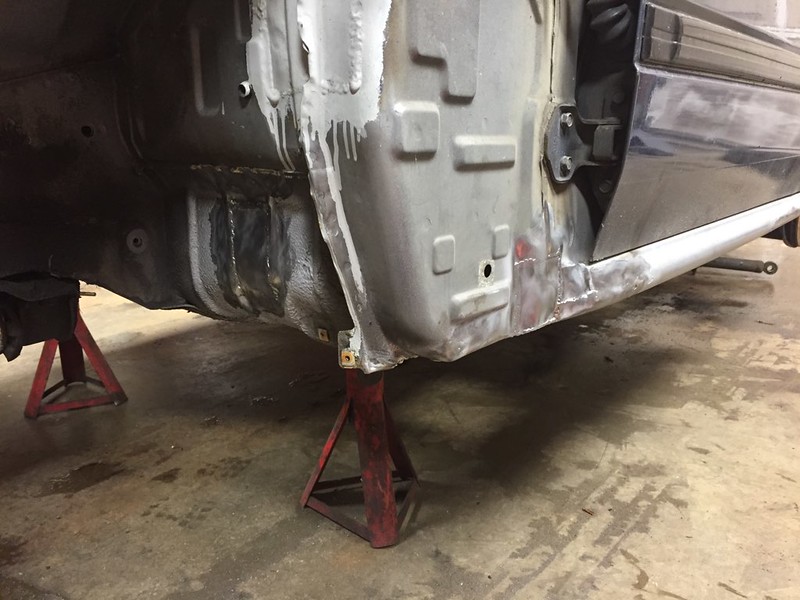
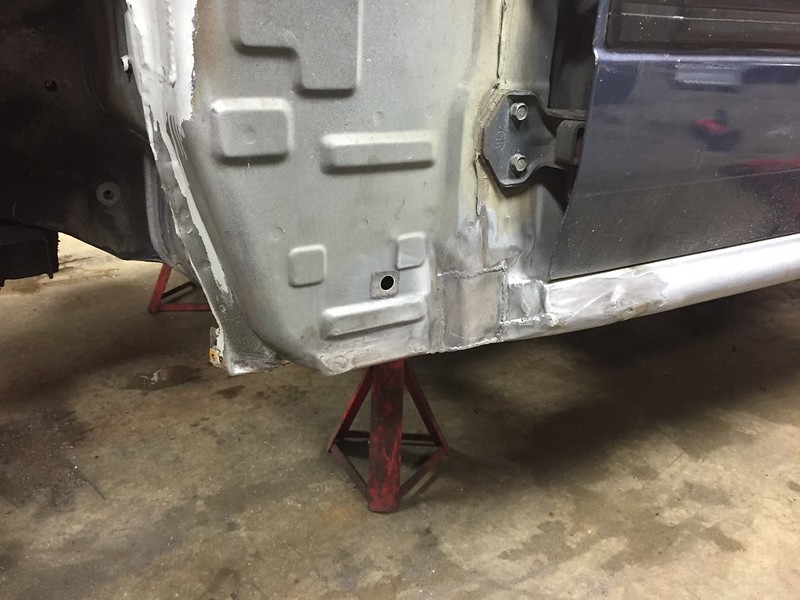
and done one side
and both. much better. OCD satisfied for now
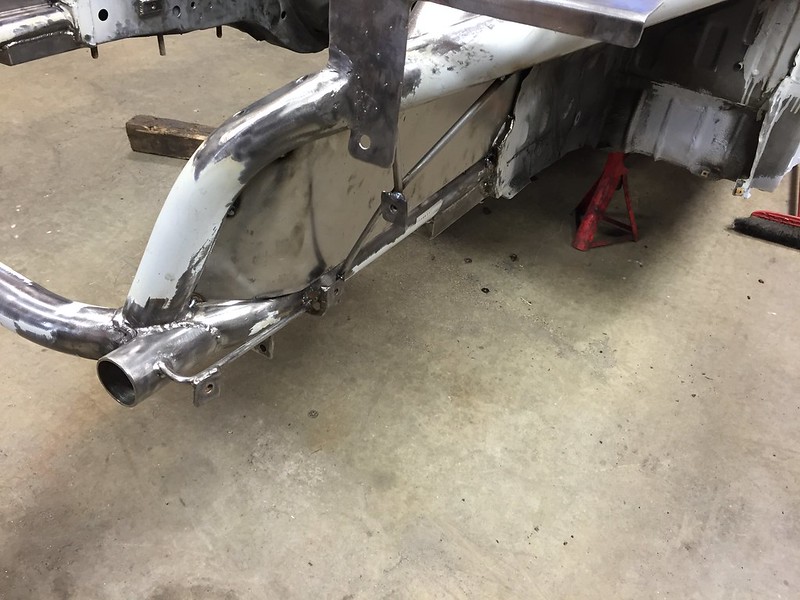
while I had the welder going I put a captive nut on a plate for a ground wire from the engine. May re do this, but its pretty low down and functional.
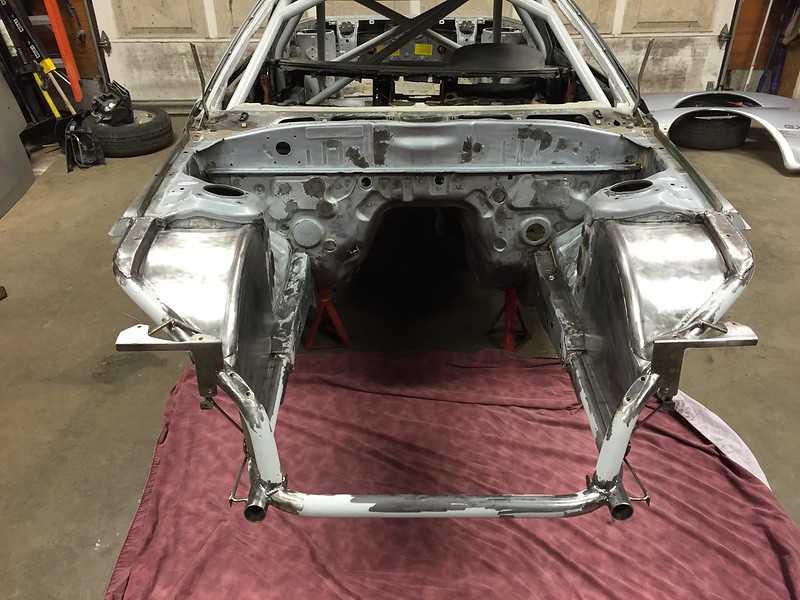
got some primer from the body shop my sister worked at
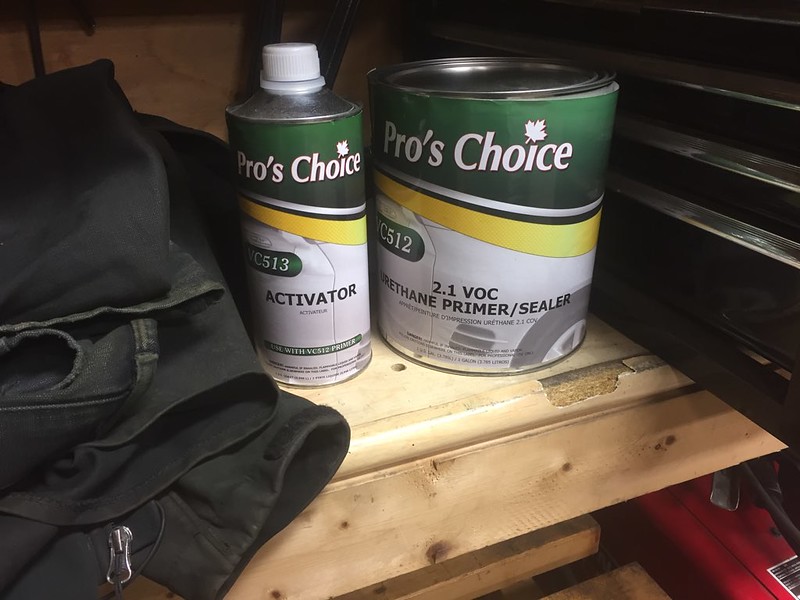
and set up for doing some primer. finally everything won't rust on me
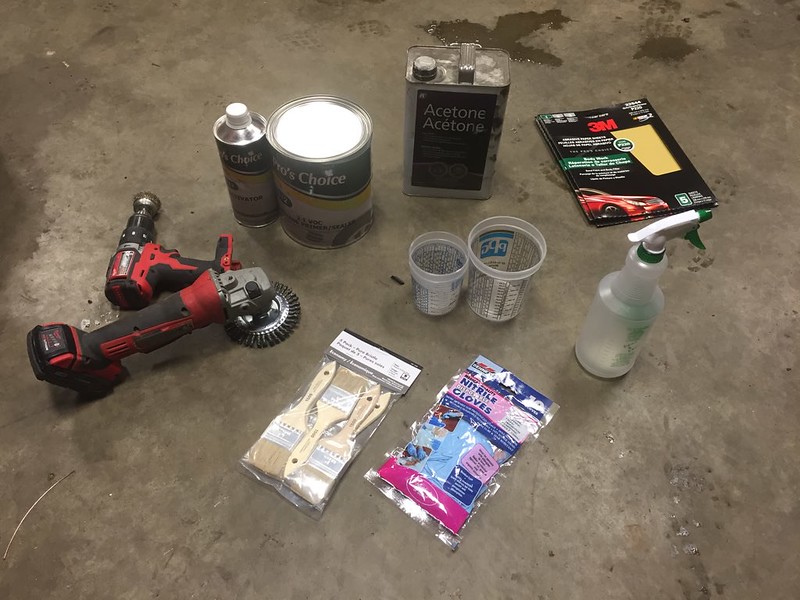
start with wire wheel
sand with 260
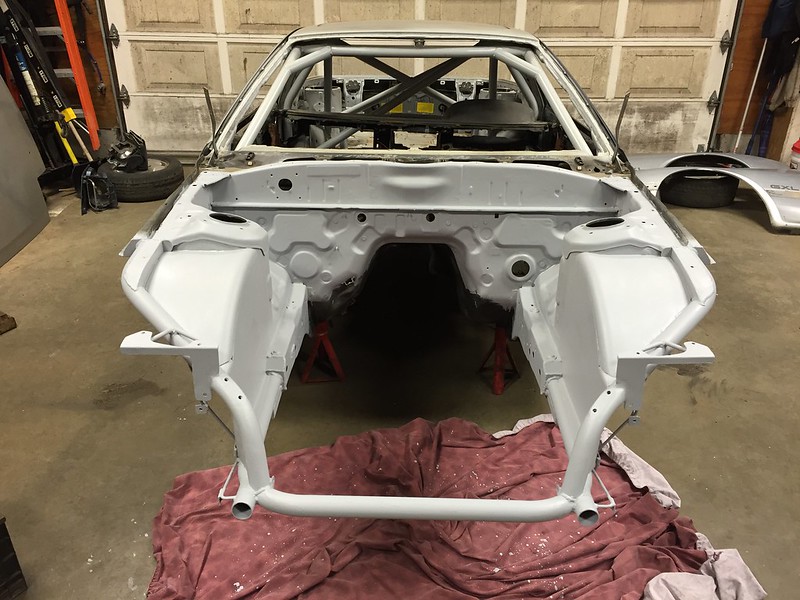
give it 2 layers of primer
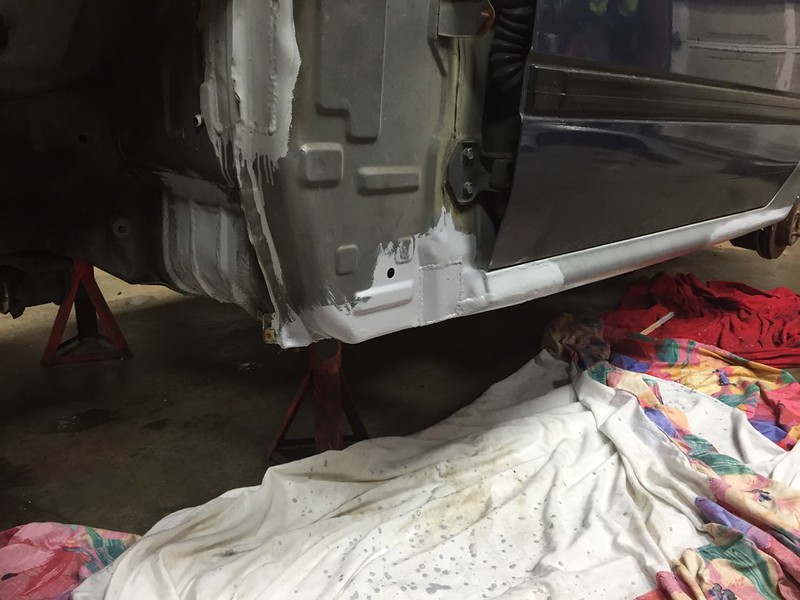
as it turns out, this is fairly time consuming. And I have to allow for drying time at the end of it before I put it back outside in whats usually rain.
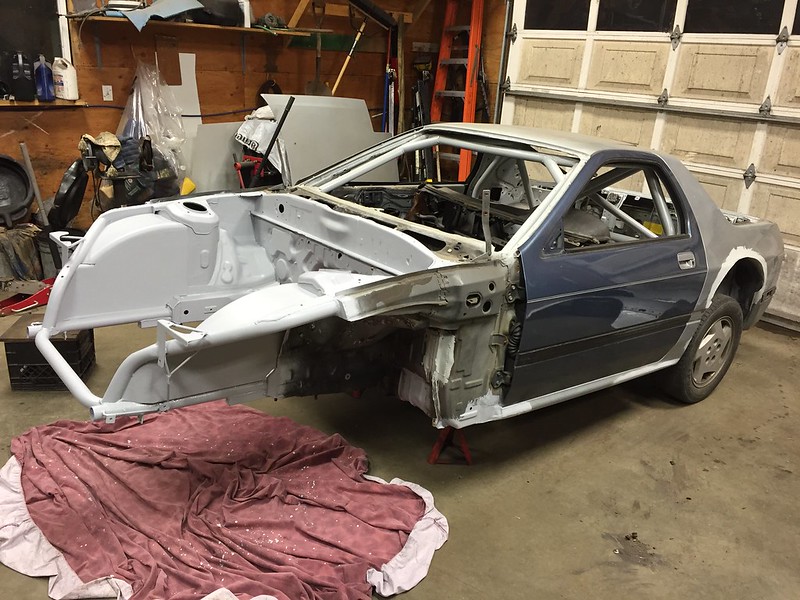
so still putting the car outside under a tarp
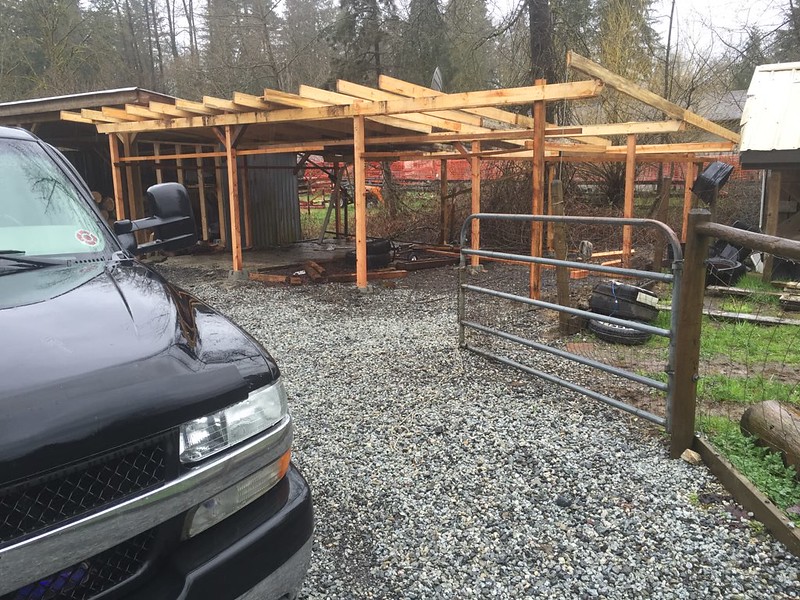
but me and my dad are working on making that better. 2 parts firewood storage and 1 part shelter for my car. Once we're done building it and framing in the sides I'm planning to frame a door and completely enclose where my car is. When we measured it out I planned for enough room to build a tire rack in front of the car and some small shelves etc. But as I've learned thrifty ways from my dad, we are trying to find as much used wood and roofing etc off CL and save money where we can there.
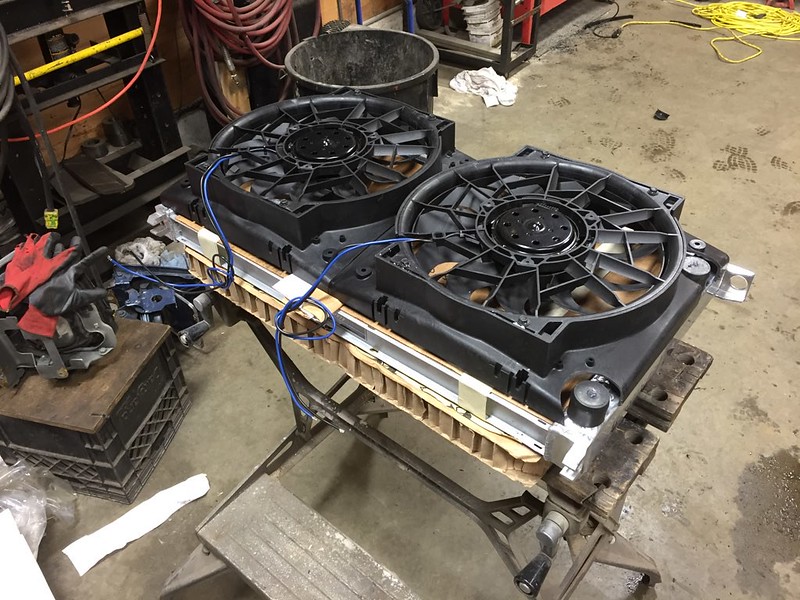
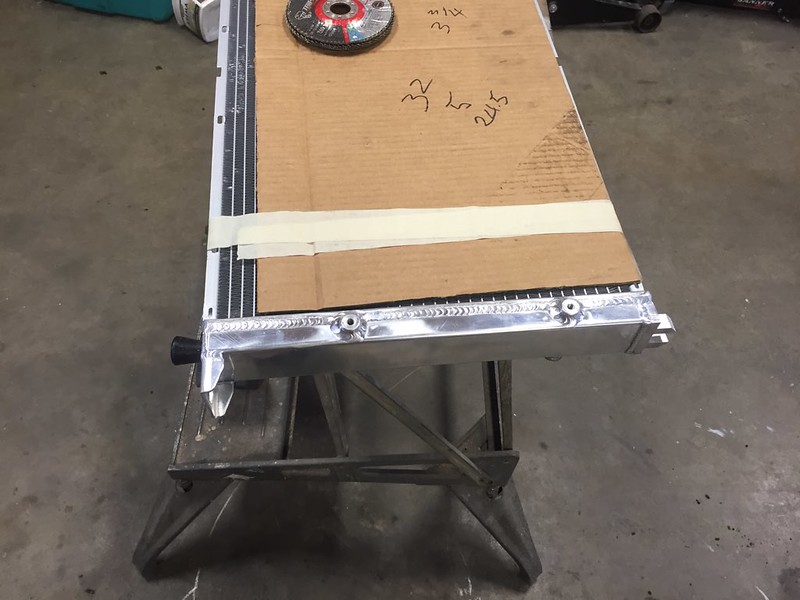
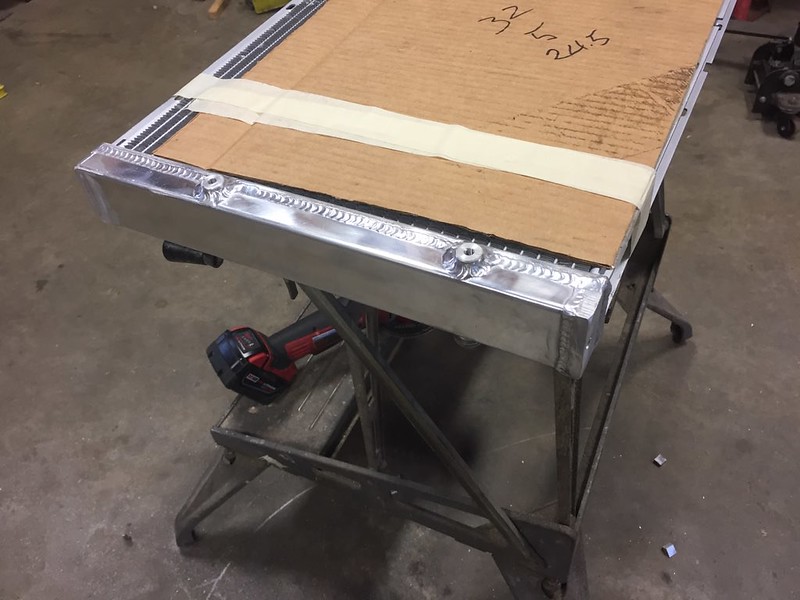
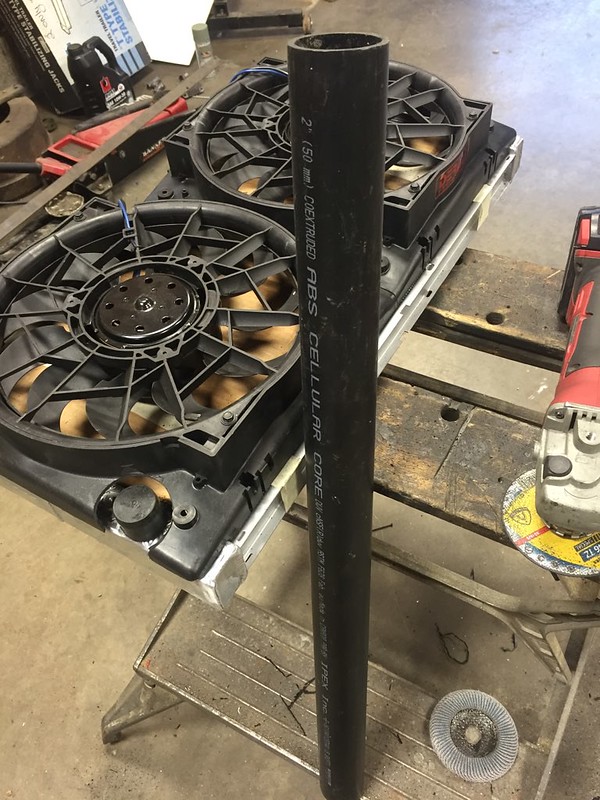
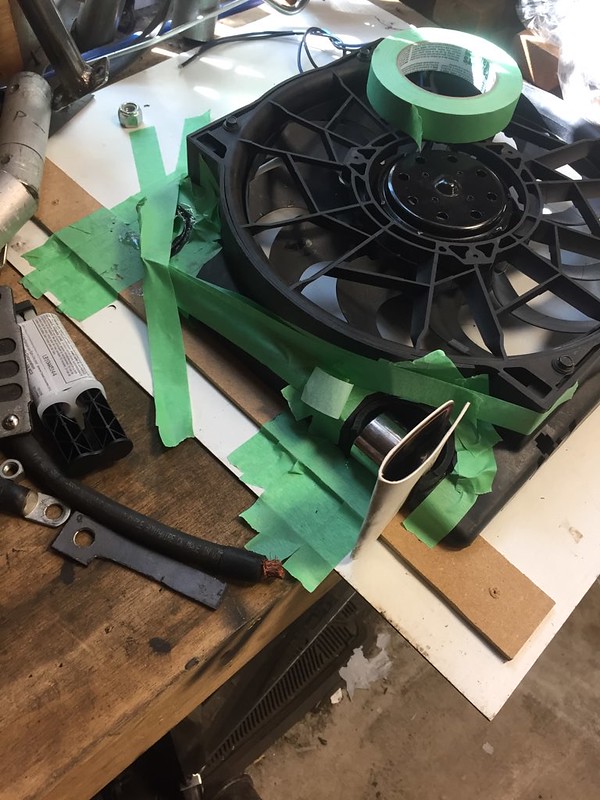
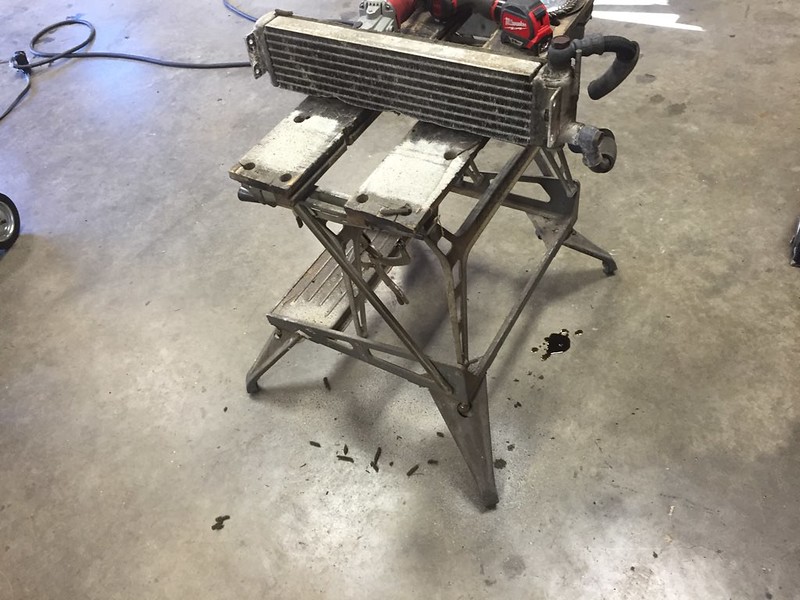
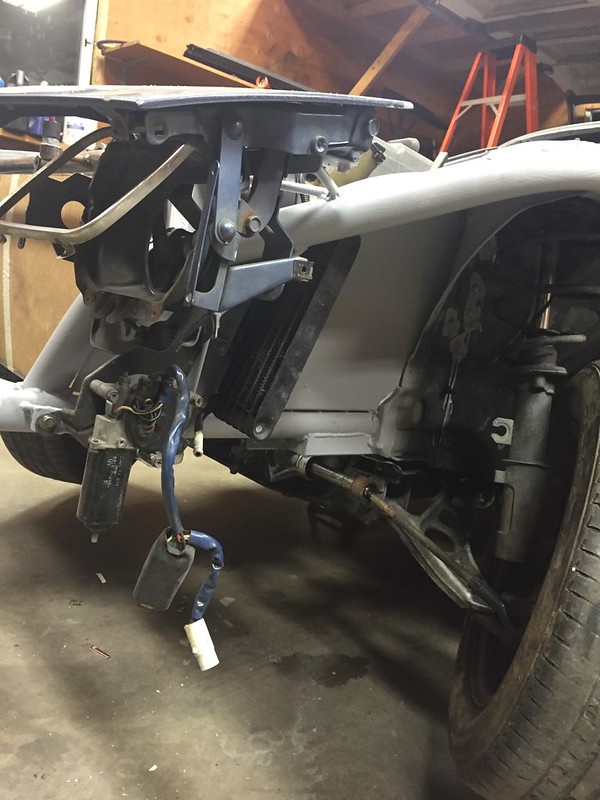
spent a few minutes with my radiator and fans, did some trimming and hole saw action
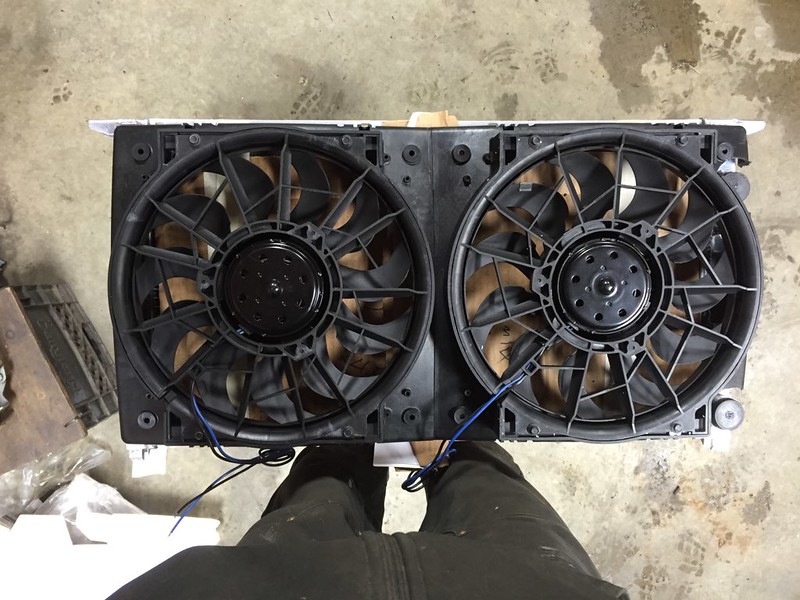
need to get some PVC pipe to finish the shroud. but fits just so.

Thread Starter
Senior Member
Joined: Mar 2015
Posts: 335
Likes: 8
From: Vancouver, BC
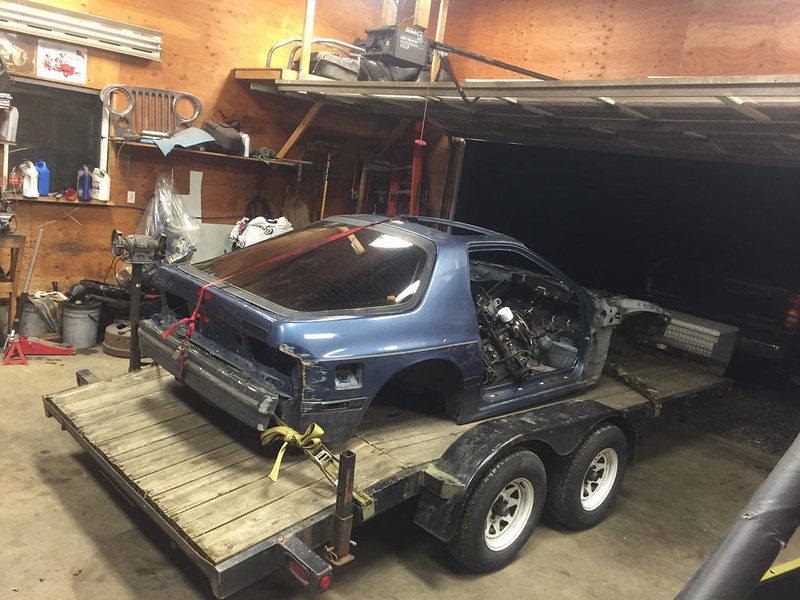
Took the missile out for its last hurrah before I disassembled it completely.
Friend was having a private day up at Penticton and I managed to snag a spot out of 5 cars. Paid for the event thinking "missiles fine, haven't touched it since october but it ran when I jumped it last"
well...
needless to say we had a rough winter and I forgot to drain the coolant or put antifreeze in it. Not 100% sure where the coolant and oil are mixing but my best guess is the front iron cracked. This was after the car was loaded on the trailer and we were otherwise set to leave early the next morning. So I threw new oil in, (didn't help) some lucas stabilizer and put premix in the tank hoping to limp it through the day.
needless to say it made it, though down on power and smoking like it was on fire (apparently shot fire ***** too). Managed to get my girlfriend in a drift car. Told her "I'll take it easy and you can get used to it". kinda did that for the first pass. 2nd pass I threw in almost 2 fast and closer to the wall then I had all day. But she wasn't phased and stayed in until we both felt sick from burning engine. Brought a buddy along to let him have a chance to do some donuts and experience drifting and well basically get him hooked on it before he does something like autoX or track racing haha.
Spent some time playing with front suspension settings and alignment settings. Private days are great for this cuz you have so much track time. I'll get into more of it later
was super surprised by how long it lasted, especially since I was not being nice to it, as I didn't really have much to lose if the engine did go. Ended up being a long day though, its about 4 hours to get to the track, then we detoured on the way home and hit snow at the summit of the Coquihalla on the way home. Left at 7 am, home at 2:30 am.
So the next weekend after that, we headed up to Nissan Fest. was thinking "ya this will be a nice chill weekend, Im not driving or drifting. maybe change some tires for the guys and get some ride alongs"

nope.
Krew Chief Keil's Allison blew up about 10 minutes from the border. So we pulled it off the hwy with Pete's LS powered 240, and I got a ride to the border and walked across to get another ride to get my dads truck. Ended up towing the trailer and all the tires for the team. worked out because my dads truck and kris' is the same except his is a diesel. But was a fun weekend, weather was all over the place. Everybody practiced in the dry and our guys got in a groove, then we had a lunch break where it rained hard for an hour then cleared up in time for the competition. But it was 100% different than practice and was super slippery. Kudos to the guys that won though, they had it pretty figured out by the end of the comp and put down some clean runs even for how wet and inconsistent it was.
Then one of our cars (lol not one of the drift cars but he did drift in the open drift after the comp) broke like 20 minutes down the high way leaving the track so we loaded him on the trailer and dragged it eventually all the way home.
Fun weekend, however not was I expecting at all but when is it ever.
Started tearing the missile down and found things I wasn't expecting
I always had this idea that I would one day build this car into the new drift car, but the roll happened much sooner than I was ready for and the accident with this car also happened unexpectedly and too soon. I always thought it was the cleanest of the 3 i've owned but turns out its the worst.
The usual areas I see rust on S4's there wasn't any but the passenger rocker was baaaaaaddd
so ripped the interior and windshield out. I plan on keeping a large amount of the parts from this car. The interior while blue was in great shape and when I go to die a dash black again I wanted matching colours so starting with the same colour dash pieces. The suspension is also full of parts from the drift car anyway, and having spares of some stuff aint a bad thing.
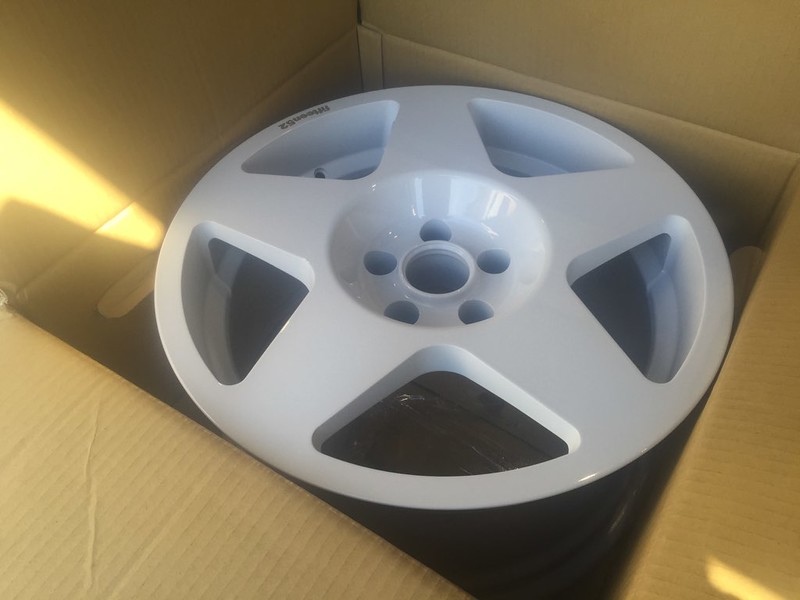
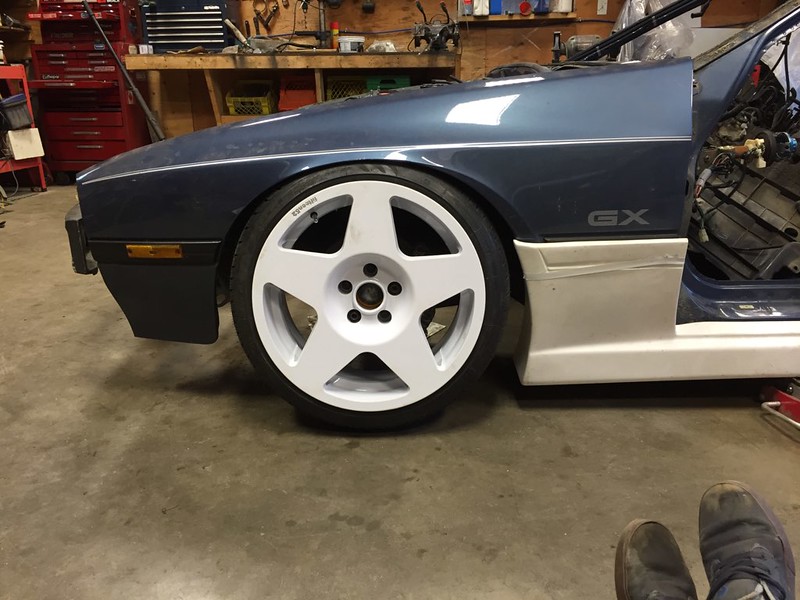
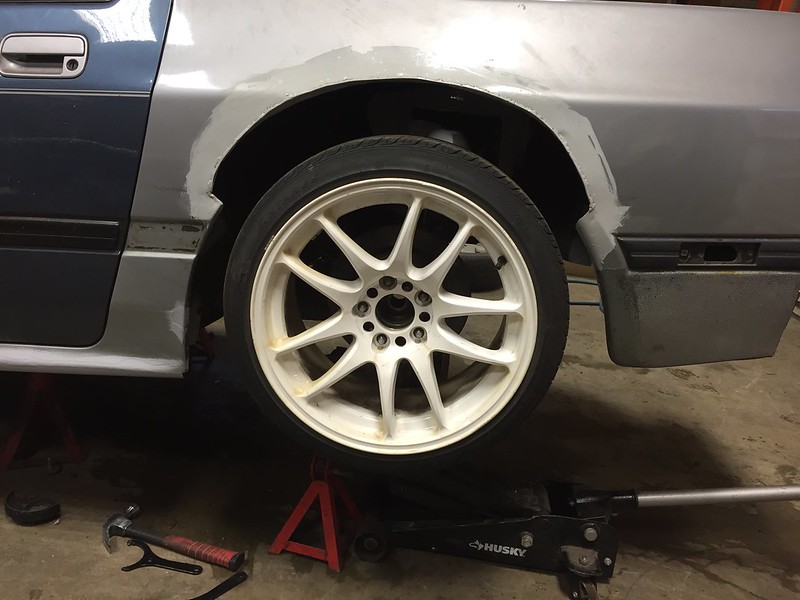
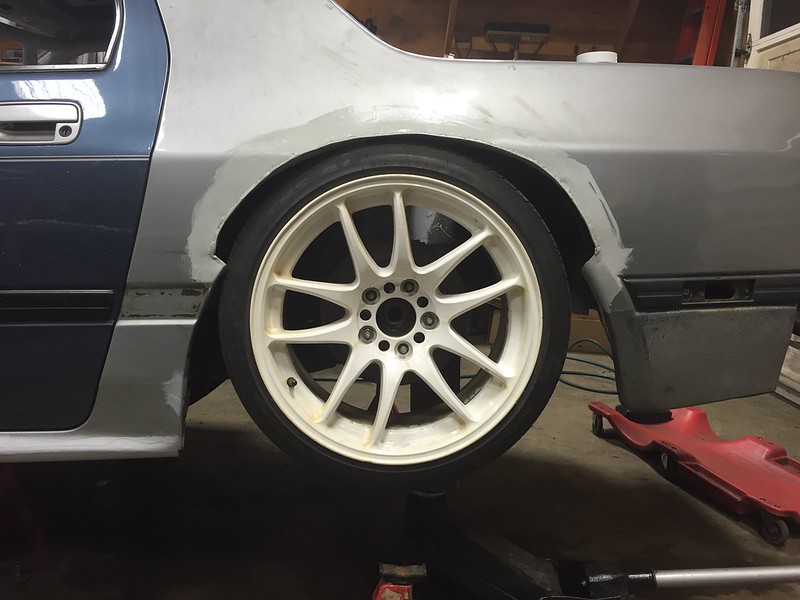
got these up around black friday (shoutout to Neil @ SCG, he's a dealer btw and I think the only Canadian dealer), they are 18x9.5 instead of the 17x9 I have currently. I think I want 18" up front but if they don't fit or clear etc I will likely use them as rears.
I was hiding these in my basement so they would be clean and mark free when I went to use them but my daily was lacking cool wheels (and I corded the tires on the CR-Kai's drifting). Picked up a set of tires cheap off a buddy in Kelowna while I was out that way (thanks again Caetano!)
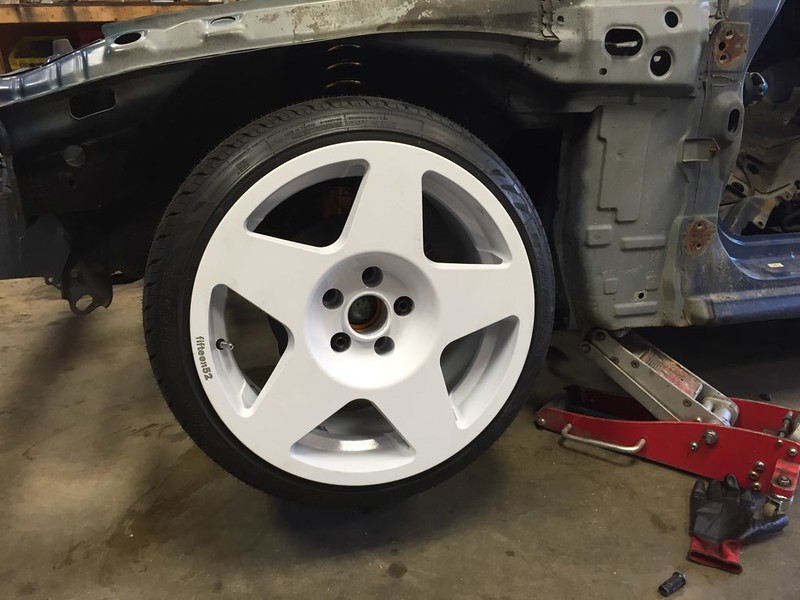
had my bud Pete (same dude with the LS 240) put them on for me and before they went on the mark 2 I test fit them on the missile.
at its current more function oriented ride height they clear everything with no spacer needed. Even the fenders on, they are pulled probably 15-20mm more than rolled flat I'd guess. Keep in mind that this is with the Villains angle kit (40mm ball joint spacer) and a bit of hammering and removal of the brake line mount, also around 7* of camber.
even a bit of room between it on the fender.
Friend was having a private day up at Penticton and I managed to snag a spot out of 5 cars. Paid for the event thinking "missiles fine, haven't touched it since october but it ran when I jumped it last"
well...
needless to say we had a rough winter and I forgot to drain the coolant or put antifreeze in it. Not 100% sure where the coolant and oil are mixing but my best guess is the front iron cracked. This was after the car was loaded on the trailer and we were otherwise set to leave early the next morning. So I threw new oil in, (didn't help) some lucas stabilizer and put premix in the tank hoping to limp it through the day.
needless to say it made it, though down on power and smoking like it was on fire (apparently shot fire ***** too). Managed to get my girlfriend in a drift car. Told her "I'll take it easy and you can get used to it". kinda did that for the first pass. 2nd pass I threw in almost 2 fast and closer to the wall then I had all day. But she wasn't phased and stayed in until we both felt sick from burning engine. Brought a buddy along to let him have a chance to do some donuts and experience drifting and well basically get him hooked on it before he does something like autoX or track racing haha.
Spent some time playing with front suspension settings and alignment settings. Private days are great for this cuz you have so much track time. I'll get into more of it later
was super surprised by how long it lasted, especially since I was not being nice to it, as I didn't really have much to lose if the engine did go. Ended up being a long day though, its about 4 hours to get to the track, then we detoured on the way home and hit snow at the summit of the Coquihalla on the way home. Left at 7 am, home at 2:30 am.
So the next weekend after that, we headed up to Nissan Fest. was thinking "ya this will be a nice chill weekend, Im not driving or drifting. maybe change some tires for the guys and get some ride alongs"
nope.
Krew Chief Keil's Allison blew up about 10 minutes from the border. So we pulled it off the hwy with Pete's LS powered 240, and I got a ride to the border and walked across to get another ride to get my dads truck. Ended up towing the trailer and all the tires for the team. worked out because my dads truck and kris' is the same except his is a diesel. But was a fun weekend, weather was all over the place. Everybody practiced in the dry and our guys got in a groove, then we had a lunch break where it rained hard for an hour then cleared up in time for the competition. But it was 100% different than practice and was super slippery. Kudos to the guys that won though, they had it pretty figured out by the end of the comp and put down some clean runs even for how wet and inconsistent it was.
Then one of our cars (lol not one of the drift cars but he did drift in the open drift after the comp) broke like 20 minutes down the high way leaving the track so we loaded him on the trailer and dragged it eventually all the way home.
Fun weekend, however not was I expecting at all but when is it ever.
Started tearing the missile down and found things I wasn't expecting
I always had this idea that I would one day build this car into the new drift car, but the roll happened much sooner than I was ready for and the accident with this car also happened unexpectedly and too soon. I always thought it was the cleanest of the 3 i've owned but turns out its the worst.
The usual areas I see rust on S4's there wasn't any but the passenger rocker was baaaaaaddd
so ripped the interior and windshield out. I plan on keeping a large amount of the parts from this car. The interior while blue was in great shape and when I go to die a dash black again I wanted matching colours so starting with the same colour dash pieces. The suspension is also full of parts from the drift car anyway, and having spares of some stuff aint a bad thing.
got these up around black friday (shoutout to Neil @ SCG, he's a dealer btw and I think the only Canadian dealer), they are 18x9.5 instead of the 17x9 I have currently. I think I want 18" up front but if they don't fit or clear etc I will likely use them as rears.
I was hiding these in my basement so they would be clean and mark free when I went to use them but my daily was lacking cool wheels (and I corded the tires on the CR-Kai's drifting). Picked up a set of tires cheap off a buddy in Kelowna while I was out that way (thanks again Caetano!)
had my bud Pete (same dude with the LS 240) put them on for me and before they went on the mark 2 I test fit them on the missile.
at its current more function oriented ride height they clear everything with no spacer needed. Even the fenders on, they are pulled probably 15-20mm more than rolled flat I'd guess. Keep in mind that this is with the Villains angle kit (40mm ball joint spacer) and a bit of hammering and removal of the brake line mount, also around 7* of camber.
even a bit of room between it on the fender.
Thread Starter
Senior Member
Joined: Mar 2015
Posts: 335
Likes: 8
From: Vancouver, BC
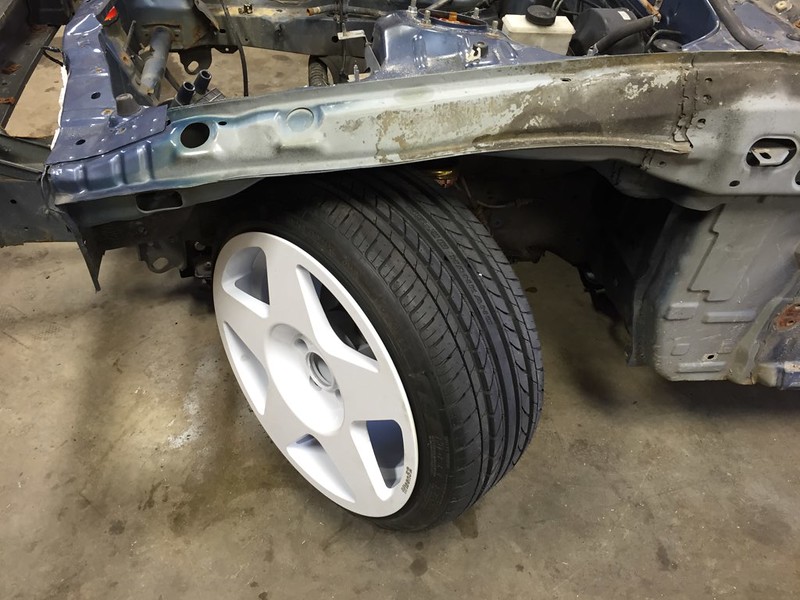
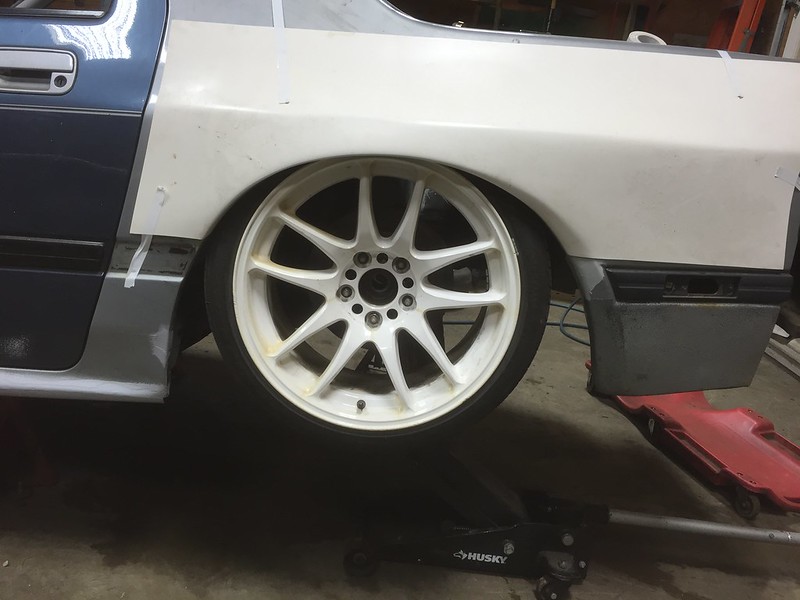
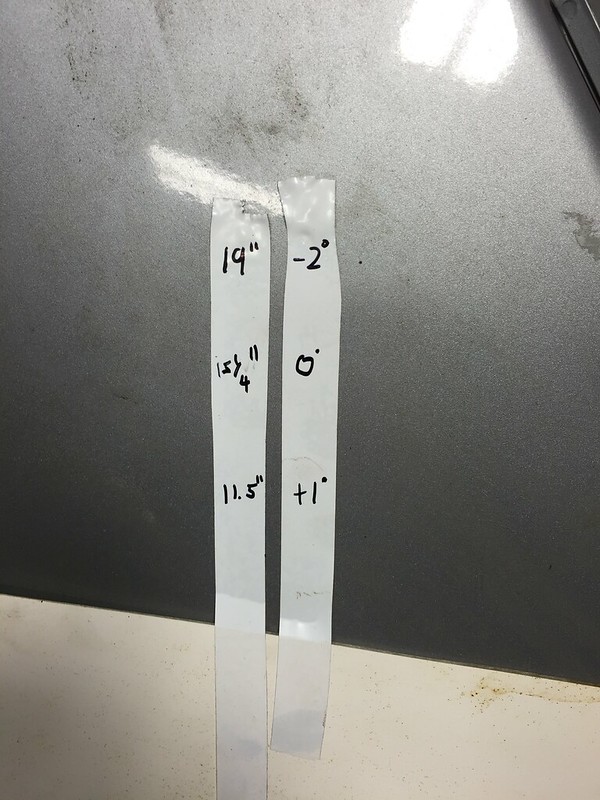
however once I got it sitting more like it should the wheel and the spring touch so I need around a 10mm spacer but I used a 15 cuz thats what I have and it still fits.
sitting the car on the ground it actually sits higher than I thought. Switching from a 215/40r18 to maybe a 235/30 or similar might help. or 17", don't know yet.
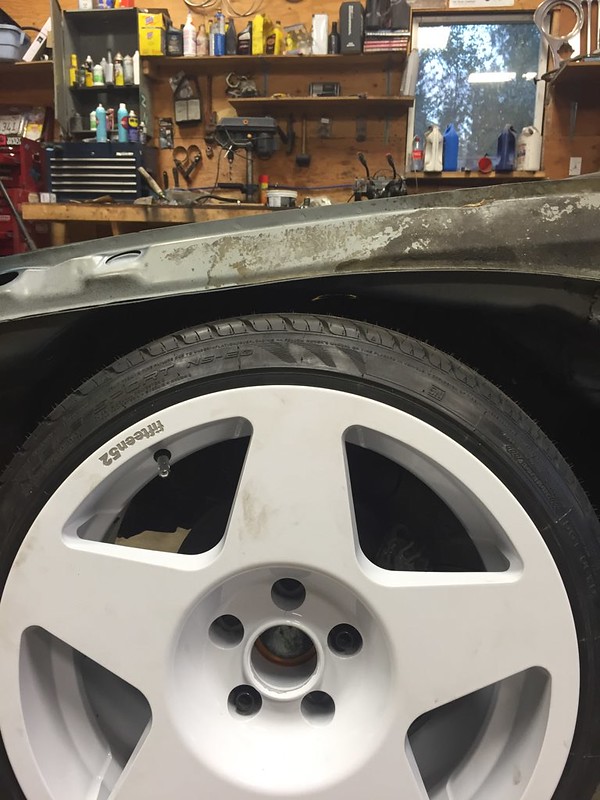
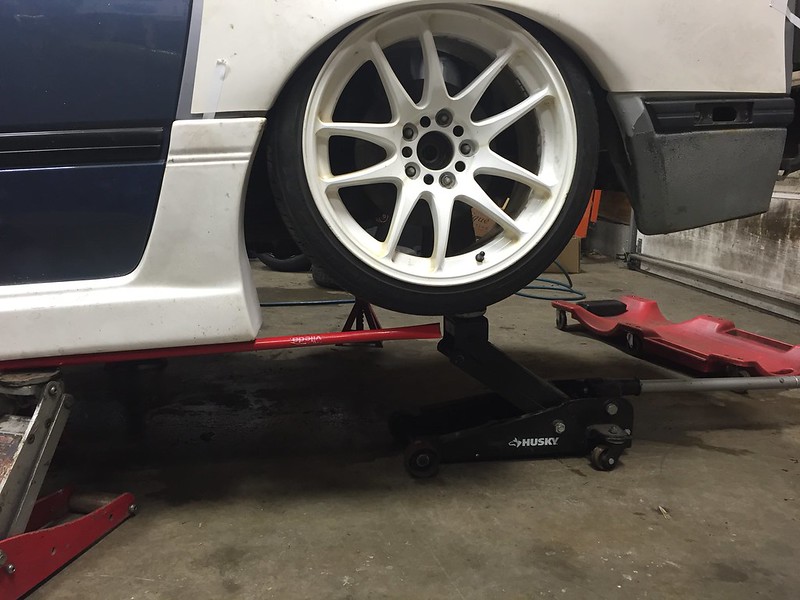
real issue is going to be this, but I had the same one with 17" wheels as well. Its not a lot of suspension travel.
When I was at the track I was advised by a new friend Garrett to try adding caster. I tried castor on the old V8 car and it felt terrible and smacked the wheel around. Now that was probably due to the weird geometry that giant rack spacers give at angle on stock ackerman knuckles. Now that the car has 0 ackerman it doesn't self steer very much and as a result its very twitchy and I had to be steering ahead kinda guessing where the wheel needed to be. This was a great way to learn where it should be but man is it hard to be smooth and precise. so at the track I added a bit of caster by maintaining camber and rotating to the middle position on the PSM top plate.
Car drove much better the rest of the day, I wish I tried it sooner and had a chance to try it with even more caster added.
The other thing I noticed test fitting the 1552's is that the knuckle no longer hits the tie rod into the ball joint/control arm. The rack now stops before anything hits, much to my surprise. Seems like a lot of change for like 2 or 3 degrees caster, but am doing a bunch of reading on steering geometry to figure out if something else also changes.
as I type I plan to take the missile to its new scrap metal yard home tomorrow. sad day for sure. Looking forward to having 1 project car and having the parts I need to test fit accordingly.
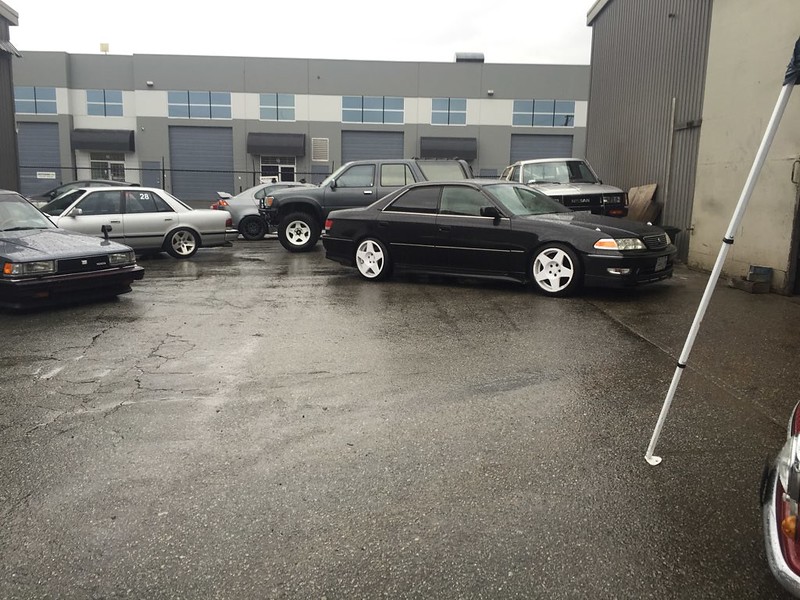
till next time heres the Mark2 at Serial Nines block party blocking SCG's cars hehe
Thread Starter
Senior Member
Joined: Mar 2015
Posts: 335
Likes: 8
From: Vancouver, BC
05/07/2017
Mini update!
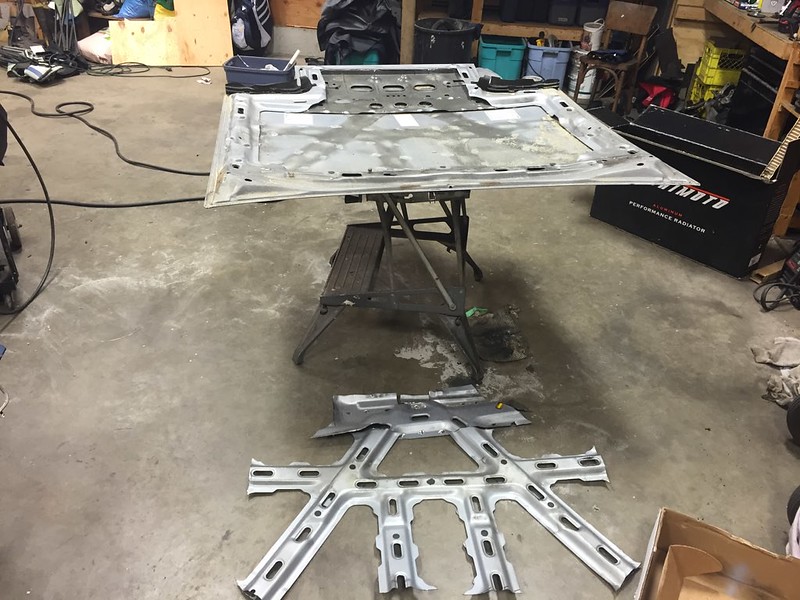
decided to test fit my subframe before I welded in the flat floor of the cubbies, and surprise surprise toe arms still hit the floor.
started from here
and with the flare on
now this is only a 215/40r17 so in the long run this might have been ok when I have an 18" on. But it could also hit hard or something and still interfere.
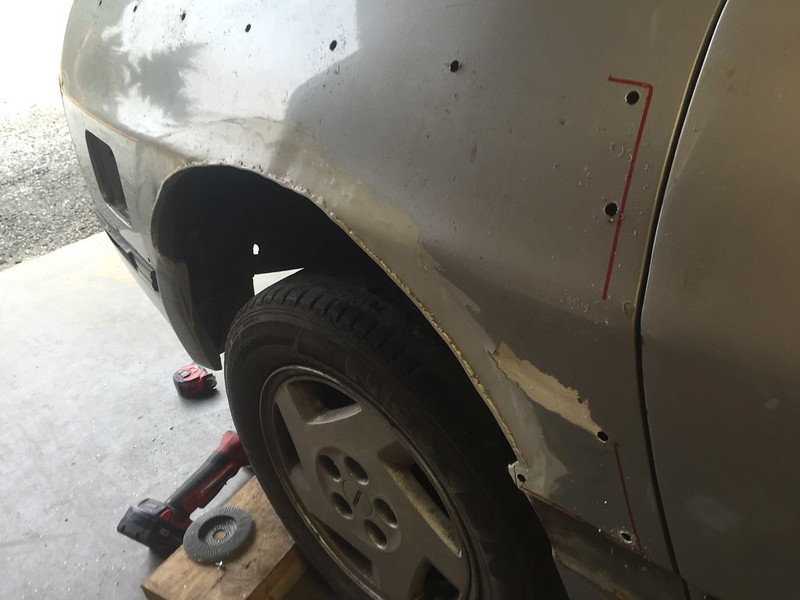
soon out came the grinder
(bad pic I know)
and that got me to this
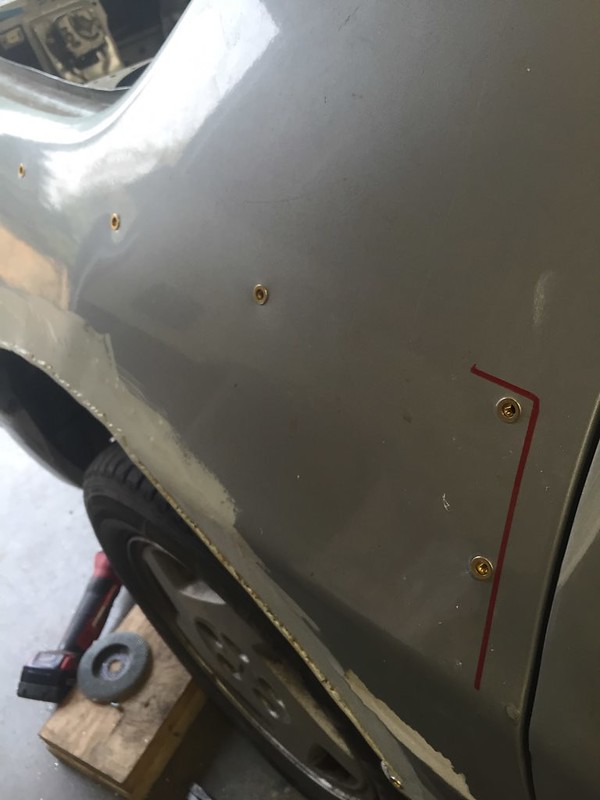
just for the lols I grabbed a skirt and threw it on
HA! the wheel is higher than the skirt, higher than the frame rail even
If I ever get bored and want to try an air ride setup, I guess I can lay frame.
even better is this:
The inner car nerd is thrilled that after quick measurements my camber gain is like 3" over 8.5" of travel, and it will never use 8.5" of travel. I haven't put those white line bushings in yet either, or the parts shop spherical's yet but no binding and ideal camber.
Mini update!
decided to test fit my subframe before I welded in the flat floor of the cubbies, and surprise surprise toe arms still hit the floor.
started from here
and with the flare on
now this is only a 215/40r17 so in the long run this might have been ok when I have an 18" on. But it could also hit hard or something and still interfere.
soon out came the grinder
(bad pic I know)
and that got me to this
just for the lols I grabbed a skirt and threw it on
HA! the wheel is higher than the skirt, higher than the frame rail even
If I ever get bored and want to try an air ride setup, I guess I can lay frame.
even better is this:
The inner car nerd is thrilled that after quick measurements my camber gain is like 3" over 8.5" of travel, and it will never use 8.5" of travel. I haven't put those white line bushings in yet either, or the parts shop spherical's yet but no binding and ideal camber.
Thread Starter
Senior Member
Joined: Mar 2015
Posts: 335
Likes: 8
From: Vancouver, BC
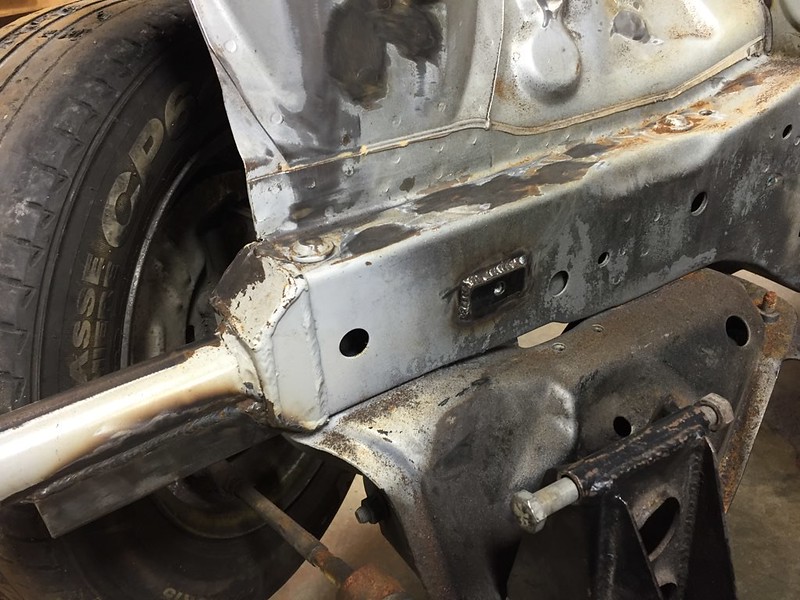
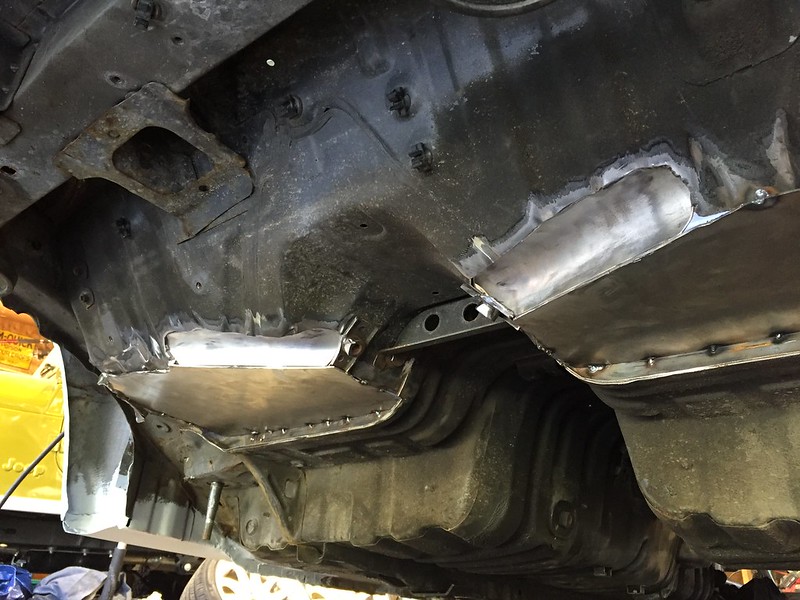
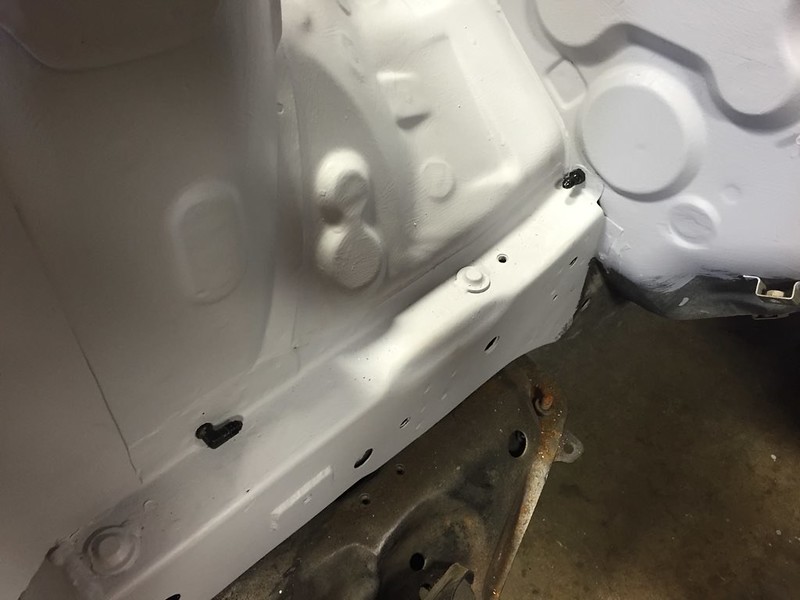
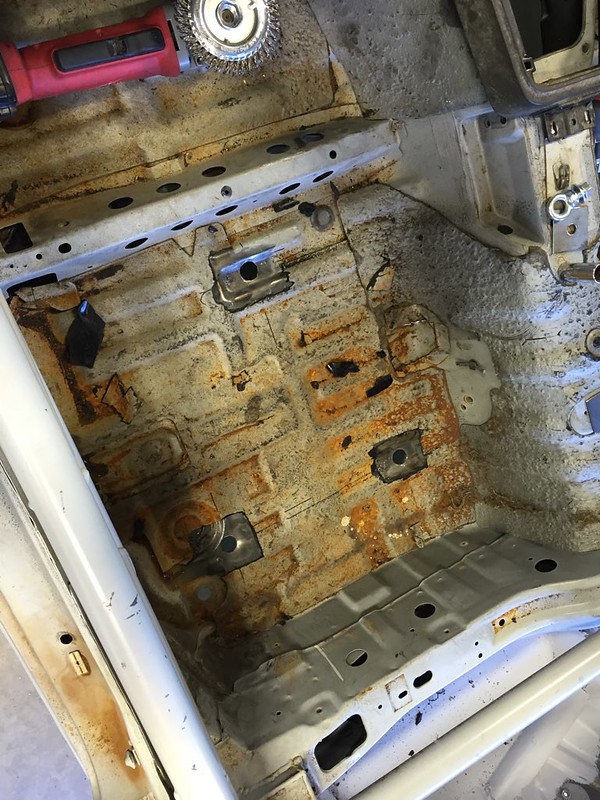
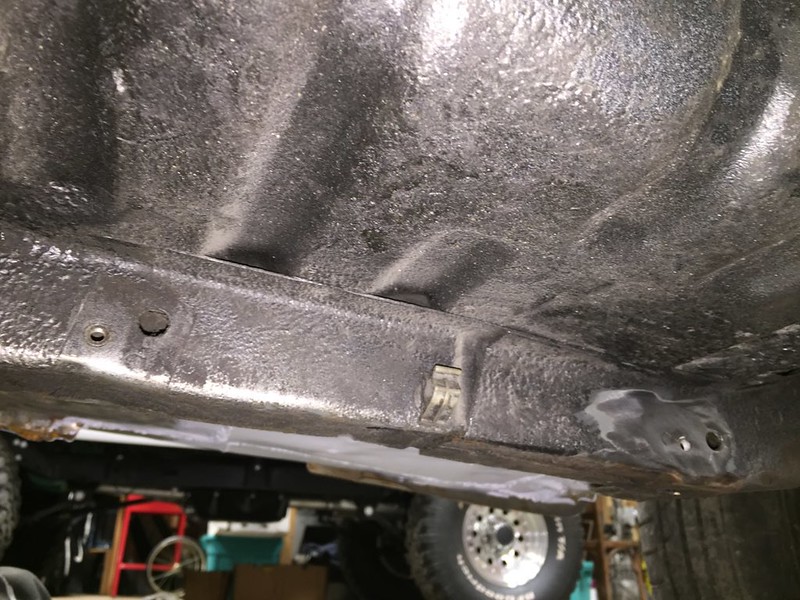
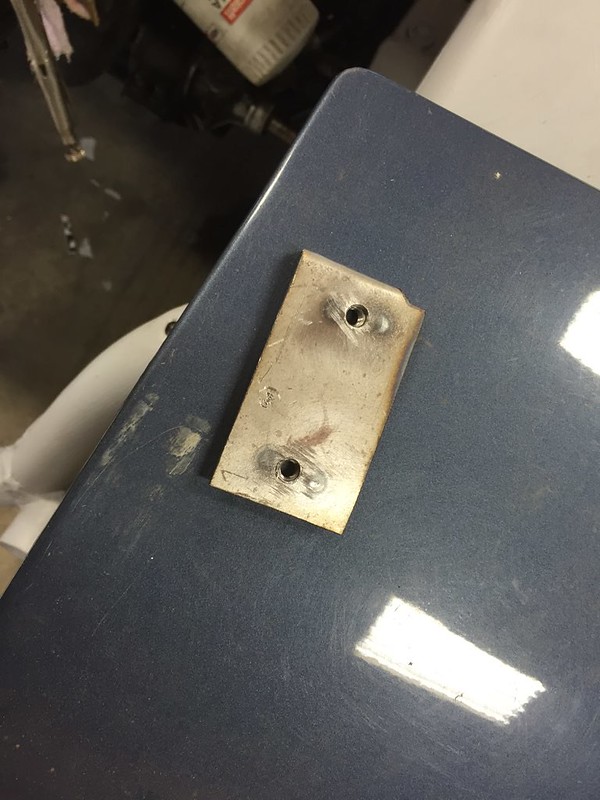
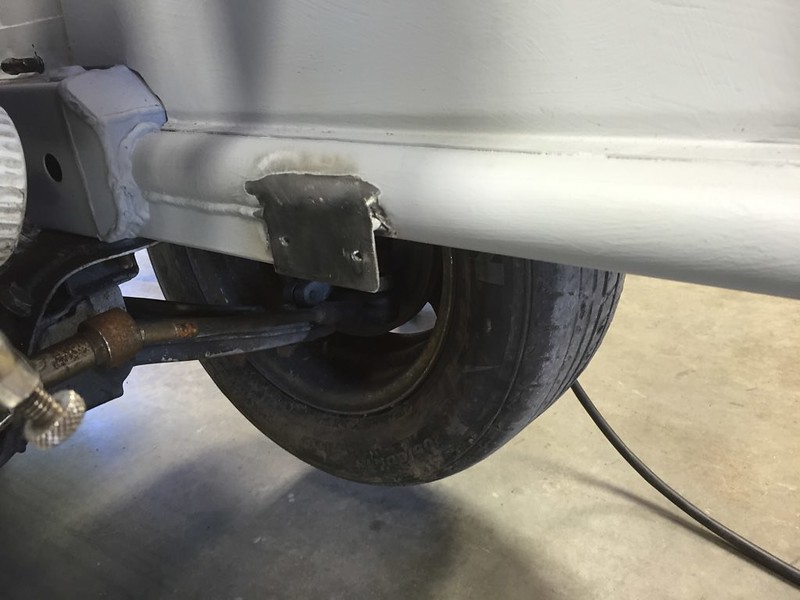
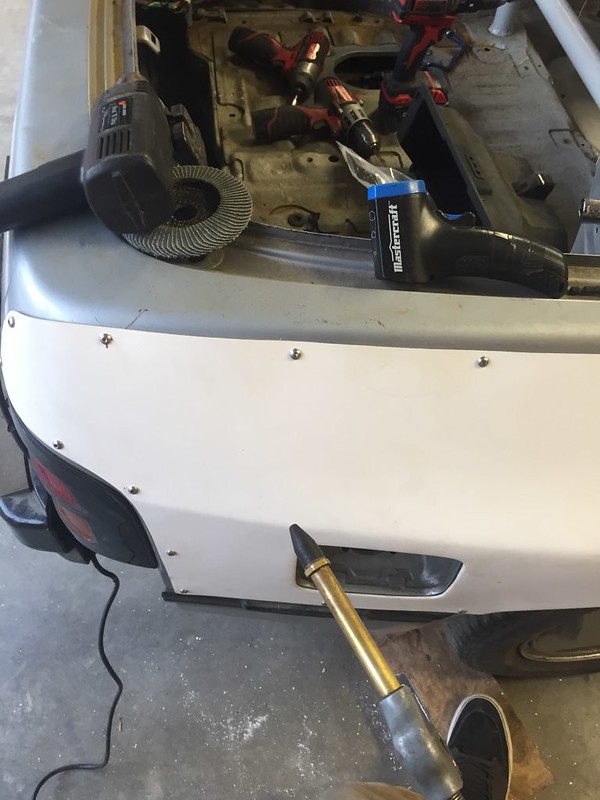
but now of course I have holes in the floor. Looked around the shop and found some leftover pieces from building my exhaust, they seem to do the job and look cool in a kind of lowrider frame notch kinda way.
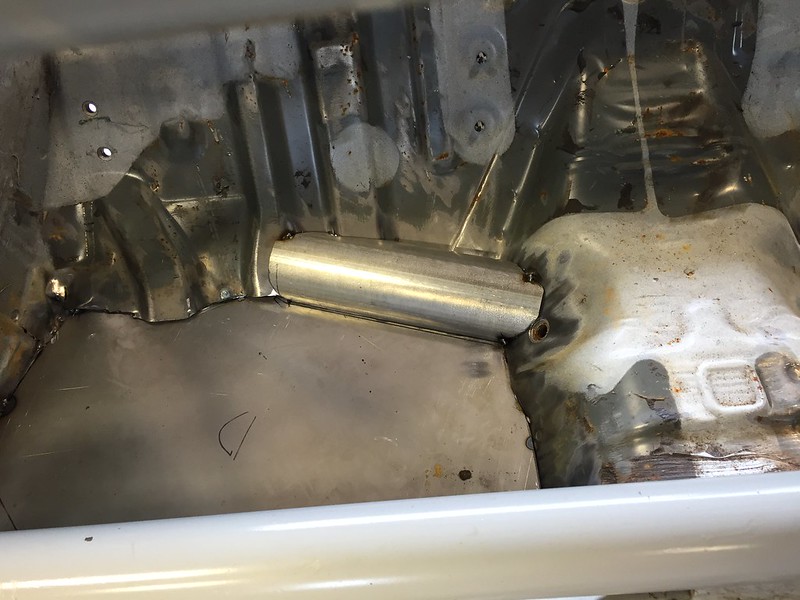
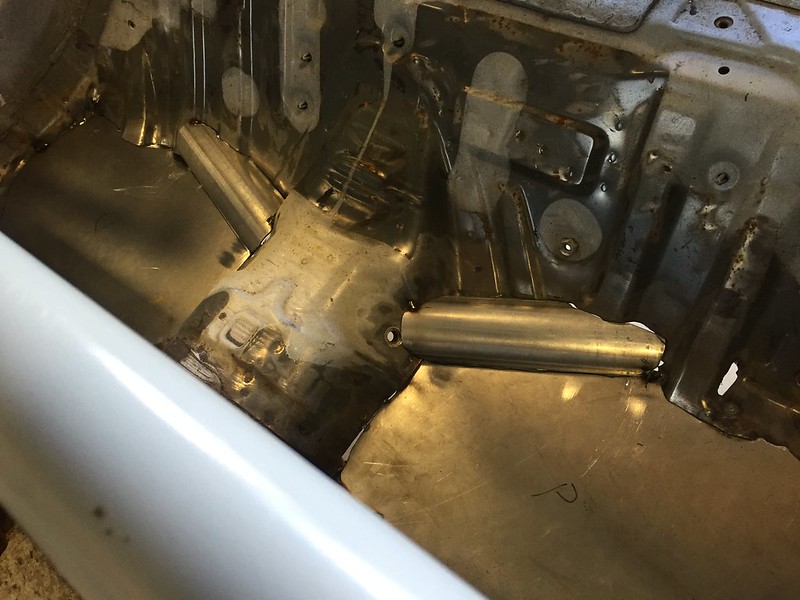
tacked in place, and fit checked once more
kinda forgot to take photos after this as i was running out of time and getting stressed. Kinda over using a grinder lol
but it's all done and primed now.
Fully stoked on this picture though, i think I need Kiwami's
can't wait to start destroying axles from stretching them
Thread Starter
Senior Member
Joined: Mar 2015
Posts: 335
Likes: 8
From: Vancouver, BC
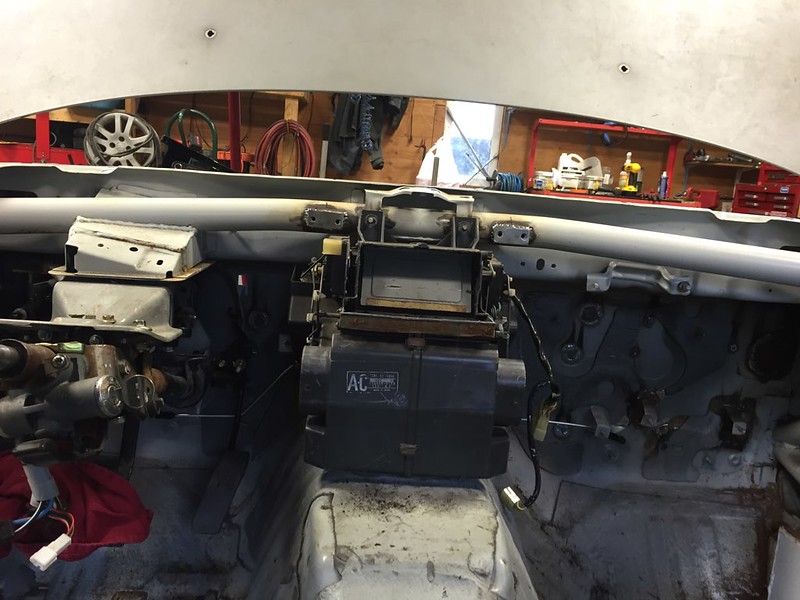
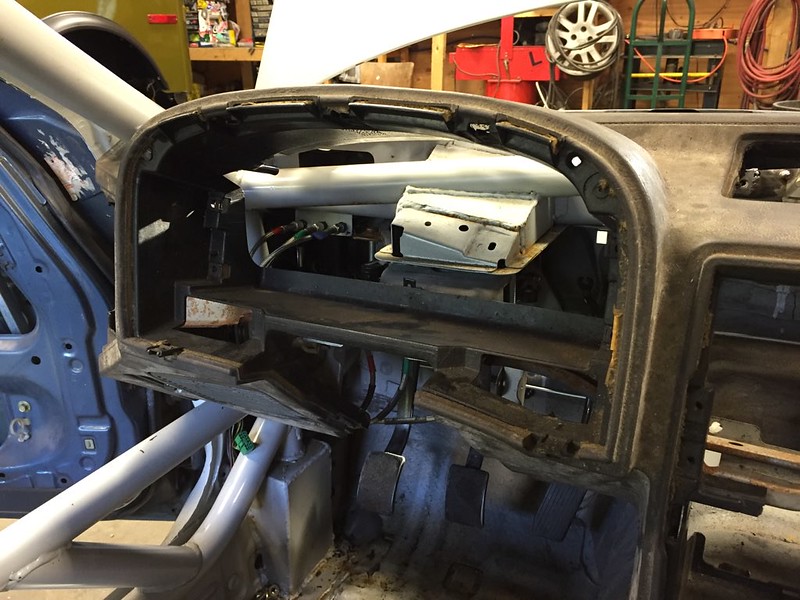
Started on a few things in the interior

One of my favourite things with the old car, and one of the things I was asked about the most by car guys and non car guys alike was the "3 bottles in the middle of the dash". This time though they have to compete for space with the heater core. The top vents that blow air at yo face are gonna be replaced with gauges anyway so I disconnected the rod for the top flap, cut what I needed to out and am going to seal the flap. First time I went to tack it in place I was thinking I could just weld it on, until I couldn't get the heater core out so it quickly became a bolt on
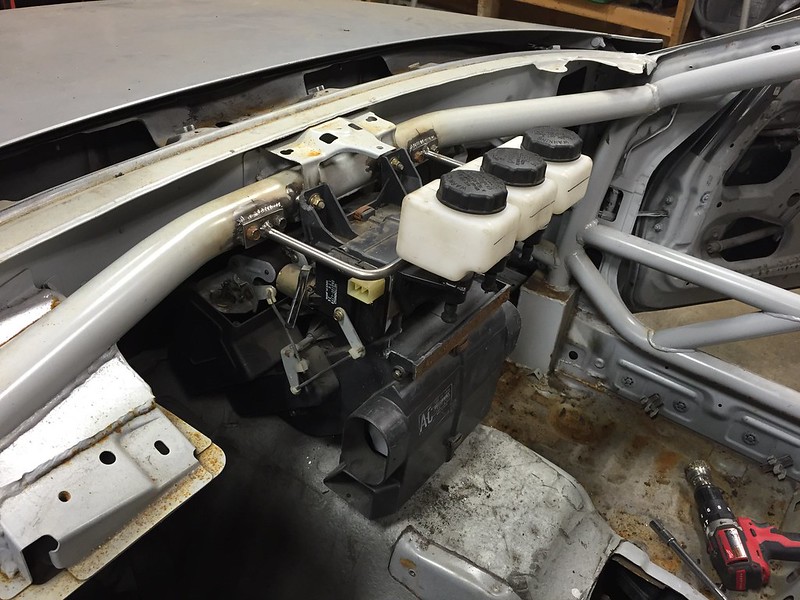
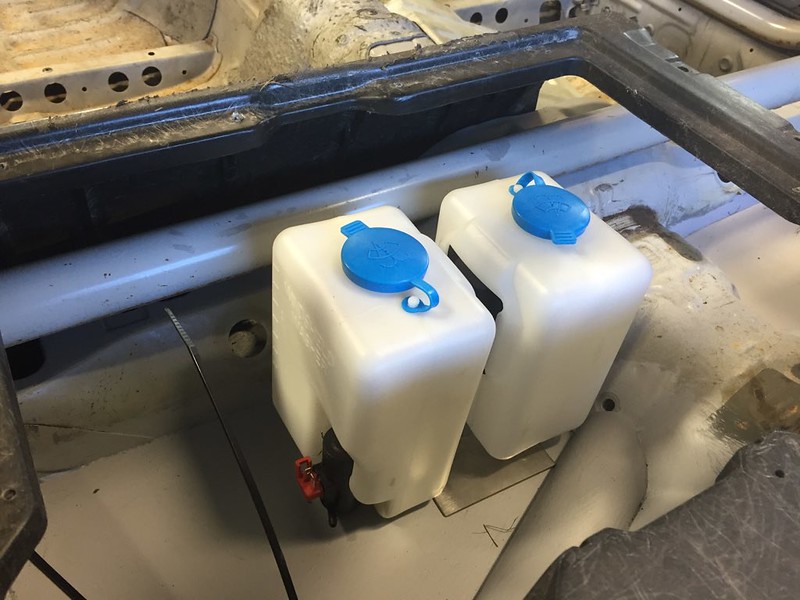
and with the reservoirs on (they really need a clean...)

and the dash on
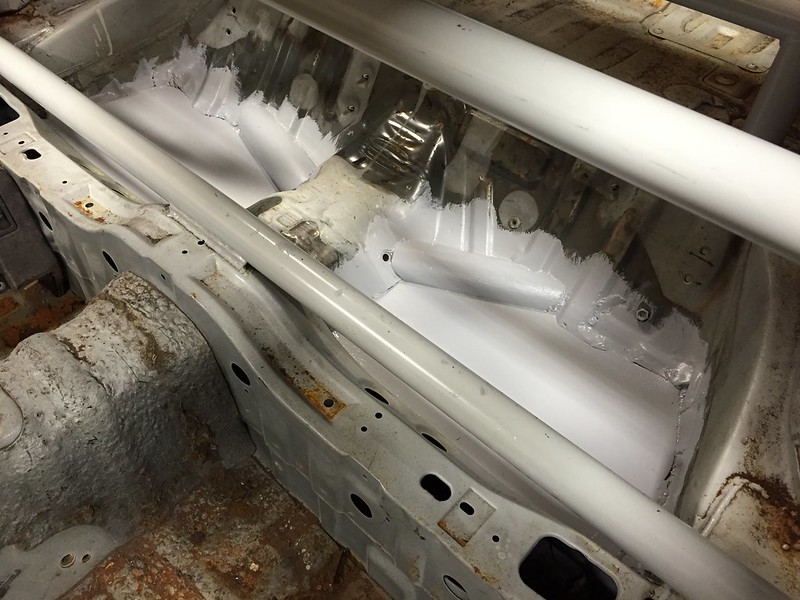
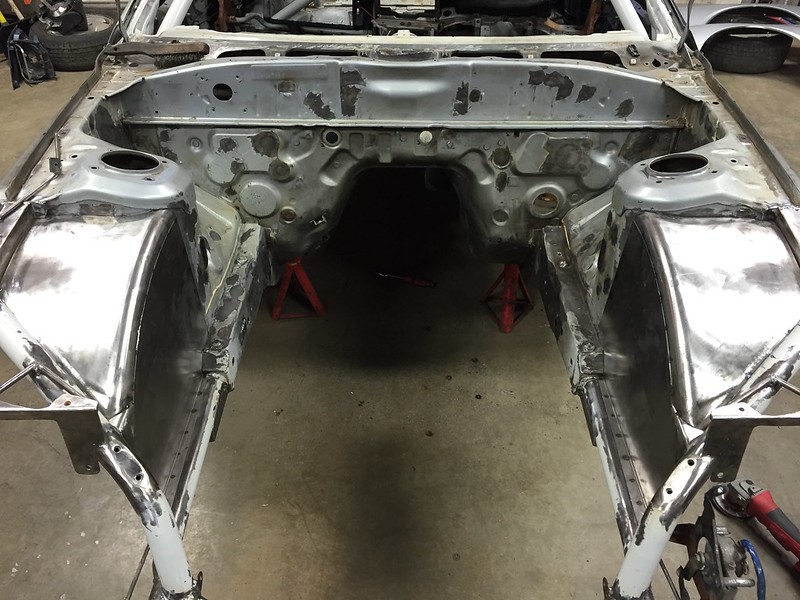
Then I moved onto the very exciting engine bay primer-ing!

heres the bay half grinded down of rust/burnt primer from welding

both sides done
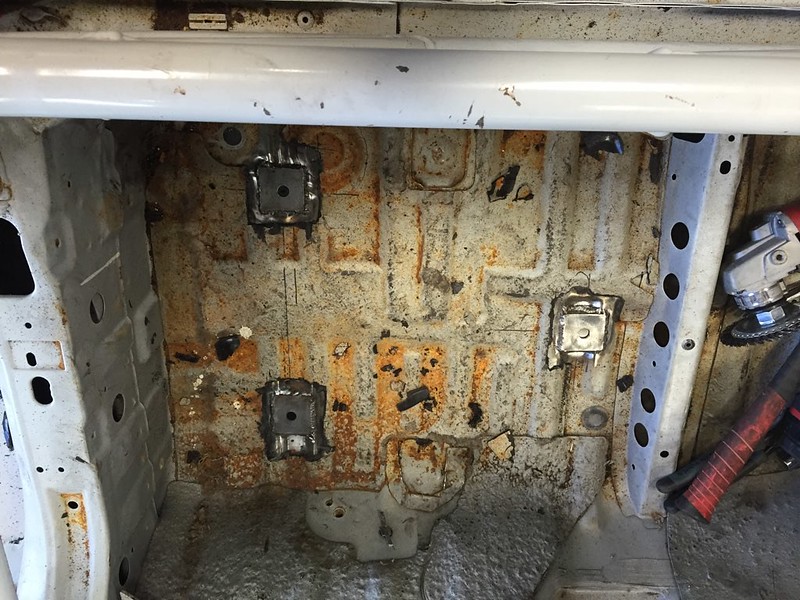
then I welded in the tub fills, have been waiting months for this
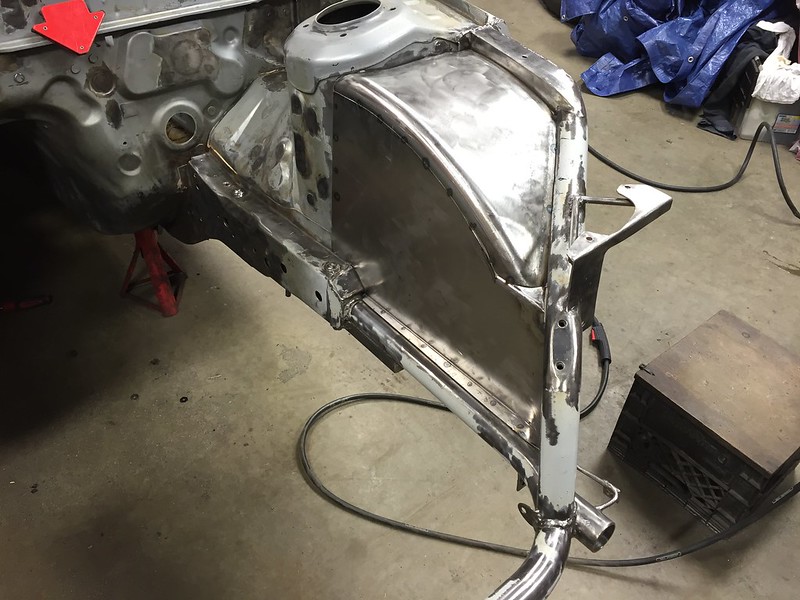
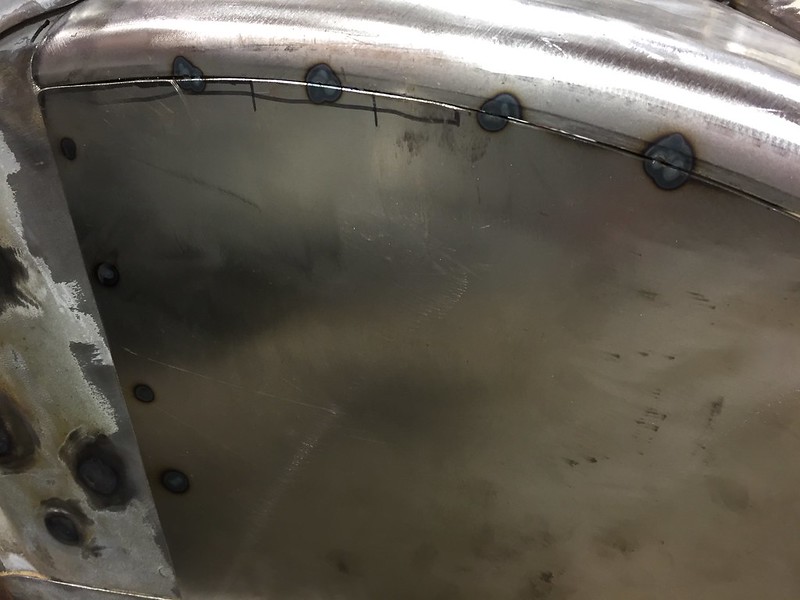
gaps super tight, almost wondering if its too tight to fill with seam sealer... not really sure how that stuff works
back side should look good when seam sealed as well
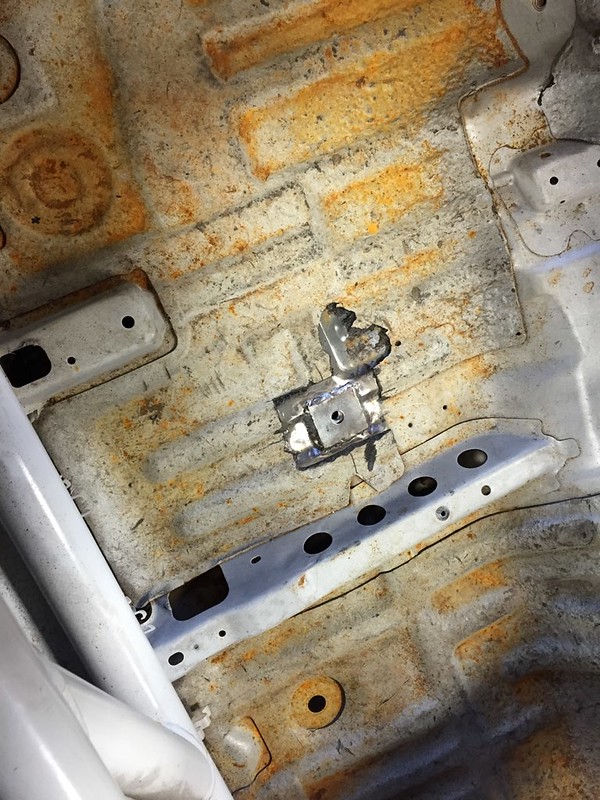
put the headlight motor's upper mounts back on
sanded the whole thing and wiped down with acetone
One of my favourite things with the old car, and one of the things I was asked about the most by car guys and non car guys alike was the "3 bottles in the middle of the dash". This time though they have to compete for space with the heater core. The top vents that blow air at yo face are gonna be replaced with gauges anyway so I disconnected the rod for the top flap, cut what I needed to out and am going to seal the flap. First time I went to tack it in place I was thinking I could just weld it on, until I couldn't get the heater core out so it quickly became a bolt on
and with the reservoirs on (they really need a clean...)
and the dash on
Then I moved onto the very exciting engine bay primer-ing!
heres the bay half grinded down of rust/burnt primer from welding
both sides done
then I welded in the tub fills, have been waiting months for this
gaps super tight, almost wondering if its too tight to fill with seam sealer... not really sure how that stuff works
back side should look good when seam sealed as well
put the headlight motor's upper mounts back on
sanded the whole thing and wiped down with acetone
Thread Starter
Senior Member
Joined: Mar 2015
Posts: 335
Likes: 8
From: Vancouver, BC
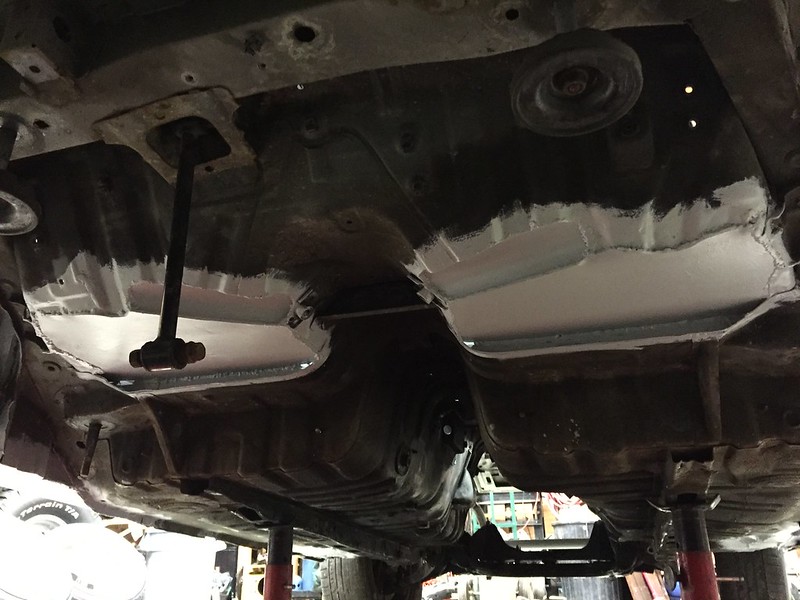
2 layers of primer later
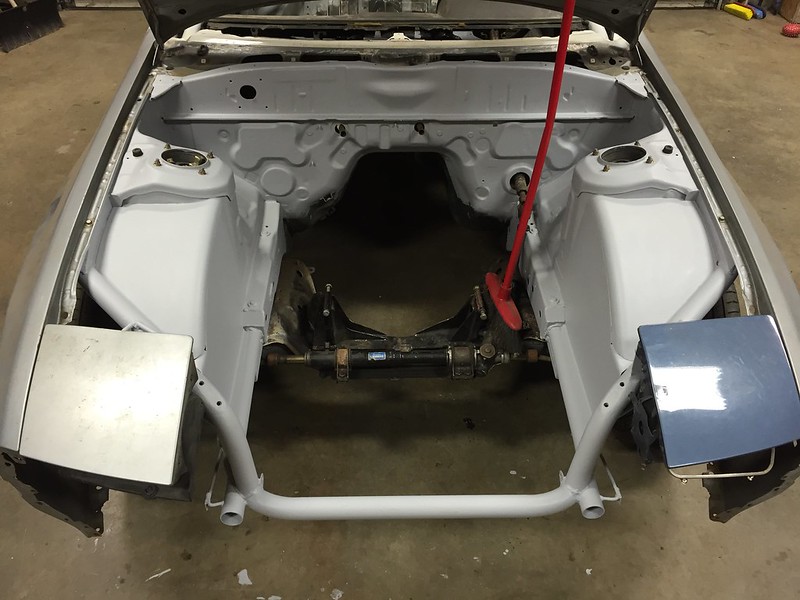
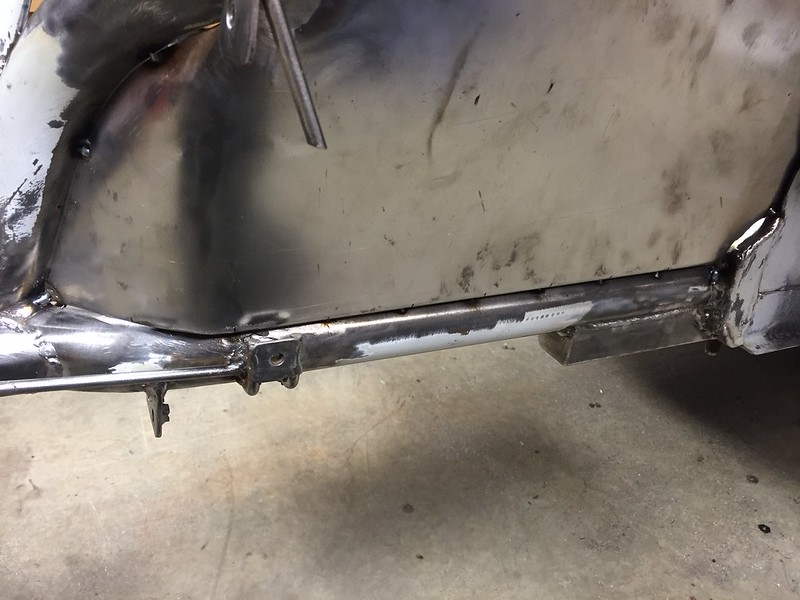
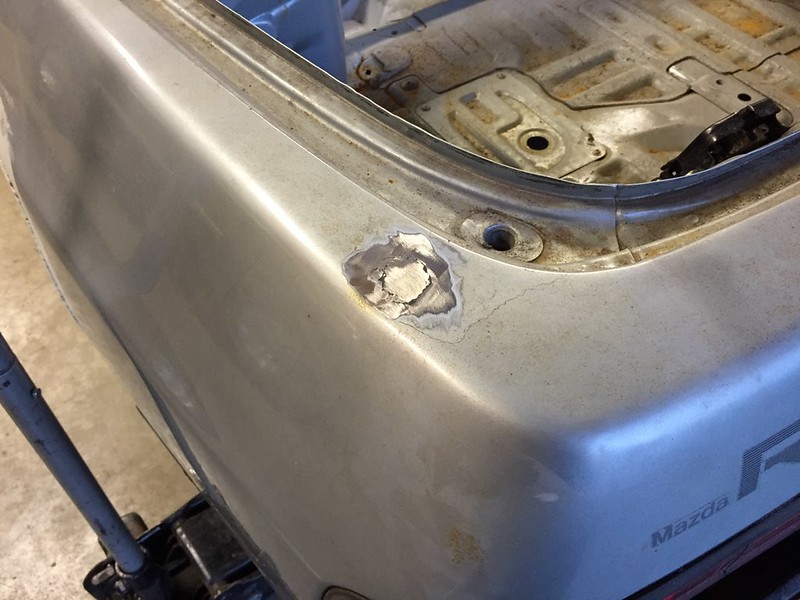
big task checked off, feels like a milestone completed. Still have more welding here and there, found another rust spot I missed near the fuel filler but getting ever closer to being done major chassis fab. Then I can put the engine in and get everything around it figured out.
As of this post you are now caught up. If you have any questions from the past posts feel free to ask.
Thread Starter
Senior Member
Joined: Mar 2015
Posts: 335
Likes: 8
From: Vancouver, BC
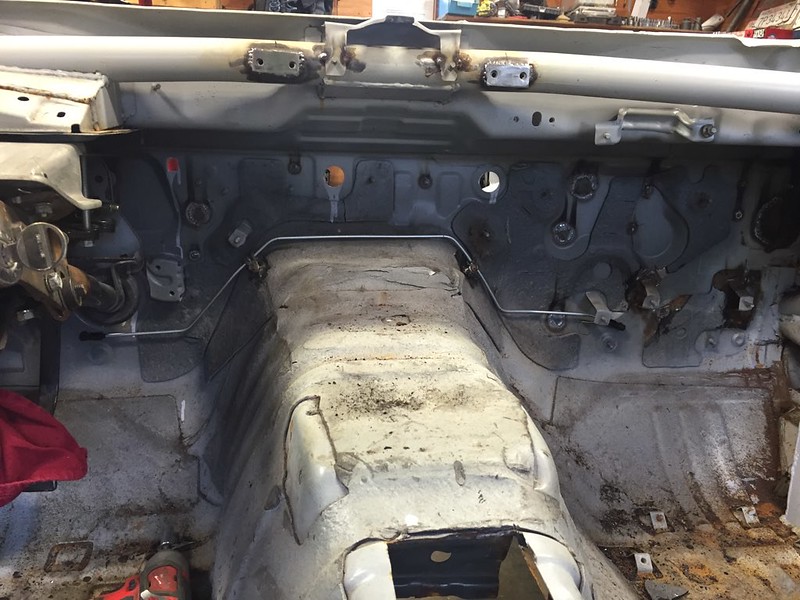
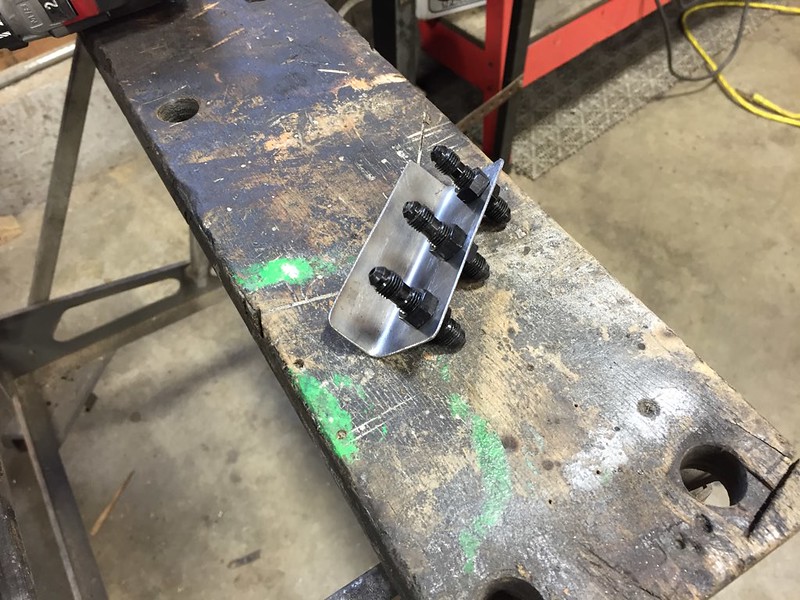
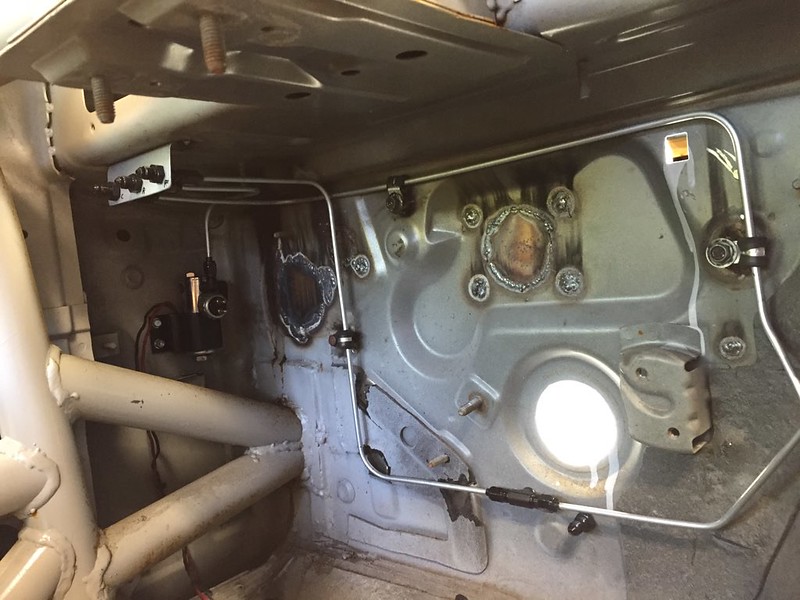
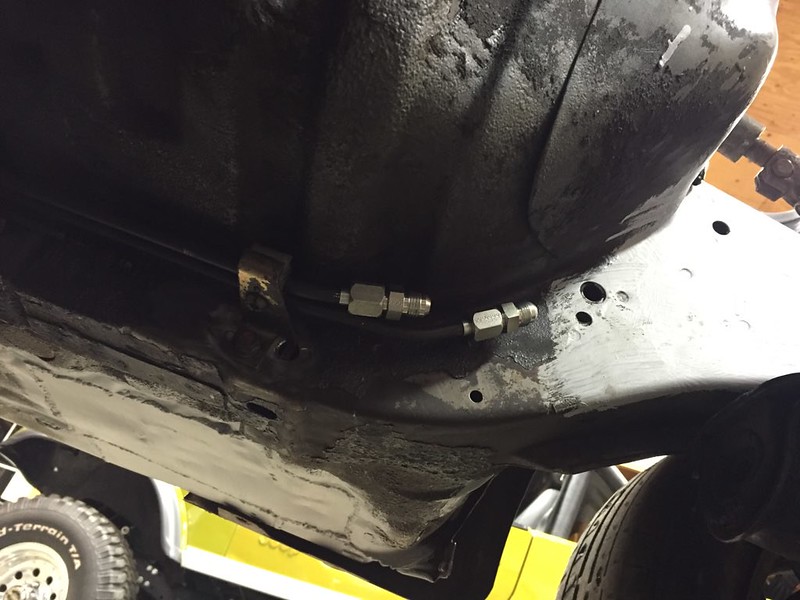
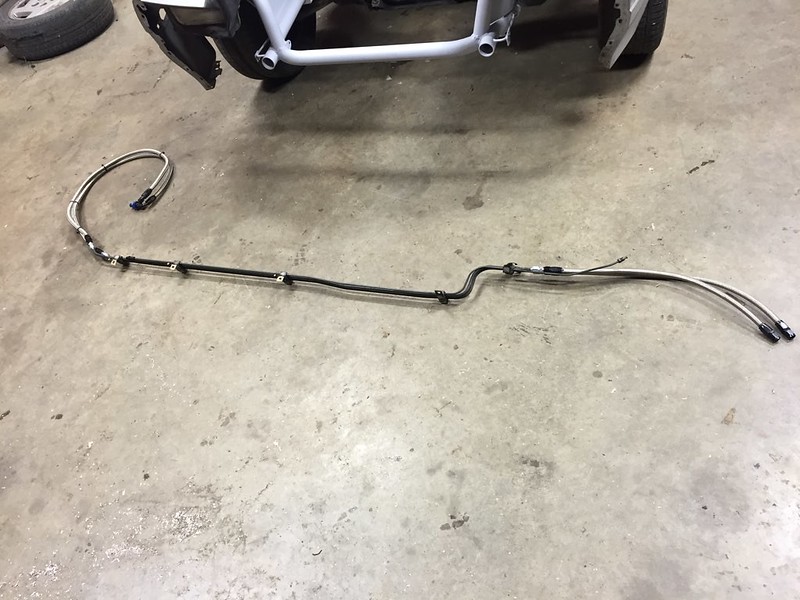
next up was the brake lines, same drill as before but even more hidden
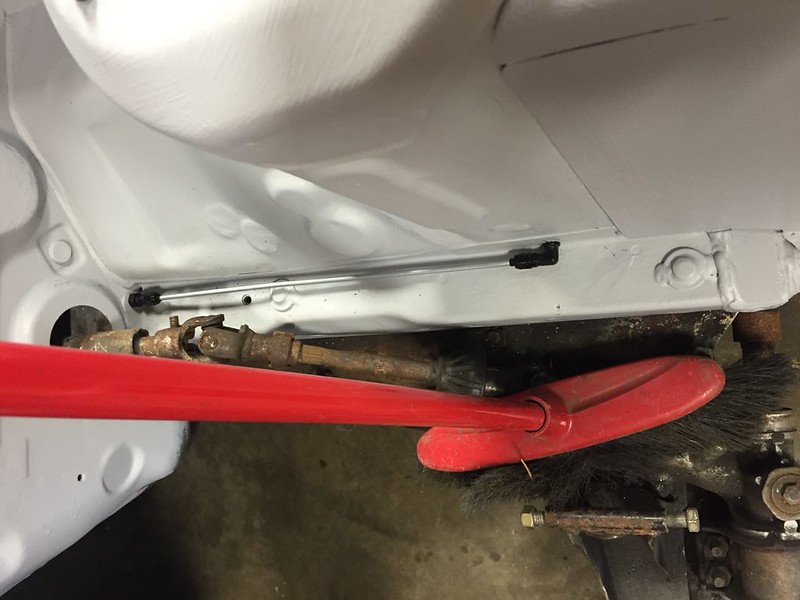
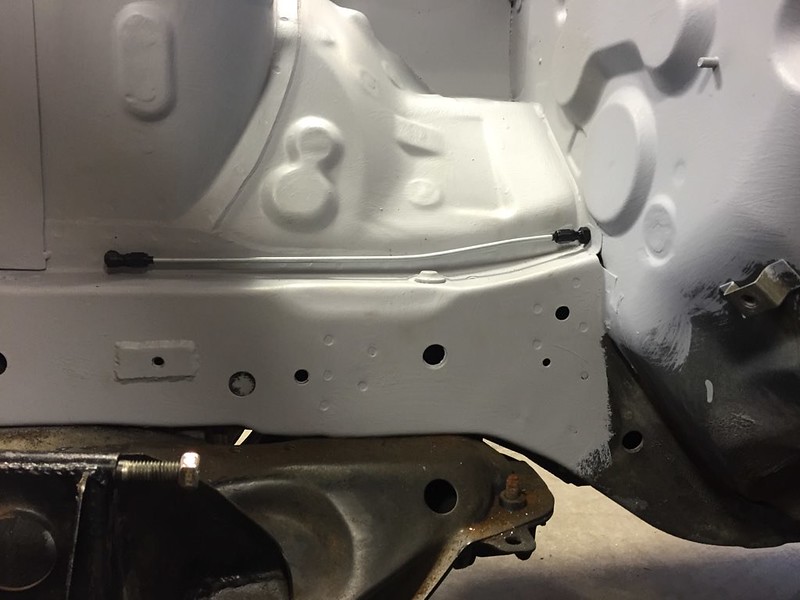
New challenges with there now being a heater core and such to compete with for space.
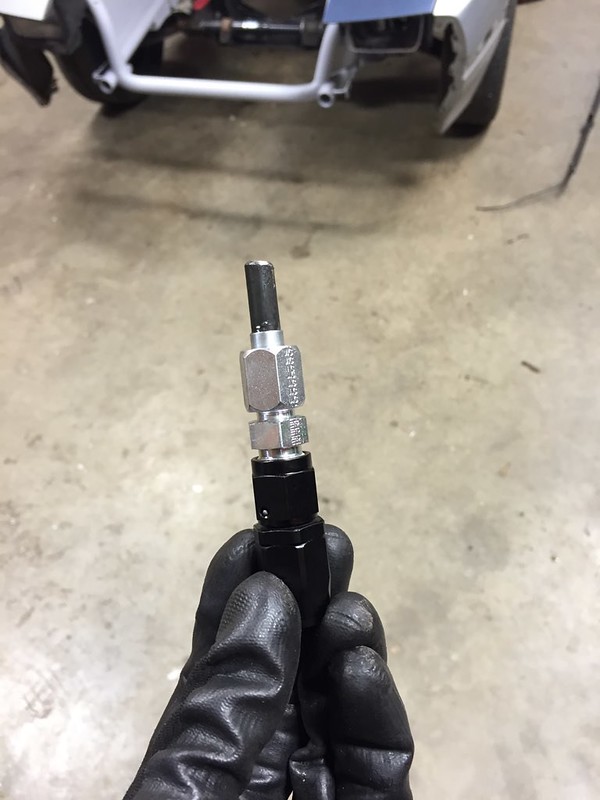
this stupid fitting was like $18 but it was the best way to do this. One of those things where they know they have you, if you are buying this fitting its the only one that will work.
New challenges with there now being a heater core and such to compete with for space.
this stupid fitting was like $18 but it was the best way to do this. One of those things where they know they have you, if you are buying this fitting its the only one that will work.
Thread Starter
Senior Member
Joined: Mar 2015
Posts: 335
Likes: 8
From: Vancouver, BC
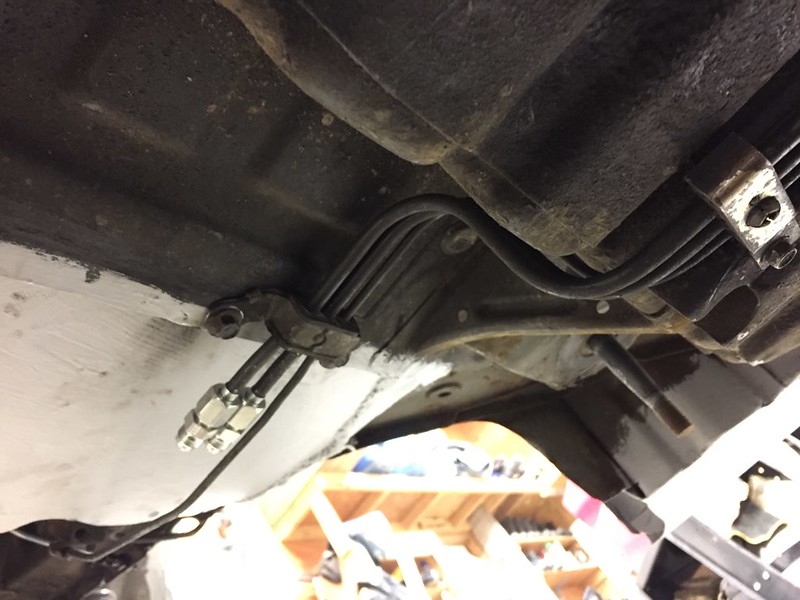
boom rear brake line done
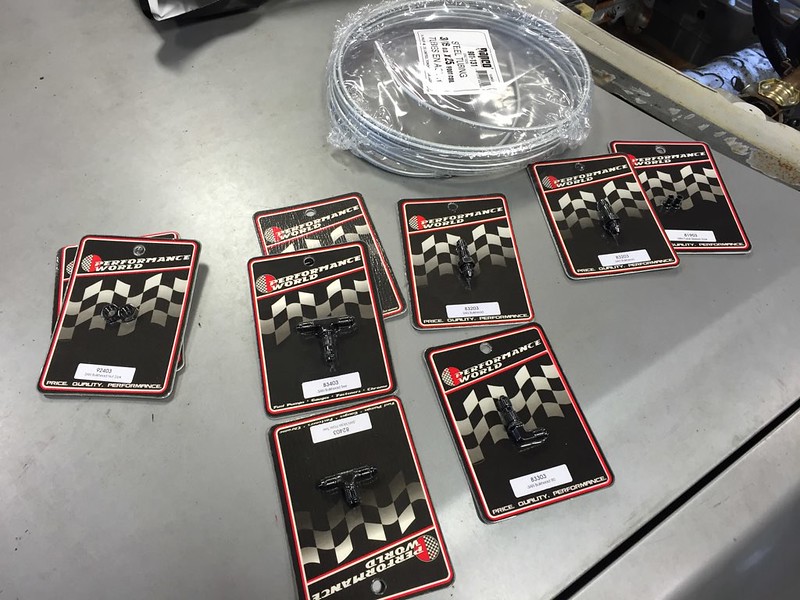
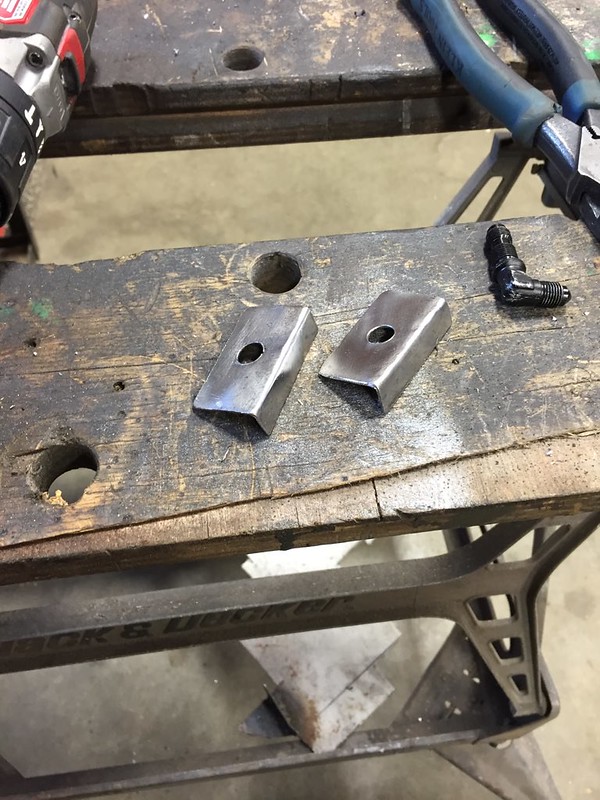
made another bracket for the bulkhead connectors for the flex lines to the masters.
bought a few new fittings for the hydro, a bulkhead T and such. Neat things those are
bent up more lines
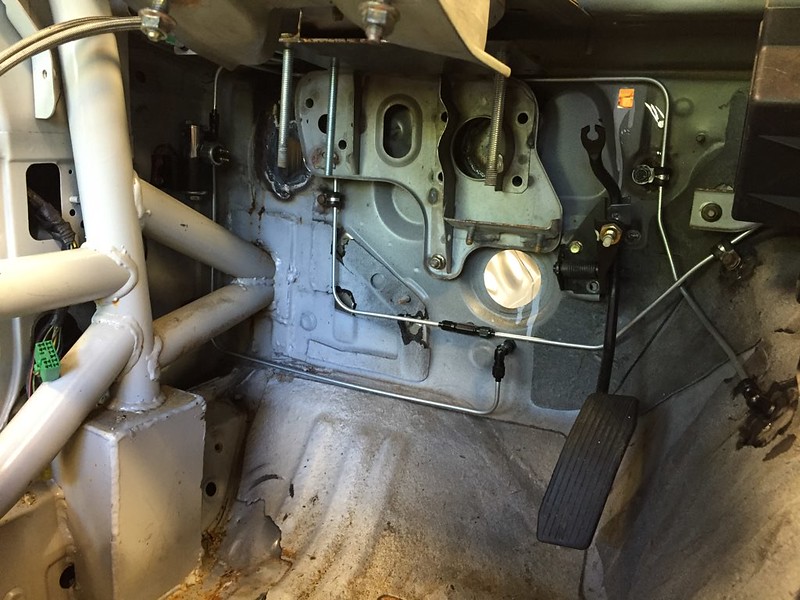
found it easier to stack 2 nuts and weld them together and then weld them to the car. last time I cut down bolts, but those were a pain to make and if I didn't use one it poked a hole. Also using my line lock solenoid to lock out the rear brakes from being functional instead of holding pressure on the front. I no longer care about being NHRA compliant (not like my local track actually checks or is capable of properly reading the rule book anyway), and want to so sick brake stands/bagel/burnies/rollers.
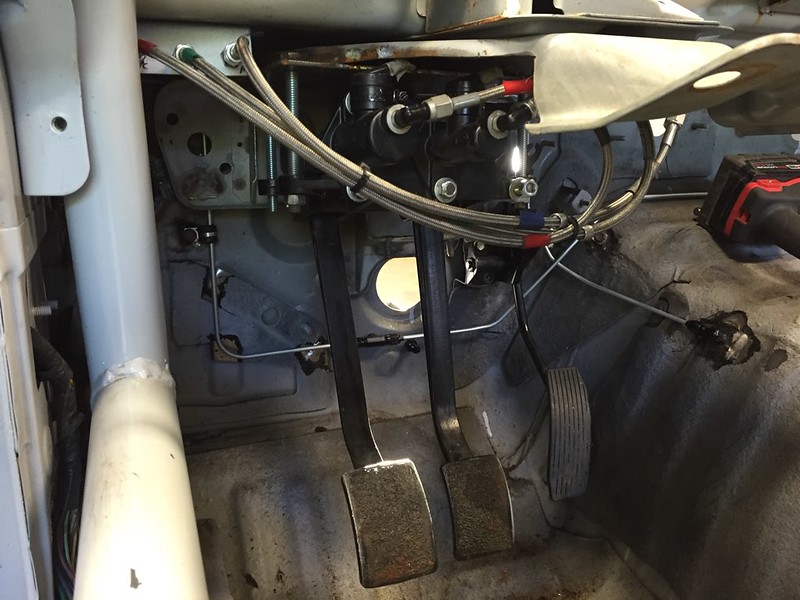
mocked up with the pedals in place (cut the dash to fit somewhere in there before)
made another bracket for the bulkhead connectors for the flex lines to the masters.
bought a few new fittings for the hydro, a bulkhead T and such. Neat things those are
bent up more lines
found it easier to stack 2 nuts and weld them together and then weld them to the car. last time I cut down bolts, but those were a pain to make and if I didn't use one it poked a hole. Also using my line lock solenoid to lock out the rear brakes from being functional instead of holding pressure on the front. I no longer care about being NHRA compliant (not like my local track actually checks or is capable of properly reading the rule book anyway), and want to so sick brake stands/bagel/burnies/rollers.
mocked up with the pedals in place (cut the dash to fit somewhere in there before)
Thread Starter
Senior Member
Joined: Mar 2015
Posts: 335
Likes: 8
From: Vancouver, BC
bent up more lines
found it easier to stack 2 nuts and weld them together and then weld them to the car. last time I cut down bolts, but those were a pain to make and if I didn't use one it poked a hole. Also using my line lock solenoid to lock out the rear brakes from being functional instead of holding pressure on the front. I no longer care about being NHRA compliant (not like my local track actually checks or is capable of properly reading the rule book anyway), and want to so sick brake stands/bagel/burnies/rollers.
mocked up with the pedals in place (cut the dash to fit somewhere in there before)
then moved onto the hydro, started with these brackets and more bulkhead fittings
because I'm on car #3 I have a bunch of things I've kept, like the clips that hold the rear brake lines
aaaaand yet another fit check. close but hits the wheel on top of the rear wheel well first, and the trailing arm on the the body before. Hoping it never gets this close though..
Thread Starter
Senior Member
Joined: Mar 2015
Posts: 335
Likes: 8
From: Vancouver, BC
bought some more small things
the pins and hiems I'll use later for the tube front but the seat belt bolts...
this is going to be much easier and stronger than last time
drilled some holes, grinded for welding
the two in the rear are for the seat mounts, going to use a very similar bracket to what I had in the blue car. I've seen a couple FC's (most notably Jeremy Lowe's) that mount their seats like this in order to sit the seat as low as possible. Passenger side I'll be using the factory mounts.
took a few min to delete the antenna hole
Thread Starter
Senior Member
Joined: Mar 2015
Posts: 335
Likes: 8
From: Vancouver, BC
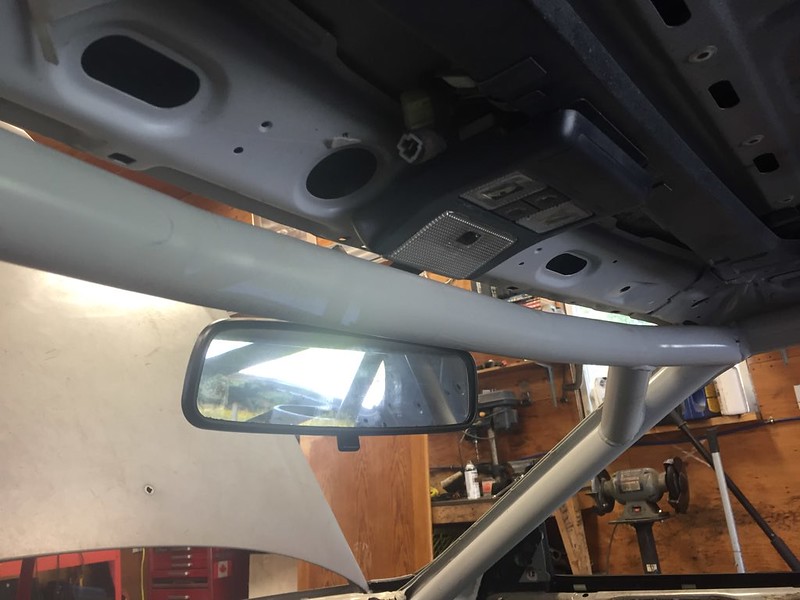
and just for the giggles, and much to my surprise the rear view mirror fits and works. I was expecting it to be blocked but the roll bar if it did fit but its all good
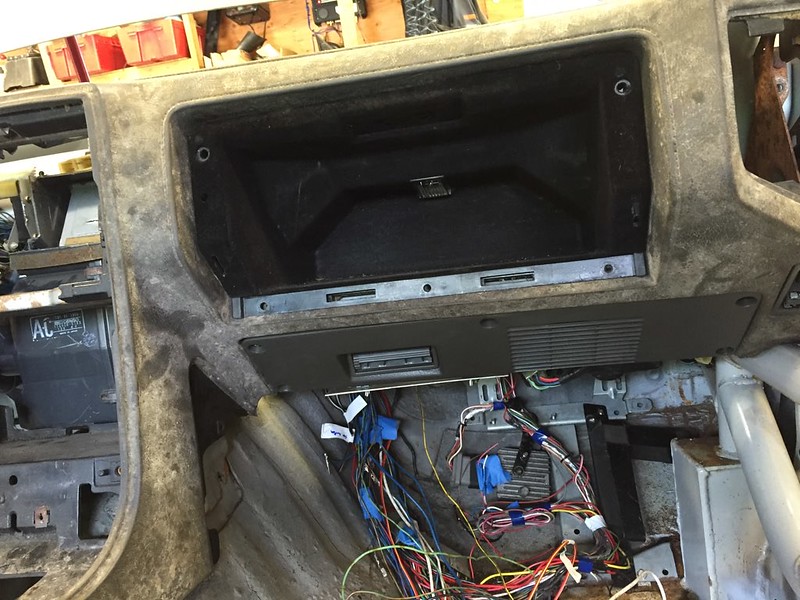
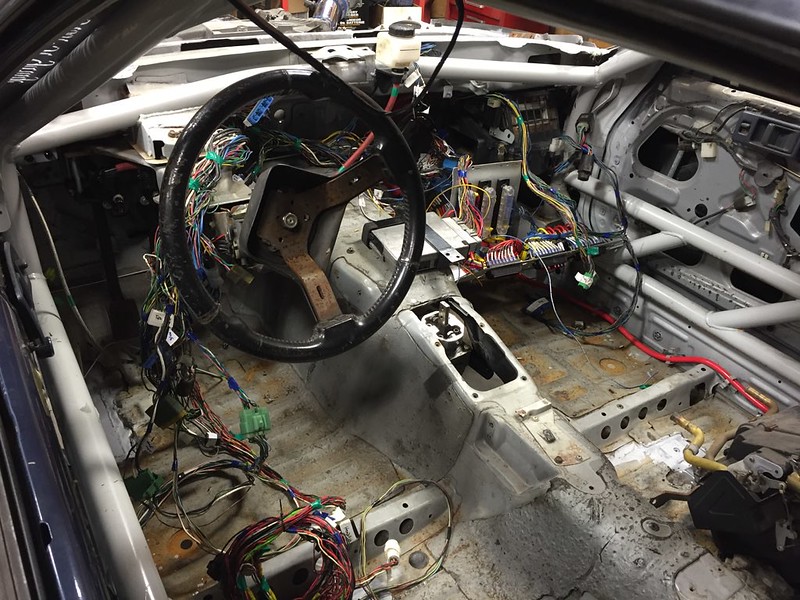
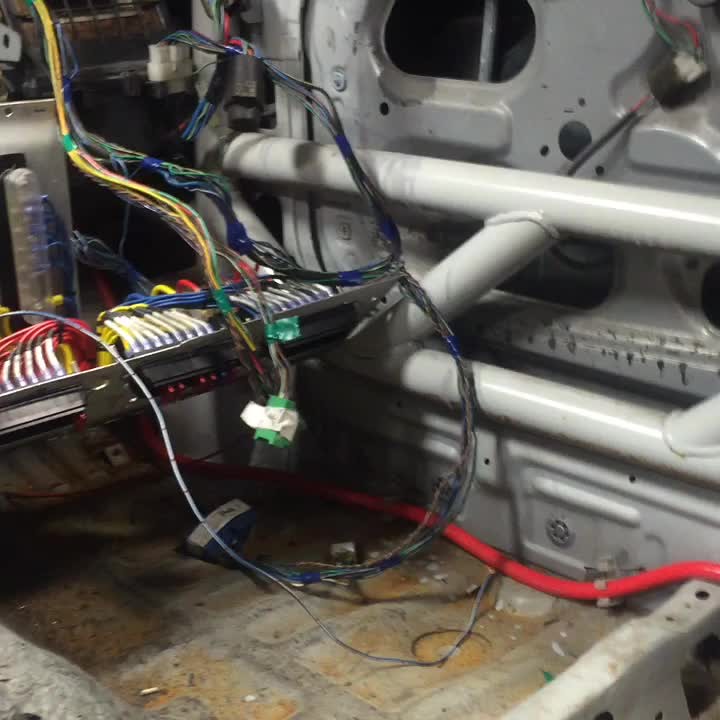
soooooo around this time I started school. I'm an electrical apprentice and I go to school for 3 months a term (or whenever i can get in really). This meant I get to wake up late, shower, and get off after being there for 6 hours. Gives me tons of time to work on my turd
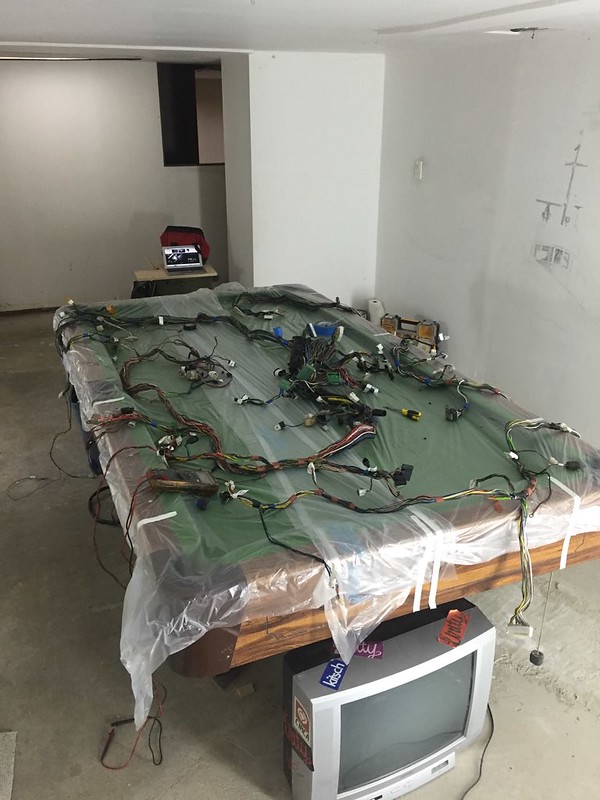
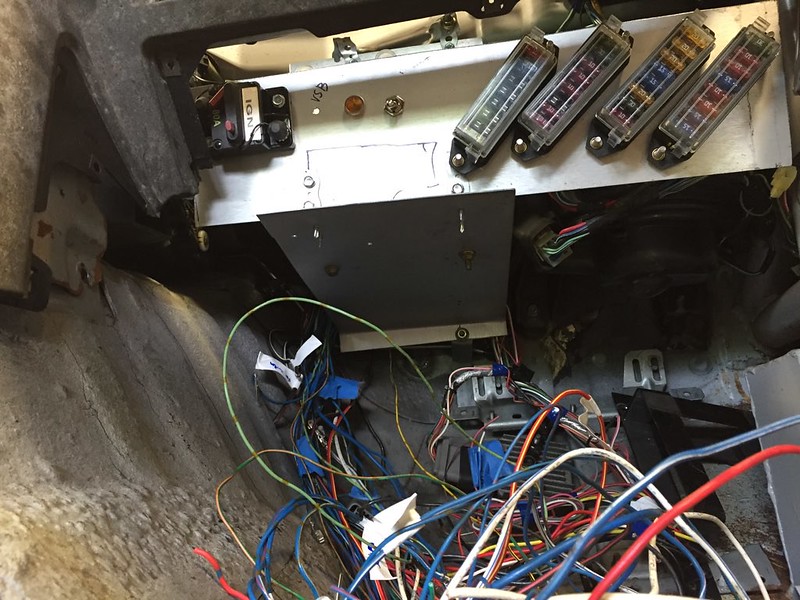
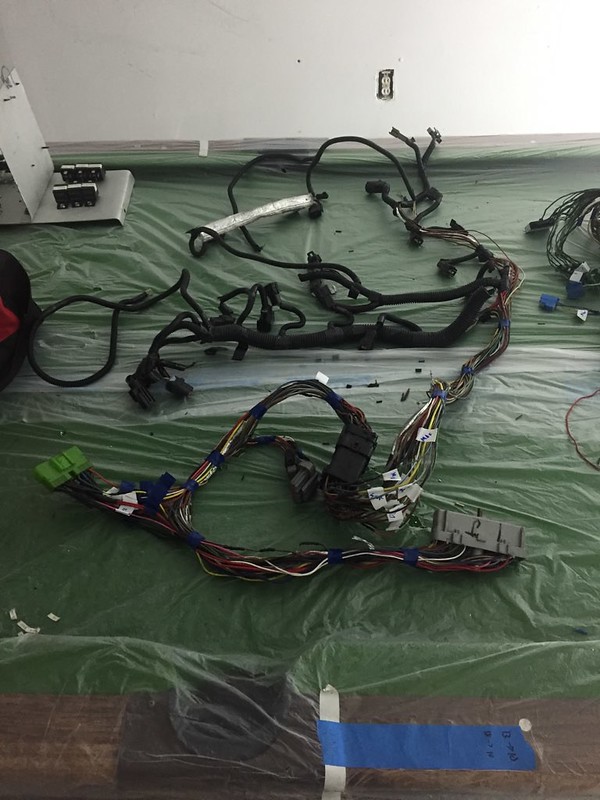
Decided to tackle the bulk of the wiring during this time, I spent about a month stripping wires, labeling things, relocating things etc. Kinda changed my thoughts a bit on soldering vs crimping but we'll see how this turns out. Basically the larger gauge wires I crimped and use 3 in 1 heat shrink on and the smaller stuff I soldered and used 3 in 1 on. Also took all the factory crimp joints and covered them with heat shrink. Cuz that tape stuff is nasty
not a lot of visual progress here, especially for the amount of time it took
here's mocking up for lengths and to make sure I didn't accidentally delete something I needed
wanted to get this down to 1 bulkhead connector instead of 2, so after a lot of planning and figuring out that all I had to do was drill the ford connector and push some plastic out in order to insert more pins in it, thats what I'm doing
Thread Starter
Senior Member
Joined: Mar 2015
Posts: 335
Likes: 8
From: Vancouver, BC
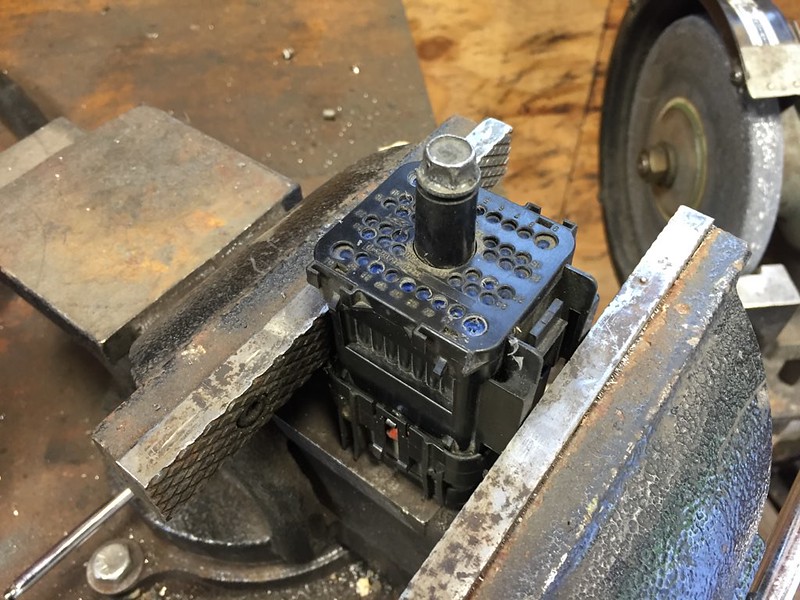

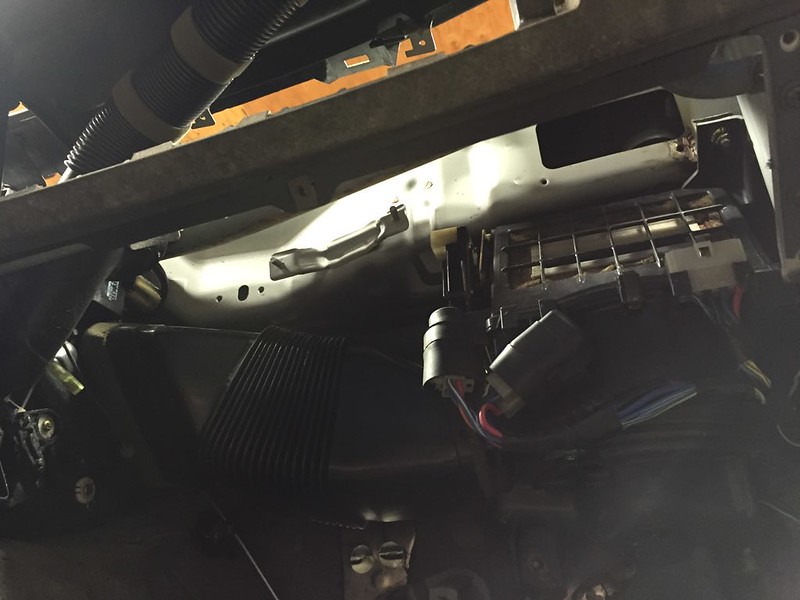
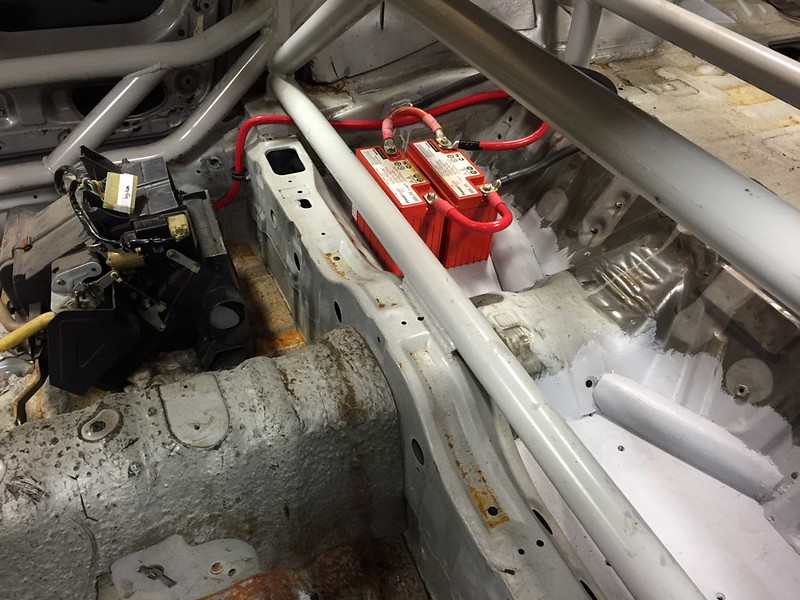
Wanted to keep the same location for the battery switch as before
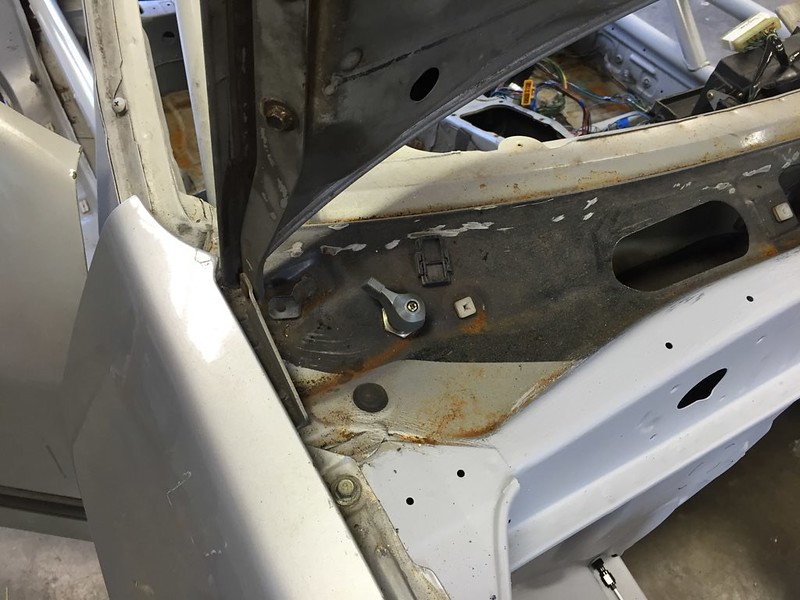
this presented a new challenge as I wanted to keep the fresh air vents and the blower fan
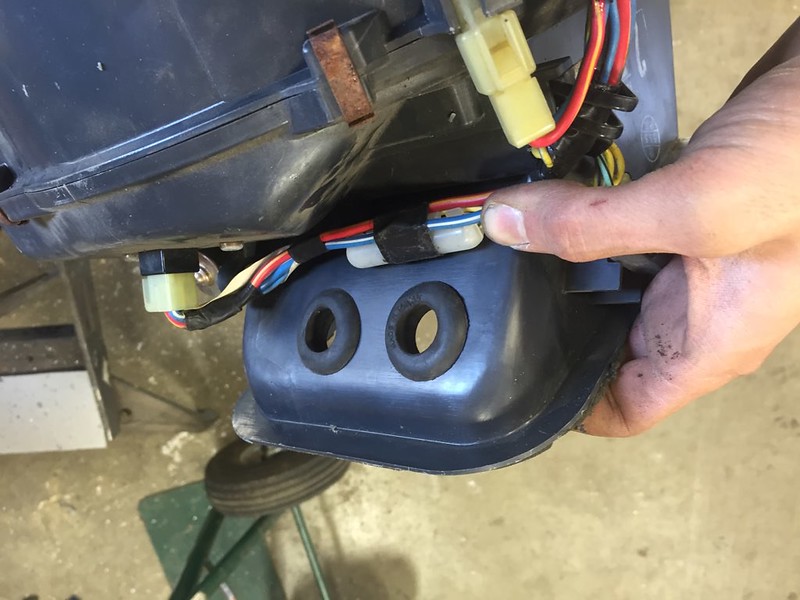
makes getting the blower fan and power wires a serious task but really I shouldn't have to take it out ever
Thread Starter
Senior Member
Joined: Mar 2015
Posts: 335
Likes: 8
From: Vancouver, BC
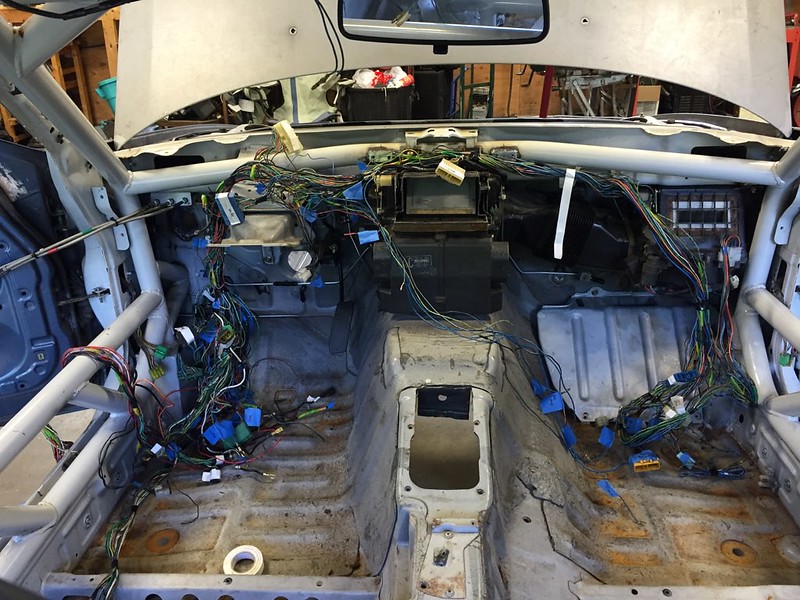
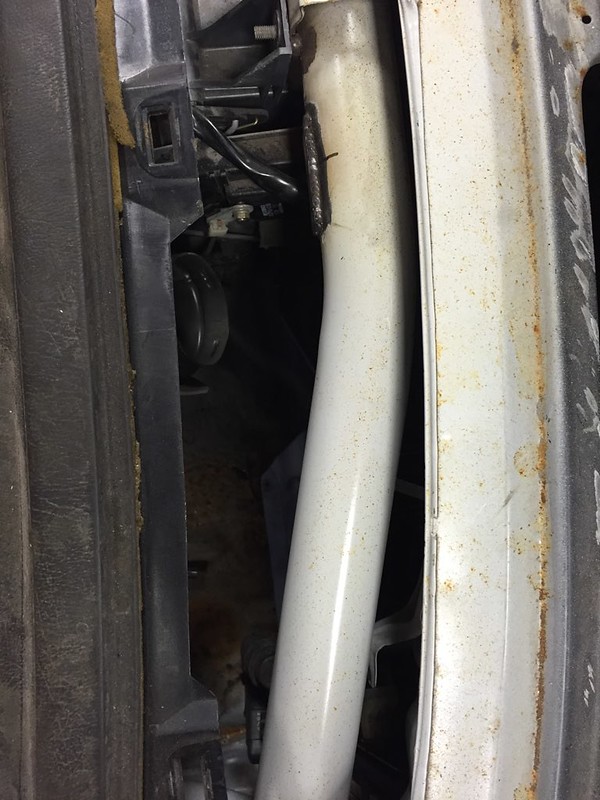
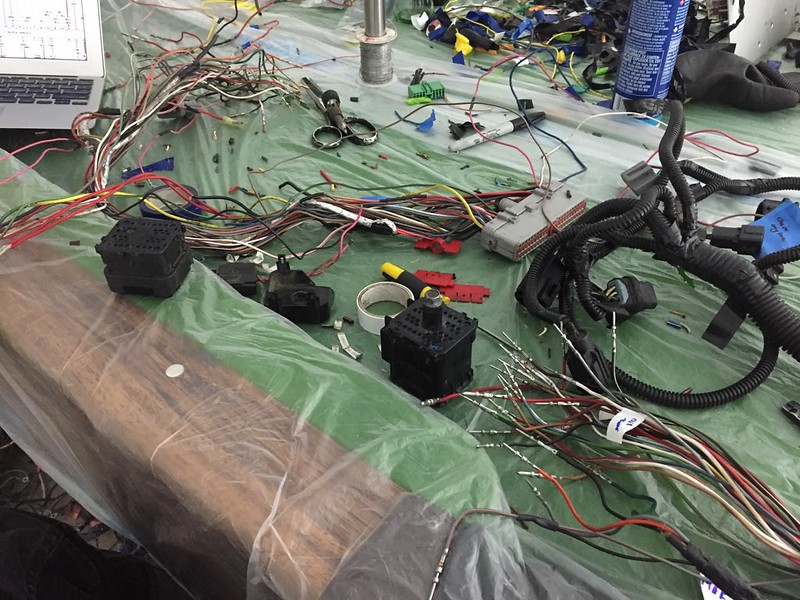
worked on placement of the bulkhead connectors.
one day I would love to do a full mil spec/raychem/fancy harness so I'm leaving enough room for an aluminum plate should I find and buy a mil spec connector. Was trying to find one on eBay, mated pairs come up but man you can't hesitate on it when you find one.
Ecu and remote TFI fit nicely where the RX7 ecu went. Not sure how the remote TFI will do being in the interior and under a cover. Seen a few mustang guys put them in their interior but can't find any real data whether it gets too hot or not.
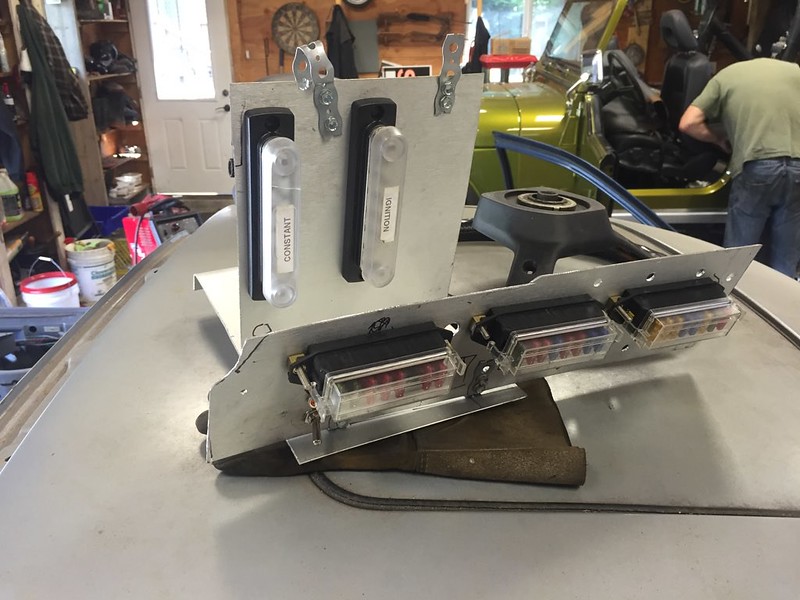
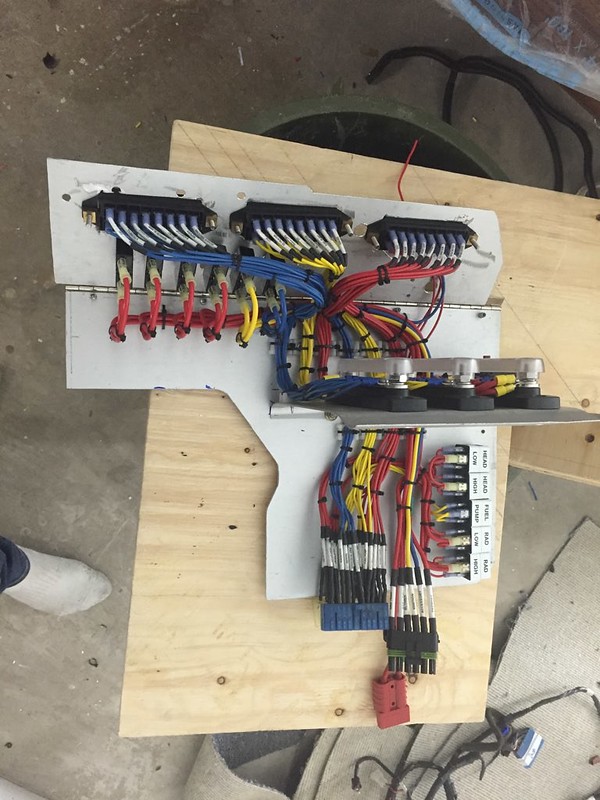
Now I had a few goals for the fuse panel. I wanted in removable from the car, and more serviceable, and to retain my glovebox. Where I had it before was kinda hard to get at, and not nearly as tidy as I had hoped it would be.
one day I would love to do a full mil spec/raychem/fancy harness so I'm leaving enough room for an aluminum plate should I find and buy a mil spec connector. Was trying to find one on eBay, mated pairs come up but man you can't hesitate on it when you find one.
Ecu and remote TFI fit nicely where the RX7 ecu went. Not sure how the remote TFI will do being in the interior and under a cover. Seen a few mustang guys put them in their interior but can't find any real data whether it gets too hot or not.
Now I had a few goals for the fuse panel. I wanted in removable from the car, and more serviceable, and to retain my glovebox. Where I had it before was kinda hard to get at, and not nearly as tidy as I had hoped it would be.

Thread Starter
Senior Member
Joined: Mar 2015
Posts: 335
Likes: 8
From: Vancouver, BC
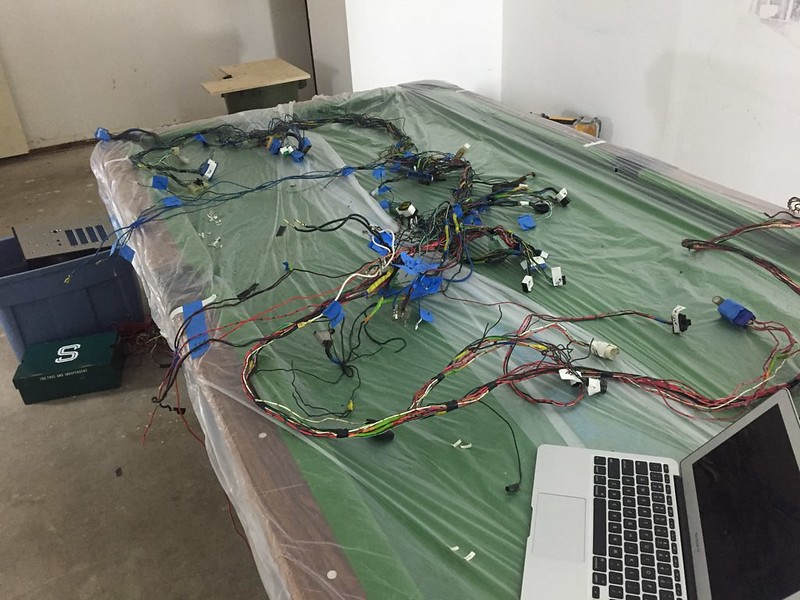
then back to the lab again
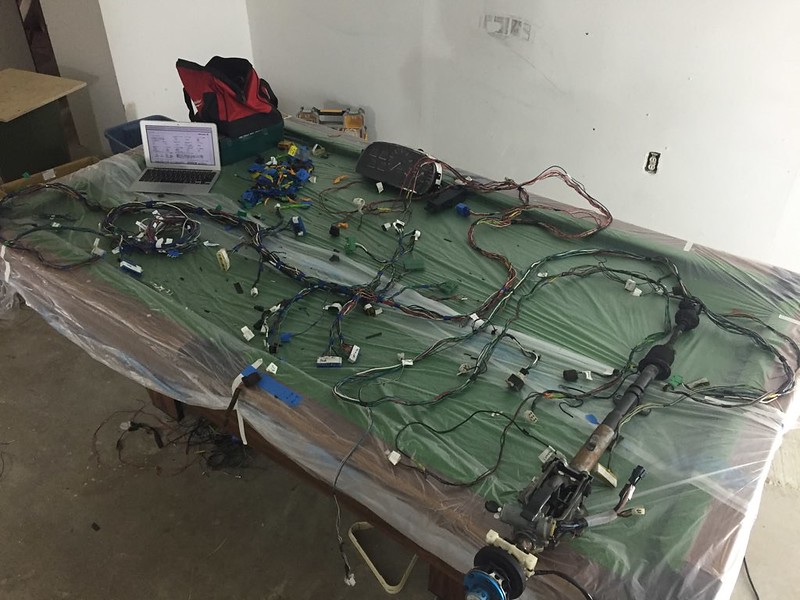
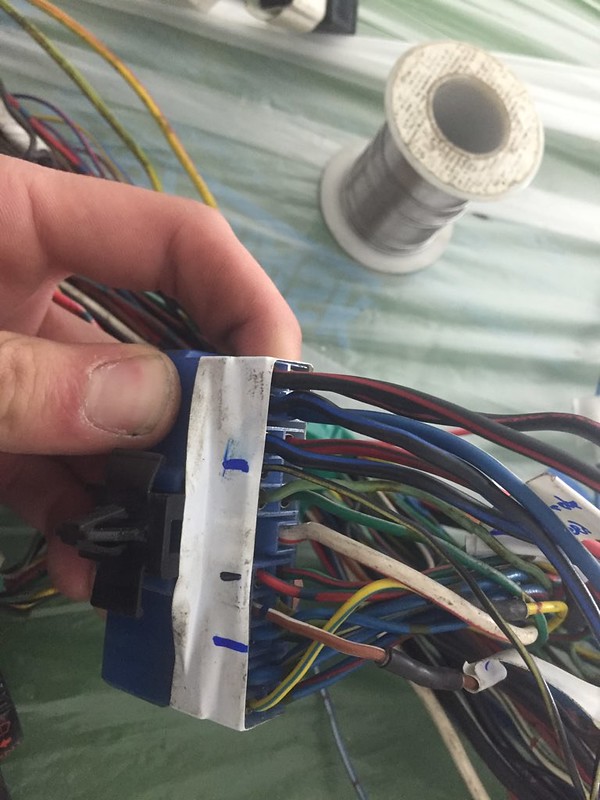
used all the old stuff from the previous 2 cars and had the blue cars unmolested harness in the other room as a reference tool. I like using factory colours and the pins.
got my engine harness sorted, its also quite modular and not 1 piece with the body harness like last time. Vast improvement and important for when I no longer have a v8.
I don't even want to talk about how many times I had to go back to the parts store for consumables, or how much all that nickel and dimming added up to, but started here
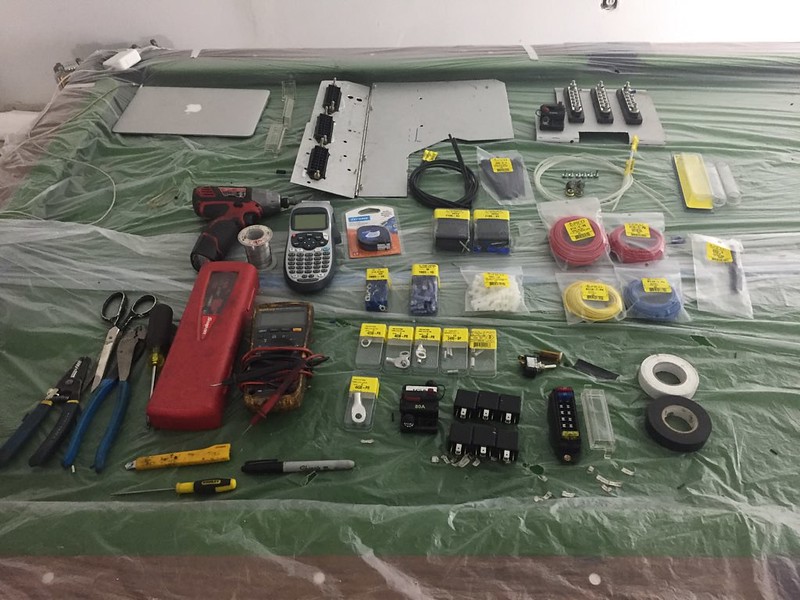
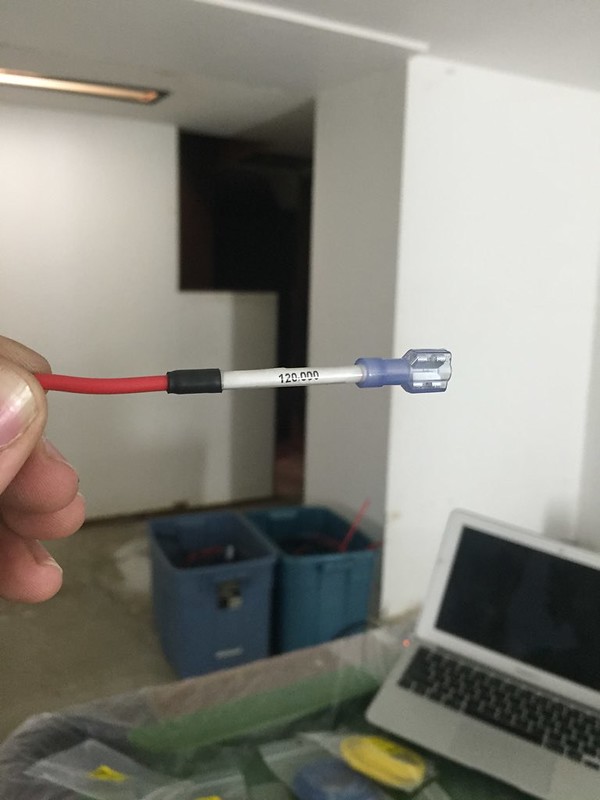
experimented with a label maker and clear heat shrink. Those 3M heat shrink labels are cool and all but that printer is out of my budget
figured out quickly what I can and can't do this way, order of the process was very important.
the only piece i'm reusing from this is the bottom piece, and well the hinge too. The front piece I need to be CNC cut (I did a quick and nasty cut just to be able to build this) and the upright piece is a touch short. Also planning on doing something black on the bottom of it, like carpet or abs.
used all the old stuff from the previous 2 cars and had the blue cars unmolested harness in the other room as a reference tool. I like using factory colours and the pins.
got my engine harness sorted, its also quite modular and not 1 piece with the body harness like last time. Vast improvement and important for when I no longer have a v8.
I don't even want to talk about how many times I had to go back to the parts store for consumables, or how much all that nickel and dimming added up to, but started here
experimented with a label maker and clear heat shrink. Those 3M heat shrink labels are cool and all but that printer is out of my budget
figured out quickly what I can and can't do this way, order of the process was very important.
the only piece i'm reusing from this is the bottom piece, and well the hinge too. The front piece I need to be CNC cut (I did a quick and nasty cut just to be able to build this) and the upright piece is a touch short. Also planning on doing something black on the bottom of it, like carpet or abs.
Thread Starter
Senior Member
Joined: Mar 2015
Posts: 335
Likes: 8
From: Vancouver, BC
then to this
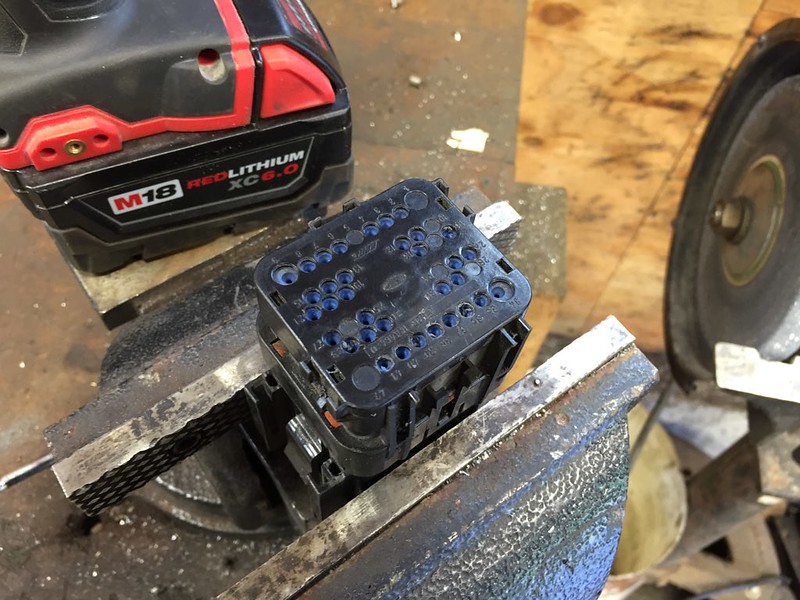
bought a Weatherpak connector in a large enough gauge for the ignition wires and fan wires. Not very sold on it, was supposed to be crimp but after trying it I added solder just to be on the safe side. I wish there was an ideal connector in the rx7 harness cuz I don't yet trust this.
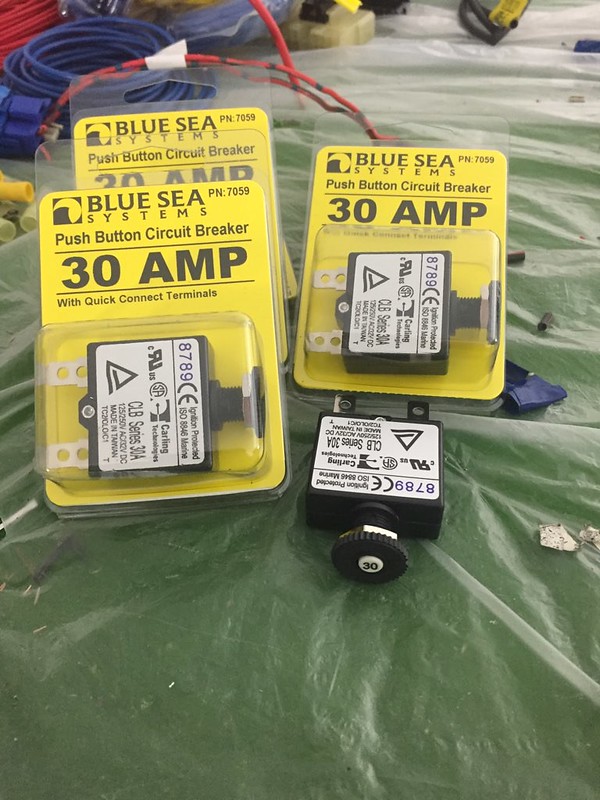
had done some work for my old boss, a marine mechanic, a long time ago and finally banked that favour
and done mostly


need to deal with this though...
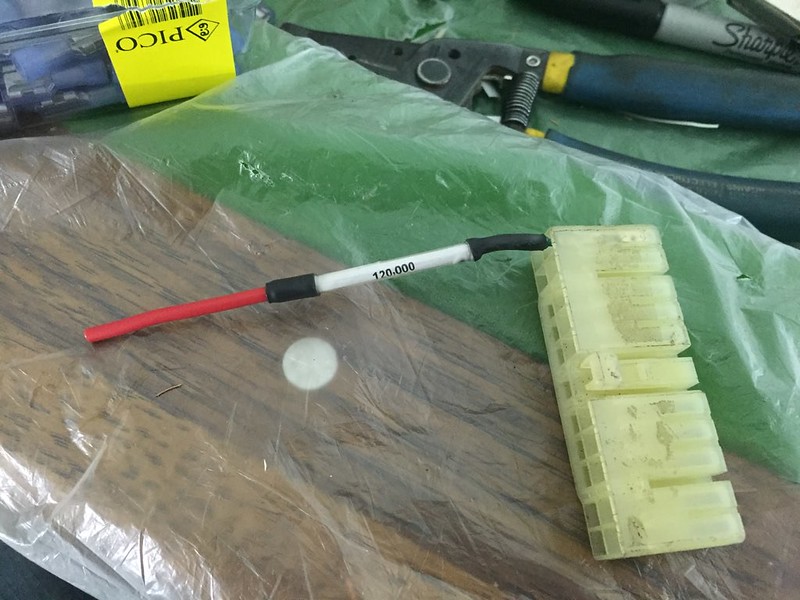
leave you with a small pro tip: when I would go to re organize or add heat shrink to a wire I would wrap tape around the connector and mark the location of it before I removed it. do one at a time. pictures of the connector are also good, maybe a tad slower though and sometimes hard to get the trace in the shot. having a complete harness in the next room was a huge help for this
taking a break from wiring for a bit;
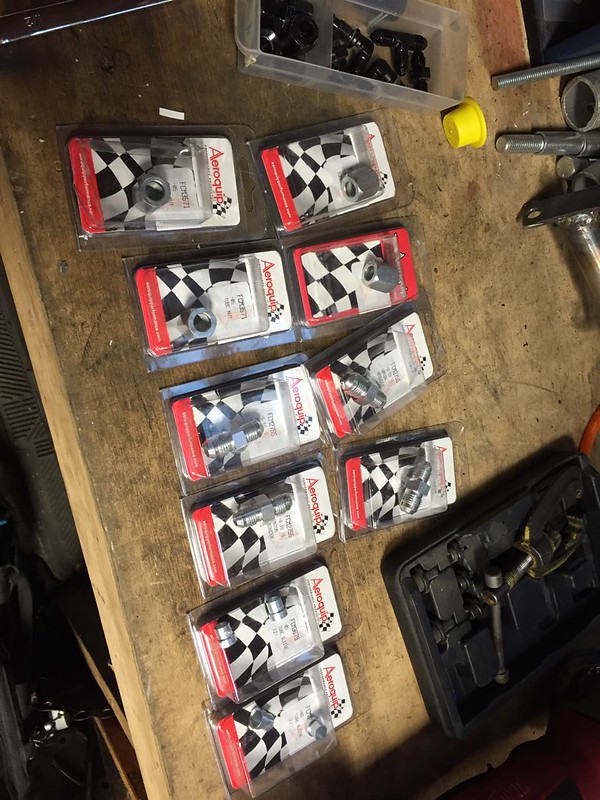
long time ago my parents gave me a gift card to a local speed parts store, so I had ordered the necessary parts to convert the factor 5/16th fuel lines to -6 AN. For some reason they only had Aeromotive steel fittings in -5, I learn later that Russel makes aluminum ones are a bit cheaper but oh well.
flared a test one just to make sure this was all gonna work
bought a Weatherpak connector in a large enough gauge for the ignition wires and fan wires. Not very sold on it, was supposed to be crimp but after trying it I added solder just to be on the safe side. I wish there was an ideal connector in the rx7 harness cuz I don't yet trust this.
had done some work for my old boss, a marine mechanic, a long time ago and finally banked that favour
and done mostly
need to deal with this though...
leave you with a small pro tip: when I would go to re organize or add heat shrink to a wire I would wrap tape around the connector and mark the location of it before I removed it. do one at a time. pictures of the connector are also good, maybe a tad slower though and sometimes hard to get the trace in the shot. having a complete harness in the next room was a huge help for this
taking a break from wiring for a bit;
long time ago my parents gave me a gift card to a local speed parts store, so I had ordered the necessary parts to convert the factor 5/16th fuel lines to -6 AN. For some reason they only had Aeromotive steel fittings in -5, I learn later that Russel makes aluminum ones are a bit cheaper but oh well.
flared a test one just to make sure this was all gonna work
Thread Starter
Senior Member
Joined: Mar 2015
Posts: 335
Likes: 8
From: Vancouver, BC
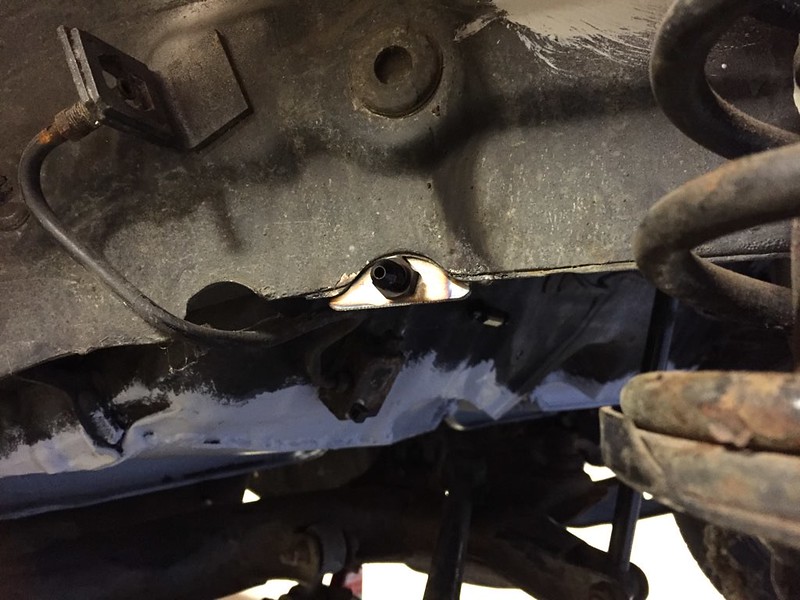
relocated one of the line holders and welded captive nuts to hold it in place. The factory lines usually dip under the rear seat tubs but since I cut those out, I cut the lines shorter. This also allowed me to snake the fuel lines around

also added a line holder, ended up looking exactly like the factory ones.
done and done.
Ordered some stuff off of Aliexpress. Knowing that usually when I buy stuff off eBay it requires modification. Some stuff however is good, and works and fits as advertised. The trick is knowing whats good and whats not. Usually this has to come first hand, the reviews on the site are a joke. Usually too these are items that someone else has done the R&D, sent it off to china to be mass produced and then copied and sold by other people. What drives me crazy is when people slap their company name on it and sell it for 400% markup. I was at Formula Drift the other weekend and there was at least 2 vendors selling Alibaba parts for significantly higher prices than listed. Moral of the story, its not a rep part if its made in the same place. And don't send your stuff to china.
And hey if I find I can buy decent stuff off of Aliexpress than I'll continue to do so
with that rant out of the way
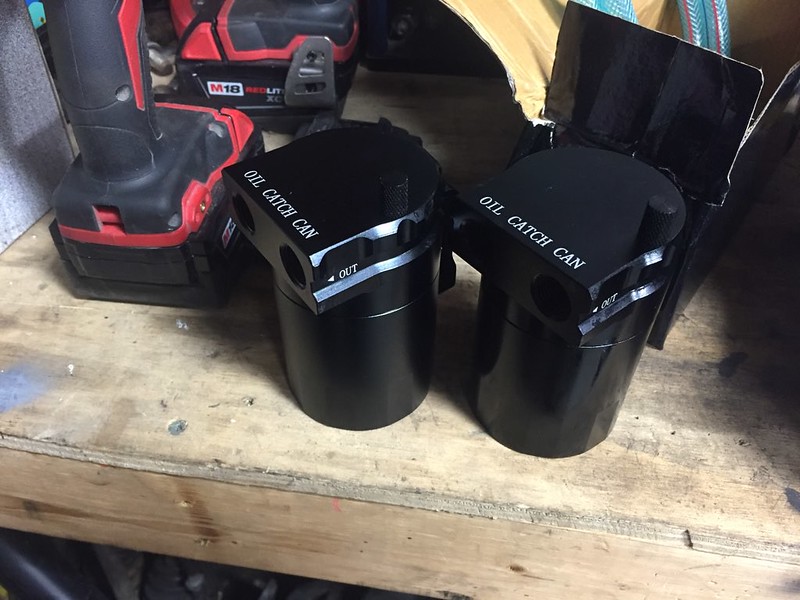
catch cans. they have a little dipstick and everything. Other than the inlet being only a -6 (feel like it should be bigger) these seem pretty good. I really like the way the Radium dual cans look, going to try and replicate that.
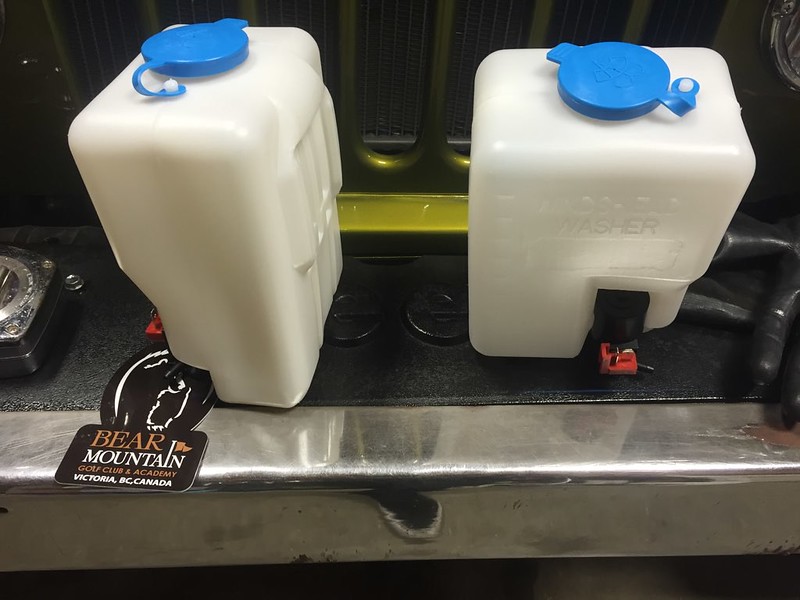
universal washer fluid bottles. Planning to use these for the radiator water sprayer, not sure the pumps will supply enough pressure but I'll find out.
coolant reservoir
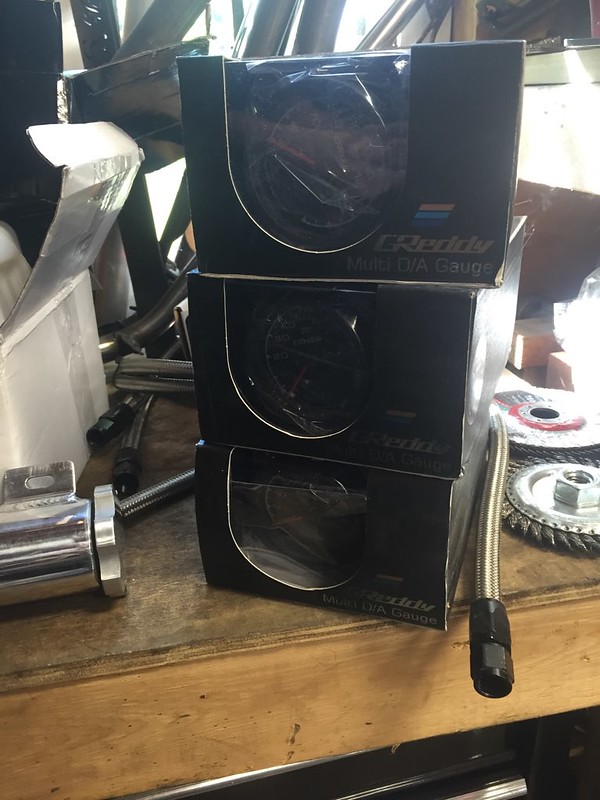
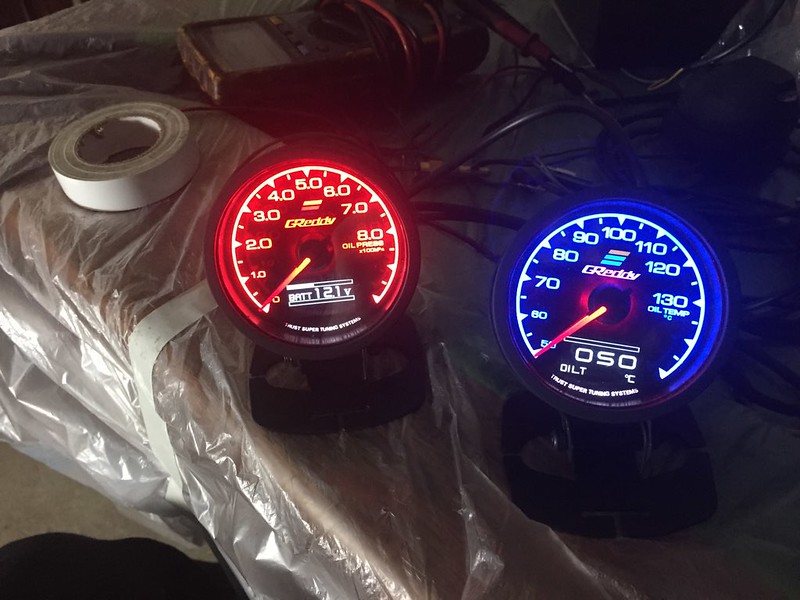
now the reason I went this way at all, friends have bought these "greddy" gauges and they work great. They aren't 100% the real deal though, the case looks the same but they do not use a brain box like the real ones. They are just a standalone gauge. But they look neat. The water temp gauge however didn't work out of the box. The seller has shipped me a new gauge, but its apparently on the slowest boat from China as I've been waiting over a month for it now. Most stuff took 2-3 weeks to arrive.
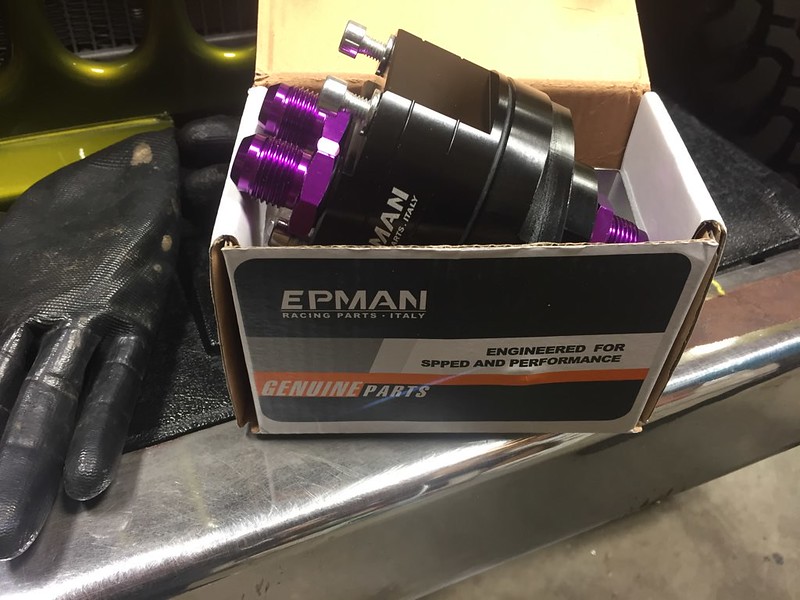
now the worst purchase I've made so far. Its an oil filter relocation kit, advertised to use a 3/4-16 thread pitch filter. However its very close but it doesn't fit. The outer diameter of their adapter is 2mm larger than an actual 3/4-16 thread. So all the filters I've tried do not thread on and its fairly loose threading onto the engine. Needless to say I won't be using it as it is. Also lol at the spelling on the box.
I've reached out to the seller, who's in disbelief that this could ever happen as they've been selling it for 6 years blah blah blah. I've asked for a refund but no dice.
Thread Starter
Senior Member
Joined: Mar 2015
Posts: 335
Likes: 8
From: Vancouver, BC
made a bracket for the washer bottles
they fit nicely where I had planned in the drivers side cubby
put my big boy pants on and tried welding the gussets by myself best I could
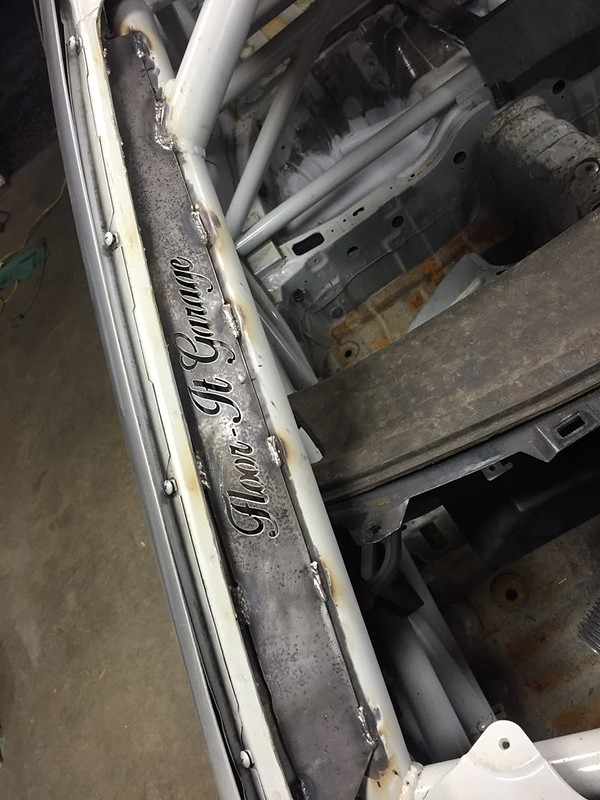
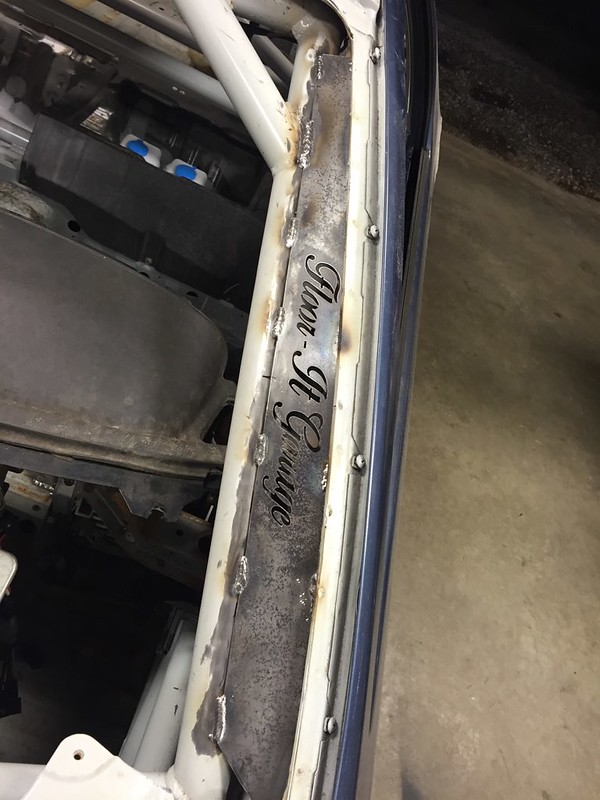
They kinda make the gaps between the cage and chassis bigger than they are, this is because I went to the middle of the bar in an effort to make the logo a legible size. I think they'll look better black after paint, kinda hoping the windshield doesn't cover them.
might have to back them with white or something if I want them to stand out.
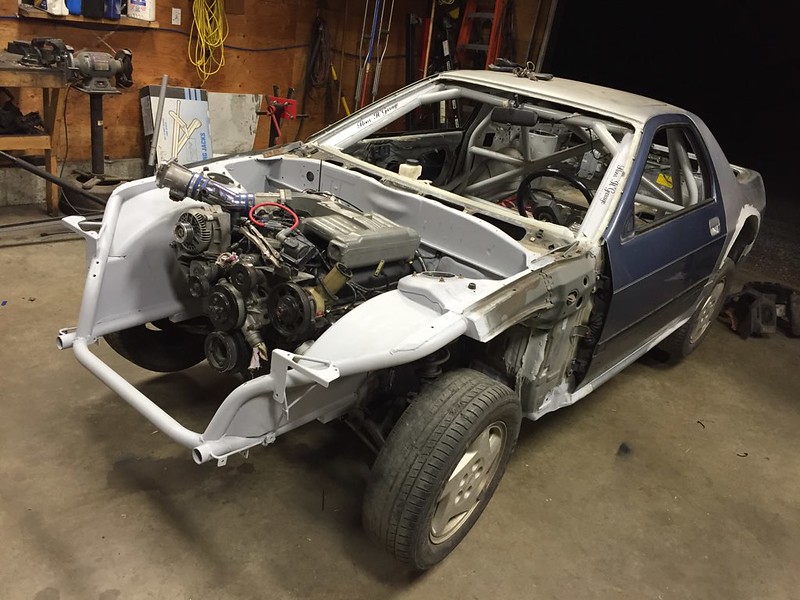
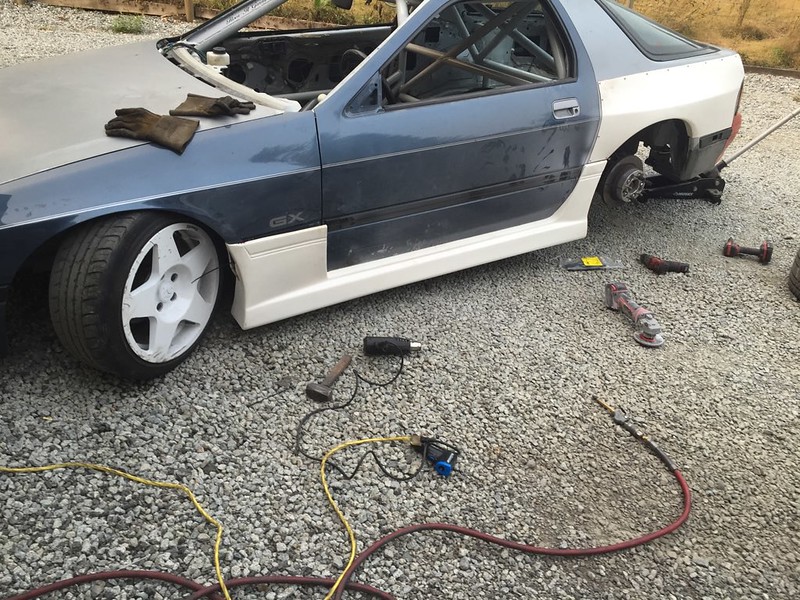
So with the wiring mostly done, the fuel lines worked out, and the majority of the welding in the interior done the next logical thing to do was drop the engine in.
Now because I have to push this thing in and out of the garage to work on it, once the weight of the engine and trans was added I wouldn't be able to do so on my own.
goal was to start with this on friday evening, and have a running car by saturday night.
had a few things to finish once the engine was in though
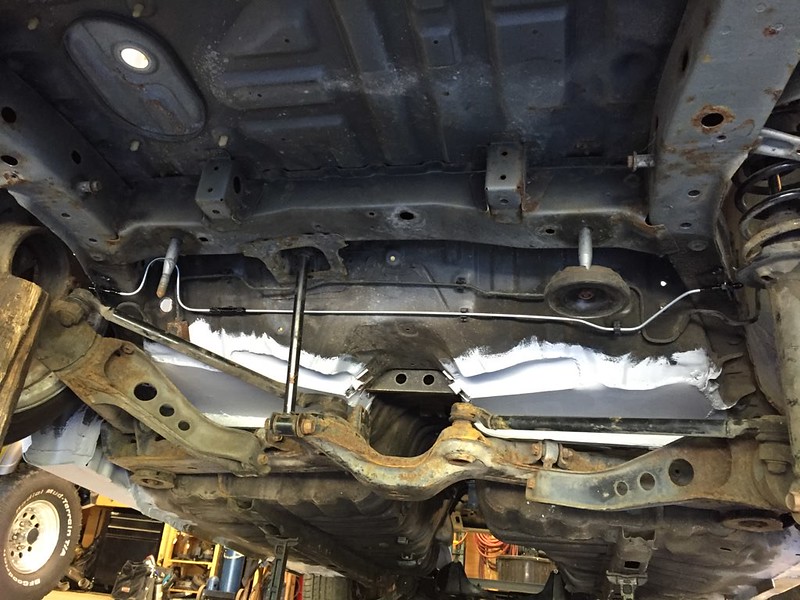
made a crossmember, this car was an automatic and the transmission crossmember I had from before (grannies) was for a manual which does not fit. not 100% sure on my driveline angles, and it may bump the steering rack as it sits but I'll modify as needed. For now its clears everything including the speedo cable and leaves ample room for an exhaust.
primed
gloss black. Cuz I still like gloss black things under the car
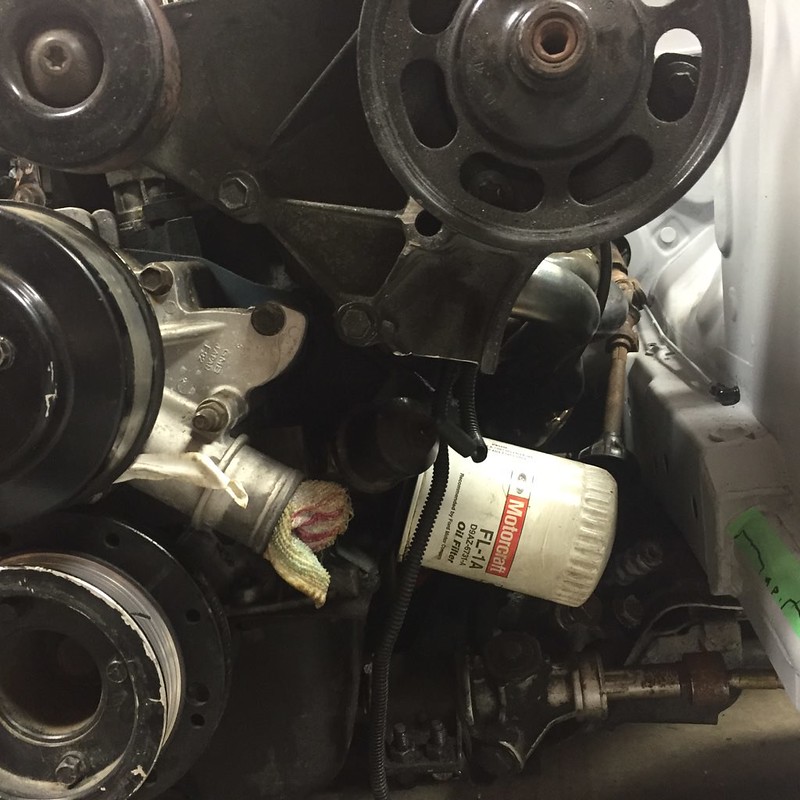
bad pic but cut the power steering bracket to clear the oil pressure sender.

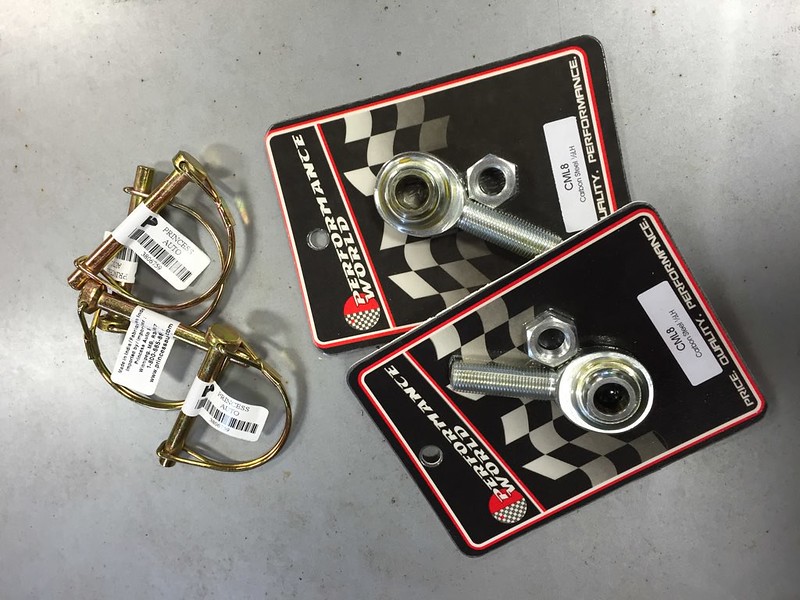
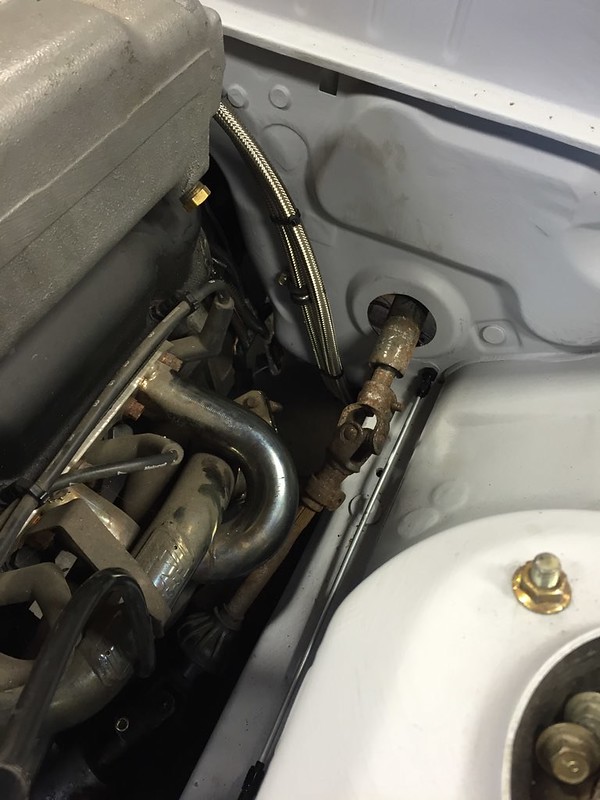
went and bought new braided line for the fuel lines as the old ones were too short and I had used them for the rear lines to the tank. Must say the newer Performance World line is much easier to work with then the old. I've never had one leak until now, but as they almost always are it was an assembly issue and the rubber part of the line didn't grab the hose end and blew off. The new line almost seems to have glue holding it to the rubber hose.
they fit nicely where I had planned in the drivers side cubby
put my big boy pants on and tried welding the gussets by myself best I could
They kinda make the gaps between the cage and chassis bigger than they are, this is because I went to the middle of the bar in an effort to make the logo a legible size. I think they'll look better black after paint, kinda hoping the windshield doesn't cover them.
might have to back them with white or something if I want them to stand out.
So with the wiring mostly done, the fuel lines worked out, and the majority of the welding in the interior done the next logical thing to do was drop the engine in.
Now because I have to push this thing in and out of the garage to work on it, once the weight of the engine and trans was added I wouldn't be able to do so on my own.
goal was to start with this on friday evening, and have a running car by saturday night.
had a few things to finish once the engine was in though
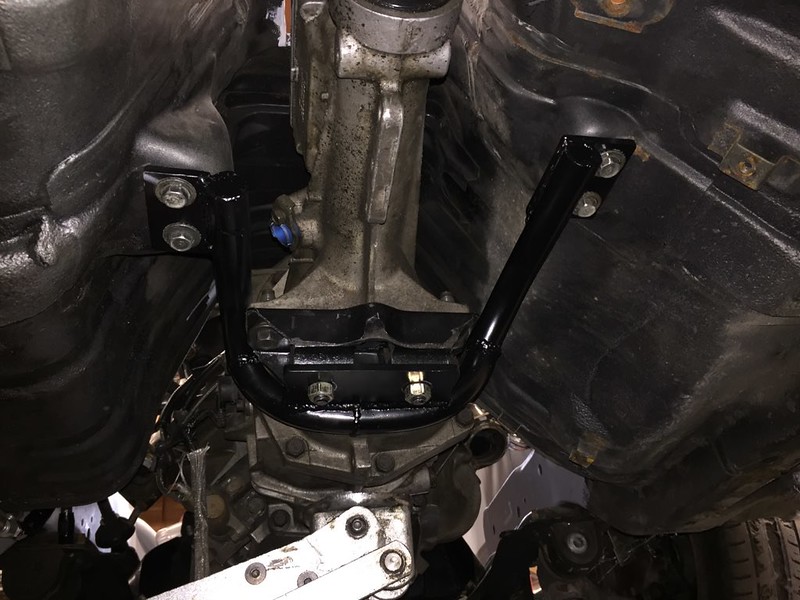
made a crossmember, this car was an automatic and the transmission crossmember I had from before (grannies) was for a manual which does not fit. not 100% sure on my driveline angles, and it may bump the steering rack as it sits but I'll modify as needed. For now its clears everything including the speedo cable and leaves ample room for an exhaust.
primed
gloss black. Cuz I still like gloss black things under the car
bad pic but cut the power steering bracket to clear the oil pressure sender.
went and bought new braided line for the fuel lines as the old ones were too short and I had used them for the rear lines to the tank. Must say the newer Performance World line is much easier to work with then the old. I've never had one leak until now, but as they almost always are it was an assembly issue and the rubber part of the line didn't grab the hose end and blew off. The new line almost seems to have glue holding it to the rubber hose.
Thread Starter
Senior Member
Joined: Mar 2015
Posts: 335
Likes: 8
From: Vancouver, BC
Im planning on running the heater core tube so I swapped one of the hose ends here to a 90 instead of a 120.
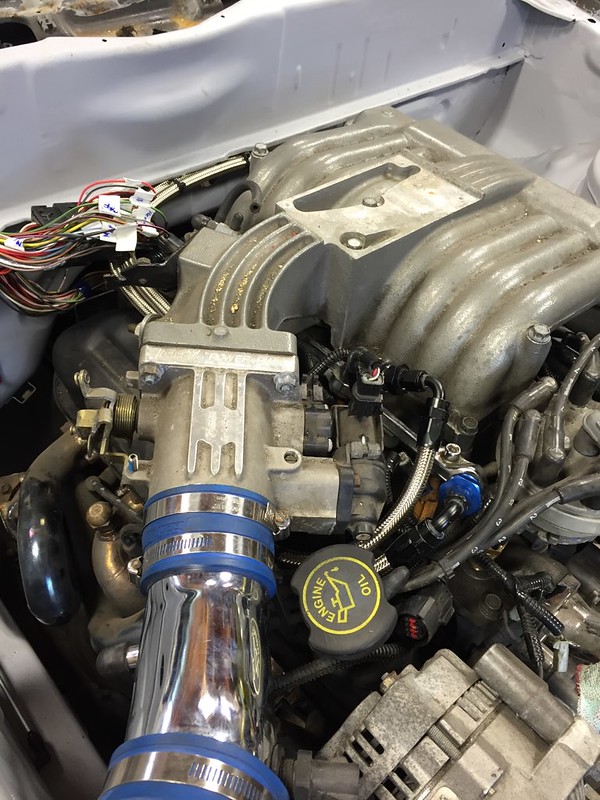
with that I just plugged everything else in, realized I used an accessory off the ignition harness in place of an ignition (though its labeled ignition 2 but functions as an accessory, thanks mazda) but was otherwise good to go.
will probably have to make a battery box as I can't find one on the internet that will fit in this space. Also need to find the battery group that is short and not a Porsche battery.
with everything super temporary,and the clutch bled
some super ghetto improvising, it runs and drives.
so with the engine running its time to get the rest of the stuff in order. Still needs a coolant system, wiring cleaned up, aero fitted, etc on and on.
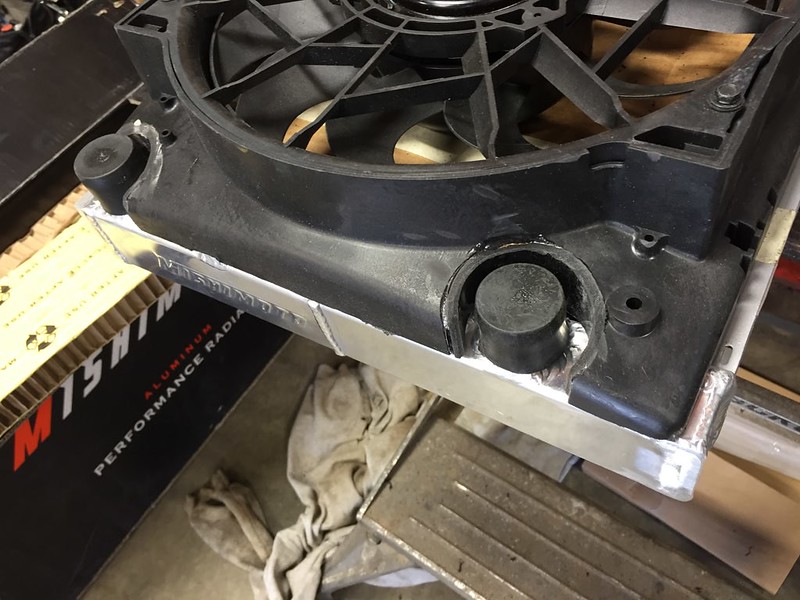
finally manned up and cut the VW mounting brackets off the rad
started sorting out the holes I cut in the rad fan
had to get a bit creative to tack it in place

then glue the back
Thread Starter
Senior Member
Joined: Mar 2015
Posts: 335
Likes: 8
From: Vancouver, BC
forgot to take a final picture but I added glue to the top. should have just masked it and left the glue there but i goofed and started sanding it.
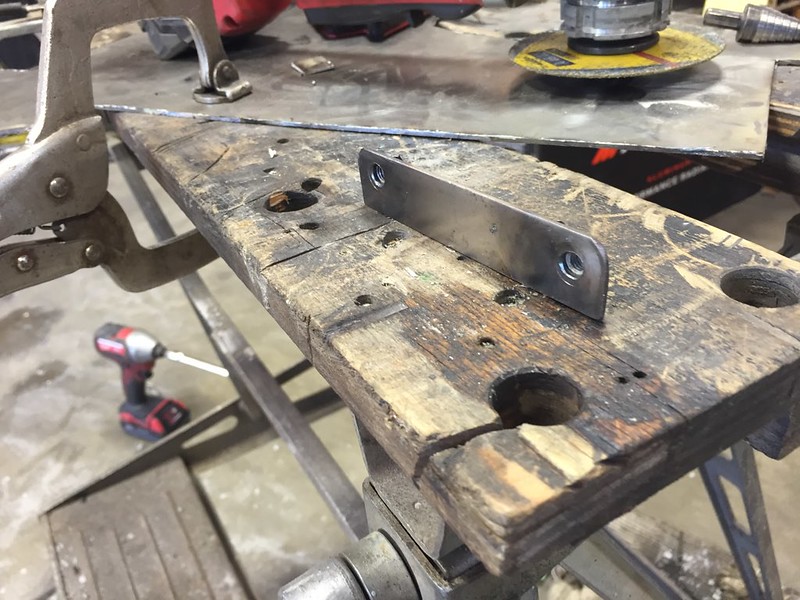
made a bracket for the oil filter relocation, even though I'm not 100% sure what I'm using yet. I put a bend in it so it would meet up with the sway bar bracket, but the pic doesn't really show it.
neither does this one
so I was going to use the stock FC oil cooler because they are huge and have a built in thermostat. Turns out 25 years and thin aluminum is not a good combo. this was what came off from taking the brackets off with my impact gun. Even more came off when i tried to clean it. Its pretty clogged through the fins. So looking into other options, probably aliexpress or B&M.
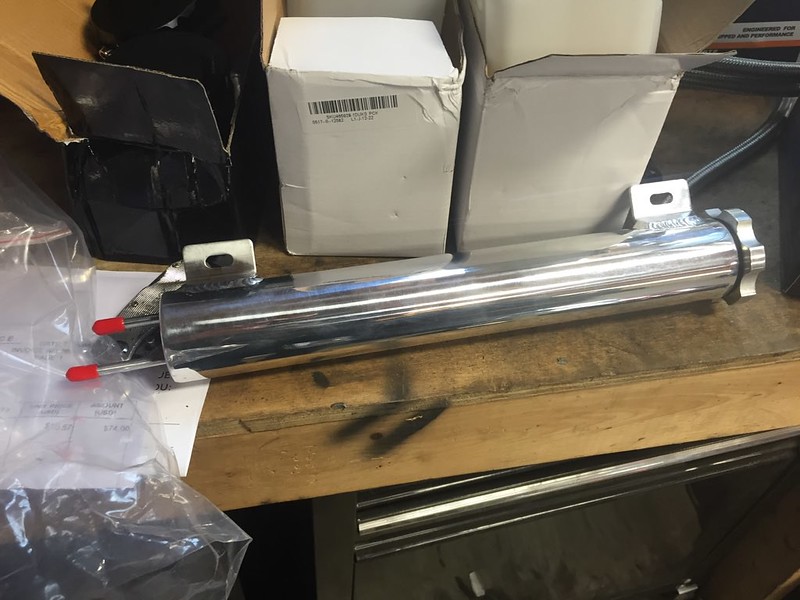
so next up then is the power steering cooler
long time ago Neil gave me an old Mk3 supra oil cooler, so made a mount to hide it in an inconspicuous place.
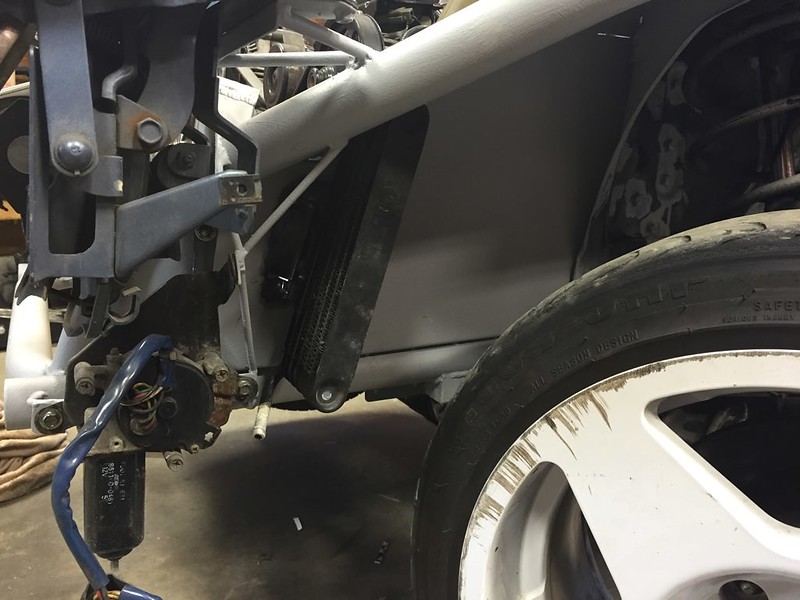
checked wheel clearance, plenty of room.
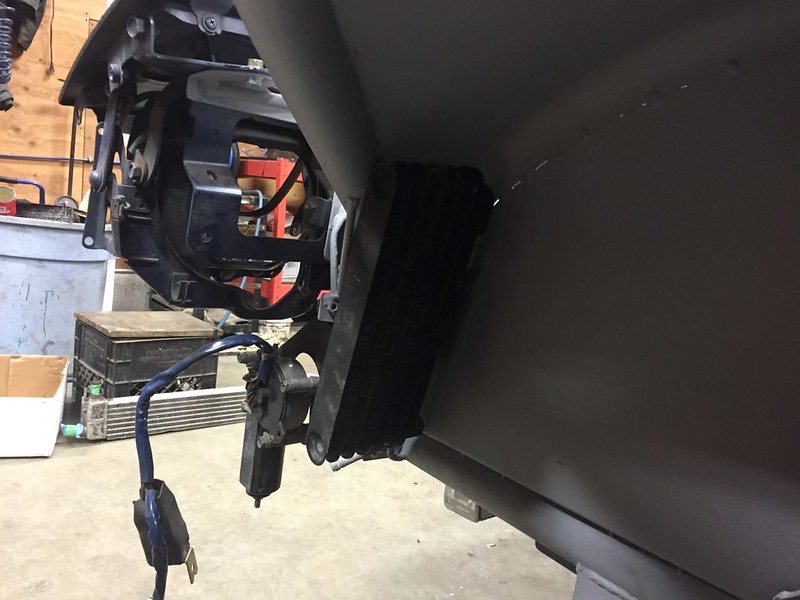
I'm mildly concerned its gonna get destroyed by rocks from the wheel but worst case I make a guard of some kind
cut a bunch of weight and added some clearance to the hood. Still weighs to much, especially compared the my dads vert hood
Thread Starter
Senior Member
Joined: Mar 2015
Posts: 335
Likes: 8
From: Vancouver, BC
so with some help from my buddy Kris we did the over fenders one evening. he came over with his Rivnut tool
can I just say Rivnuts are the coolest thing
because these are cheap rep's, they don't fit perfect. Or even close in the case of the drivers side one. But a buddy who works at a body shop gave me a tip using a heat gun and a air sprayer to rapidly cool the fibreglass, you can get it to where it should be. Still need to spend a bit more time on it.
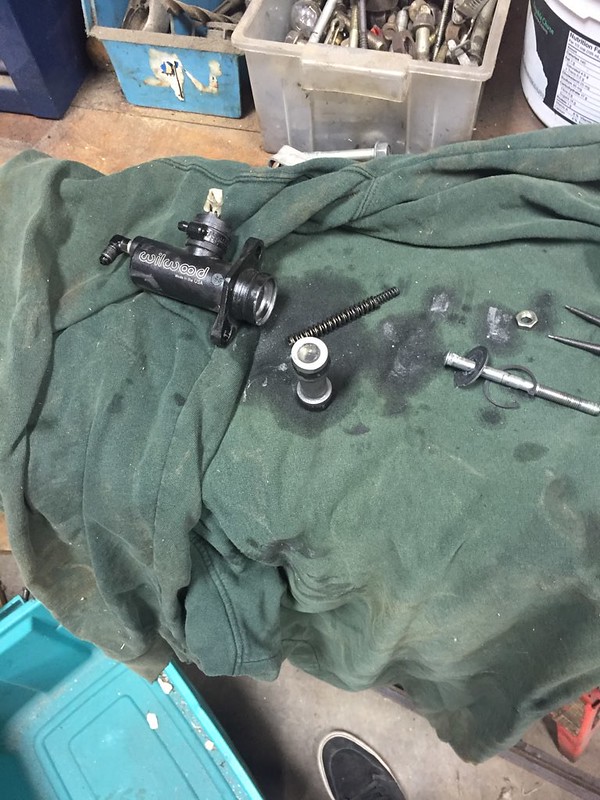
end of last season my clutch master had failed, it was leaking fluid out the front boot and all over my feet.
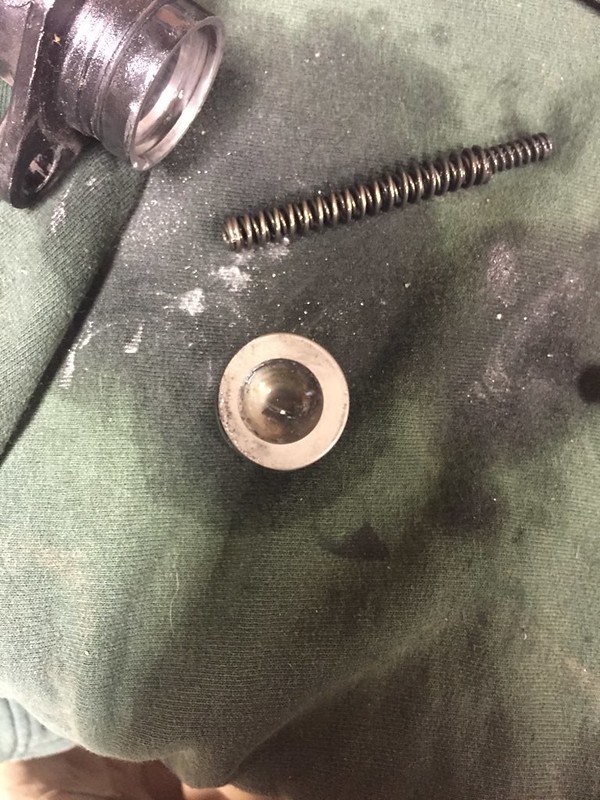
here's why; thats not really round anymore. I was hoping to use a 3/4" bore this time, as the 7/8 makes for pretty firm pedal pressure but I don't think the 3/4 is moving enough fluid.
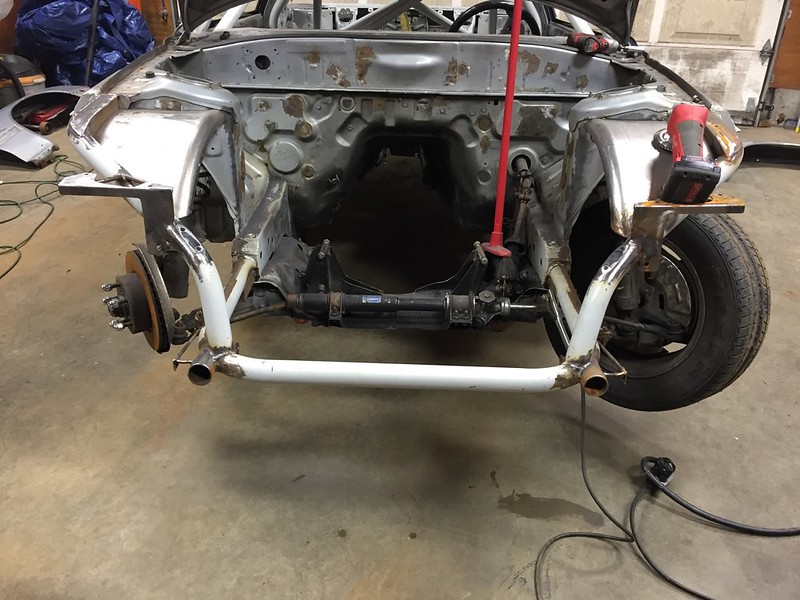
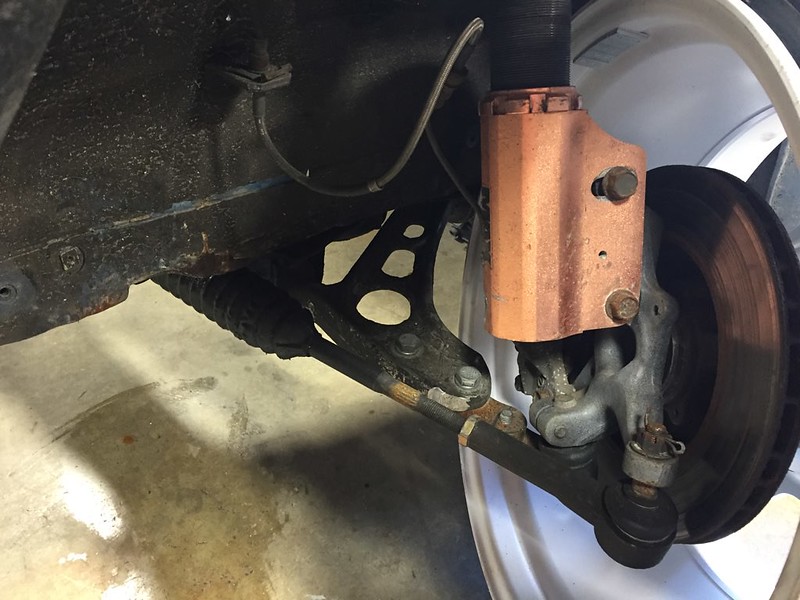
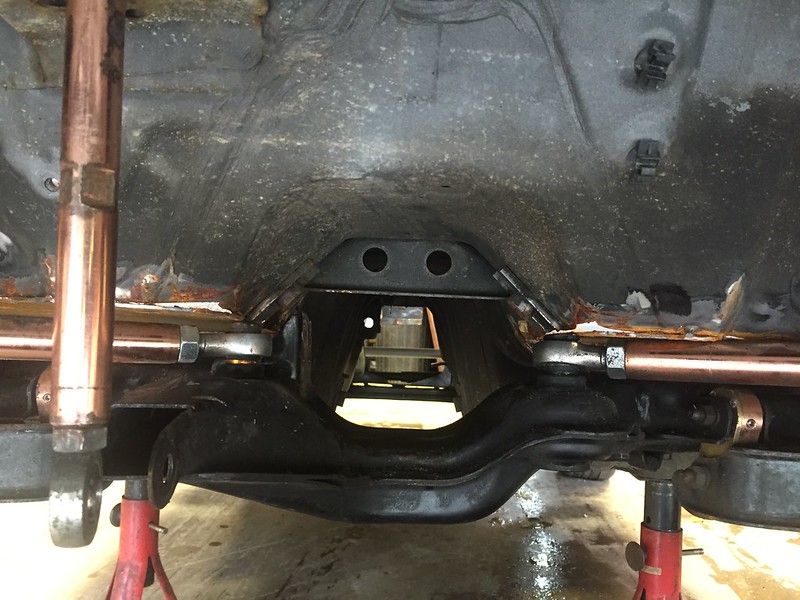
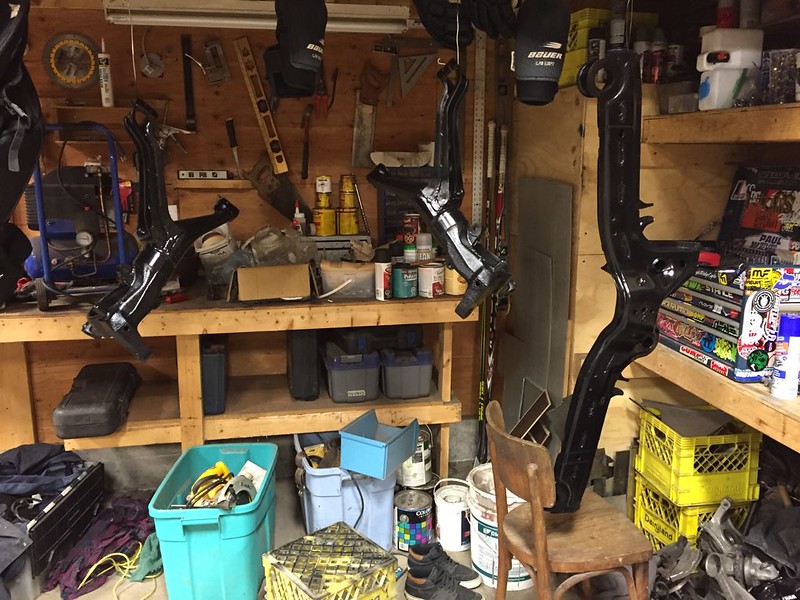
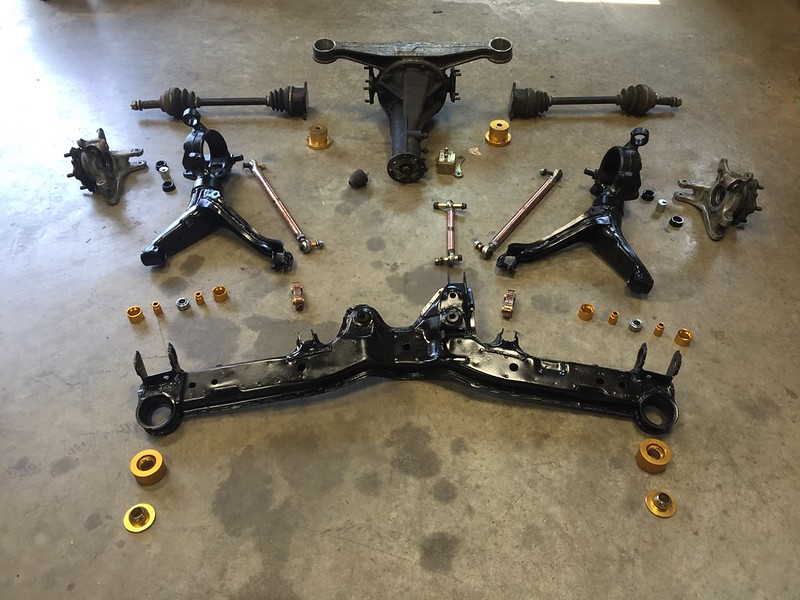
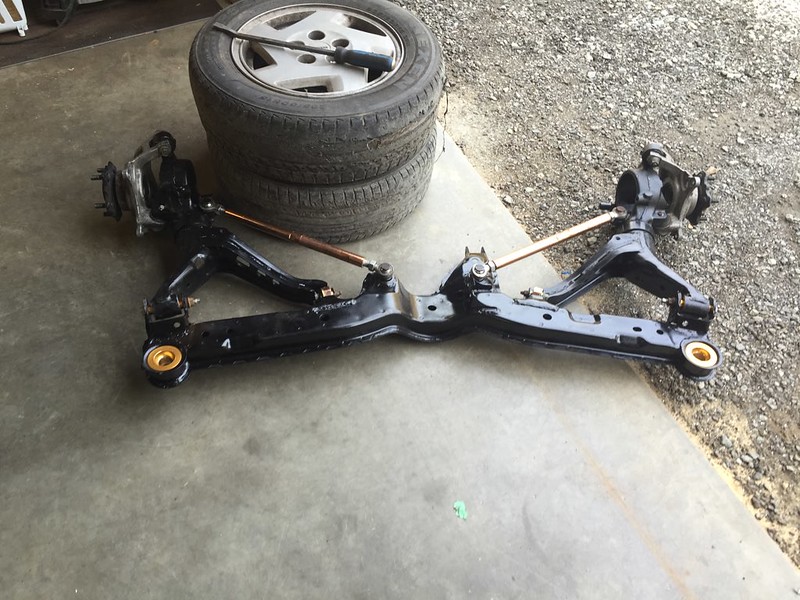
Next I set out to get my rear subframe in order
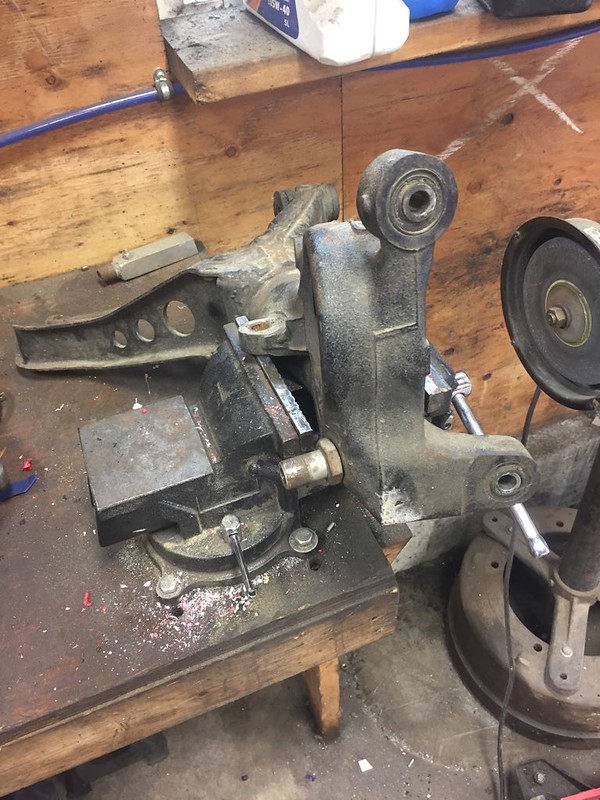
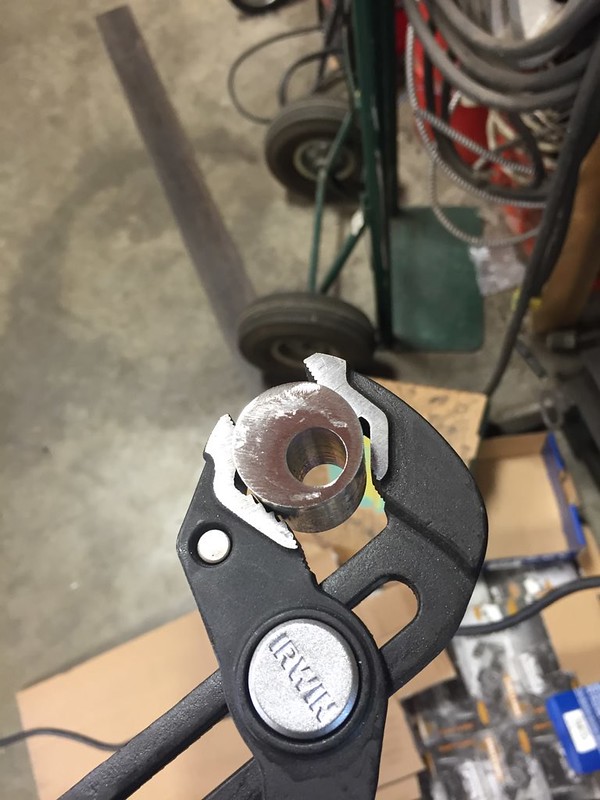
I had bought those Whiteline bushings to negate some rear negative camber, so had to get the old ones out.
pretty tough to get it all lined up and in the vice, especially with the weight and size of the trailing arm. so I came up with this. Needed to use quite a bit of torch action to get them out, make sure to remove the tape once its in place
and now that I had ruined the paint on it, and frankly it wasn't very good in the first place, I wire wheeled all the flaking paint and rust down and sanded it all down
painted them and let them dry
then spent way to long setting up for this pic and started assembling
can I just say Rivnuts are the coolest thing
because these are cheap rep's, they don't fit perfect. Or even close in the case of the drivers side one. But a buddy who works at a body shop gave me a tip using a heat gun and a air sprayer to rapidly cool the fibreglass, you can get it to where it should be. Still need to spend a bit more time on it.
end of last season my clutch master had failed, it was leaking fluid out the front boot and all over my feet.
here's why; thats not really round anymore. I was hoping to use a 3/4" bore this time, as the 7/8 makes for pretty firm pedal pressure but I don't think the 3/4 is moving enough fluid.
Next I set out to get my rear subframe in order
I had bought those Whiteline bushings to negate some rear negative camber, so had to get the old ones out.
pretty tough to get it all lined up and in the vice, especially with the weight and size of the trailing arm. so I came up with this. Needed to use quite a bit of torch action to get them out, make sure to remove the tape once its in place
and now that I had ruined the paint on it, and frankly it wasn't very good in the first place, I wire wheeled all the flaking paint and rust down and sanded it all down
painted them and let them dry
then spent way to long setting up for this pic and started assembling
Thread Starter
Senior Member
Joined: Mar 2015
Posts: 335
Likes: 8
From: Vancouver, BC
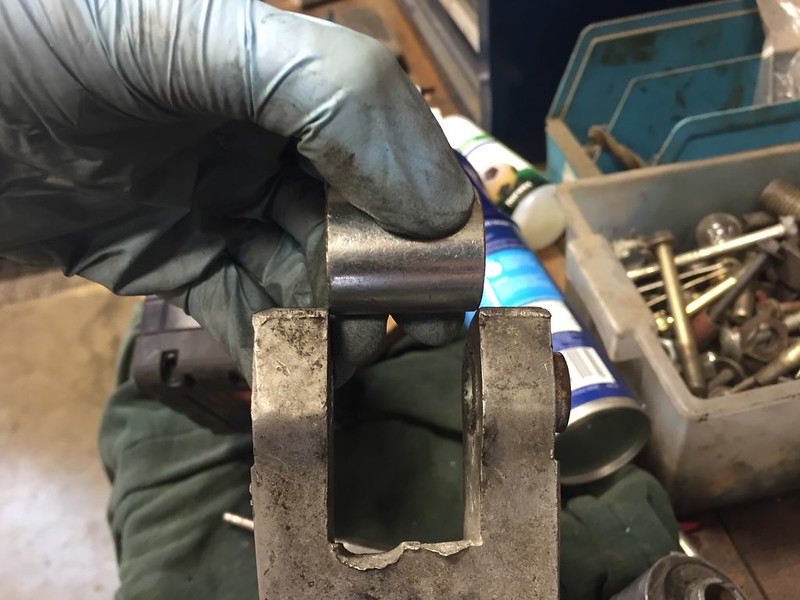
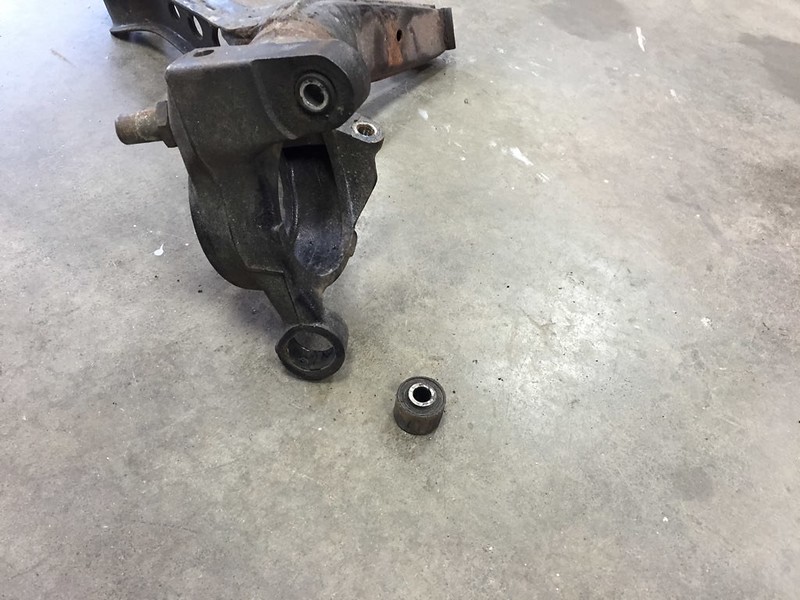
first problem I encountered was that Whiteline apparently doesn't do their homework. This was too wide buy a few mm
then the bushing was too wide inside the arm by a few mm, and when I pressed it all in it seems the ID is too tight on the sleeve (it kept bulging out) and the OD of the bushing was a little loose for the trailing arm. Needless to say I'm not impressed, seems to have more play than the old spherical but it does do as advertised for the camber.
shaving it all down
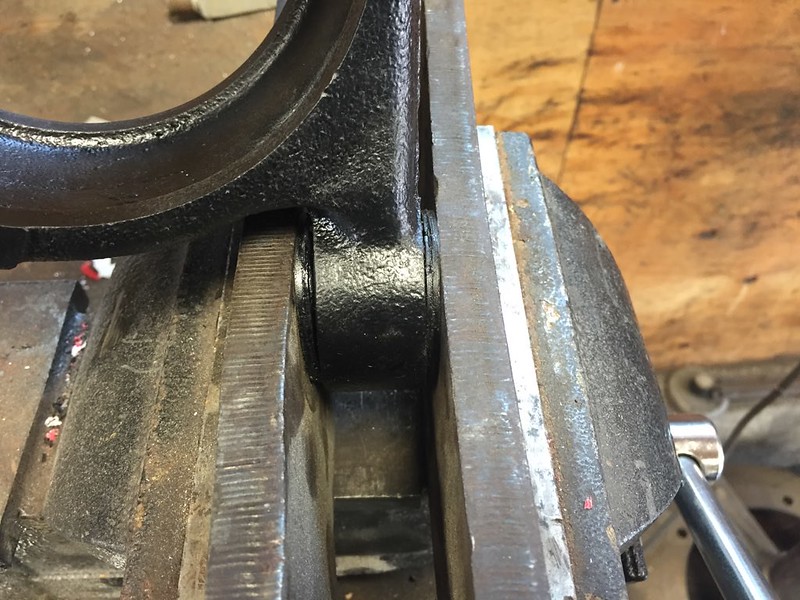
forgot to take pics of the PSM trailing arm spherical conversions, but almost broke my vice before switching to the 3 ton press. Was really awkward to fit the whole arm in the press but I found a way. Also, very important pro tip here, assemble the sleeves on the bearing, then put them in a freezer for like 2 hours before even trying to press them in. If theres not ice building up on it, leave it until there is. I did the first one after leaving it in for like 20 min, was a huge fit. 40 min later I go grab the other and it just pops right in, using the 3 ton press both times.
also a thing I noticed, I was told that poly bushings in the trailing arms and solid everything else would cause binding. I never found this myself but after installing the spherical conversion and seeing how much it pivots through the range of motion I now understand where that train of thought comes from. But that was on the shop floor, once the thing was back in the car the bushing sat very straight. I credit this to my ride height and to the PSM riser bushings.
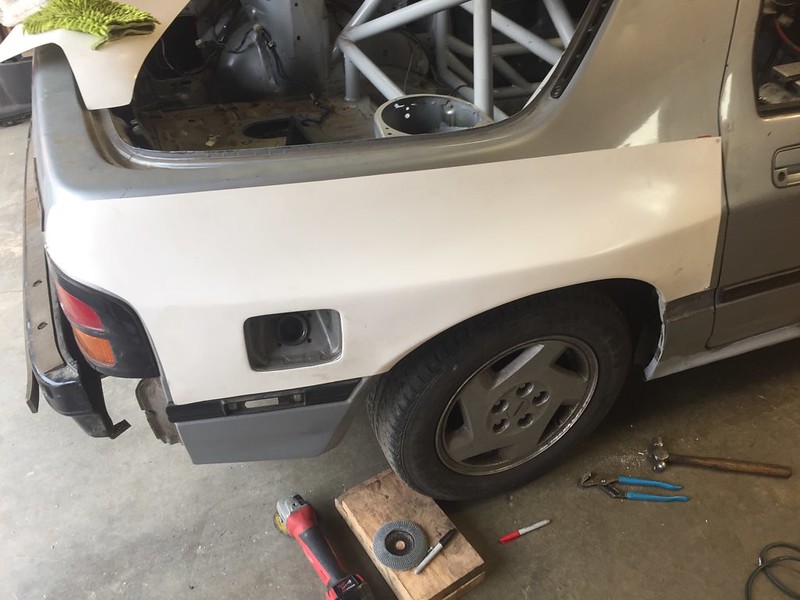
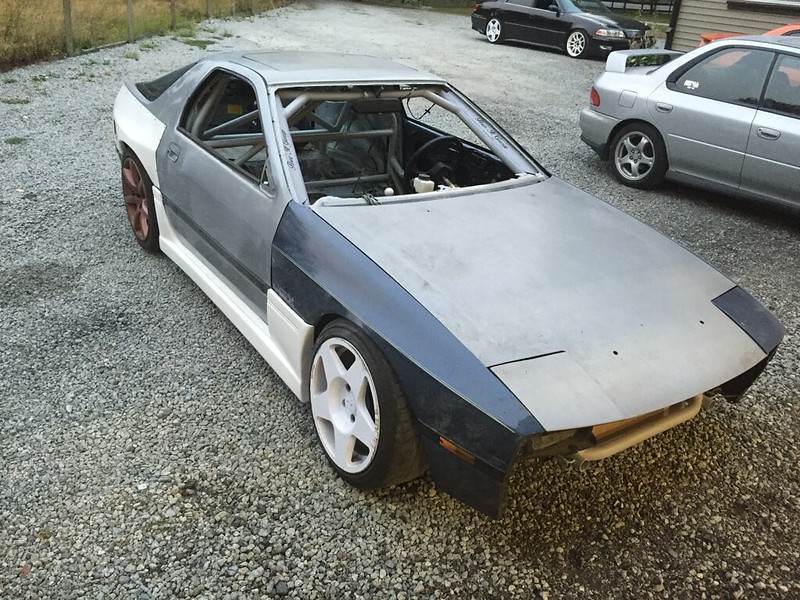
then even though more important things are left to do, I decided to loosely fit the skirts. such a mess that makes
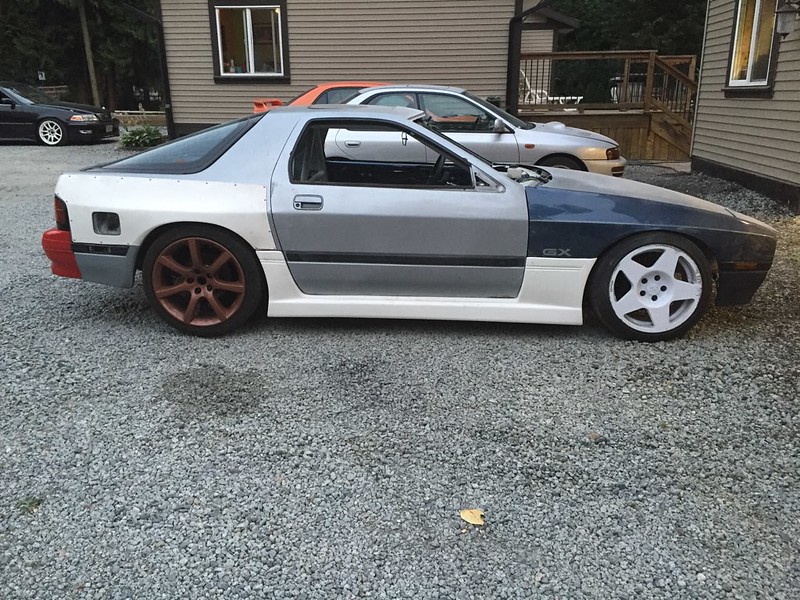
put the hatch on, a rear bumper, S5 tails, 18" rear wheels, 17" front
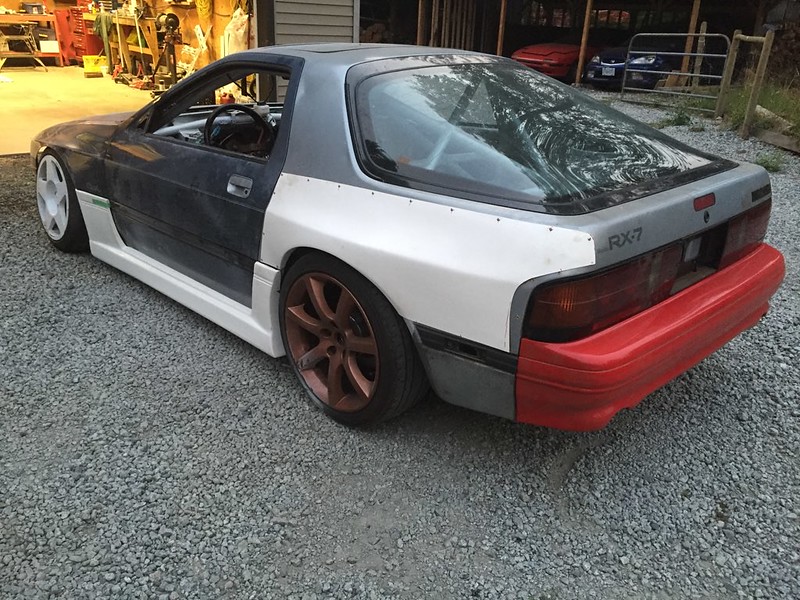
you can see how bad the drivers side rear over fits, I'll be adding glass to have it even loosely match the other side
before putting the fancy suspension back in we thought the rear looked way wider than the front. But now that the rear subframe, full Villains kit with 40mm balljoint spacers, and wheels that kinda fit front and rear it doesn't look as different
The blue fenders are off my car that was written off, and while they are in rough shape in a few spots I plan to roll the stock grey ones this shell came with to a similar roll
and here's where we are for now. lot of work down, lots to go. Almost at the point where I'm gonna be stuck waiting on parts to arrive before I can make progress, which is a nice feeling because that means there is less to do. While it does wear my patience thin sometimes, I really do feel thankful for the outlet for my creativity and problem solving skills this car is. hopefully it functions the way I intended and I don't wreck after a season and a half again...

Rotary Freak


Joined: Jul 2016
Posts: 1,838
Likes: 599
From: Beeton, Ontario
I'm not a fan of V8 conversions or drift builds, but somehow this is still my favourite build thread. I really like the care you put into the quality of your work, and you do an excellent job of documenting it as you go.
Good work, I eagerly await future updates.
Good work, I eagerly await future updates.
Thread Starter
Senior Member
Joined: Mar 2015
Posts: 335
Likes: 8
From: Vancouver, BC
thanks! I appreciate the compliments. its funny I've been diligent at taking photos while working that its almost foreign not to