
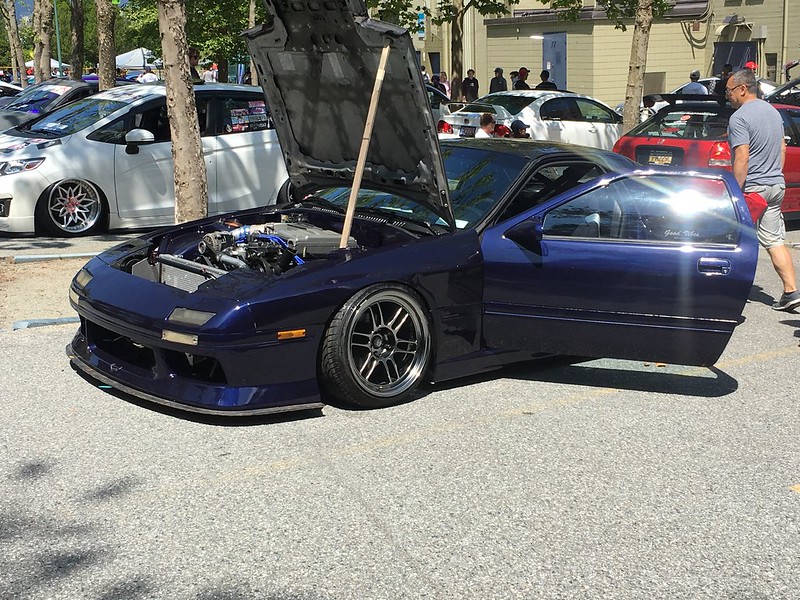
I Bit Off More Than I Can Chew: A Drift Car


Thread Starter
Senior Member
Joined: Mar 2015
Posts: 335
Likes: 8
From: Vancouver, BC

taking photos of things is key. How am I gonna make a trans mount thats simple, poly urethane preferably and won’t interfere with the speedo cable.
[img[https://farm8.staticflickr.com/7881/46224181055_4e87b50ed6.jpg[/img]

its a start. Neil had some china special poly mount kicking around, I think it’ll work.

Thread Starter
Senior Member
Joined: Mar 2015
Posts: 335
Likes: 8
From: Vancouver, BC

Reference photos again, this time for finding oil and water passages and engine mount locations. Both pics are upside down lol but the bottom one is the drivers side of the engine. that odd shaped port thing is the factory oil filter pedestal. I made some engine mount plates but forgot to take pics.

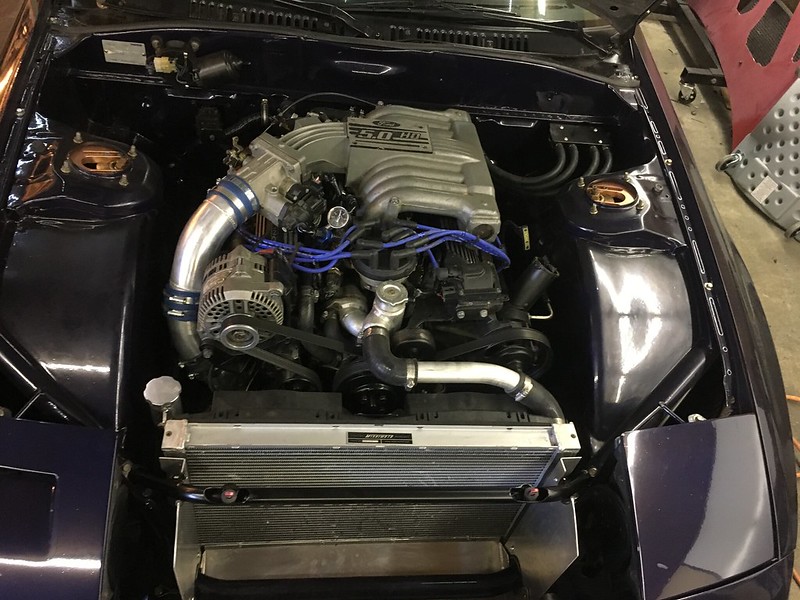
went back and forth comparing prices etc etc but ordered these off amazon prime shipped next day. Trans dapt universal engine mounts, high duro rubber and If I decide I later on solid mounts its pretty easy to change. These engines are very smooth at least in fwd config so we’ll see.
There is a shop local to me called Spectrum Motorsport Solutions that specializes in custom turbos and manifolds, the local turbo wizard I referred to is the owner Chris Scremin. I went over there one night and he graciously took like 2.5 hours to educate me about general turbo things and to talk about my setup. I legitimately can’t name a better person to do what Chris does, he built and maintains test equipment that some turbo companies don’t even have. Before he started doing Spectrum full time he was building and spec’ing turbos for OEM applications and similar things. Even if your not local they can still build turbos and high quality manifolds for a variety of cars.
I won’t give too much away yet but he is working on a pair (yes pair) of turbos for my car, and I can’t wait to start mocking them up.
I said I couldn’t wait.

so back to using the Honda’s turbo just to get an idea. The honda finally went to scrap after sitting for months with the window cracked open. We did finally fix the leaks and it blew out spark as soon as it hit boost lol.


Thread Starter
Senior Member
Joined: Mar 2015
Posts: 335
Likes: 8
From: Vancouver, BC


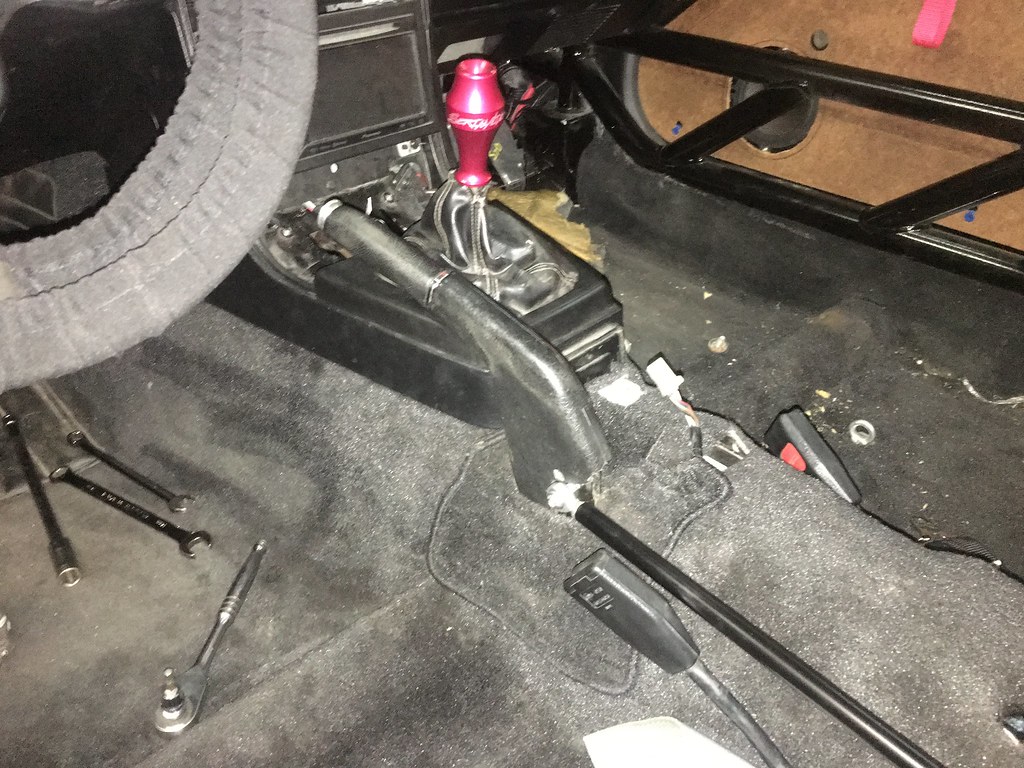
Local company to me Serial Nine did a run of red shift *****, I had to have one. I always like the HKS weighted shift *****, and while I liked the shape for the most part of Serial Nines **** the colours weren’t what I was after. I like supporting locals when I feel they do good work and such. I asked them once what it would take to get a red ****, they told me due to the order of manufacturing that it would pretty much take making a run of them. Well they made a run lol.
You can adjust the weight of it with a slug insert above the thread adapter, I went with the heaviest and it feels good like that.

[img[https://farm8.staticflickr.com/7923/46414709084_aa2fe9a6f4.jpg[/img]
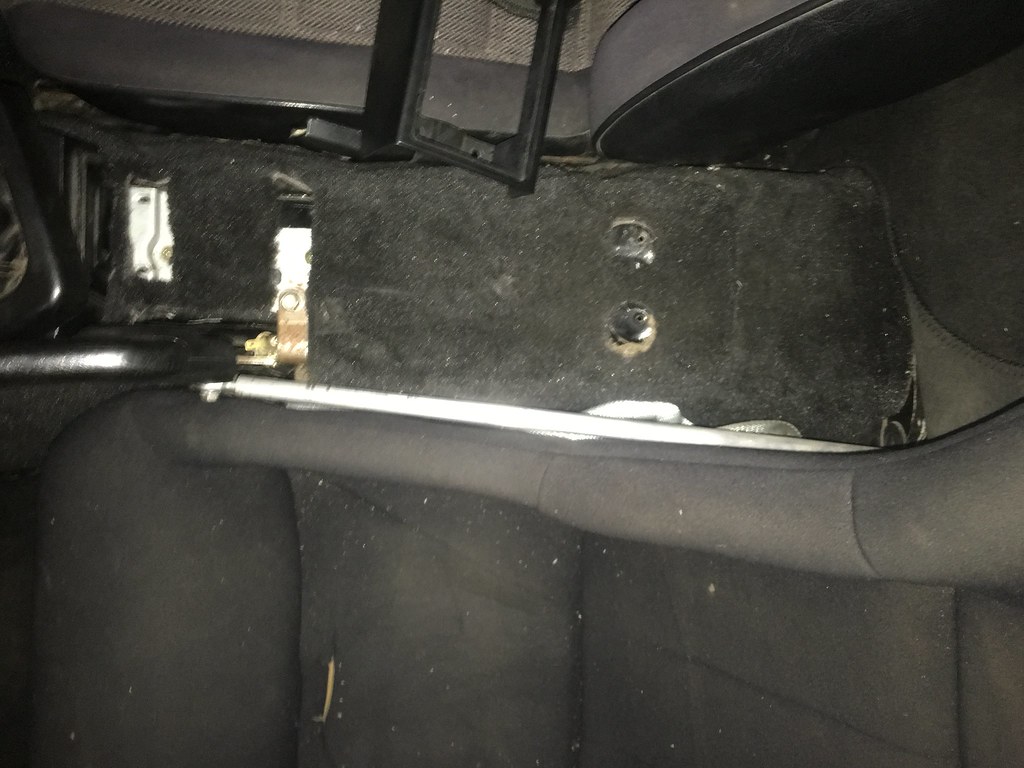
With the turbos sorta figured out but not in my hands, neil’s 3D printer was down, and a bunch of other things figured out it was time to address some of the issues my car has with the V8 in it. The handbrake just does not work. The cable has too much friction in the tight radius 180 bend its in. I’ve spent enough time on it and I don’t think its going to get better if I made the master cylinder mount more friction free. My original plan was to make the stock handle push a master cylinder mounted sideways in the centre console with the reservoir in the cubby. Then Im like well what if it pushes a rod hooked to a master hidden in the cubbies? Then somehow the cable idea got in my head and I thought it would work better.
My fear is that thing wouldn’t clear the seat, but before I cut anything I took a small piece of rod and drilled a hole into the cubbies where there would be room for a larger rod to get through the gap between the roll cage tube and the FC’s chassis. It kinda looked tight but it looked like it would work. Grabbed a piece of ready rod from work and welded a few nuts together to see how this was gonna go. The bracket flexed a lot and actually so did the floor it was bolted to. I was gonna need a brace to the cage. The ready rod also flexed badly and I expected that
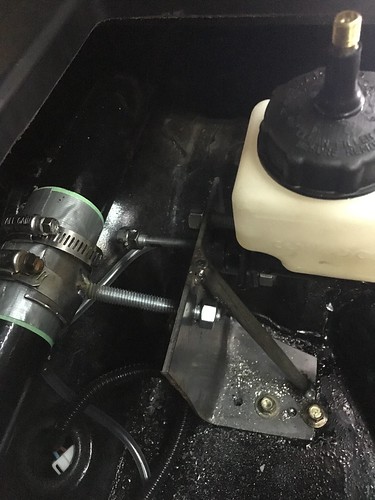
Added some angle iron to the ready rod, took a piece of tube and welded ready to it for a brace to the master bracket
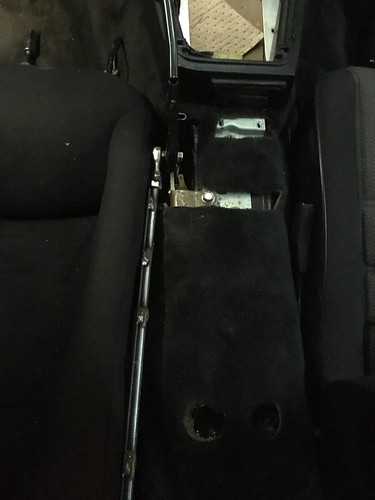
clears the seat, and man does it work. Took a big pry bar between the rear wheel lugs and with the handle even 2-3 clicks up I couldn’t turn the lugs. I would do the same test with the cable setup and it would maybe do that on full lock with two or three times the pull force. I have started re-making the bracket and bought a rod to make this a permanent finished product, and I can’t wait to finish it.
Thread Starter
Senior Member
Joined: Mar 2015
Posts: 335
Likes: 8
From: Vancouver, BC
Also noticed this the other day

the black and red was supposed to be -8AN, I don’t know why it took me this long to notice that its -10. In a way this is better but now my oil cooler and the adapter off the block are -8. Im not likely to even use the oil cooler until the V6 is in, but I guess ill need a new oil cooler….
Big thanks to my buddy Rami for all the help with my laptops, I’m not particularly good at computers but he is.
So with functional windows I downloaded the Moates software for tuning the V8’s ECU
the software for the ECU master Black, the Ecu I want to buy. A lot learned from being able to fiddle with the software.
and just cause the Link ECU software as I’m helping a friend get his RB25 Neo running on a Link.
I have been doing a lot of reading and watched so many Haltech and HP academy videos/articles. I have a pretty good grasp on how it works but without practical application its all pretty worthless. For my buddy’s car I’m just going to help get it to idle and run, I don’t want to learn how to tune on someone else’s dime lol. Imma fiddle with the V8 a bit before the v6 is ready to go and then I hope to be able to do it all myself.

Neil got his printer back up and running and printing better and more accurately than before. We were pretty confident these were good from the stickers so these are really just to check our work. These flanges are good to go, next up is the bellhouse flanges and figuring out a way to ensure that both centres are lined up. Those two flanges took 15 hours to print.
the black and red was supposed to be -8AN, I don’t know why it took me this long to notice that its -10. In a way this is better but now my oil cooler and the adapter off the block are -8. Im not likely to even use the oil cooler until the V6 is in, but I guess ill need a new oil cooler….
Big thanks to my buddy Rami for all the help with my laptops, I’m not particularly good at computers but he is.
So with functional windows I downloaded the Moates software for tuning the V8’s ECU
the software for the ECU master Black, the Ecu I want to buy. A lot learned from being able to fiddle with the software.
and just cause the Link ECU software as I’m helping a friend get his RB25 Neo running on a Link.
I have been doing a lot of reading and watched so many Haltech and HP academy videos/articles. I have a pretty good grasp on how it works but without practical application its all pretty worthless. For my buddy’s car I’m just going to help get it to idle and run, I don’t want to learn how to tune on someone else’s dime lol. Imma fiddle with the V8 a bit before the v6 is ready to go and then I hope to be able to do it all myself.
Neil got his printer back up and running and printing better and more accurately than before. We were pretty confident these were good from the stickers so these are really just to check our work. These flanges are good to go, next up is the bellhouse flanges and figuring out a way to ensure that both centres are lined up. Those two flanges took 15 hours to print.

Junior Member

Joined: Dec 2016
Posts: 12
Likes: 0
From: D.C.
Wow, I bit off more than I could chew when I opened this thread up. Caught a cold and this thread pretty much nursed me back to health over the last day or so. I don�t know you sir but your ingenuity is fantastic to observe.
Thread Starter
Senior Member
Joined: Mar 2015
Posts: 335
Likes: 8
From: Vancouver, BC
Woo boy have I been slacking on updating this. Had some computer troubles where I didn’t have a computer for a bit, then my external hard drive with everything on it failed and I still haven’t got most of that back but thankfully got pics for this from a different back up yadayada excuses excuses.
Been a busy summer though, Im gonna do my best to keep it chronological ish from where I left off my last update.

My plan has and had always been to play with the V6 this past winter and throw the V8 back in it for this season then finish the swap come winter. I had made a goal to get the v6’s engine and trans mated and mounted in the car before putting the v8 back in but that was taking too long so I just stopped and threw the V8 back in. I also needed to address some things that didn’t work very well or weren’t done yet to get it ready to do another event.

Starting with my hydro setup. Ghetto test bracket proved the concept worked so I took my time and made up a nice bracket, welded it up and smoothed it out. Me and kris’ thing at the time was to make stuff that looked like we bought it, not built it in our garage.


got some solid aluminum rod and drilled and tapped both ends for the rod end and master pushrod. Once in place and painted black I think it will be pretty discrete.

Been a busy summer though, Im gonna do my best to keep it chronological ish from where I left off my last update.
My plan has and had always been to play with the V6 this past winter and throw the V8 back in it for this season then finish the swap come winter. I had made a goal to get the v6’s engine and trans mated and mounted in the car before putting the v8 back in but that was taking too long so I just stopped and threw the V8 back in. I also needed to address some things that didn’t work very well or weren’t done yet to get it ready to do another event.
Starting with my hydro setup. Ghetto test bracket proved the concept worked so I took my time and made up a nice bracket, welded it up and smoothed it out. Me and kris’ thing at the time was to make stuff that looked like we bought it, not built it in our garage.
got some solid aluminum rod and drilled and tapped both ends for the rod end and master pushrod. Once in place and painted black I think it will be pretty discrete.
Thread Starter
Senior Member
Joined: Mar 2015
Posts: 335
Likes: 8
From: Vancouver, BC
Another issue I was having was the speed sensor was rubbing my crossmember and had started to leak. So I heated the area with a torch and gave it a tap with some old socket and got a perfect shape for clearing the sensor. Quick spray of paint and was good to go.


At the very end of the last drift event I broke my shifter handle at the weld. So I took that apart and re welded that stronger too.

Was sick of hearing the rattling noise that my quick and dirty air intake bracket made so I made a better one out of thicker aluminum. Mounts solid now and doesn’t flop around anymore

Started finishing the ducting for the rad, as at the last event cooling down was a real issue for it. Which doesn’t make sense to me as I’m not running a crazy hp setup, I have big fans and an aluminum rad. Yet can do like 3 laps before I have to let the thing cool down and catch up *spoiler alert I later figured out all the reasons why*


So this was going to be really hard without a way to bend sheetmetal nicely. Watched a few youtube videos on making a DIY style sheet brake and gave it a shot.

I got a bit lazy and rushed as I learned later was the most important part of it, aligning the pins. But it works pretty well and I now can build a better stronger one…

So got the bottom tray started, I needed it to scoop from the bumper opening and force air up into the rad.

At the very end of the last drift event I broke my shifter handle at the weld. So I took that apart and re welded that stronger too.
Was sick of hearing the rattling noise that my quick and dirty air intake bracket made so I made a better one out of thicker aluminum. Mounts solid now and doesn’t flop around anymore
Started finishing the ducting for the rad, as at the last event cooling down was a real issue for it. Which doesn’t make sense to me as I’m not running a crazy hp setup, I have big fans and an aluminum rad. Yet can do like 3 laps before I have to let the thing cool down and catch up *spoiler alert I later figured out all the reasons why*
So this was going to be really hard without a way to bend sheetmetal nicely. Watched a few youtube videos on making a DIY style sheet brake and gave it a shot.
I got a bit lazy and rushed as I learned later was the most important part of it, aligning the pins. But it works pretty well and I now can build a better stronger one…
So got the bottom tray started, I needed it to scoop from the bumper opening and force air up into the rad.
Thread Starter
Senior Member
Joined: Mar 2015
Posts: 335
Likes: 8
From: Vancouver, BC
Tangent
I don’t usually bother/care to insert parts of my real life in here but, got married last year which means we were due for a real honeymoon. We had long ago chosen Iceland and wow was that a cool trip. One of my highlights however was seeing these crazy 4x4’s that they take on the glaciers. They run the biggest balloone-ist tires that once on snow they deflate and this actually floats the vehicle on the snow. They were everywhere, many tour companies run ones make from Ford F350’s and Econoline vans, but I saw F150’s and many others but I thought Id share these 2 Toyotas I saw gassing up


back to it, I also didn’t want to melt my clutch slave again (old chassis I did but the exhaust was closer to it) So with my new found bending abilities I whipped up a quick heat shield


I know no gold tape or nothing but simple and worked. Didn’t have a clutch problem this year
We’re going into summer now but for the rainy days its still nice to have a functional heater core. Lines have been looped this whole time, so quick china order and 3 weeks of shipping later

Also got some new hood pins bolts as mine are mangled on the ugly looking rad support I have. Also got some reservoir caps that match and a duct that I thought was going to be bigger (lol all the reviews stated this and I didn’t listen) I was planning to use for getting some clean cold air off the bottom of the rad ducting to the air filter buuuut now thats a later problem.

New season means new fluids all around

It also sadly meant it was time to warranty this stupid battery for the 2nd time. The first battery they sold me was almost 5 years old. nobody tested it before selling either. The 2nd battery they sold me was over 2 years old and would start the car fine unless it sat for more then a day. I figured I had a draw and chased it endlessly. Figured the battery was likely the issue, took it back and they didn’t have any in stock so they sent me all the way across town. Guy at that location asked me what car it was in to which I said “its irrelevant” and he proceeds to tell me they wont warranty it if its not in an approved vehicle. I had already explained how much time and effort Id wasted on this thing and I was about lose it when he said that but he added “but i’ll make an exception this time”. Ya you better
Long story short these batteries are terrible and if I wasn’t so cheap and so committed to it id have just bought anything else by now

Painted the hydro rod black and put the interior back together. Its possible to remove with the seat in place but its quite an ordeal.
I don’t usually bother/care to insert parts of my real life in here but, got married last year which means we were due for a real honeymoon. We had long ago chosen Iceland and wow was that a cool trip. One of my highlights however was seeing these crazy 4x4’s that they take on the glaciers. They run the biggest balloone-ist tires that once on snow they deflate and this actually floats the vehicle on the snow. They were everywhere, many tour companies run ones make from Ford F350’s and Econoline vans, but I saw F150’s and many others but I thought Id share these 2 Toyotas I saw gassing up
back to it, I also didn’t want to melt my clutch slave again (old chassis I did but the exhaust was closer to it) So with my new found bending abilities I whipped up a quick heat shield
I know no gold tape or nothing but simple and worked. Didn’t have a clutch problem this year
We’re going into summer now but for the rainy days its still nice to have a functional heater core. Lines have been looped this whole time, so quick china order and 3 weeks of shipping later
Also got some new hood pins bolts as mine are mangled on the ugly looking rad support I have. Also got some reservoir caps that match and a duct that I thought was going to be bigger (lol all the reviews stated this and I didn’t listen) I was planning to use for getting some clean cold air off the bottom of the rad ducting to the air filter buuuut now thats a later problem.
New season means new fluids all around
It also sadly meant it was time to warranty this stupid battery for the 2nd time. The first battery they sold me was almost 5 years old. nobody tested it before selling either. The 2nd battery they sold me was over 2 years old and would start the car fine unless it sat for more then a day. I figured I had a draw and chased it endlessly. Figured the battery was likely the issue, took it back and they didn’t have any in stock so they sent me all the way across town. Guy at that location asked me what car it was in to which I said “its irrelevant” and he proceeds to tell me they wont warranty it if its not in an approved vehicle. I had already explained how much time and effort Id wasted on this thing and I was about lose it when he said that but he added “but i’ll make an exception this time”. Ya you better
Long story short these batteries are terrible and if I wasn’t so cheap and so committed to it id have just bought anything else by now
Painted the hydro rod black and put the interior back together. Its possible to remove with the seat in place but its quite an ordeal.
Thread Starter
Senior Member
Joined: Mar 2015
Posts: 335
Likes: 8
From: Vancouver, BC


Cant say I love the look of the brace with the coupling nut but it works and Ill dream up a better solution later


Made some brackets to mount the passenger seat in. Nice that theres no need for it to be adjustable. I just cut up an extra pair of stock seat sliders and welded away. Typical me I painted them black too

I think this is 3 tries later to get a result I was happy with. The big cut in the middle is for the front jack point tube to slide through.


Wiring simply zip tied under the rad to the bottom. Hindsight being 20/20 I’m not sure this was the best, it introduced heat into the conductors from the rad…

but it at least looked nice, was hidden and secure and safe in a small collision

So the last thing that really needed to be addressed was the ECU tune, mostly the rad fans.


Thread Starter
Senior Member
Joined: Mar 2015
Posts: 335
Likes: 8
From: Vancouver, BC
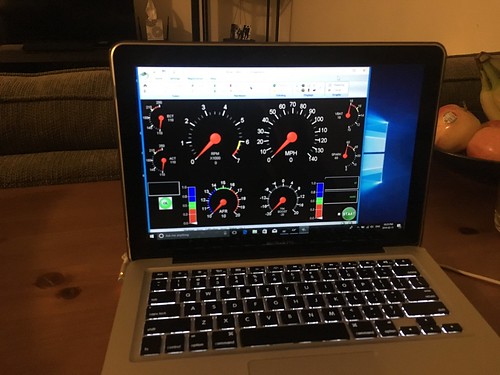
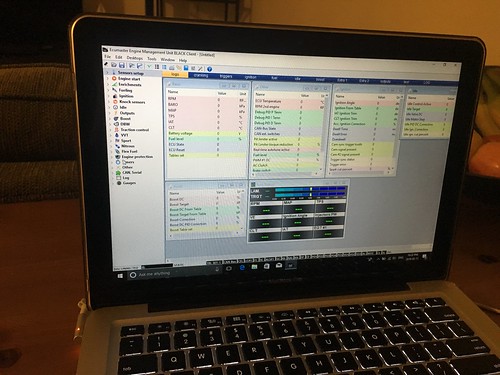
I had a spare ecu connector so I made a setup for powering the ecu up so I could load tunes etc at home vs needing it all to be plugged in at the garage. I later just loaded stuff on the ecu by bringing my laptop with me but this gave me a chance to sit down and figure out the software with the ECU awake and make sure it kept the tune etc. Im very keen to learn tuning, but man standalone ecu’s seem so much easier then these factory ecu’s are to fiddle with. I suppose thats because they really weren’t meant to be messed with vs a standalone which by design is meant to be changed and is user friendly. Ive read there are people that can change parameters by loading the calibration onto a spread sheet and know what numbers to change, thats wild. Binary Editor simplifies the process but theres a lot of terminology I don’t understand and frankly even Ford in the late 80’s/early 90’s is way more advanced then most standalones are. Meeting emissions requirements and having a much higher bar for drivability, as well as the fact that they are tuned by engineers makes there just more going on.
But I barely know what I’m talking about so I left 98% of it alone and disabled some emissions stuff my car doesn’t have anymore, bumped the idle up a bit higher then stock when the low speed fan kicks on and most importantly changed the temp that the low and high speed fans kick on at. That was after a whole season of messing with it, can’t recall what I all tried first…

So went on down to evergreen. Pitted with Matt and a bunch of other hot boi cars lol, only knew a few guys though.
Matt was practicing the 5/8ths bank with a few other pro-am cars that day
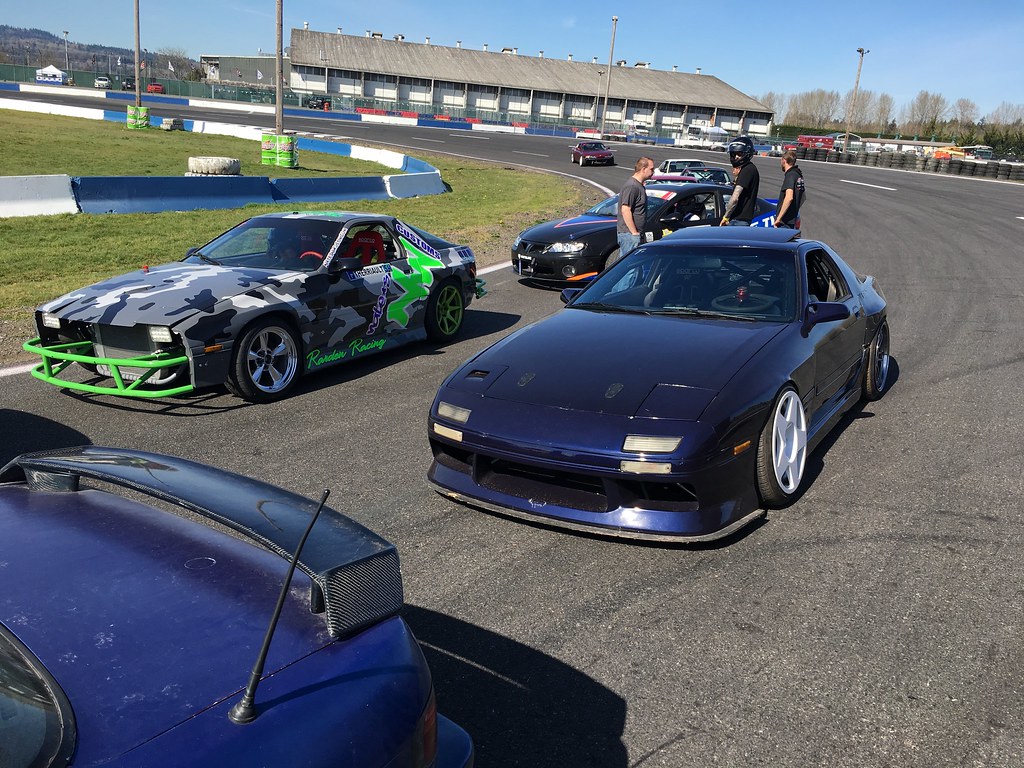
This FC was another pro-am car, I go out to do my first lap and some IS300 blew a motor and oil downed the entire track so we had to kill around 40 min…
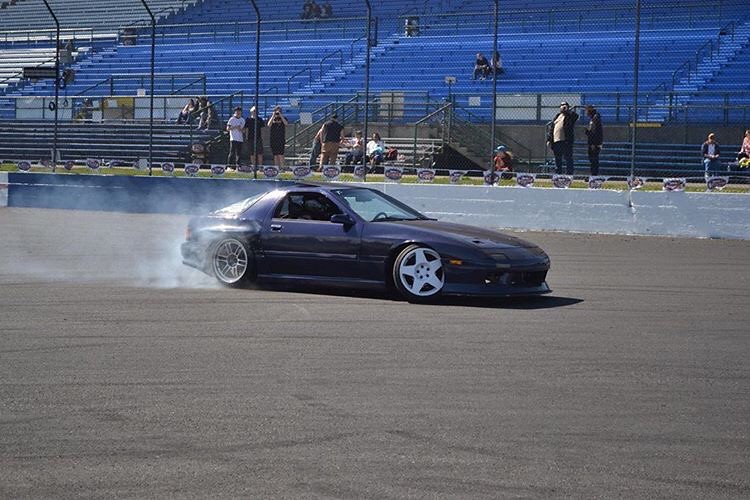
photo credit Josh, @pitbull_drifter
Car felt pretty good, whatever alignment settings I had left it at were working for me. However it did one lap and starting overheating in the line up, soooo pulled off and spent way too long (any time is too long, I hate working on my car at events) and figured out the breaker for the low fan had popped and the high fan wasn’t turning on. I did bring my laptop but if course it was dead and I didn’t bring the cord. I don’t know how i went this long and frankly it’s embarrassing but the high speed trigger off the ecu was pinned wrong, I couldn’t get it to trigger so I just tied it in with the low speed and put a switch within reach to manually turn on the fans.
Once I dealt with that the next time I went out was good, except that they started doing this “tandem mayhem” where they just hot lap a careless tandem layout and all the try hards and wild childs go out and almost crash into each other/me. Survived but would not do again lol.
Pitted after that and ate lunch, then went to fire it up again and first run out something felt wrong. Started overheating, had no power, then it would have power again, then not. blew the dipstick out. So I spent the rest of the day trying to figure out what was going on, no oil and water mix but the blow by was a concern.
Matt had also had a rough day and wasn’t sure what was wrong with his engine but towards the end of the day there were running this new experimental layout that after I rode along with my buddy Travis I really wanted to do. So I lined up behind Matt and proceeded to get lost in his smoke. I have never followed a car that makes that much smoke, absolutely blind on transitions. Chasing him was hard, his car has twice the hp and is set up for Pro am so I just followed shallow and did my best to keep up. I stayed within a car length and was blown away by that fact until he told me he just blew the tires off and wasn’t trying to lose me lol. Then we switched and I had told him to give me a bit of space just in case I threw a rod mid run or something and well. He didn’t

photo- TNewport_photo
was the best runs of the whole day, felt good man

truck hit a milestone on the way home
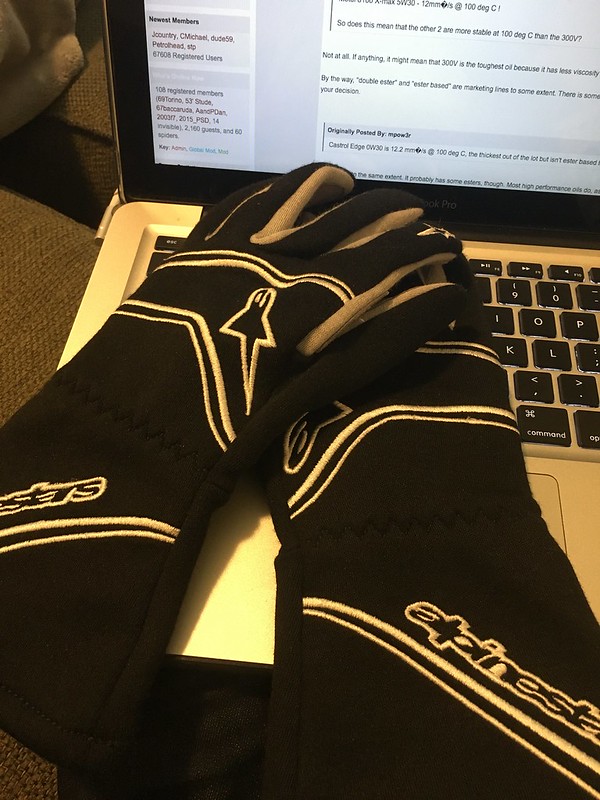

got a bday gift from my inlaws, was recommended to me to not buy any with grip tips or silicone fingers or anything as they would just wear off quick. Interestingly I see a lot of pro drivers/etc with gloves like that but I don’t get a few new pairs a year soon
Really comfy though, I like driving with them on. Suede wheel grips fast and still slides, gives you good control. Cant use my phone though, so thats a downside..


my birthday was pretty good to me, my dad found a really good deal on that vise which we later learned that Record vises are really good and usually expensive. But he found it on craigslist and painted it and its great.
The belt sander is my new favourite fab tool, I use it a lot. I was hoping for one that would be big enough to flat manifolds and stuff, this is it.


Soon got home, did a compression test and #7 was quite low. So replaced the head gasket and the intake manifolds etc. I did something wrong though because when I went to put water in it my oil level mysteriously rose

great use of brand new oil…. le sigh. So I did the upper and lower intake manifold more carefully and that was better.
But I barely know what I’m talking about so I left 98% of it alone and disabled some emissions stuff my car doesn’t have anymore, bumped the idle up a bit higher then stock when the low speed fan kicks on and most importantly changed the temp that the low and high speed fans kick on at. That was after a whole season of messing with it, can’t recall what I all tried first…
So went on down to evergreen. Pitted with Matt and a bunch of other hot boi cars lol, only knew a few guys though.
Matt was practicing the 5/8ths bank with a few other pro-am cars that day
This FC was another pro-am car, I go out to do my first lap and some IS300 blew a motor and oil downed the entire track so we had to kill around 40 min…
photo credit Josh, @pitbull_drifter
Car felt pretty good, whatever alignment settings I had left it at were working for me. However it did one lap and starting overheating in the line up, soooo pulled off and spent way too long (any time is too long, I hate working on my car at events) and figured out the breaker for the low fan had popped and the high fan wasn’t turning on. I did bring my laptop but if course it was dead and I didn’t bring the cord. I don’t know how i went this long and frankly it’s embarrassing but the high speed trigger off the ecu was pinned wrong, I couldn’t get it to trigger so I just tied it in with the low speed and put a switch within reach to manually turn on the fans.
Once I dealt with that the next time I went out was good, except that they started doing this “tandem mayhem” where they just hot lap a careless tandem layout and all the try hards and wild childs go out and almost crash into each other/me. Survived but would not do again lol.
Pitted after that and ate lunch, then went to fire it up again and first run out something felt wrong. Started overheating, had no power, then it would have power again, then not. blew the dipstick out. So I spent the rest of the day trying to figure out what was going on, no oil and water mix but the blow by was a concern.
Matt had also had a rough day and wasn’t sure what was wrong with his engine but towards the end of the day there were running this new experimental layout that after I rode along with my buddy Travis I really wanted to do. So I lined up behind Matt and proceeded to get lost in his smoke. I have never followed a car that makes that much smoke, absolutely blind on transitions. Chasing him was hard, his car has twice the hp and is set up for Pro am so I just followed shallow and did my best to keep up. I stayed within a car length and was blown away by that fact until he told me he just blew the tires off and wasn’t trying to lose me lol. Then we switched and I had told him to give me a bit of space just in case I threw a rod mid run or something and well. He didn’t
photo- TNewport_photo
was the best runs of the whole day, felt good man
truck hit a milestone on the way home
got a bday gift from my inlaws, was recommended to me to not buy any with grip tips or silicone fingers or anything as they would just wear off quick. Interestingly I see a lot of pro drivers/etc with gloves like that but I don’t get a few new pairs a year soon
Really comfy though, I like driving with them on. Suede wheel grips fast and still slides, gives you good control. Cant use my phone though, so thats a downside..
my birthday was pretty good to me, my dad found a really good deal on that vise which we later learned that Record vises are really good and usually expensive. But he found it on craigslist and painted it and its great.
The belt sander is my new favourite fab tool, I use it a lot. I was hoping for one that would be big enough to flat manifolds and stuff, this is it.
Soon got home, did a compression test and #7 was quite low. So replaced the head gasket and the intake manifolds etc. I did something wrong though because when I went to put water in it my oil level mysteriously rose
great use of brand new oil…. le sigh. So I did the upper and lower intake manifold more carefully and that was better.
Thread Starter
Senior Member
Joined: Mar 2015
Posts: 335
Likes: 8
From: Vancouver, BC
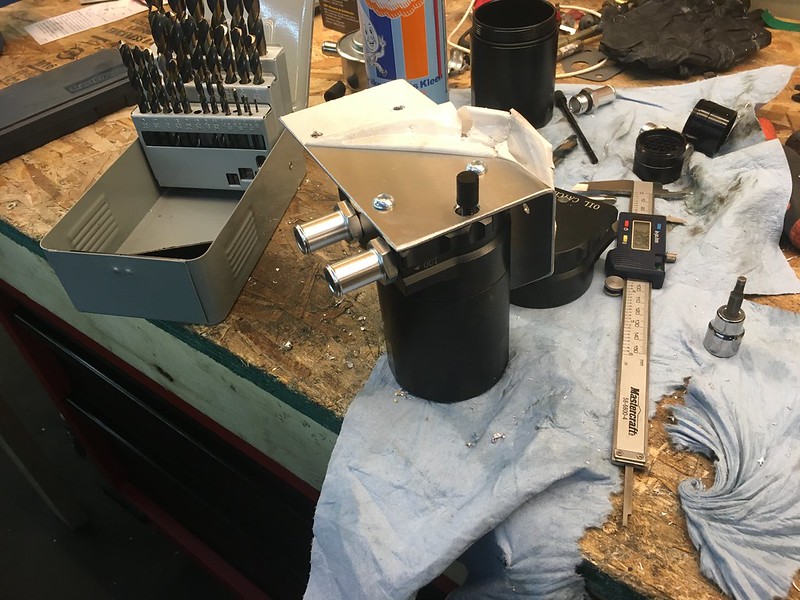
onto the next thing though, I’ve had these catch cans on a shelf for some time.


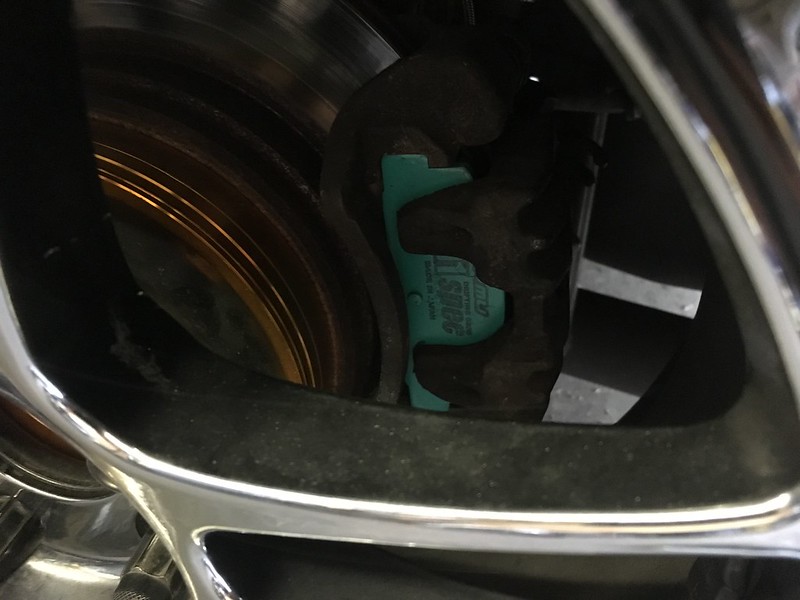
Took some detailed photos, these needed some attention just FYI. There was some coating ready to flake off and a few burs here and there but all in all not bad for the price. And they are baffled. Im not sure the in and out labels are accurate. My thoughts are they should be vent into the can and vacuum side (I’m trying to keep them closed, don’t enjoy oil vapour all over the engine bay) should pull through the steel wool filter.

made a cardboard template and after a few tries got it really good. I like the Radium dual catch cans like a lot and was going to that look without the price tag (they also don’t fit where I have them)


marked, drilled and tapped the tops. These are supposed to mount on a little bracket on the back but I like this look better. I also wanted the holes to be completely symmetrical and could swap cans on the bracket without issue.


Took some detailed photos, these needed some attention just FYI. There was some coating ready to flake off and a few burs here and there but all in all not bad for the price. And they are baffled. Im not sure the in and out labels are accurate. My thoughts are they should be vent into the can and vacuum side (I’m trying to keep them closed, don’t enjoy oil vapour all over the engine bay) should pull through the steel wool filter.
made a cardboard template and after a few tries got it really good. I like the Radium dual catch cans like a lot and was going to that look without the price tag (they also don’t fit where I have them)
marked, drilled and tapped the tops. These are supposed to mount on a little bracket on the back but I like this look better. I also wanted the holes to be completely symmetrical and could swap cans on the bracket without issue.
Thread Starter
Senior Member
Joined: Mar 2015
Posts: 335
Likes: 8
From: Vancouver, BC
I had long ago planned this and to use these rubber feet things from MSD I had laying around


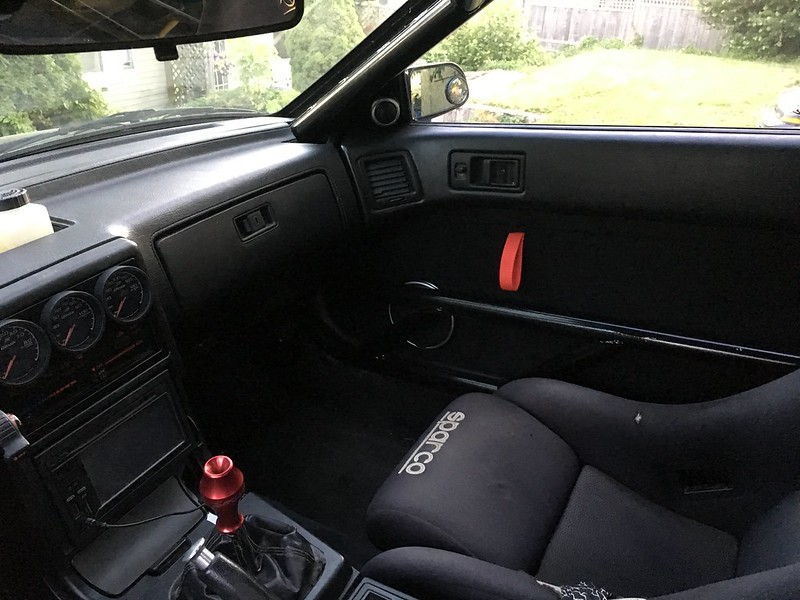
Somewhere around here I had decided and registered for Driven Vancouver so I had a bunch of interior stuff and loose ends to tie up before a show.

Went down to my local Home Depot racing and found some plumbing pieces that were pretty close to the right size as my “greddy gauges”

then took the factory vent bezel and trimmed it up to dangerously thin


So that was a start. Haven’t done this kinda work since I installed stereo’s
Same drill for tweeter pods


A belated birthday gift to me, TF works happen to have these in stock (they didn’t at christmas) so I jumped on it

These are one of the best things I have spent money on. The new hydro setup worked but still not what I was hoping for. However with these, night and day. Locks effortlessly and predictably at any speed. This opened up a whole new world for me as id never had an e brake that worked never mind could rely on. But the effort level to pull vs lockup was a bit off.

Somewhere around here I had decided and registered for Driven Vancouver so I had a bunch of interior stuff and loose ends to tie up before a show.
Went down to my local Home Depot racing and found some plumbing pieces that were pretty close to the right size as my “greddy gauges”
then took the factory vent bezel and trimmed it up to dangerously thin
So that was a start. Haven’t done this kinda work since I installed stereo’s
Same drill for tweeter pods
A belated birthday gift to me, TF works happen to have these in stock (they didn’t at christmas) so I jumped on it
These are one of the best things I have spent money on. The new hydro setup worked but still not what I was hoping for. However with these, night and day. Locks effortlessly and predictably at any speed. This opened up a whole new world for me as id never had an e brake that worked never mind could rely on. But the effort level to pull vs lockup was a bit off.
Thread Starter
Senior Member
Joined: Mar 2015
Posts: 335
Likes: 8
From: Vancouver, BC
Anyway back to body filler. More rigid the better here. Used to use this stuff, smells weird but easy to work with and fairly strong for these interior pieces.


lay, sand, repeat. While I was waiting for that to cure I started on one last thing with the hydro. I had been swapping between the hole I drilled and the hole for the screw that holds the cover together. Felt like it wanted to be in the middle of the two. but couldn’t get away with drilling another hole so I just ovalized the one and welded a washer there. This had the side benefit of reducing a lot of slop.


Carried on with the gauges

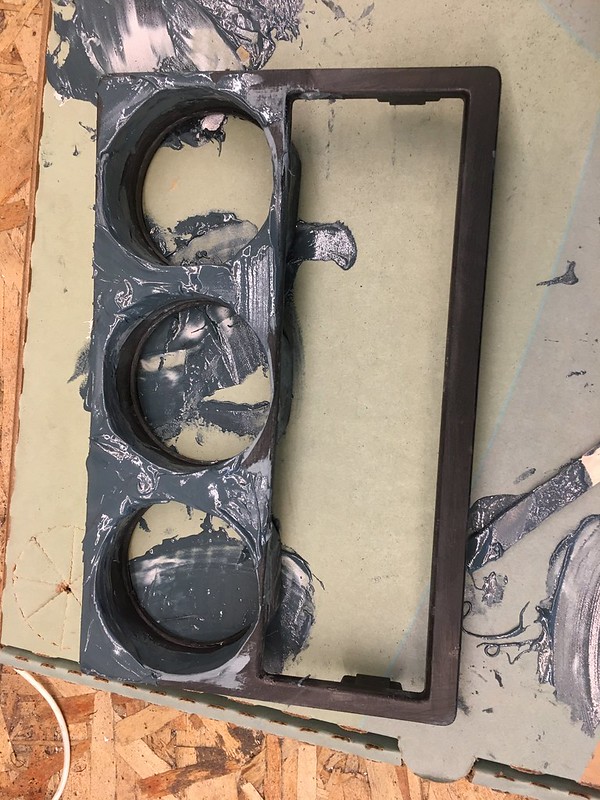


lots of sanding in between. Lost count of how many layers this took. used a sanding block where able


lay, sand, repeat. While I was waiting for that to cure I started on one last thing with the hydro. I had been swapping between the hole I drilled and the hole for the screw that holds the cover together. Felt like it wanted to be in the middle of the two. but couldn’t get away with drilling another hole so I just ovalized the one and welded a washer there. This had the side benefit of reducing a lot of slop.
Carried on with the gauges
lots of sanding in between. Lost count of how many layers this took. used a sanding block where able
Thread Starter
Senior Member
Joined: Mar 2015
Posts: 335
Likes: 8
From: Vancouver, BC
The pods I wanted to look symmetrical but actually aren’t, aiming with sound quality in mind which i realize is fully pointless in a drift car but sue me

First layer of primer, always so telling… I think I did 3 layers before paint.


dyed my sunroof panel black, it now looks better then the rest because its clean lol

Painted and installed the completed pods and gauges. I had used Satin black and should have used flat black or even SEM trim black but since I used Duplicolour i was stuck to that cuz mixing brands of can paint is risky. They can react sometimes and then you have to sand everything off and start over.


Cant recall if I ever brought it up yet but my garage mate had parted out his skyline and bought what happened to be my old JZX. He had finished swapping a bmw trans in it. Should have done that when I owned it cuz it is ridiculously awesome manual.

Bought this a long time ago but this is the material I had bought for wrapping my door cards.


First layer of primer, always so telling… I think I did 3 layers before paint.
dyed my sunroof panel black, it now looks better then the rest because its clean lol
Painted and installed the completed pods and gauges. I had used Satin black and should have used flat black or even SEM trim black but since I used Duplicolour i was stuck to that cuz mixing brands of can paint is risky. They can react sometimes and then you have to sand everything off and start over.
Cant recall if I ever brought it up yet but my garage mate had parted out his skyline and bought what happened to be my old JZX. He had finished swapping a bmw trans in it. Should have done that when I owned it cuz it is ridiculously awesome manual.
Bought this a long time ago but this is the material I had bought for wrapping my door cards.
Thread Starter
Senior Member
Joined: Mar 2015
Posts: 335
Likes: 8
From: Vancouver, BC

Another thing I haven’t done since I worked in car audio

So heres how things are looking as its loaded on the trailer for Driven. Vancouver has been cursed with a certain police officer handing out VI’s like free candy (I’m not going to get into it) so I took no chances, pulled the plates off and towed it to the event.


I so did not enjoy this event. Not only was it a long day (at least roll in was later) but there wasn’t as much to look at as previous years. I only knew a few people there so I hung out with them all day. The vibe was just not good, the indoor part of the venue was all paid commercial spots and the outside was all the common people that just wanted instagram followers. Everybody was pissy when they didn’t win an award, and the atmosphere was just toxic from my point of view. I had a few people ask about my car which was cool but not in the same way that people interact at a drift event. The most fun I had all day was during the low car limbo contest and I figure that was because I actually got to drive my car. I also happened to be the lowest static car there but once I was eliminated some v8 hater screamed through my window so that was pleasant. Everyone’s attitude at a drift event or even a meet is just different in a way, hard to put my finger on. I am really turned off of car shows as a result
I also really wish I had painted my hood.
So with that lesson learned or so I thought, I decided I’d keep it to drift events only.

based on the walk through on grannies speed shop website I calibrated my tach with a battery charger to a V8 signal

Thread Starter
Senior Member
Joined: Mar 2015
Posts: 335
Likes: 8
From: Vancouver, BC

had to add a resistor as the factory calibration pot doesn’t alter it enough (not surprisingly really)

Next up was a private day me Neil and Kris and another buddy had booked pre the drift Union Invitational. We had the track thursday, friday was booked and saturday/sunday was DUI.
We have never driven all together before besides knowing each other and drifting separately for years. So planned to go up there early thursday morning and I had to come home saturday night but was a good dudes trip.

Car was kinda all over. Wasn’t cooling down fast at all, mid day I found that only 1 fan was plugged in. oops.

this was a first. never bent a tie rod shank without breaking something else. Understeered and hit the transition from flat to bank. Ran down to lordco and bought a new one, but of course it was a slightly different length. I adjusted it to steer straight but the wheel was crooked and the rack wasn’t centred so I had more angle on one side then the other.
Me and my friends did 3 laps together lol.
Was a good day for my driving progression though, got more comfortable with the car and its behaviours. Was acting up a bit at the beginning of the day but by the afternoon it had started behaving, engine performance wise.

had a small incident where the steering wheel was on the dash while it was parked idling in the driveway, wheel fell off the dash and hit the button on the e brake and rolled into Kris’ truck’s steel bro dozer bumper. I wasn’t too phased though , its a drift car and this kinda thing would happen anyway.
Mission drift day #1 went really good. I hadn’t driven the track before only seen the lay out. They are doing these “Drift and Drag nights” on Wednesdays once a month, its literally such a cool thing that you can go on a random week night to the local racetrack and wath/partake in drifting. Something i wasn’t sure I’d ever see at Mission. They seem very keen to keep doing it though, there is definitely money to be make as the drifting has 4 to 5 times the amount of spectators and the registration usually sells out day of. Because they are running the drag strip at the same time it means the track space available is limited as the return road still has to function. So its kinda a big loop that you do twice. Kinda technical, not super flow-ey imo but a lot of fun when you get it right.
Car ran good again, felt good. Took my mom and my wife Jenna out for passenger rides and my welder buddy Andy who hadn’t ever been in my drift car besides me drifting for all these years. Barely killed a set of used tires too. it even stayed cool basically hot lapping. Would do a lap, jump back in the kinda short lineup and do another continuously.
another loose end was the bulkhead connector mounting of any kind.


drilled 4 holes and carefully grinded out the rest with a bit until the connector just fit.
At this point I was planning on drifting an event at mission raceway and Villains Sportsland in September. I was out of used tires so I splurged on some of the cheapest tires that we can get locally but actually are half decent and a set of Anatares for steer tires. I also wanted to be able to run the matching set of enkei’s because against what I had just said I booked another car show. But hear me out this one was different.
Super Street had asked for the Goodvibes guys specifically to show up at an event they were hosting at LeMay museum in tacoma.


had some help from my sister again getting the rear quarter fixed

Thread Starter
Senior Member
Joined: Mar 2015
Posts: 335
Likes: 8
From: Vancouver, BC


finished dealing with a bunch of little things that I did not want outstanding at a show of this level.

Me and the wife woke up at the crack of dawn (legit 5:00 am) and met up with Tito, Jordan and Ian and all rolled down together (except Tito, he went the night before) and hung out all day. The venue was super cool, staff were organized and the vibe was great. I hadn’t even paid before arriving and I found the editor who I had been emailing about paying and gave him cash he barely seemed like he cared lol. Was more excited to see that I had showed up. Cars were spaced out and posed nicely, and my goodness the caliber of car in attendance was high. Im talking about build quality, not just in dollars spent and e fame.
I was also happy that I drove that far both ways without any issues, car drove fine and ran good all day and all things considered isn’t even that uncomfortable for a drift car.
I did however hit a real problem in the border lineup on the way home. The fans stopped coming on even with the manual switch. Pulled to the side and let it cool down enough to attempt to find a fix. Figured out that my weather pack connectors had all melted/arced and were all useless. I had some electrical tape and a few zip ties so I cobbled it together and made it home. Took them out and just straight crimped them for the next event except for the ones on the rad. I have to conclude that the type of connector I used are just junk. The crimps themselves were fine but the connection between sides of the contact was weak and arced and then arced some more until they were melted. Three different points failed and there were all in different points in the car, interior, behind the dash, engine bay. So I won’t be using or recommending those anymore (not sure I ever recommended tho lol)
So along came the next mission drift day, bought a spot from a buddy who had to work. Spoiler:

didn’t go as smooth as the last one. Car was all over the place again, one lap ran good and strong, next it blew the dipstick and had no power. Drove off after a half lap a few times. Seemed temperature related which made me think it was a sensor issue as it was like flipping a light switch. Fans also came and went, when they worked it stayed cool, when they didn’t it got hot. But it was a weird balance between keeping it hot enough to behave and not over heat. Then to top it off I got lost in the dark following another car, went a bit wider then him and smacked the tire wall they had on the hair pin.

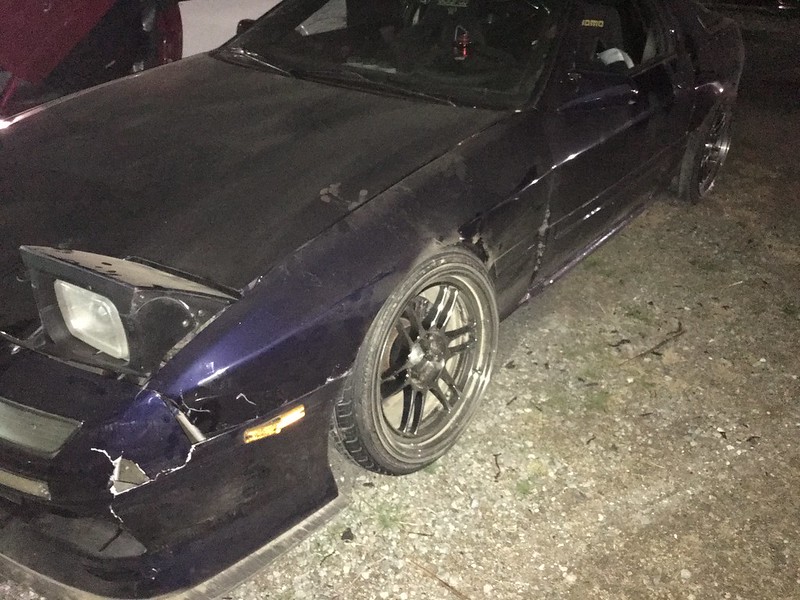
theres this one spot where if you don’t think about it and set up for it the turn before, even 2 turns before you’ll go off track and hit this literal ditch that had formed from people dirt dropping. I went off in the worst way and exploded my side skirt into 2 pieces. Wasn’t allowed to go get it either until the end of the night. So I spent half the night with 1 side skirt and on the side that most corners don’t favour photograph wise.
I don’t have Facebook but Trevor Ball I believe posted these and friends sent them to me. He took pics at both events and you can tell based on what wheels are on my fronts lol


Thread Starter
Senior Member
Joined: Mar 2015
Posts: 335
Likes: 8
From: Vancouver, BC


Lots of good looking photos in there, but I just can’t help seeing the missing side skirt and the front signal out every time. 80’s power jams while drifting are my jam. Having a radio in car is cool too, I would crank it when rolling out into the first entry and there was times off throttle where I could hear it but it just feels cool I don’t know. Rap works for me too but not in the same way. Car acting up was ruining my head game and 80’s jams were making it better. I have a spotify playlist, I’ll see if theres a way to share it and that will probably be the music portion of this update.
to deal with one of those things right away


I had ordered led strips from china to fix that burnt out bulb. The housings on the pair of S5 signals were trash so I made these to replace
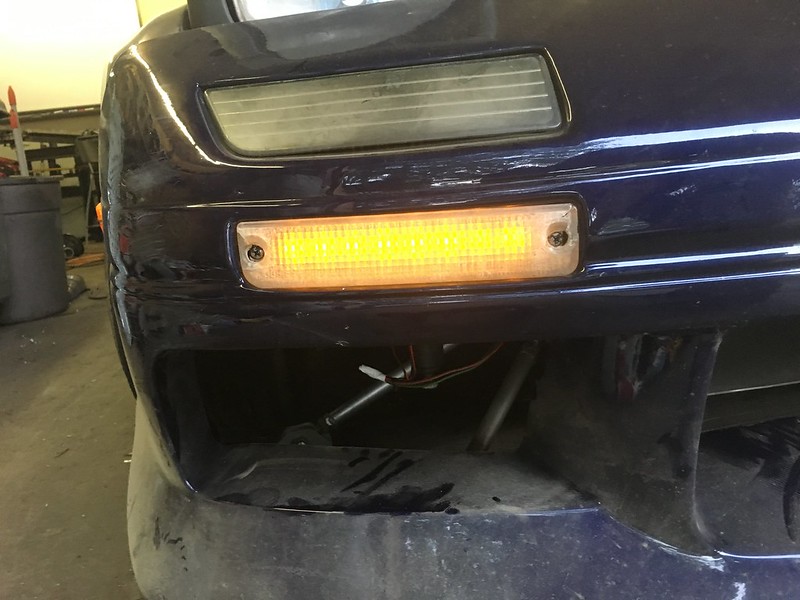
running light uses the single centre strip

signal flash uses the outer 2

looks retro mod to me. I like the Type X LED conversions you can get and this reminds me of them in the way that the light doesn’t come from a central bulb but an array.
At this point I kinda stopped and re-evaluated where I was at. Villains was close and if I wanted this car to be presentable I had a lot of work ahead. The fender was dented in beyond repair, the front bumper was cracked, a piece missing and would need to be resprayed. same for the side skirt. I was also not keen on dragging a car that far that I wasn’t sure was going to run right when it got there. So I cancelled my time off request and put the V8 setup for sale. Was more bitter sweet then I thought, when I sold it it meant I could bankroll the larger pieces of the v6 swap but its also been in my car for like 5 years now. Its a shame its been acting up, more frustrating to me that I can’t figure out why. I felt it was wiring related, and the harness has been through many revisions and changes but I couldn’t justify building a new one when I’d rather just sell it and move on.
So that concludes the V8 portion of this now improperly titled thread.
As of right now I have sold all but the grannies kit with driveshaft. I had it listed for a month or so as a package and kept getting people who just wanted the engine or the trans so I caved and sold the engine to a mustang guy and the trans to a guy building a mercury. I did sell some swap specific pieces to local guy who’s probably reading this right now lol.
I have really really really been wanting to up my wiring game, I have done a lot of wiring on this chassis and I kinda hate all of it but the chassis side at least works well so I’ll leave it until I can afford to do a PDM or something like that. I have spent so much time on friends cars and my own messing with factory harnesses, and they suck. I’m keen to build new harnesses with new wire that don’t have any corrosion or heat damage or bent pins or whatever else arrises.
The first step to this is of course tooling
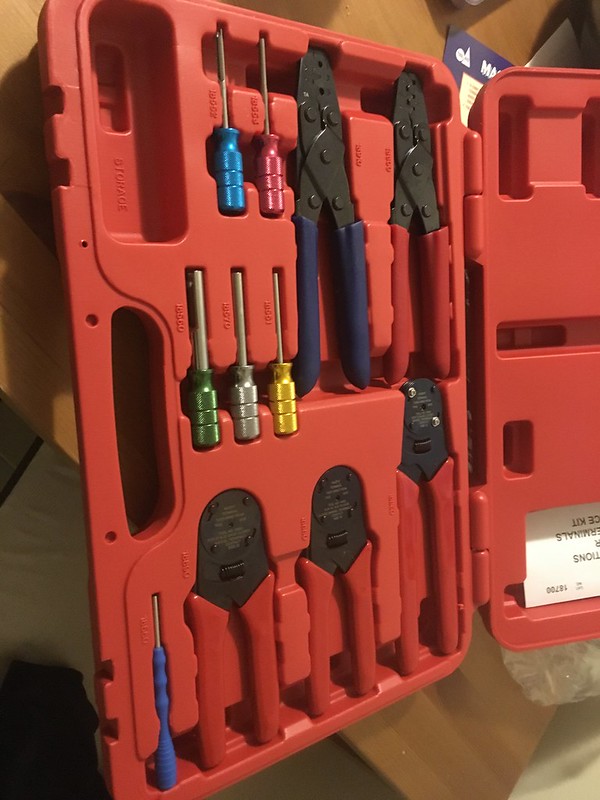
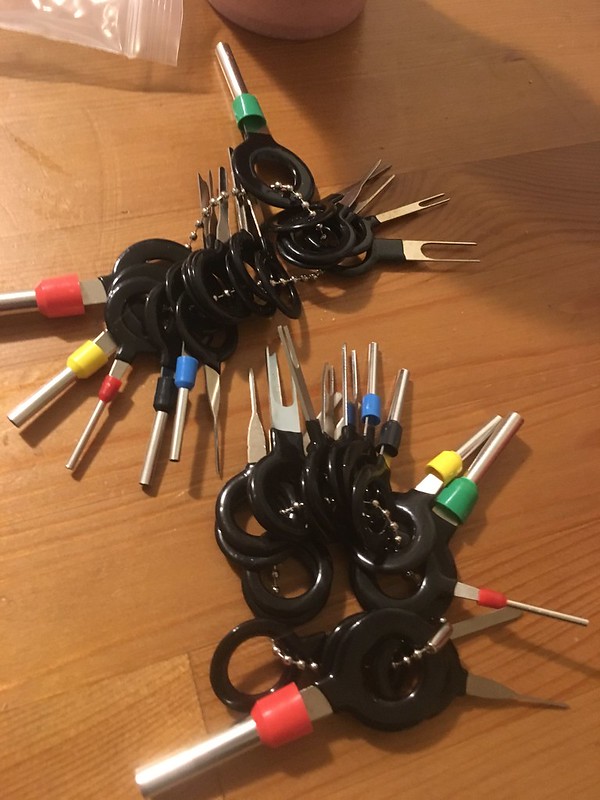
I already have some crimp tools and a good heat gun but I wanted to be able to do Deutsch stuff, so this was a major purchase. And its not even the good stuff, at this point I can’t do the real deal DMC crimper. Maybe one day but these are still designed for Deutsch terminals and just take more time to be careful doing as I understand. I am addicted to HP Academy videos and will probably buy their motorsports wiring series at some point. I spent hours just reading and researching and learning about proper methods and what tools are meant for what and what techniques are to be used where. I’m a construction electrician by trade, I work with electricity every day and while they are very different things I’m finding the fundamentals and the things I learned in school and even find on the job are applicable to this. Ive even learned stuff that make me better at my job. I think thats my favourite thing about the internet, the abundant source of knowledge it can be (caveats aside).

Im also spending some time and money just assessing where to buy materials from. Im ok with buying the wrong thing just to be able to learn. And most of this stuff in small quantities is cheap. Finding the tools that work and practicing using them and figuring out how to plan doing this stuff is what counts. Knowing it isn’t enough in my opinion.

Thread Starter
Senior Member
Joined: Mar 2015
Posts: 335
Likes: 8
From: Vancouver, BC
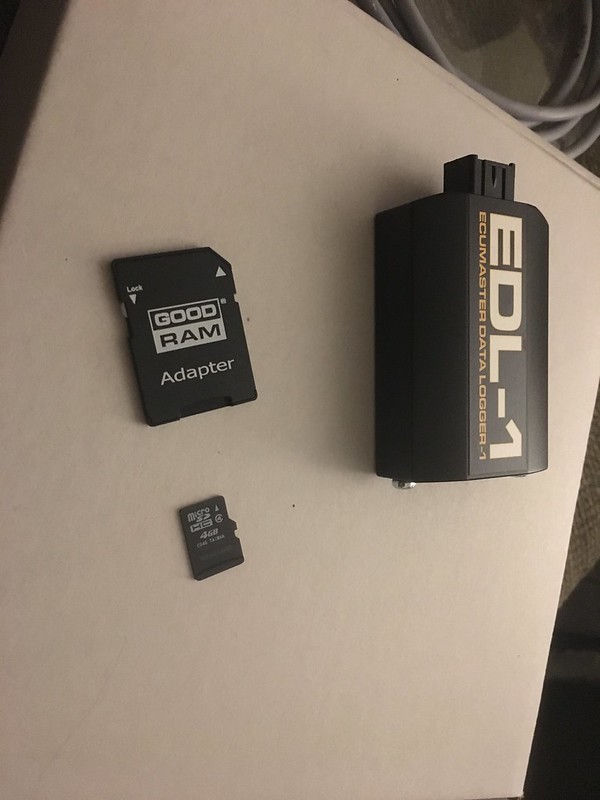
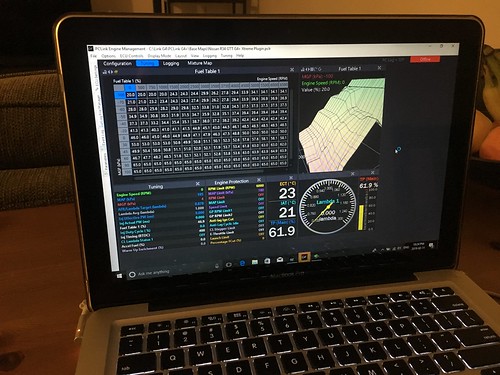
Potentially the most expensive single piece car part I’ve ever bought. An EcuMaster Black with an EDL-1 data logger. This is a huge part of my car building philosophy as of late. Im spending my money on the engine management and if its good and well setup it should be able to sense and shut down if any other part fails. Logging allows you to see things you wouldn’t be able to otherwise. Bonus the EDL comes with a 4 gig SD card.
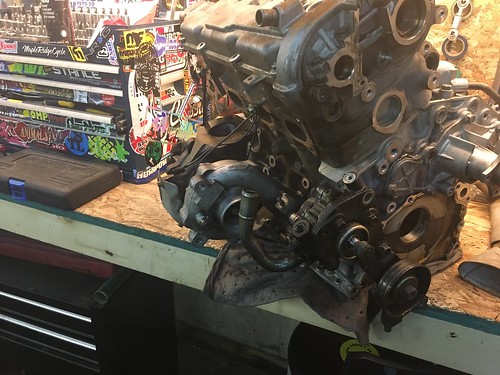
So many things to talk about regarding the V6 build. I was pretty busy this summer just maintaining the car through the season, but while I waited to sell the V8 I focused on it.


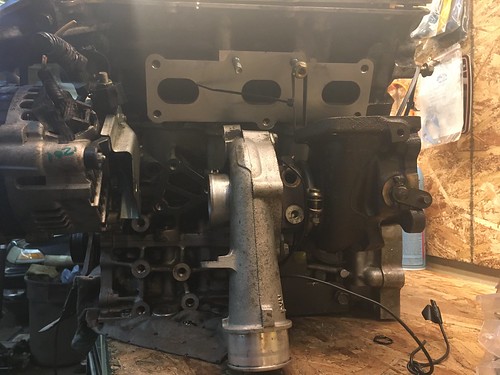
not great pics I know. This is the back of the front or drivers side cam. It has a slot in it that is actually offset that turns the distributor which is also the cam position sensor for the KL from the factory. Now it would be easiest to use the distributor as is, the stock disty has a cam sensor built in as well as an internal ignitor but id just leave that connector unplugged. I believe I posted a photo of it before and the distributor is huge. Its also ugly and designed to have a rotor and cap on it.

After much googling I found that a NA Miata CAS was supposed to fit as is, this photo is one on a KLDE actually. But alas they are a bit hard to find and expensive new. They are also kinda big and without having one on hand to know how much room it would take to get in and out and given that they are however many years old I explored other options.
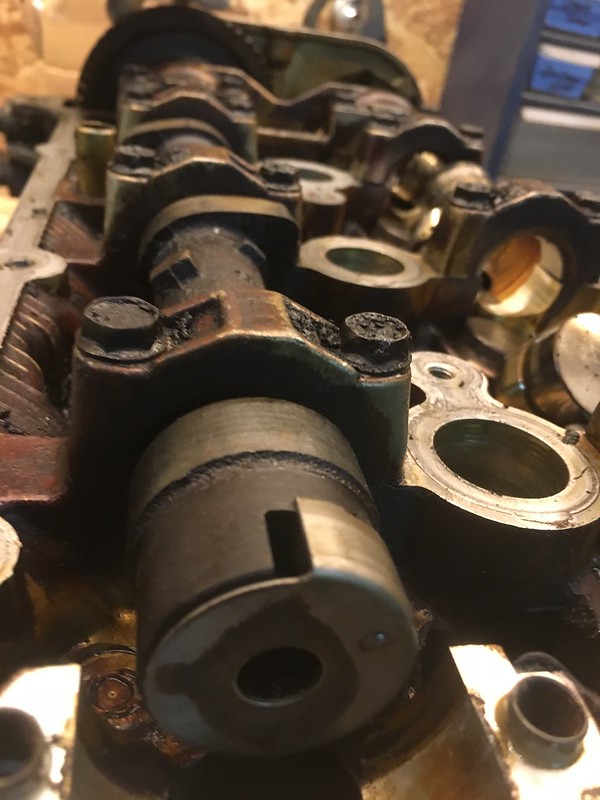

My hope here is to ditch the distributor all together and just use the cam “tooth” as the cam position trigger. With a Vr sensor stolen from a for focus (uses an EV1 connector, ideal)
The one on the right should work nicely as its taller then the needed length to stick past the head and still bolt onto something
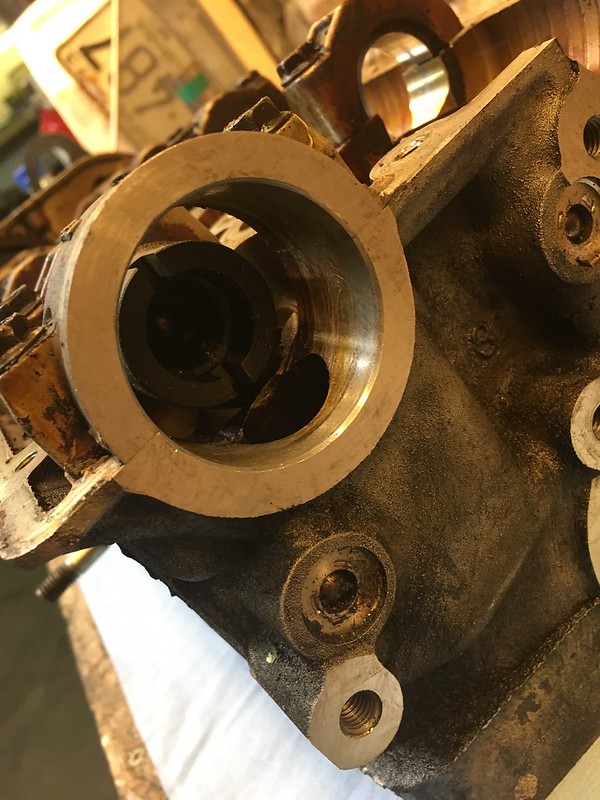
I’ll need to lathe a piece to replace the distributor. The later KLG4 engines had a piece that blocks the hole, i’m just going to drill a hole in it and tap a bolt for the sensor to mount. May have to mess with it to get the air gap right however.

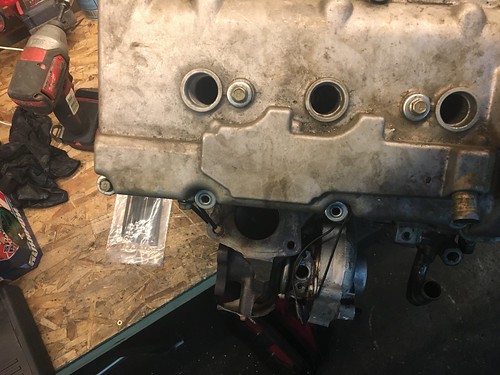
next up was revisiting the ignition coils. I follow 3D_Magic_Mike on insta gram, the dude is a wizard with CAD and 3d printing. His datsun truck is wild, but thats not important. He is building a turbo 1UZ and they happen to fit a VAG coil quite nicely in their valve cover. I had found a Fiat coil that I didn’t know much about and would have a hard time getting to replace but it fit with little modification. But I really like the look of the VAG coils, and the later variants are all pretty reliable. The true “R8” coils that are red are the same as the black ones, but that coil sticks up too high for me. I also don’t think I need to worry about tapping out the 200hp a cylinder they are allegedly capable of. So pictured is their baby brother from an Audi A3, same coil more or less but slightly shorter meaning less turns and a bit less juice. I bought the cheapest coil I could find on the internet as I was not about to cut up an $80 one from Lordco so a $20 questionable coil seemed great.
The next sequence of photos is just as I made it shorter and shorter how it fit


Thread Starter
Senior Member
Joined: Mar 2015
Posts: 335
Likes: 8
From: Vancouver, BC
So here I ran into a problem. I can’t make this front one sit as low as all the rest meaning I either keep them all that height or trim the valve cover. We’ll come back to that later

Found a deal on an Mx6 engine on craigslist. Met a cool dude named Chris who had a turbo MX6 with a couple neat bits on it, this engine was his spare. But lol he decided if his built engine blows that would probably be it for that car and he’d just part it out. We talked for a bit about the engine he built and he later gave me all the spec sheets and other info he had collected over the years.
I have this back burner set of ideas for making a cheap forged rod and piston block, as I’m sure I will one day get bored with the power the stock rods are capable of.
Anyway I now have 3 of these things, a mock block, one of questionable condition as a backup or to build one with and now a known good runner that will be the engine I actually fire up.
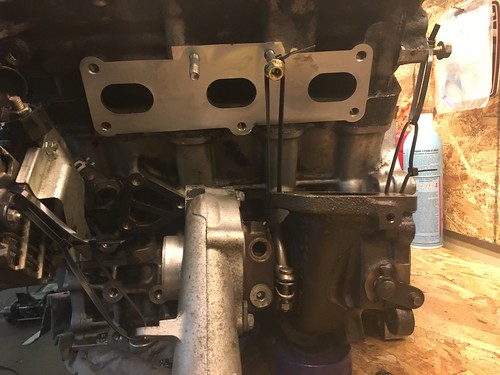
Stripped it of everything I wouldn’t need and got a few things off of it that I didn’t actually have, one was an intake manifold.

While I’m still not 100% sure on what I’m going to do for a manifold I wanted a way to jig a complete one in case its all one piece vs 2 flanges.
Ill take a minute to explain what I’ve been thinking lately. I’ve spent a bunch of time researching about the Helmholtz effect and using the resonance of the intake manifold to kinda force air into the cylinders, which is what Mazda did with the VRIS system the factory intake has. I was fearful that losing that would ruin how these engines drove, they have a flat feeling torque band that comes on early and stays. Couple hard truths here though, the Helmholtz effect while an advantage is still a small difference. A VE gain of maybe 5-10% at best and only for a certain window. It’s also effected by so many variables, air density being one of them which means as soon as the engine is in any amount of boost the whole thing changes where the resonance is. I thought then I would just make it resonate at 3000 rpm and be not restrictive at higher rpm when the turbo is doing the forcing but that math is hard, proprietary and to a degree I suspect the engineers involved had to make a few guess and tests before getting the result they were after.
This is also engineering for an N/A engine built in the early nineties, where are we at today?
There is actually quite a few twin turbo V6’s now, Ford Ecoboost being amoung the better known, but Ferrari, Alfa Romeo, Cadillac, Nissan/Infinity and Porsche all make TT v6’s. Many of them are twin throttle body as well, a design I was not looking to use.


This is an intake for the Ferrari F160 engine used in Maseratis. Apparently the block design was/is a Chrysler Pentastar engine but what matters most to me is the fact its a modern designed single throttle body twin turbo. Just looking at it you can see the MAP sensor location, at the back. And its just a really simple design, no real frills, no port injection either, plenum is kinda small compared to what I though it should be. They didn’t bother with any resonance effect either.
The ecoboost manifold is very similar, I know that engine is a truck engine designed for low down torque, but the Ferrari engine I would expect to rev a bit higher and have more top end hp, I suspect maybe turbo sizing has more to do with engine behaviour now then things like the intake manifold.
So my current plan is to make a simple design, I was struggling thinking how to make it where I could still put the fuel system on it and be able to take it on and off the car without making special tools or something. Neil suggested using silicone couplers like the Focus RS used to, I recall Papadakis did the same for fredric’s corolla when they kept cracking manifolds. That car holds like 30+ psi of boost and nitrous, if it works for papa Steph it’ll work for me. I wanna try making one out of carbon fibre or something neat but I see that as being quite a project and maybe make a simpler one until I have time to get crazy.

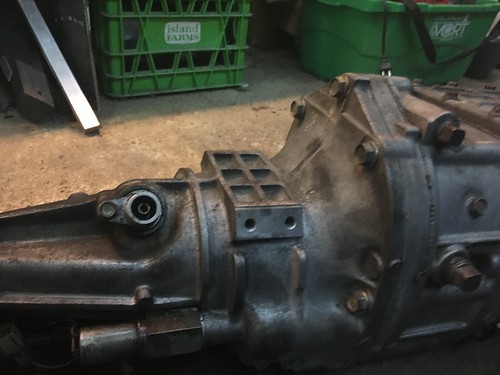
It had been too long for this as Neil and I barely remembered where we left off with the adapter. But once we found the correct files we got a few test pieces laser cut in order to check that we were on the right track with our measurements

also got my buddy travis to lathe me a “puck” to maintain centres between the patterns. One side has a step that fits on a 13B iron and the other on the KL rear main seal bore.


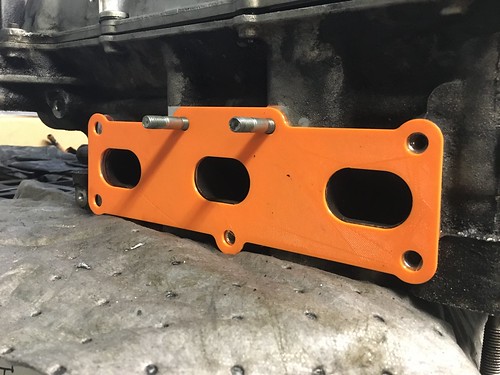
After 3 cuts with changes in between each version we had all the bolt holes lined up and centred. So we sent off to cut one more that had both patterns on it and one with the combined shape. basically the final piece but much thinner and cheaper if it was wrong.

Stacking those pieces on top of each other gave the dowels enough room to sit on something and the whole thing seems to work. At this point its hard to know if the centre is dead on yet. My research found that as much as 0.030” out could cause trans issues, but seeing that is pretty much impossible.

We cut the final one with the shape to have a removable plate for the trans input shaft. This way we could still put the same piece on both block and trans while using that “puck” to ensure fitment on the KL block.
[img]https://live.staticflickr.com/65535/49010464653_d50f58cc1a_c.jpg
Found a deal on an Mx6 engine on craigslist. Met a cool dude named Chris who had a turbo MX6 with a couple neat bits on it, this engine was his spare. But lol he decided if his built engine blows that would probably be it for that car and he’d just part it out. We talked for a bit about the engine he built and he later gave me all the spec sheets and other info he had collected over the years.
I have this back burner set of ideas for making a cheap forged rod and piston block, as I’m sure I will one day get bored with the power the stock rods are capable of.
Anyway I now have 3 of these things, a mock block, one of questionable condition as a backup or to build one with and now a known good runner that will be the engine I actually fire up.
Stripped it of everything I wouldn’t need and got a few things off of it that I didn’t actually have, one was an intake manifold.
While I’m still not 100% sure on what I’m going to do for a manifold I wanted a way to jig a complete one in case its all one piece vs 2 flanges.
Ill take a minute to explain what I’ve been thinking lately. I’ve spent a bunch of time researching about the Helmholtz effect and using the resonance of the intake manifold to kinda force air into the cylinders, which is what Mazda did with the VRIS system the factory intake has. I was fearful that losing that would ruin how these engines drove, they have a flat feeling torque band that comes on early and stays. Couple hard truths here though, the Helmholtz effect while an advantage is still a small difference. A VE gain of maybe 5-10% at best and only for a certain window. It’s also effected by so many variables, air density being one of them which means as soon as the engine is in any amount of boost the whole thing changes where the resonance is. I thought then I would just make it resonate at 3000 rpm and be not restrictive at higher rpm when the turbo is doing the forcing but that math is hard, proprietary and to a degree I suspect the engineers involved had to make a few guess and tests before getting the result they were after.
This is also engineering for an N/A engine built in the early nineties, where are we at today?
There is actually quite a few twin turbo V6’s now, Ford Ecoboost being amoung the better known, but Ferrari, Alfa Romeo, Cadillac, Nissan/Infinity and Porsche all make TT v6’s. Many of them are twin throttle body as well, a design I was not looking to use.
This is an intake for the Ferrari F160 engine used in Maseratis. Apparently the block design was/is a Chrysler Pentastar engine but what matters most to me is the fact its a modern designed single throttle body twin turbo. Just looking at it you can see the MAP sensor location, at the back. And its just a really simple design, no real frills, no port injection either, plenum is kinda small compared to what I though it should be. They didn’t bother with any resonance effect either.
The ecoboost manifold is very similar, I know that engine is a truck engine designed for low down torque, but the Ferrari engine I would expect to rev a bit higher and have more top end hp, I suspect maybe turbo sizing has more to do with engine behaviour now then things like the intake manifold.
So my current plan is to make a simple design, I was struggling thinking how to make it where I could still put the fuel system on it and be able to take it on and off the car without making special tools or something. Neil suggested using silicone couplers like the Focus RS used to, I recall Papadakis did the same for fredric’s corolla when they kept cracking manifolds. That car holds like 30+ psi of boost and nitrous, if it works for papa Steph it’ll work for me. I wanna try making one out of carbon fibre or something neat but I see that as being quite a project and maybe make a simpler one until I have time to get crazy.
It had been too long for this as Neil and I barely remembered where we left off with the adapter. But once we found the correct files we got a few test pieces laser cut in order to check that we were on the right track with our measurements
also got my buddy travis to lathe me a “puck” to maintain centres between the patterns. One side has a step that fits on a 13B iron and the other on the KL rear main seal bore.
After 3 cuts with changes in between each version we had all the bolt holes lined up and centred. So we sent off to cut one more that had both patterns on it and one with the combined shape. basically the final piece but much thinner and cheaper if it was wrong.
Stacking those pieces on top of each other gave the dowels enough room to sit on something and the whole thing seems to work. At this point its hard to know if the centre is dead on yet. My research found that as much as 0.030” out could cause trans issues, but seeing that is pretty much impossible.
We cut the final one with the shape to have a removable plate for the trans input shaft. This way we could still put the same piece on both block and trans while using that “puck” to ensure fitment on the KL block.
[img]https://live.staticflickr.com/65535/49010464653_d50f58cc1a_c.jpg
Thread Starter
Senior Member
Joined: Mar 2015
Posts: 335
Likes: 8
From: Vancouver, BC
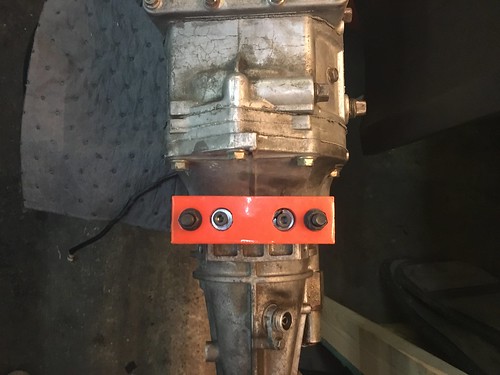
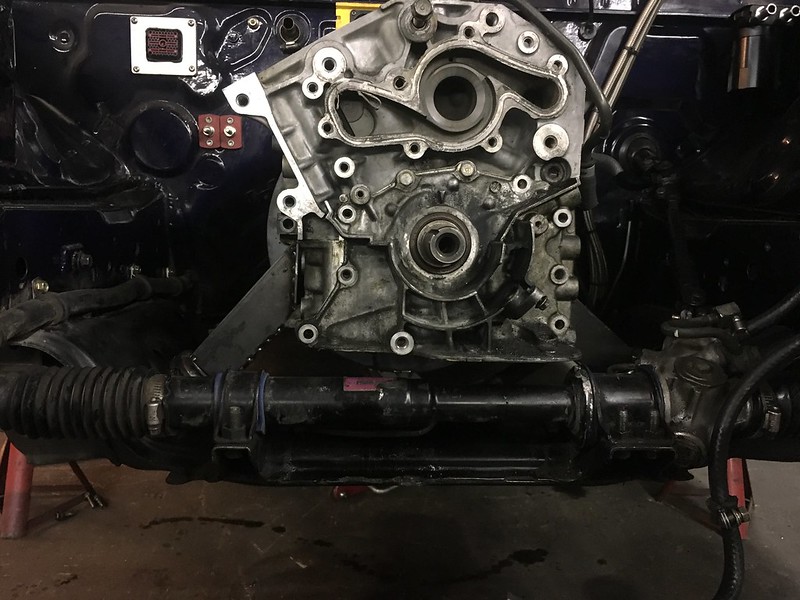
With both plates stacked and sitting on dowels, I made a ghetto electrical tape spacer to make the pilot sit centre
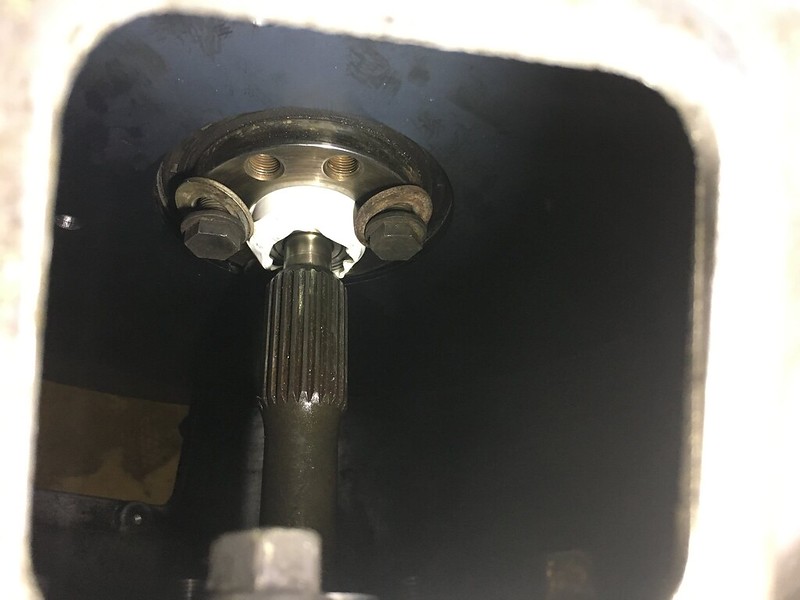

And using as many bolt holes as I could (many of the trans bolts miss the block completely) I bolted it together and hung it

At this point I was just being impatient lol, We know its going to fit. I want to do a final check with the bellhouse bolted to the block but the flywheel adapter needs to be made still..
This meant it was time

I need to update my profile picture
sitting on jack stands waiting for me to spend hours staring at it fiddling with a tape measure.

Somewhere in this time the Pro am season ended, I had been helping Neil run our friend Shawn Miller’s car, and half way through Brennan Walstrom as well. I’ve always been into seeing how the teams at FD function, I follow a bunch of drivers and a few team members on the social medias and I now have a new understanding of competitive drifting. Going somewhere in drifting is about much more than just you and your ability to drive a car. Running one car well is a lot of work and coordinating and planning and running 2 cars is even more. All I really do is show up at evergreen on raceday and swap tires in the hot pits, download logs from Shawn’s ecu and wait lol. Neil puts the effort in during the week before to make sure that both cars were as ready as they can be for battle.
It paid off too, Shawn is one of the best drivers I can say I know personally, Brennan is also a good driver (I believe he’s a stunt driver/coordinator for a living too) and they did really well all season. Shawn came 3rd overall and Brennan 2nd which grants them both a Pro2 license. This pic is from Driftcon after dark where Brennan showed up after working all night with a hurt motor and won the event sealing his position. He and shawn had to battle each other in top 8.
I’m not going to say too much more about next season as much of it is still undecided but I’ll be back helping out. Shawn’s bmw is not legal for Pro2 so we (mostly Neil lol) will be building a new car soon I hope.
Back to my dark garage though


And using as many bolt holes as I could (many of the trans bolts miss the block completely) I bolted it together and hung it
At this point I was just being impatient lol, We know its going to fit. I want to do a final check with the bellhouse bolted to the block but the flywheel adapter needs to be made still..
This meant it was time
I need to update my profile picture
sitting on jack stands waiting for me to spend hours staring at it fiddling with a tape measure.
Somewhere in this time the Pro am season ended, I had been helping Neil run our friend Shawn Miller’s car, and half way through Brennan Walstrom as well. I’ve always been into seeing how the teams at FD function, I follow a bunch of drivers and a few team members on the social medias and I now have a new understanding of competitive drifting. Going somewhere in drifting is about much more than just you and your ability to drive a car. Running one car well is a lot of work and coordinating and planning and running 2 cars is even more. All I really do is show up at evergreen on raceday and swap tires in the hot pits, download logs from Shawn’s ecu and wait lol. Neil puts the effort in during the week before to make sure that both cars were as ready as they can be for battle.
It paid off too, Shawn is one of the best drivers I can say I know personally, Brennan is also a good driver (I believe he’s a stunt driver/coordinator for a living too) and they did really well all season. Shawn came 3rd overall and Brennan 2nd which grants them both a Pro2 license. This pic is from Driftcon after dark where Brennan showed up after working all night with a hurt motor and won the event sealing his position. He and shawn had to battle each other in top 8.
I’m not going to say too much more about next season as much of it is still undecided but I’ll be back helping out. Shawn’s bmw is not legal for Pro2 so we (mostly Neil lol) will be building a new car soon I hope.
Back to my dark garage though
Thread Starter
Senior Member
Joined: Mar 2015
Posts: 335
Likes: 8
From: Vancouver, BC
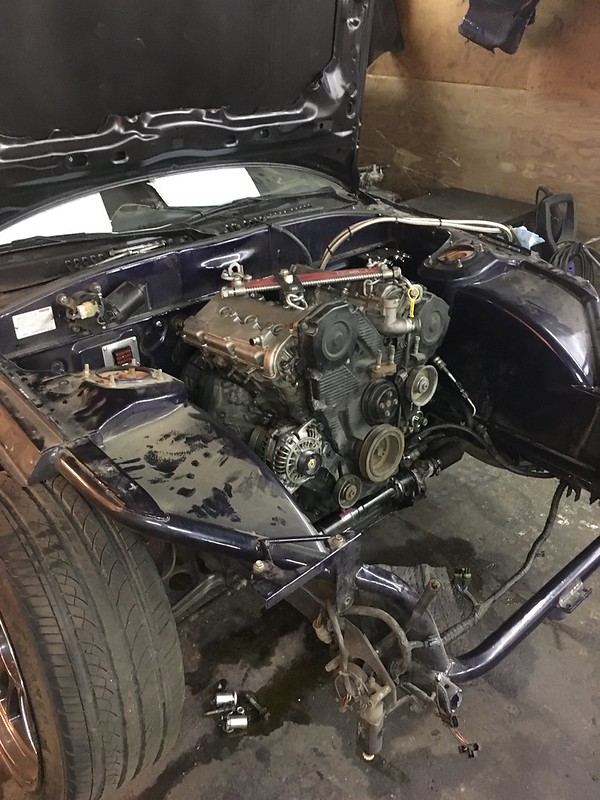
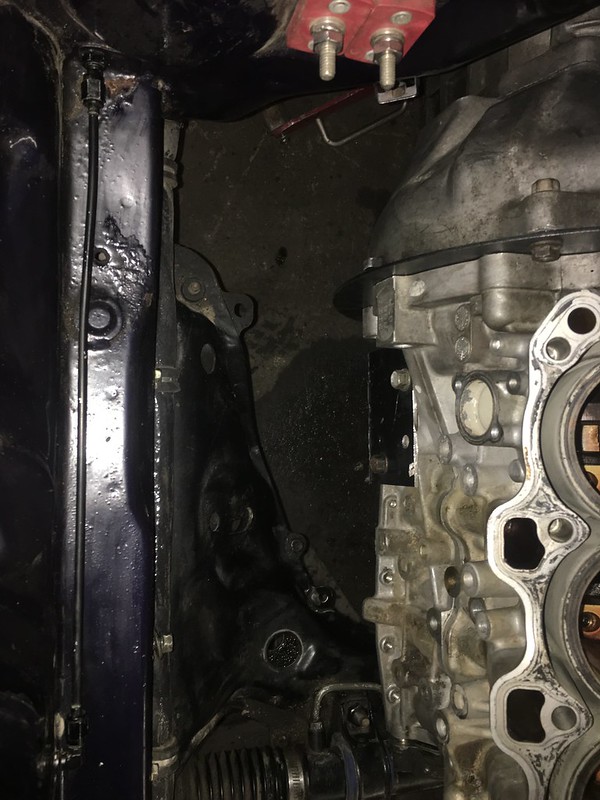
Preliminary position, its sitting on jack stands transmission and under the oil pan. I started by levelling it side to side with the car and front to back with the car. I got the crankshaft centre of the engine bay (based off the original frame rails not my tube front), I know FD’s the engine is offset from the RHD drivers position but I don’t believe that is the case with FC. I also lined up the transmissions shifter up with the hole, and tossed the driveshaft in just to make sure it was front to back correct.
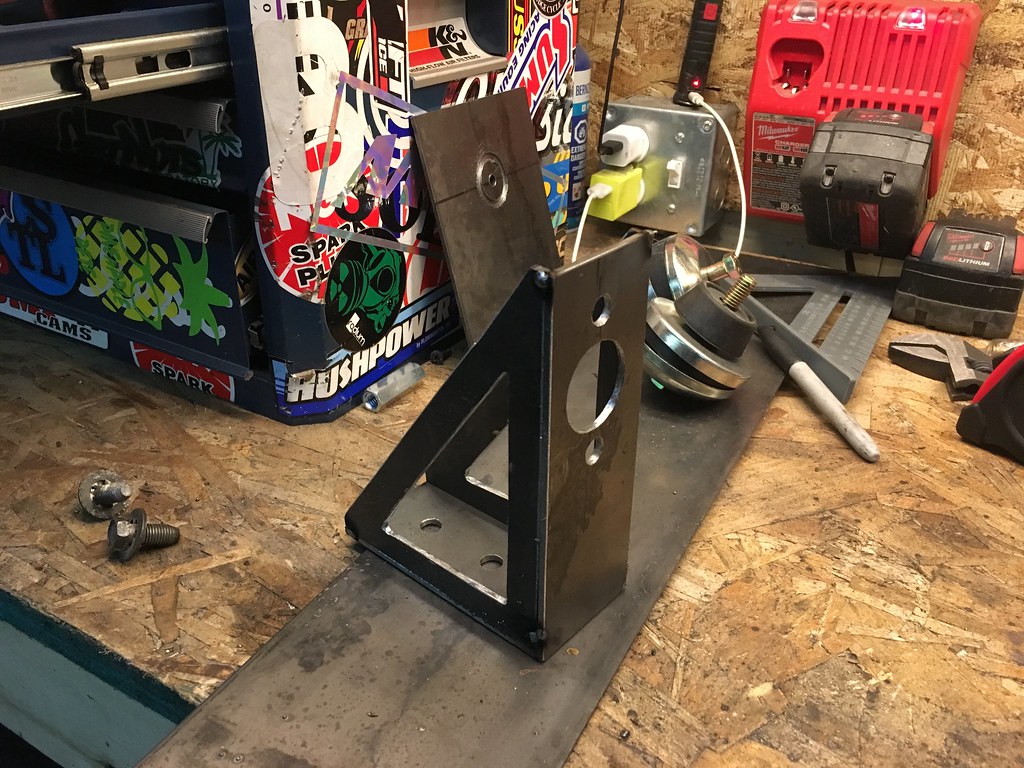
tacked together some engine mounts. Still haven’t decided what I want these to look like as a final product but I had a strong feeling they were gonna have to change a bit so these are just to get the engine where I want it so they are ugly.


SO MUCH ROOM FOR ACTIVITIES
Off the bat it sat further forward then I had hope, and thats even without the extra 1/2 that the adapter plate will add. I had already screwed up my engine mounts in this regard, they had no room to slide the engine forward.

tacked together some engine mounts. Still haven’t decided what I want these to look like as a final product but I had a strong feeling they were gonna have to change a bit so these are just to get the engine where I want it so they are ugly.
SO MUCH ROOM FOR ACTIVITIES
Off the bat it sat further forward then I had hope, and thats even without the extra 1/2 that the adapter plate will add. I had already screwed up my engine mounts in this regard, they had no room to slide the engine forward.