When you click on links to various merchants on this site and make a purchase, this can result in this site earning a commission. Affiliate programs and affiliations include, but are not limited to, the eBay Partner Network.
Sup, long time lurker here and I figured I'd post a bit about myself and background. You may have seen this build on stance works, I�ve been posting it there for a few years and for what ever reason never made the leap to using RX7club even though I search it all the time. Stanceworks appears to be winding down, theres far less traffic on it than there used to be and theres a serious lack of drift cars and discussion of any technical details. So I'm basically going to copy and paste it here, mostly unedited. The name of the thread comes from a local forum to me where I had a short build log. Basically I did this whole thing backwards (imo), I started by building a car to learn on instead of just building it as I learned.
I started in Rx7�s in like 2012 ish, making a lot of mistakes and learning/figuring it out as I went. Its funny how much my perspective has changed since starting to what they are now, and I hope my car is a reflection of that. Before I wanted a do a legal-for-all-the-things race car (including drag and autoX) that was budget friendly and ideal to learn on. That car died (read and you�ll find) which gave me a chance to build a proper drift spec car but one that isn�t a race car. I think theres an important difference between a race car and a drift car (that said I would call like an FD car a race car) and thats how it looks. You don�t have to squeeze every ounce of performance of a drift car to have it perform adequately. The difference between timed racing and a subjective judged sport, style isn't measurable like lap times. It can still look good and perform to even 85% of a racecar spec drift car with proper engineering and careful part choice. Im big into the idea of a drift car being functioning and reliable while being stupid low and cool, it just takes more work to get there. I�ve learned a lot about the 80/20 rule (which is 100% of your best takes 100% of your time and 80% of your best takes 20% of your time) and I don�t believe that means being lazy or skipping that last 20% as much as it is wise decision making. For example on the first car I stitched welded the seams. Once the cage goes in I�ll never be able to feel a difference if the cars stitched or not, and a lot of its covered up so why bother doing this step for that 5% of rigidity that my grassroots fun drift days and street use car will never be effected by. However there's still some things that don't make a difference in performance at all but are done for the look of it and cool factor, like shaving the engine bay for example. In also of the "Do it once, do it right" mindset. I find this cheaper in the long run, and finding ways to do things cheaper but still properly is one of my favourite things.
That said I�m still learning things, trying stuff and pushing my fab skills ever forward. I am a bit annoyed I don�t get to drive as much this way but for me a large part of the fun is engineering solutions and physically building the car, even though not every moment of that is fun.
I'm still building this car "for me", as much as that's become a cliche and frankly a lie these days, I want to build something that I'm proud of at the end of the day. Mistakes, shortcuts, laziness all show up at the end, in function and in looks. I don't want to be that guy than spends most an event fixing stuff they didn't check or didn't deal with before they got there.
I share my experiences, findings and a portion of my life for the same reason I enjoy reading other people do the same thing. I enjoy researching things, and I get inspired to get out and work in the garage by reading and seeing others do the same. Sometimes I'm wrong or learn the hard way, but this is just a build thread not an answer key. Don't take my word for truth, do your own research and make your own decisions. End of the day it's your time and money you're spending of your car.
With that out of the way let's rewind...
08/16/2013
1987 RX7 and its getting a V8.
I told my self I wouldn't start a build thread until something actually interesting happened, and well tomorrow we start the cage.
So around a year ago my parents left town for the weekend. This normally means I buy a car (lol is kinda a coindence, but its happened multiple times) I found it on craigslist, got it for $450. The kid thought it needed a transmission and/or a clutch. I got it home to figure out that the slave was seeping and the clutch was out of fluid. If i had spotted that earlier I probably could've driven it home.
Car was in great shape, needed some TLC, however the awful stereo install had to go asap. I hit my knee on those stupid door pods every time I got in and out.
I believe its a GXL, it has the turbo brakes, a clutch LSD, power steering, power everything else, even A/C (which didn't work)
Drove it for a bit and decided rotary was not for me. I love the idea of them, and in my head it should work better than pistons. Then when it wouldn't idle for more than 30 seconds at a time, and I decided to not invest any more energy into and look into other options. I wanted something easy, cheap and readily available. I did want to keep it mazda, or at least japanese. However I went parts shopping with my buddy who has a 5.0 fox mustang. Parts are dirt cheap, and I mean stupid cheap for the horsepower you get. They are also everywhere, and there are a lot of people who wrap them around trees, so parts where cheap and readily available. After a bit of research I learned doing the 302 swap would be laughably easy. I've yet to hear of a simpler cross-make engine swap. So the hunt began!
Sold the old engine/tranny for near what I paid for the car, to a guy going to put it in a Datsun 510! (sick!)
This is where I made a slight mistake. Well even before that. I should have just driven it as is and make it work, start doing events and upgraded as I go. But instead I just took it really far apart and had all these plans to do cool stuff. But no money. I'm now still going to do cool stuff, but lol I should have planned that better. I've owned this car way to long to only have driven once, I'm barely familiar with it.
/rant
Stripped it right down
Sold stuff, threw a lot more out (interior was in rough shape)
I have my buddies old mustang motor that needs head gaskets (or we hope thats all it needs). He built a 306 designated for turbo fox body awesomeness.
Scored a T5 for $180! its even a word class rated for 225 ft-lbs. Got a swap kit on ebay for half price of a new one, and it even came with the aluminum driveshaft option!
Bought a bunch of leftover parts from various people and I now have 90% of what I need to make this work the way I want it to.
The plan is as follows:
5.0 mustang engine long block
Sn95 intake upper and lower
Explorer front accessory setup (same as Sn95)
Electric water pump (still figuring out what kind)
3rd gen alternator (this will be the only thing on a belt)
De-powered steering rack (I believe I have a 17:1 rack)
TBA clutch setup
Hydraulic clutch conversion
All new wiring
as much delrin/solid mount stuff I can get my hands on
as much Lucky 10 stuff as I can afford
stock e-brake for now
JIC coils (used but were a steal)
Dual master cylinder brake setup
rebuild the stock calipers
new pads/ rotors
Formula D/SCCA solo 2 spec cage
AN fittings e'erwhere
probably use the stock Rx7 rad, unless I find out its not enough to keep it cool
Big fat electric fan
Momo Corse drivers seat, still working on a pass seat
Crow harnessssssss
Walbro 255
NRG quick release (need some theft deterrents here)
Grip royal 'Hills'
Custom gauge panels (i'll get to them in a minute)
Going to Plastidip the entire car when done, I really dislike paint and body work, this way I can make the exterior rust proof but ugly, then just dip over it. goes on like 1.5mm thick, self levelling, easy to fix and weighs maybe a pound. can't loose.
I'm forgetting some small things.
I've found the more research and planning I do the less money I spend.
Not sure on wheels yet...
Also probably going to get a Volvo lip and maybe shine skirts. Though I'd rather spend money on not body kits.
Now more on that custom gauge panel,
So what we have here is the stock radio/climate bezel that I just added some 1/4" ABS to fill the space then sanded primed and painted to look like this:
And the gauge cluster bezel got similar treatment
Probably going to dye the dash black and flock it, the blue doesn't go with anything lol
And incase anyone asks the gauges are Faria Euro. They are boat gauges, I think they look great and very different. They're fairly accurate (not auto meter or anything), much cheaper, water proof and built for shock. Still need a big 5" tach...
That's all for now, I'll try and be diligent taking pictures of the cage build tomorrow.
Started the de-powering of the steering rack, amidst helping a buddy do brakes on his Integra.
So first clean the mess my dad had left for me (well some of its mine) so I'd have somewhere to work
Before:
After: (sorry for blurries)
Then with my OCD taken care of, yank the the rack out of the car
Take it all apart, holy cow were those tie rod ends on there. Same goes for the pin at the top of the column.
It was also really grimy, so took care of that.
Then I bathed the piece I'm going to try and weld to prevent slop. It's been in an oily environment so long theres a good chance the weld will be full of porosity.
Had to modify my bucket a little, which resulted in a mess on the counter :roll eyes
While I was busy cleaning things I pressure washed my T5, I should have taken a before shot. The bellhouse was at least a cm thick in grime, I couldn't touch any of it without getting my hands black. Fixed
Then the scary part. Cutting off the seal without damaging anything else. Came out fine, no collateral
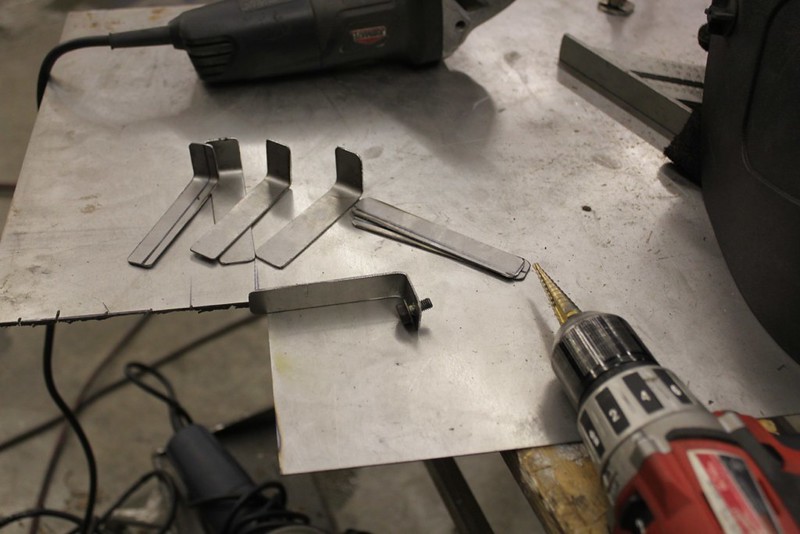
While I wait for my buddy to have time to weld the steering column I continued chassis prep. Cut off and grinded away remnants of the seat mounts.
Crazy times, I've hardly been able to work on the car lately. But got a 12 hr day in on it today so theres some progress.
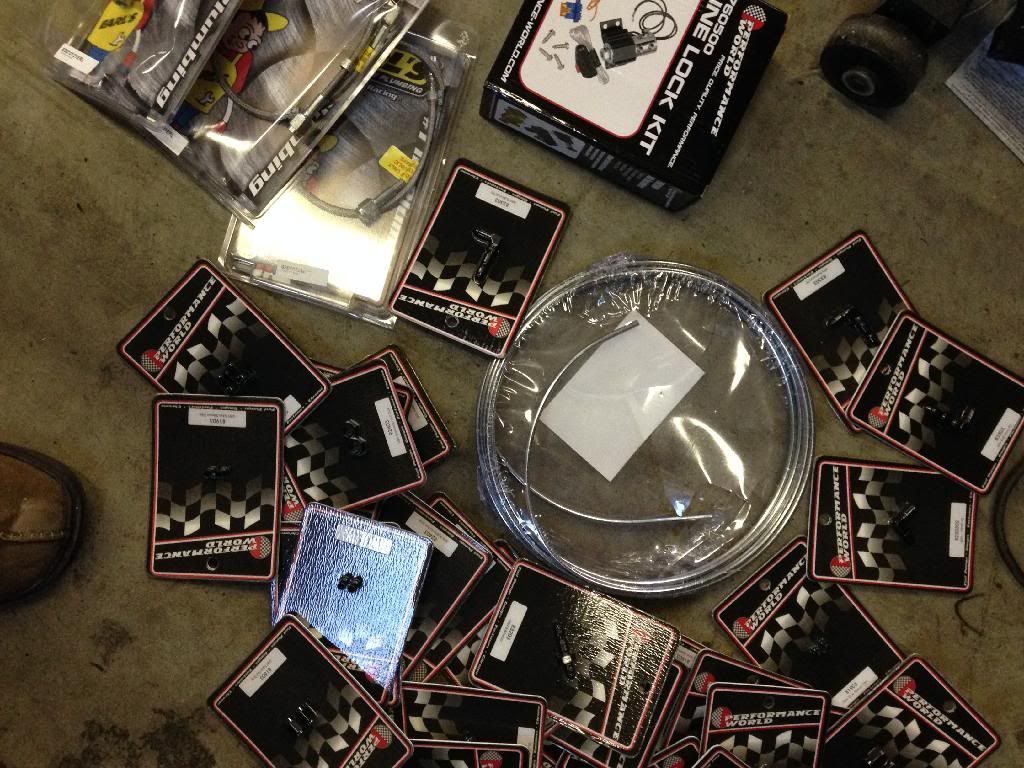
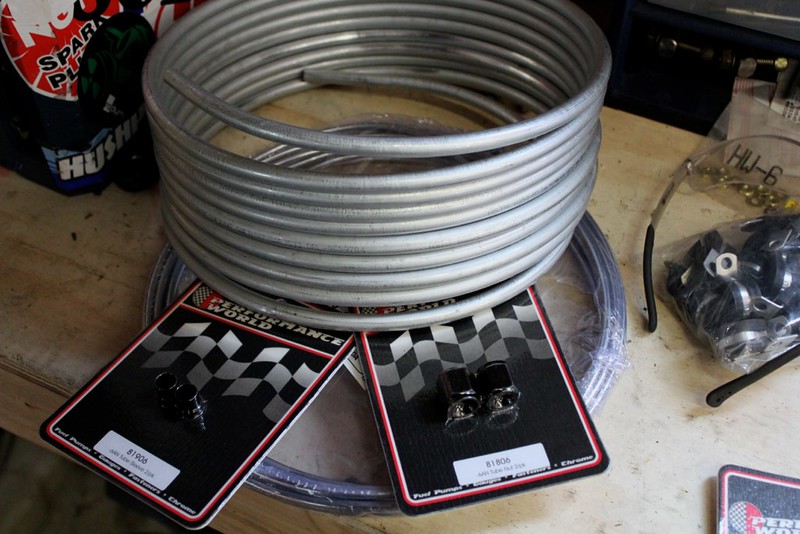
Before that though I went to the ricer store with some friends. When in Rome...
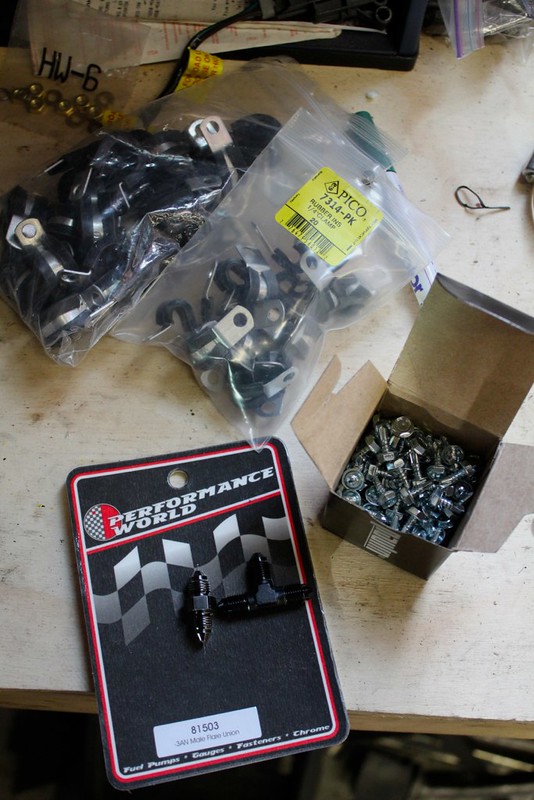
Got some plug like thingys for the steering rack to keep dust out, also have some grease nipples to weld/drill into the other line caps so I can grease the rack down the road.
By the way, I broke that stupid wire clip that holds the end of the steering rack on. The one that you have to spin out, anyone know where to get a new one? Dealer can't get them, even for a Miata. Edit: no luck at anywhere, found some wire that fit and made one
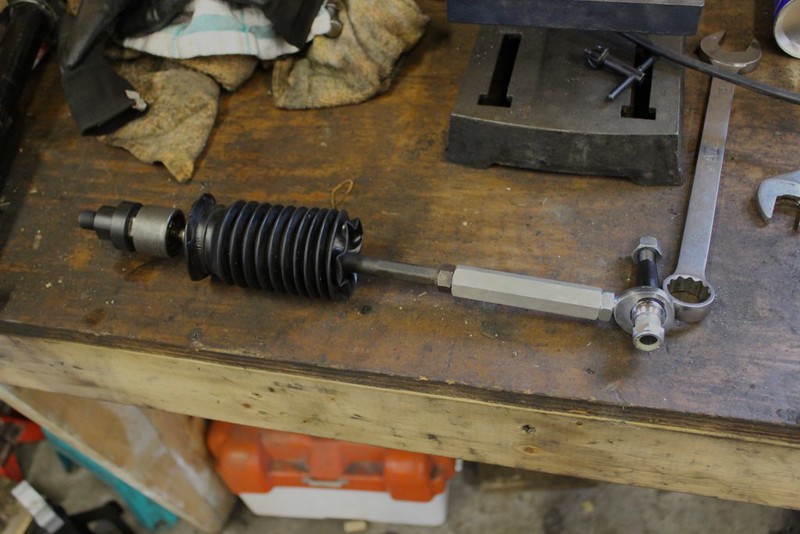
Also got this welded all strong, my buddy said it was horrible to do. I soaked it in cleaner and heated it up but not quite hot as did he when he tig'd it; but there was still oils in it, which happens after steel has spent the better part of 20 years living in power steering fluid. Its strong, no one will see it (except everyone because this is the internet) so I'm happy with it.
And the best news is, I finally have some cage work happening! my buddy has been even busier than me so its been hard to find time to use his welder and skills.
I found this awesome coping calculator site (link) which makes coping so easy and cool. You basically enter your pipe dimensions and the angle your putting them together, print out the little template it gives you, cut it out, wrap it around the pipe (leave extra on the wrap ends to ensure its on the pipe straight) mark it and cut! I used a grinder with a cut off wheel and another with a flap disc. Takes some time but works well.
I made a bunch to template (and practice) so I have an idea before I cut the real deal.
Works really good with some technique and patience, basically all the shape requires is a cut from either side, and a bit of shaping/smoothing.
So I had my buddy do a trial piece or two to get an idea for power settings on his welder, tell me what you guys think, will we have issues with passing tech with these welds?
And finally some cage in the car, man this stuff is time consuming to do.
And the big news; I bought a motor assembly! I went to a yard that specializes in jeeps and mustangs, he had a 95 gt that looks like it smacked a curb good or something, bunch of BBK pieces on it, hadn't been pilaged yet. So I bought the whole engine, trans, all wiring, ECU, pedal assembly (long story), and everything currently attached to it. It should be able to pick it all up late next week, will update when that happens.
This is great because my welder buddy wants my T5, he can have his fox motor back, and I was basically using mostly Sn95 stuff anyway. And apparently the ECU's have better processors.
Winter is in full swing around here. The weather too
BBK equal length headers, (sorry for the blurry) I believe these are the SN95 specific ones so they should help keep the clearance I need from the steering column.
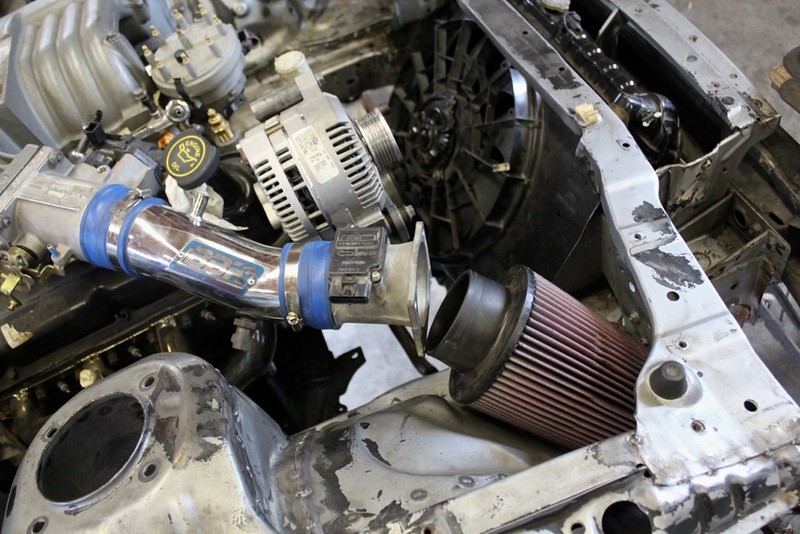
BBK (PO seems to like BBK) cold air, unsure if i'm able to use this yet.. but I'm gonna try!
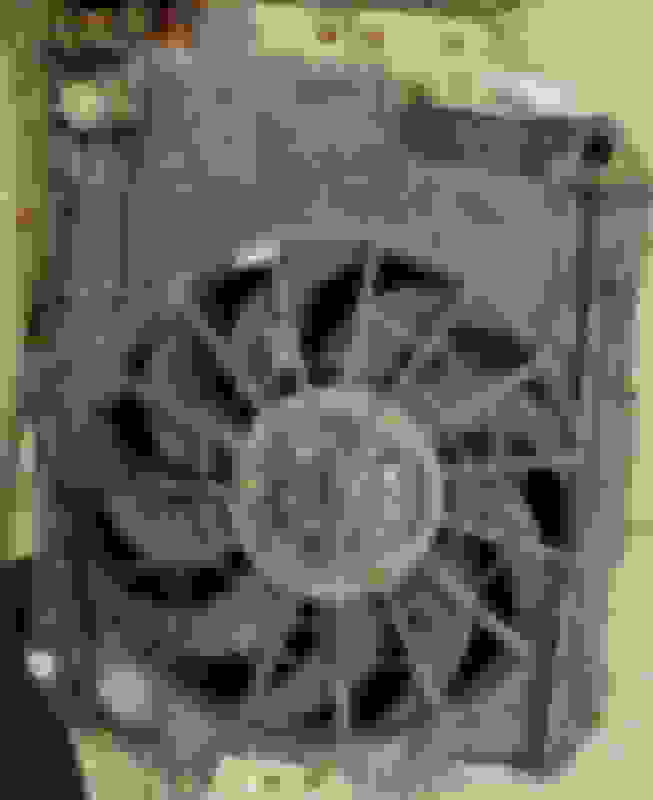
and a fox rad with a huge electric fan on it. I don't think the rad will fit, but the fan should work!
The guys at the yard were really good, I'm able to go back and grab whatever little wiring pieces etc i still need from the mustang. One of the guys there had actually done a chevy into an Rx7.
Tomorrow looks like a lot of cleaning, and more cage work.
Much more cleaning ahead. And I gotta figure out the best way to mount those pedals so they are easy to remove with the cage in...
10/15/2013
Anyway this last weekend was Canada's version of Thanksgiving. Which means long weekend. Yeeeeeeee
Engine cleaned and getting ready to go:
Steering rack reassembled, though I'm not super sure about it. It feels tighter than it did before, not binding but stiff even with the support loose. I'll have to drive on it I guess.
Got a lot of research regarding the wiring behind the 5.0 done, this site
Well. It has been a while hasn't it? I was out of town for a week, but Andy (my welder) was going crazy to finish the cage, so thats what we've been doing. Until we run out of gas at least.
Back to the build at hand:
weld weld weld weld
ooooh! lets guess what this is (because it looks cool)
kinda looks funky, but then it makes sense
Came out steezy for the little access he had with the windshield in the way.
Speaking of "little access"
Sometimes kids, you have to do things that work safe programs frown upon. Even strongly frown upon. Andy's lady likes a little sun tan on his face, and hands. Lol. So in order to get at the angle required and be able to see it, this happened.
Don't try that at home he's a paid pro, when he works for me, Mcd's is on the house. (well often anyway)
So we got almost all of it done, theres a few to finish and I mis-cut the other side of the harness bar. I'll have to get more DOM when I get the gas filled. There's a bit of gusseting to do as well, then the back wall. So who am I kidding, theres a good bit of welding to do.
Tonight while rocking out to JT, I trimmed the dash and fit it in place and through the rest of the pieces in to see how it looked/felt.
Needless to say, I love it. Bit more bling to get yet, but feels good. I don't even hit my long elbows on the roll bar.
I can get used to this view
So we ran outta gas for the welder, which gave us time to do the brake master and booster in Andy's jeep. He had to run to the parts store to get a wrench and brake fluid or something and challenged me to get the coils on the car while he was gone. 25 min later, I had the coils in. About 2 minutes after that he got back. Fought a seized bolt and managed to swap the front wheels which don't fit. Then I went overtime to adjust them, swap the rears and crank the preload so the fronts clear. I think I'll need some decent spacers to push them away from rubbing the coil. And it wouldn't hurt in the rear either to fill that wheel gap..
sits much prettier.
Was gifted this:
Off a Nissan Sentra, so naturally the plates don't fit. But the length is pretty ideal. I kinda wanted an adjustable/removable strut brace for the rear. So another project will be to make plates and weld them to work.
Thrifty tip: take your old seat belts that you don't need anymore because you bought RCI harness (cam lock and all boi!) and steal the grade 8 hardware. Then cut a bunch off and make some tow straps! then dye them red. Or you know JDM purple, however you wanna go with it. I just have to sow a loop into the end part, but they should work awesome. And save me like $25 from spending on eBay.
Oh and I bought some Wilwood master cylinder kits.
Remote resevoirs, matte black nice pieces. But after mocking them up with the pedal box I had planned, it ain't gonna fit easy like. So I'm gonna have to get creative. Anyone have tips or ideas from how they did theirs? key here is easy to get at them for adjustment and such.
Ill take pics when I don't forget (see what I did there?) or when I buy the third one. I gotta decide on a slave and then do some math.
No its no auto meter or anything, but it'll do what I need to. One day i'd like to get a racepak dash thingy instead of a billion gauges.
so I threw it in to see how it looked, and well I like it. I wish it didn't go to 10, because the pride of Ford america in 1994's V8 don't go to 10. Goes to like 6, on a good day.
and as promised: :cool
Baller bling things that will be hidden under the dash when done.
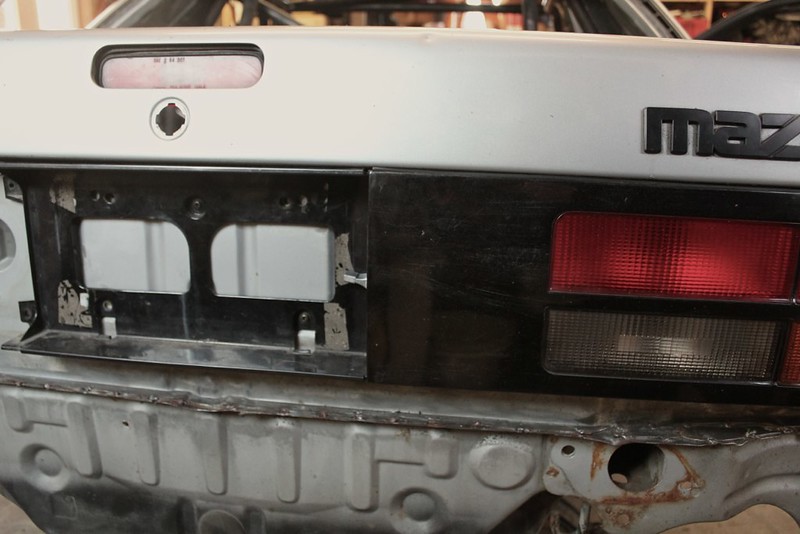
Had these welded back together, after I broke all but one nut with an impact gun. That's what happens when Mazda decided welding them in with a soldering iron would be fine. :shifty Honestly they don't experience much force in that direction, but I broke them anyway :rolleyes
For kicks I'd thought I would throw this on here too:
My toolbox. Had it for 3 years now, been sticker-ing it ever since I got it. Some cheesy, some legit ones, some free, some I bought, some rare, many freebies. Kinda the only thing i do that I have zero rules for or thought. Its a sticker, find a place, stick it. Chaos. But it looks artsy that way. And I didn't just go buy some JDM ebay sticker bomb sheet.
Spent a bit of time mocking up and measuring stuff. Have to put a full night in this week so we can accomplish some welding on sat. Found out I have a deadline, as my welder is going to school for 6 weeks or so. So we need everything critical done before that.
Ordered a Energy Suspension master kit, should be here by the end of the week.
Also sold some stuff so I have a bit of $$ to throw at it, looking at Abercrombie Motorsports knuckle kit. And some Parts Shop Max/PBM bushings solid diff/subframe bushings.
Any one have experience with either these? The abercrombie knuckles look the business, 72* with only 4* of Ackerman spread. This is more angle than I've seen out of any kit for the FC, which isn't blessed with lock from the factory, and more than a lot of 240sx kits.
also looking at Lucky10, its a company local to me that also has a sweet time attack FC build happening. They make nice stuff also, but a little on the expensive side to say PSM/PBM.
So i'll have a bigger update coming, that deadline I mentioned has me pushing hard to get as much welding done as possible in time. So haven't had much time/energy to take pictures. So I have a few for now, but come the weekend I'll do a bigger one.
Got this:
Energy suspension master kit for FC RX7s
First of many suspensions. Ordered from Part Shop Max, Abercrombie, and Racing Beat. hope to run across the border sometime this week, in between fab work. Pretty stinking excited!
got this mocked/tacked together. Fits perfect, I can remove it even with the dash and steering column in place. Number 1 goal with this build is to make it easy to work on and adjust. Will get it welded up, then probably weld the pedal box in place, its kinda floppy with all the metal I took out lol.
rear seatbelt mounts welded up nice
Got these for a steal, and while I don't need to run two I'm gonna. Because having your car die from leaving your lights on for 20 min isn't cool. And in future I want to have an electric water pump and fat fan running in the pits with the engine shut off. They are like 11 lbs each, Odyessy PC545. boo rah
dat gusseting
trimmed the dash up perfect, did the bottoms too. Dremel then finished with a knife for a clean edge.
Now before you say "Tysy! those holes are way off, you're blind. They're way bigger on the one side."
Well thats on purpose. Makes getting the dash in and out easier, and so it will clear the reservoirs mounted where the idiot lights were. The front piece almost has to go through the sunroof opening to clear the cage.
more to come probably after the weekend
Have a hydraulic slave setup to make, welding to finish, brake lines to run, and engine to drop in, the list is long.
So cage is aaaaalllllllllll done. gussets, plates, the works. Can't thank my dude Andy enough for helping make that possible.
I'll have to take more pics (i forgot to take specific ones) to show off the complete thing.
moving on,
got some gr.8 hardwares to mount the seat, some spares for the engine mount and a few for the kit that were missing. Man I love that golden Zinc coating look
got some paint, I'll need to do some stuff sooner than later to prevent rust from starting. Honestly not looking forward at all to all the sanding and paint prep required in the coming months
and well speaking of gold :eyebrows
Parts shop max order came! this stuff is beefy, and shiny. Theres actually a lot of little marks and scratches on them, though they were wrapped well for shipping. I don't care really, I'll do worse getting them in probably. No one will see when they're in the car anyway.
We have here
Camber link
Solid diff riser bushings
Solid subframe bushings that tilt
Revised length trailing arm links, which are built. I hear a lot of people break the AWR adjuster ones, it'll take a nuclear explosion to wreck these (famous last words right therrr)
this is all designed to work together, which is why I bought it kind of as a kit.
also got these. What a fiasco, Canada post worker delivers a package that wasn't mine to my house when only my mom was home. She signed and paid the duty ($50!) and gave me the box and bill, to which I quickly figured out wasn't mine. I called the owner, who's name and number were on the side on 3 different tags and gave it to him. 2 days later after no help from racing beat (who are not getting future business) or CP or border services, same post worker knocks on my door to explain he made a mistake. 3 hours later he found my package. somebody switched invoices on them at the border methinks. everyone blames each other. /rant
played with these a bit too, they look good.
and with new parts,
new stickers!
Tonight involved more tidying of the work space, and the car. Clean clean clean. fit fit fit.
after a lot of aggravation, I had made a new mess and got the seat and pedals securely mounted. I'm quite in love with the seating position and pedal placement. Every where I looked people always have the brake closer to the gas. Keeping it on the other side of the steering column however means I can take the pedals out without removing anything else, and lets my big feet heel toe real nice, and I can left foot brake easier. This is going to be so much nicer than hitting my knees on the steering wheel like in most other cars.
Swapped my injectors to explorer ones. They are the same flow rating, but the spray pattern is newer/better. Can't argue with upgrades I have lying around.
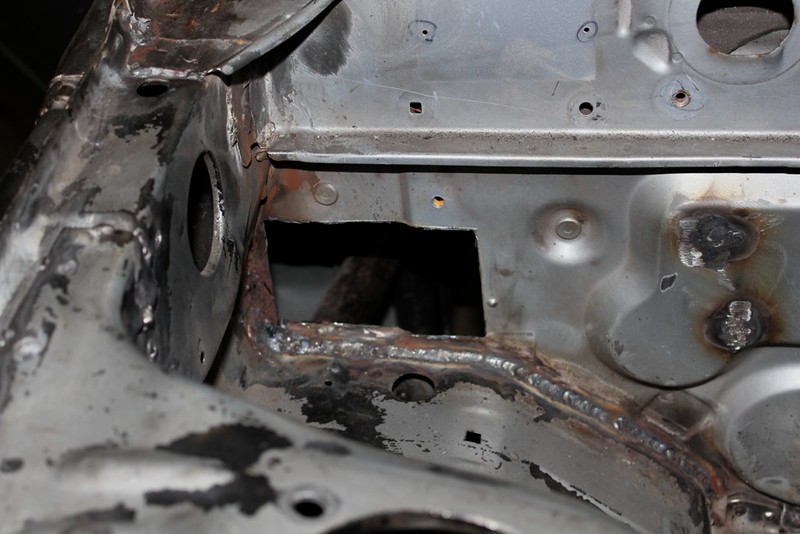
Couldn't decide what to do with the firewall. Didn't want holes everywhere. Didn't want to spend the time shaving it. I like the race car look with the bay all full of unused holes. I found a perfect solution. Tacked sheet metal from the inside to cover the holes. After some sealer, some sanding and a bit of paint it'll look ideal.
mocked the stock radiator, well actually its not stock. It's a premium oem replacement, ditches the plastic ends for all copper everything. I think I'm going to use it until its a problem, then get a nice aluminum one.
The 5.0 fan fits quite well actually, not going to take much effort to make it work.
It is kinda thick however. I'm already positive i'm going to have to move it forward and change the angle because the V8's balancer hangs farther forward.
I was given this
I have always loved and wanted one of these cue ball shifters. It's gonna fit right in with the rest of the interior too.
up next in the near future: Stitch welding, and fitting the engine in. hopeful start the welding by next week provided the holidays don't get too cray.
Been a bit slowed down by the holidays, but the holidays do bring other things as well..
Low pro jack, aluminum, foldable, pretty perfect for a portable track jack :cool
Rache-ty wrenches! The best thing since sliced bread, and they're the stubby variety, which is nice cuz I don't own either rachets or stubbys.
finally got this in, not sure when I'll get to painting the dash. Need to wait till the weather warms up methinks.
Now not super proud of my stitch welding. I was basically still learning how to weld when I started. So some of its not the prettiest, and in these pics none of it (except engine bay) was cleaned with a wire wheel yet. I did my best to get all the seam sealer and undercoating out before welding, but that doesn't always happen. And the welder I was lent isn't the best..
But the bright side is the whole car is done. I may have a bad weld or two here and there but those few aren't going to ruin the whole car. I got a lot better over the course of the car and saved the interior and engine bay for last.
got the firewall more or less the way I want it
I'll have more pics as I clean the interior. The whole car is a mess right now.
The other item on the list that requires a welder is fixing the areas of rust the car has. theres a spot in each wheel well, a few in the floor and one bad one on the pass subframe area.
(for some reason my camera makes everything look rusty, I promise its not that bad! must be dust or something)
Now really bummed about this next part. So theres a little bit of rust bubble above the windshield, it needed to at least be looked at. At the same time I noticed that the inside and parts of the outside of the windshield were all covered with girding/weld slag, so I tried to scrape them off. Well they came off, but they had melted the safety glass layer on the inside. So I need a new windshield. *sigh* :mad
so out it came. I was really trying to avoid that because I don't see a new one being cheap, and now I can't drive it until I get a new one. This really made me sink, I've got so much time into this thing. I'm really done with fab too, but this is the home stretch. After tomorrow I can move on to not metal work.
I've disassembled the front and rear subframes. Perfect time to pull in some favours and clean/paint and install all those new bushings.
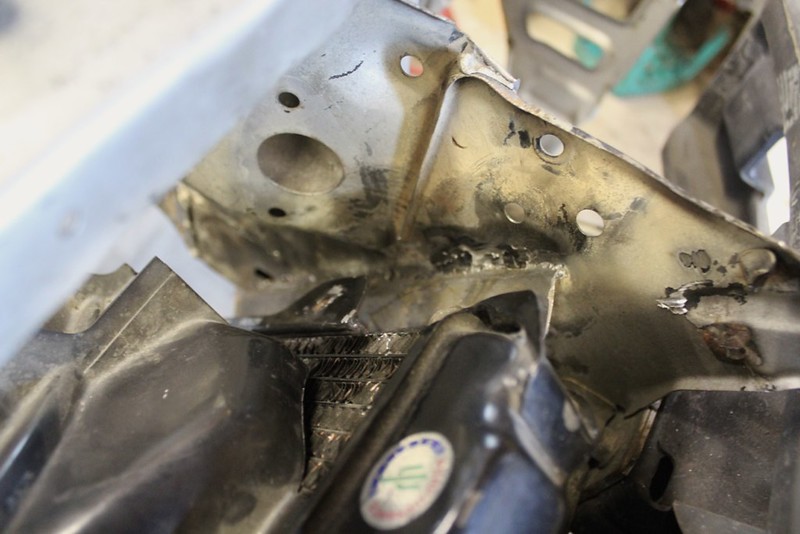
fixed. This was a tough one, as all the metal (well basically) that attached to the firewall had rusted away to almost nothing. this makes for bad welding, so after a good grinding welding commenced. Worked out really good for what I was expecting. My welder buddy certainly earned his Mcd's.
and then
and then
all the pass seat mounting and harness mounts
meanwhile I took a grinder to those patches
came out ok ish. might need more.
strengthened up the front diff mount
heres a few close ups of my stitch welding. lol would've been so much nicer with a better welder. oh well, I'm told its strong just not super pretty.
and now onto not welding,
Those DTSS bushings are gonna be a pain
gonna take some heat, a press, and probably cursing lol
found the rear wheels bearings had play, soooo out they came
Mating surfaces looked good
but they was diiiiiirrty. So a quick one over with the wire wheel and they came out clean isn. I'm not gonna say I spent a ton of time on a part that no one will see and that's gonna get covered in brake dust and more importantly tire rubber
before
after
ann denn
knocked the races off the hubs and painted them
you know cuz everyone will see them under all the rotor and wheel and brake dust and tire rubber. lolz
these went nice and easy
can't say the same however for these stupid things
I managed to get one of the trailing arm bushings out, but the other one however
ruined my shop press! :mad
So I'm getting a buddy to torch it out, no more of this risky sketchy pressing out business
so after that I got new bearings and seals. put the DTSS eliminators in too, they were pretty tough actually�
busted out the welder (again yes) and got to work.
I didn't want to make anything penetrate the firewall, so that meant no self tappers or anything. So welded some nuts and made a bracket..
which gave me a place to put Line lock.
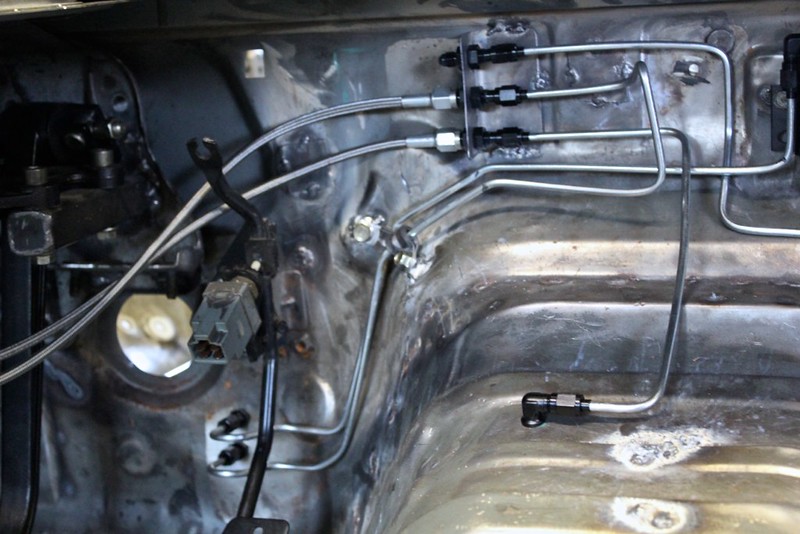
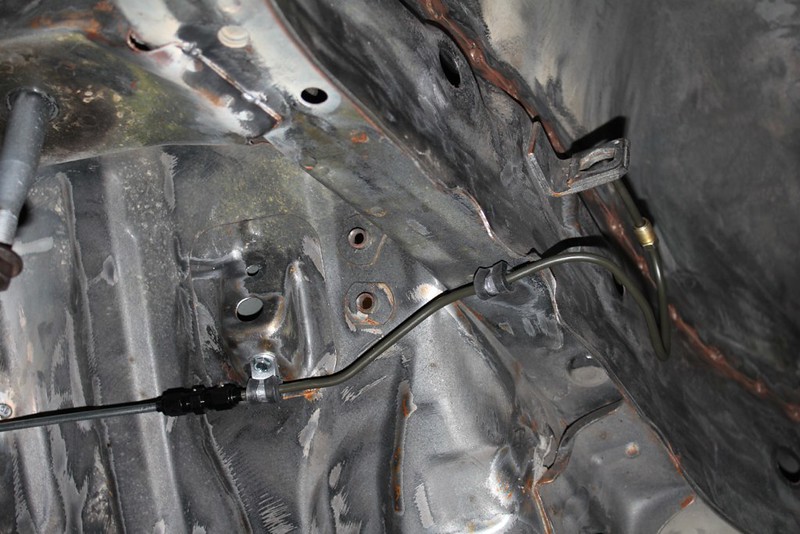
used bulkhead -3 connectors to link the hard lines to the flex lines
Then bent and flared a bunch lines, really like AN fittings. Way easier than double or bubble flare stuff.
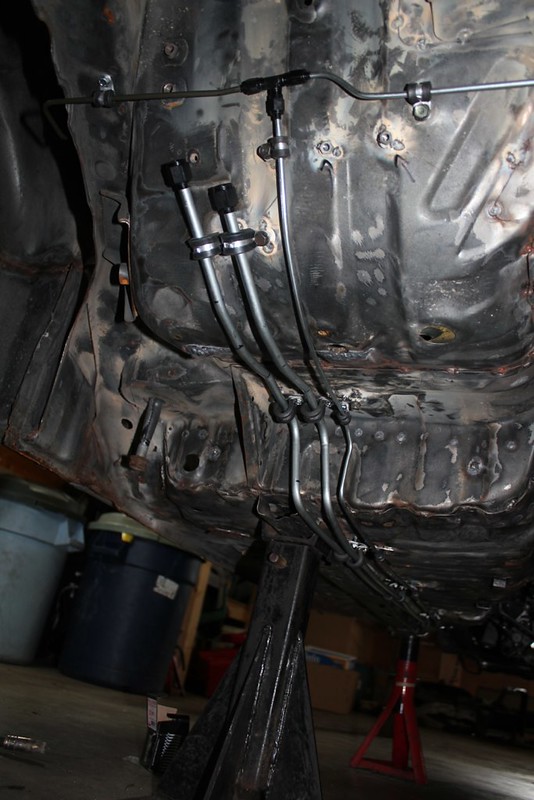
Passenger side
and passenger side in the engine bay
I would've liked to completely tuck them somewhere, but they would basically have to run under the front frame of the car (no, risk of damage) or in the frame rail (no hard to get at if need be) so that leaves us with a tuck against the engine bay. they will probably need heat protection from the exhaust how ever. But you can barely see them when everything else is in.
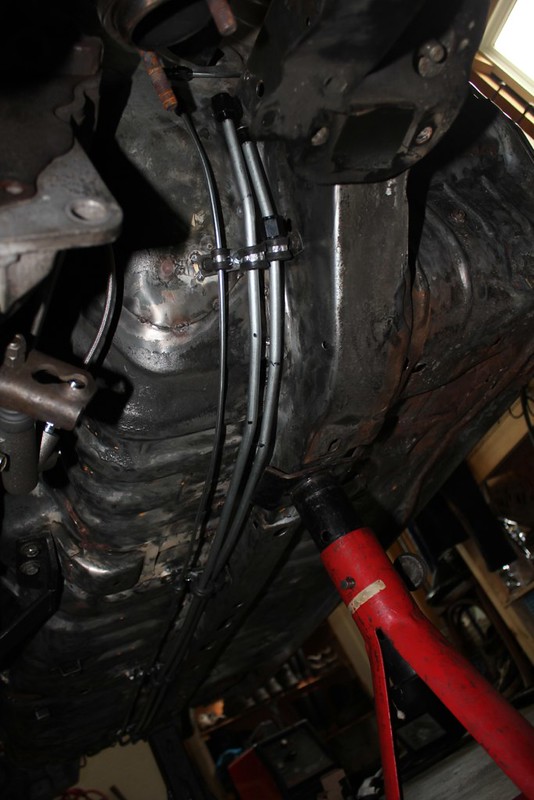
drivers side
the line comes close to the gas pedal, but the pedal doesn't/can't touch it
lol line is hard to get right, good thing its cheap
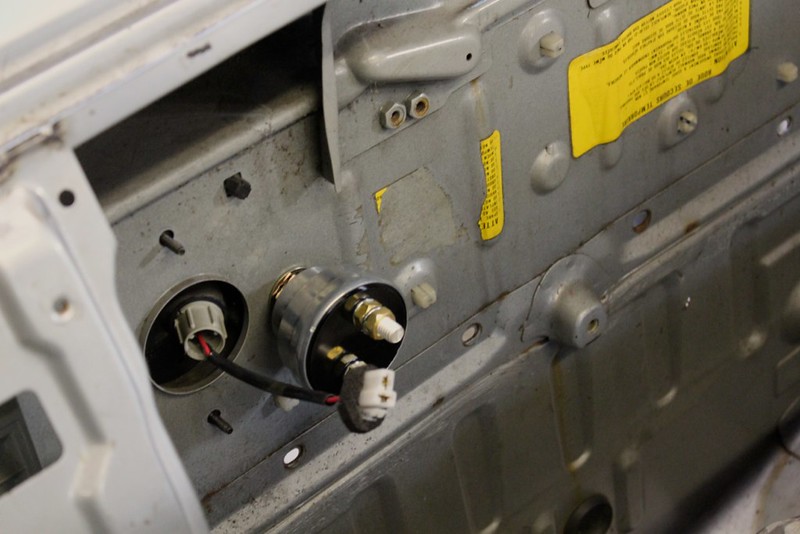
got this in (finally) after being back ordered, stopped due to holidays etc I have the last gauge
and this
I'm gonna need two. In order to race the friday night street legals at the local drag strip the car has to be NHRA compliant. NHRA is annoying and wants a switch on the back, where as every other sanctioning body wants one on the cowl. Cowl makes more sense to me, if the car gets in an accident the rear is more likely to be damaged than the firewall area which is one of the strongest parts of the car. /rant
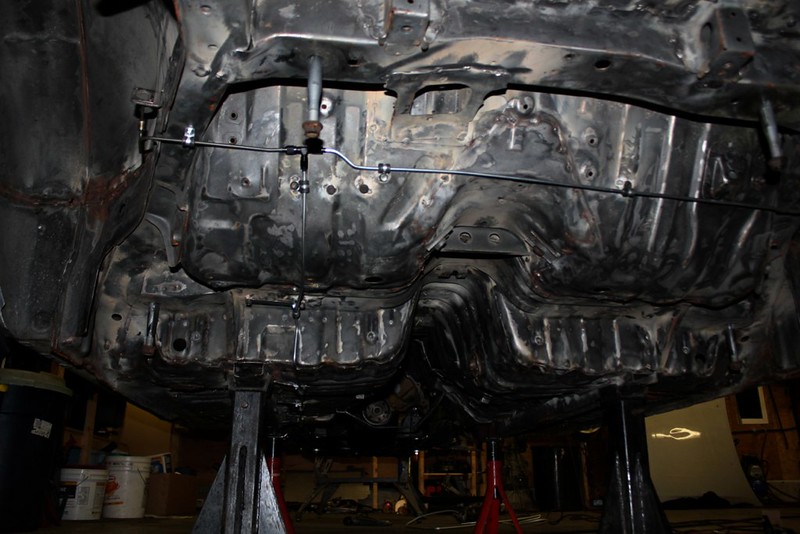
and to bring some light to the sway bar thing, my other engine didn't have a oil pan on it when I had it mocked in there. The pan is what it hits, so it's going to have to be relocated anyway.
Disty is looking reeeeaaallly close. makes me think it ain't gonna fit close. time will tell when I get the hood mounted.
But for now I can weld in the new rad support, fuel lines, on and on. much to still do, but it feels like progress.
01/31/2014
so to add more light to this sway bar business, it hits the pan. or more accurately the drain plug. It will probably clear when the suspension is under full droop. in this pic i can get the bolt out.
this is with it relocated forward btw
then while in an experimenting mood we put the hood on to see how it fit. Thankfully my buddy drives an FC so we went outside to eyeball how the hood sat, then put it on. I forgot to lift the back of the engine to simulate the trans being it, so it just didn't clear on the distributor.
then i clued in and lifted the back and put the hood back on.
fits! but is seriously close, so I took out a grinder...
before
and after
fits perfect with some trimming. going to pull the hood hinges out tomorrow and be 100% sure but i think i have to trim it just a bit wider in the middle to clear the intake manifold.
here is a bad photo from under neath
I also got these suckas out
I learned a tip, they are a 2 part metal sleeve. get one out the other is easy, so grind along the seam and hammer away. Helps that the rubber was burnt out. I honestly don't see another way to do the subframe bushings, but one could press the diff bushings out.
Starting the collection of stuff needed for wiring this beast. What we have here is solid copper SAE 1/0 wire and appropriately sized ring terminals and P clips. Not in the picture is red shrink tube for the ends.
Also
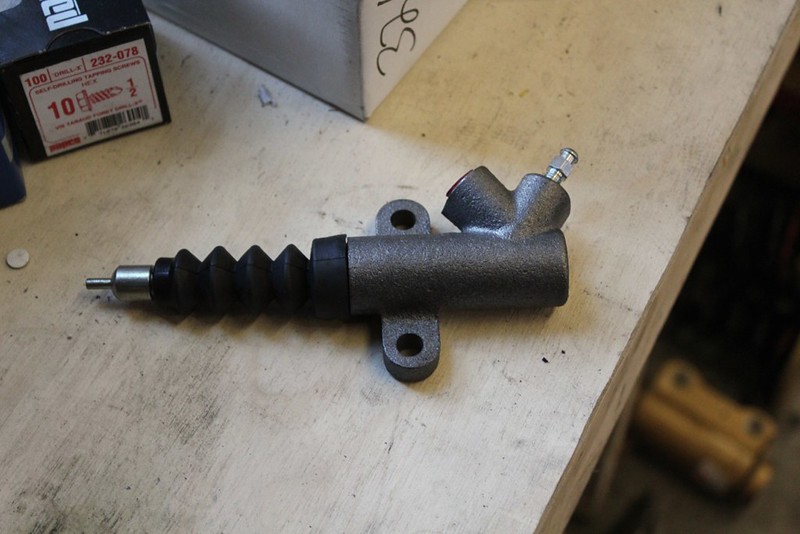
got a Miata slave cylinder. After a ton (probably overkill really) of research to find a slave for the hydro conversion I settled on this. Still don't know what size master I'll use. Have the bracket all planned, got a adapter to use -3 line to connect it to...
(ahg blurries)
the now complete hard lines! ran out of line to do the rear, but probably going grab more tomorrow.
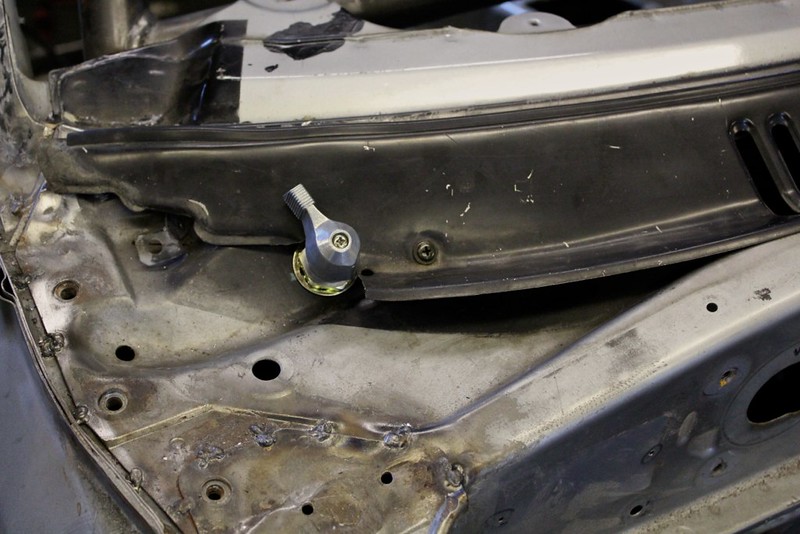
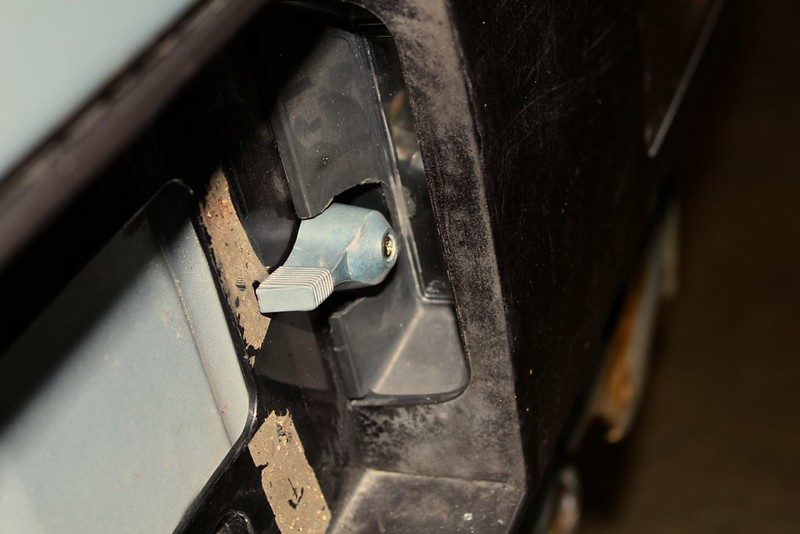
Fit the switch on the cowl area
and the part I'm most excited with, the rear. I like this so much I'm barely annoyed I have to run 2 switches haha
at first glance you may not even notice it
buuuuut its there
like so
now to run wire to it, build a battery box and wire in the rest of the body harness!
Also trimmed the hood a little bit more, I'll take another pic when its 100%. Need the trans in place and the hood hinges installed first though.
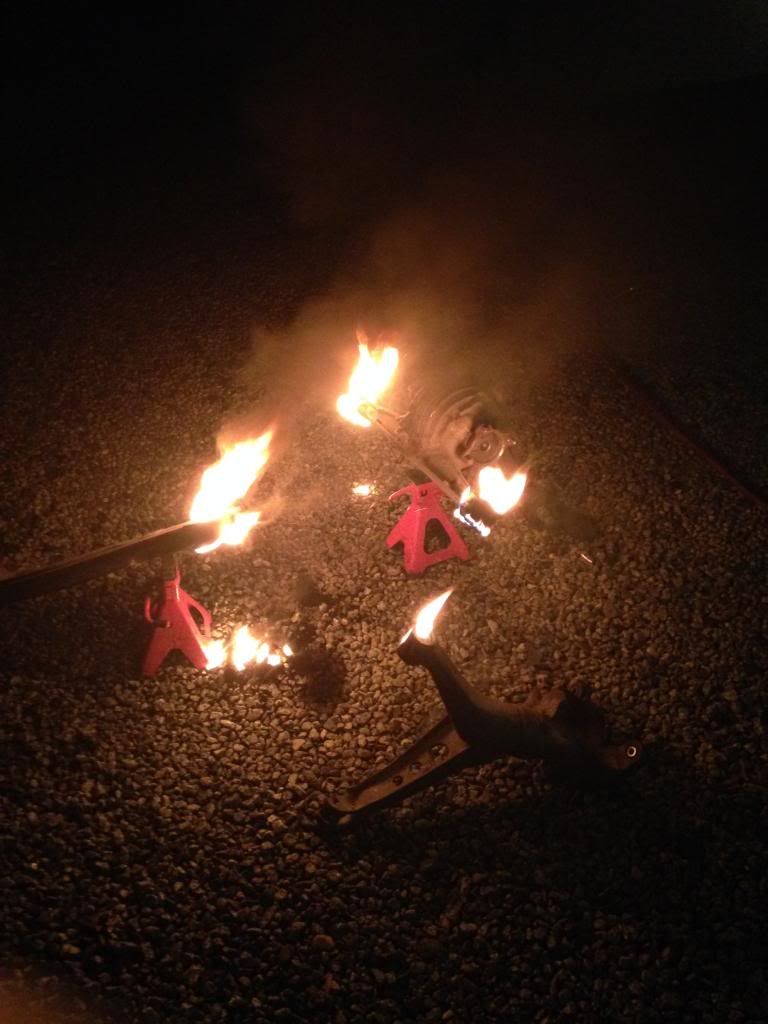
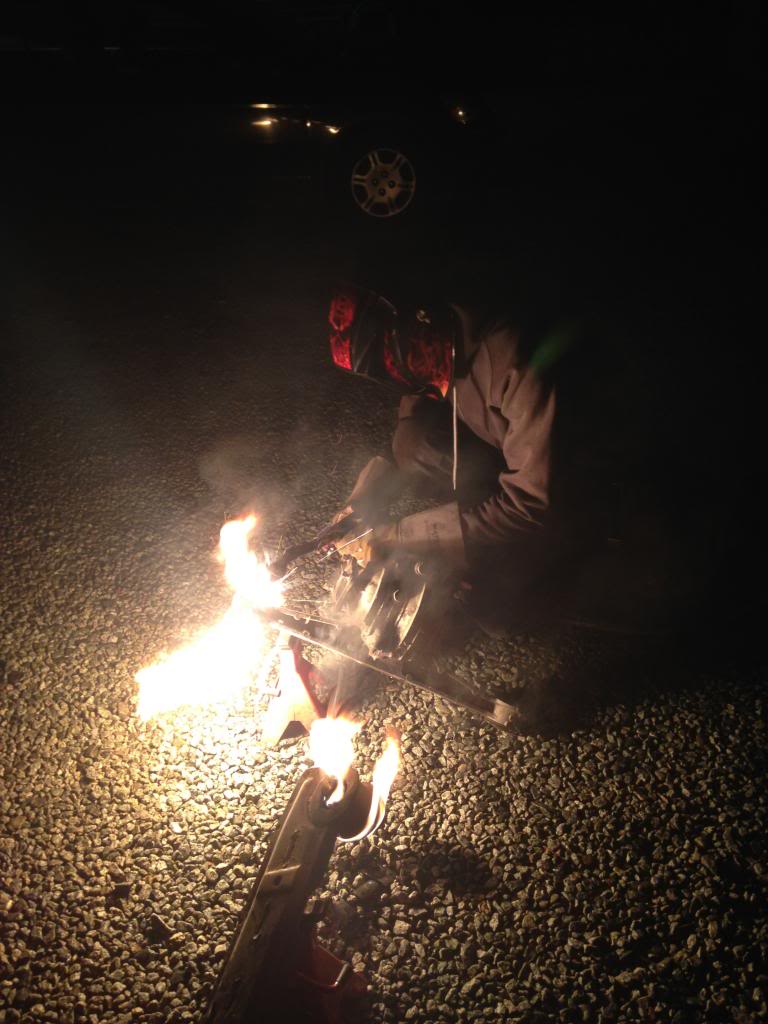
and for the lulz here are some iPhone pics from the night we burnt out the bushings. at like 10:30 pm. love that farm lifestyle
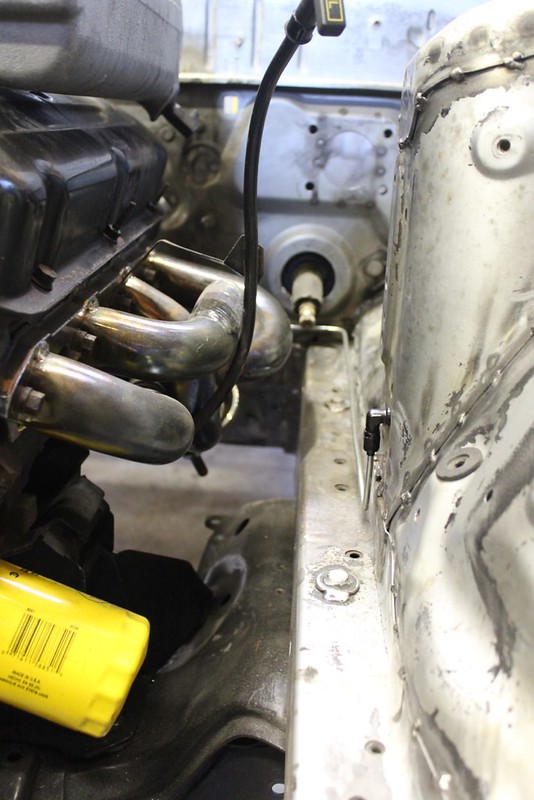
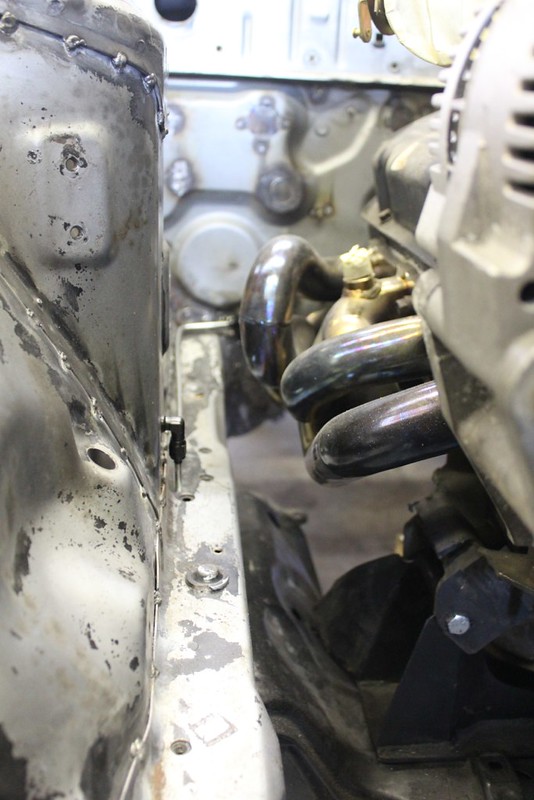
drivers side (with the steering column in place, just for reference. It should clear the headers no problem, but they'll defs get it warm)
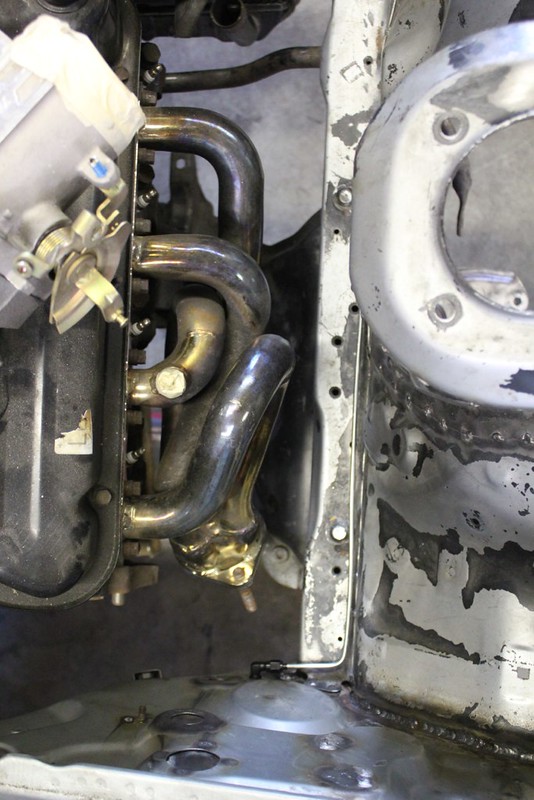
and passenger
so minor update
after a mix up at the post office in sumas blah blah blah I got my hands on these:
my Abercrombie steering rack kit! everything looks good quality, and the heims look similar to the ones a local place sells if I ever need to replace them.
just for a comparison does anyone have a Parts Shop Max spacer kit? would like to see if its longer or just looks different in pictures.
mounted my radiator/fan combo
made some brackets and welded them on with my lack of skills... but a grinder helped cover that up
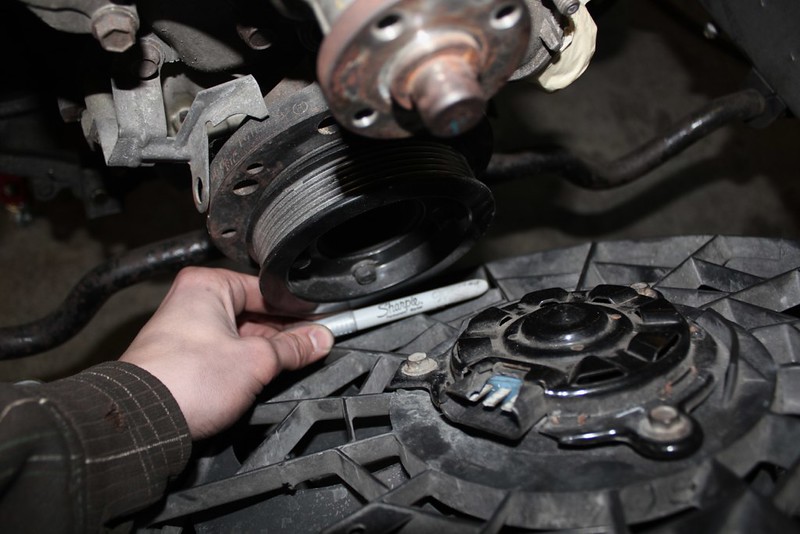
this is my clearance between crankshaft pulley and the fan (ya the connector broke )
I would make it farther but the fan sits pretty high, I can always trim it down if need be the fan is kinda fatter than it needs to be, and a Spal slim fan can buy me at least another inch.
The sharpie fits through with room to spare btw, picture aint so good.
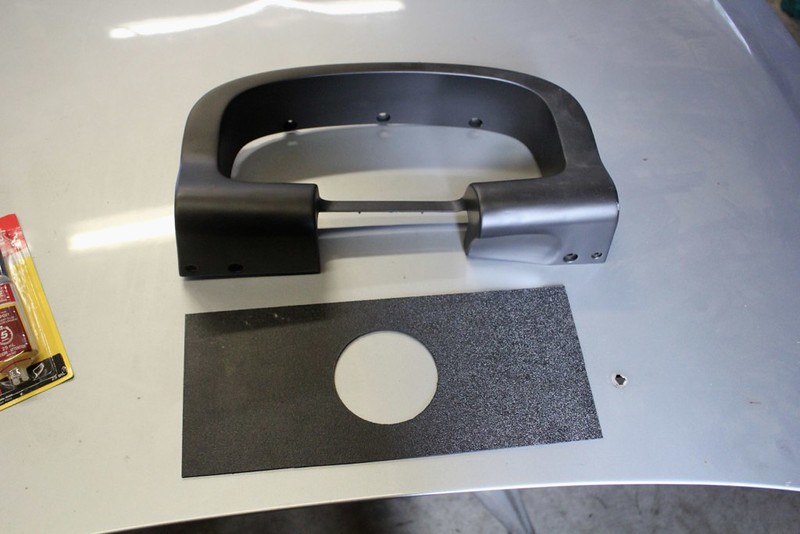
went back to old work, scored a scrap piece of ABS and borrowed my boss' 4" hole saw
fairly certain this is per instruction (someone correct me if I have to cut anything) but i'll find out when I go to align it.
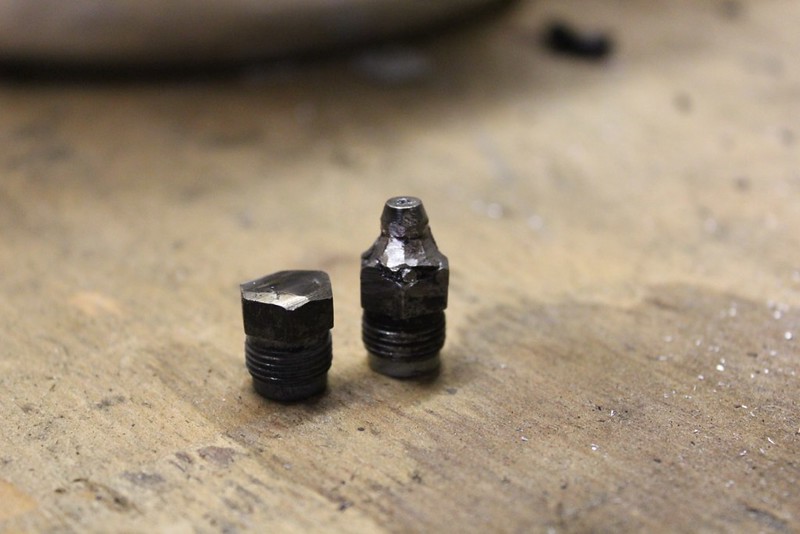
then I welded 2 caps and 2 grease nipples out of the old line ends. Had to grind a bit to make my grease gun fit on the nipple, which surprisingly survived the heat of welding.
finished the fuel lines and rear brake lines
glad thats over, 3/8s line is a bear to work with...
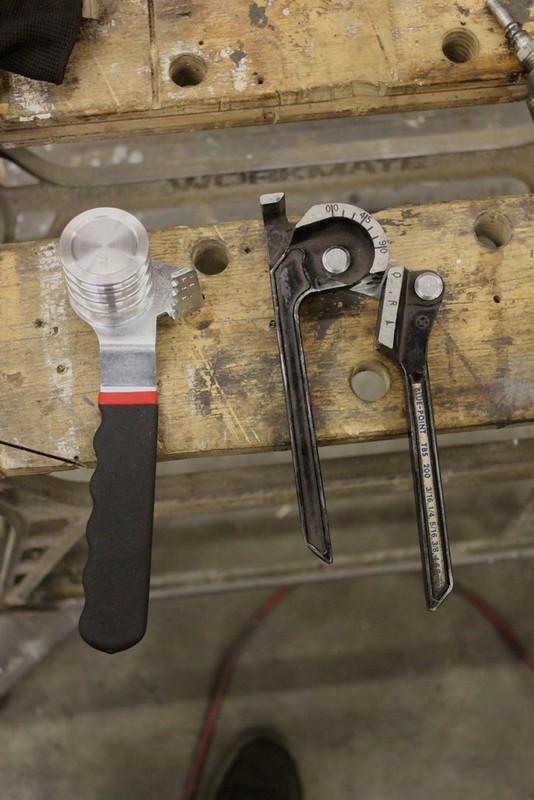
this is where good tools come in. I wasted an entire roll of 3/8"s line trying to figure out how to safely bend it with out kinks. Couldn't. Bought a cheap bender, still kinked. does smaller 1/4" and 3/16" fine though. Ended up borrowing a bender from a friend that goes up to 3/8", still not easy to work with, but did work.
will be getting some braided steel line to go from the tank to the lines, and then the lines to the engine via Ford EFI connectors.
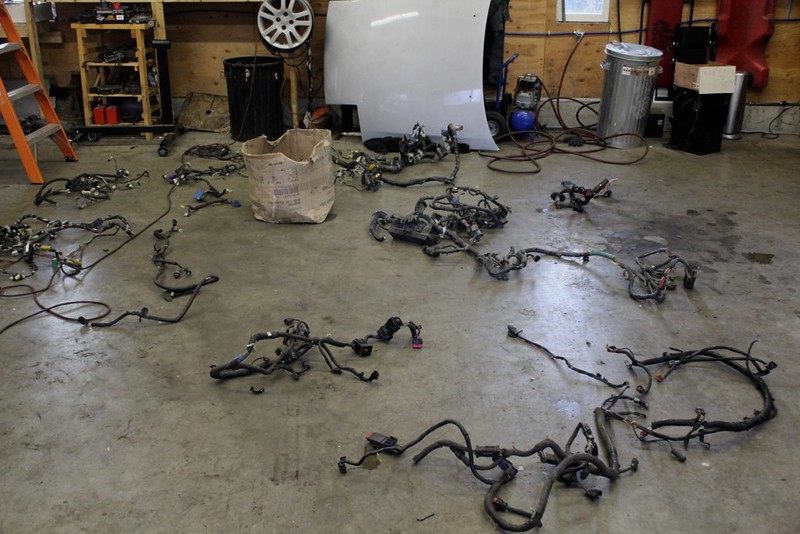
then went and busted out a bunch of wiring
to find these:
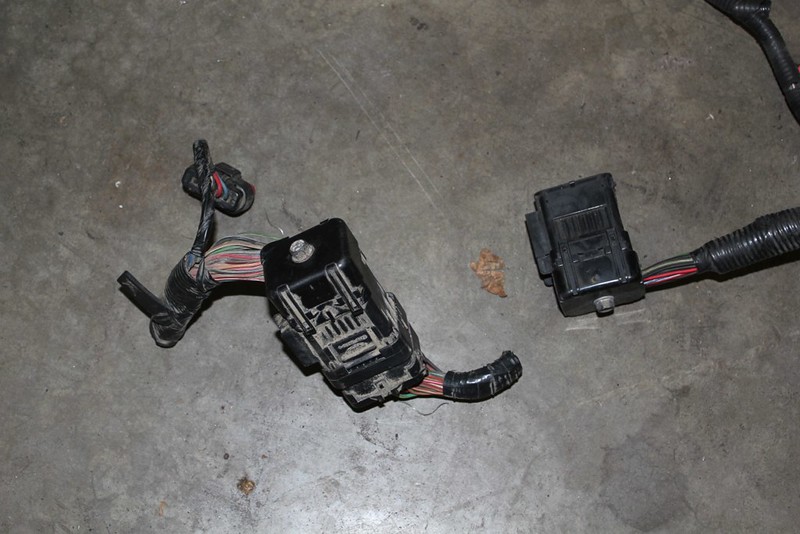
I have about 3 and 1/2 cars worth of wiring in that pile, I definitely have my work cut out for me. In the harness that came from the 98 Explorer is the same type of connector thats on the mustang. I'm going to have to do a pin count and see if I need both of these, but this is what I'm using for a bulkhead connector. Its not baller mil spec stuff, but its free and was good enough for Ford to use for over 6 years of production.
cut a hole that i'll be plating with the piece I have yet to figure out to connect to the Ford connectors.
mocked up an intake tract, probably going to work as is with a little trimming of the other pipe (not pictured)
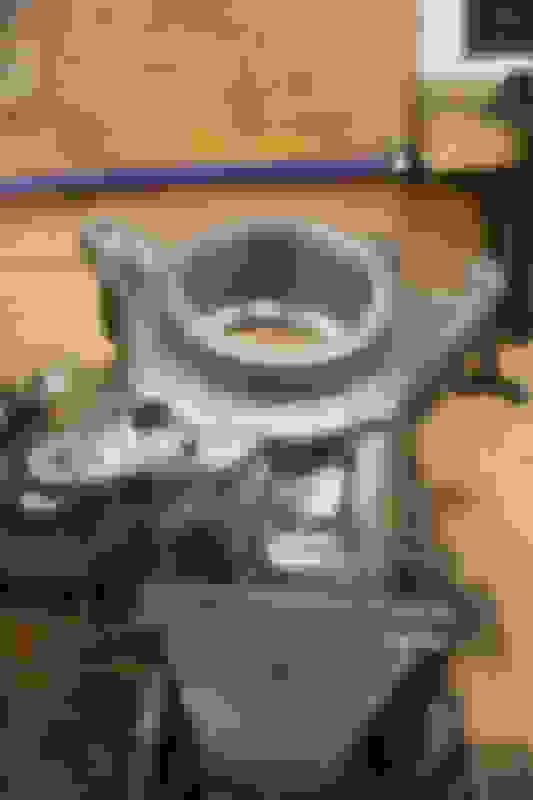
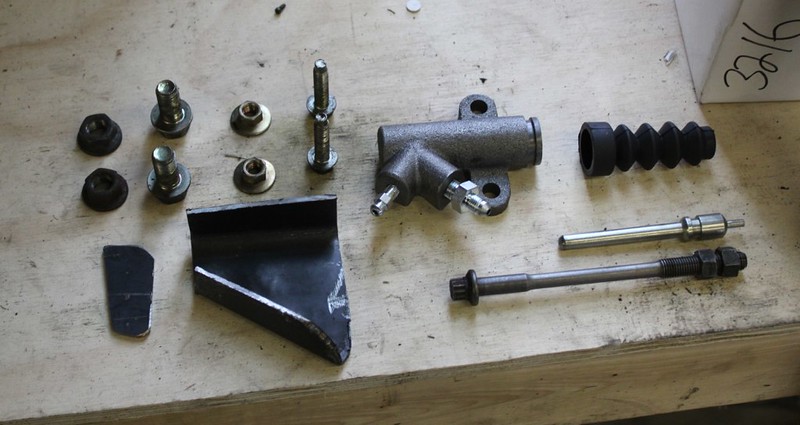
now going to get specific for a bit, and explain my T5 hydro conversion mount in detail.
started here
we have a NA Miata slave cylinder, which came with a pin and dust boot, also a carefully selected bunch of bolts from previous cars (great idea to keep these when doing projects)
2 are for mounting the slave to the bracket (also in there, but not yet welded) and 2 are for mounting the slave to the bell house.