I Bit Off More Than I Can Chew: A Drift Car


Thread Starter
Senior Member
Joined: Mar 2015
Posts: 335
Likes: 8
From: Vancouver, BC
Kinda small update, been busy doing the garage instead of the car so I can have more time to work on the car (ironic no?) but now like 6 weeks later finally getting somewhere.
Was getting pretty frustrated with my old situation. Seemed like every time I went I spent more time setting up and cleaning up than making progress, more and more water on the car as the roof started leaking a little and the tarp just didn�t get every drop. Then distractions (love the fam and all but need time for both that is not at the same time), also my stupid truck breaking on the reg (a different story for later), etc etc. First world problems fully and don�t mistake my frustrations for ungratefulness to my parents for the use of their property. But it was time to grow up and get my own space on my own dime.
Didn�t take before and after pics, cuz it was that bad. Like 4-5 dump runs and a few scrap metals runs, couple hundred dropped at home depot, and many hours of hard physical labour we had something to work with. Also learned I kinda suck at things when I don�t plan it out beforehand. We�ll just not talk about the first tire rack though lol.
Very much grateful to my new garage mate Kris and his mom for their hospitality and this opportunity. Space feels very much like my own and feels very permanent. You�ll be seeing more of his skyline in future updates when its more� straight.
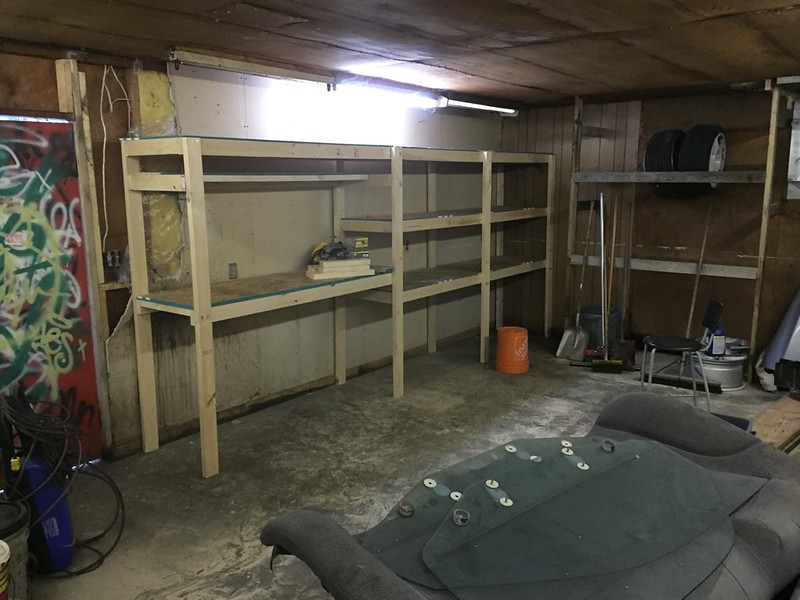
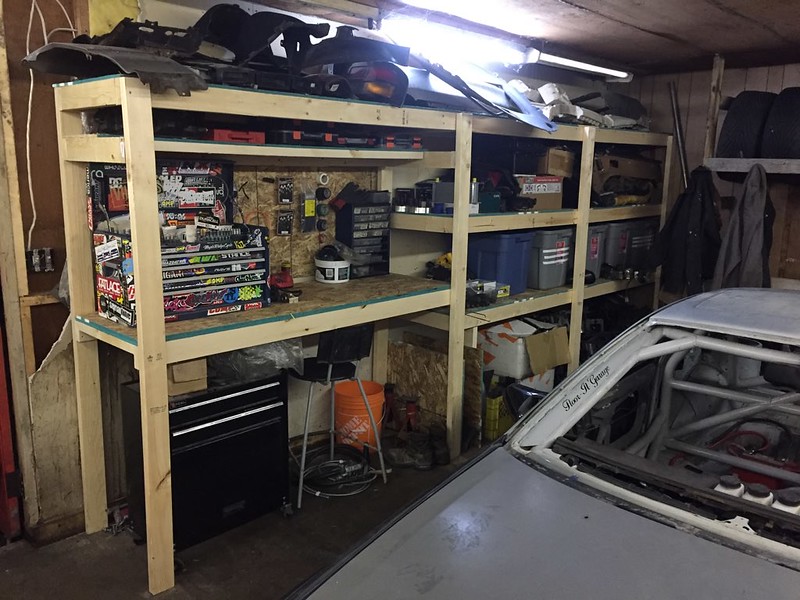
Built a shelf and tire rack.
Put some stuff on it.
Since then I re did the tire rack as we came up with a better design mostly measurements wise. That one was a little big and with wood we had kicking around.
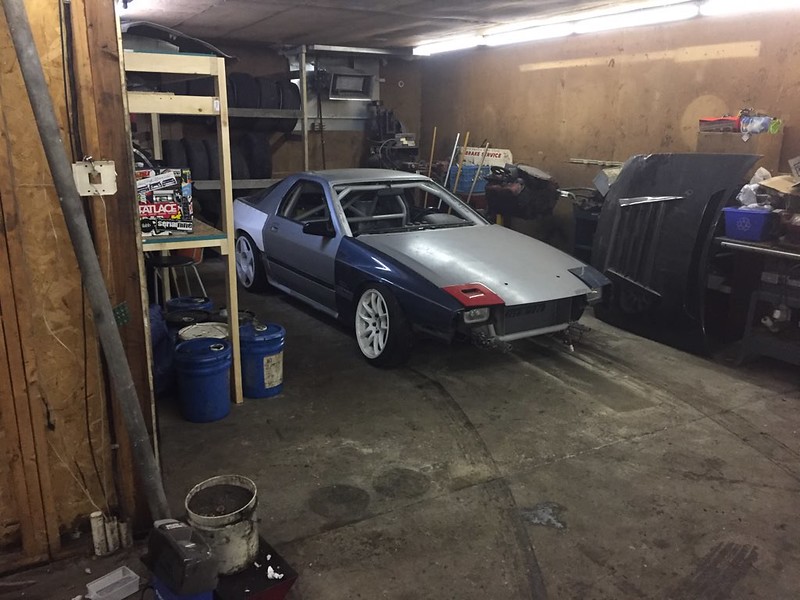
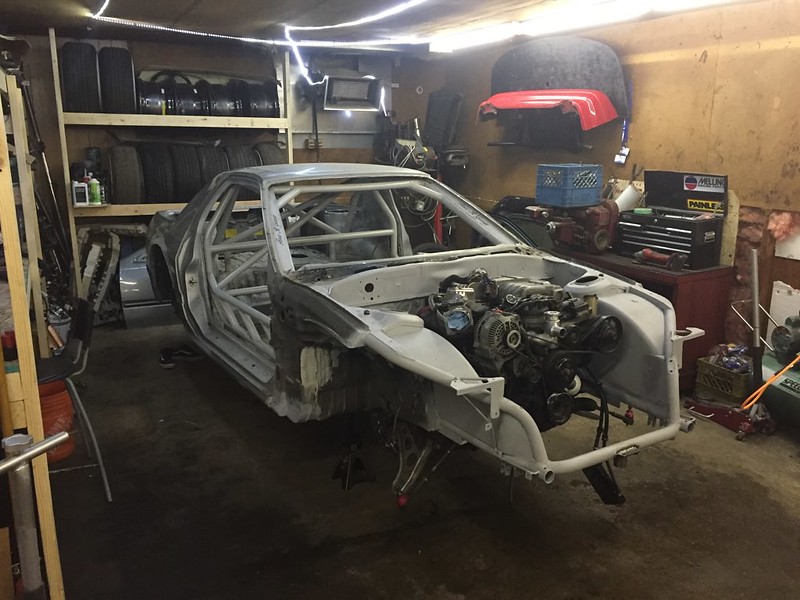
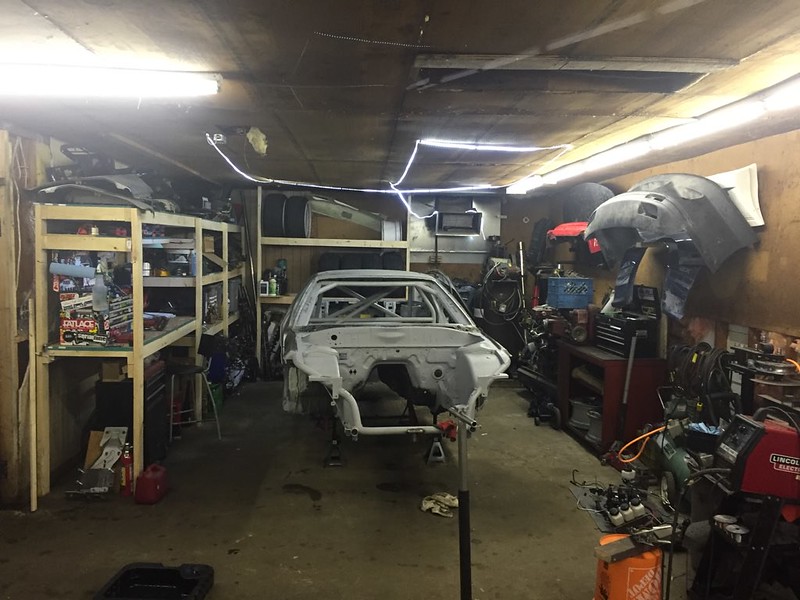
And then on what turned out to be a magical monday after work (and a late one), brought the car to its new home.
This is one of those times where I�m grateful for the people in my life, namely Kris. We swapped the t case in my truck, then loaded the car and the last of the parts and dragged the thing 35 minutes away. Finished all but 10 minutes before it started to rain, then took the trailer all the way back to my dads, got home somewhere near midnight. On a monday. We both start before 7:00 am.
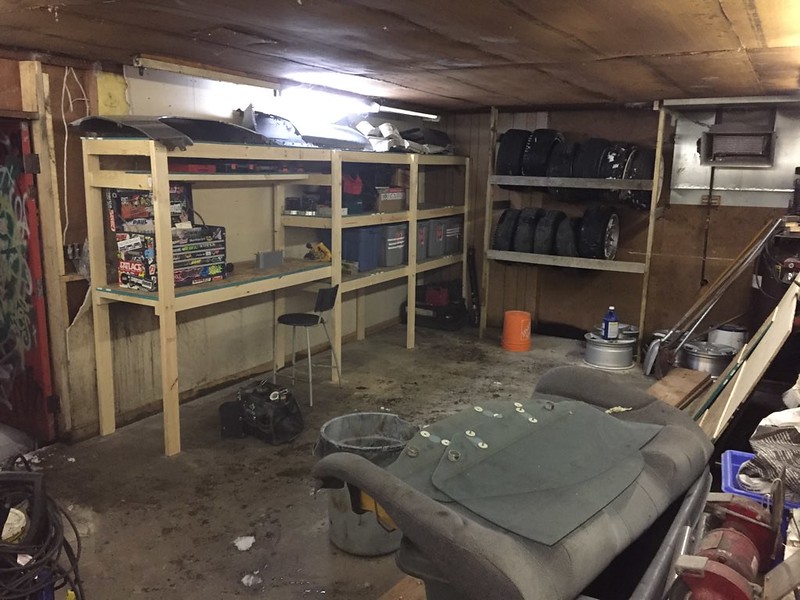
Theres still some stuff that we�re planning on having leave such as the big block and brake lathe etc. But I have decent space to open the doors and work around the entire car. It�s around the size of a 1 car garage, which is all I could ask for. Especially since I can leave it in pieces if I want
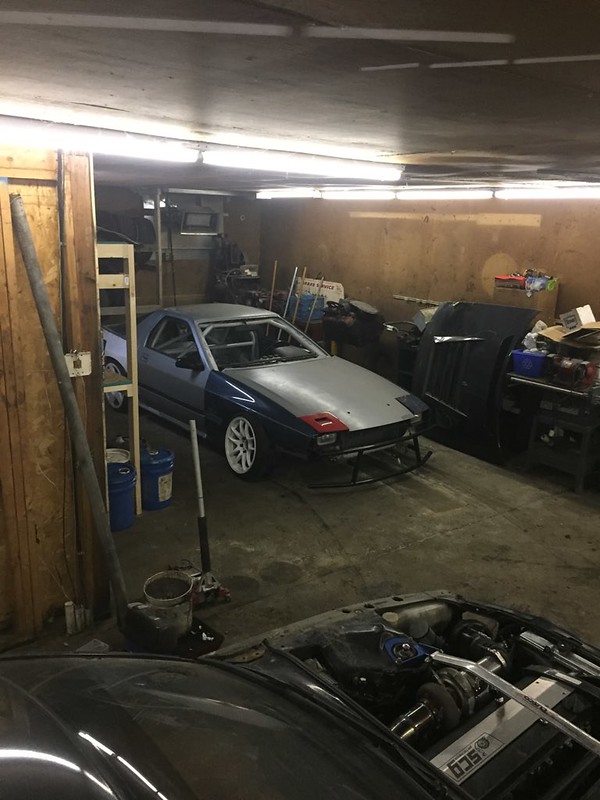
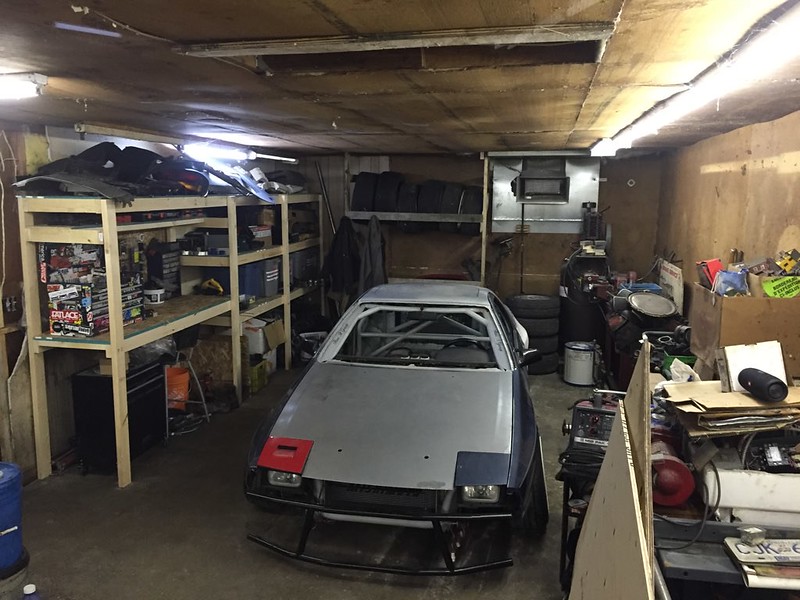
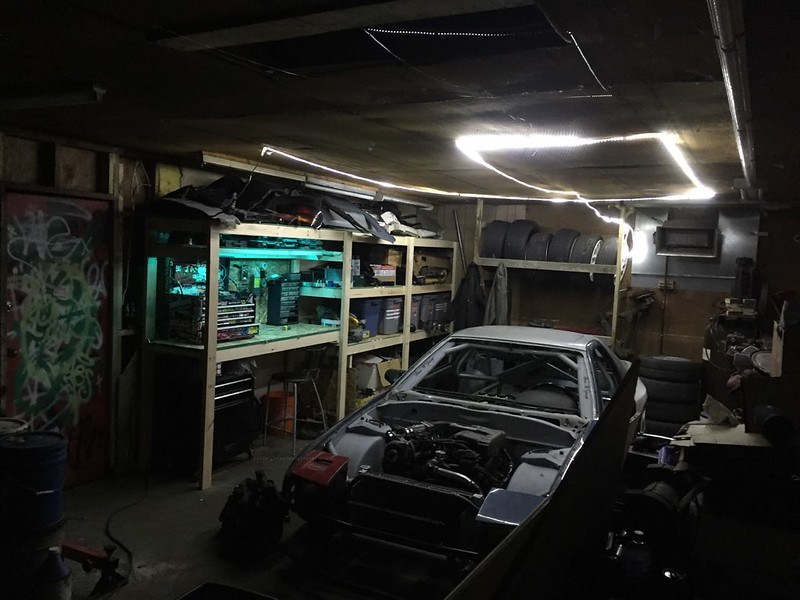
Spent the next while getting more and more setup, bringing stuff over, organizing. Bought some LED strips to try using as the primary light source as the current fluorescent tubes were pretty weak. Weeeeellllll its kinda worse. More evenly lit on my side but not gonna cut it. The bench light was a neat touch even though its terrible as working light. But i had it laying around so why not.
Before I took it there though I did do some final playing around.

Was getting pretty frustrated with my old situation. Seemed like every time I went I spent more time setting up and cleaning up than making progress, more and more water on the car as the roof started leaking a little and the tarp just didn�t get every drop. Then distractions (love the fam and all but need time for both that is not at the same time), also my stupid truck breaking on the reg (a different story for later), etc etc. First world problems fully and don�t mistake my frustrations for ungratefulness to my parents for the use of their property. But it was time to grow up and get my own space on my own dime.
Didn�t take before and after pics, cuz it was that bad. Like 4-5 dump runs and a few scrap metals runs, couple hundred dropped at home depot, and many hours of hard physical labour we had something to work with. Also learned I kinda suck at things when I don�t plan it out beforehand. We�ll just not talk about the first tire rack though lol.
Very much grateful to my new garage mate Kris and his mom for their hospitality and this opportunity. Space feels very much like my own and feels very permanent. You�ll be seeing more of his skyline in future updates when its more� straight.
Built a shelf and tire rack.
Put some stuff on it.
Since then I re did the tire rack as we came up with a better design mostly measurements wise. That one was a little big and with wood we had kicking around.
And then on what turned out to be a magical monday after work (and a late one), brought the car to its new home.
This is one of those times where I�m grateful for the people in my life, namely Kris. We swapped the t case in my truck, then loaded the car and the last of the parts and dragged the thing 35 minutes away. Finished all but 10 minutes before it started to rain, then took the trailer all the way back to my dads, got home somewhere near midnight. On a monday. We both start before 7:00 am.
Theres still some stuff that we�re planning on having leave such as the big block and brake lathe etc. But I have decent space to open the doors and work around the entire car. It�s around the size of a 1 car garage, which is all I could ask for. Especially since I can leave it in pieces if I want
Spent the next while getting more and more setup, bringing stuff over, organizing. Bought some LED strips to try using as the primary light source as the current fluorescent tubes were pretty weak. Weeeeellllll its kinda worse. More evenly lit on my side but not gonna cut it. The bench light was a neat touch even though its terrible as working light. But i had it laying around so why not.
Before I took it there though I did do some final playing around.
Last edited by teeson; Mar 25, 2018 at 02:15 AM.
Thread Starter
Senior Member
Joined: Mar 2015
Posts: 335
Likes: 8
From: Vancouver, BC
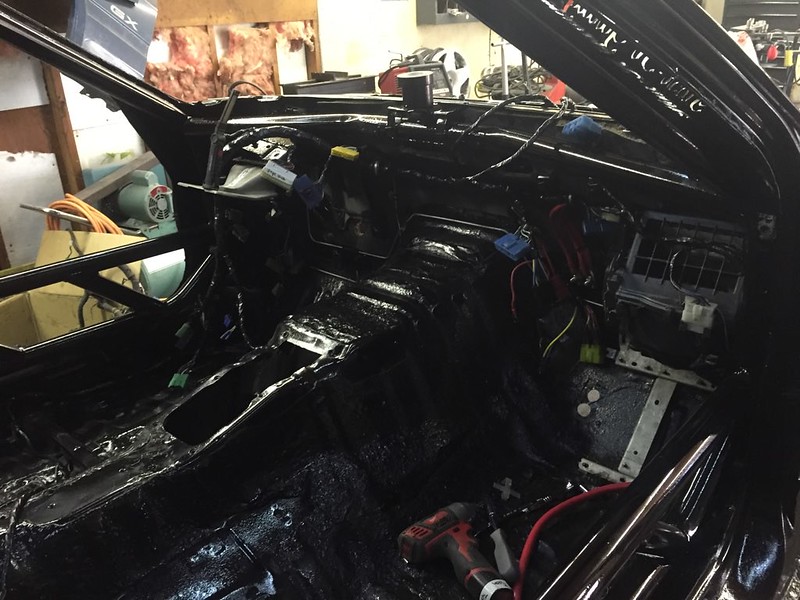
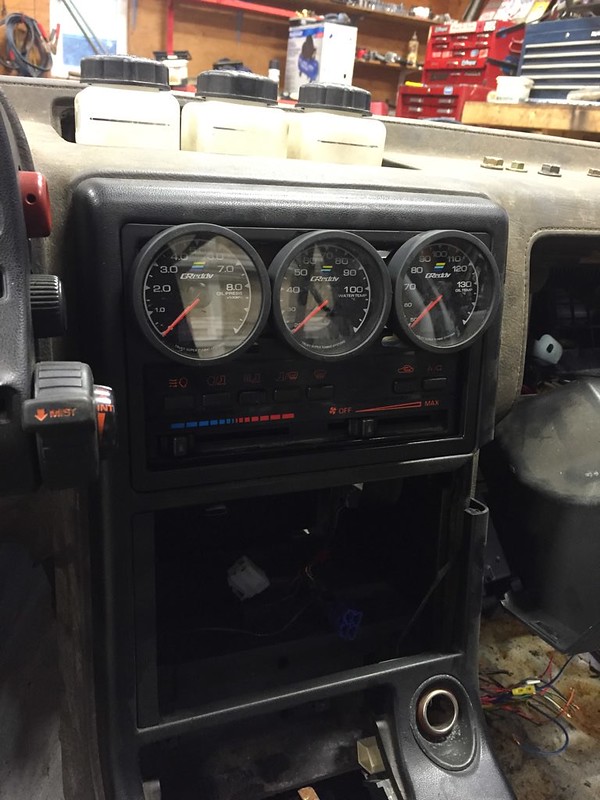
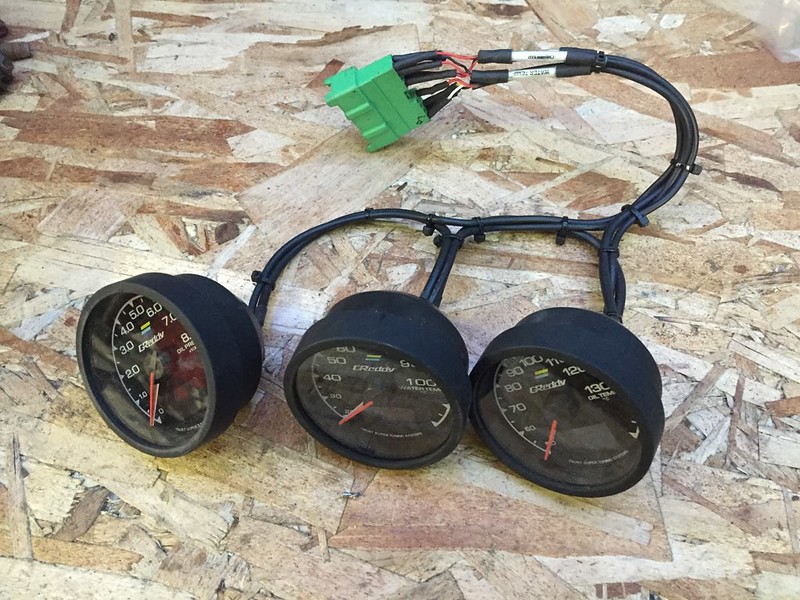
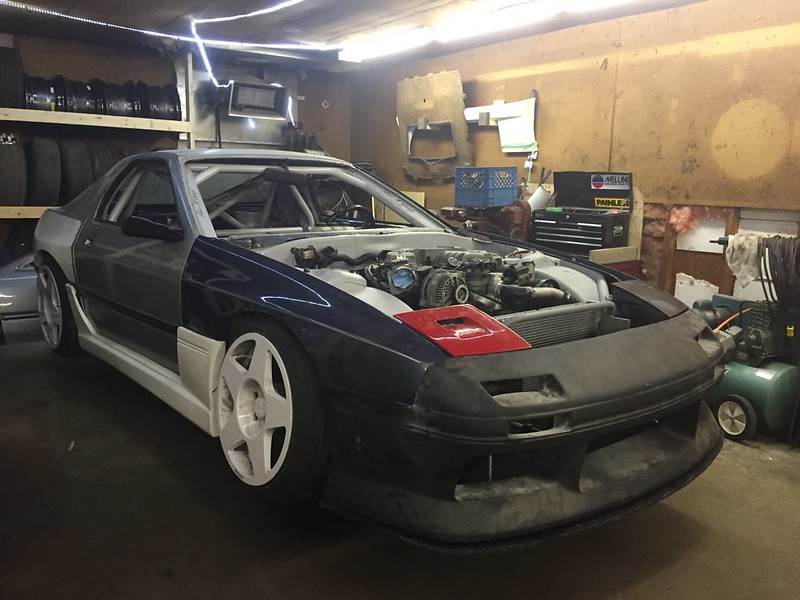
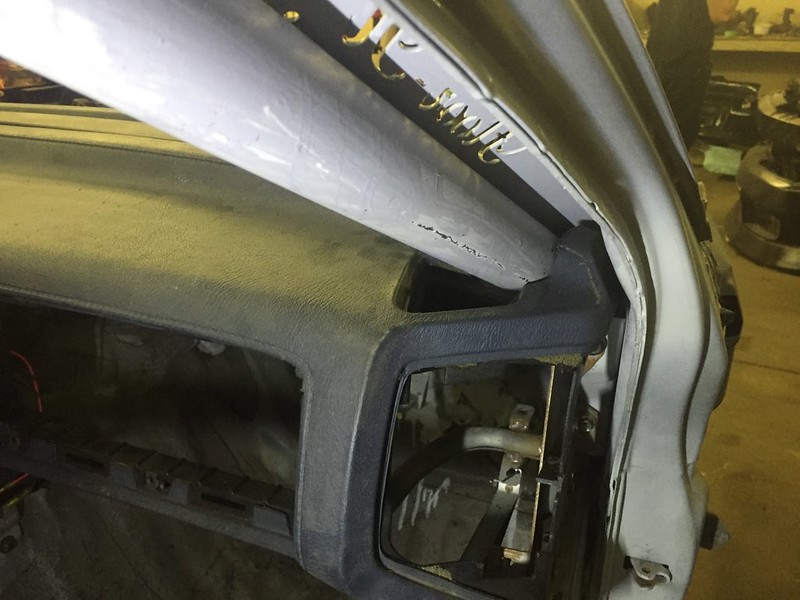
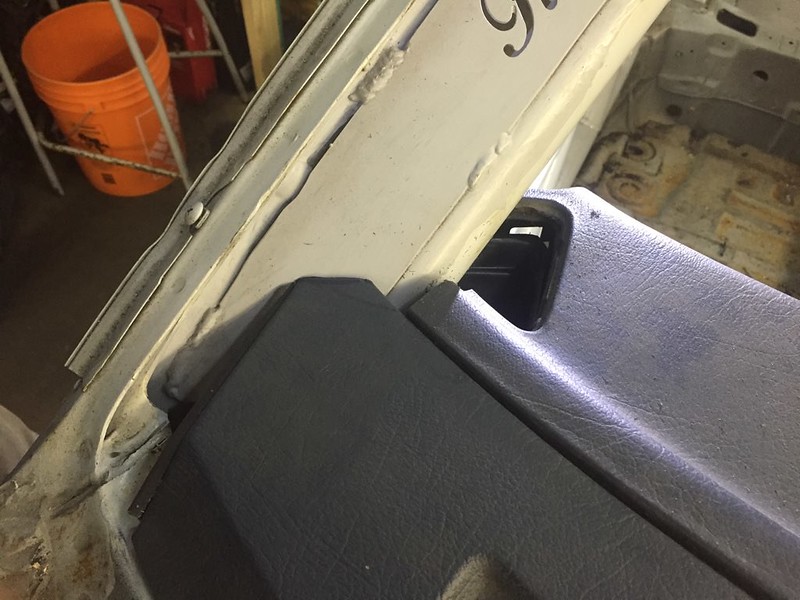
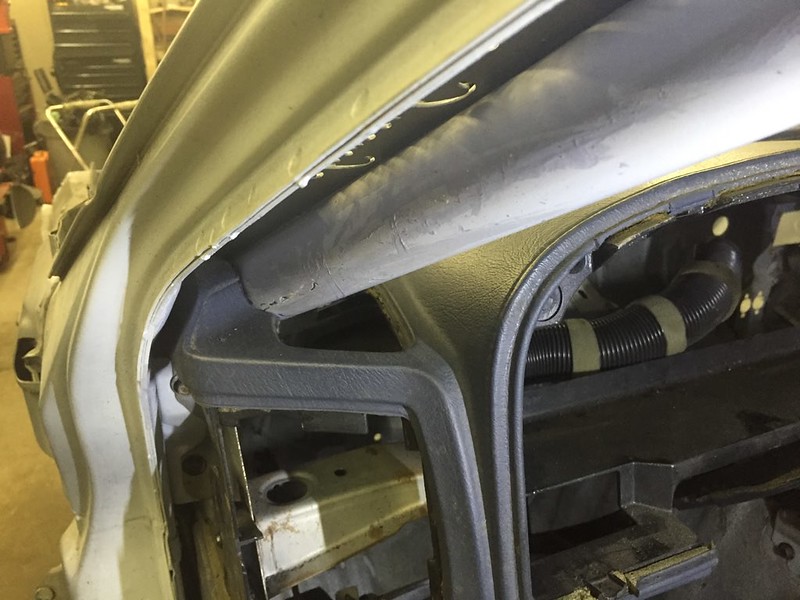
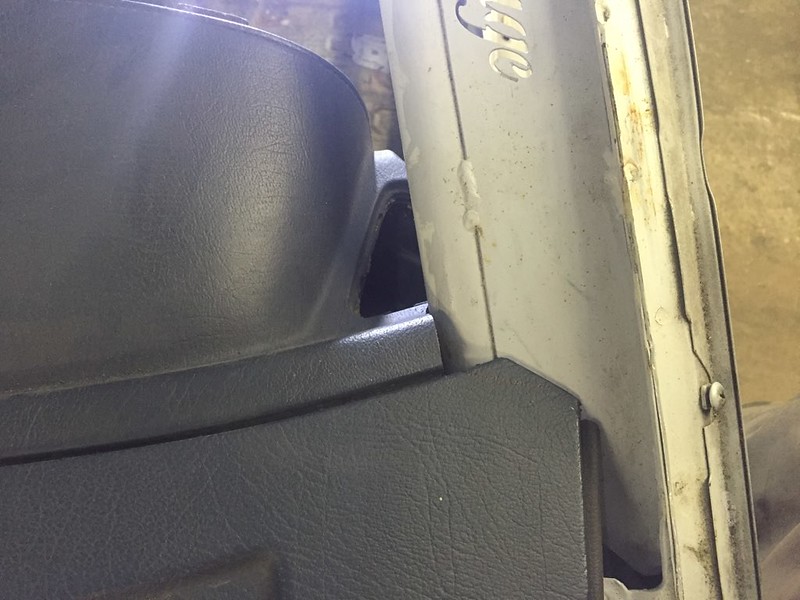
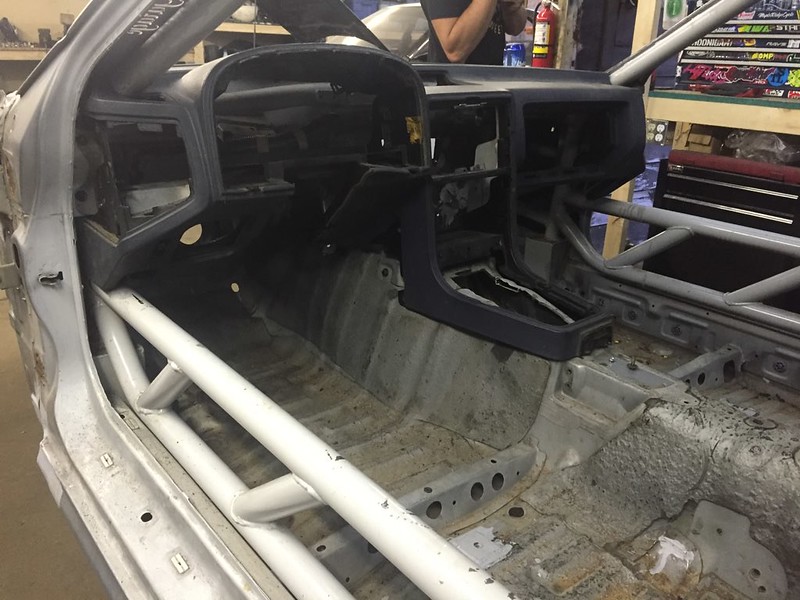
Put everything in place and plugged in just to see if my wiring was going as planned. One or two small surprises but nothing that worries me. Also trimmed the vents out to fit the gauges like I had planned so long ago.
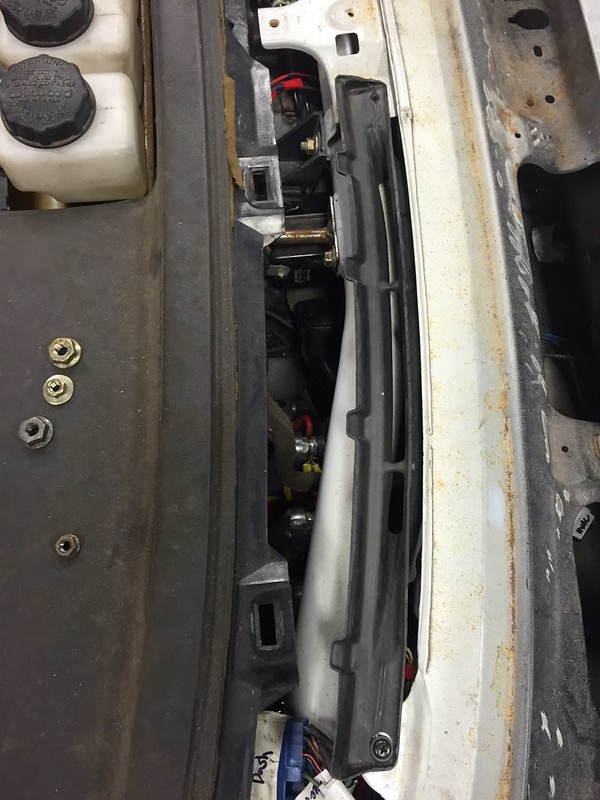
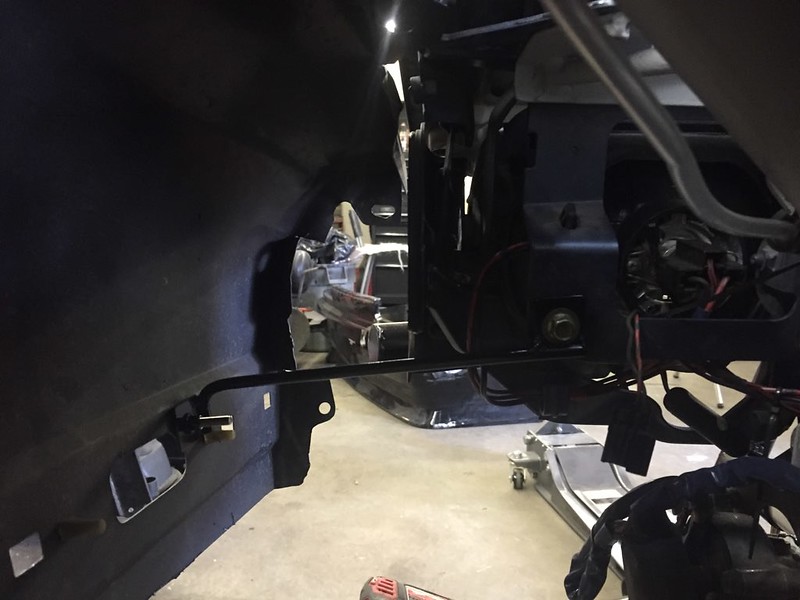
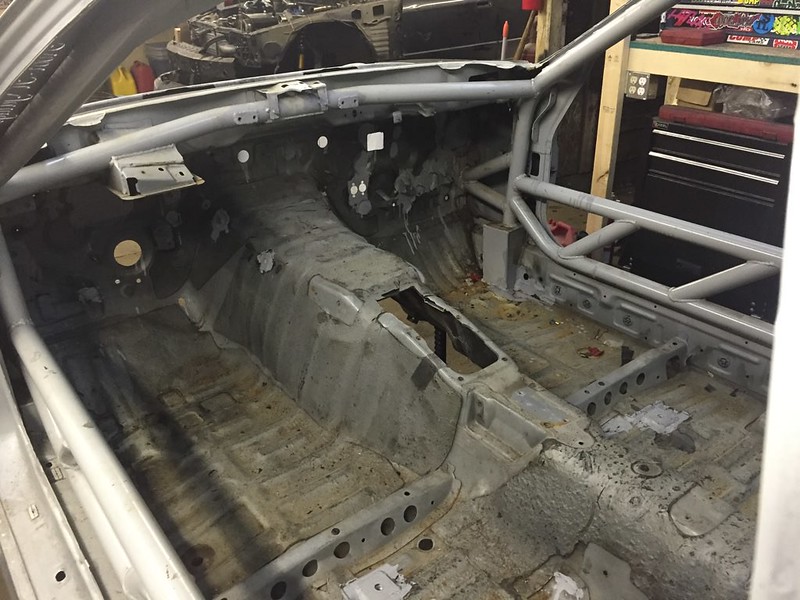
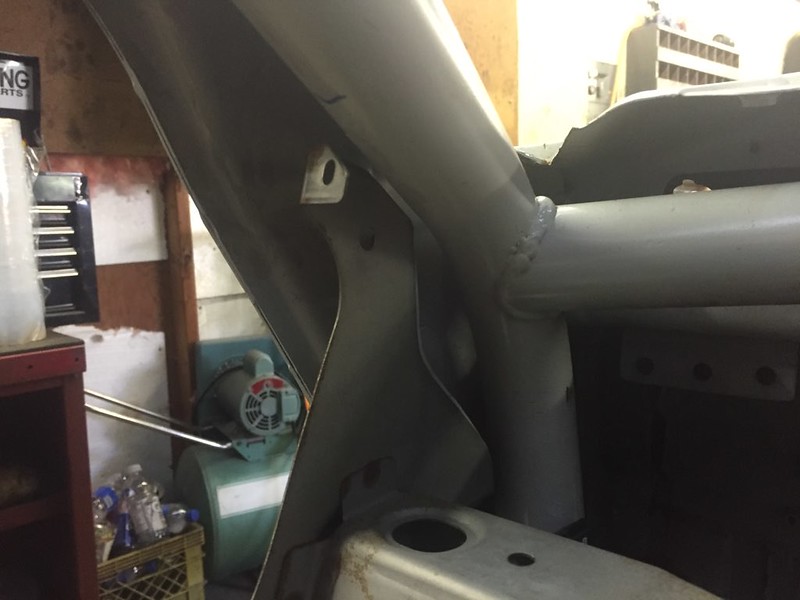
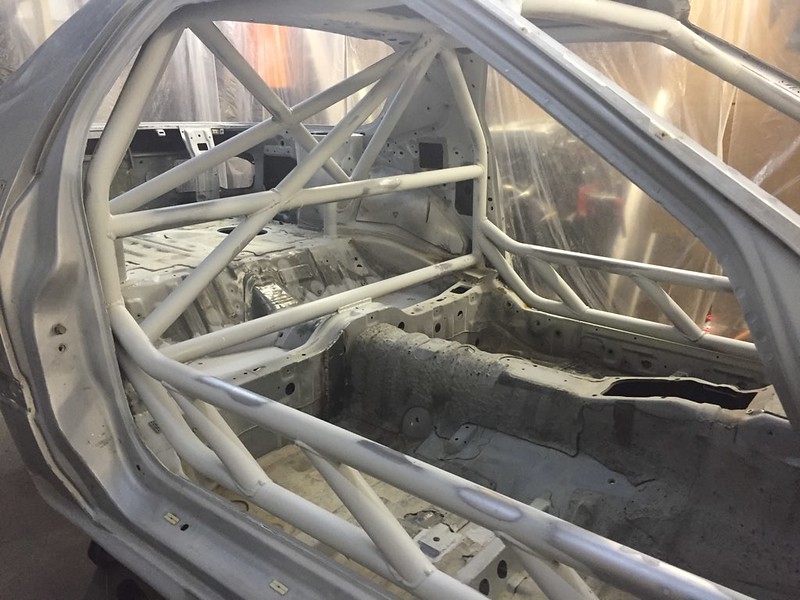
One challenge I was expecting but am not prepared for is how to deal with this. has to go here
This is kinda the main point of having the full interior, for the window defog. But I put a roll bar in the way. Really want it to line up with the factory vent assembly so it looks clean and un altered.
Any ideas that doesn’t involve fibreglassing a new shape and is still removable hit me up.
Moving forward and downward tho
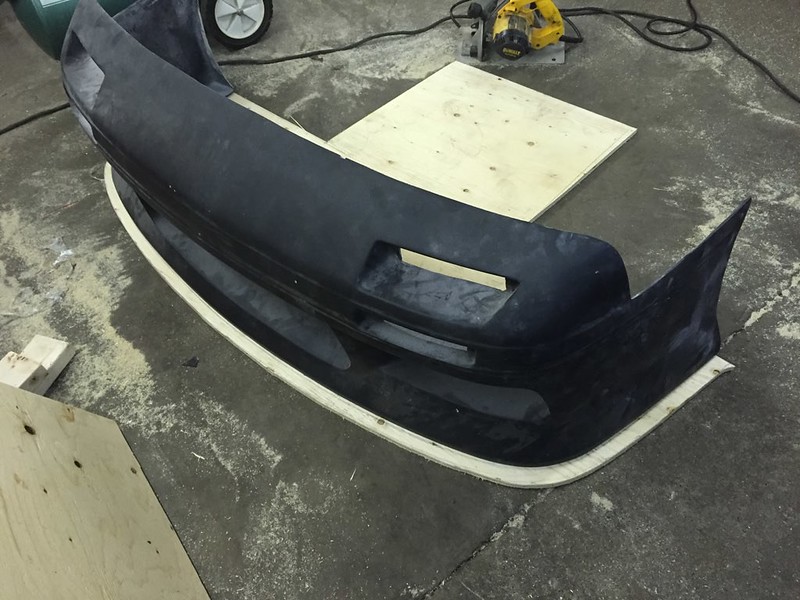

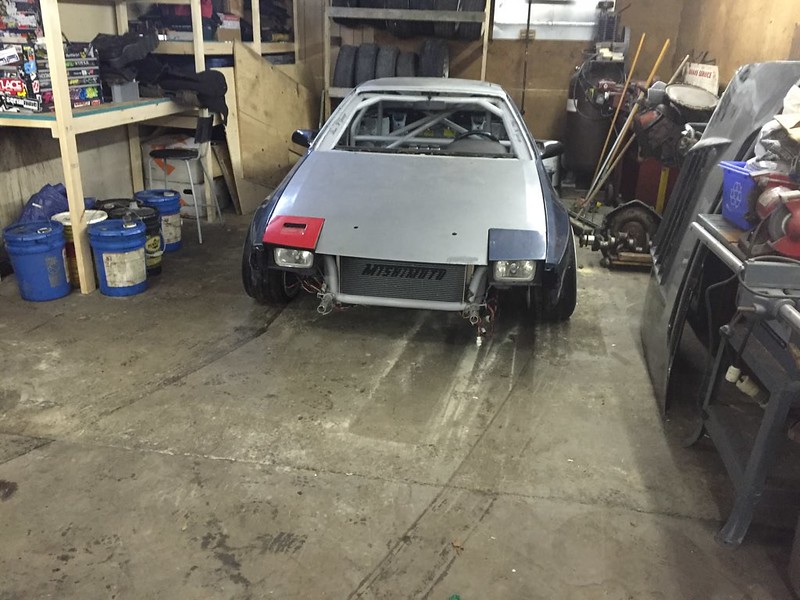
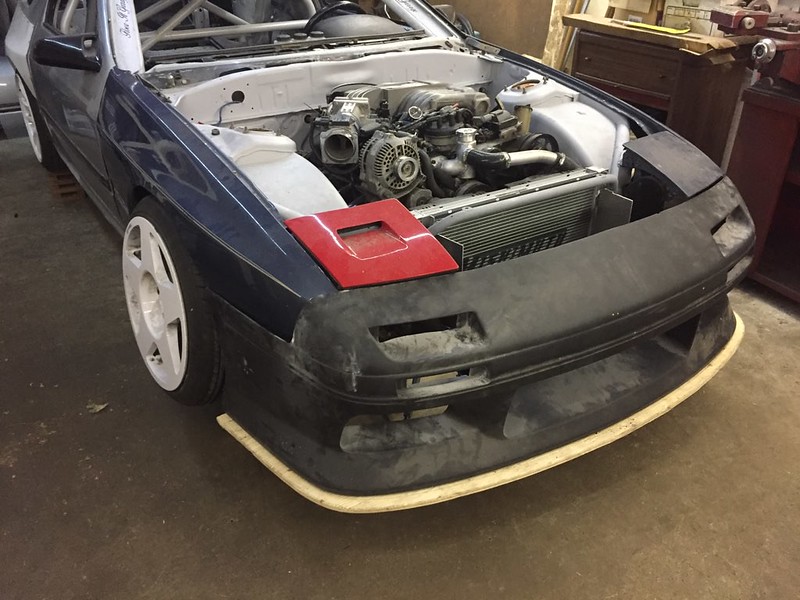
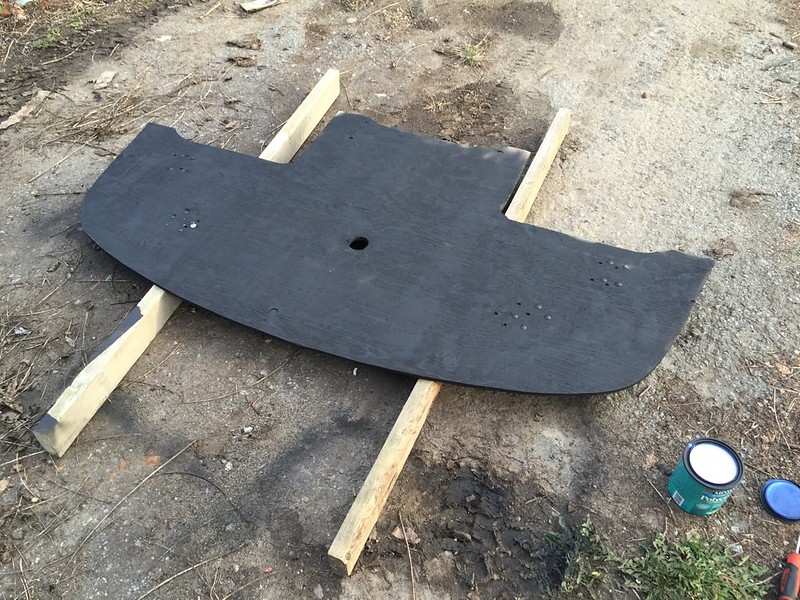
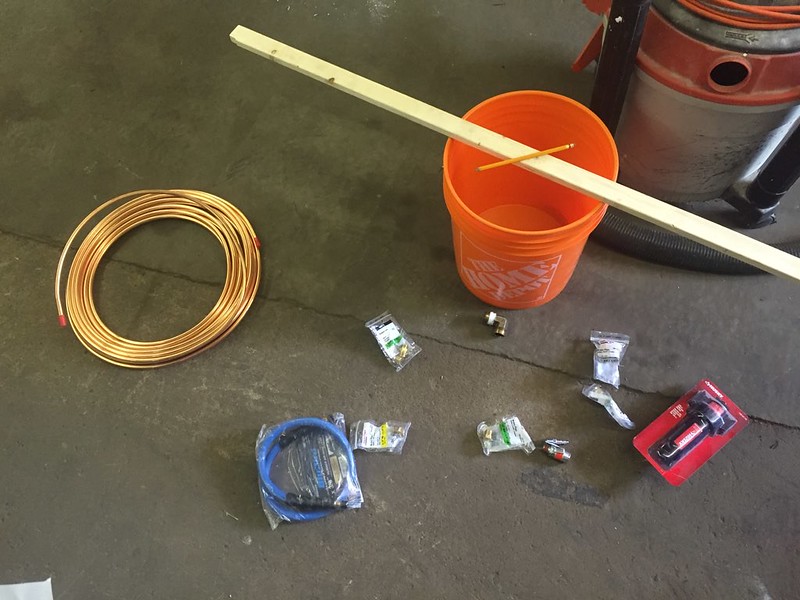
amongst all those Home Depot trips I bought a sheet of 1/2 ply for a wood splitter.
Traced the bumper out then added an inch all around the outside. Thought about tapering it in where it meets the tire but nawww, like this better.
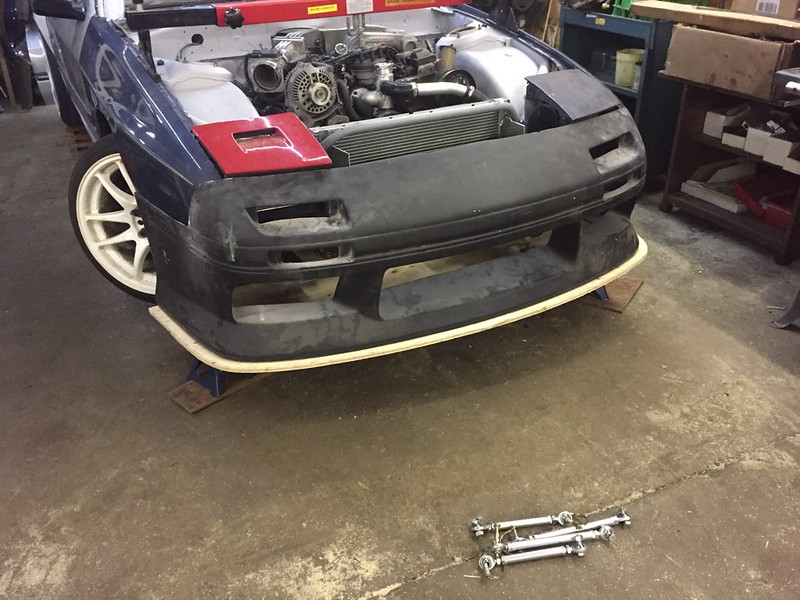
Can see my links chilling on the floor

Going to make a set or two for my buddies and see how they go. Kinda need 6 mount points to really make this stable though, it gets tricky from chassis to chassis but we’ll see what we come up with.
Still dreaming up the best way to make this part quick release but for now 2 long M6 bolts to where the old under tray used to mount to works.

One challenge I was expecting but am not prepared for is how to deal with this. has to go here
This is kinda the main point of having the full interior, for the window defog. But I put a roll bar in the way. Really want it to line up with the factory vent assembly so it looks clean and un altered.
Any ideas that doesn’t involve fibreglassing a new shape and is still removable hit me up.
Moving forward and downward tho
amongst all those Home Depot trips I bought a sheet of 1/2 ply for a wood splitter.
Traced the bumper out then added an inch all around the outside. Thought about tapering it in where it meets the tire but nawww, like this better.
Can see my links chilling on the floor
Going to make a set or two for my buddies and see how they go. Kinda need 6 mount points to really make this stable though, it gets tricky from chassis to chassis but we’ll see what we come up with.
Still dreaming up the best way to make this part quick release but for now 2 long M6 bolts to where the old under tray used to mount to works.
Thread Starter
Senior Member
Joined: Mar 2015
Posts: 335
Likes: 8
From: Vancouver, BC
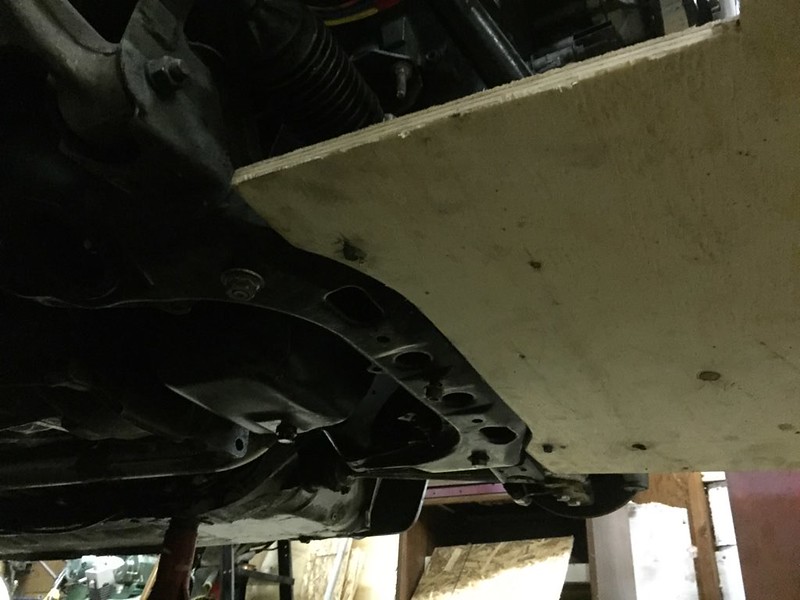
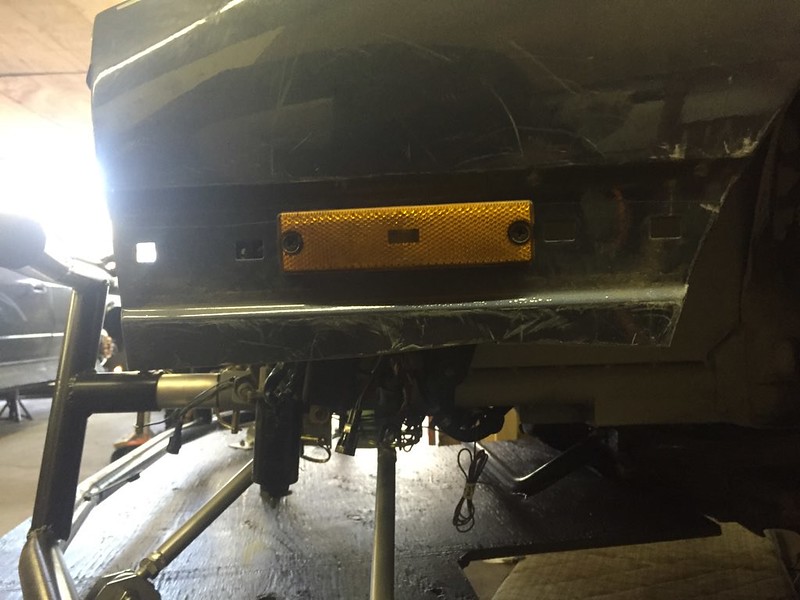
It does have some give to flex around any obstacles it encounters so just to be safe I gave the tire more than enough room
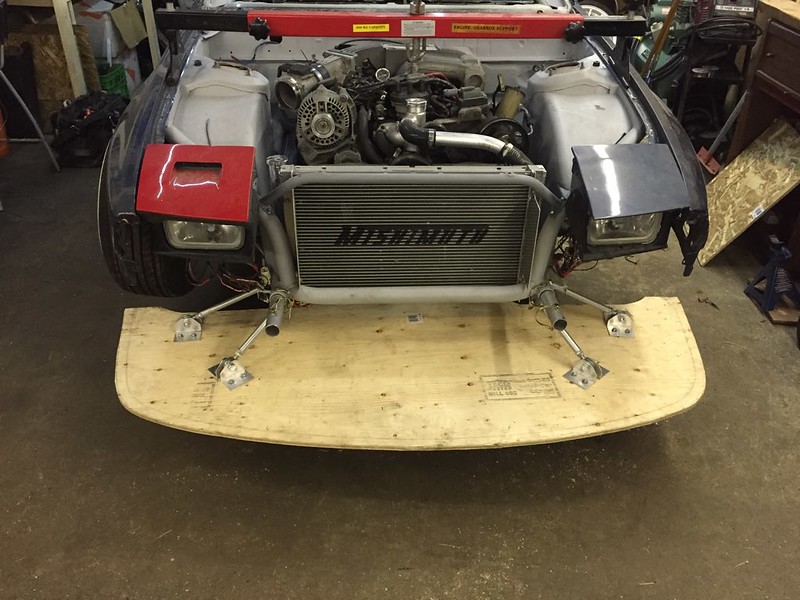
While I can reach the pins with the bumper on, I really don�t see myself removing one without the other.
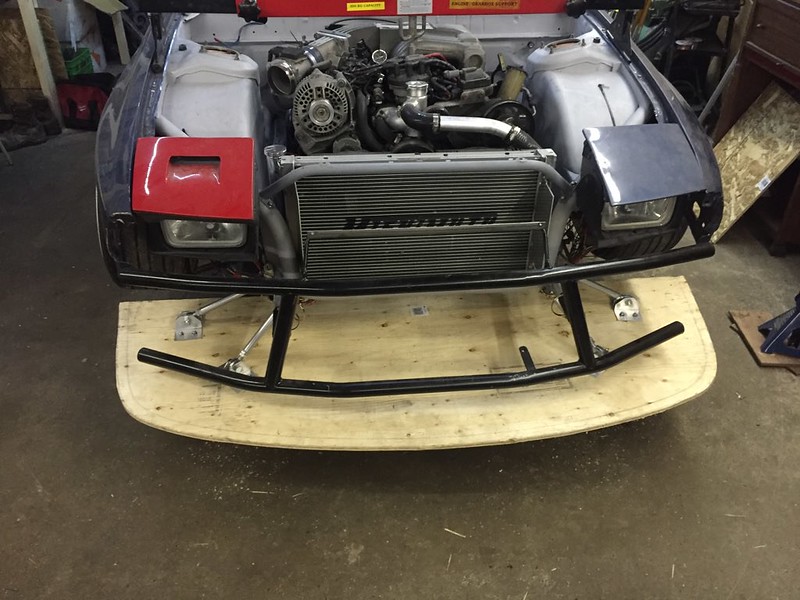
Here�s hoping that it keeps my bumper from exploding, as Nate from villains tells me it does for them. Also have to acknowledge Kam Cadwells design on these. His are better though haha
Finally got around to this. Love the ability to just knock out a 20 minute job when I have only 20 minutes. Garage is 5 minutes from home and on the way from work.
Any hope I had of reselling this Steeda Tri-Ax is gone lol. Took the last little bit I didn�t need off the top and took pics of the shifter.
Until I determine what **** height and throw length I like the ugly bits stay ugly. Though the centre bit really needs some horizontal pieces to stabilize it�
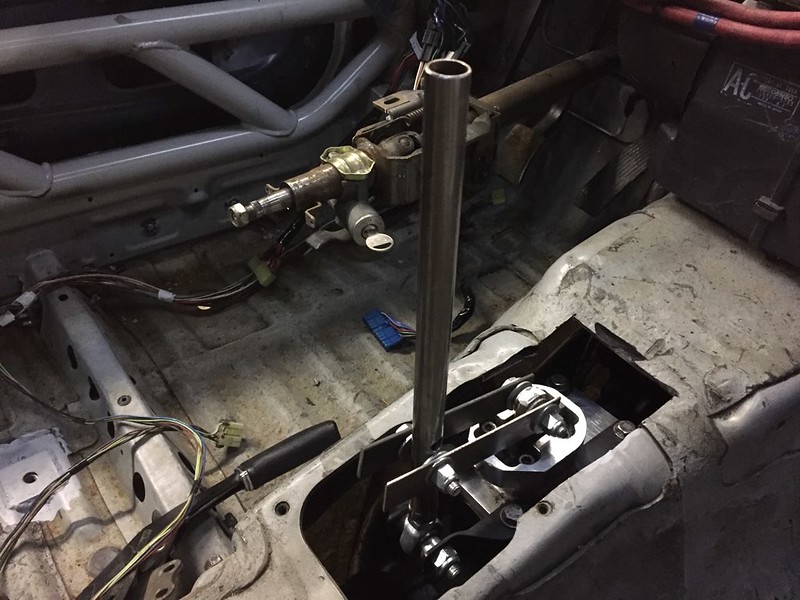
It feels really good though, much better than the dog leg shifter thing abomination I had before.
Then I spent/blew my tax return
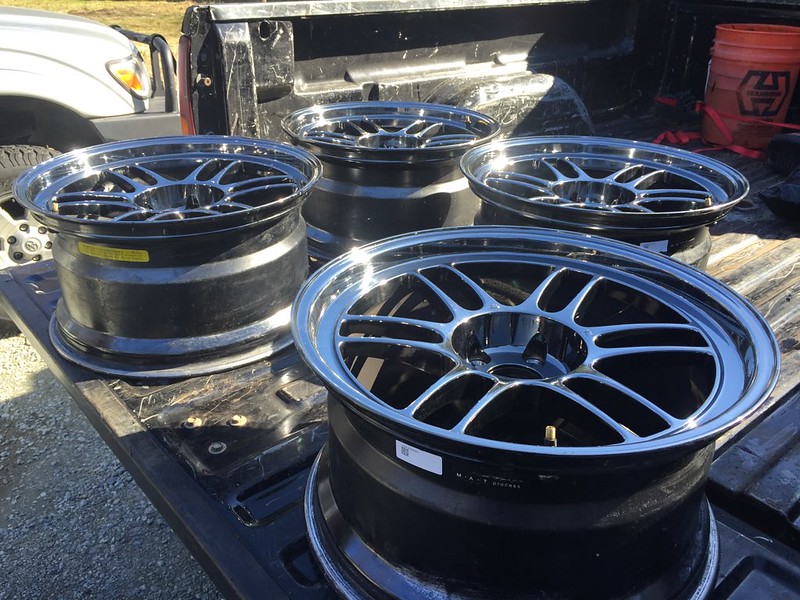
18x9.5 +12 (i think�.. either 12 or 15) Enkei RPF1 in SBC
While I can reach the pins with the bumper on, I really don�t see myself removing one without the other.
Here�s hoping that it keeps my bumper from exploding, as Nate from villains tells me it does for them. Also have to acknowledge Kam Cadwells design on these. His are better though haha
Finally got around to this. Love the ability to just knock out a 20 minute job when I have only 20 minutes. Garage is 5 minutes from home and on the way from work.
Any hope I had of reselling this Steeda Tri-Ax is gone lol. Took the last little bit I didn�t need off the top and took pics of the shifter.
Until I determine what **** height and throw length I like the ugly bits stay ugly. Though the centre bit really needs some horizontal pieces to stabilize it�
It feels really good though, much better than the dog leg shifter thing abomination I had before.
Then I spent/blew my tax return
18x9.5 +12 (i think�.. either 12 or 15) Enkei RPF1 in SBC
Thread Starter
Senior Member
Joined: Mar 2015
Posts: 335
Likes: 8
From: Vancouver, BC
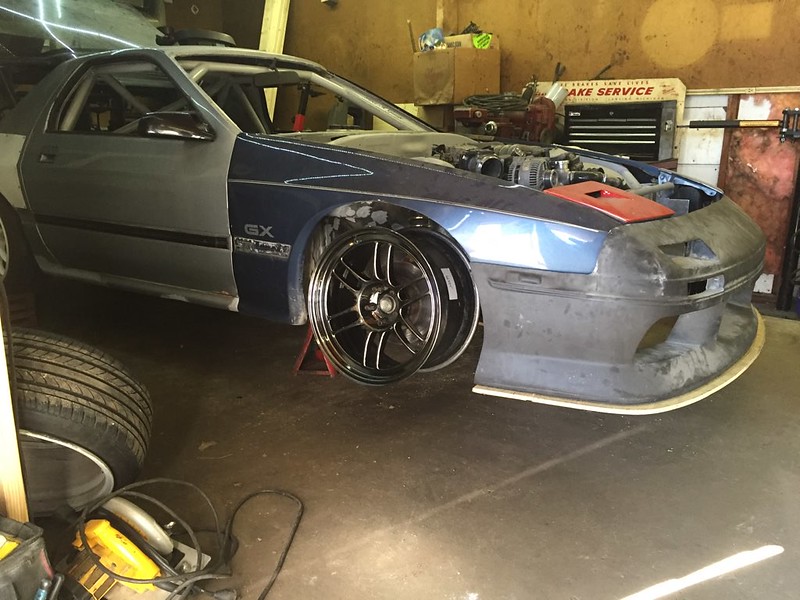
Surprisingly aggressive in the front.
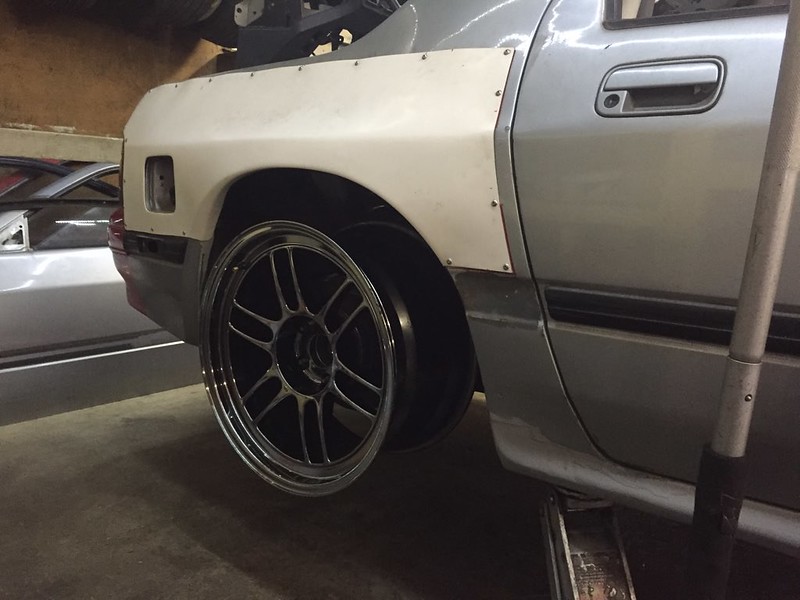
But with a small spacer pretty ideal in the rear.
Pretty stoked on having another set of 18” wheels, the SBC is cool and when a pair is scratched and chipped enough I’ll paint them white to match. I kinda want to buy one more pair of wheels but at the moment I have enough 18” alone (planning to run 18/18) for a healthy track day.
Also made a relevant discovery to any FC owners with a swapped car. Well at least to me, I feel like this is old news to may ppl on the inter web but I have spent hours searching for a solution for the sway bar hitting the oil pan. Closest thing I found was a rumour that a specific e36 bar fit (never found out which though) and that a Mercedes ML suv rear bar fit.
But an S13 bar fits
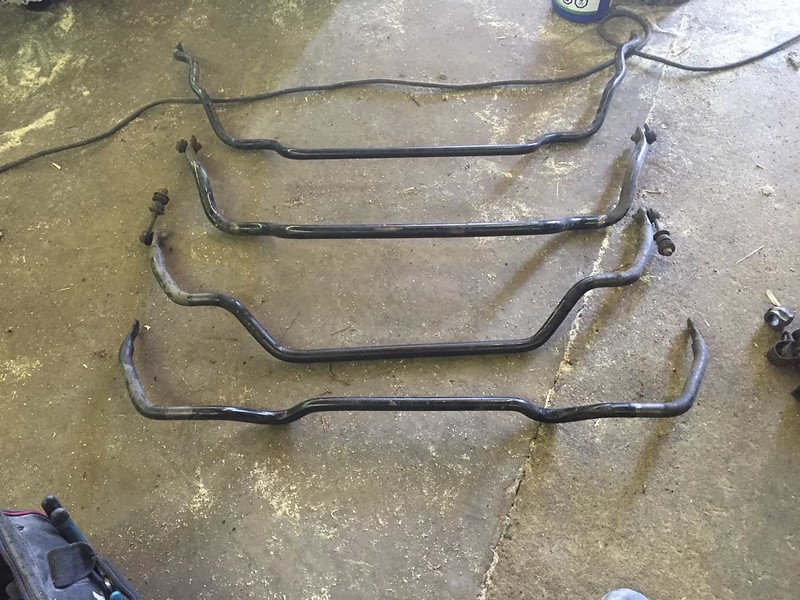
top to bottom we have an R32 rear bar, what we think is an s14 front bar, then an s13 front and the stock FC. They both weigh a ton so I think they are both solid and they happen to be the same diameter. Kris had a bunch laying around so I tried them all lol.
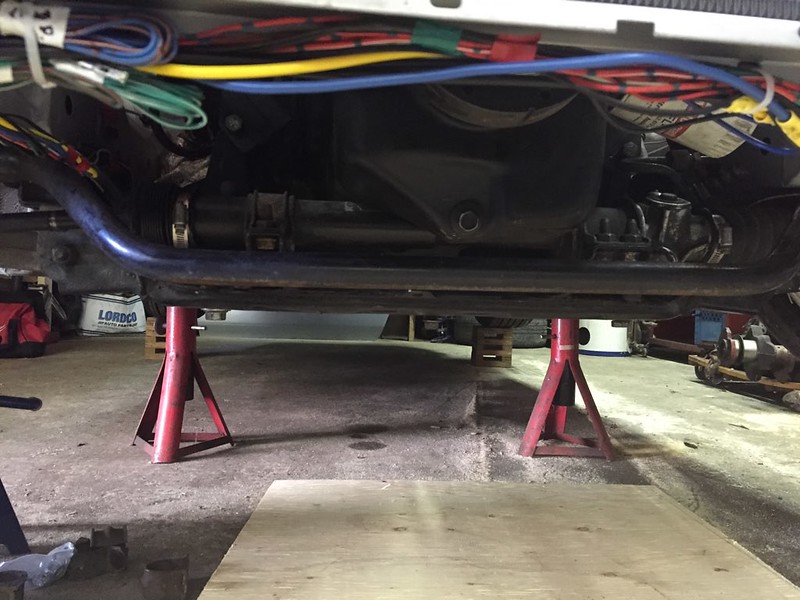

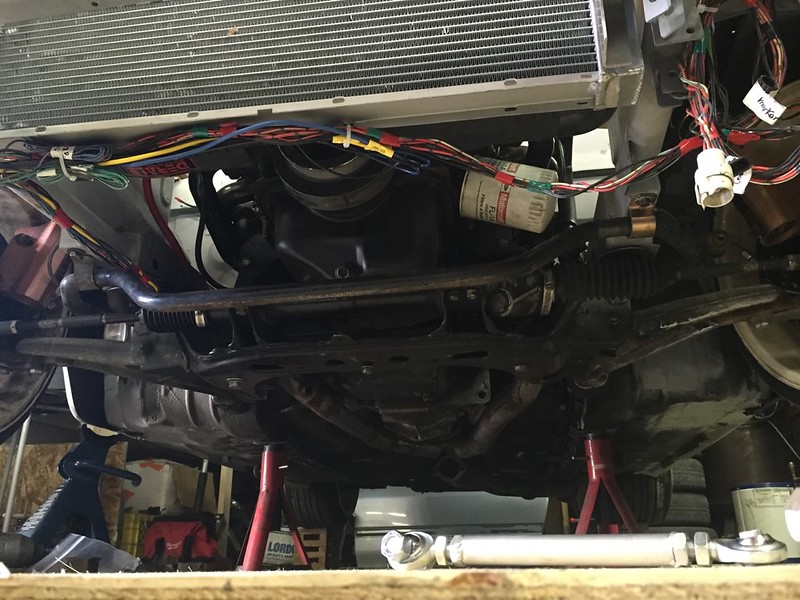
room for oil pan clearance, still clears the diffuser too. Has a decent amount of wheel clearance but I feel this could be improved. It will still hit at max lock.
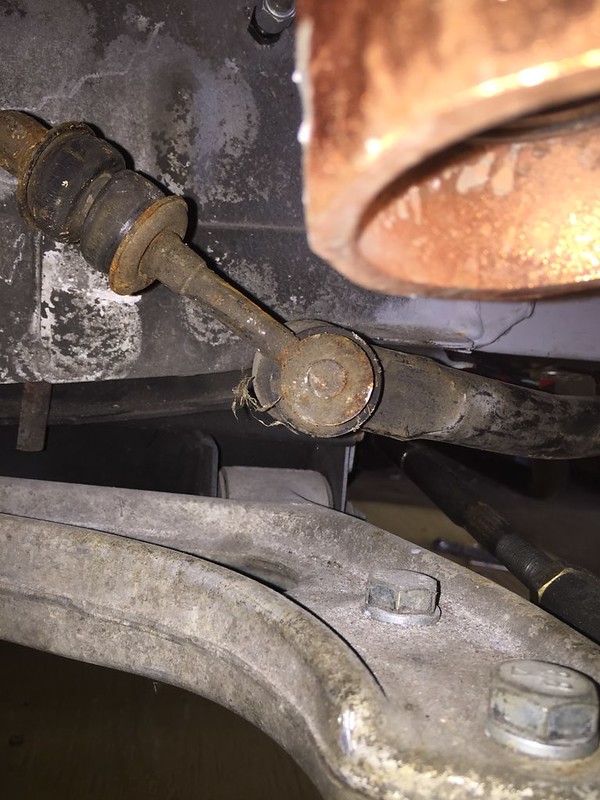
obviously gonna have to make custom end links of some kind, s chassis is a different style and it doesn’t sit exactly the same as the FC bar. I’m sure this will affect its effective stiffness depending on where I attach it but probably try for same place as stock.
and the S13 bushings and brackets even fit. The only catch there is they are at the limit of the straight part of the bar before the bend. So I will probably have to make a plate moving it in like 1/2 a side or something if I’m finding it binding. Ignore the tube front in this case, I put the sway bar mounts in the stock location.
But with a small spacer pretty ideal in the rear.
Pretty stoked on having another set of 18” wheels, the SBC is cool and when a pair is scratched and chipped enough I’ll paint them white to match. I kinda want to buy one more pair of wheels but at the moment I have enough 18” alone (planning to run 18/18) for a healthy track day.
Also made a relevant discovery to any FC owners with a swapped car. Well at least to me, I feel like this is old news to may ppl on the inter web but I have spent hours searching for a solution for the sway bar hitting the oil pan. Closest thing I found was a rumour that a specific e36 bar fit (never found out which though) and that a Mercedes ML suv rear bar fit.
But an S13 bar fits
top to bottom we have an R32 rear bar, what we think is an s14 front bar, then an s13 front and the stock FC. They both weigh a ton so I think they are both solid and they happen to be the same diameter. Kris had a bunch laying around so I tried them all lol.
room for oil pan clearance, still clears the diffuser too. Has a decent amount of wheel clearance but I feel this could be improved. It will still hit at max lock.
obviously gonna have to make custom end links of some kind, s chassis is a different style and it doesn’t sit exactly the same as the FC bar. I’m sure this will affect its effective stiffness depending on where I attach it but probably try for same place as stock.
and the S13 bushings and brackets even fit. The only catch there is they are at the limit of the straight part of the bar before the bend. So I will probably have to make a plate moving it in like 1/2 a side or something if I’m finding it binding. Ignore the tube front in this case, I put the sway bar mounts in the stock location.
Last edited by teeson; Mar 25, 2018 at 02:35 AM.
Thread Starter
Senior Member
Joined: Mar 2015
Posts: 335
Likes: 8
From: Vancouver, BC
Also promising is the GK tech sway bar kit may fit. Its a splined bar with high steering angle in mind.


I actually email GK a long while back before the bar was for sale and asked for rough dimensions. He emailed me back the drawing for it and it looks very close. the last pic is pretty telling, I also don’t think the bearing can ride on the splines so a bracket to move it in will be a must I if ever try that. The end plates are a slight gamble if they’ll clear as well….
I actually email GK a long while back before the bar was for sale and asked for rough dimensions. He emailed me back the drawing for it and it looks very close. the last pic is pretty telling, I also don’t think the bearing can ride on the splines so a bracket to move it in will be a must I if ever try that. The end plates are a slight gamble if they’ll clear as well….
Last edited by teeson; Mar 25, 2018 at 02:22 AM.
Thread Starter
Senior Member
Joined: Mar 2015
Posts: 335
Likes: 8
From: Vancouver, BC
Have a whole list of little things to do before I can begin tear down for paint
ran the hose for the rad sprayer and put some rivnuts in for the holders. For the tube sections though I wasn’t a fan of rivnuts so I welded nuts in
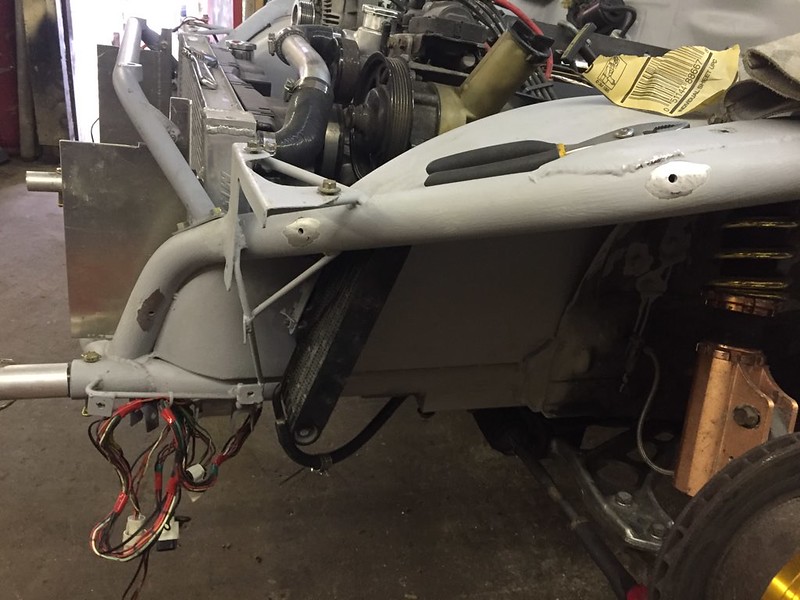
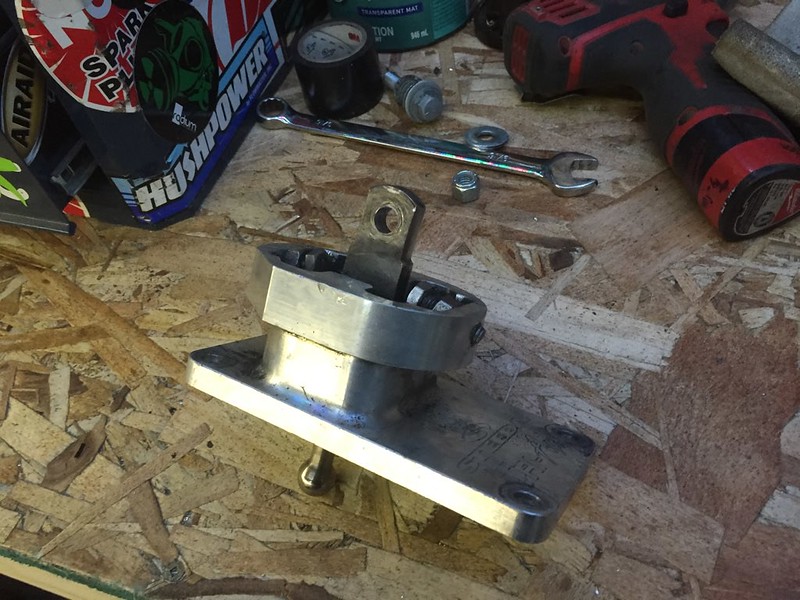
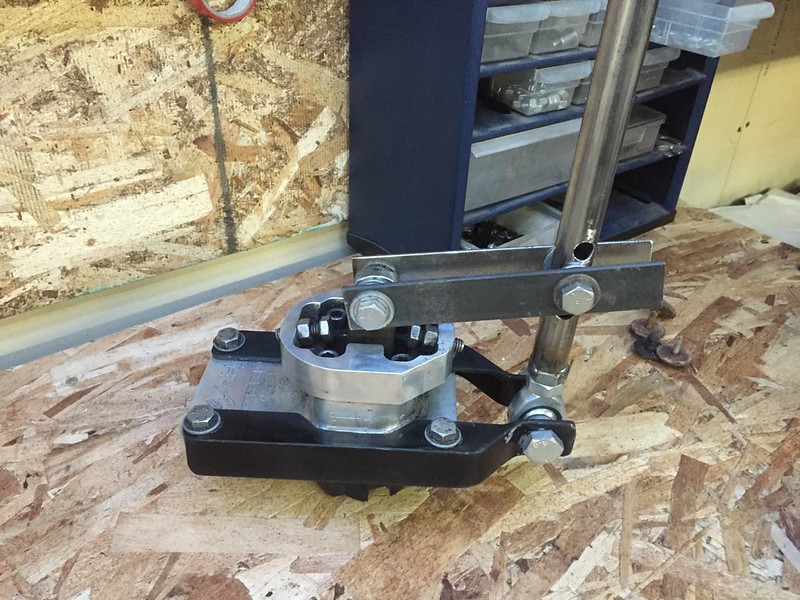
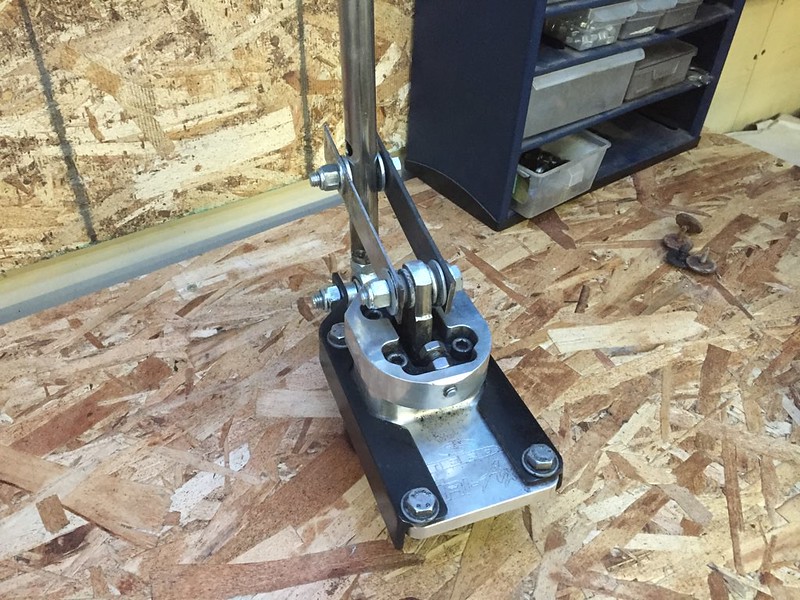
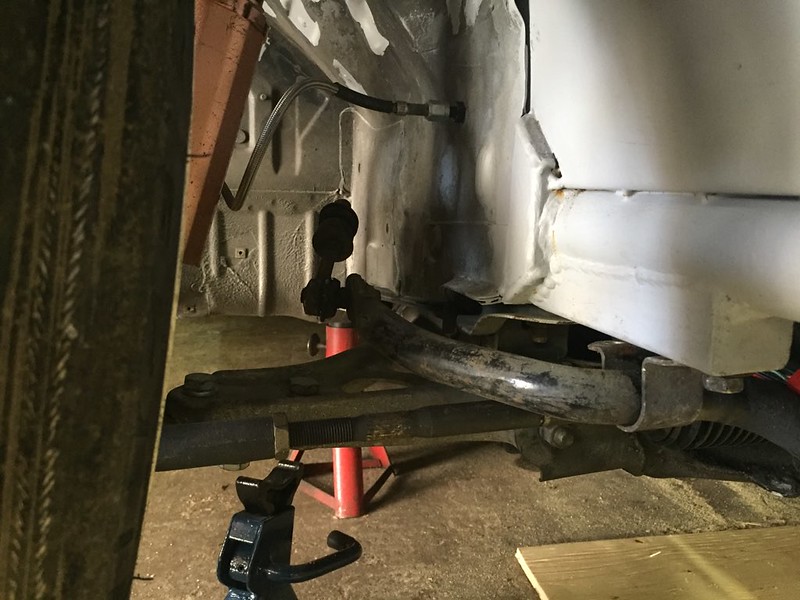
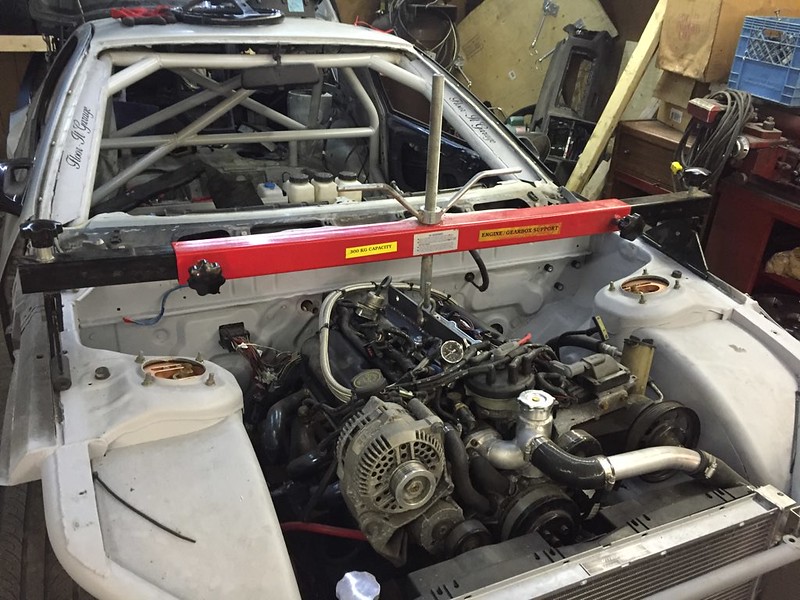
Next up was to test if the power steering works and doesn’t leak, but need to swap racks to the 2 hole rack I have. Didn’t want to remove the whole engine to drop the crossmember so I built a lift plate.
ran the hose for the rad sprayer and put some rivnuts in for the holders. For the tube sections though I wasn’t a fan of rivnuts so I welded nuts in
Next up was to test if the power steering works and doesn’t leak, but need to swap racks to the 2 hole rack I have. Didn’t want to remove the whole engine to drop the crossmember so I built a lift plate.
Thread Starter
Senior Member
Joined: Mar 2015
Posts: 335
Likes: 8
From: Vancouver, BC
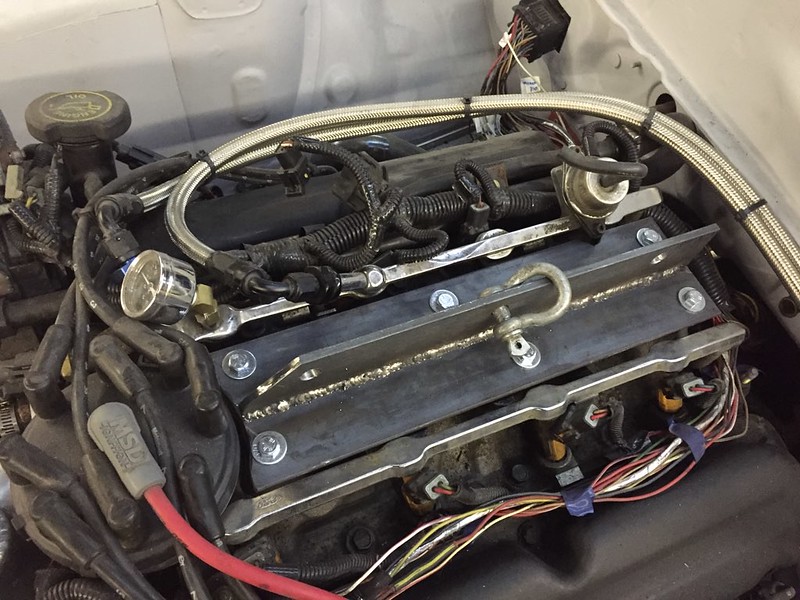
My dad had one of these engine supports for doing fwd clutches but works well for this too. I�m not 100% sold on it though. When I bolted it all back together the intake had lifted and formed a vacuum leak, I guess the weight pulled the manifold and the engine apart and the gasket lost its seal. Not sure if the bolts stretched or were a bit loose or what but I�m going to be careful going forward. I hope it was just loose cuz this thing is very convenient.
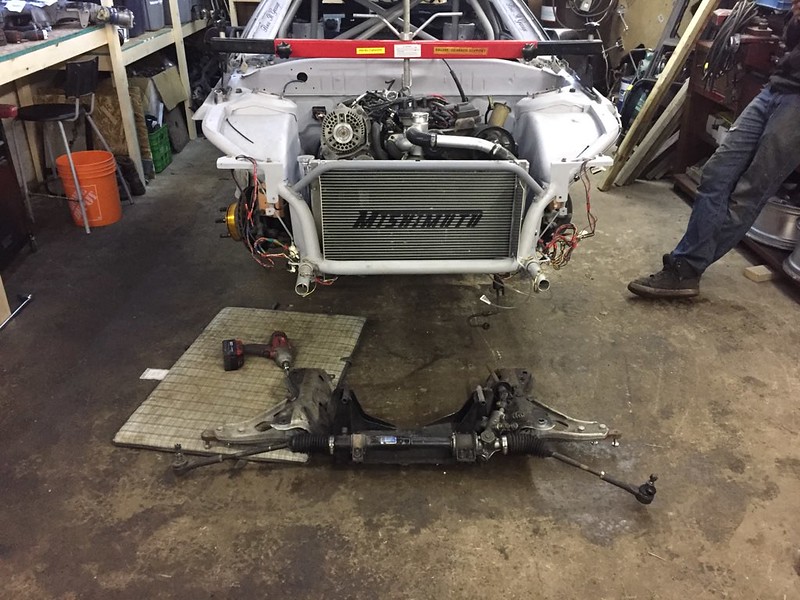
rack out
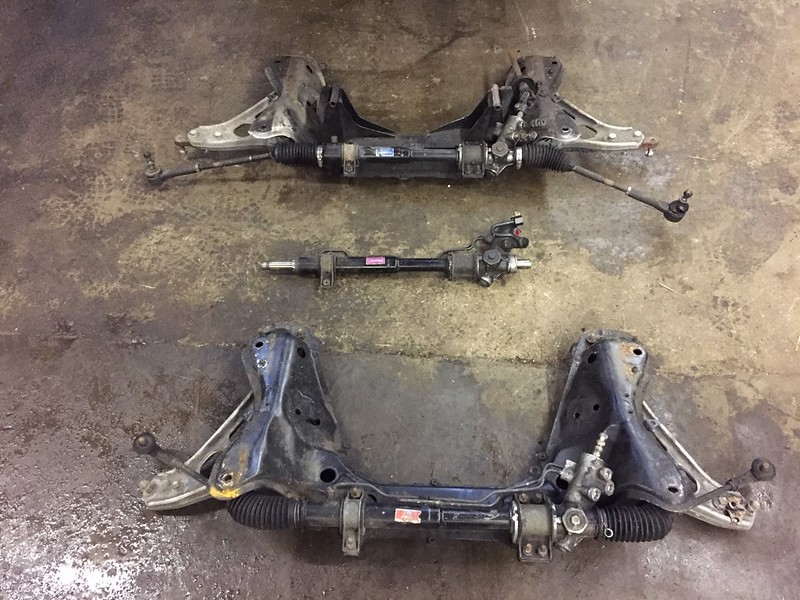
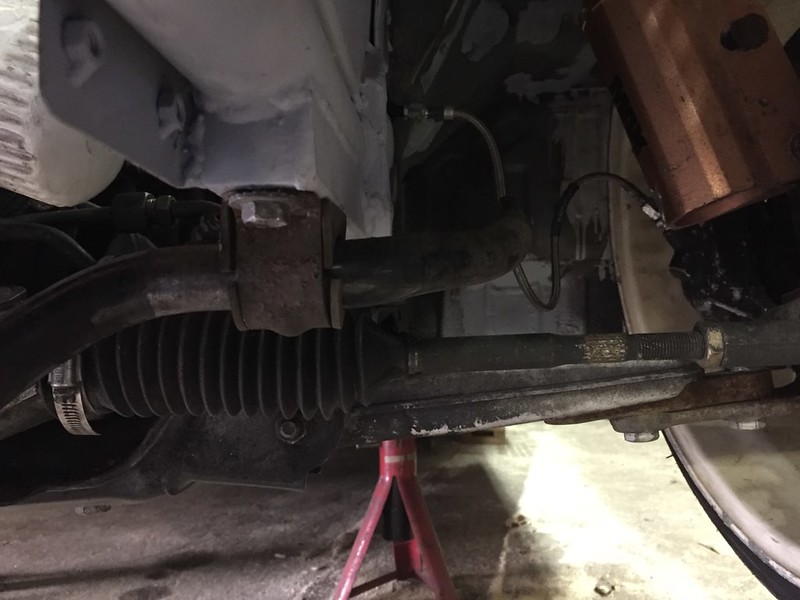
this crossmember has the poly bushings in it, but also an 3 hole rack in it. Have a 2 hole for simplified plumbing (though I could just block the otters hole on a 3 hole but this is tidier)
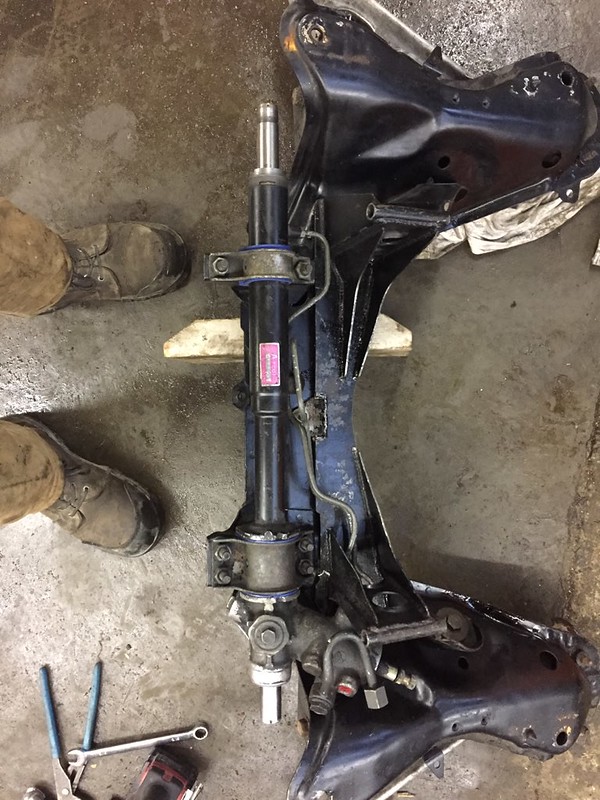
was painted black from before, gave it a quick wipe clean and put it together with the poly rack bushings
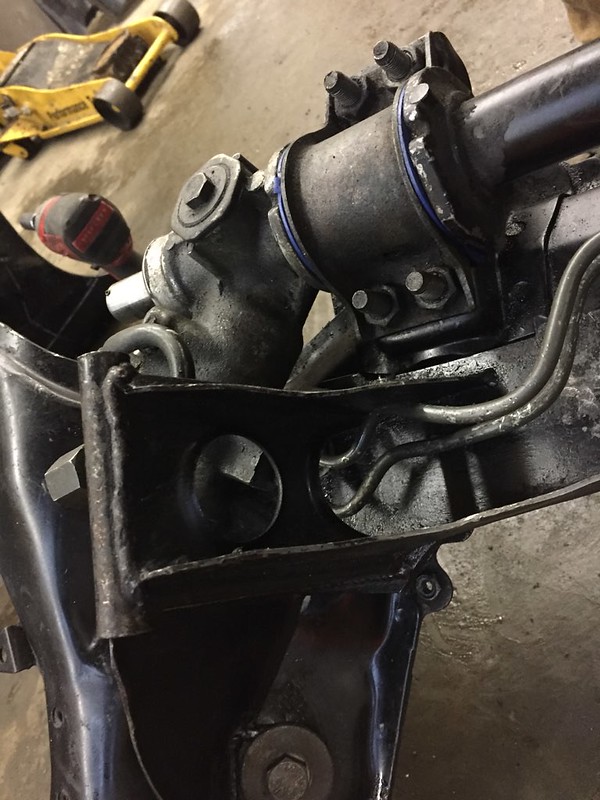
Getting the power steering lines in and connected was sure a hassle. Feel like the cradle could be better here..
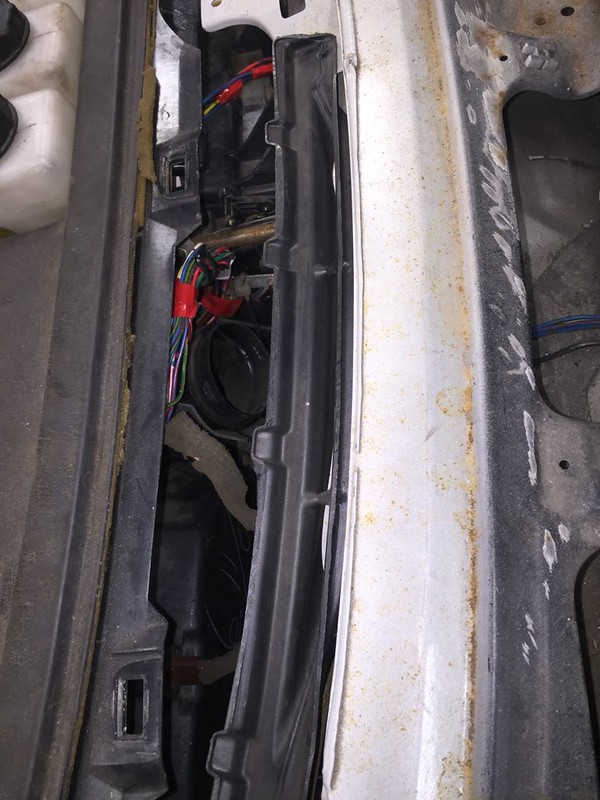
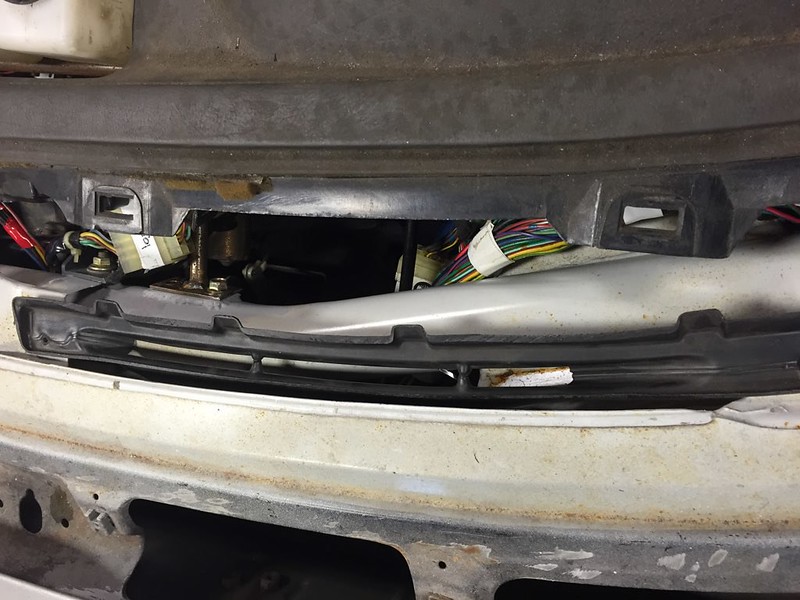
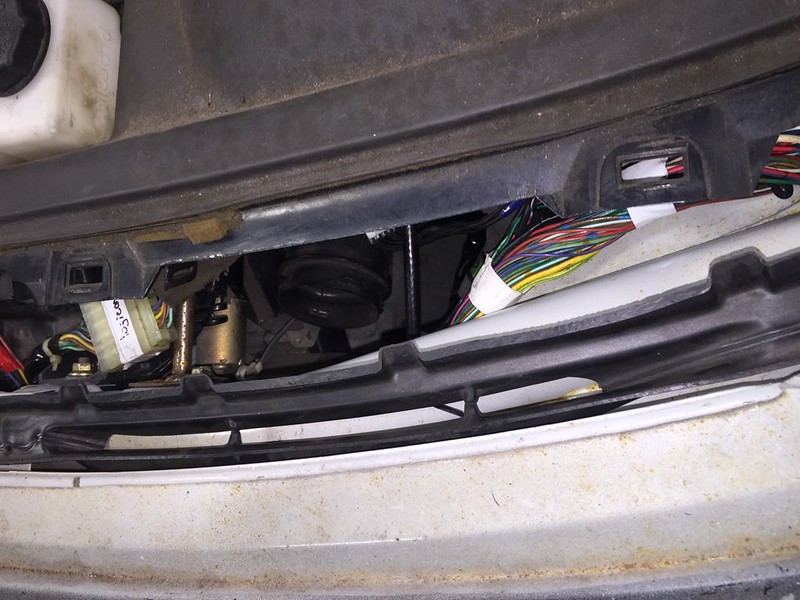
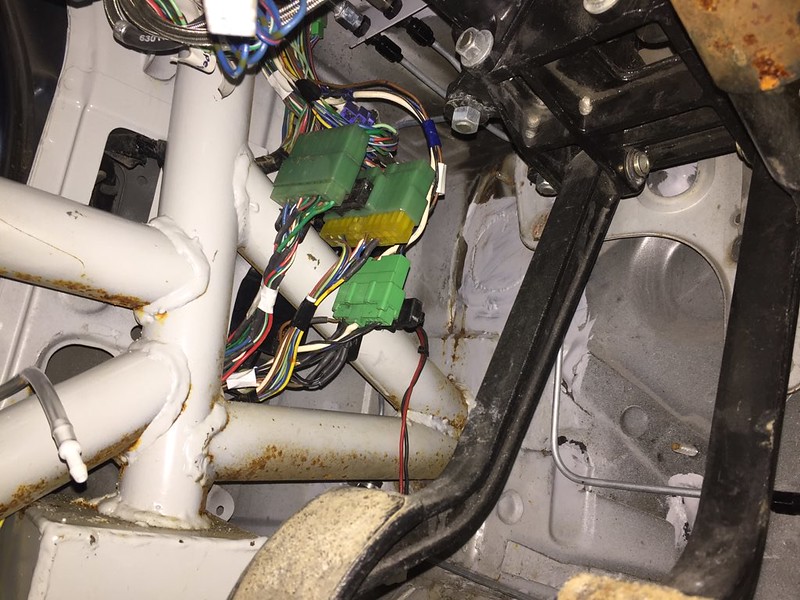
routed the wire for the wiper motor
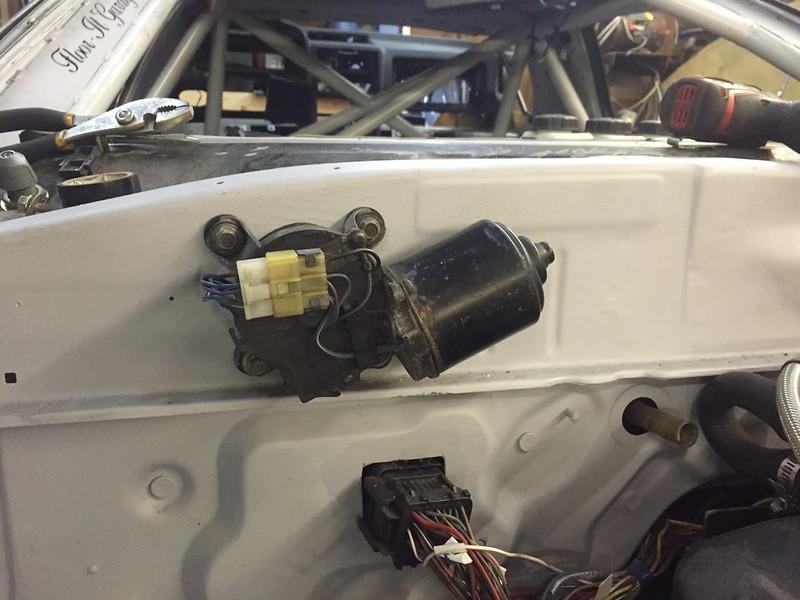
I didn�t want to see the wires but I also didn�t want them in the way of the assembly or in a spot they would let water into the cabin
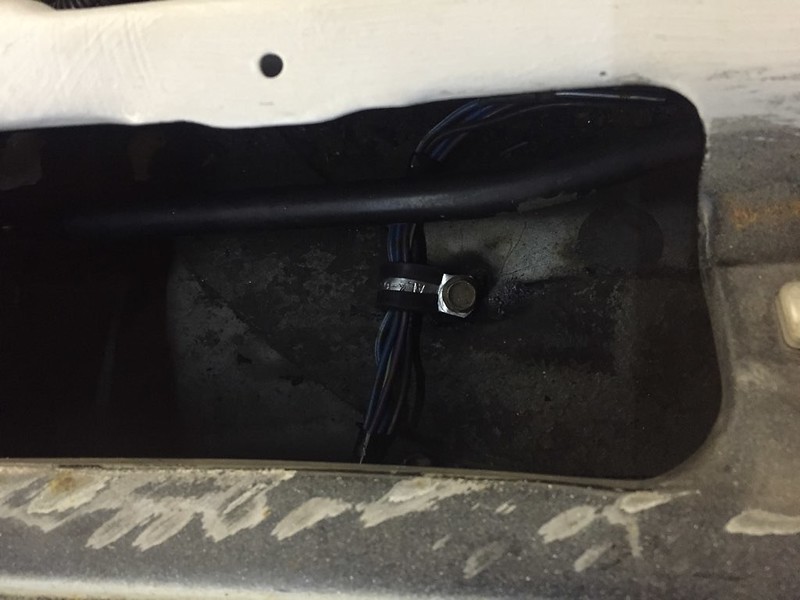
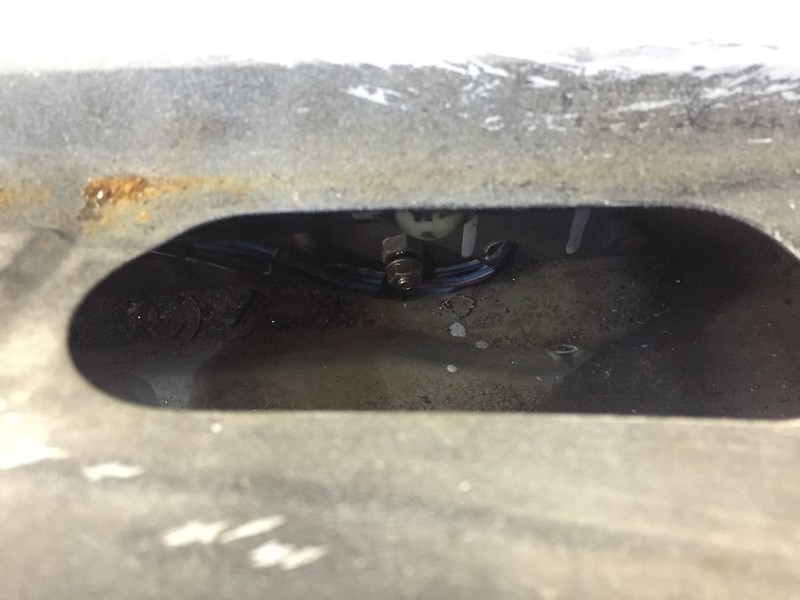
worth mentioning that if I need to remove the wire it now involves de pinning the connector to fit through the hole. More work to service but really how often will I be pulling it out?
rack out
this crossmember has the poly bushings in it, but also an 3 hole rack in it. Have a 2 hole for simplified plumbing (though I could just block the otters hole on a 3 hole but this is tidier)
was painted black from before, gave it a quick wipe clean and put it together with the poly rack bushings
Getting the power steering lines in and connected was sure a hassle. Feel like the cradle could be better here..
routed the wire for the wiper motor
I didn�t want to see the wires but I also didn�t want them in the way of the assembly or in a spot they would let water into the cabin
worth mentioning that if I need to remove the wire it now involves de pinning the connector to fit through the hole. More work to service but really how often will I be pulling it out?
Thread Starter
Senior Member
Joined: Mar 2015
Posts: 335
Likes: 8
From: Vancouver, BC
Wanted to fill with water and bleed the coolant and power steering but needed a working gauge to see what the thermostat is doing
I bought a low t stat and it opens at like 70*, but the low speed fan doesn�t come on until like 93* so I�ll need to get a programmer to change that� but it keeps it cool idling on stands
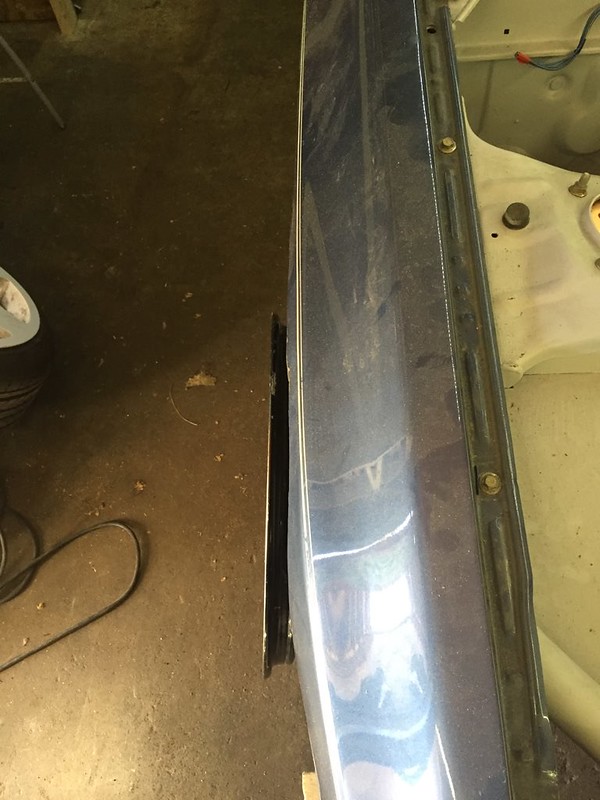
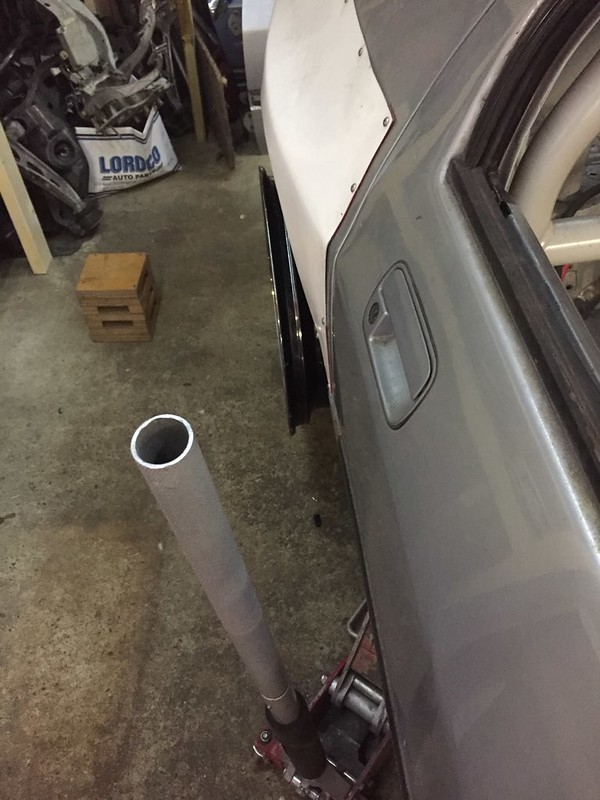
put a jack point and tow hook mount up front

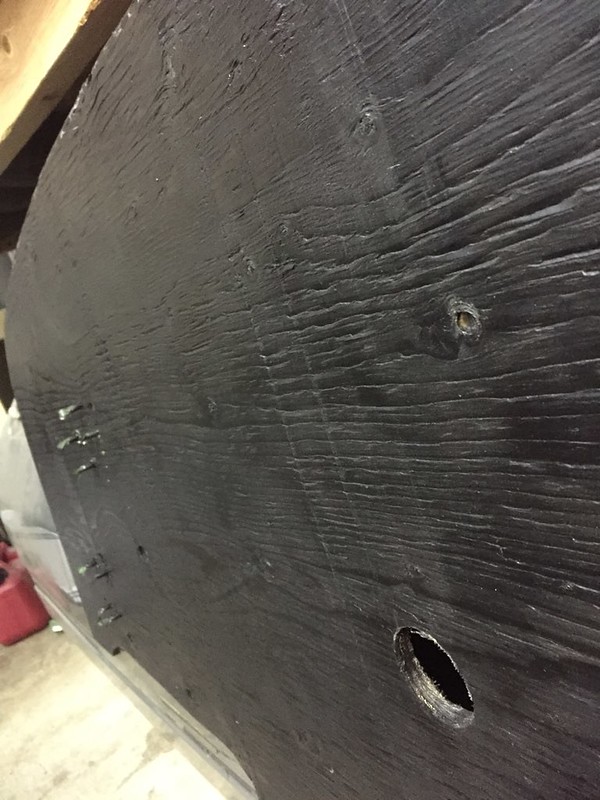
then painted my splitter black and coated it with this awesome clear stuff (which i spilled the remainder of immediately after this photo)
Was a good suggestion on Johno�s part.
The idea here is I can slip a pipe into the jack point and lift the front easier. Its pretty tricky getting a jack under with all the aero on
I bought a low t stat and it opens at like 70*, but the low speed fan doesn�t come on until like 93* so I�ll need to get a programmer to change that� but it keeps it cool idling on stands
put a jack point and tow hook mount up front
then painted my splitter black and coated it with this awesome clear stuff (which i spilled the remainder of immediately after this photo)
Was a good suggestion on Johno�s part.
The idea here is I can slip a pipe into the jack point and lift the front easier. Its pretty tricky getting a jack under with all the aero on
Thread Starter
Senior Member
Joined: Mar 2015
Posts: 335
Likes: 8
From: Vancouver, BC
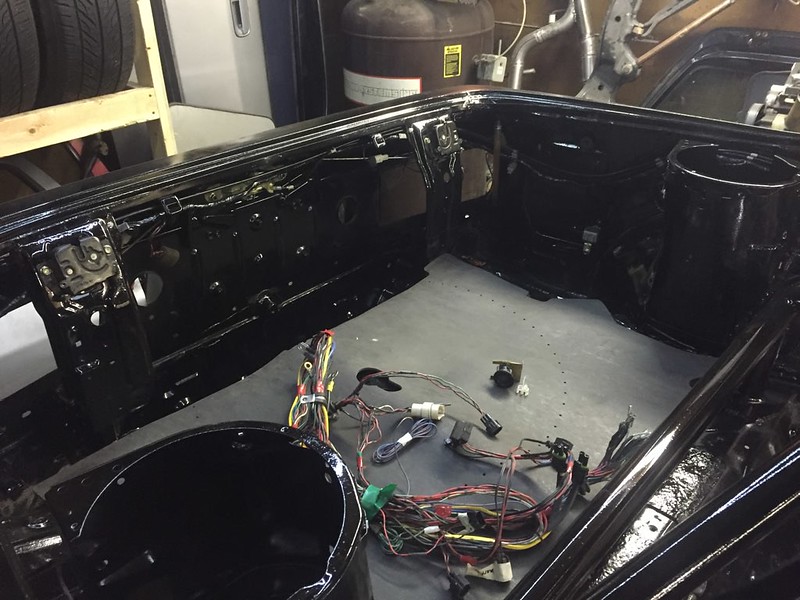
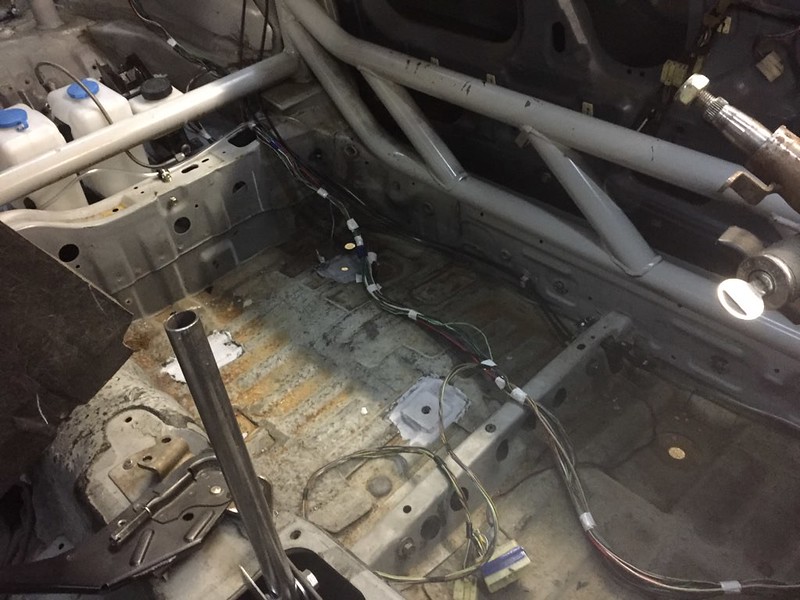
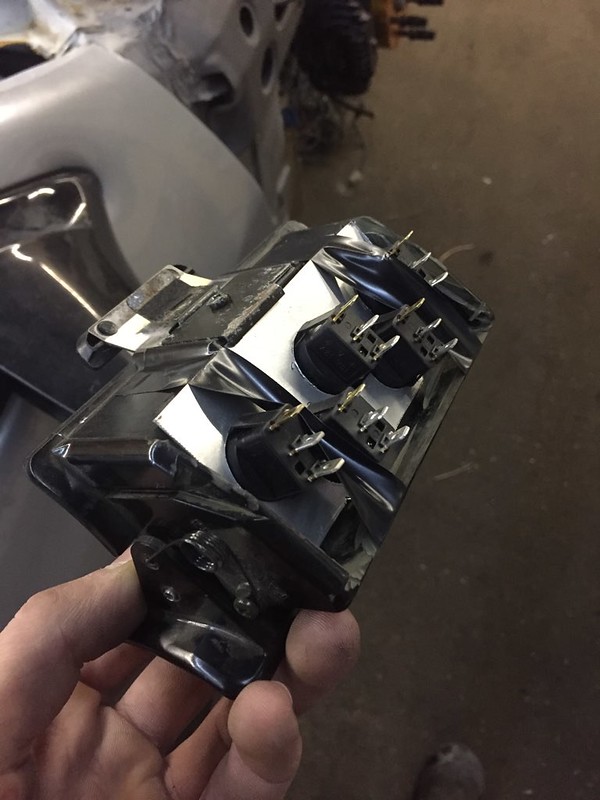
Found a place and a way to hold the rear running wiring connectors that I like. Need to weld in the nits but I’ll wait until everything else is removed.
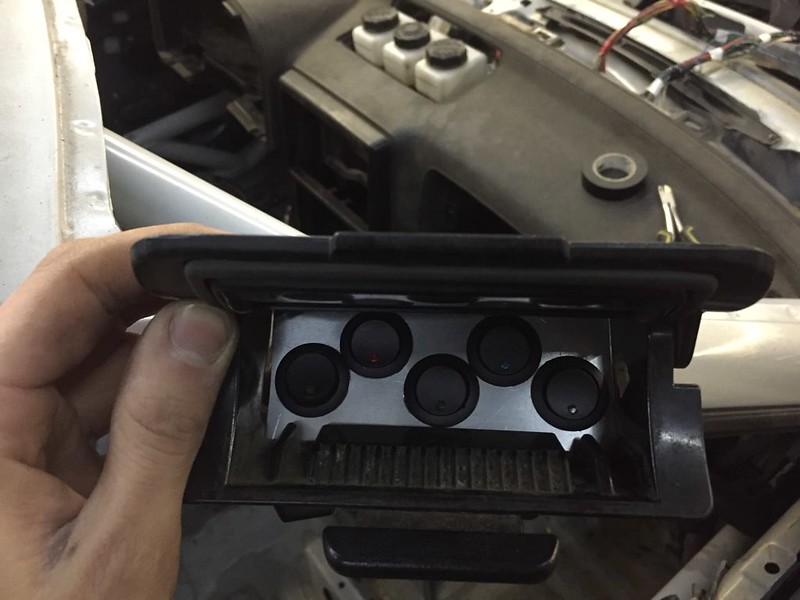
somewhere in there I mocked up a switch panel in the ash tray. 5 switches is too many, space is tight and I’ll probably be soldering onto the switches,.
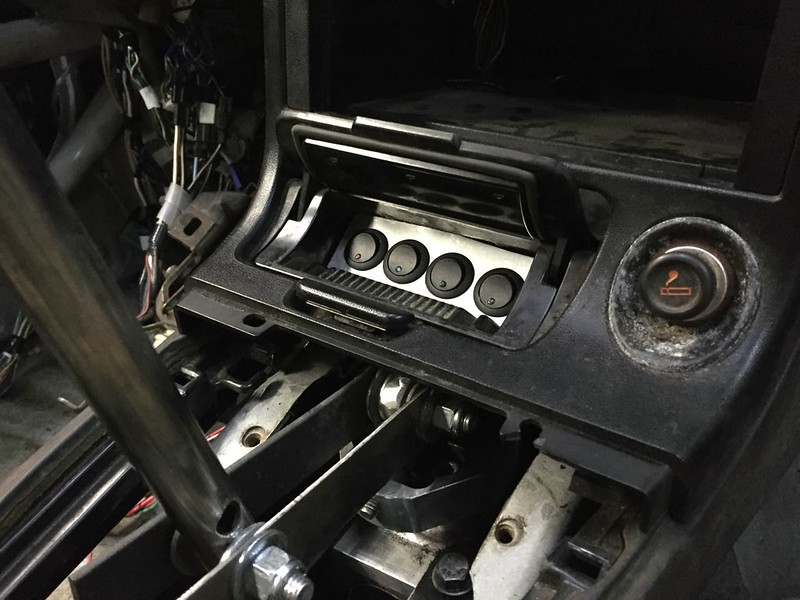
4 seems just right
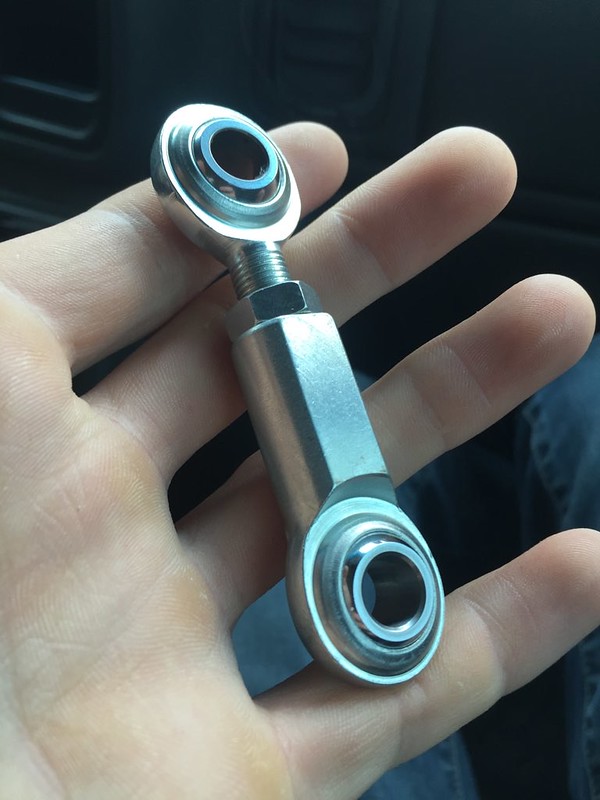
Picked these up to make sway bar end links some day in the future
next was the exhaust. Shout out to Neil for letting me borrow his chop saw. This is at least the 3rd time redoing this exhaust haha
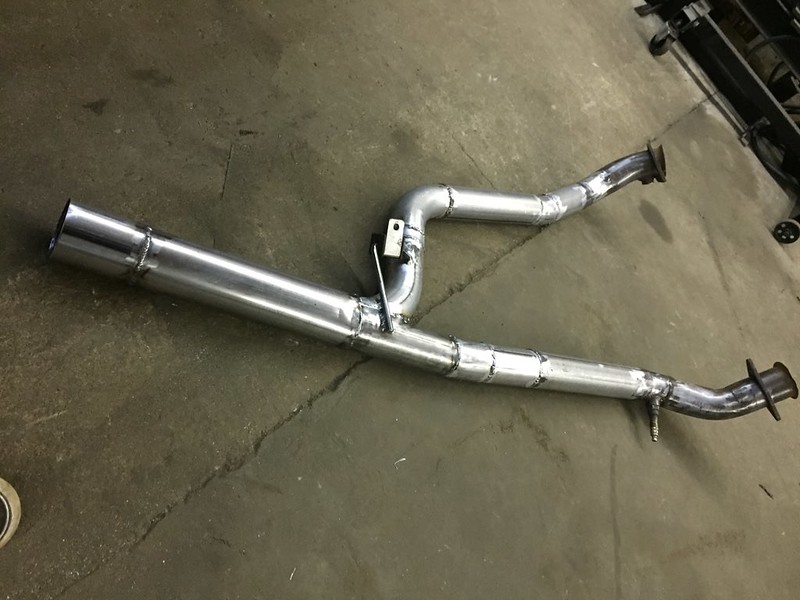
with the clutch slave out of the way i could get it good and tucked up
somewhere in there I mocked up a switch panel in the ash tray. 5 switches is too many, space is tight and I’ll probably be soldering onto the switches,.
4 seems just right
Picked these up to make sway bar end links some day in the future
next was the exhaust. Shout out to Neil for letting me borrow his chop saw. This is at least the 3rd time redoing this exhaust haha
with the clutch slave out of the way i could get it good and tucked up
Thread Starter
Senior Member
Joined: Mar 2015
Posts: 335
Likes: 8
From: Vancouver, BC
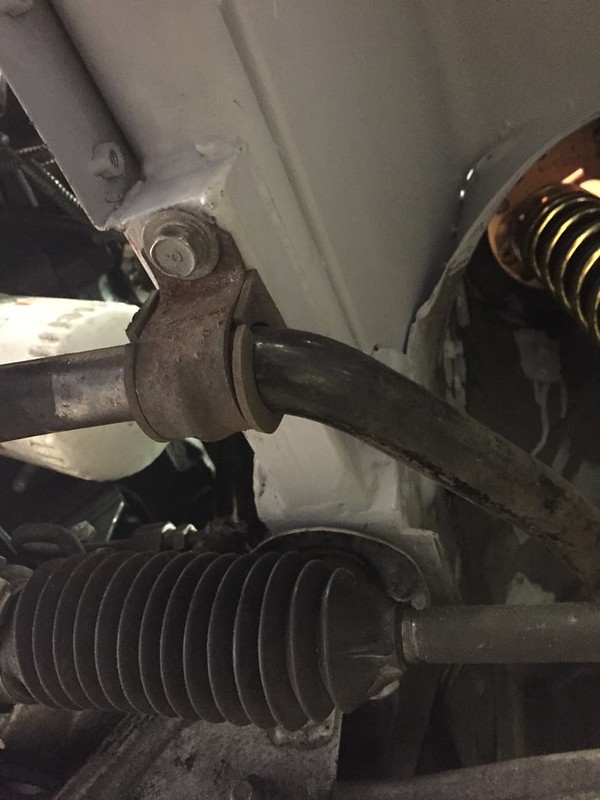
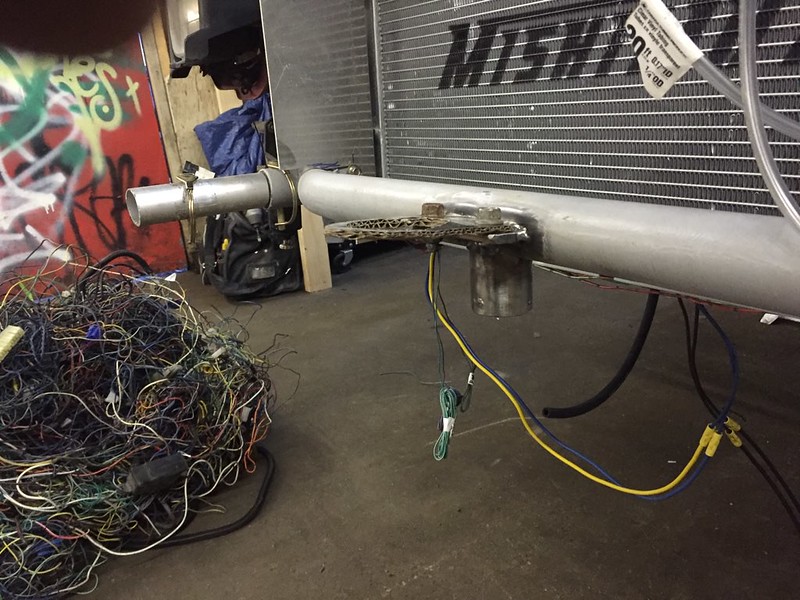
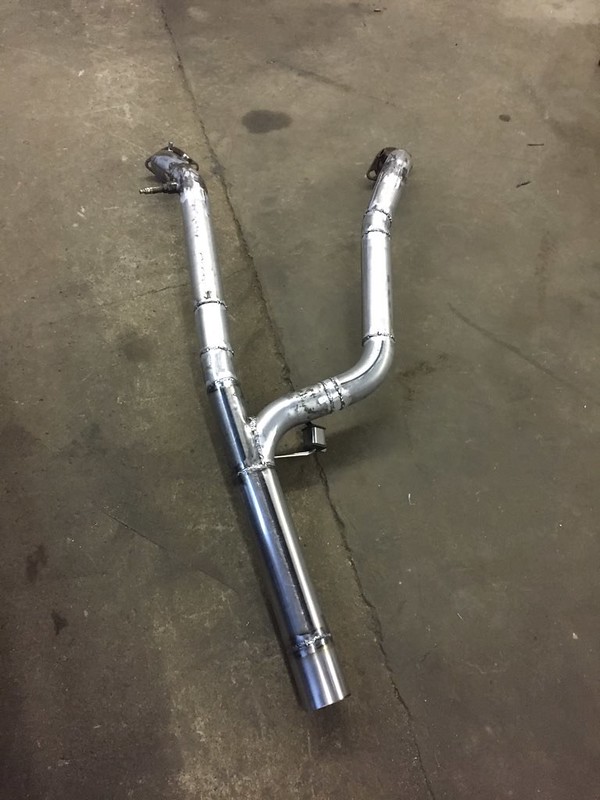
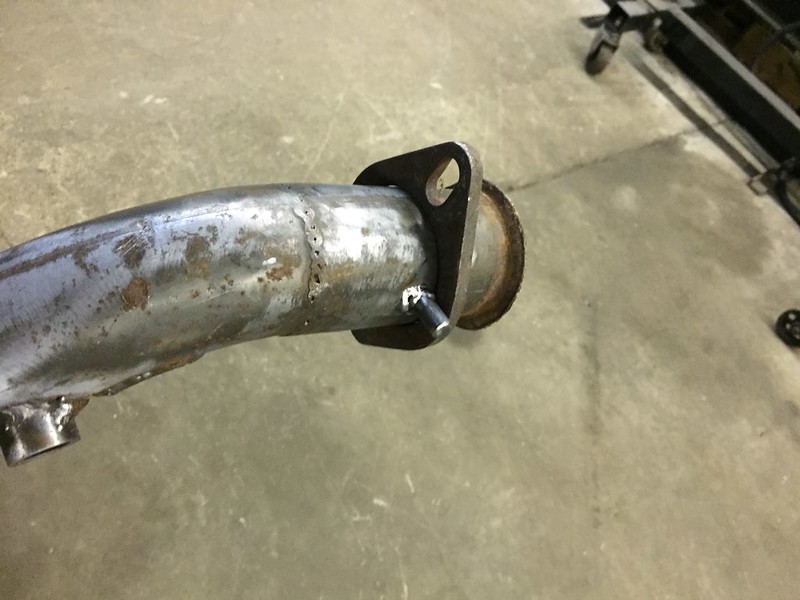
added a little keeper so that the flange doesn�t fall down. the one side the 02 is right there, but this makes the other side easier


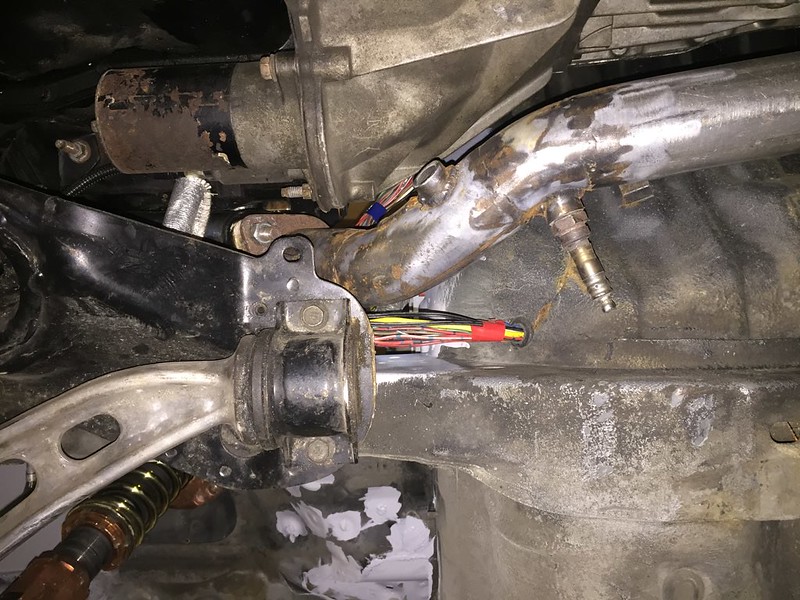
much better place than before when it was hitting the front U joint�.
I cut off the old flange on the stainless axle back I had
much better place than before when it was hitting the front U joint�.
I cut off the old flange on the stainless axle back I had
Thread Starter
Senior Member
Joined: Mar 2015
Posts: 335
Likes: 8
From: Vancouver, BC
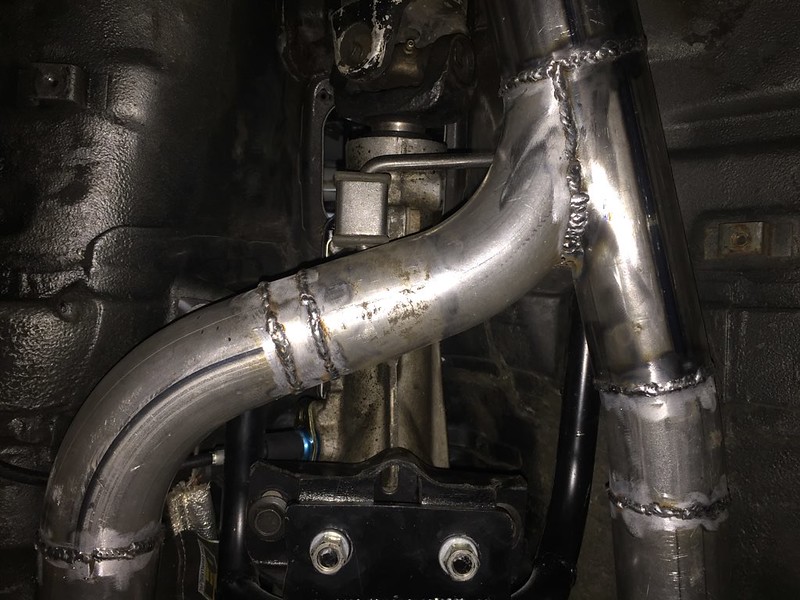
I wanted to use slip joints again, as that are easy and low profile. They can also handle mild - stainless transition
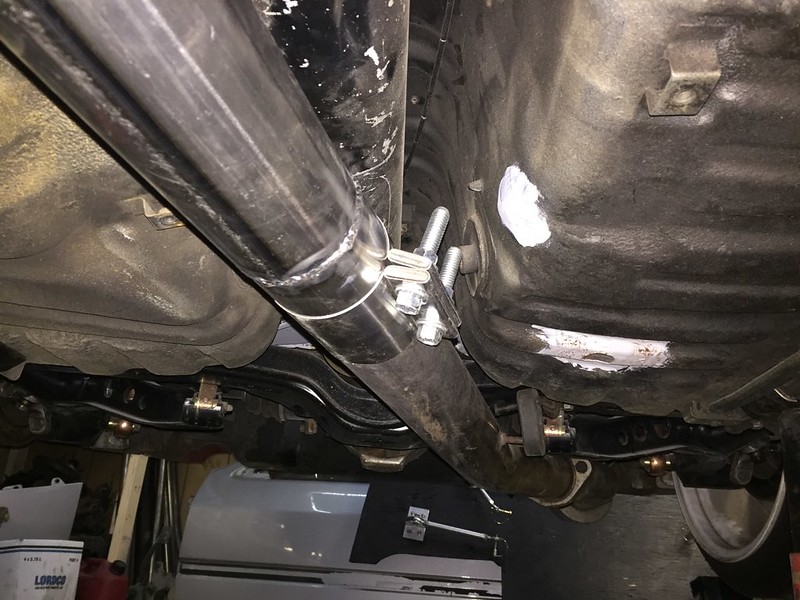
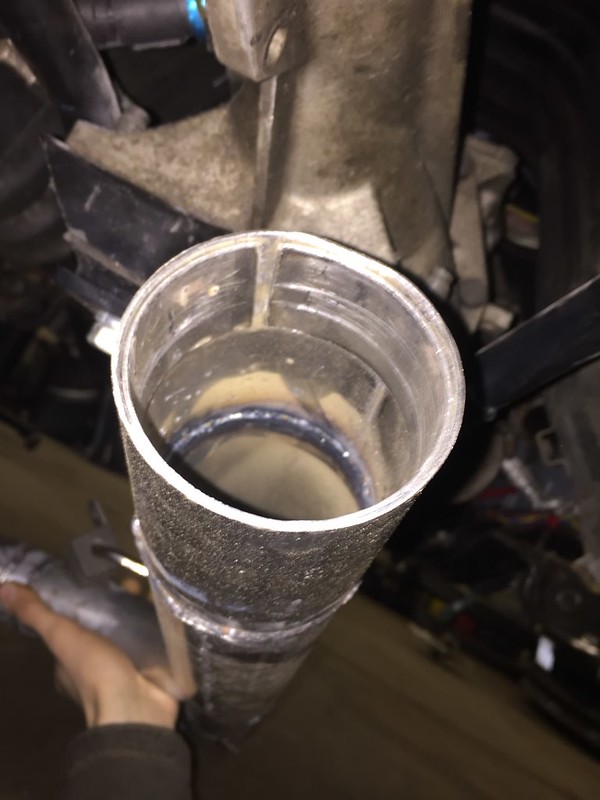
never that easy though, Had to shim it a little

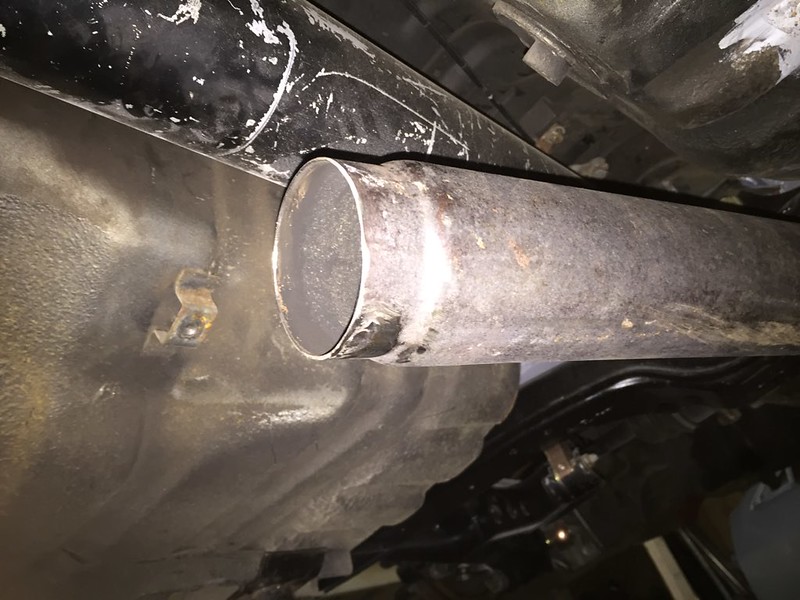
sits as high up as it can. It dips below the frame rail to go under the rear subframe but I can’t do a lot about that… This is much better than last time though and should scrape less
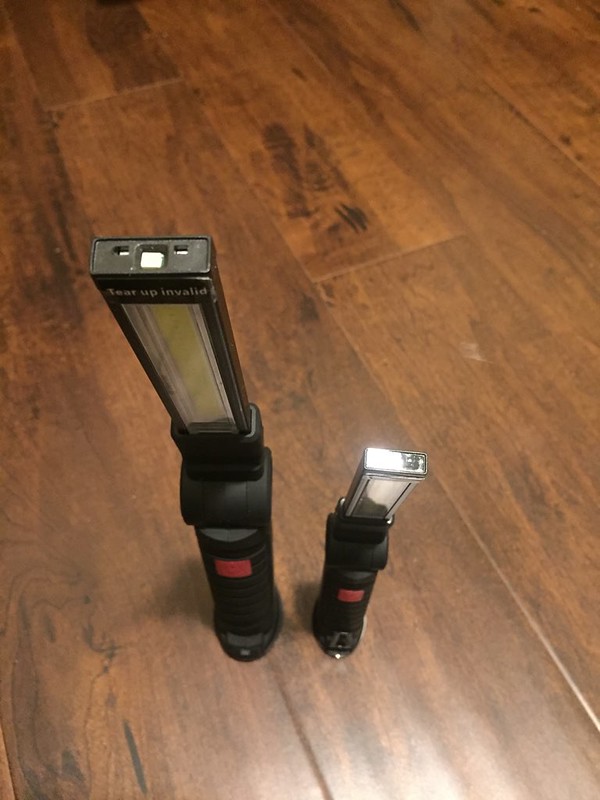
got these sweet lights from china, they were like $25 cdn shipped and i got 15 off because the one was missing a charger cover and a cover on the top light. But they are super bright, light, magnetic and have a hook. charge over USB too
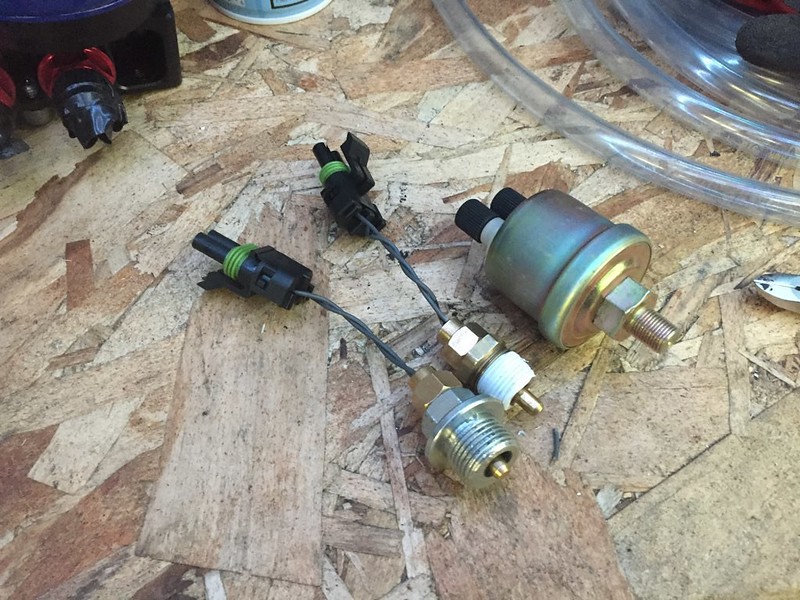
played around with my new crimpers and got the senders ready to go
After 3 tries to bleed the coolant, it finally did. Runs well once bled, power steering calmed down after a bit too. this is peace of mind for me and to hear the exhaust roar without fear of cooking something was nice. debugged a broken wire in the alternator harness and its basically ready to drive. But more things to do first
never that easy though, Had to shim it a little
sits as high up as it can. It dips below the frame rail to go under the rear subframe but I can’t do a lot about that… This is much better than last time though and should scrape less
got these sweet lights from china, they were like $25 cdn shipped and i got 15 off because the one was missing a charger cover and a cover on the top light. But they are super bright, light, magnetic and have a hook. charge over USB too
played around with my new crimpers and got the senders ready to go
After 3 tries to bleed the coolant, it finally did. Runs well once bled, power steering calmed down after a bit too. this is peace of mind for me and to hear the exhaust roar without fear of cooking something was nice. debugged a broken wire in the alternator harness and its basically ready to drive. But more things to do first
Thread Starter
Senior Member
Joined: Mar 2015
Posts: 335
Likes: 8
From: Vancouver, BC
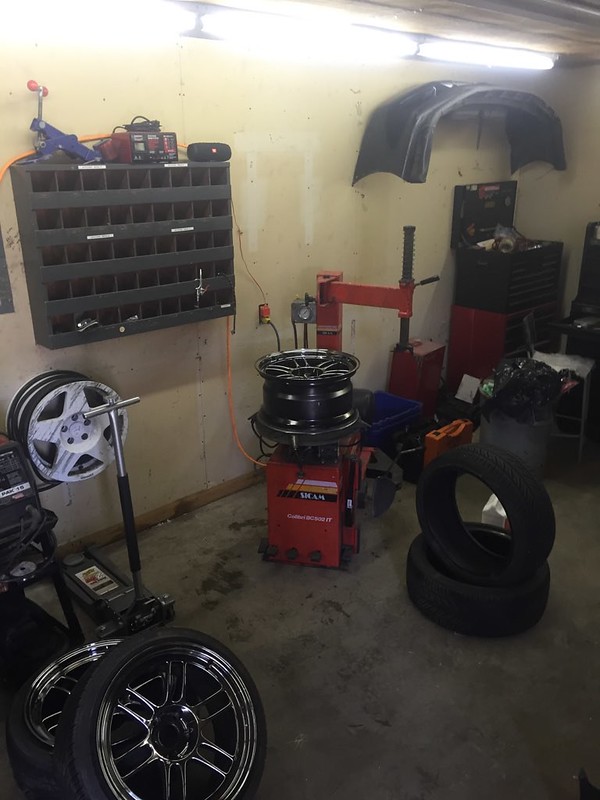
made a kinda big purchase for something that I’ve wanted for a long time, my own tire machine.
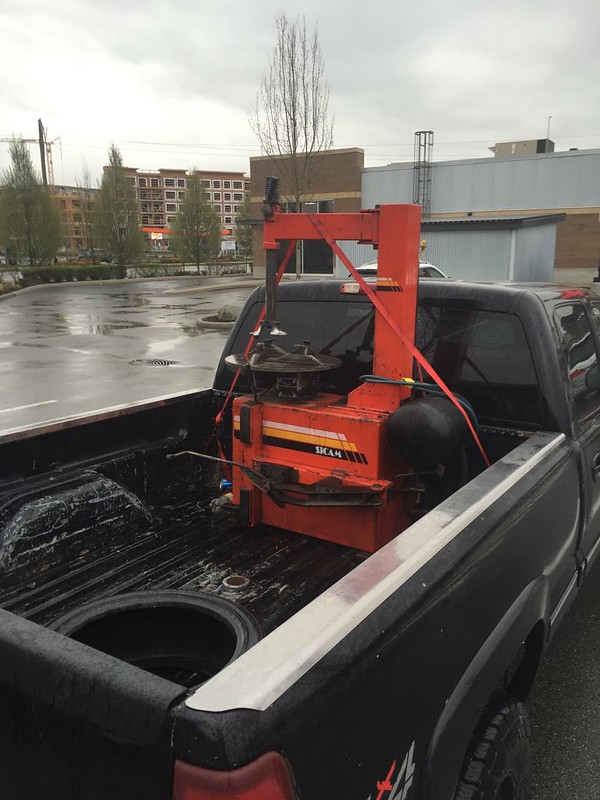
buddy got a new fancier on and gave me his for a good deal. Pulled the tire tire off the broken wheel (long story short, its cracked deep through and not by my doing but i aint mad about it)

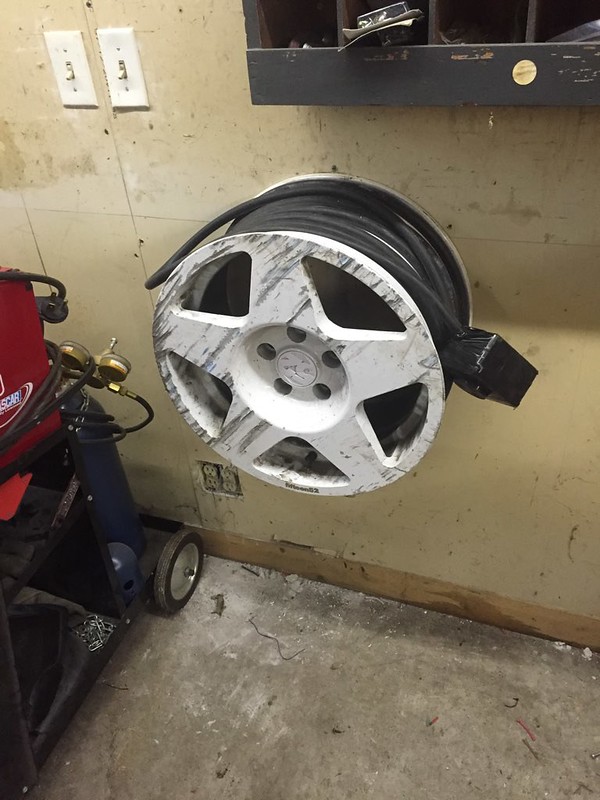
its now a trophy/cable holder lol
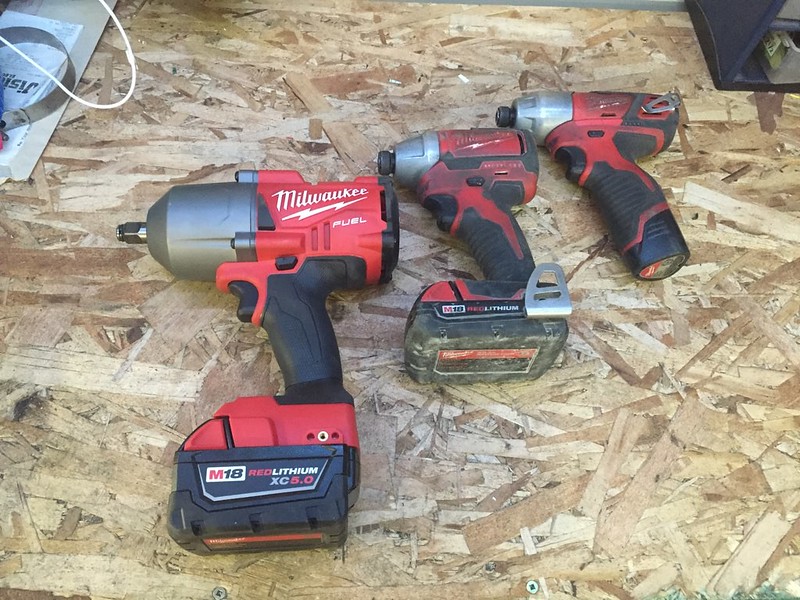
for my birthday recently my fianc� spoiled me by adding another member to the milwaukee family. This thing is sweet and super powerful.
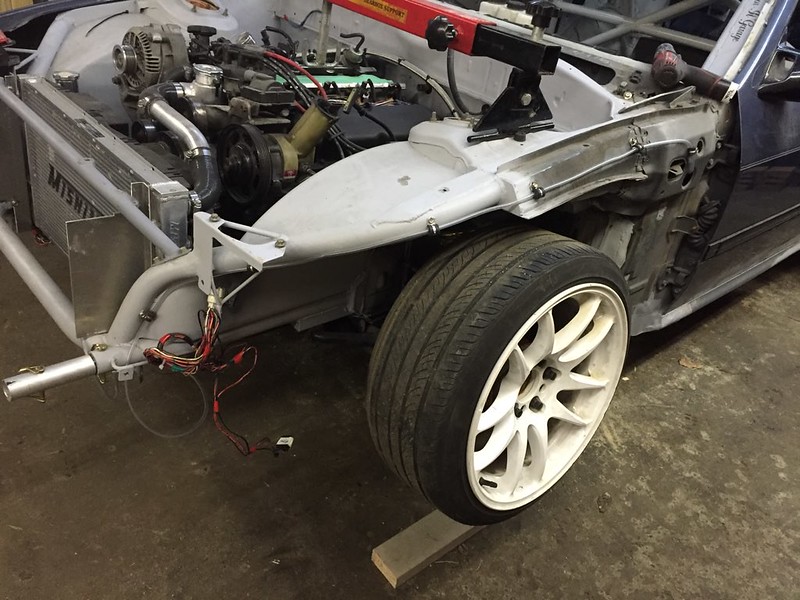
made fender holders to keep the fenders out where they should be and tighten the gap between them and the front bumper.

its the little things I love
buddy got a new fancier on and gave me his for a good deal. Pulled the tire tire off the broken wheel (long story short, its cracked deep through and not by my doing but i aint mad about it)
its now a trophy/cable holder lol
for my birthday recently my fianc� spoiled me by adding another member to the milwaukee family. This thing is sweet and super powerful.
made fender holders to keep the fenders out where they should be and tighten the gap between them and the front bumper.
its the little things I love
Thread Starter
Senior Member
Joined: Mar 2015
Posts: 335
Likes: 8
From: Vancouver, BC
somewhere in there we got a shop doggo
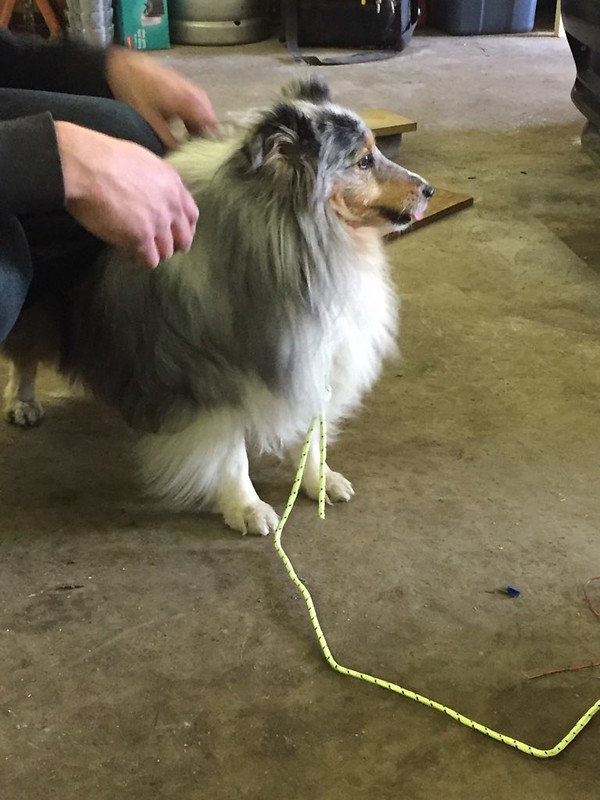
her name is Roxy and she�s a perfect shop doggo because she�s 11 and basically deaf and blind so not much phases her
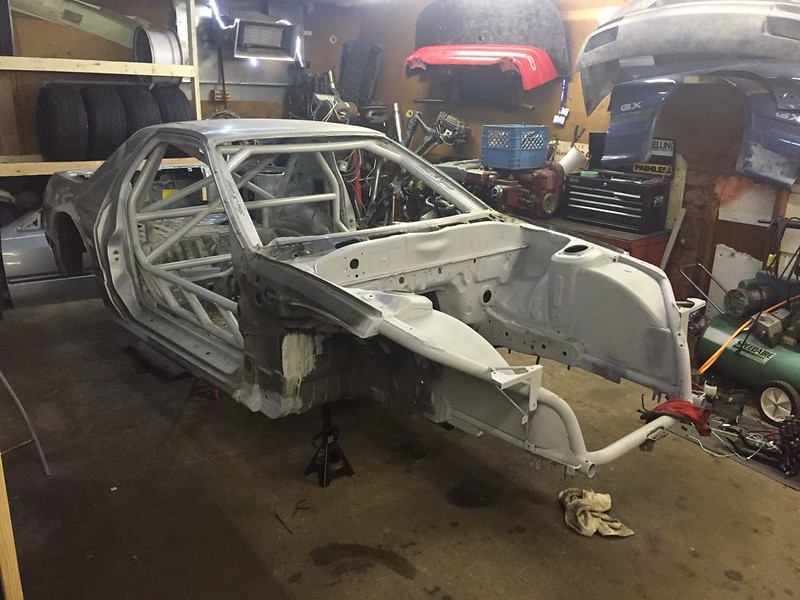
And here we are, basically ready to start tearing it apart to paint the underside and interior and engine bay.
I start 3rd term school on monday so I�m on target for where I wanted to be. Theres a local show i�d really like to make but its june 10th, so I have a lot of work to do to make that as it�ll need to be fully painted and assembled for that�
her name is Roxy and she�s a perfect shop doggo because she�s 11 and basically deaf and blind so not much phases her
And here we are, basically ready to start tearing it apart to paint the underside and interior and engine bay.
I start 3rd term school on monday so I�m on target for where I wanted to be. Theres a local show i�d really like to make but its june 10th, so I have a lot of work to do to make that as it�ll need to be fully painted and assembled for that�

Rotary Freak


Joined: Jul 2016
Posts: 1,838
Likes: 599
From: Beeton, Ontario
I really like what you did with the switches in the ashtray. I may do something similar if I need to add switches in my car (I really hate seeing switches that aren't in OEM locations, so concealing them in the ashtray is a nice alternative).
Thread Starter
Senior Member
Joined: Mar 2015
Posts: 335
Likes: 8
From: Vancouver, BC
they will be controlling the strobes and underglow etc, so not stuff I want out in the open anyway lol. I had to trim the bottom of the ashtray in my last chassis to clear the shifter, so this has a second purpose as well. Just need to get some abs plastic and glue it in instead of the aluminum mock up piece

Thread Starter
Senior Member
Joined: Mar 2015
Posts: 335
Likes: 8
From: Vancouver, BC
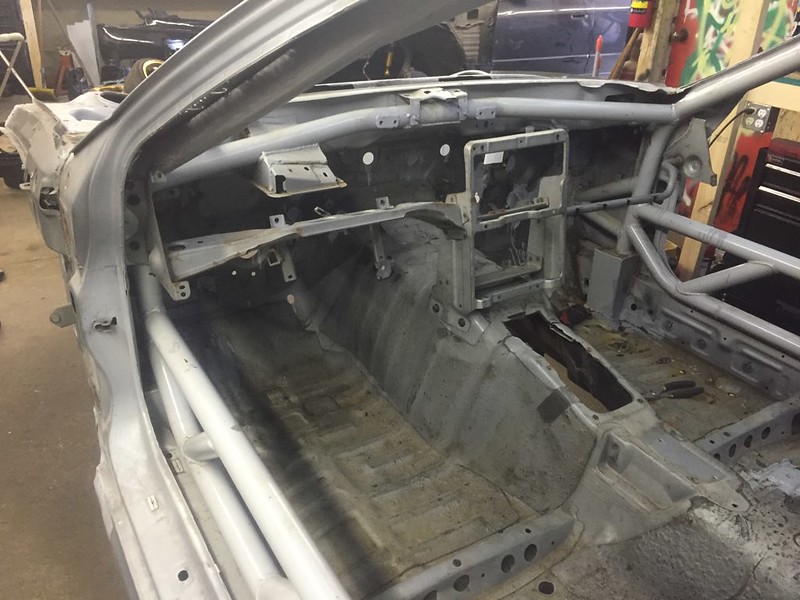
Well as per my usual its been far too long. This is largely due to my work pace, I�ve been pretty bad at taking pics of everything. Some details are minor and some details are in my opinion worth sharing and I have pics of most of those.
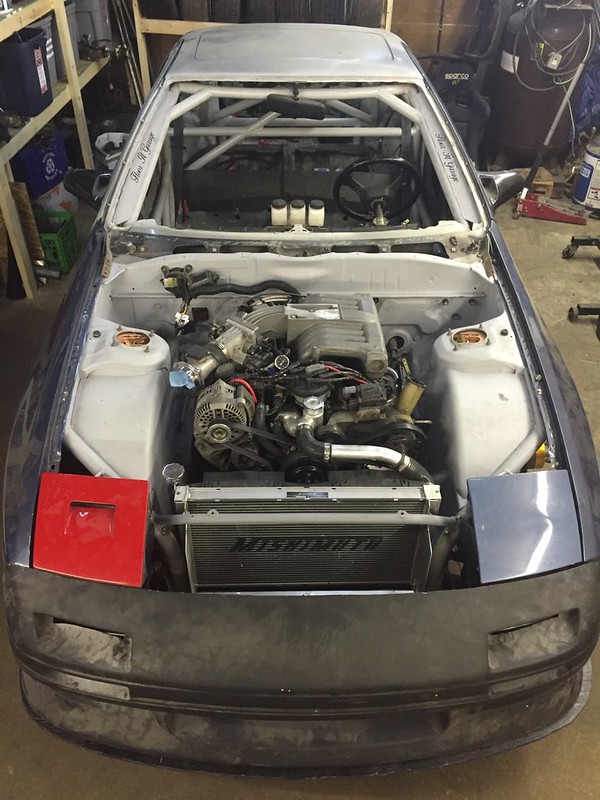
we left off with it basically ready to be stripped for paint.
this was after about 8 hours, basically down to the engine and subframes.
took a minute to put tires on the RPF1�s as well
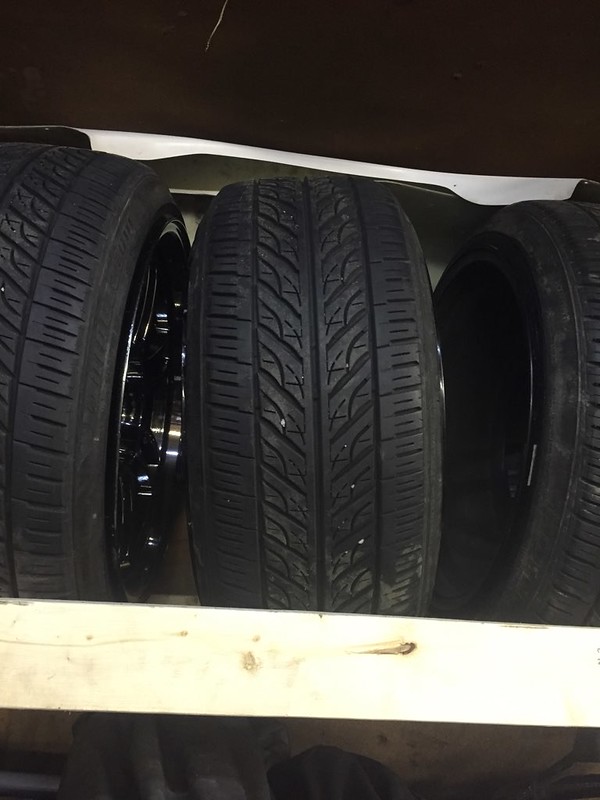
these are 225/40�s on a 9.5 and they are more stretched than I thought. looks like a 10� wheel� but i like it

once it was stripped down there was a handful of tasks still to be done that I was waiting to do once most stuff was out of the way.
This is the other half of the oil filter relocation kit that wasn�t really working out. I had bought an adapter from transdapt to make the thread something more common, and that combined with a part from the other oil filter pedestal make it work for a spin on fuel filter. A long time ago I had the idea to use a spin on can, they are huge media area and very small micron (10 and less) and $7 for a replacement.
but where to fit it
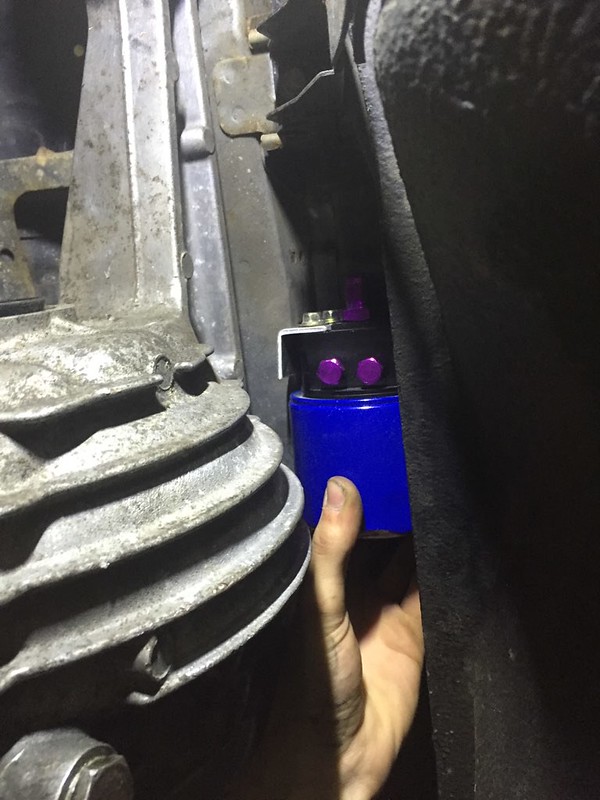
Where I settled on was above the diff. Safe from a rear ender, safe from an axle breaking. Ideally I�d prefer the filter closer to the rail, but I also didn�t like any of the places that it could physically fit, either it be in the way of something else or proximity to the ground or exhaust. I can change it without removing anything, just have to jack the car up. I believe FD rx7�s have their filters in a similar place. Thankfully with a filter this size its not something I have to change often. And theres ports for a fuel pressure and temperature senders if I ever want.
we left off with it basically ready to be stripped for paint.
this was after about 8 hours, basically down to the engine and subframes.
took a minute to put tires on the RPF1�s as well
these are 225/40�s on a 9.5 and they are more stretched than I thought. looks like a 10� wheel� but i like it
once it was stripped down there was a handful of tasks still to be done that I was waiting to do once most stuff was out of the way.
This is the other half of the oil filter relocation kit that wasn�t really working out. I had bought an adapter from transdapt to make the thread something more common, and that combined with a part from the other oil filter pedestal make it work for a spin on fuel filter. A long time ago I had the idea to use a spin on can, they are huge media area and very small micron (10 and less) and $7 for a replacement.
but where to fit it
Where I settled on was above the diff. Safe from a rear ender, safe from an axle breaking. Ideally I�d prefer the filter closer to the rail, but I also didn�t like any of the places that it could physically fit, either it be in the way of something else or proximity to the ground or exhaust. I can change it without removing anything, just have to jack the car up. I believe FD rx7�s have their filters in a similar place. Thankfully with a filter this size its not something I have to change often. And theres ports for a fuel pressure and temperature senders if I ever want.
Thread Starter
Senior Member
Joined: Mar 2015
Posts: 335
Likes: 8
From: Vancouver, BC
anyway completely stripped down
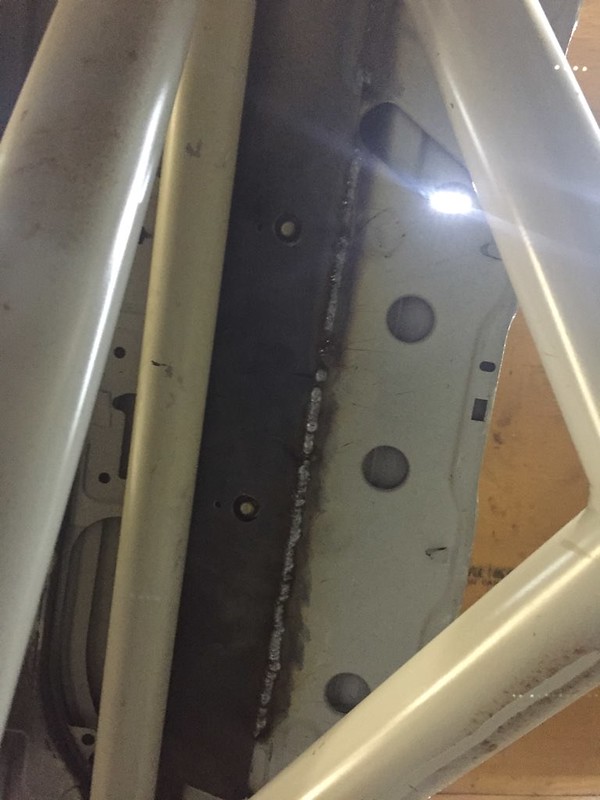
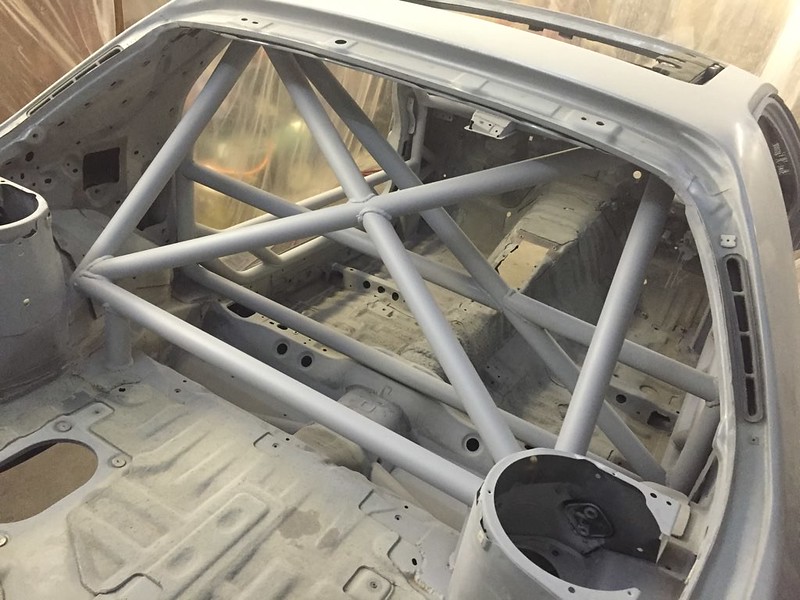
while theres gussets on the A pillar, there wasn�t anything on the rear of the car. So I added a plate above the rear of the main hoop. I drilled holes for the bolts that hold the sunroof in as a last resort but I don�t think that the sunroof frame will ever come out.
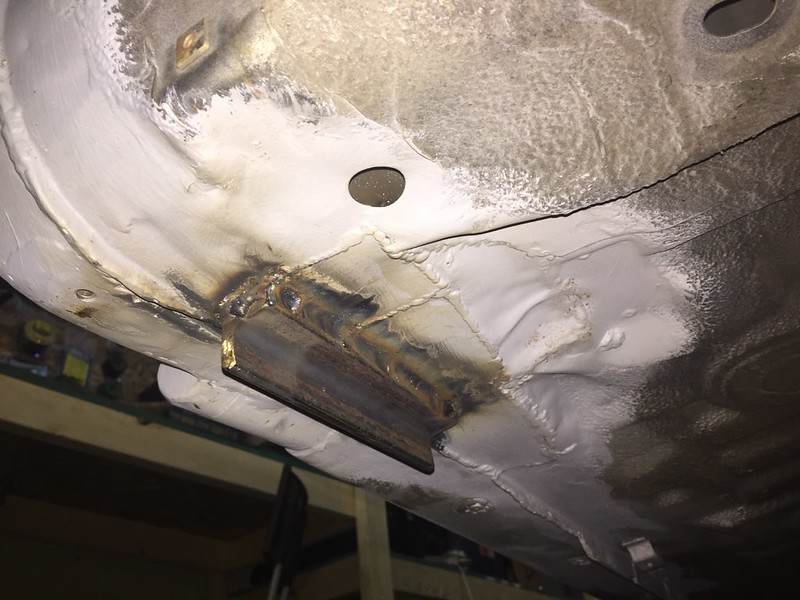
Came to the realization that I didn�t have pinch welds, and while when doing the rust repair and such I decided I didn�t want to bother but I realized that if my frame ever needs to be straightened they will need a way to grab the frame. Its also ideal for jack stands, something FC pinch welds aren�t
One thing I hadn�t done yet was trim my good dash to fit the car. I made templates for it based off the first dash I over cut (for ease of removal) so I could get It as perfect as possible.
I took the skin off the dash frame and trimmed the frame separately
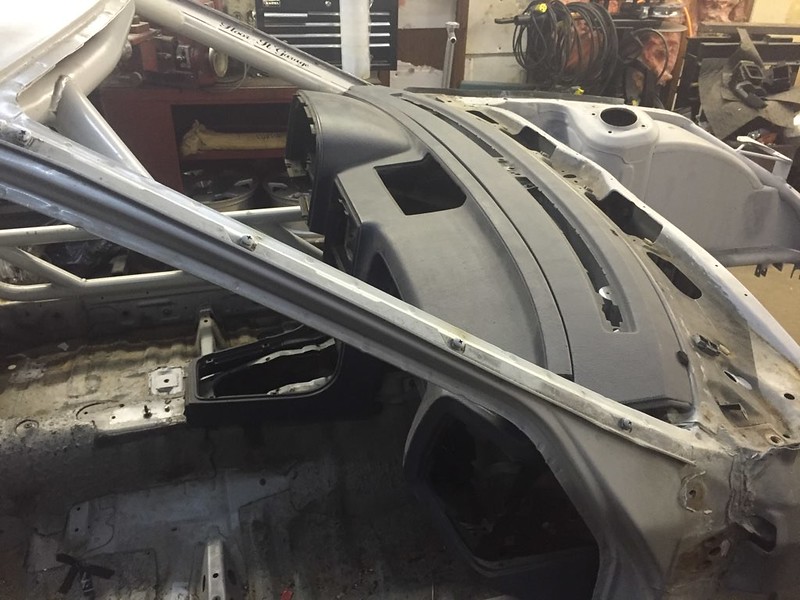
then the dash skin
Thread Starter
Senior Member
Joined: Mar 2015
Posts: 335
Likes: 8
From: Vancouver, BC
Im sure I could have gotten it even better than that with a 3rd try but oh well
prepping for paint includes the garage too, we have a compressor with a 40 or so gallon tank. While that may cut it it will be hard to keep up with the demand of a HVLP gun. In the back of the garage theres a huge 100 gallon or something tank but it doesn�t have a motor. My plan was to use the little one to feed the big one (with some cool down time in-between filling it) and also build an air cooler/water trap to prevent anything from getting into the paint.

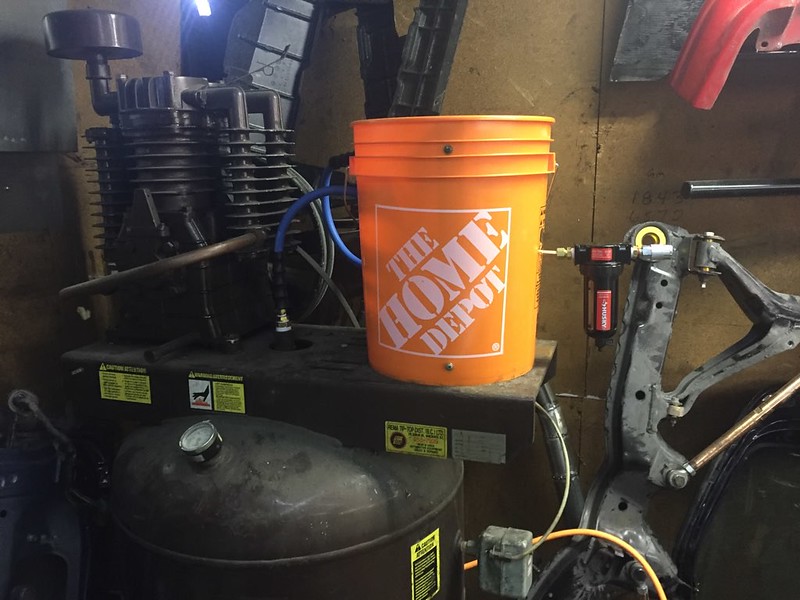
a rather frustrating almost $150 later, I had a diy water trap.
Thread Starter
Senior Member
Joined: Mar 2015
Posts: 335
Likes: 8
From: Vancouver, BC
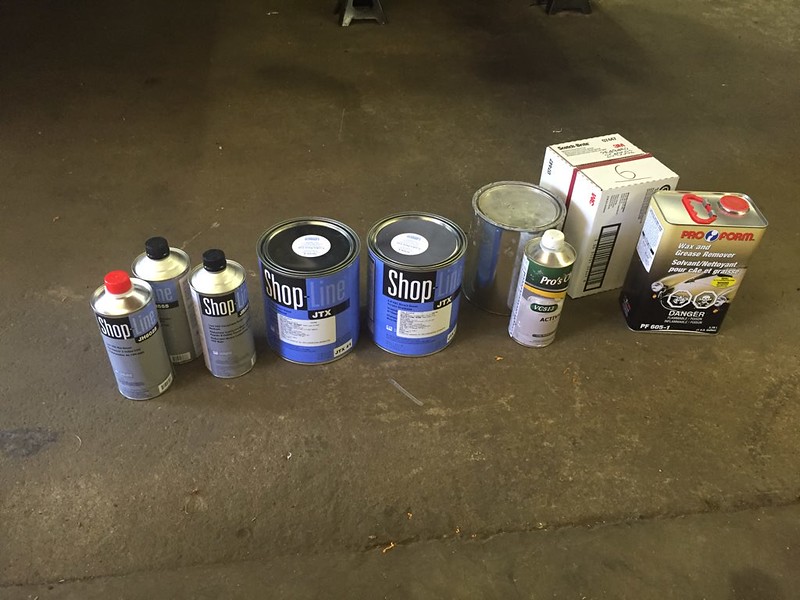
While I’m spending money…. this is about $700 in paint supplies lol
but short of black primer its everything I need to paint the underside, engine bay, interior and exterior and have some leftovers for repainting aero parts I’m sure to destroy
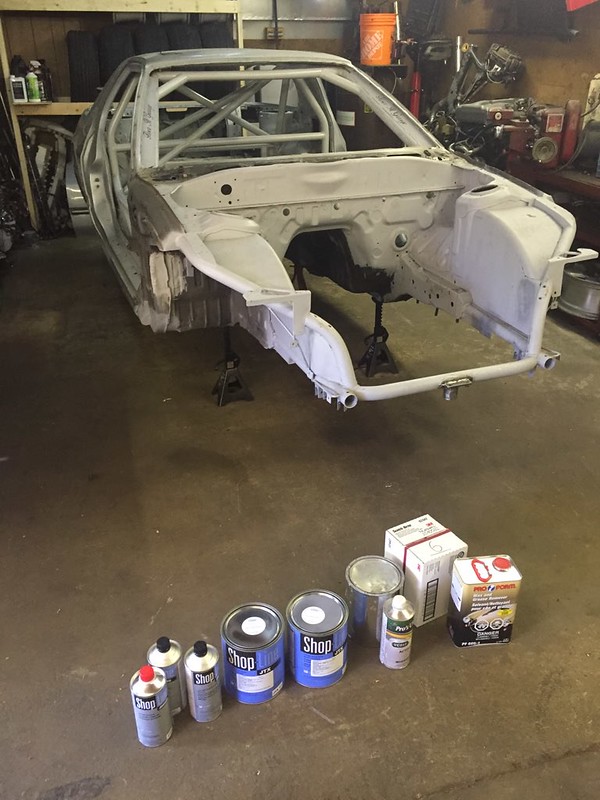
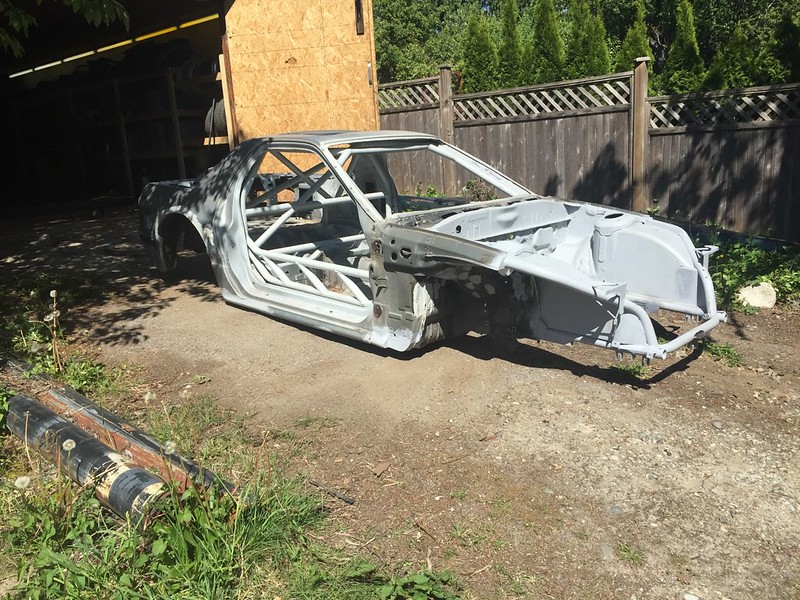
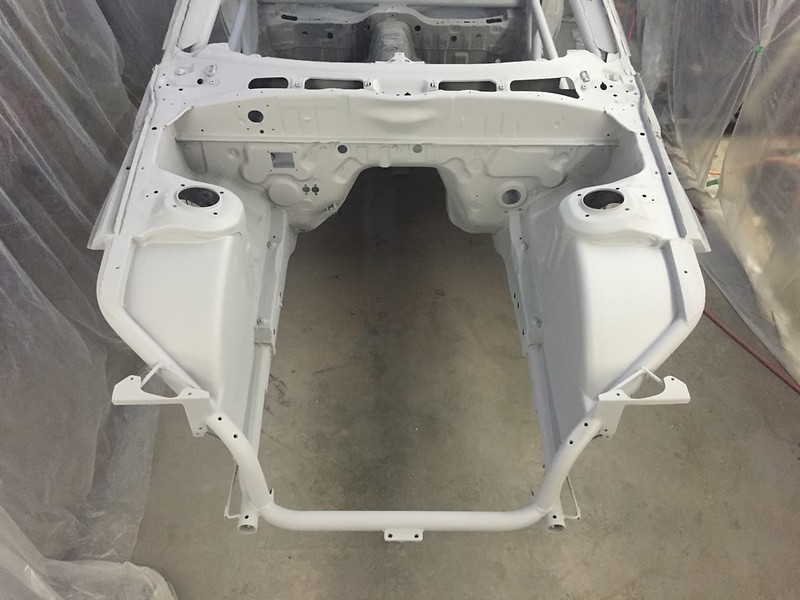
dragged it outside to pressure wash it before starting sanding
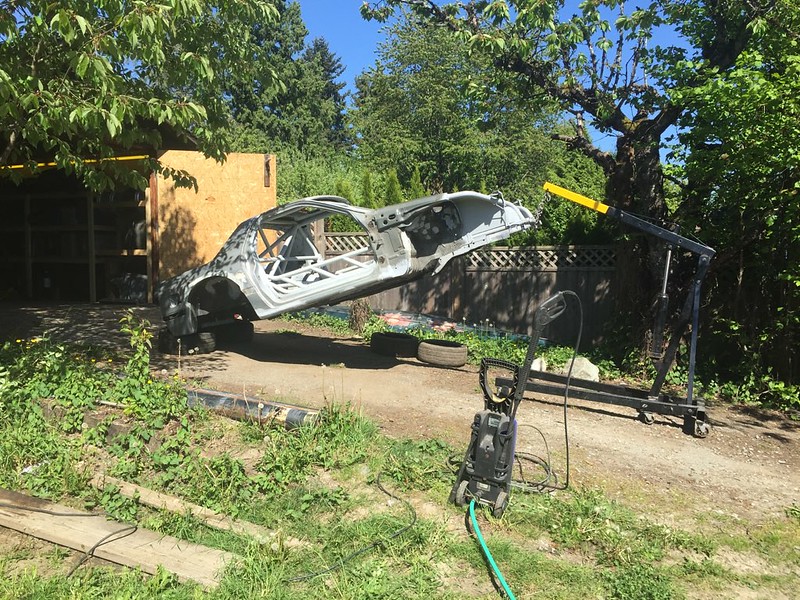
given how sketchy the car was sitting, i wasn’t super comfortable getting right under it to scrub the dirt. So it was kinda a waste of time lol. Got the surface stuff but the real grime needed more attention
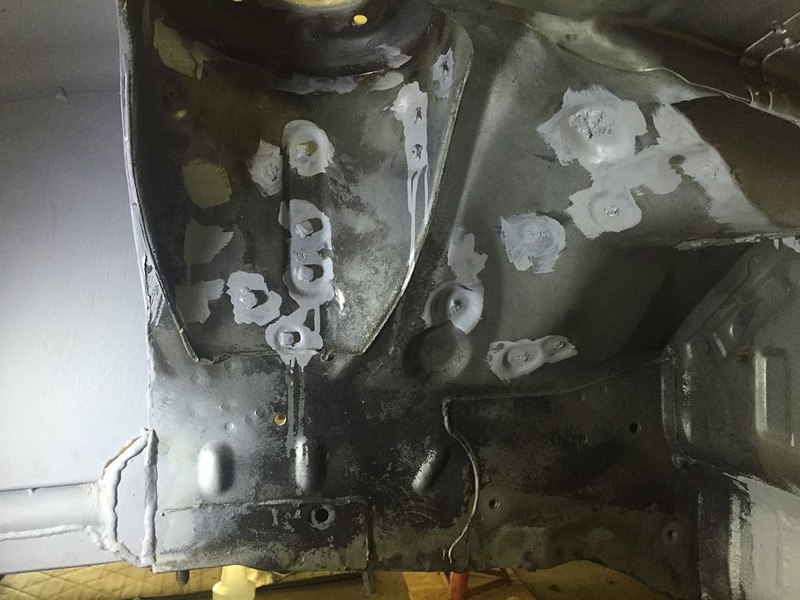
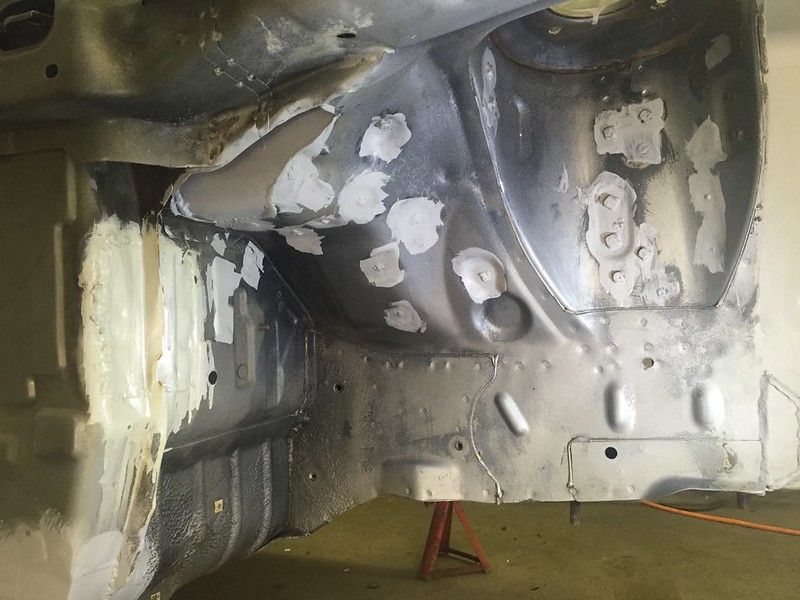
for example

Put up the poly plastic walls, bought some pizza and had the vibes boys over for some sanding. Obviously we listened to Darude Sandstorm. Shoutout to Mitch, Jordan, Kris, Tito for 15 minutes and Eli for the help (also Eli for ditching his gf lol)
Thread Starter
Senior Member
Joined: Mar 2015
Posts: 335
Likes: 8
From: Vancouver, BC

But in one night, including a lot of goofing off we got like 80% of the car sanded. I had to spend some extra effort in the engine bay due to brushing on primer. Mitch will be the first to tell you this.
[mg]https://farm2.staticflickr.com/1813/42957881921_1e0fe04c2e_c.jpg[/img]
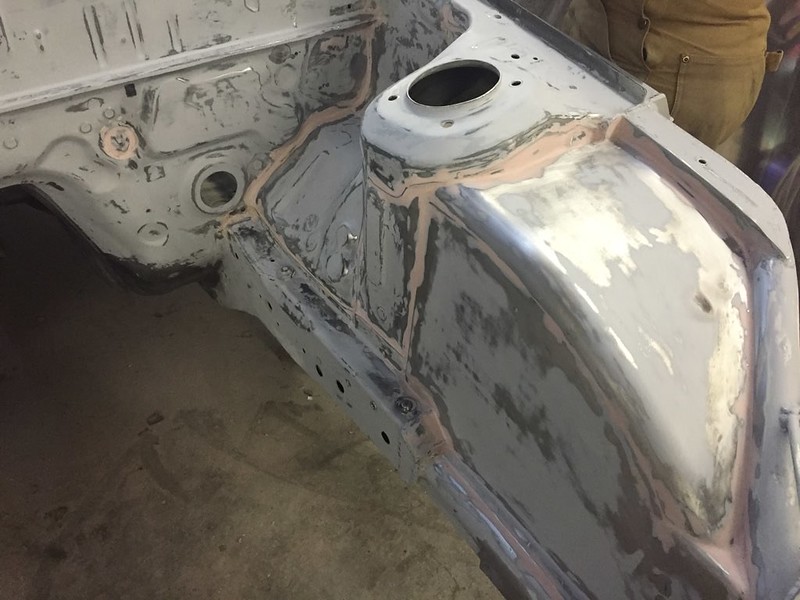
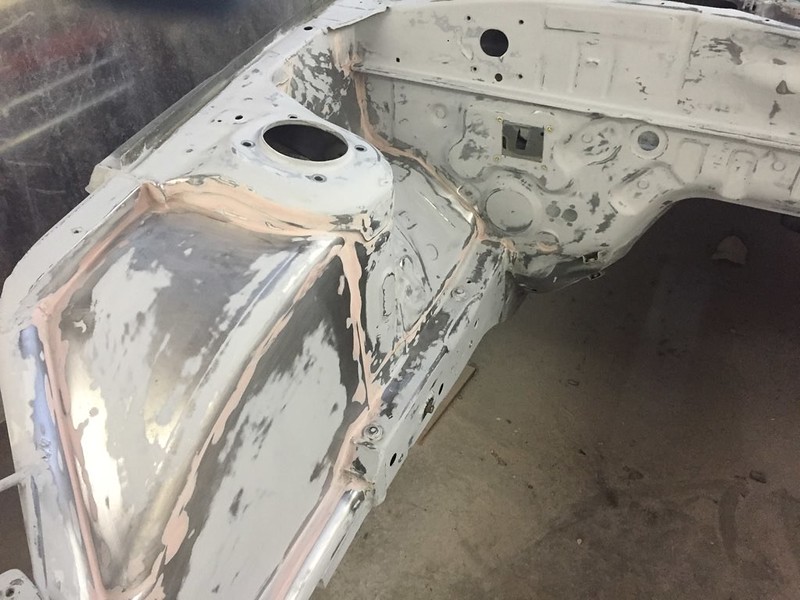
Everyone seems to fill the gaps and such in Bondo, especially where theres room for the engine bay to flex it always cracks. I chose to use some 2 part epoxy filler, and maaaaaaaan does this stuff suck to sand. I thought it would take all of an evening to sand it once it hardened but it was like 3. Might have been easier if i went with rigid type instead of semi-rigid but i doubt it. sanding “innies” isn’t fun either.
Somewhere in there I applied seam sealer to all the seams I either created or grinded. Was really rushing to get stuff done before painting so I didn’t really take pics
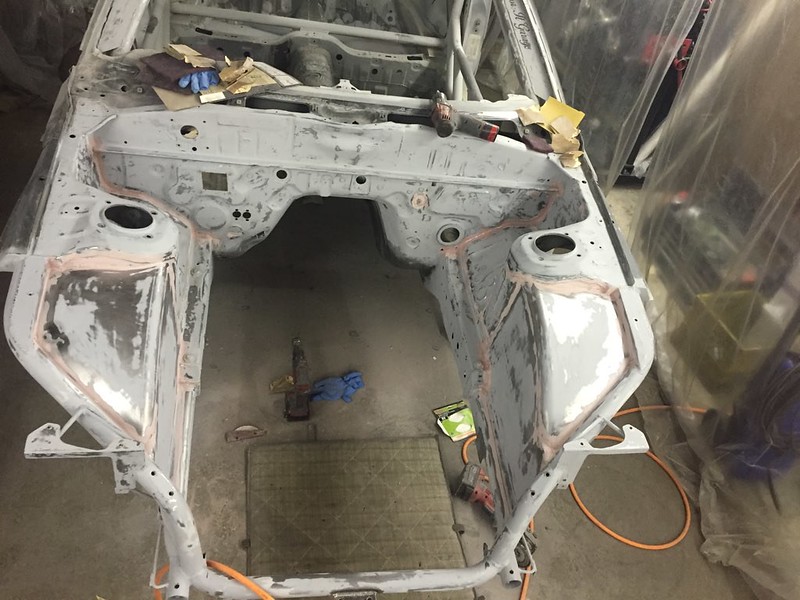
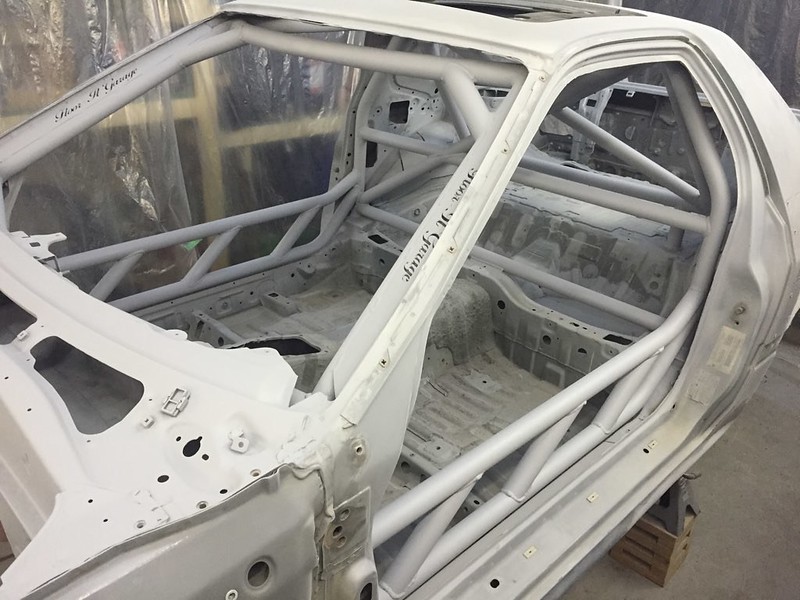
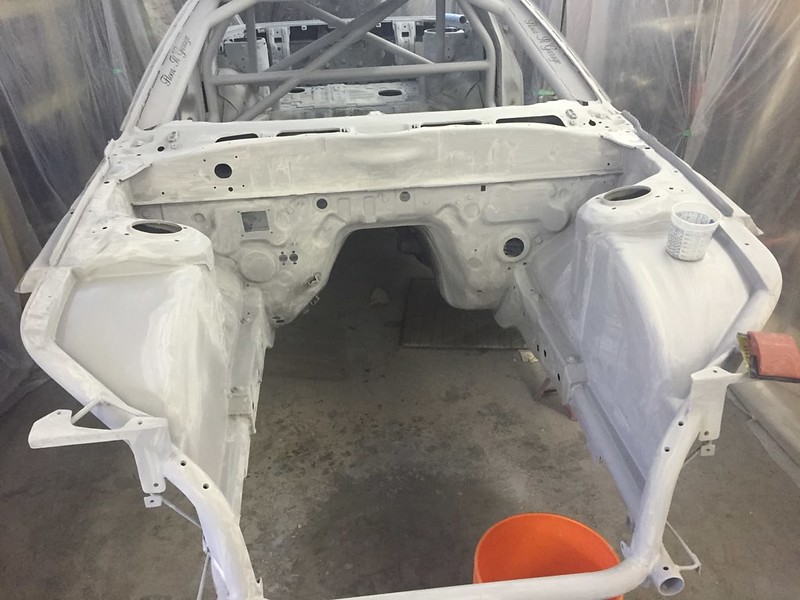
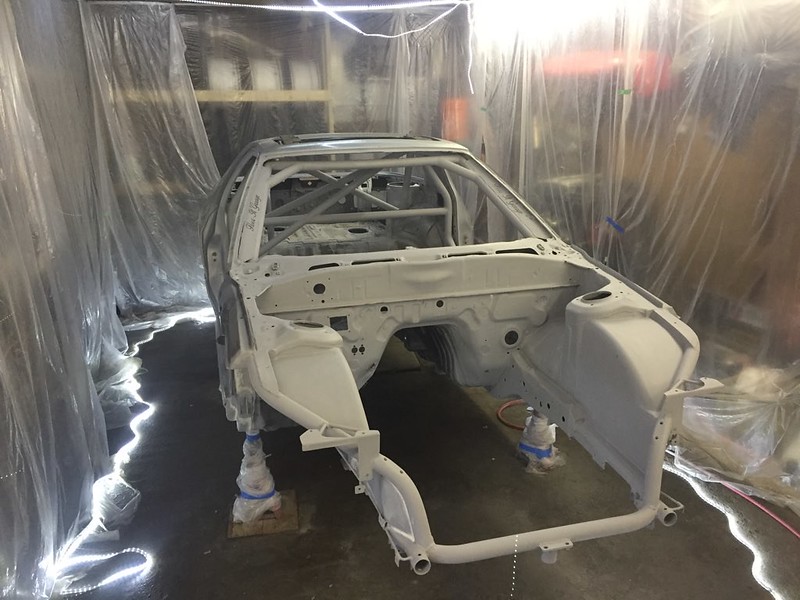
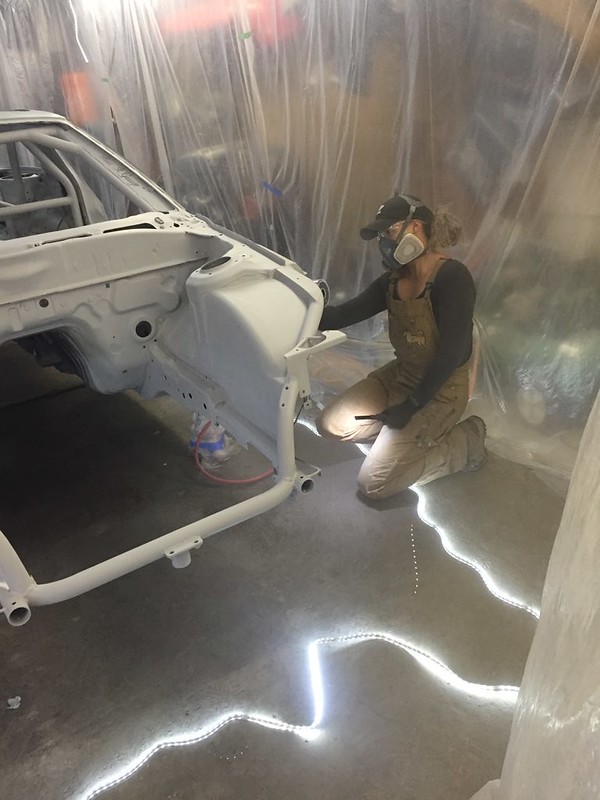
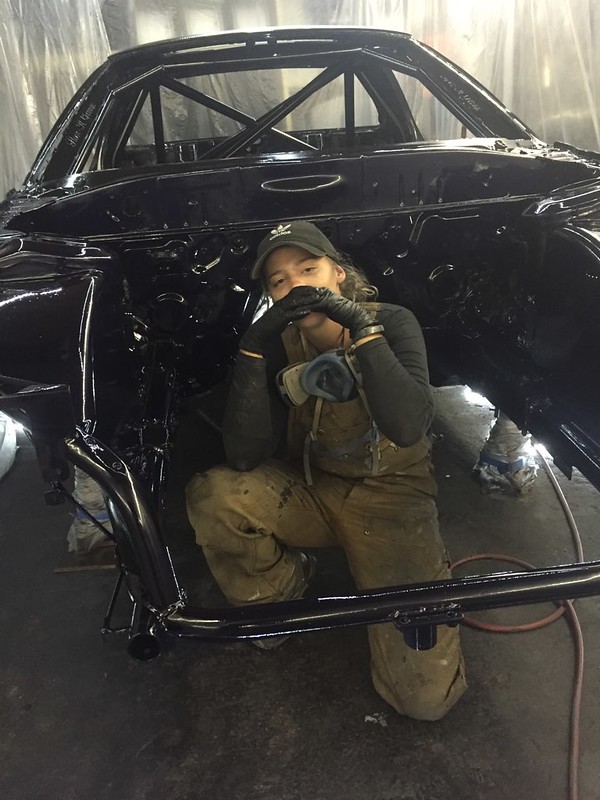
My fianc� (who I did not unfortunately get a picture of while working) and my sister came out to help sand around this part. My sister is an auto painter by trade, so it was a huge help having her advice and expertise throughout the entire process. She laid down a final layer of primer on the cage and engine bay.


Thread Starter
Senior Member
Joined: Mar 2015
Posts: 335
Likes: 8
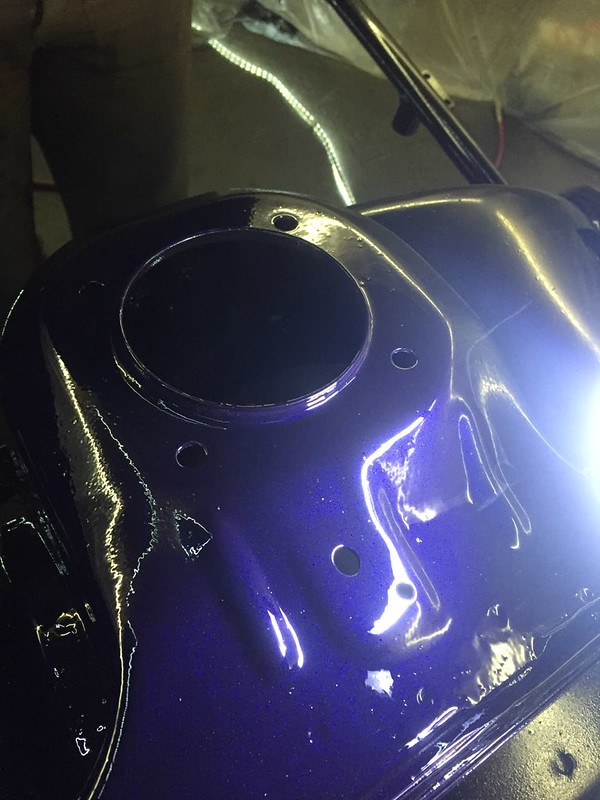
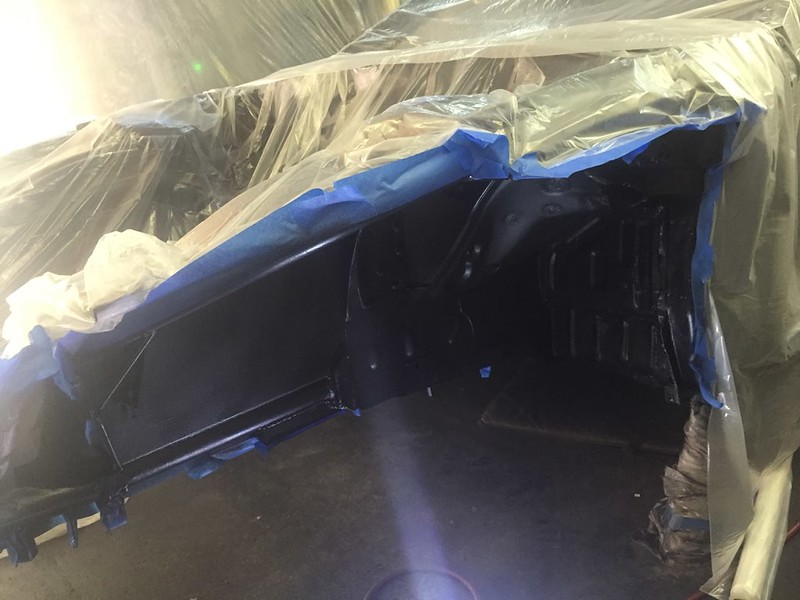
From: Vancouver, BC

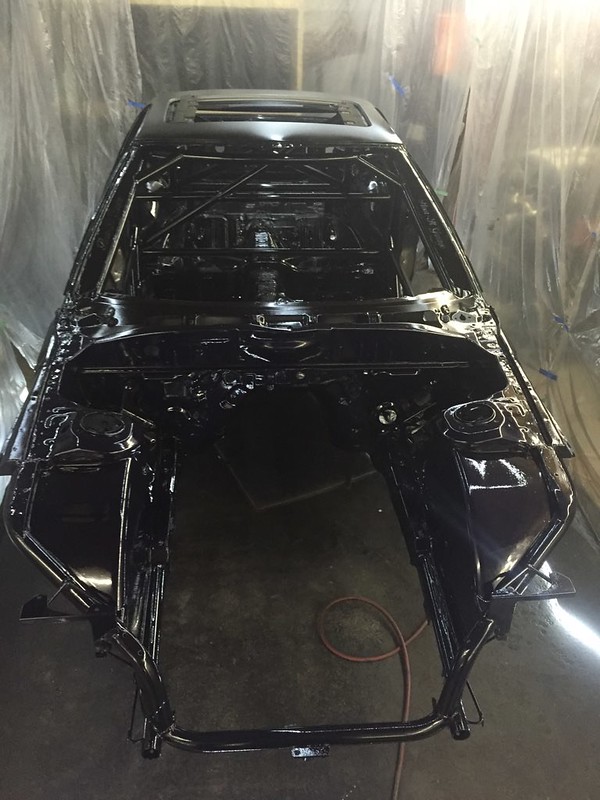
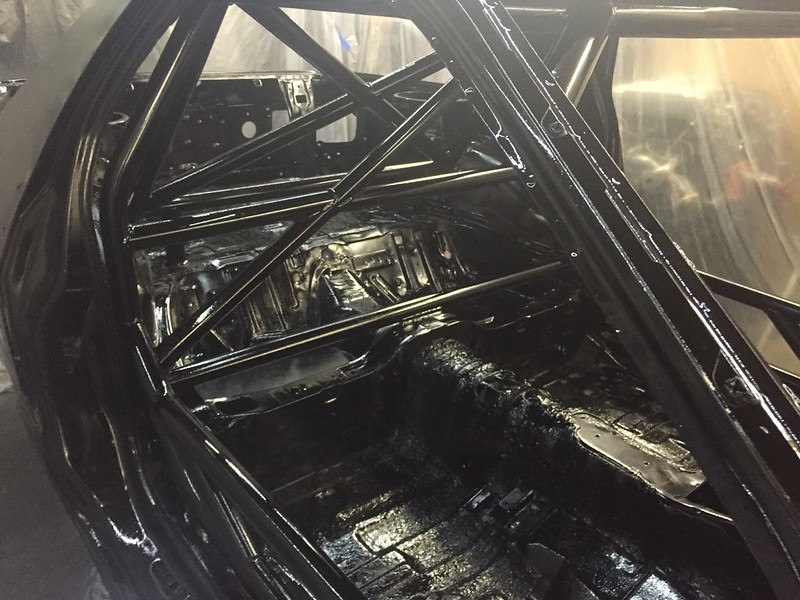
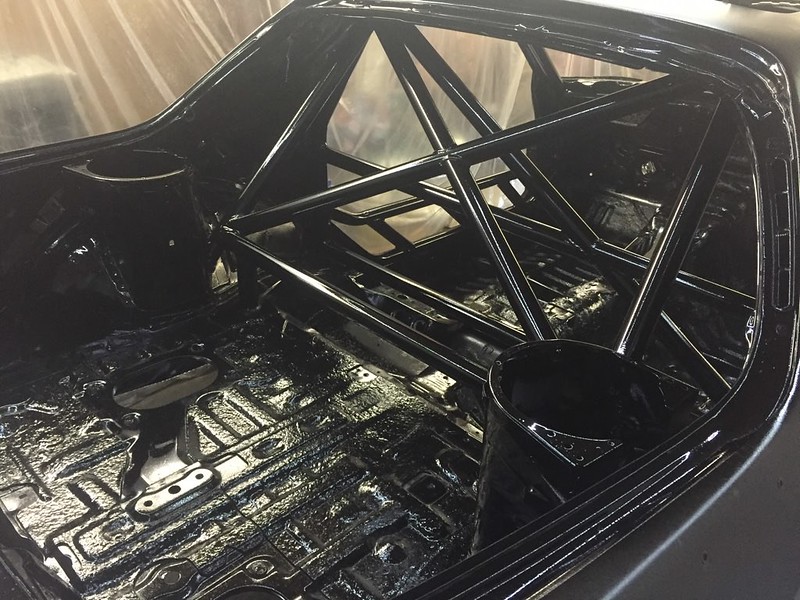
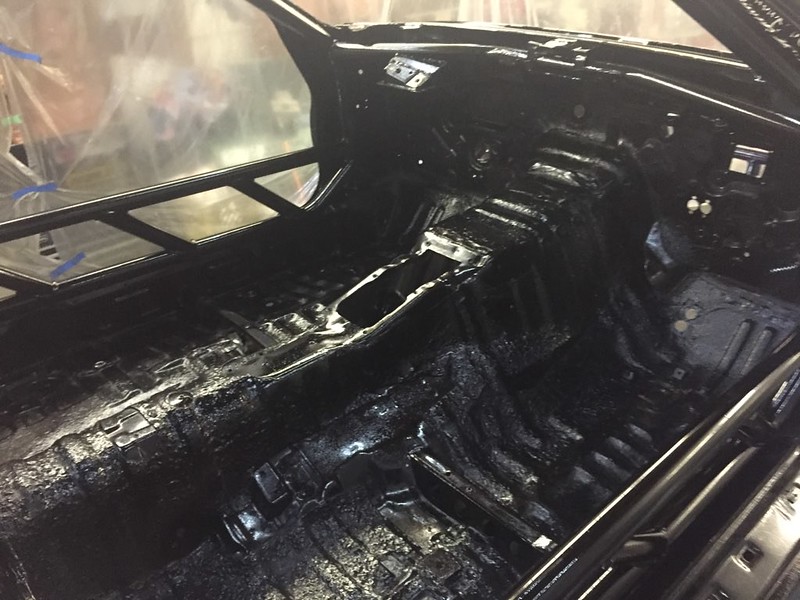
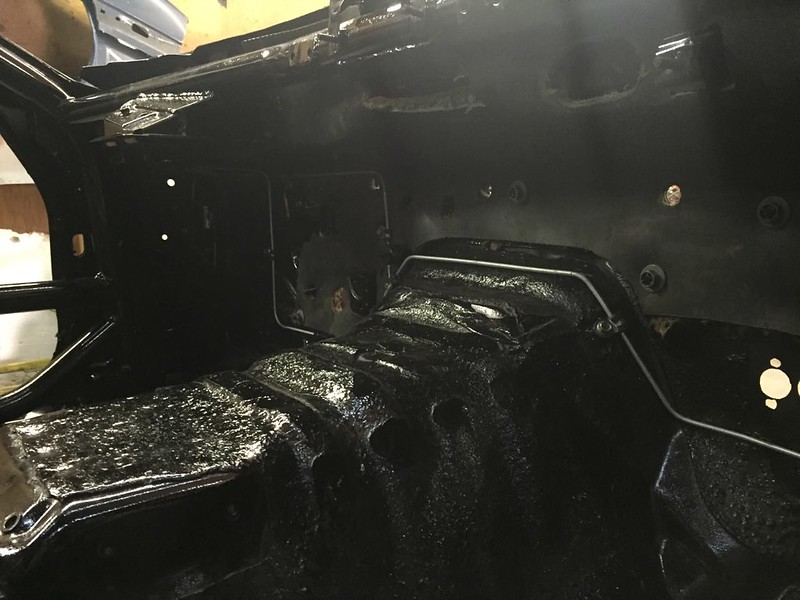
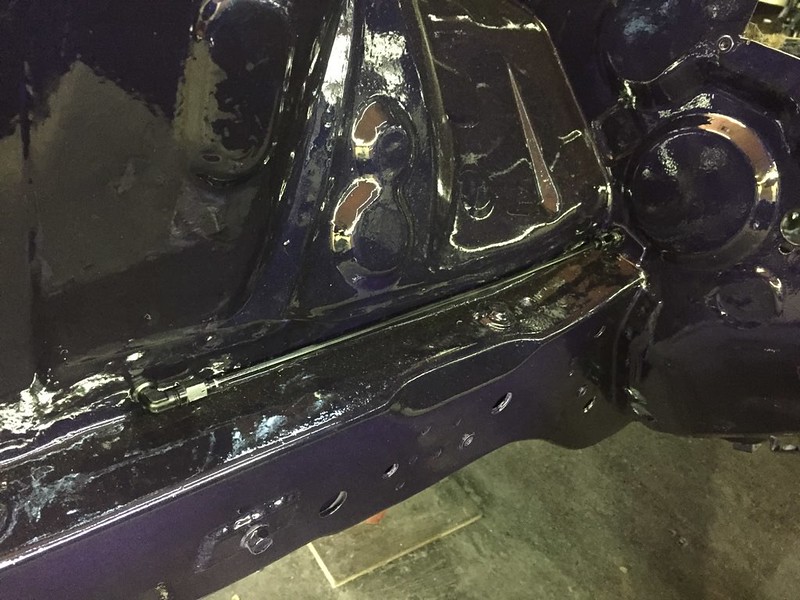
Colour is Mazda Stormy Blue Mica. Came on RX8�s and NC miata�s. Its usually more black but i kinda goofed and used a lighter colour primer than intended so It looks a bit purple. especially in the spots with less coverage. She sprayed 2 coats of gloss black in the interior, 1 thick one on the underside (the undercoating just soaked it up), and 3 coats on the bay. Have to give it up to my sister, She was painting from about 6 pm until midnight. And hindsight being 20/20, a hat was not enough to keep paint out of her hair.
I left it for the rest of the weekend (we painted on friday) and came back monday to scuff and spray bedliner onto the wheel wells.
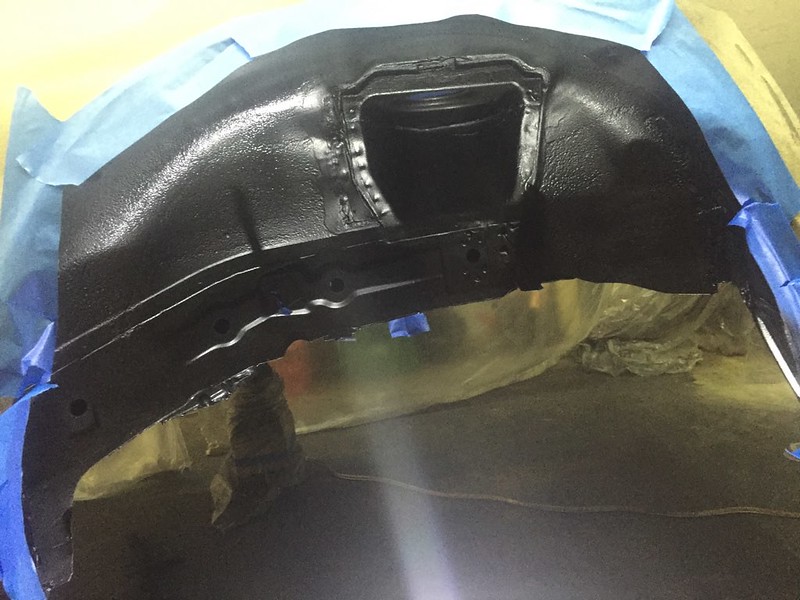
This worked really good on the last chassis and texture just covers up so many imperfections haha
full force reassembly, can finally get all this stuff I have had on shelves for ages off of them
Painted my front brake lines. people before would always ask me where the brake lines were, they are basically invisible now lol