
I Bit Off More Than I Can Chew: A Drift Car


Thread Starter
Senior Member
Joined: Mar 2015
Posts: 335
Likes: 8
From: Vancouver, BC
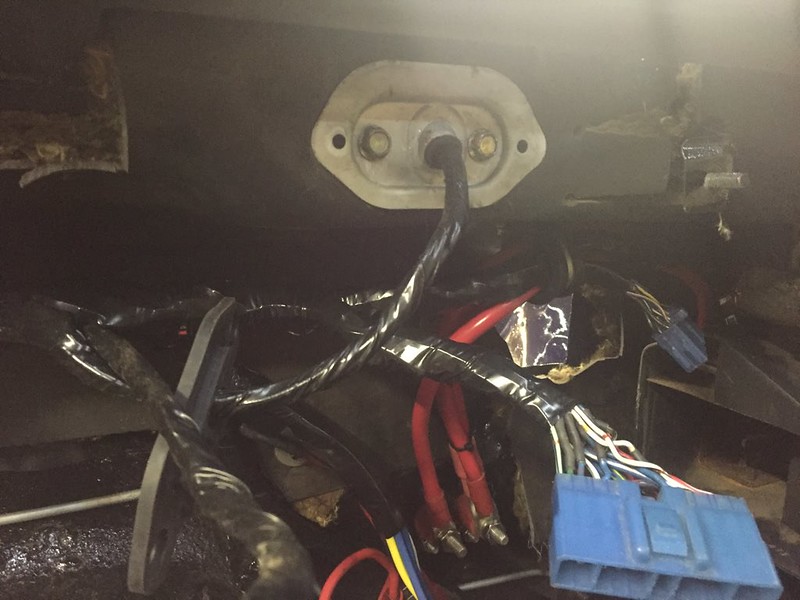
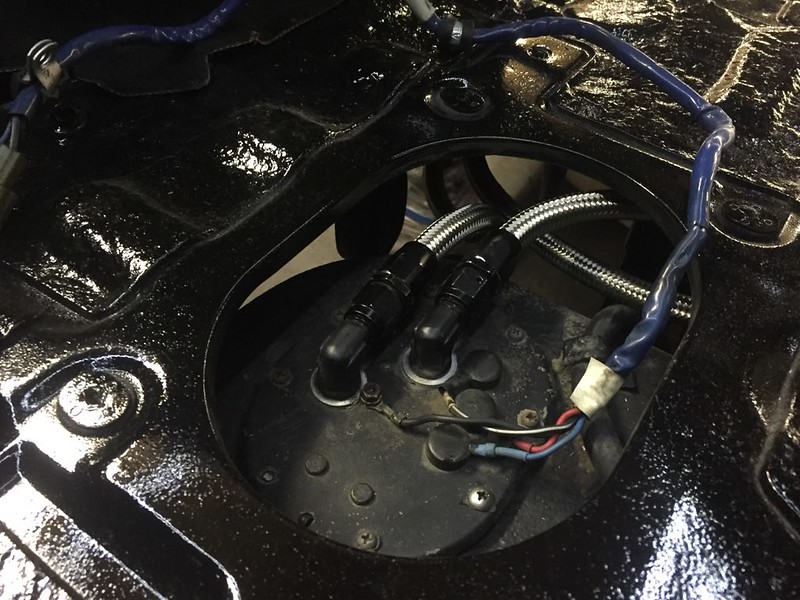
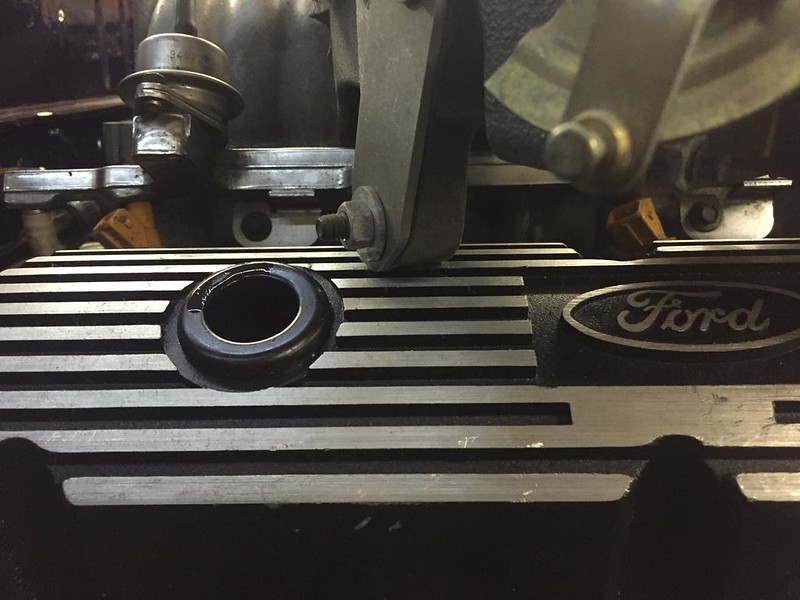
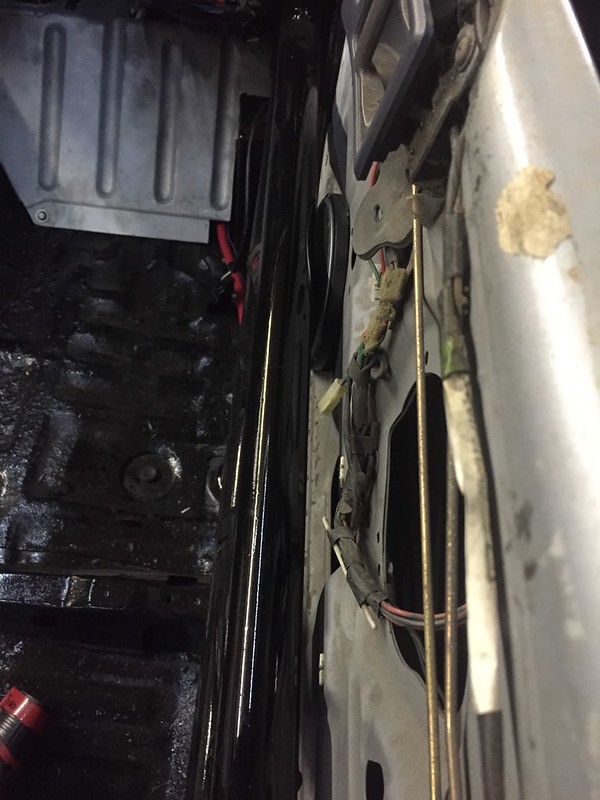
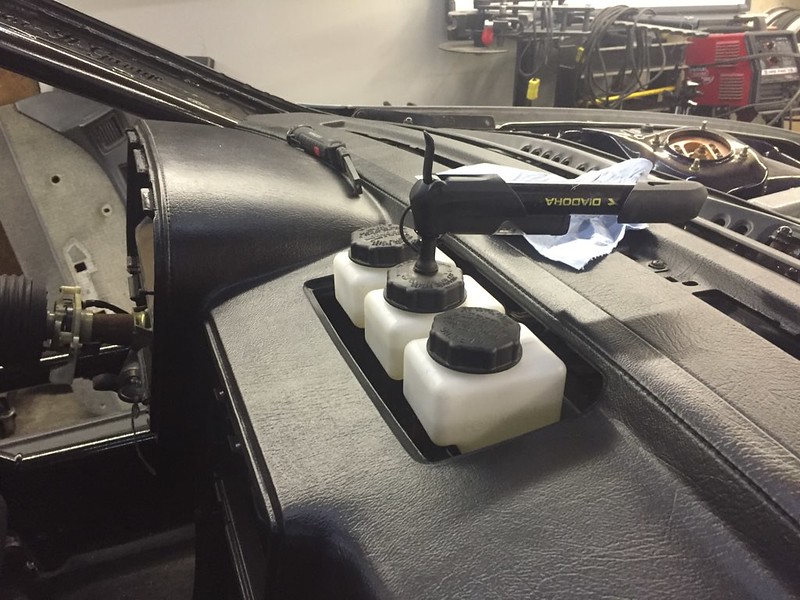
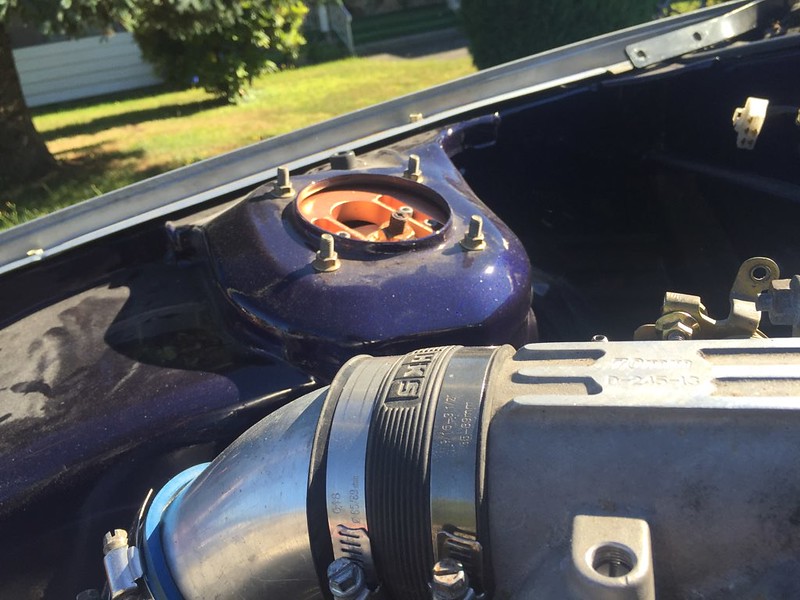
This is one of these little details that get me. originally this was a grommet plate thingy for an AM antenna I believe. But now it passes the wires for my tucked wiper motor wires. Annoyingly the connector has to be depinned each time I remove the main harness but I don’t see doing that ever again really
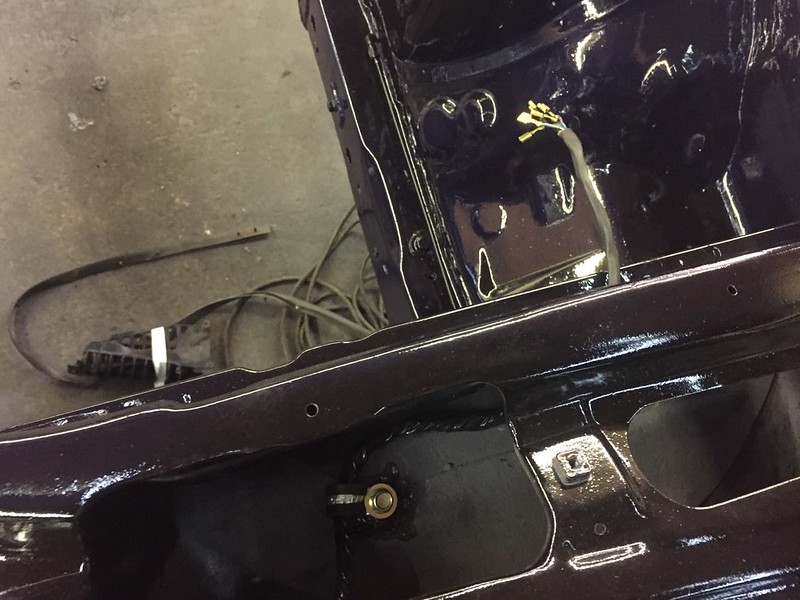

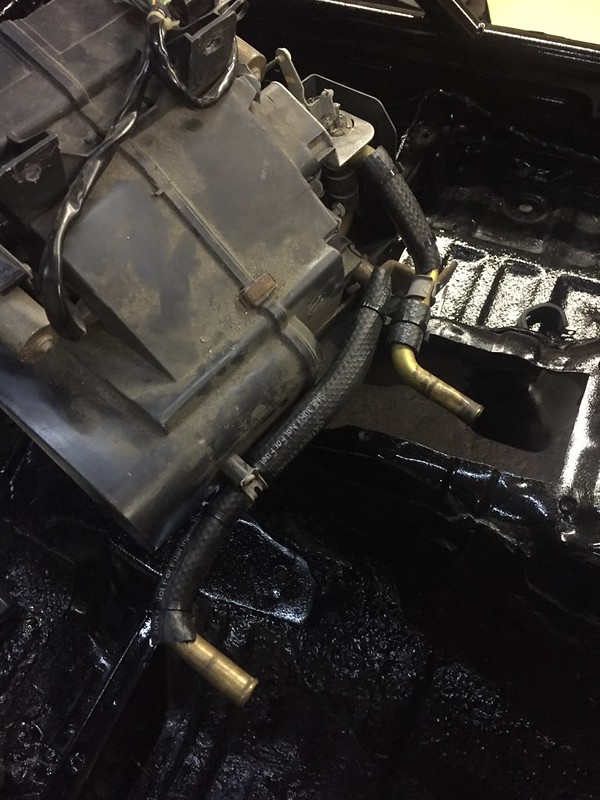
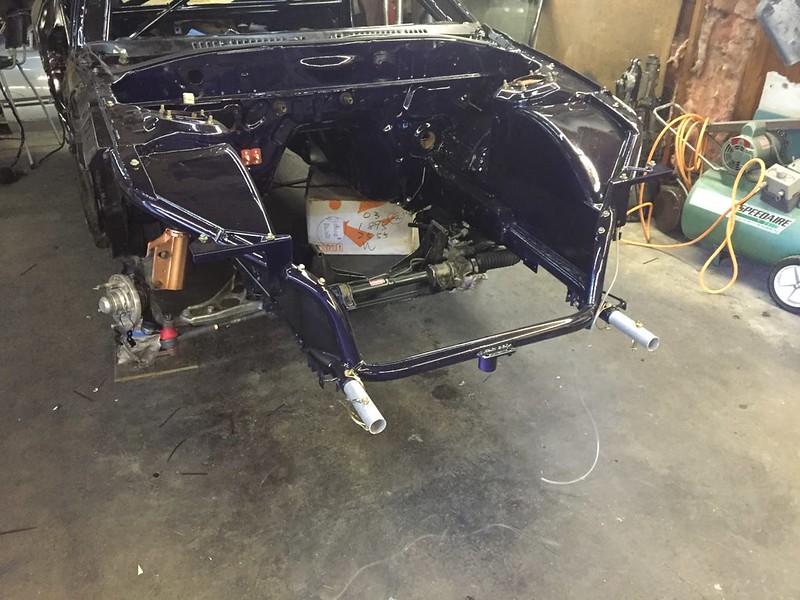
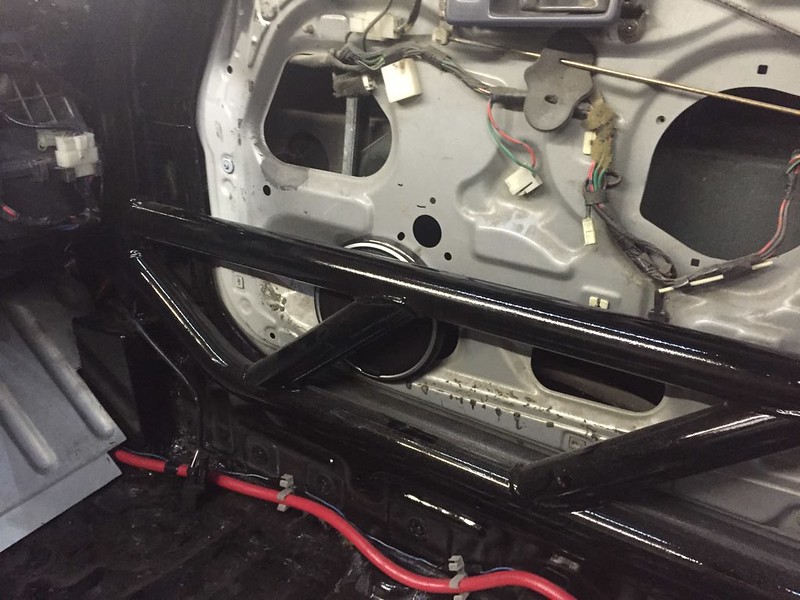
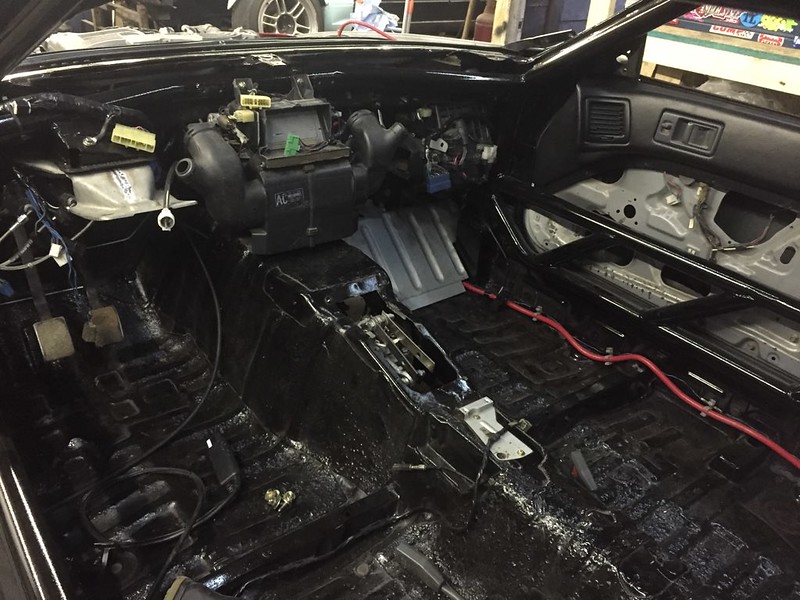
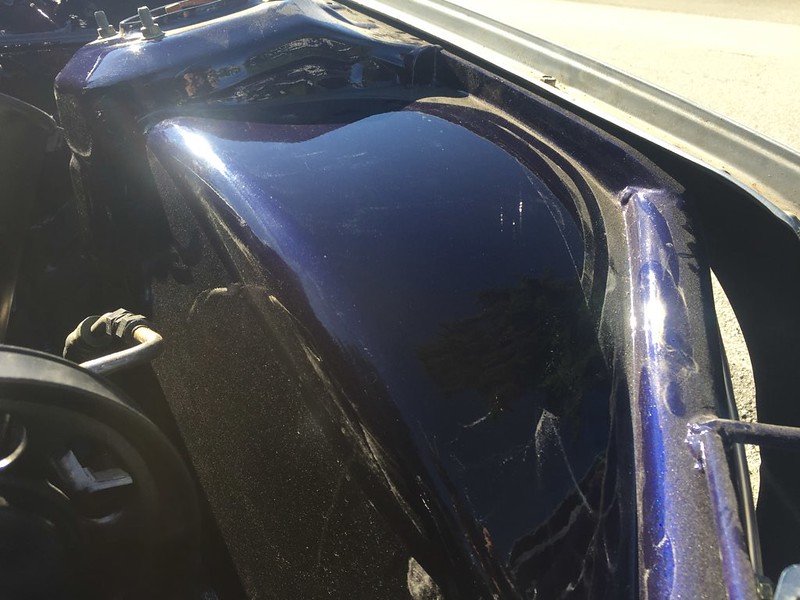
Seeing as how Im not running the harness in the same place as the factory did (I put a roll cage there), I had to do some heat protection from the heater core
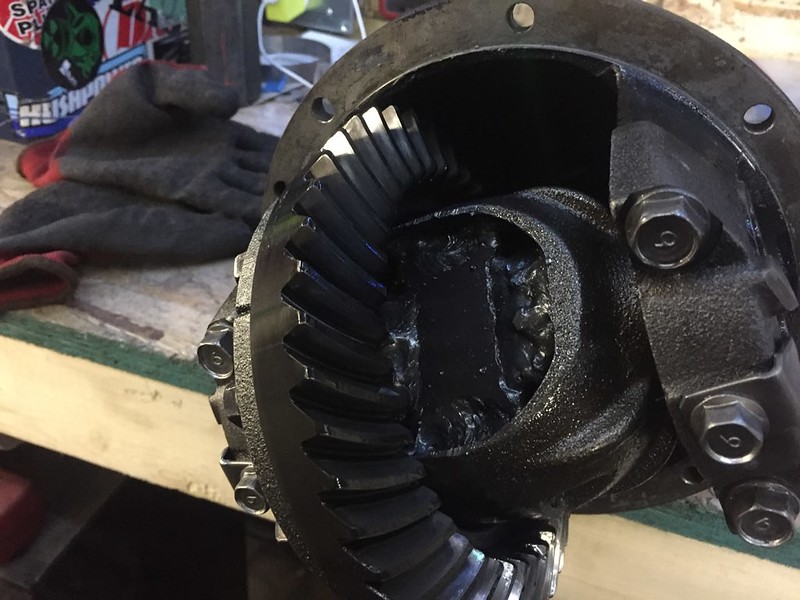
kinda off topic but I had taken the diff cover off to mock the fuel filter and decided it was a good time to check on my welded diff. Lost a few slag bits, as one does with a welded diff but other than that looks healthy. So I grinded the case down and painted it black.
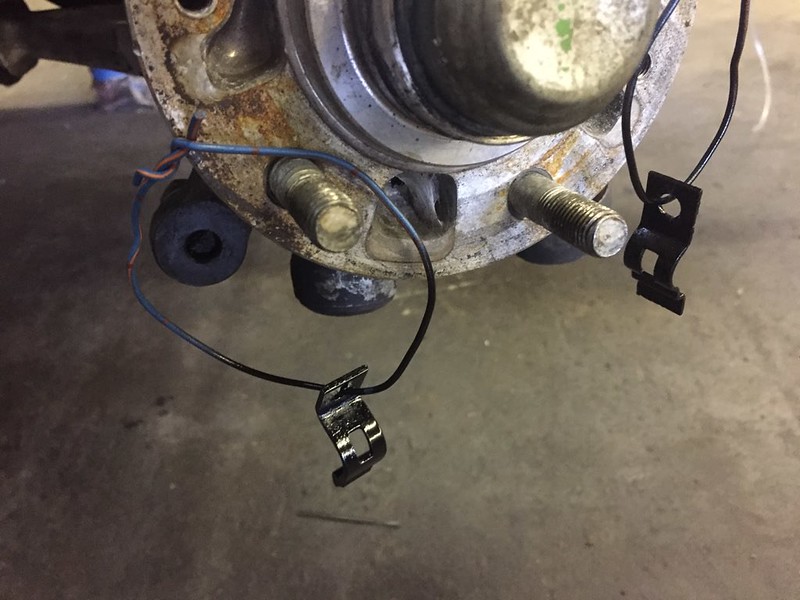
also have been painting all the little things along the way these are the holders for the e brake cable. Everything I can’t paint I’m cleaning to the point where I can touch it bare handed without getting dirty because I hate that
Thread Starter
Senior Member
Joined: Mar 2015
Posts: 335
Likes: 8
From: Vancouver, BC
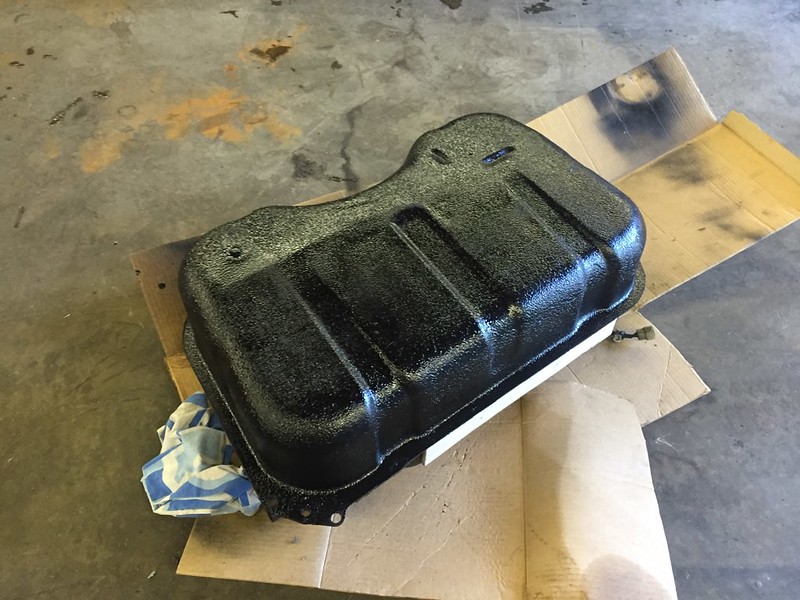
gas tank, as it has had yellow road line paint splatter on it since I took ownership of my first RX7
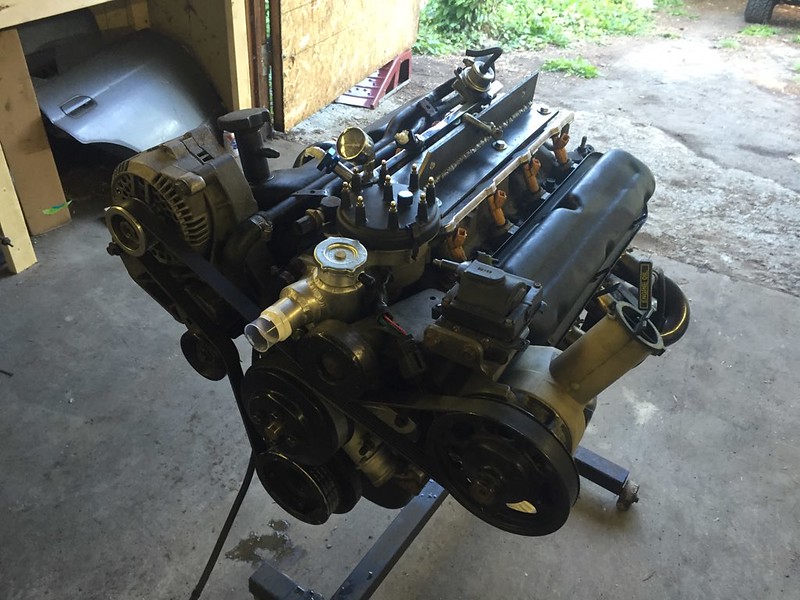
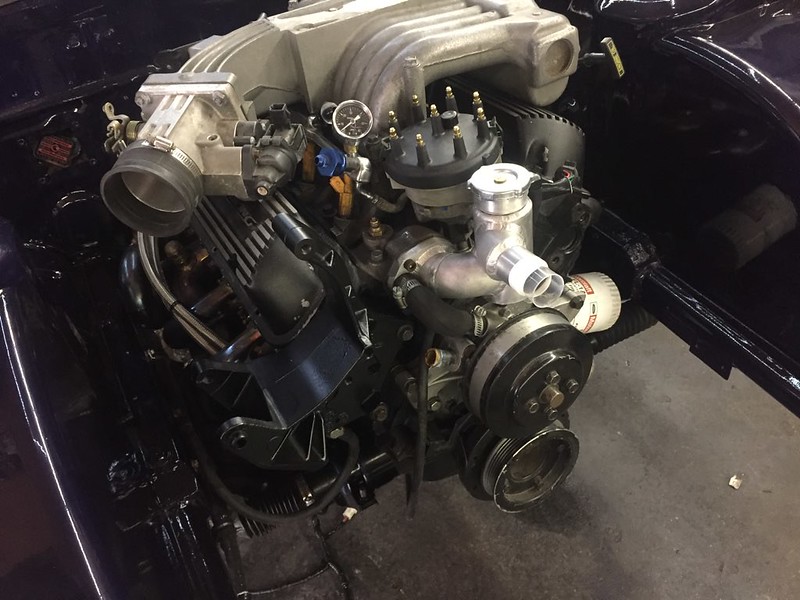
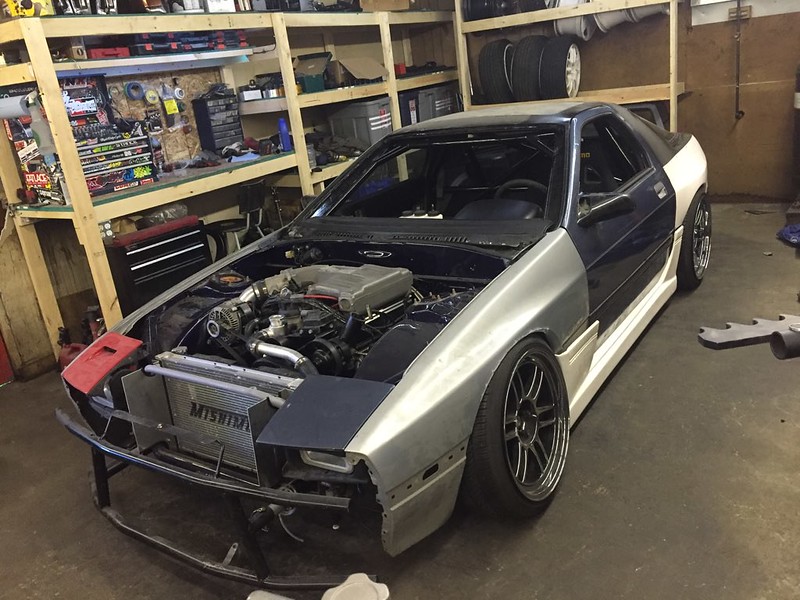
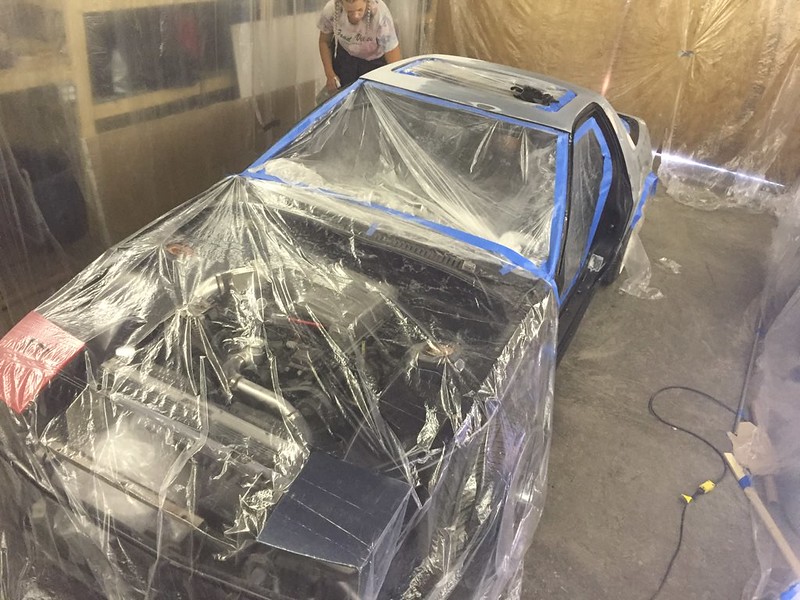
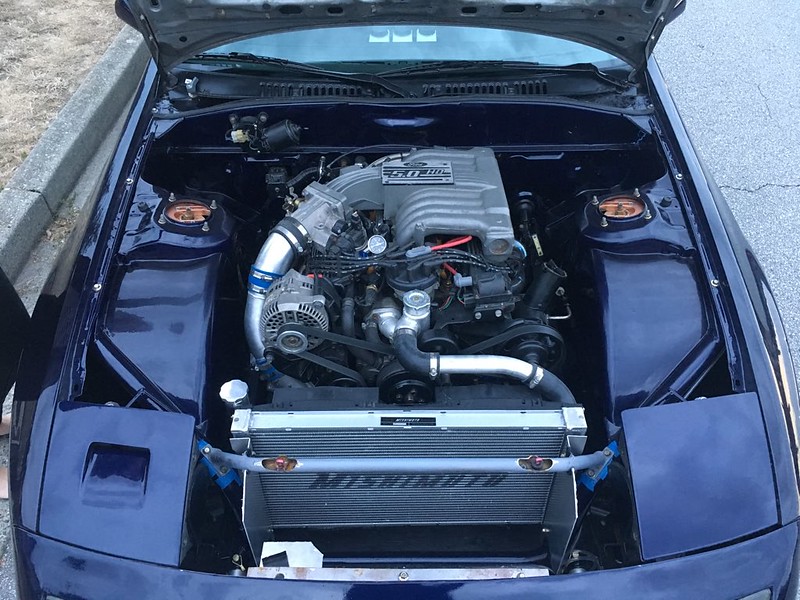
pushed the engine outside and pressure washed it, and man did it need it. oil and grime everywhere now gone
put bits on as I cleaned them
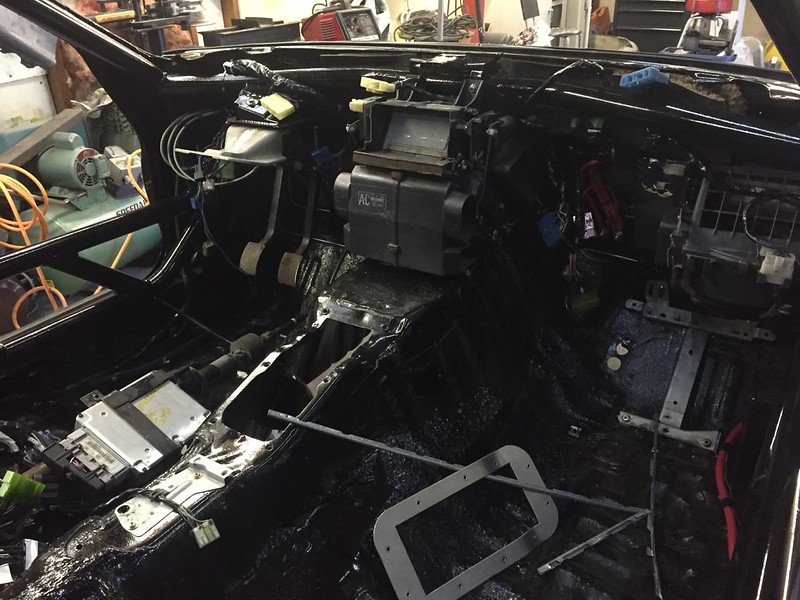
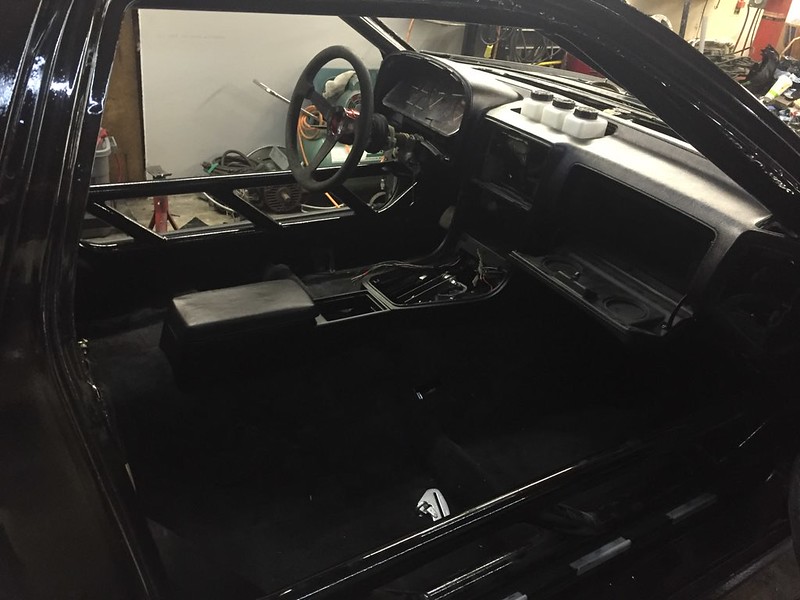
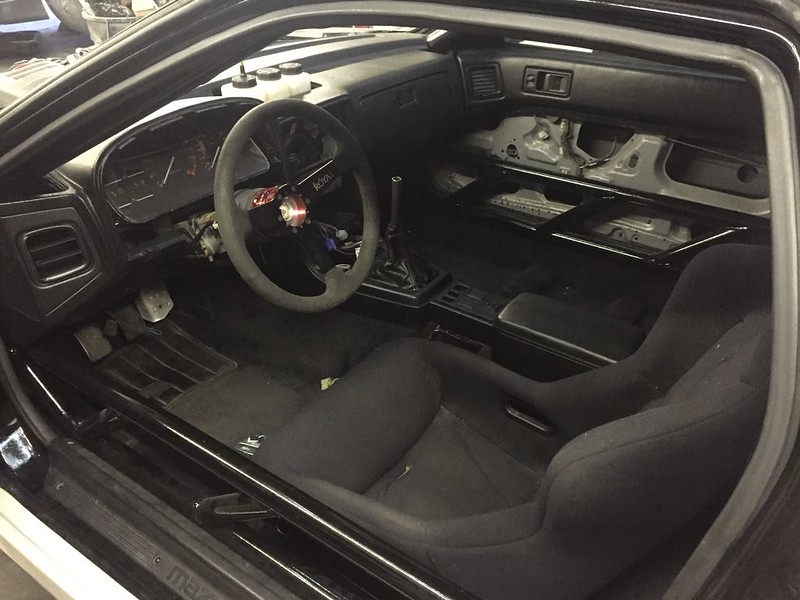
random process pic of the interior
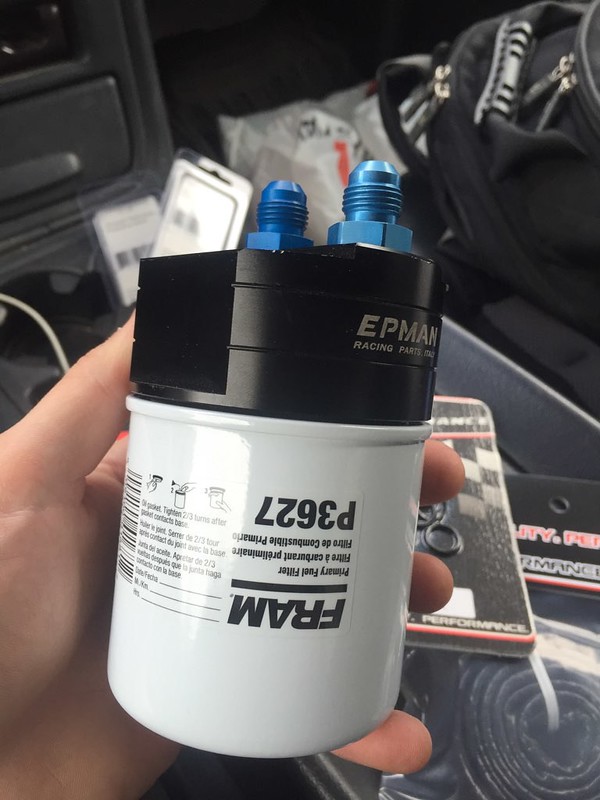
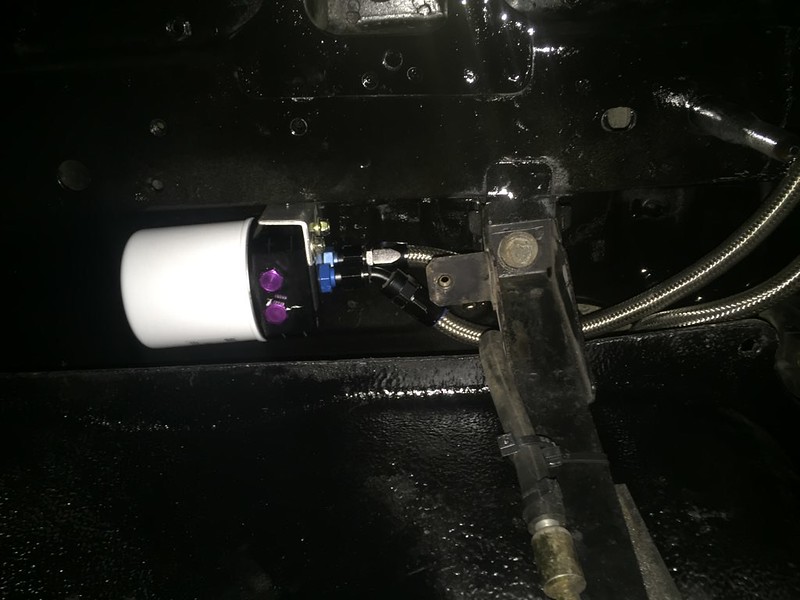
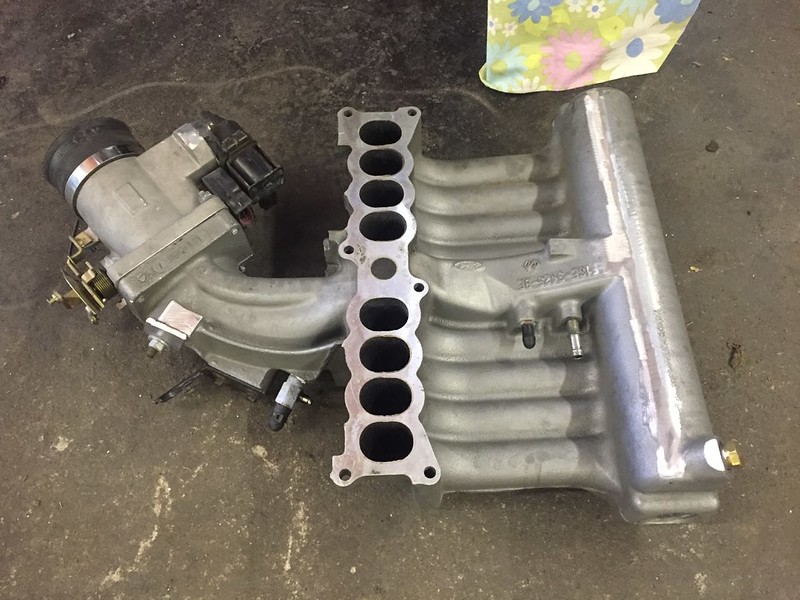
tracked down some fittings for this, the fittings on it were for -8 AN, but my fuel lines are -6. Mopac happened to have 2 of the adapters I needed from Aeromotive
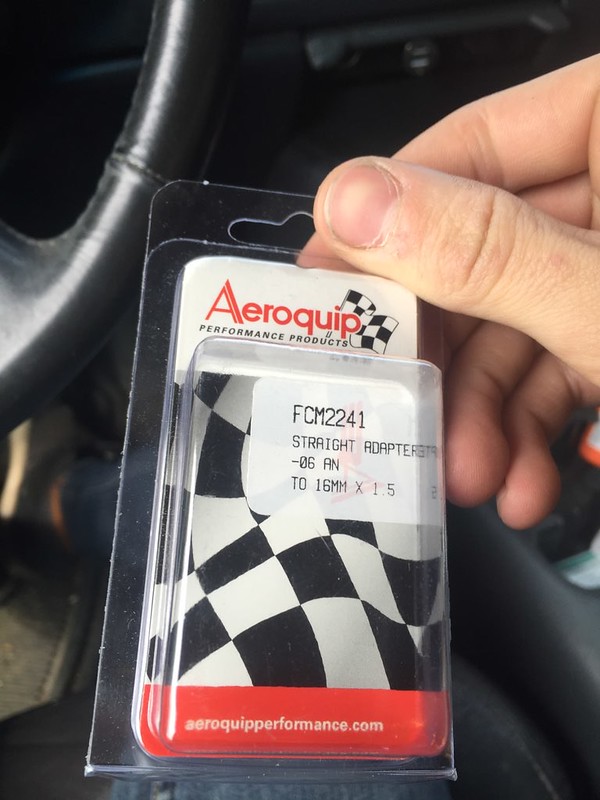
not a common stocking item he told me

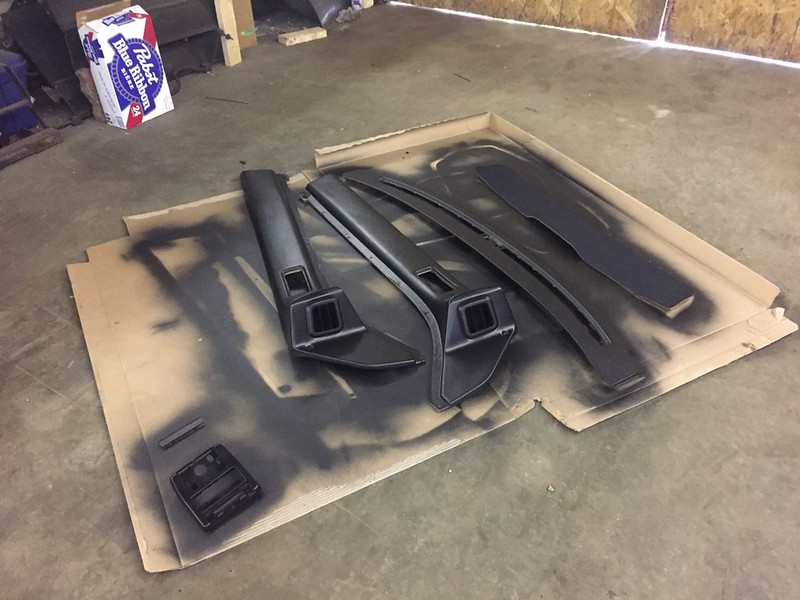
Bought and started painting the blue interior pieces black. I had most of a black interior from an S5 but there was some pieces missing or broken when I bought it. This Vinyl dye stuff is actually pretty good at least on low contact parts like the headliner for example.
pushed the engine outside and pressure washed it, and man did it need it. oil and grime everywhere now gone
put bits on as I cleaned them
random process pic of the interior
tracked down some fittings for this, the fittings on it were for -8 AN, but my fuel lines are -6. Mopac happened to have 2 of the adapters I needed from Aeromotive
not a common stocking item he told me
Bought and started painting the blue interior pieces black. I had most of a black interior from an S5 but there was some pieces missing or broken when I bought it. This Vinyl dye stuff is actually pretty good at least on low contact parts like the headliner for example.
Thread Starter
Senior Member
Joined: Mar 2015
Posts: 335
Likes: 8
From: Vancouver, BC

sorted out my fuel line routing and mounted the fuel filter on the rivnuts i had installed before paint
phone camera + dirty phone case + flashlight covered in paint = potato

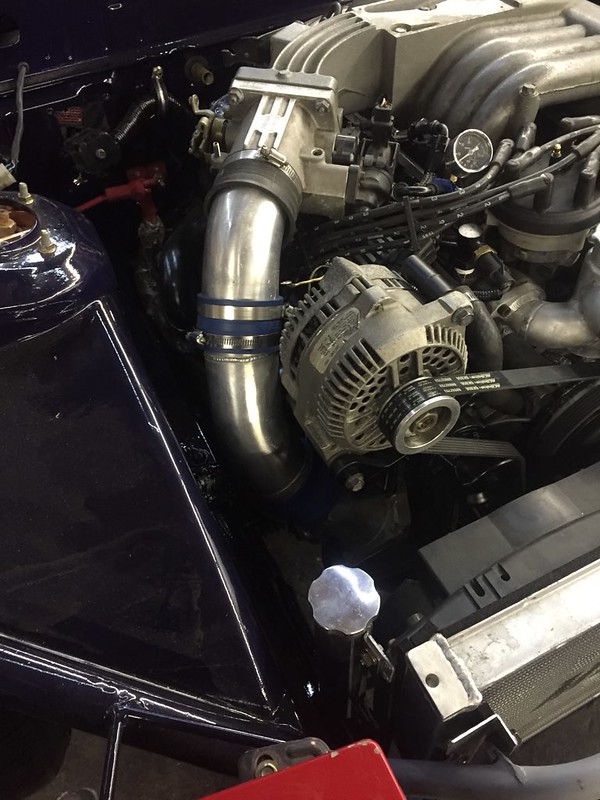
Mopac also had this stuff for me. DEI makes it as well (or should I say buys it from the same factory in china) and calls it EXO sleeve. basically rubber high temp heat shield for my forward wiring harness.
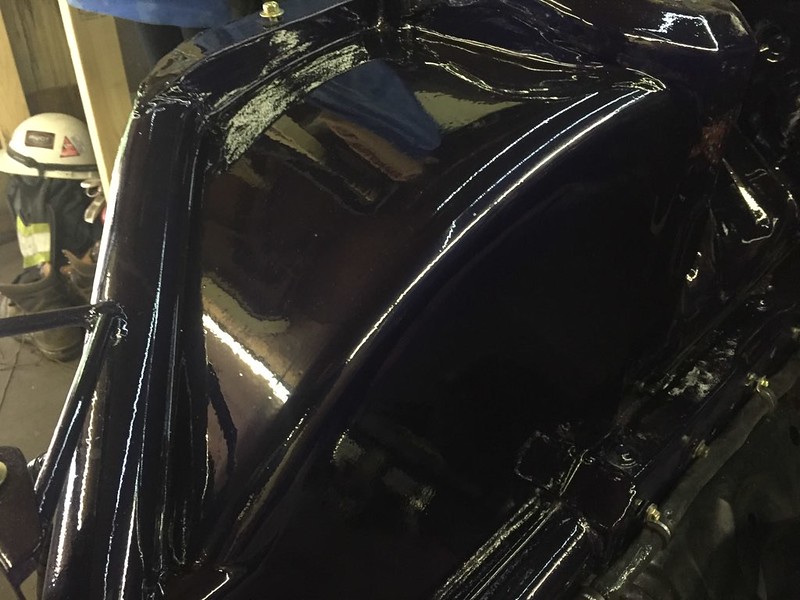
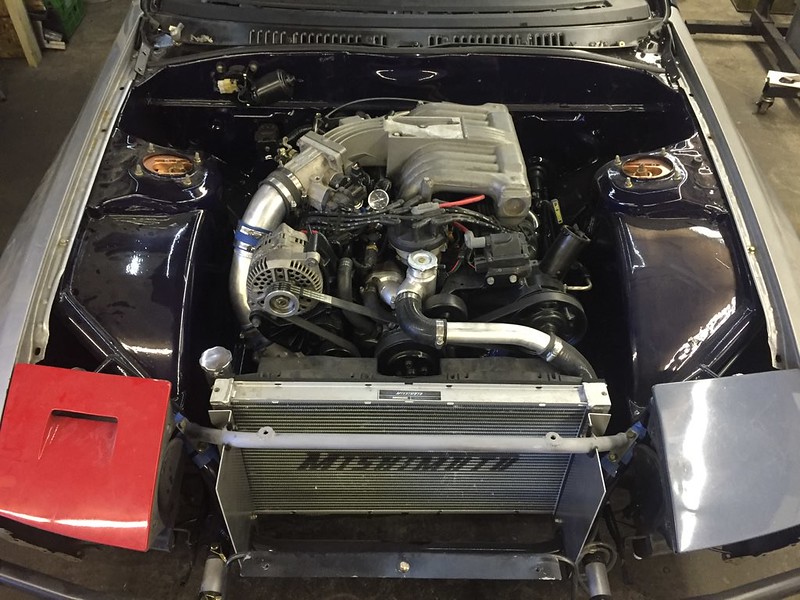
Nicole came back for an evening and buffed some of the flat portions of the engine bay. She had a slight run during spraying but you can�t even tell anymore. She was quite annoyed that I cheated out and bought single stage paint (it was like half price lol, but much harder to work with especially in corners) but she also said this PPG stuff was really durable and buffed really well compared to other single stage paint jobs she�s touched.
Thread Starter
Senior Member
Joined: Mar 2015
Posts: 335
Likes: 8
From: Vancouver, BC
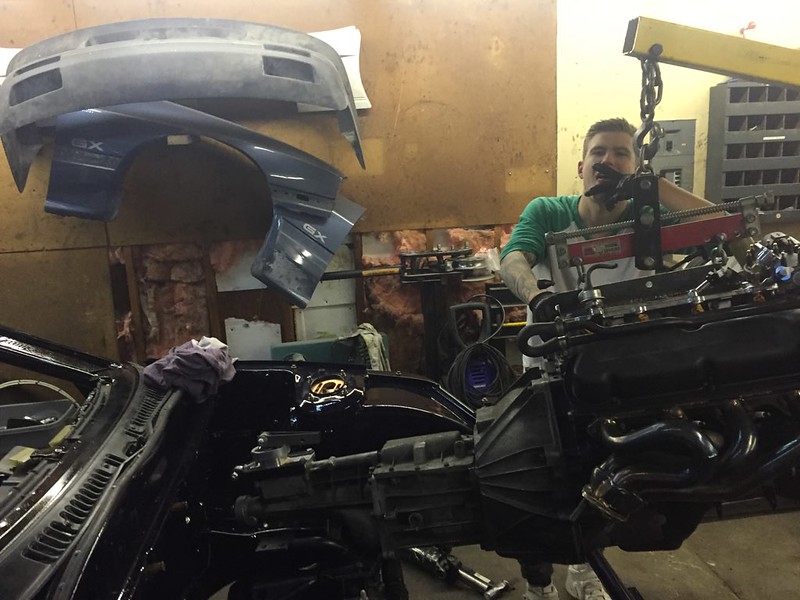
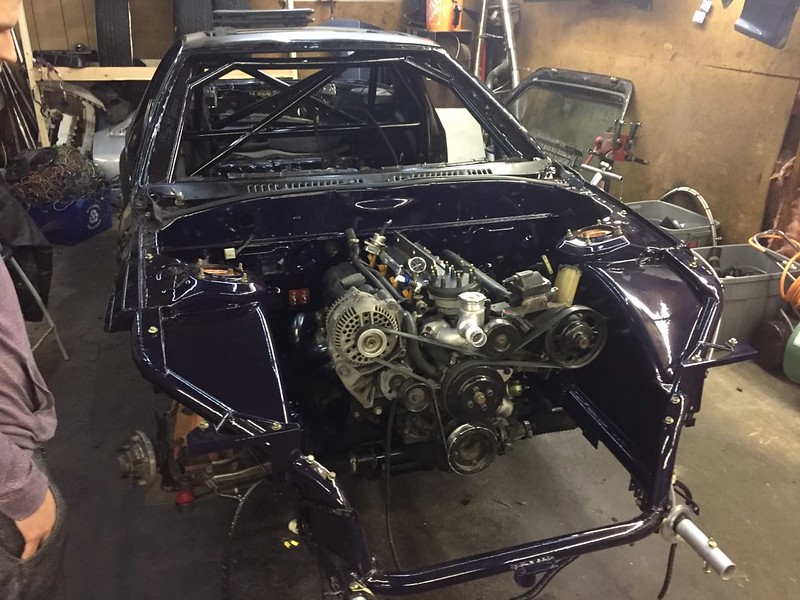
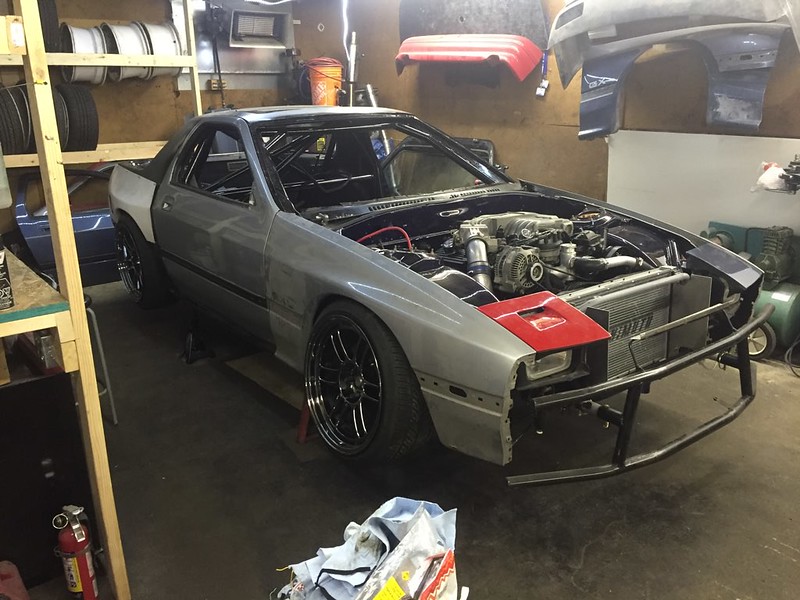
with that done I can start putting stuff in the way again, shoutout to Tudor for helping drop the engine in scratch free (Alex my roommate too)
had some issues getting the trans and engine to mate, which has always been pretty easy. Later found that my clutch slave was stuck and was preventing the fork from moving in a little. T5’s want like 15-20 ft lbs of pressure on the PP at rest. But once that was popped free it was all easy going. Then we welded alex’s e36 LSD locked and I did a few other things
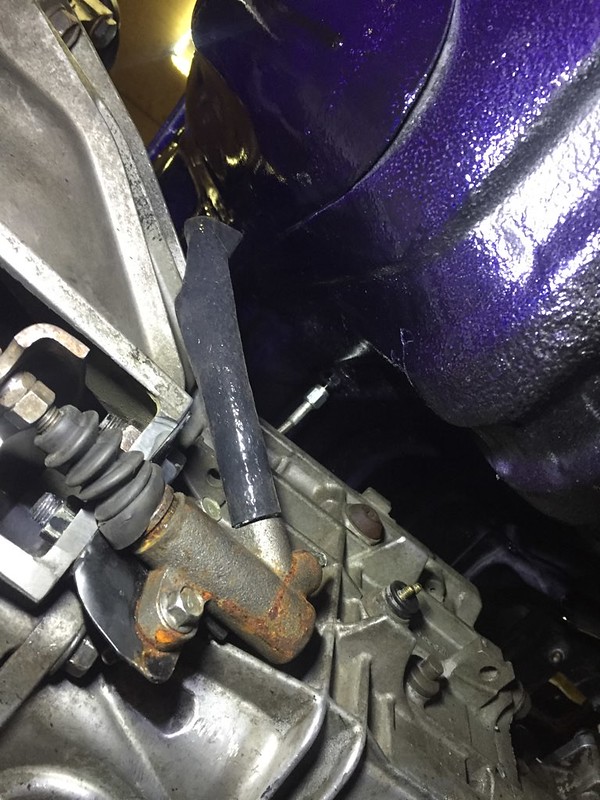
used the leftover bit of that black heat sleeve I had on the line, still need to make a shield of some kind from the exhaust
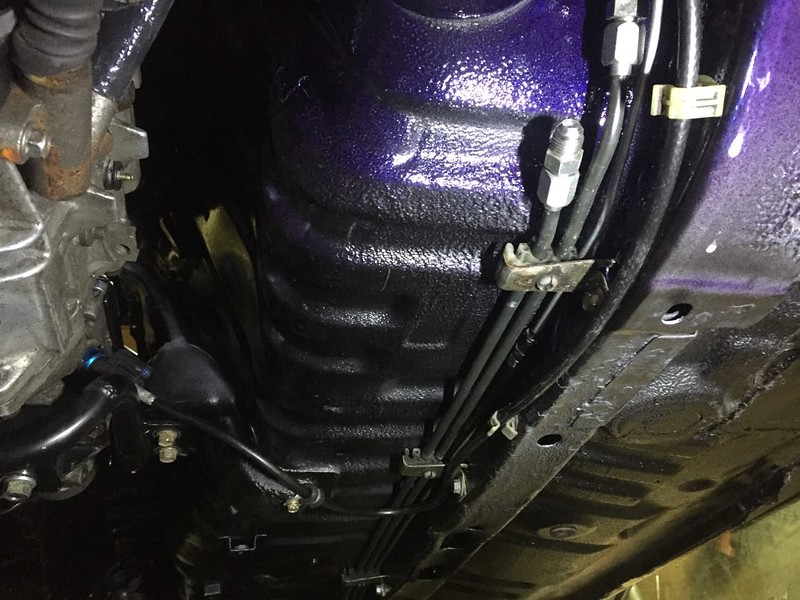
speedo cable, trans mounted etc
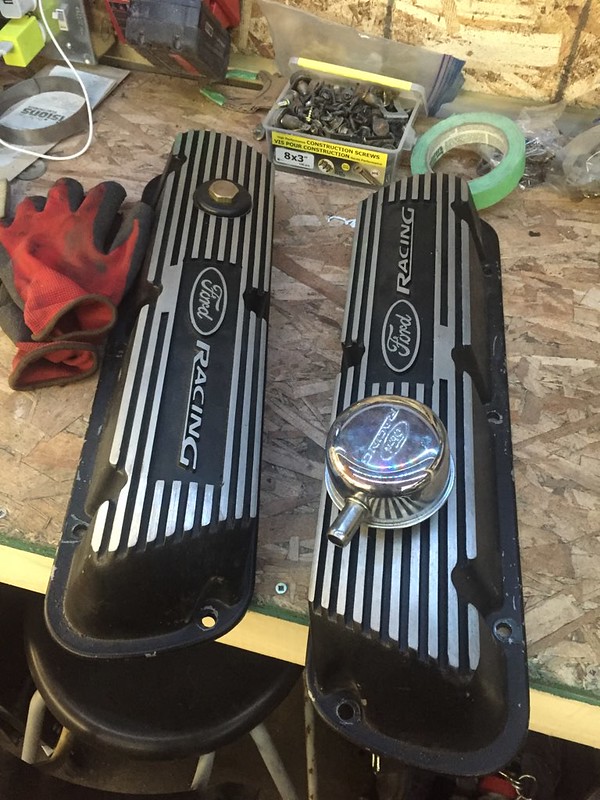
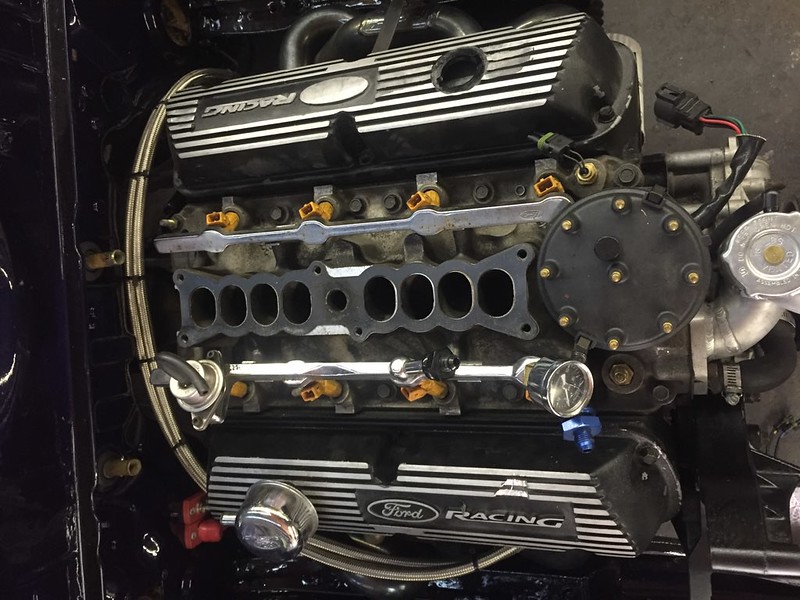
A while back my buddy Julian sold me valve covers. I detest the factory stamped steel covers, he said these are supposed to fit fox body’s without issues. I know fox can fit on SN95 soooo bough them.
They didn’t fit at all haha
but some time later
had some issues getting the trans and engine to mate, which has always been pretty easy. Later found that my clutch slave was stuck and was preventing the fork from moving in a little. T5’s want like 15-20 ft lbs of pressure on the PP at rest. But once that was popped free it was all easy going. Then we welded alex’s e36 LSD locked and I did a few other things
used the leftover bit of that black heat sleeve I had on the line, still need to make a shield of some kind from the exhaust
speedo cable, trans mounted etc
A while back my buddy Julian sold me valve covers. I detest the factory stamped steel covers, he said these are supposed to fit fox body’s without issues. I know fox can fit on SN95 soooo bough them.
They didn’t fit at all haha
but some time later
Thread Starter
Senior Member
Joined: Mar 2015
Posts: 335
Likes: 8
From: Vancouver, BC
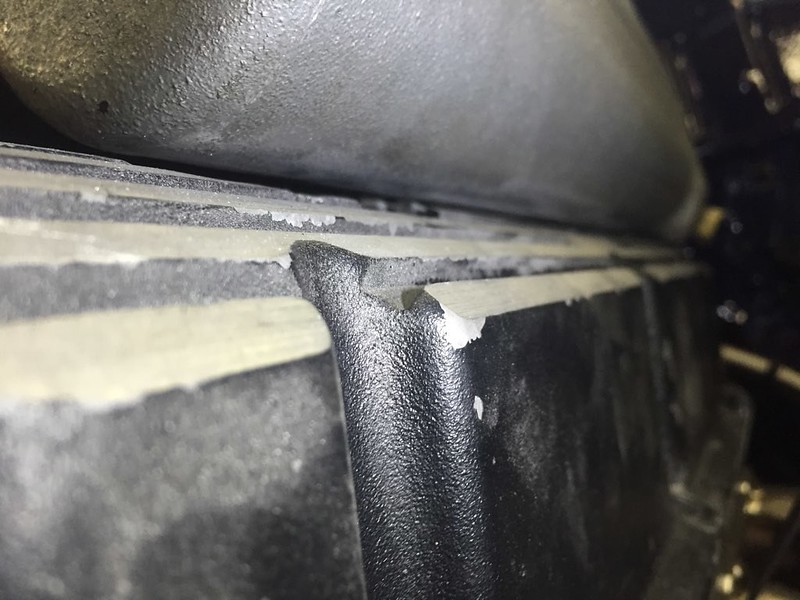
all in all nearly pointless given how much you can see them. I also cant run a cork gasket like i was before. They are currently permatex ultra black’d on there, if it leaks ill have to try something else i guess… not sure if a rubber seal will fit as some spots have 1/8” of clearance. It also meant I had to change my fuel line routing, but i forgot to take a pic of that.
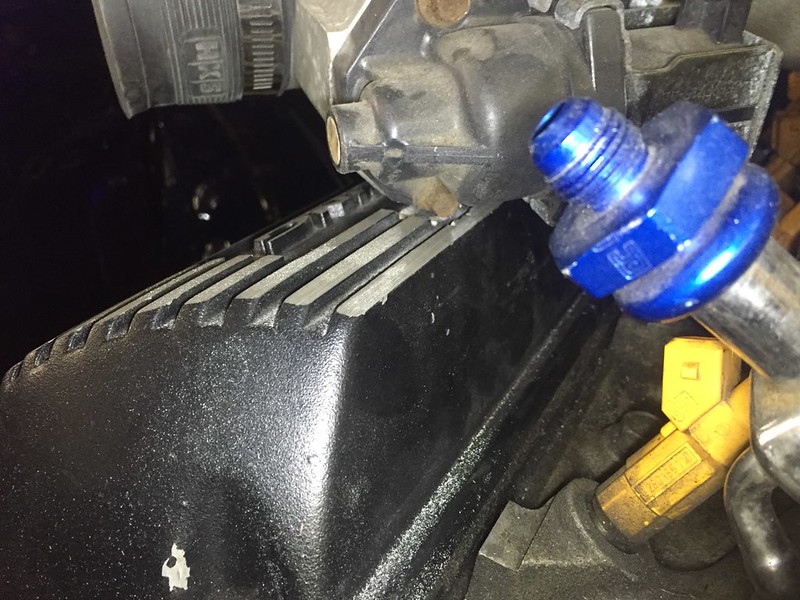
next up on the list of things that aren’t actually important but I still want: make my factory oil pressure sender do something. doesn’t have to be accurate as I have a new gauge for it but I just don’t want a dead gauge.
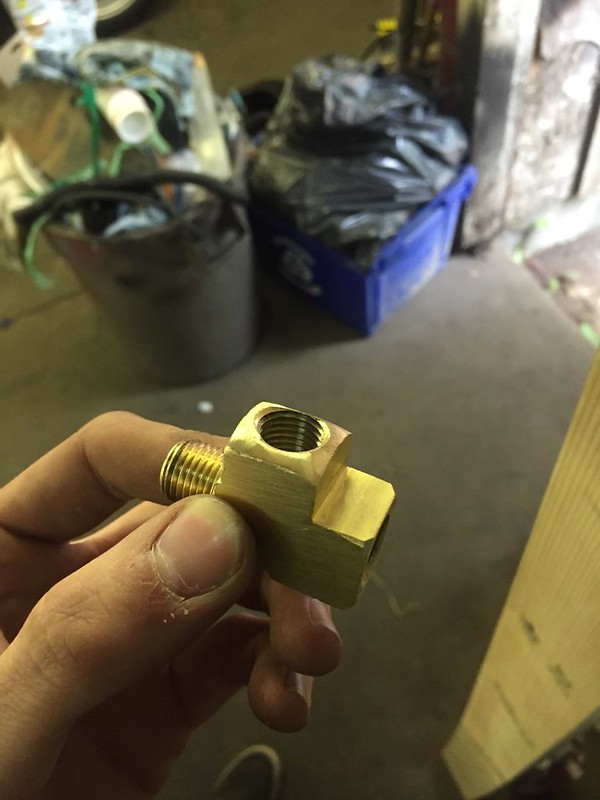
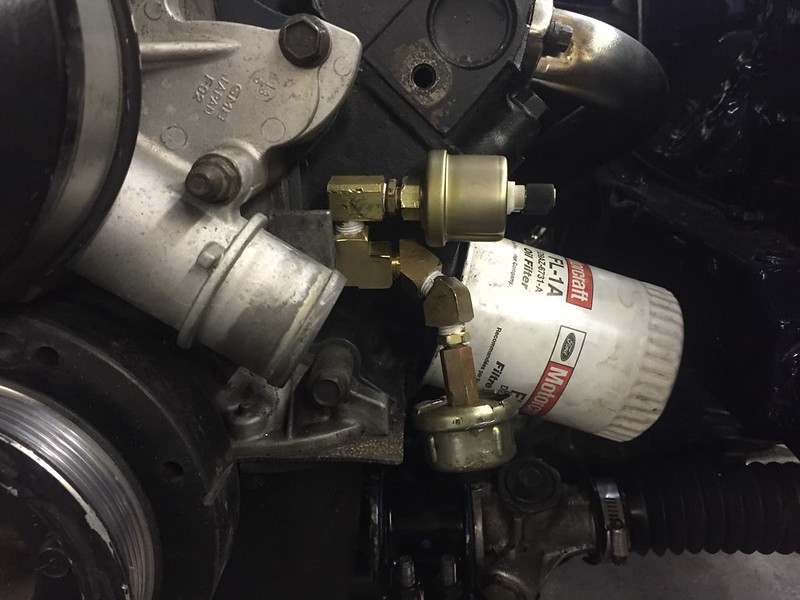
2 trips at least to the parts store and very careful assembly order, it better not leak lol
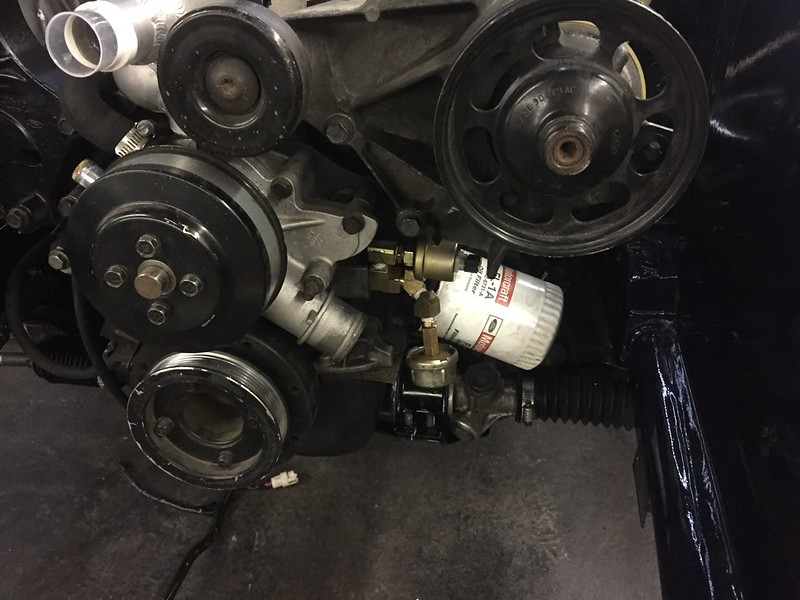
its thankfully pretty hidden under the power steering pump, cuz its pretty ugly
Thread Starter
Senior Member
Joined: Mar 2015
Posts: 335
Likes: 8
From: Vancouver, BC
also my factory coolant temp sender
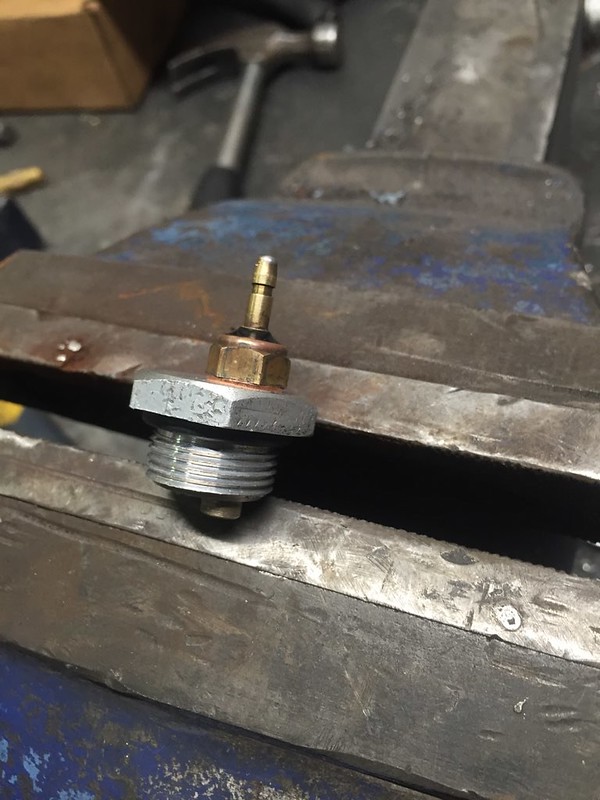
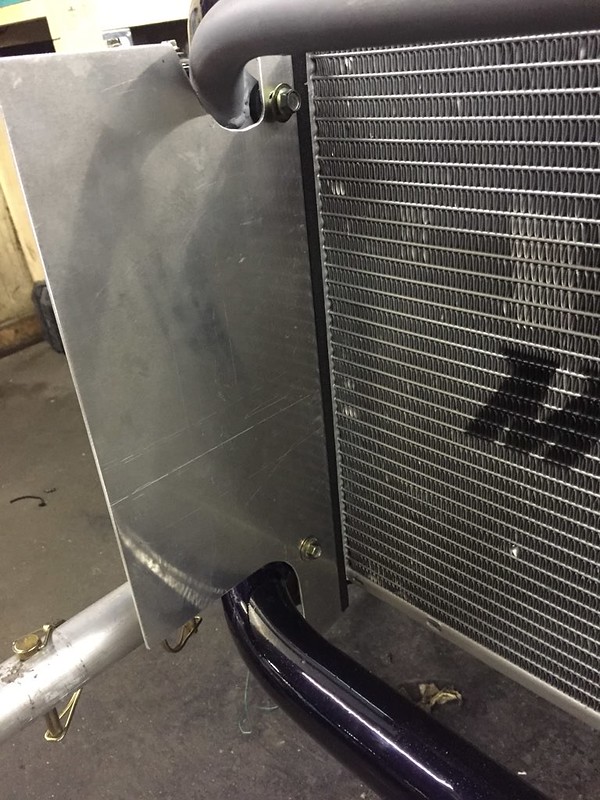
didn’t have a place to put this that was actually on the motor but the rad had this great plug thing for i don’t know what
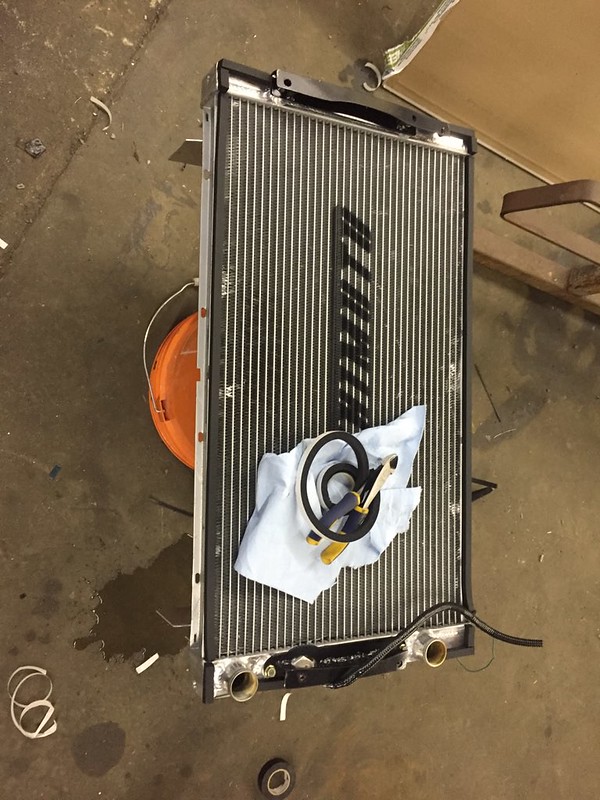
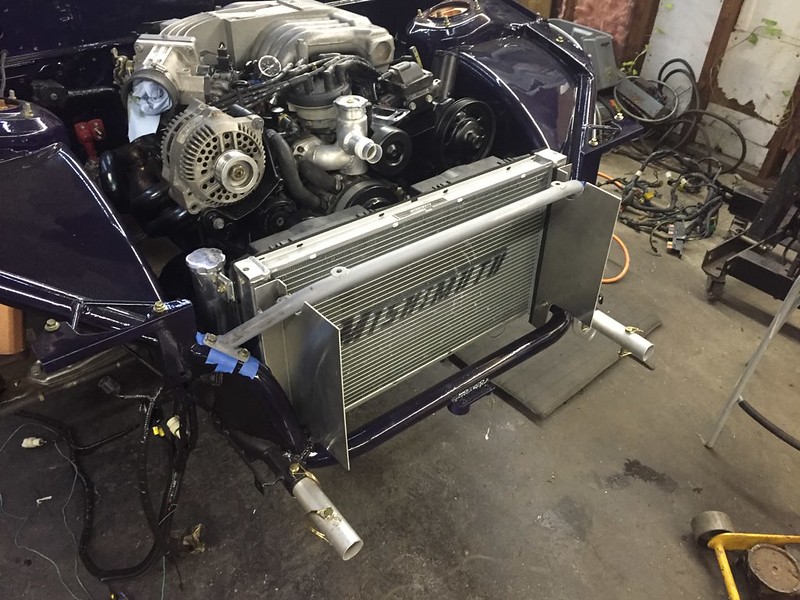
forgot to take pics again but its under the bracket on the same side as the inlet/outlet. tight fit so had to do some cutting to the sender and a bullet connector. also in this pic is me adding foam to the rad fans and brackets. I don’t want cooling to be an issue this time around
Kris helped me bend up some brackets so I could re do these for the 3rd time. still need to add some rubber trim around a few edges but it came out ok
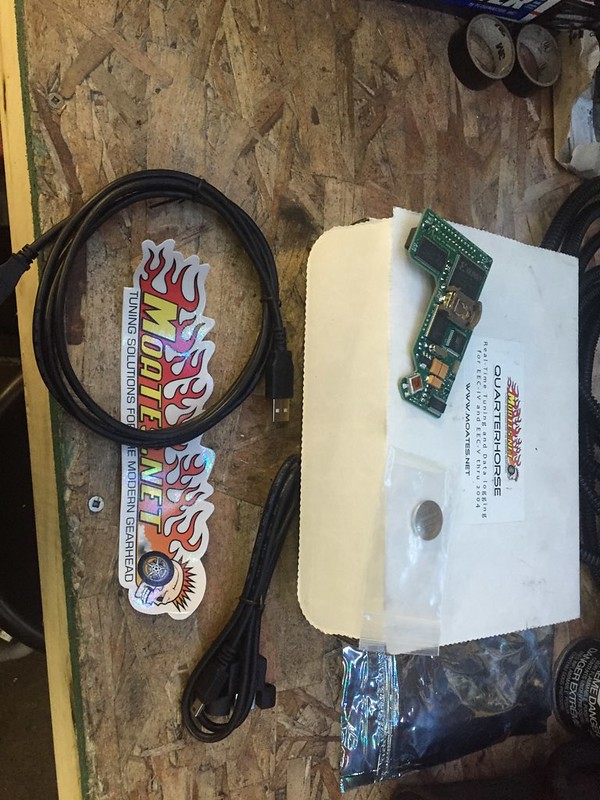
Julian also sold me a mates quarter horse as I had given my old one to andy. Cant wait to actually use this thing this time, I’ve spent so much more time learning how tuning works I can’t wait to get my feet wet and blow something up. 5.0’s are pretty forgiving though

painted my dashboard finally. bought another can of vinyl dye and while it was marked flat black it sure seemed to come out glossy, but I’m letting it cure a few days before I freak out

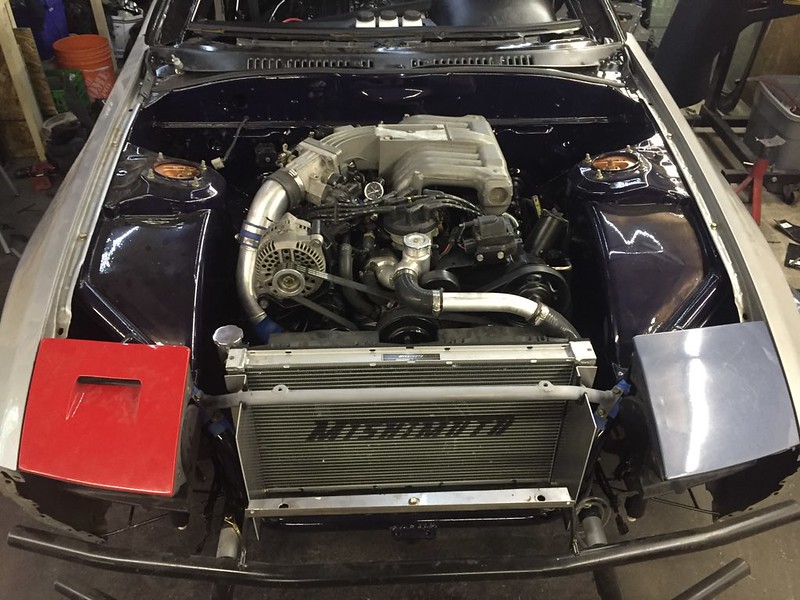
with the rad in place I could finally put all the wiring in. came out very neat. the fans are interchangeable, the low speed will probably see more run time than the high so i will swap them periodically. you can also see the connector I added for the coolant sender
didn’t have a place to put this that was actually on the motor but the rad had this great plug thing for i don’t know what
forgot to take pics again but its under the bracket on the same side as the inlet/outlet. tight fit so had to do some cutting to the sender and a bullet connector. also in this pic is me adding foam to the rad fans and brackets. I don’t want cooling to be an issue this time around
Kris helped me bend up some brackets so I could re do these for the 3rd time. still need to add some rubber trim around a few edges but it came out ok
Julian also sold me a mates quarter horse as I had given my old one to andy. Cant wait to actually use this thing this time, I’ve spent so much more time learning how tuning works I can’t wait to get my feet wet and blow something up. 5.0’s are pretty forgiving though
painted my dashboard finally. bought another can of vinyl dye and while it was marked flat black it sure seemed to come out glossy, but I’m letting it cure a few days before I freak out
with the rad in place I could finally put all the wiring in. came out very neat. the fans are interchangeable, the low speed will probably see more run time than the high so i will swap them periodically. you can also see the connector I added for the coolant sender
Thread Starter
Senior Member
Joined: Mar 2015
Posts: 335
Likes: 8
From: Vancouver, BC
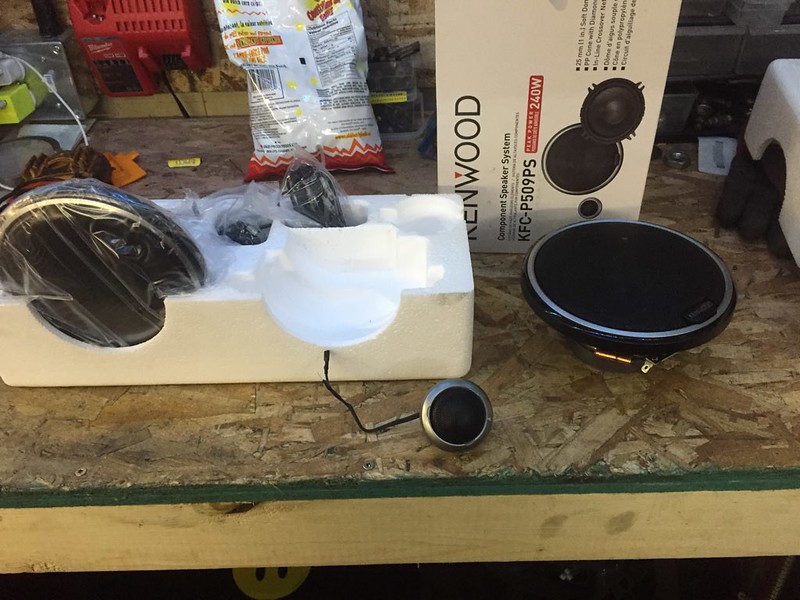
kinda an impulse buy while surfing craigslist but bought some speakers. I would have preferred 6.5” but these fit a little nicer and not like i can be concerned about SQ in this car. I jumped on these because they have a very shallow mounting depth and are component
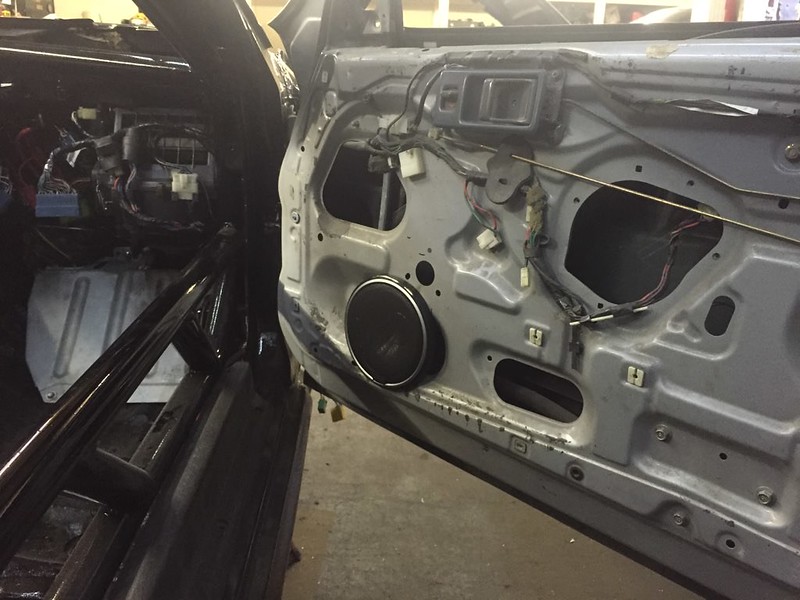
firing right into the cage isn’t like super ideal, but I only have so many options it seems with the window track right where I would want the speaker. oh well haha

threw the door panel bit on to see how i looked. Im planning on doing door cards and wrapping them in black carpet. probably add some little red porsche gt3 esque pull straps when I find them on aliexpress
with all the wiring up front done and secured I put the headlights on and put my clean fenders on as well. The fender supports I made previously come in handy here. I will be using them to aggressively roll these untouched fenders and then cutting them in the same spot, then switching to the other fender mounts I made off the headlights.
Thread Starter
Senior Member
Joined: Mar 2015
Posts: 335
Likes: 8
From: Vancouver, BC
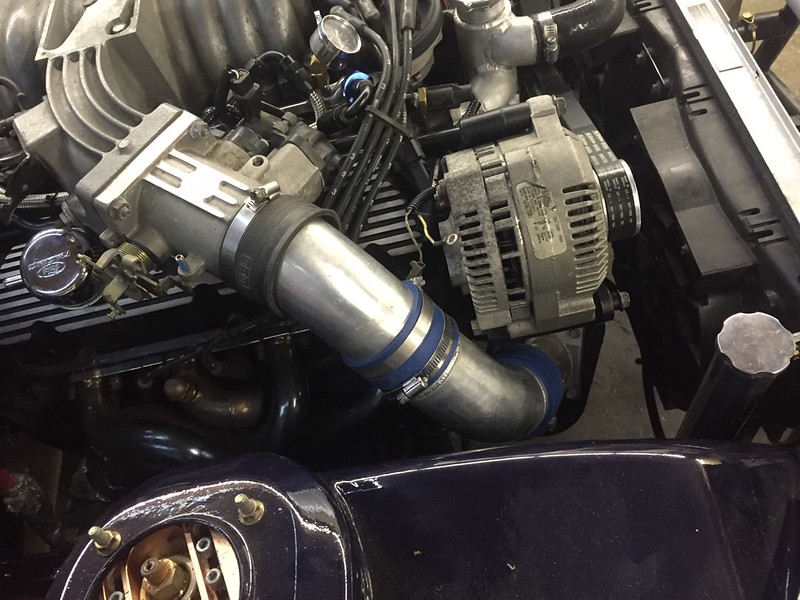
made a very crude intake tube mockup. I want to do this over with stainless and black silicone couplers but we’ll see what I have time for later
and another random process pic of the interior. Dash is basically ready to go in, but need to do the carpet first. and before the carpet I have a few small things to do still, besides trimming the carpet to fit around the cage.
And no i didn’t make the local car show I was kinda shooting for, decided it would have been too much work, would have taken every minute of my time and had to skip a lot of the small details that are important to me. a 5.0 in an FC isn’t new or even cool but what I feel makes my build stand out is the little things, but if I had to rush all that whats the point? its also just a car show, I got way more important things on the go right now. Deadline is still September 1st as thats my wedding day, but I may take it out to a 7’s day bbq before paint…. but for now you’re caught up.
I realize when writing this how much help I really do have. For the most part I do as much as I can myself, I take some kind of weird pride in that sometimes too, but there are many times where I ask for the help of others or they even offer on rare occasion. Have to be thankful for that, I don’t have all the skills or tools in the world at my disposal. I like to help others with their builds too, its all part of a community. My buddy Ed said some time ago, “cars aren’t build by one guy, they are built by a community”, this was fitting as I was helping him wire his RX7 swap lol, but he also had help from a few of our friends with various little bits. He’s so right honestly. Even the guys who don’t have crazy shops or tools or builds still affect me either with ideas or just encouragement. So thank you to all those dudes, the locals, the internet people, the instagram likes, the constructive comments, the random forum posts with new ideas (bring back forums!), the guys with kind words, the guys with more skill than me that post up their stuff for me to get inspired by, the professionals who are willing to share their methods, and you build thread reader.
Thread Starter
Senior Member
Joined: Mar 2015
Posts: 335
Likes: 8
From: Vancouver, BC
wow the last 6 months have been a blur, lets get you up to speed

So I’ve been jamming this album for like 3 weeks now, and with the news of his death even more so. Really unfortunate, I’ve been a mac miller fan for years now and I honestly think this is his best yet. Really smooth laid back feel, much better lyrically then the last album in my humble opinion. He will be missed.
where I left off I was about to put the carpet and such in

first I made the shifter boot fit. Using the old surround plate I had made, which is slightly too small, it kinda fit lol. Need to glue them together or something but I think I may re-make it and use less rubber and more plate shape.
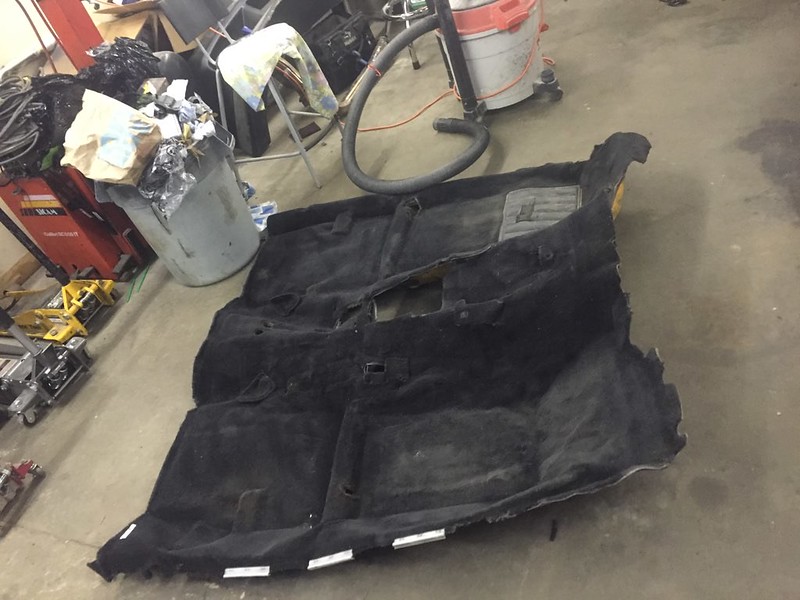
cleaned my carpet while it was easy. Its been on a shelf for like 2 years lol
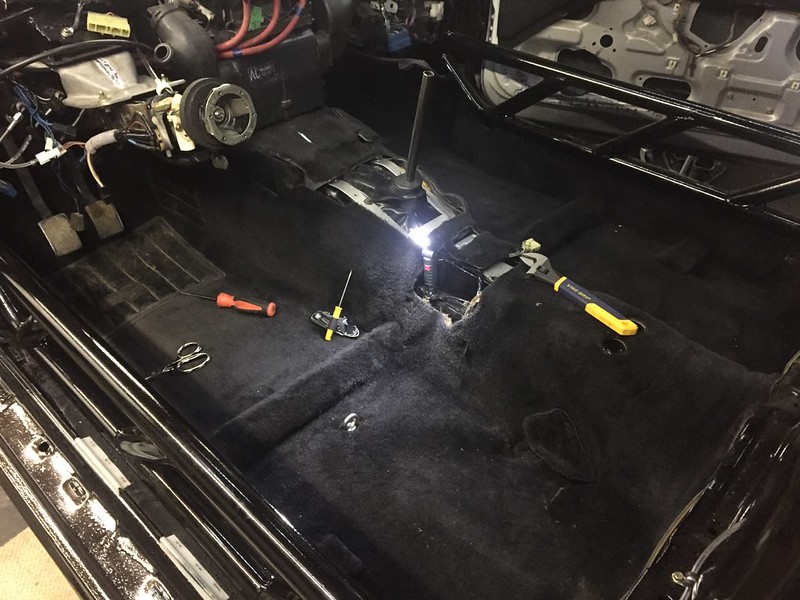
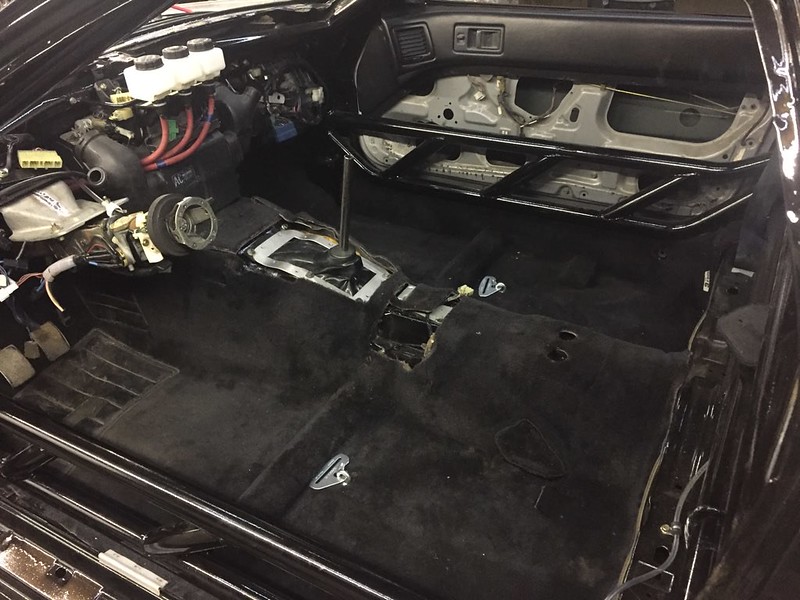
a lot of fighting and some trimming later. Cut bits for clearing the cage floor boxes, the seat mounts and because I find it annoying removed some of the carpet under the heater core. removing it still requires removing the dash though… I also regret not cutting the foam out from under the drivers feet. I guess my pedals hang lower than the stock ones do as I noticed my feet wedging between the pedal and the carpet, never had that with no carpet. Probably do a foot plate again like the last chassis.

now onto a failed idea…

my plan here was to reduce some slop in the e brake assembly that occurred when I went to one cable vs the factory’s two. What it ended up doing was adding a pivot point thus changing the effective lever ratio and if it was too tight it added friction to the whole thing. So tossed in and had to make a new piece to join both cables. This happened when the car was rolling on the ground and I was in a much bigger rush, so no pictures. I first tried cutting the rivets off the factory piece but this made the cable too long to work for my setup. So I made a whole new piece from 1/4 plate and some m6 nuts and bolts; its about the same length as the middle hole from a side hole on the factory piece.
Also learned a valuable lesson when bleeding the calipers, flip them over and bleed the bottom screw as well. I’m using the Villains kit which is more or less then same as the Racefab kit and I wasn’t sure if was supposed to put the drivers side caliper on the passenger and vice versa but they fit well that way. They just didn’t bleed very easy until I discovered that little tip.
So I’ve been jamming this album for like 3 weeks now, and with the news of his death even more so. Really unfortunate, I’ve been a mac miller fan for years now and I honestly think this is his best yet. Really smooth laid back feel, much better lyrically then the last album in my humble opinion. He will be missed.
where I left off I was about to put the carpet and such in
first I made the shifter boot fit. Using the old surround plate I had made, which is slightly too small, it kinda fit lol. Need to glue them together or something but I think I may re-make it and use less rubber and more plate shape.
cleaned my carpet while it was easy. Its been on a shelf for like 2 years lol
a lot of fighting and some trimming later. Cut bits for clearing the cage floor boxes, the seat mounts and because I find it annoying removed some of the carpet under the heater core. removing it still requires removing the dash though… I also regret not cutting the foam out from under the drivers feet. I guess my pedals hang lower than the stock ones do as I noticed my feet wedging between the pedal and the carpet, never had that with no carpet. Probably do a foot plate again like the last chassis.
now onto a failed idea…
my plan here was to reduce some slop in the e brake assembly that occurred when I went to one cable vs the factory’s two. What it ended up doing was adding a pivot point thus changing the effective lever ratio and if it was too tight it added friction to the whole thing. So tossed in and had to make a new piece to join both cables. This happened when the car was rolling on the ground and I was in a much bigger rush, so no pictures. I first tried cutting the rivets off the factory piece but this made the cable too long to work for my setup. So I made a whole new piece from 1/4 plate and some m6 nuts and bolts; its about the same length as the middle hole from a side hole on the factory piece.
Also learned a valuable lesson when bleeding the calipers, flip them over and bleed the bottom screw as well. I’m using the Villains kit which is more or less then same as the Racefab kit and I wasn’t sure if was supposed to put the drivers side caliper on the passenger and vice versa but they fit well that way. They just didn’t bleed very easy until I discovered that little tip.
Thread Starter
Senior Member
Joined: Mar 2015
Posts: 335
Likes: 8
From: Vancouver, BC
another tip me and Kris have for the internet
drilled a wildwood cap (my brakes, clutch and hydro use this style cap and so does his hydro) puled a valve stem in it and took a bike pump and put like 10-20 psi into the master. Especially with first time seeing fluid in the system this really helped push the fluid through the lines. Just have to be careful the master doesn’t run out of fluid because then you are pushing air into the line.

also while the car was in the air I put my ricer underglow in. Was a huge hassle to get in the irrigation tube, and lol I have to do it again now that the longer LED’s i ordered finally showed up.
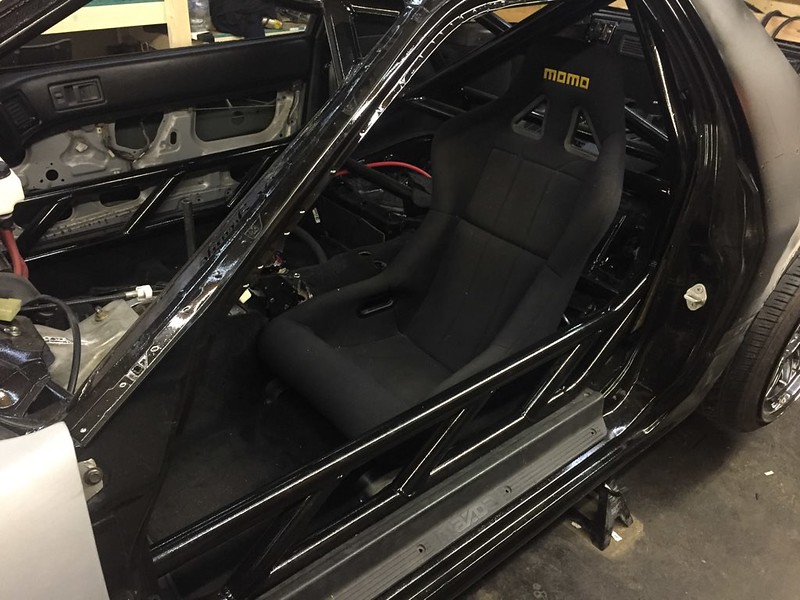
Mounted the drivers seat. This momo is a wire frame style seat and Im basically sitting on the floor when I’m in it. I’m a tall guy so having my shoulder at the door line is difficult
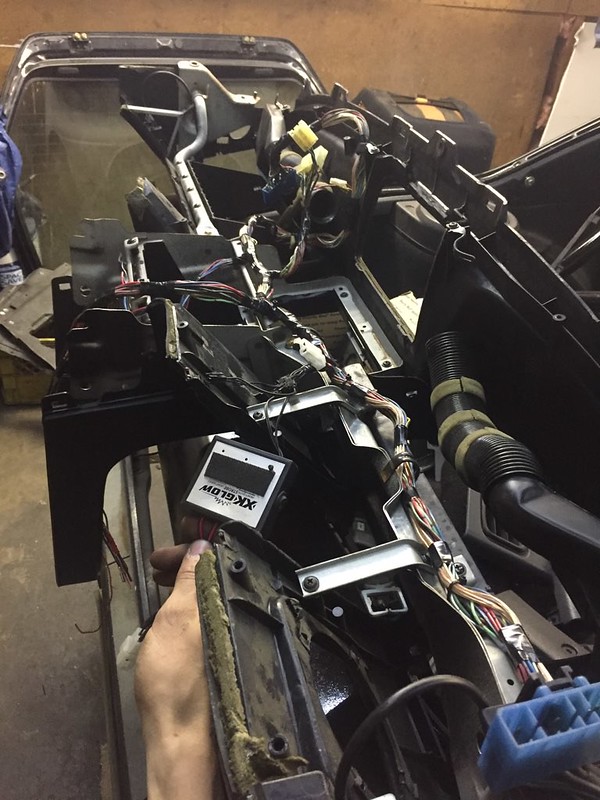
Put the modified dash harness into the dash. mounted the strobe’s brain with velcro for easy removal as well as putting its power wires on a connector. Theres a little button on the front, and didn’t take pics but I made a little hole in the dash where it mounts to be able to press it. Its by my knee and very discrete in the car. The button is for changing the strobes pattern, so I kinda wanted access to that without climbing under the dash
installing all the nice freshly painted black bits.
learned a lesson here too, always test spray a fresh can of paint to check the colour. I got 2 cans from the same store that were labeled “flat black” and when sprayed were really “gloss black”. Odd to see a labeling error from a company like VHT but i guess it happens.
Next up was starting the body work
drilled a wildwood cap (my brakes, clutch and hydro use this style cap and so does his hydro) puled a valve stem in it and took a bike pump and put like 10-20 psi into the master. Especially with first time seeing fluid in the system this really helped push the fluid through the lines. Just have to be careful the master doesn’t run out of fluid because then you are pushing air into the line.
also while the car was in the air I put my ricer underglow in. Was a huge hassle to get in the irrigation tube, and lol I have to do it again now that the longer LED’s i ordered finally showed up.
Mounted the drivers seat. This momo is a wire frame style seat and Im basically sitting on the floor when I’m in it. I’m a tall guy so having my shoulder at the door line is difficult
Put the modified dash harness into the dash. mounted the strobe’s brain with velcro for easy removal as well as putting its power wires on a connector. Theres a little button on the front, and didn’t take pics but I made a little hole in the dash where it mounts to be able to press it. Its by my knee and very discrete in the car. The button is for changing the strobes pattern, so I kinda wanted access to that without climbing under the dash
installing all the nice freshly painted black bits.
learned a lesson here too, always test spray a fresh can of paint to check the colour. I got 2 cans from the same store that were labeled “flat black” and when sprayed were really “gloss black”. Odd to see a labeling error from a company like VHT but i guess it happens.
Next up was starting the body work
Thread Starter
Senior Member
Joined: Mar 2015
Posts: 335
Likes: 8
From: Vancouver, BC
Im really not good at body work, and I have little experience


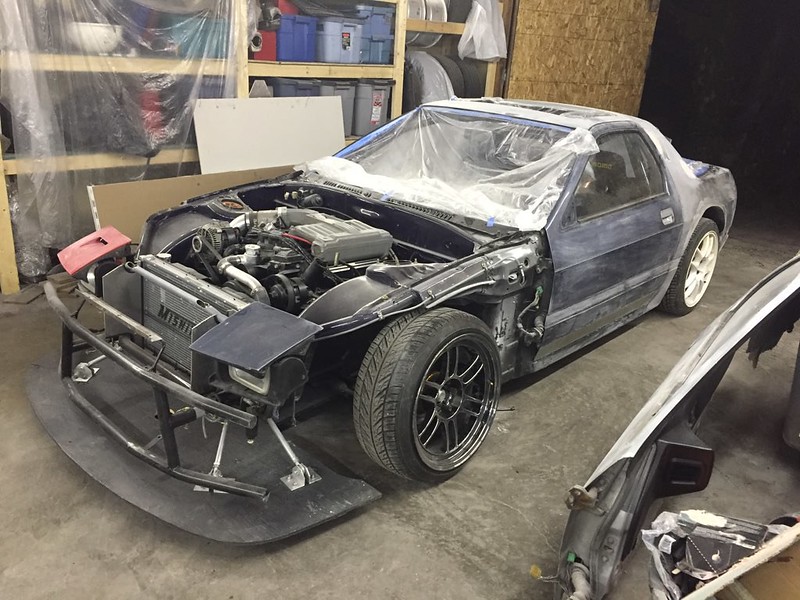
My vision here was starting to take shape. time to switch spots with Kris as his car had a blown head gasket and he was about to start the daunting task of building and swapping and tuning an rb25 while getting his car ready ish for paint all before my wedding (he’s one of my groomsmen) https://www.driftworks.com/forum/thr...4-door.235255/ read about it here, lol its a wild story now
My vision here was starting to take shape. time to switch spots with Kris as his car had a blown head gasket and he was about to start the daunting task of building and swapping and tuning an rb25 while getting his car ready ish for paint all before my wedding (he’s one of my groomsmen) https://www.driftworks.com/forum/thr...4-door.235255/ read about it here, lol its a wild story now
Thread Starter
Senior Member
Joined: Mar 2015
Posts: 335
Likes: 8
From: Vancouver, BC
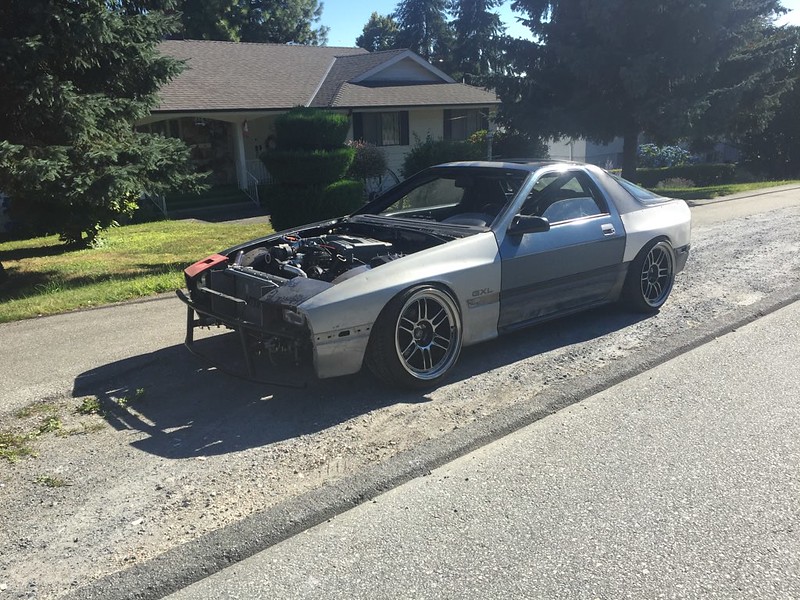
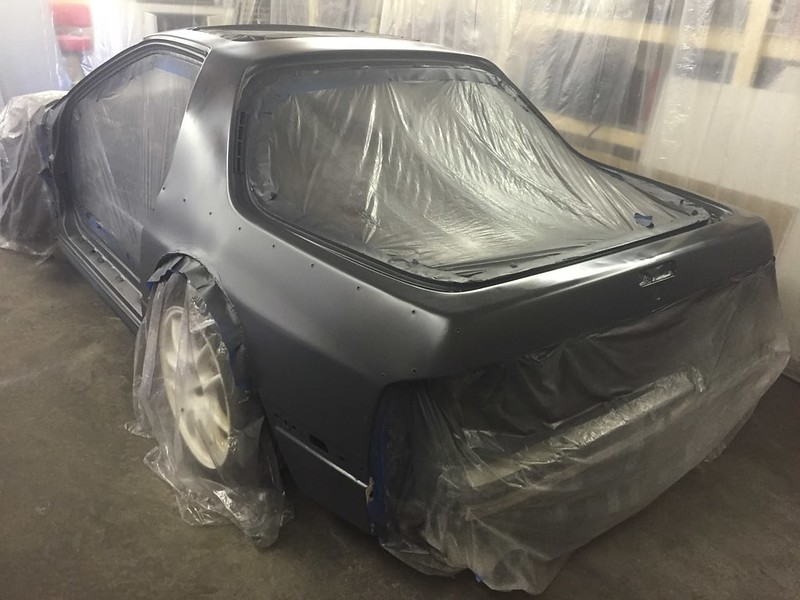
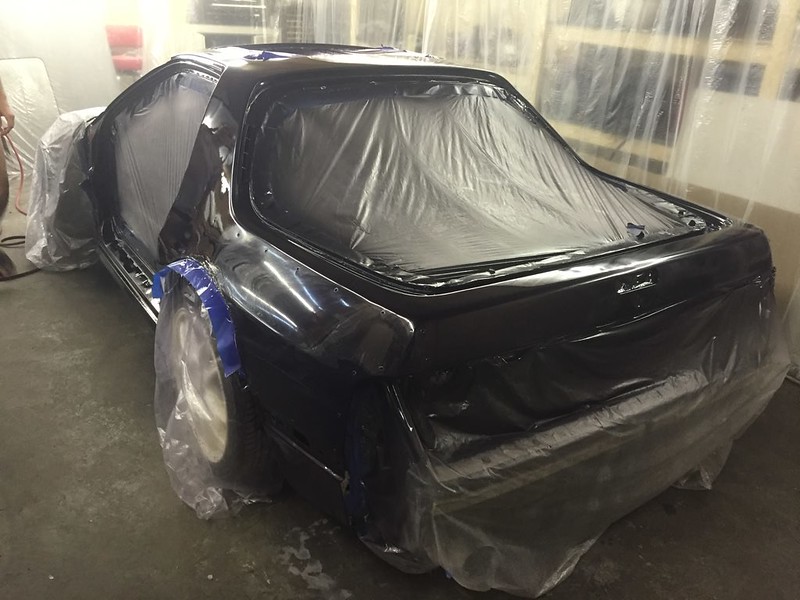
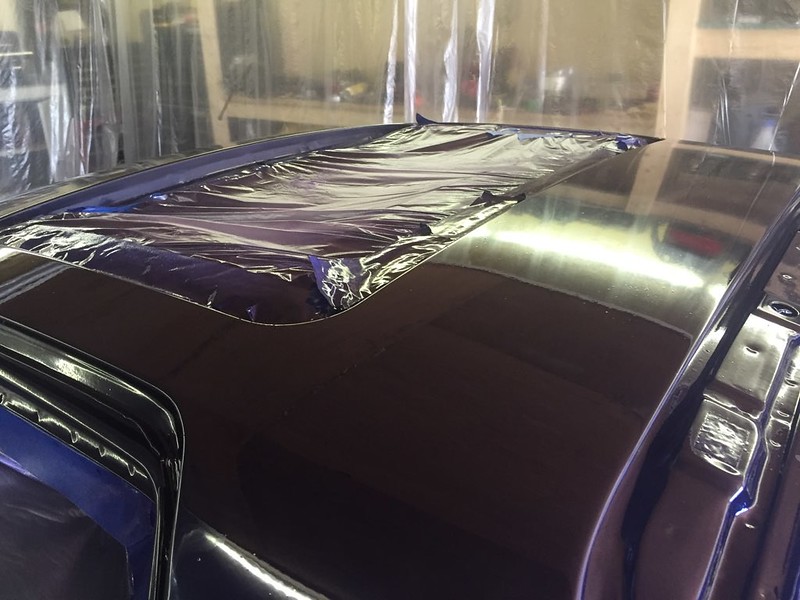
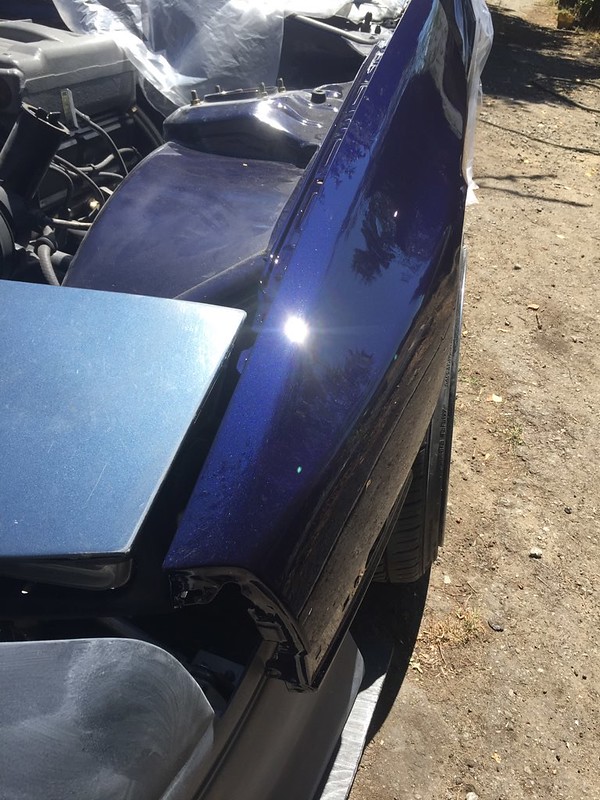
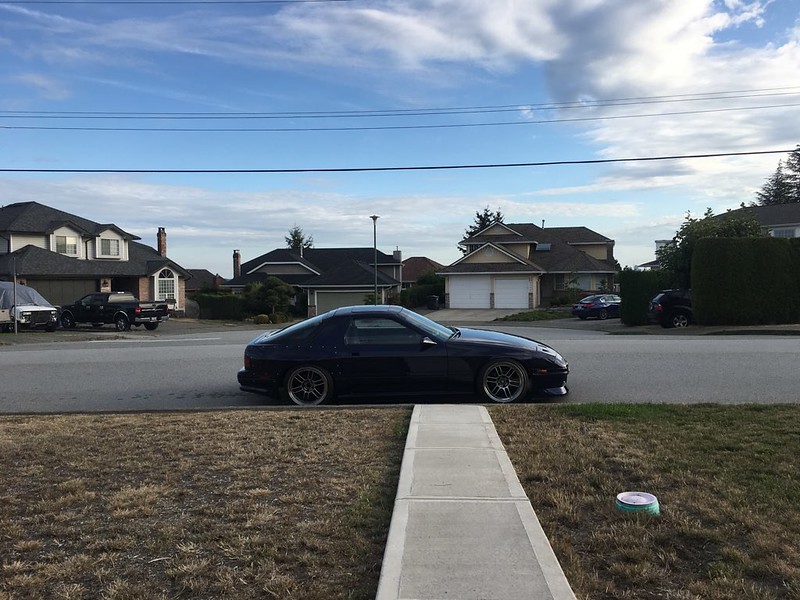
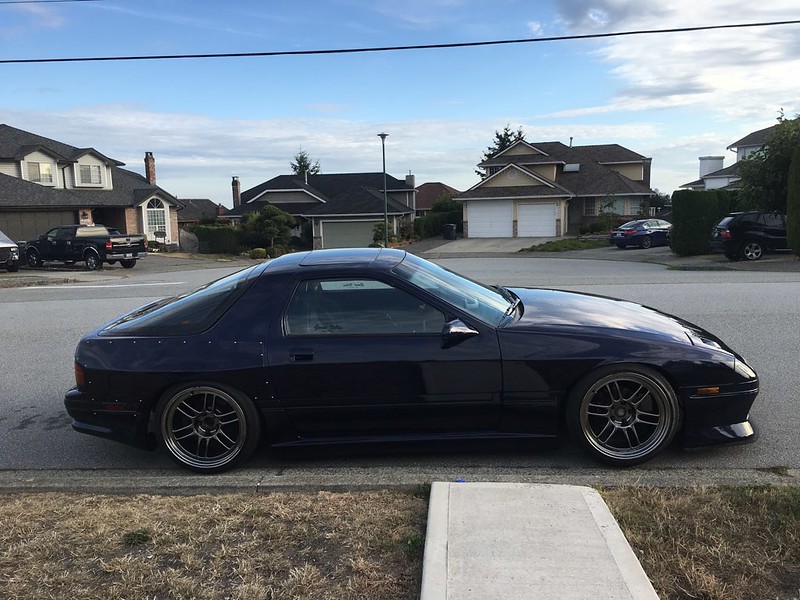
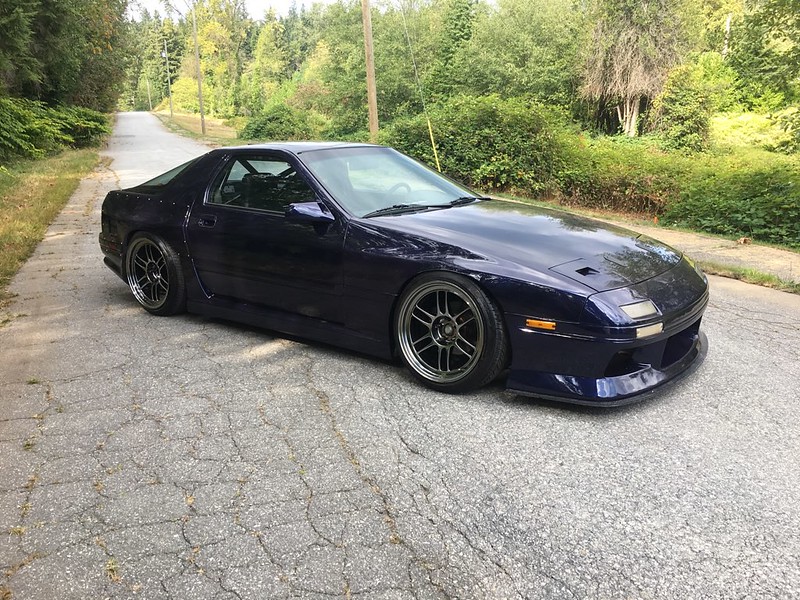
First time it had seen sunlight since bringing it to the garage
wiped some of the dust off so I could see the colour, got me pretty excited. camera doesn’t really do it justice though, video might do a little better my sister tells me

drove it down the block to turn it around, nothing broke didn’t overheat. I’m trying to think of everything but really surprised there was not teething issues yet.
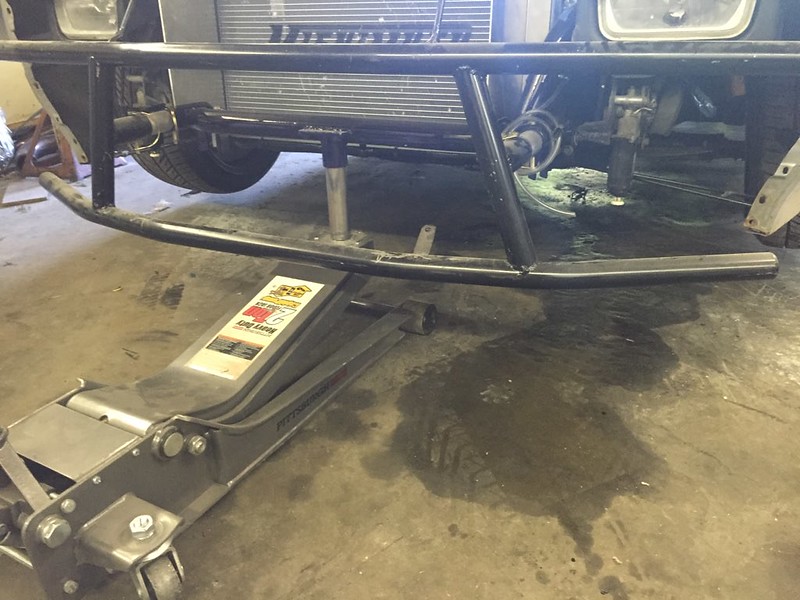
Jack point is so ideal, just put that tube in before the jack is under the car and no blocks or ramps needed
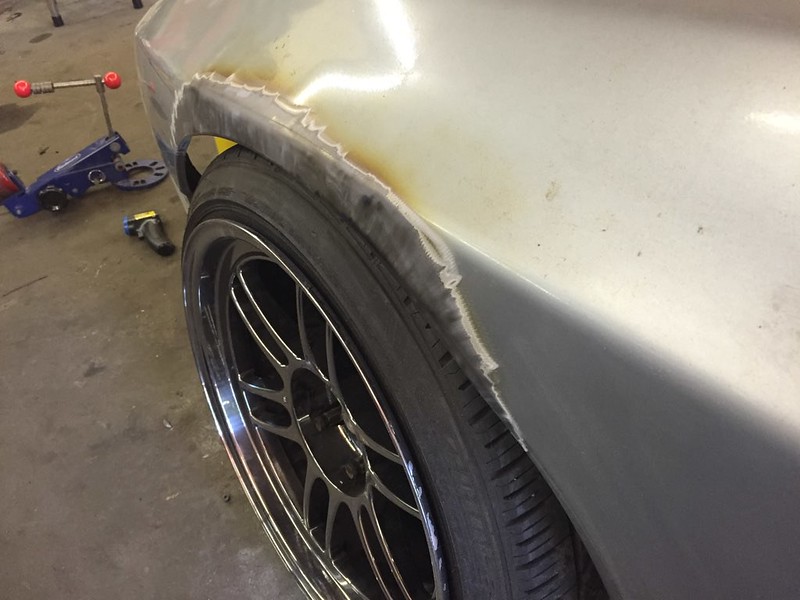
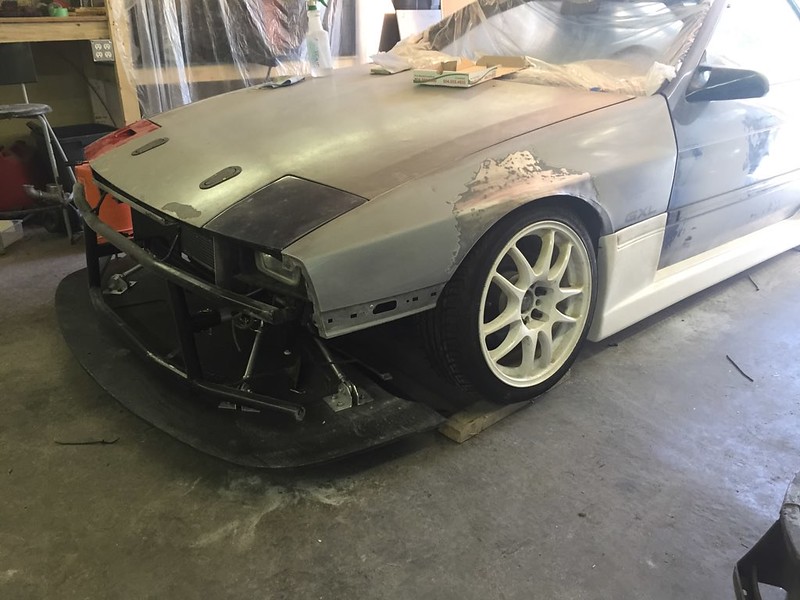
taking tips from my buddy Tito who’s actually good at body work, bought a torch (map torches are sick, way hotter faster than propane) and did a fairly aggressive roll/pull hammer of the fenders. in the end they are probably 20mm wider than the oems, still metal and don’t lose much of the factory shape. I don’t really like vented fenders.
Thread Starter
Senior Member
Joined: Mar 2015
Posts: 335
Likes: 8
From: Vancouver, BC
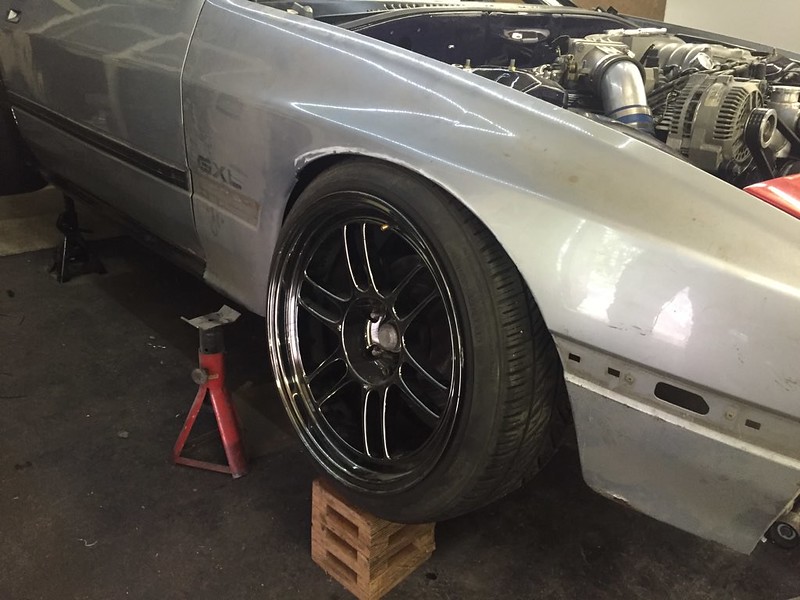
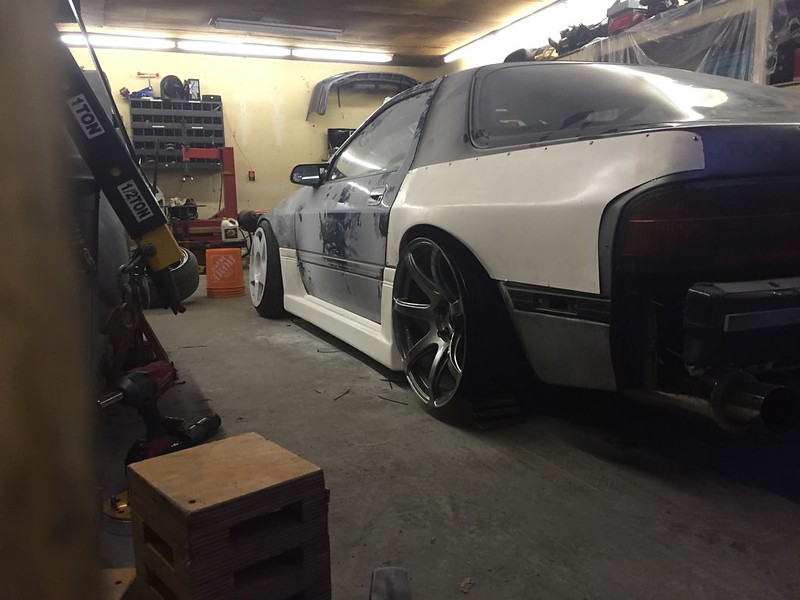
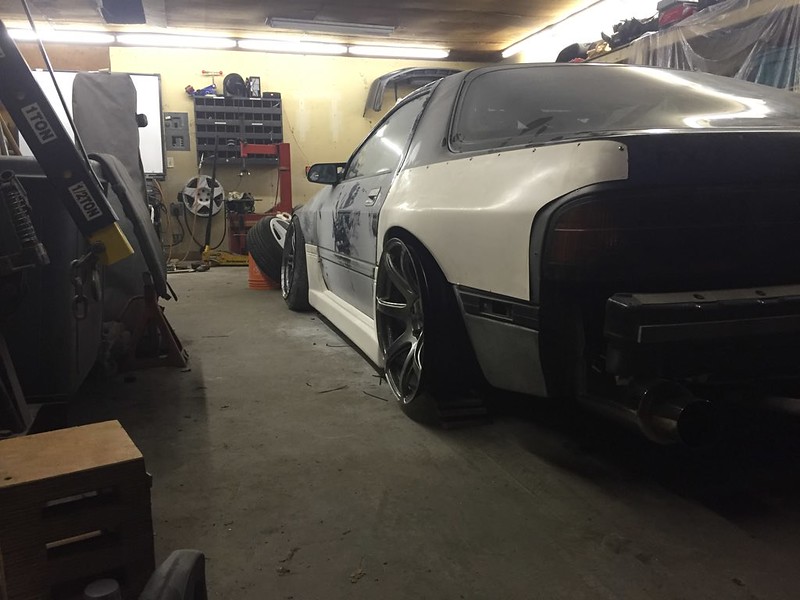
played around with another 19” wheel
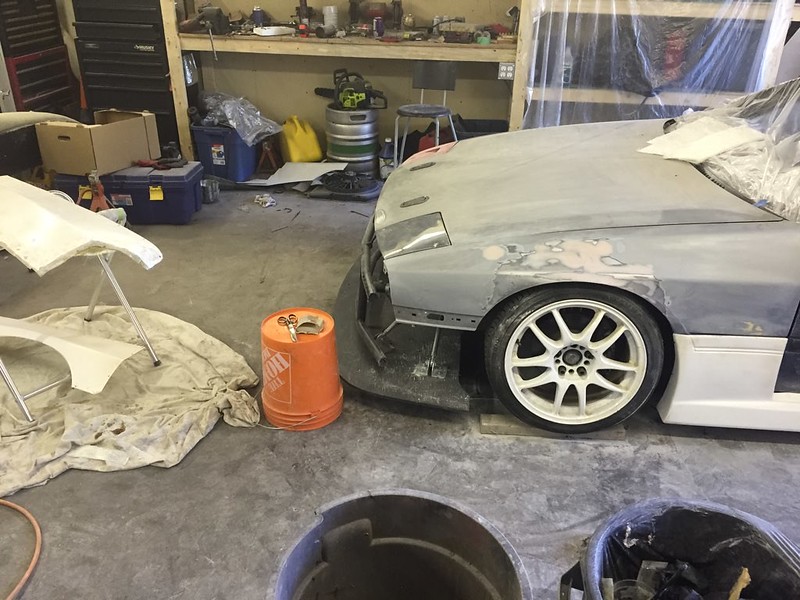
shop got really nasty with 2 of us grinding fibreglass and sanding paint and bondo, but misery loves company
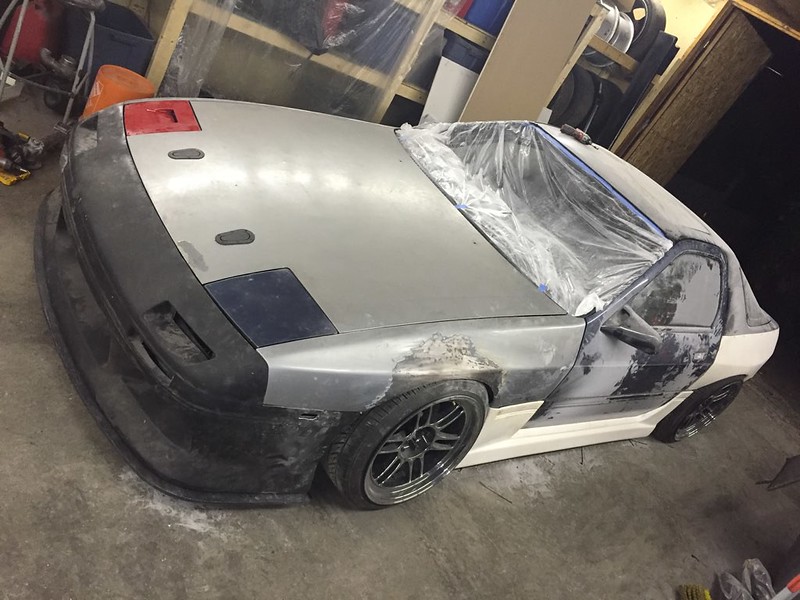
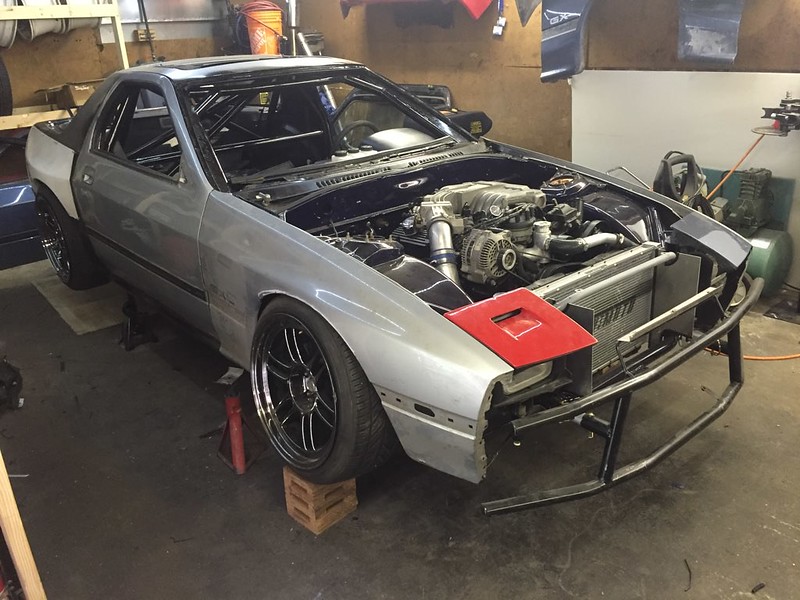
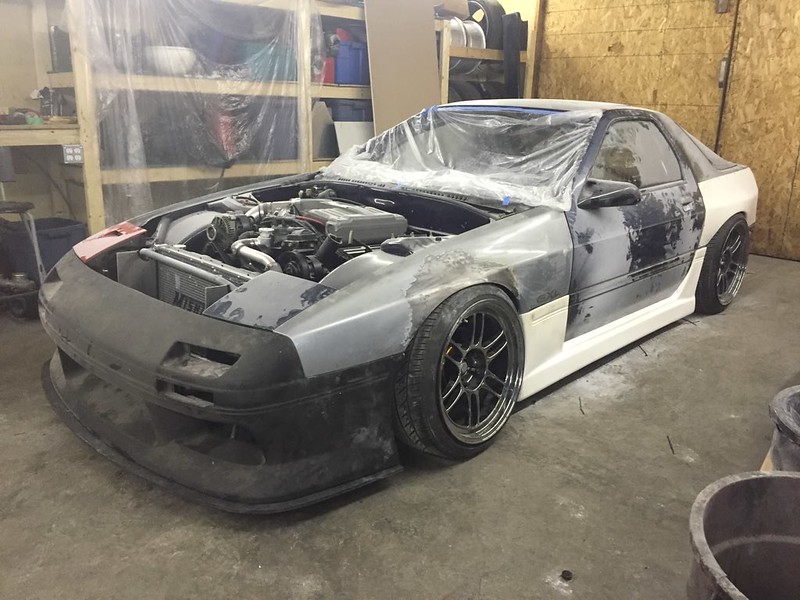
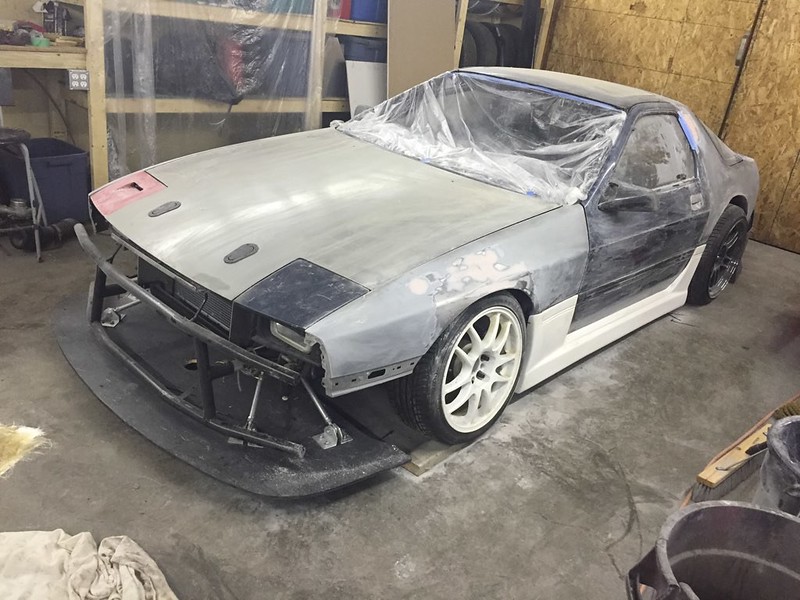
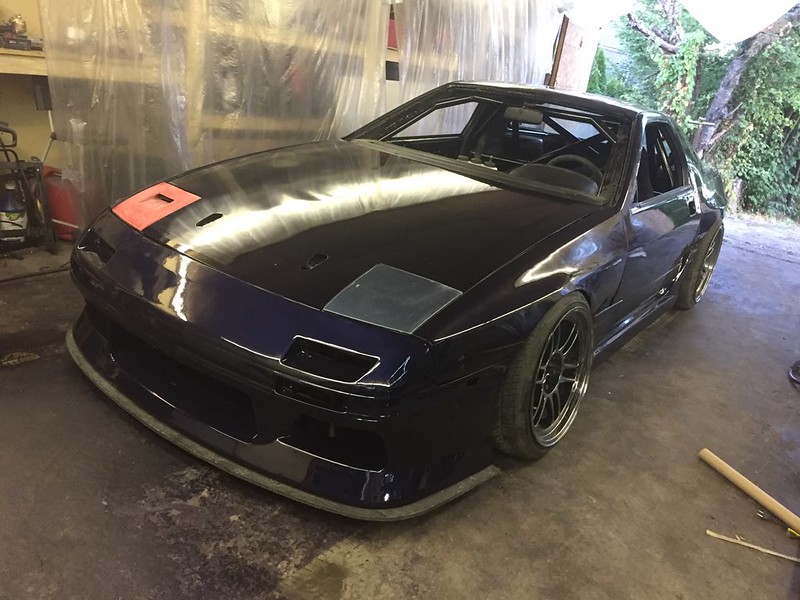
This is a temporary hood for now, I have an aluminum one from my dads vert, it has a dent in it but I plan to cover that up by cutting a hole in it for a vent. Didn’t have time to do all that before my deadline so I just cut in the aerocatches and sanded it
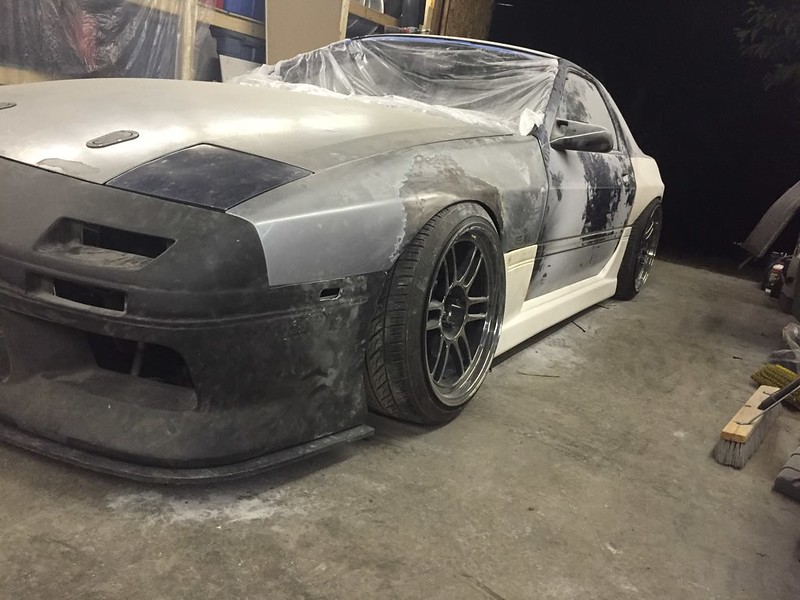
playing around with fitment and alignment settings. The body work stage is at least satisfying visually

shop got really nasty with 2 of us grinding fibreglass and sanding paint and bondo, but misery loves company
This is a temporary hood for now, I have an aluminum one from my dads vert, it has a dent in it but I plan to cover that up by cutting a hole in it for a vent. Didn’t have time to do all that before my deadline so I just cut in the aerocatches and sanded it
playing around with fitment and alignment settings. The body work stage is at least satisfying visually
Thread Starter
Senior Member
Joined: Mar 2015
Posts: 335
Likes: 8
From: Vancouver, BC
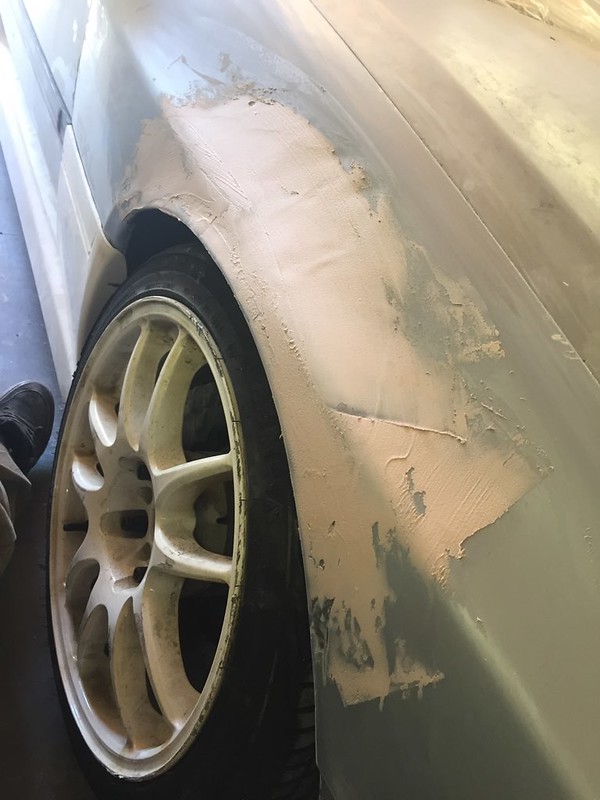
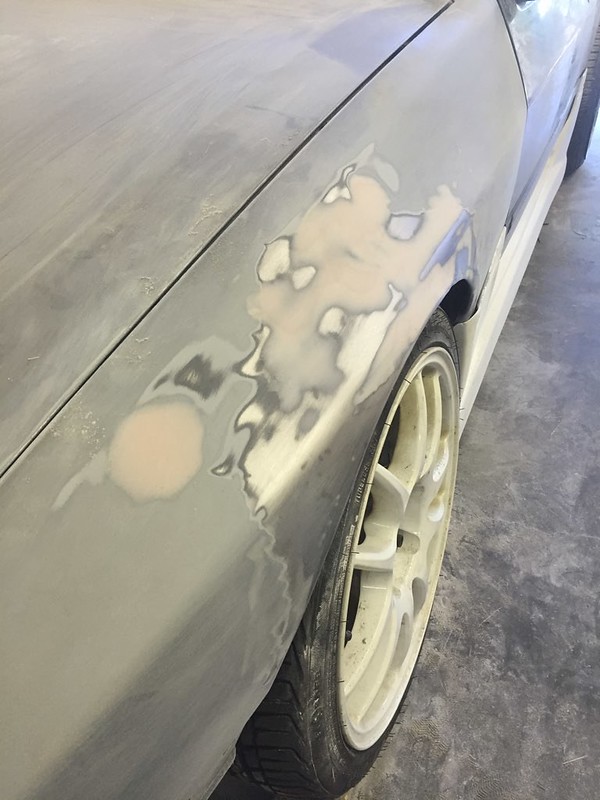
took this down to this
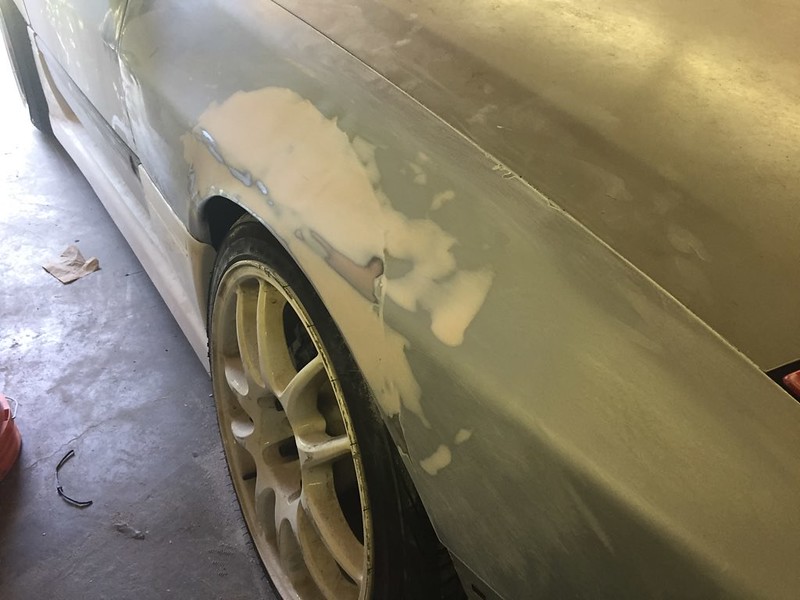
I was trying to just fill in low spots while avoiding adding a lot of bondo, but post paint and prime you can see a lot of it. maybe 2 layers of primer would have helped but I think I just needed to use more bondo. My inexperience showing here
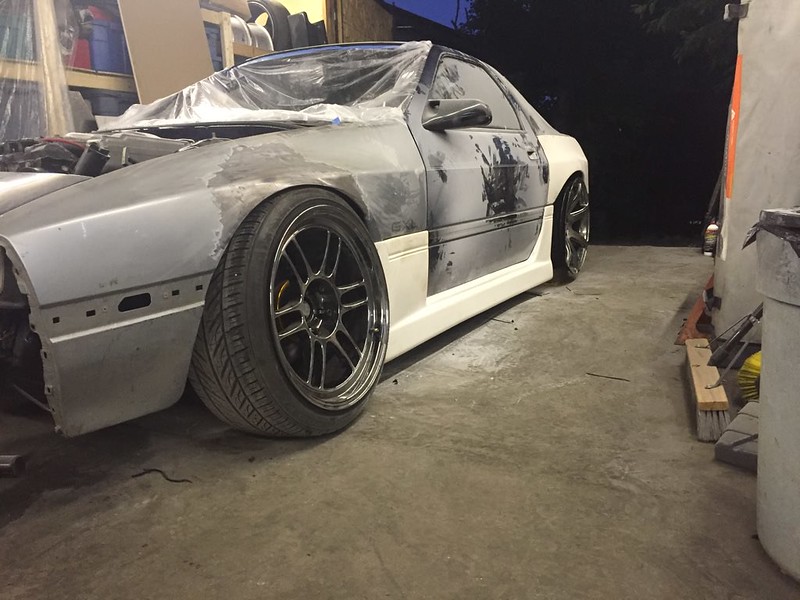
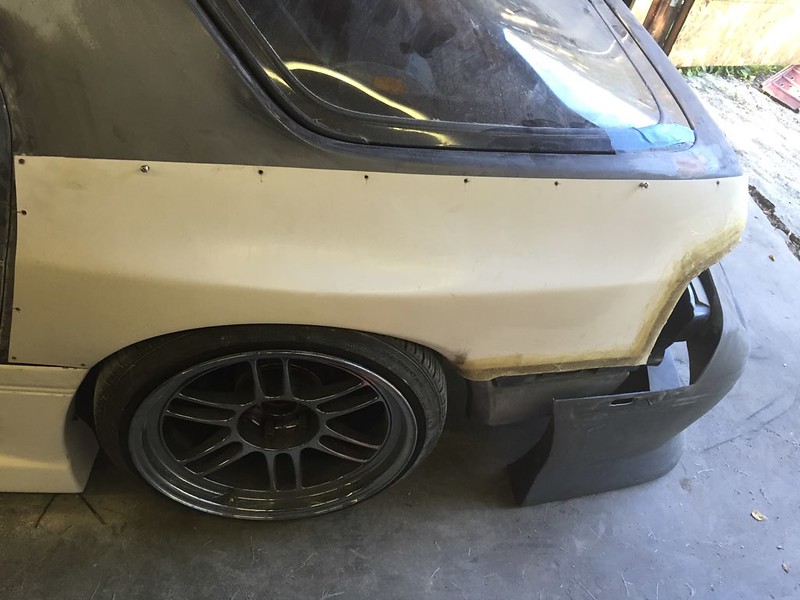
I said a long time ago these overs didn’t see to bad for the price. I was wrong. They didn’t fit the same side to side, like not even close, so I had to add glass on one side.
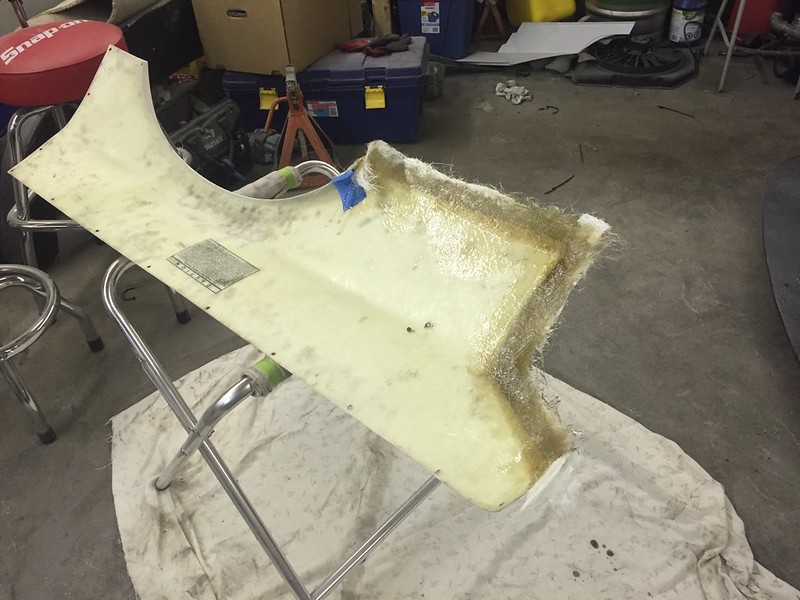
in the end they still fit terribly and I’m concerned now that If I get new ones the rivnut holes will be off. They are such an eyesore in my opinion it may be something I do sooner than later
Thread Starter
Senior Member
Joined: Mar 2015
Posts: 335
Likes: 8
From: Vancouver, BC
I now had a deadline on when the car and parts needed to be ready for primer, so I was putting in crazy hours and mad stressing while doing 3 things at once all while helping plan a wedding.
also sanding is really boring

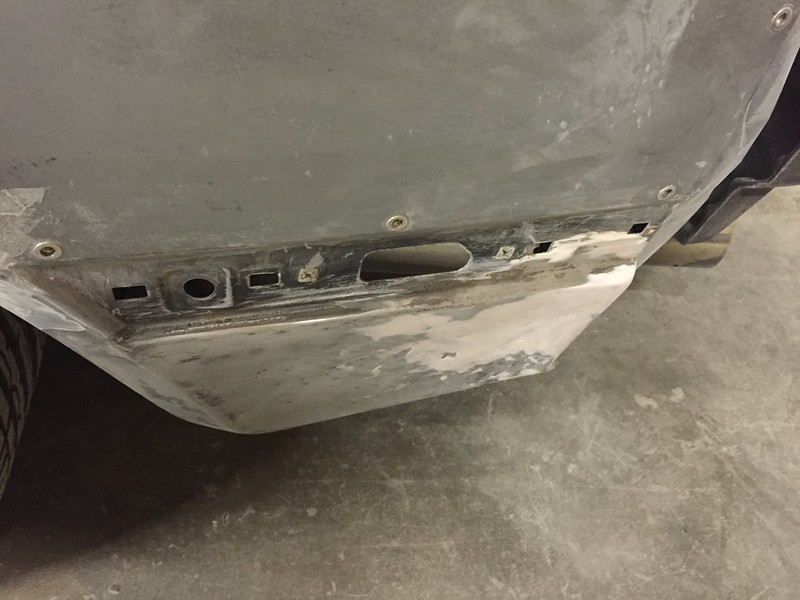
filled in a bunch of dings and dents the shell had when I got it

as I was getting close I stripped it of all the parts so we could paint just the small section of the body
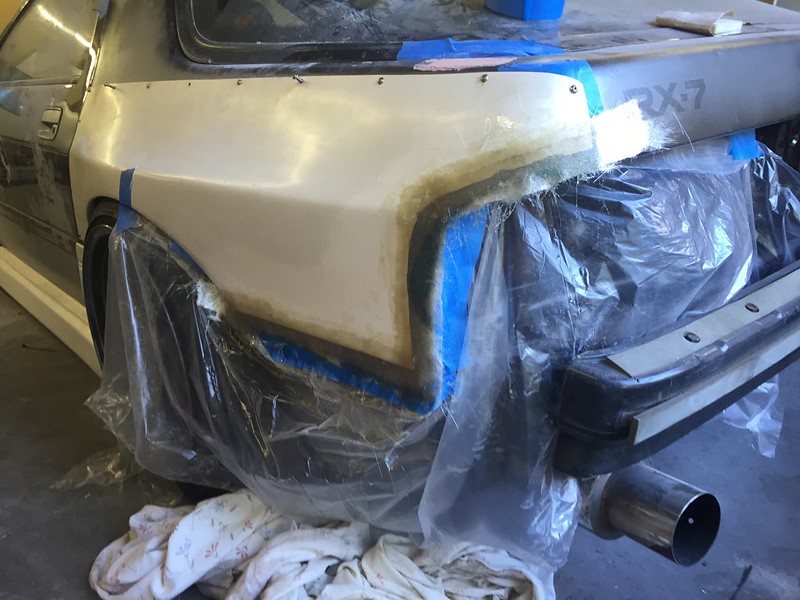
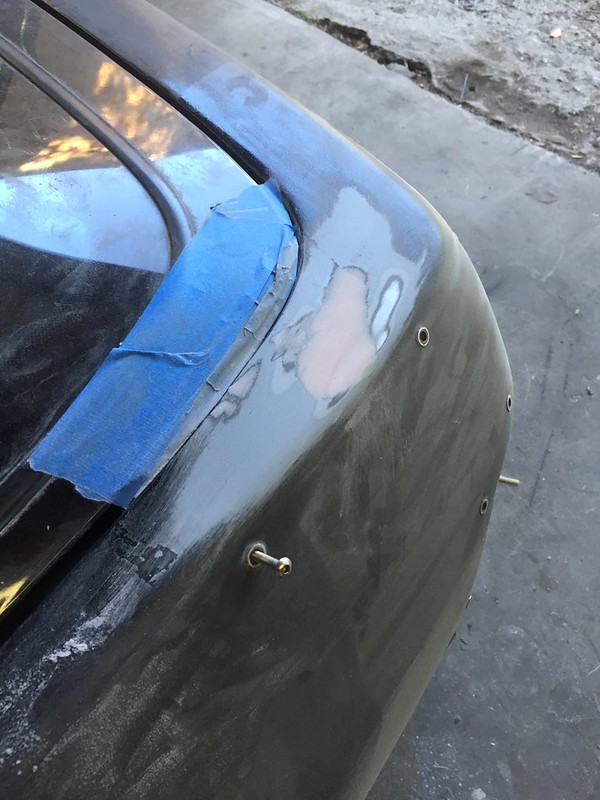
One area i had left until last was this corner. Never noticed the texture was different than the other side and that was because it was a 1/2” thick layer of bondo! yay
So grinded all that off and smoothed just the top as my buddy Craig came thru in a pretty clutch way… more on that in a bit

also sanding is really boring
filled in a bunch of dings and dents the shell had when I got it
as I was getting close I stripped it of all the parts so we could paint just the small section of the body
One area i had left until last was this corner. Never noticed the texture was different than the other side and that was because it was a 1/2” thick layer of bondo! yay
So grinded all that off and smoothed just the top as my buddy Craig came thru in a pretty clutch way… more on that in a bit
Thread Starter
Senior Member
Joined: Mar 2015
Posts: 335
Likes: 8
From: Vancouver, BC
ready for final sanding a remasking
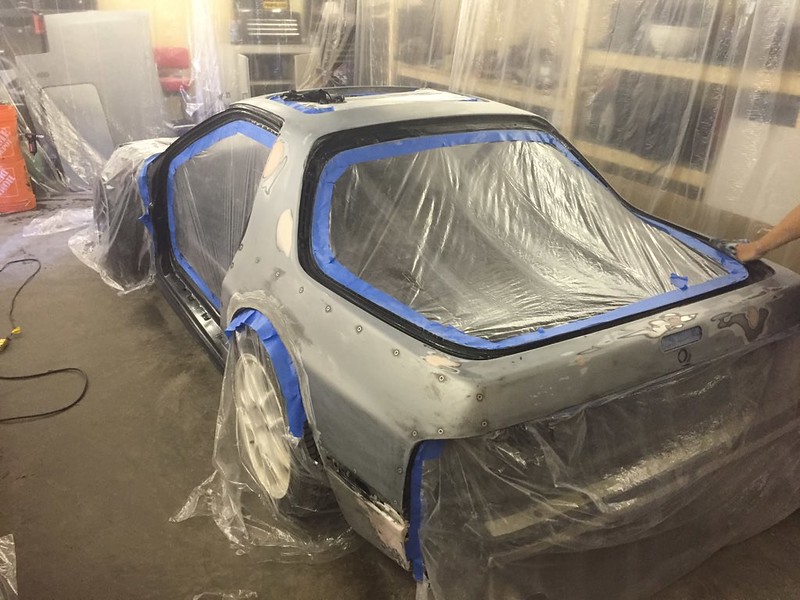
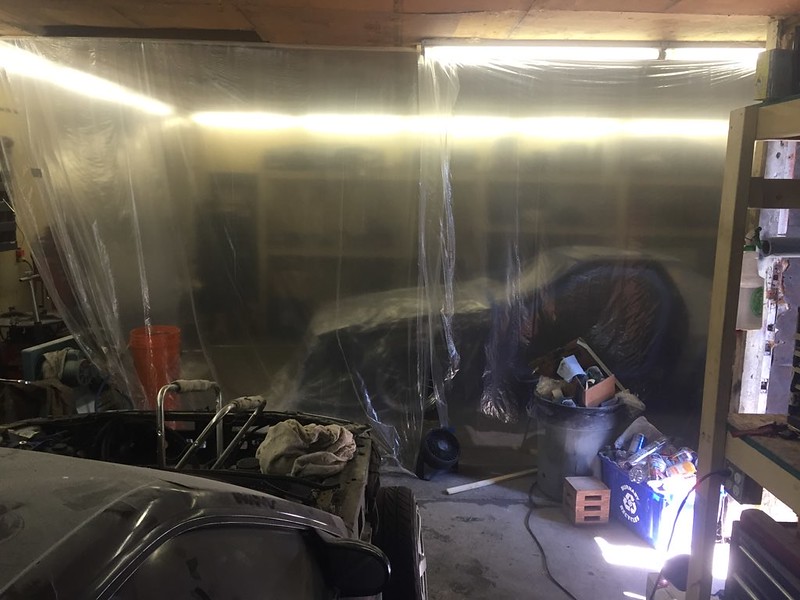
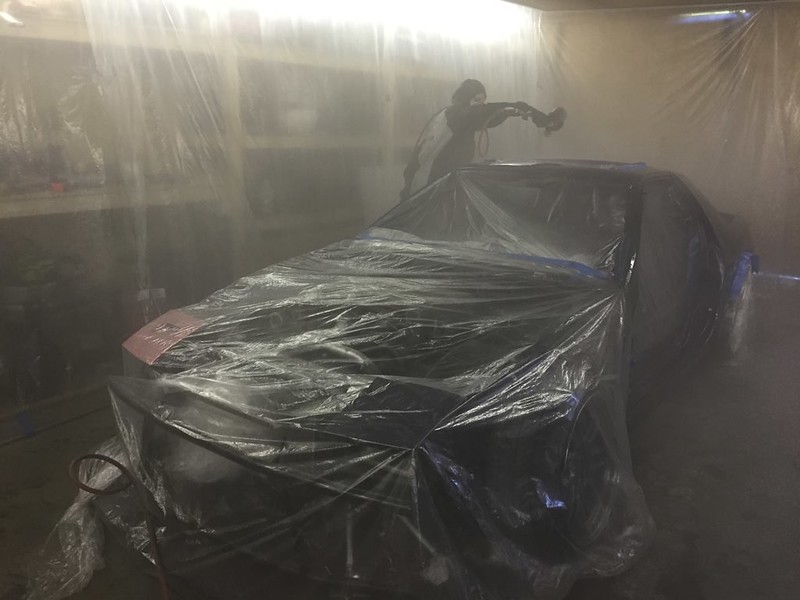
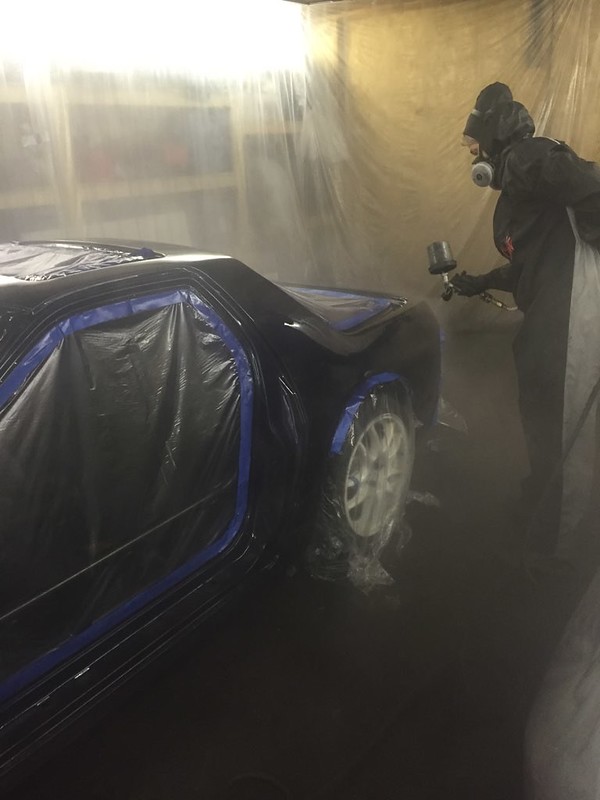
built the booth on the other side of the garage this time. Seeing as how we were doing considerably less spraying at one time than before we elected to try using just the small compressor and tank, and left the big tank out. This worked well with the air dryer
my sister doing her thang, pre-spray ritual was shotgun a hey�all and blast cardi B. I wanted good results so lol go ahead
Thread Starter
Senior Member
Joined: Mar 2015
Posts: 335
Likes: 8
From: Vancouver, BC
first layer of colour, which due to not having proper mixing sticks was a little light on metallic. we eventually had to scuff and respray this as it didn’t match the rest of the pieces.
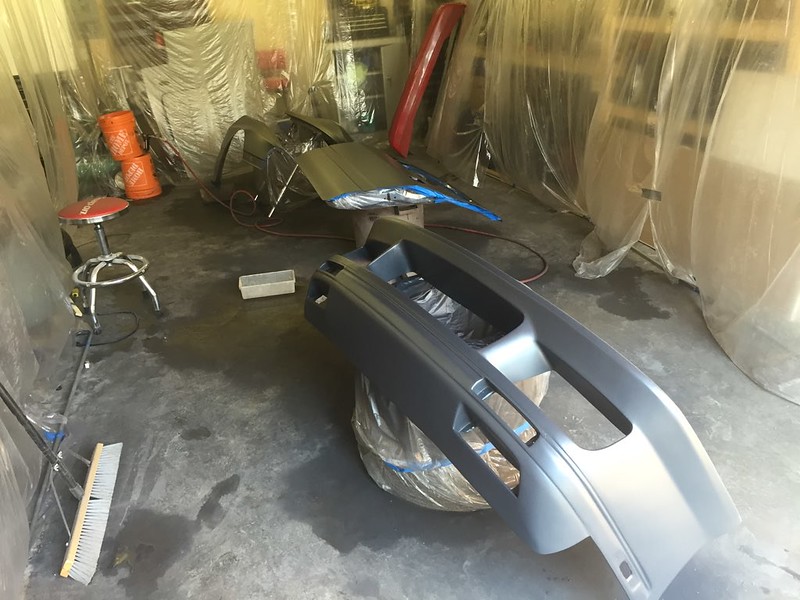
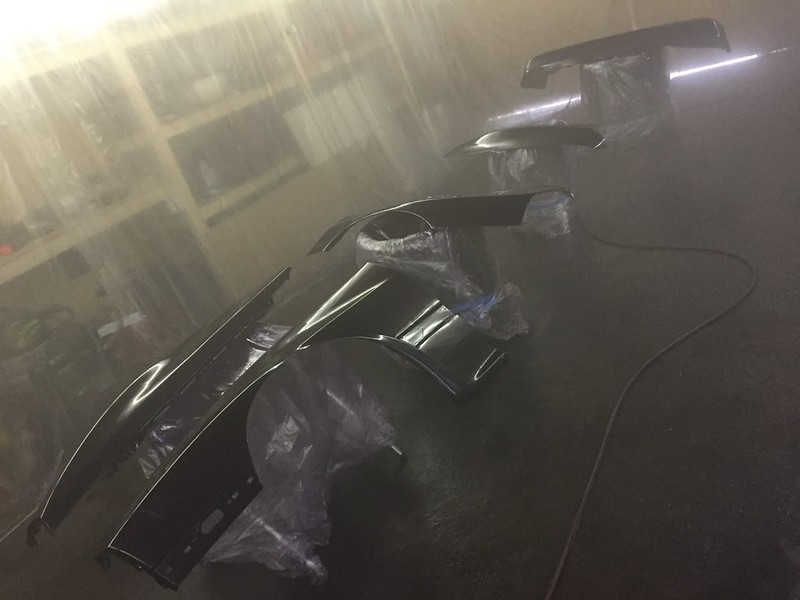
parts littered everywhere in various stages of prep, long days into late nights, literally one of the longest long weekends of my life so far. But we pulled through, basically all got sick by the end but had something to show for it
parts littered everywhere in various stages of prep, long days into late nights, literally one of the longest long weekends of my life so far. But we pulled through, basically all got sick by the end but had something to show for it
Thread Starter
Senior Member
Joined: Mar 2015
Posts: 335
Likes: 8
From: Vancouver, BC
Niq spilled hey’all on this fender while it was still curing so that may be in there forever I guess
(yes its the lighting)
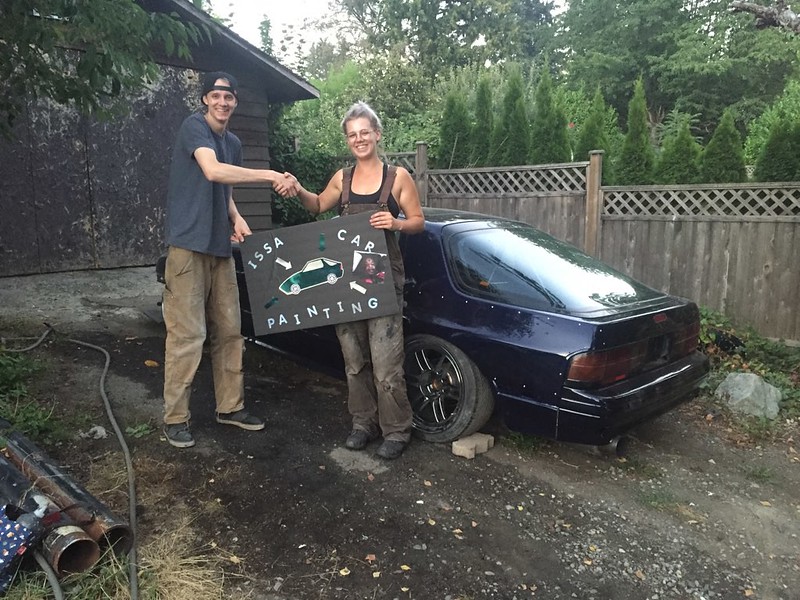
her and my fianc� made this poster as a christmas gift for me, and well it kinda rolled into my birthday as well. I kept it and we got our “giant cheque” photo
with the car painted minus some small bits, it was time to rope Kris into his old trade and put in the windshield
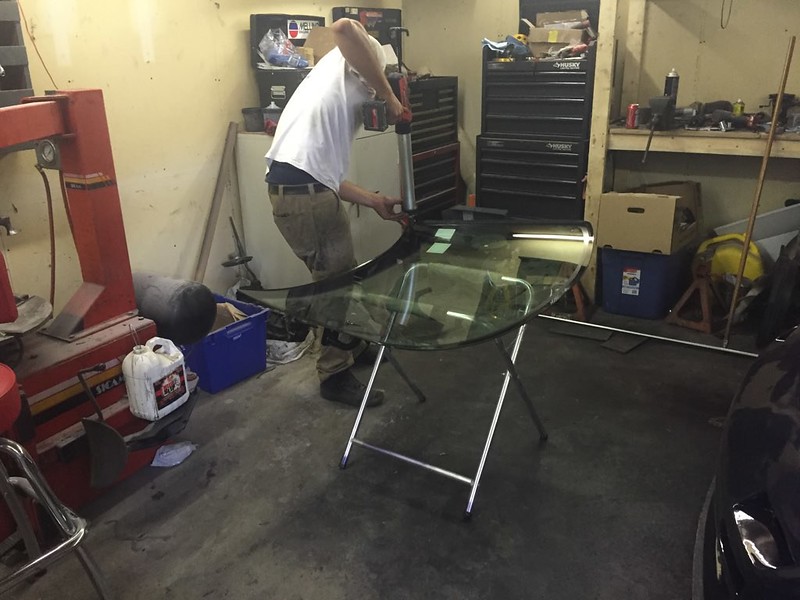
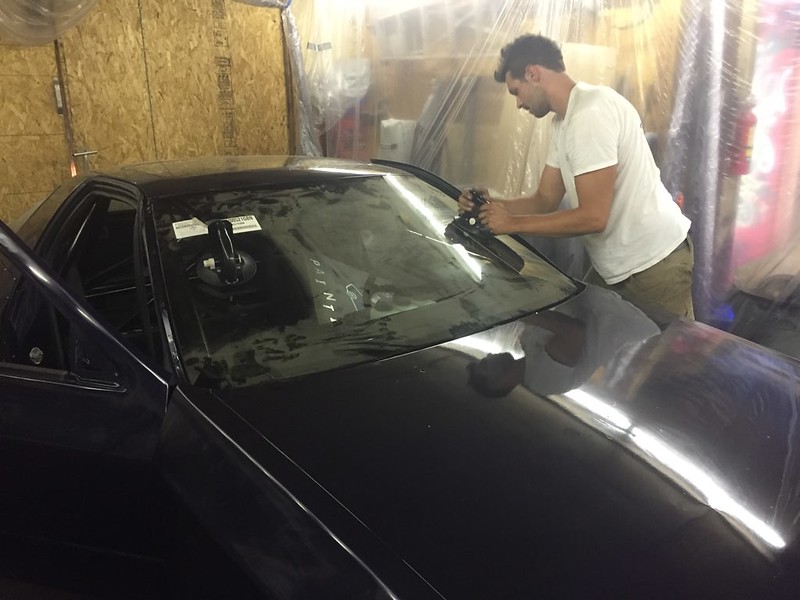
many thanks to him pulling strings he really didn’t want to in order to get urethane and primer
Thread Starter
Senior Member
Joined: Mar 2015
Posts: 335
Likes: 8
From: Vancouver, BC
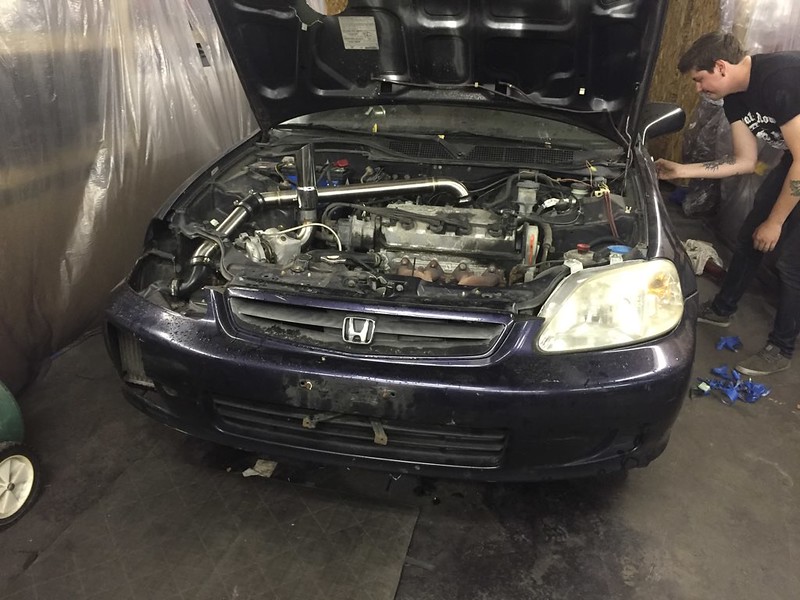
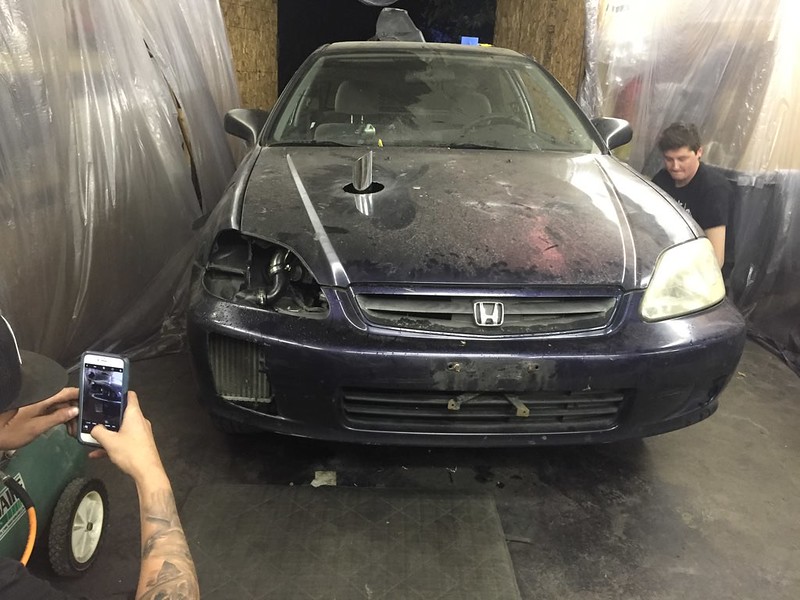
had to take a small break for my stag, my best man Andy and kris bought a civic for like $300. Andy’s plan was originally to throw a nitrous kit on it and see how long it lasted a the drag strip. But instead we figured we could turbo it with parts we had laying around for cheaper.
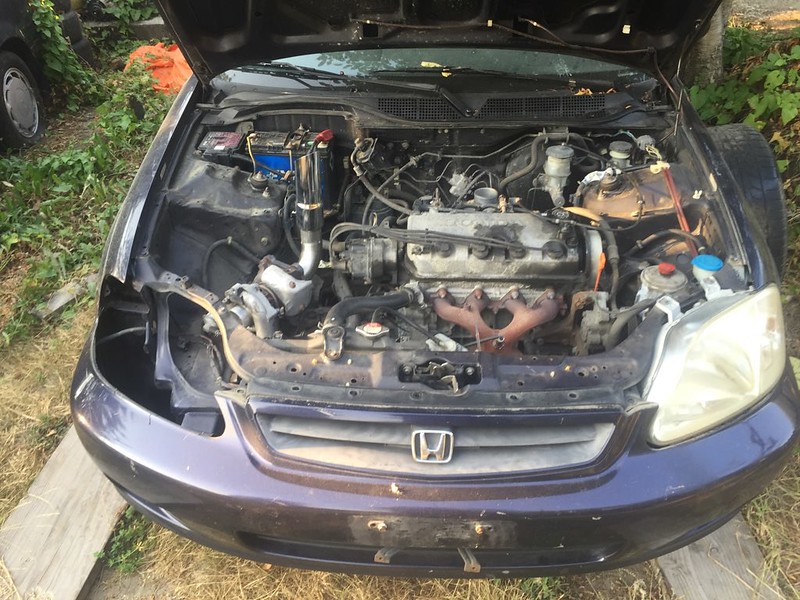
Andy spent a few hours doing the turbo ‘header’ before bringing the car to us. The rest of the work the 4 of us did in like 10 hours where we stopped twice for food and parts runs. So we maybe actually worked on it for like 6 hours each. We also had a rule that there was no bad ideas and no judgements of fab work. If it worked it worked.

I mounted and modded the bumper for a sick side mount intercooler that our buddy Anthony gave us from some audi
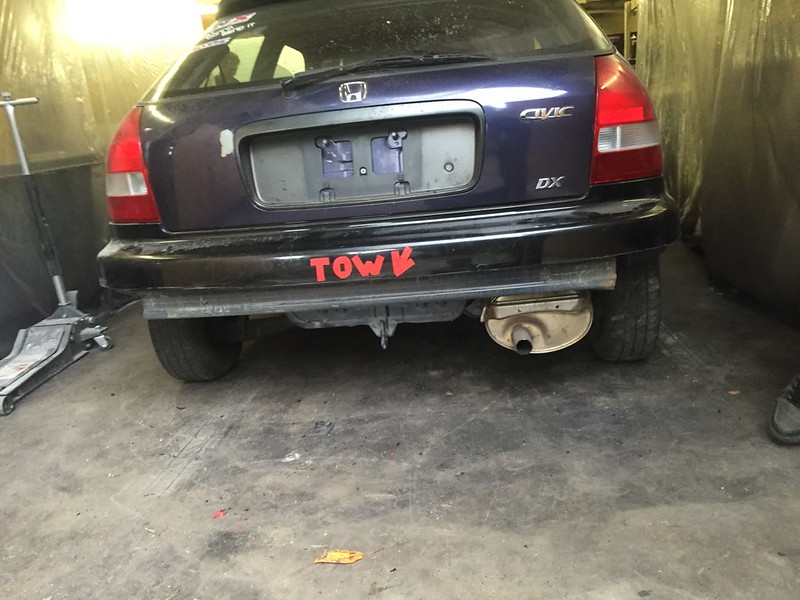
kris cut the rear bumper and made a “tow sticker” out of electrical tape
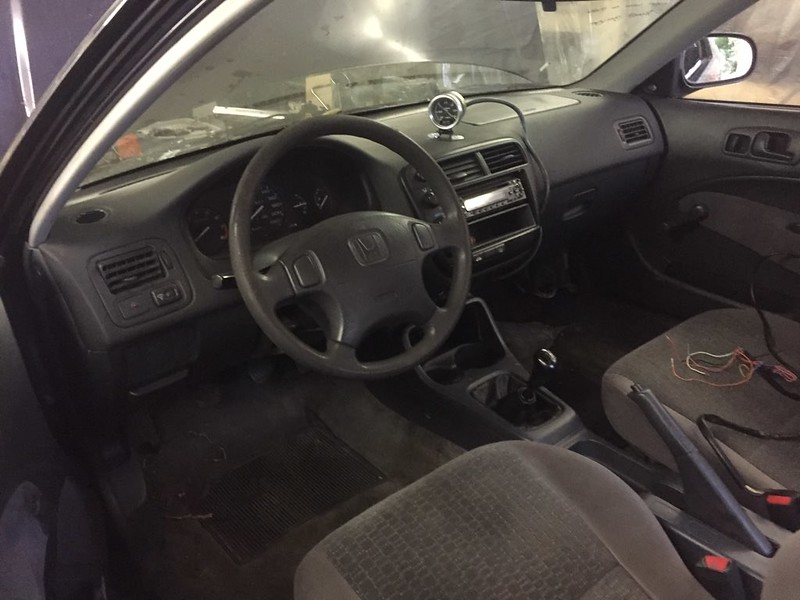
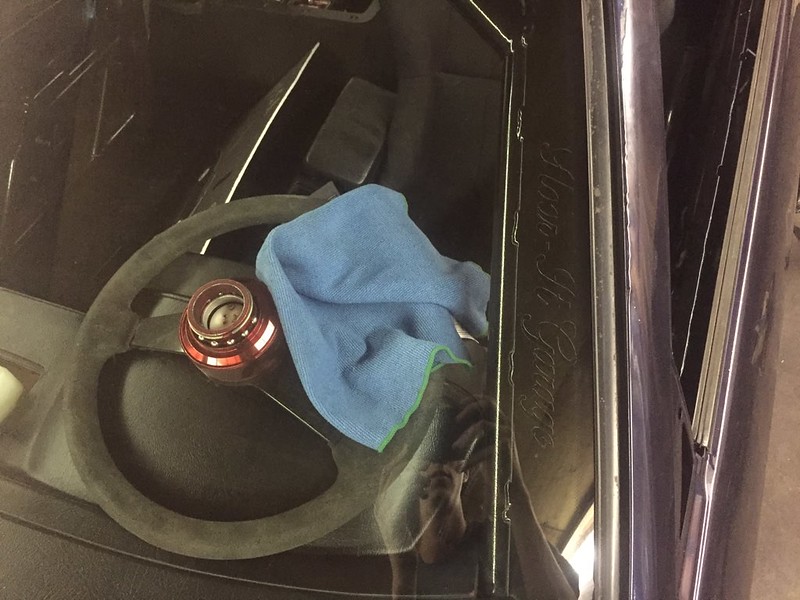
alex mounted the gauge on an interesting angle

sometime later we had the turbo mounted, drain punched and tapped into the pan, feed T’d off the oil pressure sender and the intercooler piping more or less done
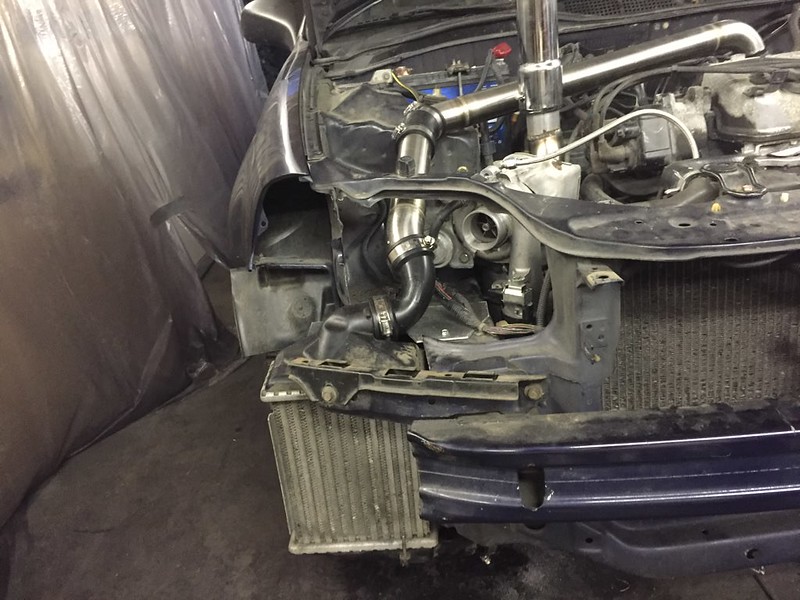
Andy really wanted the turbo to be in the headlight
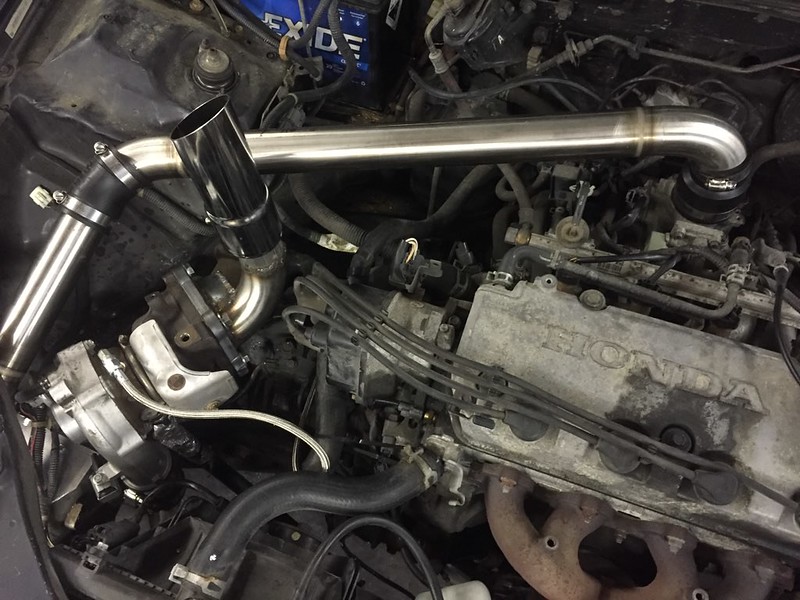
Andy spent a few hours doing the turbo ‘header’ before bringing the car to us. The rest of the work the 4 of us did in like 10 hours where we stopped twice for food and parts runs. So we maybe actually worked on it for like 6 hours each. We also had a rule that there was no bad ideas and no judgements of fab work. If it worked it worked.
I mounted and modded the bumper for a sick side mount intercooler that our buddy Anthony gave us from some audi
kris cut the rear bumper and made a “tow sticker” out of electrical tape
alex mounted the gauge on an interesting angle
sometime later we had the turbo mounted, drain punched and tapped into the pan, feed T’d off the oil pressure sender and the intercooler piping more or less done
Andy really wanted the turbo to be in the headlight
Thread Starter
Senior Member
Joined: Mar 2015
Posts: 335
Likes: 8
From: Vancouver, BC
we also bought a lot of the stuff we needed from Home Depot which only makes it funnier to me
Alex finishing off his custom flame paint job
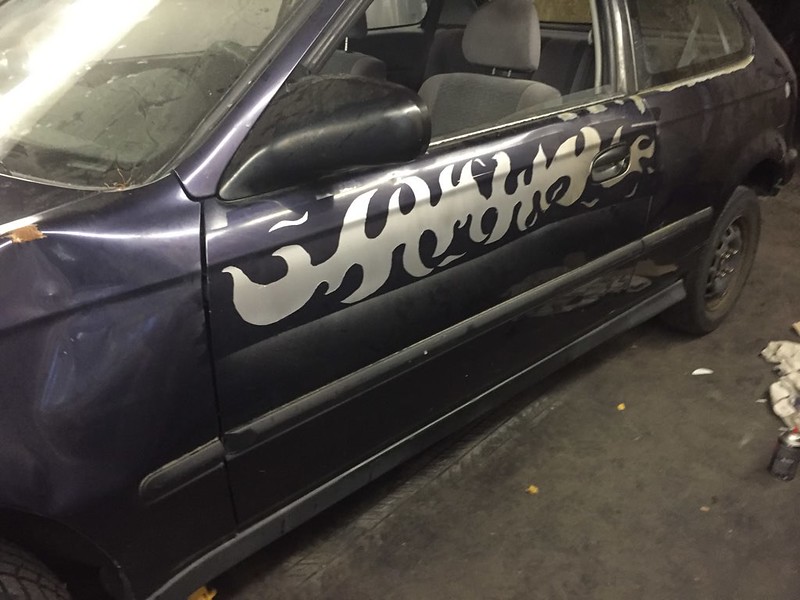
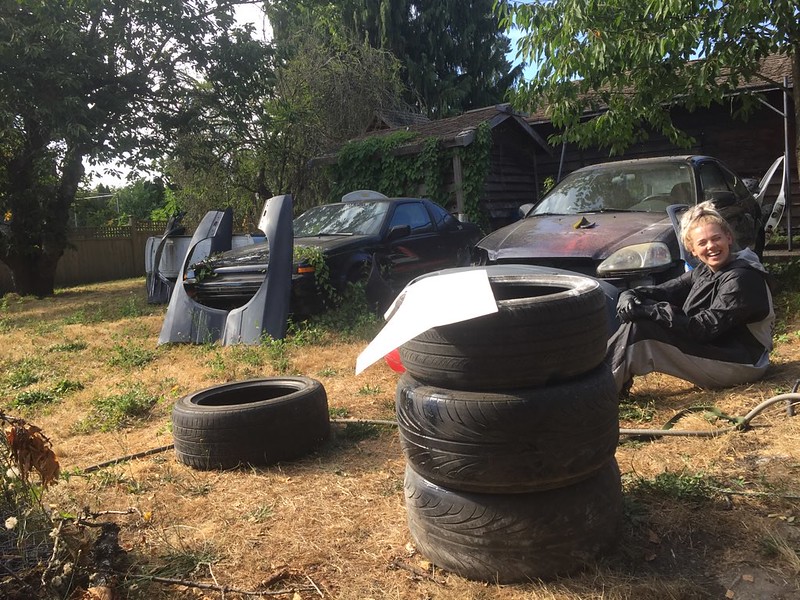
full need for speed spec
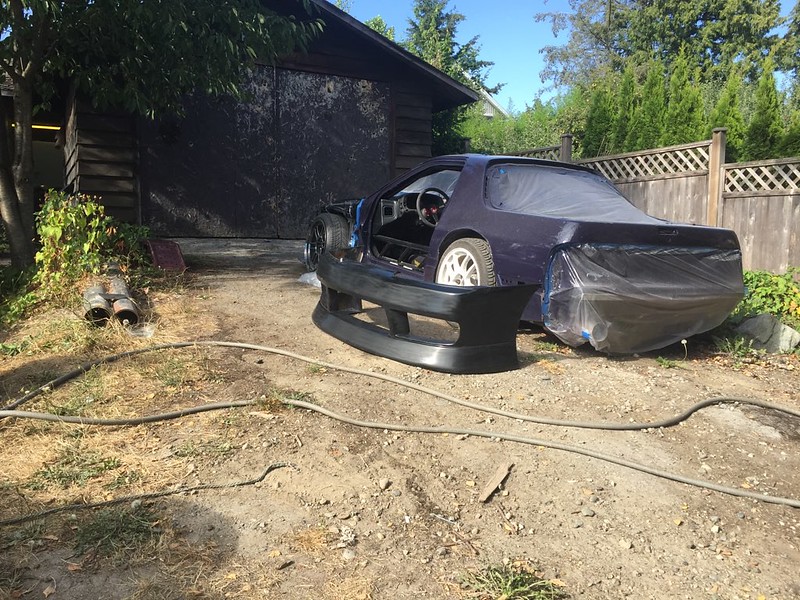
My car had to sit outside for the day, wood splitter appears to be working.
At the end of the night we all hopped in and did a pull in the civic. The turbo was hella blown but it still made like 9 psi and turbo noises. But there was raw oil in the exhaust so I found a new turbo on craigslist and have yet to swap it on before we go drag racing. I’ve never built a car with so little regard for how it looked and have to say it was a lot of fun. Much different than building my car but I haven’t laughed like that for 8 hours straight either
 [/url]
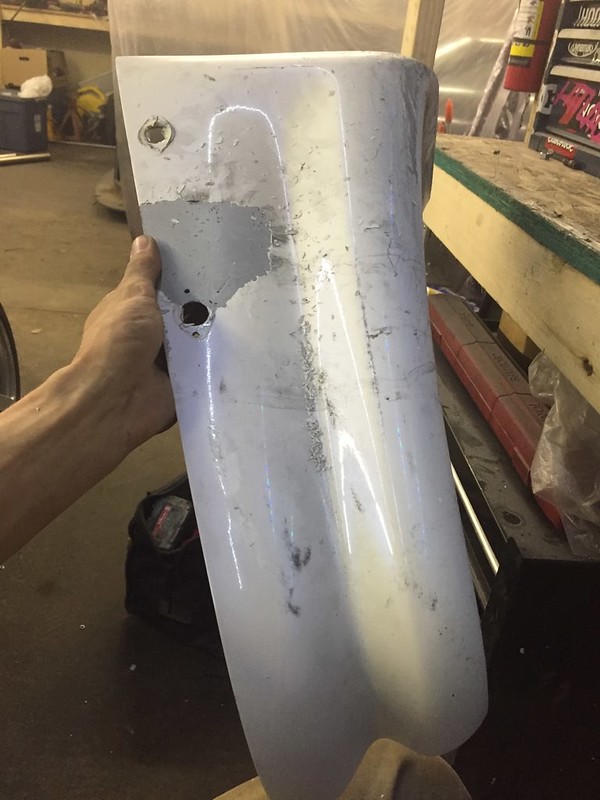
So where Craig came in at the last minute, he bought a shine kit used off someone in the states and he really only wanted the lip. He also knew i wanted Shine S5 spats, so he sold them to me the night he picked them up. This meant I could cover up the band corner instead of trying to make it look nice. the catch was the paint on the spats was cranked and peeling off due to bad prep work and there were holes in them from Dzuz fasteners that I needed to fill.
then I completely didn’t take any photos lol. I need to go back to get some parts that I missed but want to talk about anyway.
Alex finishing off his custom flame paint job
full need for speed spec
My car had to sit outside for the day, wood splitter appears to be working.
At the end of the night we all hopped in and did a pull in the civic. The turbo was hella blown but it still made like 9 psi and turbo noises. But there was raw oil in the exhaust so I found a new turbo on craigslist and have yet to swap it on before we go drag racing. I’ve never built a car with so little regard for how it looked and have to say it was a lot of fun. Much different than building my car but I haven’t laughed like that for 8 hours straight either
[/url]So where Craig came in at the last minute, he bought a shine kit used off someone in the states and he really only wanted the lip. He also knew i wanted Shine S5 spats, so he sold them to me the night he picked them up. This meant I could cover up the band corner instead of trying to make it look nice. the catch was the paint on the spats was cranked and peeling off due to bad prep work and there were holes in them from Dzuz fasteners that I needed to fill.
then I completely didn’t take any photos lol. I need to go back to get some parts that I missed but want to talk about anyway.
Thread Starter
Senior Member
Joined: Mar 2015
Posts: 335
Likes: 8
From: Vancouver, BC
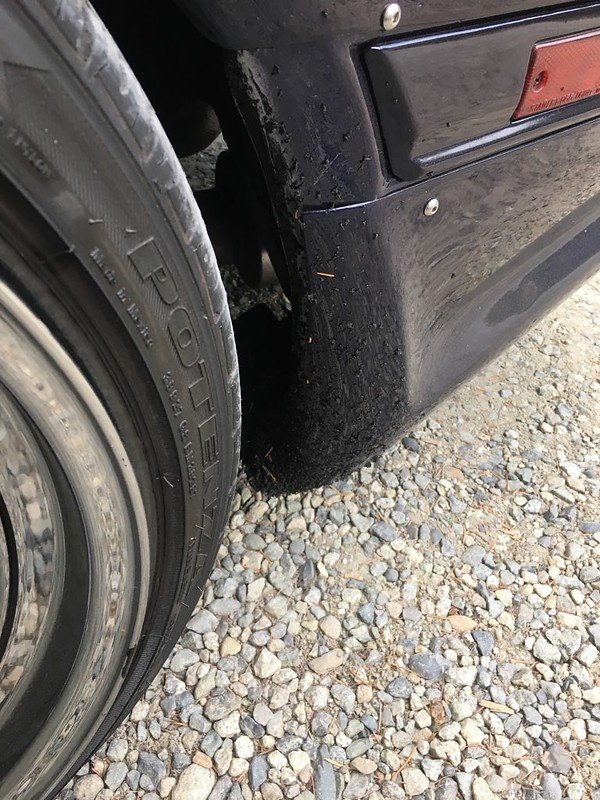
Drove it for the first time of course at night in the dark to the closest low car friendly gas station
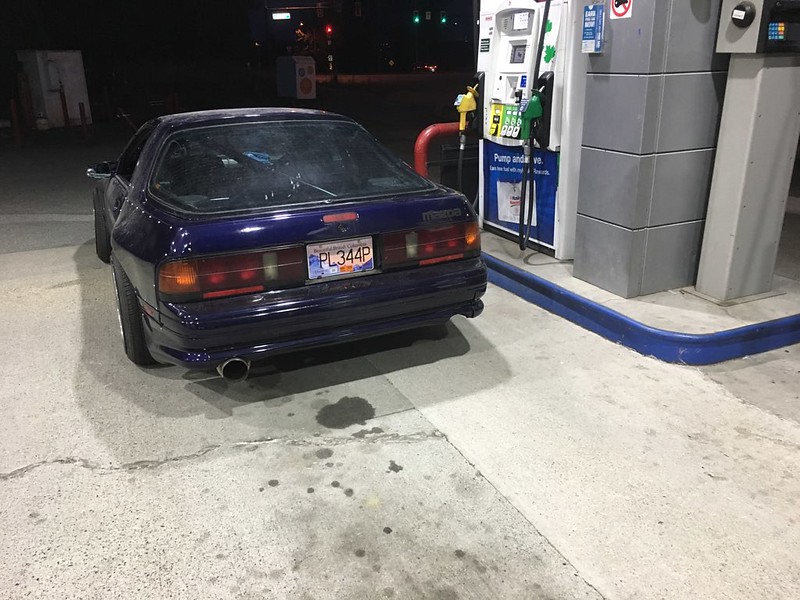
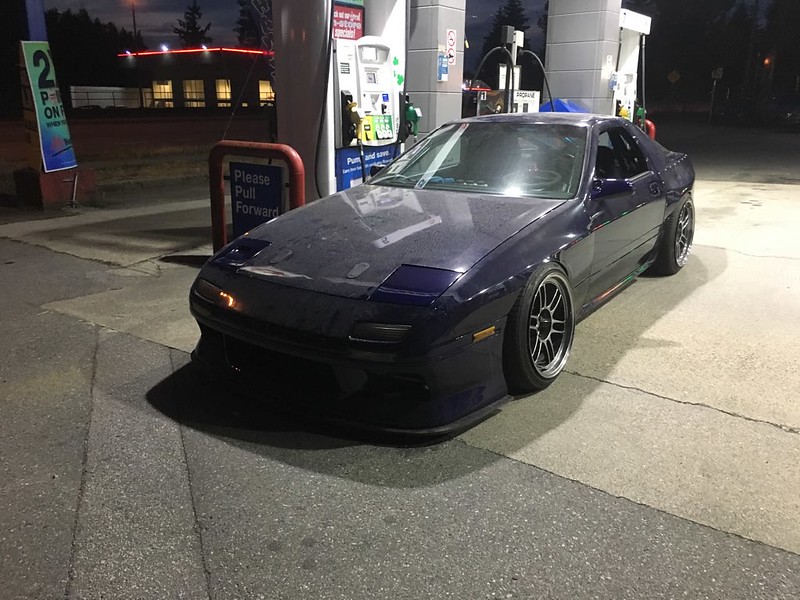
as nervous as I was, it did fine. Didn’t over heat (though it stays at like 90-92, i was hoping it would be lower), rubbed a bit oh well, drove well, does skids and burnouts (wow am I rusty at drifting this car) and sounds ridiculous banging on the limiter
though i am forgetting the part where I took it down the street and back while I was moving the car out of the way for kris to load his on a trailer, and the strut to knuckle bolts werent tight enough and the slipped. this meant the next time I turned it folded in my fenders. took some paint off the lip, but i rolled them more or less back to shape.
the other thing I wish didn’t happen…
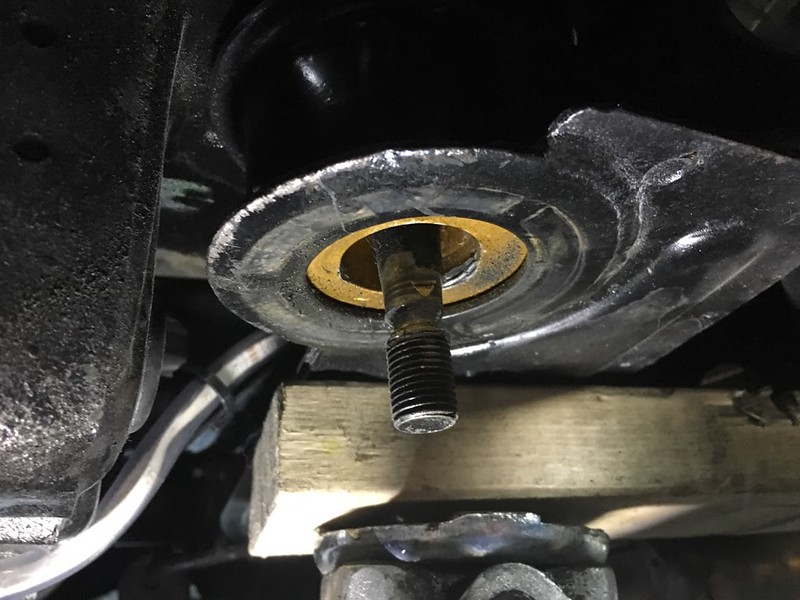
When I assembled it all again I forgot i needed to space the nut up with washers because the threads don’t go down far enough. So after the first test drive I went to investigate a clunk, the subframe wasn’t seated tight. They were tight on there so I went to take them off and couldn’t.

my solution for now (until it breaks and I have to deal with it) a spacer kris made from some thick wall tube he had and the nut sits at the end. Really don’t like it, but I’ll have to cut my cage baseplates and all kinds of mess in order to replace the studs….
Kris’s car blew the driveshaft on the dyno but that didn’t stop us from slamming in his old one and puttering the car around for pics
as nervous as I was, it did fine. Didn’t over heat (though it stays at like 90-92, i was hoping it would be lower), rubbed a bit oh well, drove well, does skids and burnouts (wow am I rusty at drifting this car) and sounds ridiculous banging on the limiter
though i am forgetting the part where I took it down the street and back while I was moving the car out of the way for kris to load his on a trailer, and the strut to knuckle bolts werent tight enough and the slipped. this meant the next time I turned it folded in my fenders. took some paint off the lip, but i rolled them more or less back to shape.
the other thing I wish didn’t happen…
When I assembled it all again I forgot i needed to space the nut up with washers because the threads don’t go down far enough. So after the first test drive I went to investigate a clunk, the subframe wasn’t seated tight. They were tight on there so I went to take them off and couldn’t.
my solution for now (until it breaks and I have to deal with it) a spacer kris made from some thick wall tube he had and the nut sits at the end. Really don’t like it, but I’ll have to cut my cage baseplates and all kinds of mess in order to replace the studs….
Kris’s car blew the driveshaft on the dyno but that didn’t stop us from slamming in his old one and puttering the car around for pics
Thread Starter
Senior Member
Joined: Mar 2015
Posts: 335
Likes: 8
From: Vancouver, BC
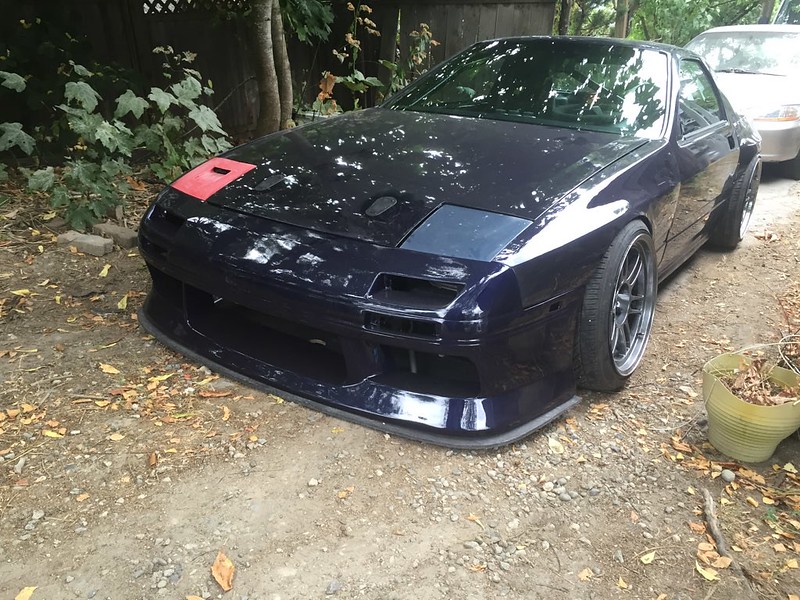
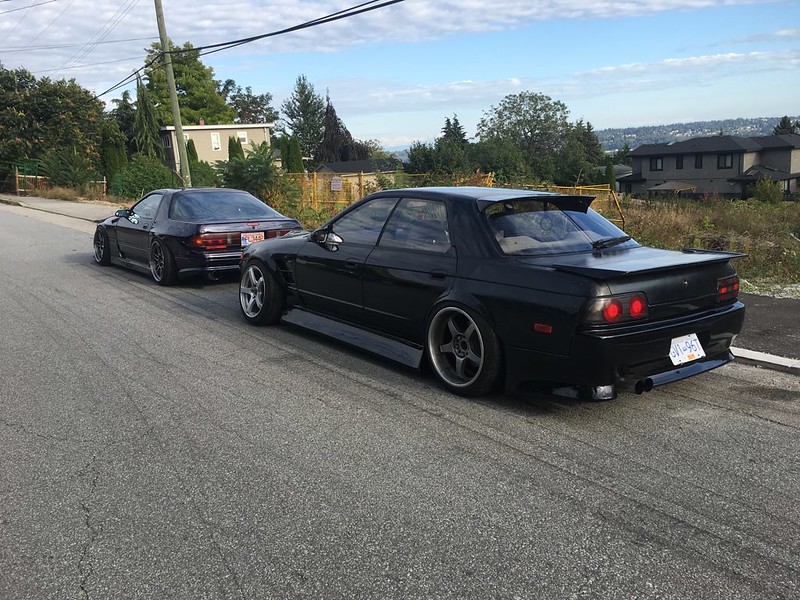
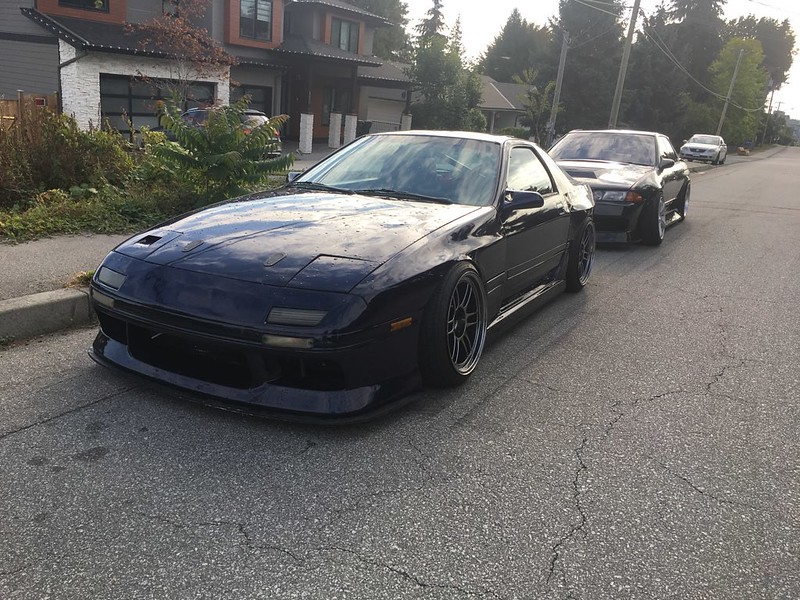
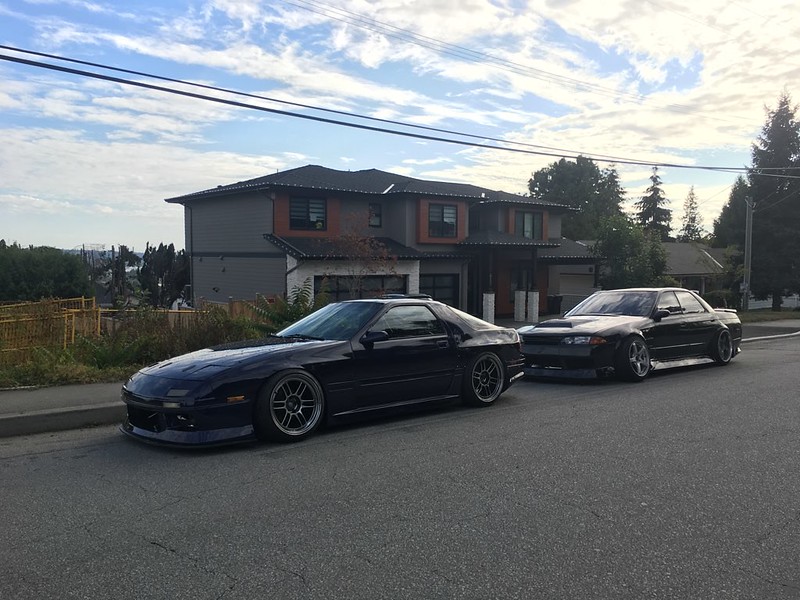
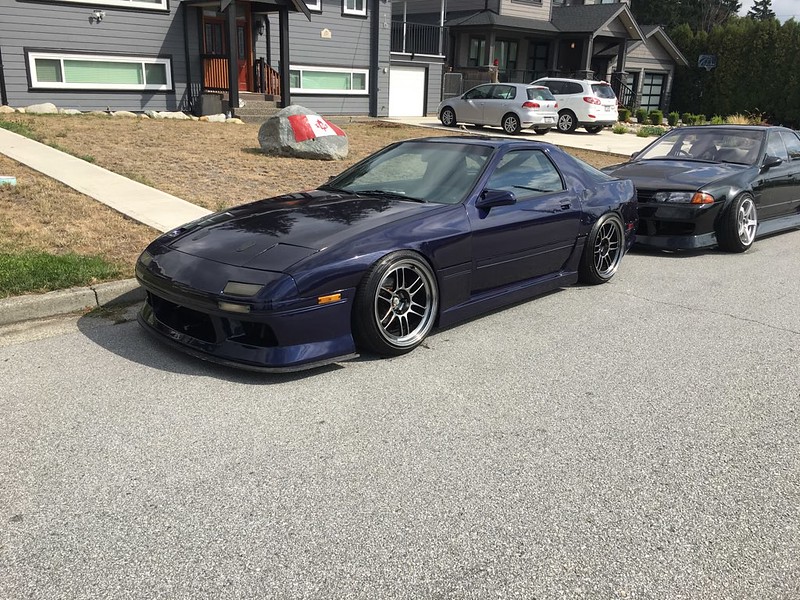
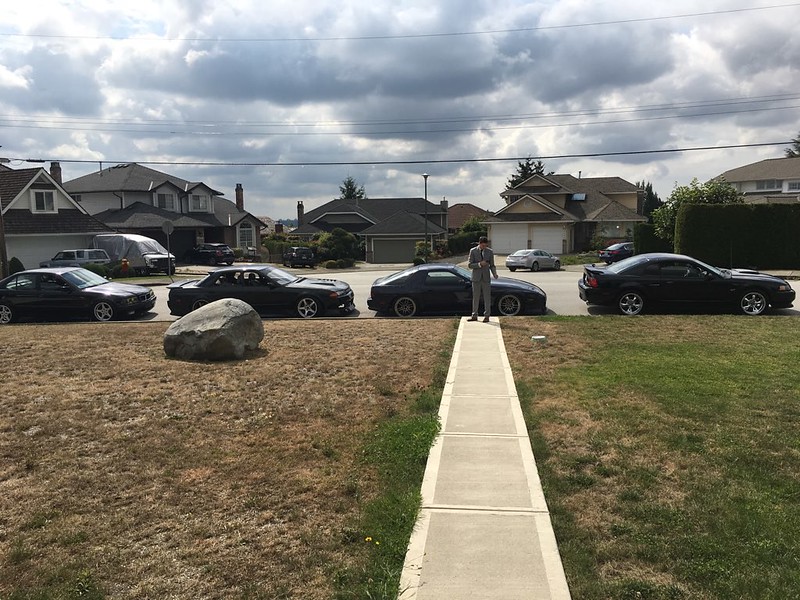
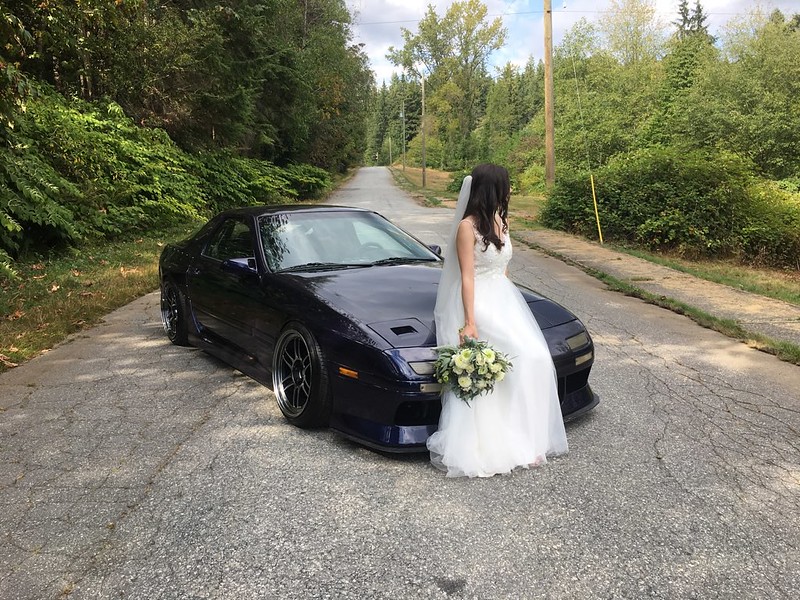
with as many of the kinks ironed out as possible I brought it home the night before the wedding
day of we all met at my house to get ready
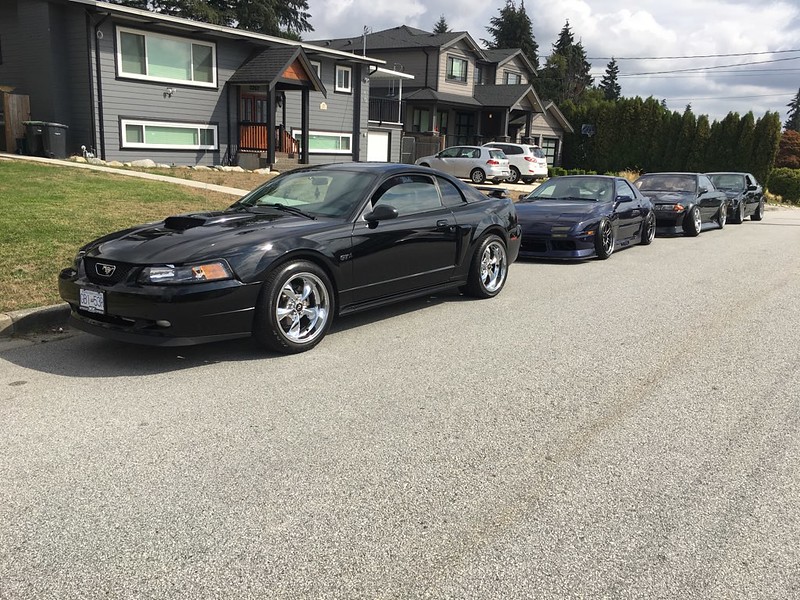
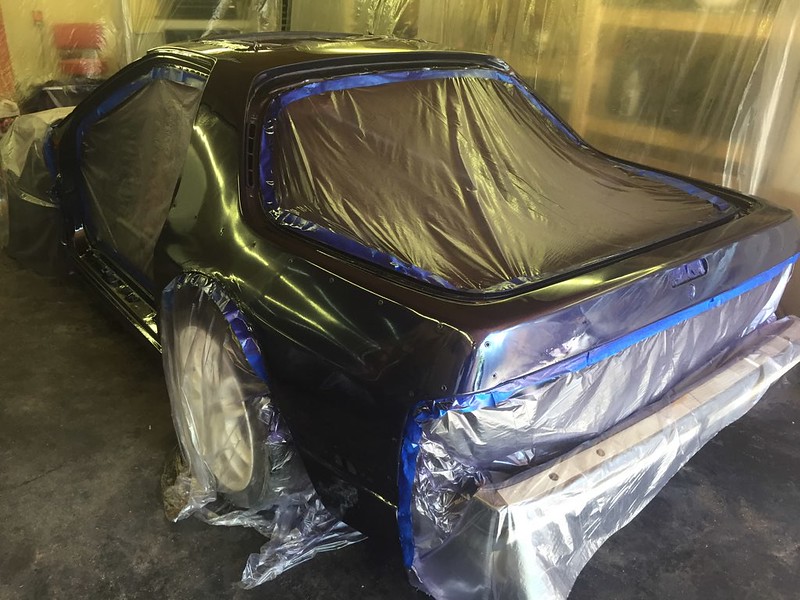
didn’t intentionally plan this but they all had black cars, mine is kinda a blue/purple, which also matched our suit combo, me wearing a navy and them wearing grey.

day of we all met at my house to get ready
didn’t intentionally plan this but they all had black cars, mine is kinda a blue/purple, which also matched our suit combo, me wearing a navy and them wearing grey.
Thread Starter
Senior Member
Joined: Mar 2015
Posts: 335
Likes: 8
From: Vancouver, BC
did a cooker, obviously. Pics didn’t turn out like I was picturing but pretty cool nevertheless. Not sure when we get our photos back yet
The last 6 months or so has been wild. currently back from our honeymoon and spending time starting our life together. Absolutely love this girl and her allowing me but also encouraging me to finish the car in time. I need a break from it, and it needs some things completed before it sees a track probably next year. Building a car on a deadline was not fun, i don’t recommend. But the result was worth it. This has been an idea in my head for a long time, I’m going to enjoy driving around and going to meets again for a while before I tear it apart to solve the little issues.
