
I Bit Off More Than I Can Chew: A Drift Car


Thread Starter
Senior Member
Joined: Mar 2015
Posts: 335
Likes: 8
From: Vancouver, BC
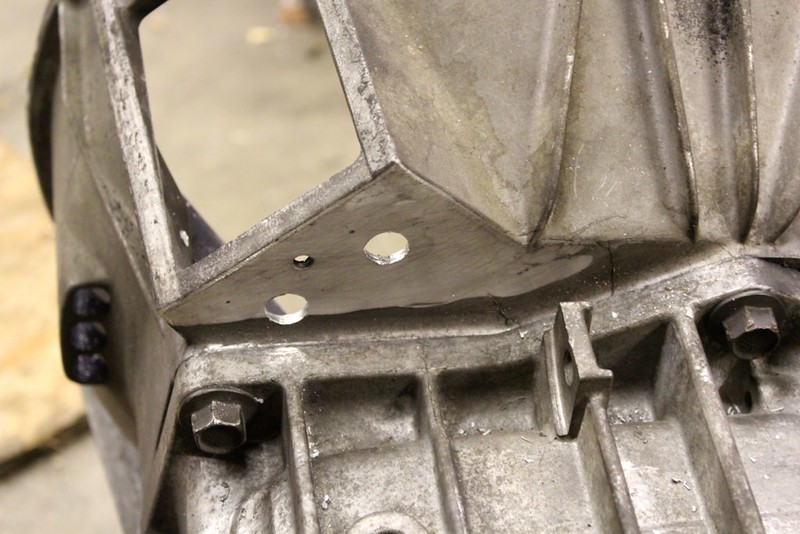
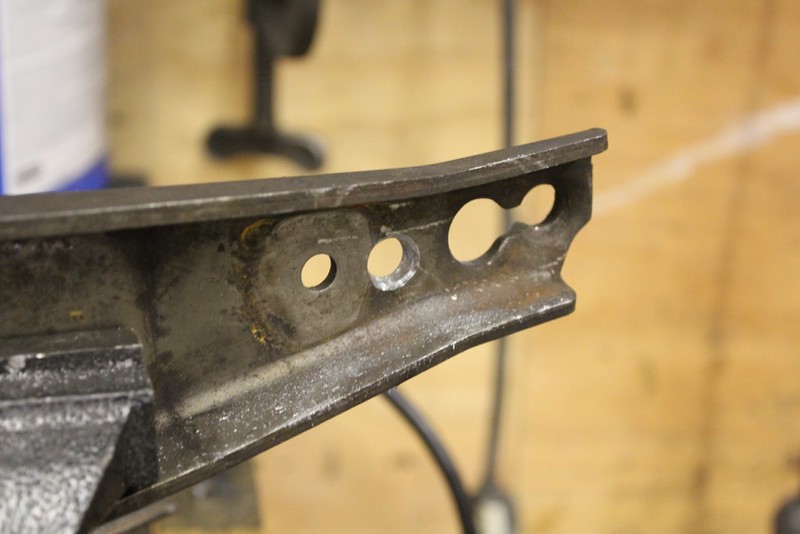
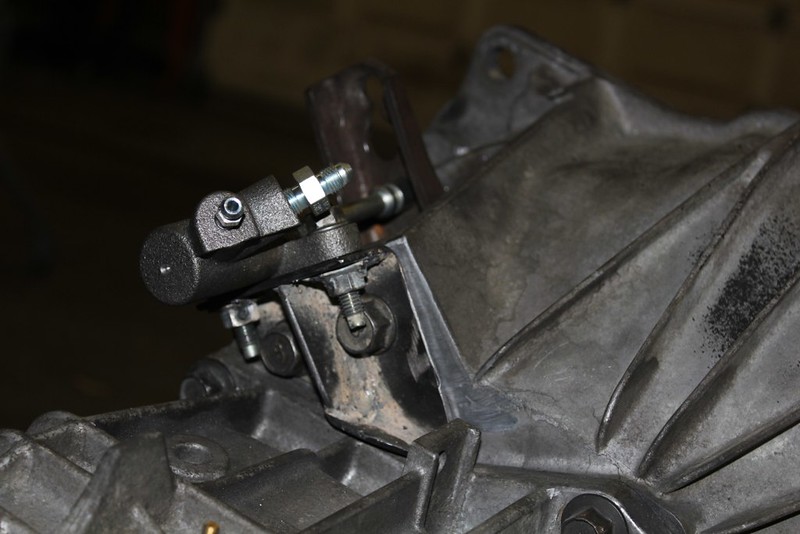
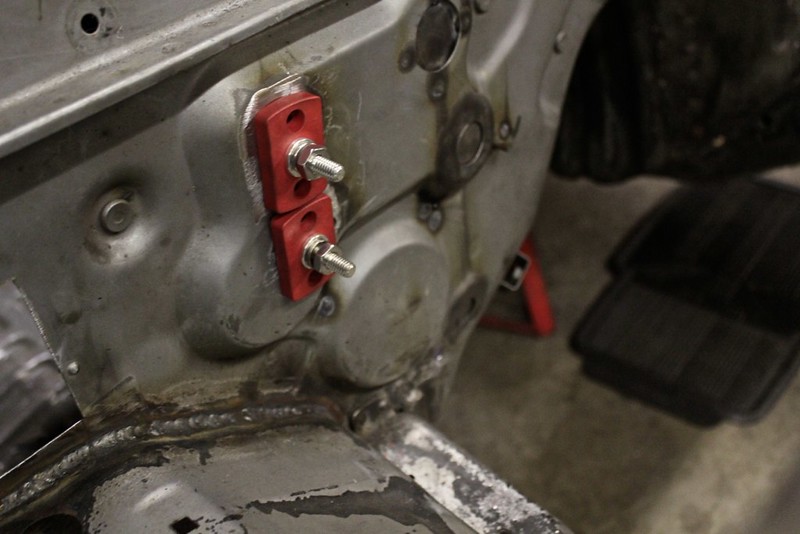
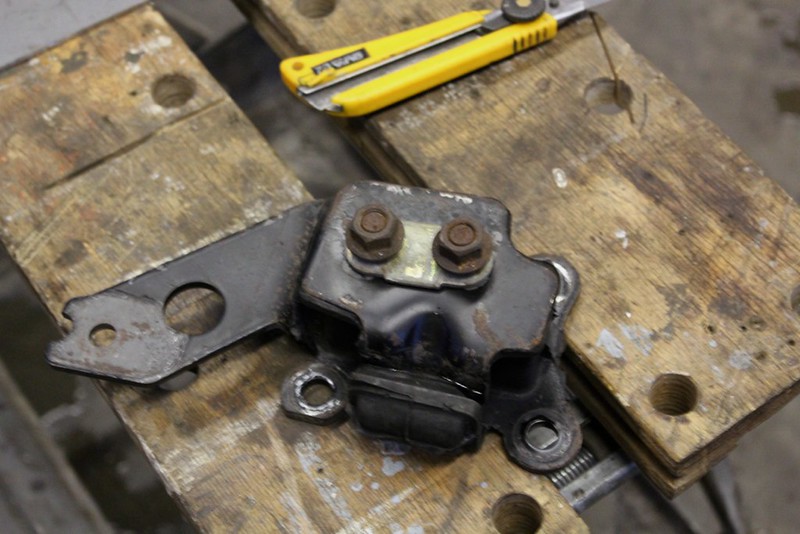
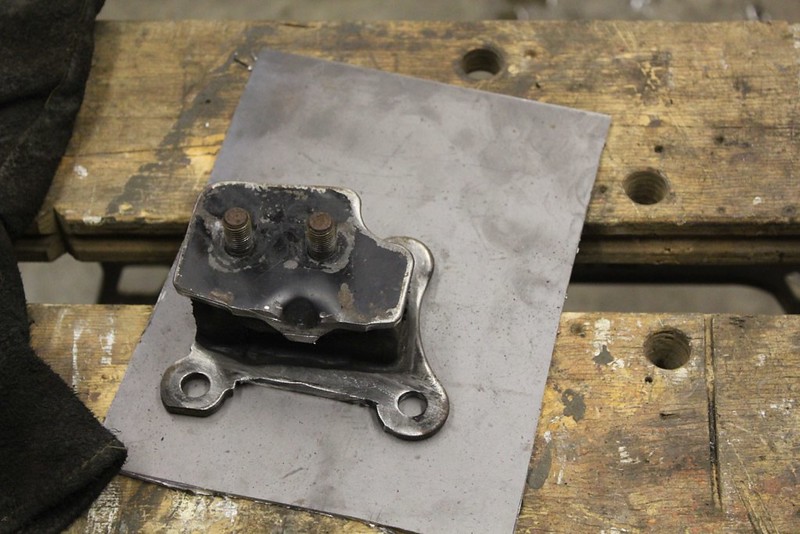
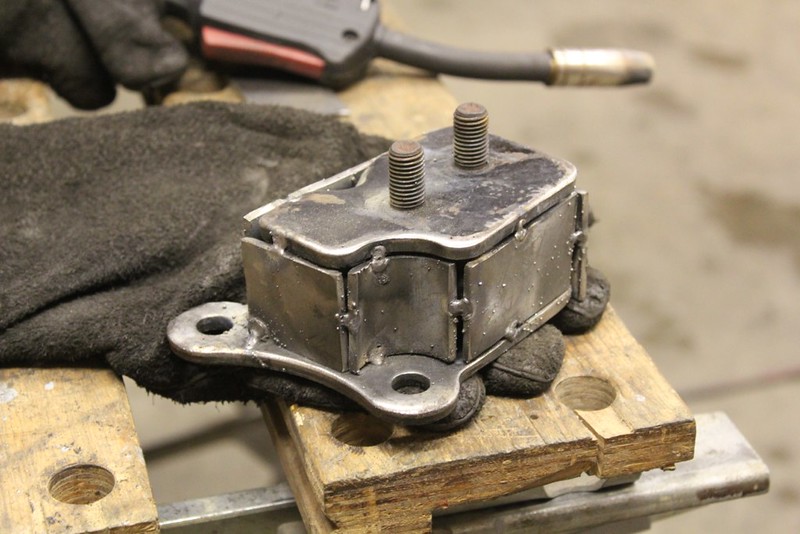
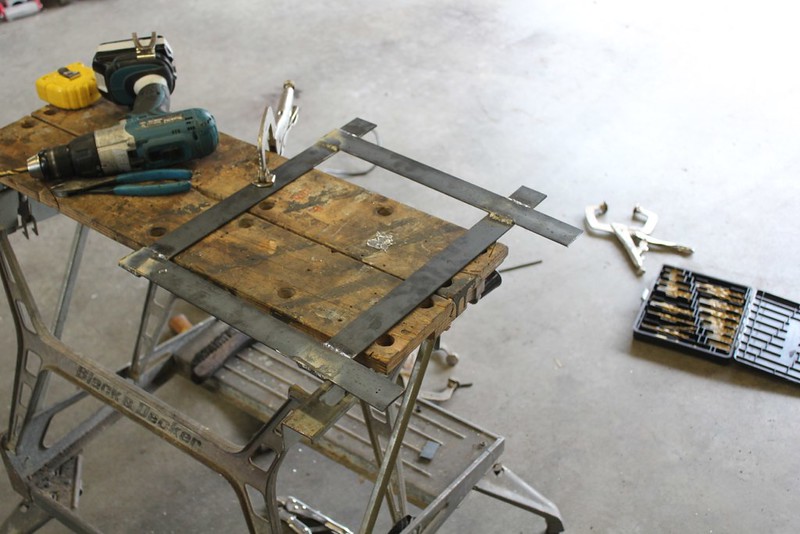
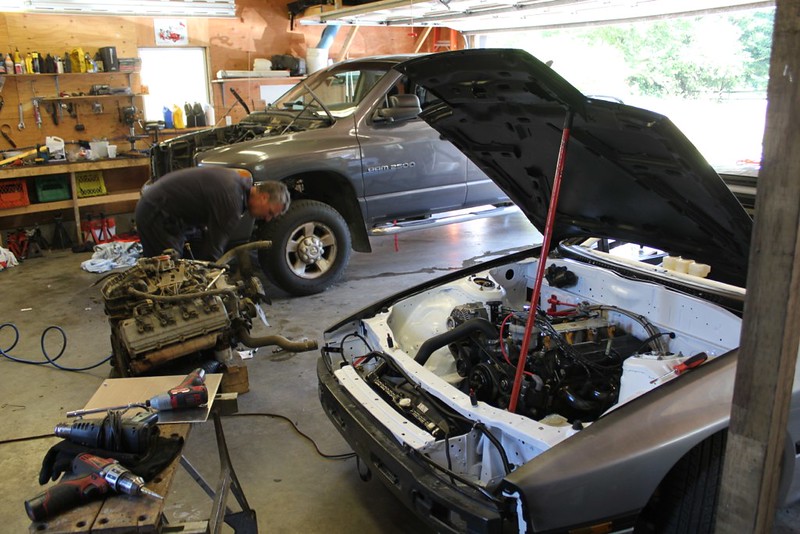
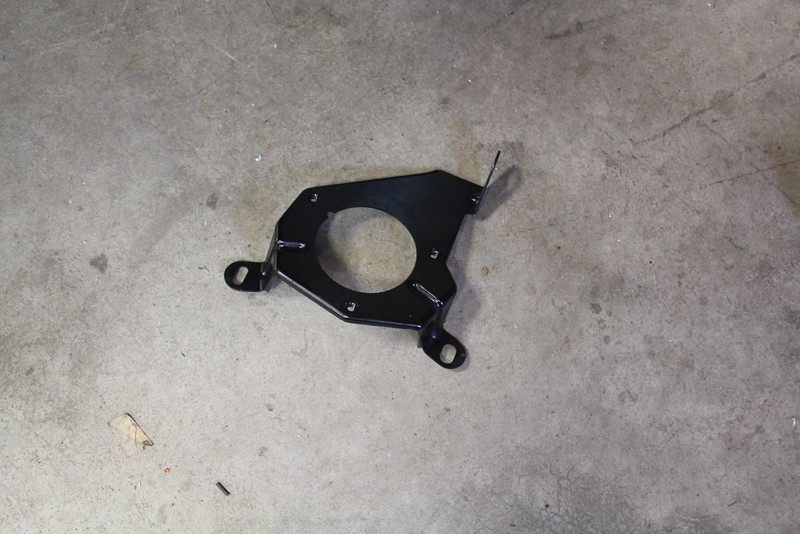
now to mount it to the bell house I first grinded off the logos and numbers that wouldn't allow it to sit flat.

then welded up the bracket being careful to make sure everything fit and no bolts interfered with each other.
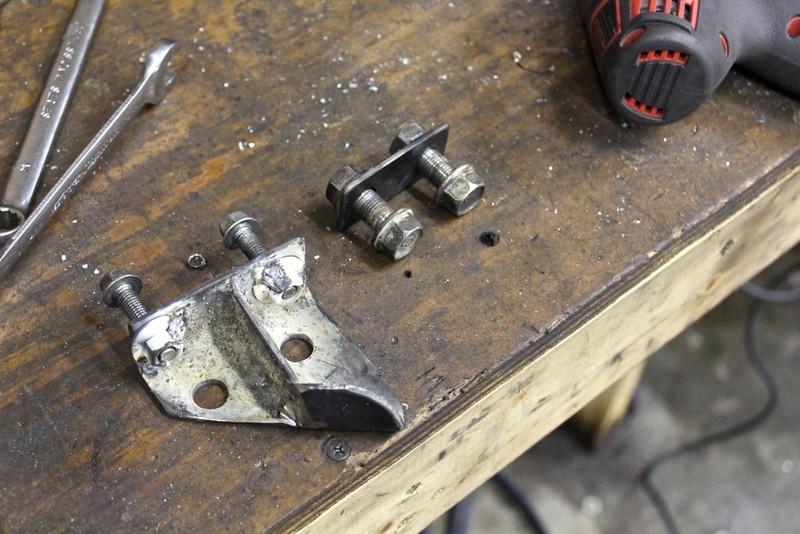
also made a plate for the back nuts to spread load, and make it easier to disassemble and reassemble. I can get the bracket mounted with the clutch fork in place if need be.
Then drilled holes for the bracket to bolt to, and ground off a little nub preventing the bolt plate from siting flat
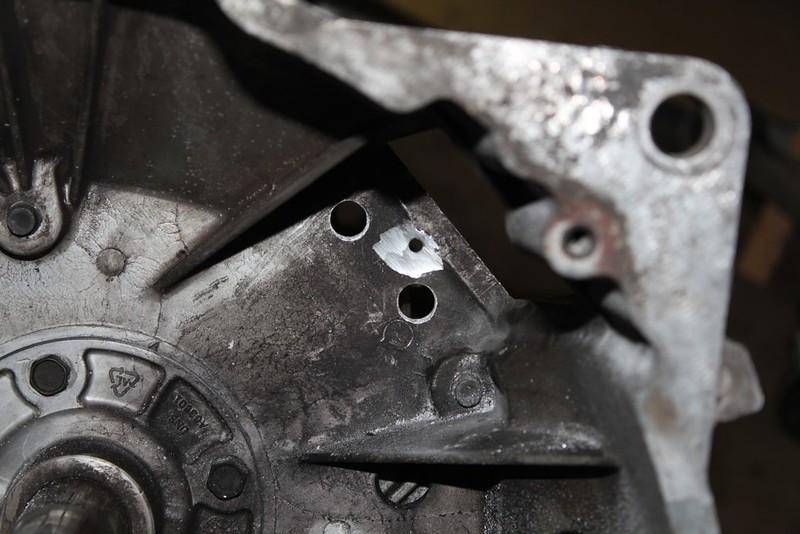
then took the bolt I planned to use for the rod, and rounded one of the nuts to allow for some necessary pivoting
made the same type of seat but inverse (obviously lol) on the fork. Which btw is hardened steel, nothing I had wanted to even scratch it unless it was carbide.
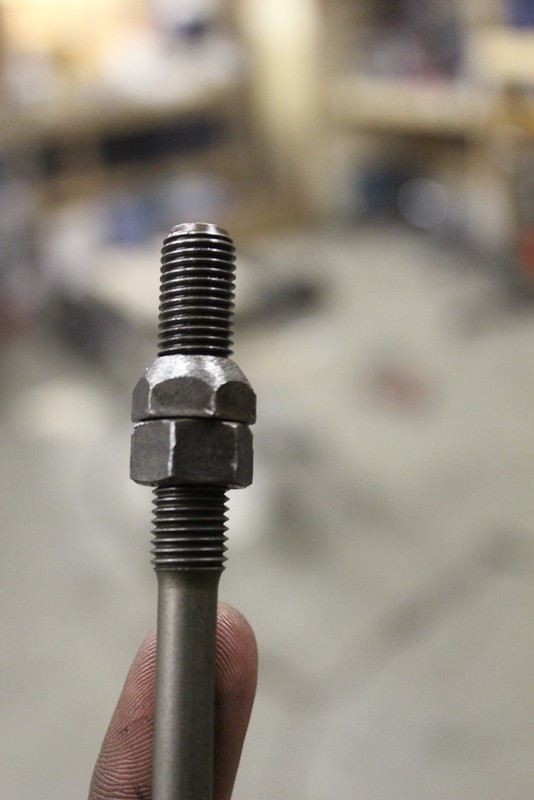
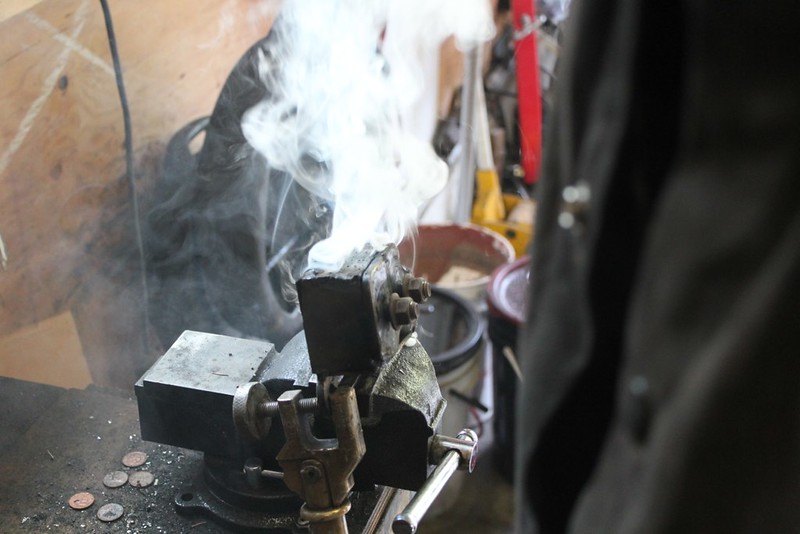
then cut the rod/bolt and rounded the end to mimic the stock miata rod
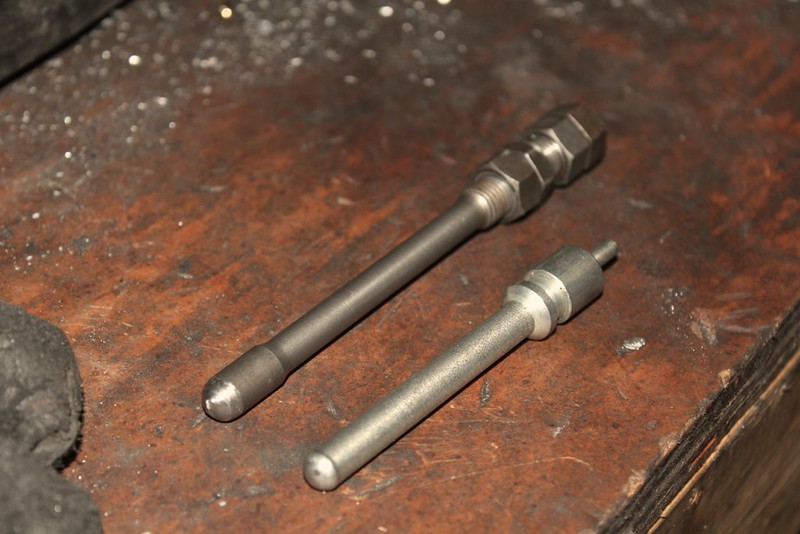
I later ended up taking off another 1/2" or so off (where the rod flares in, basically its the same length as the stock miata one, just the threading goes longer)
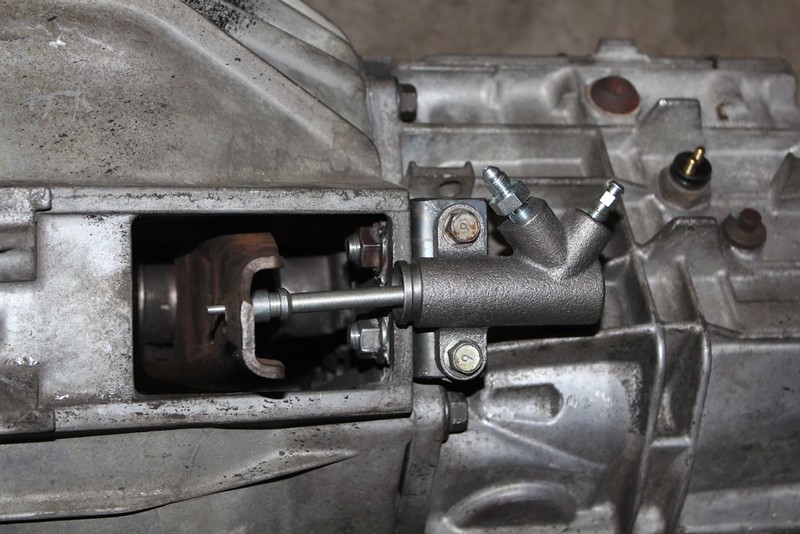
mocked up on the floor
then welded up the bracket being careful to make sure everything fit and no bolts interfered with each other.
also made a plate for the back nuts to spread load, and make it easier to disassemble and reassemble. I can get the bracket mounted with the clutch fork in place if need be.
Then drilled holes for the bracket to bolt to, and ground off a little nub preventing the bolt plate from siting flat
then took the bolt I planned to use for the rod, and rounded one of the nuts to allow for some necessary pivoting
made the same type of seat but inverse (obviously lol) on the fork. Which btw is hardened steel, nothing I had wanted to even scratch it unless it was carbide.
then cut the rod/bolt and rounded the end to mimic the stock miata rod
I later ended up taking off another 1/2" or so off (where the rod flares in, basically its the same length as the stock miata one, just the threading goes longer)
mocked up on the floor
Thread Starter
Senior Member
Joined: Mar 2015
Posts: 335
Likes: 8
From: Vancouver, BC
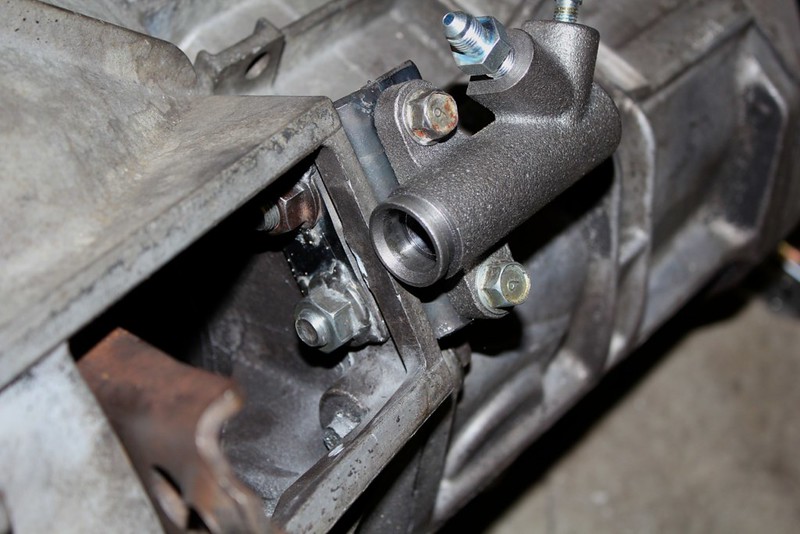
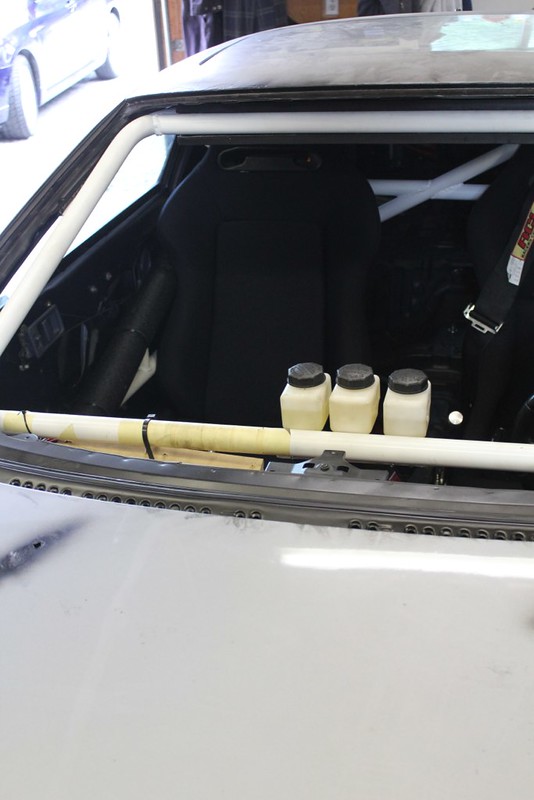
and in car (with the slop taken out but hidden behind a boot)
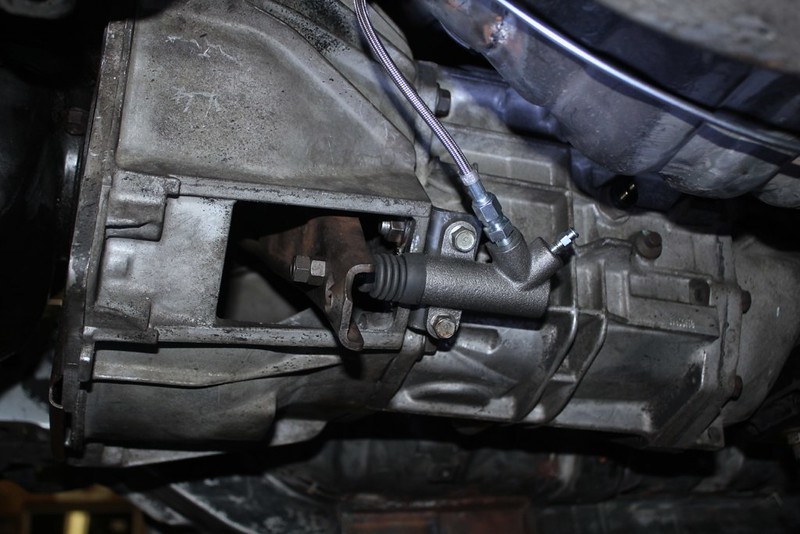
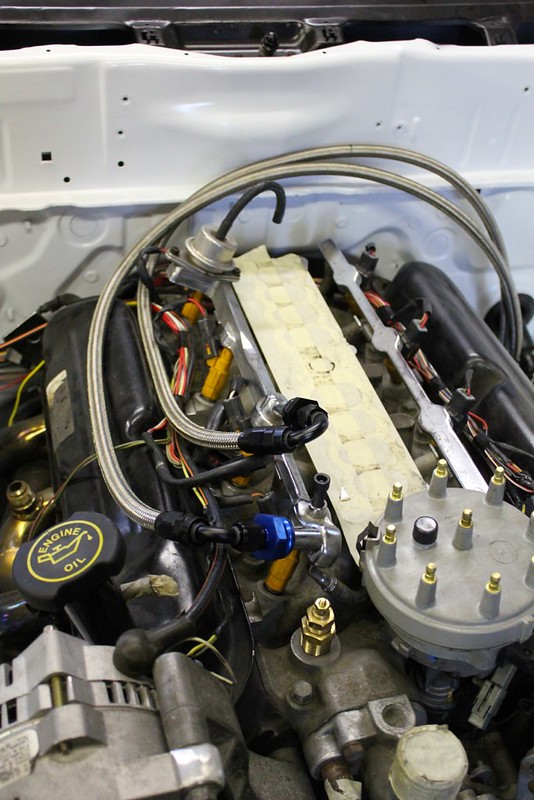
an Earls adapter to go from stock M10x1.0 to -3 AN, and boom hydro T5
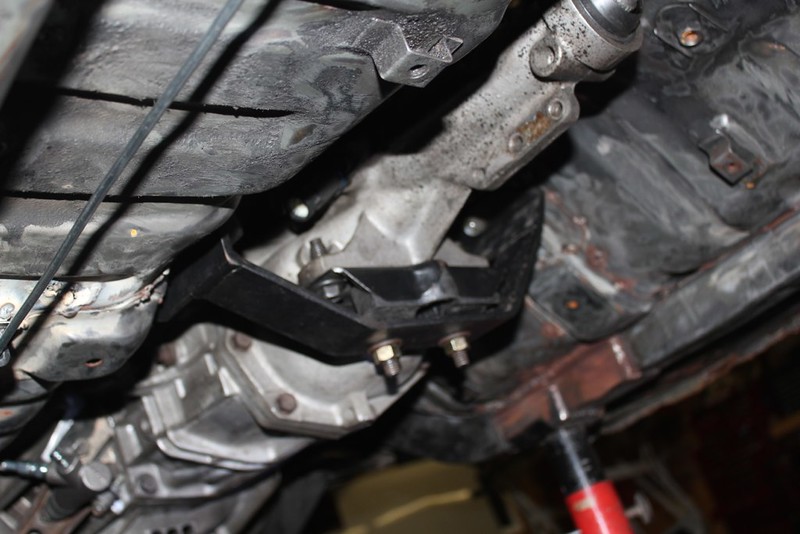
heres a blurry shot of the Grannies trans kit, had a bit of trouble lining it up too. somethings got to be off a hair
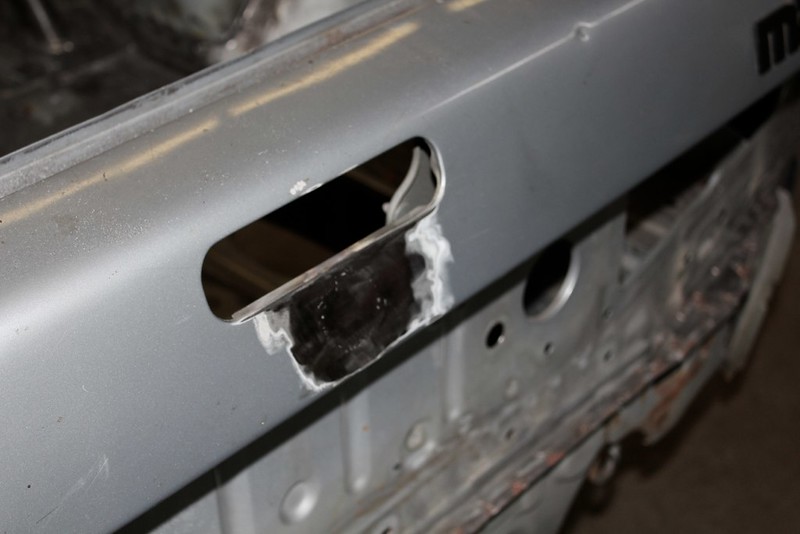
which let me cut the required hole in the trans tunnel (yay)
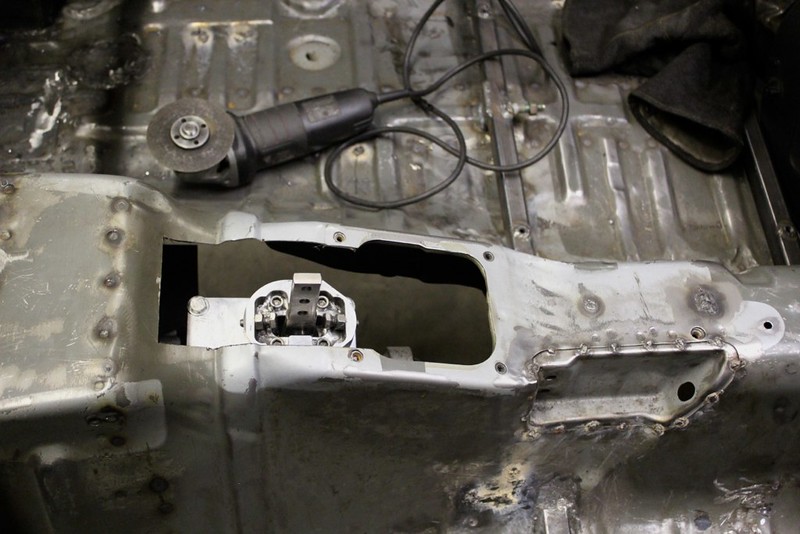
and the dashboard too

however, it hits my panel :'( :mad
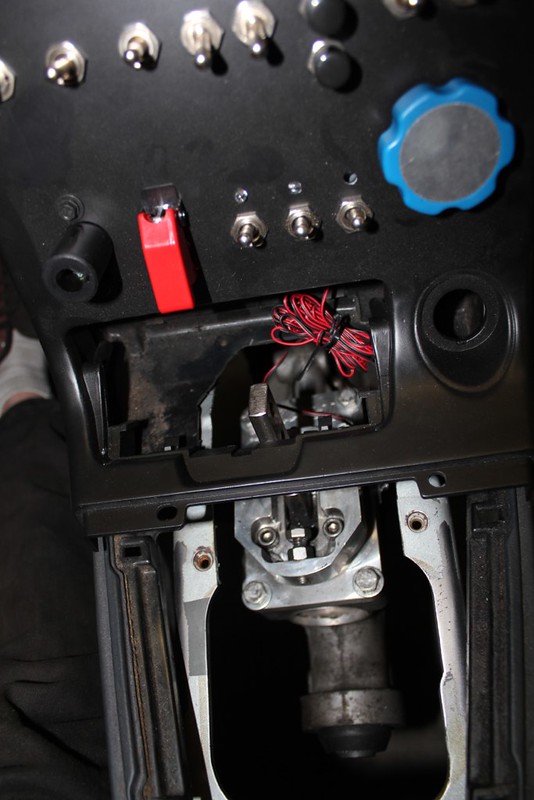
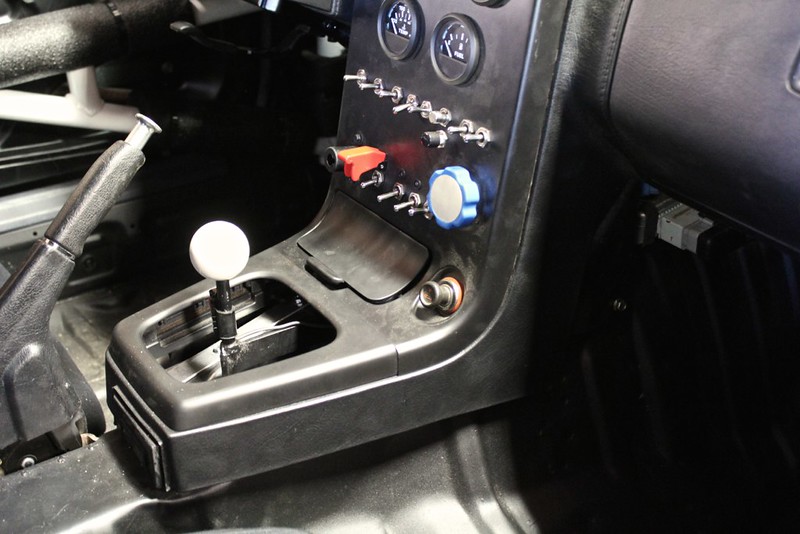
so I'm going to have to make the ashtray a cover, and cut the Steeda shifter. It has 3 bolts when it only uses 2 so between those 2 things it should fit.
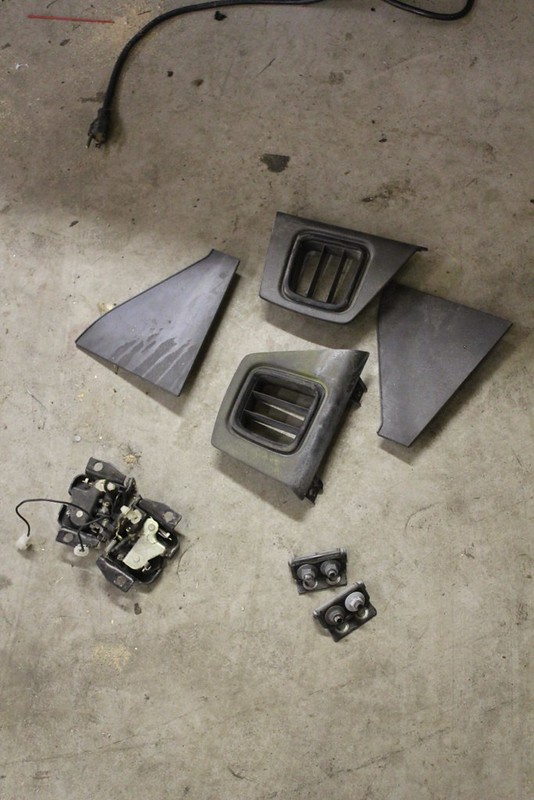
ran a few other small things while working in the area
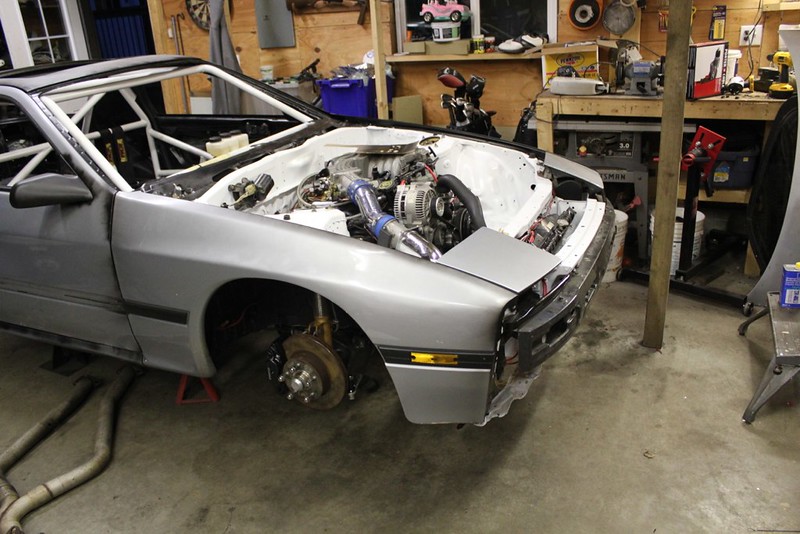
and heres how the engine sits with the trans in place
and that is all for now, a few more things to do and I start disassembling for paint (yay but ew)
an Earls adapter to go from stock M10x1.0 to -3 AN, and boom hydro T5
heres a blurry shot of the Grannies trans kit, had a bit of trouble lining it up too. somethings got to be off a hair
which let me cut the required hole in the trans tunnel (yay)
and the dashboard too
however, it hits my panel :'( :mad
so I'm going to have to make the ashtray a cover, and cut the Steeda shifter. It has 3 bolts when it only uses 2 so between those 2 things it should fit.
ran a few other small things while working in the area
and heres how the engine sits with the trans in place
and that is all for now, a few more things to do and I start disassembling for paint (yay but ew)
Thread Starter
Senior Member
Joined: Mar 2015
Posts: 335
Likes: 8
From: Vancouver, BC
02/23/14
I put the hood on the hinges and the alt was still hitting but only a little corner. So I covered it for protection (nobody wants bits of metal near magnets in their alt right?) and took a grinder to it.
worked!
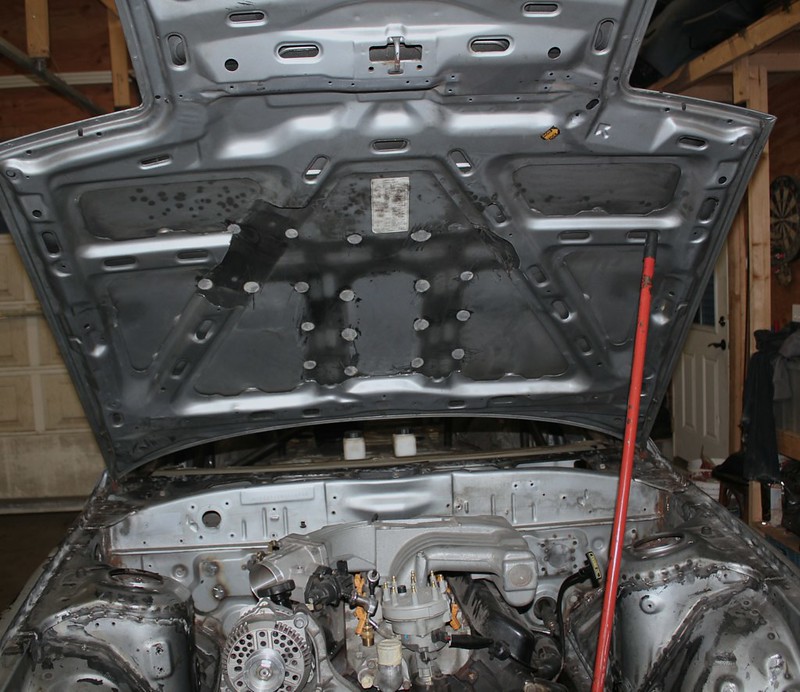
this is my final hood trimming, just a little bit here and there to allow some wiggle room. And then debur those sharp edges
and to be absolutely sure heres the headlights in place with the hood on the rubber stops
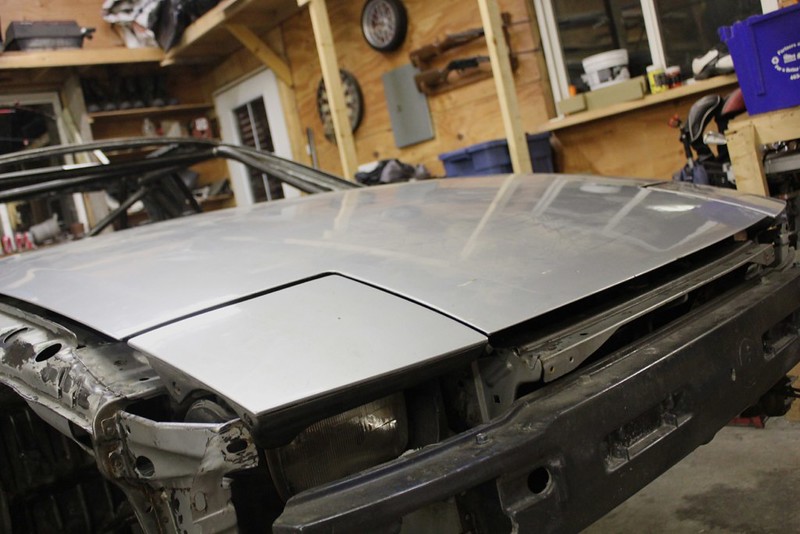
no nothings lined up at all
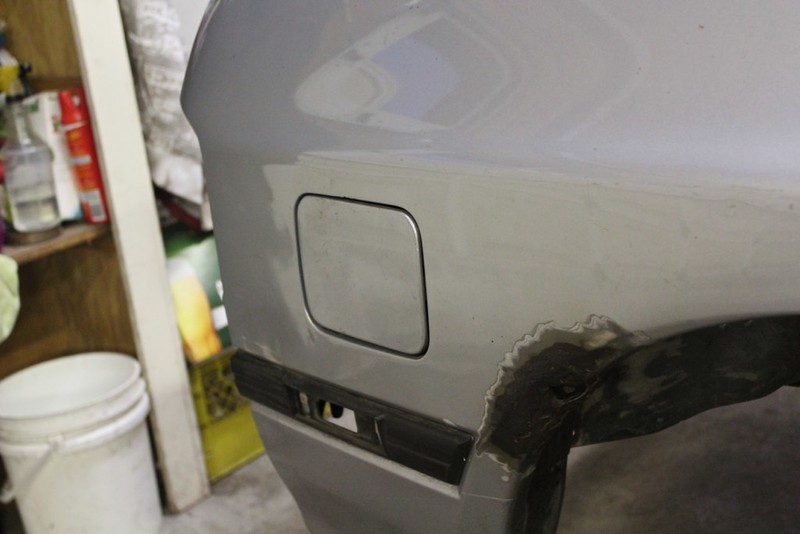
then put the gas door in place, I deleted the cable pull so I got creative and have it staying closed but openable with a self tapping screw. I just push on the front side before the hinge and it pops open, pressure keeps it shut. simple. until the first wall tap lol
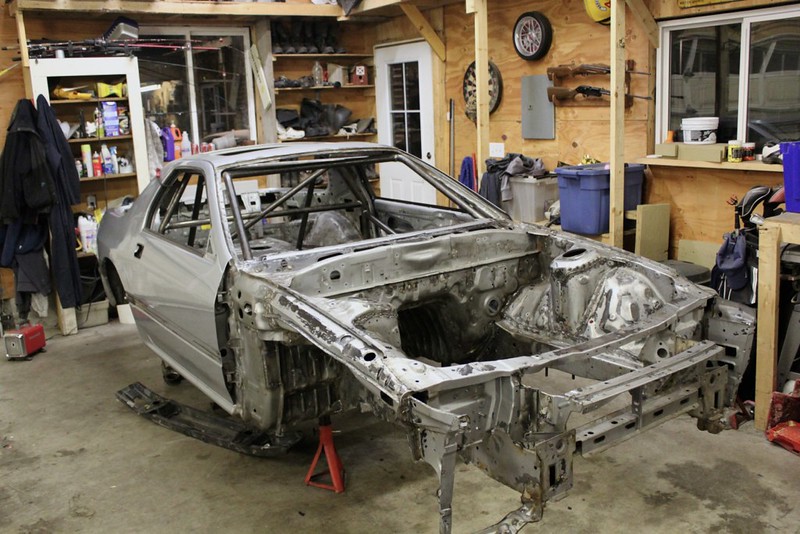
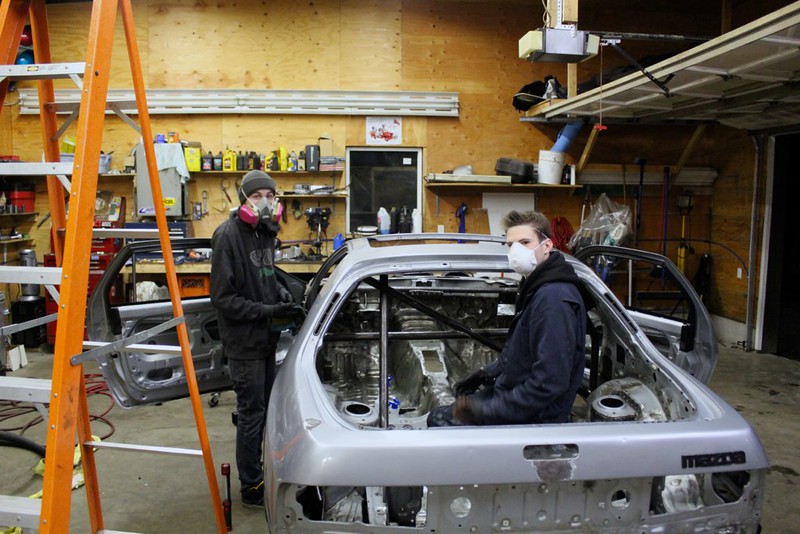
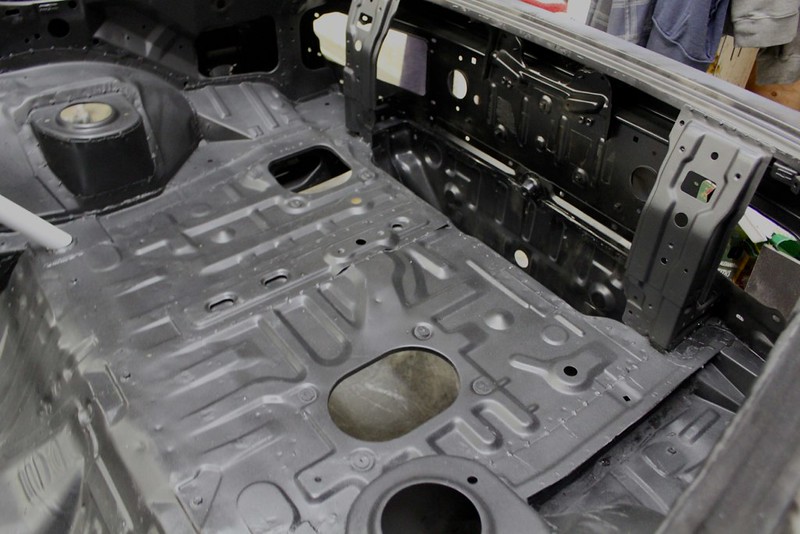
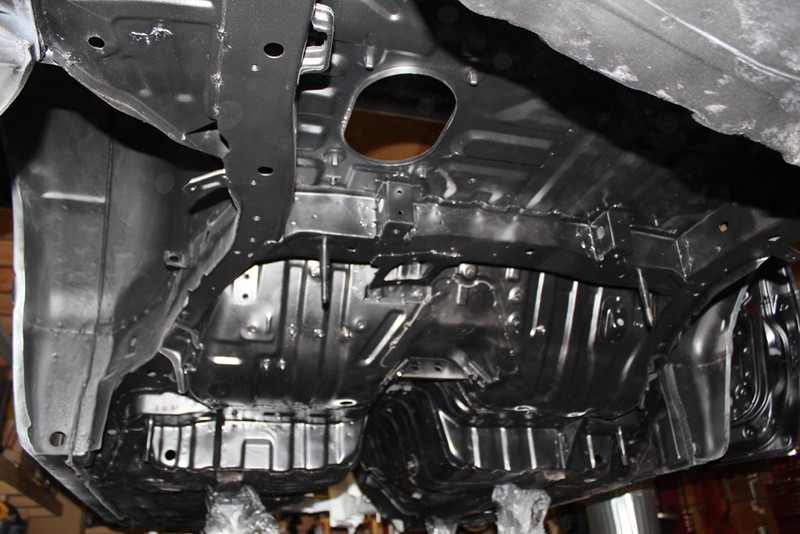
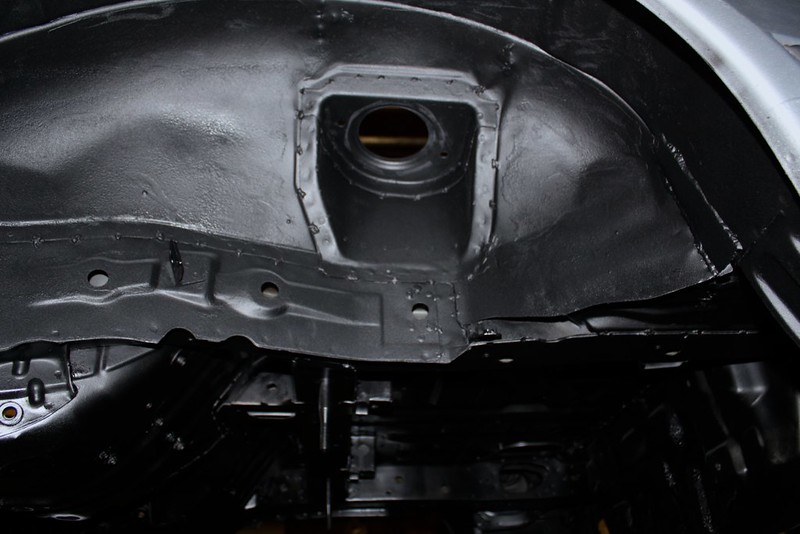
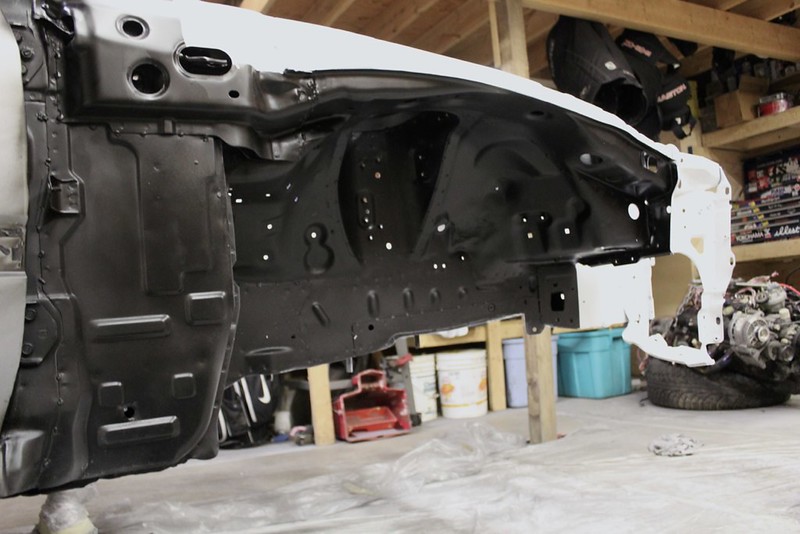
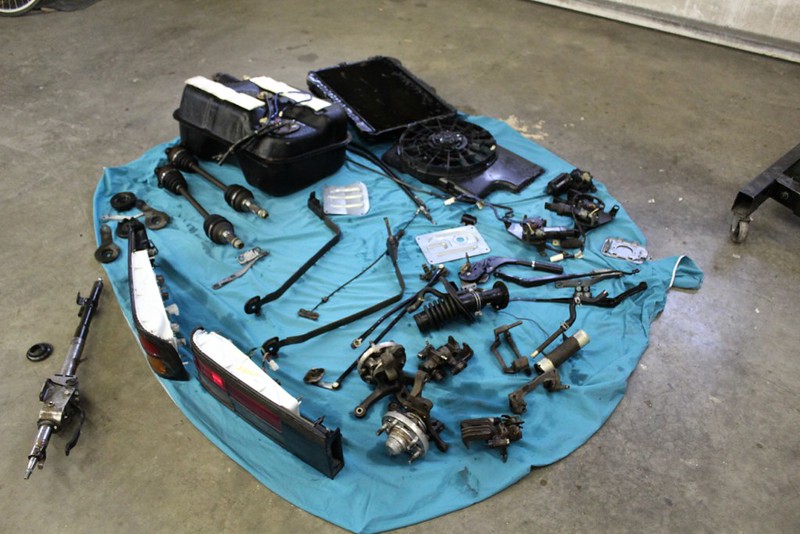
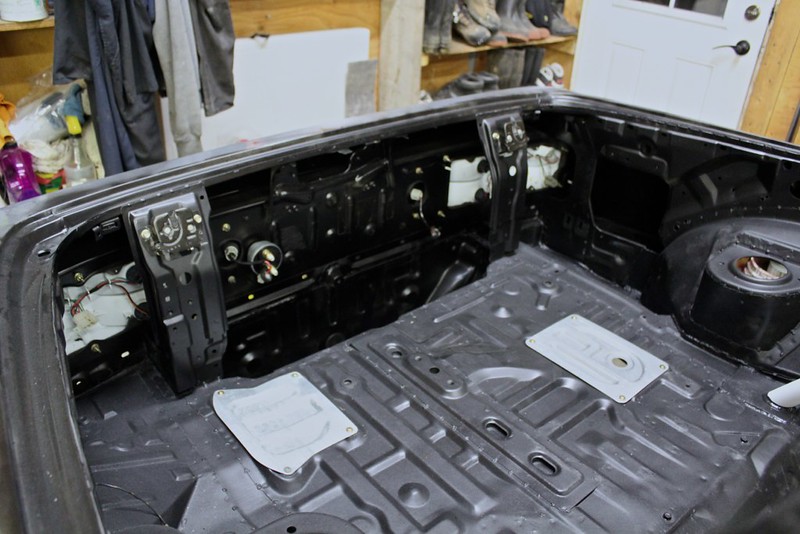
then striped the car of everything. I mean everything. the plumbing, engine, little rubber grommets clips etc. Some welding will take place before paint, but I'm basically now waiting for warmer weather. will do small things until painting happens.
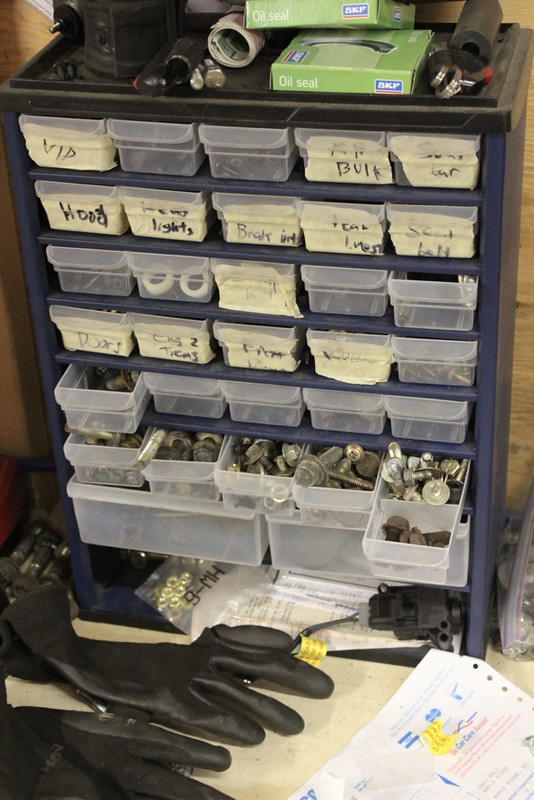
also organizing and labelling this time! should make putting it back together a breeze.
and that was my night, now I'm going to stay up all night to watch Canada hopefully win gold!
I put the hood on the hinges and the alt was still hitting but only a little corner. So I covered it for protection (nobody wants bits of metal near magnets in their alt right?) and took a grinder to it.
worked!
this is my final hood trimming, just a little bit here and there to allow some wiggle room. And then debur those sharp edges
and to be absolutely sure heres the headlights in place with the hood on the rubber stops
no nothings lined up at all
then put the gas door in place, I deleted the cable pull so I got creative and have it staying closed but openable with a self tapping screw. I just push on the front side before the hinge and it pops open, pressure keeps it shut. simple. until the first wall tap lol
then striped the car of everything. I mean everything. the plumbing, engine, little rubber grommets clips etc. Some welding will take place before paint, but I'm basically now waiting for warmer weather. will do small things until painting happens.
also organizing and labelling this time! should make putting it back together a breeze.
and that was my night, now I'm going to stay up all night to watch Canada hopefully win gold!
Thread Starter
Senior Member
Joined: Mar 2015
Posts: 335
Likes: 8
From: Vancouver, BC
03/12/2014
small update
started a new job, so I've been a bit too busy to post an update.
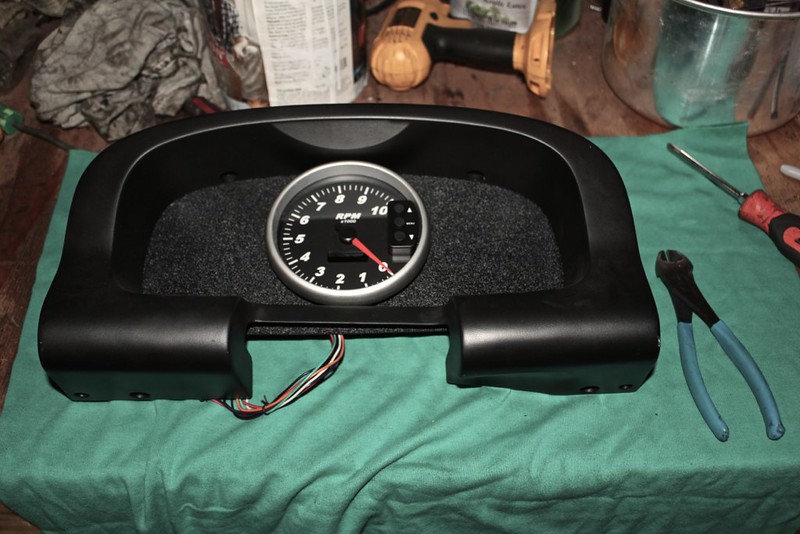
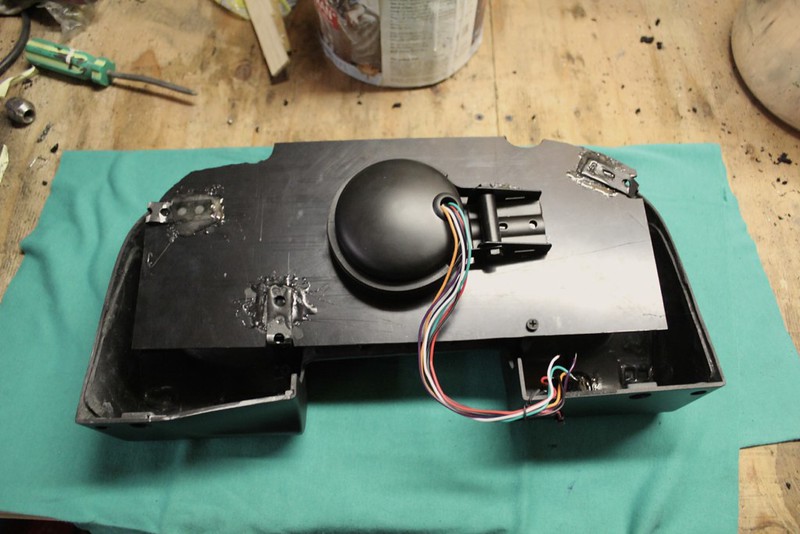
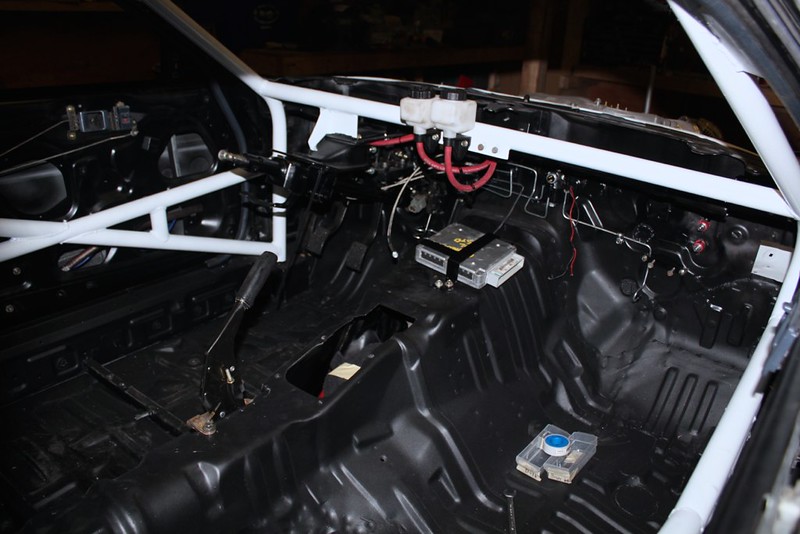
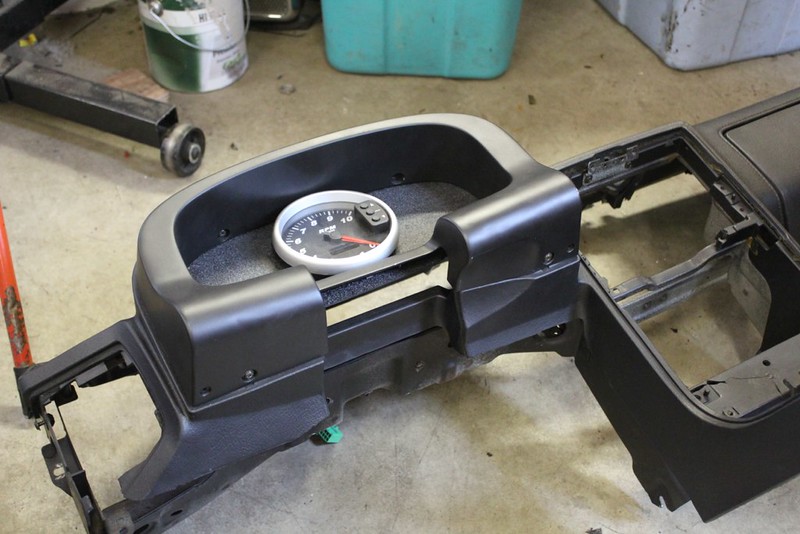
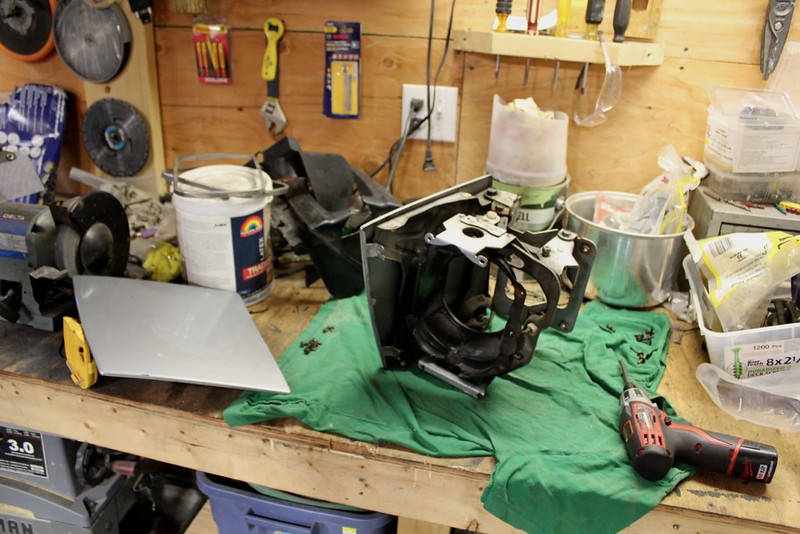
finished the gauge cluster
and cut/bent/welded an ECU mount
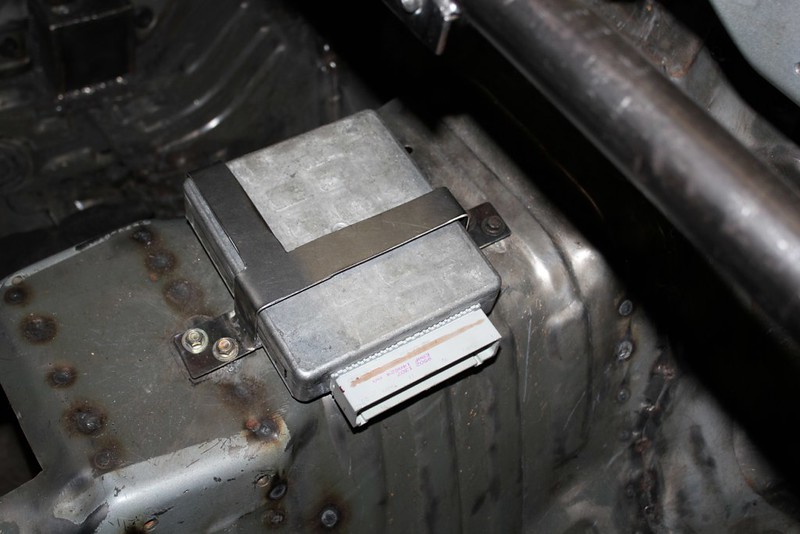
have some room to put foam or rubber to dampen vibrations
did the same to the ignition module (TCI)
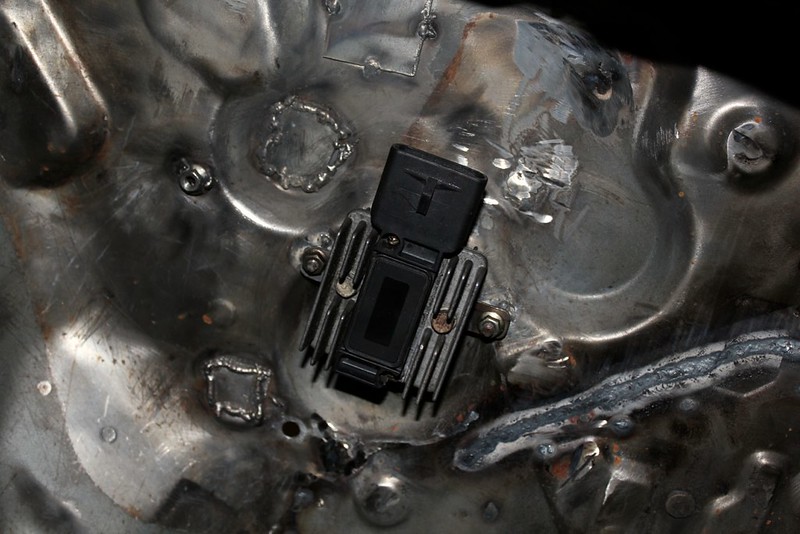
but first I took the time to fix Ford's genius. They put these stupid 5.5mm bolts to hold the TCI to the heat sink. So when the module inevitably goes bad, you have to grind a socket to get the bolts off, then replace the module. They don't sell the heat sink either.
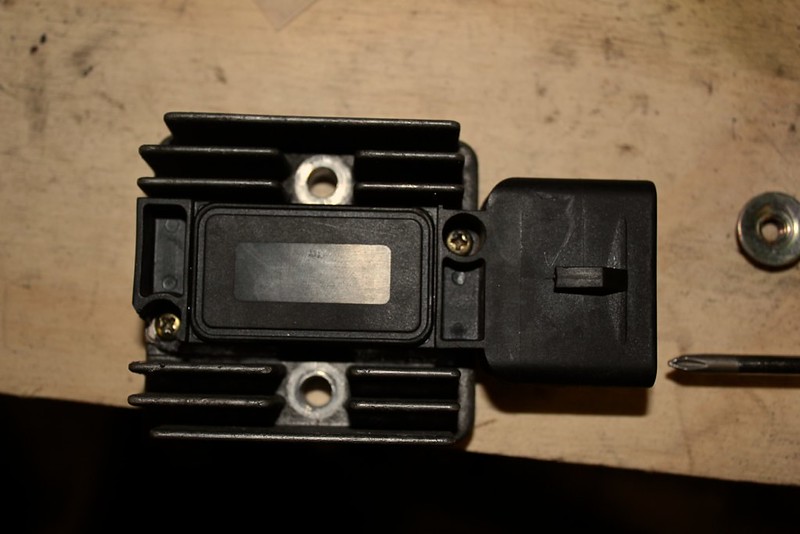
so I drilled out the 5.5mm's and found some phillips head ones to replace them.
Made these real quick too
When I pulled the engine last time I spent more time trying to find bolts and washers then pulling the engine. The chain also hit the fuel rail.
These plates make it easy to pull and block off the EGR ports on the back of the heads.
I'll probably get some prettier ones CNC cut, but I think i'm going to mount the ignition coil to the one pictured first.
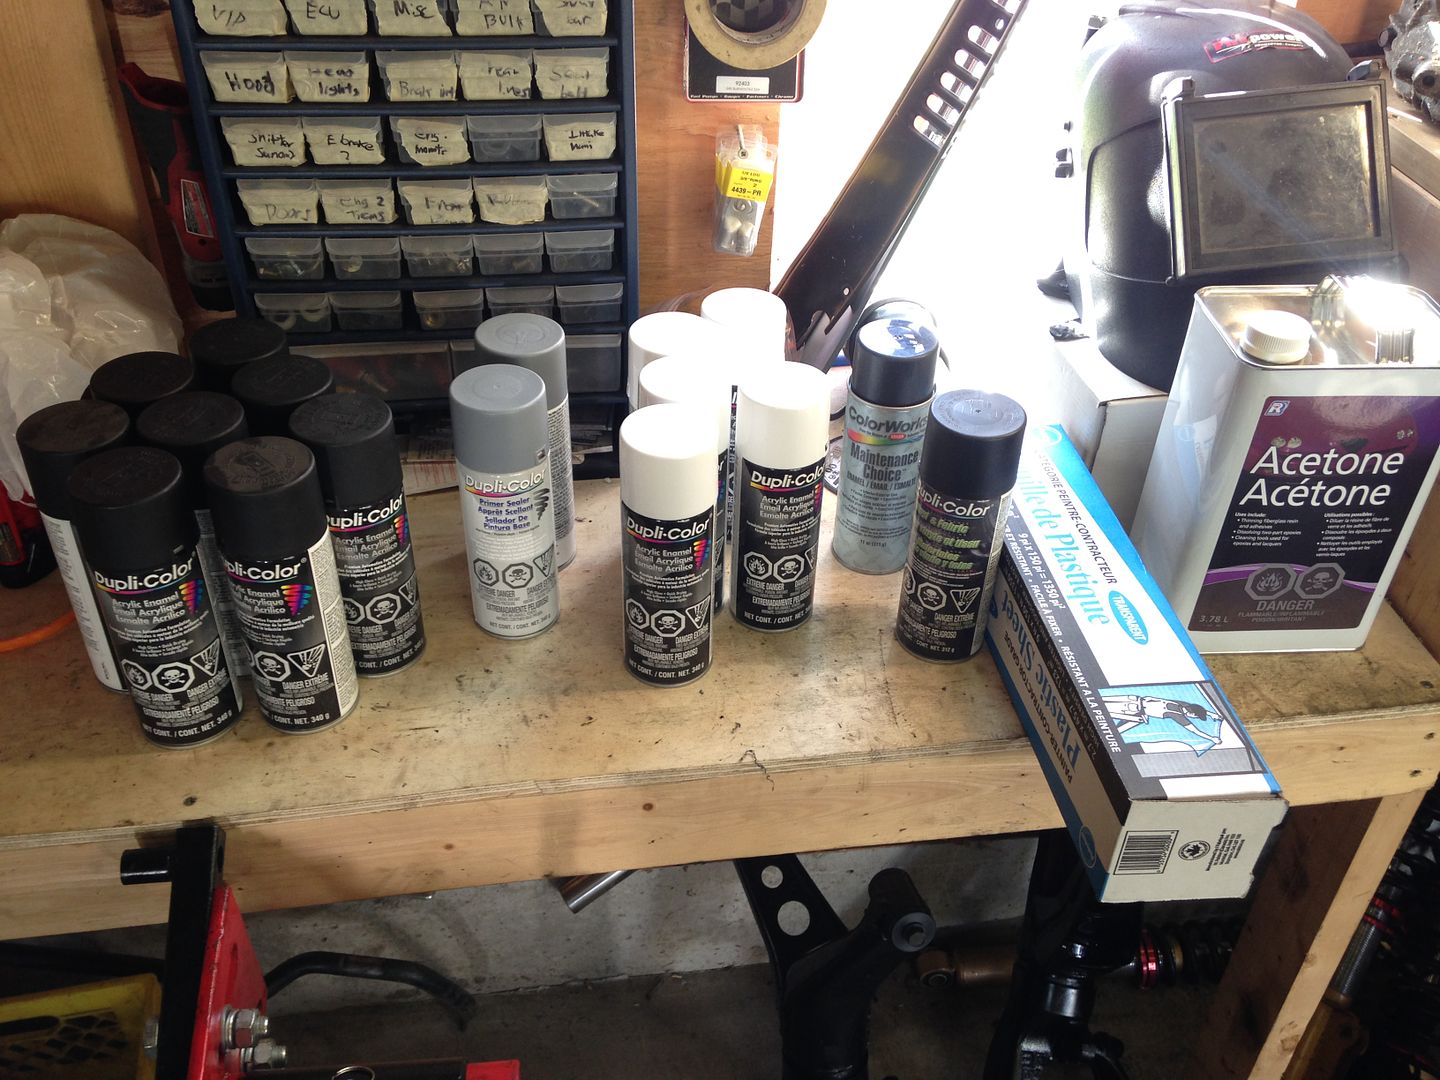
all for now, just saving up a little to buy paint. I don't want to rely on the weather (which is warming up..) so as a test I through a tarp over the car and put a heater under it. An hour later the car was an average of 20*. So I'm going to get some plastic and make a shelter for the car, and paint it in the shelter.
small update
started a new job, so I've been a bit too busy to post an update.
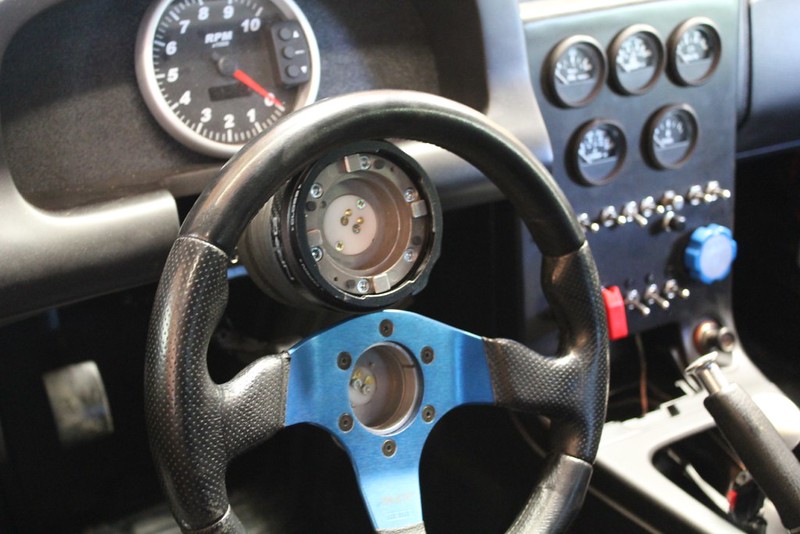
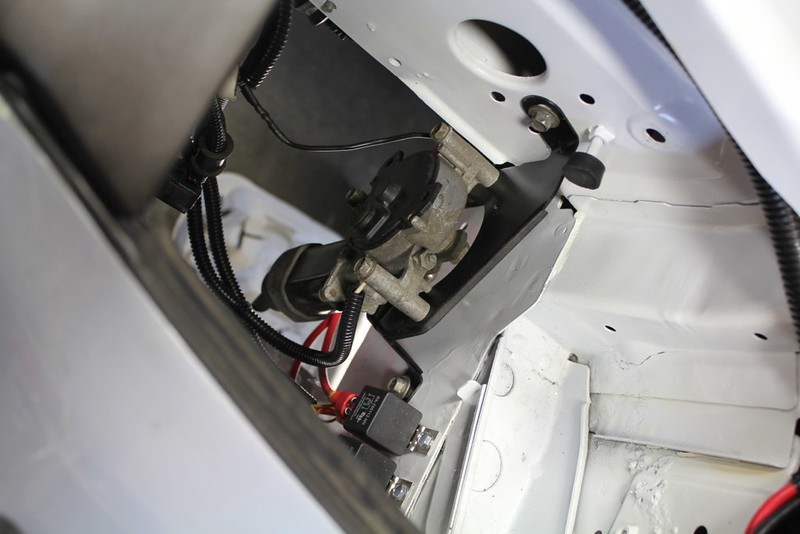
finished the gauge cluster
and cut/bent/welded an ECU mount
have some room to put foam or rubber to dampen vibrations
did the same to the ignition module (TCI)
but first I took the time to fix Ford's genius. They put these stupid 5.5mm bolts to hold the TCI to the heat sink. So when the module inevitably goes bad, you have to grind a socket to get the bolts off, then replace the module. They don't sell the heat sink either.
so I drilled out the 5.5mm's and found some phillips head ones to replace them.
Made these real quick too
When I pulled the engine last time I spent more time trying to find bolts and washers then pulling the engine. The chain also hit the fuel rail.
These plates make it easy to pull and block off the EGR ports on the back of the heads.
I'll probably get some prettier ones CNC cut, but I think i'm going to mount the ignition coil to the one pictured first.
all for now, just saving up a little to buy paint. I don't want to rely on the weather (which is warming up..) so as a test I through a tarp over the car and put a heater under it. An hour later the car was an average of 20*. So I'm going to get some plastic and make a shelter for the car, and paint it in the shelter.
Thread Starter
Senior Member
Joined: Mar 2015
Posts: 335
Likes: 8
From: Vancouver, BC
03/23/2014
filled in the key holes myself, was going to let a pro do it, but whatev�s
it worked with mixed success, its gonna need filler/bondo. But I really don't care for show car quality paint or anything, its too stressful lol.
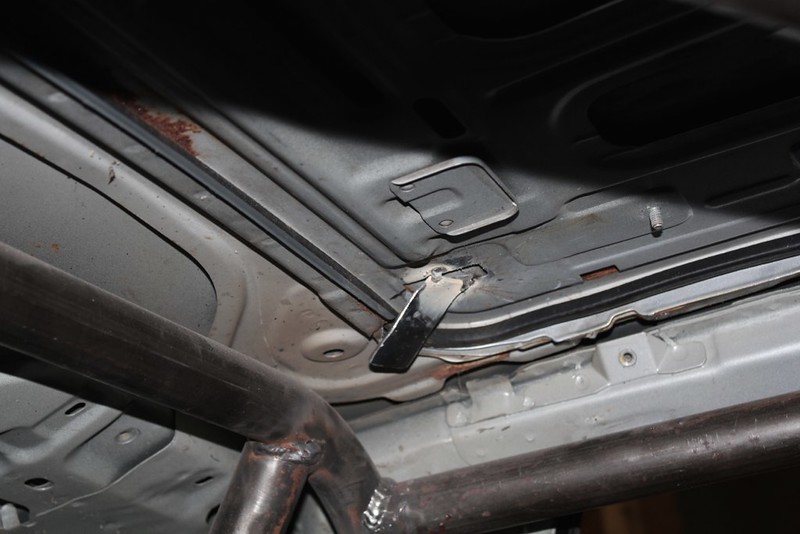
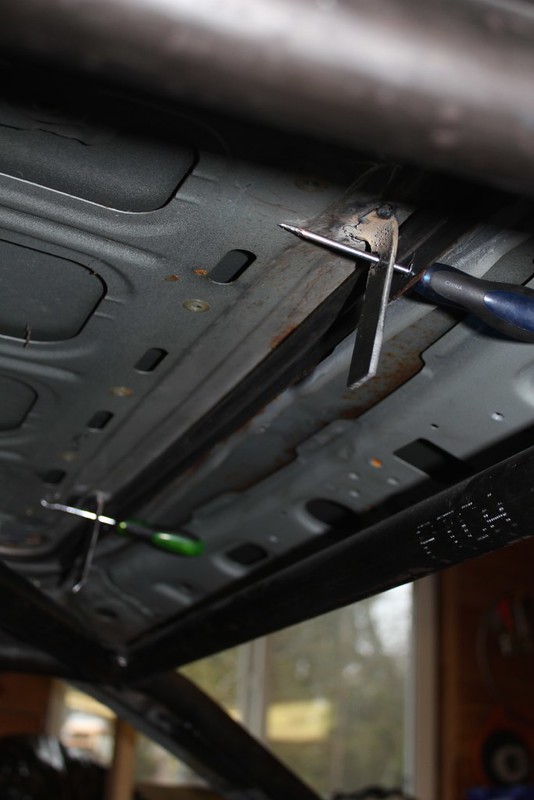
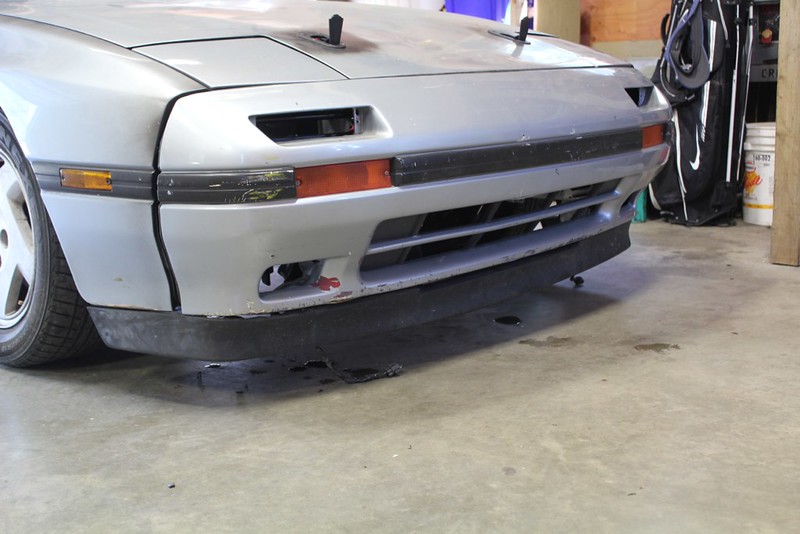
cut that little bend off the front wheel area 1: tire clearance, to truly gain more I'll probably have to channel the frame however. 2: give the sway bar more room
which I moved really far forward. not sure how much tire clearance I'm limiting by doing this yet, but chances are I'll run no bar for drift events anyway. welded 2 bolts to a plate and then welded the whole thing to the car. Easier said than done for me and my lack of welding skillzzz
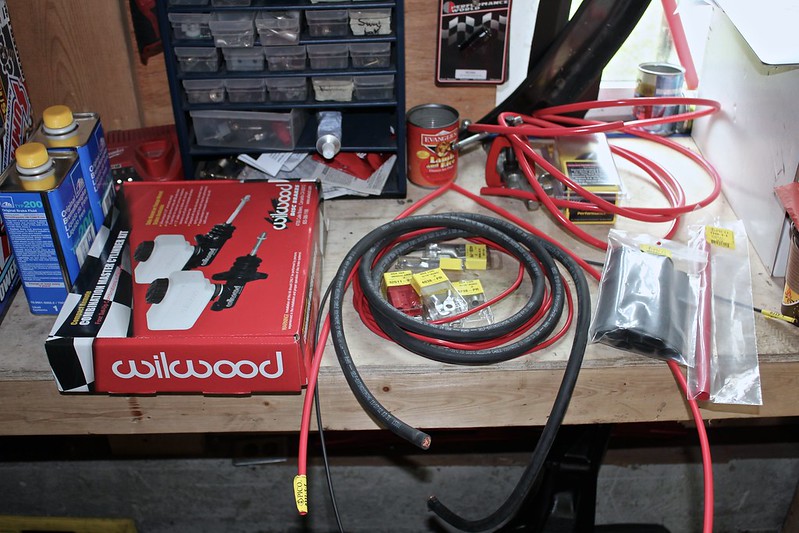
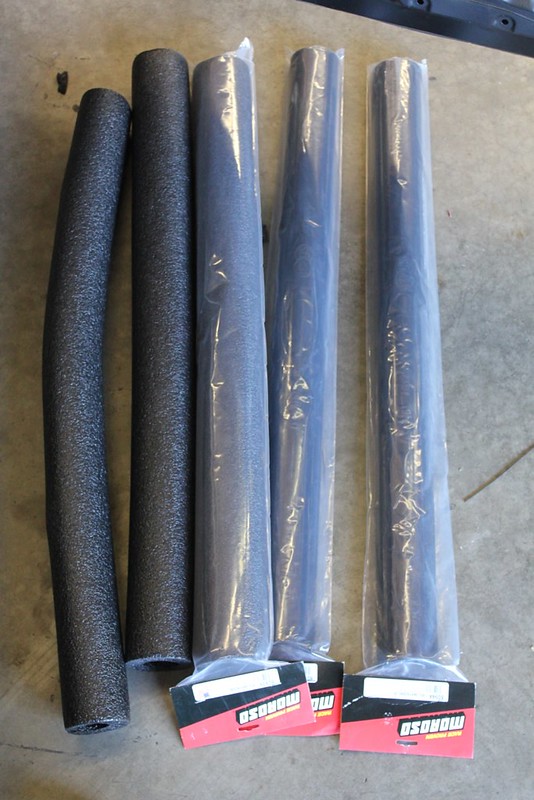
bought more thingssss!!
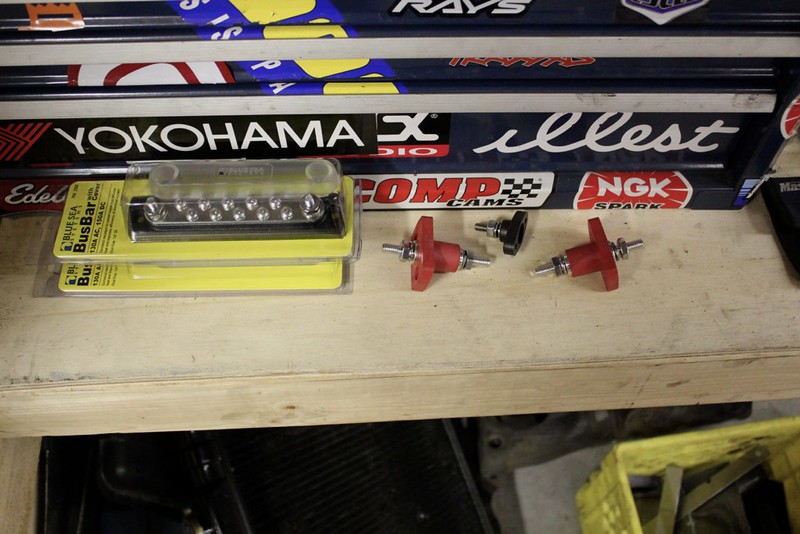
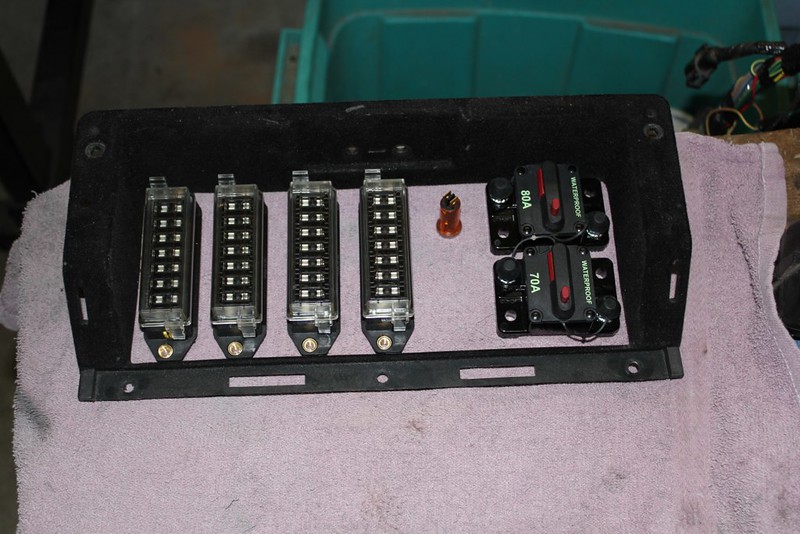
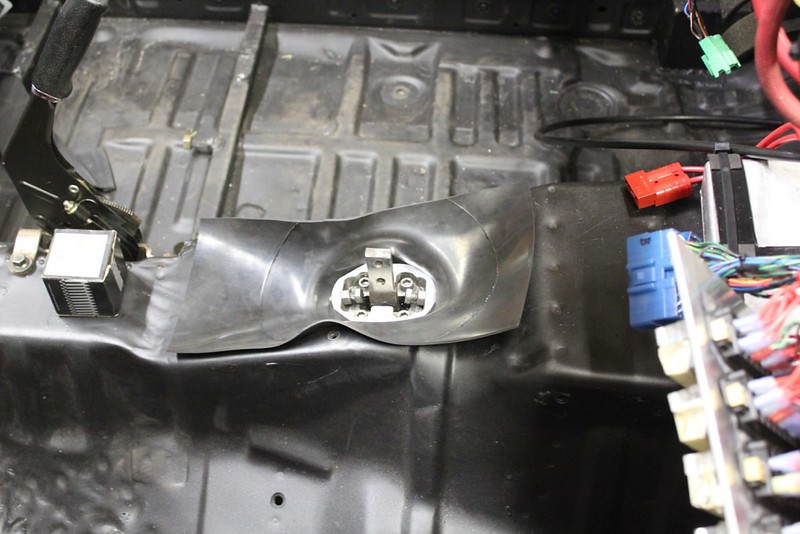
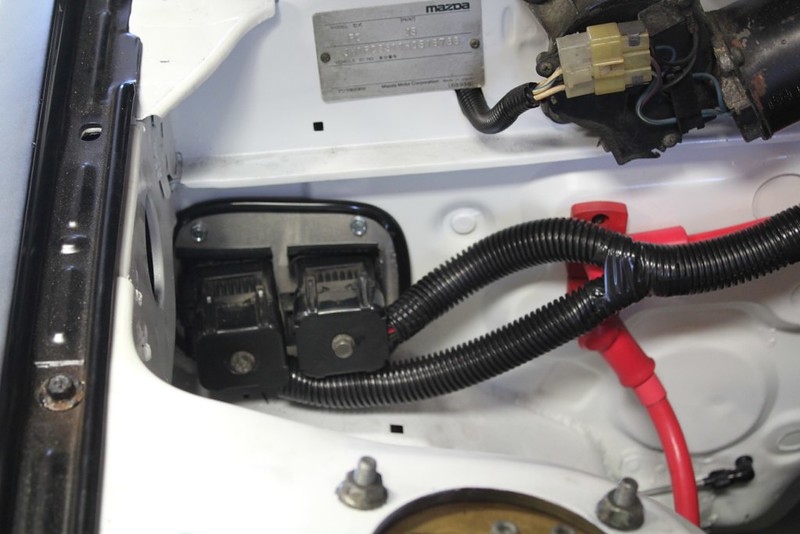
bus bars, bulkhead pass throughs.
they go like this
one for the alternator, one for the starter.
helped a buddy pull a clock spring for his Honda, and while we were there I grabbed some small pieces that I had either, lost, thrown out by accident, or never had.
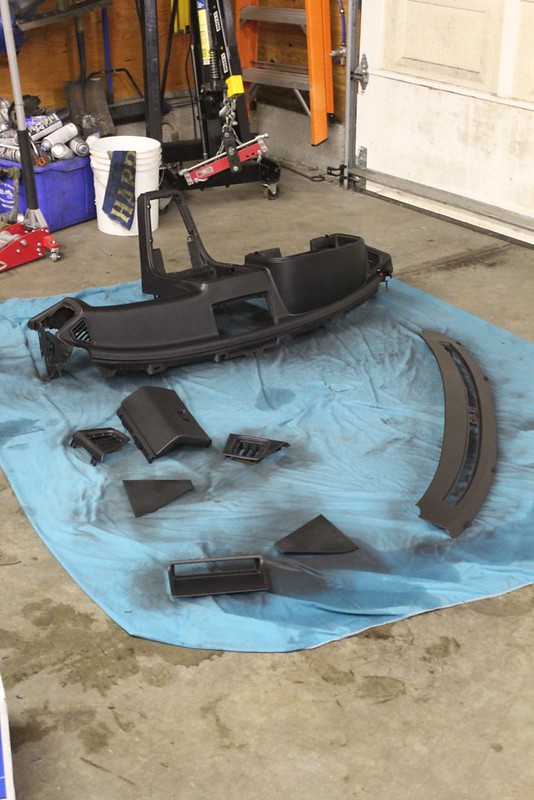
will be painting the grey black with the dash etc
then I got a little carried away
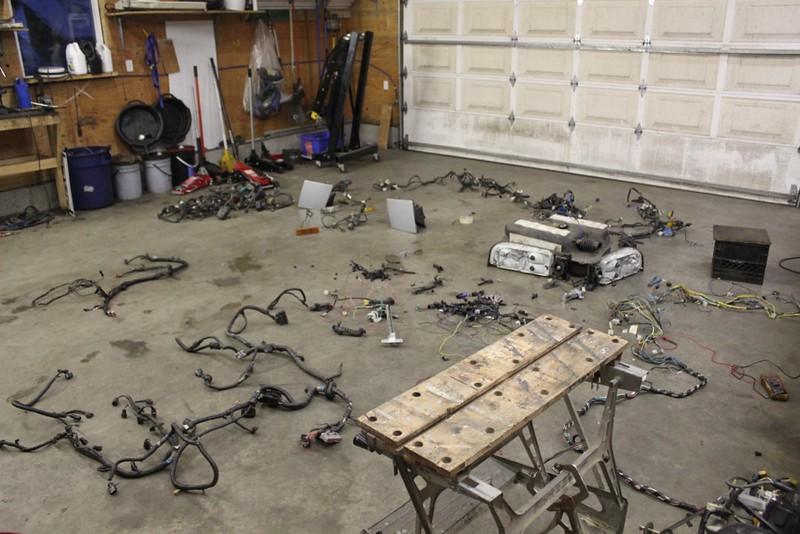
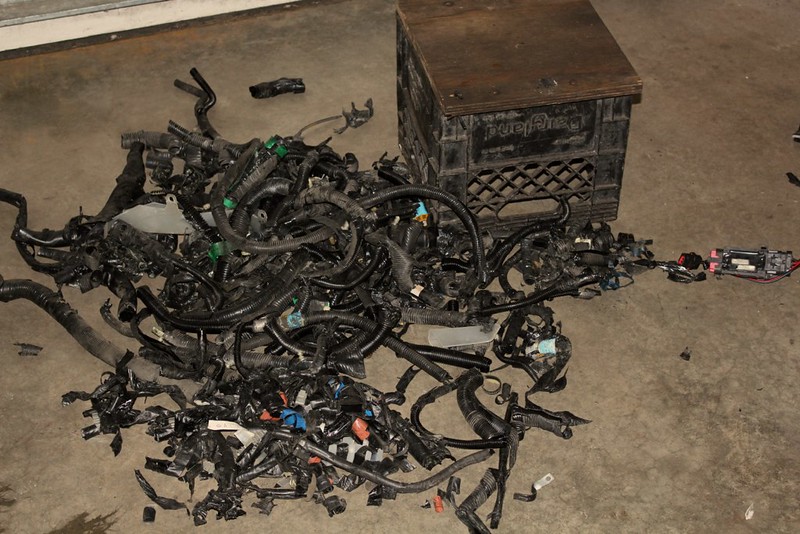
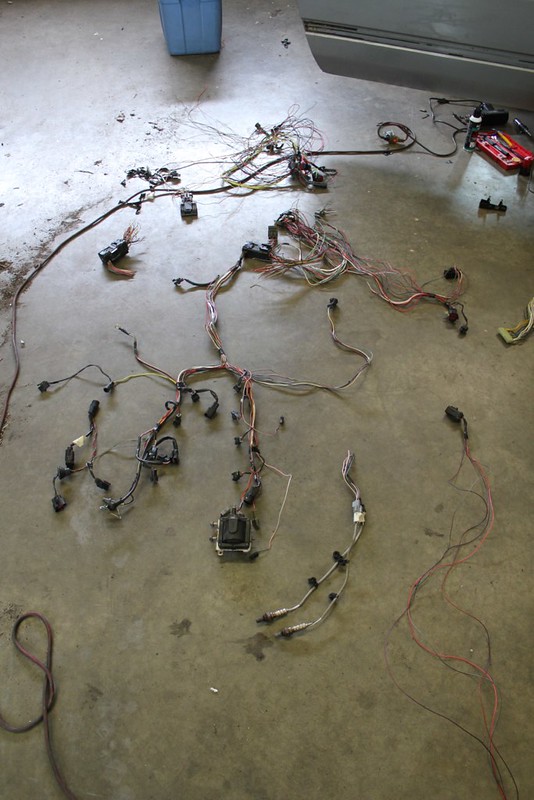
took all the wiring I have, laid out what was important and proceeded to strip back all the loom from it. I will be cutting/de-pinning everything I don't need (which haha is most of it) then get the car running and loom it shortly after that. Just in case theres something I missed or want to add.
but man there was a lot of junk...
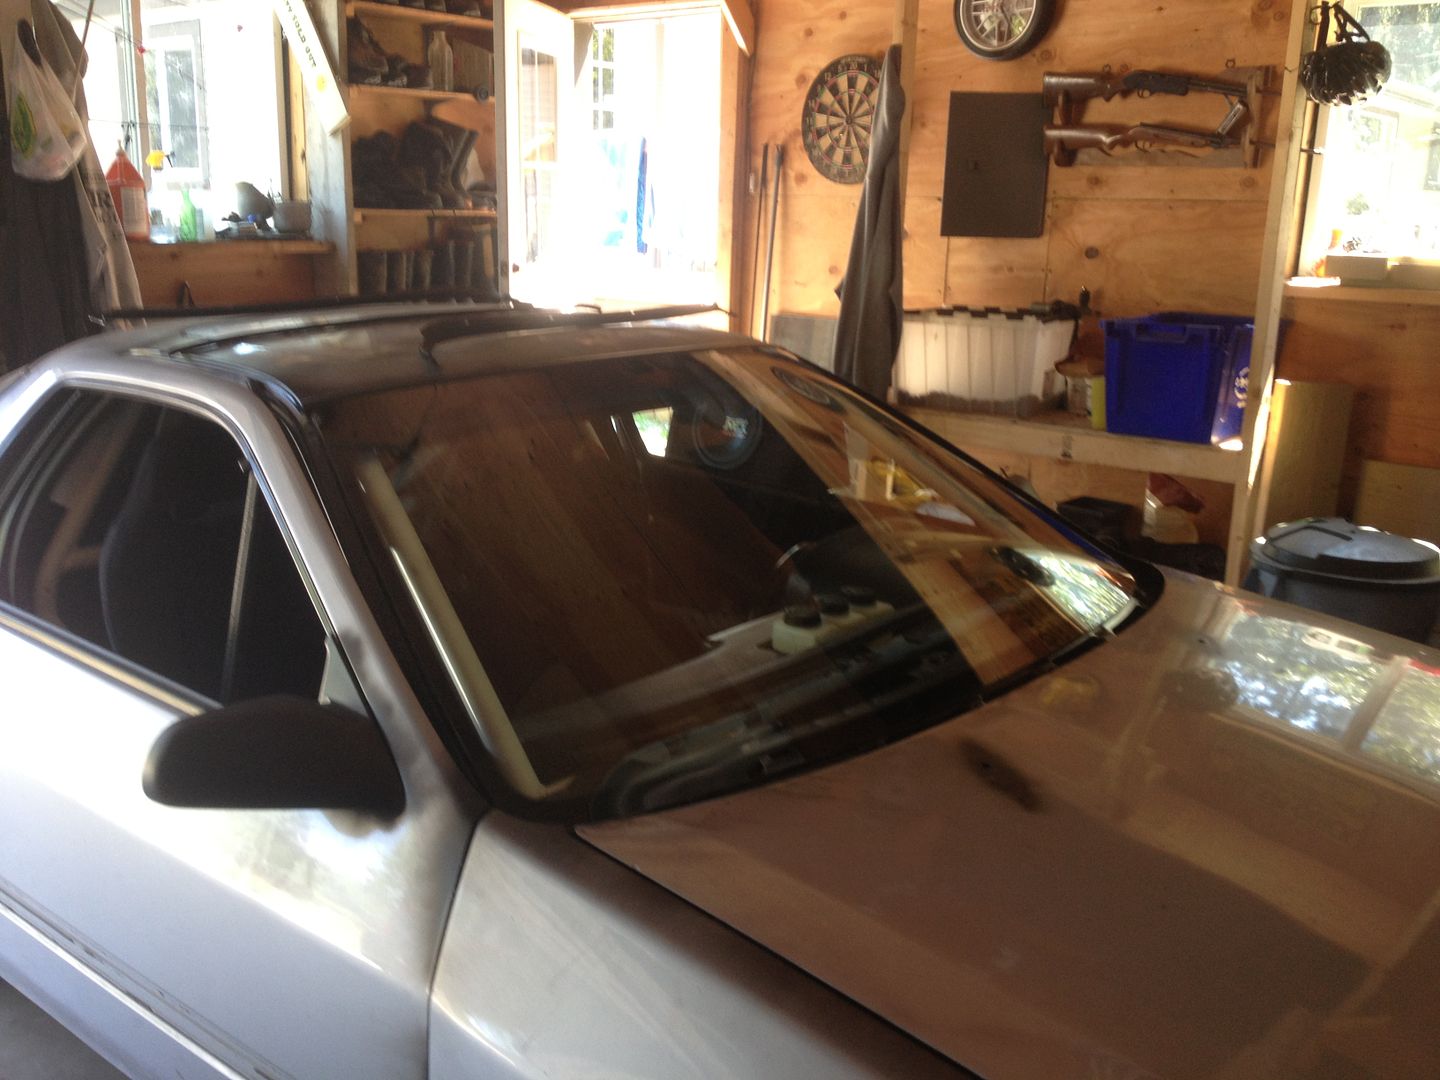
and now for the sunroof..
heres what I came up with

the tabs on the back overhang in the car, so you just place the back in first on the little lip
filled in the key holes myself, was going to let a pro do it, but whatev�s
it worked with mixed success, its gonna need filler/bondo. But I really don't care for show car quality paint or anything, its too stressful lol.
cut that little bend off the front wheel area 1: tire clearance, to truly gain more I'll probably have to channel the frame however. 2: give the sway bar more room
which I moved really far forward. not sure how much tire clearance I'm limiting by doing this yet, but chances are I'll run no bar for drift events anyway. welded 2 bolts to a plate and then welded the whole thing to the car. Easier said than done for me and my lack of welding skillzzz
bought more thingssss!!
bus bars, bulkhead pass throughs.
they go like this
one for the alternator, one for the starter.
helped a buddy pull a clock spring for his Honda, and while we were there I grabbed some small pieces that I had either, lost, thrown out by accident, or never had.
will be painting the grey black with the dash etc
then I got a little carried away
took all the wiring I have, laid out what was important and proceeded to strip back all the loom from it. I will be cutting/de-pinning everything I don't need (which haha is most of it) then get the car running and loom it shortly after that. Just in case theres something I missed or want to add.
but man there was a lot of junk...
and now for the sunroof..
heres what I came up with
the tabs on the back overhang in the car, so you just place the back in first on the little lip
Thread Starter
Senior Member
Joined: Mar 2015
Posts: 335
Likes: 8
From: Vancouver, BC
then (mock up photo) pin the front.
you can't take it off without having access to the inside of the car, it seals in a similar way to the factory mech, and its waaay lighter/simpler.
probably not daily friendly at this point, I don't know for sure it doesn't leak yet... but according to the PO it leaked anyway.
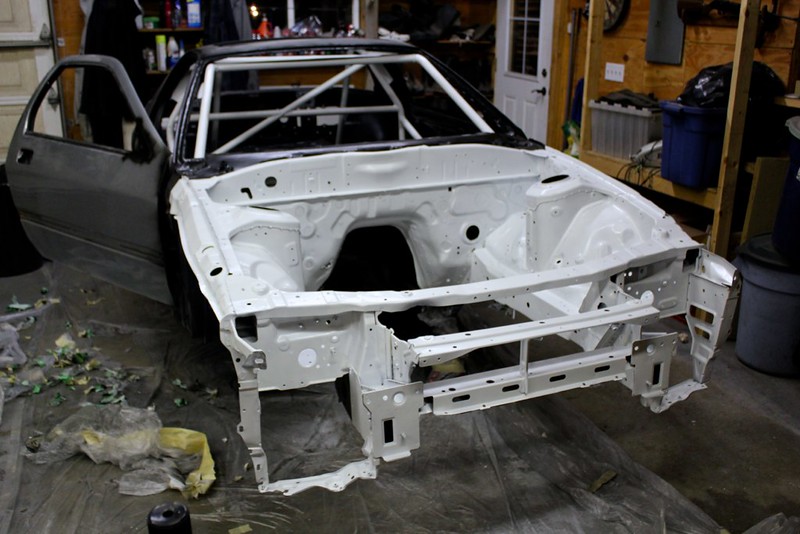
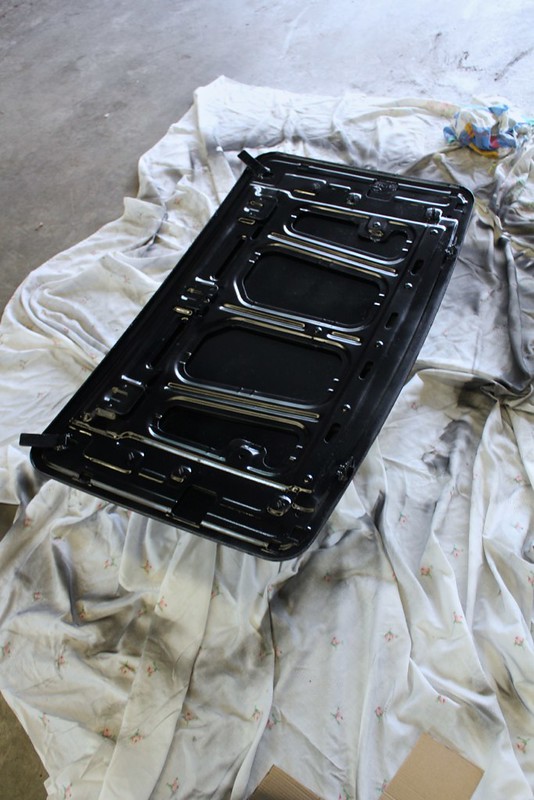
then just today I stripped, cleaned and painted my subframes. not the most fun afternoon but soooo worth is
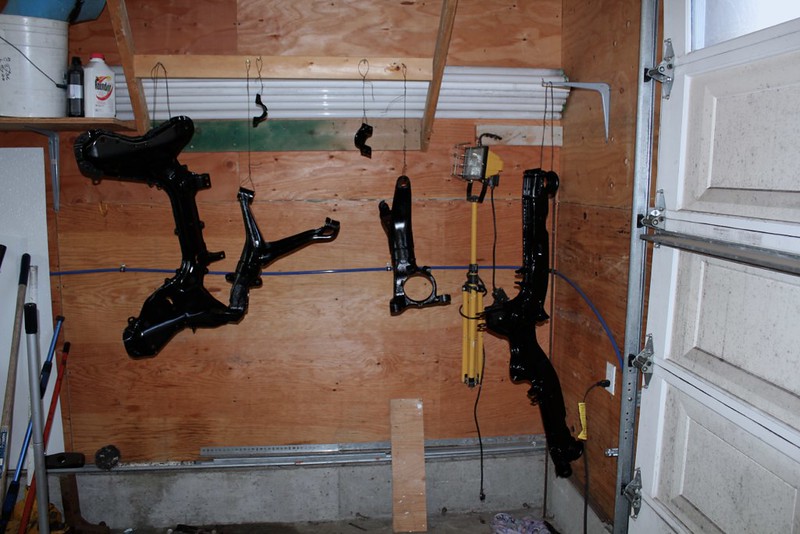
gloss black is my new favourite colour

I hope to buy paint and plastic this week and lay some rust proofing (aka paint) on the car this next week.
04/24/2014
teaser:
Thread Starter
Senior Member
Joined: Mar 2015
Posts: 335
Likes: 8
From: Vancouver, BC
04/13/2014
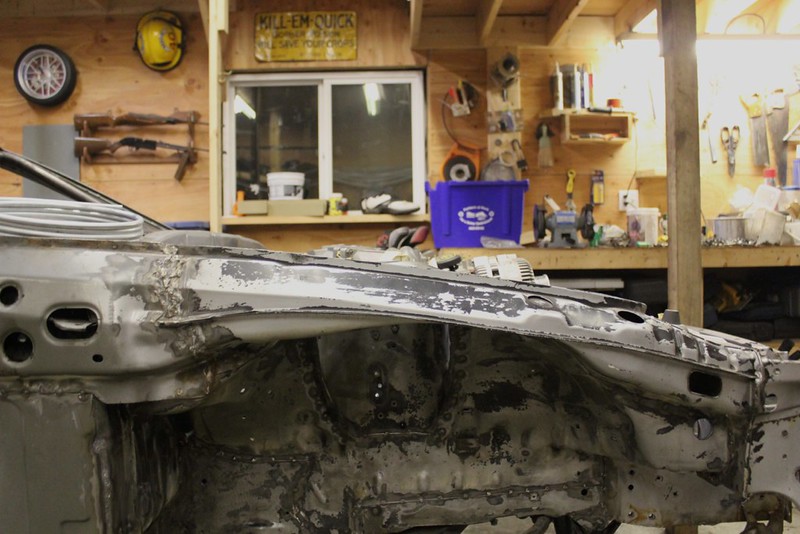
so first things first, rolled the car outside; well okay I took apart my engine stand to make a dolly and the wheels were getting stuck on the gravel even after I layer roofing tiles to smooth it out. So I grabbed my dads truck and pulled it outside haha. Then degreased and pressure washed the whole thing yet again. oh and this was after taking a wire wheel to everything just to make sure there was no surface rust or anything.

then spent a late evening scrubbing the entire thing with acetone (or "ace-tone" as sean kept calling it) shoutout to alex and sean for getting high on paint fumes for/with me!
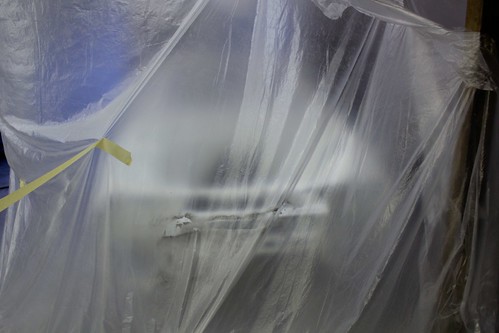
then built the "booth" and put the car in it
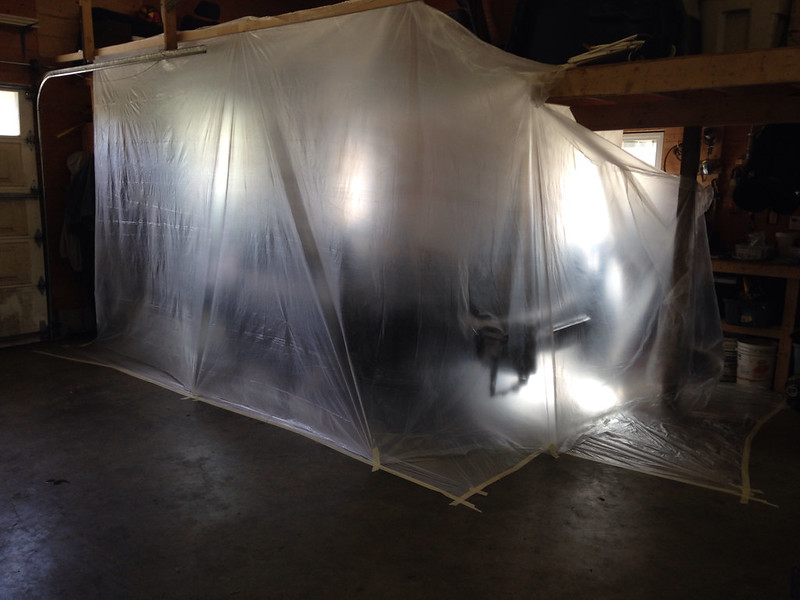
(apologies for iPhone pic)
my lens isn't wide enough for a decent shot of the inside but you get it..
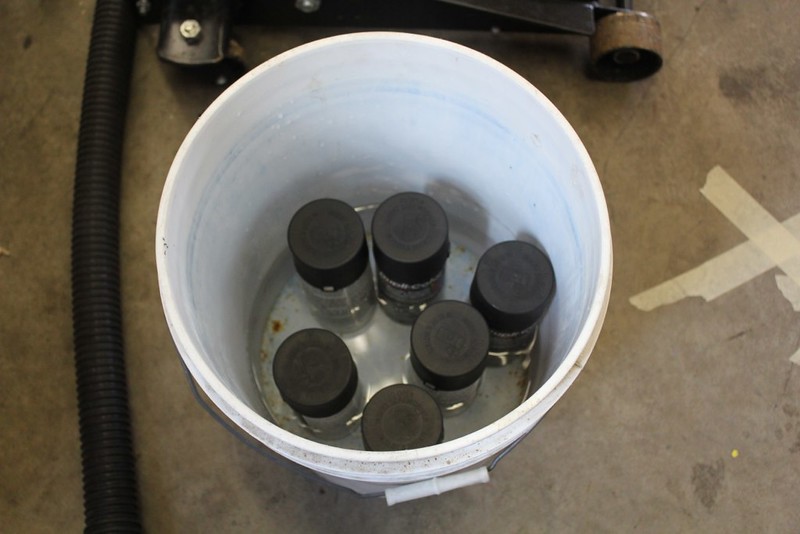
my paint preheater system. better known as warm water in a bucket.
The weather played nice too, didn't rain this week, humidity was low enough. No super strong wind. I waited till late afternoon/evening to paint when the air is warmest. Kept a heater in the booth over night as well, to let the paint cure quicker.
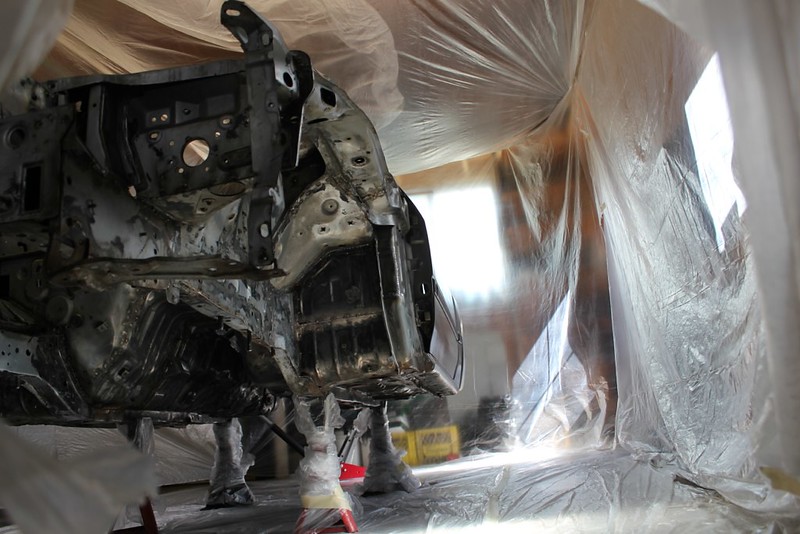
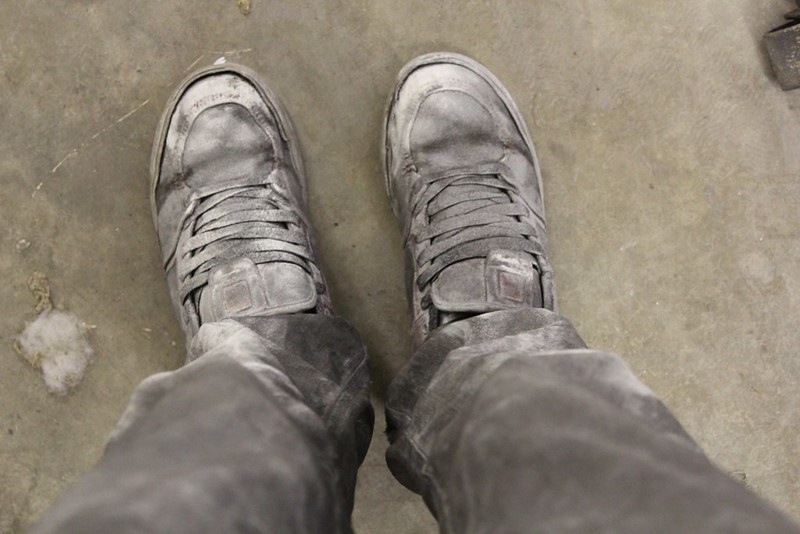
now I didn't take many pics, the dust level inside was crazy. I was doing my best to vent it with the door but I didn't want to risk my camera.
primer dust too is the worst
and I ended up need close to double what I started with for paint
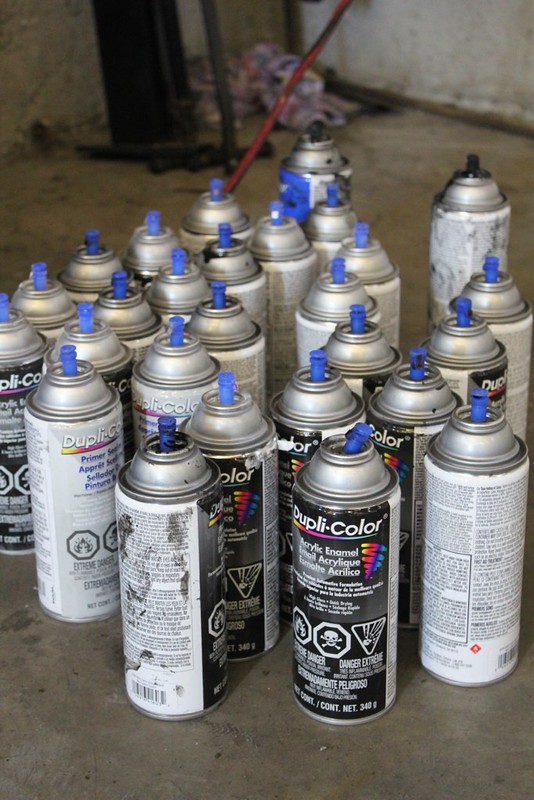
I used:
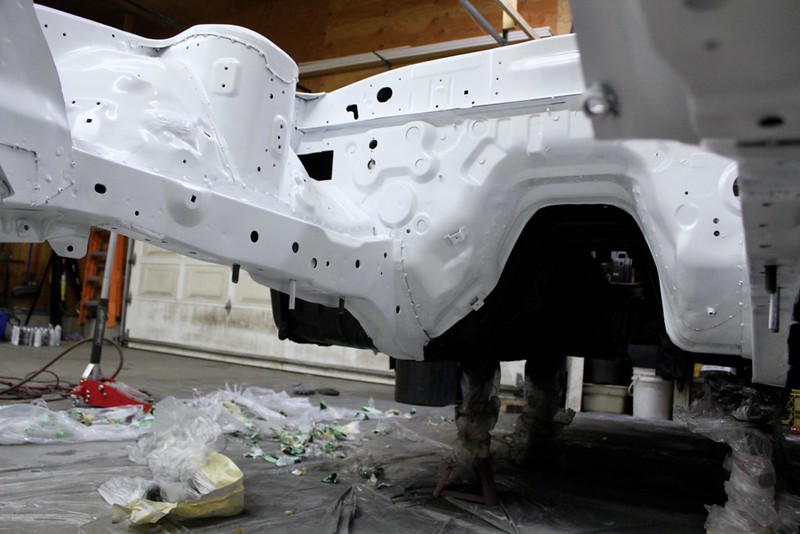
4 cans of primer for Engine bay and seams around car
4.5 cans (had a 1/2 leftover from before) for the underside/wheel wells and back.
4 cans for the roll cage. turns out round is hard to paint.
5 cans for engine bay
8 cans for interior
2 cans of this:
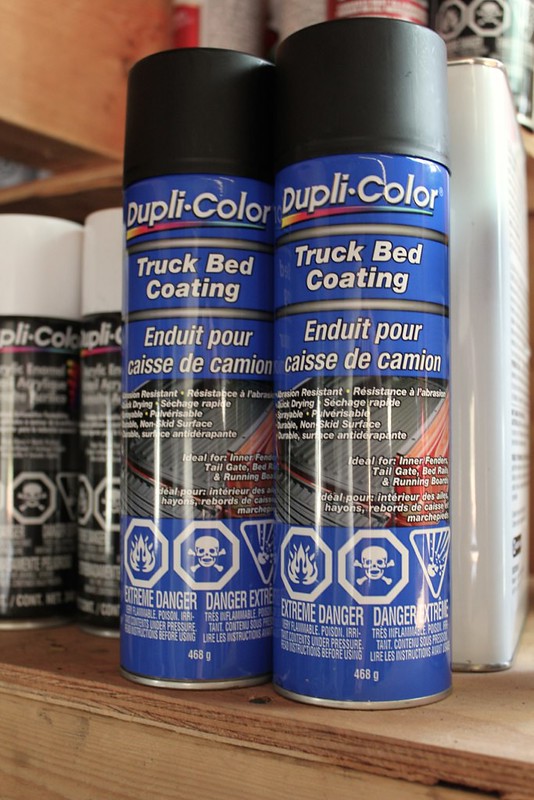
did light coats of bed liner in the wheel wells, underside and floor of the interior. Turned out awesome, my buddy did this in his jeep in place of carpet. looks really cool, is super tough and masks over spray etc. Did the wheel wells to hopefully prevent rock chips.
I'm also amazed it only took 2 cans to do all of that
so sometime later
oh and disclaimer: I took these right after I pulled the booth down, so there was a decent amount of dust everywhere and on everything. So if a spot looks bare or oversprayed its probably dust. coverage was pretty good on everything.
so first things first, rolled the car outside; well okay I took apart my engine stand to make a dolly and the wheels were getting stuck on the gravel even after I layer roofing tiles to smooth it out. So I grabbed my dads truck and pulled it outside haha. Then degreased and pressure washed the whole thing yet again. oh and this was after taking a wire wheel to everything just to make sure there was no surface rust or anything.
then spent a late evening scrubbing the entire thing with acetone (or "ace-tone" as sean kept calling it) shoutout to alex and sean for getting high on paint fumes for/with me!
then built the "booth" and put the car in it
(apologies for iPhone pic)
my lens isn't wide enough for a decent shot of the inside but you get it..
my paint preheater system. better known as warm water in a bucket.
The weather played nice too, didn't rain this week, humidity was low enough. No super strong wind. I waited till late afternoon/evening to paint when the air is warmest. Kept a heater in the booth over night as well, to let the paint cure quicker.
now I didn't take many pics, the dust level inside was crazy. I was doing my best to vent it with the door but I didn't want to risk my camera.
primer dust too is the worst
and I ended up need close to double what I started with for paint
I used:
4 cans of primer for Engine bay and seams around car
4.5 cans (had a 1/2 leftover from before) for the underside/wheel wells and back.
4 cans for the roll cage. turns out round is hard to paint.
5 cans for engine bay
8 cans for interior
2 cans of this:
did light coats of bed liner in the wheel wells, underside and floor of the interior. Turned out awesome, my buddy did this in his jeep in place of carpet. looks really cool, is super tough and masks over spray etc. Did the wheel wells to hopefully prevent rock chips.
I'm also amazed it only took 2 cans to do all of that
so sometime later
oh and disclaimer: I took these right after I pulled the booth down, so there was a decent amount of dust everywhere and on everything. So if a spot looks bare or oversprayed its probably dust. coverage was pretty good on everything.
Thread Starter
Senior Member
Joined: Mar 2015
Posts: 335
Likes: 8
From: Vancouver, BC
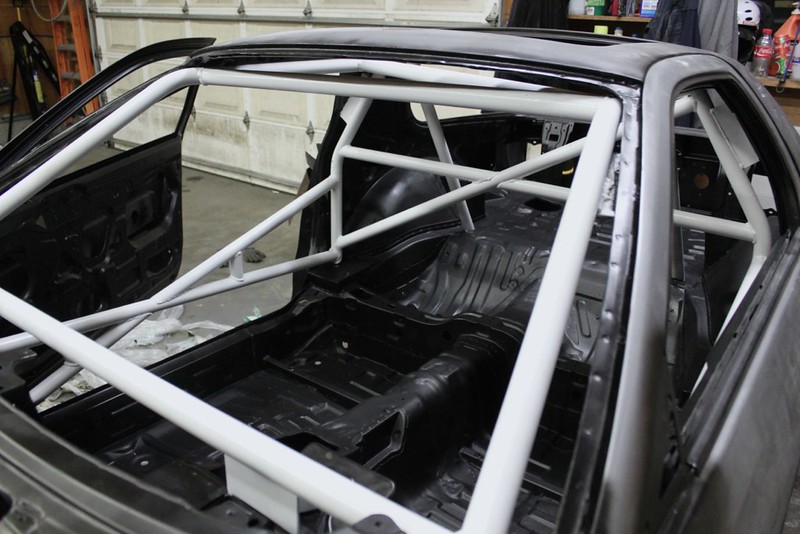
roll cage was a huge ordeal to mask so I could paint the interior...
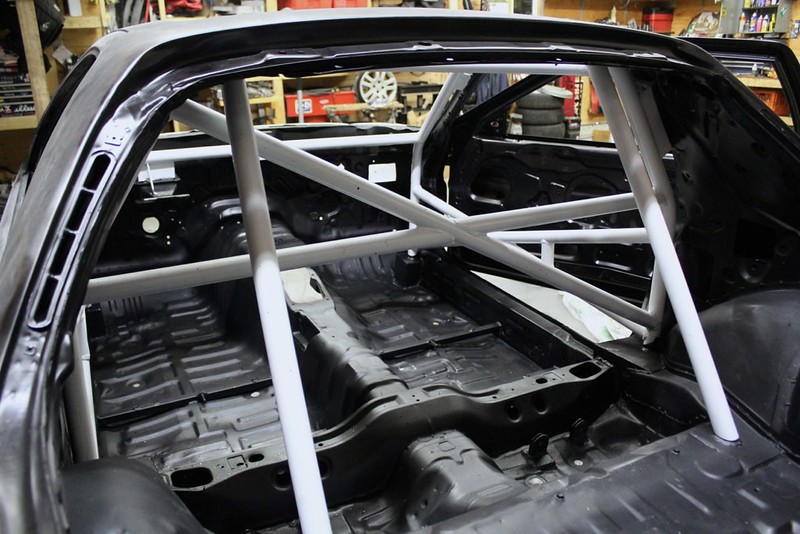
did all the areas that after its plastidipped won't be covered in dip. door jams behind bumpers etc
with basically 0 regard for overspray lol
Thread Starter
Senior Member
Joined: Mar 2015
Posts: 335
Likes: 8
From: Vancouver, BC
Overall I'm happy with it for spray cans. The cage is a bit rough, the spray pattern on the cans makes it really hard to not have it run. but its rust proof and the whole thing cost me maybe $250 in paints and supplies. now I just gotta wait a week for the paint to fully cure and then start putting everything back together. As of this weekend I'm 2 months away from my goal of driving it to my buddy's wedding.
Gonna have to fill the time while I wait this week with small things, still have a diff to clean and a bunch of small stuff to paint.
04/20/2014
I got some work done.
the routine was clean, acetone and paint. I cleaned some of the smaller plastic stuff in my mom's sink (oh she loved it) and pressure washed the rest.
so clean followed by paint
then put it on the car


lol dropped the engine in in 20 min before Easter dinner, haha love it. Everything goes in so nice and easy, and its clean.
However the first scratch is the hardest, honestly looking forward to when it doesn't bother me. I really like the "lived in" look, can't wait till its patina'd
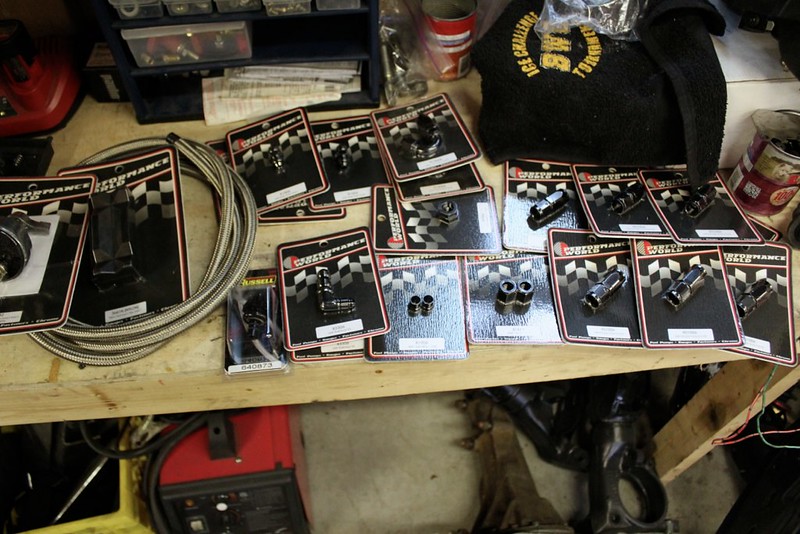
made another parts binge purchase. I think this is one of the last I'll need, theres a few more on order and I'm sure I'll need a few things here and there but for the most part I'm done buying things (haha ya right, the next stuff is bling)
this also pushed the total spent just above $5,000 (approx.)
which needless to say I'm impressed with.. If I skipped the brake setup and wasn't going overboard with the wiring I'll bet this could be easily finished for under $5k
the stuff left to do now requires one of a few things
1. Searching for bolts in the pile
2. Fab
3. extreme wire wheeling' and then paint.
4.????
5. profit
my short list is:
modify the gas tank for bulkhead fittings
fab an idler pulley bracket and one for the ignition coil
make a throttle cable
paint the dash, knuckles, calipers, sway bar, axles, diff and headlight assemblies
theres little bolts to find and springs etc etc to put in
oh wait I still have to wire it... haha
Thread Starter
Senior Member
Joined: Mar 2015
Posts: 335
Likes: 8
From: Vancouver, BC
04/25/2014
Painted more things
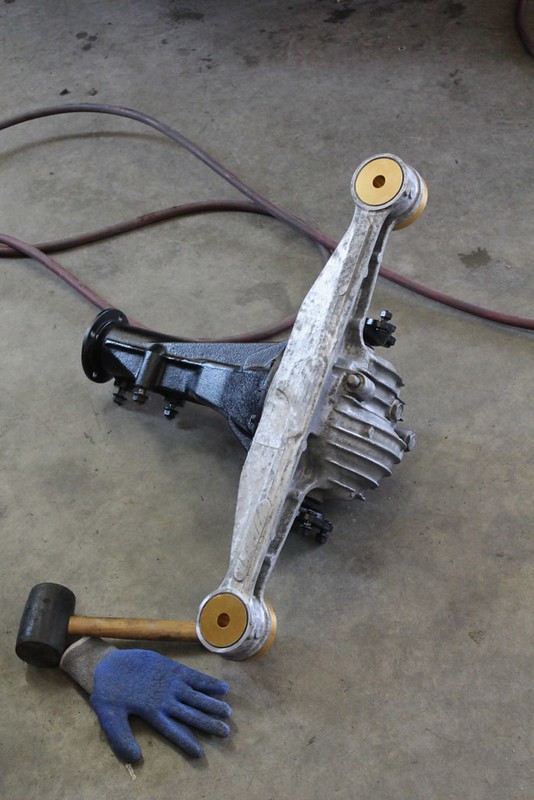
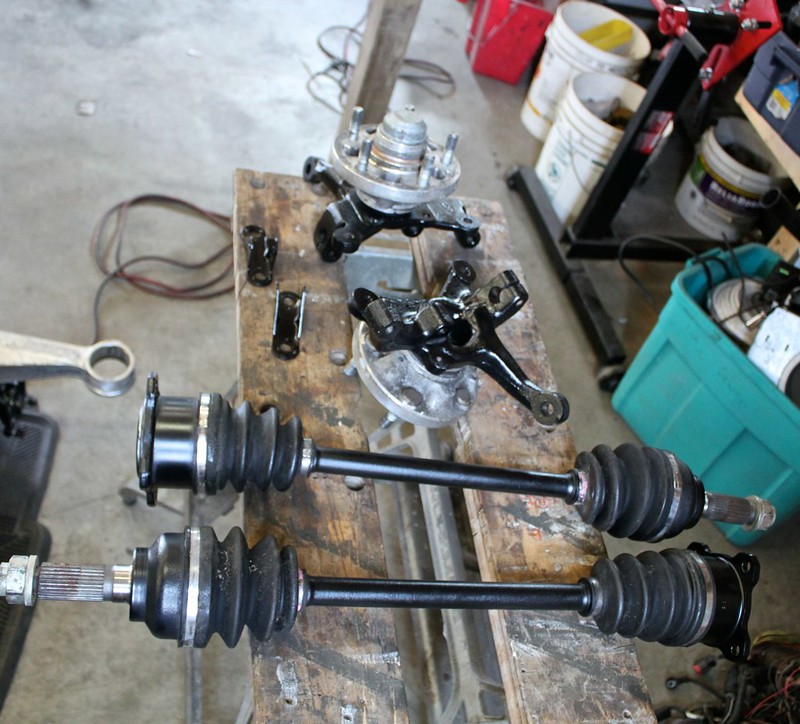
And cleaned and painted the diff. And put the diff mounts in, was easy. Too easy, maybe Lamar can shed some light here but I can little push them in by hand, that how they're supposed to be?

assembled these
and put it all engine (except the diff, i'll explain)
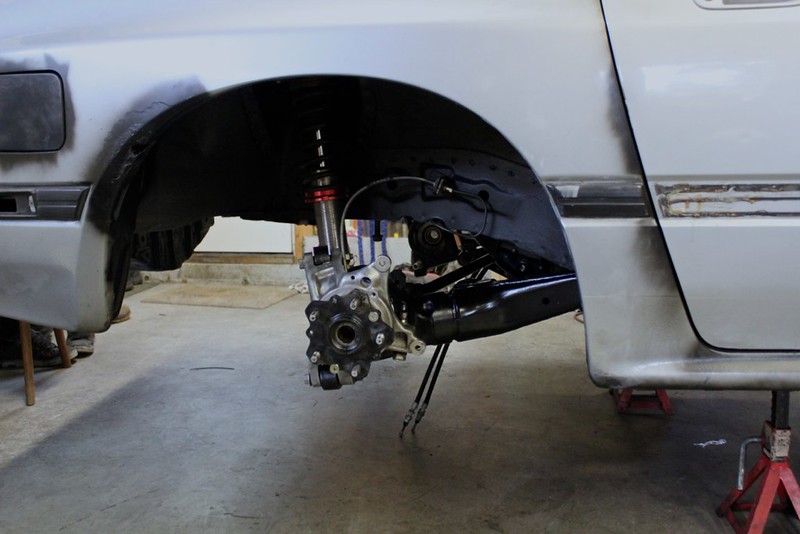
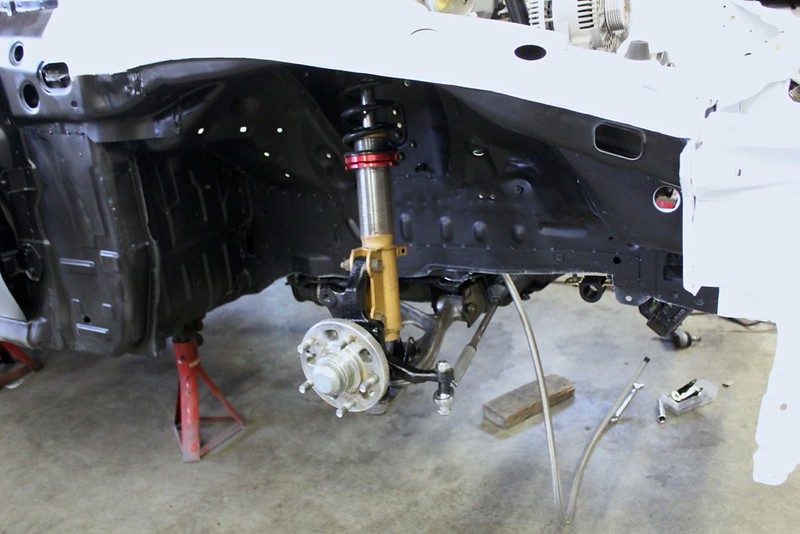
And because the suspension was in, this means the car can sit!

Man what a good feeling. Been waaaay too long since the last time it was on suspension. But I still have to put the brake callipers on and the diff in.
now the diff isn't in because the front diff mount is stock. In and effort to save money on a nice gold PBM one (which really isn't that expensive) I took my stock mount
and cut everything useless off
then took some leftover metal from the cage and boxed it
I'm now going to hand it over to a professional welder to make sure it's strong.
around 11:00 pm last night I decided it would be a good idea to paint my dash!
the dye stuff is a bit harder to work with so I'm glad I have all that practice from painting the car. Spraying it is a little tedious, it gets thick and shows lines really easy. But once its properly dry it becomes a nice finish.
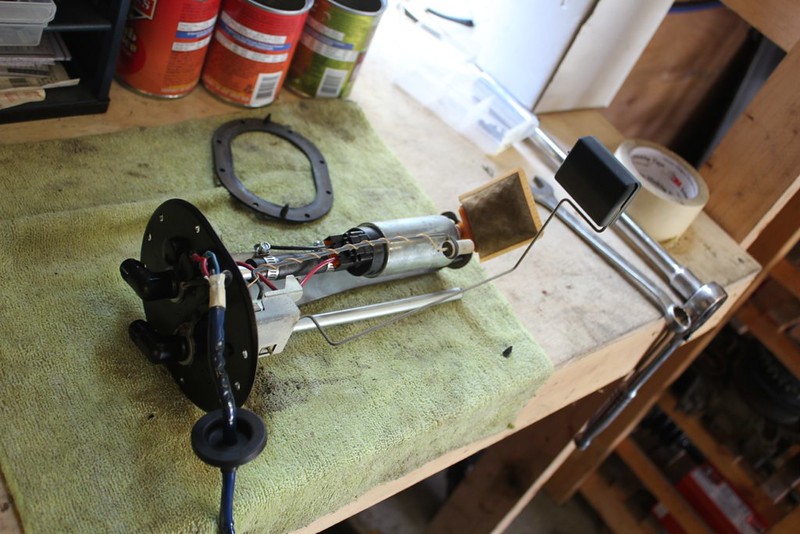
I also started modifying my gas tank pump cover thing..
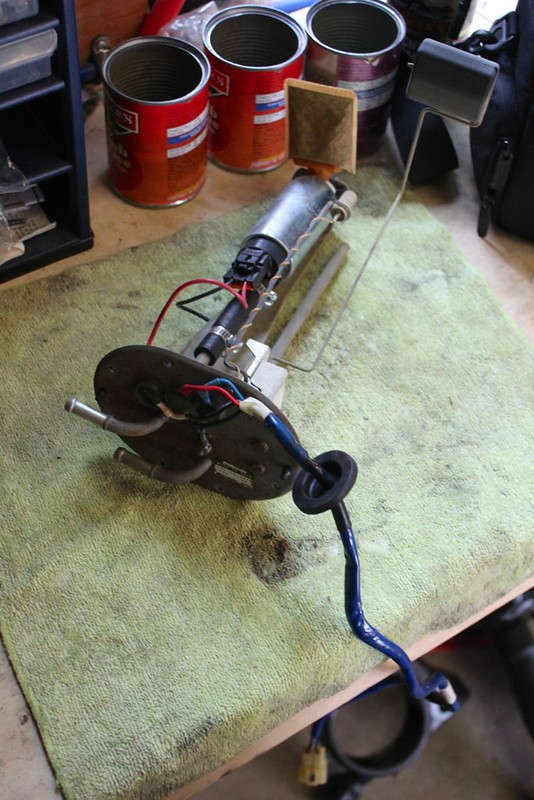
I need to get -6AN to attach to it, so I bought 2 bulkheads and went to work.
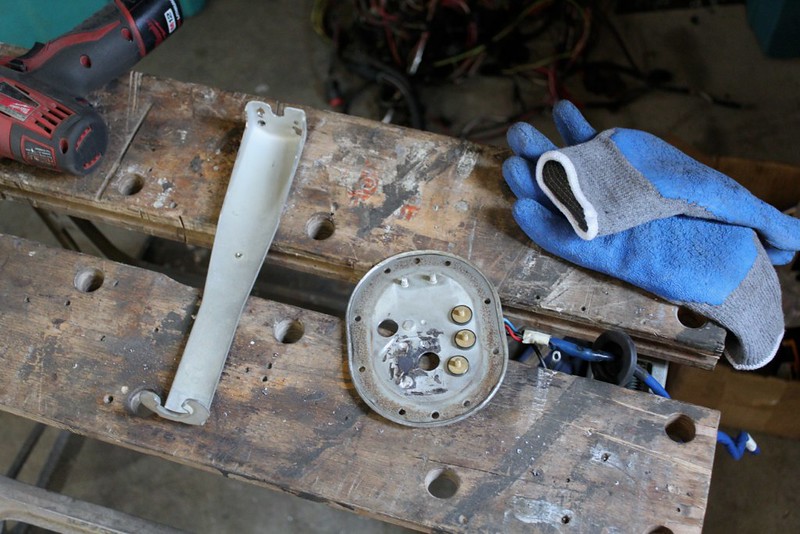
I determined that I would have to cut off the hanger part to be able to get the feed line in place. So after being as careful as I could to not warp the cover I got it off. Still warped the cover lol. The drilled the holes out and filled in the holes where the spot welds were, again being careful to not nick the screw threads with a grinder. And I nicked like 3 lol. Arrg.
Painted more things
And cleaned and painted the diff. And put the diff mounts in, was easy. Too easy, maybe Lamar can shed some light here but I can little push them in by hand, that how they're supposed to be?
assembled these
and put it all engine (except the diff, i'll explain)
And because the suspension was in, this means the car can sit!
Man what a good feeling. Been waaaay too long since the last time it was on suspension. But I still have to put the brake callipers on and the diff in.
now the diff isn't in because the front diff mount is stock. In and effort to save money on a nice gold PBM one (which really isn't that expensive) I took my stock mount
and cut everything useless off
then took some leftover metal from the cage and boxed it
I'm now going to hand it over to a professional welder to make sure it's strong.
around 11:00 pm last night I decided it would be a good idea to paint my dash!
the dye stuff is a bit harder to work with so I'm glad I have all that practice from painting the car. Spraying it is a little tedious, it gets thick and shows lines really easy. But once its properly dry it becomes a nice finish.
I also started modifying my gas tank pump cover thing..
I need to get -6AN to attach to it, so I bought 2 bulkheads and went to work.
I determined that I would have to cut off the hanger part to be able to get the feed line in place. So after being as careful as I could to not warp the cover I got it off. Still warped the cover lol. The drilled the holes out and filled in the holes where the spot welds were, again being careful to not nick the screw threads with a grinder. And I nicked like 3 lol. Arrg.
Thread Starter
Senior Member
Joined: Mar 2015
Posts: 335
Likes: 8
From: Vancouver, BC
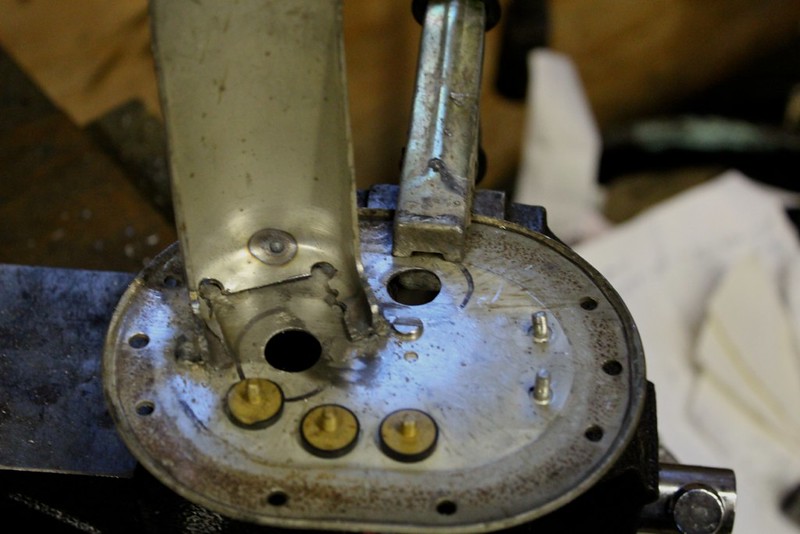
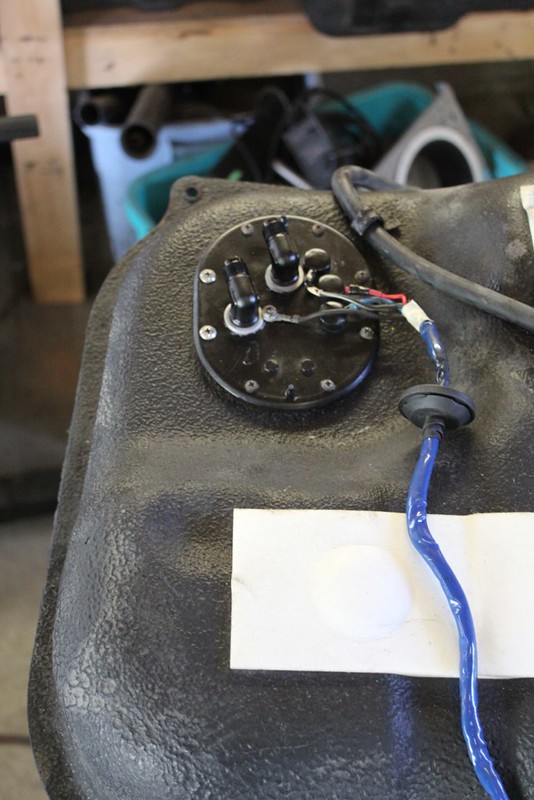
then tacked it in place, careful not to move it too far from where it was but enough that the bulkhead nuts clear. I also checked that it all fits in the tank. Then painted it and let it dry overnight. And thats where I stopped. I throw a few completed pics up when it done.
05/04/2014
finished the fuel tank mod
didn't go back in as easily as I had thought.. some things just didn't want to line up. RTV'd the bananas out of the seal as to prevent leaking.
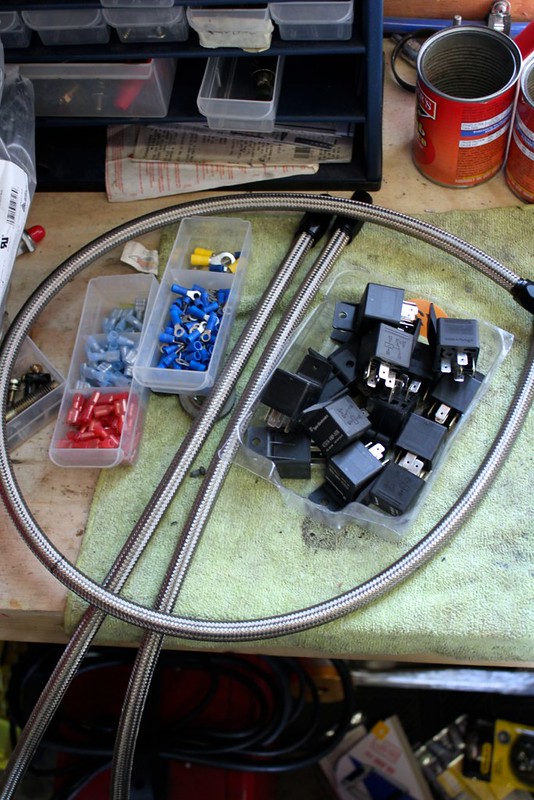
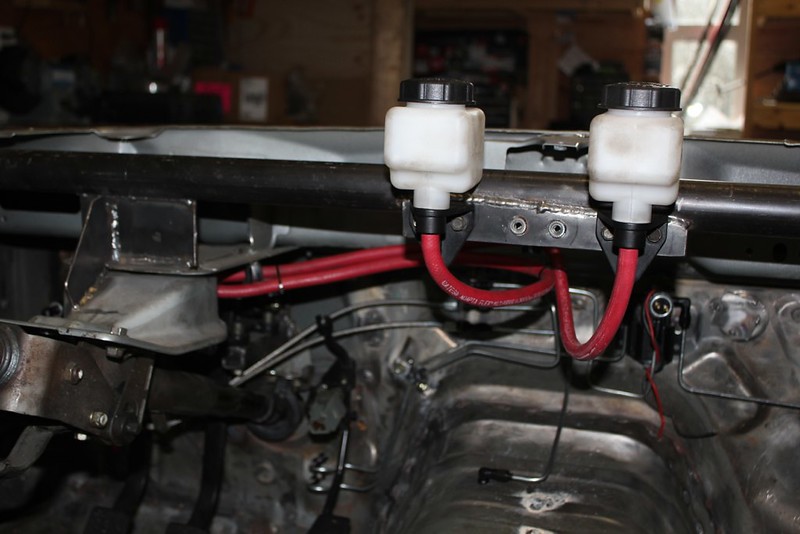
got more thingz..
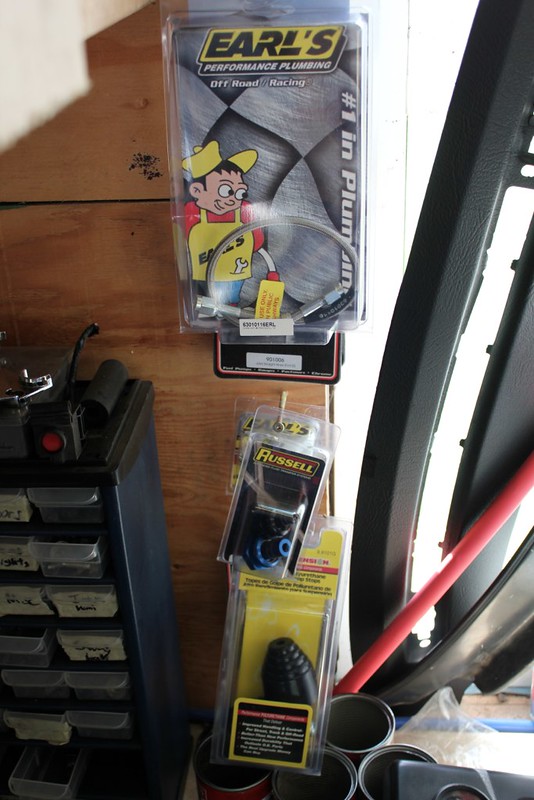
some relays and wiring connectors, circuit breakers, fuse holders, a light for the CEL, wire, heat shrink, rubber P clips, pinion snubber, front brake lines and a buddy gave me the Russell EFI adapter that the local parts store is waiting for. It's blue so eventually I'll get a black one but hey it was free(ish).
Also built all my AN line and put them on
not too thrilled with how difficult it is to get them on.. going to move the flare down the tube a few inches. I wanted to be able to remove them with out have the car up, but the steering column and exhaust get in the way too much.
mocked up the glove box
still have to get some aluminum to make the panel for it but you get the idea.
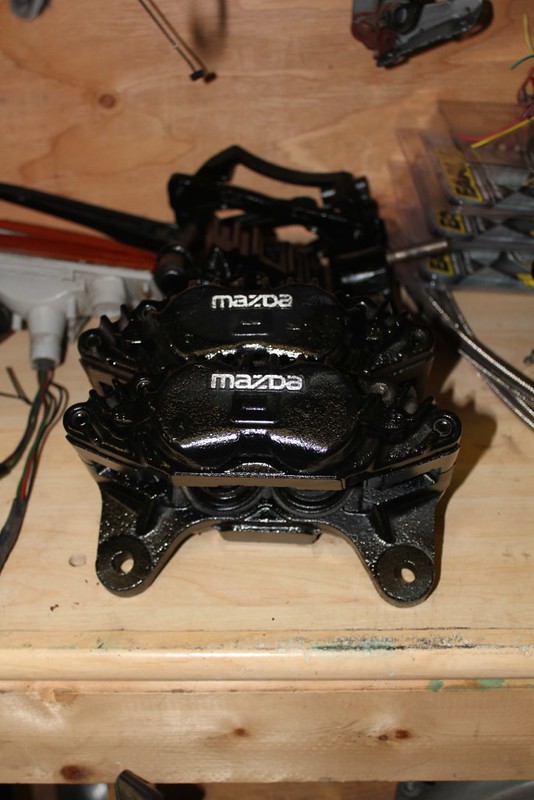
also finally got around to painting my brake callipers
and sanded the mazda logo
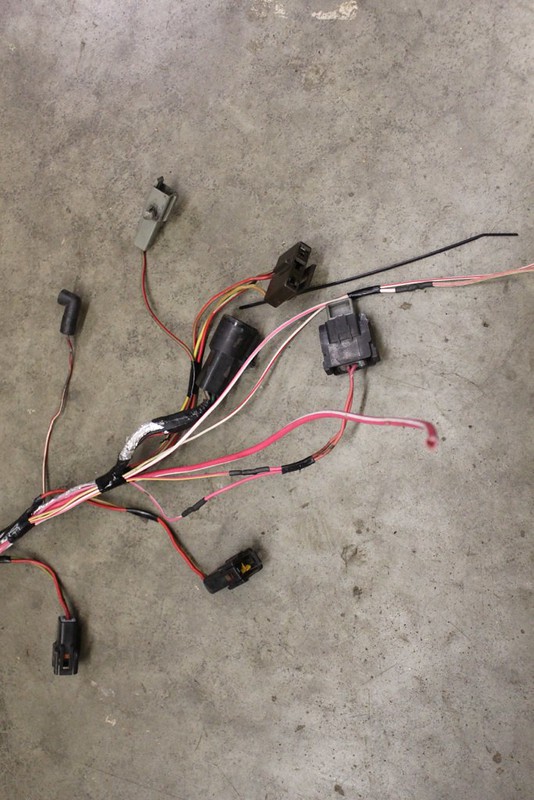
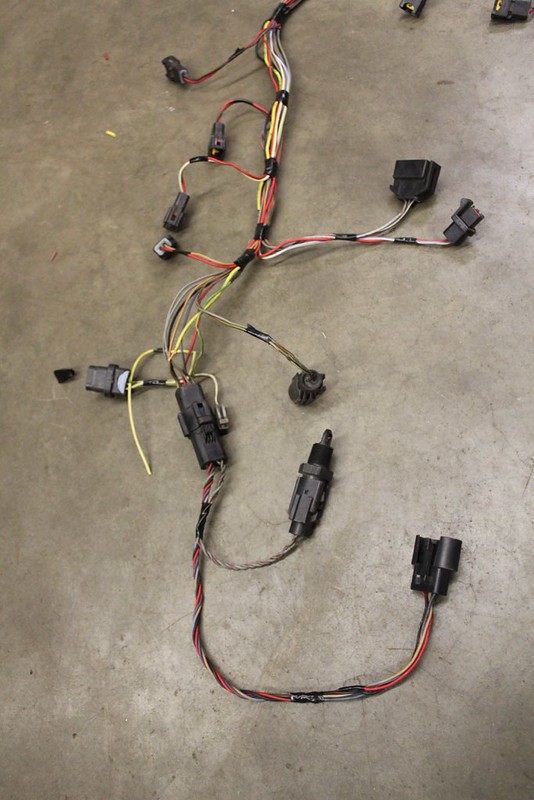
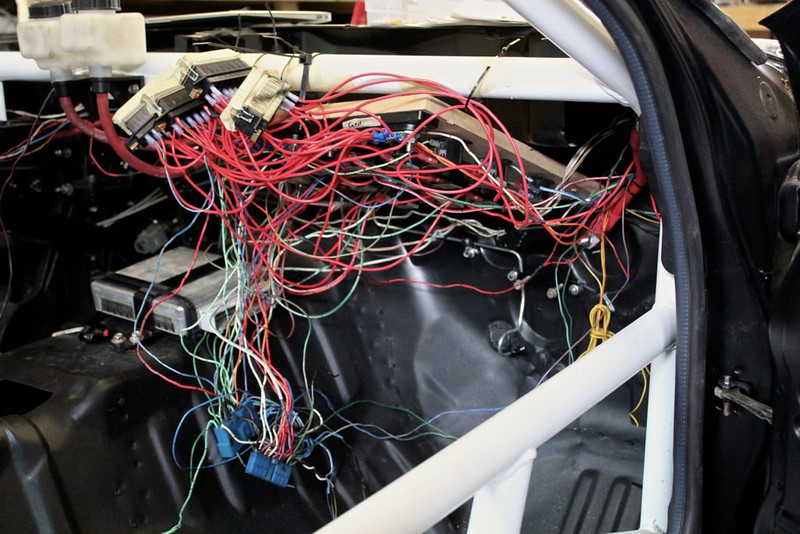
so I took that mess of wiring from before, and cut about this much out
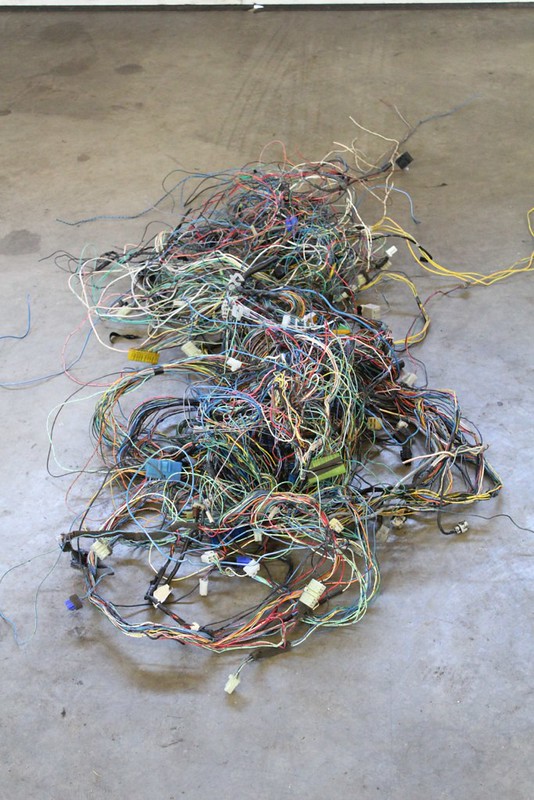
(most of it lol)
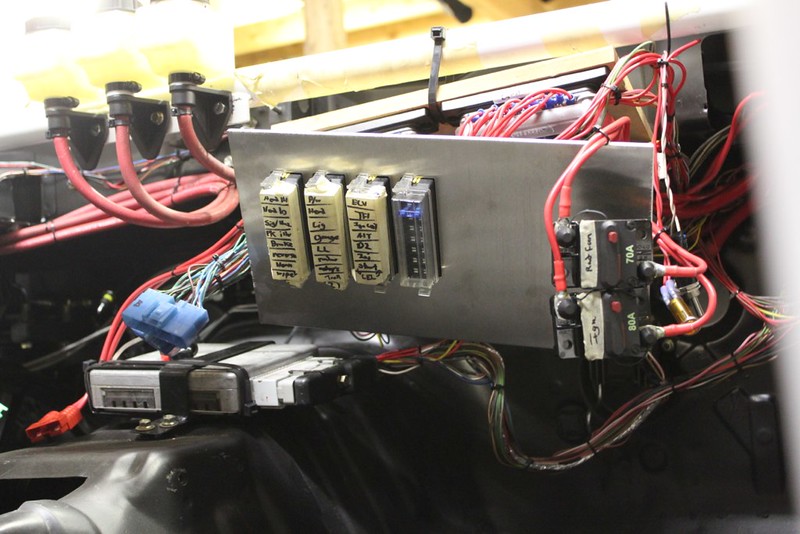
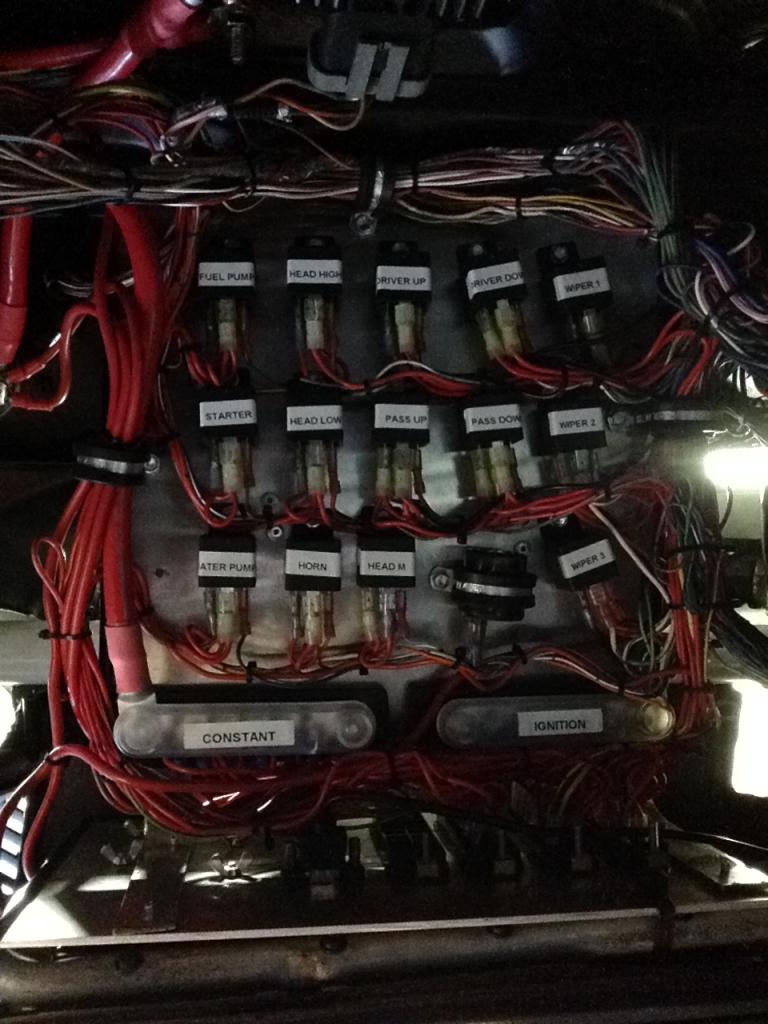
then did the rear of the fuse panel
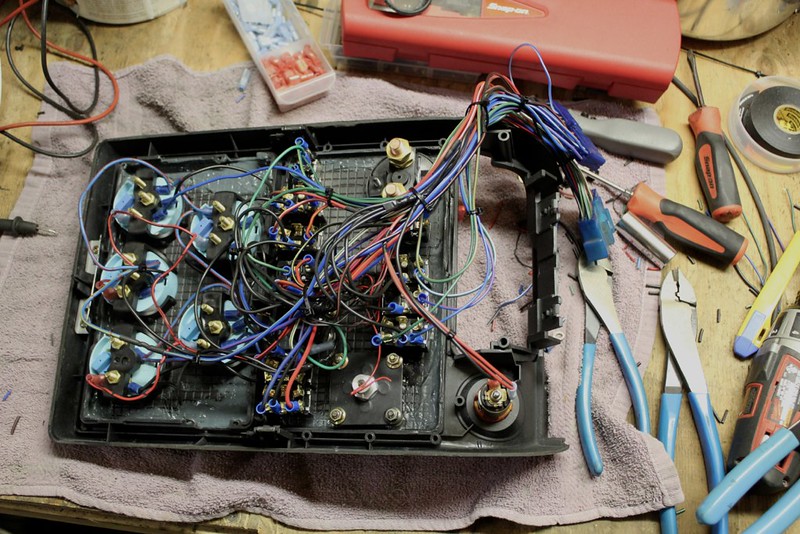
I'm not overly thrilled with how this came out... its all functional but I feel if the wire were a bit longer I could've made it much tidier. The compromise of re-using factory wiring in an effort to save money I suppose. Couldn't imagine how much it would cost to buy all new copper wire...
Thread Starter
Senior Member
Joined: Mar 2015
Posts: 335
Likes: 8
From: Vancouver, BC
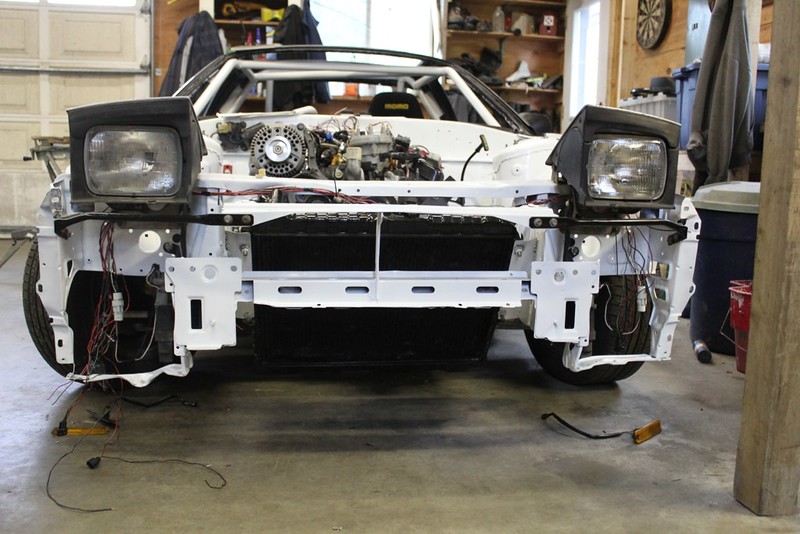
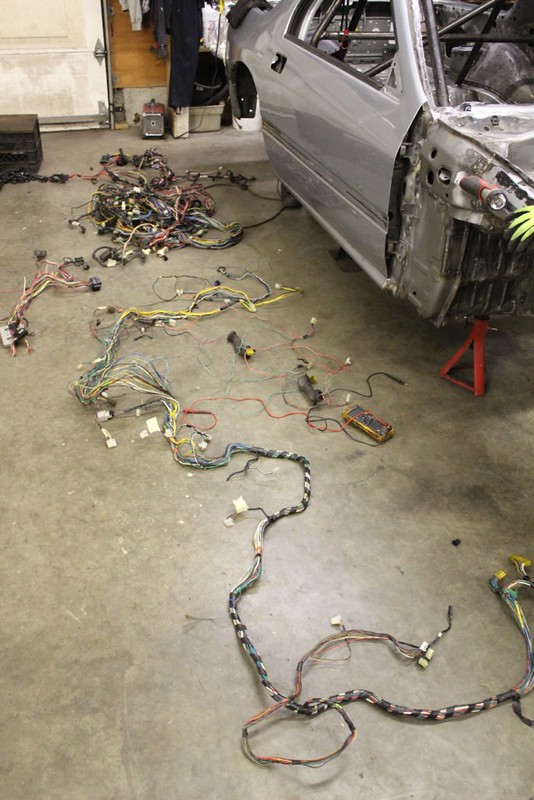
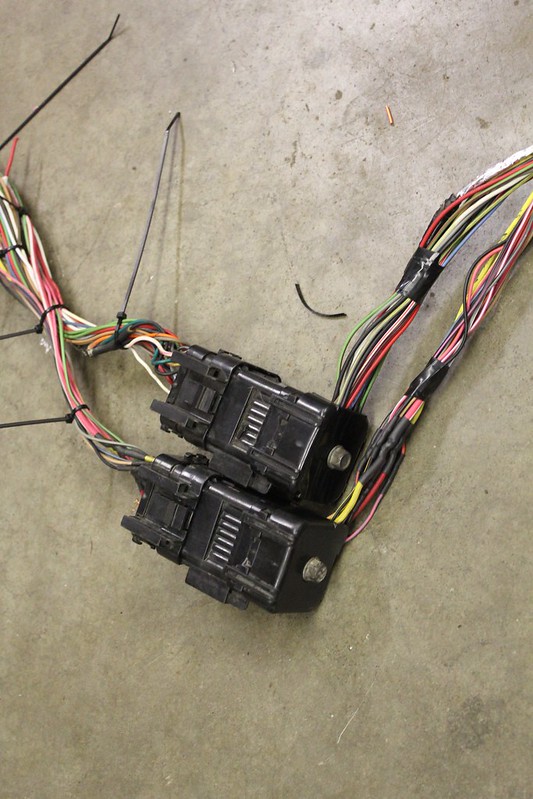
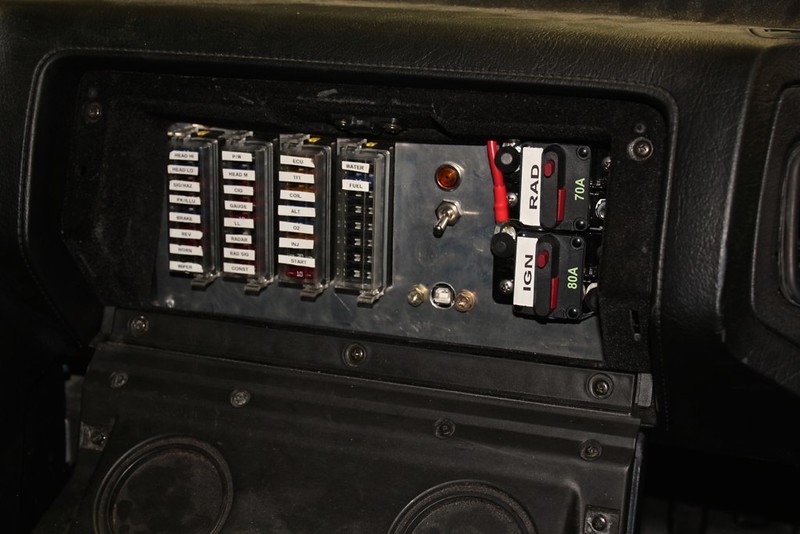
have the front of the car mostly buttoned up, I will be going back and covering it all in loom once I'm confident it all works properly. Even as I go through it I keep changing my mind and discovering flaws in my original plans.
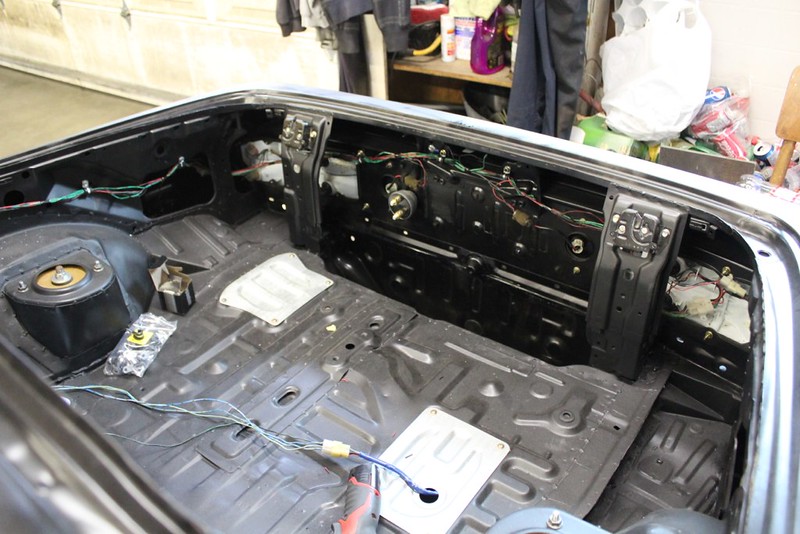
the rear of the car is done tho
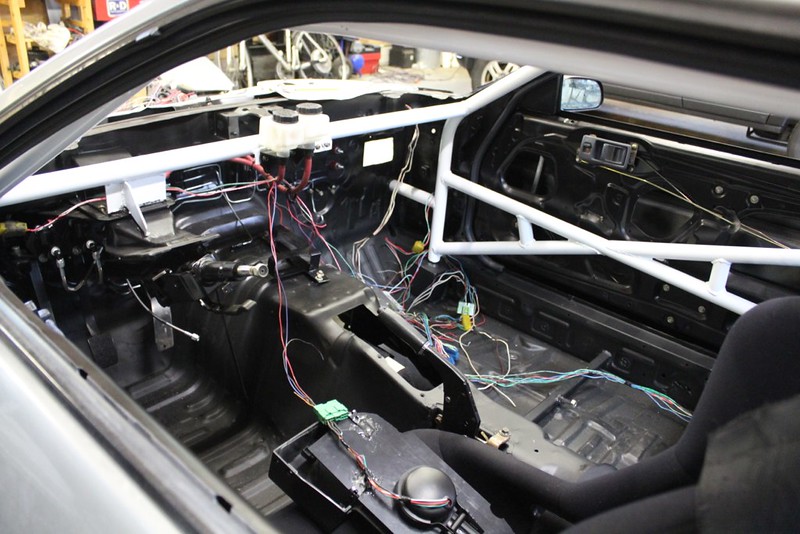
which now leaves me with the hardest part, the fuse and relay panel. Solder and heat shrink e'erythang takes time.
also can't find the 02 harness... not sure if I got it with the engine. Not a huge deal as I want to put them out the back, as opposed to the ridiculous around the front and along the oil pan oem way.
I feel as I'm about 30% through the wiring. Then buy fluids and start it up!
Thread Starter
Senior Member
Joined: Mar 2015
Posts: 335
Likes: 8
From: Vancouver, BC
05/11/2014
minor update:

did some heavy gauge wiring

quite time consuming actually heating up the terminal, filling it with solder, dipping the wire in it, heat shrink, route it and check length. Repeat. Then I ran out of 1/0 so I need like 3 ft more or so.
tried (yes tried) to watch Formula Drift in Atlanta while working, but between my poor internet and the drift stream being cranky I didn't get to see very much. Oh well, Cory Hosford still liked my IG of it haha. Made my day.
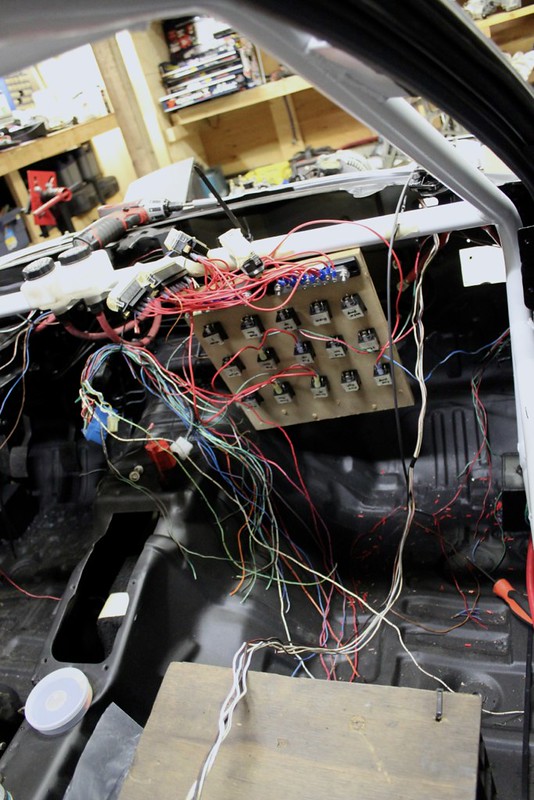
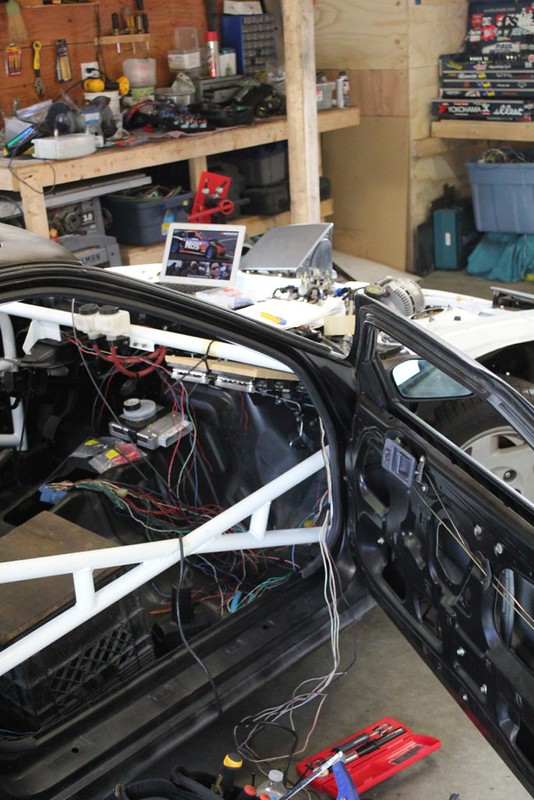
made a mock panel out of MDF I had laying around, this way I can change things if need be. I have it so I can swing it in and out of position so I can check wire lengths but still actually work on it.
we attempted to weld that diff mount I modified... that didn't work
the rubber was catching on fire and the gasses created were blowing holes through the weld pool. So after about halfway we just called it. I'll be buying a Parts Shop Max one later, this is more solid than the stock one still but not a permanent piece.

went to the local ladies craft store and grabbed some foam and did this:
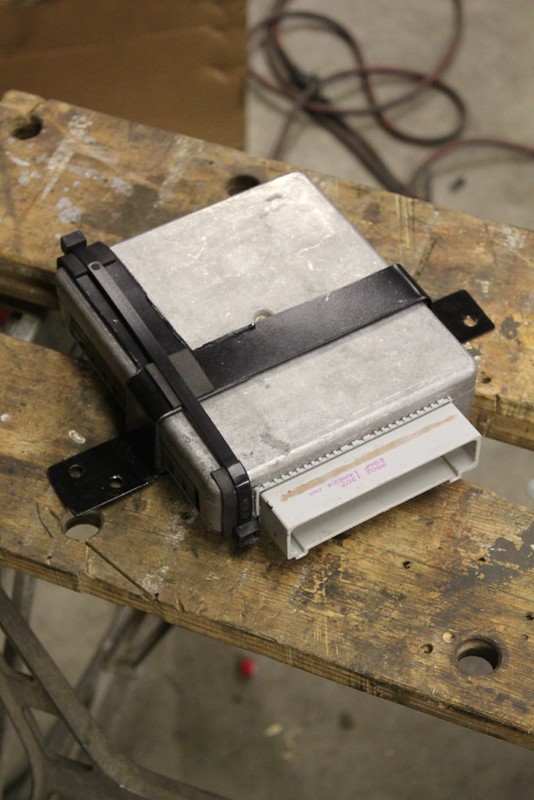
The zap strap will probably not be staying, I'll get a huge worm gear clamp or something, but for now a pair of jumbo zap straps work well. ECU sits in there good, 2 layers of foam made a good snug fit.
seems like every day is a trip to the parts store for some small thing, but I'm making progress. I know theres not much to see but theres a good amount getting done. I keep changing my mind on how to do things, and when I do I stop the portion I'm working on and figure out the changes before actually crimping/soldering/cutting. As I get closer to finished the faster it should all go.
on a slightly different note I think my deadline is well dead. My buddy's most likely going to drive his dads 201x (haha not sure) Mustang instead of his fox body. My car which would be on stock wheels will kinda be out of place without his factory looking-ish Mustang there. So I'm kinda demotivated to get the car finished by then. I suppose the silver lining is less rush and stress which result in a better end result. I can enjoy the wedding and surrounding festivities a little more too I think...
anyway I'll stop rambling and go do more wiring
minor update:
did some heavy gauge wiring
quite time consuming actually heating up the terminal, filling it with solder, dipping the wire in it, heat shrink, route it and check length. Repeat. Then I ran out of 1/0 so I need like 3 ft more or so.
tried (yes tried) to watch Formula Drift in Atlanta while working, but between my poor internet and the drift stream being cranky I didn't get to see very much. Oh well, Cory Hosford still liked my IG of it haha. Made my day.
made a mock panel out of MDF I had laying around, this way I can change things if need be. I have it so I can swing it in and out of position so I can check wire lengths but still actually work on it.
we attempted to weld that diff mount I modified... that didn't work
the rubber was catching on fire and the gasses created were blowing holes through the weld pool. So after about halfway we just called it. I'll be buying a Parts Shop Max one later, this is more solid than the stock one still but not a permanent piece.
went to the local ladies craft store and grabbed some foam and did this:
The zap strap will probably not be staying, I'll get a huge worm gear clamp or something, but for now a pair of jumbo zap straps work well. ECU sits in there good, 2 layers of foam made a good snug fit.
seems like every day is a trip to the parts store for some small thing, but I'm making progress. I know theres not much to see but theres a good amount getting done. I keep changing my mind on how to do things, and when I do I stop the portion I'm working on and figure out the changes before actually crimping/soldering/cutting. As I get closer to finished the faster it should all go.
on a slightly different note I think my deadline is well dead. My buddy's most likely going to drive his dads 201x (haha not sure) Mustang instead of his fox body. My car which would be on stock wheels will kinda be out of place without his factory looking-ish Mustang there. So I'm kinda demotivated to get the car finished by then. I suppose the silver lining is less rush and stress which result in a better end result. I can enjoy the wedding and surrounding festivities a little more too I think...
anyway I'll stop rambling and go do more wiring
Thread Starter
Senior Member
Joined: Mar 2015
Posts: 335
Likes: 8
From: Vancouver, BC
05/26/2014
any who llloooooonnnnggg time since an update (ok its been like 2 weeks) so here we go
So the thing with wiring is its very hard to jump into for just a few minutes. So I've been needing to dedicate an entire day or evening in order to get anything accomplished. So after a seriously long weekend and a few late weeknights its pretty much done!!!
so took the engine harness
gutted it like a fish. Ford makes all their harnesses (or they did back in '94) for all options so this m/t harness has auto wires and any other option the car could come with pre-wired. So all that junk came out as well as the emissions junk.

So much better
(lol can't even tell)
I took the time to change a few things tho
The SPOUT pill for setting the timing used to be on the fender of the mustang, but I put it where they go on fox's
much more convenient. My only fear is that the rest of the spout is shielded so if its a problem and I'm getting interference I will shield the re-located wires as well.
also relocated the MAF and IAT sensors
as well as the 02 and transmission wires (no pic tho)
the completed bulkhead connectors
then I made another stop at the race car candy land store
but after I left I realized I should have grabbed another set of those power wire boots, I used these ones for the rear cut off switch. I want some for under the hood as well.
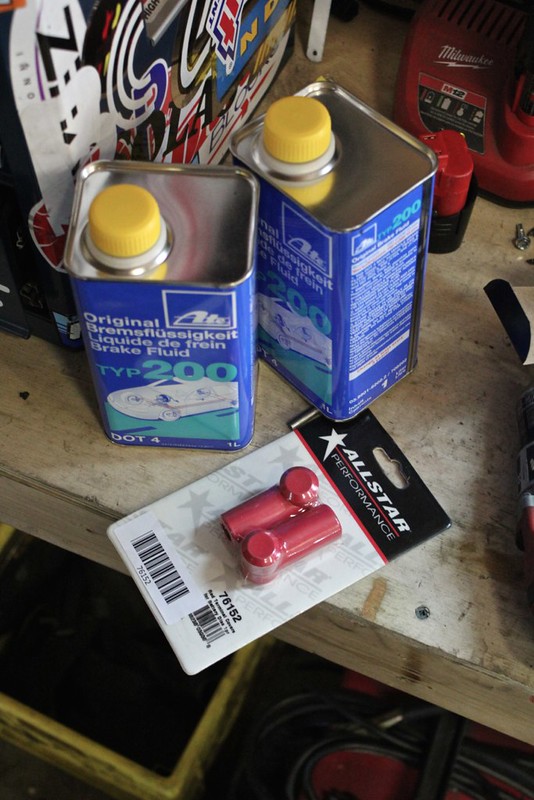
also ATE Typ200 (cuz it was cheaper than blue, blaming you american DOT law thing)
also got this, because I love these things and it was $3

then the wallet started to hurt...
bought the last of the wire I needed (well until I ran out of 8 gauge) we have black 1/0 and ring terminals and heat shrink, 4 gauge, terminals, heat shrink, and 8 gauge, terminals, and heat shrink. Also a quick disconnect for the ignition switch.
And I pulled the trigger after much research and little math on what size master to use for the clutch. Went 7/8ths, which is supposed to be quite ideal.
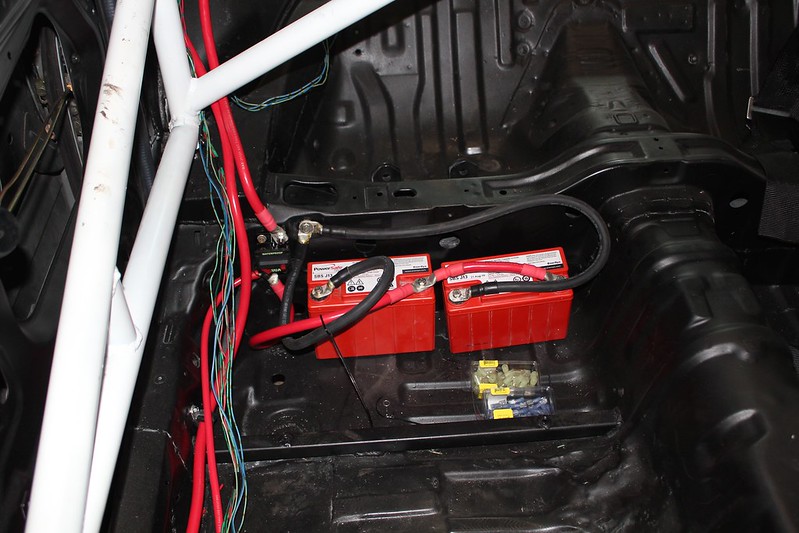
finished up the battery area, well minus the box for them. Going to build and get one welded, but all in good time.
this was getting out of hand... so I made it prettier (only took like a week)
any who llloooooonnnnggg time since an update (ok its been like 2 weeks) so here we go
So the thing with wiring is its very hard to jump into for just a few minutes. So I've been needing to dedicate an entire day or evening in order to get anything accomplished. So after a seriously long weekend and a few late weeknights its pretty much done!!!
so took the engine harness
gutted it like a fish. Ford makes all their harnesses (or they did back in '94) for all options so this m/t harness has auto wires and any other option the car could come with pre-wired. So all that junk came out as well as the emissions junk.
So much better
(lol can't even tell)
I took the time to change a few things tho
The SPOUT pill for setting the timing used to be on the fender of the mustang, but I put it where they go on fox's
much more convenient. My only fear is that the rest of the spout is shielded so if its a problem and I'm getting interference I will shield the re-located wires as well.
also relocated the MAF and IAT sensors
as well as the 02 and transmission wires (no pic tho)
the completed bulkhead connectors
then I made another stop at the race car candy land store
but after I left I realized I should have grabbed another set of those power wire boots, I used these ones for the rear cut off switch. I want some for under the hood as well.
also ATE Typ200 (cuz it was cheaper than blue, blaming you american DOT law thing)
also got this, because I love these things and it was $3
then the wallet started to hurt...
bought the last of the wire I needed (well until I ran out of 8 gauge) we have black 1/0 and ring terminals and heat shrink, 4 gauge, terminals, heat shrink, and 8 gauge, terminals, and heat shrink. Also a quick disconnect for the ignition switch.
And I pulled the trigger after much research and little math on what size master to use for the clutch. Went 7/8ths, which is supposed to be quite ideal.
finished up the battery area, well minus the box for them. Going to build and get one welded, but all in good time.
this was getting out of hand... so I made it prettier (only took like a week)
Thread Starter
Senior Member
Joined: Mar 2015
Posts: 335
Likes: 8
From: Vancouver, BC

still have a little more tiding to do, but the wipers aren't working and neither are my head light motors, so some de bugging will have to occur.
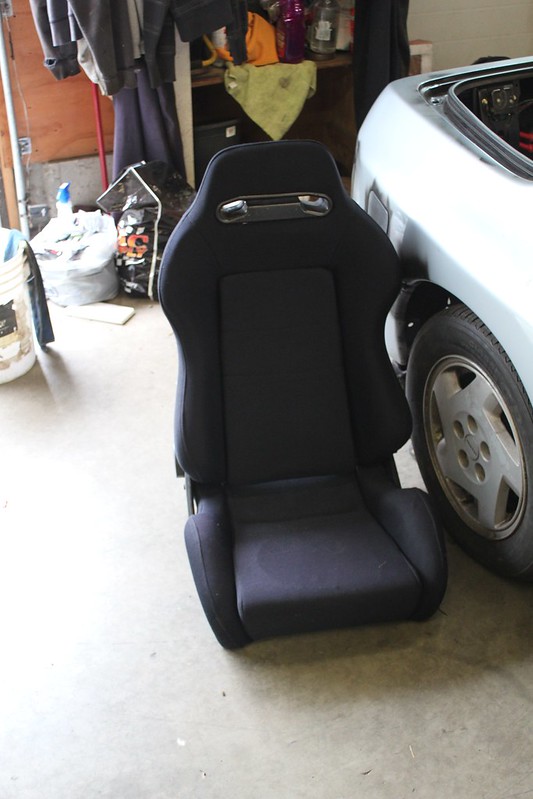
got me a passenger seat finally. Well technically I still have to pay for it lol. Need to fab a mounting bracket for it and buy another 5 point belt.
The day this things runs I'm booking the windshield appointment. Its still going to be madness for the next 2 weeks at least doing all the small things. But to have the lights and things working is a huge motivator!
Thread Starter
Senior Member
Joined: Mar 2015
Posts: 335
Likes: 8
From: Vancouver, BC
06/04/2014
got some work done, and a few from the day before
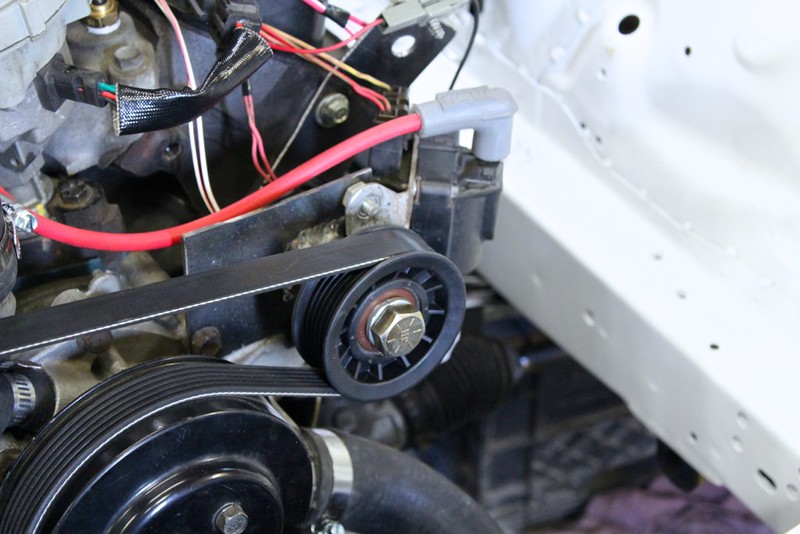
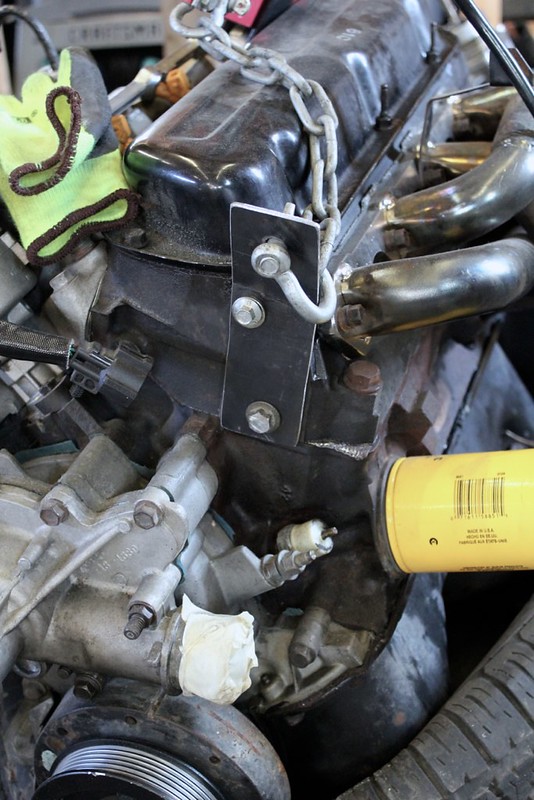
got the belt system figured out, well ish. This ghetto fabulous bracket it temporary until I have the time to either do it properly or change the timing cover/water pump setup. But it works well and holds the slightly modified (custom) (just kidding I bent it) ignition coil bracket.
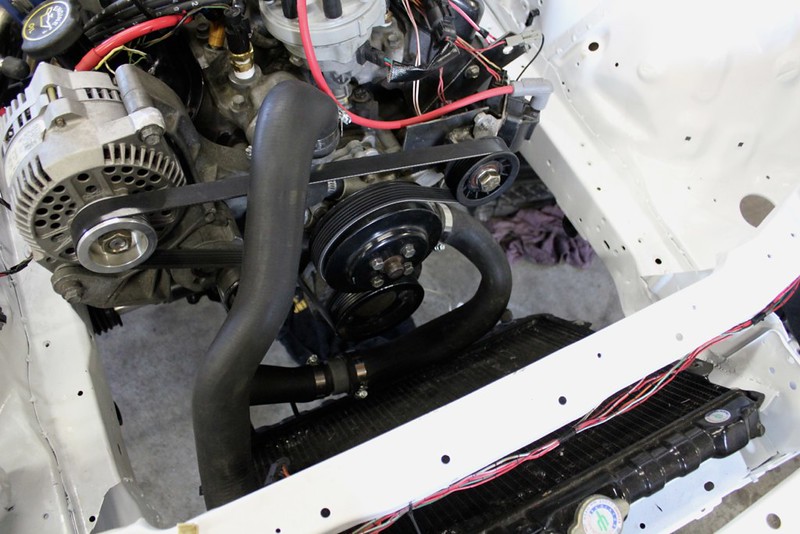
also things I may do over later are the coolant hoses, these are actually the ones from the Sn95 mustang, the bottom one has a 1 1/2" to 2" coupler and a 90 degree bend random hose
rad fan just fits all that business
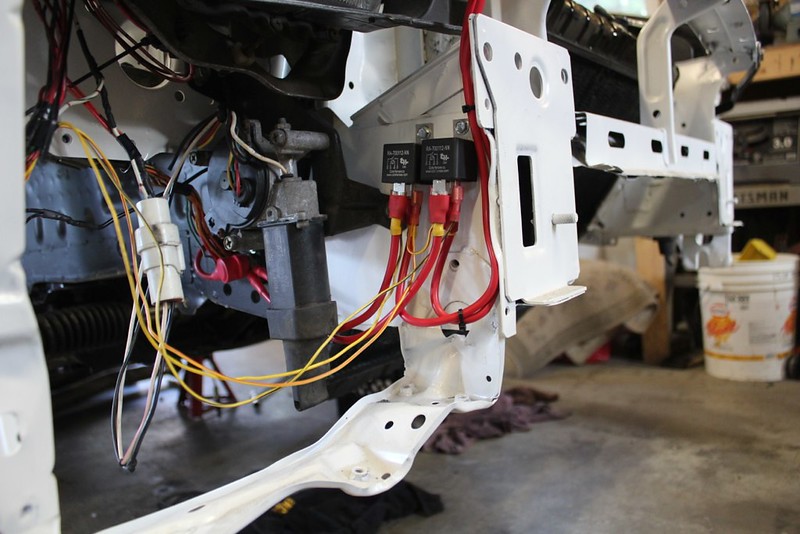
so I finished wiring it in, burned my hand pretty good with dripping solder.
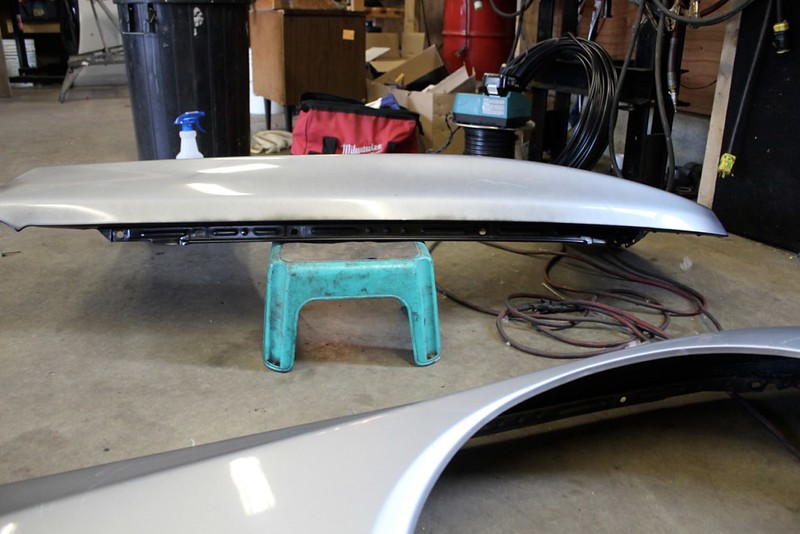
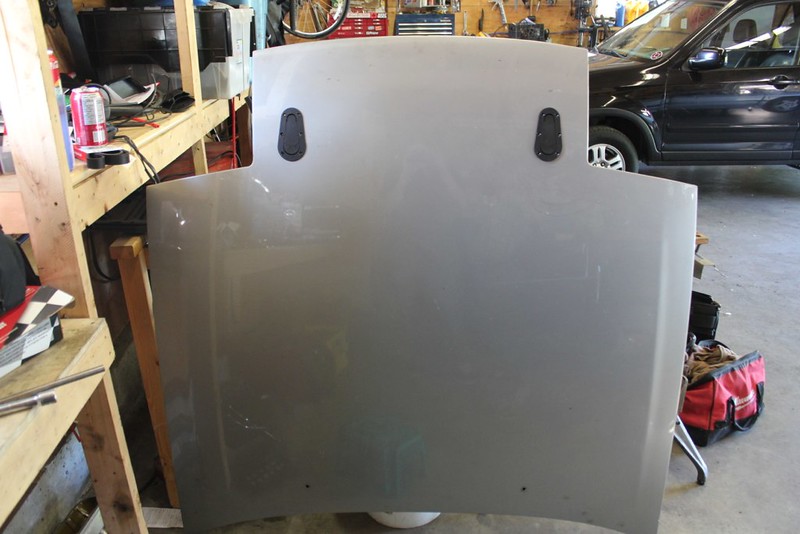
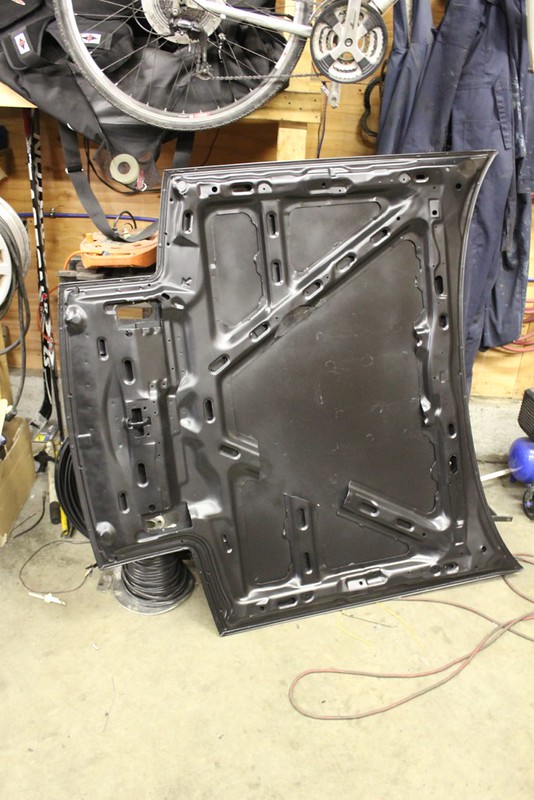
then painted some things, the sunroof
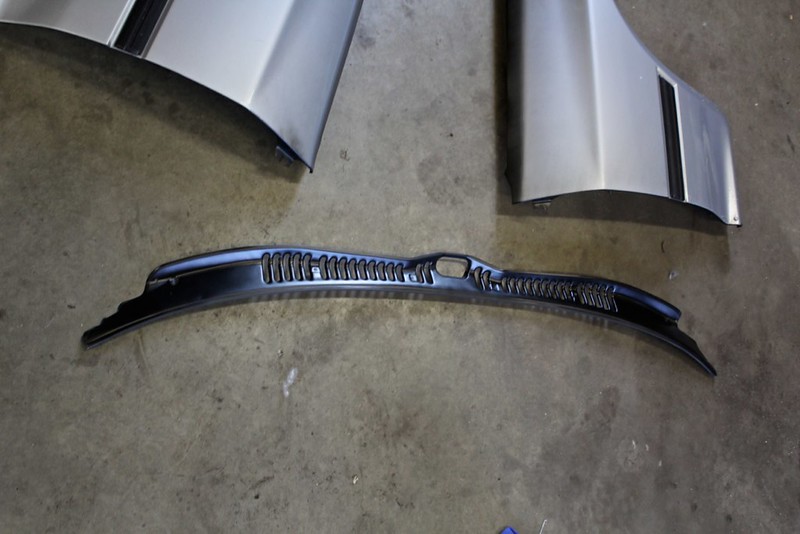
windshield cowl
and the top of the fenders
along with their bolts. I kinda want to get those fancy aluminum ones the Honda kids all have..
then I spent the remainder of the night chatting and fighting with bleeding the brakes. I appear to have air trapped in the lines at a point above the masters. It will build pressure but as soon as I let off its spongy/loose again. Will have to try pumping up the brakes before cracking the bleeder. Or maybe residual valves...
lol I never have good luck with brakes. That said none of my fittings are leaking.. so thats good.
I so just jinxed that
once the brakes are bled its drivable!
got some work done, and a few from the day before
got the belt system figured out, well ish. This ghetto fabulous bracket it temporary until I have the time to either do it properly or change the timing cover/water pump setup. But it works well and holds the slightly modified (custom) (just kidding I bent it) ignition coil bracket.
also things I may do over later are the coolant hoses, these are actually the ones from the Sn95 mustang, the bottom one has a 1 1/2" to 2" coupler and a 90 degree bend random hose
rad fan just fits all that business
so I finished wiring it in, burned my hand pretty good with dripping solder.
then painted some things, the sunroof
windshield cowl
and the top of the fenders
along with their bolts. I kinda want to get those fancy aluminum ones the Honda kids all have..
then I spent the remainder of the night chatting and fighting with bleeding the brakes. I appear to have air trapped in the lines at a point above the masters. It will build pressure but as soon as I let off its spongy/loose again. Will have to try pumping up the brakes before cracking the bleeder. Or maybe residual valves...
lol I never have good luck with brakes. That said none of my fittings are leaking.. so thats good.
I so just jinxed that
once the brakes are bled its drivable!
Thread Starter
Senior Member
Joined: Mar 2015
Posts: 335
Likes: 8
From: Vancouver, BC
06/15/2014
got the brakes mostly bled, still takes a pump to get them useable. buddy has a power bleeder so I may try that. They feel good when they're working tho.
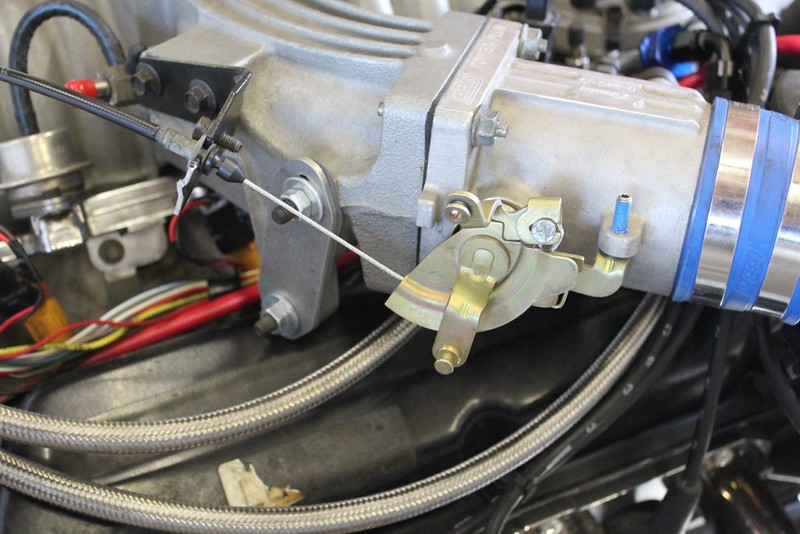
built my throttle cable. Used some aircraft cable and the original mustang cable housing. I cut the old end of the throttle side, drilled a hole and looped the cable through.
then I used the RX7 firewall bushing, had to drill it out and strip the mustang's housing a bit for a perfect wedge fit. then re-used the rx7's end and oem pedal.
only issue i have is the flex brake lines contact the cable a bit under braking. need to fix that. The bracket i made for the pedals to mount to is flexing more than I'd like, so I will probably be bracing that.
mocked the aluminum panel I had CNC'd, some trimming required haha.
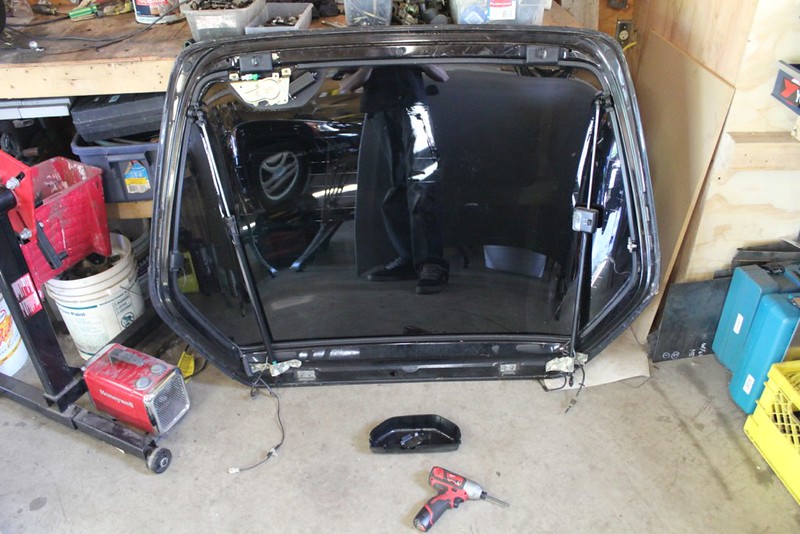
took apart the hatch some (forgot to take an after picture) before putting in on
spent the evening doing the hood pins, then painted it all
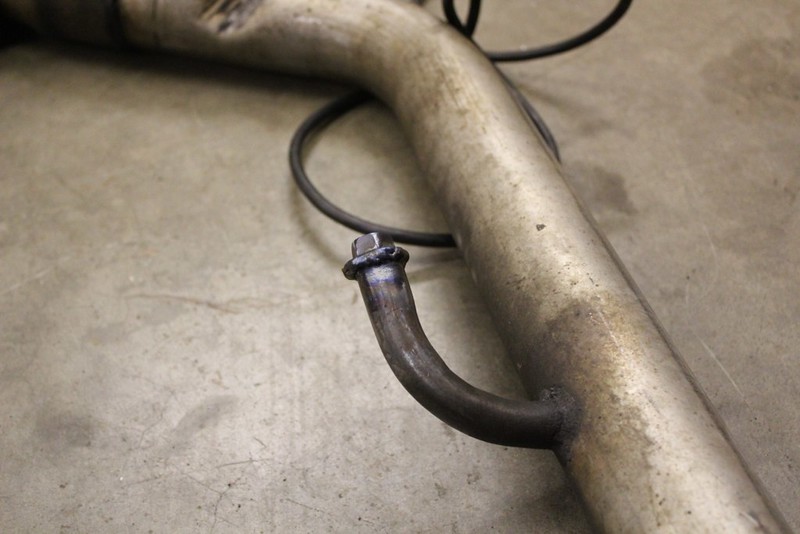
welded up the EGR tube of the x pipe
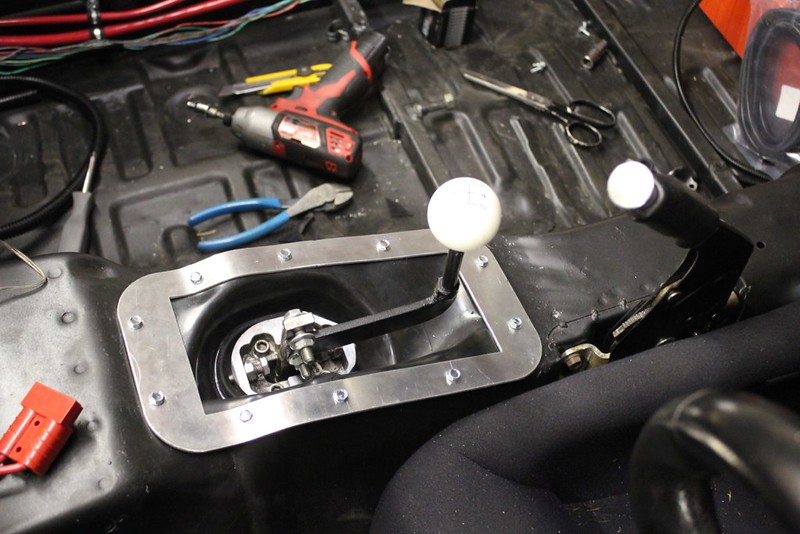
found this stuff at home depot racing to make a shift boot. Roof flashing, pretty strong, heat resistant and comes in many sizes. I went with 3 inch, some trimming required.
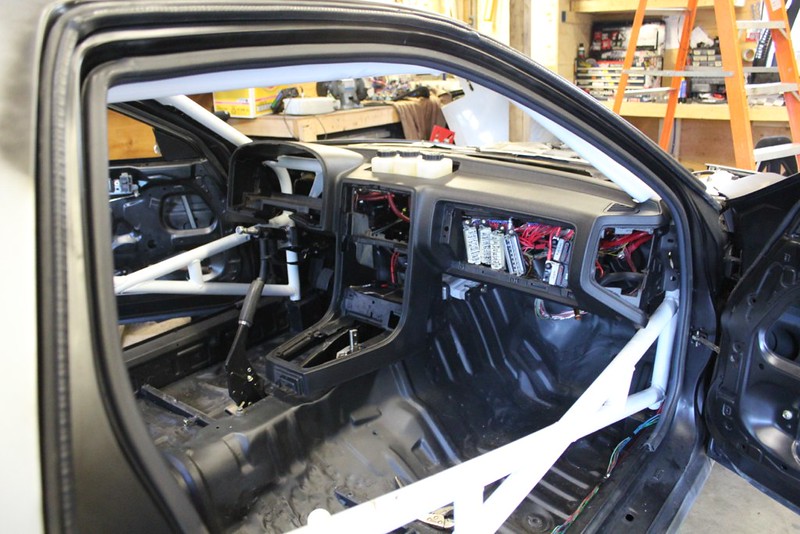
put the dash in
cleaned the windows
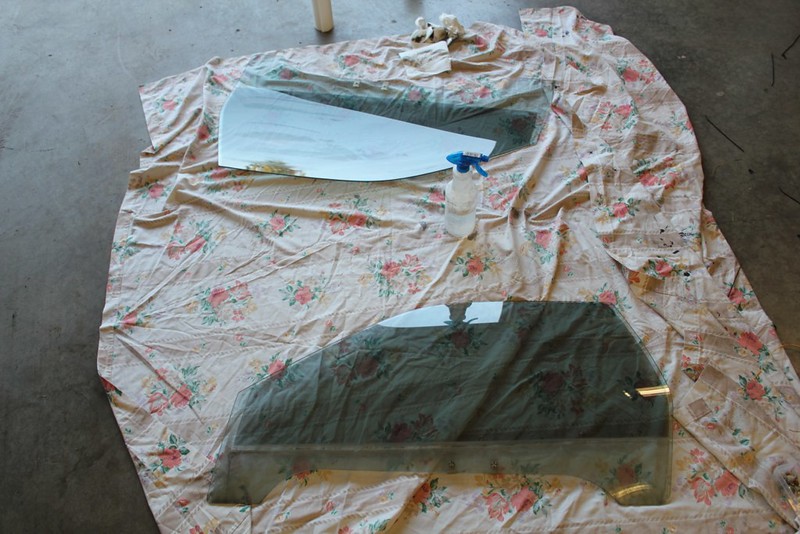
which I forgot were tinted haha
then put them in
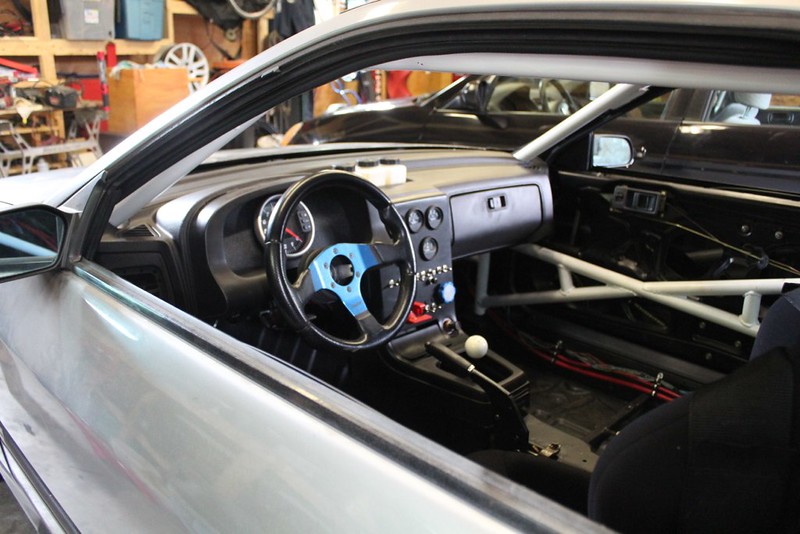
assembled the interior
got the brakes mostly bled, still takes a pump to get them useable. buddy has a power bleeder so I may try that. They feel good when they're working tho.
built my throttle cable. Used some aircraft cable and the original mustang cable housing. I cut the old end of the throttle side, drilled a hole and looped the cable through.
then I used the RX7 firewall bushing, had to drill it out and strip the mustang's housing a bit for a perfect wedge fit. then re-used the rx7's end and oem pedal.
only issue i have is the flex brake lines contact the cable a bit under braking. need to fix that. The bracket i made for the pedals to mount to is flexing more than I'd like, so I will probably be bracing that.
mocked the aluminum panel I had CNC'd, some trimming required haha.
took apart the hatch some (forgot to take an after picture) before putting in on
spent the evening doing the hood pins, then painted it all
welded up the EGR tube of the x pipe
found this stuff at home depot racing to make a shift boot. Roof flashing, pretty strong, heat resistant and comes in many sizes. I went with 3 inch, some trimming required.
put the dash in
cleaned the windows
which I forgot were tinted haha
then put them in
assembled the interior
Thread Starter
Senior Member
Joined: Mar 2015
Posts: 335
Likes: 8
From: Vancouver, BC
and the rest of the body panels
(haha note the wedding gifts)
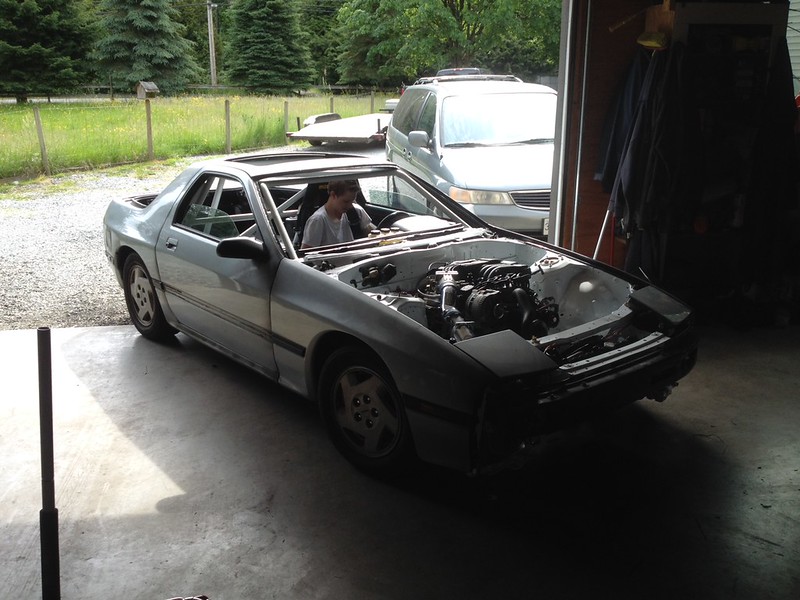
so I think I missed the part where it fired, after setting the timing properly it fired. When I reassembled the engine after cleaning I just threw the distributor in without thinking. So once that was figured out, everything went smooth. All my wiring appears to be working perfect, that said the engine won't rev over 4k under load, so some tweaking will have to happen.
now you're saying to yourself "under load? how would he know that"
well the morning of the stag, we threw the seat in and drove the car around the block!
then the morning of the wedding (week later) I had the rest of the car together and we drove it out. It was raining and I still don't have a windshield in it so driving it for the wedding wasn't optional.
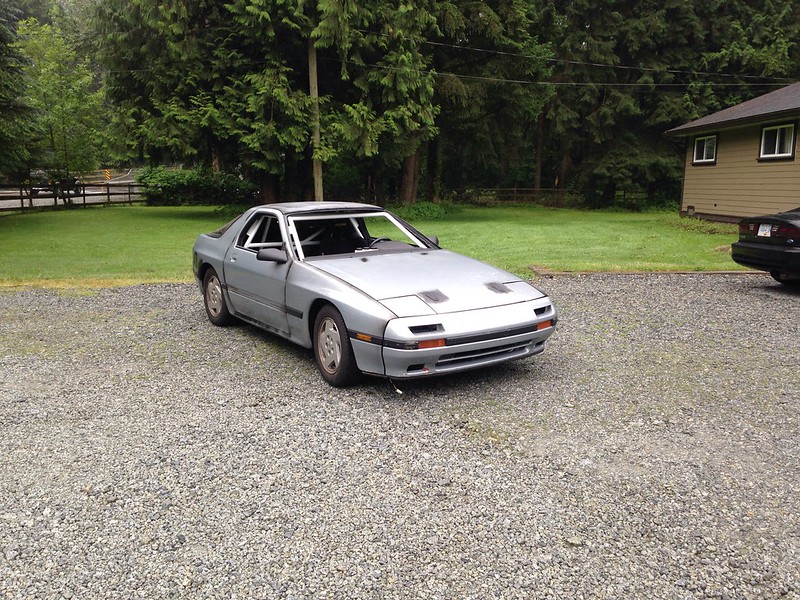
we're counting this as "goal met", even though its not 100%
speaking of the stag
we had a pretty good time. Took a van and a civic up to a local off road area, and chaos ensued.
[IMG]
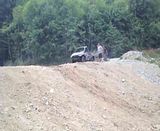
[/IMG]
no, no one was in the van lol. We cut the roof off the night before and painted it up. also disabled the airbags and things. Took the abuse quite well, it did die once because the coil power wire got ripped out. exhaust also had to come off. chain and a tree took care of that.
the civic got the General Lee make over, and after a full day of abuse we fin-allied by driving it into a puddle, hydro locking the engine.
[IMG]
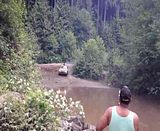
[/IMG]
the original plan was Andy was going to drive the civic in said puddle solo in his underwear. somehow the whole grooms party was roped into this haha.
all in all a great time, a miracle that no one got hurt. Super happy for him as well, as the wedding was yesterday.
so I did work a lot of overtime this week, and it looks like more this coming week. This means I'm ordering wheels
(haha note the wedding gifts)
so I think I missed the part where it fired, after setting the timing properly it fired. When I reassembled the engine after cleaning I just threw the distributor in without thinking. So once that was figured out, everything went smooth. All my wiring appears to be working perfect, that said the engine won't rev over 4k under load, so some tweaking will have to happen.
now you're saying to yourself "under load? how would he know that"
well the morning of the stag, we threw the seat in and drove the car around the block!
then the morning of the wedding (week later) I had the rest of the car together and we drove it out. It was raining and I still don't have a windshield in it so driving it for the wedding wasn't optional.
we're counting this as "goal met", even though its not 100%
speaking of the stag
we had a pretty good time. Took a van and a civic up to a local off road area, and chaos ensued.
[IMG]
[/IMG]
no, no one was in the van lol. We cut the roof off the night before and painted it up. also disabled the airbags and things. Took the abuse quite well, it did die once because the coil power wire got ripped out. exhaust also had to come off. chain and a tree took care of that.
the civic got the General Lee make over, and after a full day of abuse we fin-allied by driving it into a puddle, hydro locking the engine.
[IMG]
[/IMG]
the original plan was Andy was going to drive the civic in said puddle solo in his underwear. somehow the whole grooms party was roped into this haha.
all in all a great time, a miracle that no one got hurt. Super happy for him as well, as the wedding was yesterday.
so I did work a lot of overtime this week, and it looks like more this coming week. This means I'm ordering wheels
Thread Starter
Senior Member
Joined: Mar 2015
Posts: 335
Likes: 8
From: Vancouver, BC
07/04/2014
well I suppose I should update this eh?
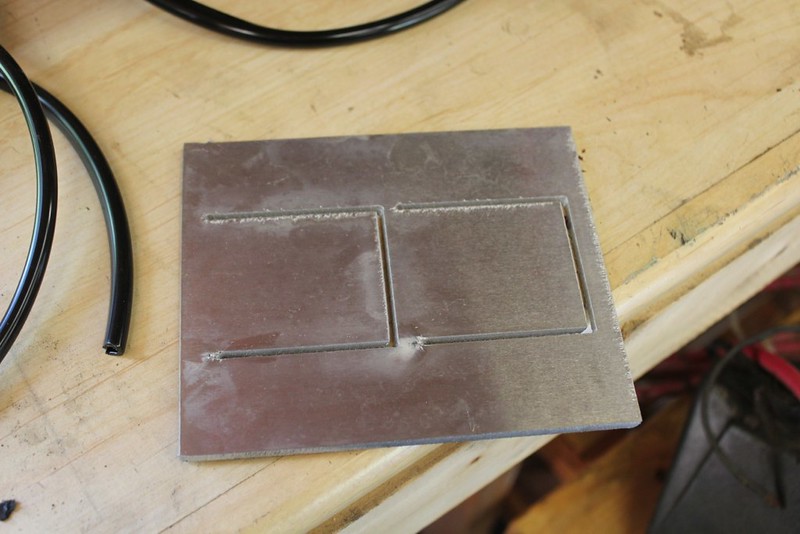
so this is version 2.0 of the plate I had cnc'd in aluminum for the firewall connectors, but it didn't work so great. I have version 3 waiting for me at the shop, so hopefully third tries the charm lol
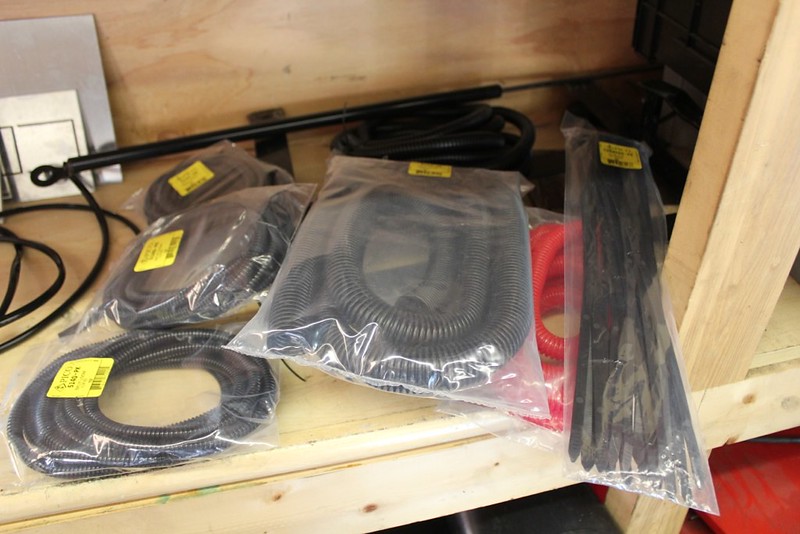
bought a whole bunch of split loom. already been back 4 times for more loom and rubber straps. thus is car projects haha
also got some roll cage padding, so I can stop bashing my head/knees/elbows on hard metal. The SFI stuff is for the head contact areas, and wow I used 3 pieces of it. stuffs expensive compared to the non SFI stuff
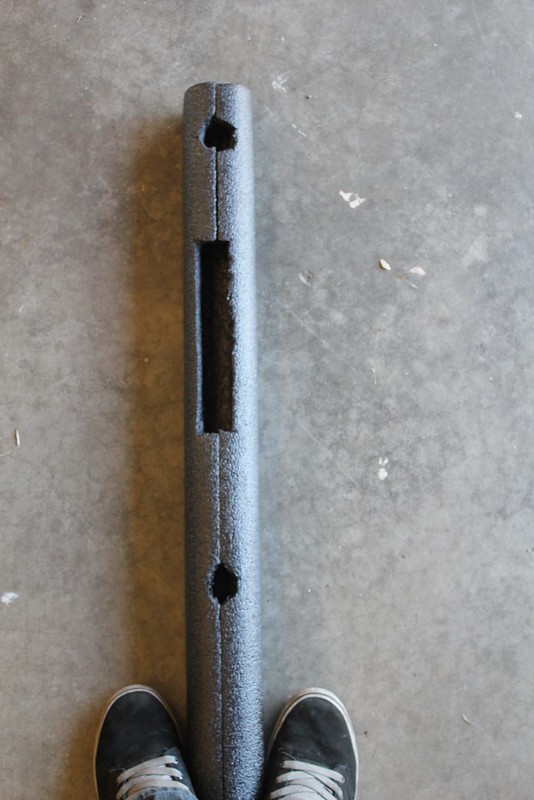
to ensure a good fit around the door bars I trimmed the seam area a little. then I forgot to take a completed picture. rain check

got a D button from a local shop, had to grind down the button a little to make it fit the way I wanted, as the button was s13 fit. minor detail
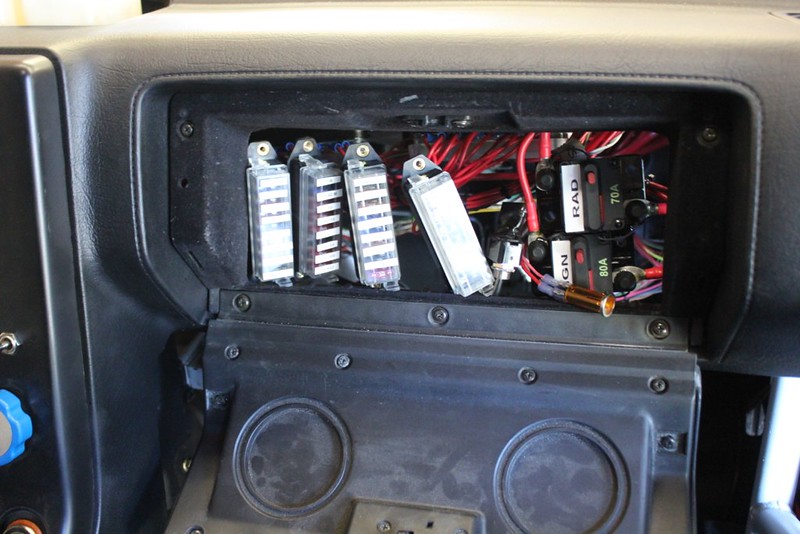
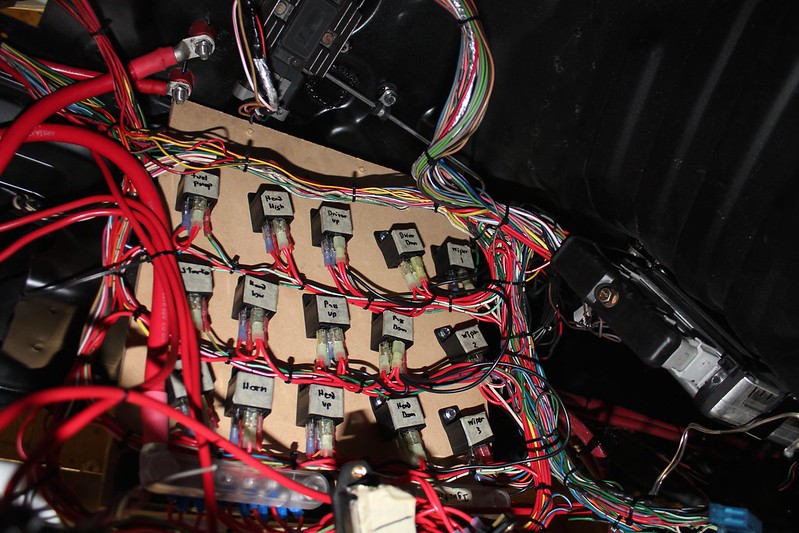
labeled everything. not happy with how it turned out on the fuse holders, but I'll live with it for now
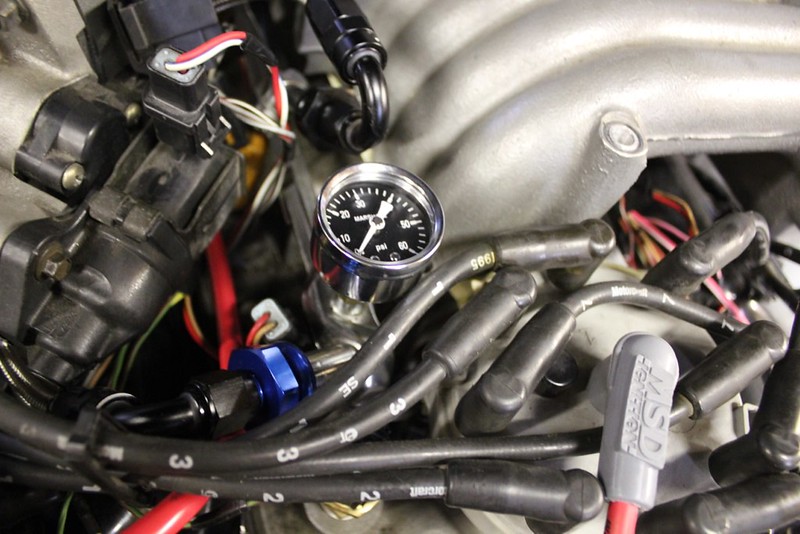
sorry for the bad pic (theres a few of those this time) bought a fuel pressure gauge that mounts on the factory fuel rail's Schrader valve. super cheap and easy with the right adapter.
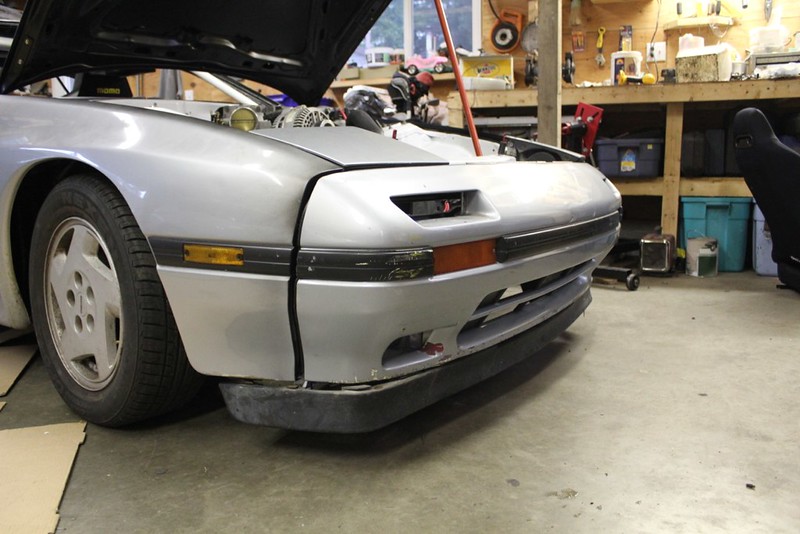
scored a volvo lip from a local, super stoked about this. I've been trying to find one for a while, and the price was good. needs some trimming to make it fit right, but test fit looks good no?
It does go to the back of the fender in front of the wheel, the curve on the front bumper needs work.
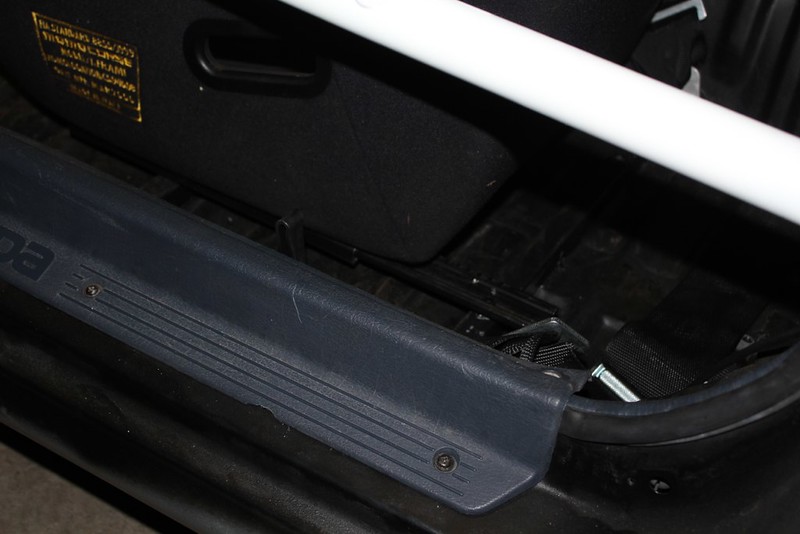
did sills which for the sake of my hands I should have done a long time ago haha. And if you can see it hiding in there the trunk release lever is down there. I had cut off the factory mount when I did the seat rails so I found a hood release from a saturn ion or something for $20. fits good, perfect length.
you can see here I've loomed the trunk area as well as ran the cable for the release. aircraft cable again. may redo it after making it black.
something I am happy with is this! roof flashing and a aluminium piece that took my buddy at the metal supplier/cnc place literally a minute to make. I was impressed.
then fabbed up a seat bracket for the monster sized seat I'm using for the passengers. Its just too big, even the small guys heads are almost touching the roll cage padding. Fit width wise is really tough too.
well I suppose I should update this eh?
so this is version 2.0 of the plate I had cnc'd in aluminum for the firewall connectors, but it didn't work so great. I have version 3 waiting for me at the shop, so hopefully third tries the charm lol
bought a whole bunch of split loom. already been back 4 times for more loom and rubber straps. thus is car projects haha
also got some roll cage padding, so I can stop bashing my head/knees/elbows on hard metal. The SFI stuff is for the head contact areas, and wow I used 3 pieces of it. stuffs expensive compared to the non SFI stuff
to ensure a good fit around the door bars I trimmed the seam area a little. then I forgot to take a completed picture. rain check
got a D button from a local shop, had to grind down the button a little to make it fit the way I wanted, as the button was s13 fit. minor detail
labeled everything. not happy with how it turned out on the fuse holders, but I'll live with it for now
sorry for the bad pic (theres a few of those this time) bought a fuel pressure gauge that mounts on the factory fuel rail's Schrader valve. super cheap and easy with the right adapter.
scored a volvo lip from a local, super stoked about this. I've been trying to find one for a while, and the price was good. needs some trimming to make it fit right, but test fit looks good no?
It does go to the back of the fender in front of the wheel, the curve on the front bumper needs work.
did sills which for the sake of my hands I should have done a long time ago haha. And if you can see it hiding in there the trunk release lever is down there. I had cut off the factory mount when I did the seat rails so I found a hood release from a saturn ion or something for $20. fits good, perfect length.
you can see here I've loomed the trunk area as well as ran the cable for the release. aircraft cable again. may redo it after making it black.
something I am happy with is this! roof flashing and a aluminium piece that took my buddy at the metal supplier/cnc place literally a minute to make. I was impressed.
then fabbed up a seat bracket for the monster sized seat I'm using for the passengers. Its just too big, even the small guys heads are almost touching the roll cage padding. Fit width wise is really tough too.
Thread Starter
Senior Member
Joined: Mar 2015
Posts: 335
Likes: 8
From: Vancouver, BC
but after a lot of aggravation and fighting its bolted in.
shout out to Alex for helping get the gauge cluster mounted again. A long time ago I dropped the dash when cutting it and broke the tabs that mount the cluster on, so no more zap straps.
made up some nifty aluminum brackets and glued them in
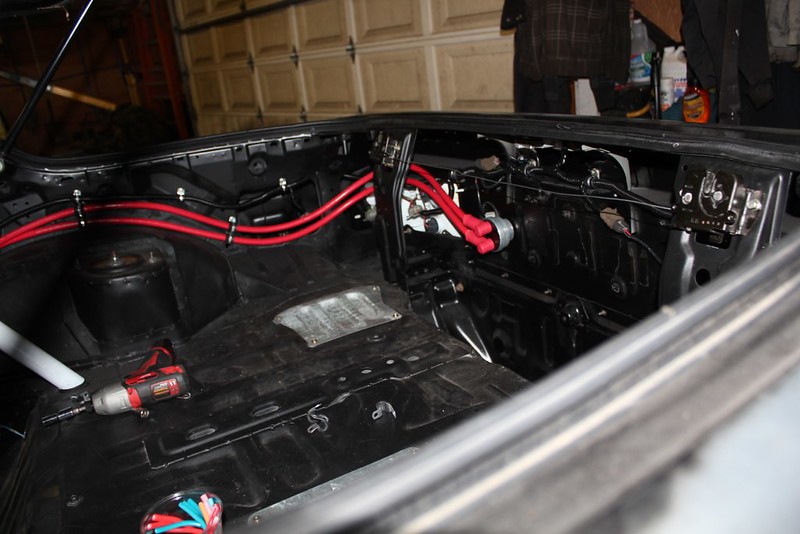
some time not long after my dad accidentally let all the freon out of the truck he was engine swapping, so I called it a night. Got the engine harness loomed first tho.
[IMG[https://farm4.staticflickr.com/3891/...1f3b374d_c.jpg [/IMG]
everything labeled and colour coded. also figured out why the brakes weren't bleeding, loose hose clamps on the masters. those are important as it turns out. It was drawing in air with each stroke. I also relocated the bias adjuster cable, lol when I drove it every time i used the brakes the cable pulled the throttle cable a little. But no more.
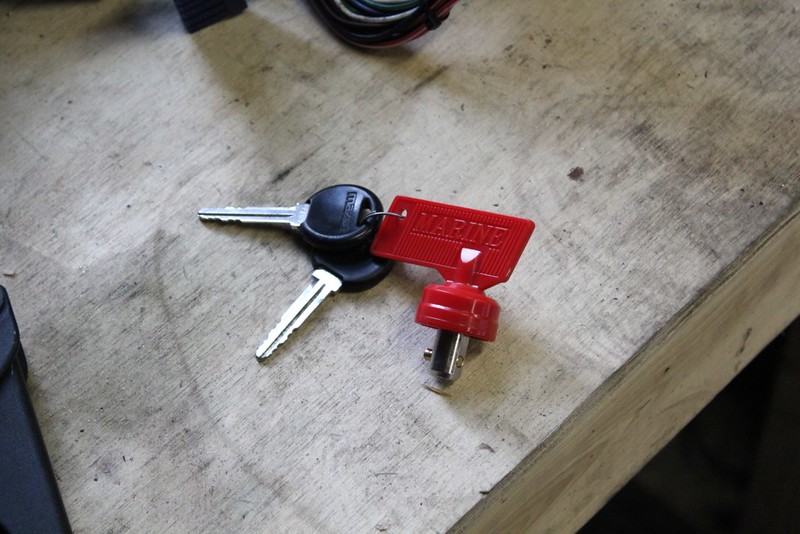
this is my key chain at the moment. kinda like it.
now as I type this I'm pissed off about this panel... its too big. I though I measured it all out carefully etc but when I went to test fit the dash its preventing the fuse panel from going in the right place. So I will be re-doing it, its just a set back I really didn't need...
anyway work has slowed down (finally!) so I can resume working on it after work again. I can also use some of that overtime pay
none of the wheels I want are in stock anywhere.. but its probably better I spend it on getting the car 100% anyway... :rolleyes
Thread Starter
Senior Member
Joined: Mar 2015
Posts: 335
Likes: 8
From: Vancouver, BC
07/15/2014
quick update!
got this all sorted out. pretty happy with how it looks. I may later get a new glove box surround and trim it a little more conservatively but it can wait.
fitted that volvo lip properly. nails the look i was shooting for
got a NRG quick release of my local CL. not super stoked on the "carbon fibre" but i'll live with it.
after like 4 versions I finally have this bulkhead plate working. not 100% on the results yet, but its fine for now.
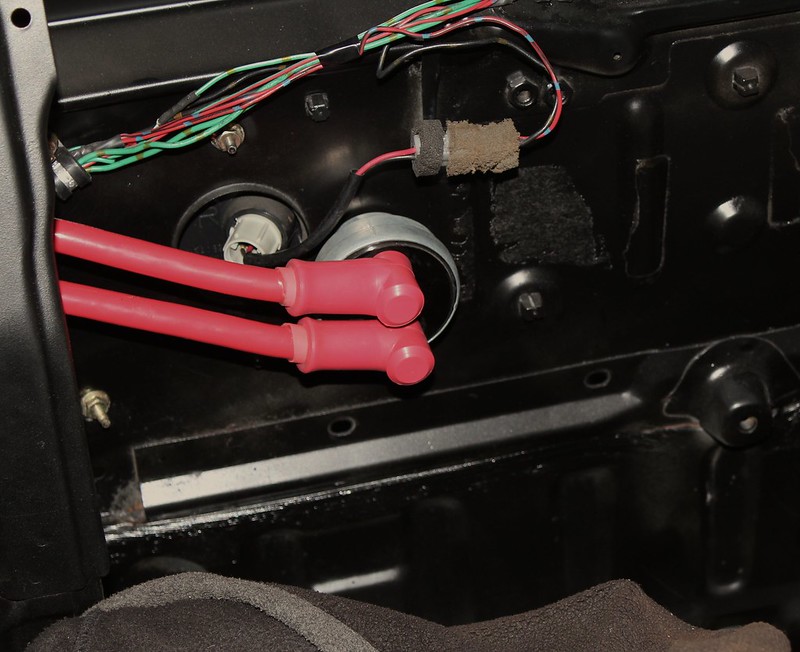
So after messing with the brakes some, I swapped my 7/8ths master from my clutch pedal and put it on the front brakes. once I get the air out of the fronts again (need to bleed after swapping them)(i've figured out how to get them to bleed now) I have adequate brake pressure. the 5/8ths seems to be ideal for the rear brakes so it stayed. The 3/4 is just enough for the clutch. Still a heavy pedal but much more bearable. engages really close to the floor right now so i'll be playing with all the adjusters on it.
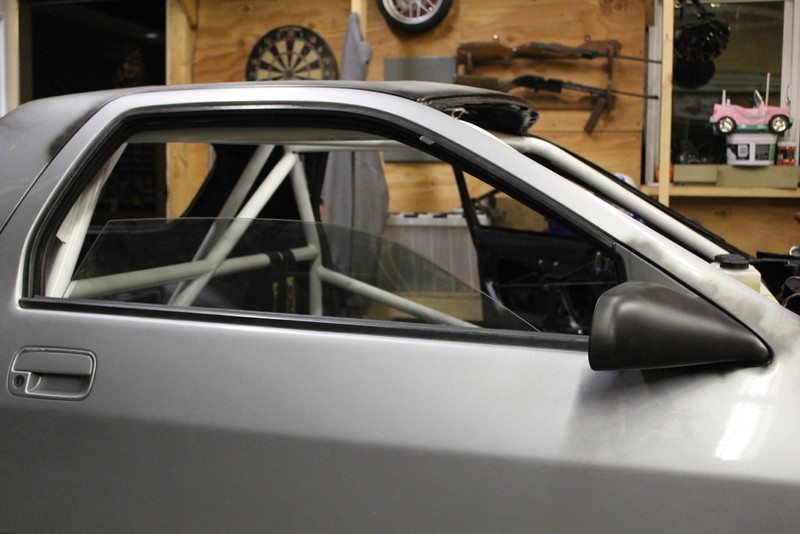
and the windshield got done today! so excited.
however when I was playing with it sunday afternoon it started to overheat. I grabbed a new rad cap and thermostat that I have yet to put in. I'm hoping thats all it is.
quick update!
got this all sorted out. pretty happy with how it looks. I may later get a new glove box surround and trim it a little more conservatively but it can wait.
fitted that volvo lip properly. nails the look i was shooting for
got a NRG quick release of my local CL. not super stoked on the "carbon fibre" but i'll live with it.
after like 4 versions I finally have this bulkhead plate working. not 100% on the results yet, but its fine for now.
So after messing with the brakes some, I swapped my 7/8ths master from my clutch pedal and put it on the front brakes. once I get the air out of the fronts again (need to bleed after swapping them)(i've figured out how to get them to bleed now) I have adequate brake pressure. the 5/8ths seems to be ideal for the rear brakes so it stayed. The 3/4 is just enough for the clutch. Still a heavy pedal but much more bearable. engages really close to the floor right now so i'll be playing with all the adjusters on it.
and the windshield got done today! so excited.
however when I was playing with it sunday afternoon it started to overheat. I grabbed a new rad cap and thermostat that I have yet to put in. I'm hoping thats all it is.
Thread Starter
Senior Member
Joined: Mar 2015
Posts: 335
Likes: 8
From: Vancouver, BC
07/27/2014
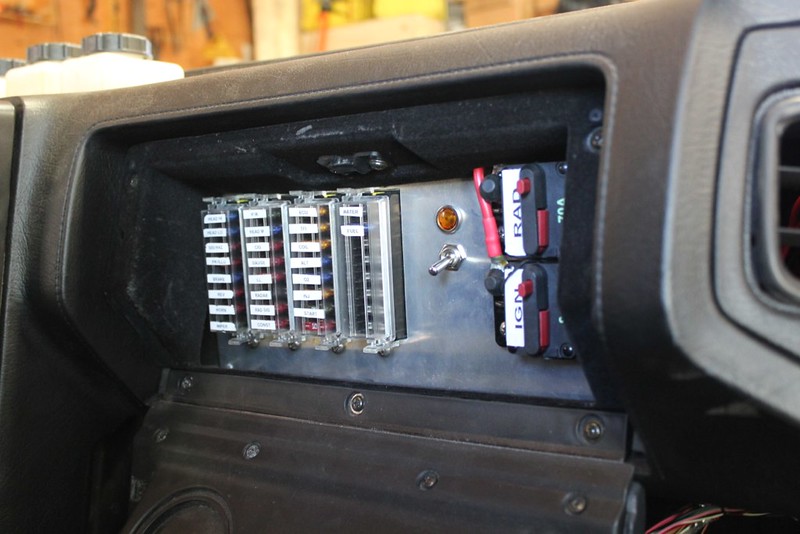
So long overdue but here's a pic of the fuse panel behind the dash. I had to take it with a potato (iPhone) because my camera's lens doesn't go that wide.
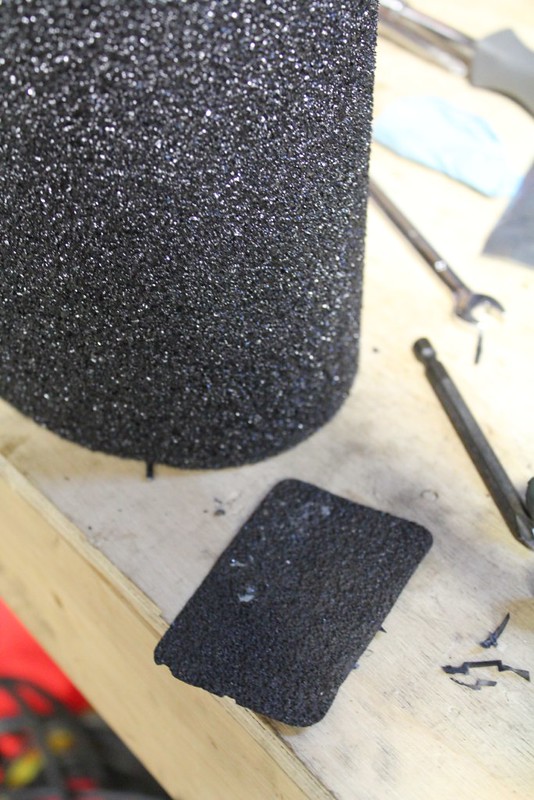
buddy got my some grip tape for long boards, my brake pedal had brake fluid spilled on it and the grip tape fell off
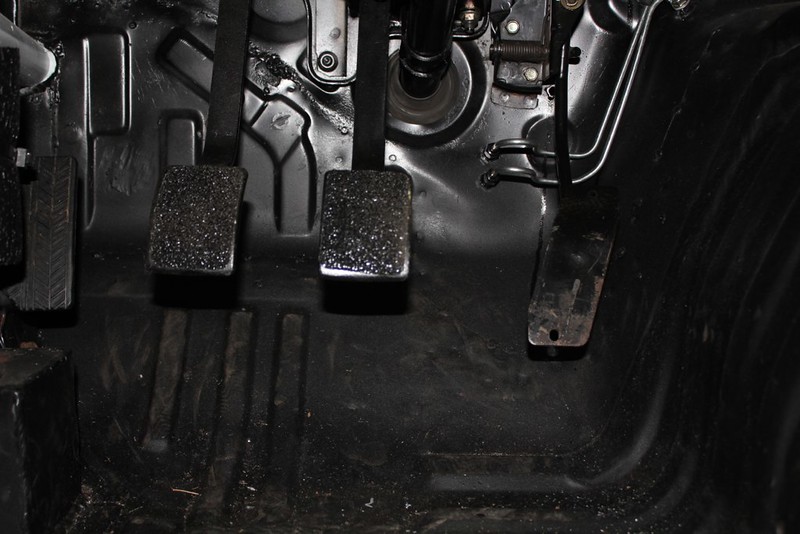
thinking of making a aluminum sheet for below my feet, my shoes keep catching on the bumps in the floor when using the clutch.
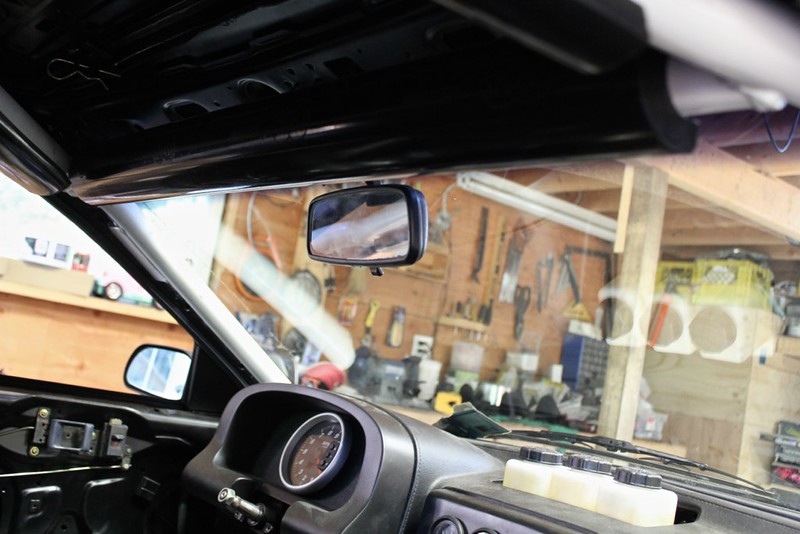
finally put the rear view mirror in
and

I got the ashtray to fit!
requires some grinding of the bottom of it, but I kinda over did it. Theres a hole on the bottom now haha, but it can be done.
also got around to painting my head light assemblies. I know no one will ever see it but OCD won that battle.
so stripped them done, washed and painted
did the covers too
and the headlight motor brackets
and assembled and put them back on

So long overdue but here's a pic of the fuse panel behind the dash. I had to take it with a potato (iPhone) because my camera's lens doesn't go that wide.
buddy got my some grip tape for long boards, my brake pedal had brake fluid spilled on it and the grip tape fell off
thinking of making a aluminum sheet for below my feet, my shoes keep catching on the bumps in the floor when using the clutch.
finally put the rear view mirror in
and
I got the ashtray to fit!
requires some grinding of the bottom of it, but I kinda over did it. Theres a hole on the bottom now haha, but it can be done.
also got around to painting my head light assemblies. I know no one will ever see it but OCD won that battle.
so stripped them done, washed and painted
did the covers too
and the headlight motor brackets
and assembled and put them back on
Thread Starter
Senior Member
Joined: Mar 2015
Posts: 335
Likes: 8
From: Vancouver, BC
also put in some decent lamps, I've used these in my probe gt daily and been quite happy with the output and the pattern
[IMG[https://farm6.staticflickr.com/5571/14774531493_6ac6b4e520_c.jpg[/IMG]
now quite exciting, my buddy with the mustang bought a Moates Quarterhorse tuner to use with his A9P. For what ever reason it won't work with the chip in. So we popped my ECU open and put it in. Then loaded the T4M0's strategy and calibration and what do you know it worked! He's going to sell it to me and buy a Bama chip instead, which works for me.
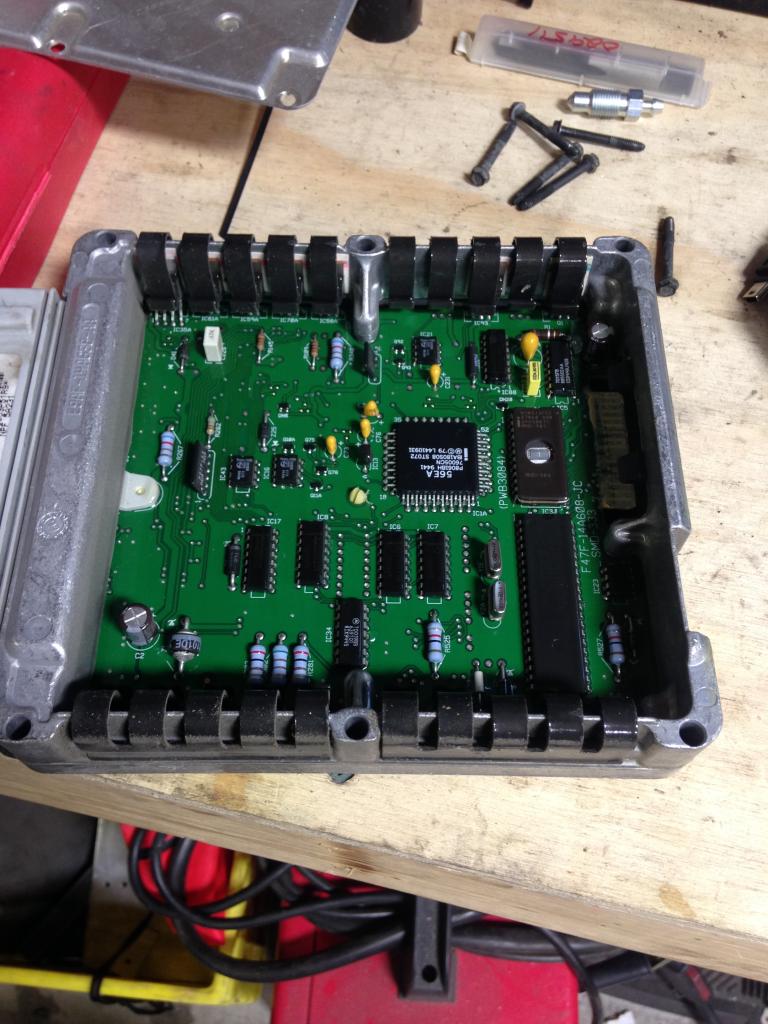
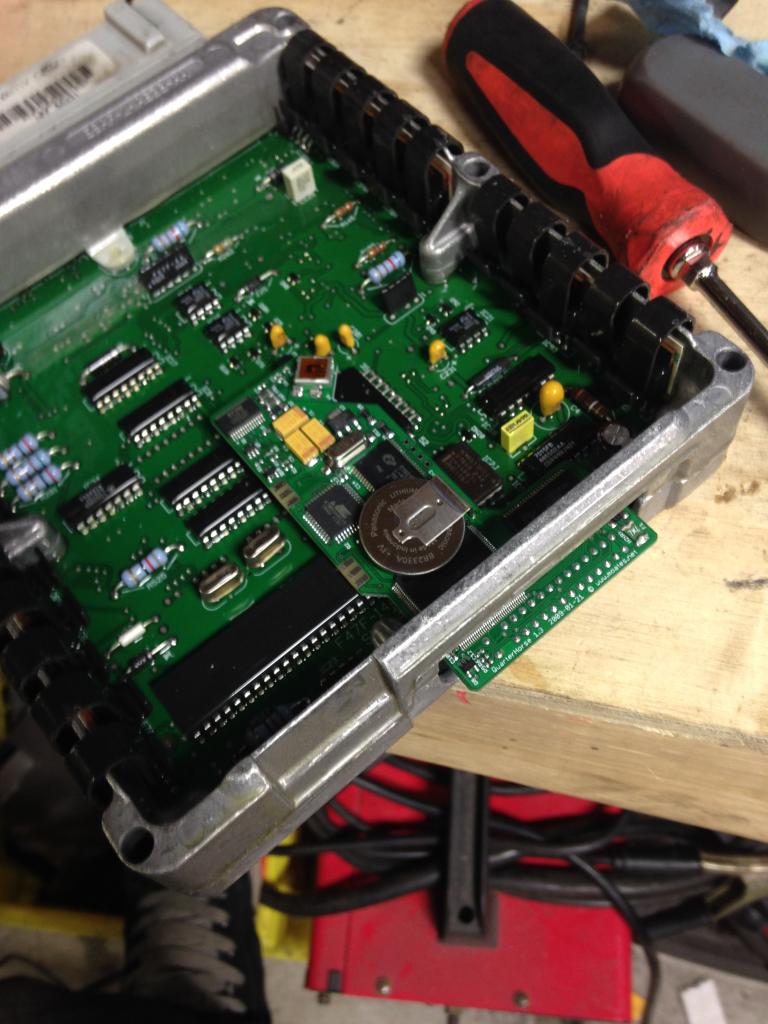
installed the usb cable
and boom
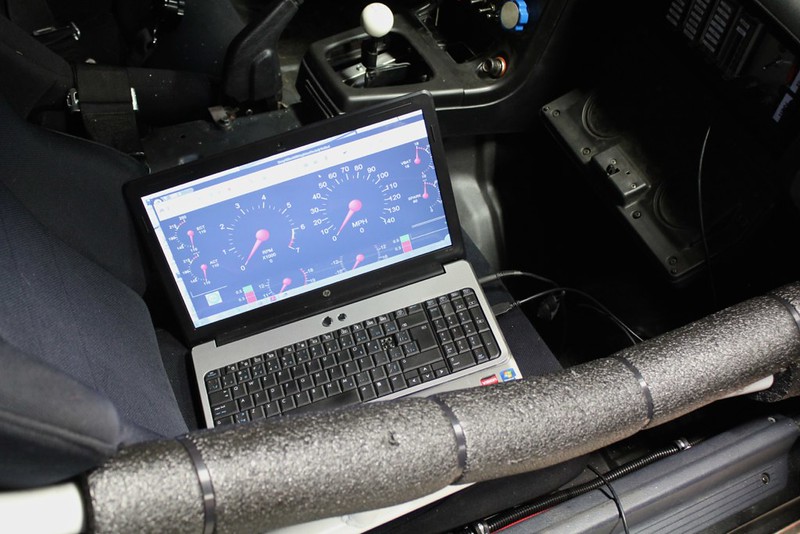
we have tune.
But its disabled until I get a wideband, for the safetys.
even more exciting than that though, I've fixed the broken bleeder!
had to drill out the old one carefully, removing the broken EZ out then drill and tap a bigger bleeder in place. I wasn't positive it was going to work, buuuuutt it did!
and you know what that means can happen?!
ya I drove it.
and yes there was a burnout and a skid.
however,
I had blocked off all the ports, turns out the PCV needs to vent somehow and somewhere, it chose the dipstick. Which blew oil all over the headers, smoking like crazy. Then it began to overheat, so I coasted back into my driveway.
Side note, the 7/8ths brake master on the front is really stiff. Brakes great but I think I'll try the 3/4 again and if thats too light then order a 13/16ths
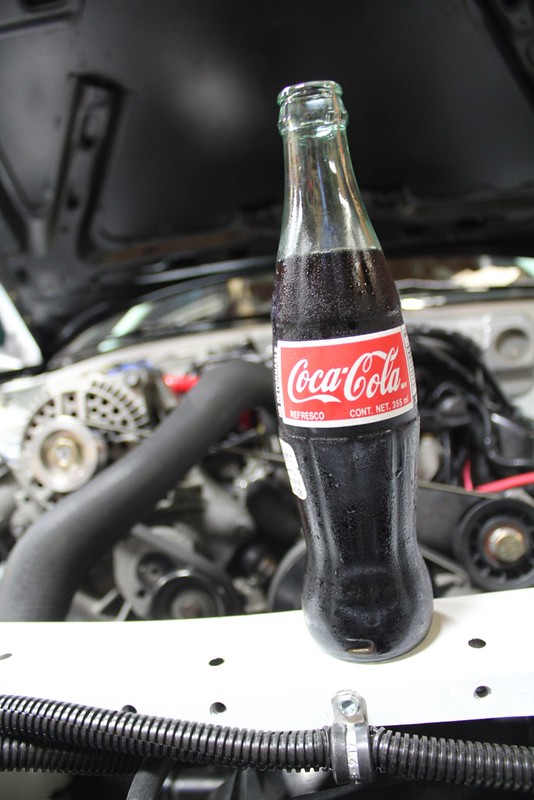
and that marked a great weekend. Glass bottled coke (kinda rare in Canada) marked a great weekend
[IMG[https://farm6.staticflickr.com/5571/14774531493_6ac6b4e520_c.jpg[/IMG]
now quite exciting, my buddy with the mustang bought a Moates Quarterhorse tuner to use with his A9P. For what ever reason it won't work with the chip in. So we popped my ECU open and put it in. Then loaded the T4M0's strategy and calibration and what do you know it worked! He's going to sell it to me and buy a Bama chip instead, which works for me.
installed the usb cable
and boom
we have tune.
But its disabled until I get a wideband, for the safetys.
even more exciting than that though, I've fixed the broken bleeder!
had to drill out the old one carefully, removing the broken EZ out then drill and tap a bigger bleeder in place. I wasn't positive it was going to work, buuuuutt it did!
and you know what that means can happen?!
ya I drove it.
and yes there was a burnout and a skid.
however,
I had blocked off all the ports, turns out the PCV needs to vent somehow and somewhere, it chose the dipstick. Which blew oil all over the headers, smoking like crazy. Then it began to overheat, so I coasted back into my driveway.
Side note, the 7/8ths brake master on the front is really stiff. Brakes great but I think I'll try the 3/4 again and if thats too light then order a 13/16ths
and that marked a great weekend. Glass bottled coke (kinda rare in Canada) marked a great weekend
Thread Starter
Senior Member
Joined: Mar 2015
Posts: 335
Likes: 8
From: Vancouver, BC
08/10/2014
So last monday I put day permits on it and took it down to a local mustang show. Its funny I was less hesitant taking it there than to a Rx7 meet.
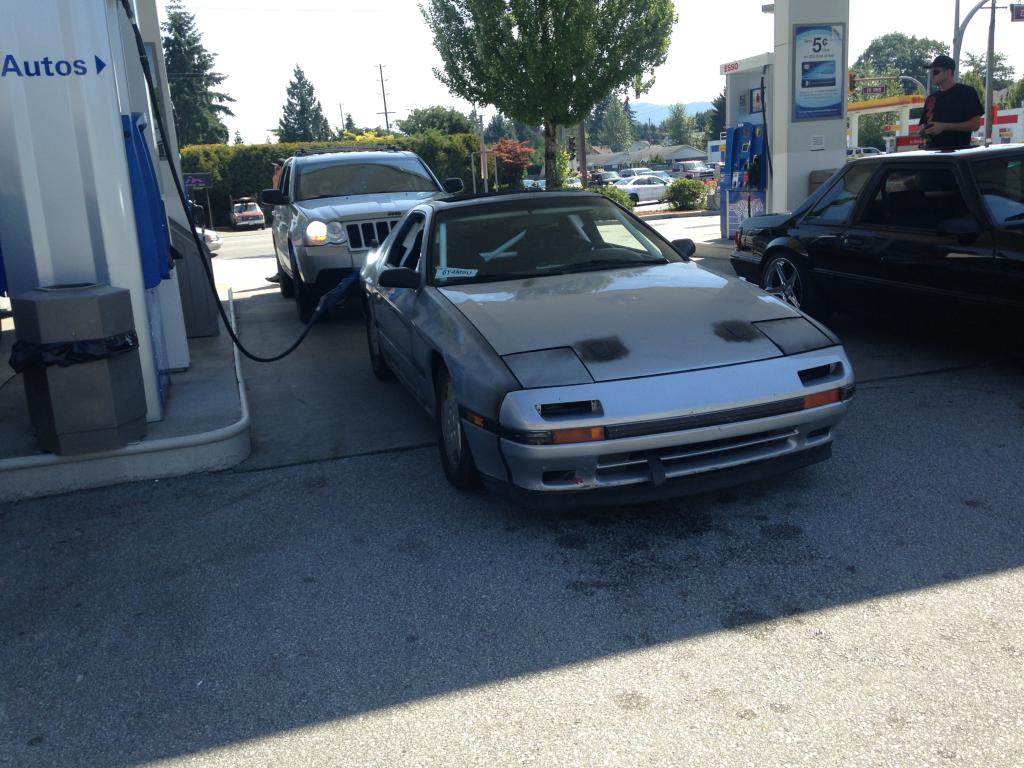
put some good ole premium in, and proceeded to shred tire for an extremely hot afternoon.
Car has no exhaust and next to 0 heat protection, and on a 30* day it was gross inside the cabin. The tunnel/floor must been 60*
but the car handled it well, I haven't broken the diff. Didn't overheat or leak. Needs an alignment and I want to play around with the brakes a little more, pedal effort is super high.
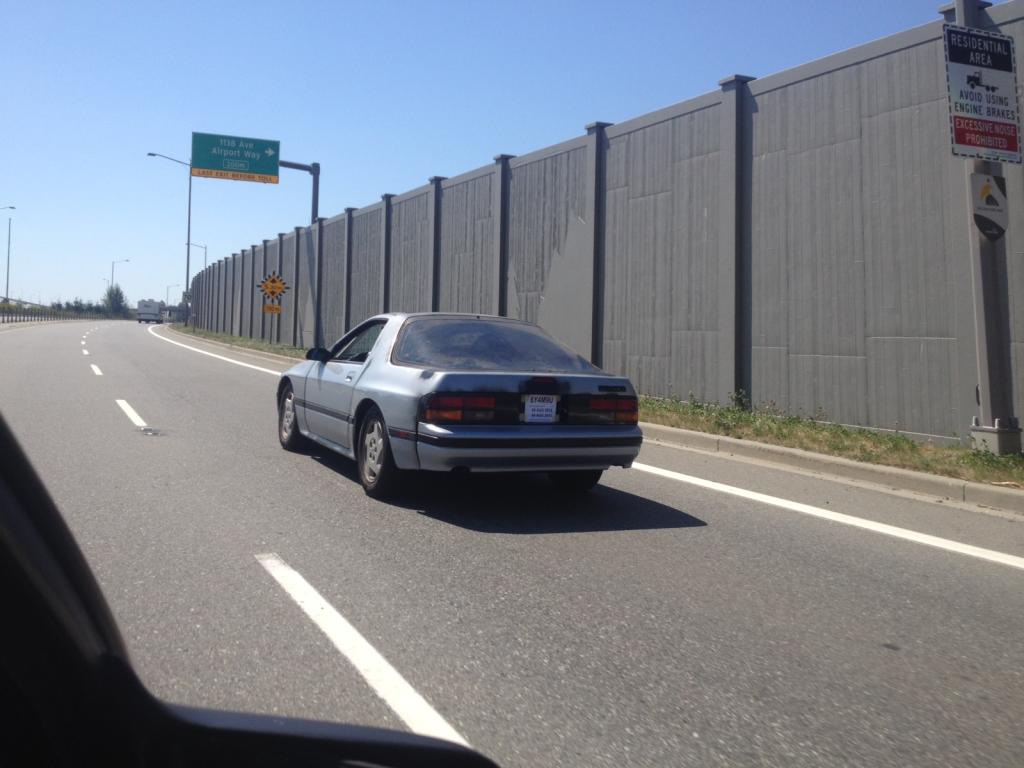
rolled down with a few buddies and a turbo fox, I was hoping moving in a group would hide how loud my exhaust was. but didn't get caught!
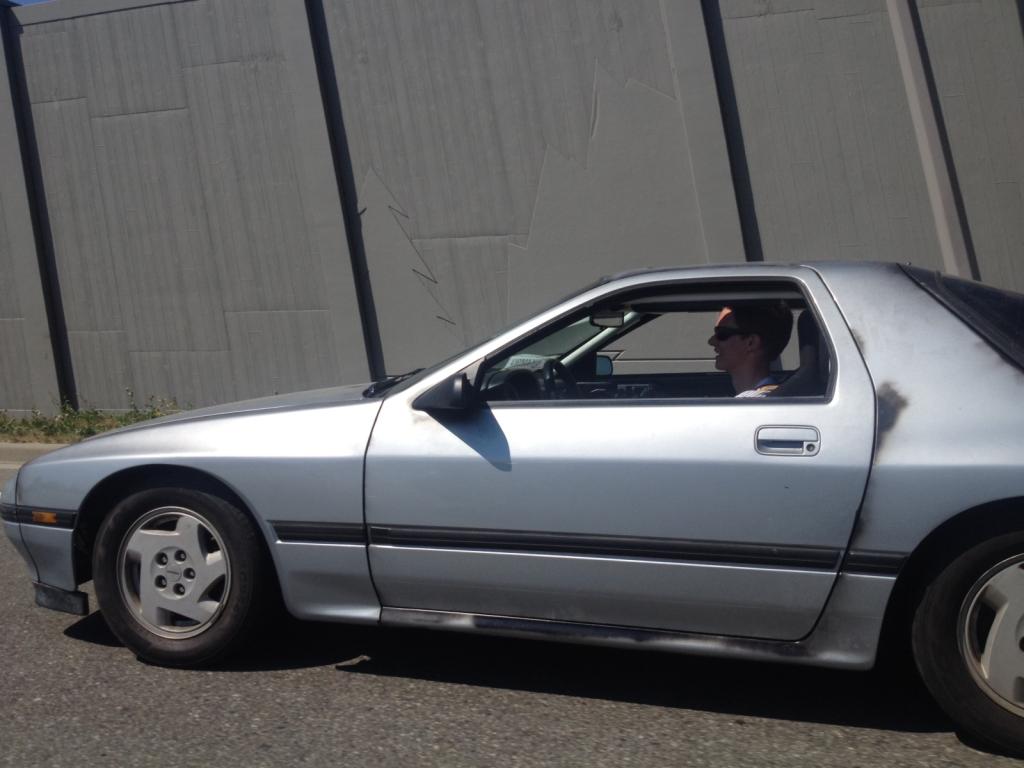
I also need a new passenger mirror
IMG_1377_zps5028644c.mp4
it kinda fell off when I shifted into 2nd. right after this some mustang tried to race me, but he had like 4 ppl in the car so he didn't stand a chance really.
So last monday I put day permits on it and took it down to a local mustang show. Its funny I was less hesitant taking it there than to a Rx7 meet.
put some good ole premium in, and proceeded to shred tire for an extremely hot afternoon.
Car has no exhaust and next to 0 heat protection, and on a 30* day it was gross inside the cabin. The tunnel/floor must been 60*
but the car handled it well, I haven't broken the diff. Didn't overheat or leak. Needs an alignment and I want to play around with the brakes a little more, pedal effort is super high.
rolled down with a few buddies and a turbo fox, I was hoping moving in a group would hide how loud my exhaust was. but didn't get caught!
I also need a new passenger mirror
IMG_1377_zps5028644c.mp4
it kinda fell off when I shifted into 2nd. right after this some mustang tried to race me, but he had like 4 ppl in the car so he didn't stand a chance really.
Thread Starter
Senior Member
Joined: Mar 2015
Posts: 335
Likes: 8
From: Vancouver, BC
09/16/2014
Been working away at the exhaust for the last 3 weeks probably. Its time consuming and I wanted a good fit so I took the time to do it to the best of ability.
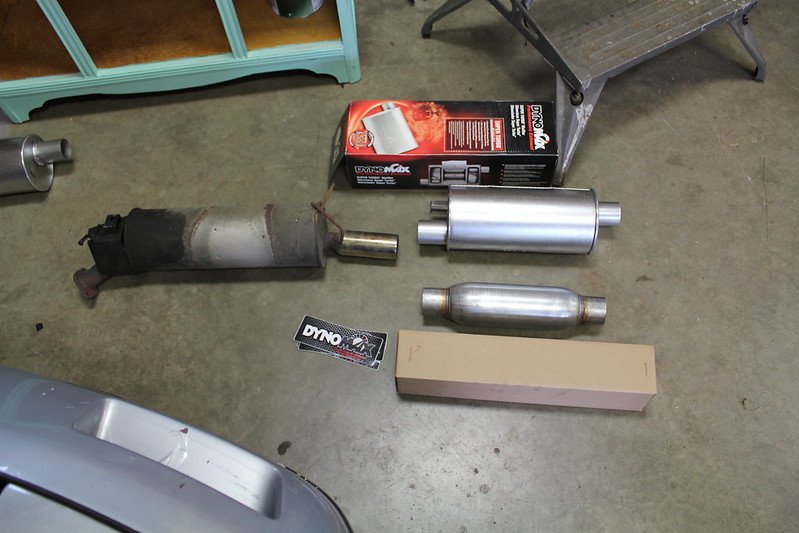
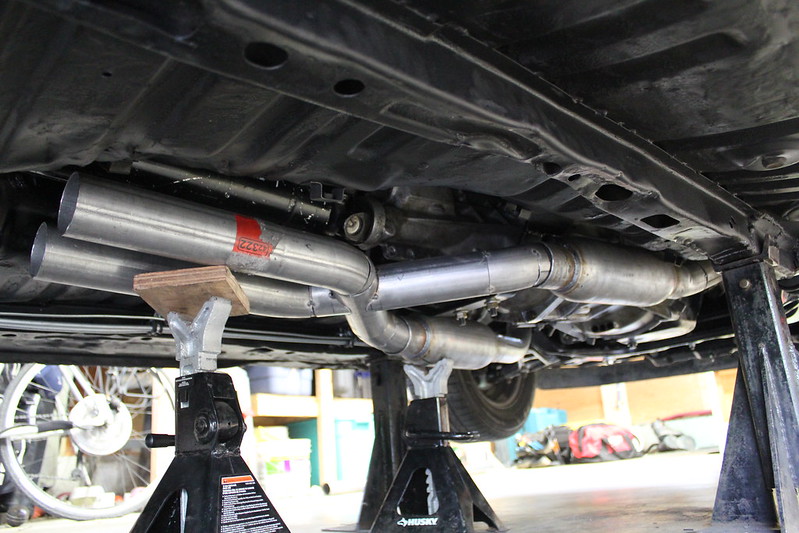
the new mufflers are a bit smaller than the old ones, but they will obviously do better than those rusty things.
so took all the jackstands I could find (no really, I had 4 pairs tied up for this and a jack or two) and mocked the mufflers and went shopping again.
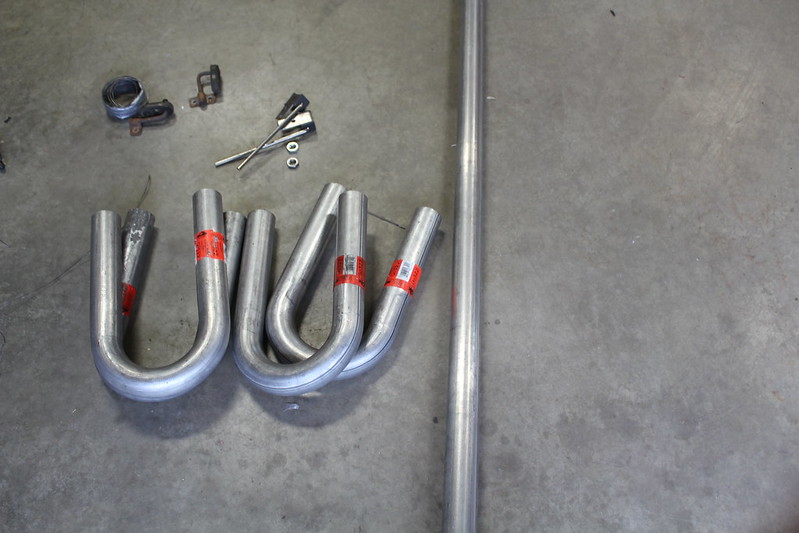
got 4 180* bends, 7ft of 2.5" tubing some hangers and some 02 bungs that I didn't use. They were too short, the 02 stuck in farther than the X pipe I had placed them.
Soooo I made a trip down to a very expensive place also called Mopac; my local speed shop/performance parts place.
got some vibrant ones, which are very nice. stainless steel, thick and the right depth. They were only like a dollar more each than the other ones too
but I also got this when I was there

I've been waiting for them to get their RCI shipment, and I also kinda wanted platinum from the get go. Not only are they silver and cool they can be restitched and rectified when they expire. I got a voucher that I mail in with the harnesses.
Fun fact, the build date on these was for October 2014, a month after I bought them. They do this because they know most of them sit in race cars before being used, so this is a nice way to prolong the SFI certification.
because I cheap I re-used the tips from the previous mufflers
truth is I like them, they are a little subtle though..
I have a pro tip for figuring out the bends required. I don't have a lot of leftover curves from the last custom exhaust I did (because this was my first time doing one) so I grabbed tie wire and bent it to copy the curve on the inside of the 180
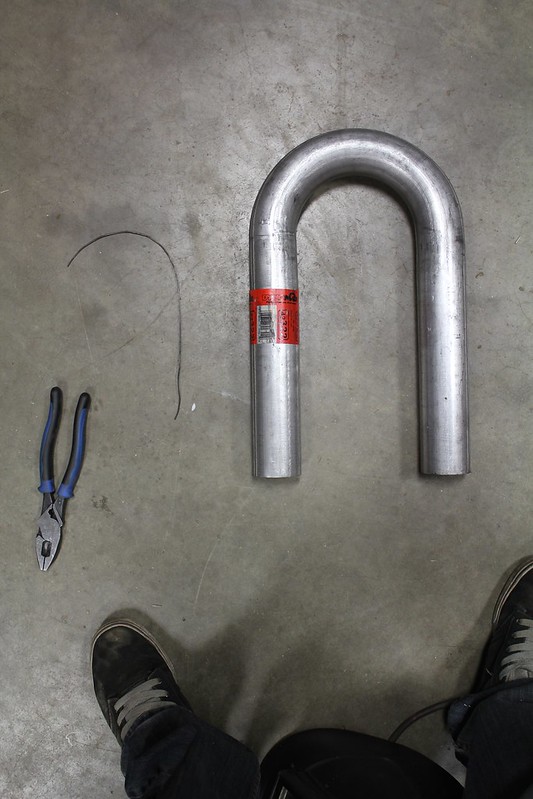
I would make 2 of these and trim them back until they were just fitting between the 2 pieces i had set of jacks. The trick is to remember that your going from the inside of the curve to the inside of the next curve. With this I think I had 2 or 3 mis-cuts (minor ones, and 2 were the last 2 curves i did) from the whole project. I really didn't want to have to buy another 180
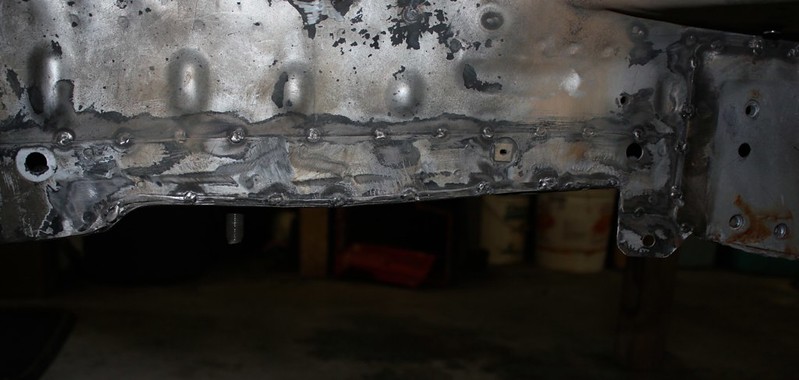
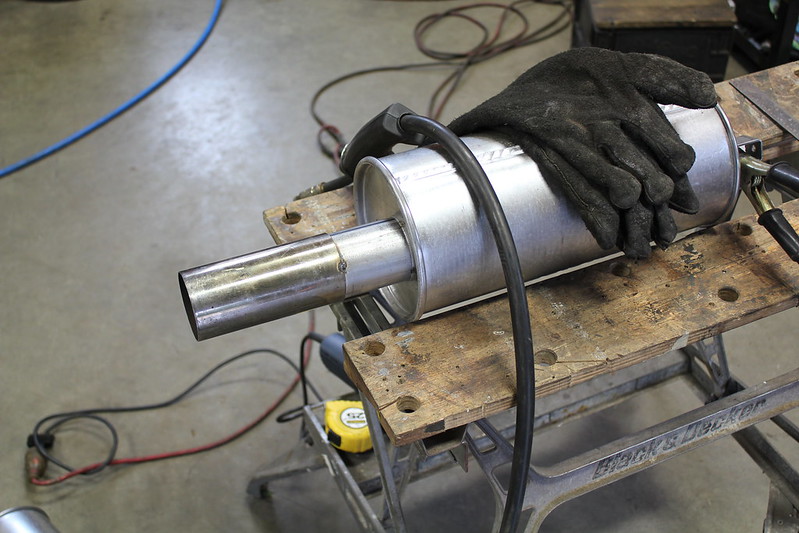
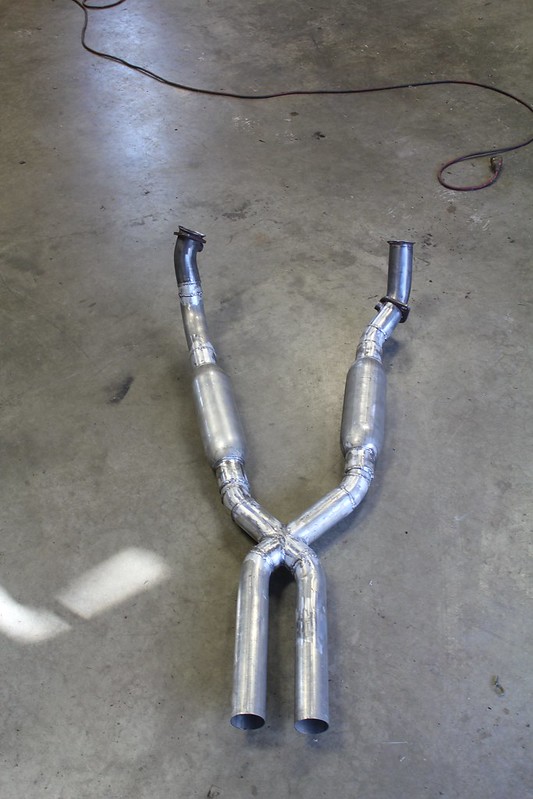
I took some of the straight pip I had and made my own X pipe (this took some serious time, yay angle grinder skillzzz)
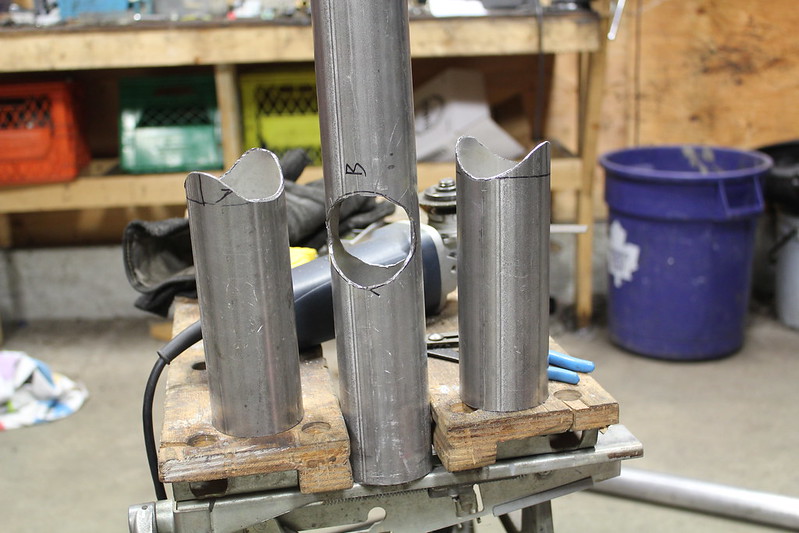
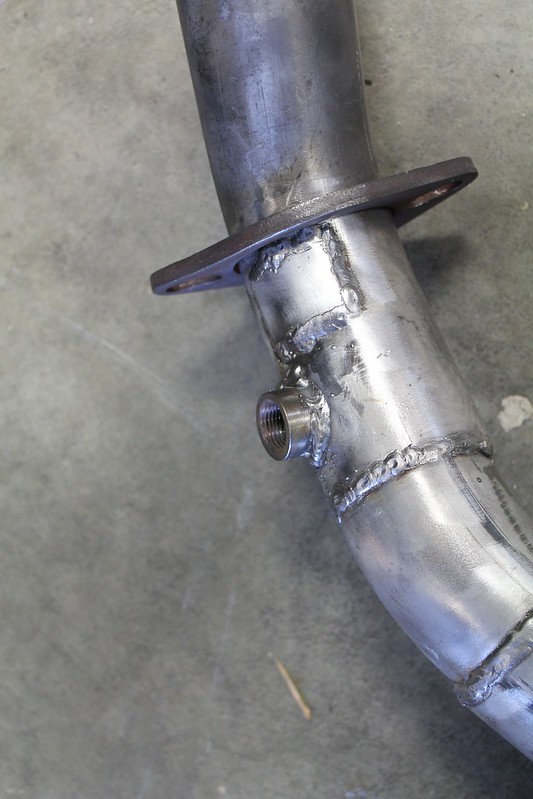
I cut off the ends from the existing X pipe and used that for the flanges and getting it from the headers down.
some time later...
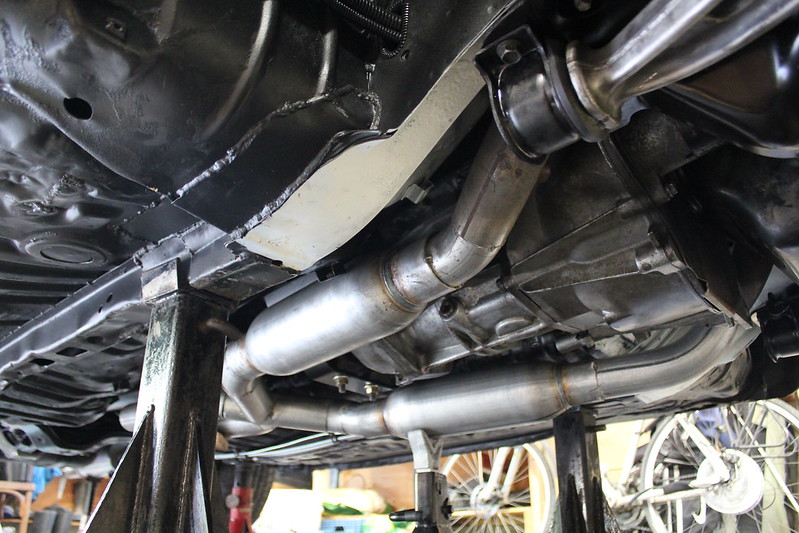
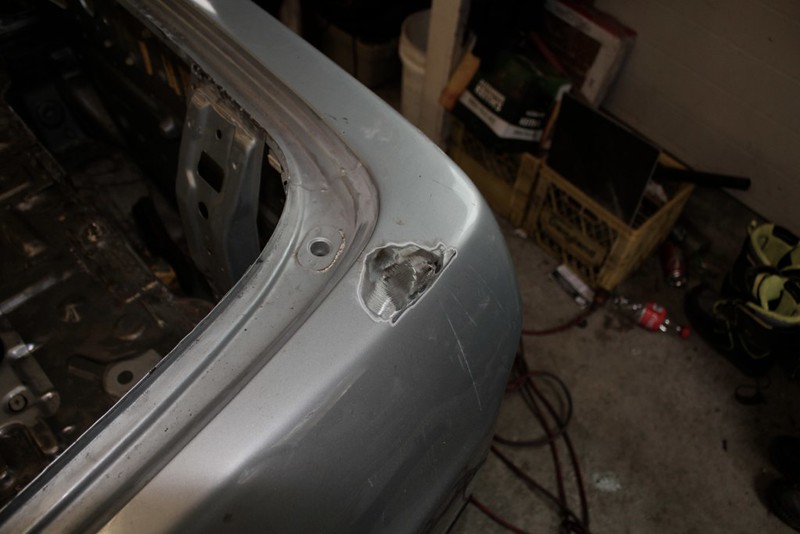
fits as tight as allows, the driver side has the slave cylinder in the way, and the trans crossmember is shaped a little differently than the passenger side, so the muffler was forced t sit about a 1/2" lower.
the unnecessary bits of the clutch fork were also in my way. So that got cut
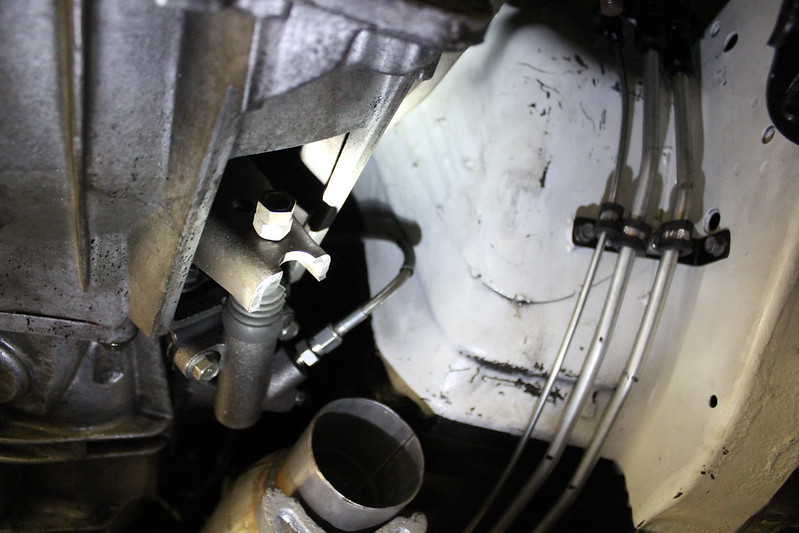
(scratches on the fresh paint. yup)
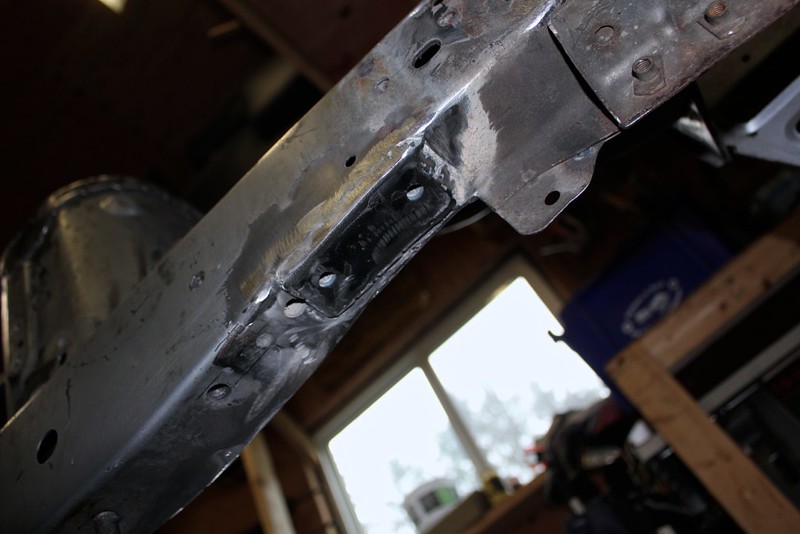
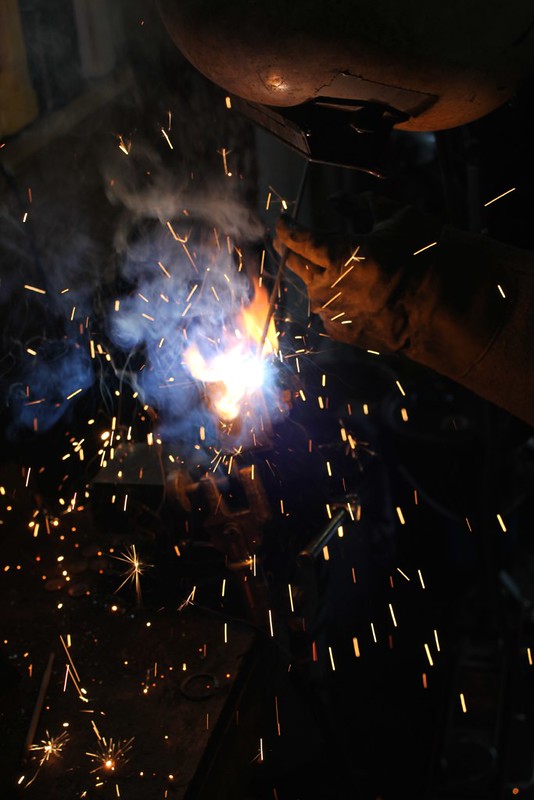
then gave it to my buddy to weld 'er up
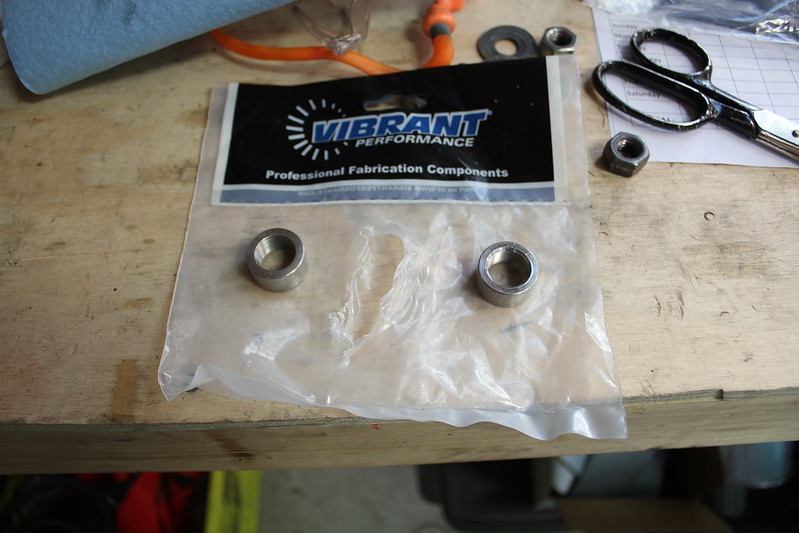
he also did the bungs and the patch from the old 02 which was now hitting the bell house. I also put an extra bung on for a wideband. While I'm here amiright?
Been working away at the exhaust for the last 3 weeks probably. Its time consuming and I wanted a good fit so I took the time to do it to the best of ability.
the new mufflers are a bit smaller than the old ones, but they will obviously do better than those rusty things.
so took all the jackstands I could find (no really, I had 4 pairs tied up for this and a jack or two) and mocked the mufflers and went shopping again.
got 4 180* bends, 7ft of 2.5" tubing some hangers and some 02 bungs that I didn't use. They were too short, the 02 stuck in farther than the X pipe I had placed them.
Soooo I made a trip down to a very expensive place also called Mopac; my local speed shop/performance parts place.
got some vibrant ones, which are very nice. stainless steel, thick and the right depth. They were only like a dollar more each than the other ones too
but I also got this when I was there
I've been waiting for them to get their RCI shipment, and I also kinda wanted platinum from the get go. Not only are they silver and cool they can be restitched and rectified when they expire. I got a voucher that I mail in with the harnesses.
Fun fact, the build date on these was for October 2014, a month after I bought them. They do this because they know most of them sit in race cars before being used, so this is a nice way to prolong the SFI certification.
because I cheap I re-used the tips from the previous mufflers
truth is I like them, they are a little subtle though..
I have a pro tip for figuring out the bends required. I don't have a lot of leftover curves from the last custom exhaust I did (because this was my first time doing one) so I grabbed tie wire and bent it to copy the curve on the inside of the 180
I would make 2 of these and trim them back until they were just fitting between the 2 pieces i had set of jacks. The trick is to remember that your going from the inside of the curve to the inside of the next curve. With this I think I had 2 or 3 mis-cuts (minor ones, and 2 were the last 2 curves i did) from the whole project. I really didn't want to have to buy another 180
I took some of the straight pip I had and made my own X pipe (this took some serious time, yay angle grinder skillzzz)
I cut off the ends from the existing X pipe and used that for the flanges and getting it from the headers down.
some time later...
fits as tight as allows, the driver side has the slave cylinder in the way, and the trans crossmember is shaped a little differently than the passenger side, so the muffler was forced t sit about a 1/2" lower.
the unnecessary bits of the clutch fork were also in my way. So that got cut
(scratches on the fresh paint. yup)
then gave it to my buddy to weld 'er up
he also did the bungs and the patch from the old 02 which was now hitting the bell house. I also put an extra bung on for a wideband. While I'm here amiright?