
4-Rotor FC Build


Thread Starter
Joined: Oct 2010
Posts: 605
Likes: 13
From: The Netherlands
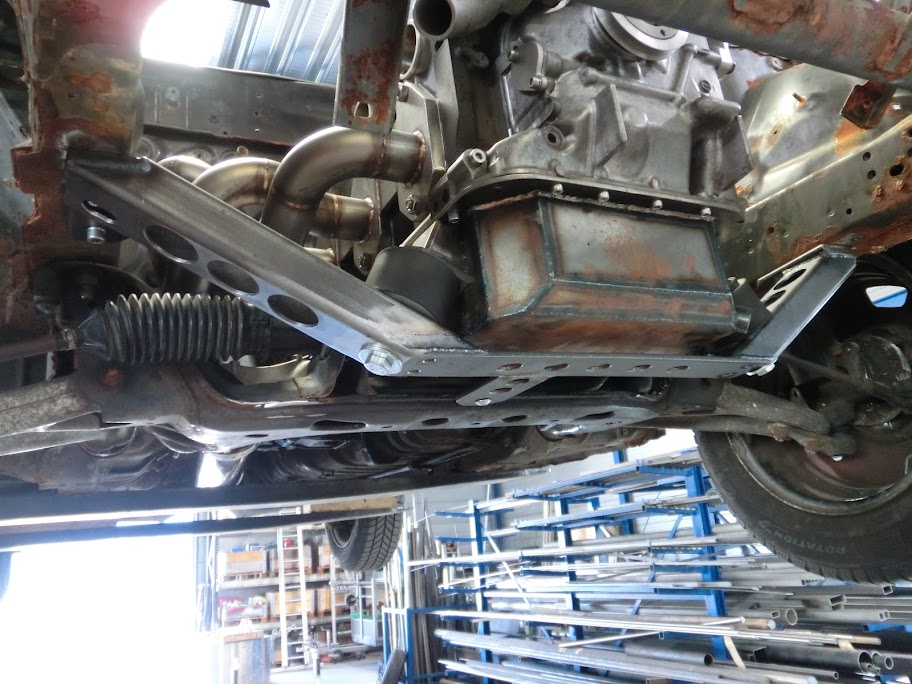
Made a brace that supports the front part of the 4-rotor engine. 2 mounting points were added to the oilpan for the mounting rubbers to bolt on to. The weight of the engine is now evenly divided between the 5 engine mounts.

Thread Starter
Joined: Oct 2010
Posts: 605
Likes: 13
From: The Netherlands
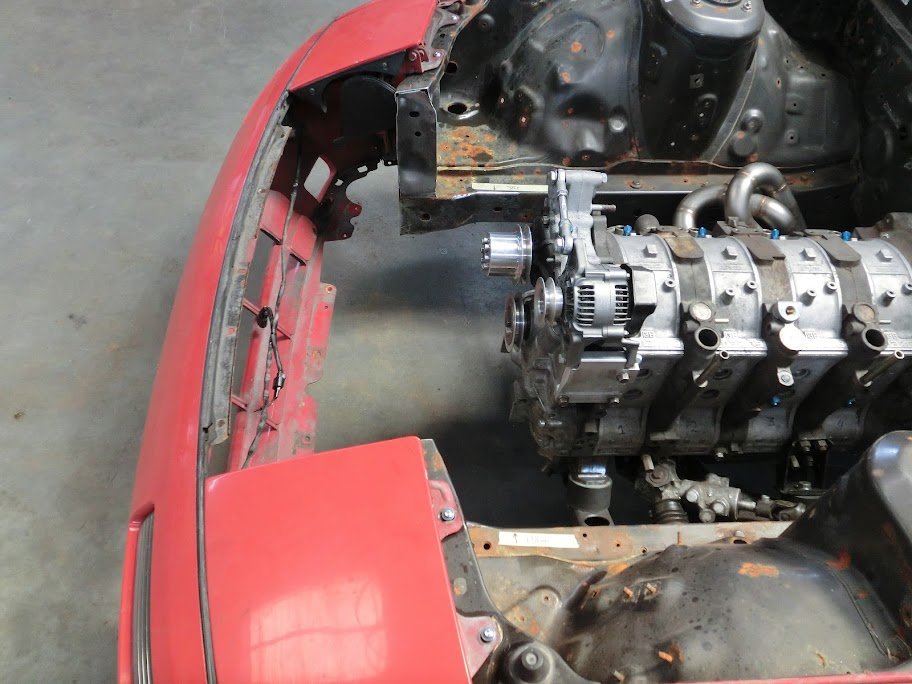
Tried figuring out how to fit the radiator and oil coolers. Couldn't find a way to fit everything nicely so I did this:
Holy crap, what have I done

Fitting the front panels and bumper to check if everything still fits ok, also took a lot of measurements so I could check if the front end of the car warped, it's still straight and everything still fits nicely, lot's of room now to do whatever I want
Cleaned some stuff up and made bumper mounts.
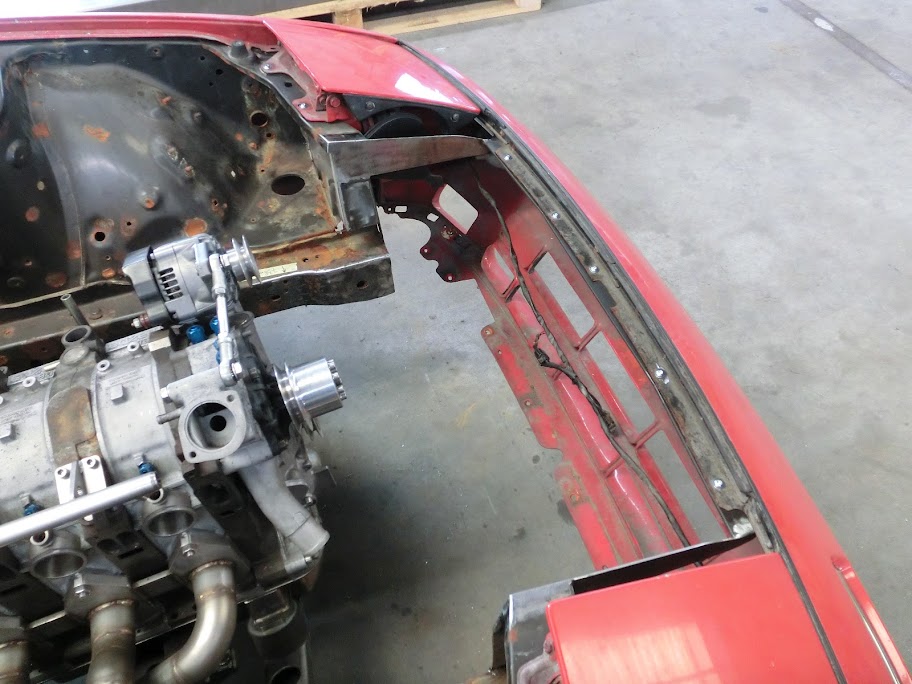
Next up is the radiator, already made all the needed parts, hopefully I can try to weld it together tomorrow. I hope it works out allright, since I don't have a lot of experience with welding aluminium.

Holy crap, what have I done
Fitting the front panels and bumper to check if everything still fits ok, also took a lot of measurements so I could check if the front end of the car warped, it's still straight and everything still fits nicely, lot's of room now to do whatever I want
Cleaned some stuff up and made bumper mounts.
Next up is the radiator, already made all the needed parts, hopefully I can try to weld it together tomorrow. I hope it works out allright, since I don't have a lot of experience with welding aluminium.

Thread Starter
Joined: Oct 2010
Posts: 605
Likes: 13
From: The Netherlands
Thanks 
Started assembling the radiator today.
I've only welded aluminium a handfull of times, and usually didn't do a great job at it, so I started with cutting out some testpieces and tried figuring out how to weld aluminium for a few hours. Didn't want to start on the radiator straight away, since an aluminium radiator core isn't cheap. Once I sortoff thought I knew what I was doing work on the radiator started.
Tacking up an endtank here
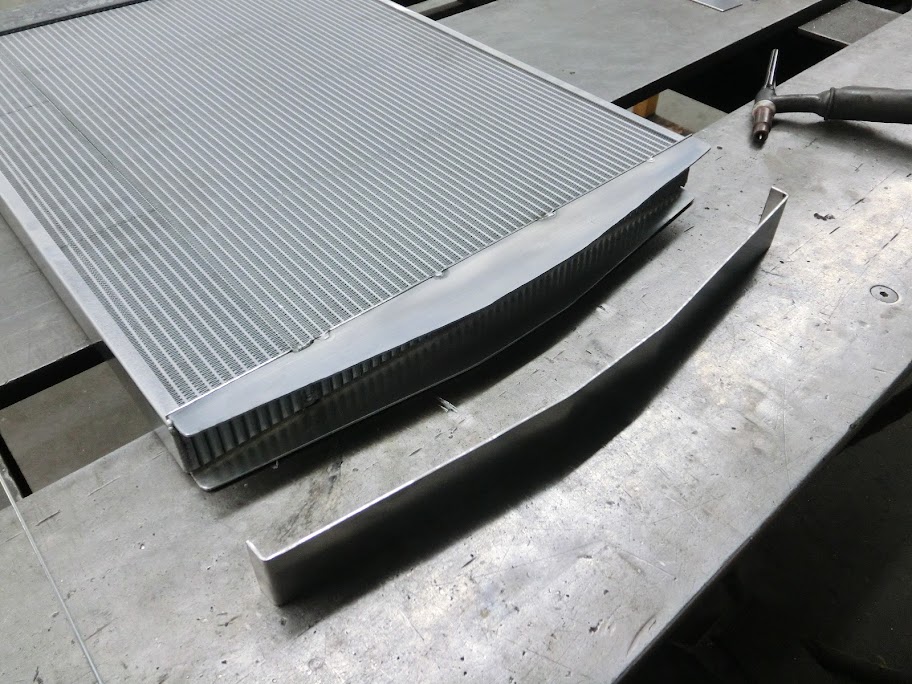
And the other one
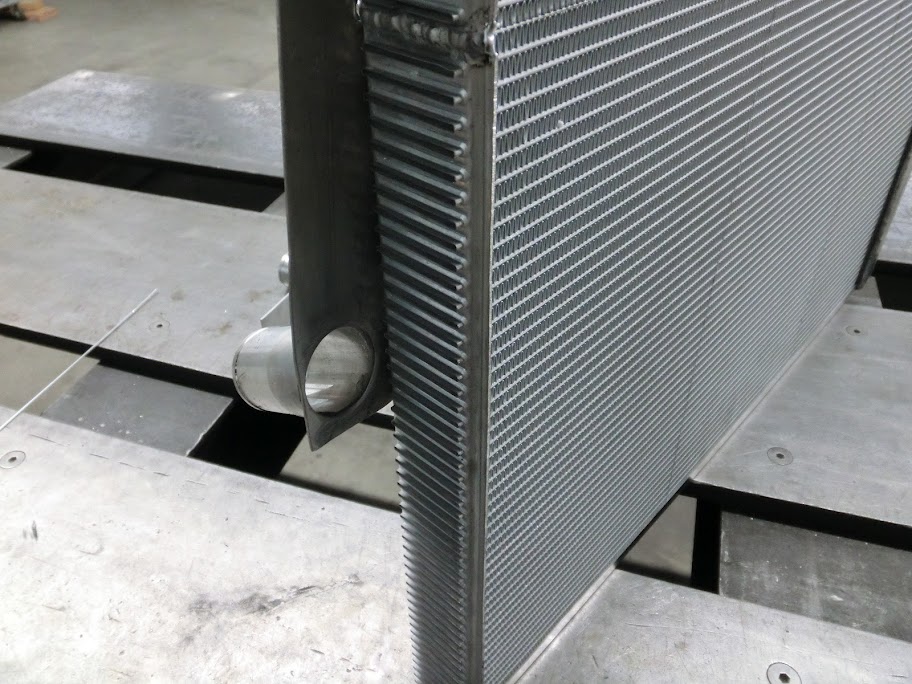
Almost done
So I didn't get it completely done yet, still need to do the last endtank, clean stuff up a bit and pressure test it. So far it's going pretty well I think, welds look pretty decent, I've seen tidier ones but this will do just fine.
Started assembling the radiator today.
I've only welded aluminium a handfull of times, and usually didn't do a great job at it, so I started with cutting out some testpieces and tried figuring out how to weld aluminium for a few hours. Didn't want to start on the radiator straight away, since an aluminium radiator core isn't cheap. Once I sortoff thought I knew what I was doing work on the radiator started.
Tacking up an endtank here
And the other one
Almost done
So I didn't get it completely done yet, still need to do the last endtank, clean stuff up a bit and pressure test it. So far it's going pretty well I think, welds look pretty decent
, I've seen tidier ones but this will do just fine.
Thread Starter
Joined: Oct 2010
Posts: 605
Likes: 13
From: The Netherlands
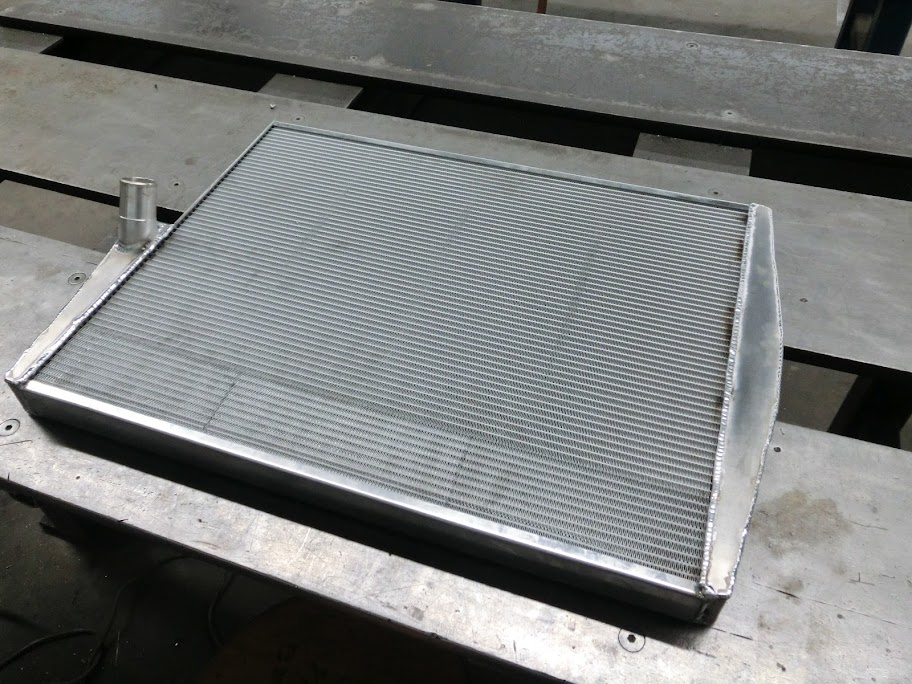
Finished the radiator today

Also added a drainage plug

Tested the radiator for leaks, pressurised it with compressed air and used soapy water to find them.
People at home be carefull pressurising radiators like this, they can blow up if you put a lot of pressure on them. I used about 16 psi.

It was a good thing I checked for leaks, I found a few. Got them all fixed pretty easily though.
Also added a drainage plug
Tested the radiator for leaks, pressurised it with compressed air and used soapy water to find them.
People at home be carefull pressurising radiators like this, they can blow up if you put a lot of pressure on them. I used about 16 psi.
It was a good thing I checked for leaks, I found a few. Got them all fixed pretty easily though.

Senior Member
Joined: Nov 2003
Posts: 533
Likes: 3
From: Sweden
It's better to pressure-test with some fluid inside. Only air could be a good explosion because air compresses more. If you have some water in i, and the fail is there, there will only be a little poof.
16Psi isn't much? You will have 14-15psi all the time later on?
16Psi isn't much? You will have 14-15psi all the time later on?

Thread Starter
Joined: Oct 2010
Posts: 605
Likes: 13
From: The Netherlands
It's a lot easier to find leaks when using air, because it causes the soapy water to bubble. 16 psi is enough to find any leaks so why risk blowing up your radiator?
Thread Starter
Joined: Oct 2010
Posts: 605
Likes: 13
From: The Netherlands
The rotors came back from balancing. At first they balanced the jig I made up to mount the rotors in the balancing machine. After that every rotor was checked, they were all pretty good, the worst one was 2,5 grams off, 50 grams being the tolerance limit. We could balance every rotor to perfection, but then the weight between the rotors wouldn't be equal anymore, and since we were so far within the tolerance limit we didn't modify the rotors. It would be possible to get them balanced and get the weight equal by machining the rotors with good balance on all three sides, but that would take a lot of expensive manhours for no noticable gains.
Next up is balancing the entire rotating assembly, I re-checked the weight of each rotor and every dummy weight and assembled the rotating assembly for balancing.
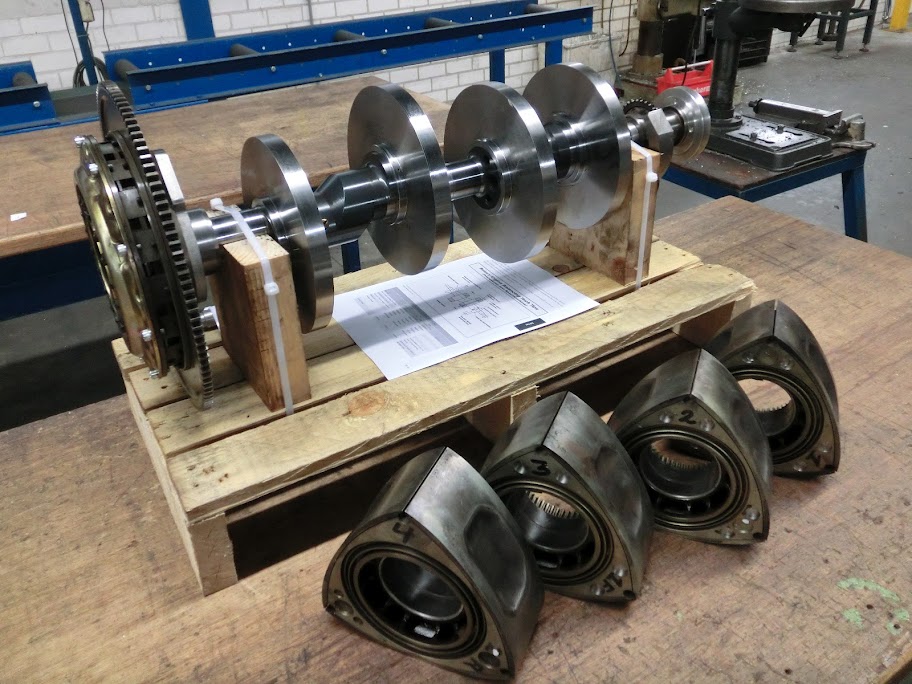
At first they balanced the jig I made up to mount the rotors in the balancing machine. After that every rotor was checked, they were all pretty good, the worst one was 2,5 grams off, 50 grams being the tolerance limit. We could balance every rotor to perfection, but then the weight between the rotors wouldn't be equal anymore, and since we were so far within the tolerance limit we didn't modify the rotors. It would be possible to get them balanced and get the weight equal by machining the rotors with good balance on all three sides, but that would take a lot of expensive manhours for no noticable gains.Next up is balancing the entire rotating assembly, I re-checked the weight of each rotor and every dummy weight and assembled the rotating assembly for balancing.
Last edited by John Huijben; May 24, 2012 at 05:24 PM.