When you click on links to various merchants on this site and make a purchase, this can result in this site earning a commission. Affiliate programs and affiliations include, but are not limited to, the eBay Partner Network.
i really like that you can start typing numbers and it autofills
They also frequently offer parts at a better price than other vendors, and sometimes even the dealership.
My dealership quoted me $160 CAD for a set of shifter boots. Atkins has them at $84 USD (about $105 CAD) before shipping.
Amayama charged me like $90 CAD.
The buying process is a little different than most (price is an estimate, you order, they get the actual price from their suppliers, then you pay) and it took a bit longer to get my parts. But it was a good experience over all and they saved me a good amount of money.
What does this bolt go to? the bolthead is 14mm and its length is 4".
It necks down partway along the bolt, wonder why?
I found where this bolt belongs, it goes below the starter into the recessed hole and it is for attaching the transmission to the engine.
It is not the short bolt to attach the starter to the transmission!
I have the slot on my transmission, the shape of the plug looks to me to be some kind of shield for this area. It is not made to be removed with the transmission attached to the engine so that rules out an inspection port.
I wonder what it is shielding?
I will fabricate a plug for the hole, really don't need a piece of debris getting into the housing!
Thanks!
I filled the slot with JB weld sealant.
This should do the trick!
The original plastic part seems to be a shield or diverter of the air stream of the clutch spinning around!
I just found these mounts on eBay, this particular sale listed these style mounts to be used for an automatic trans!
I found plenty more listings for these but no mention that they are only for an auto trans!
They do not fit a series 5 automatic transmission car at all. I don�t know about the series 4 but for the s5 the manual and automatic mounts are the same.
Hi everyone,
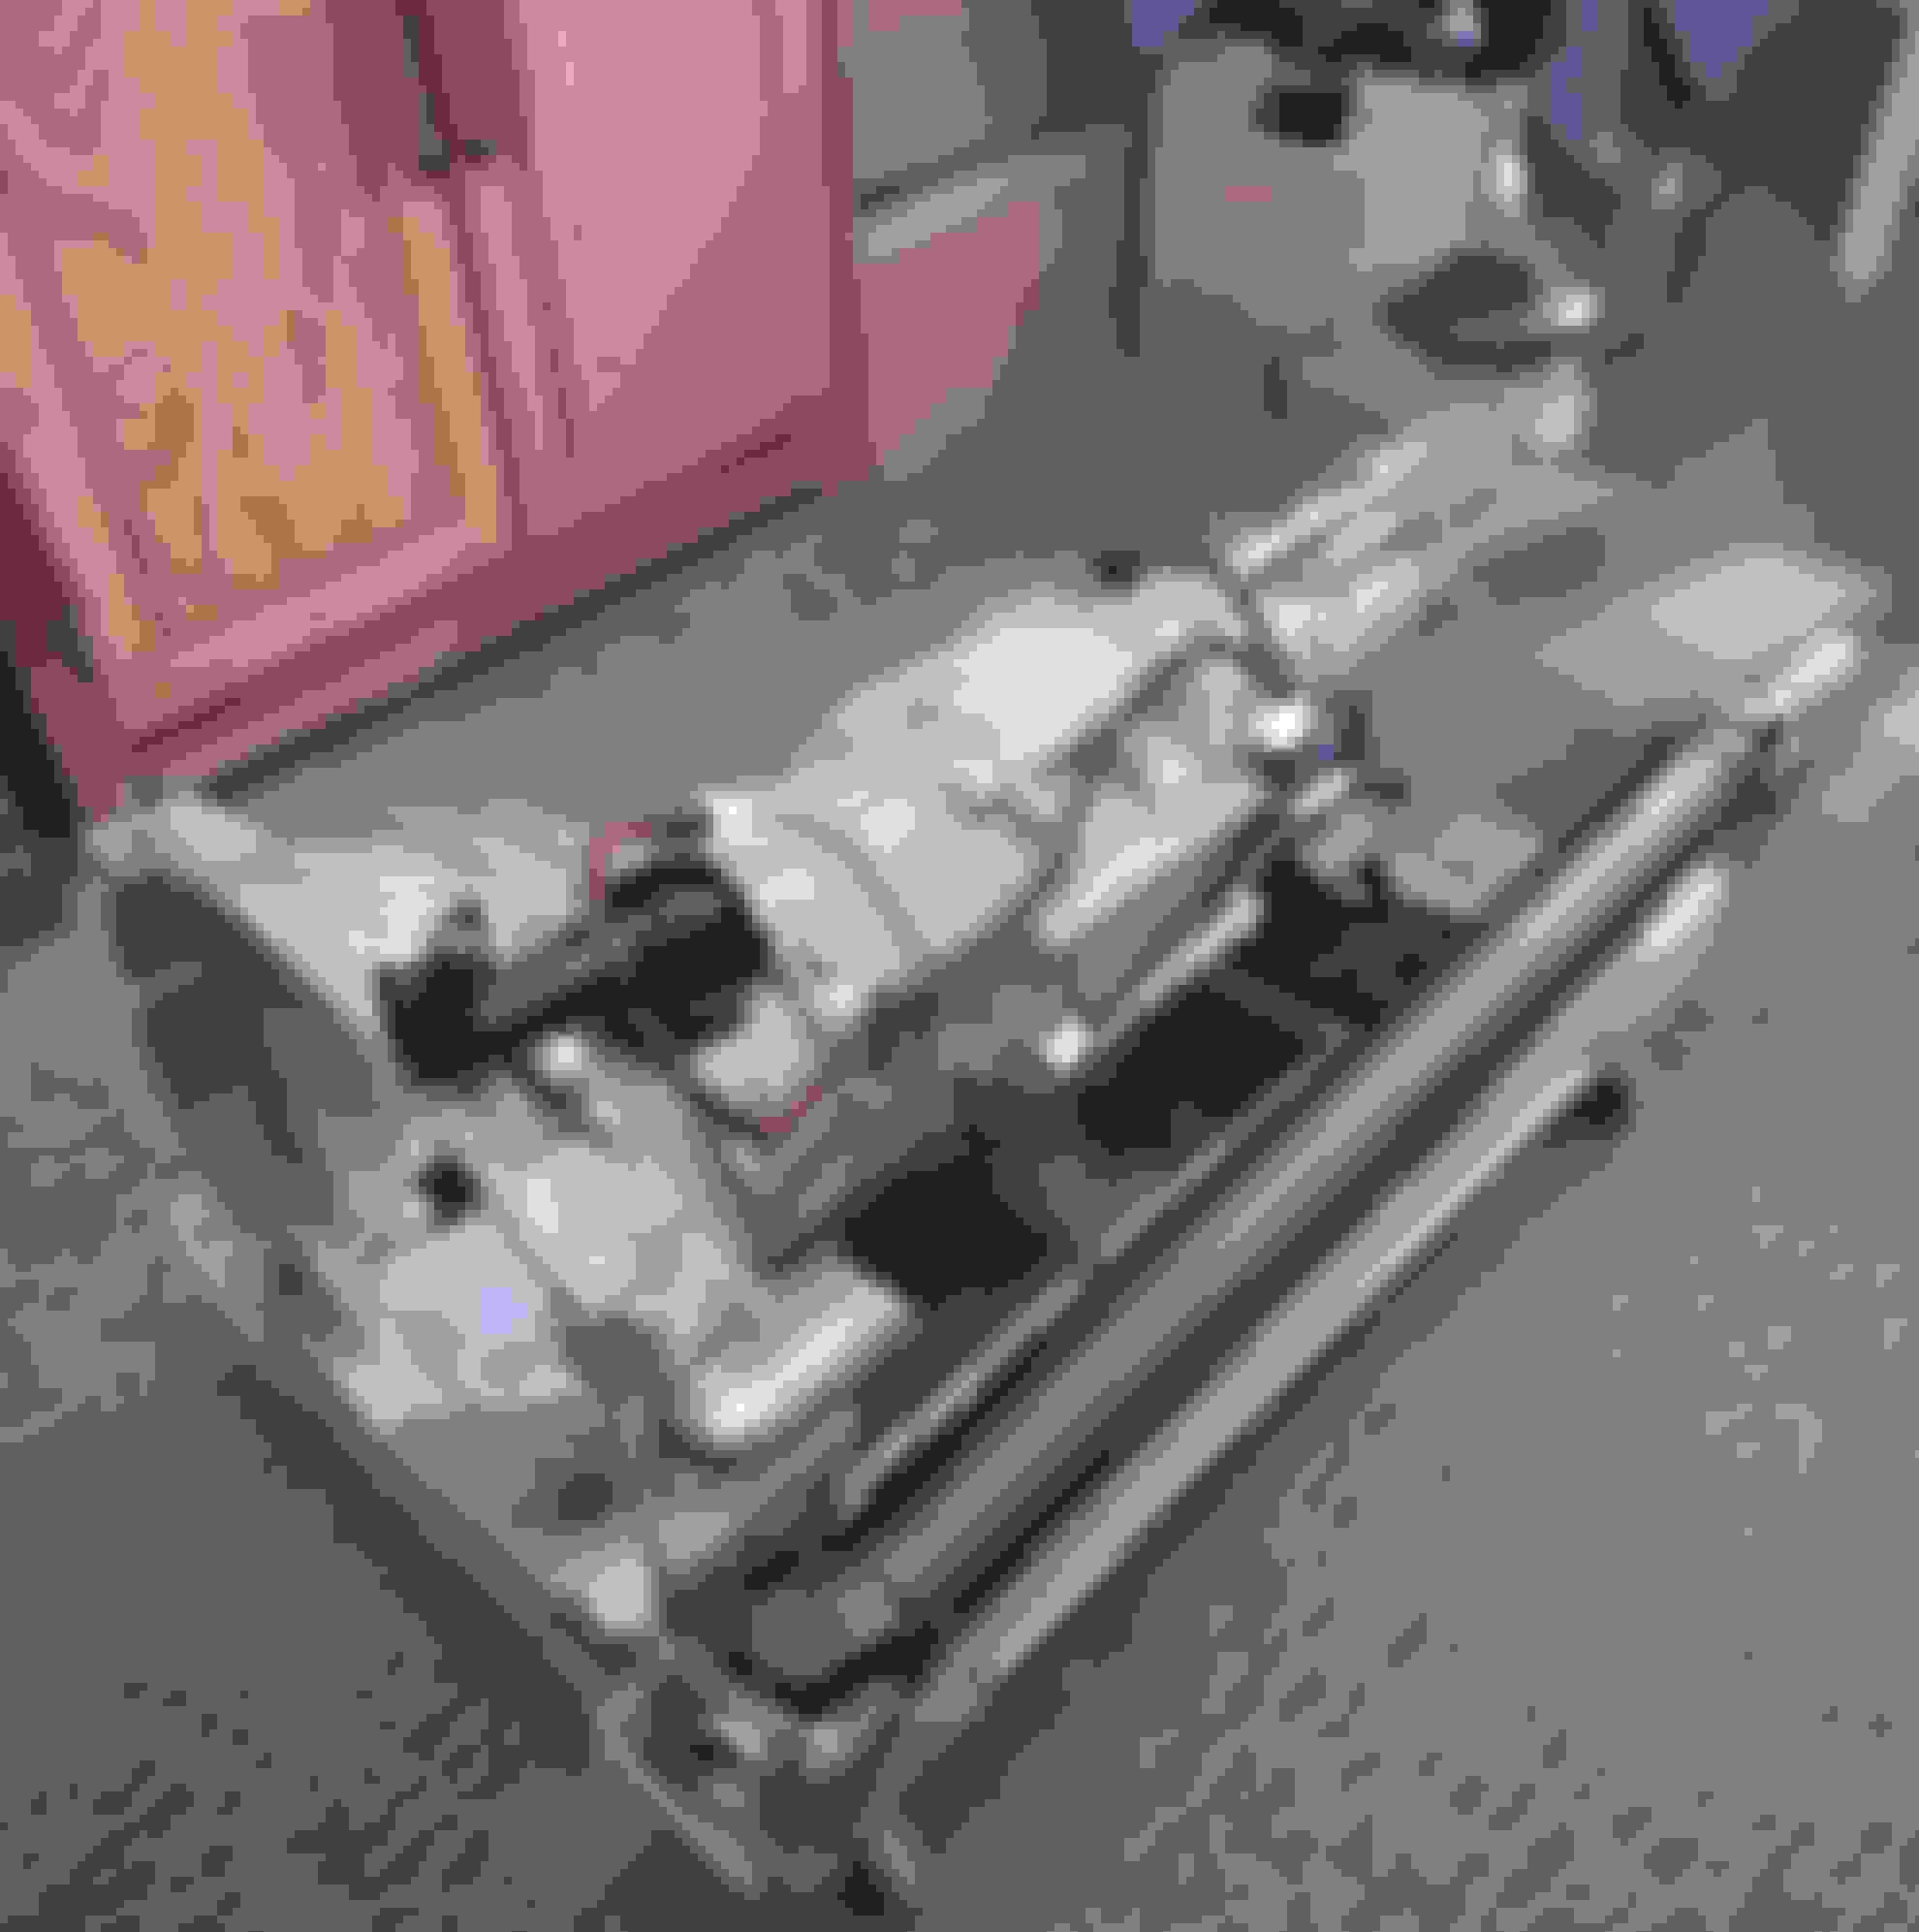
I finally have the rebuilt transmission for my 1988 GXL ready to install now!
These are the new parts I added to the transmission:
Clutch and release bearing. While it was apart I found one at a good price.
Driveshaft with rebuildable u-joints. The original driveshaft front u-joint was binding. 150k miles
Master and slave hydraulic clutch cylinders with SS braided line. Lost all fluid twice, never found why.
Mounts and crossmember. Destroyed the center mount on the crossmember while taking it apart. The original mounts were still good but hard as a rock.
5th/ reverse switch with nylon wire cover. The wires were all broken and spliced after two clutch replacements by the dealer. Lucky to find it new.
Short throw shifter. Always had trouble shifting into third at 7000 rpms.
Stud for the lower starter hole, has two different thread pitches, the unique coarse thread that was the original bolt had, and a thread that matches the rest of the mounting bolts!
Condenser that goes under one of the slave cylinder mounting bolts. Wire broke off from the original one.
Once installed, I plan to fill it with conventional gear oil, then after 600 miles to break it in, replace the oil with a synthetic gear oil.
I read that it will shift smoother with the synthetic oil!
If you switch after years of using a conventional oil, the old seals will react badly. But since my seals are new I should not have any problems.
One last problem area, the hole in the control rod end is much larger than normal, it almost reaches the sides of it! The smaller ball end on the new shifter has too much play. I need to find one of those nylon spacers!
Are you running one of their driveshafts? I�m looking for u joints to press in to my s5 n/a shaft and I�m not having much luck.
Are the driveshafts the same between the S4 & S5 models?
My Haynes repair manual covers from 1986 thru 1991. There is no mention of replacing the u-joints on the driveshaft! Only how to R&R the entire driveshaft assembly.
My 1988 workshop manual states that if something is wrong with anything to do with the driveshaft assemble, replace the entire driveshaft. The u-joints are NOT replaceable!
My original driveshaft had binding on the front u-joint, so I purchased a replacement shaft from Mazdatrix. The replacement has the u-joints installed already, Just bolt it in.
The Mazdatrix driveshaft uses u-joints that can be replaced! I included a spare joint that will fit the new shaft.
Yeah I guess that�s what I�ll have to do. The u joints are certainly replaceable, I actually pressed mine out and changed the flange for my manual swap. There�s even a few threads on here about doing it but the part numbers they list bring up some u joints that are a little too small.
I have the slot on my transmission, the shape of the plug looks to me to be some kind of shield for this area. It is not made to be removed with the transmission attached to the engine so that rules out an inspection port.
I wonder what it is shielding?
I will fabricate a plug for the hole, really don't need a piece of debris getting into the housing!
Thanks!
I was looking at the area where the starter sits in the bellhousing and noted that it is a bulge in an otherwise round shape.
There is a corresponding bulge in the rear iron as well.
The plug sits against part of the bulge in the iron, dividing it apart!
The only thing I can think of for this divider piece is to break up some of the turbulence in this area.
I wonder how fast the air is moving at 7000 rpm, and what benefit there would be to smoothing out the airflow in this area?
I'm missing the studs on the left side of the front cover.
The studs are for attaching the P/S-A/C bracket to the engine.
Does anyone have a part number, or know the size?
I just received two studs from Atkins and they do not fit my cover, the new studs are M10x1.25 50mm.
It appears that my cover takes size M10x1.0
So, after chasing these studs forever, I just purchased a cheap $30 front cover to get the correct studs I need!
I found the studs from a company in Japan but after putting in my order they sent me a email saying the stud are NLA, and returned my payment.
Finally found the stock size studs for the front cover!
Had to buy a front cover for $30 that still had them in it.
These are my measurements:
Overall length - 50mm
Metric size - M10
Thread pitch - 1.25mm
Untreaded length - 15mm
Short threaded length - 10mm
Long threaded length - 25mm
The part from Atkins will fit after all, the threaded holes in my front cover have paint in them! Need to chase the threads to remove it.
I was concerned that if I forced the studs in I would damage the threaded holes and have to re-tap them. Been there, done that.
So, this concludes my search for these studs. Ta-Da!
Hi everyone, I came across these unique bolts that have a spiral pattern on the threads.
The first ones I noticed were the radiator to frame mounting bolts, the second ones are grade 8 bolts that are pictured.
Are these bolts some form of self-tapping ones? They go into welded nuts on the frame, why are they different than regular bolts?
Are they meant to hold better? Any ideas? I'm just trying to learn about these things.
I think I figured out why these types of bolts are used for.
When nuts are welded into position on parts it has to be bare metal for the welds to hold. Then the parts are painted, the threads on the attached nuts get painted in the process.
These special threaded bolts are then necessary to cut through the paint and push it out the back of the nut without the bolt binding in the hole as it is being tightened!
I just had this binding issue on my front cover studs, I thought I was using the wrong thread pitch, but it was the paint that got into the hole.
I had to work the studs in and out repeatedly to remove most of the paint before they finally went in.
On the assembly line there would not be the time for this, hence the self cleaning threads.