
Column Mounted Switchgear- A Journey Into Madness

Each of the two bezels has solved some of the problems I face and I've definitely gained insight into what I'm up against.
The two main areas of concern are the overall aesthetic of the final shape and meeting the hard points of the design (the "hard points" being where the outer edge of the bezel meets the dash and the inner edges meets the gauge cluster.
Obviously the original piece, built from the vert bezel, successfully met all the hard points but it's aesthetics were awful.
The second effort showed potential in terms of look but was awful at actually fitting well.
Moving on to version three.
I think I've found a simple way to fix all the problems at once.
I should note that I'm only paying @$5 for these bezels, so I'm not being as profligate as it seems.
Anyway, I just procured another bezel and have started the process.
Again.
Not as much as I.
The lighting in my garage is too crappy to continue and sadly, too dim for some pics...they'll happen in the AM.
Here's what's happening though.
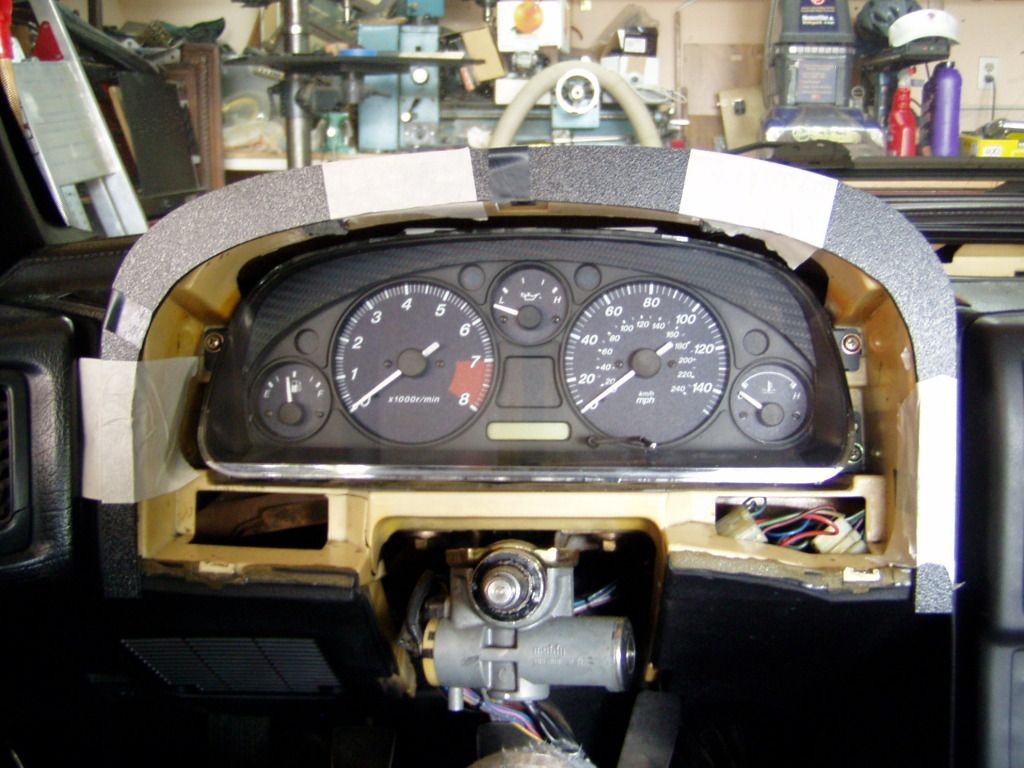
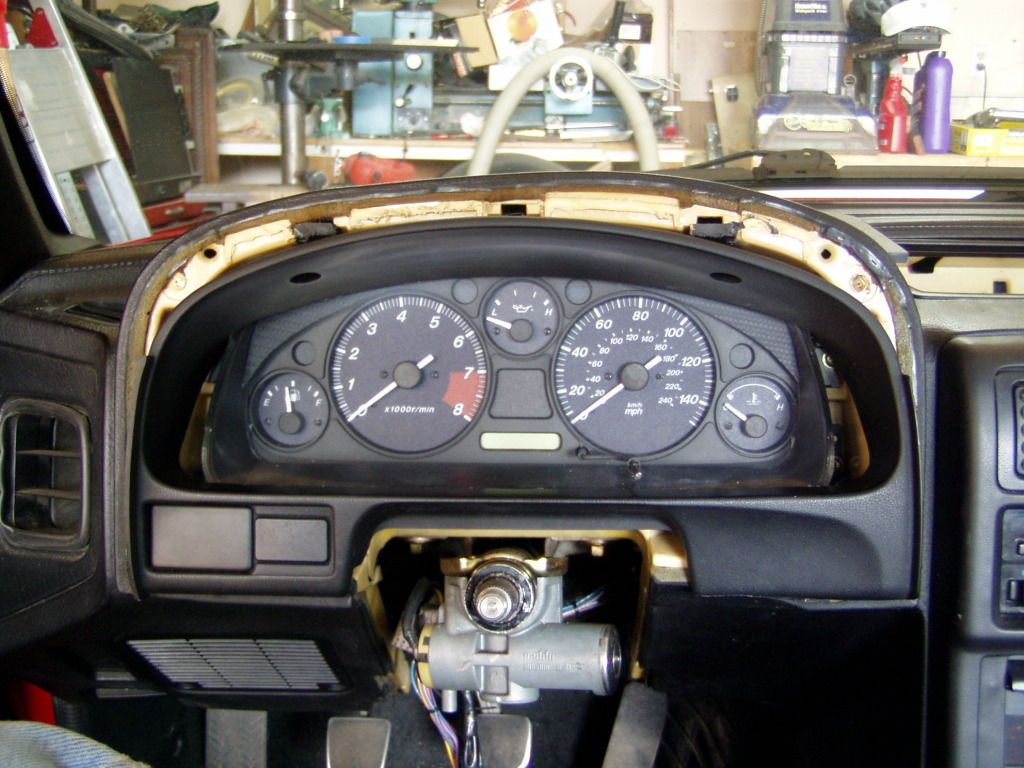
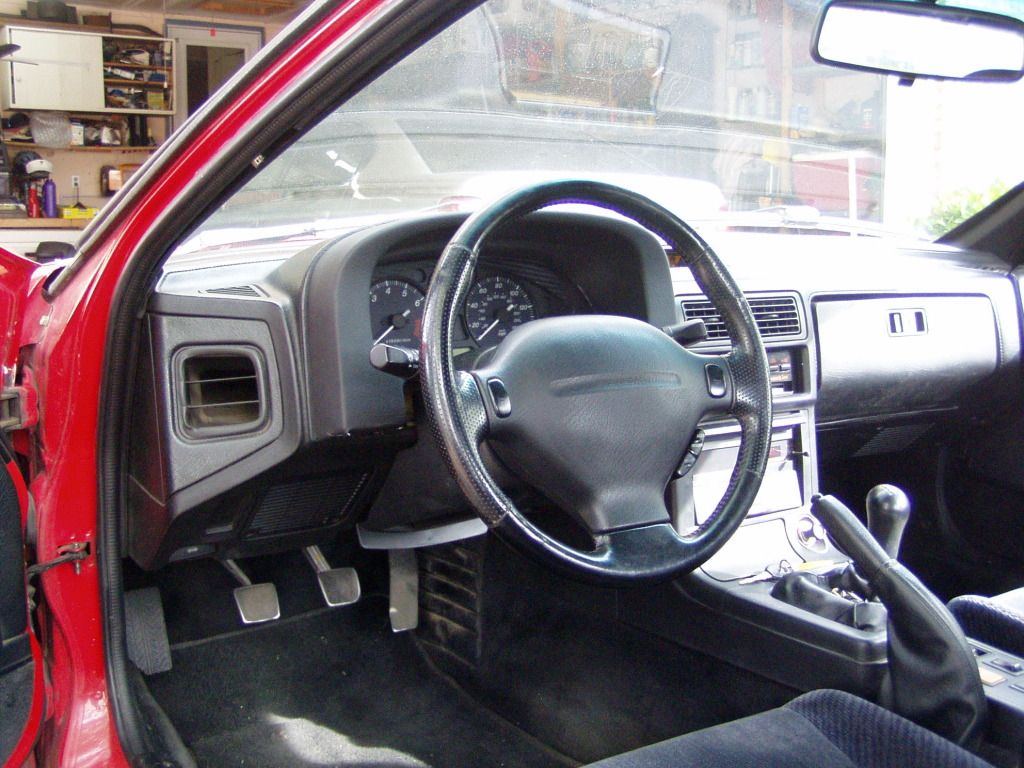
My first two attempts used the stock bezel- the first one entirely, the second, less so.
The second version (hybrid FC and Nissan Sentra) began to show some of the style I'm looking for but also graphically demonstrated how difficult it is to meld two dissimilar parts together without the need for a lot of post assembly bodywork.
No matter how carefully fitted and how apparently similar the parts, the nuances of each makes the melding nearly impossible.
You know, when I first began blueskying this mod, I figured the first two stages would be the hard parts but they've paled in comparison to the effort I've put into this goddamned bezel.
I thought it could be done relatively easily with some OEM plastic (not necessarily Mazda OEM, obviously) and maybe a bit of trim but mating another bezel with the FC bezel requires full on fabrication/finishing to look even halfway decent.
There are just too many layers- the Miata cluster to the FC faceplate to the Nissan bezel to the FC bezel.
Yikes!
The Sentra bezel is almost too much of a good thing, it left very little room for the FC bezel skin.
I finally wondered why I was ******* with the FC part at all, it really only was being used to extend to the edges where it meets the dash- a very simple shape on a single plane.
What if I made a flat piece (I used 1/4" ABS to begin but may glue up another layer if it looks oddly thin) shaped to fit the dash opening and just inset the Sentra bezel as far in as possible?
This proved infinitely simpler than what I've been doing, suddenly I had a single flat plane to work off.
First test fit tomorrow.
The lighting in my garage is too crappy to continue and sadly, too dim for some pics...they'll happen in the AM.
Here's what's happening though.
My first two attempts used the stock bezel- the first one entirely, the second, less so.
The second version (hybrid FC and Nissan Sentra) began to show some of the style I'm looking for but also graphically demonstrated how difficult it is to meld two dissimilar parts together without the need for a lot of post assembly bodywork.
No matter how carefully fitted and how apparently similar the parts, the nuances of each makes the melding nearly impossible.
You know, when I first began blueskying this mod, I figured the first two stages would be the hard parts but they've paled in comparison to the effort I've put into this goddamned bezel.
I thought it could be done relatively easily with some OEM plastic (not necessarily Mazda OEM, obviously) and maybe a bit of trim but mating another bezel with the FC bezel requires full on fabrication/finishing to look even halfway decent.
There are just too many layers- the Miata cluster to the FC faceplate to the Nissan bezel to the FC bezel.
Yikes!
The Sentra bezel is almost too much of a good thing, it left very little room for the FC bezel skin.
I finally wondered why I was ******* with the FC part at all, it really only was being used to extend to the edges where it meets the dash- a very simple shape on a single plane.
What if I made a flat piece (I used 1/4" ABS to begin but may glue up another layer if it looks oddly thin) shaped to fit the dash opening and just inset the Sentra bezel as far in as possible?
This proved infinitely simpler than what I've been doing, suddenly I had a single flat plane to work off.
First test fit tomorrow.
Like so:
This is 1/4" ABS cut to fit the dash and the Sentra bezel.
Here's the bezel screwed in:
The two parts together:
I am finally seeing a path to tunnel's end.
This is 1/4" ABS cut to fit the dash and the Sentra bezel.
Here's the bezel screwed in:
The two parts together:
I am finally seeing a path to tunnel's end.
It seems like the dissimilar materials is the biggest challenge to making it look as "one". Given that the dash is molded to look like it is covered in stitched leather, I wonder if you had the cowl covered in pleather and then painted both with SEM Landau Black if that wouldn't tie and blend everything together.
I'm enjoying the writeup. Keep it up!
I'm enjoying the writeup. Keep it up!
Making it look "as one" is really not the issue, that's just simple economics and labor.
Making it "fit" the FC is the problem and my evolving thoughts on this are why stage 3 is taking so long.
I've narrowed my choke points down to:
-The size/shape of the dash opening.
There is simply no getting around the fact that this cavern is a huge rectangle. No matter how sexy and curvaceous the cluster and surround, at some point you have to transition to a simple geometric outline.
Now it's not that I can't physically figure out how to do this but as I visualize the finished piece, it makes no sense.
Why would one design such a svelte center and then add (apparently arbitrarily) all this blank space surrounding it, terminating is straight(ish) lines?
-The size of the new switchgear.
As I progressed through the candidates, they got bigger, which means that the surround trim did as well.
I longed to use the mating trim from the donor car but it was just too large for the Sentra bezel and trying to squeeze small trim on was an exercise in futility.
So I sat.
Sat and stared at the three (THREE?) bezels I'd made.
Any of them could be brought to completion, all three had been mostly fully installed.
I made a mental list of each one's problem areas and how difficult they'd be to solve.
By far, the first (vert-based) bezel was the winner.
I'm sure that I'm more critical of this that you guys (and given the quality of my photography, you don't have much to go on...) but I've decided that the fewer "fixes" involved trump the objection to the overall shape (which I think was accentuated by the glaring contrast in finish).
See, I've started with a "fixed" gauge cluster. I think I did a pretty good job mating the Miata to the FC glass but there are the two scab plates (covered in Di-noc) that hide the gaps.
The inside of the Sentra bezel is too wide for the FC glass, so there would be two more filler plates there.
Then there's the filler between the outside of the bezel to the FC dash opening.
Altogether that's a lot of dead space to conceal, no matter how artfully done.
Nothing I can (or would want to) do to the gauges but all the other problems disappear with the hacked FC part, both the inside and outside match perfectly.
And, because of the extra free space around the steering column, the correct trim can be used with little modification.
Yes, it's still kind of clunky but the finer details that all match up overcome that, I think.
I want this ****** done.
And I wasn't kidding.
No, it isn't really done done, but she's so much closer than ever before.
I stumbled upon a swath of vinyl that was an excellent match to the FC in both texture and finish (matte, not glossy) and figured that if color mismatch had been a problem assessing the bezel before, this might solve it.
And for the most part, it did.
The bezel was a bitch to cover and I'm hoping I can obtain another piece of vinyl to redo it (there are a few mistakes because I wildly underestimated how much material to start with).
If not, I'll make do somehow.
The car is redolent with the aroma of contact cement...wonder how long that lingers?
Anyway, the overall visual effect is pretty much what I'd hoped for, not that it's exceptionally beautiful but it does look mostly OEM and well integrated.
I have some escutcheons and switches (hazard and dimmer) that will go on the bezel where the knobby ends were, they should dress it up and make it a bit less clunky but I'm waiting to see if I can recover it first.
I think I'm on the downhill side of this now.


Joined: Apr 2005
Posts: 3,785
Likes: 30
From: And the horse he rode in on...
And I wasn't kidding.
No, it isn't really done done, but she's so much closer than ever before.
I stumbled upon a swath of vinyl that was an excellent match to the FC in both texture and finish (matte, not glossy) and figured that if color mismatch had been a problem assessing the bezel before, this might solve it.
And for the most part, it did.
The bezel was a bitch to cover and I'm hoping I can obtain another piece of vinyl to redo it (there are a few mistakes because I wildly underestimated how much material to start with).
If not, I'll make do somehow.
The car is redolent with the aroma of contact cement...wonder how long that lingers?
Anyway, the overall visual effect is pretty much what I'd hoped for, not that it's exceptionally beautiful but it does look mostly OEM and well integrated.
I have some escutcheons and switches (hazard and dimmer) that will go on the bezel where the knobby ends were, they should dress it up and make it a bit less clunky but I'm waiting to see if I can recover it first.
I think I'm on the downhill side of this now.
No, it isn't really done done, but she's so much closer than ever before.
I stumbled upon a swath of vinyl that was an excellent match to the FC in both texture and finish (matte, not glossy) and figured that if color mismatch had been a problem assessing the bezel before, this might solve it.
And for the most part, it did.
The bezel was a bitch to cover and I'm hoping I can obtain another piece of vinyl to redo it (there are a few mistakes because I wildly underestimated how much material to start with).
If not, I'll make do somehow.
The car is redolent with the aroma of contact cement...wonder how long that lingers?
Anyway, the overall visual effect is pretty much what I'd hoped for, not that it's exceptionally beautiful but it does look mostly OEM and well integrated.
I have some escutcheons and switches (hazard and dimmer) that will go on the bezel where the knobby ends were, they should dress it up and make it a bit less clunky but I'm waiting to see if I can recover it first.
I think I'm on the downhill side of this now.

I may have missed it... what kind of materials are you using to mold/glue/whatever the plastics together? I've read about crumbling up old plastic parts and mixing them with acetone to make a paste (this is for ABS plastic). Also some ABS cement which can be found in a hardware store plumbing section.
It's a bit thicker than hardware store plumbing cement but essentially the same thing, I think.
I made extensive use of the homemade ABS bondo/slurry you describe and it too works as advertised BUT...mine took longer than expected to cure, perhaps I applied too much at a time. Exposure to direct sunlight helps but too much and the outgassing becomes a problem (the joint will swell as the solvents still inside try to evaporate).
When fully dried, it's just like the parent plastic.

I have a couple of chunks that never dissolved and you risk introducing contaminants into your mix (like ArmorAll, maybe?).
For my first batch I turned down some scrap (new) ABS on the lathe...it machines off in very fine ribbons that melt quickly in the acetone.
I then lucked out when my plastic supplier said they were cutting a big order of ABS sheet and I was welcome to the swarf (basically, the chips/dust from the saw blade).
This was about the consistency of ground coffee and made great "bondo".
In future, I'd only use the slurry on the back/inside of a piece and use regular Bondo on the front. The slurry makes an excellent adhesive/strengthening material but doesn't sand very crisply, especially if using power tools. Bondo cures faster and is harder, so edges in particular can be better defined.
Both the Weldon adhesive and the slurry use acetone (or MEK) to literally melt the parent materials, the solvents then evaporate (or sublimate, or whatever it is that solvents do).
The slurry skins up quickly but takes a long time to harden in the center, so thin coats work faster than one thick coat. Some of my first experimental applications took a week to cure through.
After you think the part is cured, set it in direct sunlight for a while.
Anything not completely set will swell up as the remaining solvent escapes.
Better to find out before paint/wrapping.
Speaking of wrapping, my first attempt failed after 7-8 hours...tightly stretched/radiused sections pulled free of the plastic.
Oddly, it doesn't really bother me.
First, I've now glimpsed what the finished part could look like and I'm content.
Secondly, the vinyl I used was too nice, the finish and texture much more luxe than the rest of the dash. As I stared at it this morning, I wished I could cover the entire dash with this stuff.
I think losing all the ersatz "stitching" and fussy detailing would look pretty classy without fundamentally altering the character of the car.
The vinyl was ulpholstry grade, so it had that thicker backing on it which is why the tightest curves failed.
The second attempt will be with a pleather type material that seems closer to the original and is much thinner, so should manipulate better.
Even so, I'm not sure I can do it without seams, so I've been trying to imagine a sequence of layup that minimizes the need for cuts and puts them in the least conspicuous place.
Of course, even as I near the finish, I continue to think of the project as a whole and today a seditious concept began to emerge.
I may have early on thrown the baby out with the bathwater.
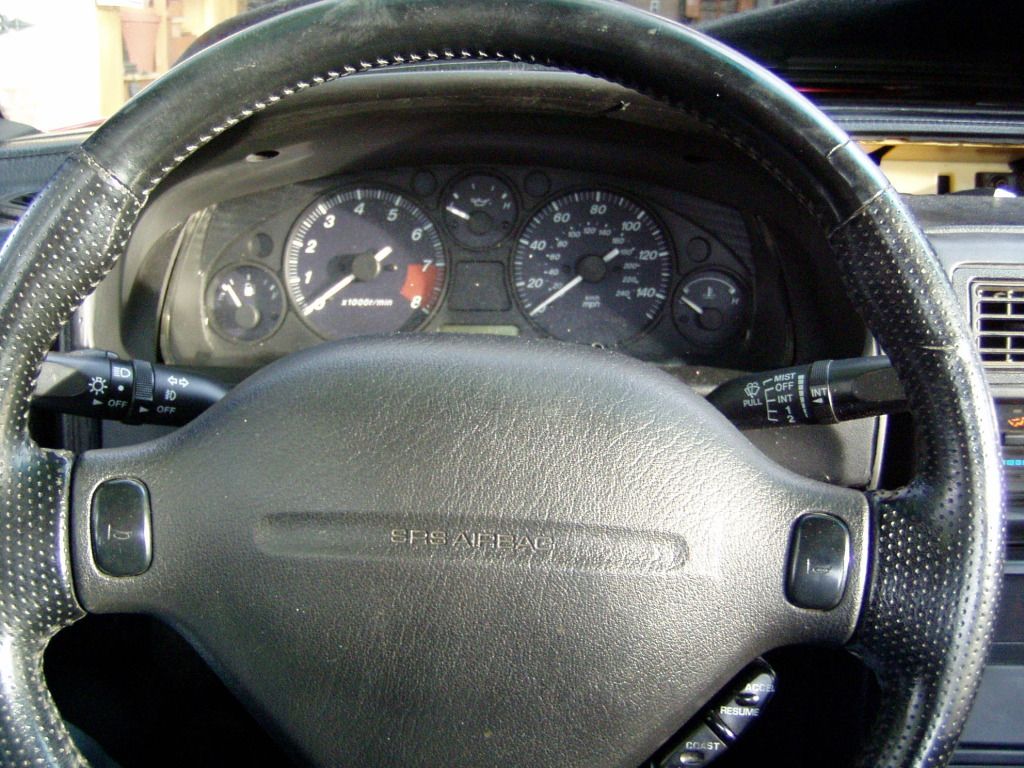
You see, even as I first mounted the virgin vert bezel (lo, these many days ago), I was already looking at the holes left by the stock switches, so the assumption was that there was going to be a certain amount of bodywork involved even had the new stalks not interfered.
When the left stalk DID have clearance issues, I didn't spend a lot of effort exploring how minimally I could intervene because what the hey? I already have these other ports/holes to deal with.
But what if I didn't?
What if the stock switches were left in place?
All the subfunctions (except intermittent interval) could be retained and the bezel would maintain it's logic...it's that big because there's **** in there.
You could remove the now useless big ***** and shorten the stems of the two small inner ones and put 'em back in.
A nicer but far smaller cut for clearance could be made and patched with a small piece of pleather and viola!, done.
Were I starting from scratch, possessed of the knowledge I've gained, that's exactly what I'd do.
^whoa, that was thorough. I will clean the parts first after reading all that. The plan is not to make new panels, but just to reinforce pieces that have broken/cracked on the non-visible sides. I'm going to test first on a mirror triangle. It's already on the verge of being useless, might as well experiment.
Thanks
Thanks
My second attempt at wrapping the bezel went much better but is still not perfect.
The "pleather", being much thinner than the upholstery vinyl, was able to handle the worst areas (the inner return to the gauge face) but still had difficulty covering the entire bezel in one piece.
-A tip about the process...make your estimate of the size needed to cover the bezel, then double it.
Add 25% to that and you may have enough.
Have fun dealing with a big piece of adhesive primed material as you try to wrestle it into position.
Anyway, the pleather can do the job but even though it didn't rip or pull away from the substrate, areas of extreme stretching show in the embossed pattern.
I decided to try covering the exterior sections with what I had left of the nice vinyl but didn't have a piece large enough, so it was patched on.
The seams aren't horrible but I can see them and don't like it.
I know for a fact that Di-noc (3M's carbon fiber overlay material) would work perfectly but that was too "glitzy" for this project.
SEM texture/finish paints would probably be the best option for a factory look, albeit fairly pricey (@$50 here in Denver).
I'm going to use the bezel as is for now and revisit the wiper wiring in an attempt to get intermittent/wash to work properly.
Meanwhile, I'll be searching for another FC bezel to work with, my supply is exhausted (as is my play money).
More delamination, I'm obviously using the wrong adhesive.
I removed all the wrap and then spent an hour scrubbing off all the remaining contact cement with mineral spirits.
I have a few ideas to tart up the vert bezel visually and I'm letting them percolate as I research adhesives.
Meanwhile, I brought down the second bezel (hybrid FC/Sentra) from it's shelf/grave and decided to finish the Bondo work to get it finish-ready as well.
There's something about it I find very compelling and I might as well see what it can turn into.
If nothing else, I can compare my initial vision with the finished product, which should be interesting.
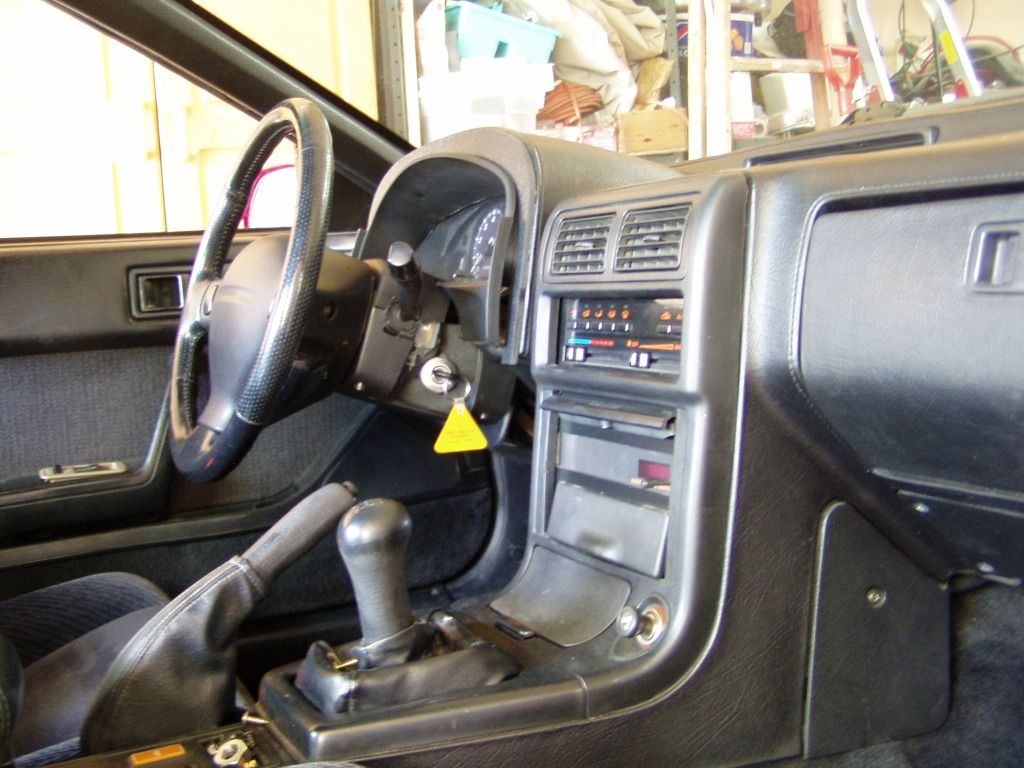
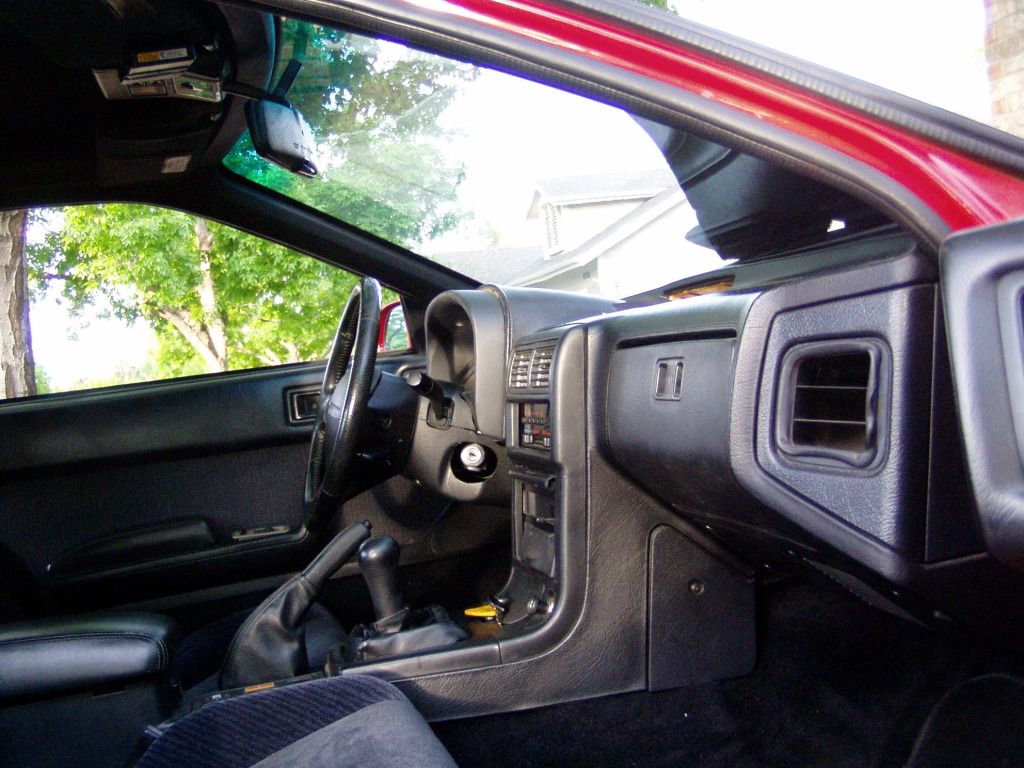
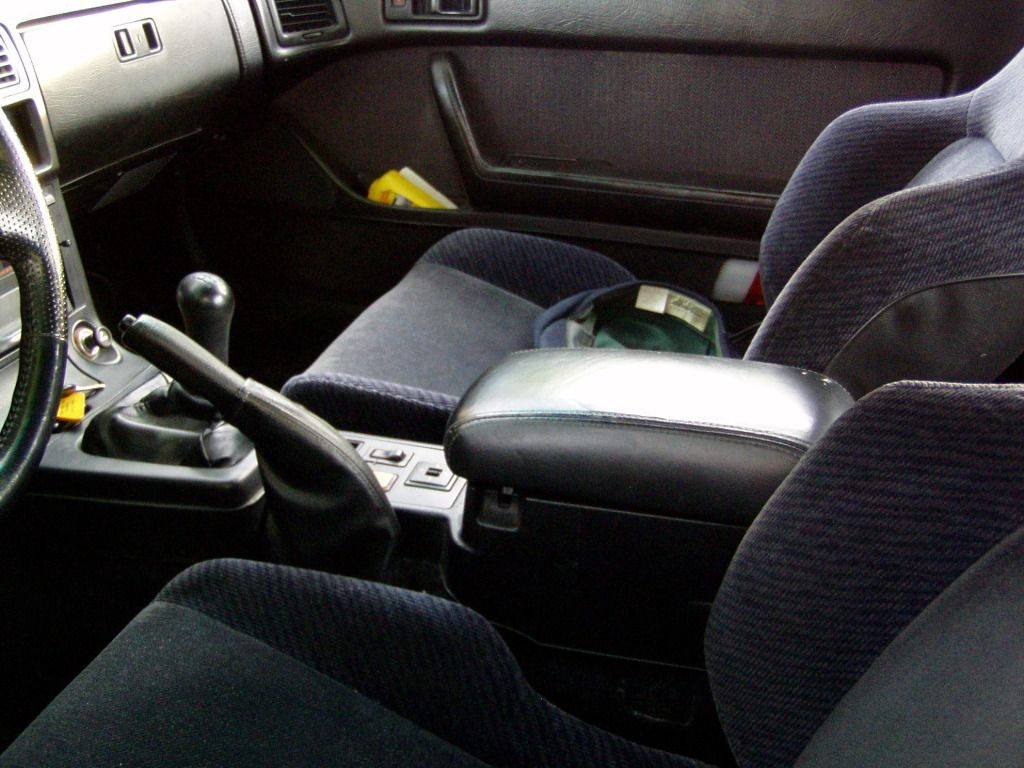
On a side note...my numerous junkyard jaunts have yielded more than switchgear **** lately, I've also been working on the rest of my ergonomic envelope.
Pedals, seat and steering wheel are mostly finalized, the two armrests remained.
IMO, a sadist designed the door and center console armrests.
They are hard, sharp edged and too low. I found a console cover from a Mitsubishsi that was taller, softer stitched leather and it went right on to my absurd center console.
(It's absurd because it's size belies the amount of actual storage space available.
Most of it was filled with the mousetrack inertial reels, the storage cubby is tiny. This WILL be changed at some point.)
With my arm on the new pad, the shifter falls right to hand, it's perfect.
Trying out a weird concept on the door armrest, not sure how that's going to work out yet.
Still limping along.
The bastard child of the FC/Sentra one nighter is in one piece and substantially shaped.
At this point it's rough sanded and I sprayed a guide coat of flat black to see what it actually looked like.
(A note about the bezel>dash interface...the vinyl/foam skin on my dash has begun delaminating around this area and is cracked and deformed. I have to do something about this, whether from the bezel side or the dash, not sure yet. Anyway, it's not the bezels fault that intersect looks so crappy, although the problem was exacerbated when I sectioned about 5/8" from the outer edge of the FC outer skin to make it thinner.)
I think it looks pretty good.
The column surround is just crudely fit but can be massaged into shape (although the weirdness around the ignition is still an issue).
I'm not at all happy with the inner bezel>gauge cluster joint.
The FC "glass" is curved in every plane and a bitch to match up to, especially given my simplistic methods. I need to reevaluate my approach.
In every other respect though I think this makes for a much airier, nicer look for the dash while not drawing undo attention to itself.
Oh, the armrests:
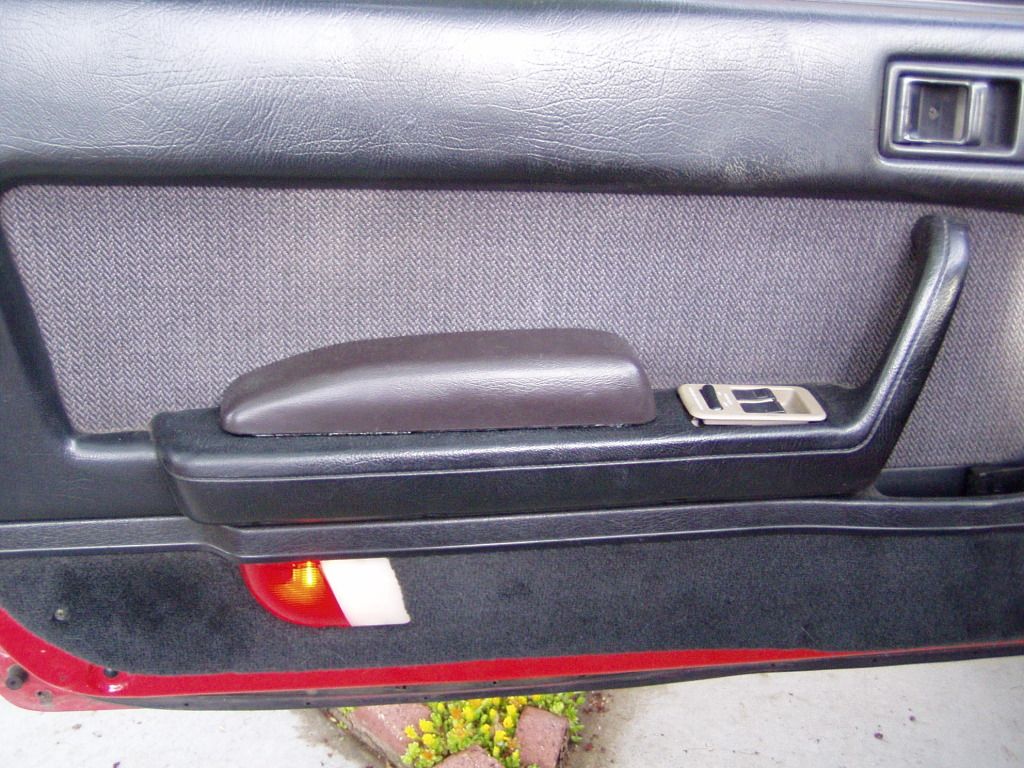
For the door rest I took another center console cap, sectioned it and turned it on it's side.
It's tacked on with GOOP (which is reversible) and right now I'm just establishing the height I like.
Apparently, the adhesive I should be using is 3M spray, probably #77.
I have enough pleather to cover both bezels and will work on them concurrently before committing to a final product.
If I ever commit at all...
The bastard child of the FC/Sentra one nighter is in one piece and substantially shaped.
At this point it's rough sanded and I sprayed a guide coat of flat black to see what it actually looked like.
(A note about the bezel>dash interface...the vinyl/foam skin on my dash has begun delaminating around this area and is cracked and deformed. I have to do something about this, whether from the bezel side or the dash, not sure yet. Anyway, it's not the bezels fault that intersect looks so crappy, although the problem was exacerbated when I sectioned about 5/8" from the outer edge of the FC outer skin to make it thinner.)
I think it looks pretty good.
The column surround is just crudely fit but can be massaged into shape (although the weirdness around the ignition is still an issue).
I'm not at all happy with the inner bezel>gauge cluster joint.
The FC "glass" is curved in every plane and a bitch to match up to, especially given my simplistic methods. I need to reevaluate my approach.
In every other respect though I think this makes for a much airier, nicer look for the dash while not drawing undo attention to itself.
Oh, the armrests:
For the door rest I took another center console cap, sectioned it and turned it on it's side.
It's tacked on with GOOP (which is reversible) and right now I'm just establishing the height I like.
Apparently, the adhesive I should be using is 3M spray, probably #77.
I have enough pleather to cover both bezels and will work on them concurrently before committing to a final product.
If I ever commit at all...
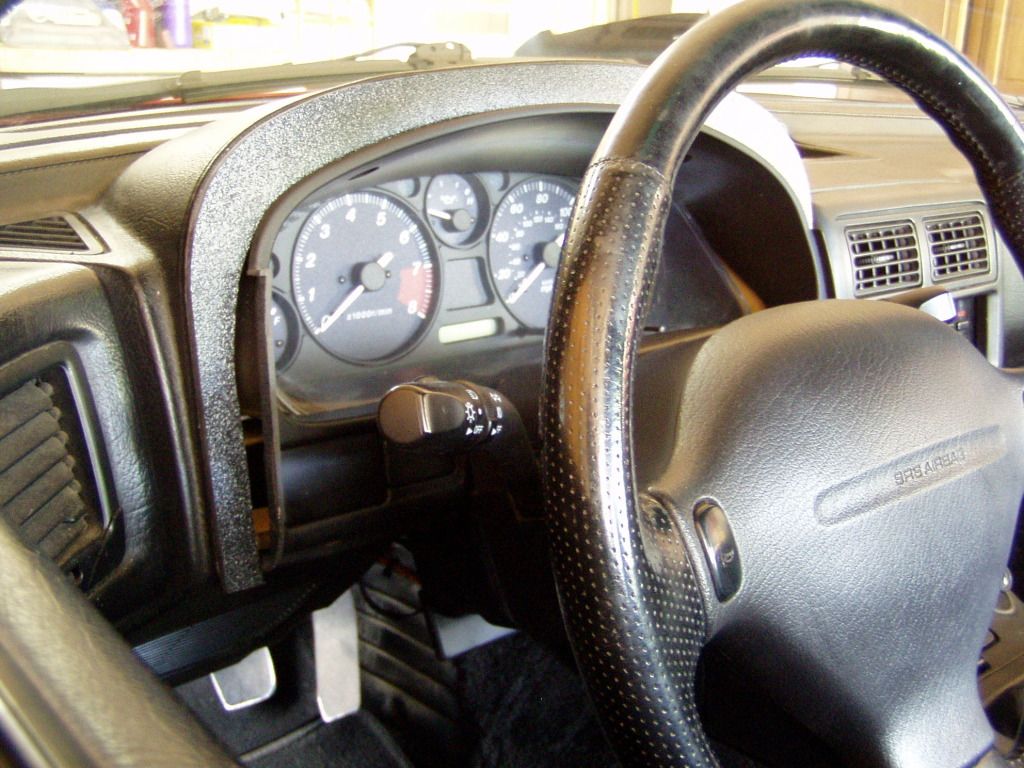
Column surround now final fitted.
For the first time in the process the trim is now fully screwed in, I finally made a third bracket to hold the lower section up (prior to this it's been hanging off the two front mounts only.
With the steering wheel off a better view of the bezel is available:


For the first time in the process the trim is now fully screwed in, I finally made a third bracket to hold the lower section up (prior to this it's been hanging off the two front mounts only.
With the steering wheel off a better view of the bezel is available:

