What did you do to your FB today?


 06-17-13, 07:28 PM
#3177
Installed the brightest 1056 LED bulb I could find (440lm) in one of the backup lights and took a photo. Significantly brighter than the filament 1056 as I think you can see. Tried to take a photo of the LED dome lamp I put in a few days ago. I couldn't turn the camera down enough to give the right impression of the brightness. But you feel like there is something wrong with the directional lamp it is so dim when the LED dome light is on. Not sure photo this really conveys the difference.
06-17-13, 11:32 PM
#3179
^Awesome! I had to free up a rusted electric fuel door solenoid recently. Now it works perfectly too!
I pulled some old dead battery cables from the blue car and measured them to buy replacements this weekend. They'll be made out of copper. Yes actual copper! Not aluminum.
Then I installed a new old stock FC waterpump on the REPU's fresh rebuilt R5 engine.
Then I examined a set of S5 throttle position sensors and made the sad discovery that I'd need to grab the contact slider from the S5 shaft as well, and also saw that the S4 intake I wanted to swap it onto was missing its TPS. D'oh! Lastly the S5 injectors use a different connector shape, so not compatible with an S4 harness.
After that I swapped a new brake master cylinder in the white car. I assume it worked. I haven't heard back from the owner but I assume the car's brakes work. lol
06-18-13, 12:47 AM
#3180
Sin City Rotary
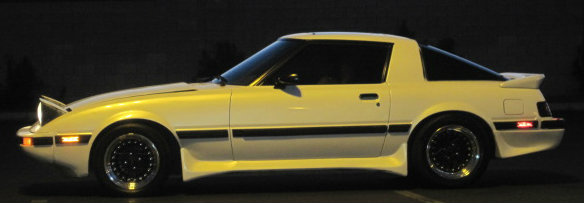
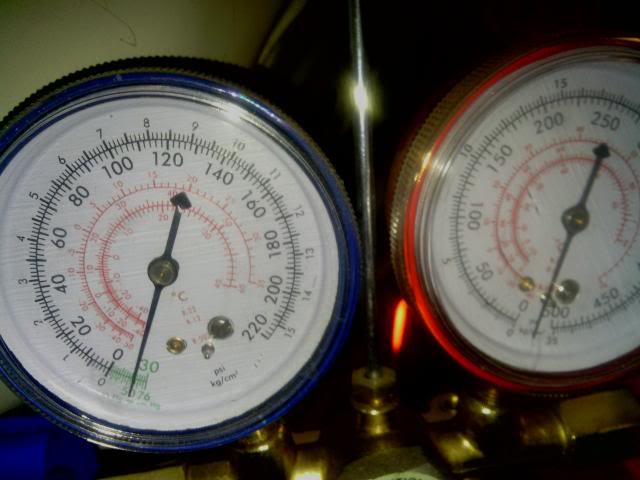
Well kind of my car ... actually the wifes GSL ... still super cool how much she digs it ... but anyway 1 request was it have a/c .... so in the lower picture is where the gauges remain reading after 24 hours show ... so should be safe to put some R12 into the system
the car
the guages

the car
the guages
06-18-13, 05:04 PM
#3182
Haha I'm in the same boat... cept I'm keeping the turbo A/C charged 7 for myself

That might not last long after I get it running.

I furthered my progress on the home made edelbrock mani.
And slaped a set of new KYB's on my SA22c. Sucks cause its raining and I can't really take the new handleing to the limits, but its deffinetly a smoother less bouncy ride.
 06-19-13, 11:43 AM
#3186
Jeff20b - looks like you hit the same road block I did with my EFI - injectors dont match the harness! Only mine are S5 injectors and haltech harness. I just got in some new injector plugs from http://www.lms-efi.com/sunshop/index...duct_list&c=25 and am hoping to wire these into the Haltech harness - I think that might be the best way to go. I hate cutting a pristine harness, though... so I haven't done it yet.
Need to see the pics of that header!!!
Qindao - would love to see that intake manifold!!
Need to see the pics of that header!!!
Qindao - would love to see that intake manifold!!
06-19-13, 12:58 PM
#3187
Originally Posted by t_g_farrell
Pics? For what vehicle?
As for the injectors, I'll just see about using a set of 88 high impedance injectors from an S4. And you're probably right about using an S4 primary rail because it looks like it should fit under the S5 manifold.
06-19-13, 05:20 PM
#3188
Moderator
iTrader: (3)
Join Date: Mar 2001
Location: https://www2.mazda.com/en/100th/
Posts: 30,826
Received 2,593 Likes
on
1,842 Posts
 06-20-13, 11:33 AM
#3193
Sad day on those white letters!
I'm still trying to talk myself into painting white letters on my Sumi's.... I just dont know that it will look as good on the GSL-SE wheels and dont want to mess up a perfectly good set of tires trying.
Jeff20b - thanks for the feedback on the S4 primary fuel rail. I was getting seriously concerned for a minute that I may need to order even MORE parts! D:
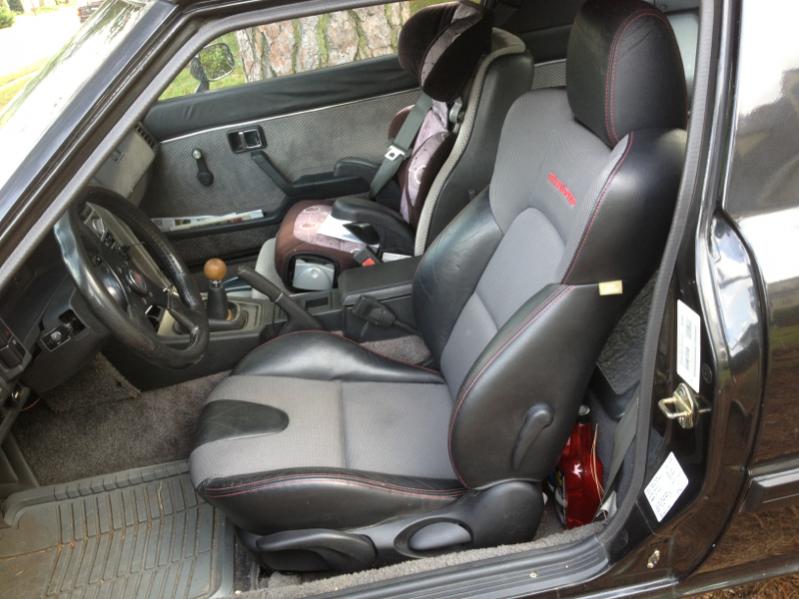
I havent done much except drive her the last little bit. OH I did finish up the interior and subwoofer mounting, turned out real good and DANG this new sub box is loud AND clean. Mounts ALMOST within the frame of the passenger storage bin, just about .5" overlap out, which I'm fairly certain I can cover up with carpeting and have look stock. I need to get another storage bin lid latch - the female end that snaps into the bin housing - and then it will be all nice and tight, rattle free! (I've never had a rattle free car before - that Hushmat was GOOD MOVE!)
I'm still trying to talk myself into painting white letters on my Sumi's.... I just dont know that it will look as good on the GSL-SE wheels and dont want to mess up a perfectly good set of tires trying.
Jeff20b - thanks for the feedback on the S4 primary fuel rail. I was getting seriously concerned for a minute that I may need to order even MORE parts! D:
I havent done much except drive her the last little bit. OH I did finish up the interior and subwoofer mounting, turned out real good and DANG this new sub box is loud AND clean. Mounts ALMOST within the frame of the passenger storage bin, just about .5" overlap out, which I'm fairly certain I can cover up with carpeting and have look stock. I need to get another storage bin lid latch - the female end that snaps into the bin housing - and then it will be all nice and tight, rattle free! (I've never had a rattle free car before - that Hushmat was GOOD MOVE!)
06-20-13, 12:54 PM
#3194
Last night, I dropped my catback and heat shields and reinserted the driveshaft into the tranny. Buttoned up the heat shielding and put a floor jack under the other end of the shaft to keep it from sliding out until I get the GSL-SE axle back on. I'm considering whether I want to tackle the RB exhaust swap at this time or not. I want to, but I'm not sure what changes to the IM are going to be required to do this.
The night before was productive. Thanks to j9fd3s, I was inspired to redo my watts links and lower trailing arms using circle track parts. I assembled the two watts links using Coleman EZ-Adjust trailing arm kits and heim joints from lefthanderchassis.com. They were stupidly simple to get together and adjusted. The only challenge was finding a 12 pt 1/4" socket to loosen the set screw on the clamp. I ended up going to Sears, which had several. NOBODY else had them. Nobody. I knew Sears had a fairly well-stocked hardware section, but damn…it's WAY better than OSH or Home Depot.
Anyway, here are pics of the watts links I put together…
Coleman EZ-Adjust trailing arm and Heim joint installed:

Trailing arm mocked up and stock watts linkage:

Slid stock bolts through the Heim joint into the stock watts link. Adjusted the Heim joints until they lined up with the stock watts link, making sure I could get bolts through both ends at a time. I was a little worried that the angle of the of the links would make replicating it with a straight link setup like this would be problematic, but the Heim joints have plenty of movement to allow me to replicate the proper angle.

Once i assembled both links, I mocked them up on the frame of the car. Here are video links that illustrate the passenger side (short) link and how much travel it allows:
Watts Links w/spherical bearings for Mazda RX-7 (FB) 2 - YouTube
Watts links w/spherical bearings for Mazda RX-7 (FB) - YouTube
That is a LOT more movement than the stock watts link!
Here they are mocked up on my GSL-SE rear axle:

And a closeup showing the spacers I used…these aren't tightened down yet:

i used these same spacers plus some washers to test mount these to the frame of the car.
The only downer was I ordered the wrong size spacers and Heim joints for the lower trailing arms, otherwise I'd have knocked those out too. They're on order. Thanks to j9fd3s for coming up with the measurements and parts lists and allowing me to be the guinea pig.
fm
The night before was productive. Thanks to j9fd3s, I was inspired to redo my watts links and lower trailing arms using circle track parts. I assembled the two watts links using Coleman EZ-Adjust trailing arm kits and heim joints from lefthanderchassis.com. They were stupidly simple to get together and adjusted. The only challenge was finding a 12 pt 1/4" socket to loosen the set screw on the clamp. I ended up going to Sears, which had several. NOBODY else had them. Nobody. I knew Sears had a fairly well-stocked hardware section, but damn…it's WAY better than OSH or Home Depot.
Anyway, here are pics of the watts links I put together…
Coleman EZ-Adjust trailing arm and Heim joint installed:
Trailing arm mocked up and stock watts linkage:
Slid stock bolts through the Heim joint into the stock watts link. Adjusted the Heim joints until they lined up with the stock watts link, making sure I could get bolts through both ends at a time. I was a little worried that the angle of the of the links would make replicating it with a straight link setup like this would be problematic, but the Heim joints have plenty of movement to allow me to replicate the proper angle.
Once i assembled both links, I mocked them up on the frame of the car. Here are video links that illustrate the passenger side (short) link and how much travel it allows:
Watts Links w/spherical bearings for Mazda RX-7 (FB) 2 - YouTube
Watts links w/spherical bearings for Mazda RX-7 (FB) - YouTube
That is a LOT more movement than the stock watts link!
Here they are mocked up on my GSL-SE rear axle:
And a closeup showing the spacers I used…these aren't tightened down yet:
i used these same spacers plus some washers to test mount these to the frame of the car.
The only downer was I ordered the wrong size spacers and Heim joints for the lower trailing arms, otherwise I'd have knocked those out too. They're on order. Thanks to j9fd3s for coming up with the measurements and parts lists and allowing me to be the guinea pig.
fm
06-20-13, 02:47 PM
#3195
Waffles - hmmm good
iTrader: (1)
Update: The addition of AlumASeal seems to have solved my coolant leak both internally and
externally. I realize now with 20/20 hindsight that I have been leaking coolant into the chambers
lately after sitting for a long period and that first start always had lots of backfires and more
white smoke than expected. Anyway, leaks fixed and startup is actually better.
Next project is to reinstall the AC and use R152 to fill it (Dust Off). Did this on my wifes BMW
323i last year when replacing a bad compressor and it works better than R134.
06-20-13, 02:52 PM
#3196
Moderator
iTrader: (3)
Join Date: Mar 2001
Location: https://www2.mazda.com/en/100th/
Posts: 30,826
Received 2,593 Likes
on
1,842 Posts
Last night, I dropped my catback and heat shields and reinserted the driveshaft into the tranny. Buttoned up the heat shielding and put a floor jack under the other end of the shaft to keep it from sliding out until I get the GSL-SE axle back on. I'm considering whether I want to tackle the RB exhaust swap at this time or not. I want to, but I'm not sure what changes to the IM are going to be required to do this.
The night before was productive. Thanks to j9fd3s, I was inspired to redo my watts links and lower trailing arms using circle track parts. I assembled the two watts links using Coleman EZ-Adjust trailing arm kits and heim joints from lefthanderchassis.com. They were stupidly simple to get together and adjusted. The only challenge was finding a 12 pt 1/4" socket to loosen the set screw on the clamp. I ended up going to Sears, which had several. NOBODY else had them. Nobody. I knew Sears had a fairly well-stocked hardware section, but damn�it's WAY better than OSH or Home Depot.
fm
06-20-13, 08:14 PM
#3197
Drove it to a junkyard. It's rare to find an Rx7 in a yard around here. Mostly wanted the storage bin sheet metal to finagle a three seat arrangement as my one year old is nearing 2 and will soon be sharing navigator duties.
Also got a dome light with the luxurious map light feature, some vent louvres, and some other odds and ends.

Instagram post by 20 yr old son, the doer of dirty work.
Also got a dome light with the luxurious map light feature, some vent louvres, and some other odds and ends.
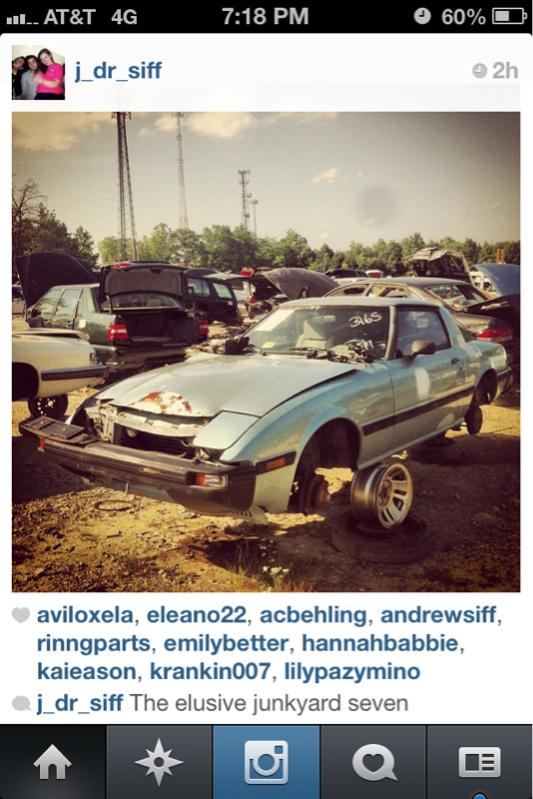
Instagram post by 20 yr old son, the doer of dirty work.
06-21-13, 02:44 AM
#3198
I'm waiting on new rod ends and spacers, so this evening I turned my attention to the GSL-SE and the S4 intake manifold I am going to fit on it. I started fabbing the block off plate for the EGR port on the center iron out of aluminum angle stock. Got it cut, the bottom of the manifold filed flat, drilled, and tapped. I need to get the correct screws for the holes I tapped as well as some Locktite tomorrow before I can put it on and mount the intake manifold on my keg.
fm


 06-22-13, 12:03 AM
#3200
I test drove the brown car with the racing nikki and the new header I just recently put together. A whole 2.9 miles. It works no leaks.
Also threw an intake on the red truck and got it test fired. It made a funny clunking noise. Turned out the main drive pulley bolts weren't all the way tight. I swapped in another distributor before I figured that out.
The new muffler sounds really good. Just enough tone for me now. Now if I could just be satisfied with NA power...
It works no leaks.Also threw an intake on the red truck and got it test fired. It made a funny clunking noise. Turned out the main drive pulley bolts weren't all the way tight. I swapped in another distributor before I figured that out.
The new muffler sounds really good. Just enough tone for me now. Now if I could just be satisfied with NA power...