Show Pics of your cages please!


Thread Starter
Senior Member
Joined: Aug 2004
Posts: 315
Likes: 4
From: Portland,Or
I did this Honda Cage last spring, owner ran it at Seattle over the summer and took a slight roll and impact on the roof. She was unhurt but the car is a write off. I heard she was doing around 70 or so and lost a front wheel through the down hills and it jumped over the to the roof and then back on the wheels. it is kind of a common occurrence at that track location for roll overs.

There was minimal roll cage damage, a little bending of the A-pillar over steering wheel but that is to be expected do the the slamming of the roof to the hard ground. Customer wants me to cut this one out and salvage what I can. I am going to scrap the whole car and cage and build a new one to the next car she finds. I will have to much time into it to cut it out, cut and clean welds and to make it all legal again.

You can see by the damage why I like to add a bar from the door bars to the A-pillar. The door opening is rather large in a honda and being that it is front wheel drive there is additional weight on the front of the chassis. I usually like to move it further back but on this particular job I didn't.
Note to self! Do it the other way from now.
There was minimal roll cage damage, a little bending of the A-pillar over steering wheel but that is to be expected do the the slamming of the roof to the hard ground. Customer wants me to cut this one out and salvage what I can. I am going to scrap the whole car and cage and build a new one to the next car she finds. I will have to much time into it to cut it out, cut and clean welds and to make it all legal again.
You can see by the damage why I like to add a bar from the door bars to the A-pillar. The door opening is rather large in a honda and being that it is front wheel drive there is additional weight on the front of the chassis. I usually like to move it further back but on this particular job I didn't.
Note to self! Do it the other way from now.
Lives on the Forum
Joined: Sep 2003
Posts: 5,707
Likes: 6
From: BC, Canada
I've seen it doen before with a bar straight from the bottom of the downtube to the top of the A pilliar for just this reason. I'd think that might be a better solution, so you're not loading the door bar in bending.
There was a really serious accident at the bottom of the hill there this past summer when an FC got airborne and flipped end over end at least once. The car was a total write off and the driver was quite badly injured. Its an exciting corner, coming down from the fastest turn on the track, then plunge down a 125 foot drop into the tightest corner on the track (back to back hairpins in an S).
There was a really serious accident at the bottom of the hill there this past summer when an FC got airborne and flipped end over end at least once. The car was a total write off and the driver was quite badly injured. Its an exciting corner, coming down from the fastest turn on the track, then plunge down a 125 foot drop into the tightest corner on the track (back to back hairpins in an S).
Thread Starter
Senior Member
Joined: Aug 2004
Posts: 315
Likes: 4
From: Portland,Or
I've seen it doen before with a bar straight from the bottom of the downtube to the top of the A pilliar for just this reason. I'd think that might be a better solution, so you're not loading the door bar in bending.
There was a really serious accident at the bottom of the hill there this past summer when an FC got airborne and flipped end over end at least once. The car was a total write off and the driver was quite badly injured. Its an exciting corner, coming down from the fastest turn on the track, then plunge down a 125 foot drop into the tightest corner on the track (back to back hairpins in an S).
There was a really serious accident at the bottom of the hill there this past summer when an FC got airborne and flipped end over end at least once. The car was a total write off and the driver was quite badly injured. Its an exciting corner, coming down from the fastest turn on the track, then plunge down a 125 foot drop into the tightest corner on the track (back to back hairpins in an S).
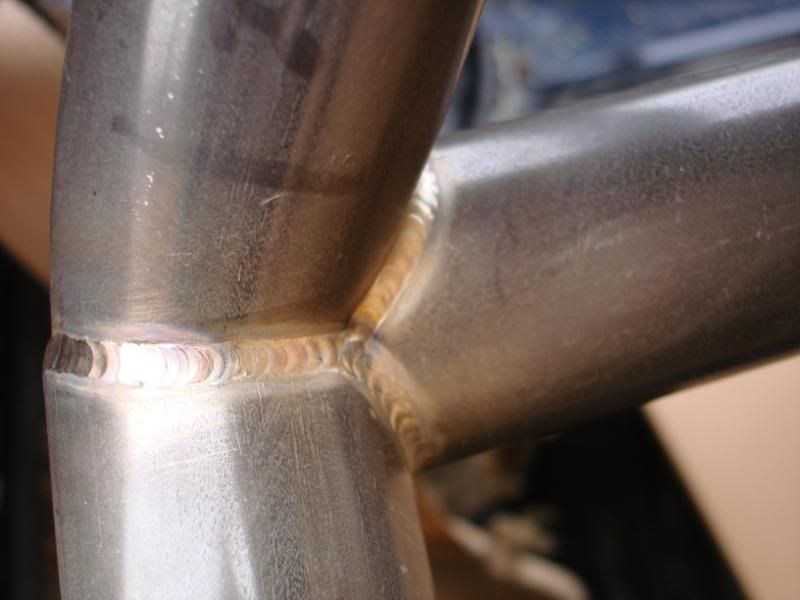
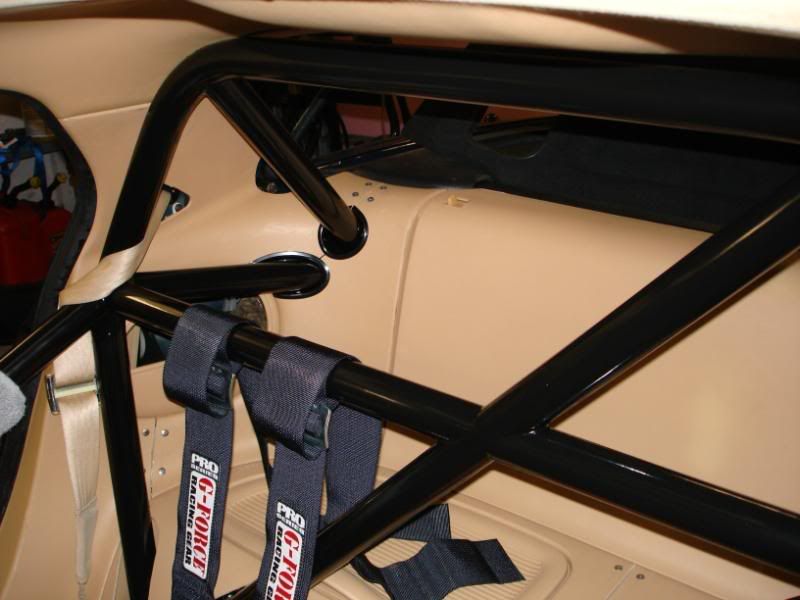
here is how I usually door the a-pillars.

Senior Member
Joined: Jan 2002
Posts: 350
Likes: 0
From: Missouri
You can see by the damage why I like to add a bar from the door bars to the A-pillar. The door opening is rather large in a honda and being that it is front wheel drive there is additional weight on the front of the chassis. I usually like to move it further back but on this particular job I didn't.
Note to self! Do it the other way from now.
Note to self! Do it the other way from now.
Thread Starter
Senior Member
Joined: Aug 2004
Posts: 315
Likes: 4
From: Portland,Or
Well, been really busy finishing up other car projects here in the shop. I wish I could find some credible help!
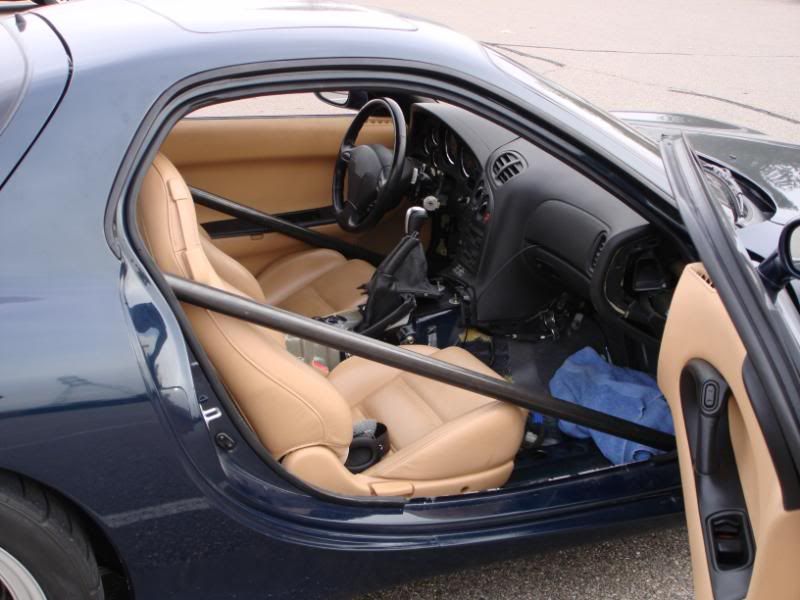
I have the GT completely stripped. Doors, fenders, windshield, all of the interior including pedals and column.
My task with this car is to have it legal and safe enough to compete in the "Silver State Challange" Race plus maybe a few SCCA events.
Here is the car.
http://img.photobucket.com/albums/v3...Picture003.jpg
being that the whole car is Aluminum it has been a challenge to say the least on coming up with a way to secure a steel roll cage to the chassis and still have the safety and room needed to be safe.
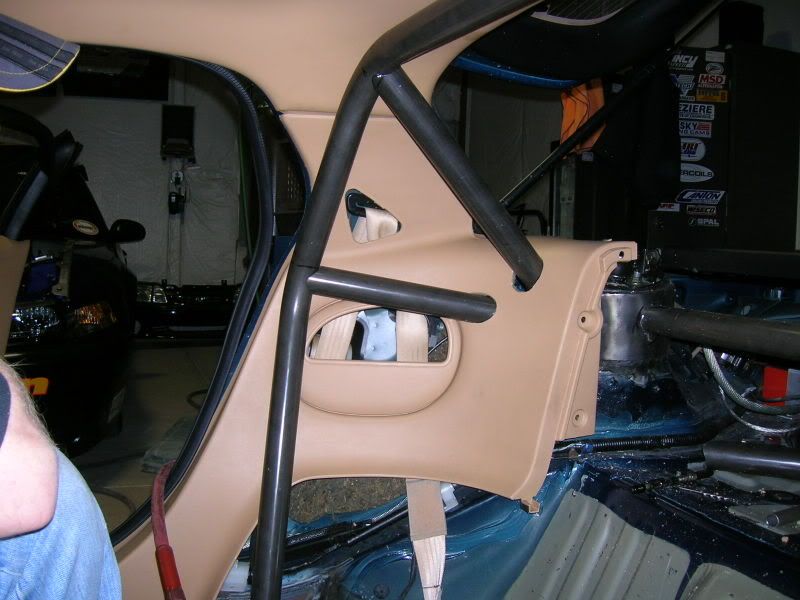
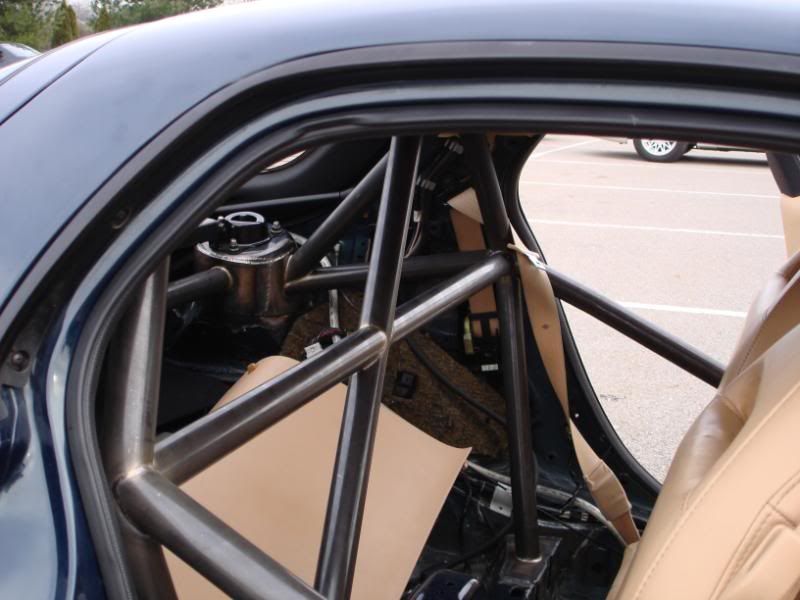
I had to trim some of the aluminum structure away from the B-pillars to allow room for the main hoop. I am doing it completely different from the other two GT cages I have found on the Net. They bonded and sandwiched plates to the floor (which is Aluminum) to weld the main hoop to. Problems I see whit that is the floor is not structural and it brought the main hoop to far forward and pushes the seat forward. I do not like either.
http://img.photobucket.com/albums/v3...gemount110.jpg
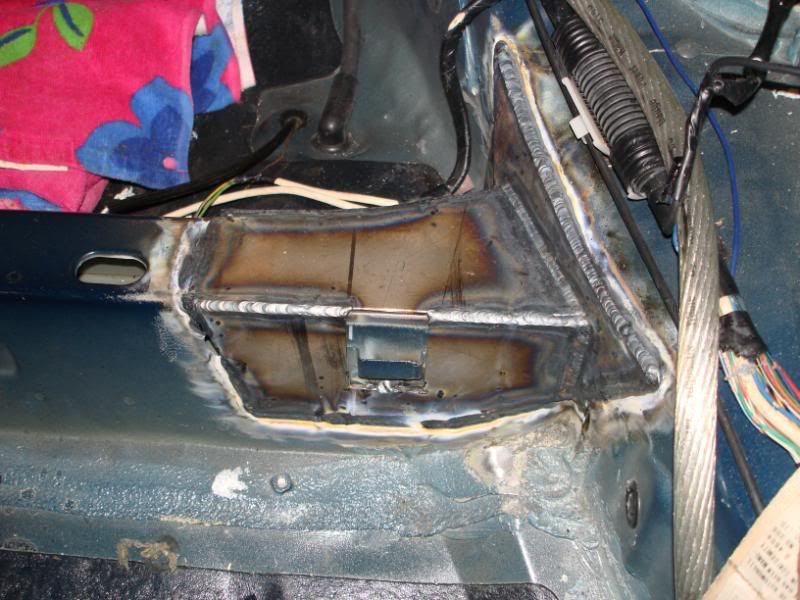
So my solution was discussed at length with a friend that is a Engineer designing Aluminum cargo trailers for the Military, perfect choice for me.
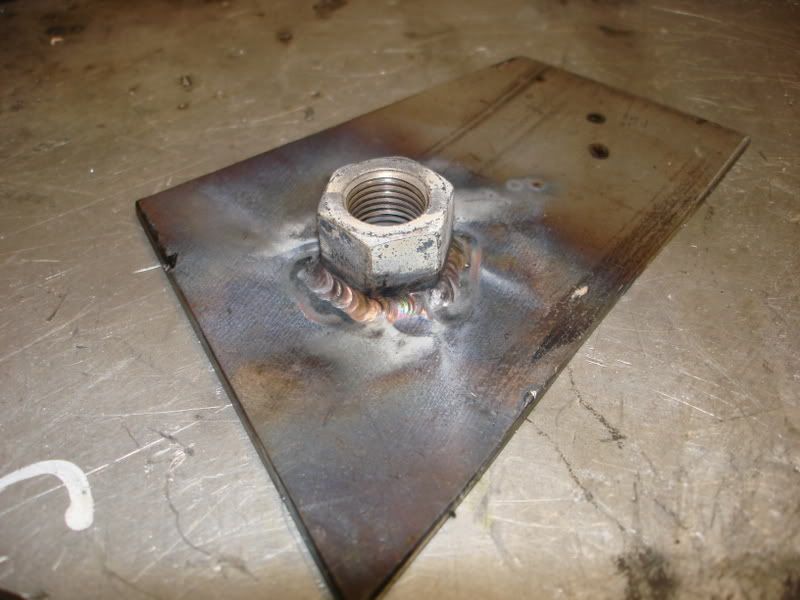
I came up with a Aluminum billet tube, 6.625" length by 1.75" diameter, same as roll cage tubing to be placed through the frame and welded to the top and the bottom. it has been bored with a .75" bore for a grade 8 bolt and a recess for the head (1.125"). That will allow the use of a steel threaded bushing to be insert into the tube and welded around the perimeter with a few well placed rosettes. Once combine the Aluminum tube will capture the Steel bushing with a bolt and the bushing will be welded to the main hoop and the forward A-pillar bars. All combine it has about 2.5 time more strength that a welded tube to a plate in tension and shear. Well above my comfort level for a customer.
http://img.photobucket.com/albums/v3...gemount115.jpg
I had to fab up a shaft suitable for a hole saw cut through 6.5" frame rail. I fabbed up a brass bushing to help keep the alignment while making the bottom cuts through the frame rail.
http://img.photobucket.com/albums/v3...0125GT0060.jpg
http://img.photobucket.com/albums/v3...0125GT0055.jpg
http://img.photobucket.com/albums/v3...0125GT0056.jpg
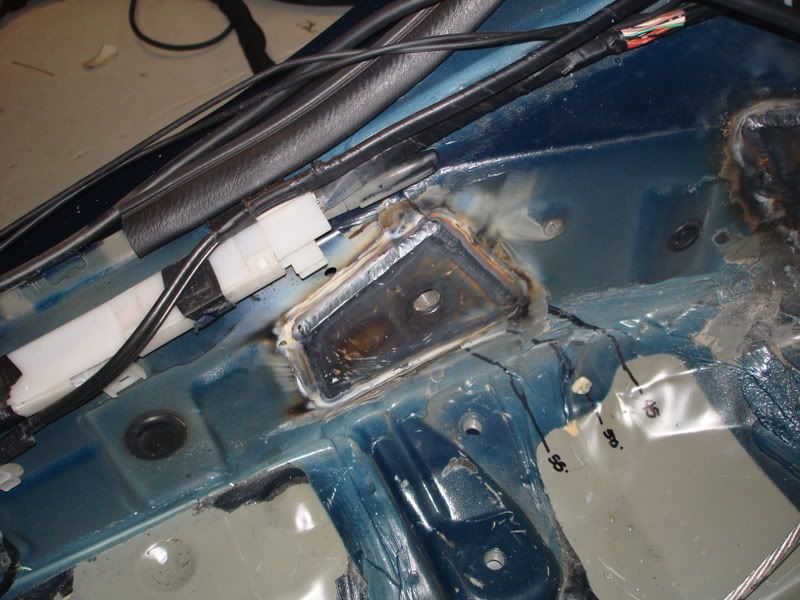
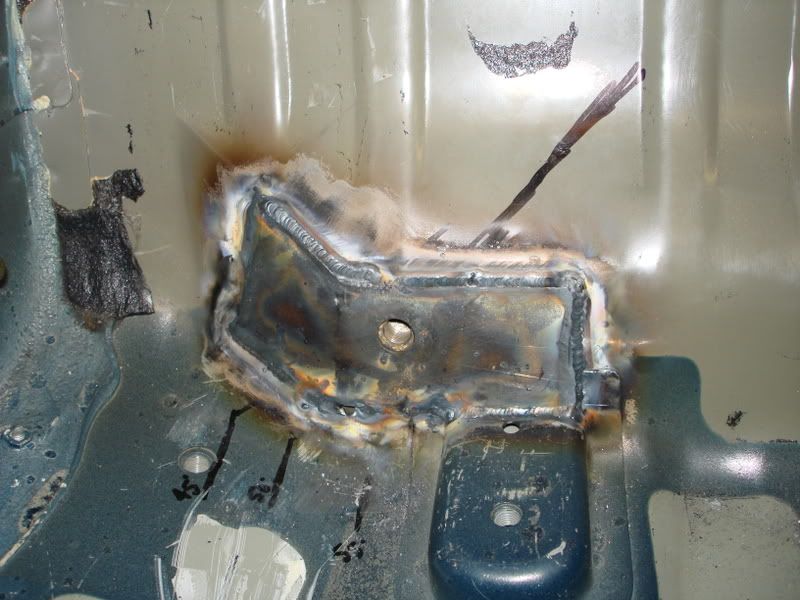
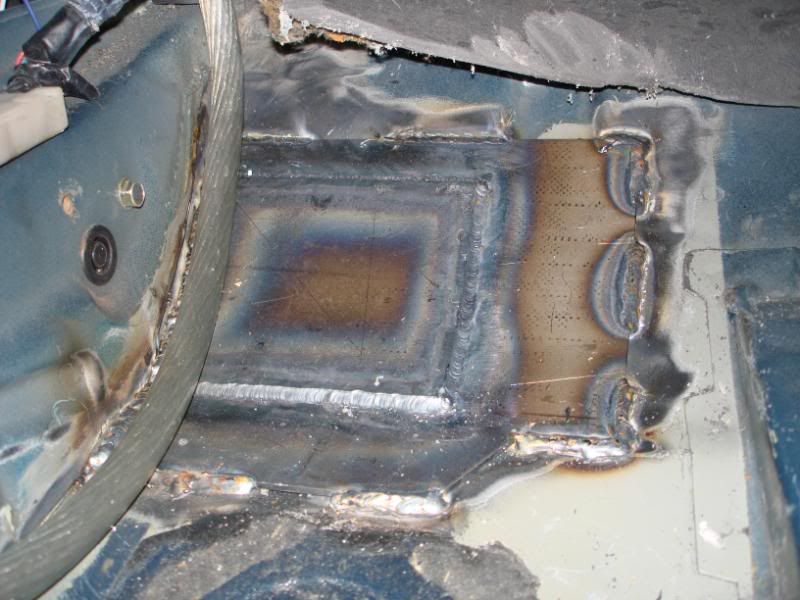
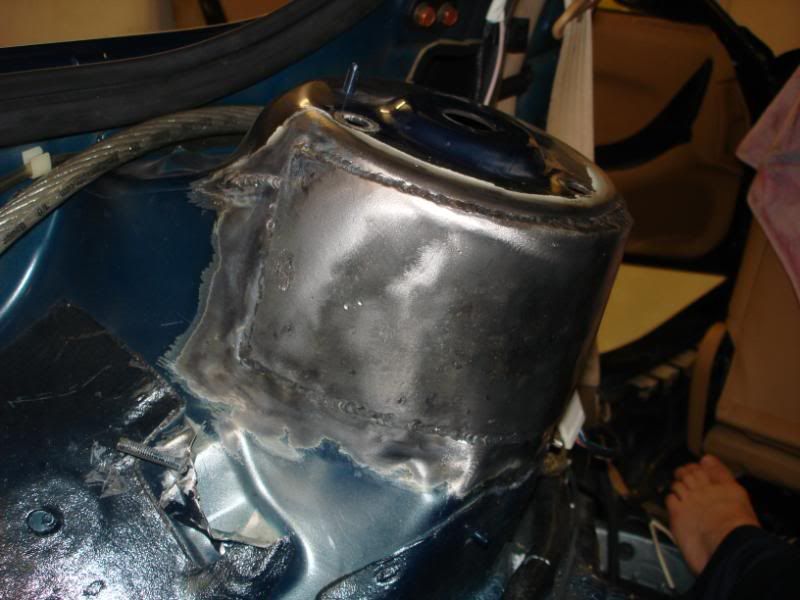
I test fit the Aluminum part with the threaded Steel insert into the chassis to check proper alignment. First picture has the bushing second picture is just the aluminum tube. It will be welded around the top and bottom after the cage is fitted to the car.
http://img.photobucket.com/albums/v3...0125GT0057.jpg
http://img.photobucket.com/albums/v3...0125GT0058.jpg
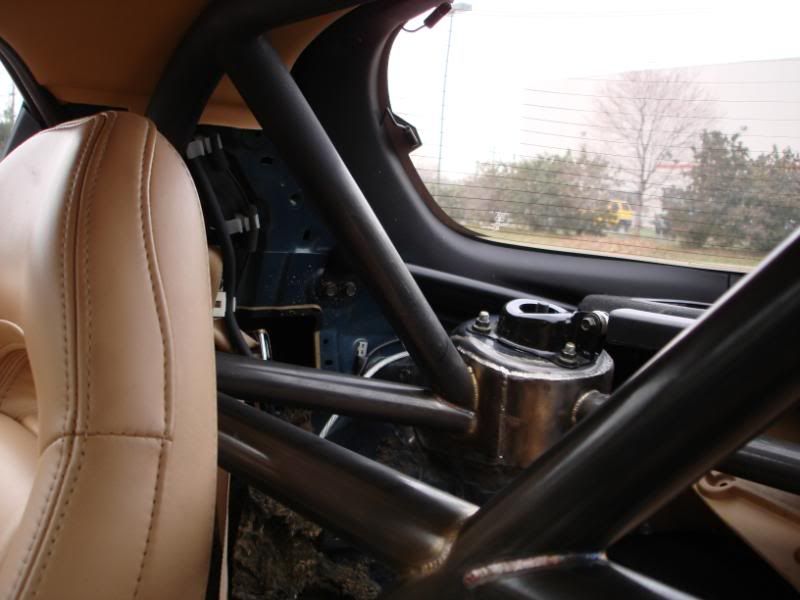
The Aluminum tube can be seen going through the frame rail, it will be machined before final welding to follow the contour of the frame. The head of the fastener will be unseen unless you look at it from the bottom. It is 3 inches from the bottom.
http://img.photobucket.com/albums/v3...0125GT0059.jpg
Thats it for now, tomorrow I will start bending the main hoop and a-pillar bars.
Edit/Delete Message
I have the GT completely stripped. Doors, fenders, windshield, all of the interior including pedals and column.
My task with this car is to have it legal and safe enough to compete in the "Silver State Challange" Race plus maybe a few SCCA events.
Here is the car.
http://img.photobucket.com/albums/v3...Picture003.jpg
being that the whole car is Aluminum it has been a challenge to say the least on coming up with a way to secure a steel roll cage to the chassis and still have the safety and room needed to be safe.
I had to trim some of the aluminum structure away from the B-pillars to allow room for the main hoop. I am doing it completely different from the other two GT cages I have found on the Net. They bonded and sandwiched plates to the floor (which is Aluminum) to weld the main hoop to. Problems I see whit that is the floor is not structural and it brought the main hoop to far forward and pushes the seat forward. I do not like either.
http://img.photobucket.com/albums/v3...gemount110.jpg
So my solution was discussed at length with a friend that is a Engineer designing Aluminum cargo trailers for the Military, perfect choice for me.
I came up with a Aluminum billet tube, 6.625" length by 1.75" diameter, same as roll cage tubing to be placed through the frame and welded to the top and the bottom. it has been bored with a .75" bore for a grade 8 bolt and a recess for the head (1.125"). That will allow the use of a steel threaded bushing to be insert into the tube and welded around the perimeter with a few well placed rosettes. Once combine the Aluminum tube will capture the Steel bushing with a bolt and the bushing will be welded to the main hoop and the forward A-pillar bars. All combine it has about 2.5 time more strength that a welded tube to a plate in tension and shear. Well above my comfort level for a customer.
http://img.photobucket.com/albums/v3...gemount115.jpg
I had to fab up a shaft suitable for a hole saw cut through 6.5" frame rail. I fabbed up a brass bushing to help keep the alignment while making the bottom cuts through the frame rail.
http://img.photobucket.com/albums/v3...0125GT0060.jpg
http://img.photobucket.com/albums/v3...0125GT0055.jpg
http://img.photobucket.com/albums/v3...0125GT0056.jpg
I test fit the Aluminum part with the threaded Steel insert into the chassis to check proper alignment. First picture has the bushing second picture is just the aluminum tube. It will be welded around the top and bottom after the cage is fitted to the car.
http://img.photobucket.com/albums/v3...0125GT0057.jpg
http://img.photobucket.com/albums/v3...0125GT0058.jpg
The Aluminum tube can be seen going through the frame rail, it will be machined before final welding to follow the contour of the frame. The head of the fastener will be unseen unless you look at it from the bottom. It is 3 inches from the bottom.
http://img.photobucket.com/albums/v3...0125GT0059.jpg
Thats it for now, tomorrow I will start bending the main hoop and a-pillar bars.
Edit/Delete Message


Thread Starter
Senior Member
Joined: Aug 2004
Posts: 315
Likes: 4
From: Portland,Or
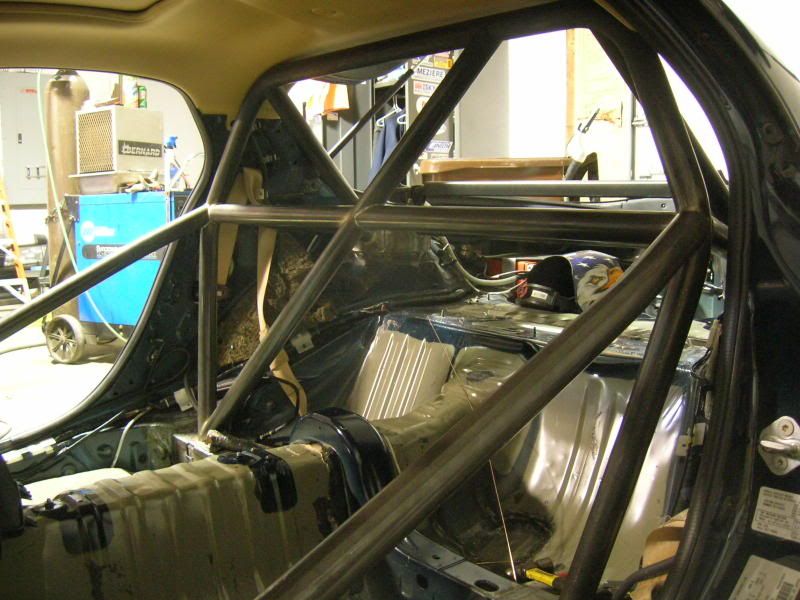
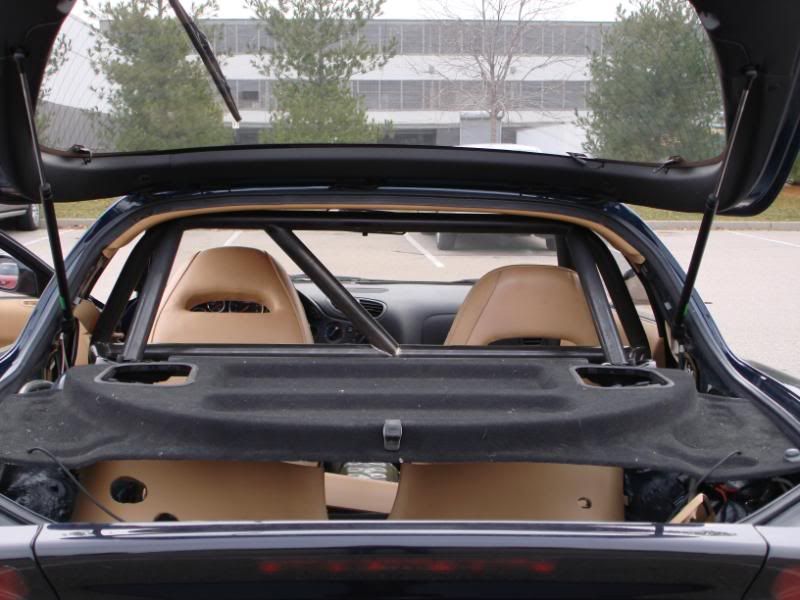
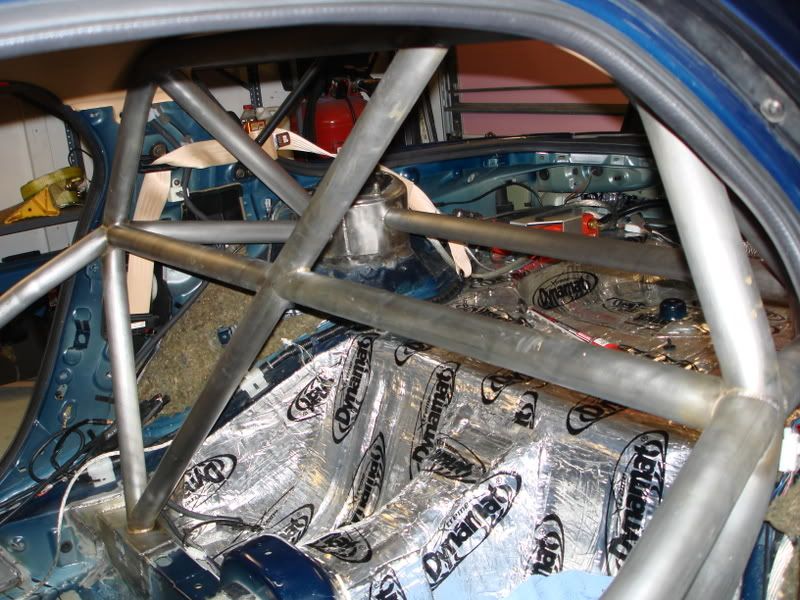
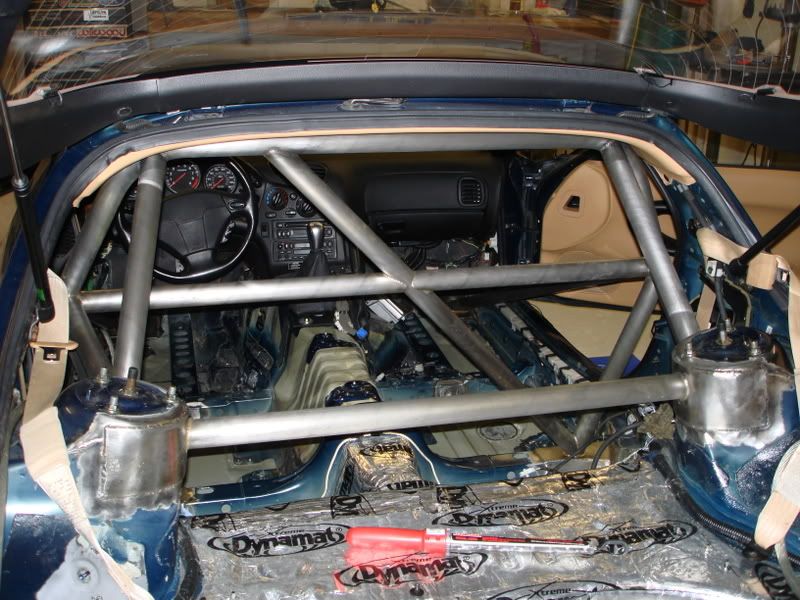
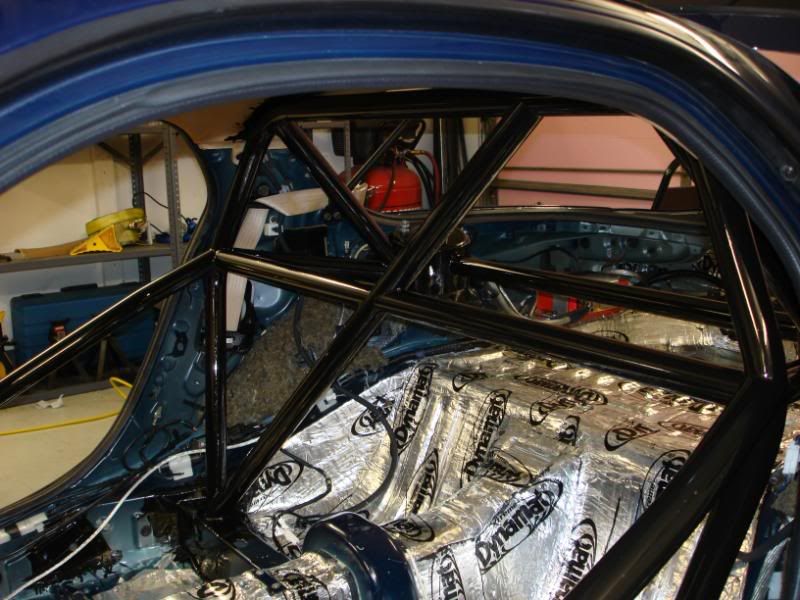
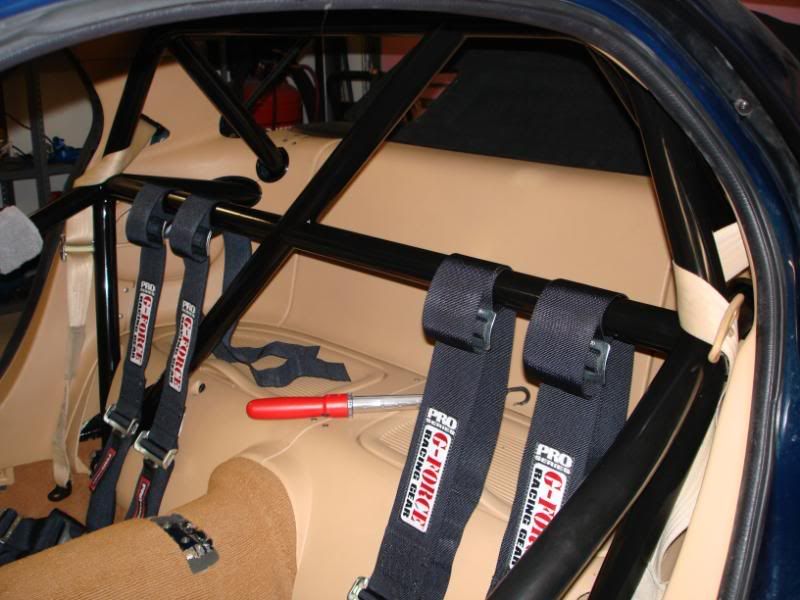
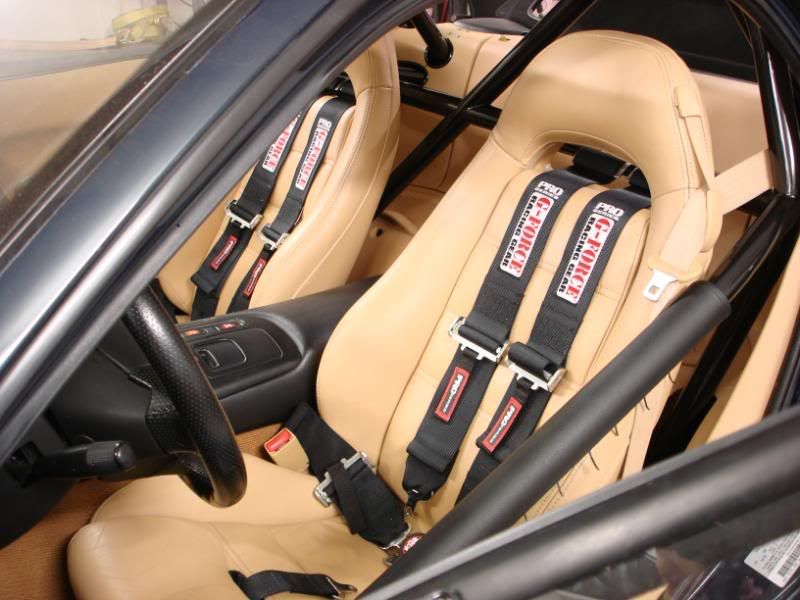
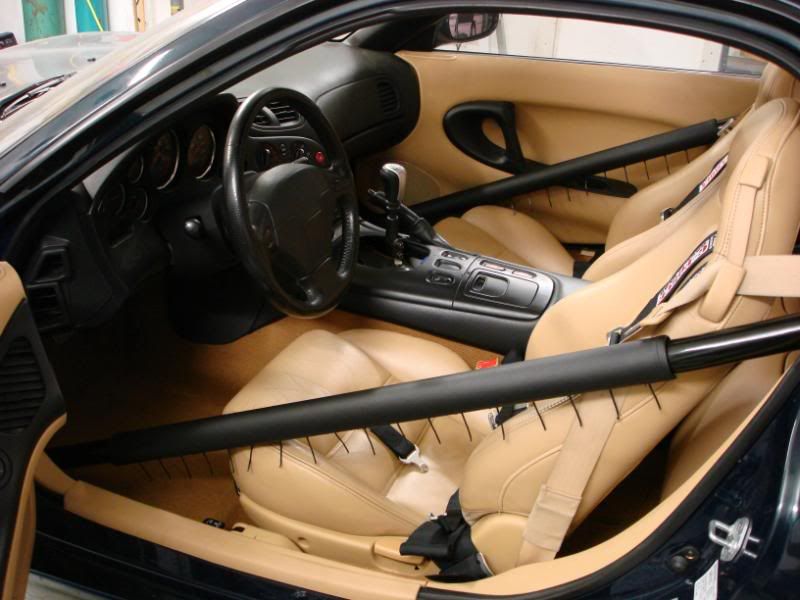
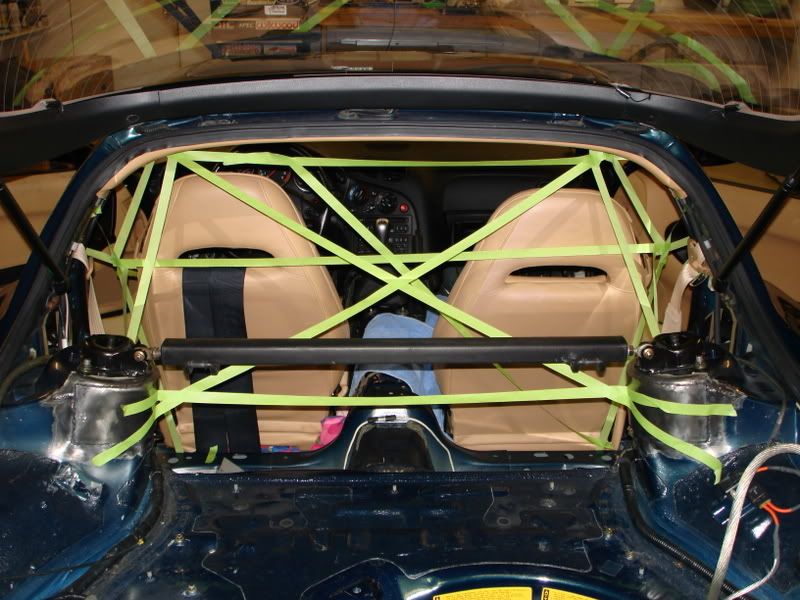
Here are a few more pictures. All of the cage is done, seat mounts done, column done, pedals done, resivors and master cylenders mounts, all brake and clutch hardware done, and both window nets done. I will try to get some pictures of the paint soon!


My Cage Part 1.
Here is my cage. I'll show pics of the progress.
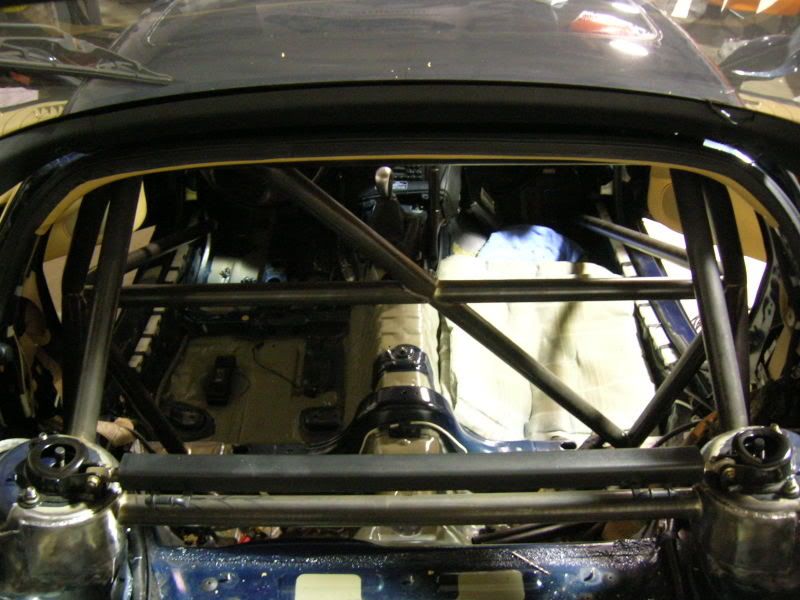
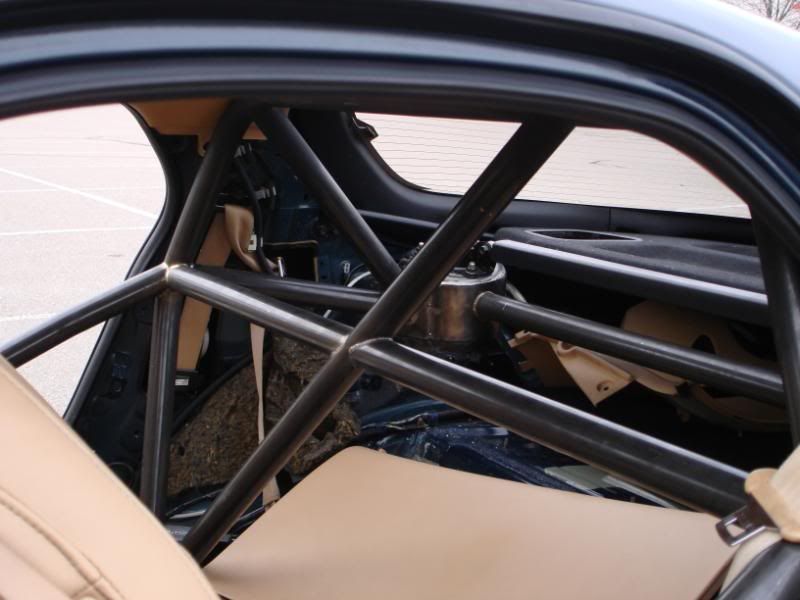
Planning. - good thing too, I decided the rear X was just too much.
Main hoop plates
Door bar plates
Shock tower plates

Planning. - good thing too, I decided the rear X was just too much.
Main hoop plates
Door bar plates
Shock tower plates