
Tegheim - Home made 4 Rotor Wolvo project


I am sure he will just mill them...
rotors all looking good tegheim!
on a side note, are you using solidworks with HSMworks, or importing the solidworks into MasterCAM?
rotors all looking good tegheim!
on a side note, are you using solidworks with HSMworks, or importing the solidworks into MasterCAM?


You have ***** of steel, or whatever material you're machining those rotors out of. 
Speaking of *****, now I have a question about your shaft (get your mind out of the gutter). Which oil squirters will you install in the shaft? Or will you install a set of weber jets like the racers do? I ask because 12A use a small ball and 13B use a big ball that's large enough to take up lots of room inside the machined holes in the shaft. Just curious, and it's nothing sexual. Thanks.
By the way, this link takes you to the the "Eccentric Shaft Oil Jet" I was talking about. http://www.mazdatrix.com/boil3.htm

You should sell some of the parts that you make like the aluminum irons.(that just doesn't sound right) I'd be interested in them on my next build and I'm sure there would be alot of people that would pony up for the materpeices you are building...
Thread Starter
Senior Member
Joined: Nov 2003
Posts: 533
Likes: 3
From: Sweden
*****, Shaft, and Squiters?! WTF?! 
I will use a plain hole in a threaded screw so I can change insert.
If you look at some of my pics on the E-shaft, you see the thread behind the excentric part. Same as stock, but in my own way
The "irons" are iron. They had a start-weight at 22kg a piece
I will use a plain hole in a threaded screw so I can change insert.
If you look at some of my pics on the E-shaft, you see the thread behind the excentric part. Same as stock, but in my own way
The "irons" are iron. They had a start-weight at 22kg a piece
Oh, ok. Makes sense since you machined your whole shaft anyway. I've decided to go with the smaller 12A type because I've got 12A rotors. It's one of those times where Mazda already worked out the specs for you (me), so it's quite logical to use what they used.
I've decided to go with the smaller 12A type because I've got 12A rotors. It's one of those times where Mazda already worked out the specs for you (me), so it's quite logical to use what they used.
Thread Starter
Senior Member
Joined: Nov 2003
Posts: 533
Likes: 3
From: Sweden
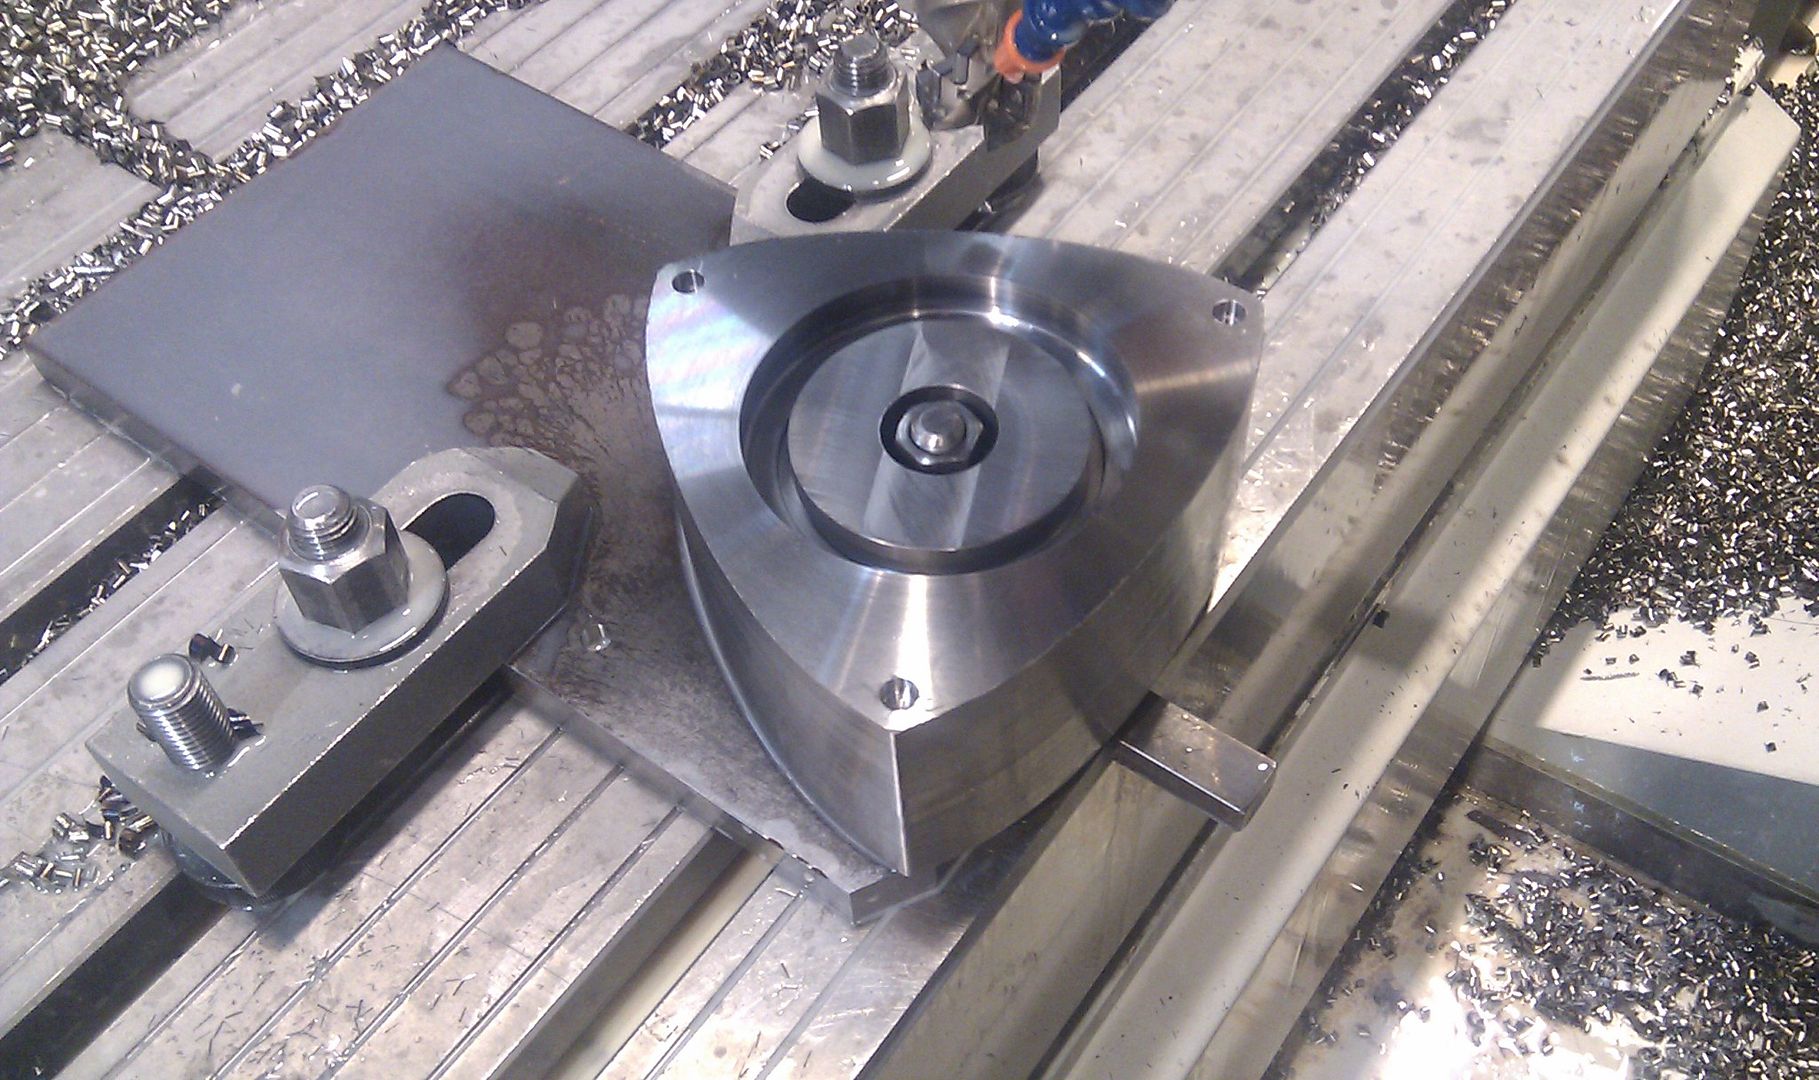
Now I've cleaned up after me and takes weekend.
This took a lot longer than I guessed. Then it's always so well with the first, but had probably hoped for smoother processing
Has anyway tried to run a finishing the outline today. Is not quite satisfied, however, it does not matter for the function. Has left 0.5mm for further testing
To be continued in the Christmas Holidays!

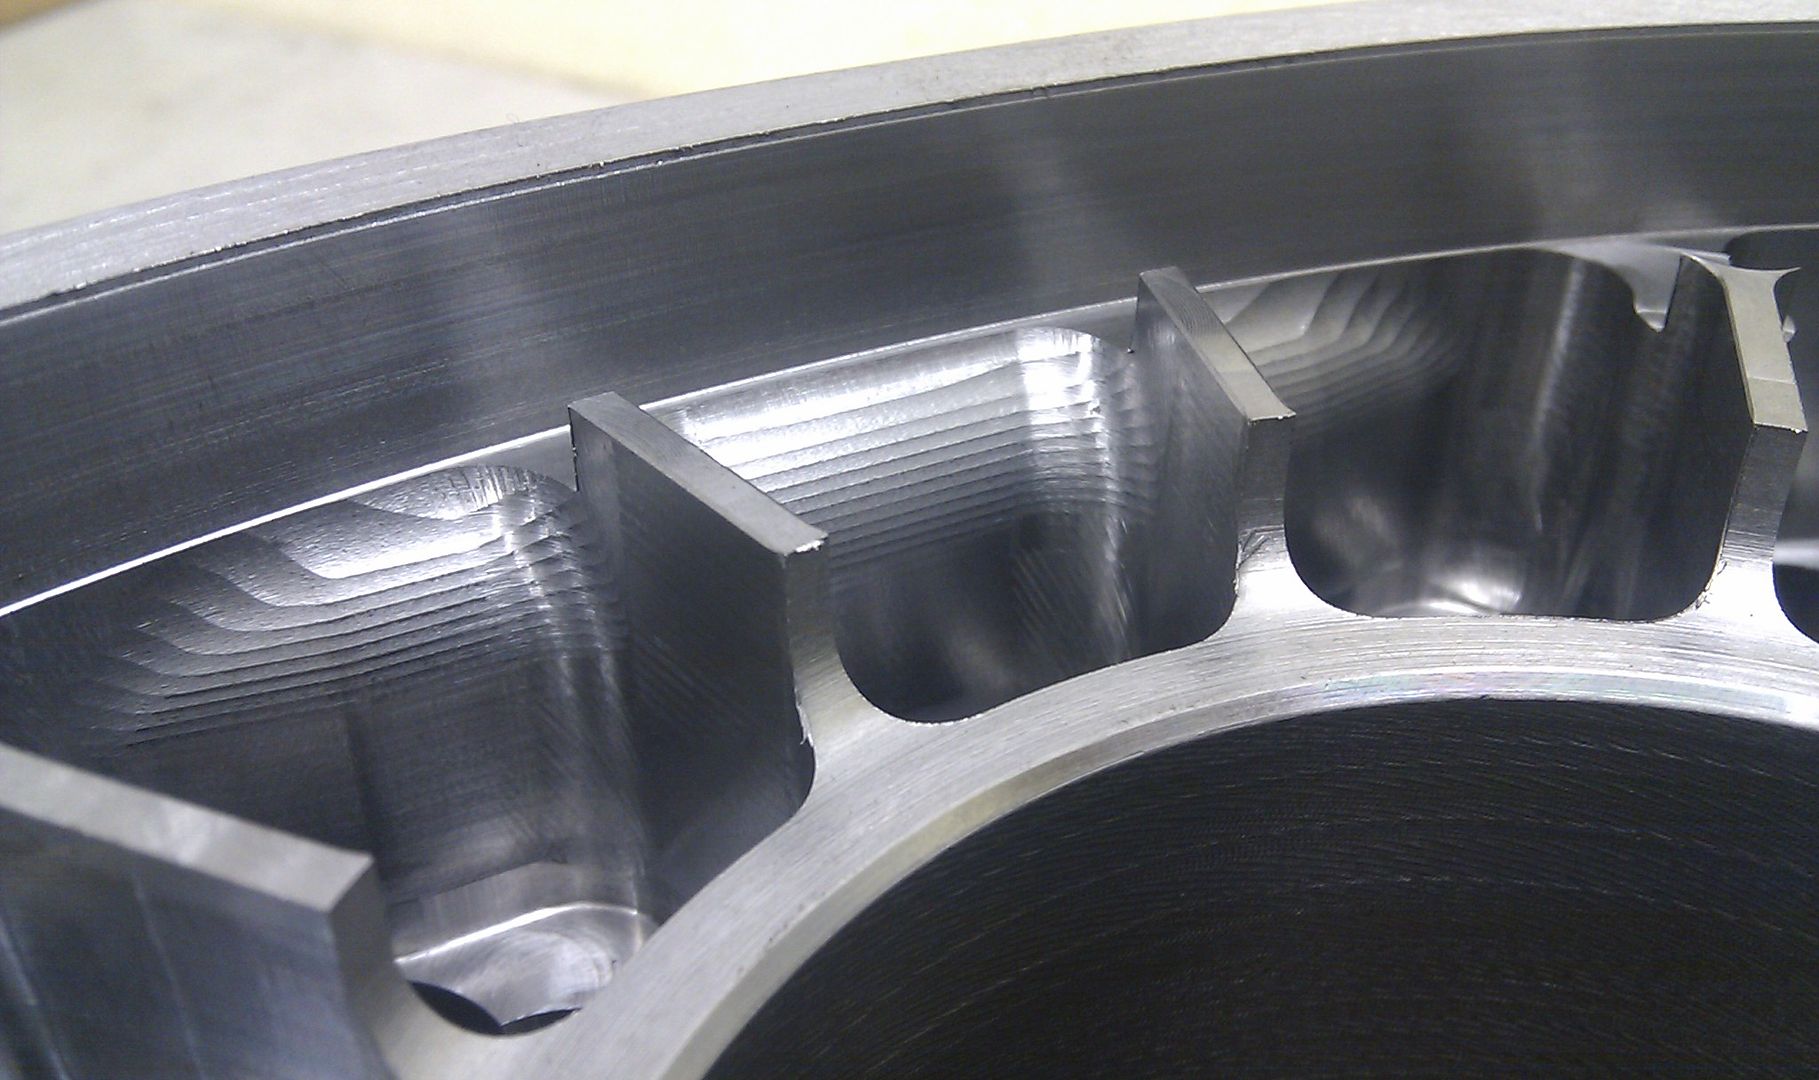
What sort of cutter did you use for the outer contour and the compression bowls?
I wouldn't mind the rough surface too much if there aren't any sharp points. sharp points start to glow and are a detonation source.
By the way, did you melt a cutter milling out the rotor, looks like you did in the lower left corner. Not that it matters, I'm just curious if I saw it right.
I wouldn't mind the rough surface too much if there aren't any sharp points. sharp points start to glow and are a detonation source.
By the way, did you melt a cutter milling out the rotor, looks like you did in the lower left corner. Not that it matters, I'm just curious if I saw it right.

i don't really see any location for a seal for the side plates though so you got me.
Gold Wheels FTW
Joined: Apr 2004
Posts: 458
Likes: 44
From: Nashville, TN
would be more like oil right out the tailpipe. should have some sort of seal, there will be some pressure trying to push the oil out of the side plates and into the chambers otherwise. something like a viton seal should do the job just fine unless the oil temps start to go beyond 400F somehow.
i don't really see any location for a seal for the side plates though so you got me.
i don't really see any location for a seal for the side plates though so you got me.
Thread Starter
Senior Member
Joined: Nov 2003
Posts: 533
Likes: 3
From: Sweden
The seal will be there. But thats the only part I will not show. A man gonna have some secrets
But, its pretty simple actually. And if I show the world the solution, maybe we will see someone else selling mine and Gus3fd's rotor-design. That would be sad
But, its pretty simple actually. And if I show the world the solution, maybe we will see someone else selling mine and Gus3fd's rotor-design. That would be sad