
67 Rotobug Build

67 Rotobug Build
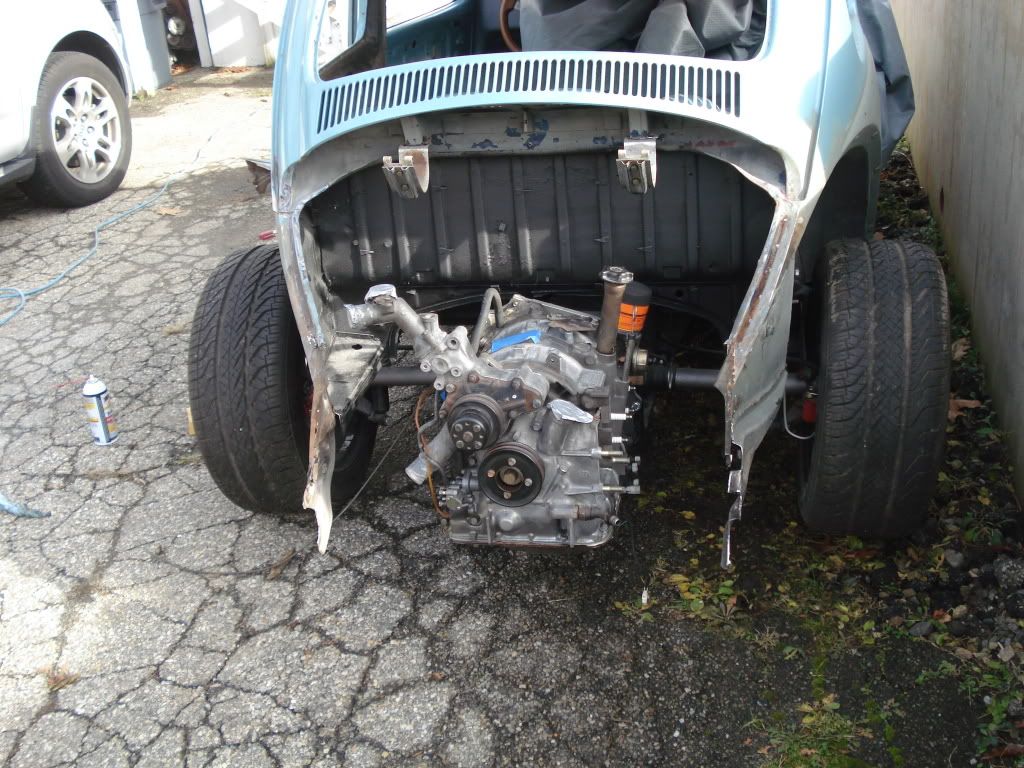
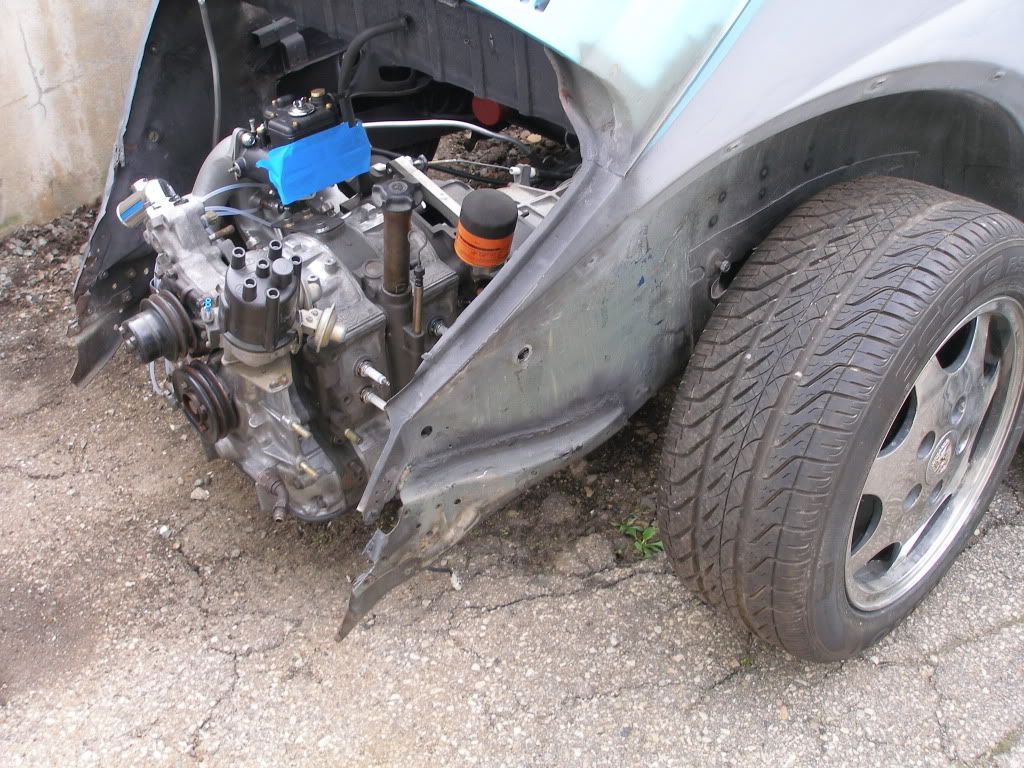
This thread is about my 67 VW Bug. I have owned the car for two years and only drove it for about 4 months before I tore it apart. I took the car down to bare shell and separated the body from the pan. Then went about rustproofing everything and installing disc brakes, new brake lines, 3/8" fuel line, tie rods, ball joints, 2.5" drop spindles, and porsche bolt pattern among other things.
A little info on where I am headed:
The car has been off the road for almost 2 years and I am on the mad dash to get it done. I want to finish it so bad I've been having dreams about it. My wife and I have our first baby on the way which is due in about 10 weeks so this is my deadline.
I have to have this car done in ten weeks!!!
I want to have the car done before the baby is here because I know I won't have time to work on it with an infant to take care of and I refuse to go into another east coast winter without this car finished. Sorry for the rant but I just want to enjoy this car. I am dying to drive it.
Why I am here:
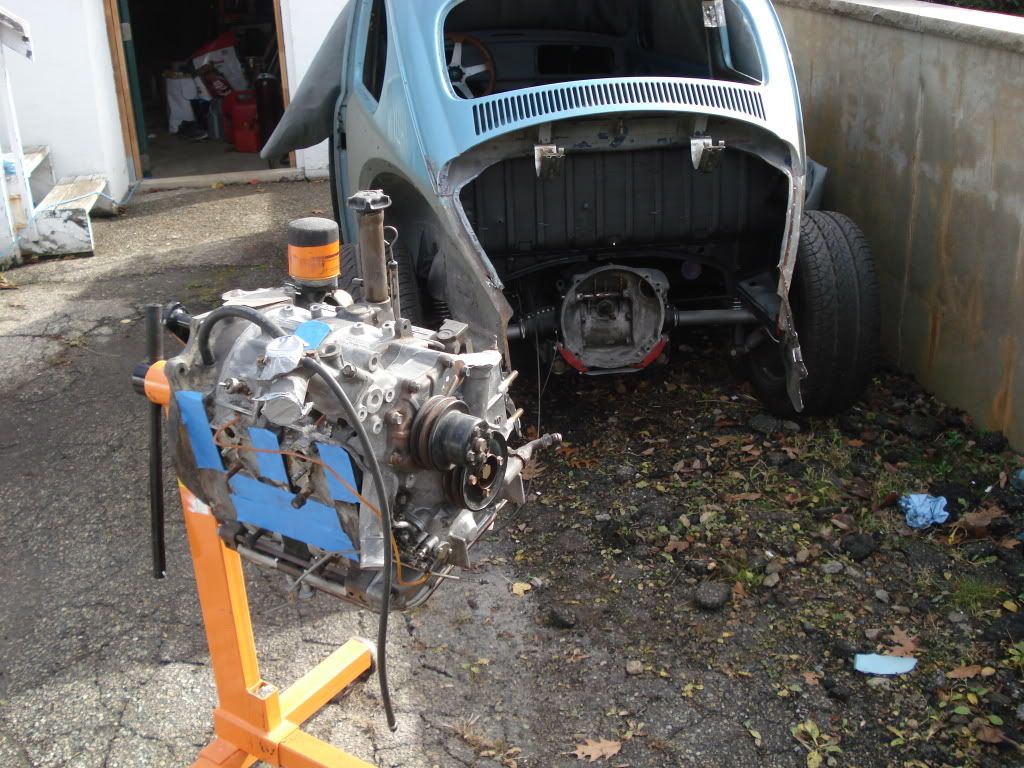
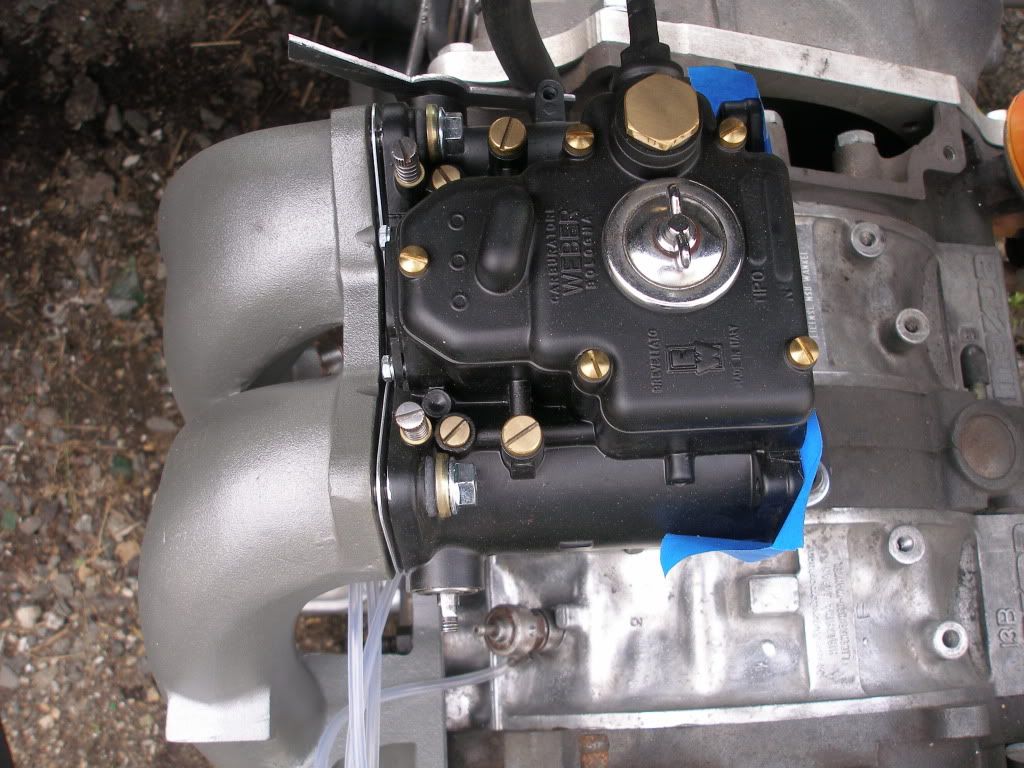
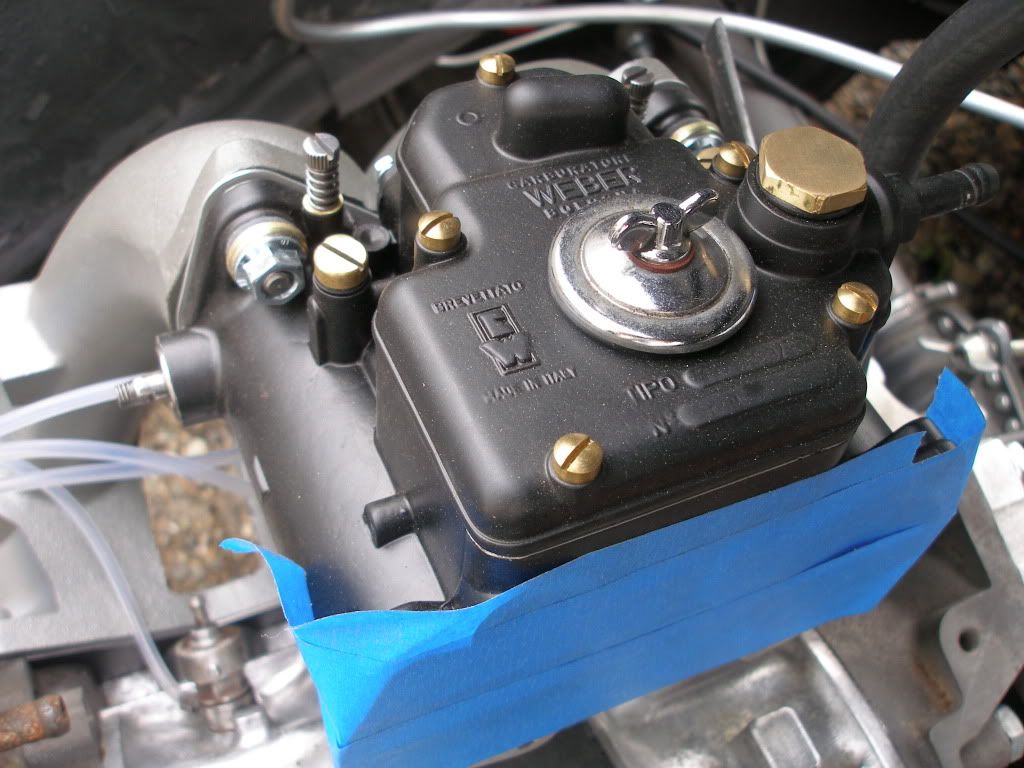
I would like to start by saying I have learned so much from this site and all of you. This site has been a big part of my daily browsing and without this I would be lost. Anyway. Being that this car is being done a budget I could not afford high power vw engine and I was not willing to stick with the mildly tuned 1600 flat 4 that I have. In comes the rotary. Last year, after lots of research, I purchased an 86 6 port 13B for $500. I heard the motor run before I took home so I did not rebuild it. I went through some trial and errors as well. I wanted to go with a Weber carb and so I bought a 45 dcoe which I found out was too small for the 13B. Then I built and exhaust manifold that that was too large and poorly configured. After alot of searching I found a 48 dcoe which was badly worn and in need of tlc. When I got it, it didn't even have the same size jets in both barrels.
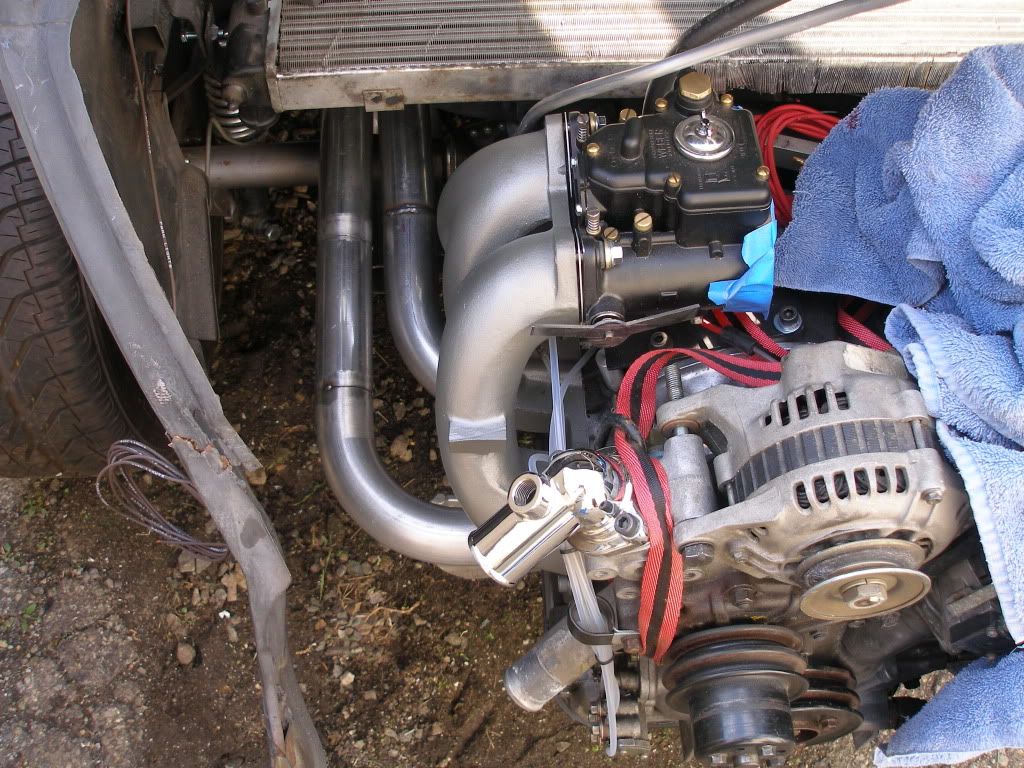
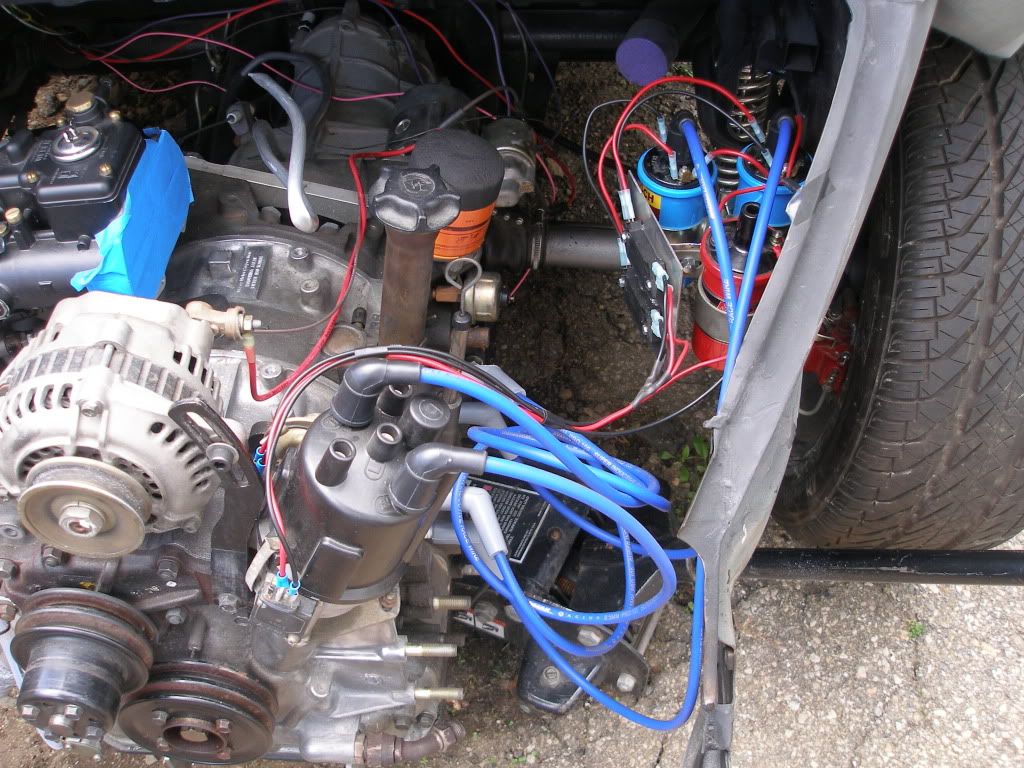
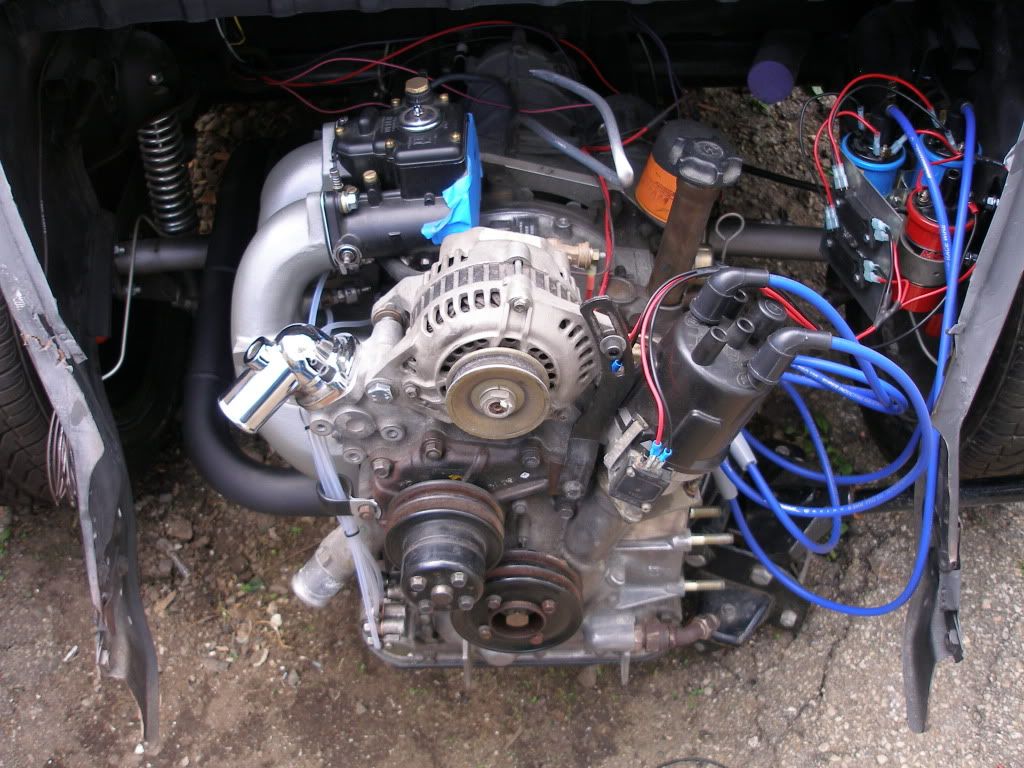
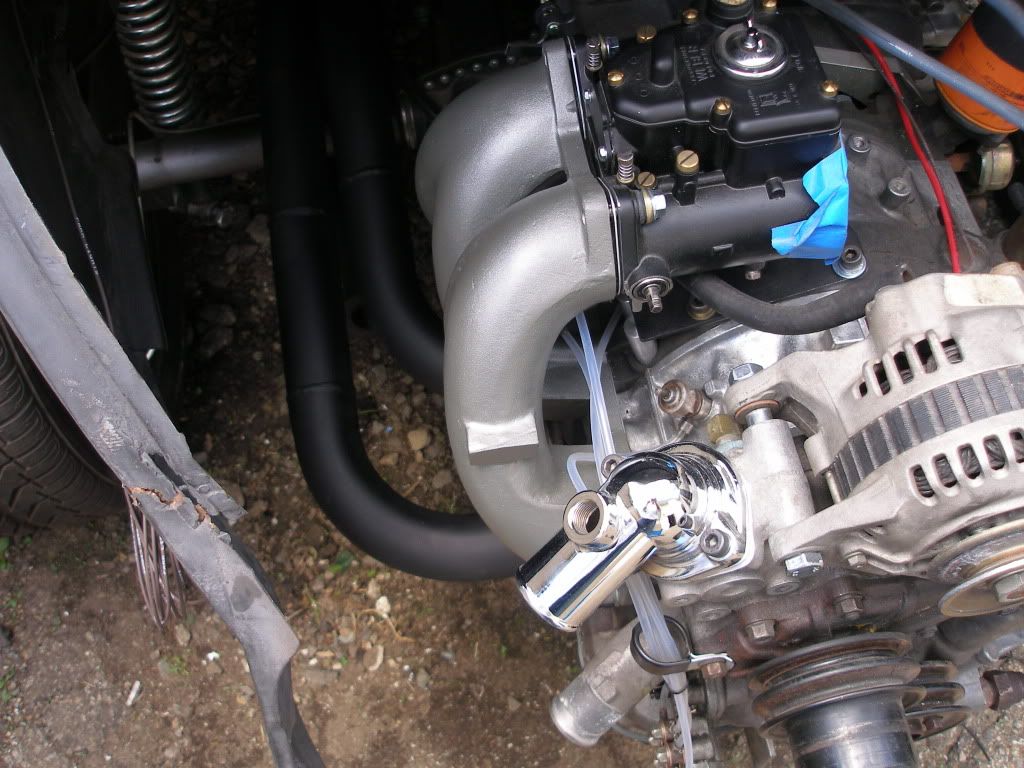
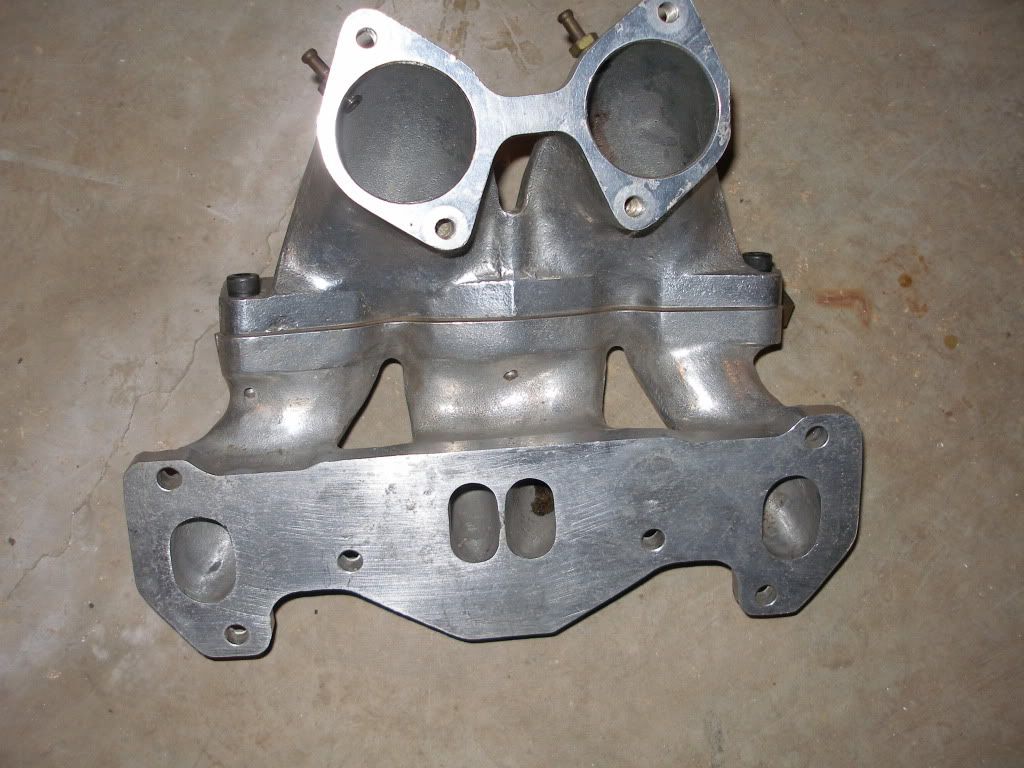
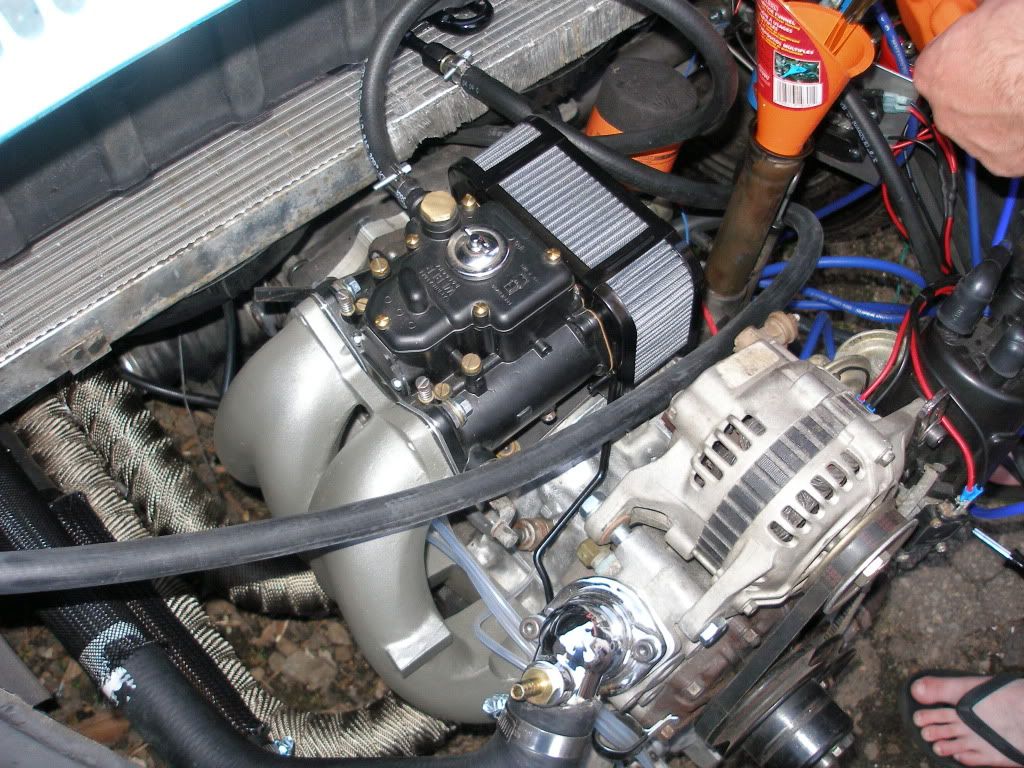
So I rebuild the stripped the carb completely, flattened all of the gasket mating surfaces ( since they looked like someone had cleaned them with a fork). Then I purchased new jets and all and powdercoated the body matt black and fitted the carb with brass screws. The carb is mated to a Pierce 6 port manifold. I love the way it looks.
As far as ignition goes I have to give a shout out to JEFF20B. I don't know him but after reading his posts I was convinced to switch to DLIDFIS. So I put together my own setup with some parts I had and some I had to find.
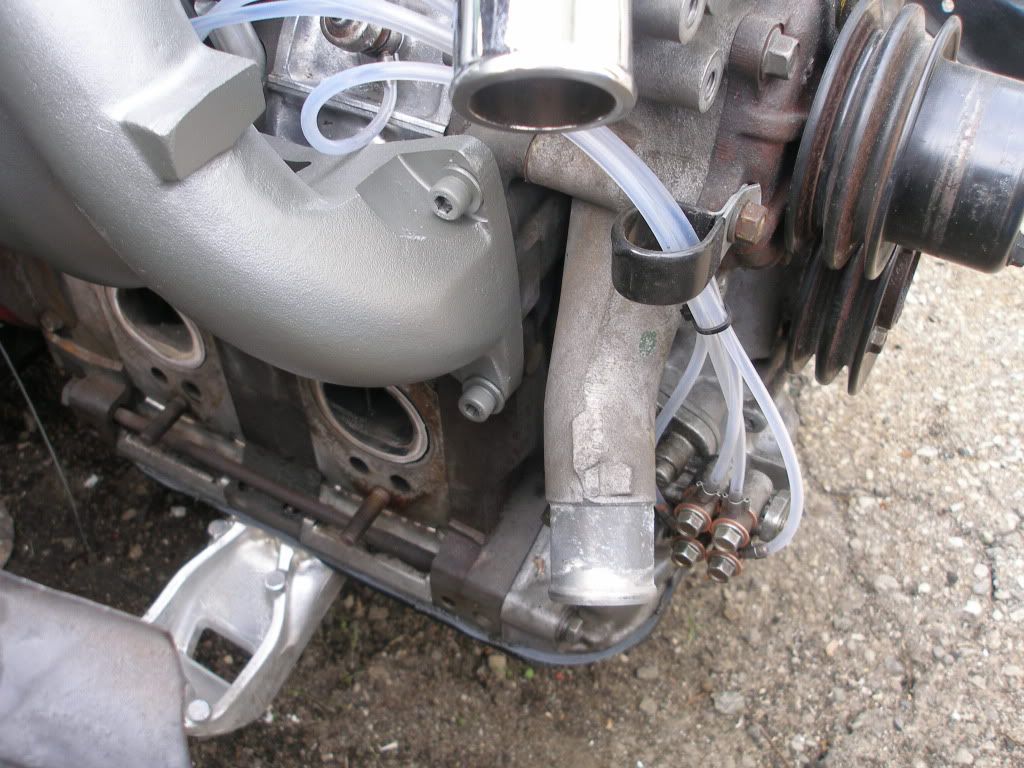
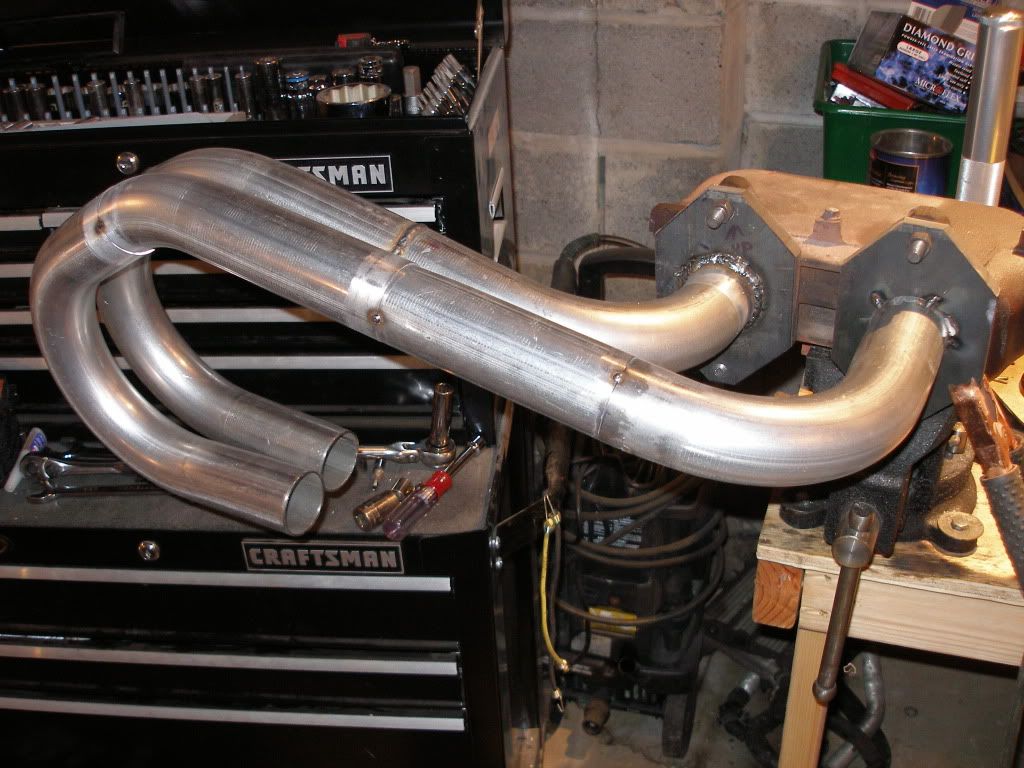
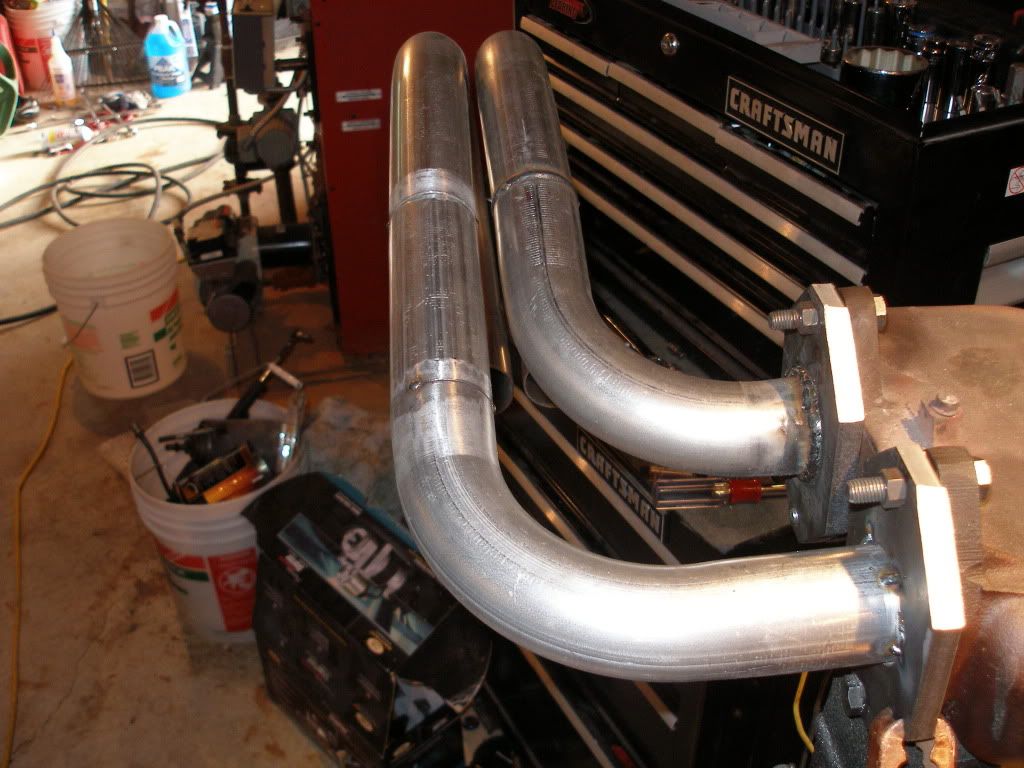
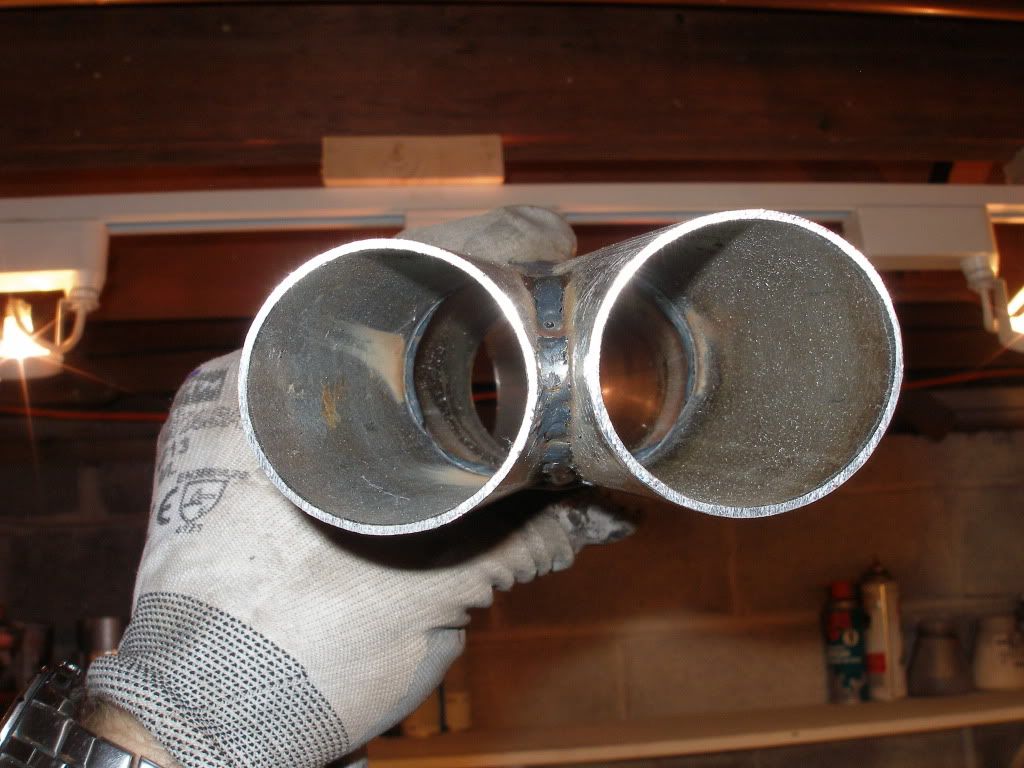
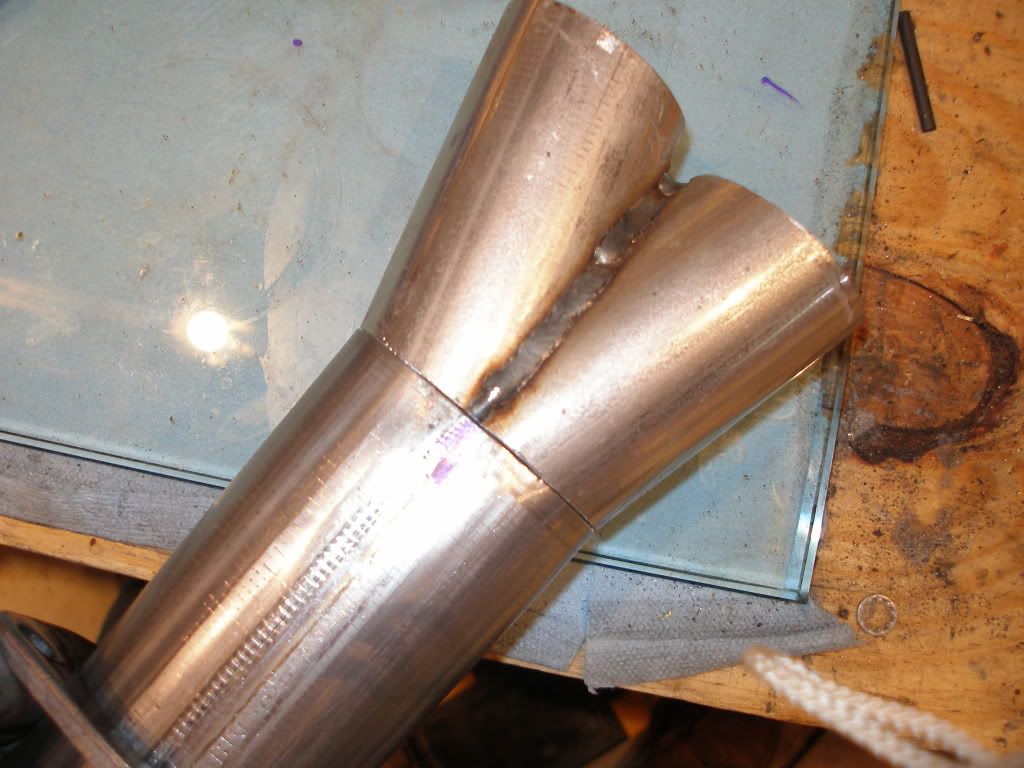
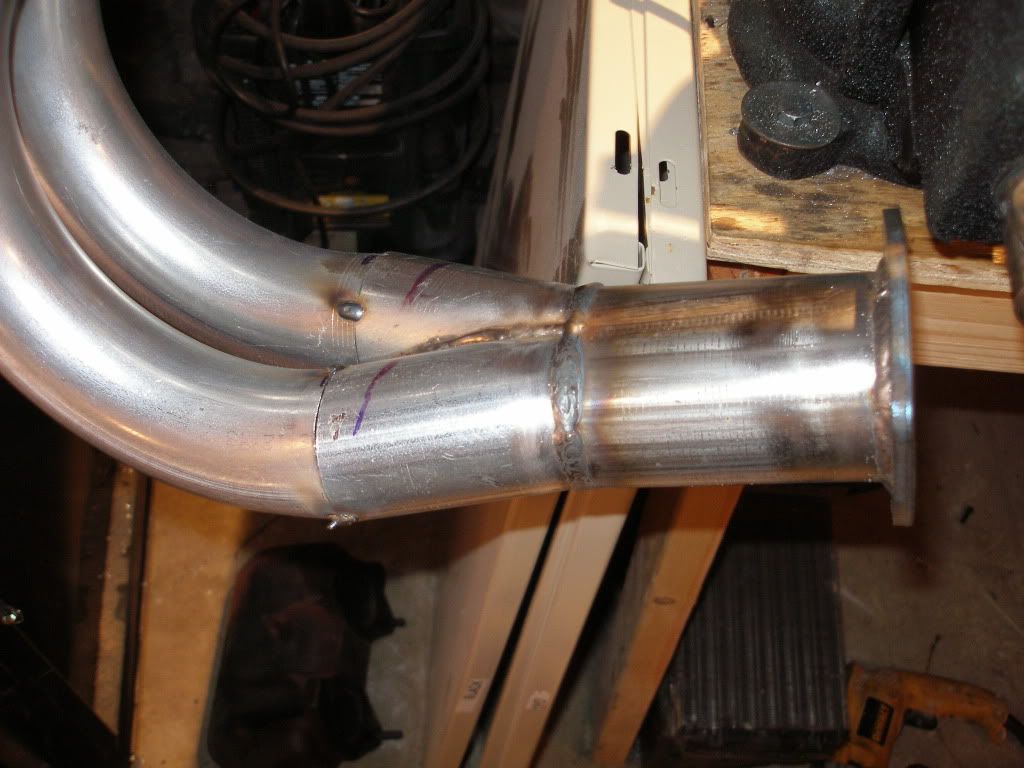
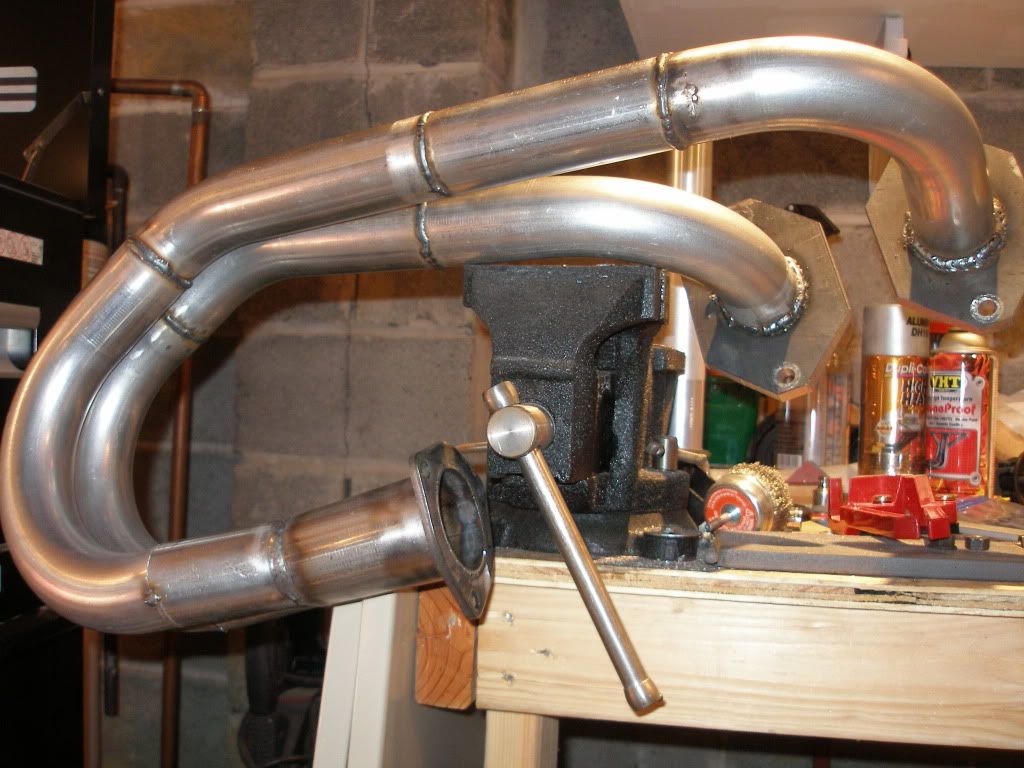
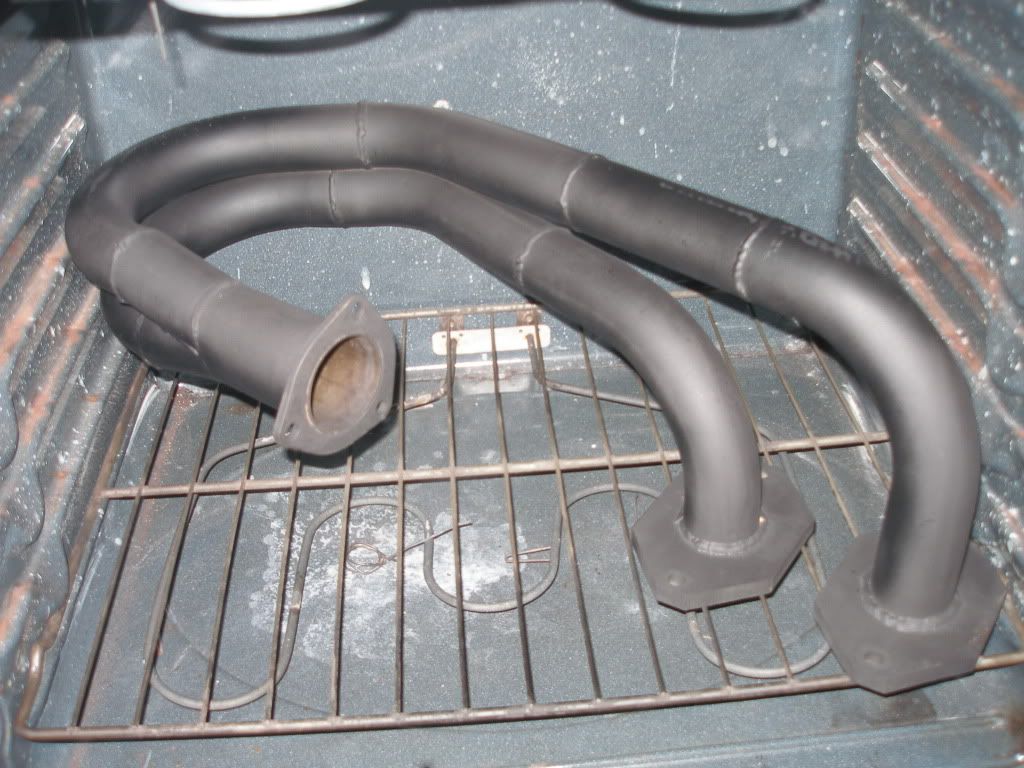
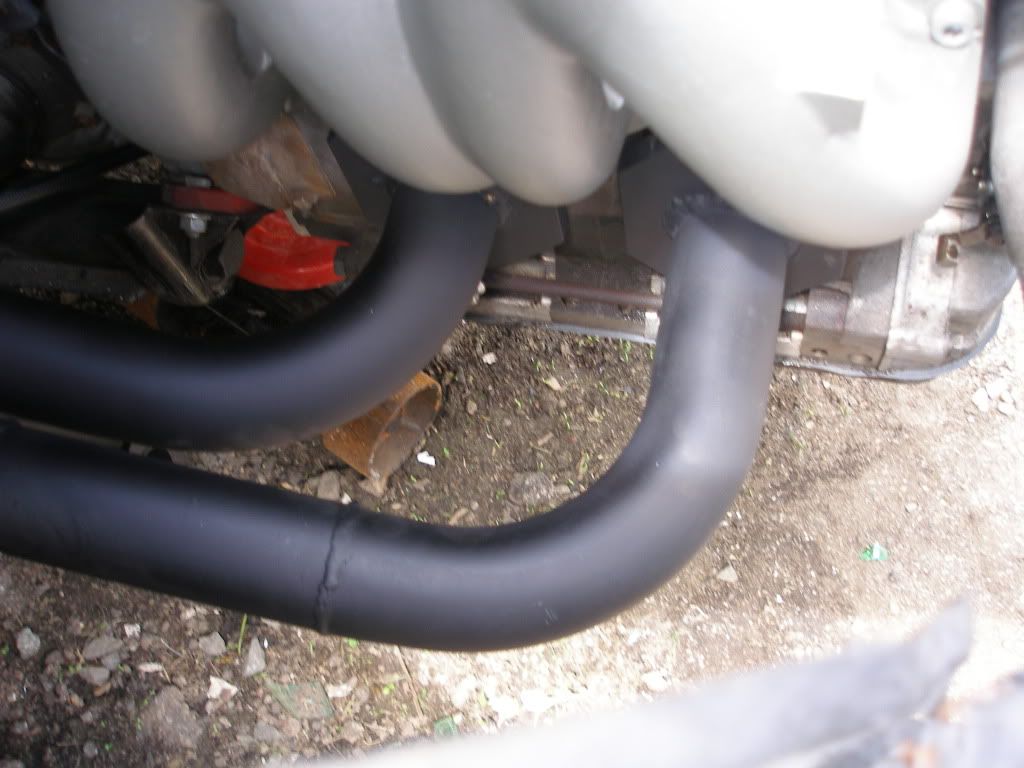
For the exhaust I did not want to use the stock manifold. I got some 2" and 2.5" mandrel bends from ebay and went to work. I used 1/2" steel plate for flanges. It was not easy trying to figure out where to route the exhaust. I wanted to keep the runners close to equal length even though they are not and I ran them straight back over, in front of, and then under the axle tube and then back. The runners merge just behind the axle with a homemade collector. Then I installed a 2.5" three bolt flange and will then install the stainless muffler and then it will dump out the back. You will see all of it in the pics. I know the rotaries create an incredible amount of exhaust heat and so I used header paint on it which is curing in the oven as we speak. Then I will run titanium exhaust wrap around the runners to keep engine bay temp down.
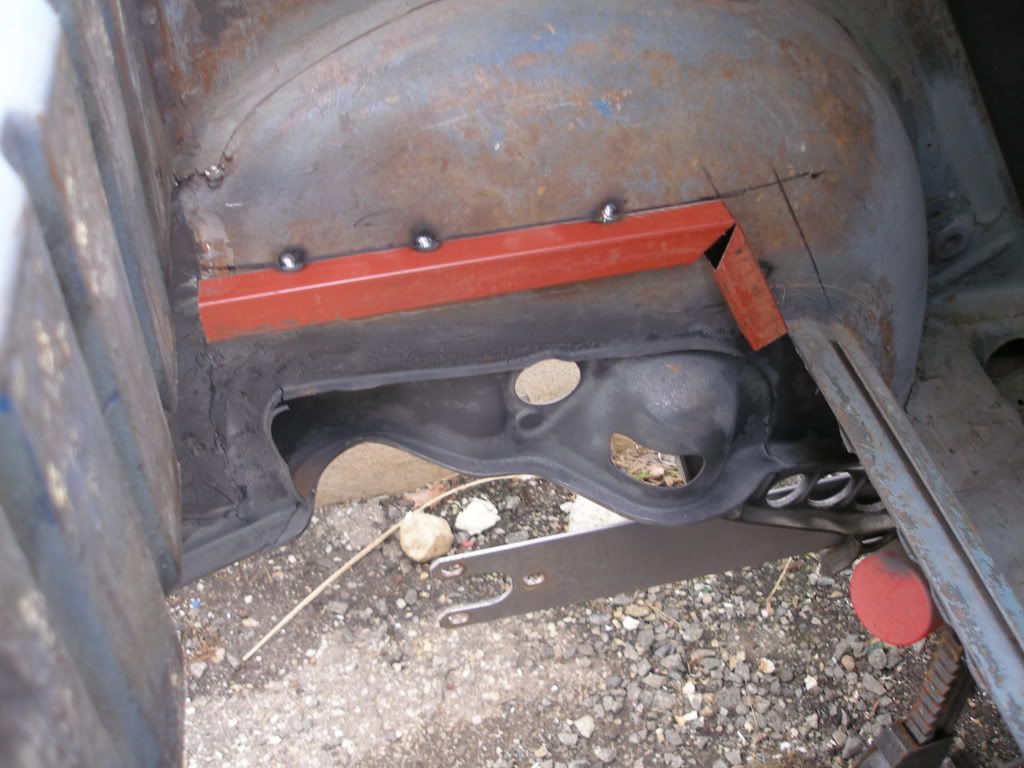
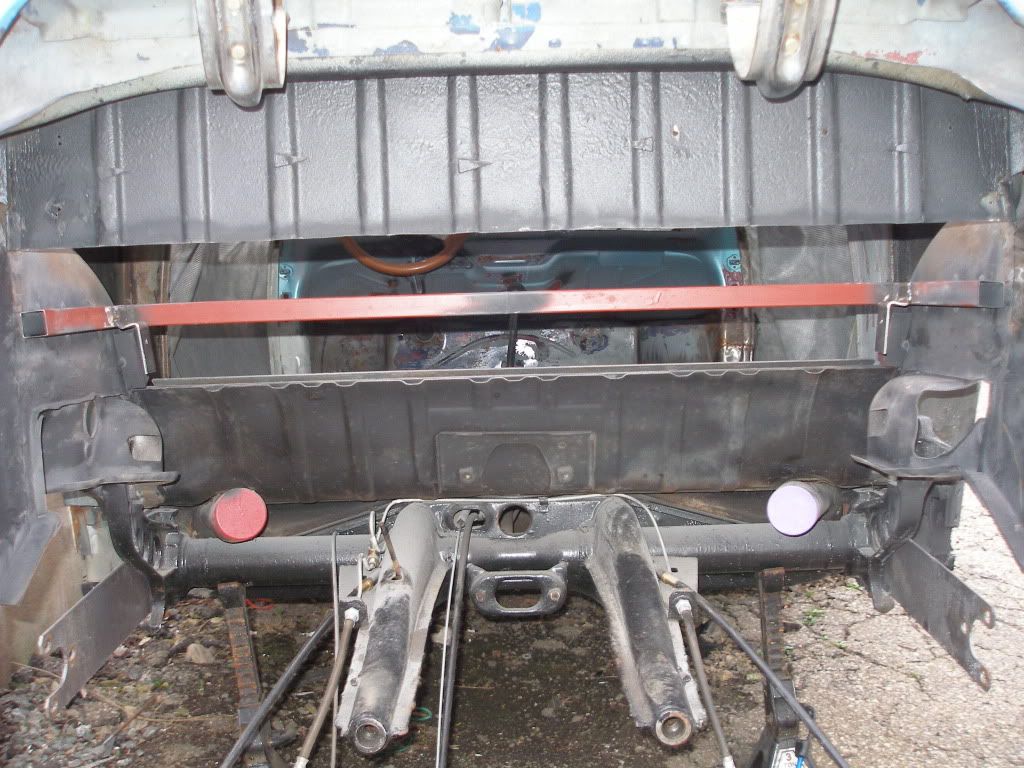
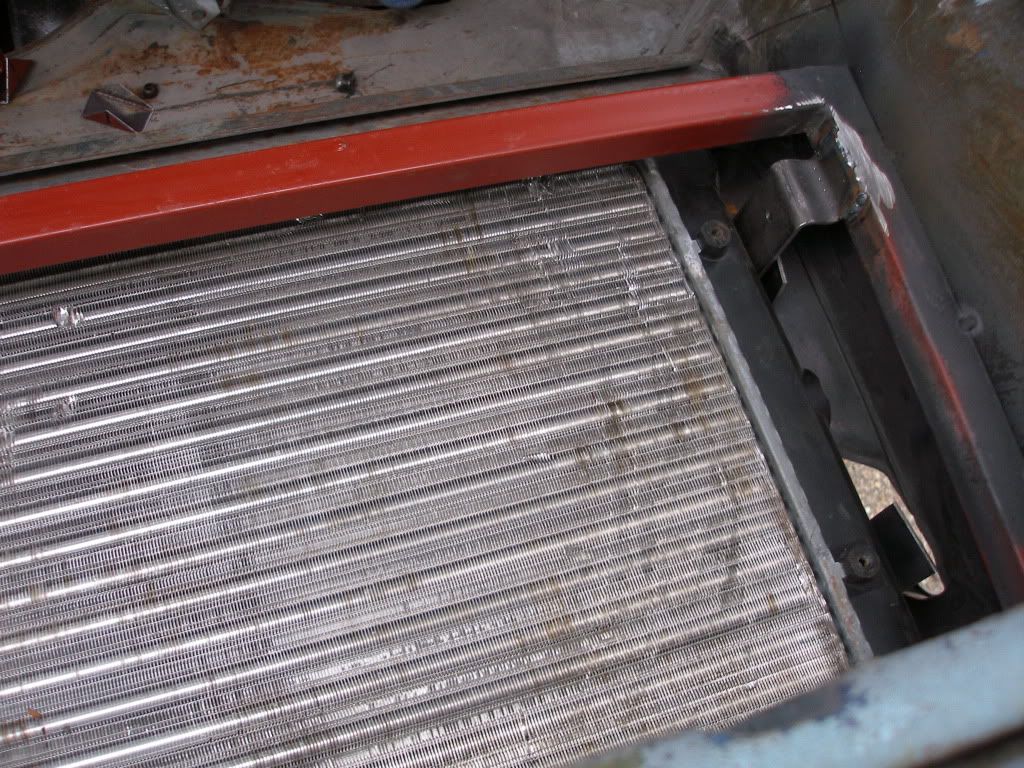
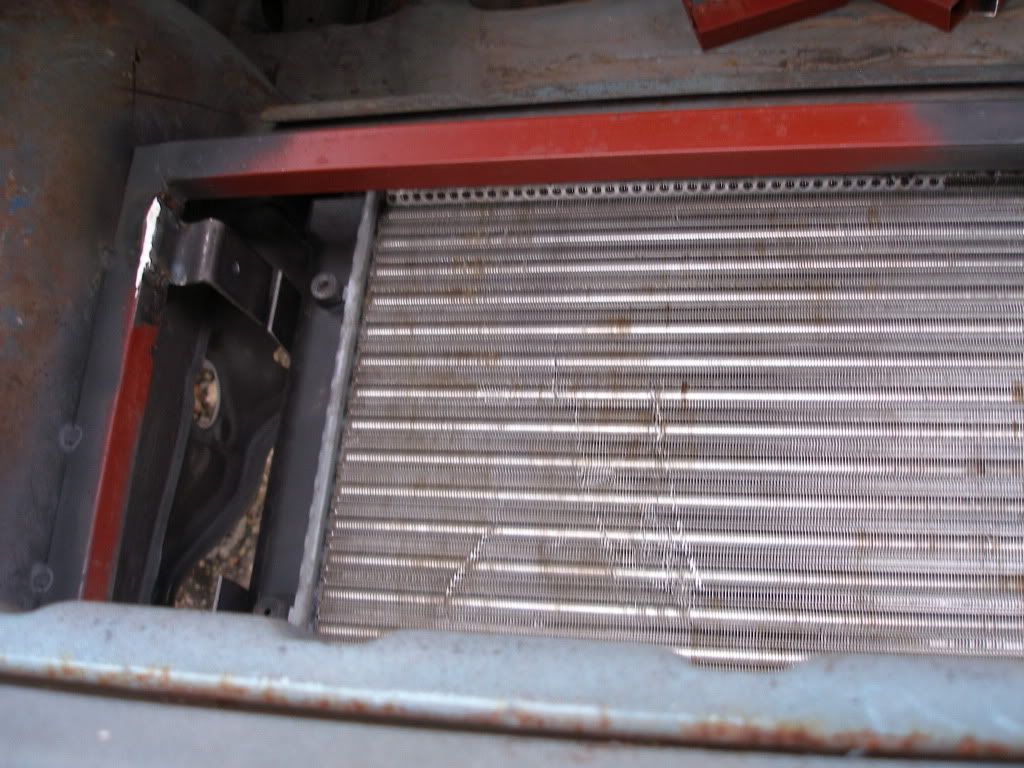
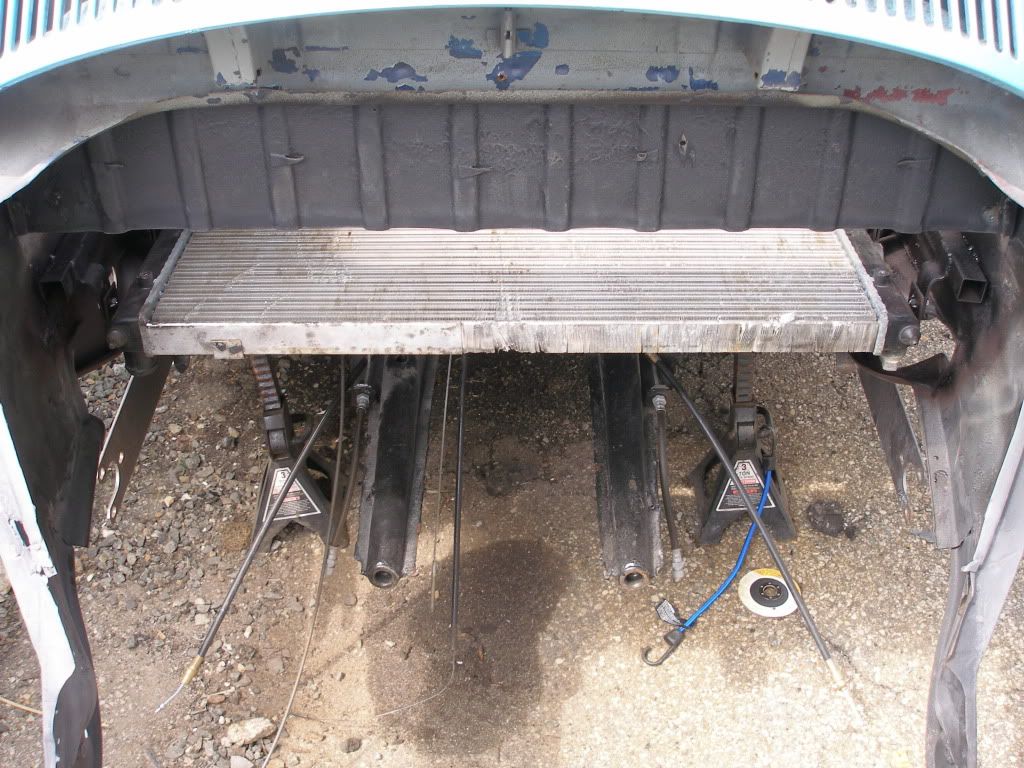
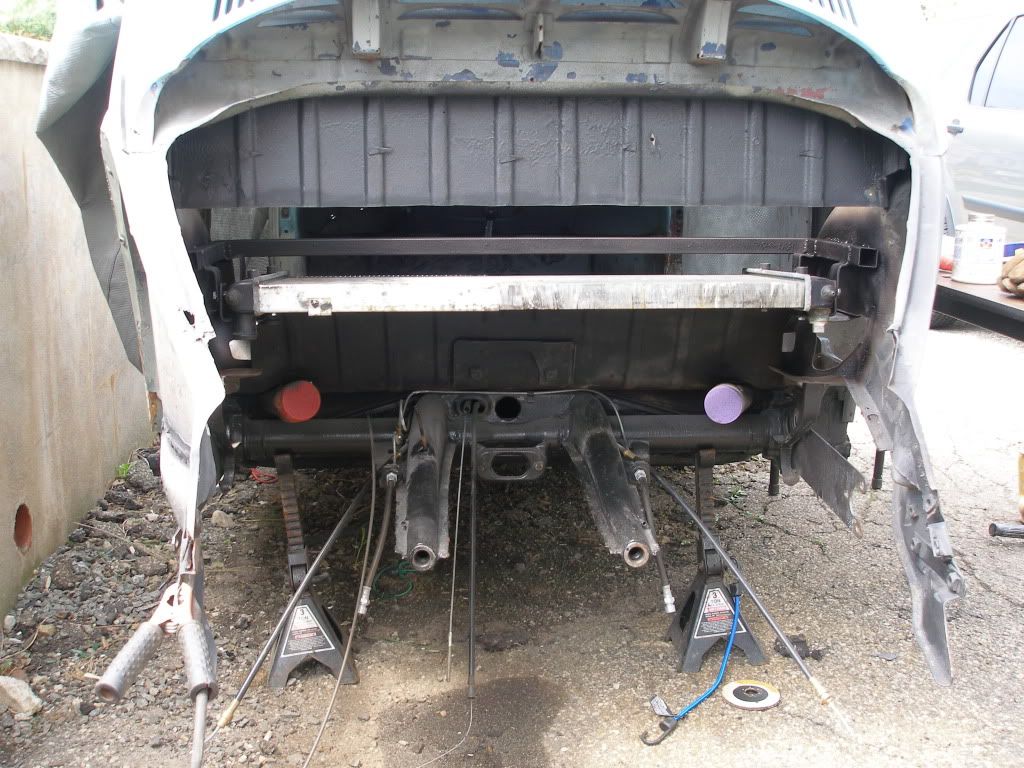
When it comes to cooling most people who swap a watercooled engine into a bug put the radiator in the front. Thats great but I didn't want to run lines to the front of the car but mostly didn't want to cut up the front of the car. I am going for a clean german look car which I my mind has no room for holes or a grill in the front clip. That being said I mounted the rad horizontally above the trans which required moving the rear parcel tray up about 4". Then I made some brackets to hold it all together and I am thinking about making the rear parcel tray removable for ease of access in the future. The rad is out of a newer watercooled vw but I don't know which model. I mounted 2 12" fans to the rad because I know that the back of a car is not the ideal place for a radiator and it will need some help. The fans will be triggered by a water temp switch and relay. For those of you who believe that the rad in the back of the car will not work I understand where you are coming from but I don't want to argue with anyone about it. So on this one lets just agree to disagree. Thanks.
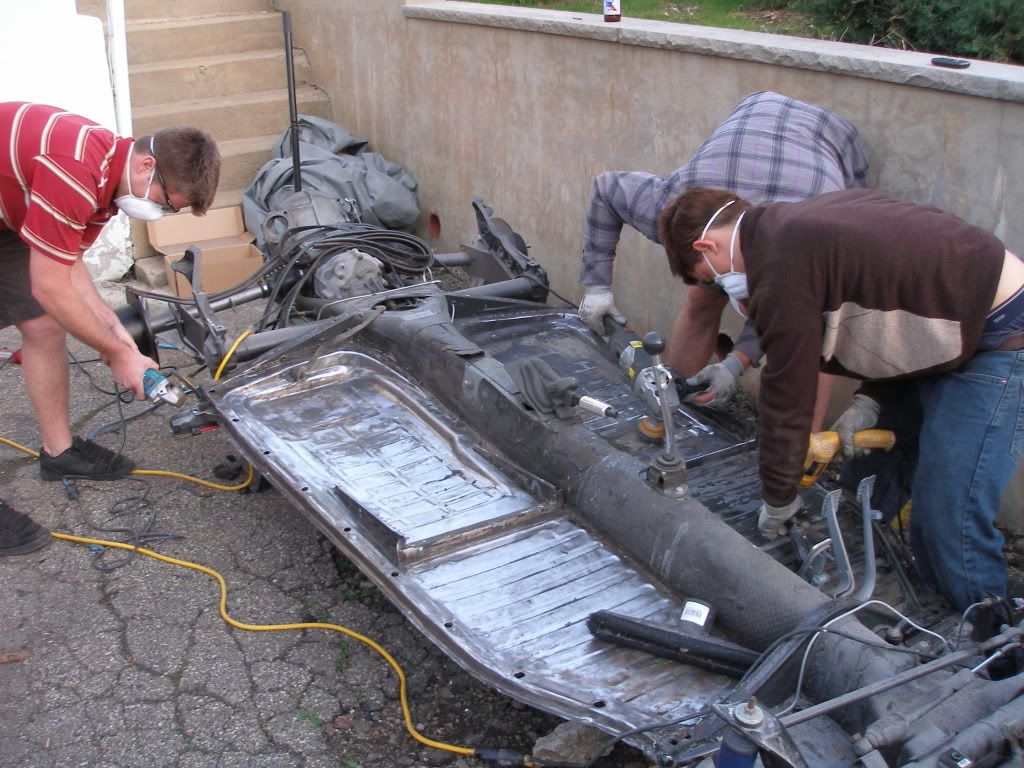
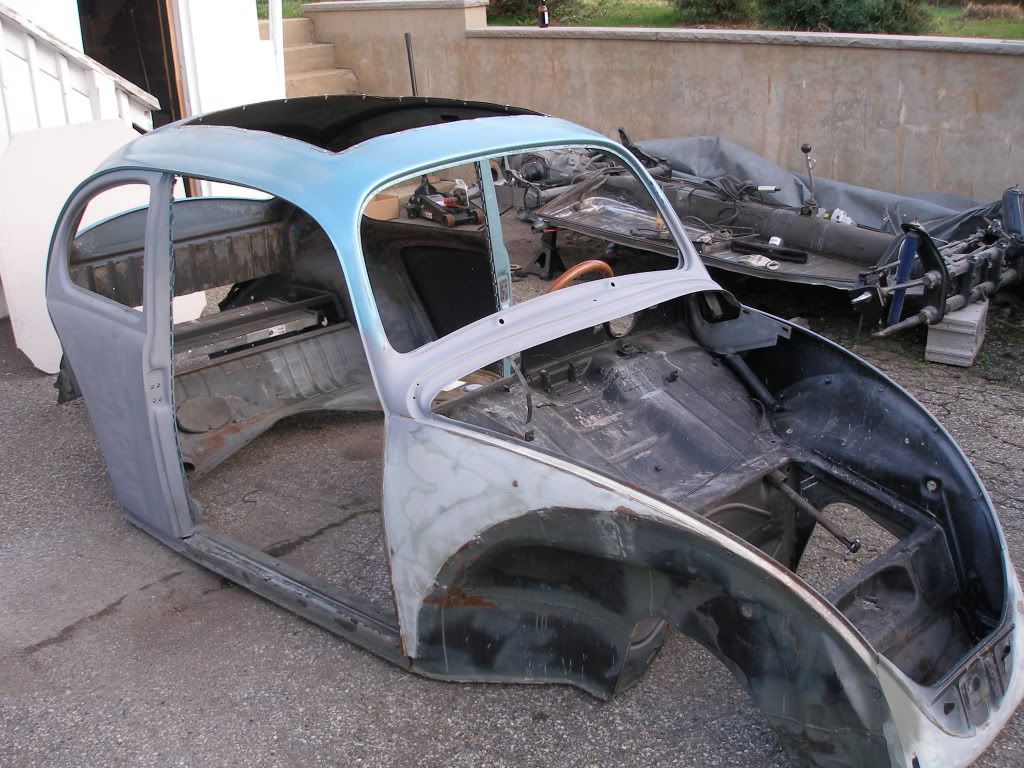
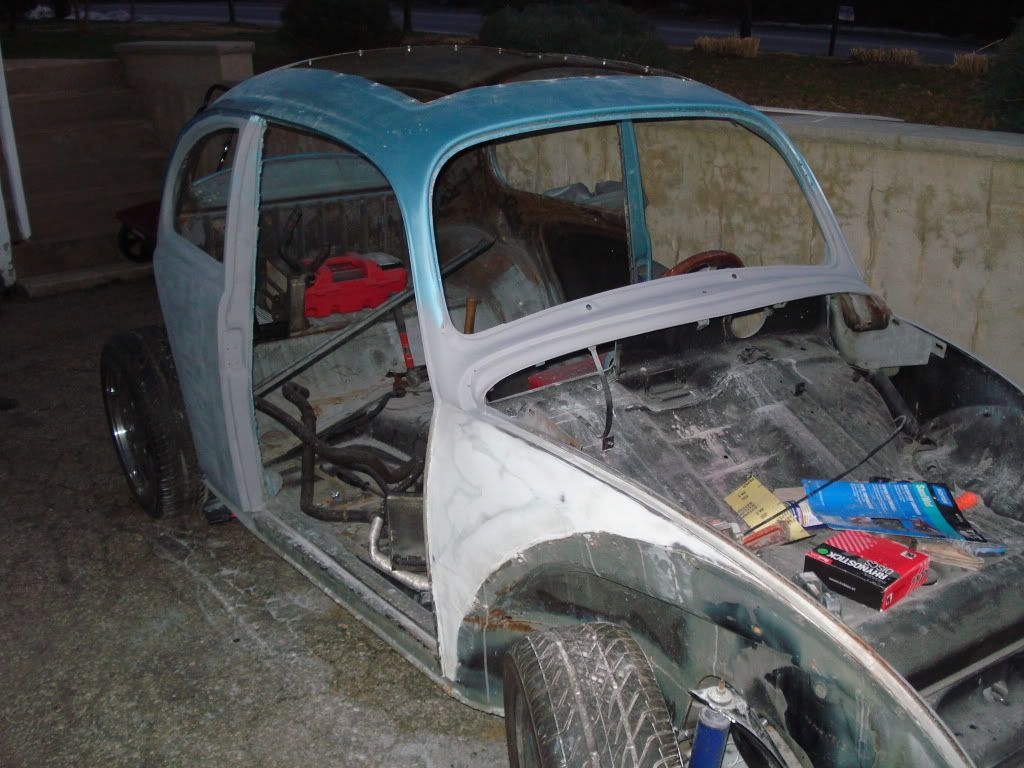
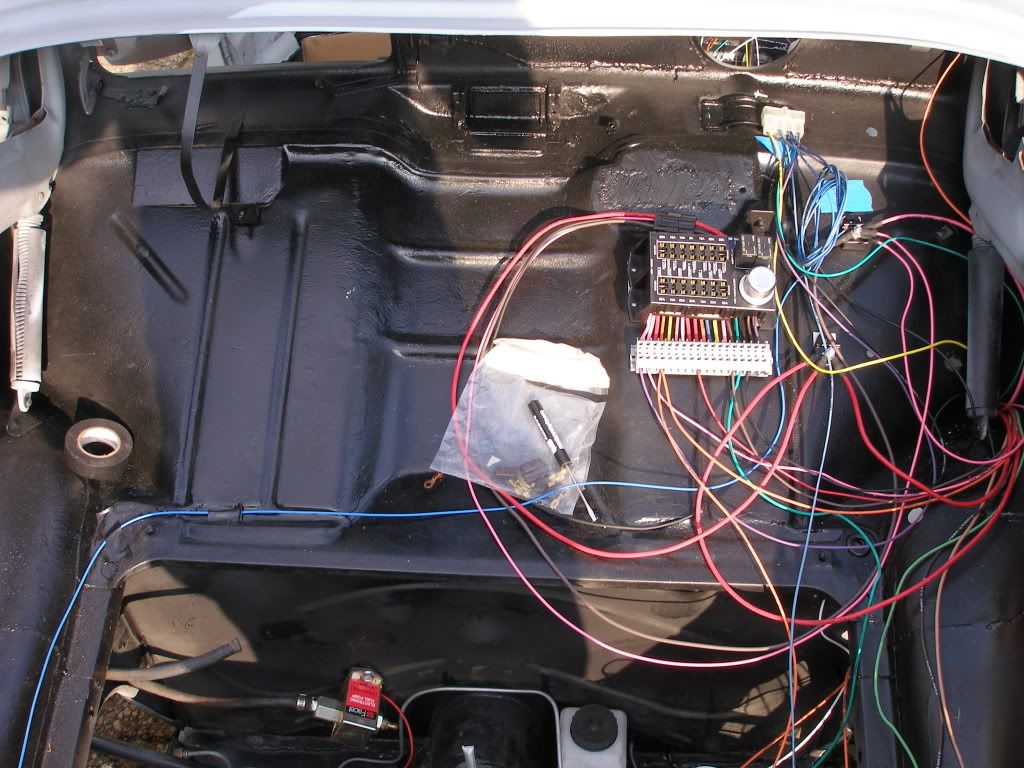
As for the rest of the car I mentioned earlier that I had taken the car down to bare shell. Alot of the body work has been completed already ( meaning I had to replace of the lower quarter panels and put on a whole front clip due to really crappy previous owner work). Still have some work to do on the fenders and rear clip. But at this moment I want to get the car running and do all of the body and paint last. Right now I am also in the process of running a new wiring harness from Watson's Street Works. I can't say enough about the harness as far as quality and ease of use etc. etc. The only thing I am waiting for before first start is the oil cooler and whatever miscellaneous stuff pops up before then. I don't have the oil cooler lines yet in case someone has a spare set laying around.
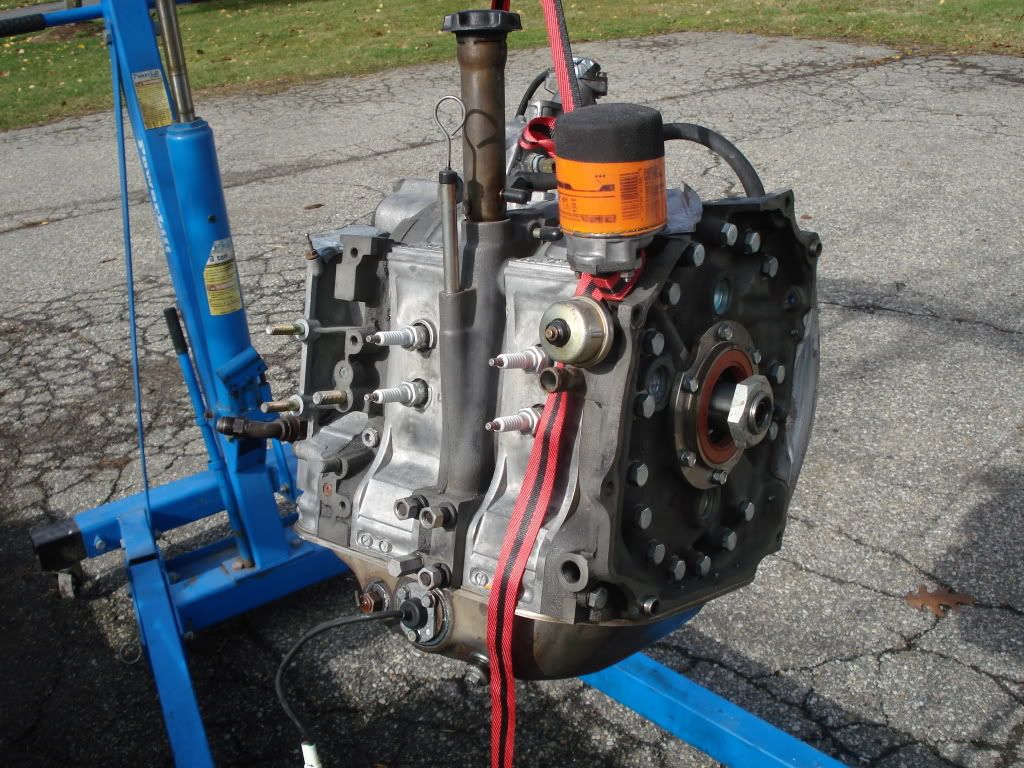
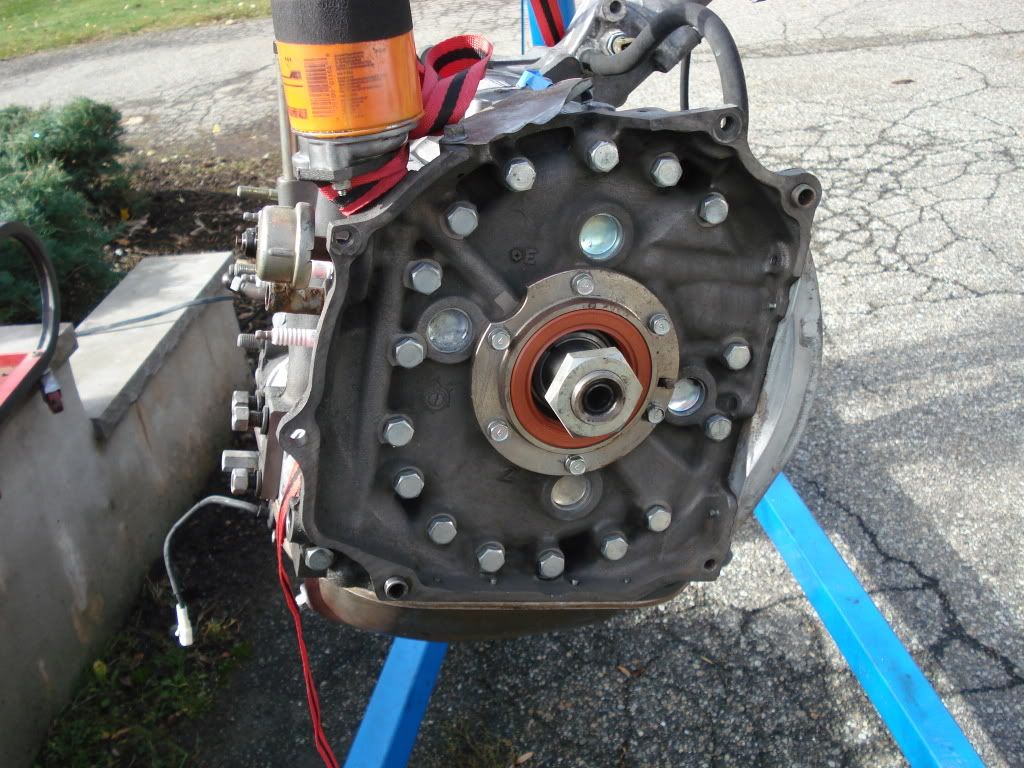
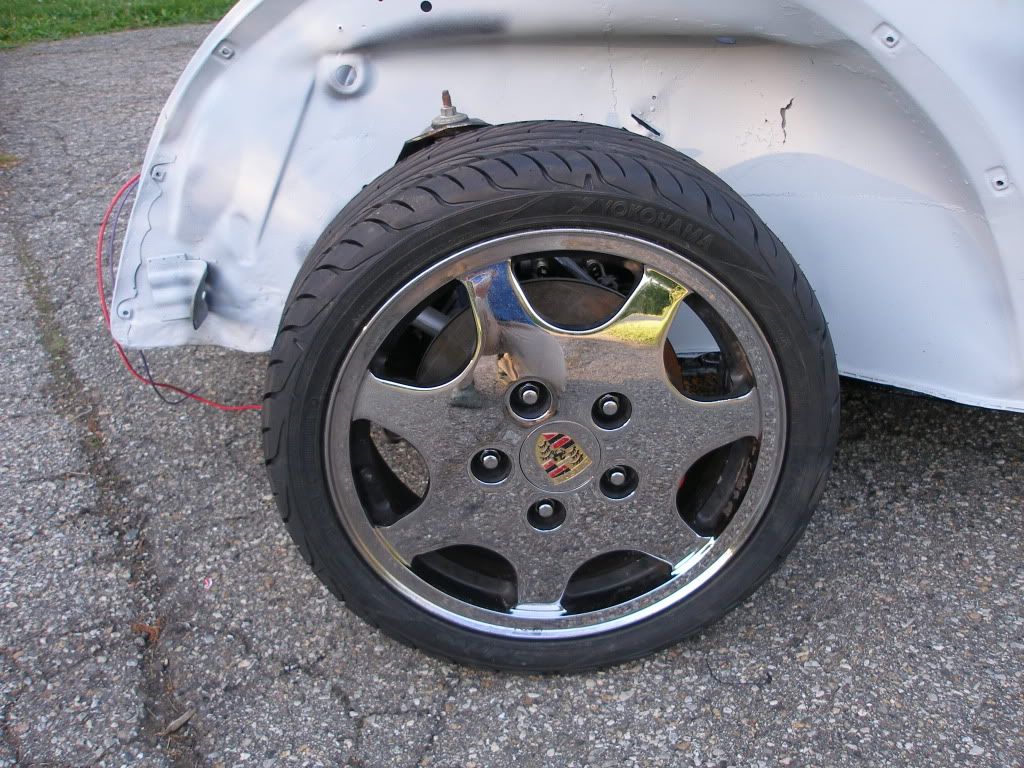
The motor is bolted to the stock trans which is the stock swingaxle. I believe the trans is a 4.12 ratio which will prob be why too low. So a freeway flier swingaxle with a 3.88 and a few other goodies will be in short order. But the stock will at least get the car moving. As for shoes i've mounted porsche D90's which are not the sweetest of porsche wheels but they will get me going with an 6" width in the front and 8" in the back. Even with a stripped body and no fenders at the moment, the car has a mean stance.
I will be painting the car myself because I can't afford to pay someone. And all of this will be progressing throughout the next ten weeks. I work on the car every spare moment that I have and so if you tune in you should see some rather quick progression. (Hopefully) I will post up the progress with pics as it takes place. I have the week of 4th of July off from work and I am expecting that week to be clutch on completing this project and just in time as my baby is due July 22.
Please share your thoughts, ideas, comments, suggestions, concerns.
A little info on where I am headed:
The car has been off the road for almost 2 years and I am on the mad dash to get it done. I want to finish it so bad I've been having dreams about it. My wife and I have our first baby on the way which is due in about 10 weeks so this is my deadline.
I have to have this car done in ten weeks!!!
I want to have the car done before the baby is here because I know I won't have time to work on it with an infant to take care of and I refuse to go into another east coast winter without this car finished. Sorry for the rant but I just want to enjoy this car. I am dying to drive it.
Why I am here:
I would like to start by saying I have learned so much from this site and all of you. This site has been a big part of my daily browsing and without this I would be lost. Anyway. Being that this car is being done a budget I could not afford high power vw engine and I was not willing to stick with the mildly tuned 1600 flat 4 that I have. In comes the rotary. Last year, after lots of research, I purchased an 86 6 port 13B for $500. I heard the motor run before I took home so I did not rebuild it. I went through some trial and errors as well. I wanted to go with a Weber carb and so I bought a 45 dcoe which I found out was too small for the 13B. Then I built and exhaust manifold that that was too large and poorly configured. After alot of searching I found a 48 dcoe which was badly worn and in need of tlc. When I got it, it didn't even have the same size jets in both barrels.
So I rebuild the stripped the carb completely, flattened all of the gasket mating surfaces ( since they looked like someone had cleaned them with a fork). Then I purchased new jets and all and powdercoated the body matt black and fitted the carb with brass screws. The carb is mated to a Pierce 6 port manifold. I love the way it looks.
As far as ignition goes I have to give a shout out to JEFF20B. I don't know him but after reading his posts I was convinced to switch to DLIDFIS. So I put together my own setup with some parts I had and some I had to find.
For the exhaust I did not want to use the stock manifold. I got some 2" and 2.5" mandrel bends from ebay and went to work. I used 1/2" steel plate for flanges. It was not easy trying to figure out where to route the exhaust. I wanted to keep the runners close to equal length even though they are not and I ran them straight back over, in front of, and then under the axle tube and then back. The runners merge just behind the axle with a homemade collector. Then I installed a 2.5" three bolt flange and will then install the stainless muffler and then it will dump out the back. You will see all of it in the pics. I know the rotaries create an incredible amount of exhaust heat and so I used header paint on it which is curing in the oven as we speak. Then I will run titanium exhaust wrap around the runners to keep engine bay temp down.
When it comes to cooling most people who swap a watercooled engine into a bug put the radiator in the front. Thats great but I didn't want to run lines to the front of the car but mostly didn't want to cut up the front of the car. I am going for a clean german look car which I my mind has no room for holes or a grill in the front clip. That being said I mounted the rad horizontally above the trans which required moving the rear parcel tray up about 4". Then I made some brackets to hold it all together and I am thinking about making the rear parcel tray removable for ease of access in the future. The rad is out of a newer watercooled vw but I don't know which model. I mounted 2 12" fans to the rad because I know that the back of a car is not the ideal place for a radiator and it will need some help. The fans will be triggered by a water temp switch and relay. For those of you who believe that the rad in the back of the car will not work I understand where you are coming from but I don't want to argue with anyone about it.
So on this one lets just agree to disagree. Thanks. As for the rest of the car I mentioned earlier that I had taken the car down to bare shell. Alot of the body work has been completed already ( meaning I had to replace of the lower quarter panels and put on a whole front clip due to really crappy previous owner work). Still have some work to do on the fenders and rear clip. But at this moment I want to get the car running and do all of the body and paint last. Right now I am also in the process of running a new wiring harness from Watson's Street Works. I can't say enough about the harness as far as quality and ease of use etc. etc. The only thing I am waiting for before first start is the oil cooler and whatever miscellaneous stuff pops up before then. I don't have the oil cooler lines yet in case someone has a spare set laying around.
The motor is bolted to the stock trans which is the stock swingaxle. I believe the trans is a 4.12 ratio which will prob be why too low. So a freeway flier swingaxle with a 3.88 and a few other goodies will be in short order. But the stock will at least get the car moving. As for shoes i've mounted porsche D90's which are not the sweetest of porsche wheels but they will get me going with an 6" width in the front and 8" in the back. Even with a stripped body and no fenders at the moment, the car has a mean stance.
I will be painting the car myself because I can't afford to pay someone. And all of this will be progressing throughout the next ten weeks. I work on the car every spare moment that I have and so if you tune in you should see some rather quick progression. (Hopefully) I will post up the progress with pics as it takes place. I have the week of 4th of July off from work and I am expecting that week to be clutch on completing this project and just in time as my baby is due July 22.
Please share your thoughts, ideas, comments, suggestions, concerns.
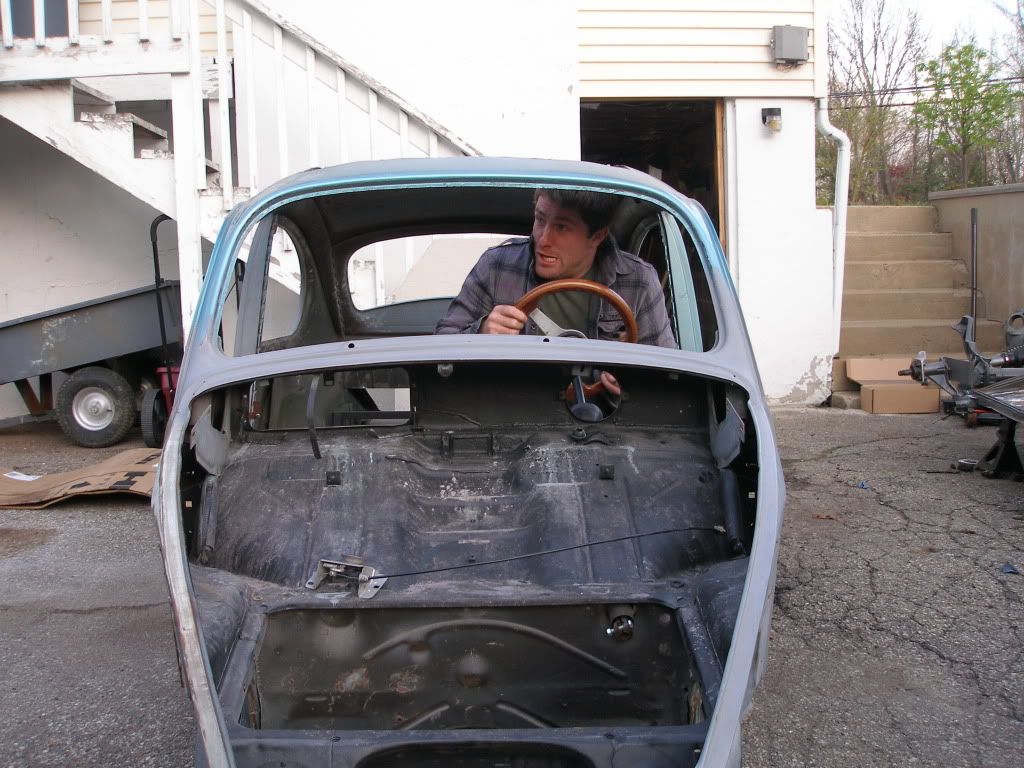
my buddy Dan
the motor after cleaning
like a glove

this is the 45 dcoe, which i still have if someone is interested.

replacing front clip
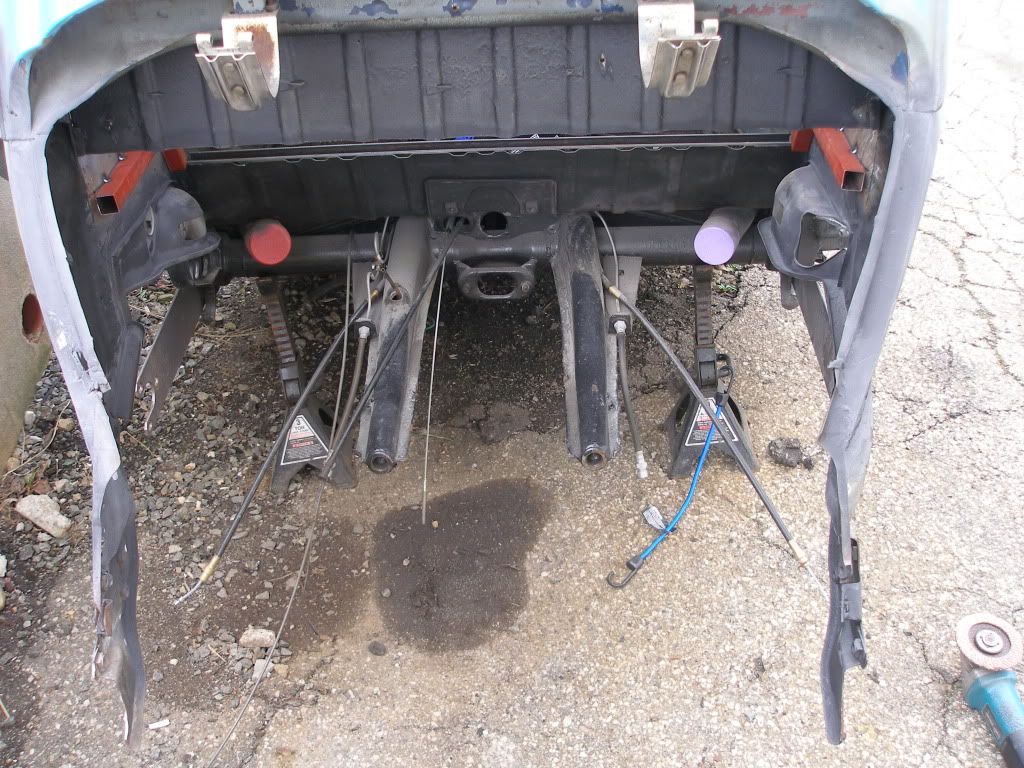
after removing parcel tray and some unnecessary remnant sheet metal

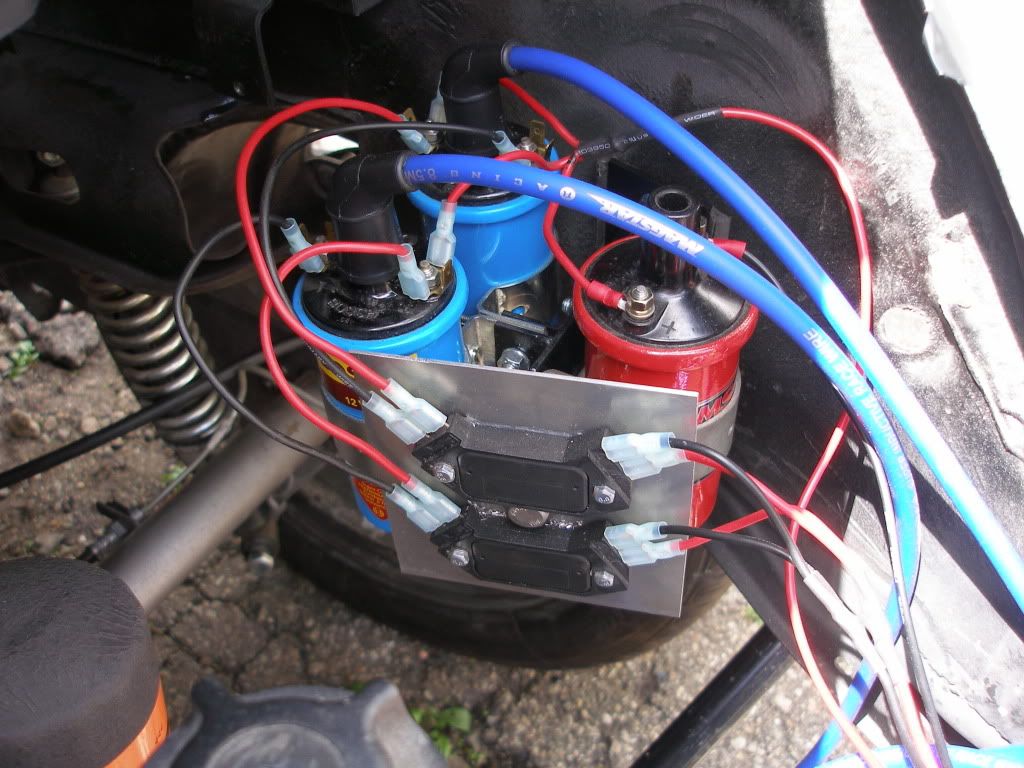
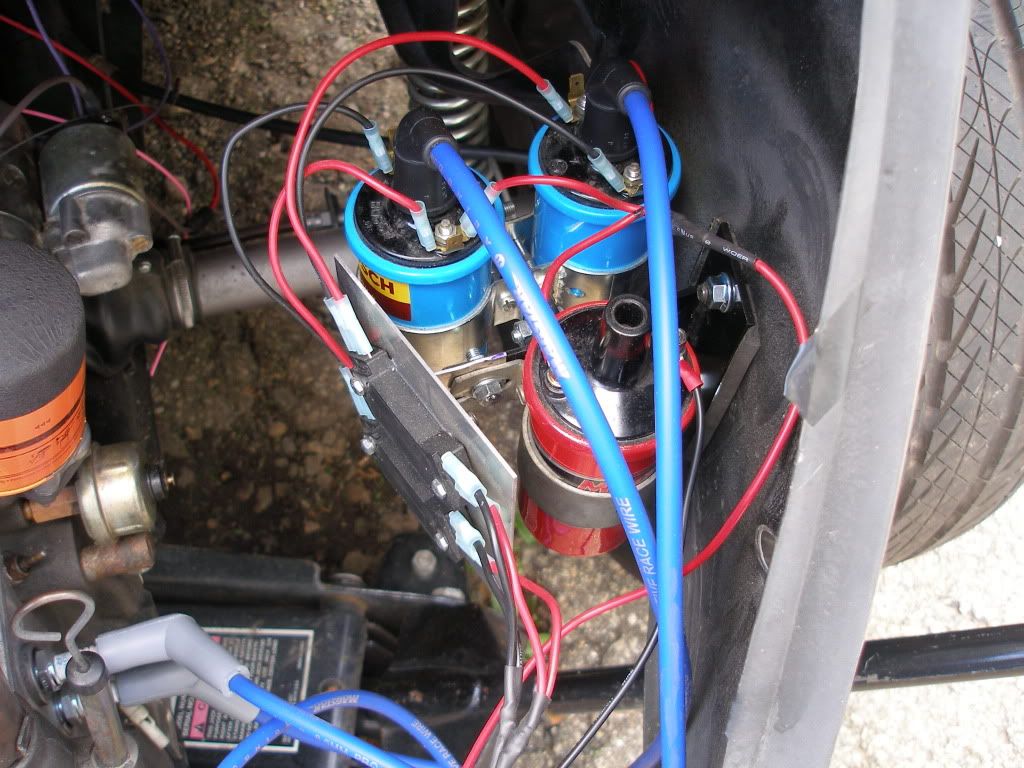
I rebuilt the distributor, the advance bearings were a little crunchy so I cleaned and regreased them, good as new

oven cured now just waiting for the exhaust wrap
Just a quick note:
I have never driven a rotary nor even been in a rotary car. Driving this car for the first time will be a completely new experience. The car should weigh less than 1800 lbs. so with this motor should be a good combination.
This will be an exciting ten weeks.
Thank you
I have this manifold that came with one of the carbs I bought. I don't know if this is only for a 12a or 13b but it is 4 port. If it will work for you let me know.
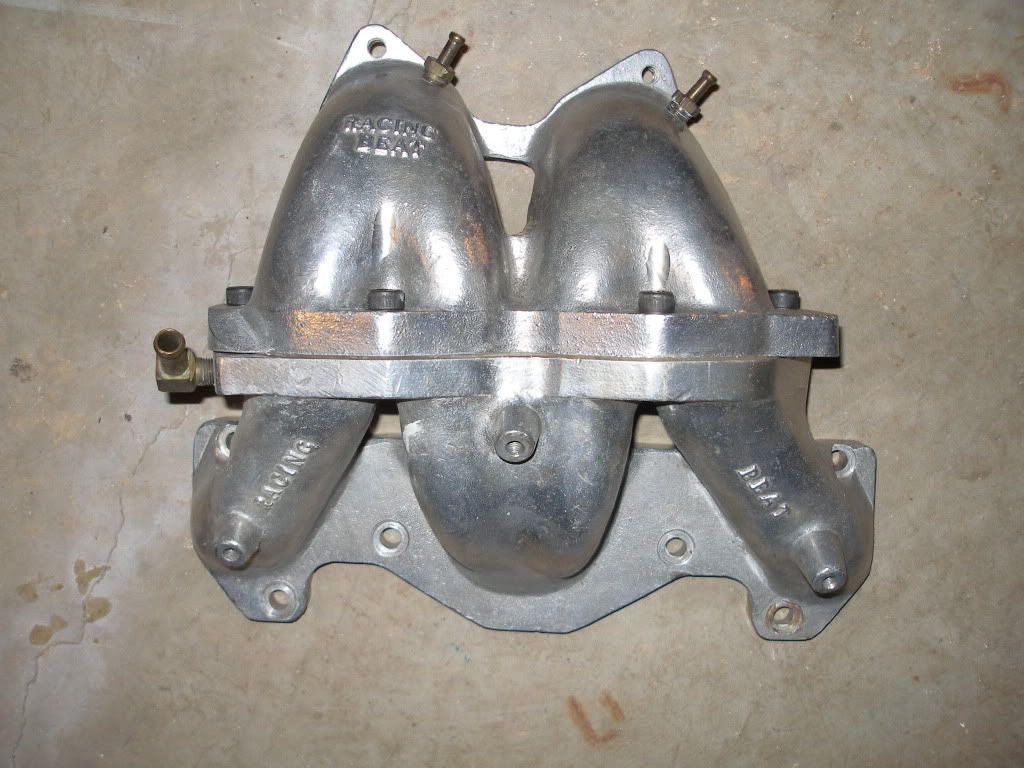
I have this manifold that came with one of the carbs I bought. I don't know if this is only for a 12a or 13b but it is 4 port. If it will work for you let me know.
Trending Topics


I want to do this same swap in the near future, so I'm subscribed to this thread.
I think you may find the single muffler not enough. You may need to add another
after the first and have it bend 90 degrees and place the second across the back.
You'll know after you start it up. Nice work on the header, it very similiar to how
I was thinking of doing the header.
I won't argue the radiator placement but I am very interested in how it works out.
I like the idea of not running miles of tubes to the front for a radiator. I couldn't
tell from the pics, where's the oil cooler mounted?
I like the ignition using the HEIs, don't bother with the trailing as its not worth the
effort. You could also go with different coils like the ford TFI coils to get even more
kick in your ignition. See the TFIDFIS thread linked in my sig. I think the weber
carbed 13B will make this thing a blast to drive.
Good luck on both babies in July
Thanks alot! I am still waiting for the oil cooler to show up in the mail. I hate playing the waiting game. Its pretty much the last thing I need before I can complete the swap. As far as the location I'm not sure yet. I'm going to wait till I get it and see where it fits the best. Maybe in the rear fender well with a rock guard or something like that.
Quick update, got a few little things wrapped up. Literally.
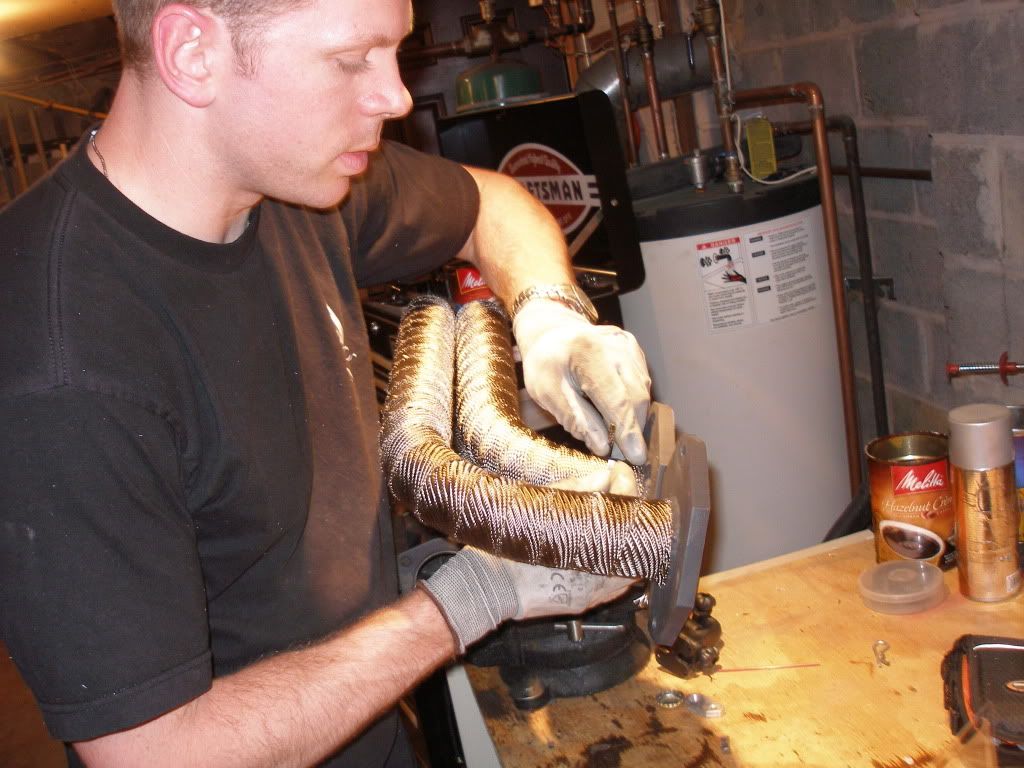
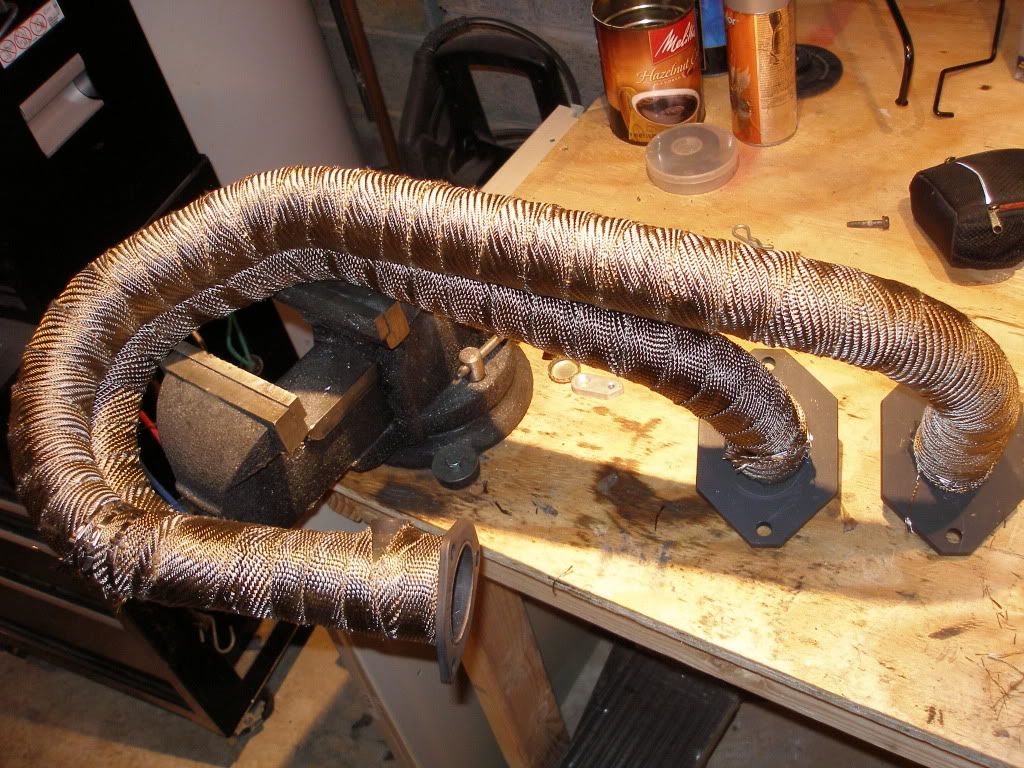
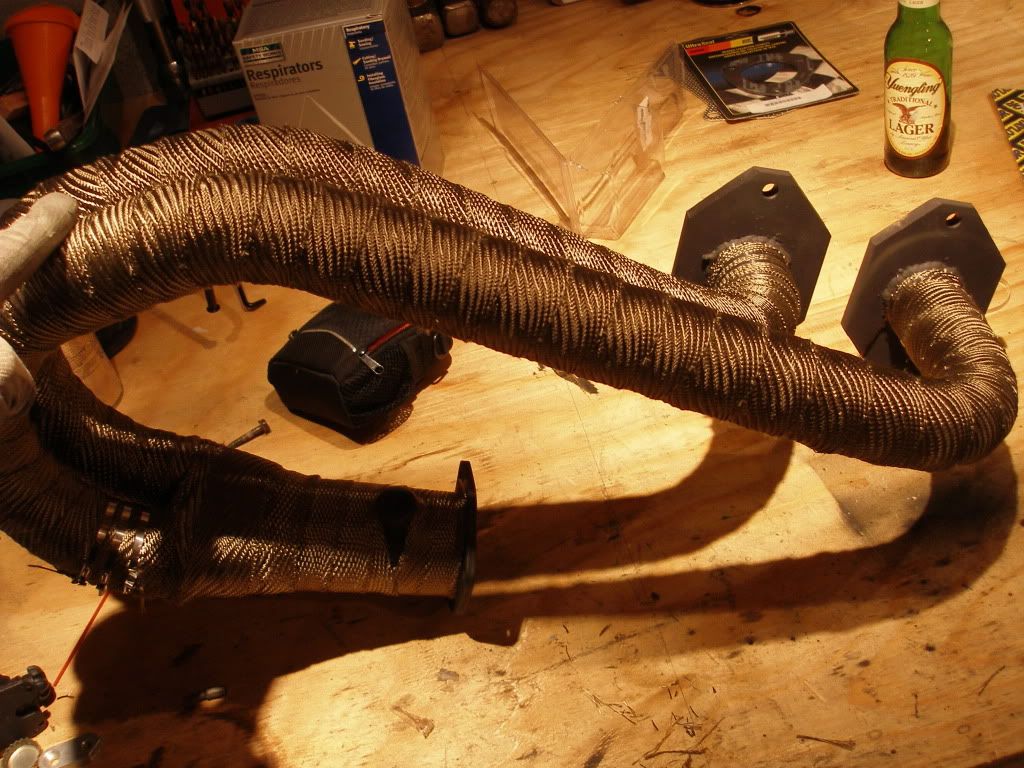
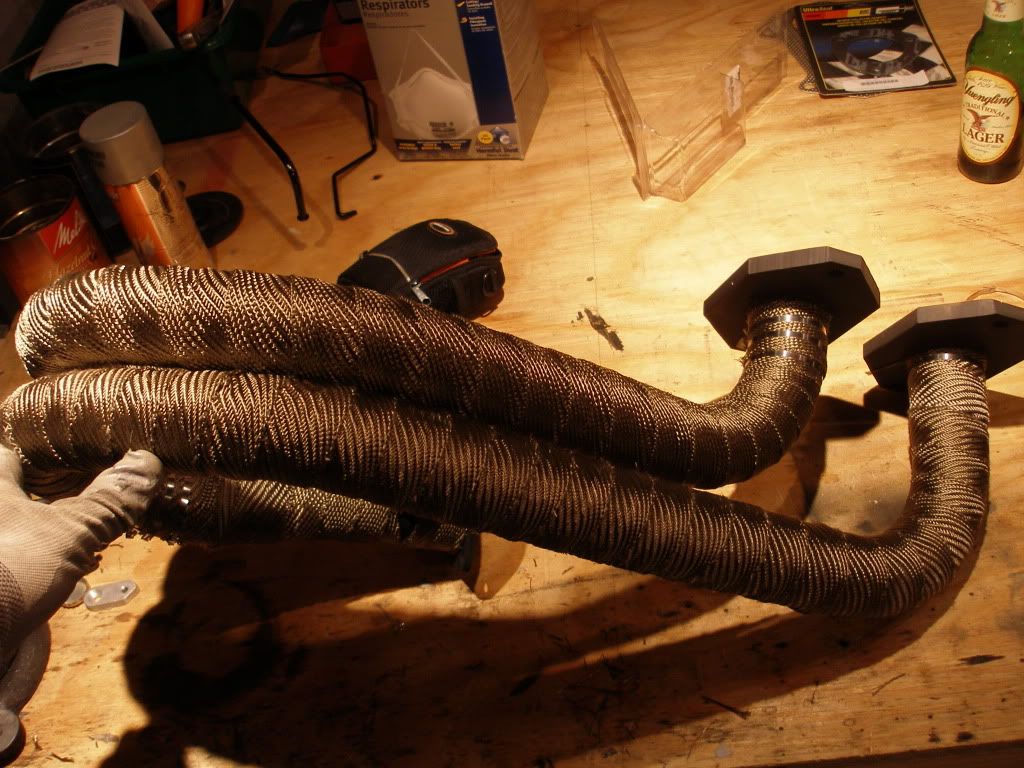
Wrapped the header with DEI titanium header wrap. I'm happy with the result. Hopefully it will keep engine bay temps down since the primaries run a little close to some rubber stuff.
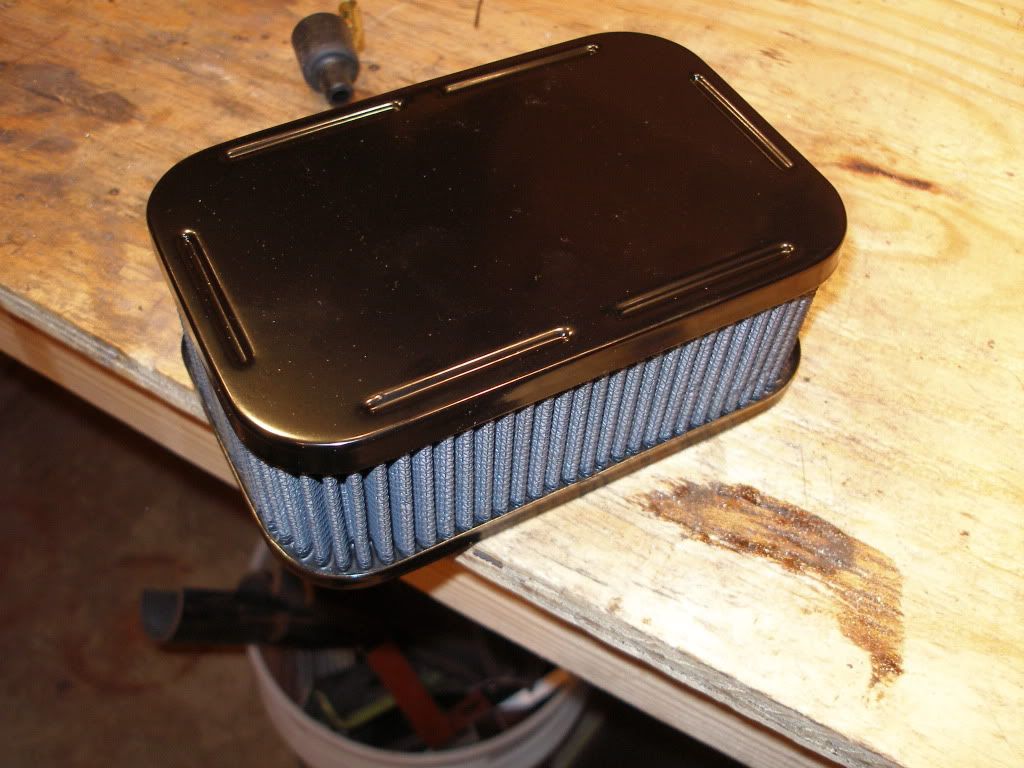
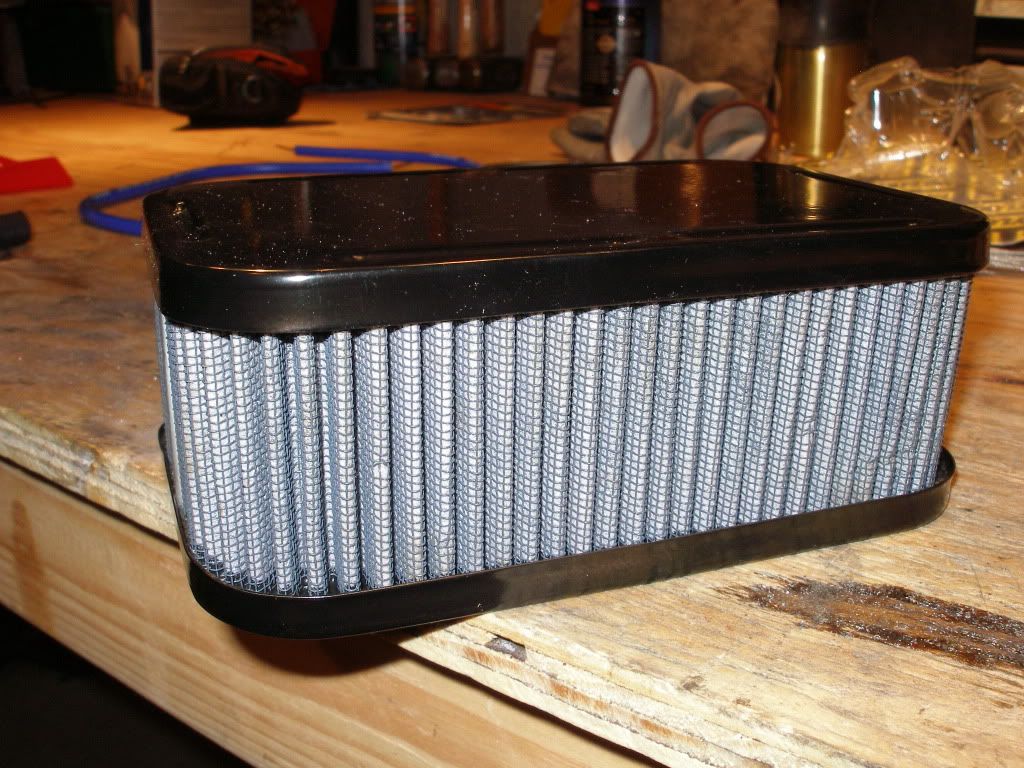
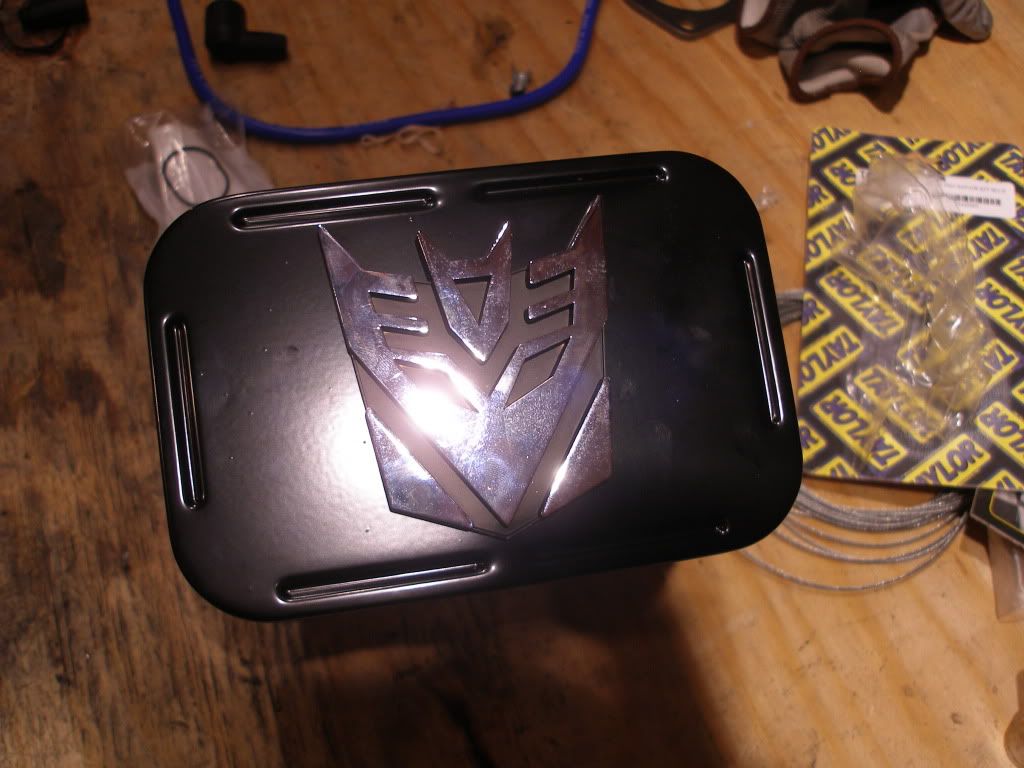
Powdercoated the air cleaner as it was chrome and I did not like it. My buddy had the emblem so we threw it on there.
Wrapped the header with DEI titanium header wrap. I'm happy with the result. Hopefully it will keep engine bay temps down since the primaries run a little close to some rubber stuff.
Powdercoated the air cleaner as it was chrome and I did not like it. My buddy had the emblem so we threw it on there.
Last edited by dirty-german; May 18, 2010 at 10:18 PM.

Senior Member
Joined: Oct 2008
Posts: 253
Likes: 0
From: round rock tx
cool project im working on my 70 bug rotary swap now. it was rusty so had to replace the package tray and half the floors. rebuilt front beam with avis adjusters. ill be running a 13B with fuel injection and mega squirt. your collector looks better than the ugly one i built. here are the pics of my build. http://smg.photobucket.com/albums/v6..._bug/70%20bug/
Yeah I just got a video camera so I'm definitely going to take video of the first start. I ordered a second muffler because the single will most likely be too loud. But I'm not going to install it until after I do the first start. I want to hear with the single muffler first. Other than that I'm working some of the small details at the moment: oil cooler and lines, finishing radiator plumbing, wiring up gauges. More pics soon.
Other than that I'm working some of the small details at the moment: oil cooler and lines, finishing radiator plumbing, wiring up gauges. More pics soon.
cool project im working on my 70 bug rotary swap now. it was rusty so had to replace the package tray and half the floors. rebuilt front beam with avis adjusters. ill be running a 13B with fuel injection and mega squirt. your collector looks better than the ugly one i built. here are the pics of my build. http://smg.photobucket.com/albums/v6..._bug/70%20bug/


Nice.
The great thing about the bug or buggies or kit cars is they are so light. Even an unmodified rotary will turn one of these cars into a monster. Hopefully I will be able to keep my car under 1700 lbs. but a kit car could weight much much less.
The great thing about the bug or buggies or kit cars is they are so light. Even an unmodified rotary will turn one of these cars into a monster. Hopefully I will be able to keep my car under 1700 lbs. but a kit car could weight much much less.
Yesterday when I got home from work I had a few of my friends come over and they helped me tackle some of the small but many projects I had left to do before first start. I had hooked up so radiator hoses but they needed some finishing touches. Two of my buddies actually redid them and completed them and they came out great. They look cleaner now then when I had done them and they were able to get them further away from the exhaust primaries. Another one of my friends hooked up the fuel pump and ran the 3/8" fuel hose front and back. Meanwhile I hooked up the oil cooler. As for the oil cooler I still have not gotten the one that I ordered in the mail. So I bought a cheap one from the local autoparts just to get us to this point. I plan to swap it out as soon as the real one arrives.
So its dark out now and we are ready to crank it over. The ignition system works and the starter sounds really strong. (Good so far). But the motor is not firing. I know that we have fuel so I know its the ignition system. We start trying to diagnose the problem. As I mentioned earlier in the thread I made a DLIDFIS system. So I checked my wiring again and it seemed correct. We again tried starting it and the motor would begin to start but then die off again. It sounded like it was firing at the wrong time. We hook up a timing light and find that its firing sporadically. At this point it was late and we were all tired and decided to leave it at that.
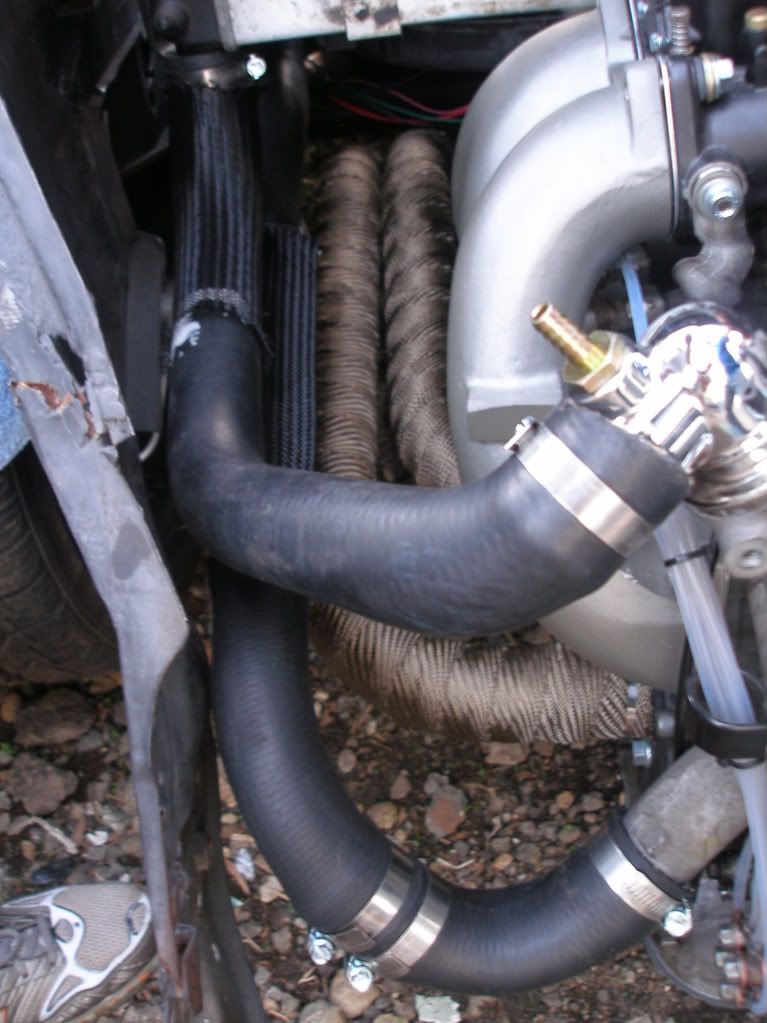
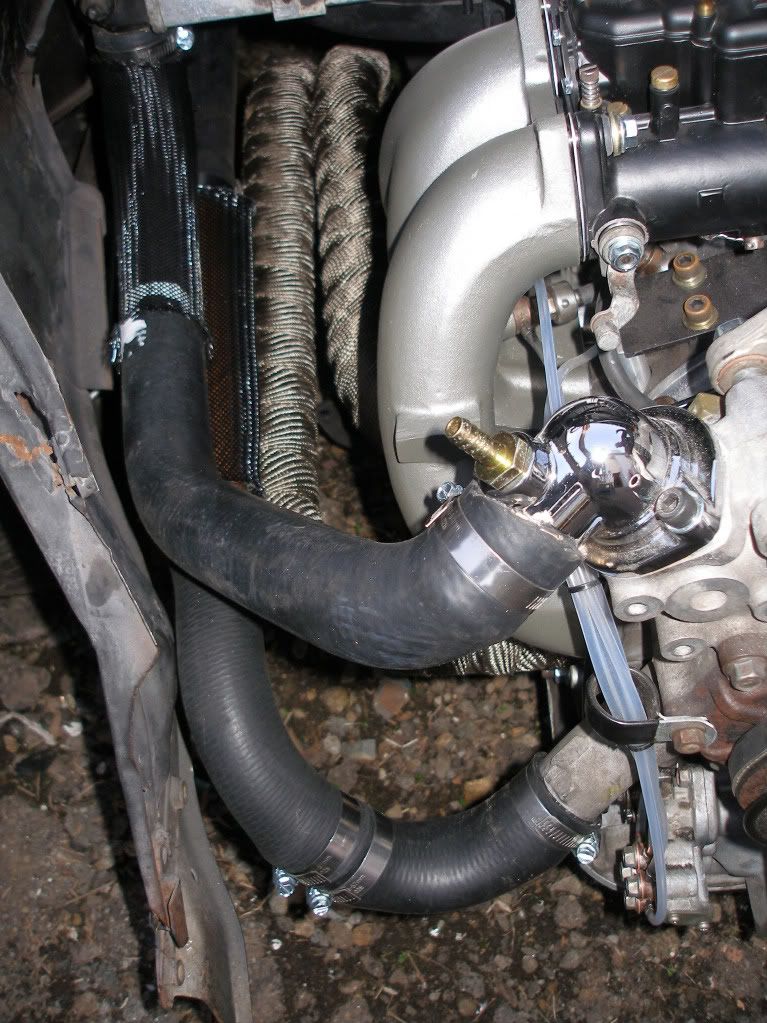
The new coolant lines. I will make a heat shield for them.
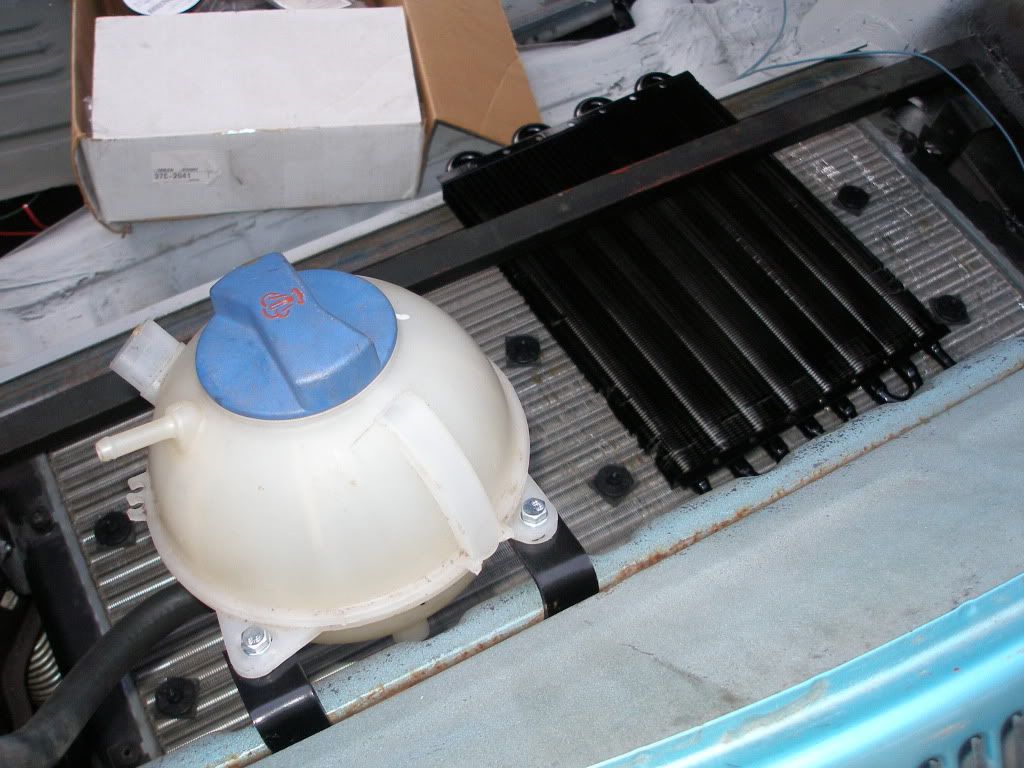
This is the reservoir and oil cooler. These are temporary locations again just to get the car started.
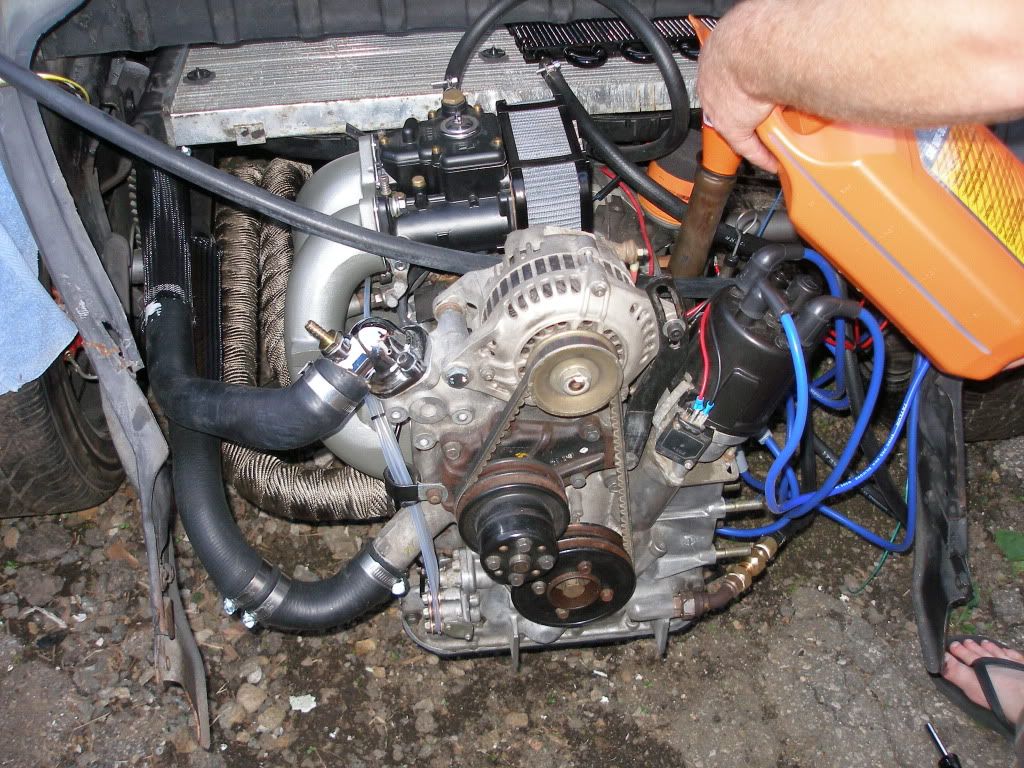
Filling up the oil.
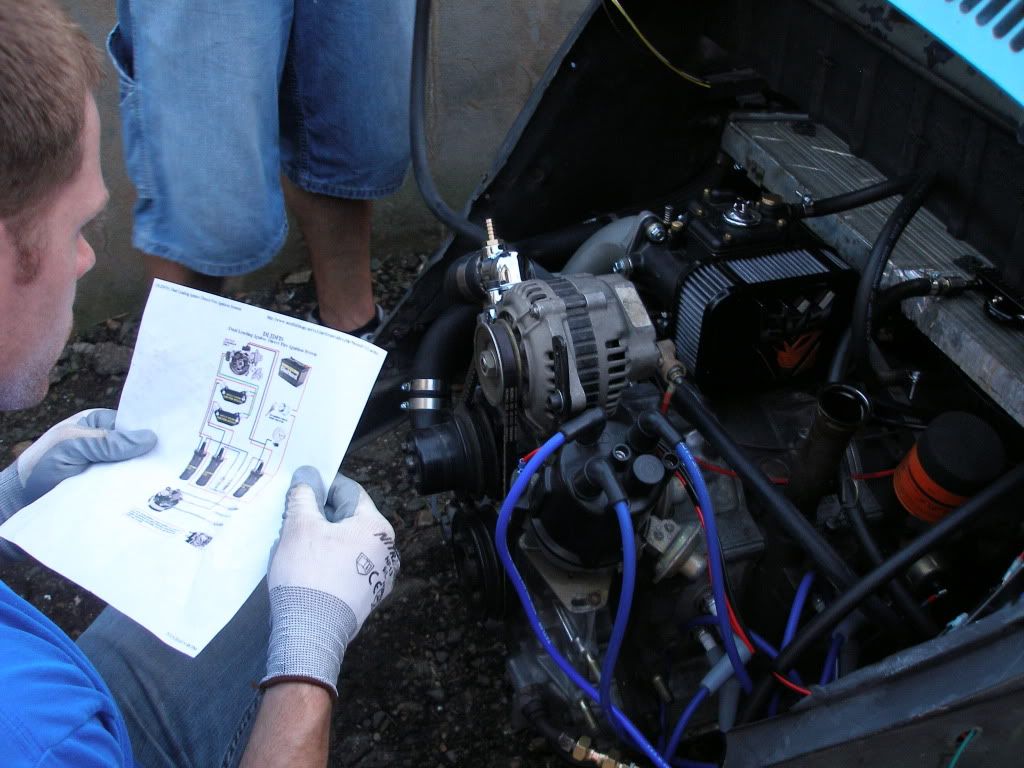
Trying to diagnose ignition problem.
I realized this morning after researching online that I forgot to hook up the condenser on the dizzy. This may be the cause of the problem. Also when I get home I'm going to adjust the timing again and all of the wire connections. Then hopefully it will start right up.
So its dark out now and we are ready to crank it over. The ignition system works and the starter sounds really strong. (Good so far). But the motor is not firing. I know that we have fuel so I know its the ignition system. We start trying to diagnose the problem. As I mentioned earlier in the thread I made a DLIDFIS system. So I checked my wiring again and it seemed correct. We again tried starting it and the motor would begin to start but then die off again. It sounded like it was firing at the wrong time. We hook up a timing light and find that its firing sporadically. At this point it was late and we were all tired and decided to leave it at that.
The new coolant lines. I will make a heat shield for them.
This is the reservoir and oil cooler. These are temporary locations again just to get the car started.
Filling up the oil.
Trying to diagnose ignition problem.
I realized this morning after researching online that I forgot to hook up the condenser on the dizzy. This may be the cause of the problem. Also when I get home I'm going to adjust the timing again and all of the wire connections. Then hopefully it will start right up.