E Production Rx-7 Build

Thread Starter
Fabrineer
Joined: Oct 2002
Posts: 976
Likes: 1
From: Charlotte, NC
A straight tube immediately loads the rest of the cage in tension when you try to bend it.
A bent tube will deform first, and by the time it starts loading the cage, it may have twisted around so much that it's tearing away from the cage. Certainly the tube is now part of the driver.
I understand the problem with driver room, but it's still a bad idea.
A bent tube will deform first, and by the time it starts loading the cage, it may have twisted around so much that it's tearing away from the cage. Certainly the tube is now part of the driver.
I understand the problem with driver room, but it's still a bad idea.
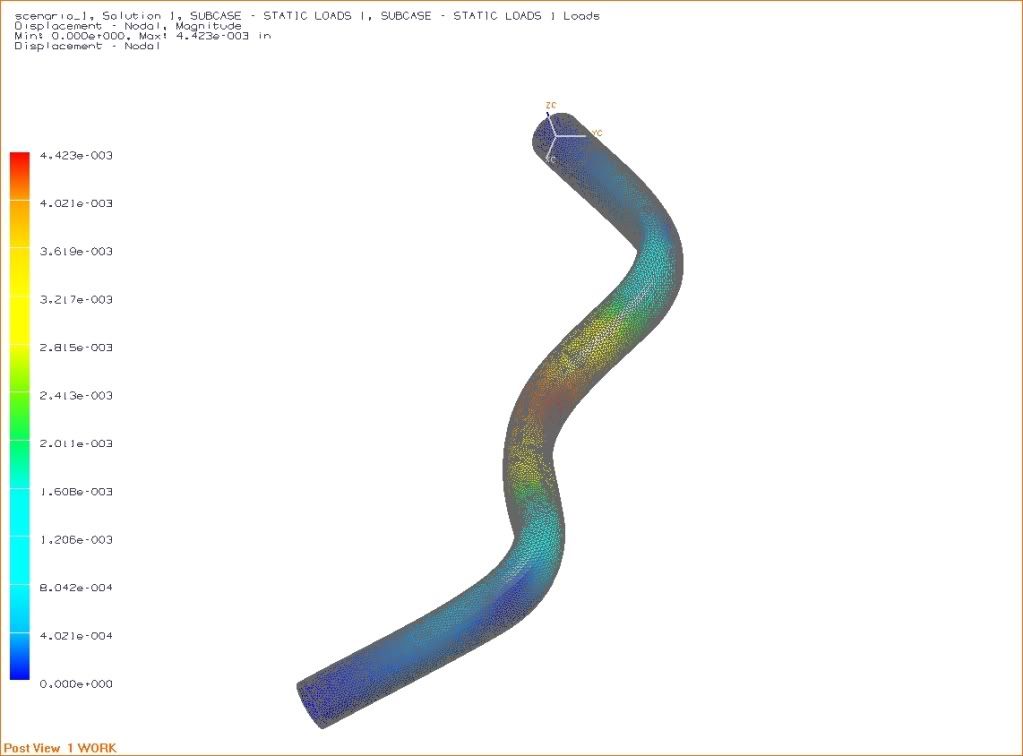
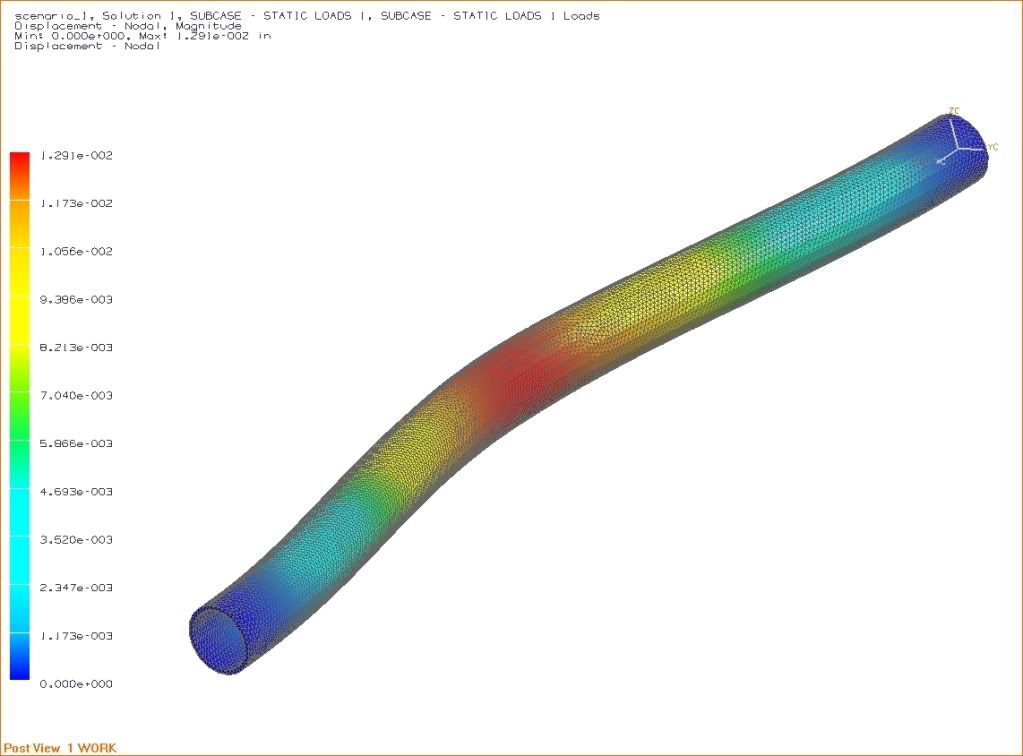
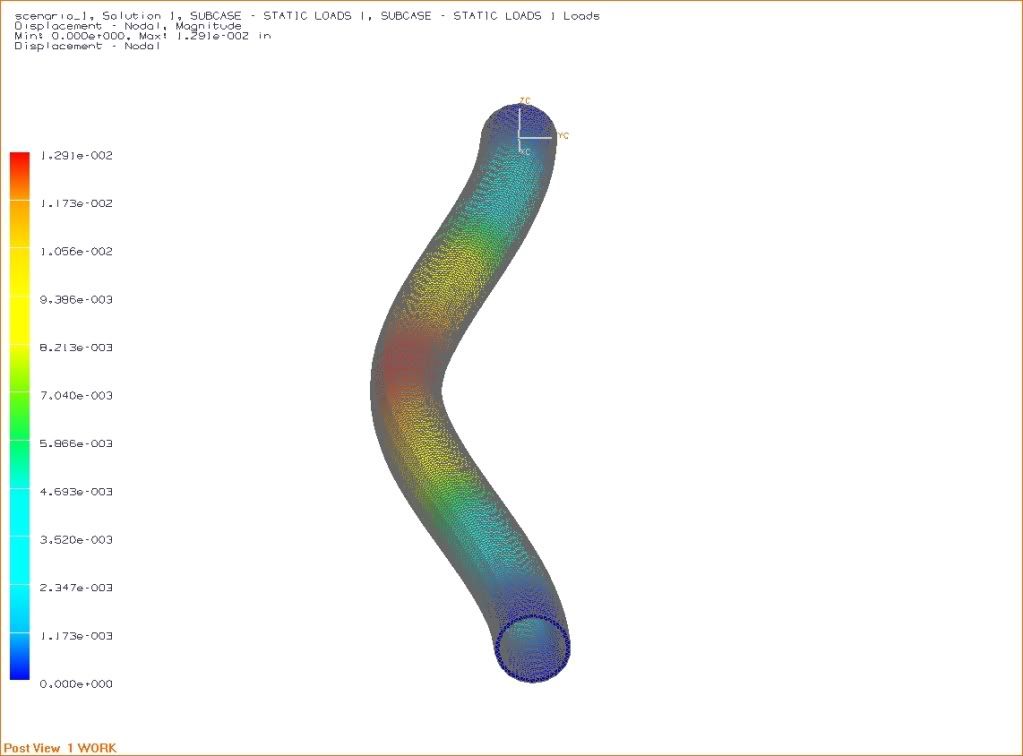
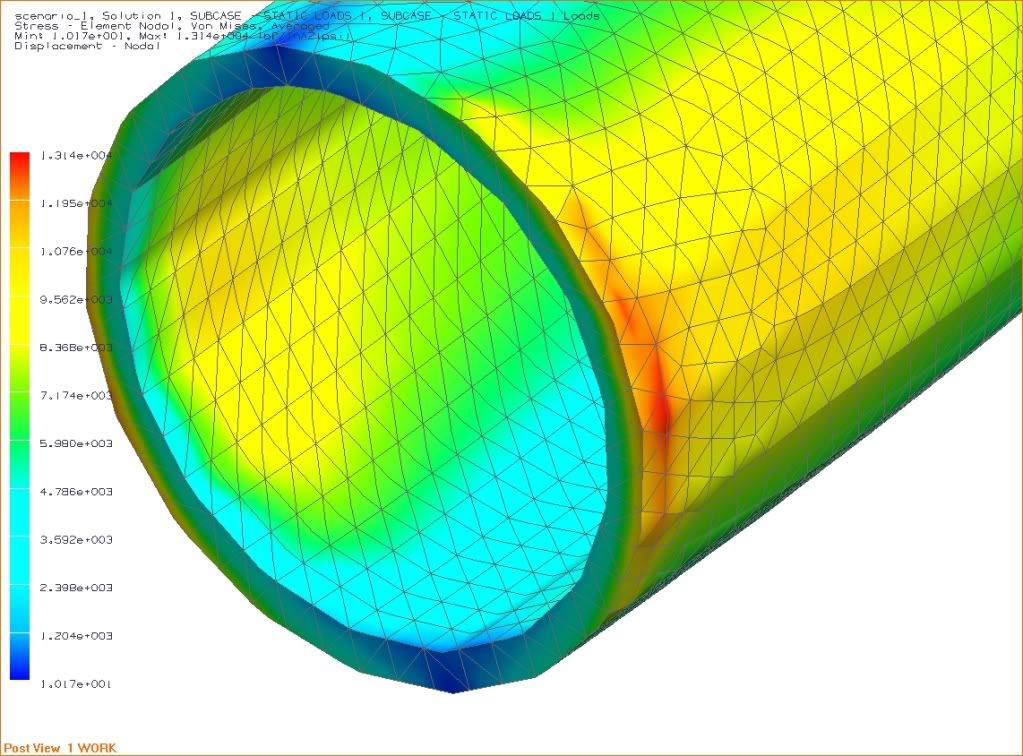
Keep in mind, the deflections in this model are greaty exaggurated to give you an idea of the shape.
The overall length of each bar modeled is 24"
The tube is steel 1.5" OD x 0.095" wall
The bar was loaded at the center with a 500 pound load perpendicular to the bar.
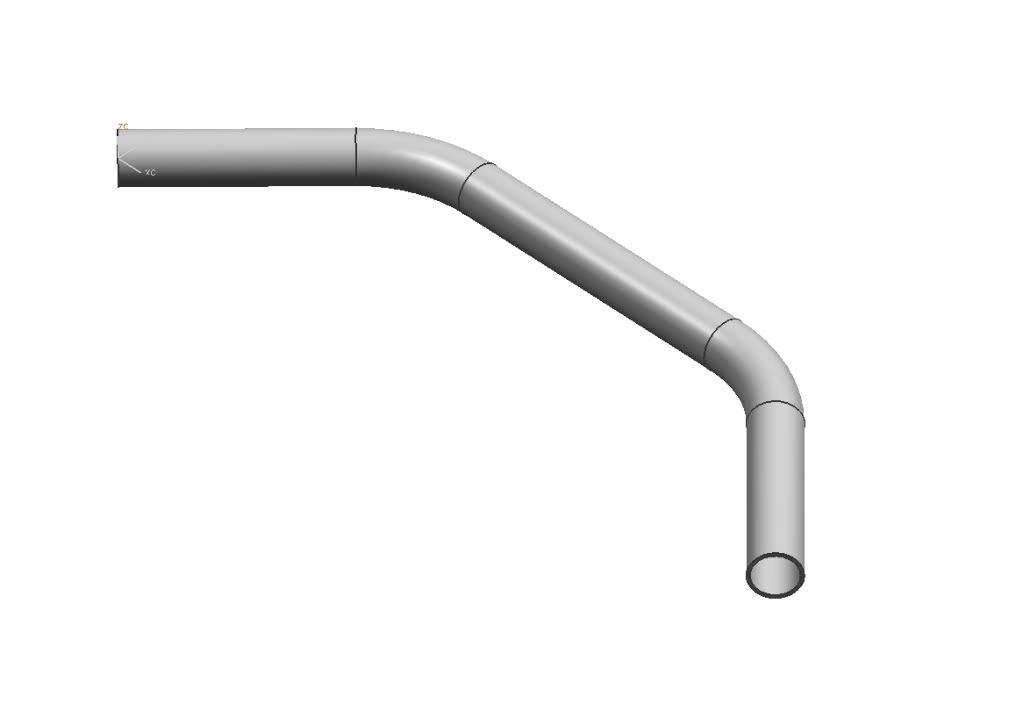
You can verify these numbers in the pictures:
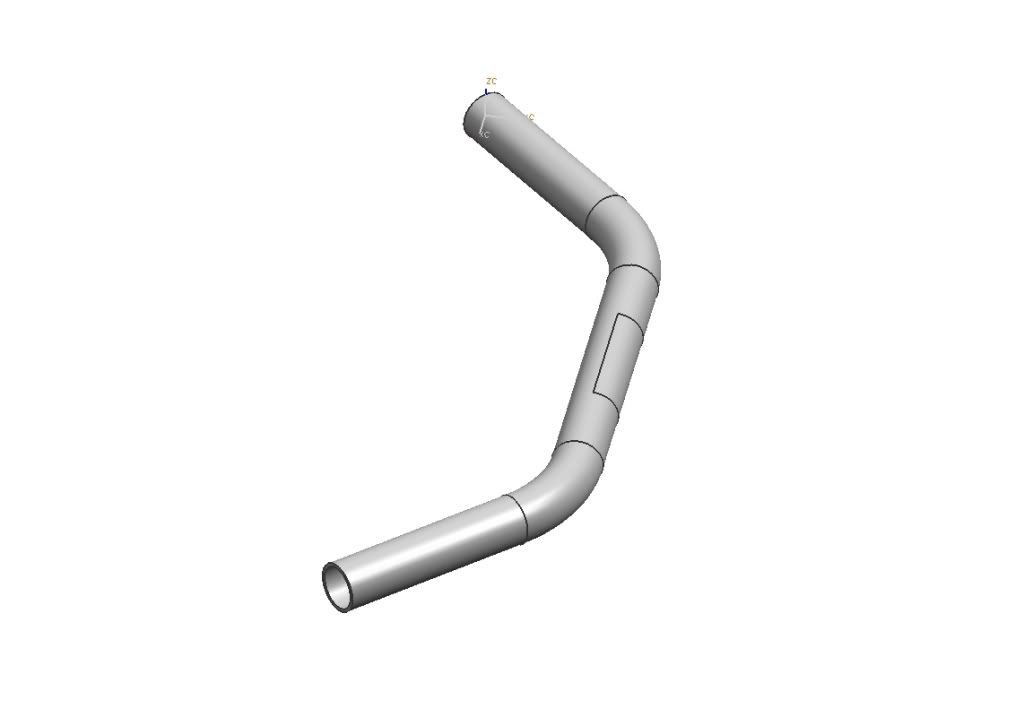
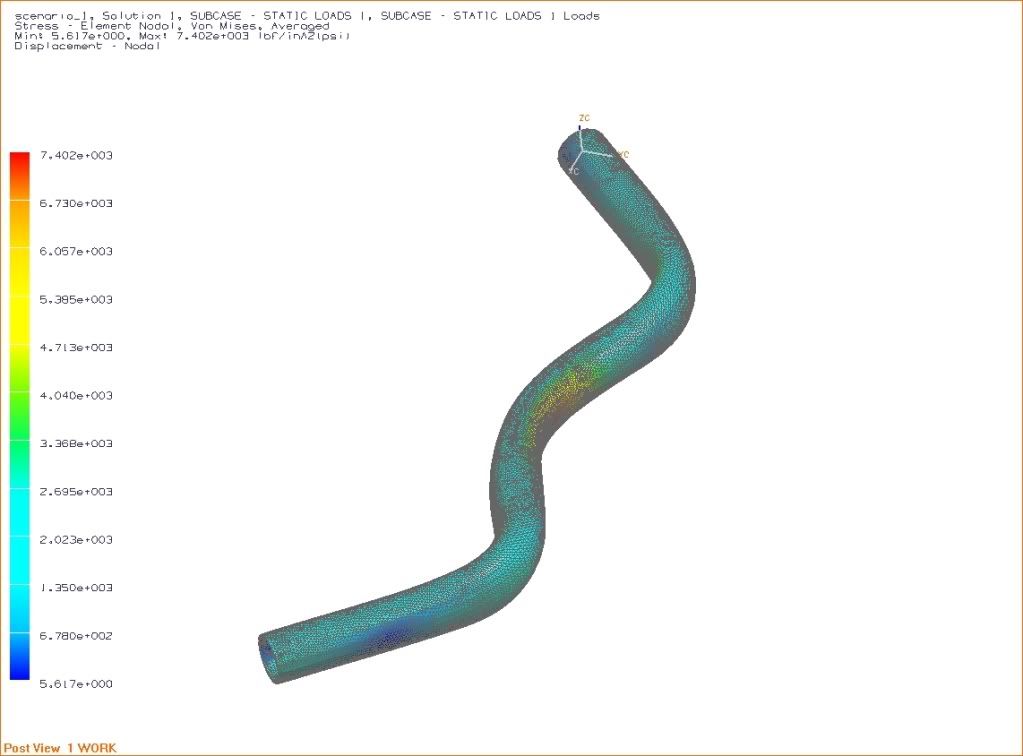
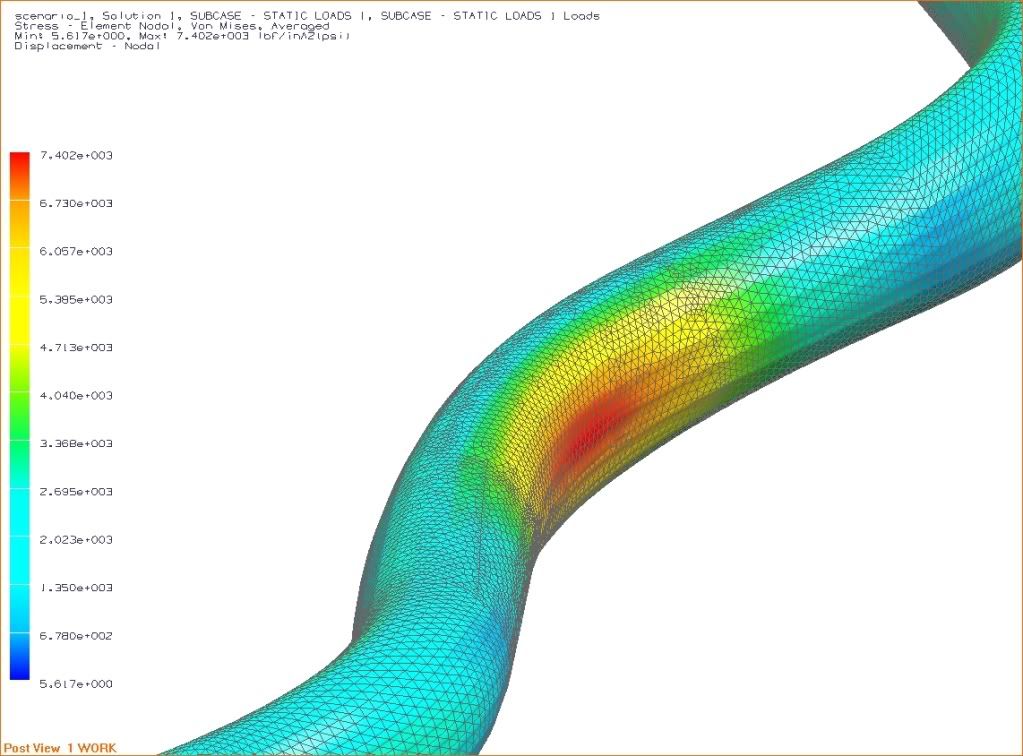
Bent door bar
Maximum Deflection - 0.00423"
Maximum Stress - 7,402 psi
**maximum stress occurs at the center of the tube, very low stress at the tube ends, where the metal is typically welded (and material properties have changed - generally for the worse)
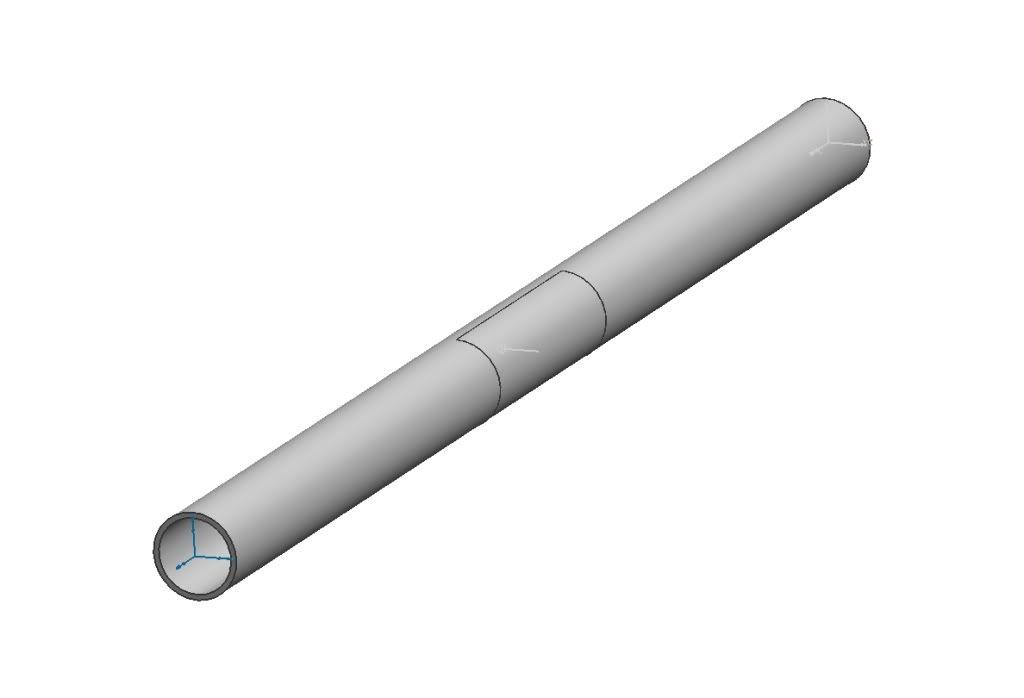
Straight door bar
Maximum Deflection - 0.01291"
Maximum Stress - 13,140 psi
**maximum stress occurs at the ends of the tube, generally where a weld occurs. Welding changes the material properties and usually reduces the ultimate strength of the material in the heat affected zone.
**The stress at the center of the straight tube is still higher than the stress at the center of the bent tube.
Maximum Stress at center of Bent Tube - 7,402 psi
Maximum Stress at center of straight tube - 9,586 psi
Pics:
Bent Door Bar
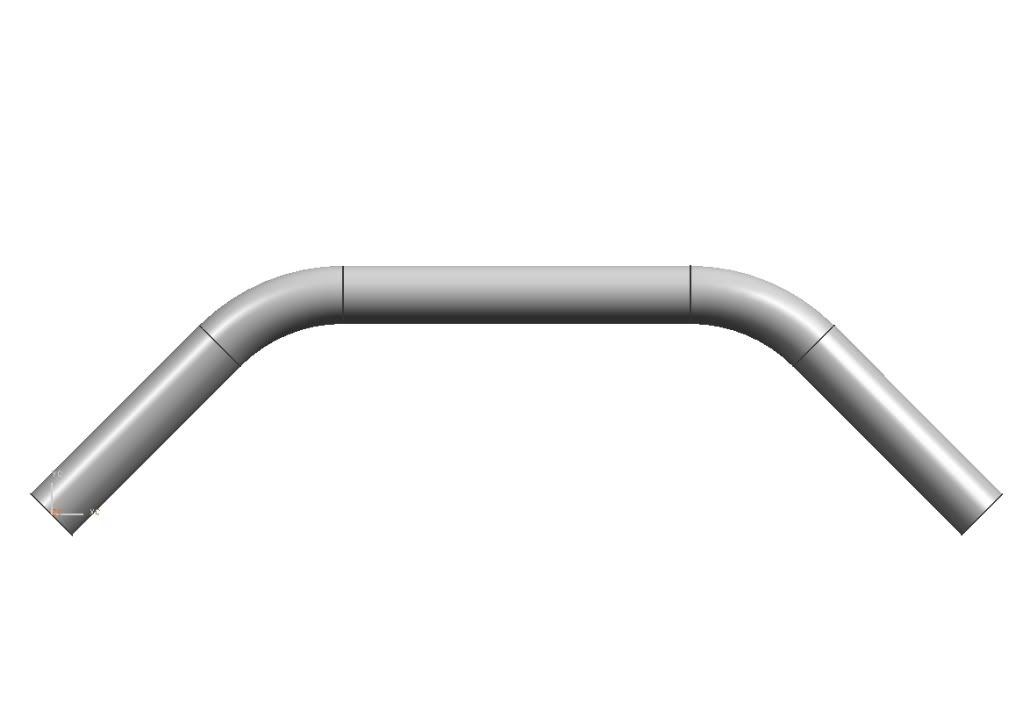
Straight Door Bar
Bent Door Bar Deflection
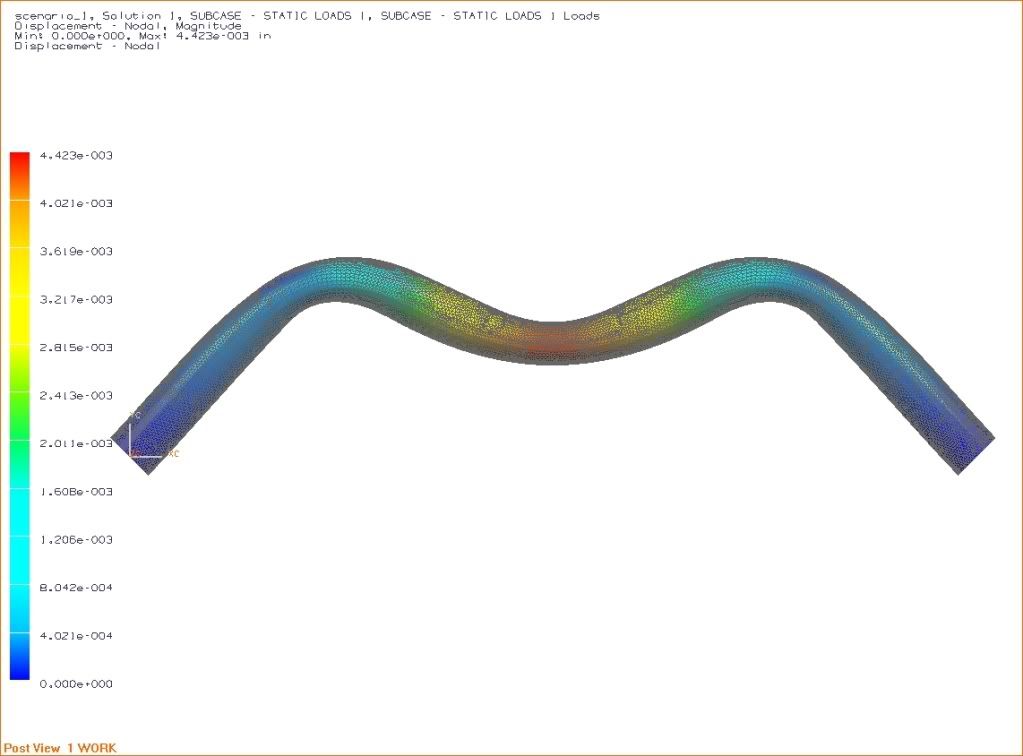
Straight Door Bar Deflection
Bent Door Bar Stress
Straight Door Bar Stress

Nate, excellent explanation.
A few years ago I read the WRC cars,starting with Subaru IIRC, were going with 1.5"x.120 over 1.75x.095 because it will yield more before it buckles. How about an element change to see if that shows up in this test?
I have always looked to the latest rally builds for ideas. I figure a tree can come flying at the side of the car at 80 mph, they're going to do what they can to protect the driver and the screaming ballast in the passenget seat..
I have always looked to the latest rally builds for ideas. I figure a tree can come flying at the side of the car at 80 mph, they're going to do what they can to protect the driver and the screaming ballast in the passenget seat..
Thread Starter
Fabrineer
Joined: Oct 2002
Posts: 976
Likes: 1
From: Charlotte, NC
A few years ago I read the WRC cars,starting with Subaru IIRC, were going with 1.5"x.120 over 1.75x.095 because it will yield more before it buckles. How about an element change to see if that shows up in this test?
I have always looked to the latest rally builds for ideas. I figure a tree can come flying at the side of the car at 80 mph, they're going to do what they can to protect the driver and the screaming ballast in the passenget seat..
I have always looked to the latest rally builds for ideas. I figure a tree can come flying at the side of the car at 80 mph, they're going to do what they can to protect the driver and the screaming ballast in the passenget seat..
Old [Sch|F]ool


Joined: May 2001
Posts: 12,867
Likes: 573
From: Cleveland, Ohio, USA
...which is why bent door bars will not pass rally scrutineering. IIRC tubes must not be bent anywhere unless they are gusseted or the bend is at a junction with another tube.
FEA is nice if you enter in all of the variables. Most of the cage rules we have are borne from what people survived and what people have not survived...
I recognize that road-course collisions are of a different nature - you're more worried about a wall or another car than a tree or a pole... but the idea still makes me cringe.
80mph sideways into a (solid) tree will be fatal no matter what, sadly. Unless you make the car 10 feet wide, you can't come to a stop in a long enough time to spread the deceleration forces over a long enough time.
80 mph sideways and you should be more worried about your aorta detaching from your heart more than what door bars you have!
Usually roadracing the object that is hitting you is also crunching if you have a door shot. Trees hold their ground pretty well.
I like the pods they put on the door bars that have the honeycomb cells wrapped in CF or kevlar(one of them, maybe a weave of both). I thought of trying to make one but thought better of it since I really only know how spell carbon fiber and don't own an autoclave...yet.
Every form of motorsports may have a different and unique need of roll cage requirements. But Nascar style door bars are just that, a design from nascar. Those cars get hit by other cars, tires, chassis parts and who knows what else. I think distributing the loads as Seth and others have pointed out, combined with the greater distance than 2" from the driver is going to be better for any type of impact. But this is my opinion. So unless someone shows crash pics with verified proof one is better, its best left to unspoken speculation. Now on with the build thread 
Thread Starter
Fabrineer
Joined: Oct 2002
Posts: 976
Likes: 1
From: Charlotte, NC
More Progress
I decided it would be more wise to wait on the rear suspension redesign until I collect data from the racetrack. So, for the next year or so, I will stick with the stock control arms.
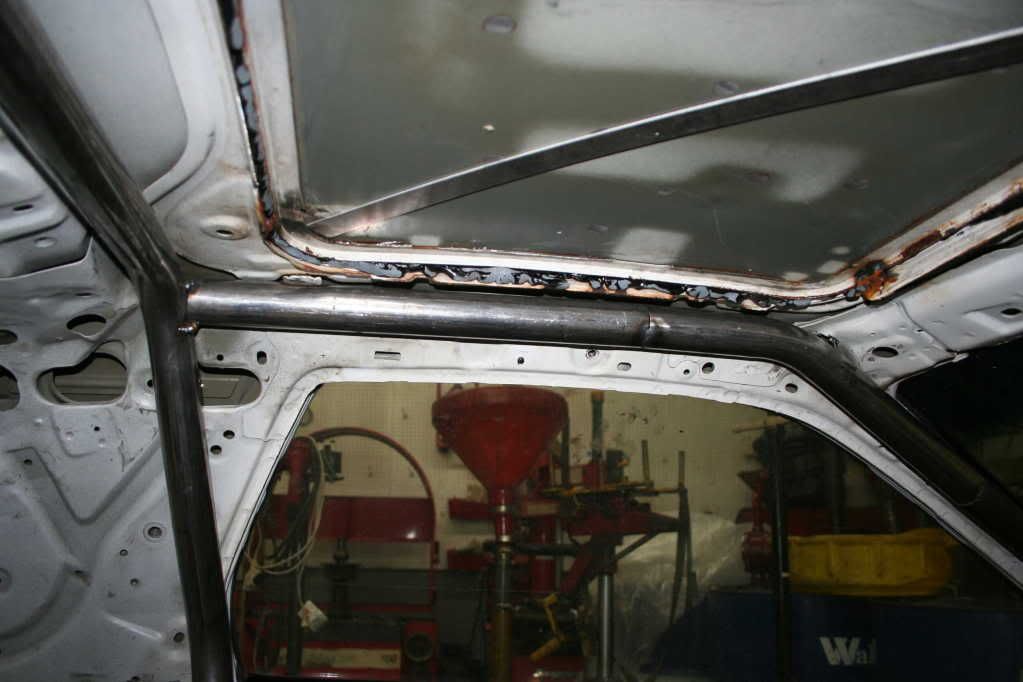
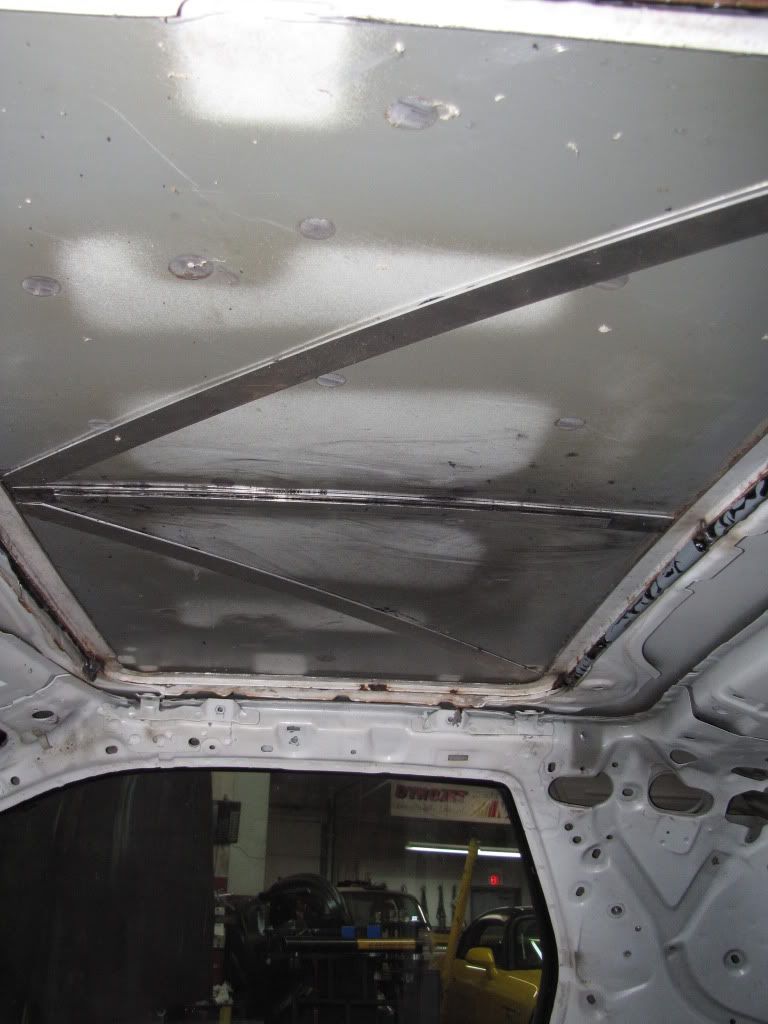
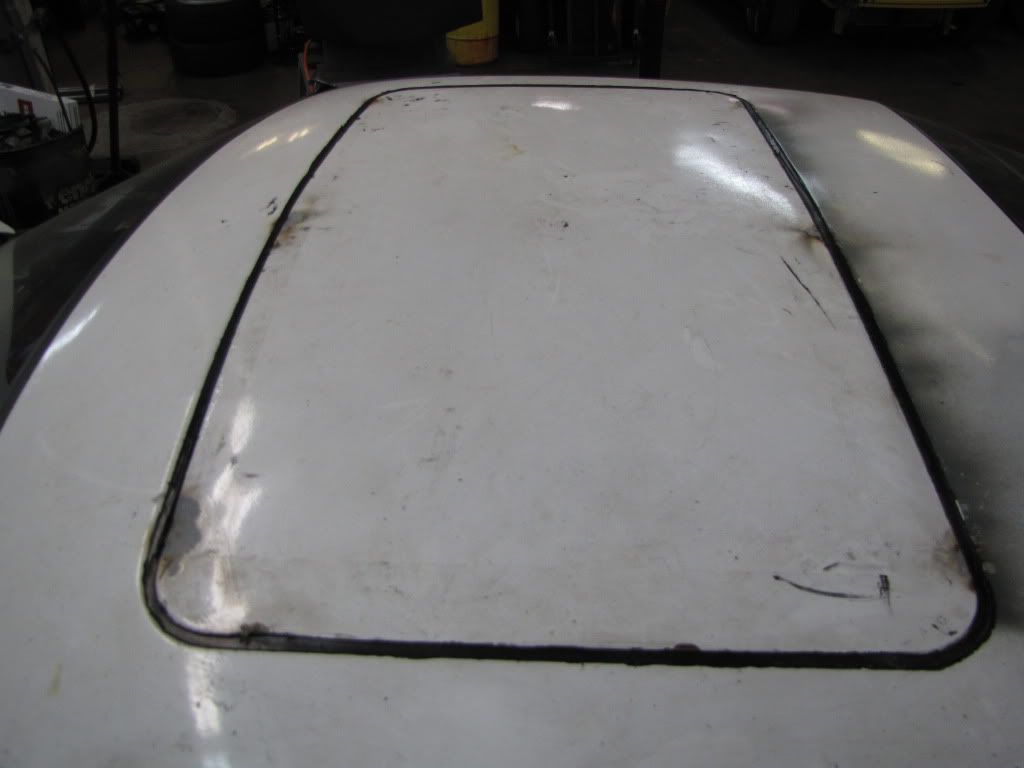
Sunroof - I finished the aluminum sunroof, and it was very lightweight and quite stiff. I made it flat along the front/rear axis of the car and curved in right/left axis, and this was wrong. The stock sunroof has a compound curve. Moral of the story, it had a 1/4 inch vertical disconinuity at the center of each side of the sunroof where it meats the roof of the car. Had I not been an idiot and realized it was a compound curve, I would have built this into the sunroof (which would have taken the same amount of time to make) and not have wasted so much time.
After contemplating throwing the aluminum sunroof across the room, I gutted the stock one's stucture, and glued in some aluminum strips for some lightweight reinforcement. I am hoping this thing doens't "dip" in the center under high speeds. The stock structure had become unglued, so I was at no loss there.
Then, I welded it in place, and filled the gap with windo-weld. Don't worry about the burn pain from welding it in or the window weld that my hand accidentally put on the paint, I will be repainting the car.
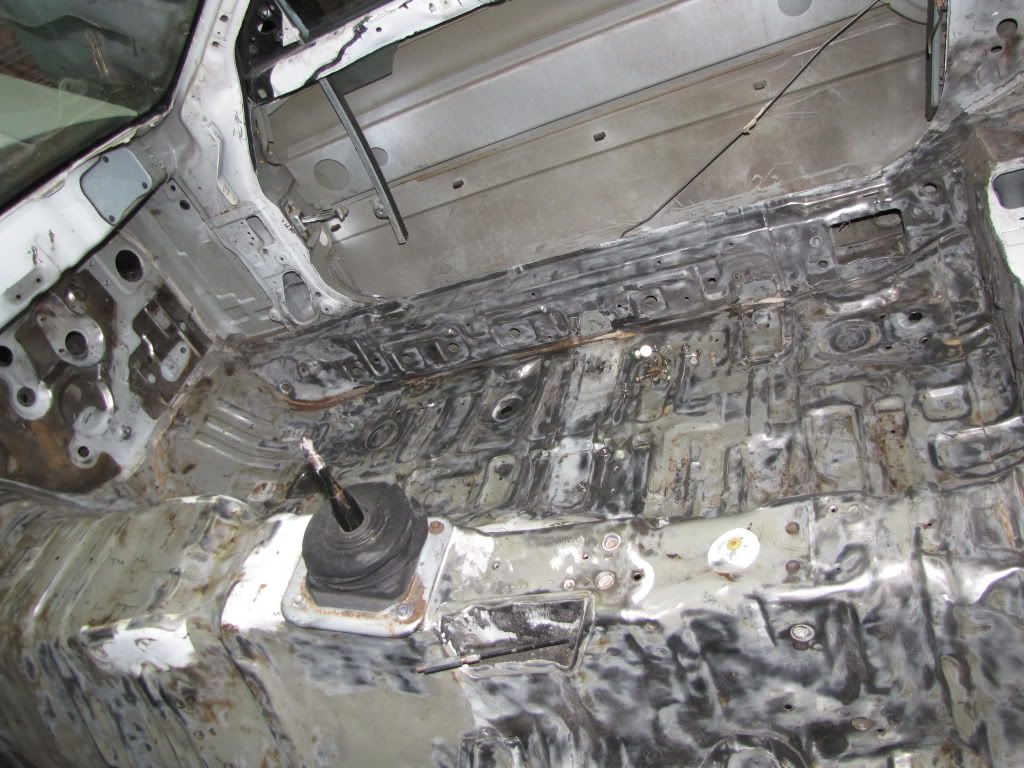
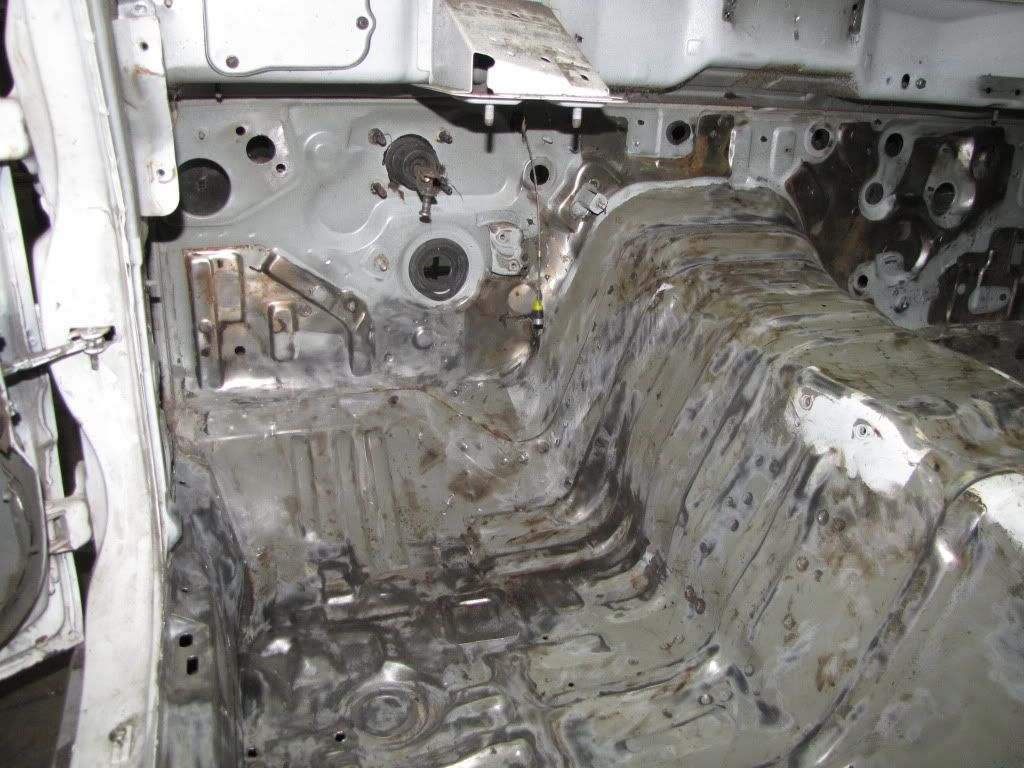
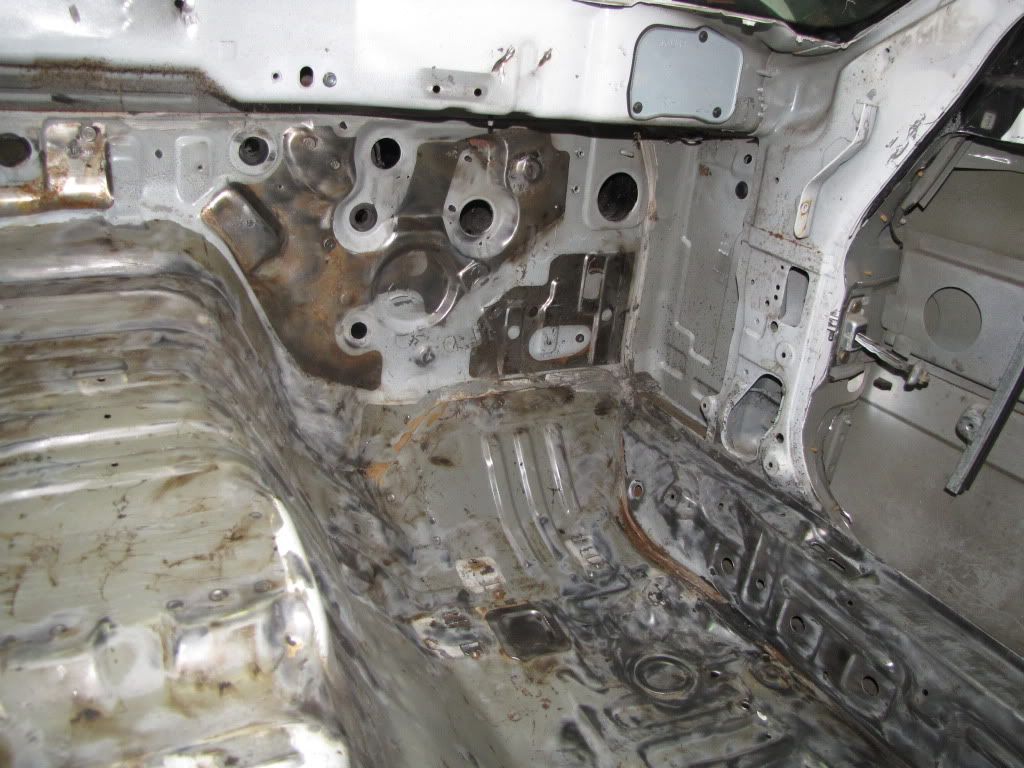
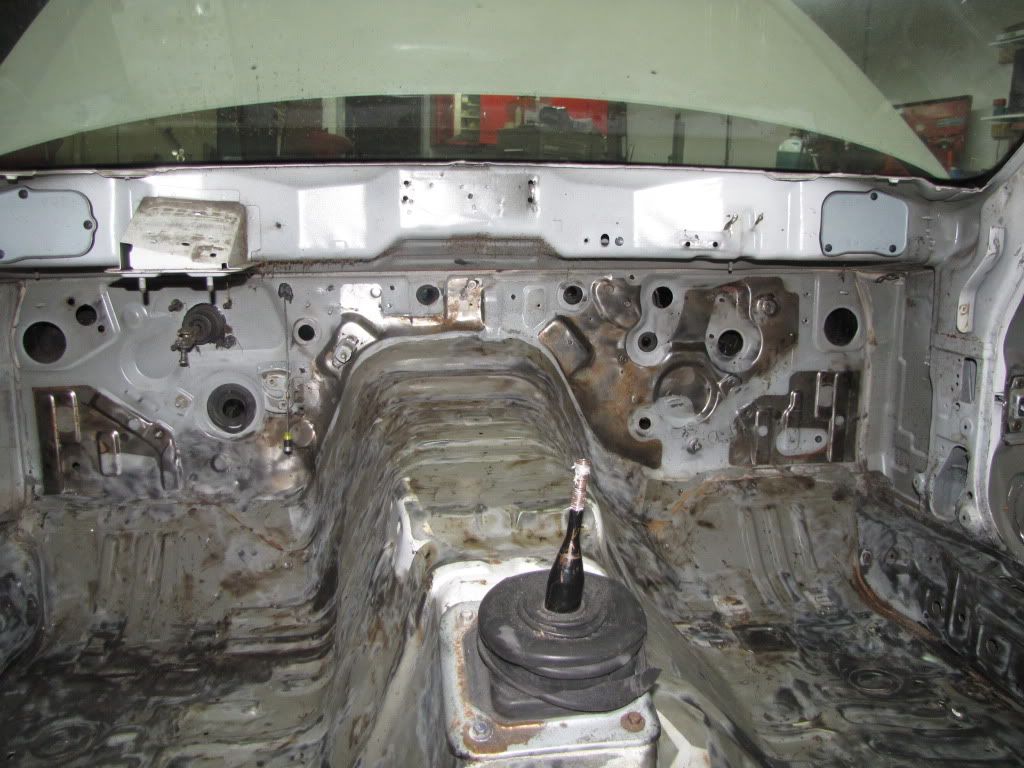
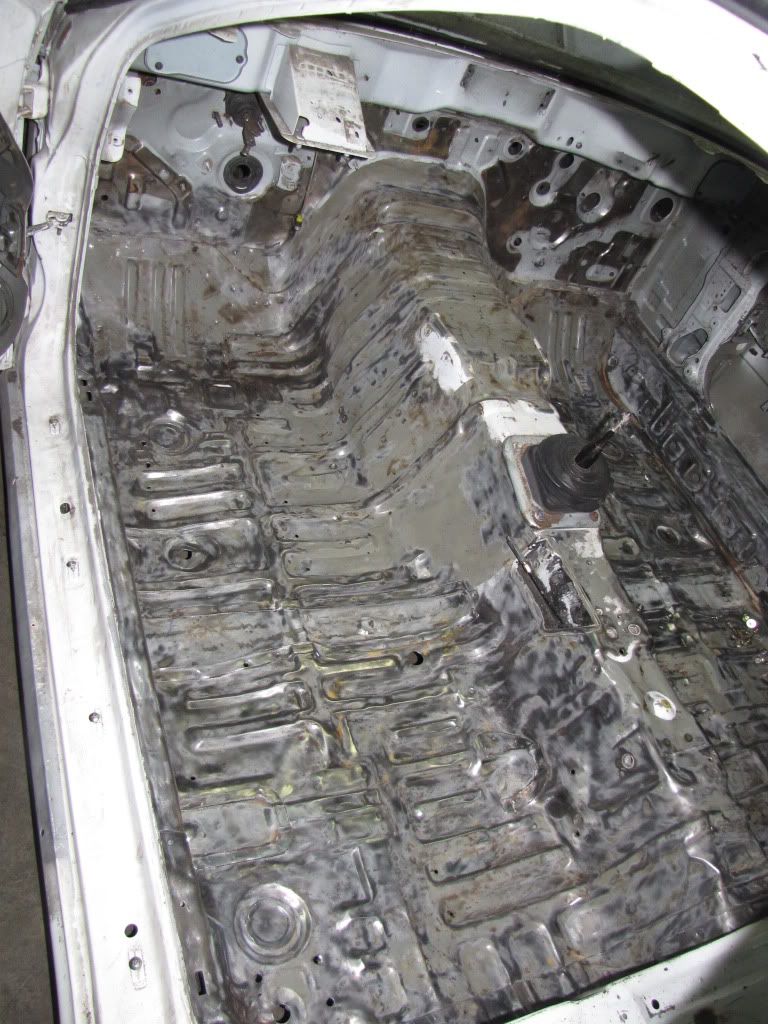
I had some help stripping the rest of that rhino liner out of the floor board (WORST IDEA EVER: NEVER RHINO LINE INTERIOR). I also chiseled out the rest of the tar. I hated doing that, and if anyone has suggestions on a better way than a hammer and a chisel, let me know, because I'll eventually do it again on my next racecar. End result: the inside is almost prepped for paint (lots of bare metal showing now)!
I also cut off the uneccessary brackets on the firewall and gutted the doors.

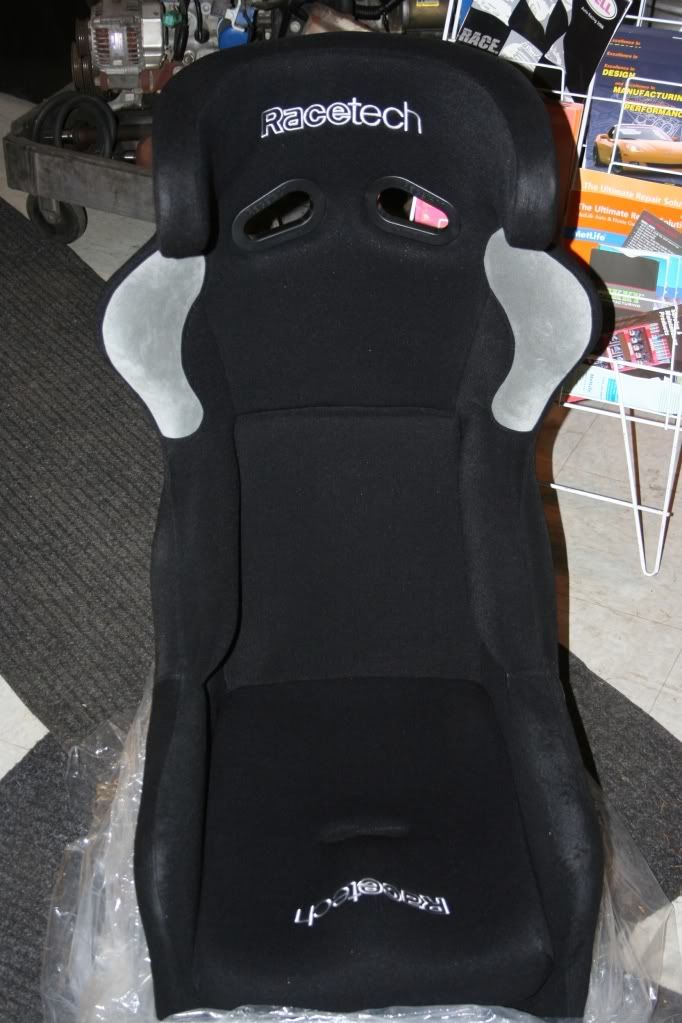
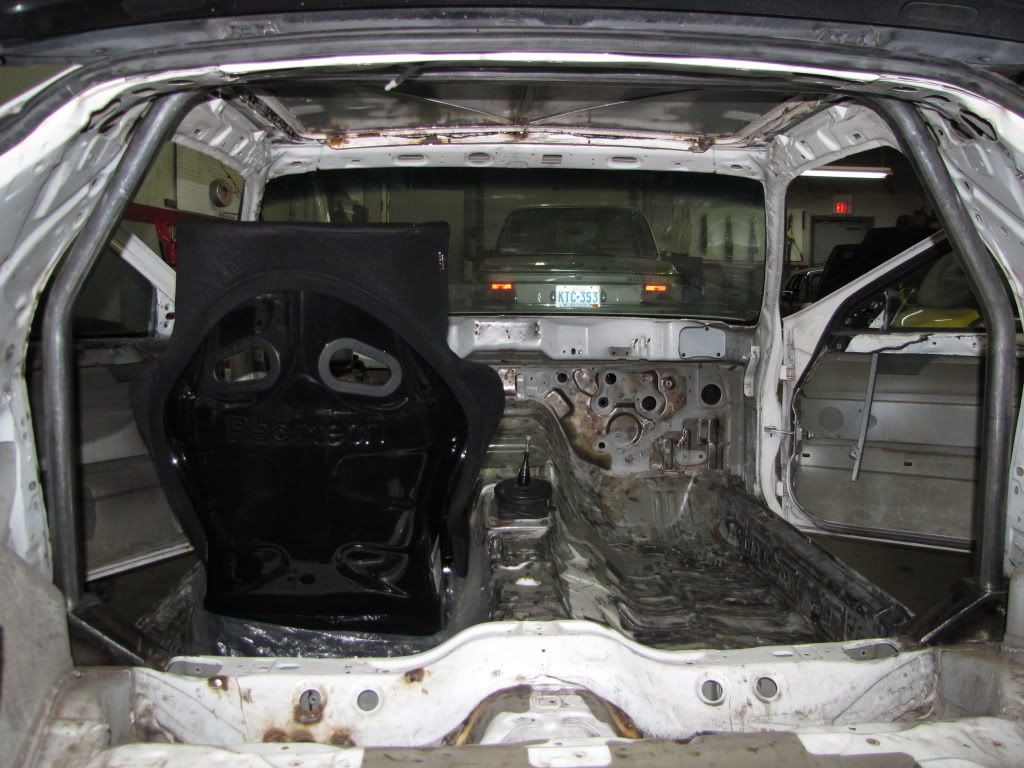
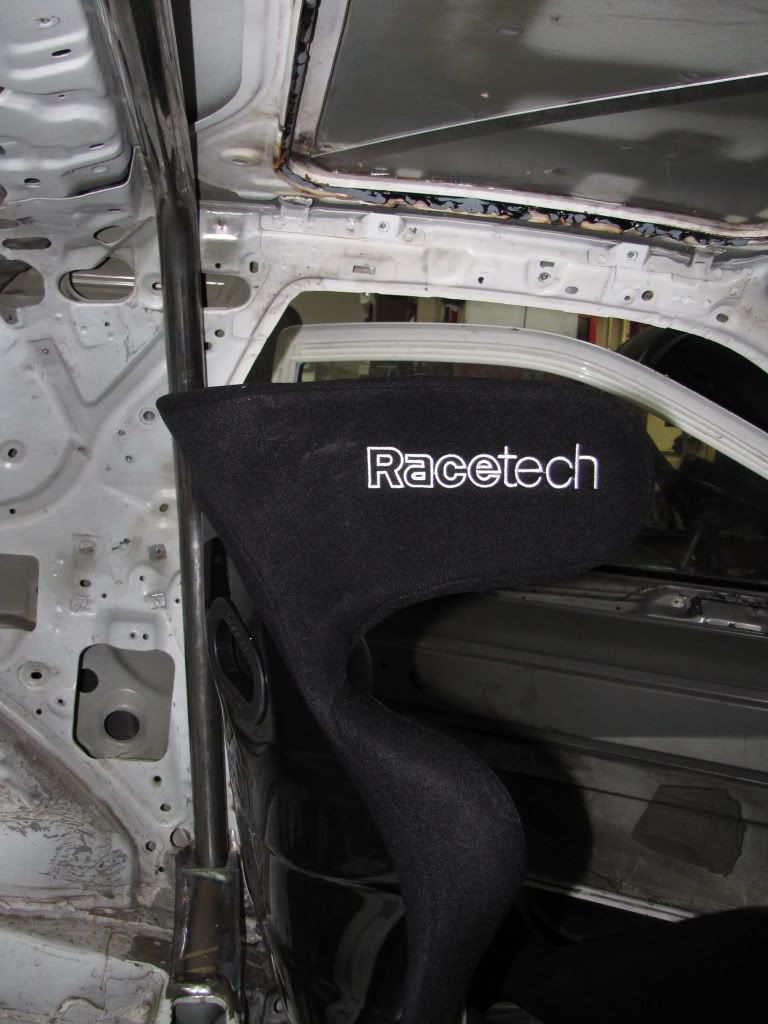
The cage is NEXT!!!! I am awaiting the racetech seat to arrive; I expect it in the next couple weeks.
Sunroof - I finished the aluminum sunroof, and it was very lightweight and quite stiff. I made it flat along the front/rear axis of the car and curved in right/left axis, and this was wrong. The stock sunroof has a compound curve. Moral of the story, it had a 1/4 inch vertical disconinuity at the center of each side of the sunroof where it meats the roof of the car. Had I not been an idiot and realized it was a compound curve, I would have built this into the sunroof (which would have taken the same amount of time to make) and not have wasted so much time.
After contemplating throwing the aluminum sunroof across the room, I gutted the stock one's stucture, and glued in some aluminum strips for some lightweight reinforcement. I am hoping this thing doens't "dip" in the center under high speeds. The stock structure had become unglued, so I was at no loss there.
Then, I welded it in place, and filled the gap with windo-weld. Don't worry about the burn pain from welding it in or the window weld that my hand accidentally put on the paint, I will be repainting the car.
I had some help stripping the rest of that rhino liner out of the floor board (WORST IDEA EVER: NEVER RHINO LINE INTERIOR). I also chiseled out the rest of the tar. I hated doing that, and if anyone has suggestions on a better way than a hammer and a chisel, let me know, because I'll eventually do it again on my next racecar. End result: the inside is almost prepped for paint (lots of bare metal showing now)!
I also cut off the uneccessary brackets on the firewall and gutted the doors.
The cage is NEXT!!!! I am awaiting the racetech seat to arrive; I expect it in the next couple weeks.
First, removing tar. I grew up in Toledo, if it was winter time I used to put the car outside until frozen then hit the stuff with a ball peen hammer. Pops off in big sheets. Now that I'm in Florida I buy dry ice and pop it off in smaller sheets. After that hit what doesn't come off the my high speed 4 1/2" wire wheel and it clean. Lacquer thinner for the residue.
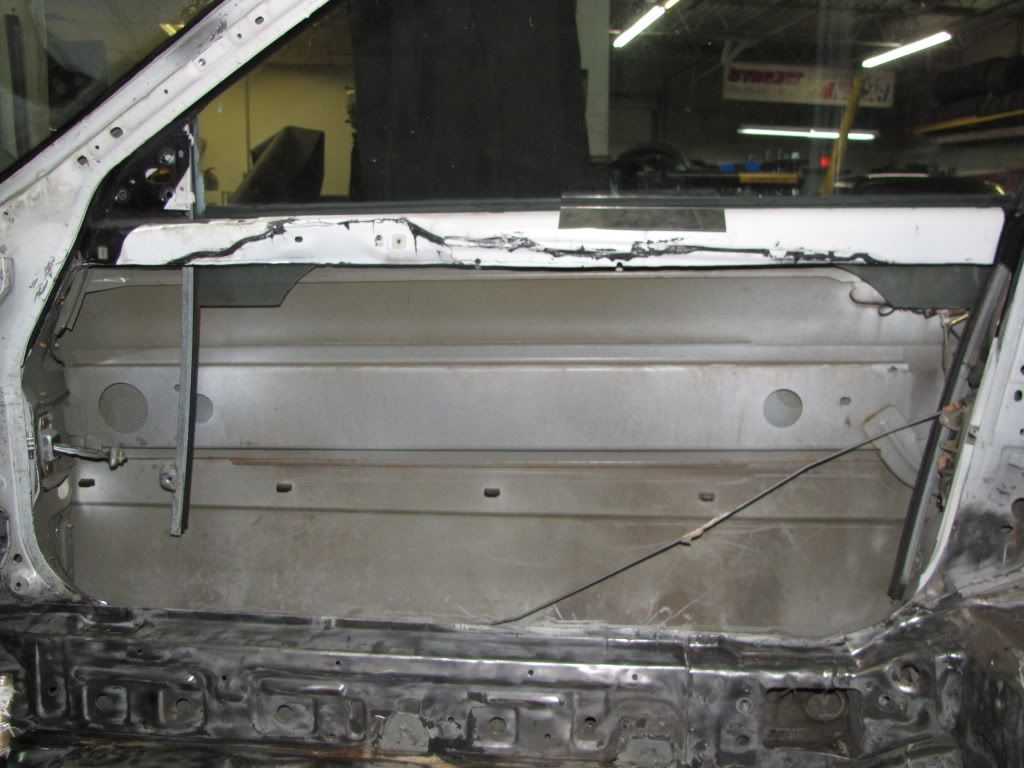
Next, lose those door bars. 11.5 lbs each! Drill out the spot welds in the door jamb side of the door, front and back. Then cut a slot in the beam so you can fold it in toward you(pull it in from the middle) or else it won't come out.
Next, lose those door bars. 11.5 lbs each! Drill out the spot welds in the door jamb side of the door, front and back. Then cut a slot in the beam so you can fold it in toward you(pull it in from the middle) or else it won't come out.
Thread Starter
Fabrineer
Joined: Oct 2002
Posts: 976
Likes: 1
From: Charlotte, NC
First, removing tar. I grew up in Toledo, if it was winter time I used to put the car outside until frozen then hit the stuff with a ball peen hammer. Pops off in big sheets. Now that I'm in Florida I buy dry ice and pop it off in smaller sheets. After that hit what doesn't come off the my high speed 4 1/2" wire wheel and it clean. Lacquer thinner for the residue.
Next, lose those door bars. 11.5 lbs each! Drill out the spot welds in the door jamb side of the door, front and back. Then cut a slot in the beam so you can fold it in toward you(pull it in from the middle) or else it won't come out.
Next, lose those door bars. 11.5 lbs each! Drill out the spot welds in the door jamb side of the door, front and back. Then cut a slot in the beam so you can fold it in toward you(pull it in from the middle) or else it won't come out.
Have you had anyone give you hell for not having the side impact beams?
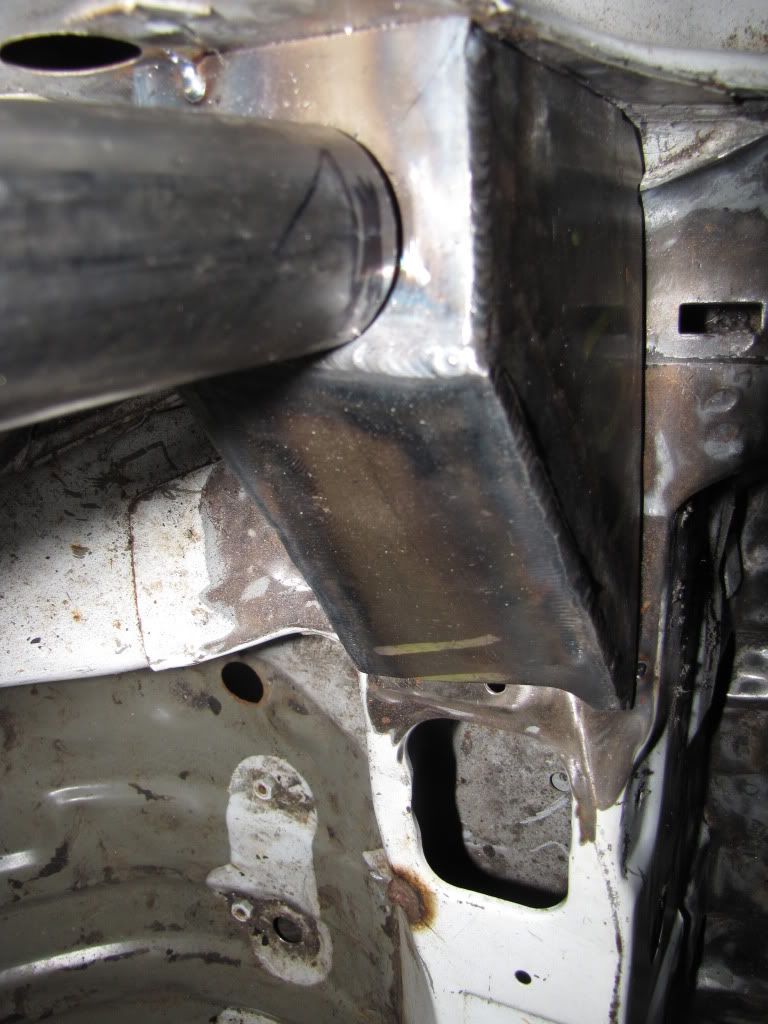
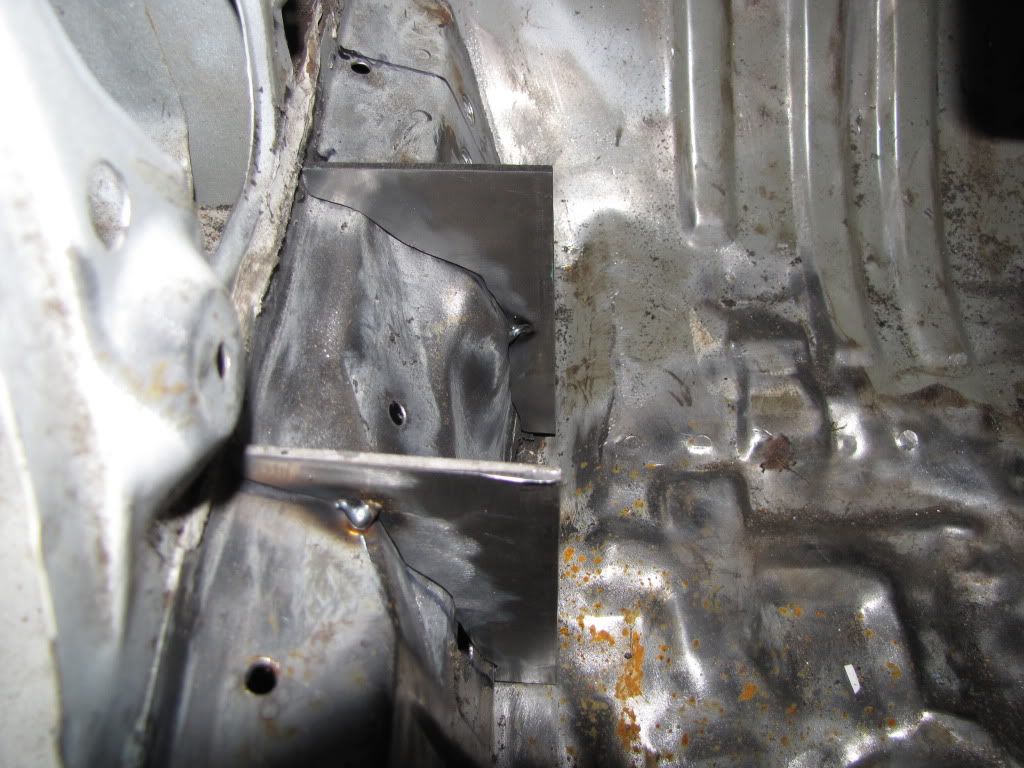
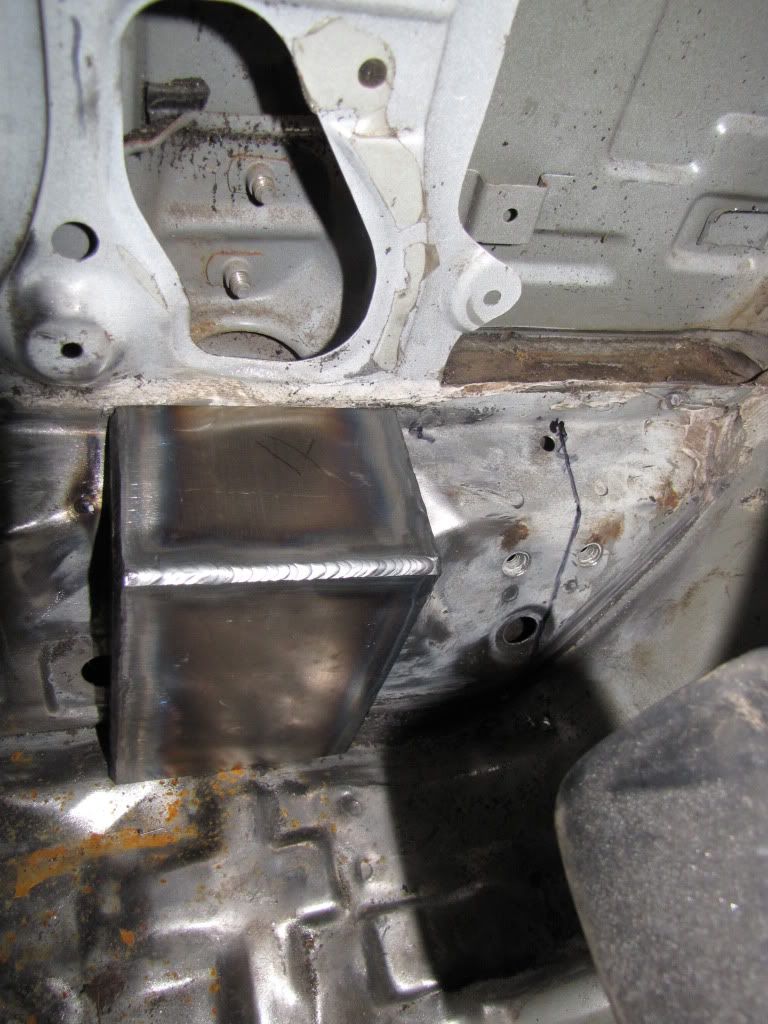
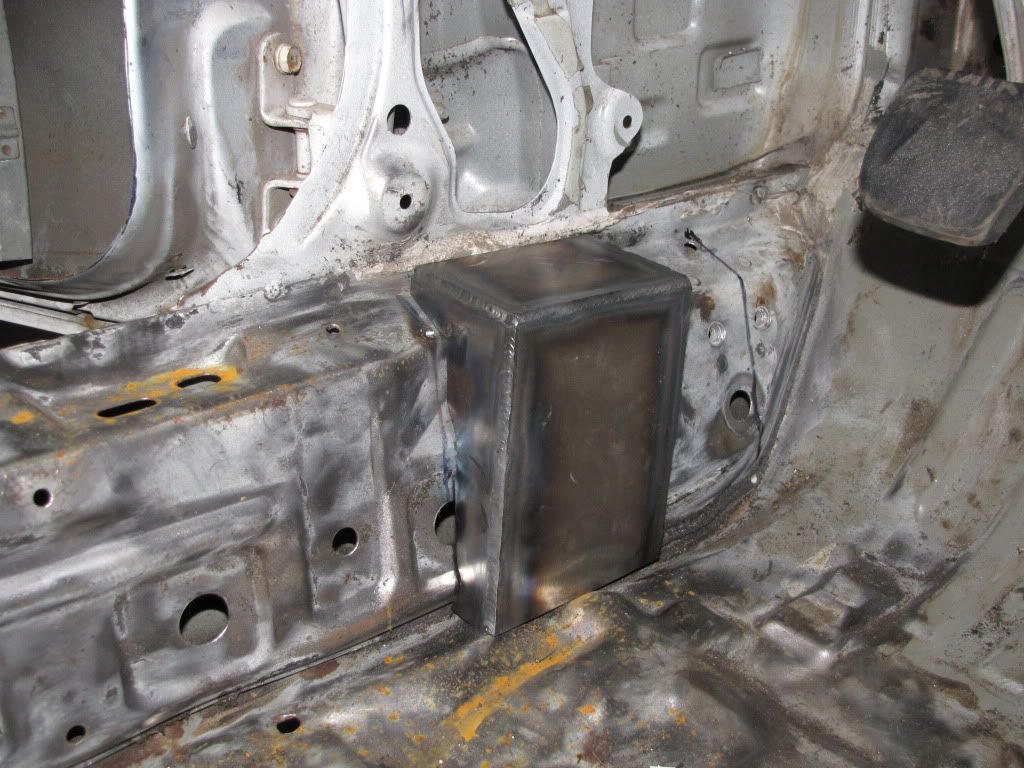
It's legal. Removing the door bar does not make any holes in the body (other than where the spot welds are drilled out but those are holes in the side of the door) Here's how far you can go....
First, removing tar. I grew up in Toledo, if it was winter time I used to put the car outside until frozen then hit the stuff with a ball peen hammer. Pops off in big sheets. Now that I'm in Florida I buy dry ice and pop it off in smaller sheets. After that hit what doesn't come off the my high speed 4 1/2" wire wheel and it clean. Lacquer thinner for the residue
+1 Works like a charm.

Thread Starter
Fabrineer
Joined: Oct 2002
Posts: 976
Likes: 1
From: Charlotte, NC
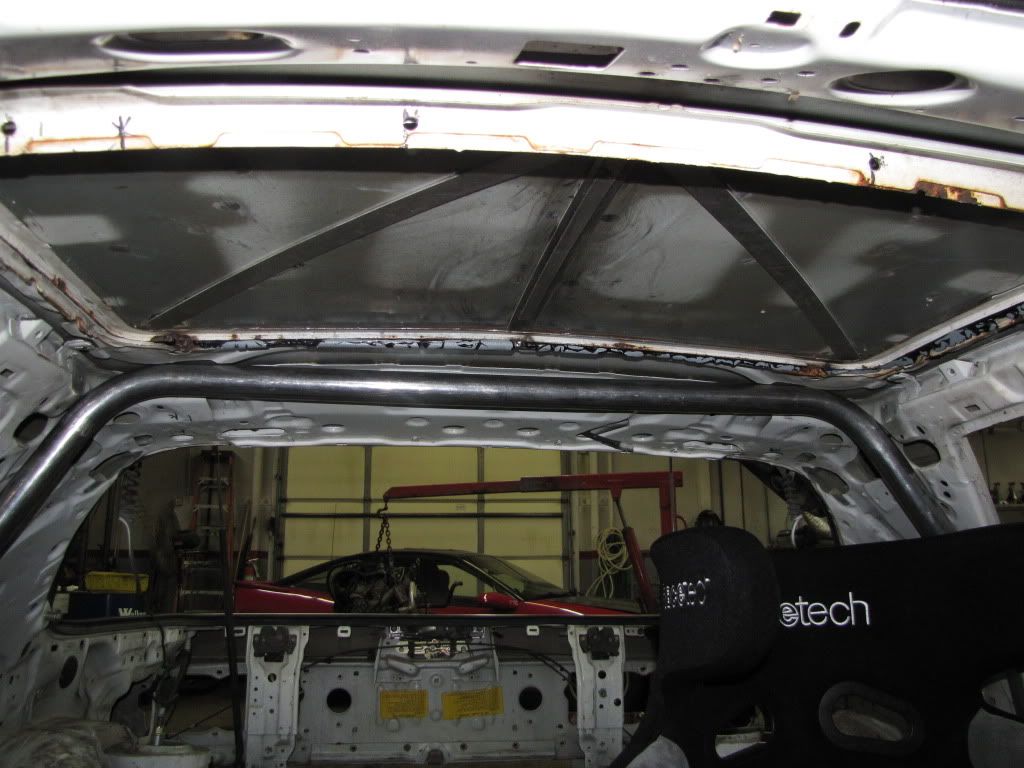
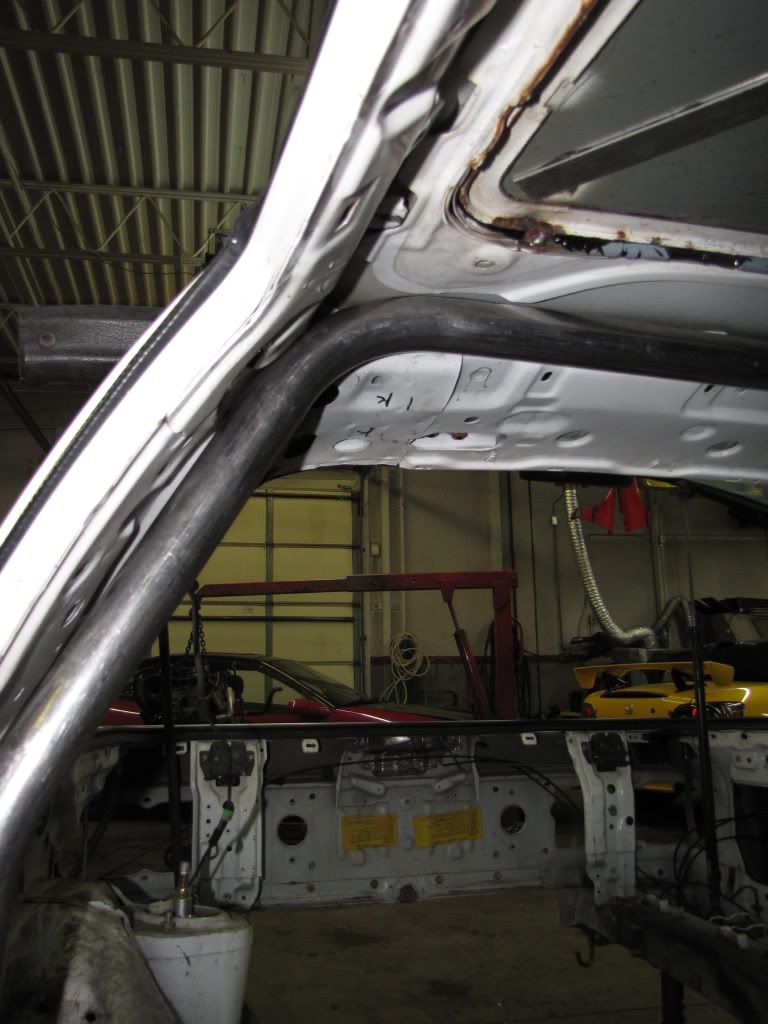
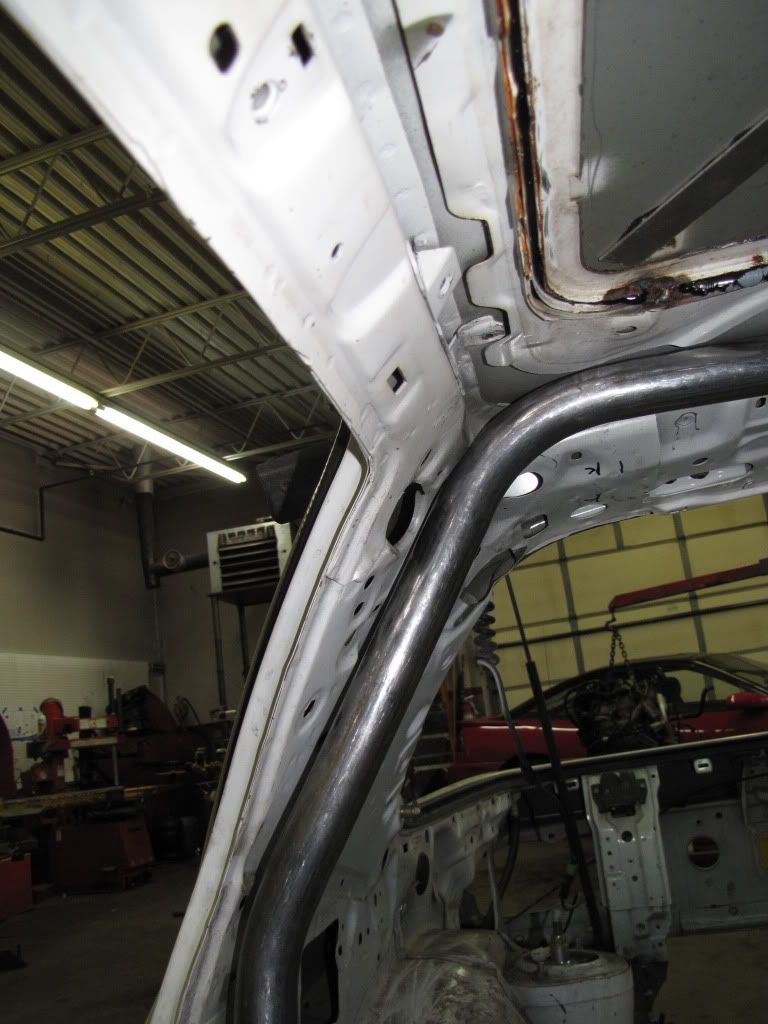
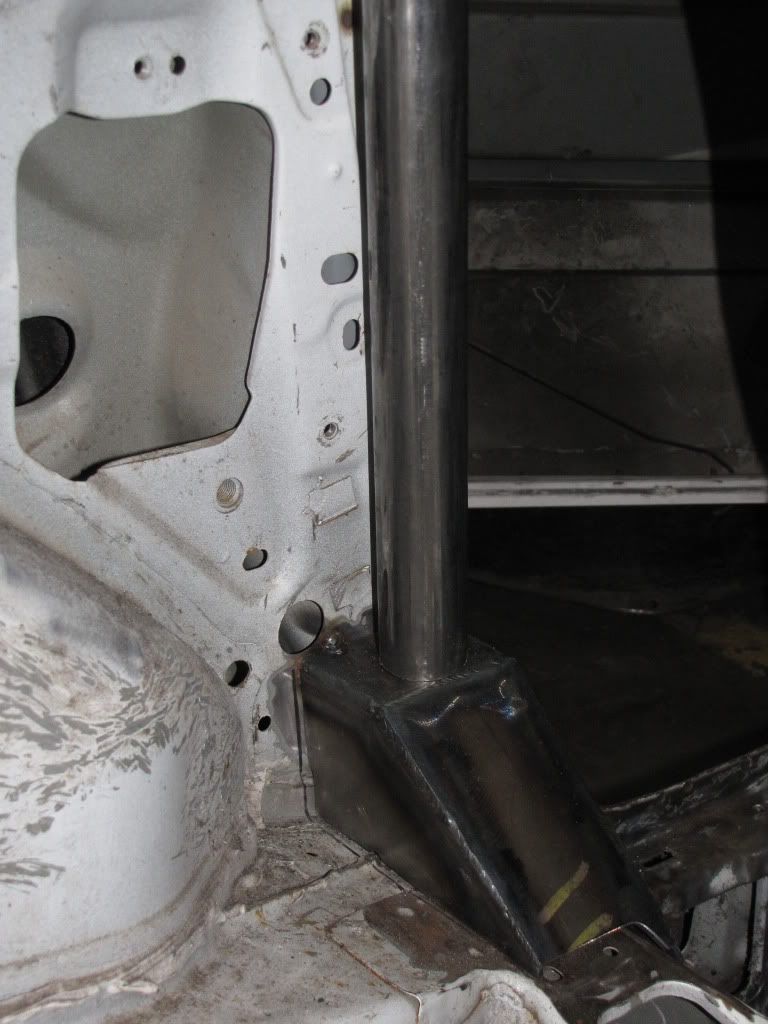
Main Hoop
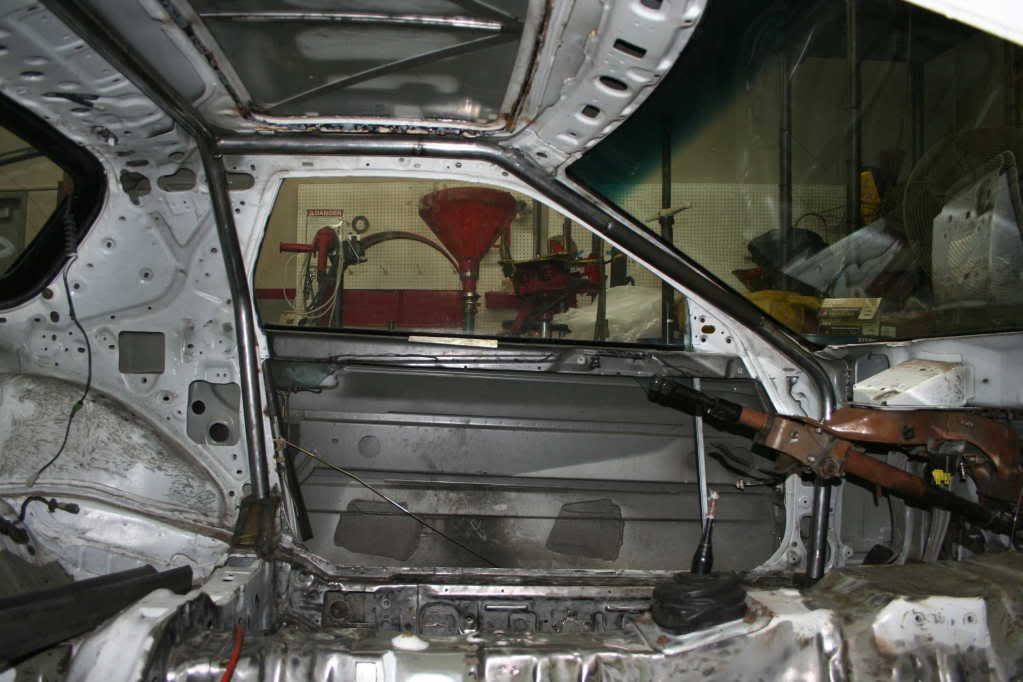
I wish I had a better fitment of the main hoop near the lower part of the b-pillar bars, but other than that, it is very tight against the body and way out of the way of the driver's head (me).
I will have to do a bent harness bar.
I will have to do a bent harness bar.
Nice fit. Don't be too worried about getting it closer, you need to be able to weld other tubes to it.
For the halo, you can cut the reinforcement above the window/door so you can pick up an inch of head room to the side.
For the A pillars, don't get close to them. Think of an I beam and use plates to connect the cage to the pillars. The issue is visual obstruction. I made mine asymetrical so they weren't obtrusive from the drivers viewpoint.

Beautiful work. Remember to leave enough room the weld other bars to it. I ended up taking my front point a little further forward and then hit the kick panel with a hole saw. I welded up the outside of the door bars from the front wheel well. Some sheet metal and snips and I welded the hole back up.
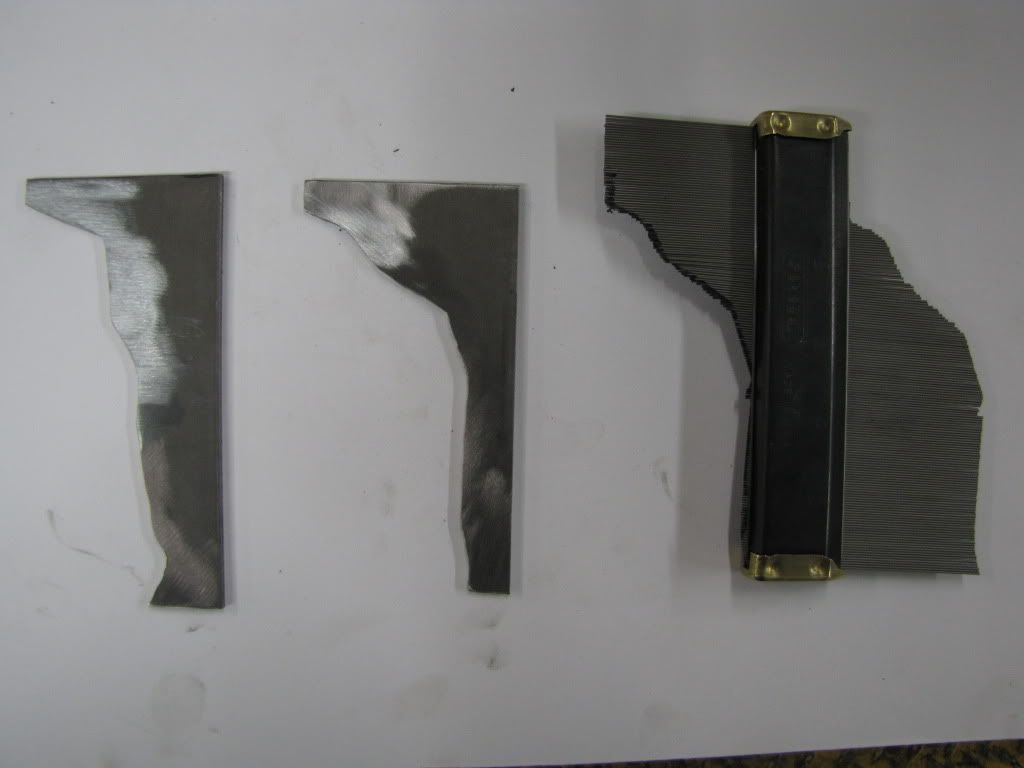
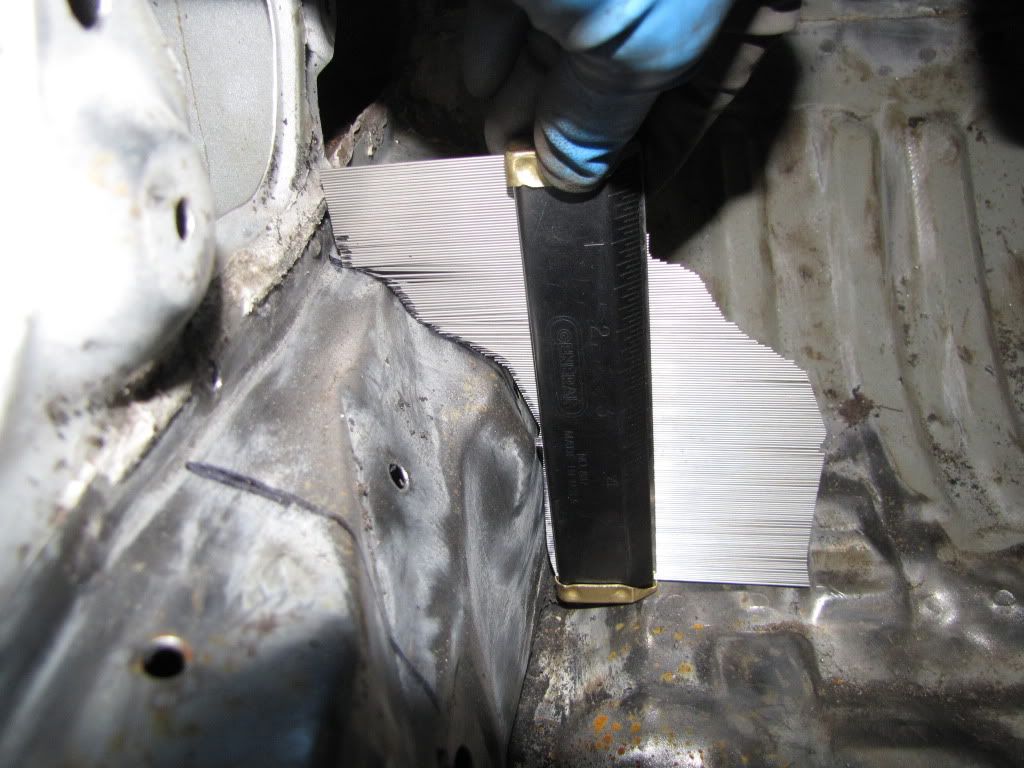
This is an awesome tool!
What exactly do you do for a living if you don't mind me asking? This build is looking top notch!

Cage is coming along beautifully, Fuel setup is amazing, any info on the engine? Pics?
What exactly do you do for a living if you don't mind me asking? This build is looking top notch!
Cage is coming along beautifully, Fuel setup is amazing, any info on the engine? Pics?
Thread Starter
Fabrineer
Joined: Oct 2002
Posts: 976
Likes: 1
From: Charlotte, NC
I'm a research engineer. I just do this as a hobby.
The engine is slowly coming along. I will probably not divulge much about that ;-) But I'll certainly post pictures of the outside of it. If it makes a lot of power, I'm probably go ing to keep my lips sealed about the specific numbers.
I will say that I am working with Carlos Lopez on the rotors.
The engine is slowly coming along. I will probably not divulge much about that ;-) But I'll certainly post pictures of the outside of it. If it makes a lot of power, I'm probably go ing to keep my lips sealed about the specific numbers.
I will say that I am working with Carlos Lopez on the rotors.


Urban Explorer
Joined: May 2009
Posts: 86
Likes: 0
From: dexter mi
very nice work my friend!!!
cannot wait to see the cage come along, I think it will be kick ***!
progress on my car has slowed to a crawl.
tomorrow I am hoping to get atleast 6 hours on this project.
cheers
cannot wait to see the cage come along, I think it will be kick ***!
progress on my car has slowed to a crawl.
tomorrow I am hoping to get atleast 6 hours on this project.
cheers