From Zero to Hero: Heavy JDM Influenced Restoration
 08-18-19, 11:48 AM
#251
Update 8/18/2019:
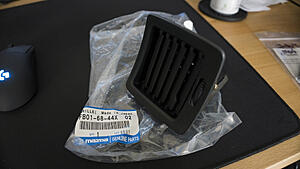
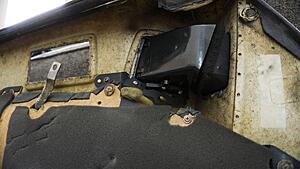
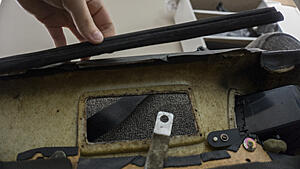
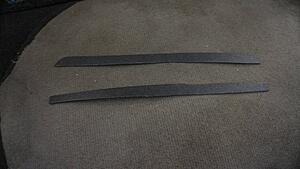
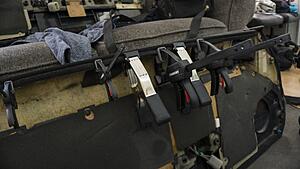
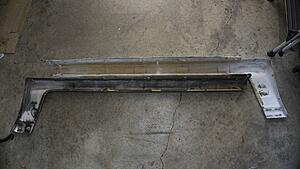
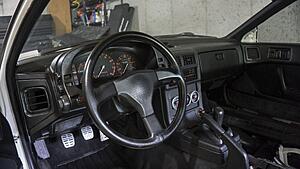
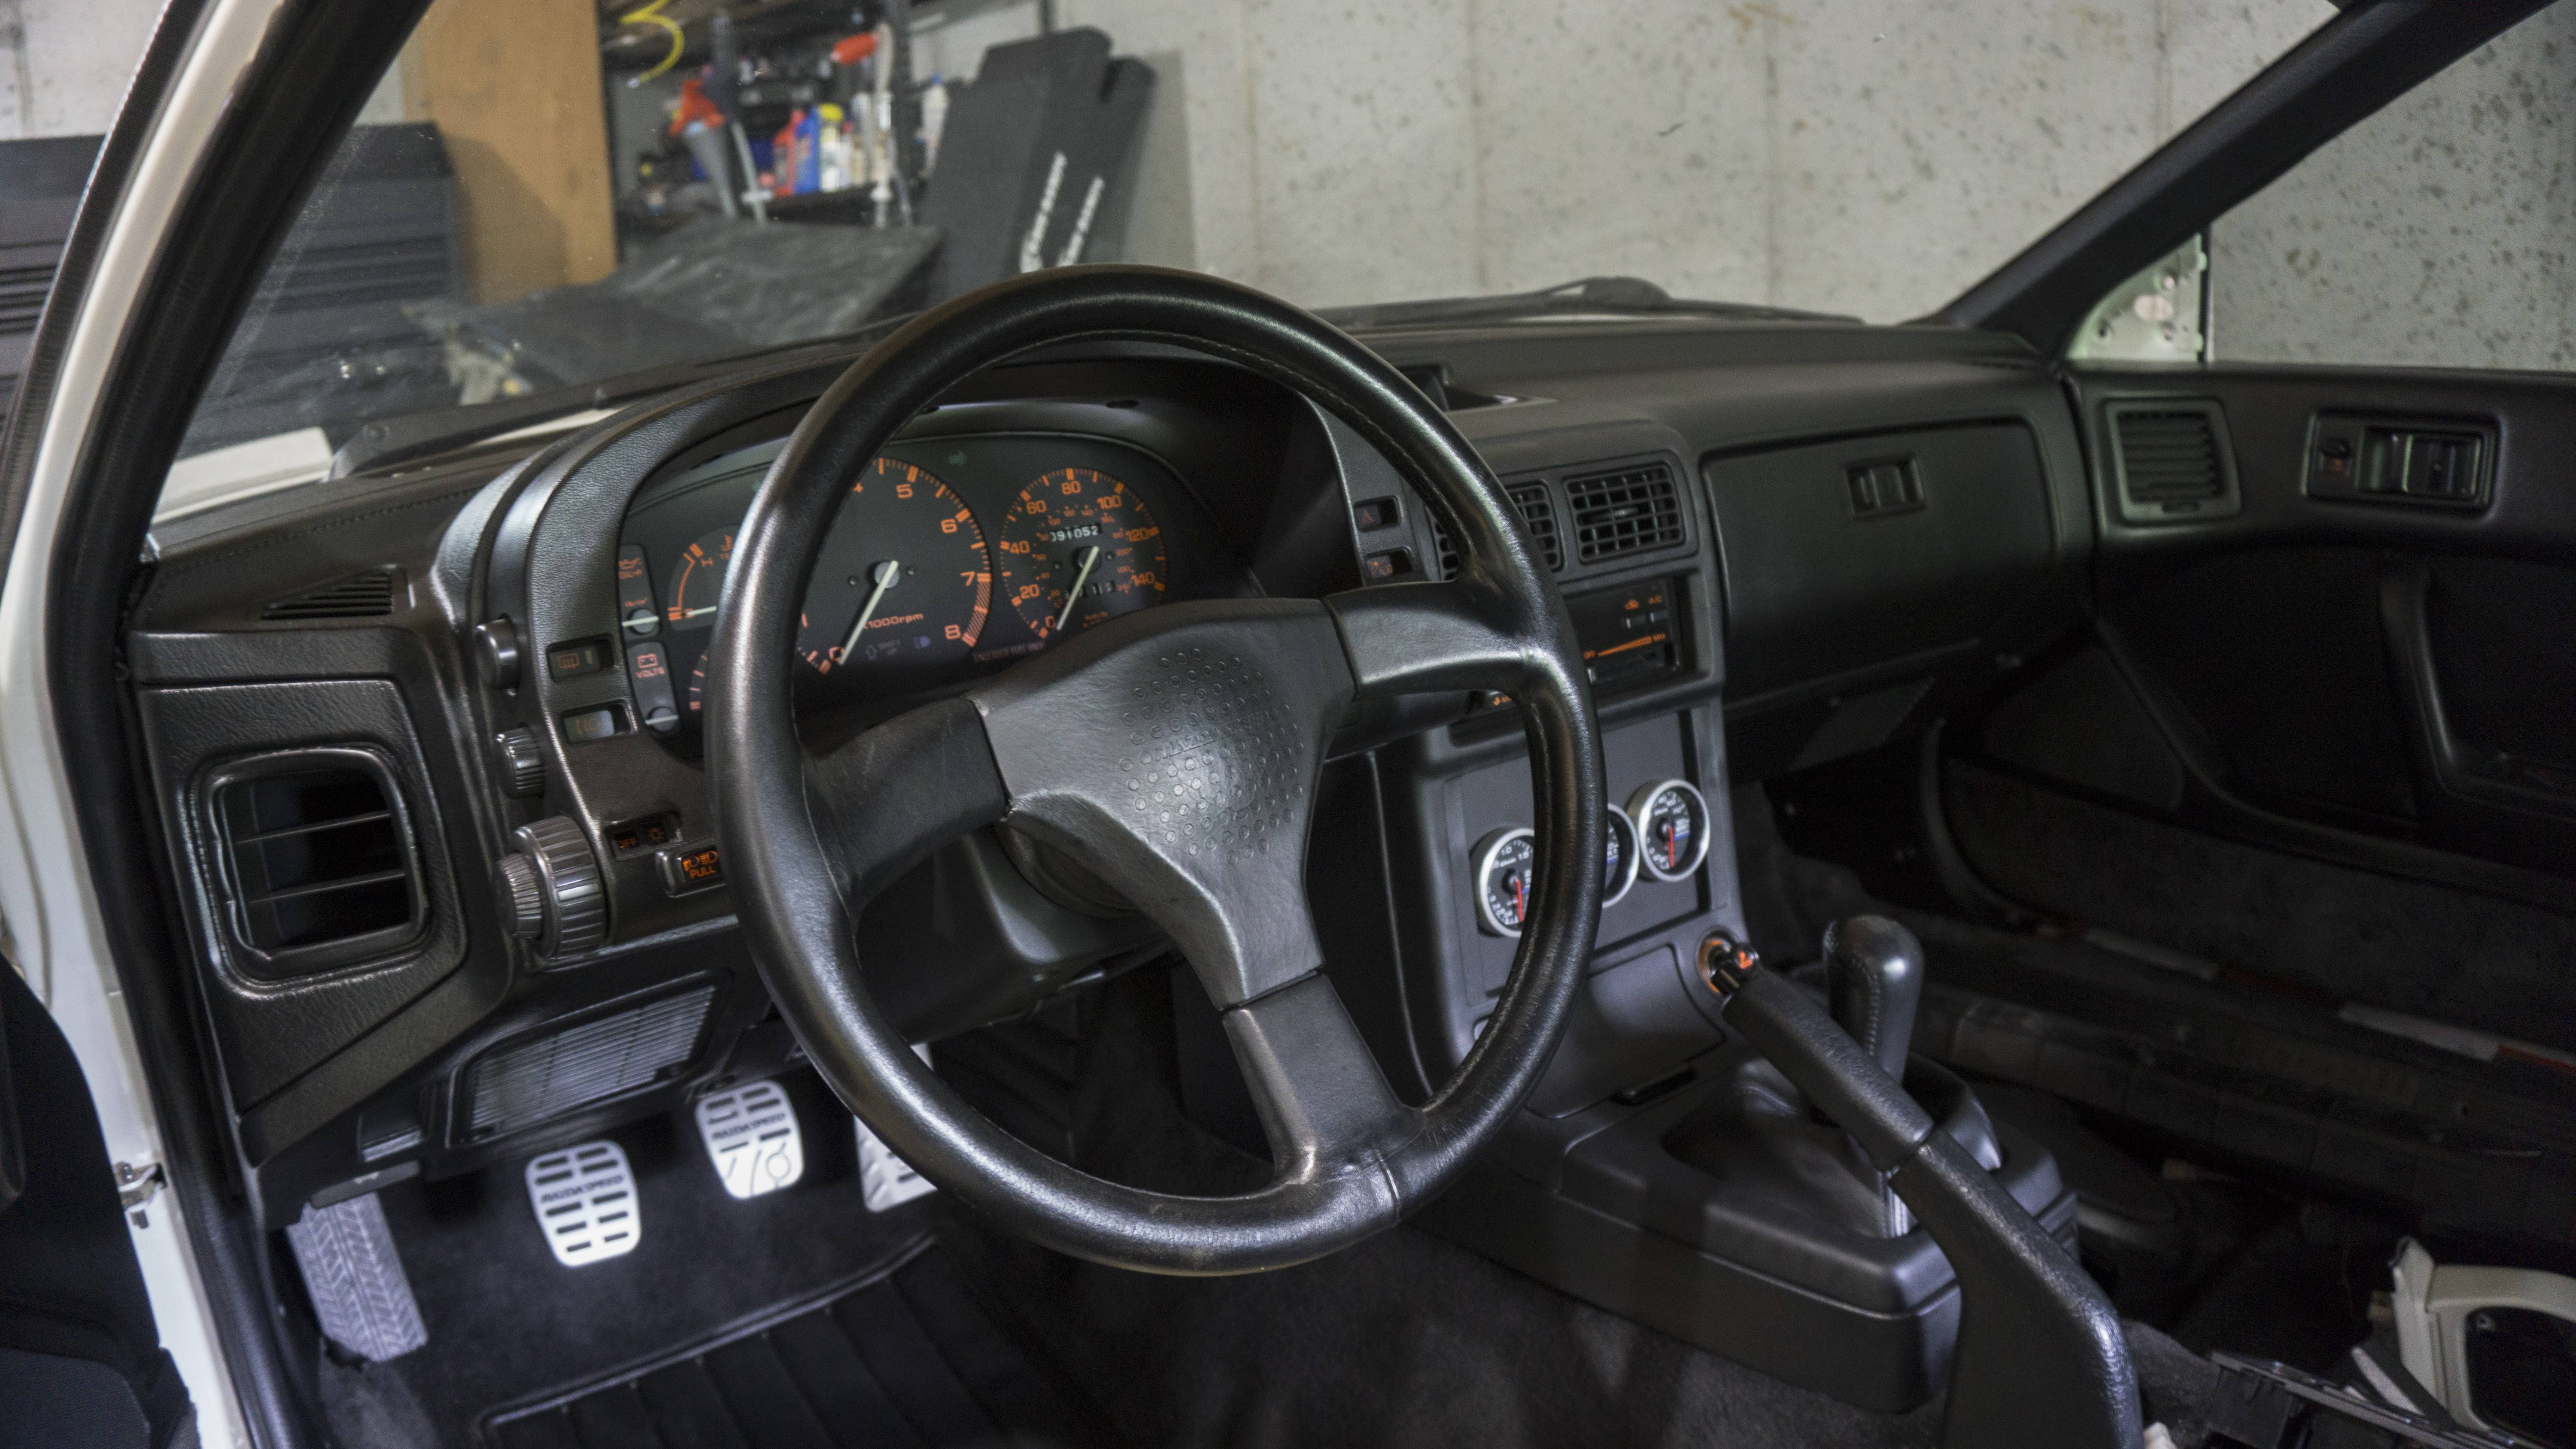
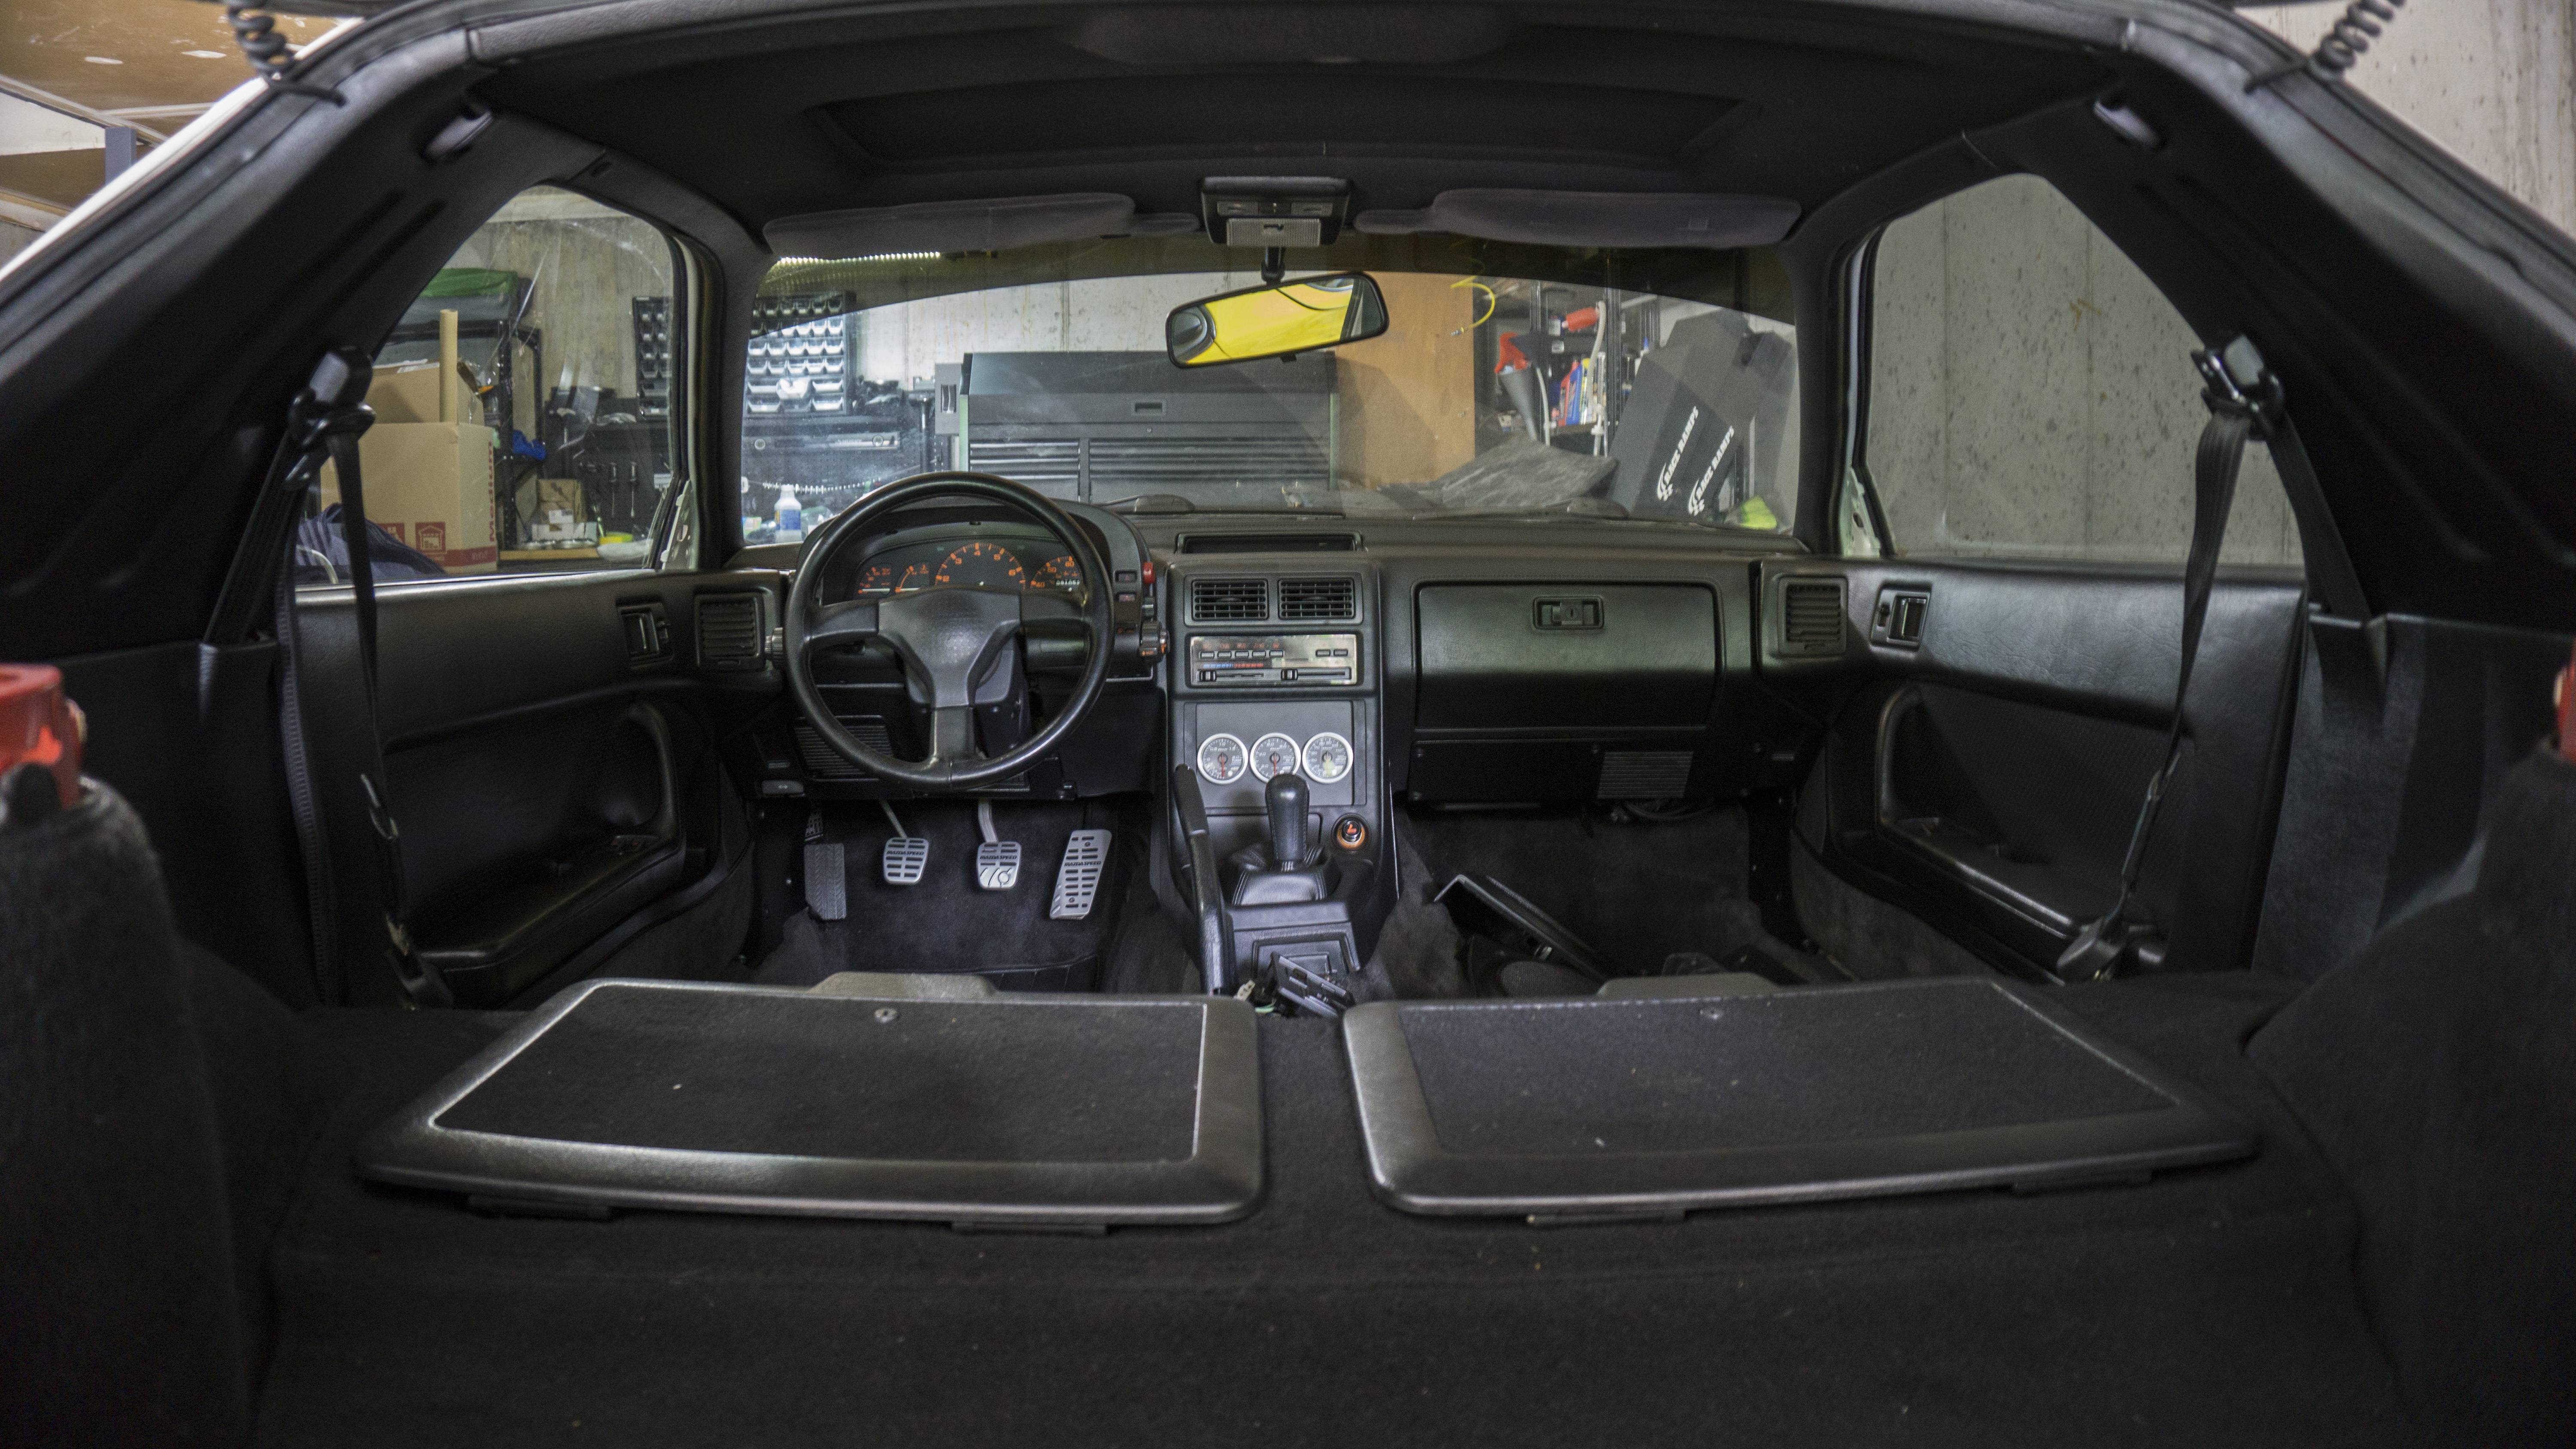
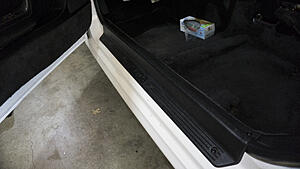
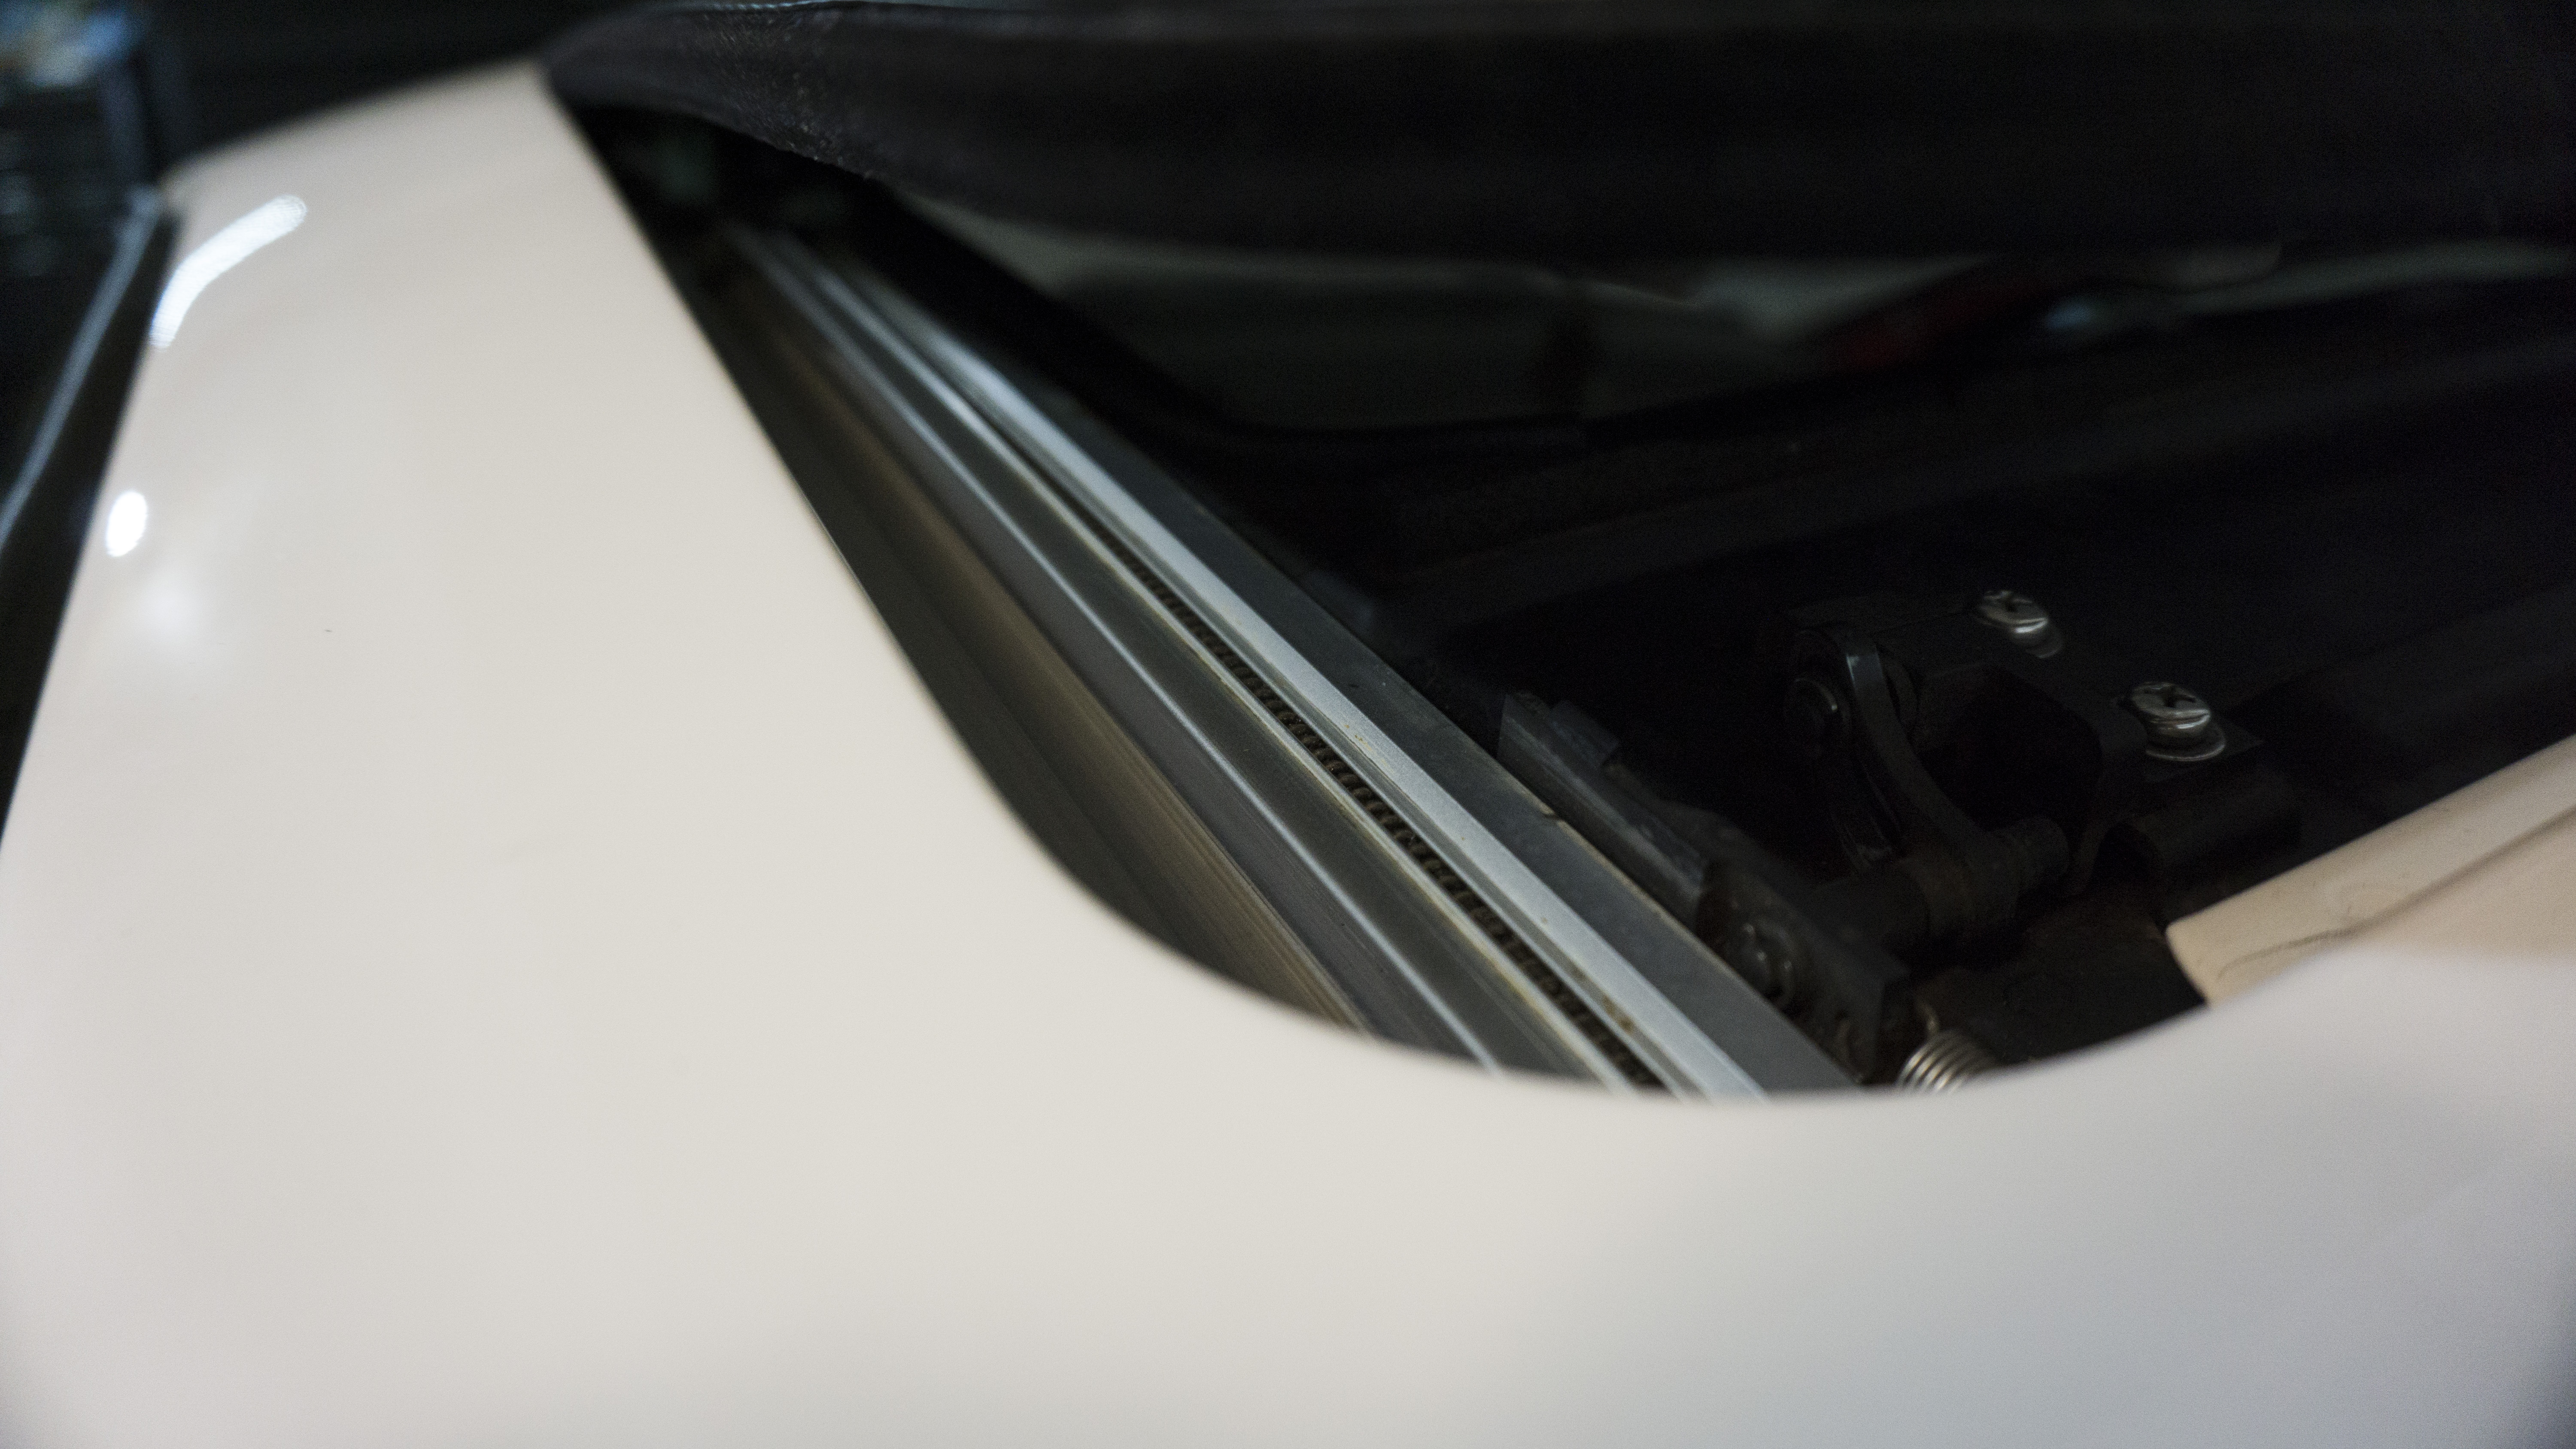
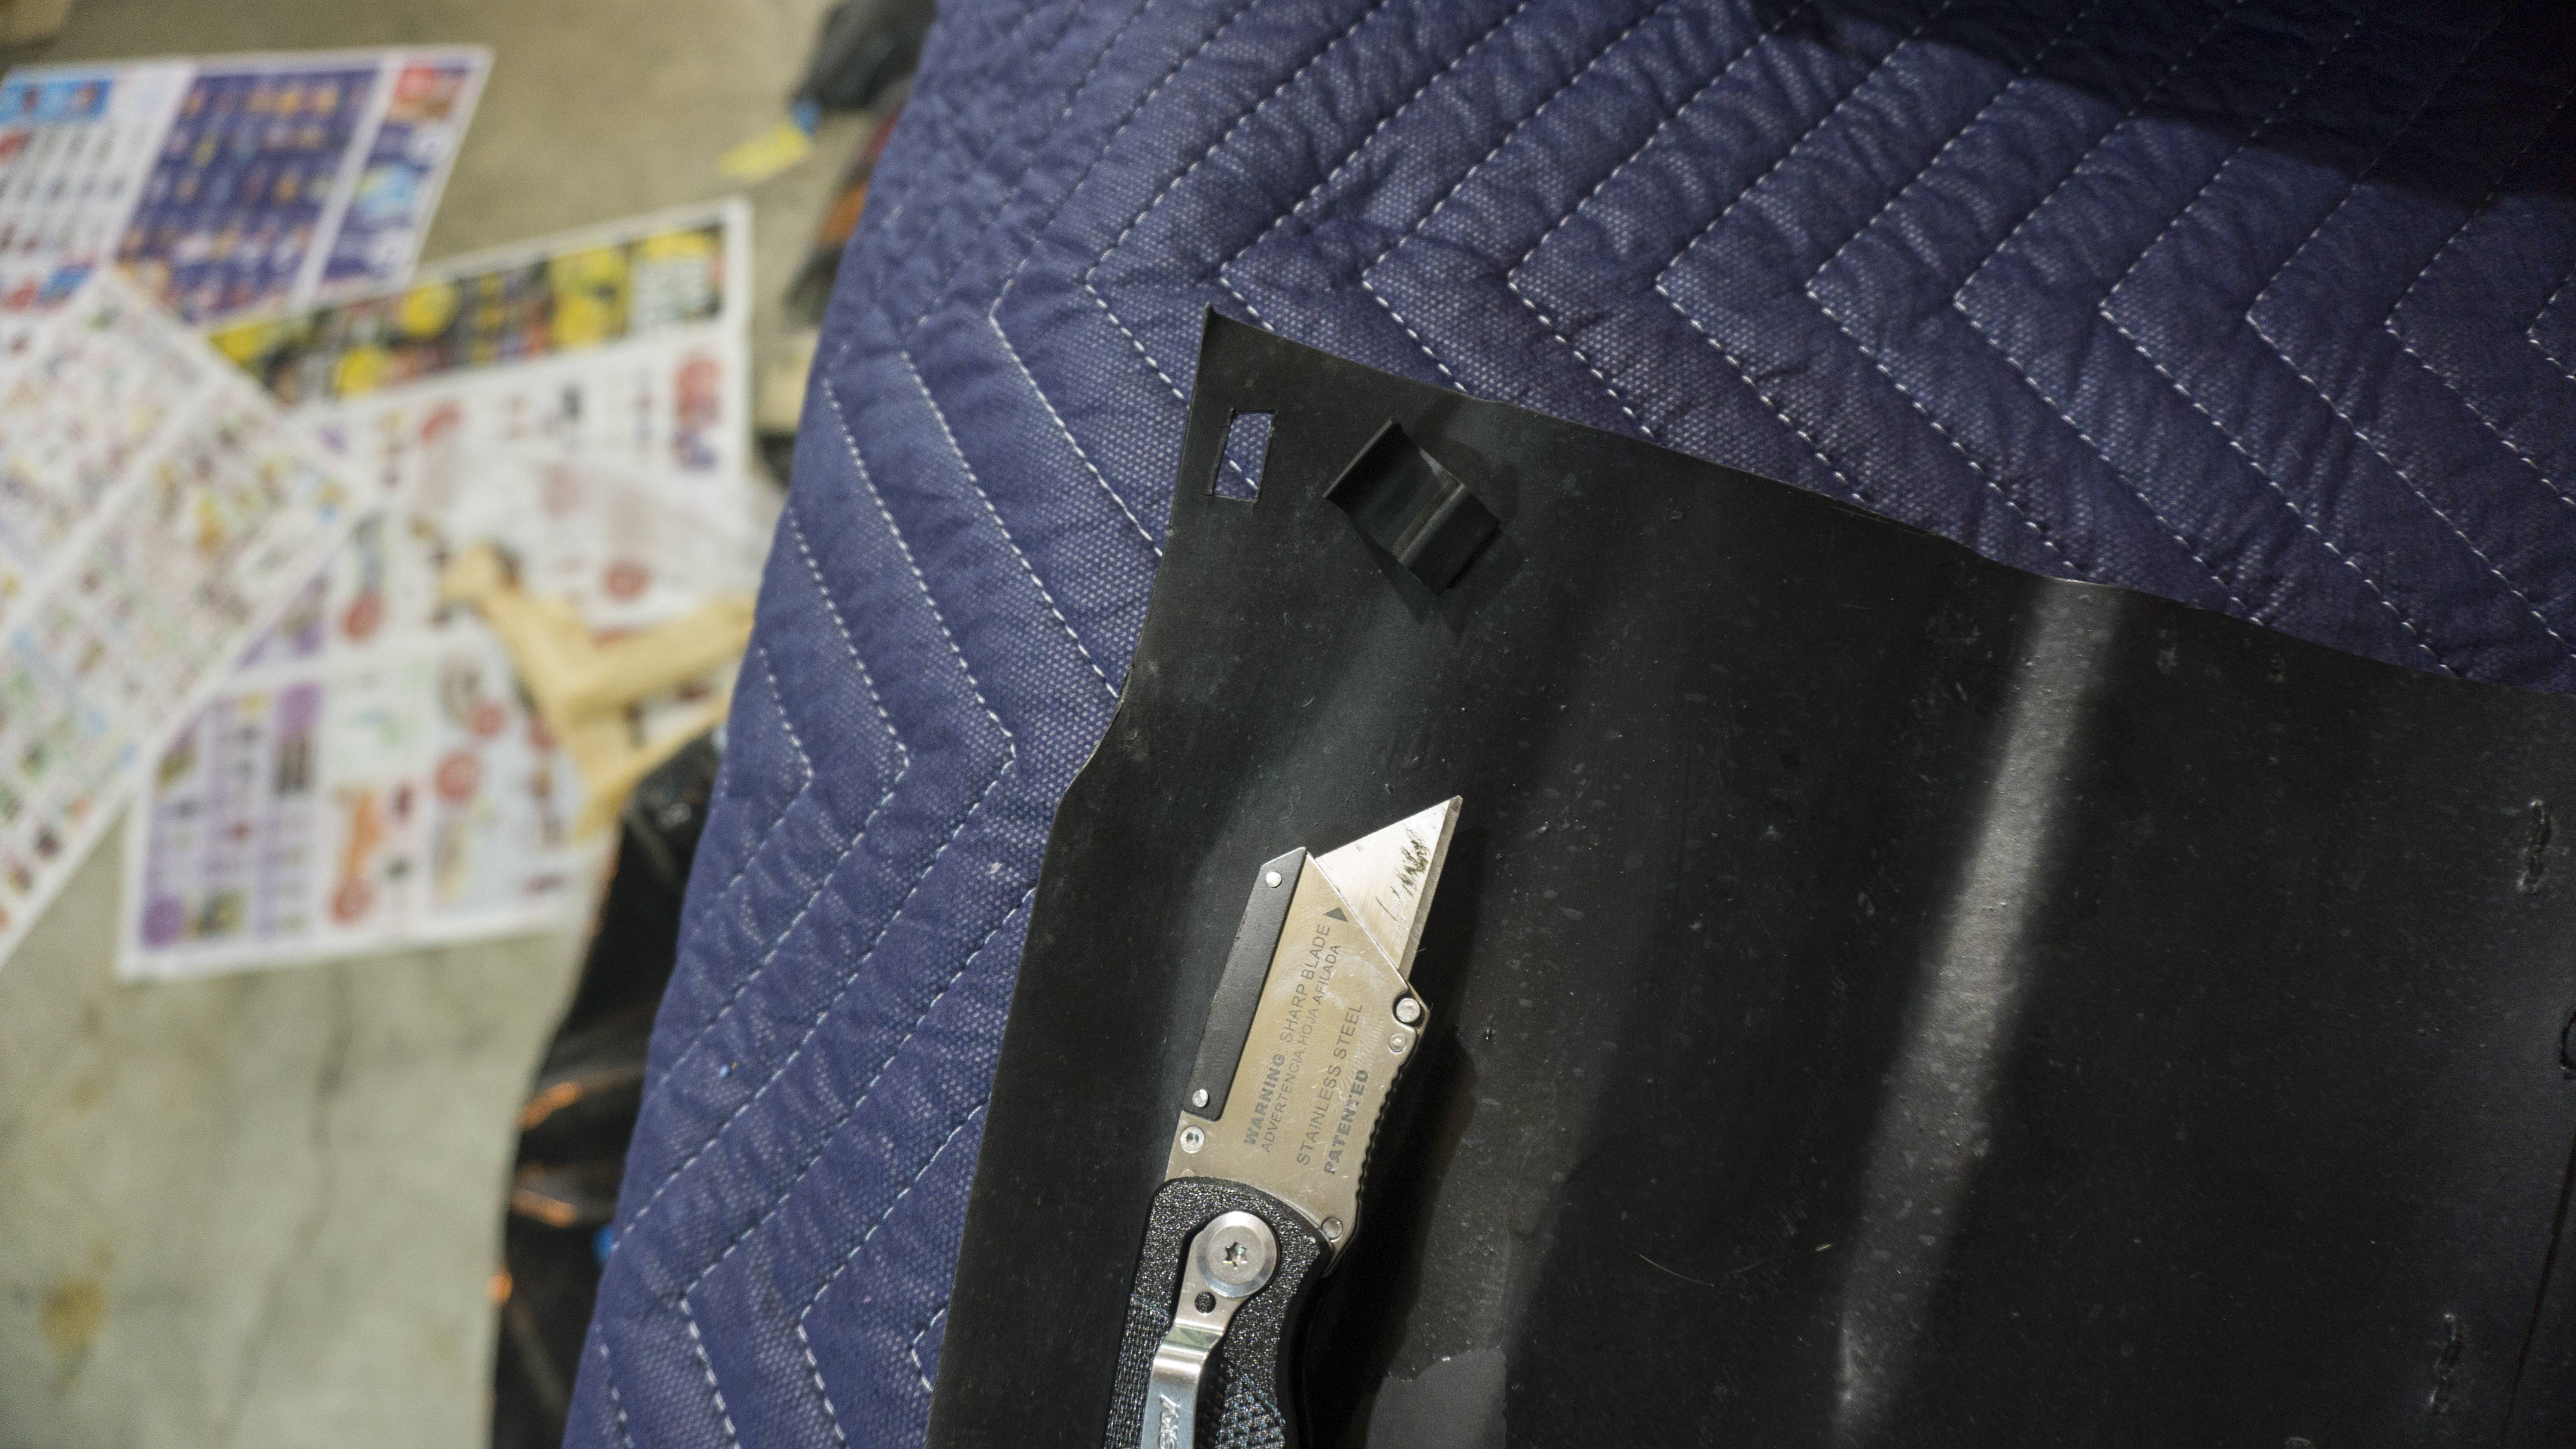
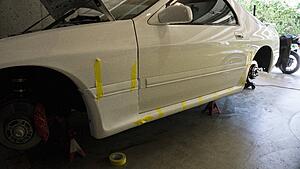
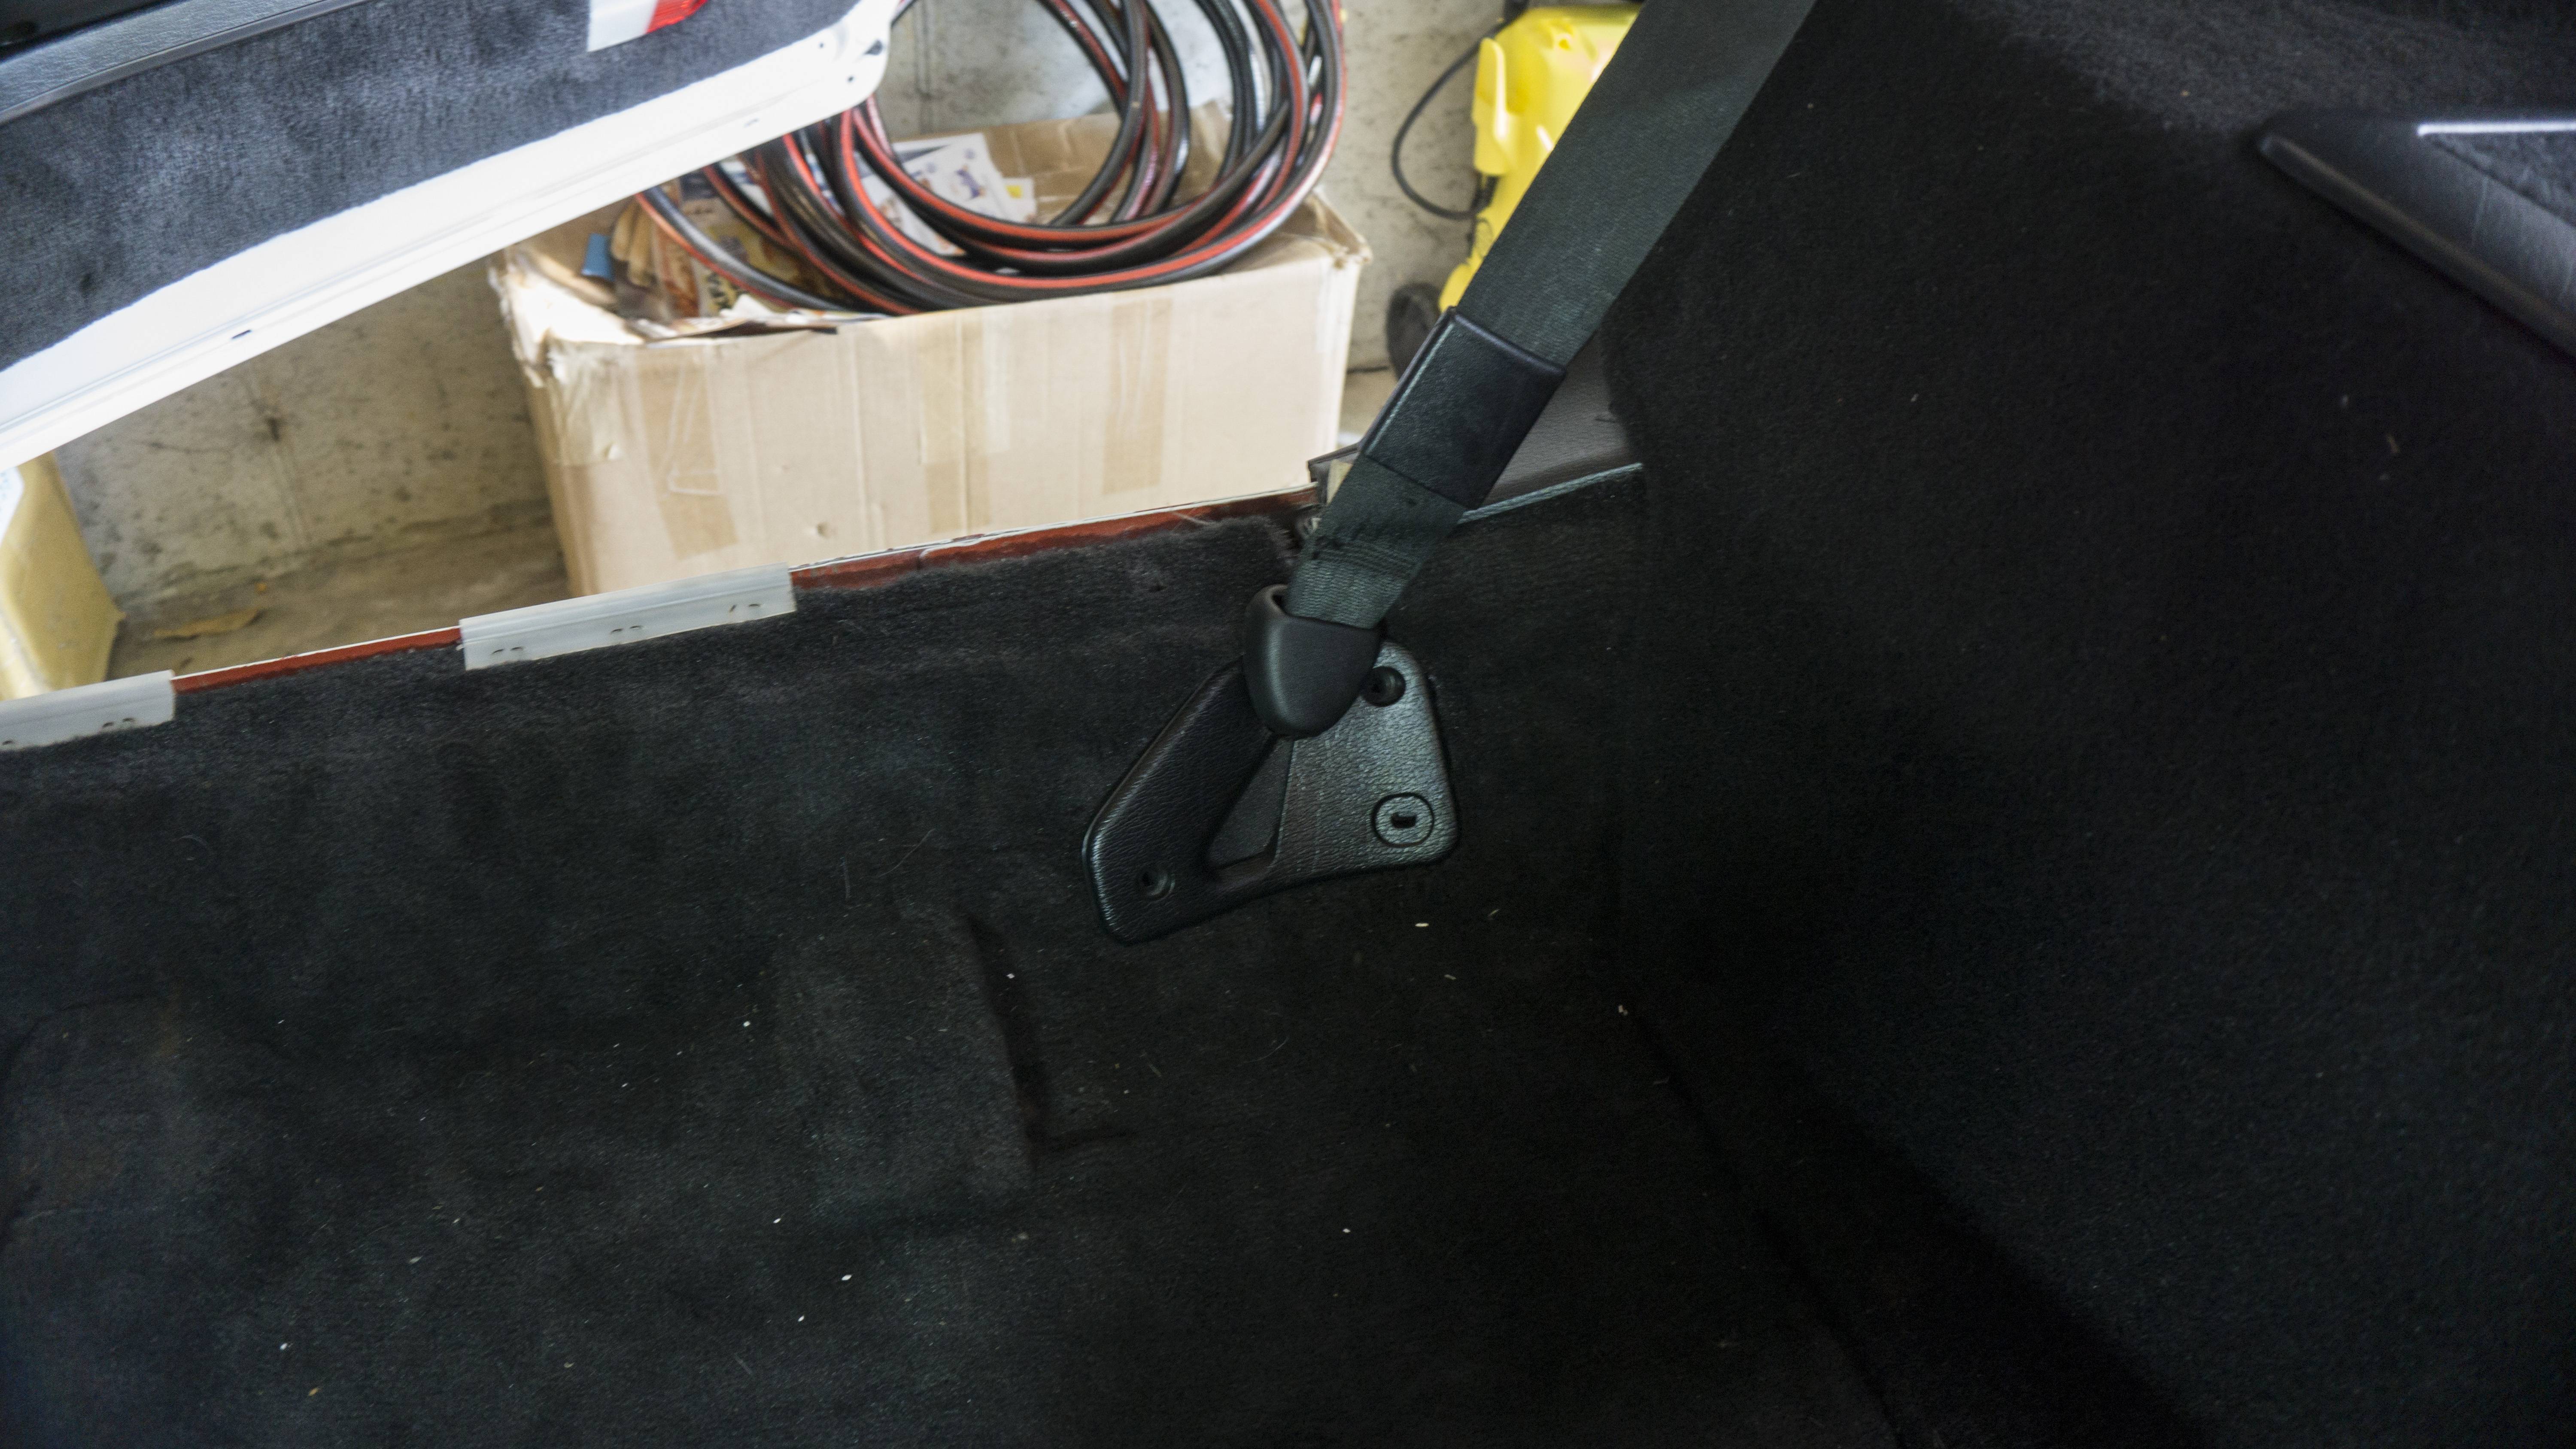
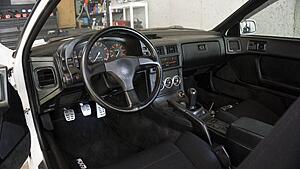
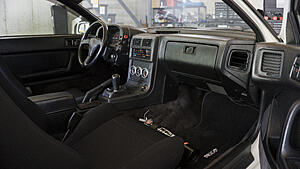
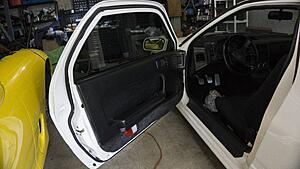
Before I get into the meat and potatoes of this update I wanted to offer some words of wisdom. I recently purchased a brand new S5 instrument cluster hood without doing my research. Needless to say, S4 Turn Signal switch and S4 Cruise Control blank won�t fit. I went ahead and purchased another complete S4 instrument cluster hood (this one doesn�t have any cracked plastic). I will probably sell the S5 cluster hood, but may keep it to swap things when I feel like sourcing or converting the S4 Turn Signal Switch Harness. Happy to say the front interior is finally complete. I had to re-pull the door cards and while they were out I went ahead and installed a brand new vent on the passenger side door card. The one that was on there was held on by hopes and dreams due to cracked plastic. I pulled the bracket that holds the vent off and de-rusted and sprayed it. In order to actually fix the door cards I had to create a backing for the part that the window slides against. The window was gripping it and pulling it down since it didn�t have any support. I bought some thin ABS plastic and cut strips to make the backing and then epoxy glued it on. I think it turned out fairly well and once I get the exterior moldings on should hold up to the window sliding against it. I was also able to get one of the side skirts completely ready for fitting. Once I get the other one done I should be able to get them test-fitted and the lower riv-nuts installed before paint. The last phase of the interior is coming up as well. Hopefully this is the last time I have to drop the headliner. I think I�ve figured out the issue as to why my sunroof doesn�t sit flush and I�m bound and determined to make it sit flush lol.
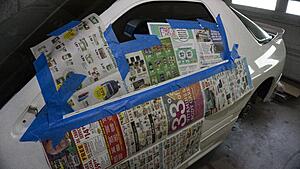
Here is the process of fixing the door card:
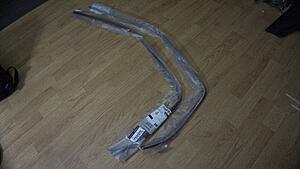
Here is the side skirts (One to go!):
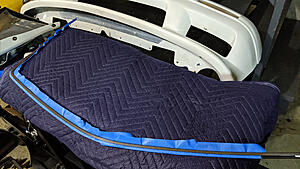
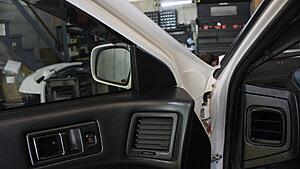
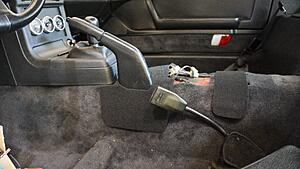
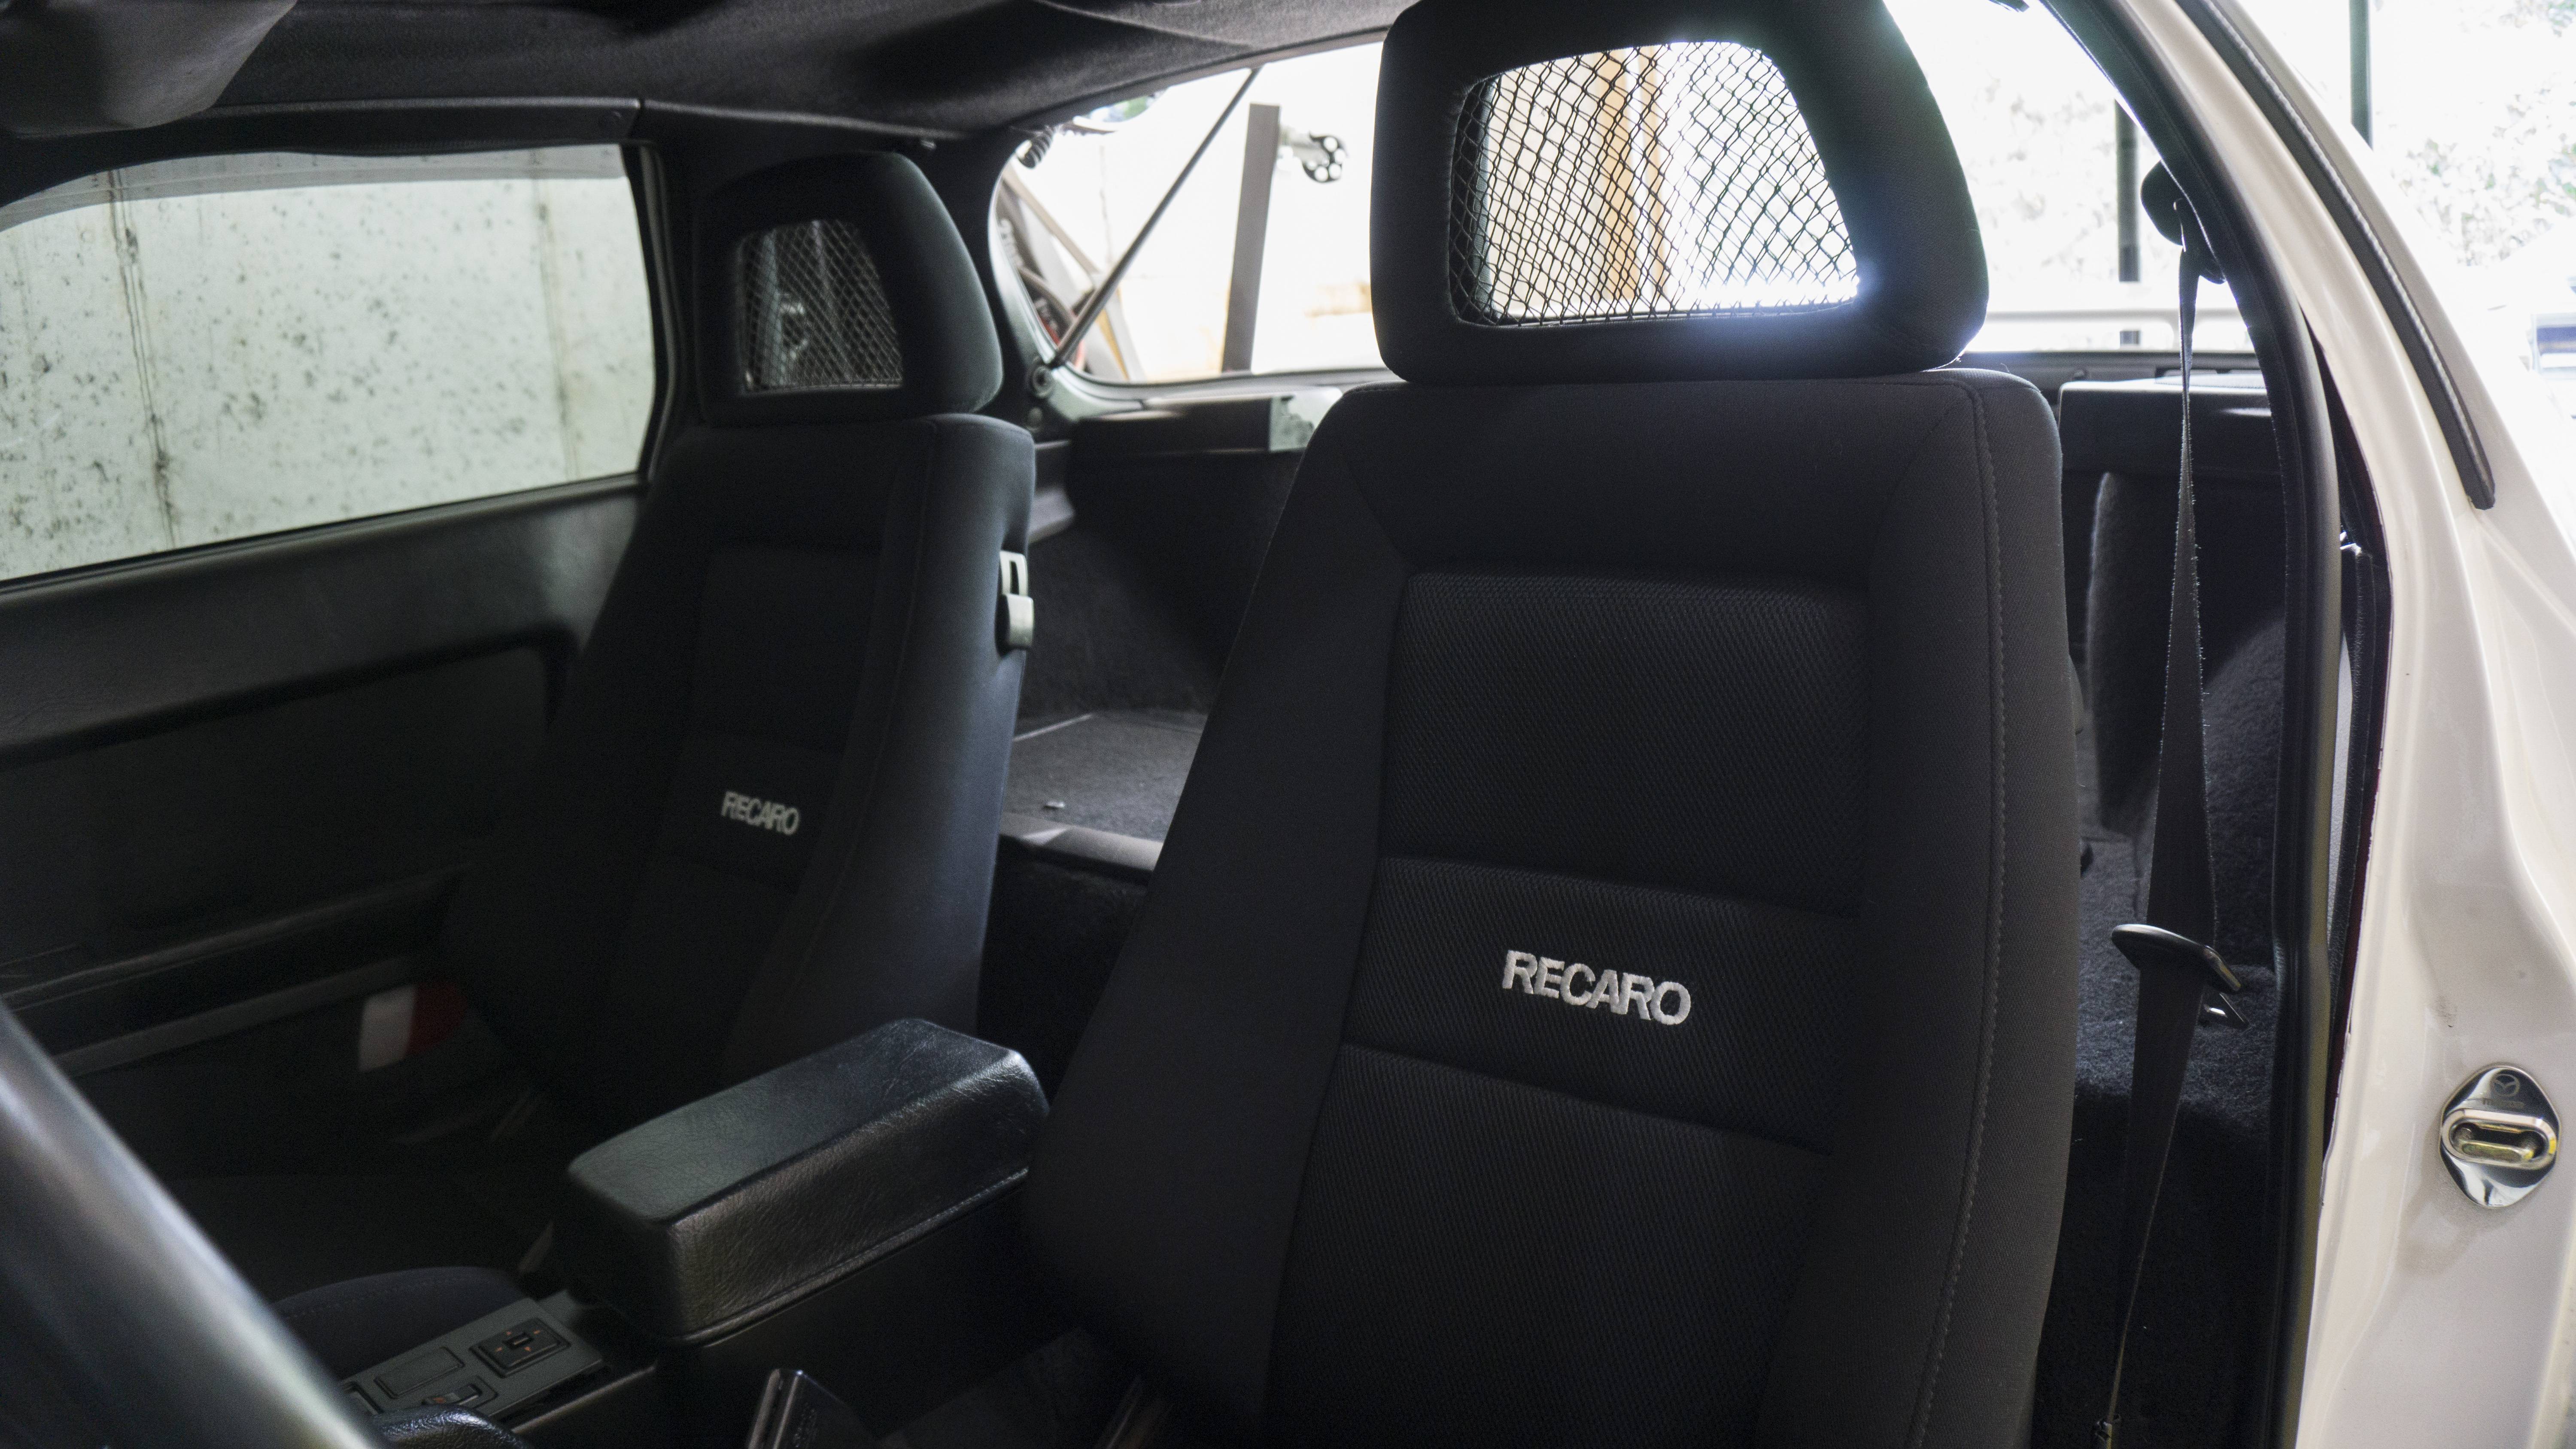
Here is the finished front interior:
Before I get into the meat and potatoes of this update I wanted to offer some words of wisdom. I recently purchased a brand new S5 instrument cluster hood without doing my research. Needless to say, S4 Turn Signal switch and S4 Cruise Control blank won�t fit. I went ahead and purchased another complete S4 instrument cluster hood (this one doesn�t have any cracked plastic). I will probably sell the S5 cluster hood, but may keep it to swap things when I feel like sourcing or converting the S4 Turn Signal Switch Harness. Happy to say the front interior is finally complete. I had to re-pull the door cards and while they were out I went ahead and installed a brand new vent on the passenger side door card. The one that was on there was held on by hopes and dreams due to cracked plastic. I pulled the bracket that holds the vent off and de-rusted and sprayed it. In order to actually fix the door cards I had to create a backing for the part that the window slides against. The window was gripping it and pulling it down since it didn�t have any support. I bought some thin ABS plastic and cut strips to make the backing and then epoxy glued it on. I think it turned out fairly well and once I get the exterior moldings on should hold up to the window sliding against it. I was also able to get one of the side skirts completely ready for fitting. Once I get the other one done I should be able to get them test-fitted and the lower riv-nuts installed before paint. The last phase of the interior is coming up as well. Hopefully this is the last time I have to drop the headliner. I think I�ve figured out the issue as to why my sunroof doesn�t sit flush and I�m bound and determined to make it sit flush lol.
Here is the process of fixing the door card:


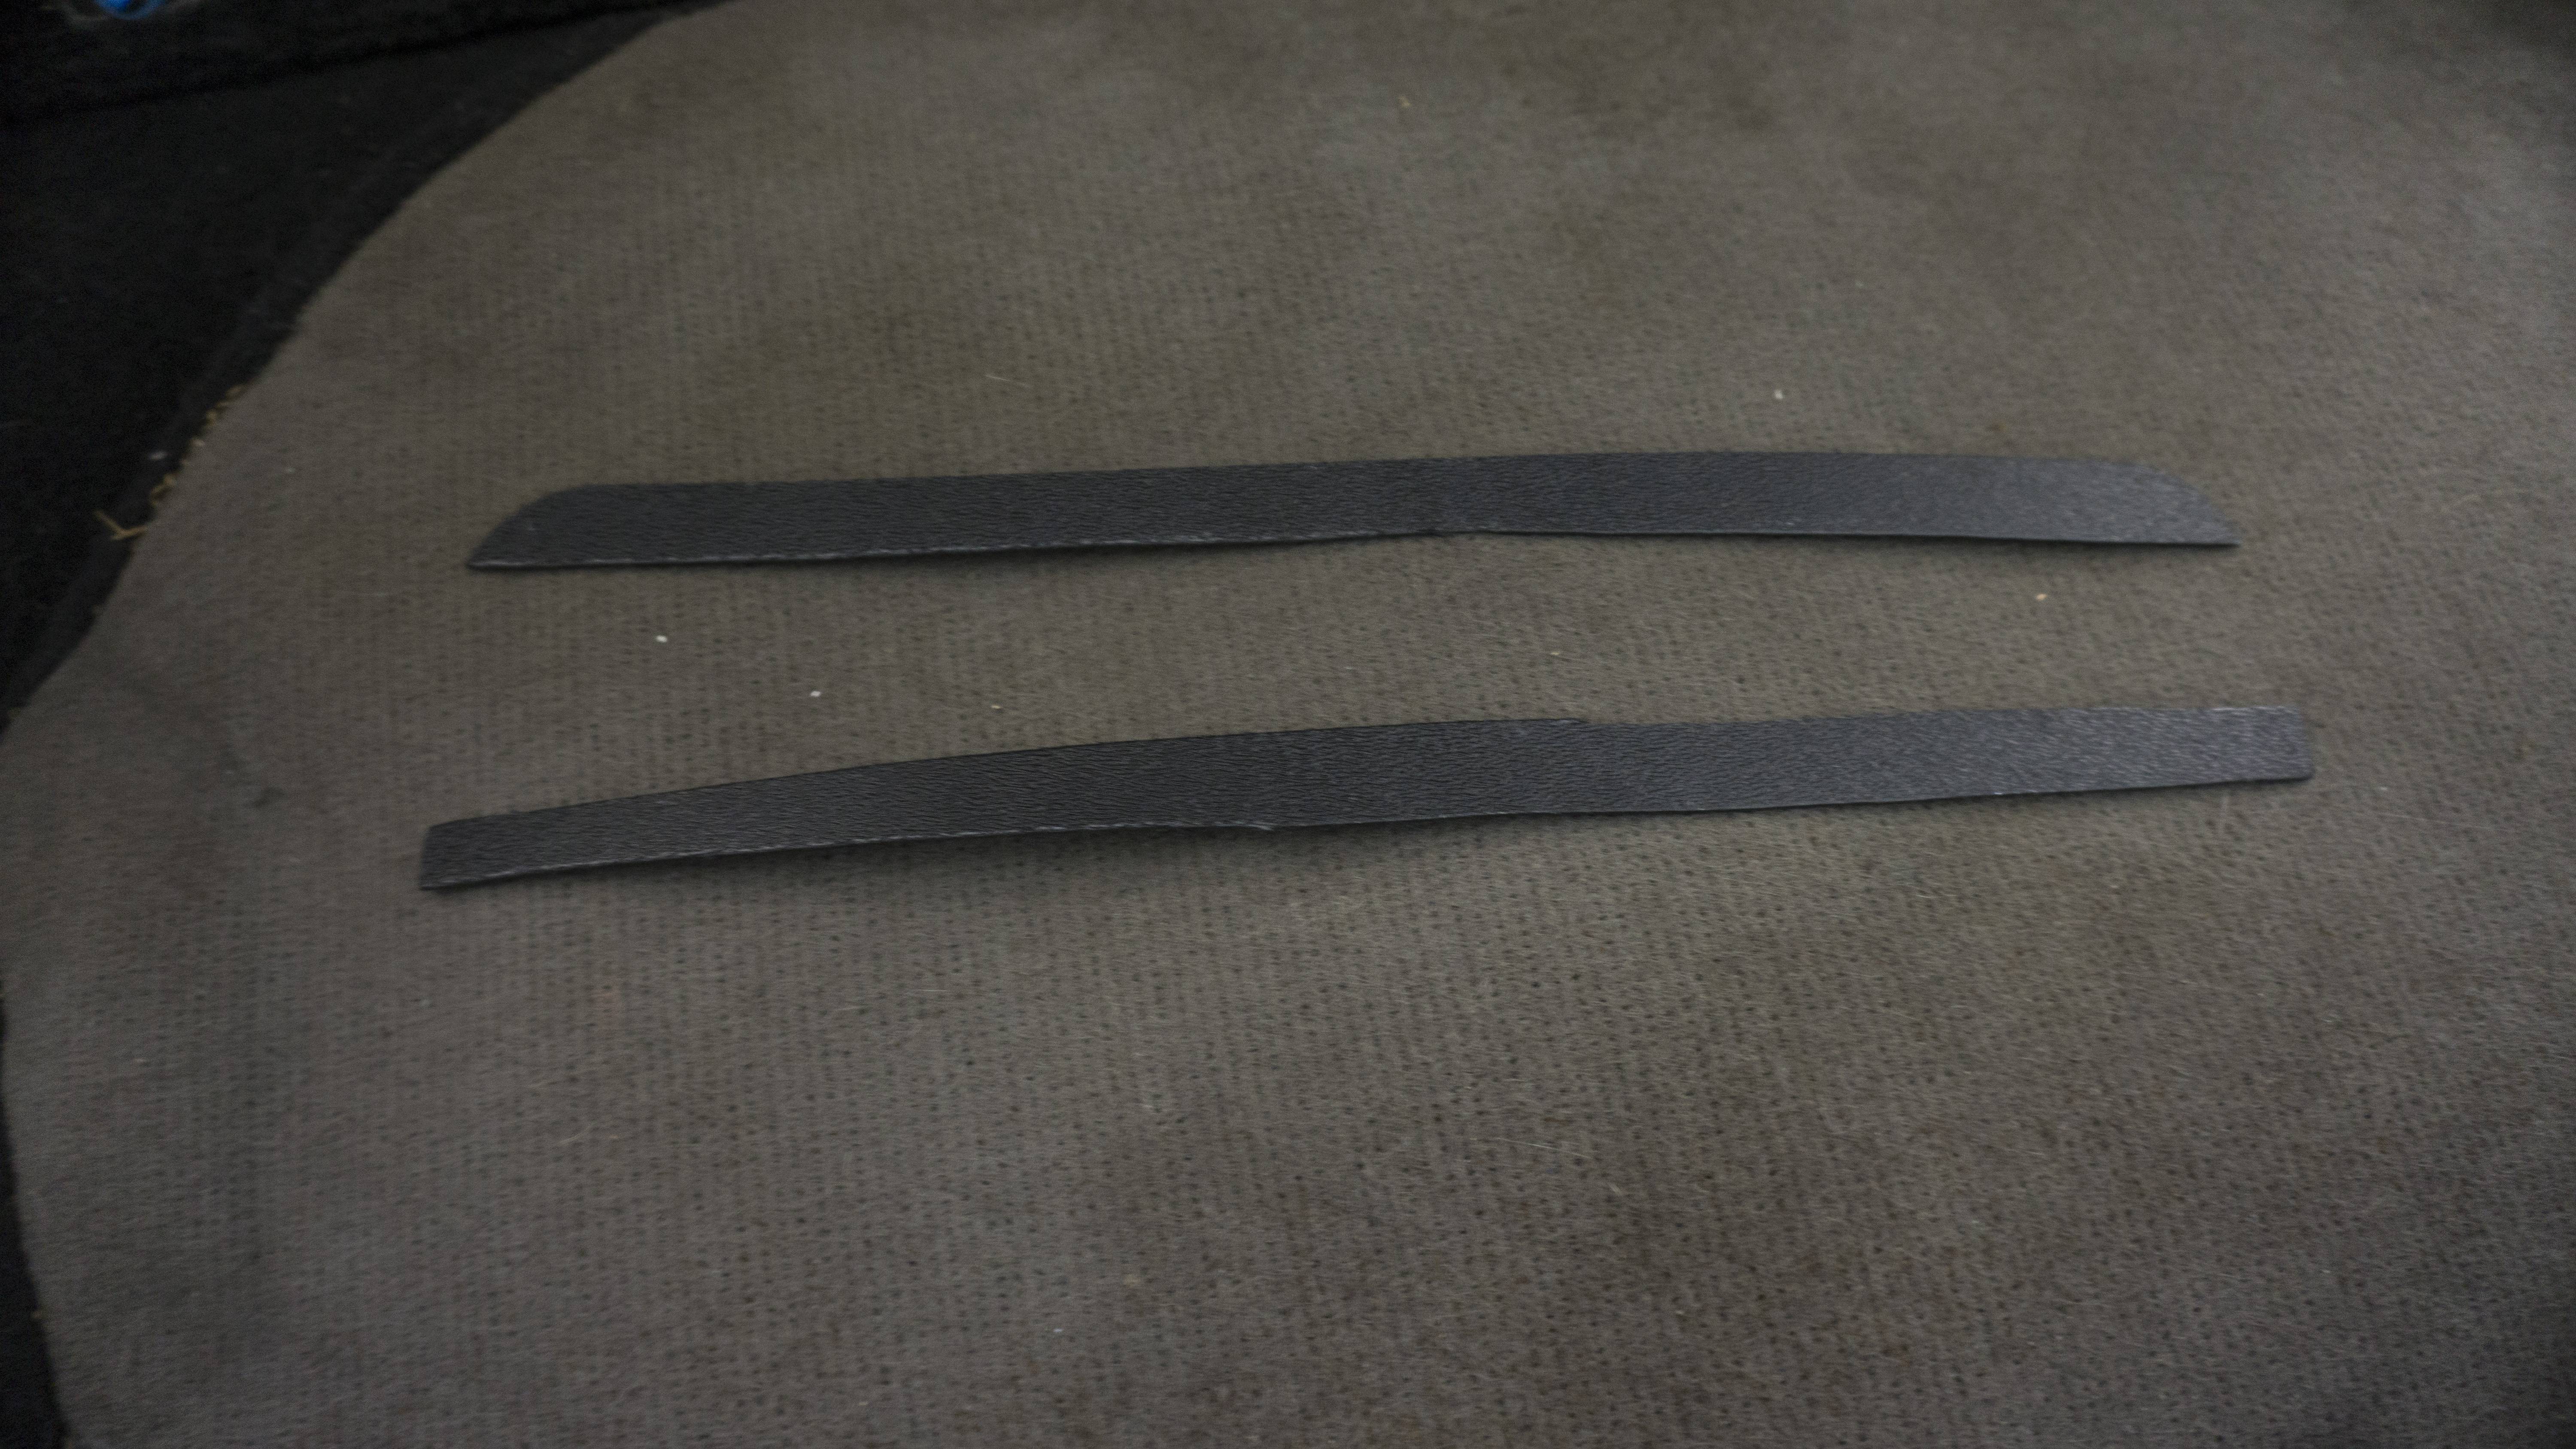

Here is the side skirts (One to go!):

Here is the finished front interior:
 09-01-19, 04:32 PM
#253
Update 9/1/2019:
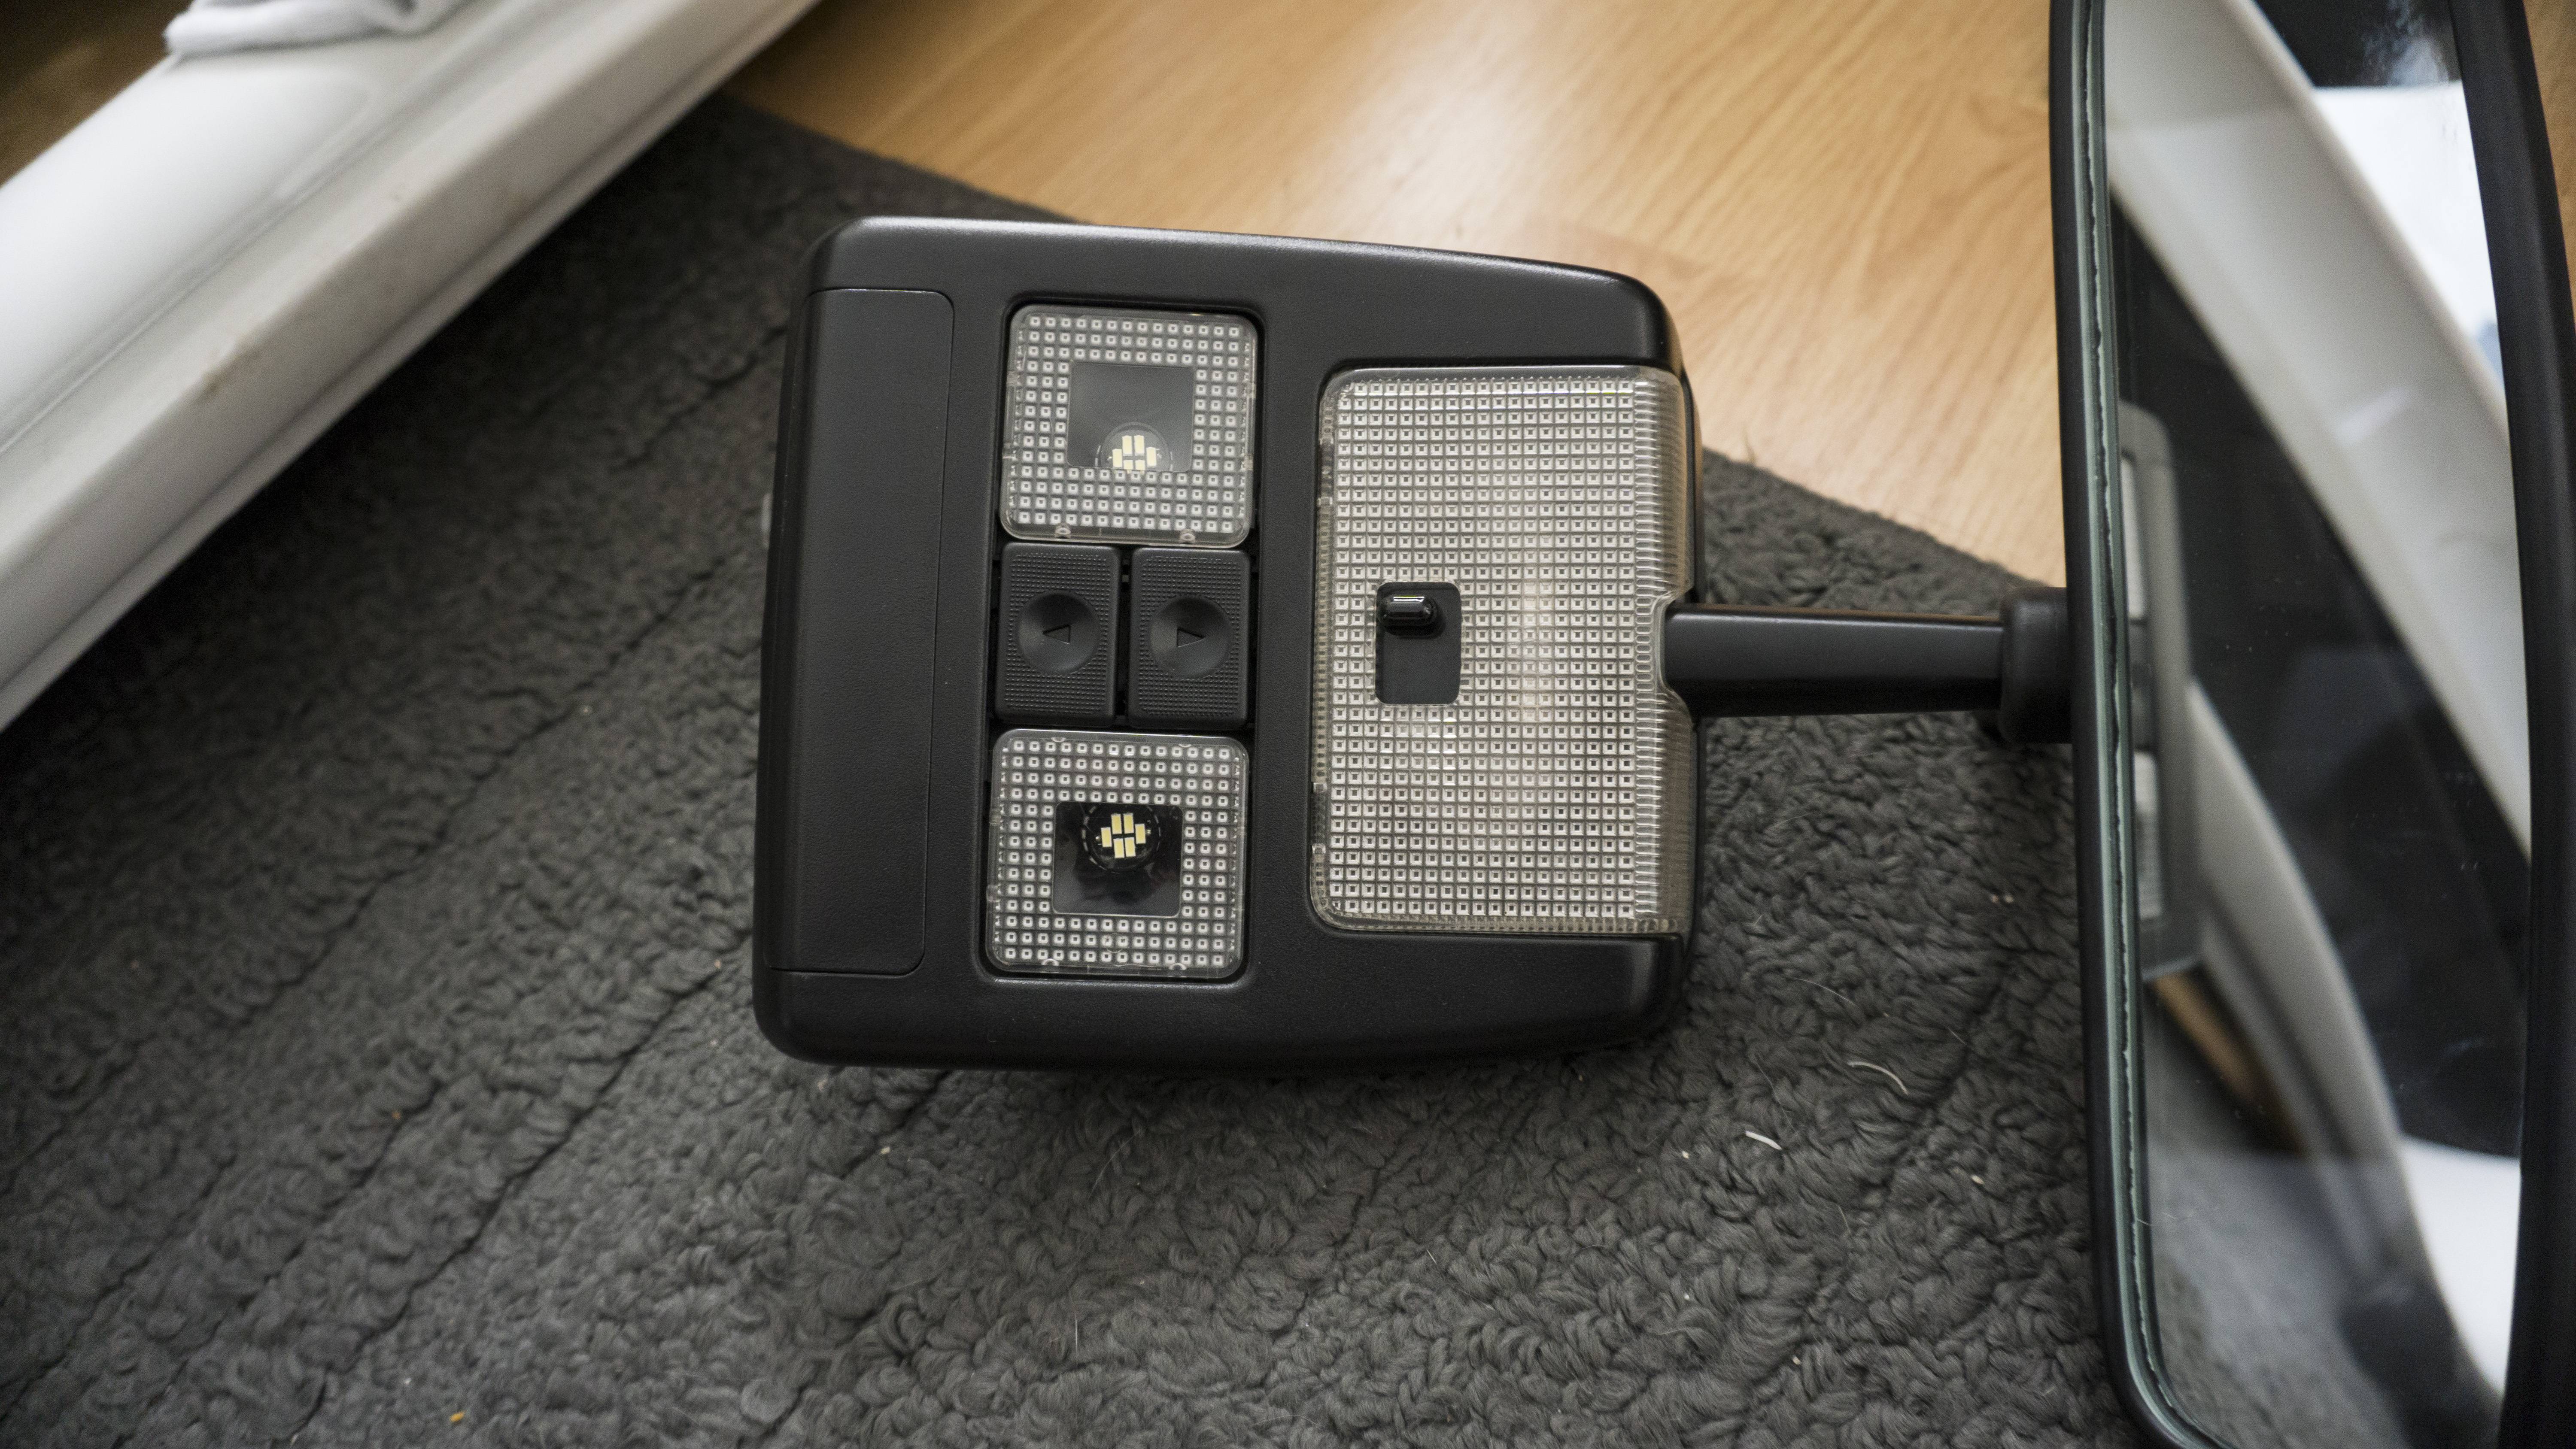
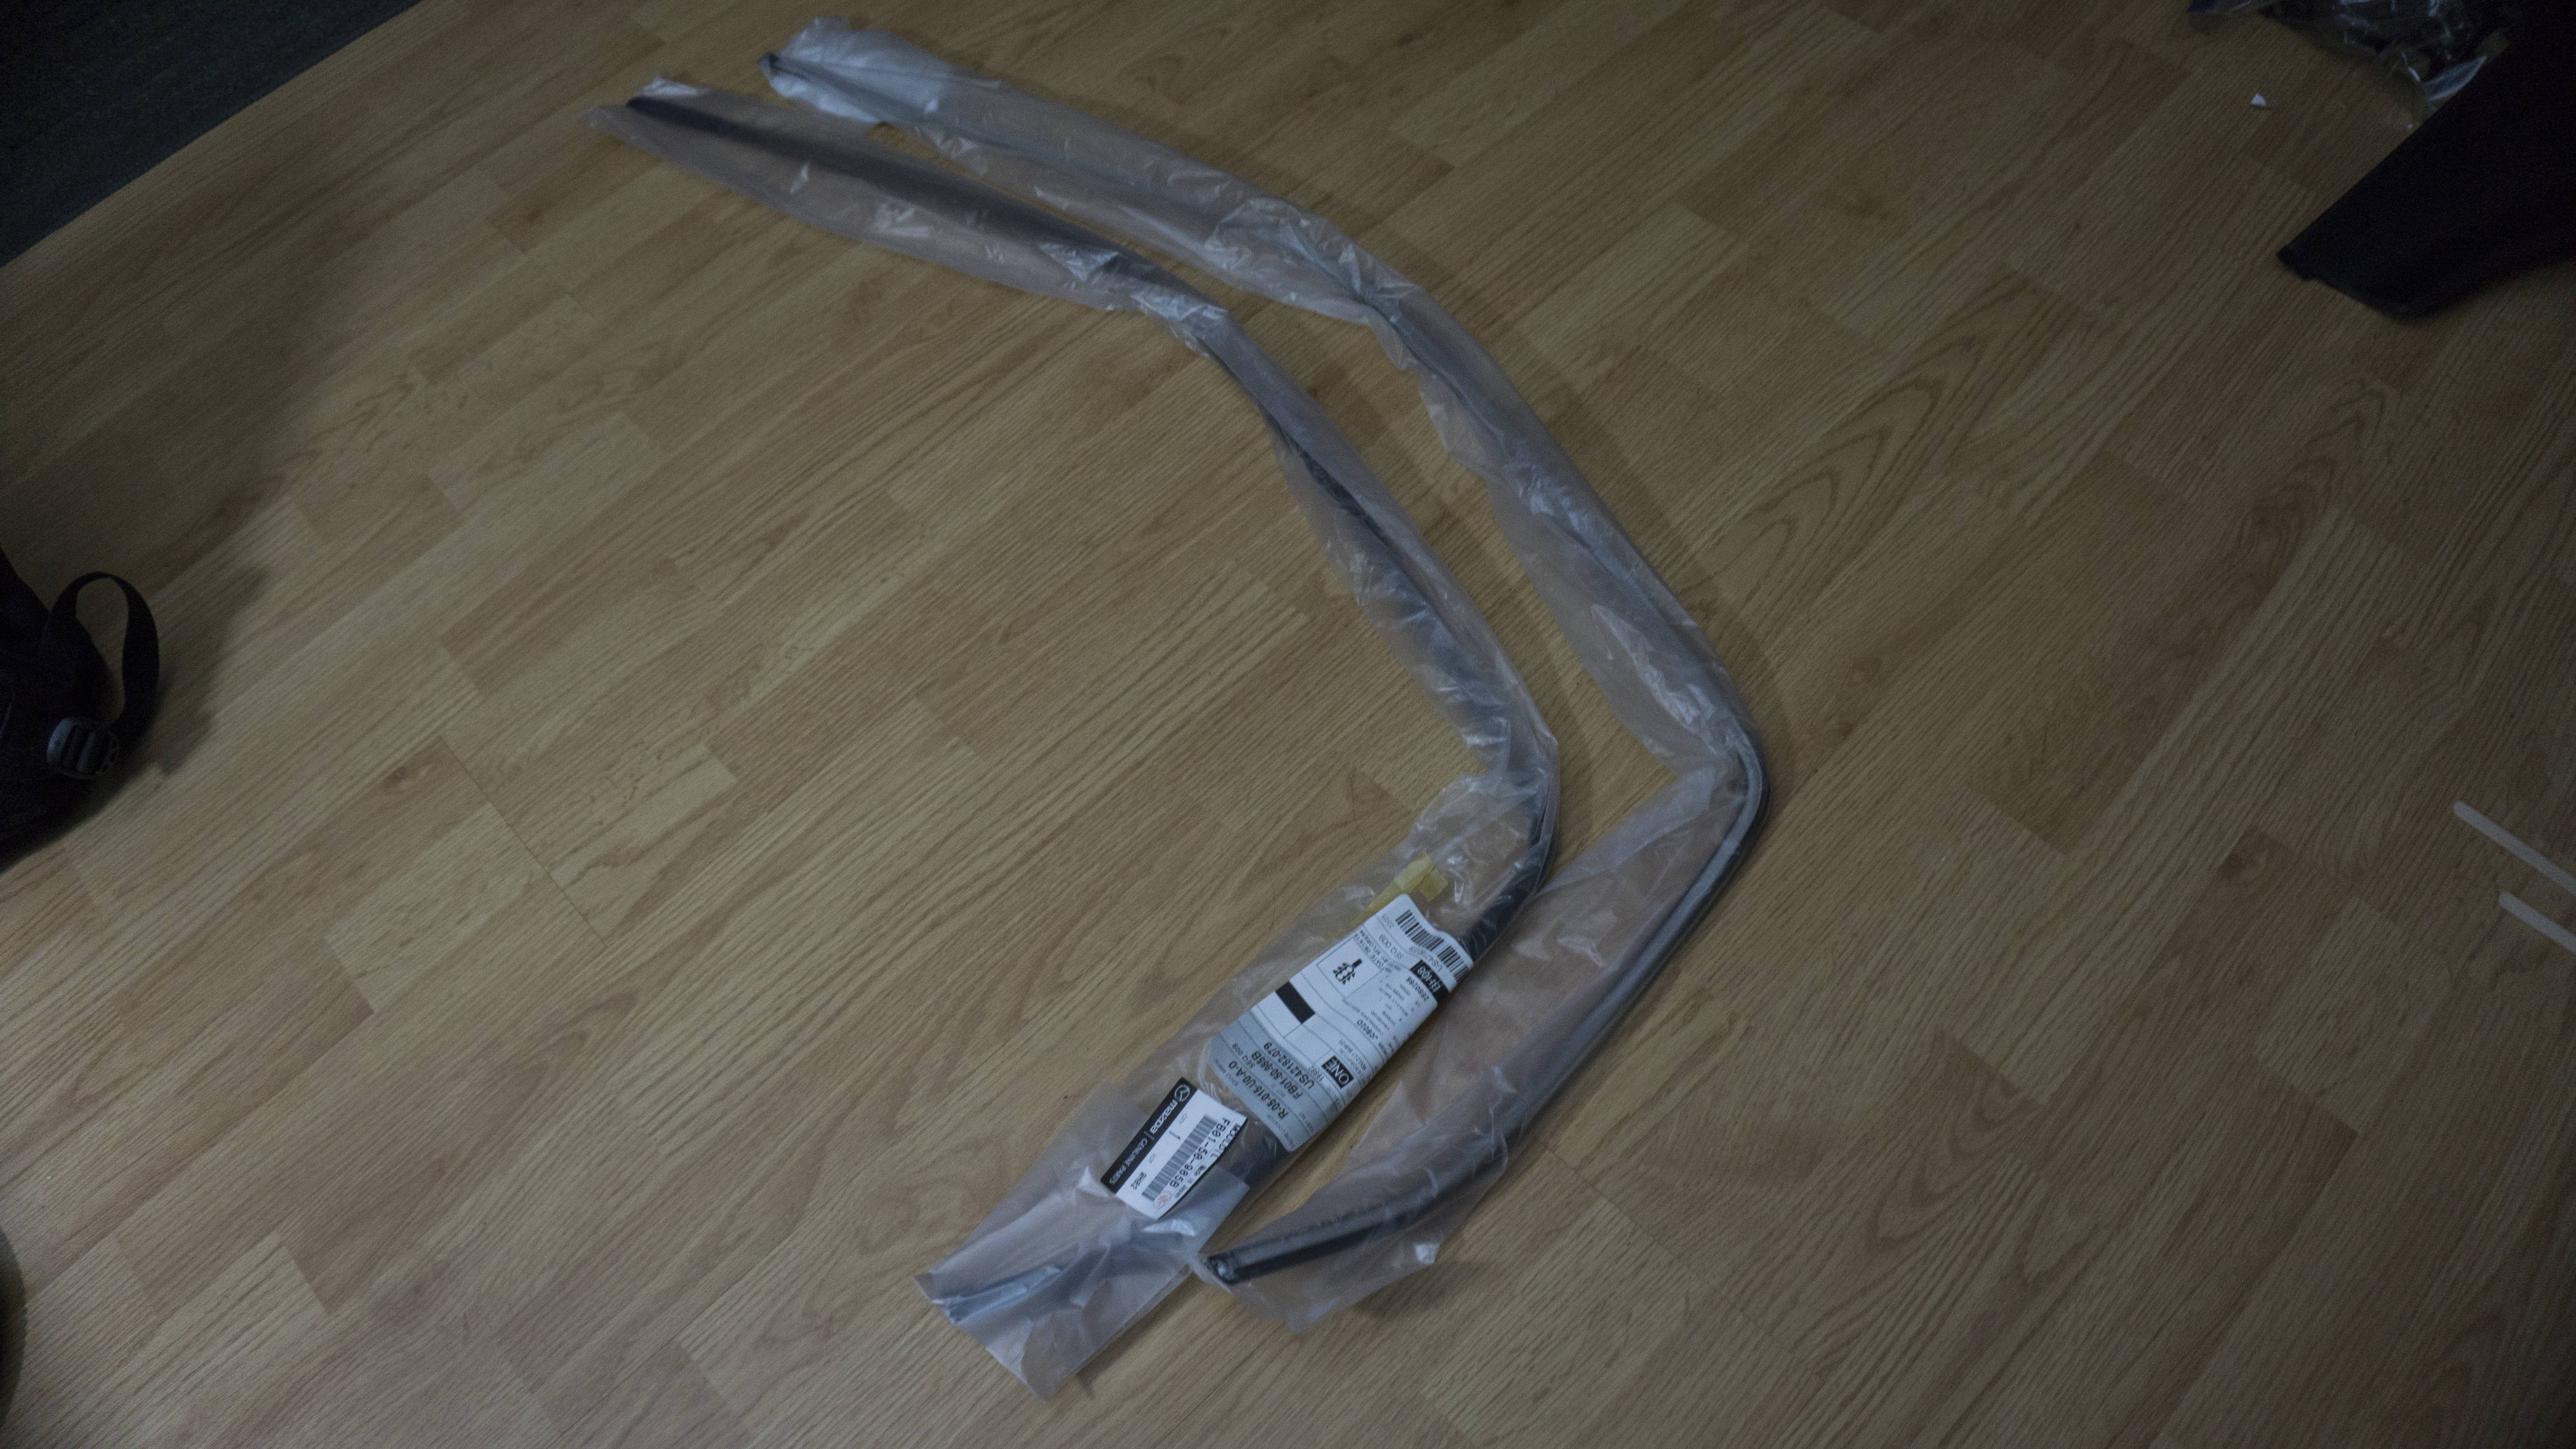
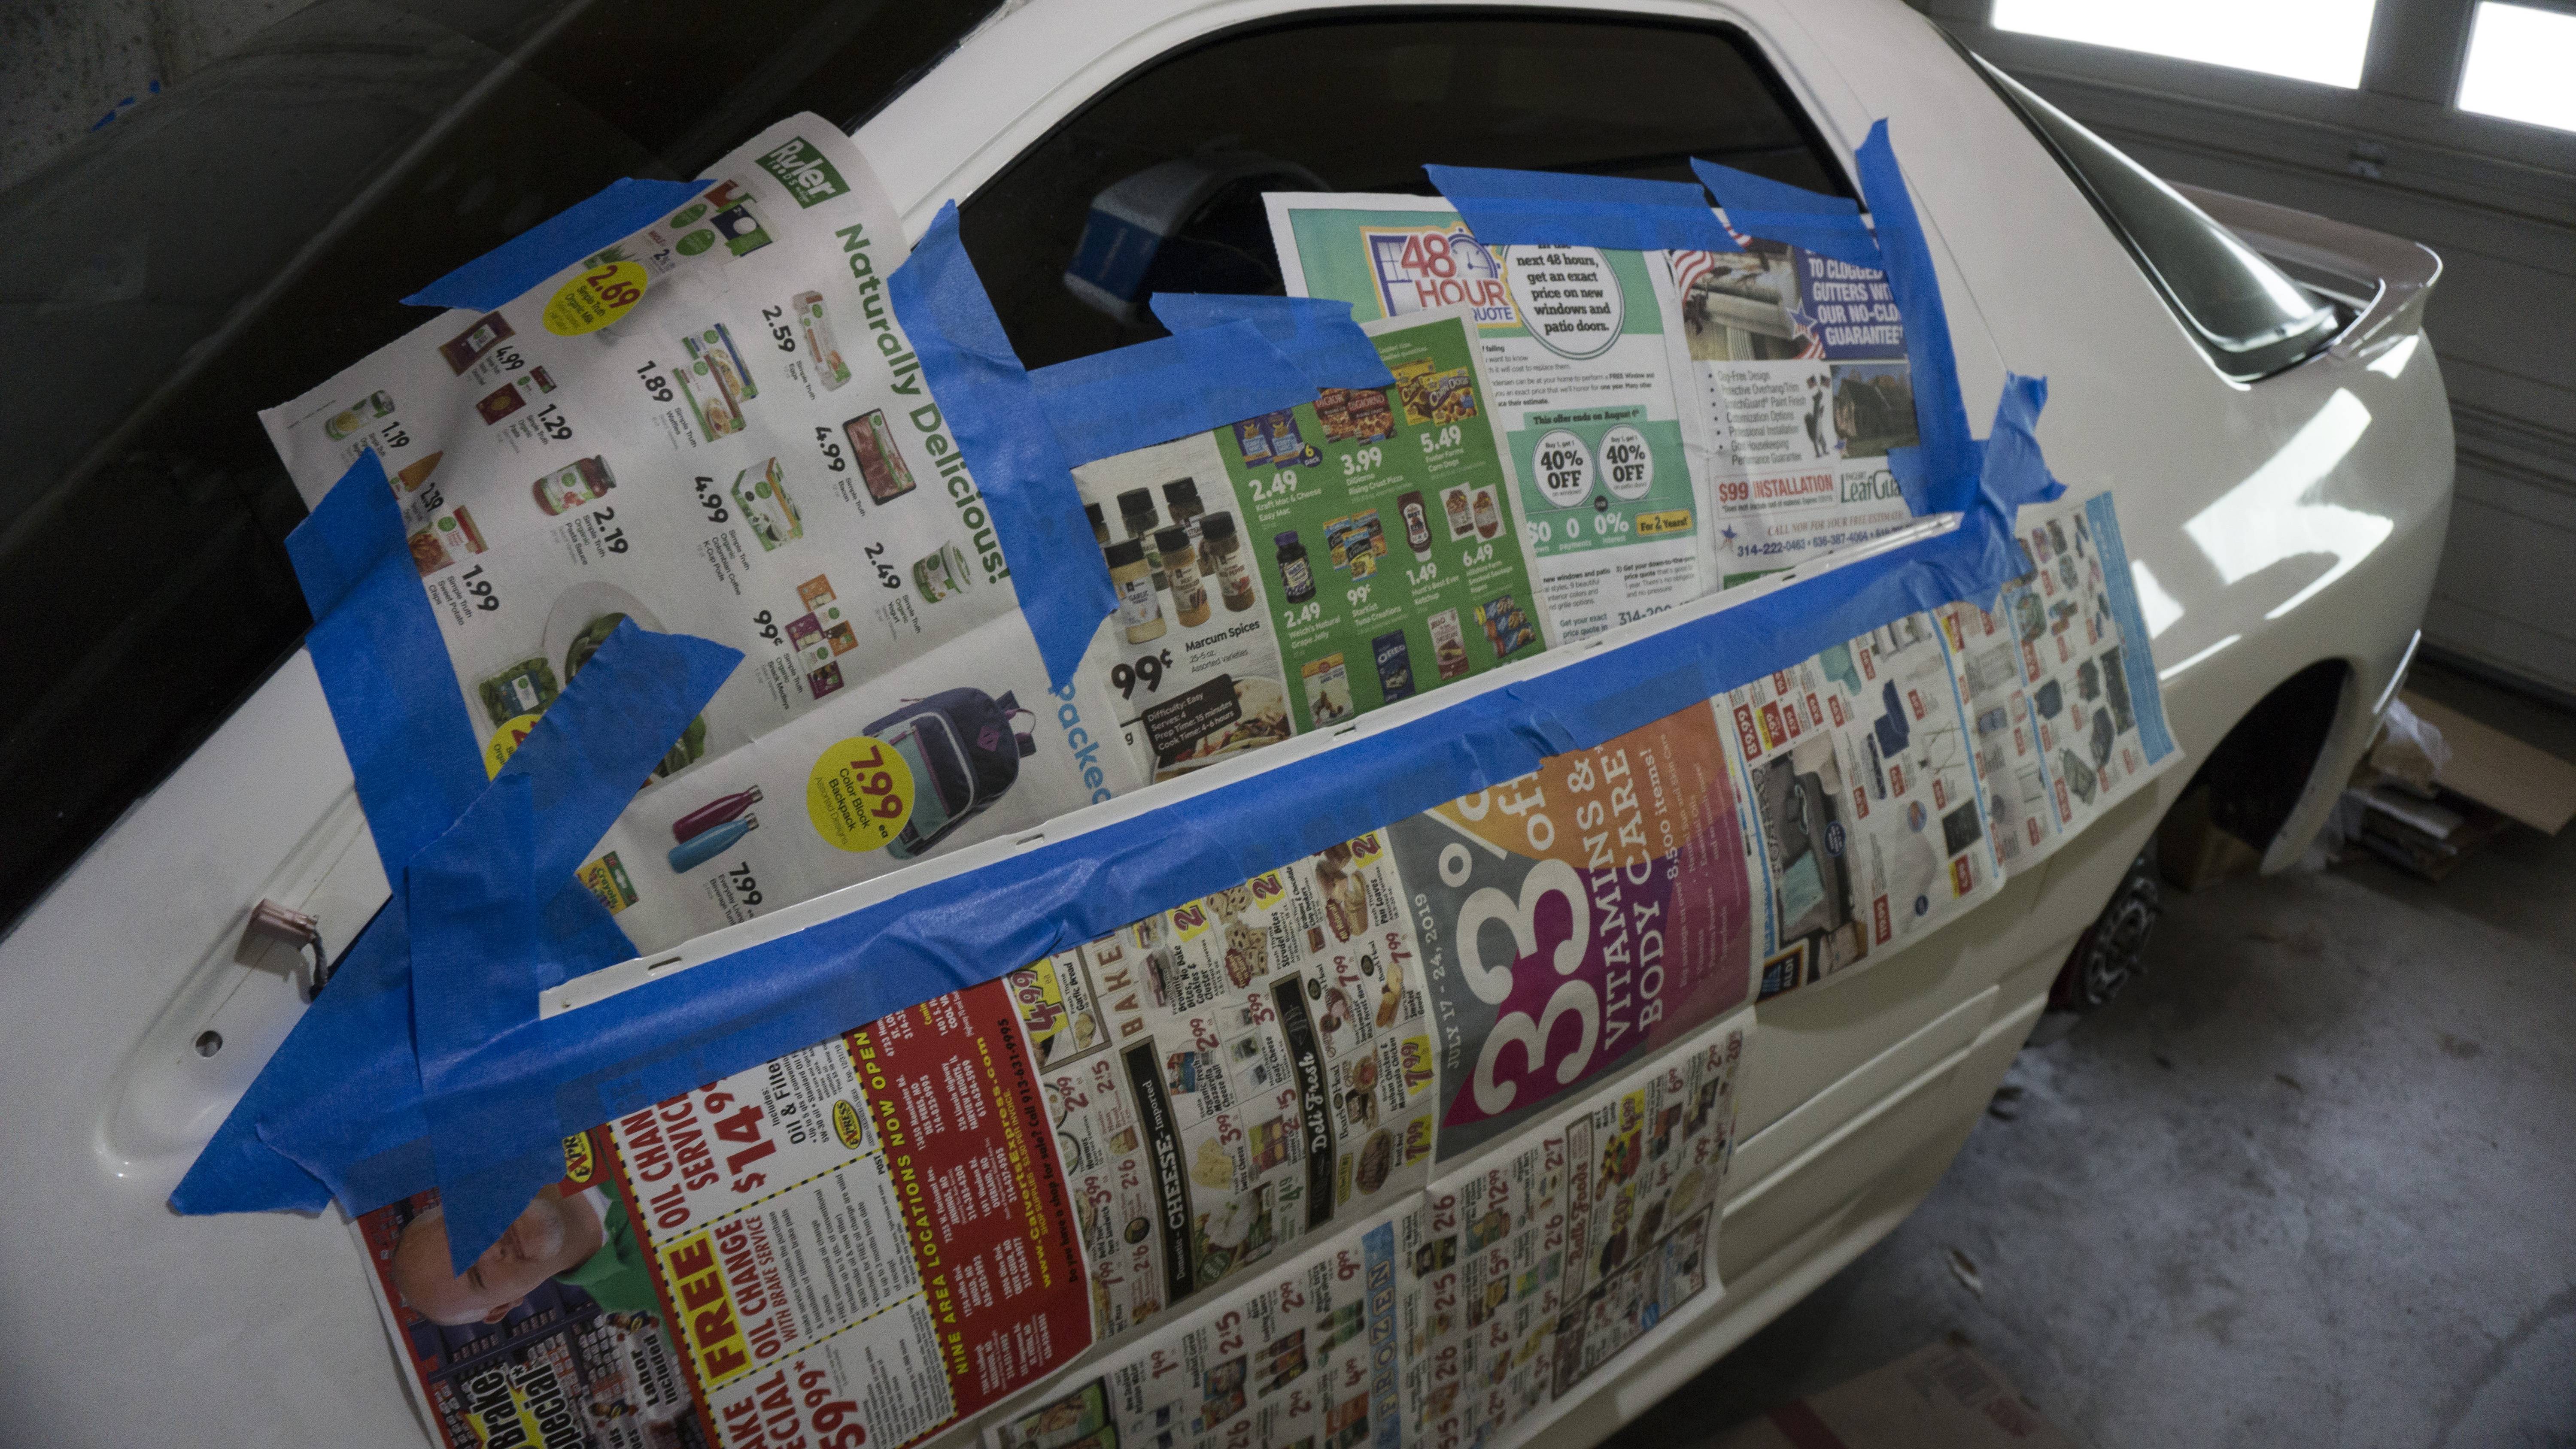
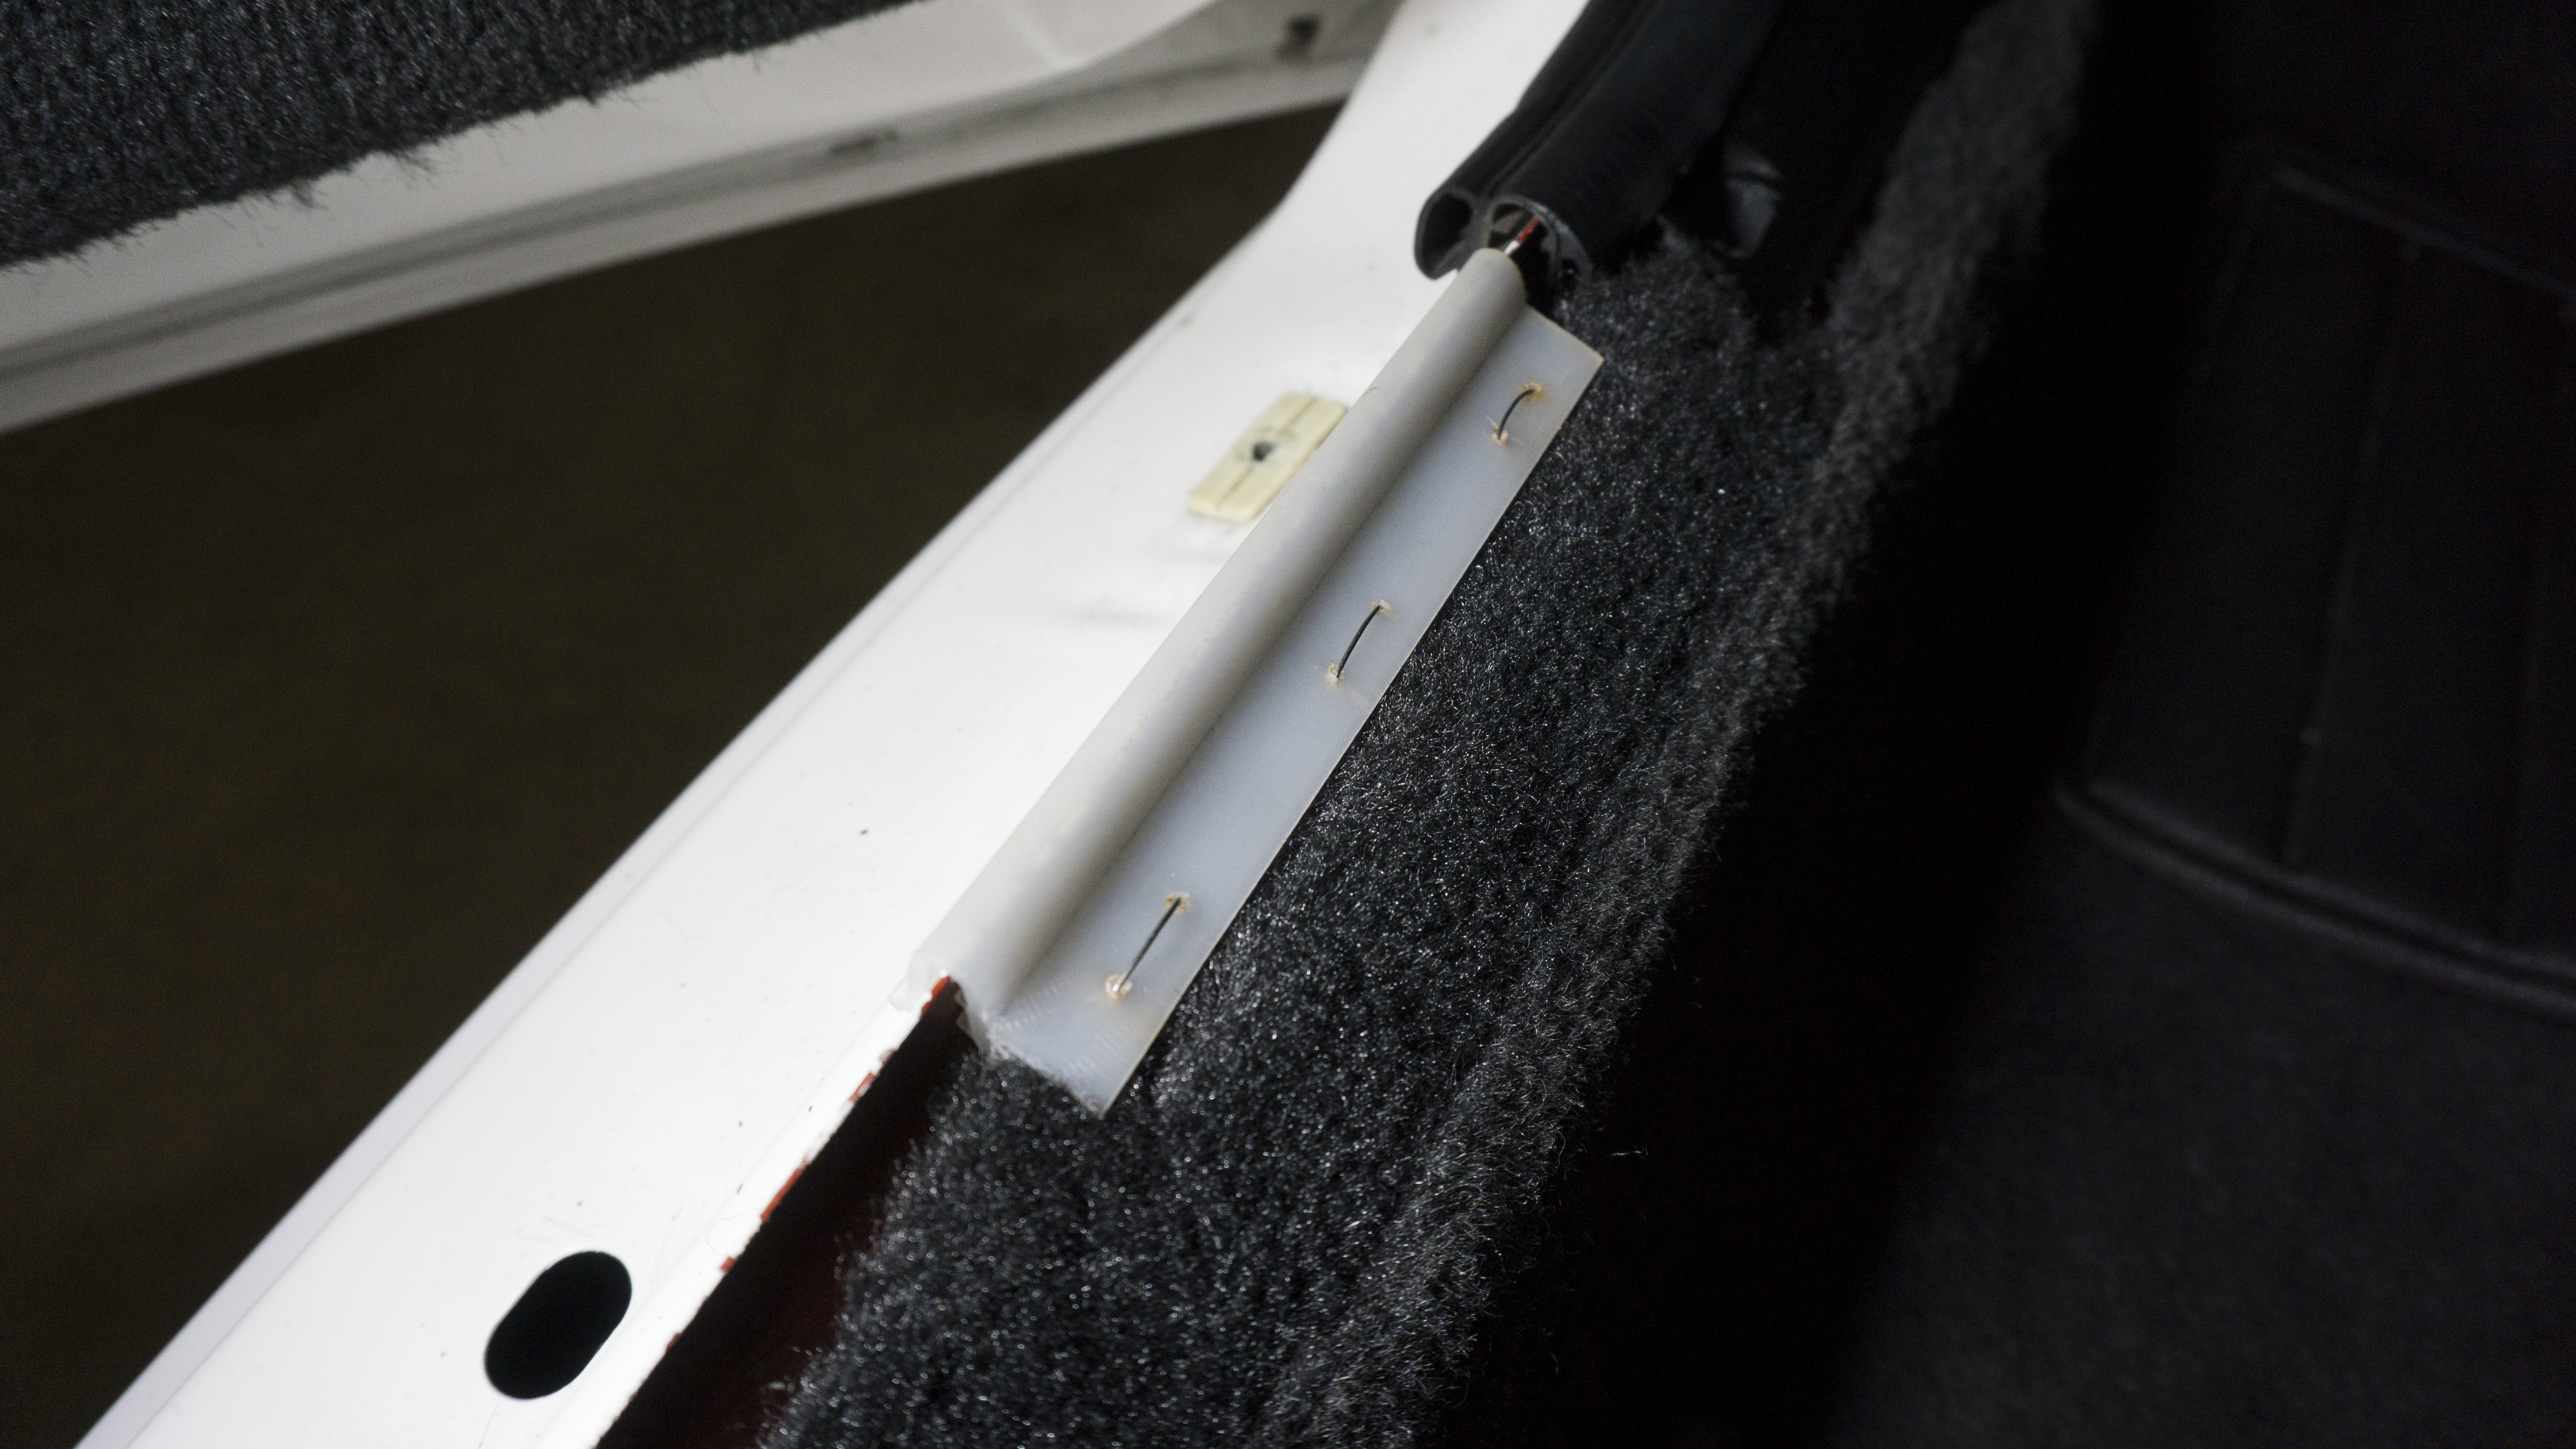
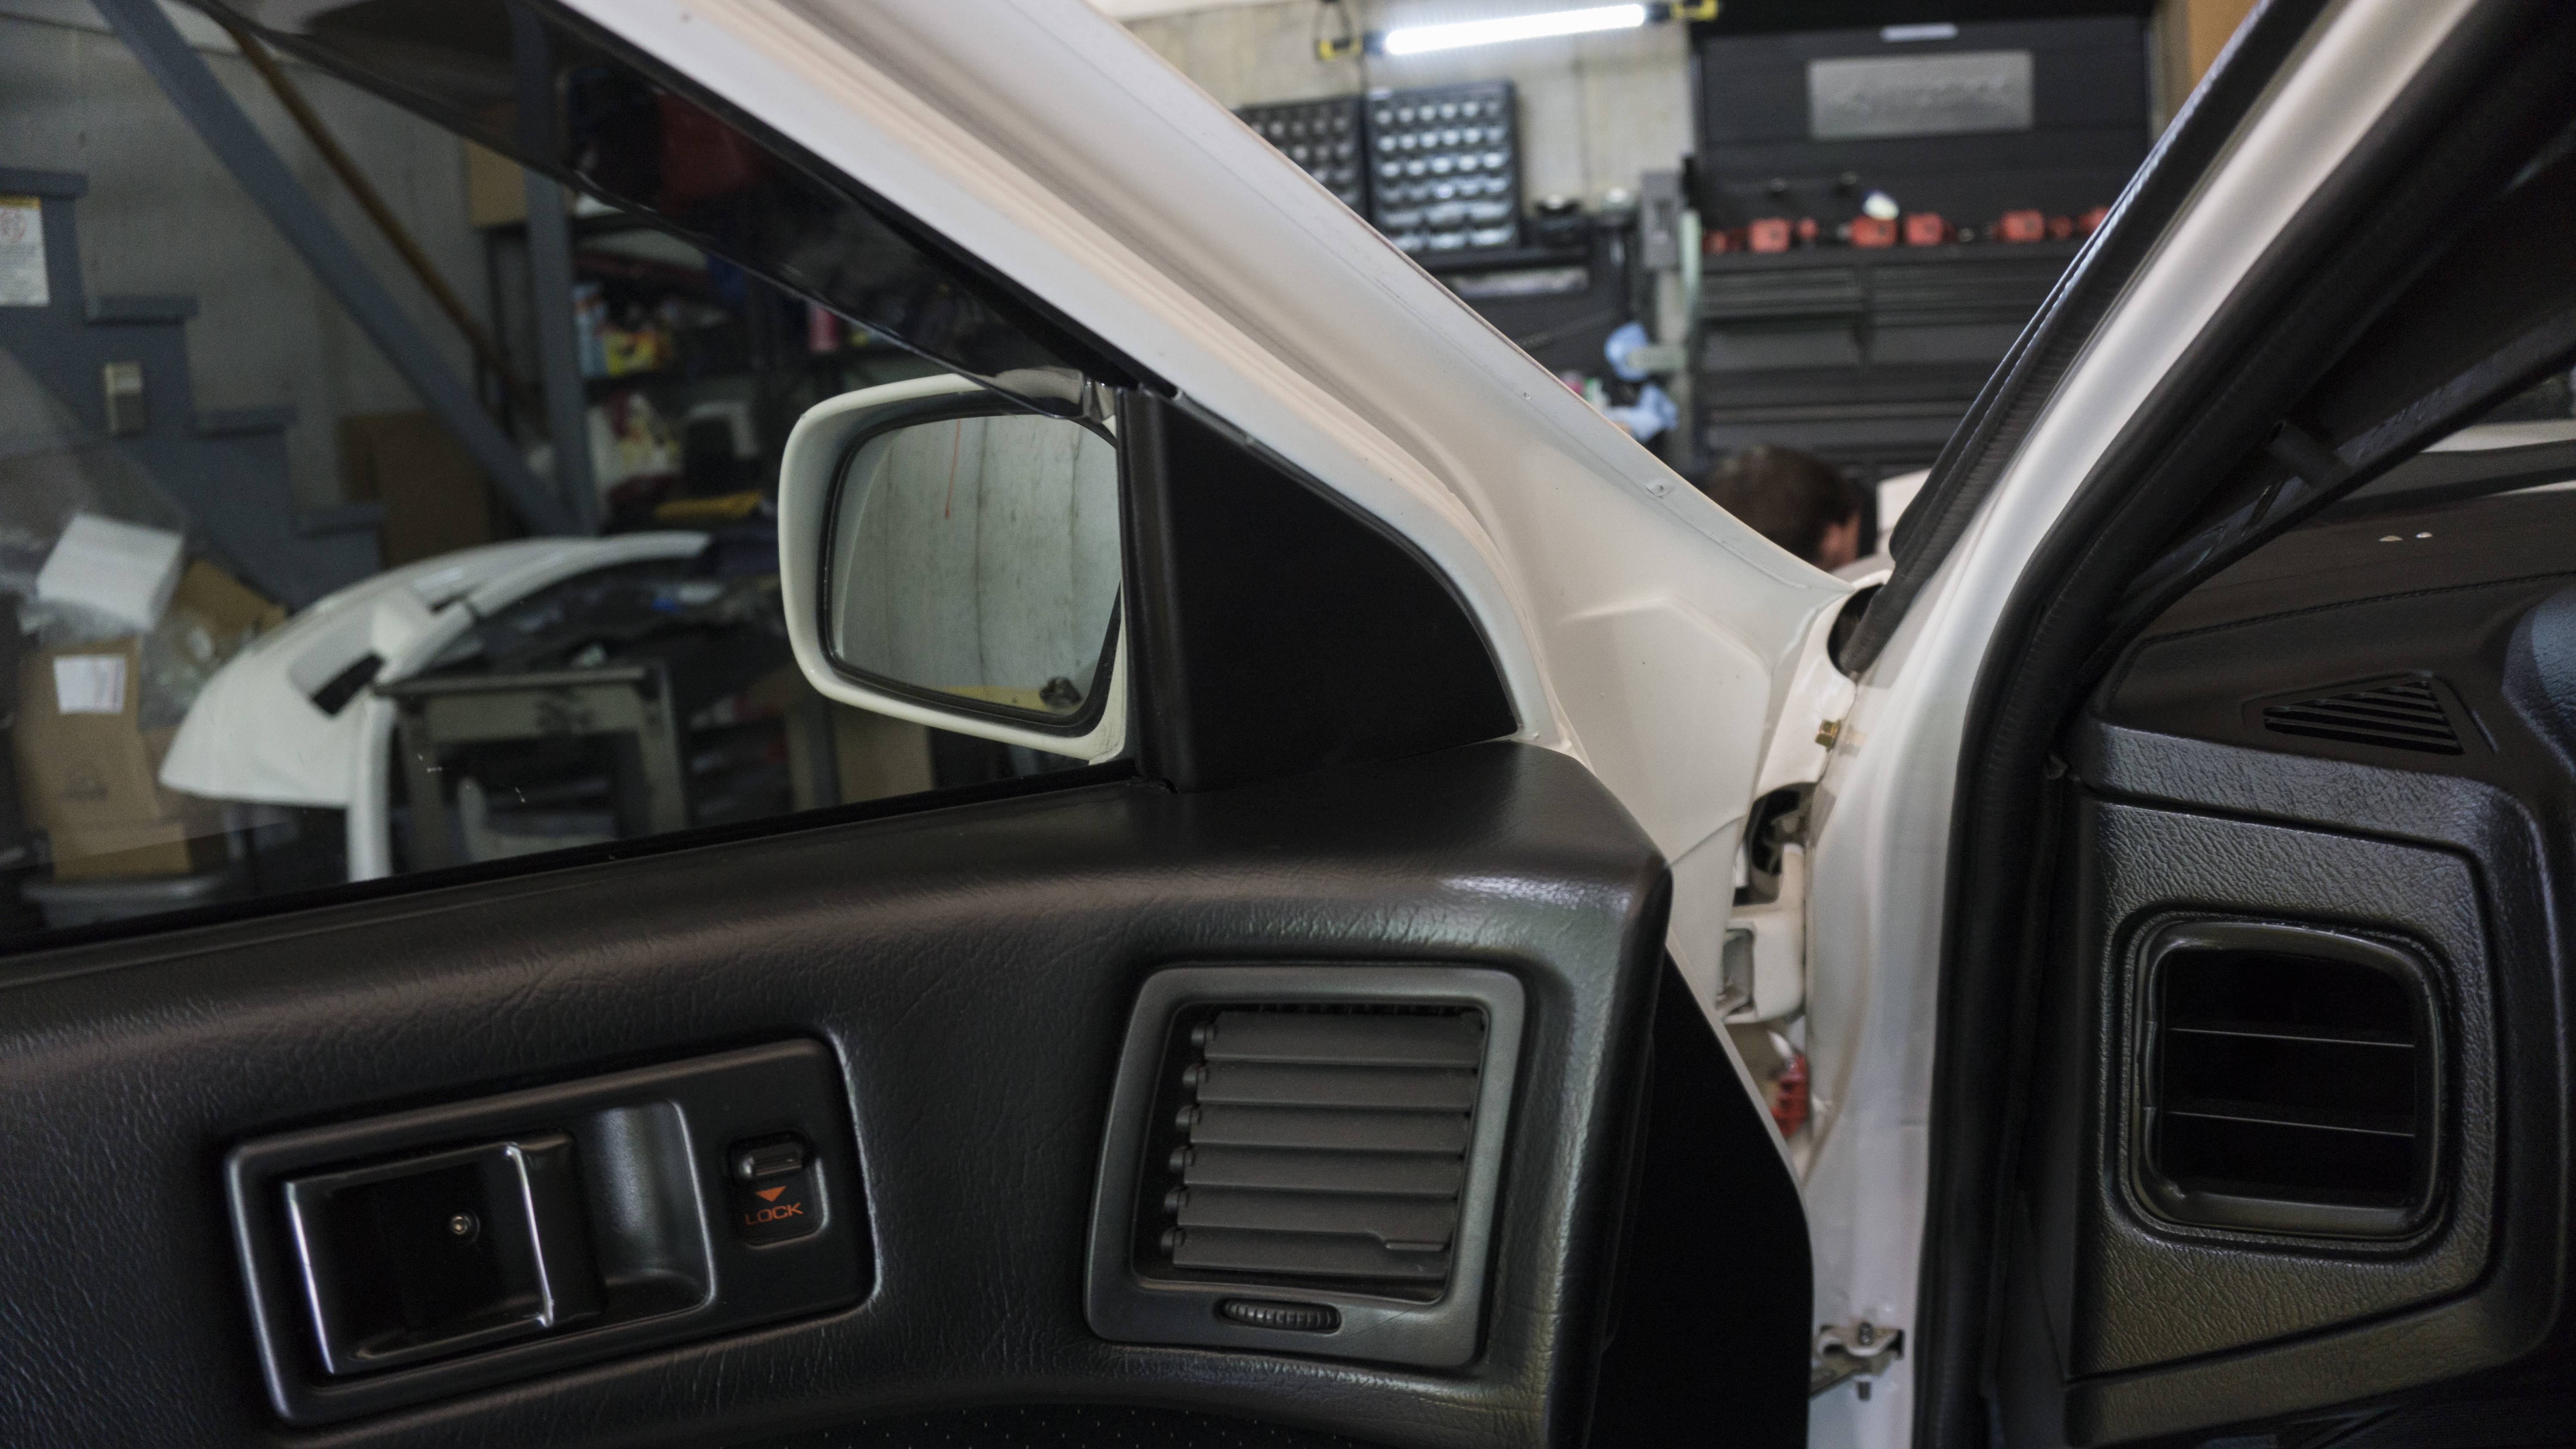
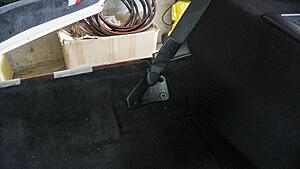
Still knocking things out as I can. I caught myself posting a lot of finished products but not many in the middle of - like I used to back in the day. I always enjoy seeing the way people do things so I�ll try and start showing a more thorough picture. I went ahead and purchased another rear view/sunroof switch assembly and tore them both down. I had forgotten mine was an original black assembly (I thought I spray painted it). I hated that the assembly was black and the sunroof switch was a dark grey. I ended up spraying the sunroof switch and it is a near perfect match to the black assembly I had. I�ll sell the other dark grey assembly. I also dropped some 168 LED�s in replace of the bulbs. My new exterior upper window trim came in. I went ahead and did some precursory preventative maintenance by putting a coat of paint on the backside of it. This will hopefully curb future surface rust. Got all the window trim back on. I think the window inner liners are worn and warped; with the rain guards on the window catches and won�t roll all the way up. I may try replacing them both with new ones and see the result. Before I put those on I did some minor surface rust removal where the lower trim piece sits. Used some touch up paint and clear. Last thing I was able to get done was get the carpet latches fixed. I�ve been putting that off forever, because I couldn�t find a good solution outside of sewing it. I ended up using some bobby pins and bending them - works great. Interior is finally almost done. While the bins were not fully attached I took the time to mask the center carpet and respray them. Still trying to source some mint black sun visors to pull it all together.
I have some stuff in the works for the next update. Should be a good one!
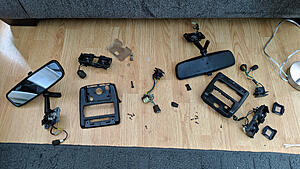
Here are some shots of the rear view mirror tear-down and reassembly:


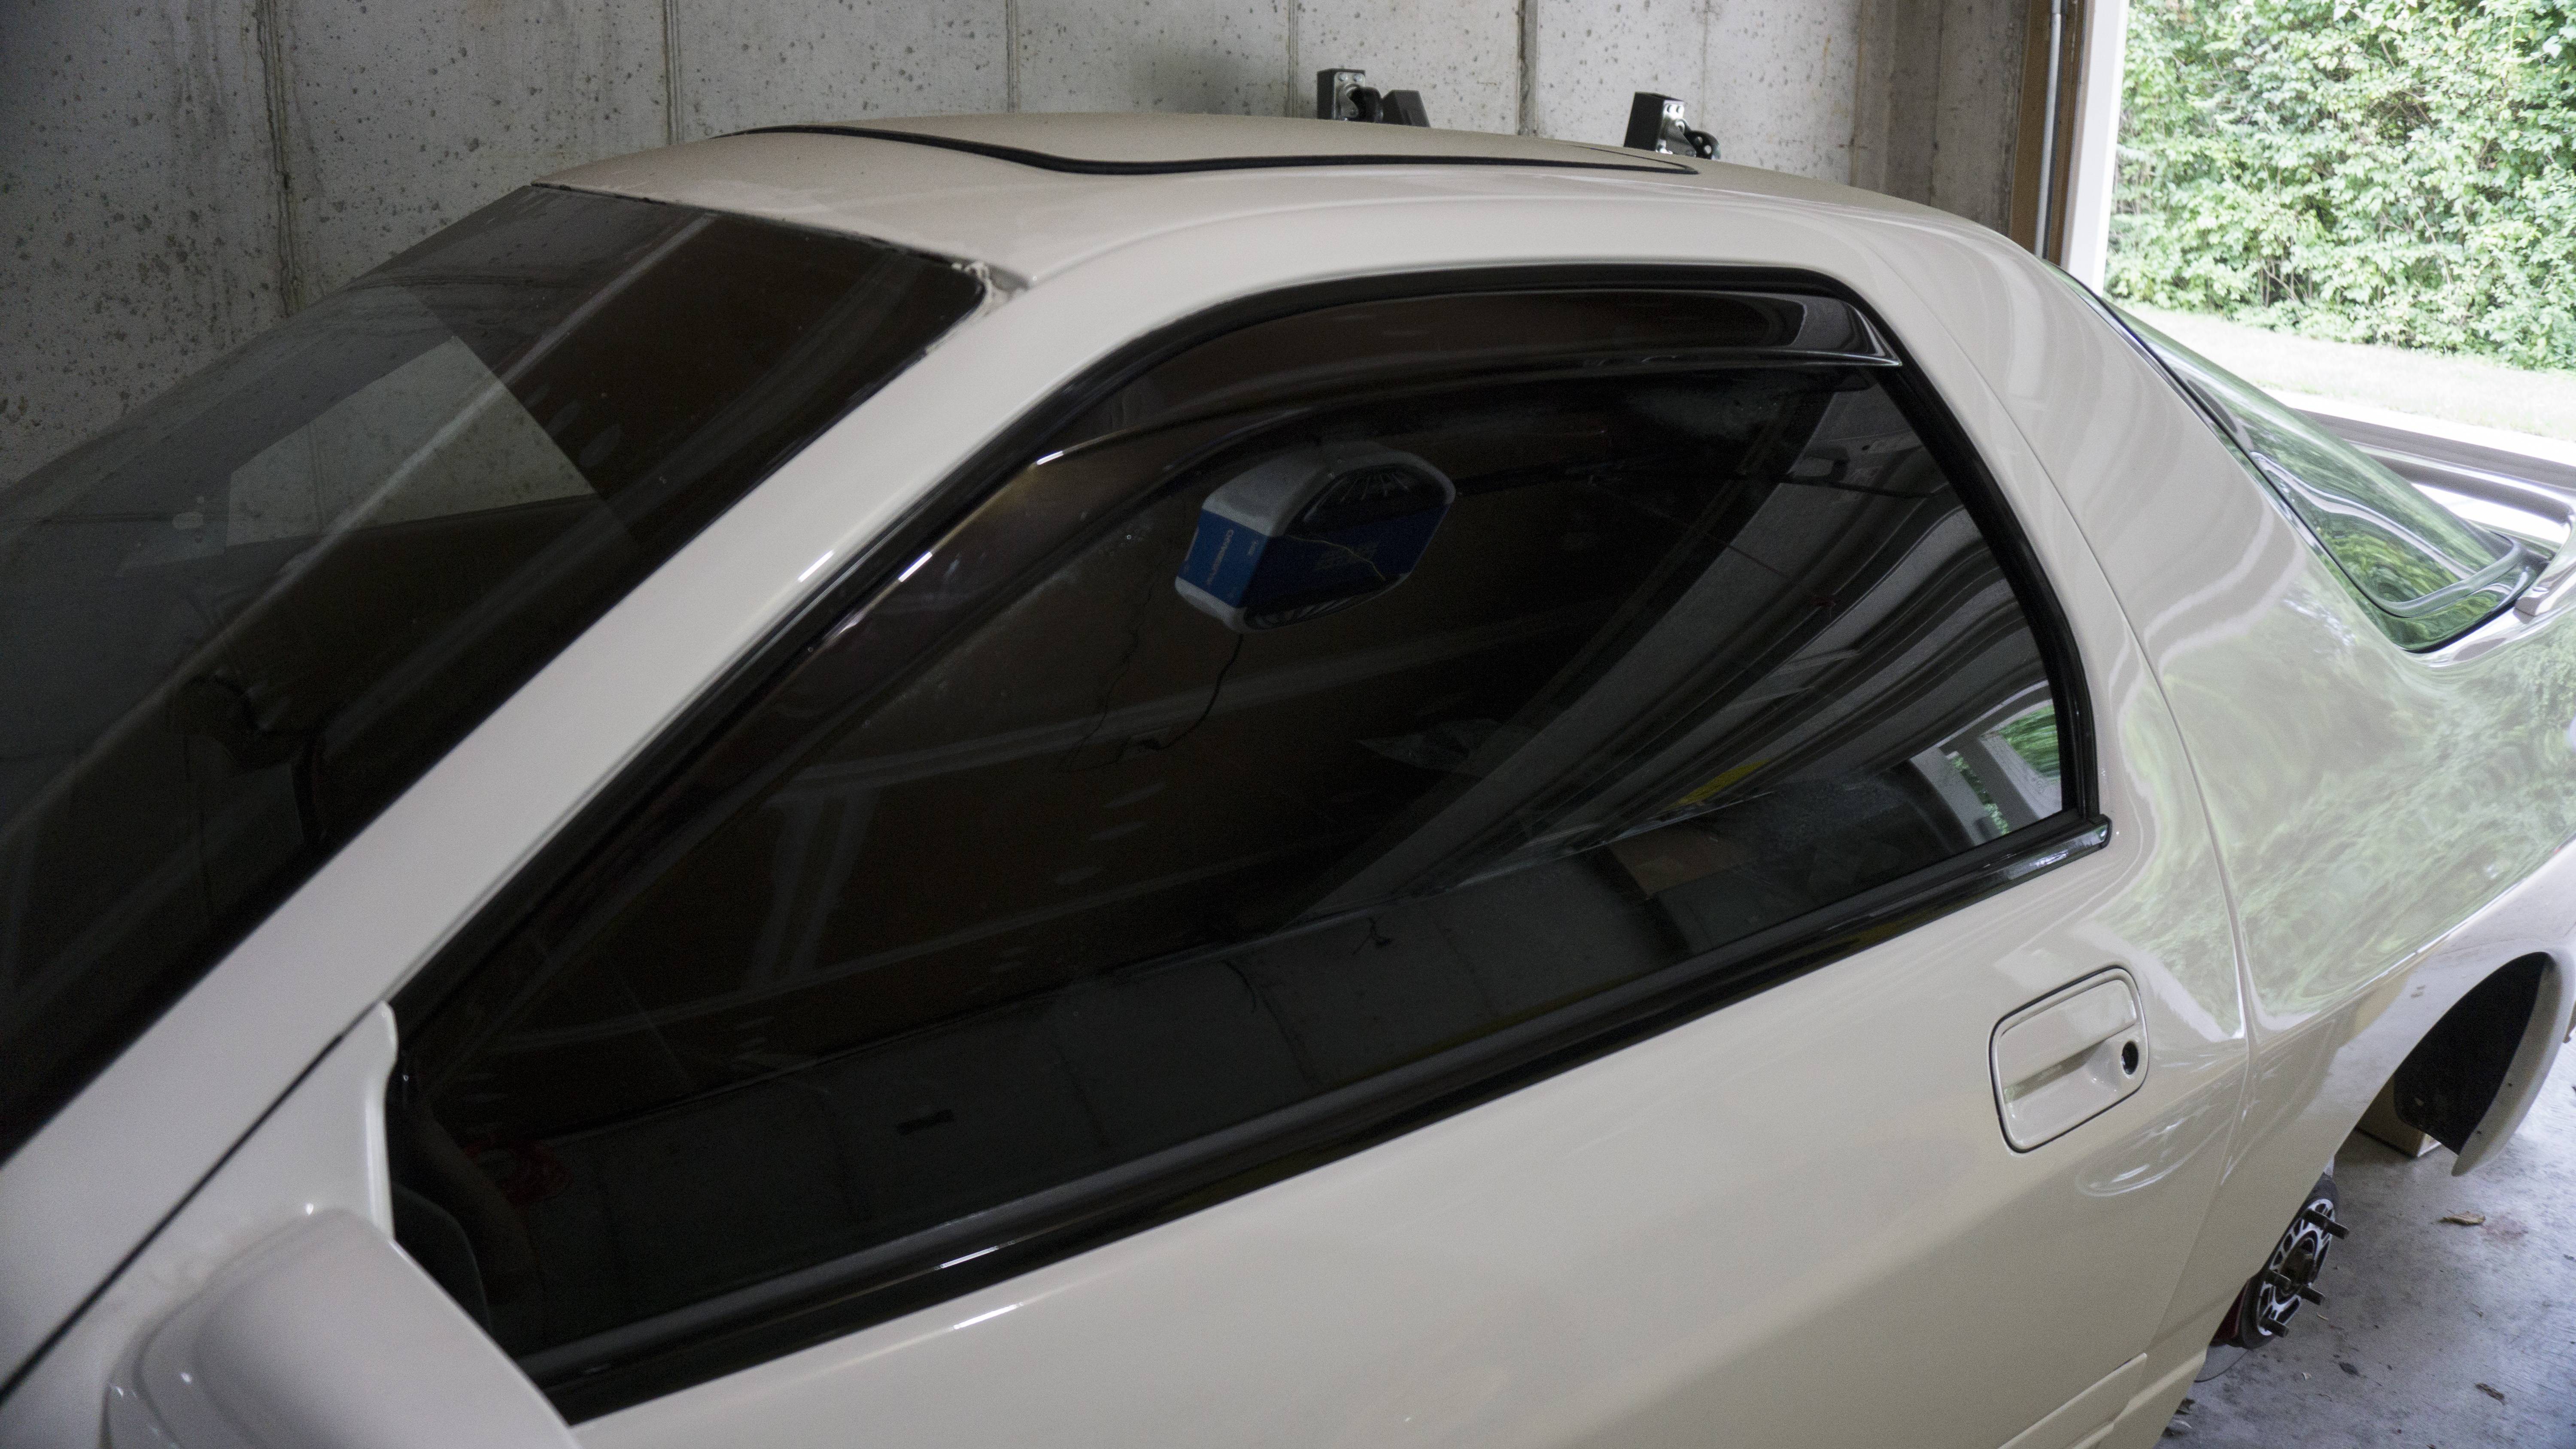
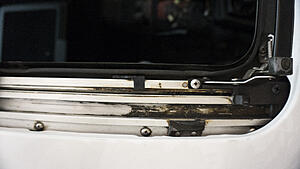
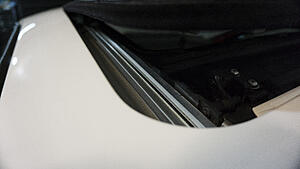
Here are some shots of the exterior window molding project:

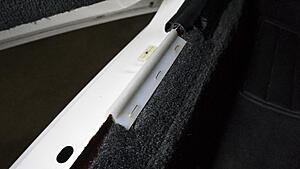
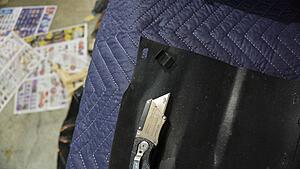
Here is the carpet latch and kick guards:
Still knocking things out as I can. I caught myself posting a lot of finished products but not many in the middle of - like I used to back in the day. I always enjoy seeing the way people do things so I�ll try and start showing a more thorough picture. I went ahead and purchased another rear view/sunroof switch assembly and tore them both down. I had forgotten mine was an original black assembly (I thought I spray painted it). I hated that the assembly was black and the sunroof switch was a dark grey. I ended up spraying the sunroof switch and it is a near perfect match to the black assembly I had. I�ll sell the other dark grey assembly. I also dropped some 168 LED�s in replace of the bulbs. My new exterior upper window trim came in. I went ahead and did some precursory preventative maintenance by putting a coat of paint on the backside of it. This will hopefully curb future surface rust. Got all the window trim back on. I think the window inner liners are worn and warped; with the rain guards on the window catches and won�t roll all the way up. I may try replacing them both with new ones and see the result. Before I put those on I did some minor surface rust removal where the lower trim piece sits. Used some touch up paint and clear. Last thing I was able to get done was get the carpet latches fixed. I�ve been putting that off forever, because I couldn�t find a good solution outside of sewing it. I ended up using some bobby pins and bending them - works great. Interior is finally almost done. While the bins were not fully attached I took the time to mask the center carpet and respray them. Still trying to source some mint black sun visors to pull it all together.
I have some stuff in the works for the next update. Should be a good one!
Here are some shots of the rear view mirror tear-down and reassembly:


Here are some shots of the exterior window molding project:

Here is the carpet latch and kick guards:
 09-07-19, 07:30 PM
#254
Update 9/7/2019:
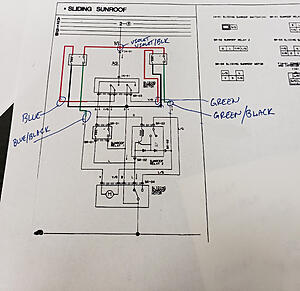
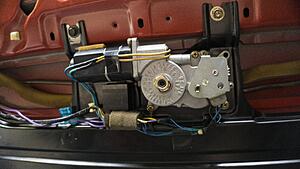
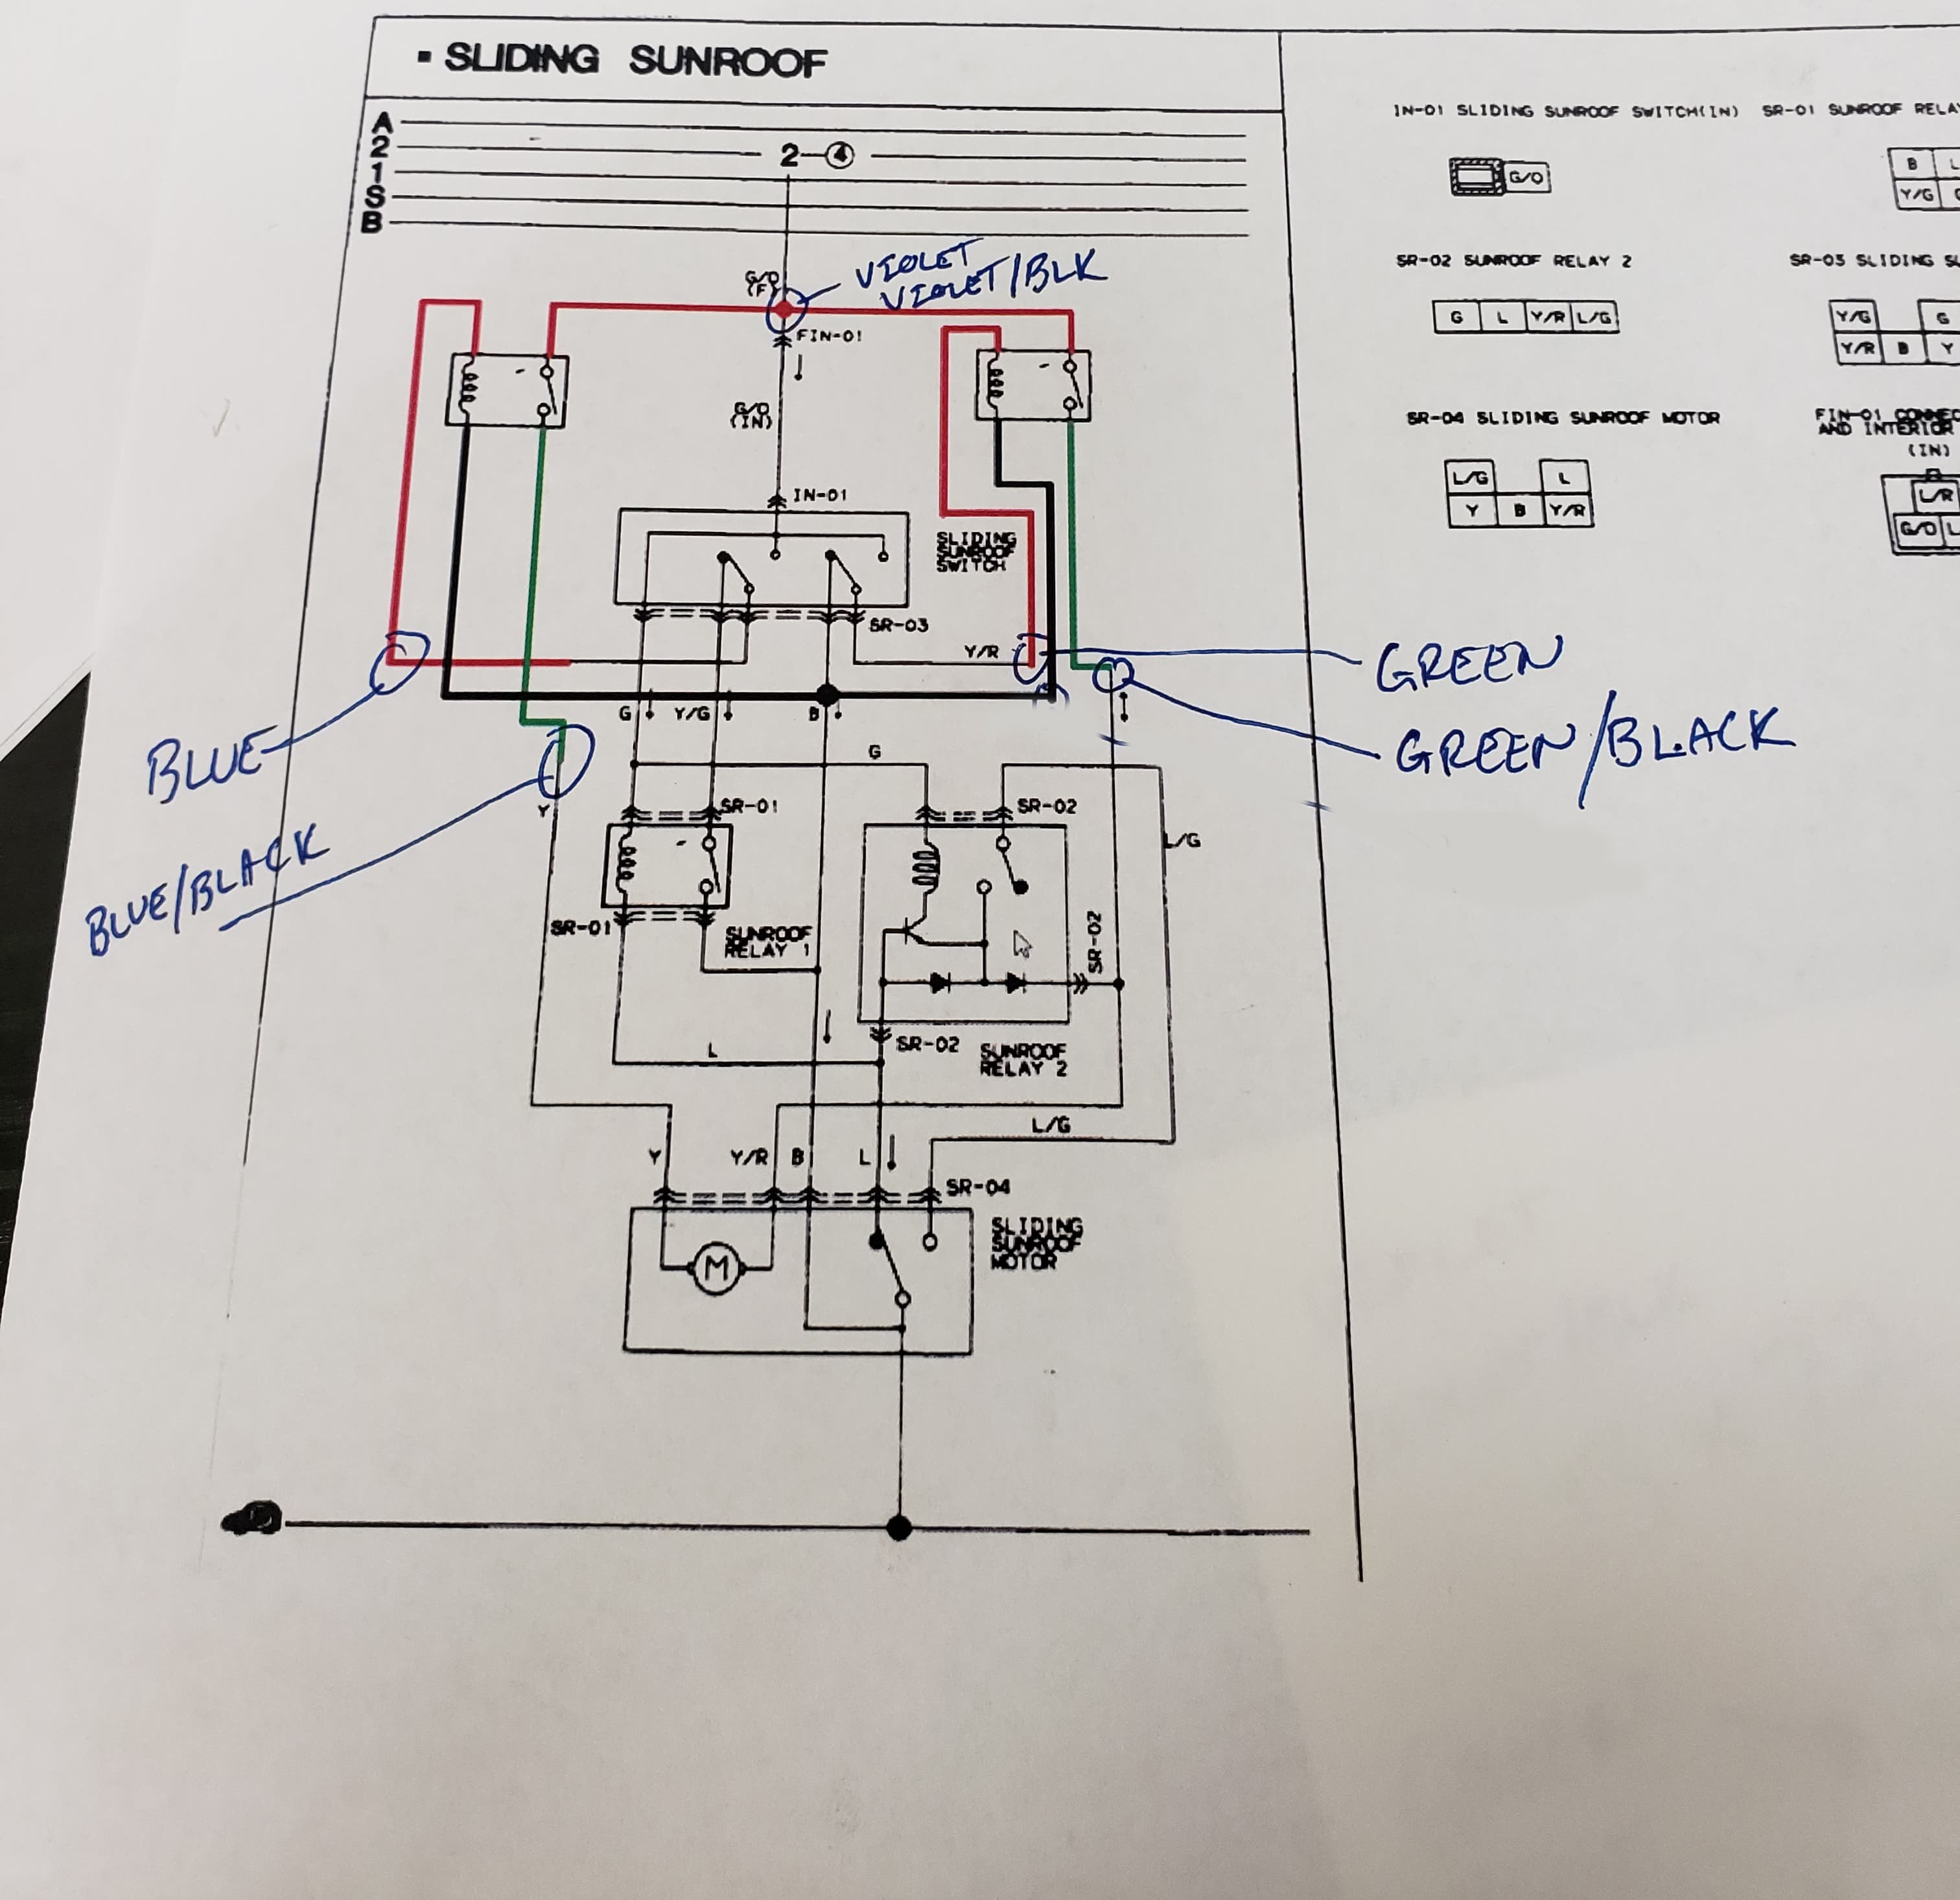
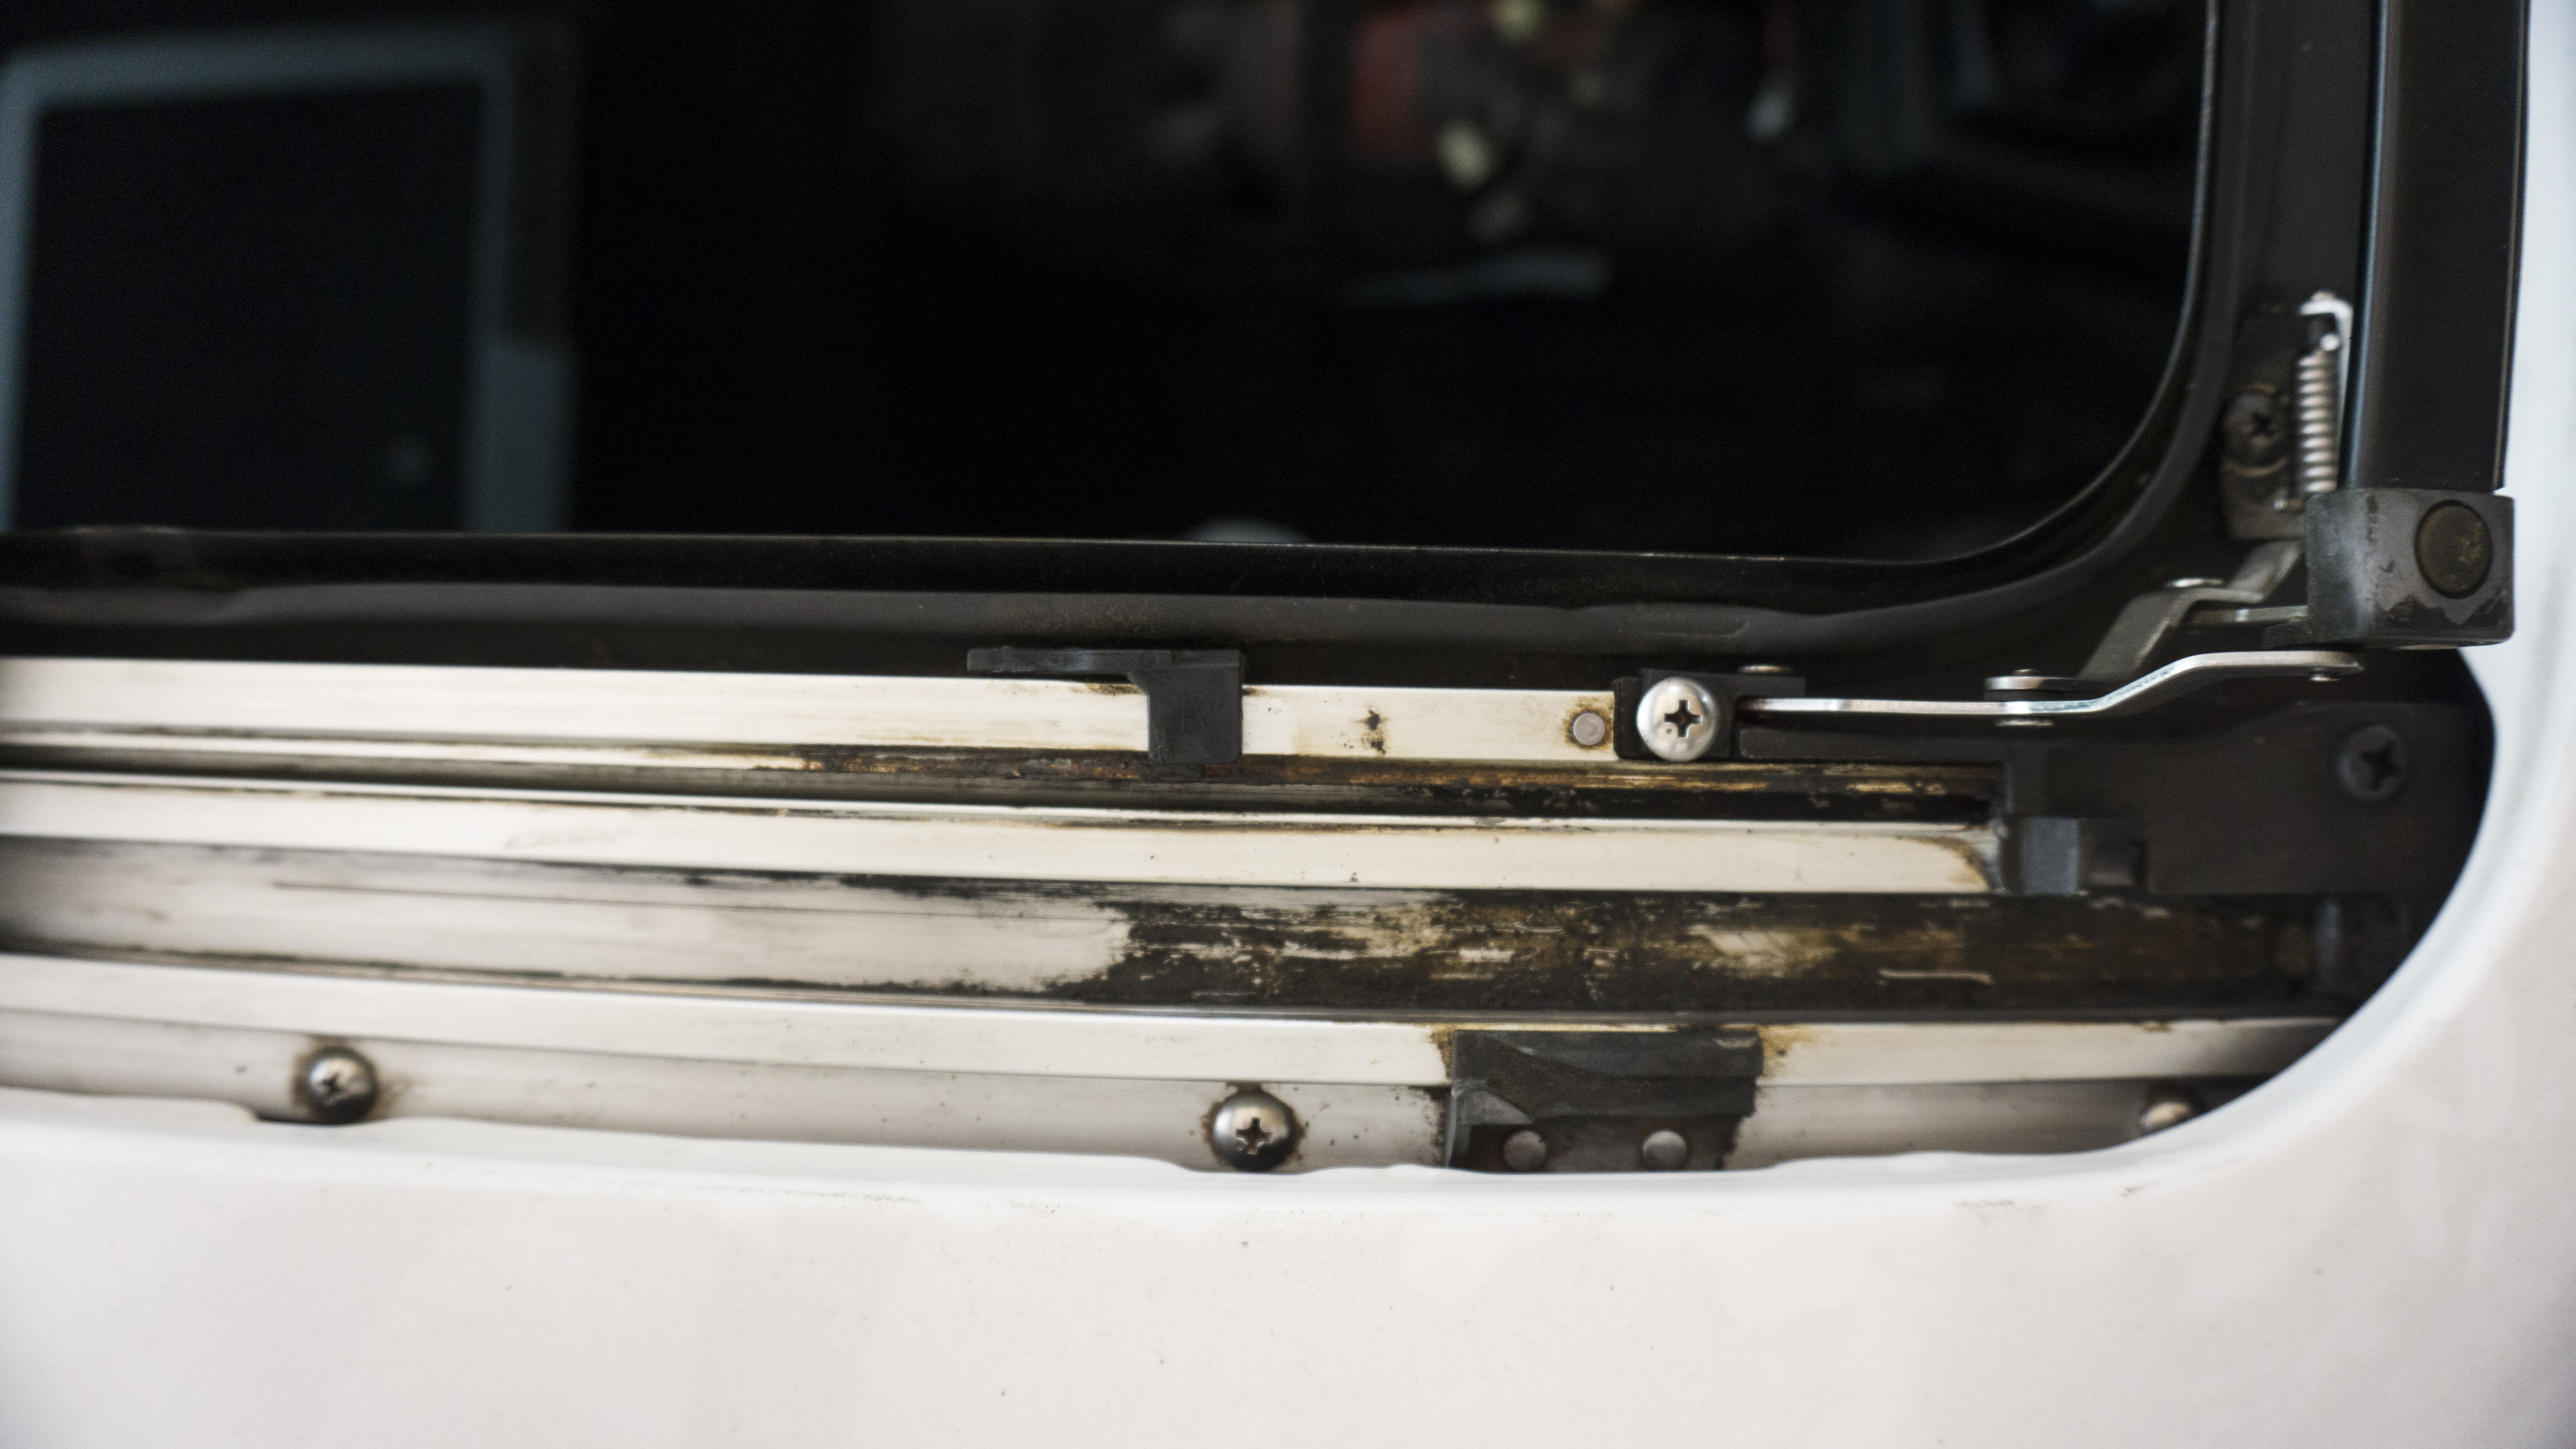
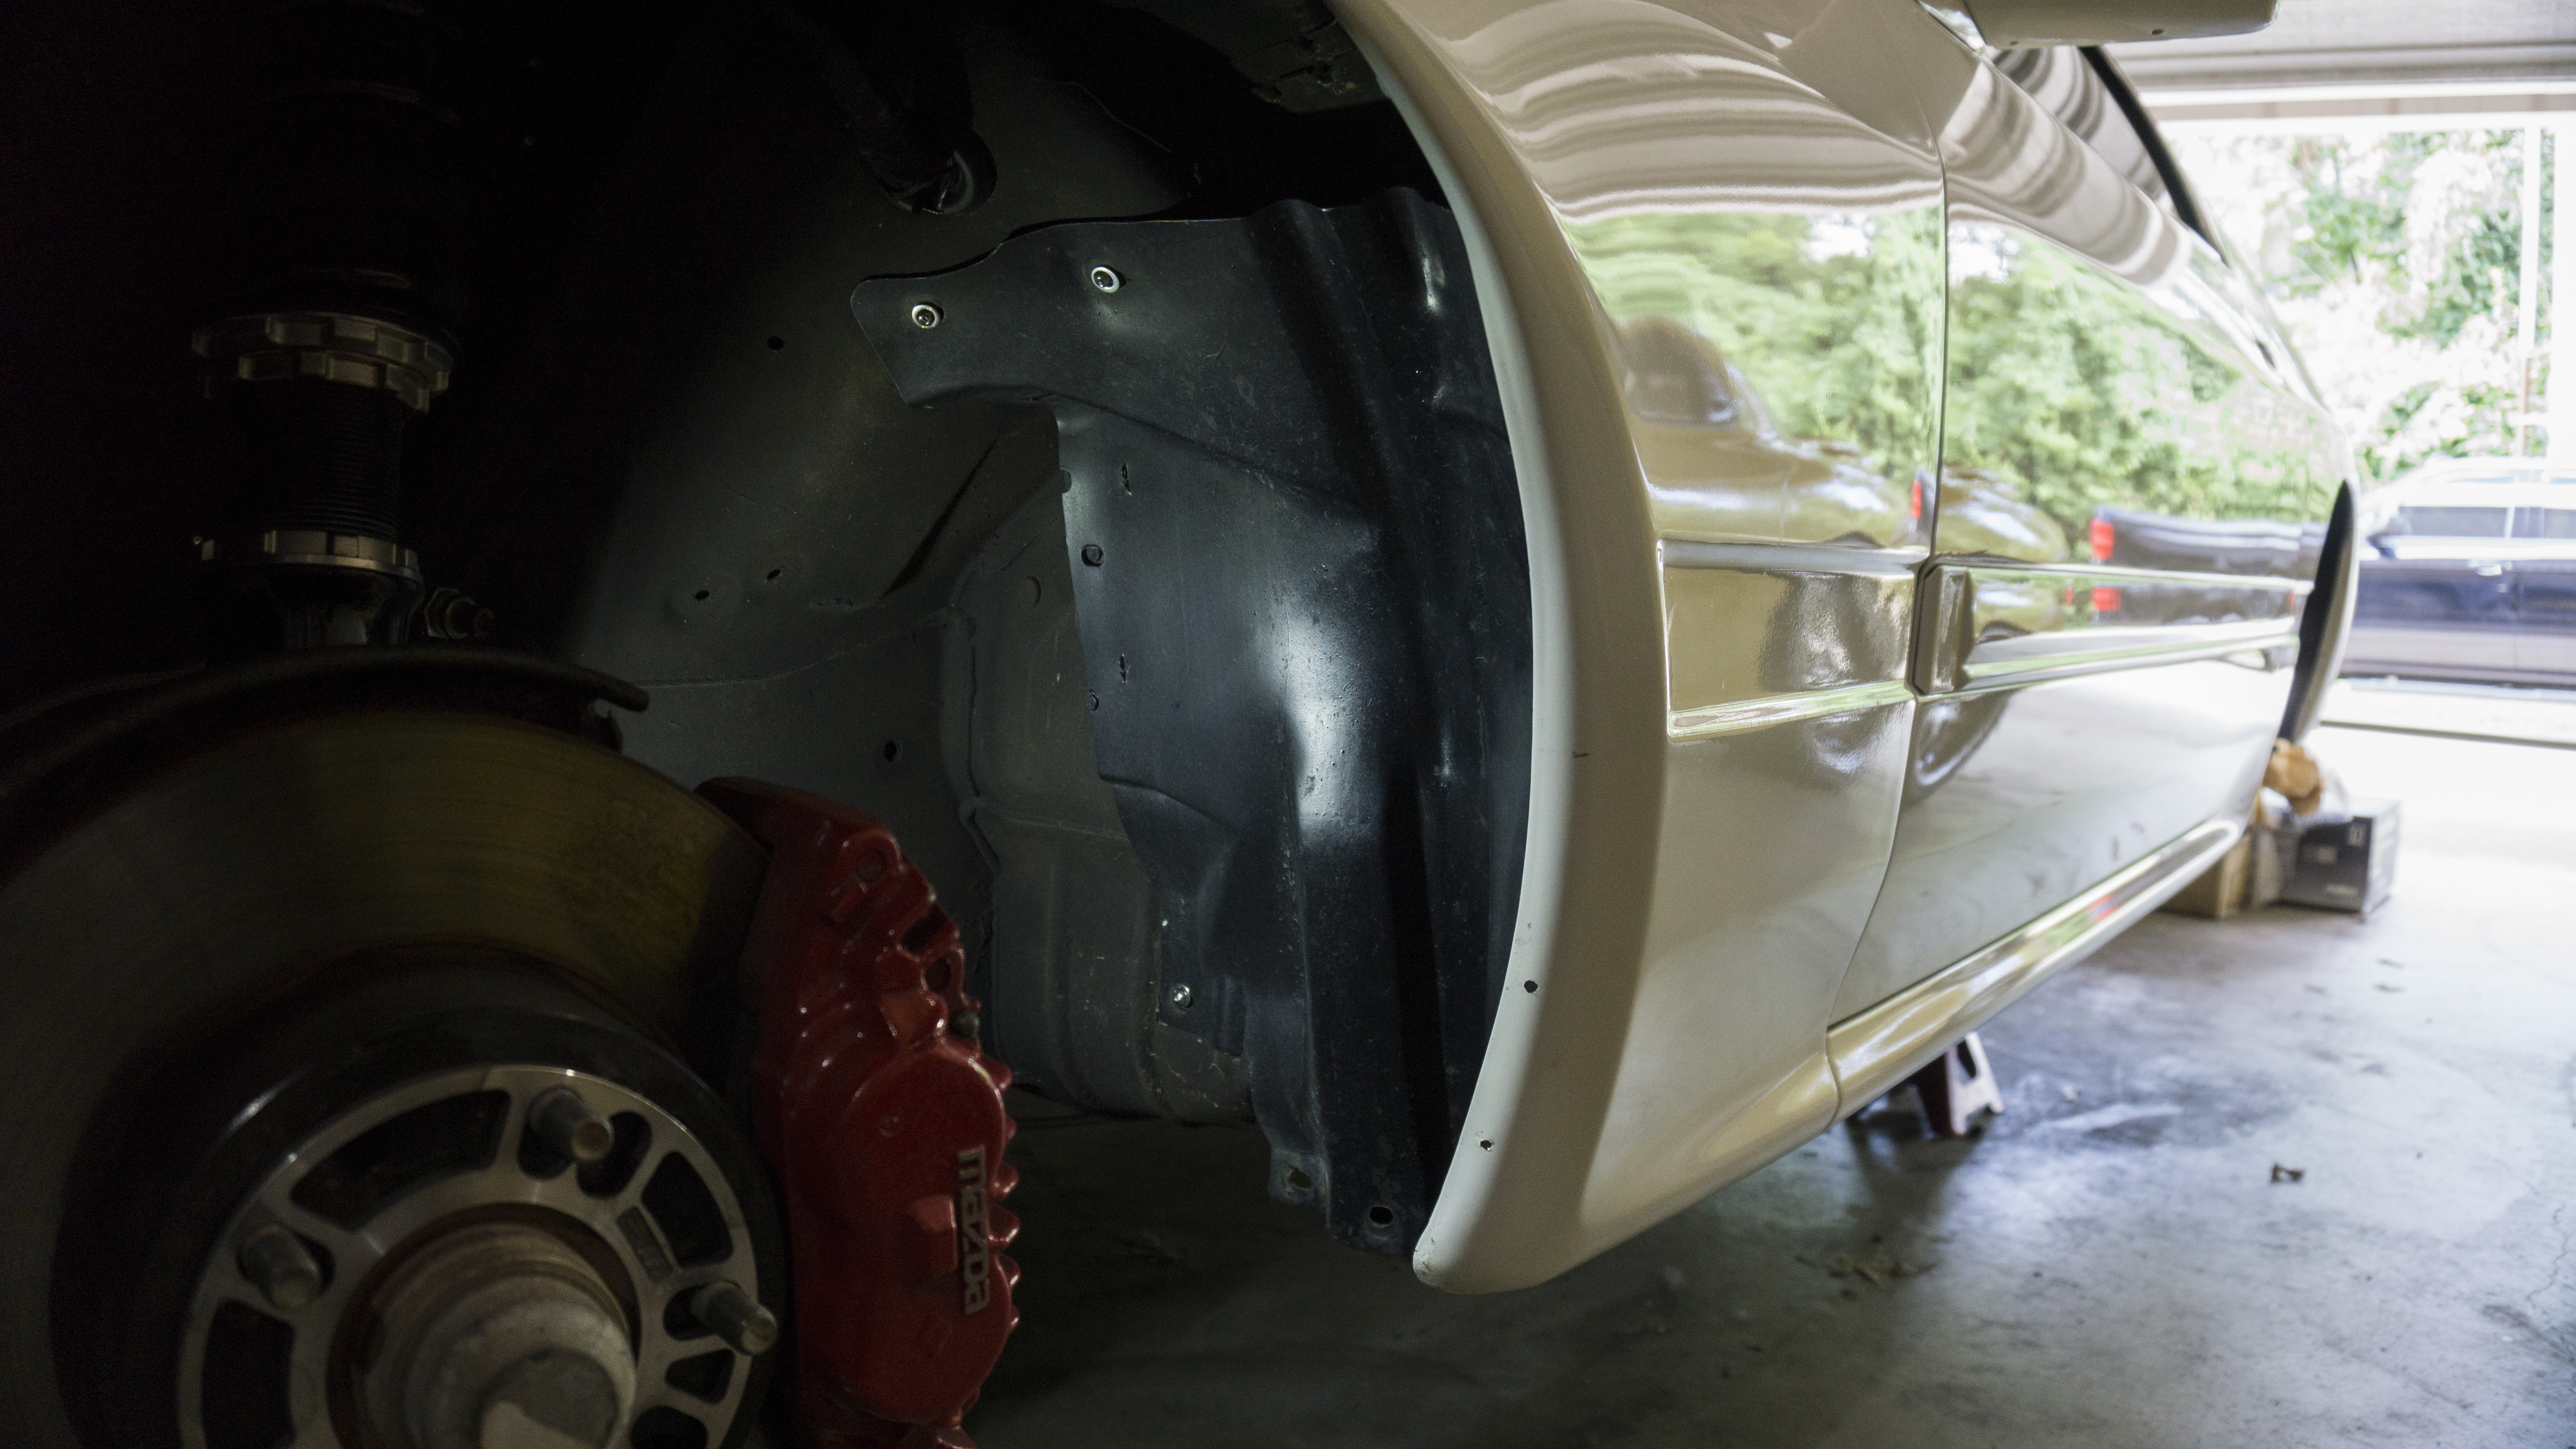
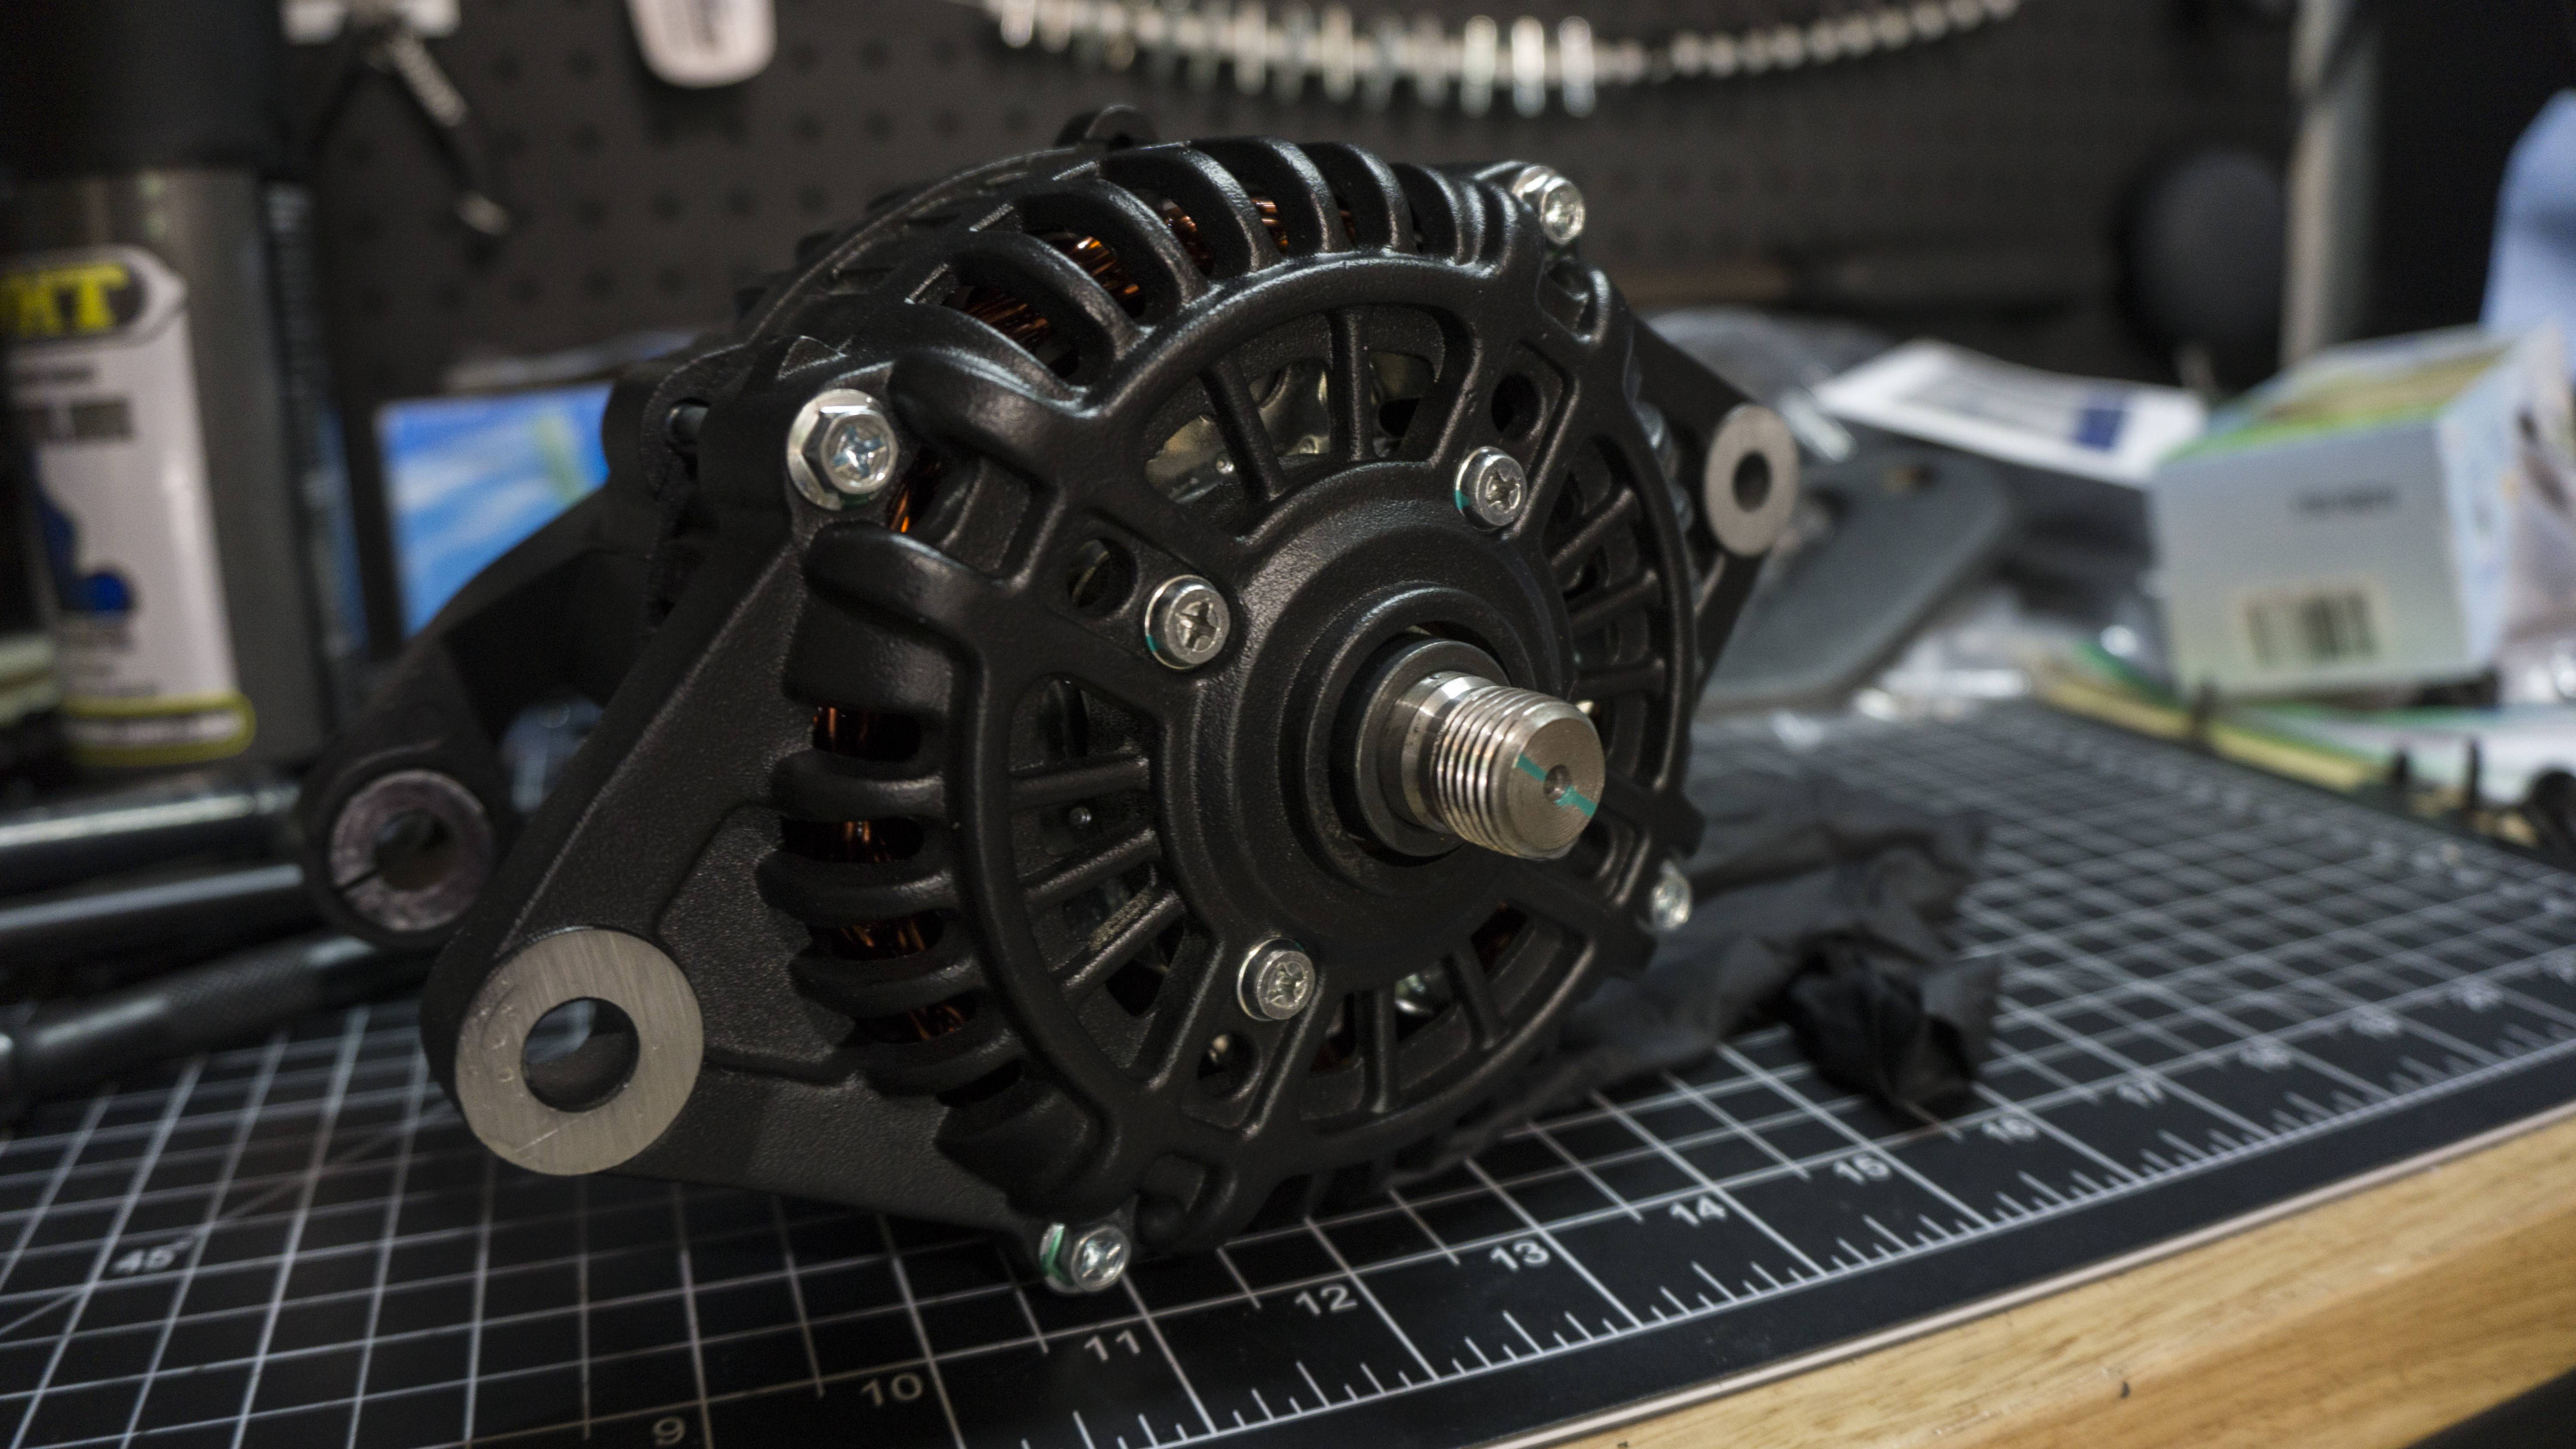
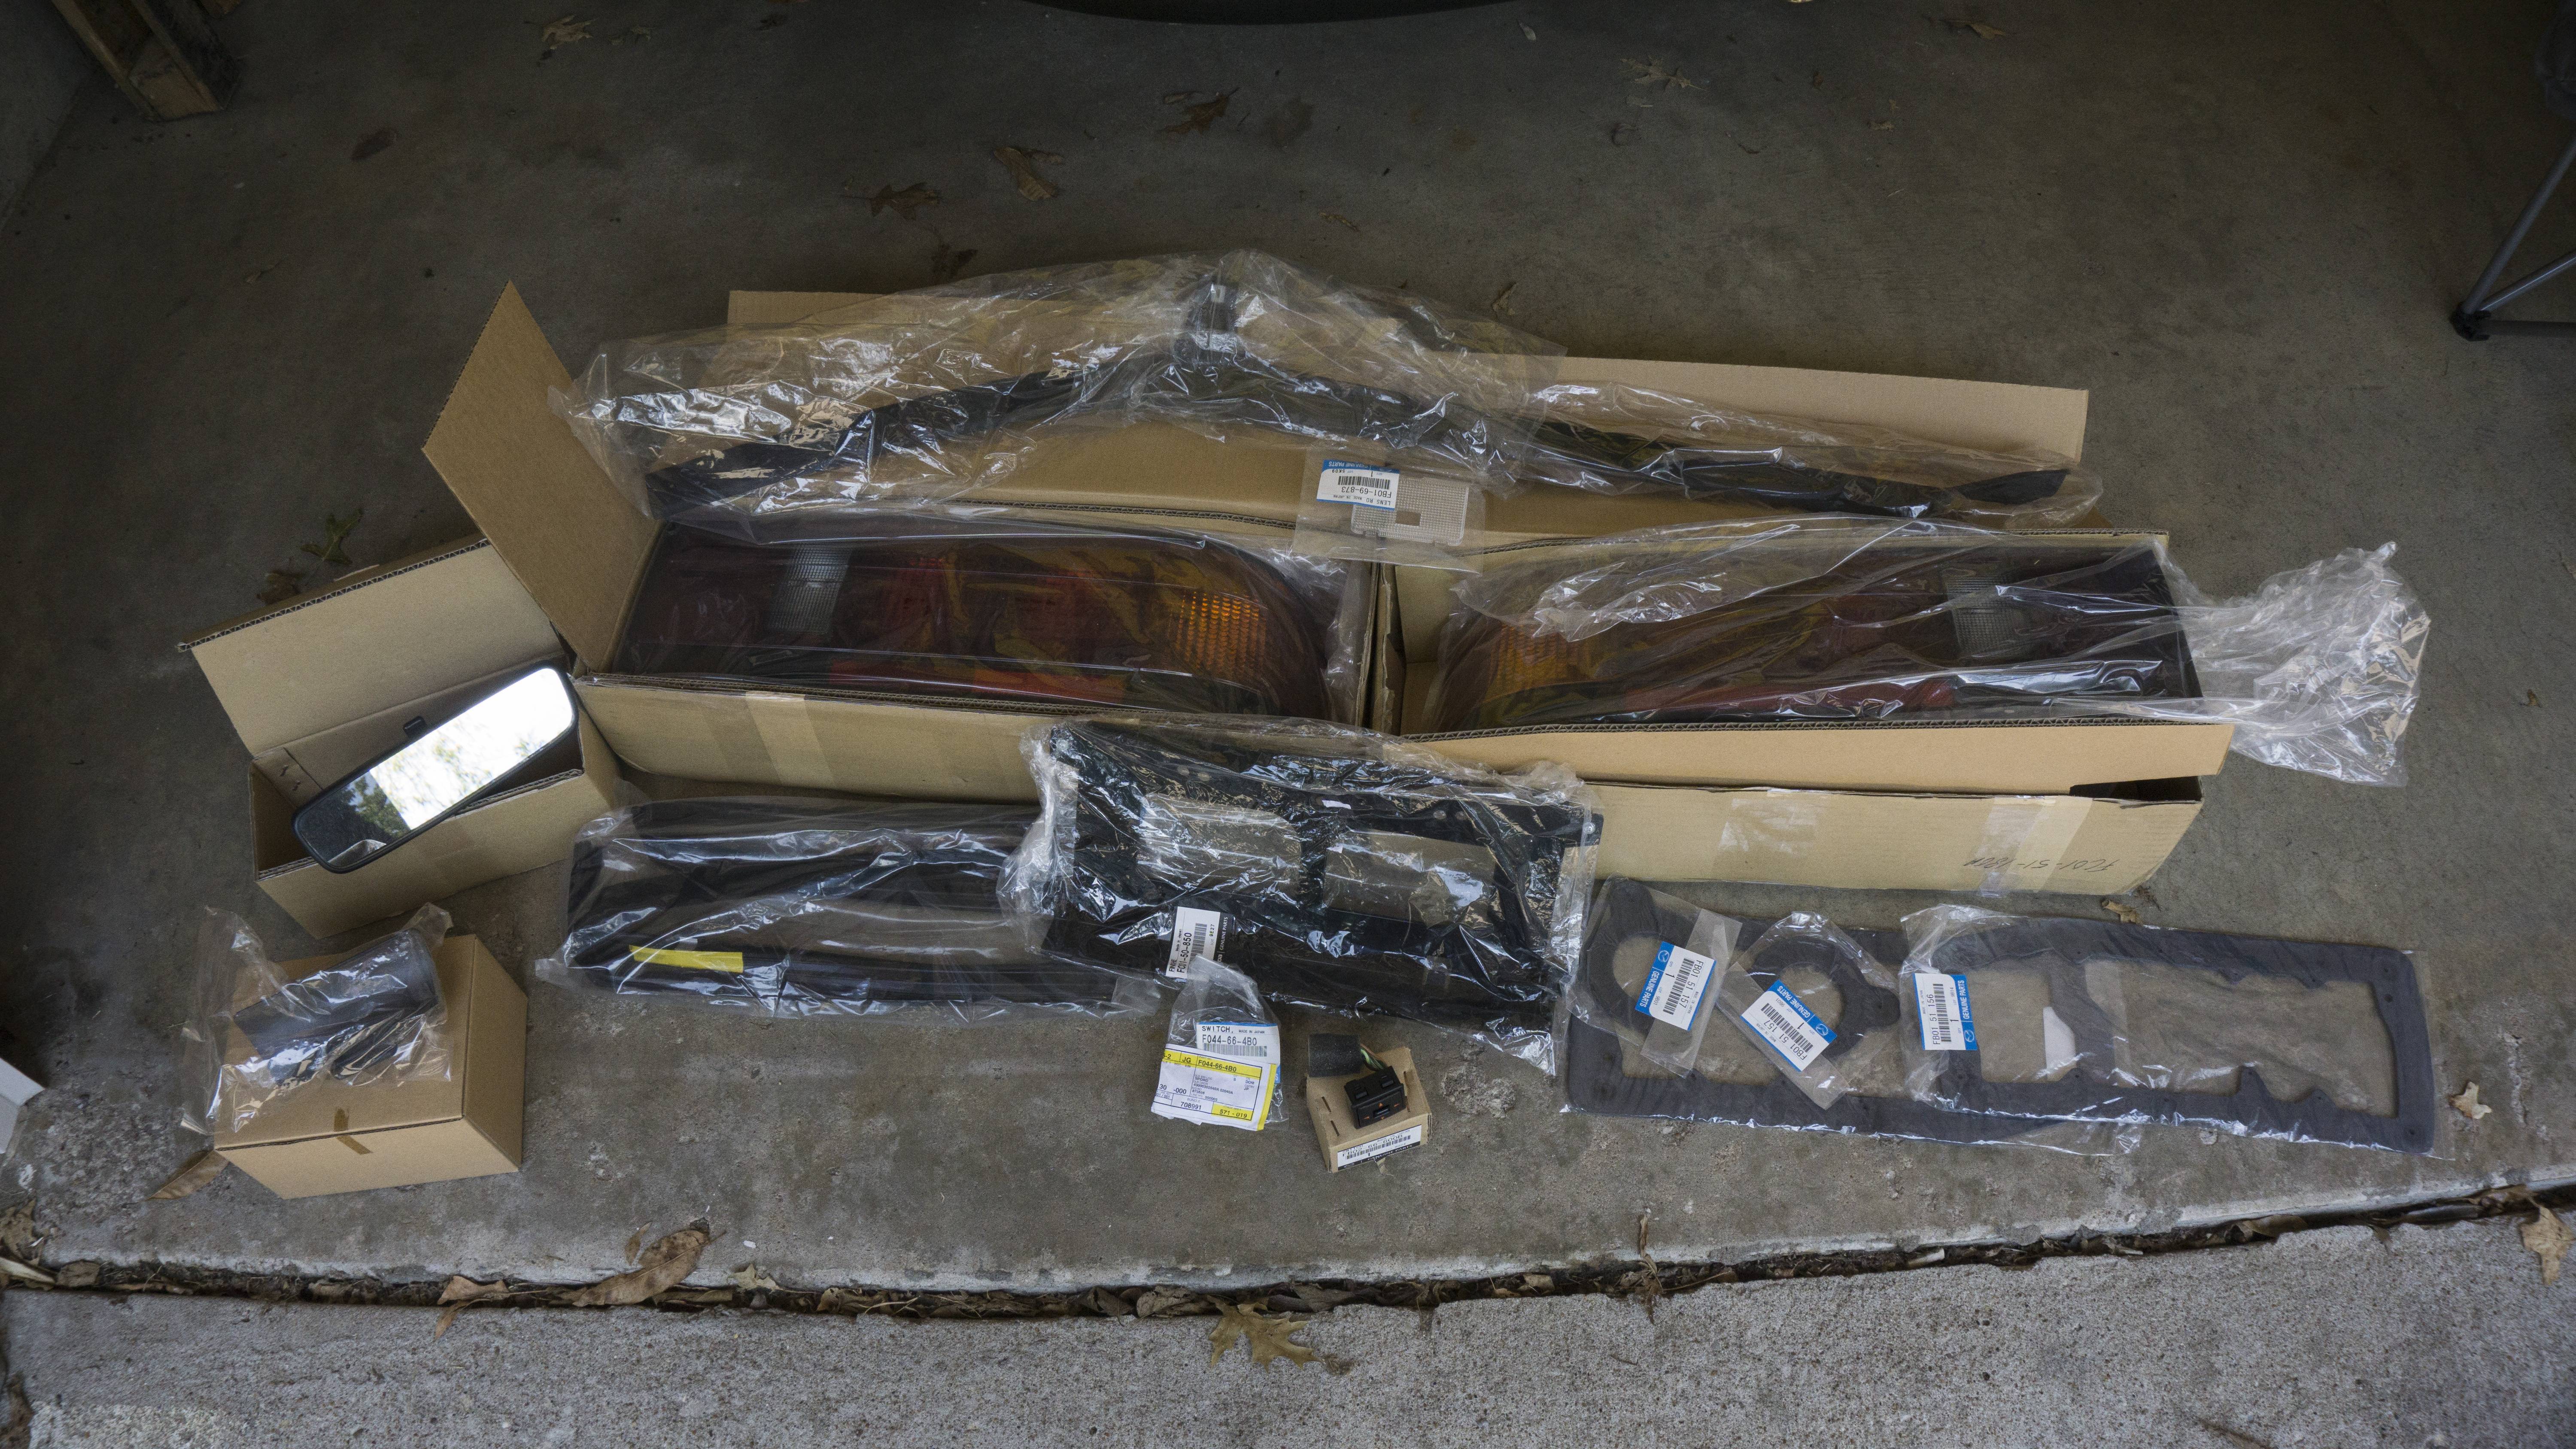
Woah! Posting on a Saturday!? If you haven�t caught on - I usually only post status updates on Sundays. However, I wanted to get this one out because I didn�t want to deal with it tomorrow (selfish I know). I was able to get a lot of things knocked out this week - some of it will be detailed in the next update. I guess the biggest thing first - I�ve acquired a ton of brand new OEM parts again. Brand new tail lights, center piece, switches, rear view mirror and gaskets among other things. I also grabbed one of the last 86-88 Black A-Pillars that are available. I wanted to be better safe than sorry - ESPECIALLY given that these snap if you look at them funny. My alternator came back from powder coating. It looks super good and the engine as a whole is definitely coming together visually; I�m excited for the finished product. I was finally able to stop kicking the can down the road and get the fender liners I purchased almost a year ago modified. After getting them on I probably should have let the front one extend further upward, but there is always room for a version 2.0. I ended up fitting one of those fender grabbers from the top portion to assist lower down since the top portions won�t be used. I also was finally able to, like the door windows, get a 451m relay for the sunroof. Got it installed and the sunroof is working flawlessly, I�m curious if it worked this good from the factory to be honest. I highly recommend everyone perform the mod if they have a slow or assistance required sunroof. I also took the time to clean the tracks and apply new lithium grease as well. I�ll include the diagram that I used below (courtesy of my friend). In addition, I�ll have a text version at the end of this post. Since, I got my new window liners in and the side windows fitting well I was finally able to put on my interior side mirror triangles that I purchased new. The interior is really coming together and I�m super excited for it to be complete. I have a few little projects to finish up before I can put the seats in and finish it out.
I�m currently looking for MINT black interior pieces of the following:
Coupe Sun Visor
Rear Hatch Carpet
Center Console Switch Panel (Plastic piece in front of the center arm rest)
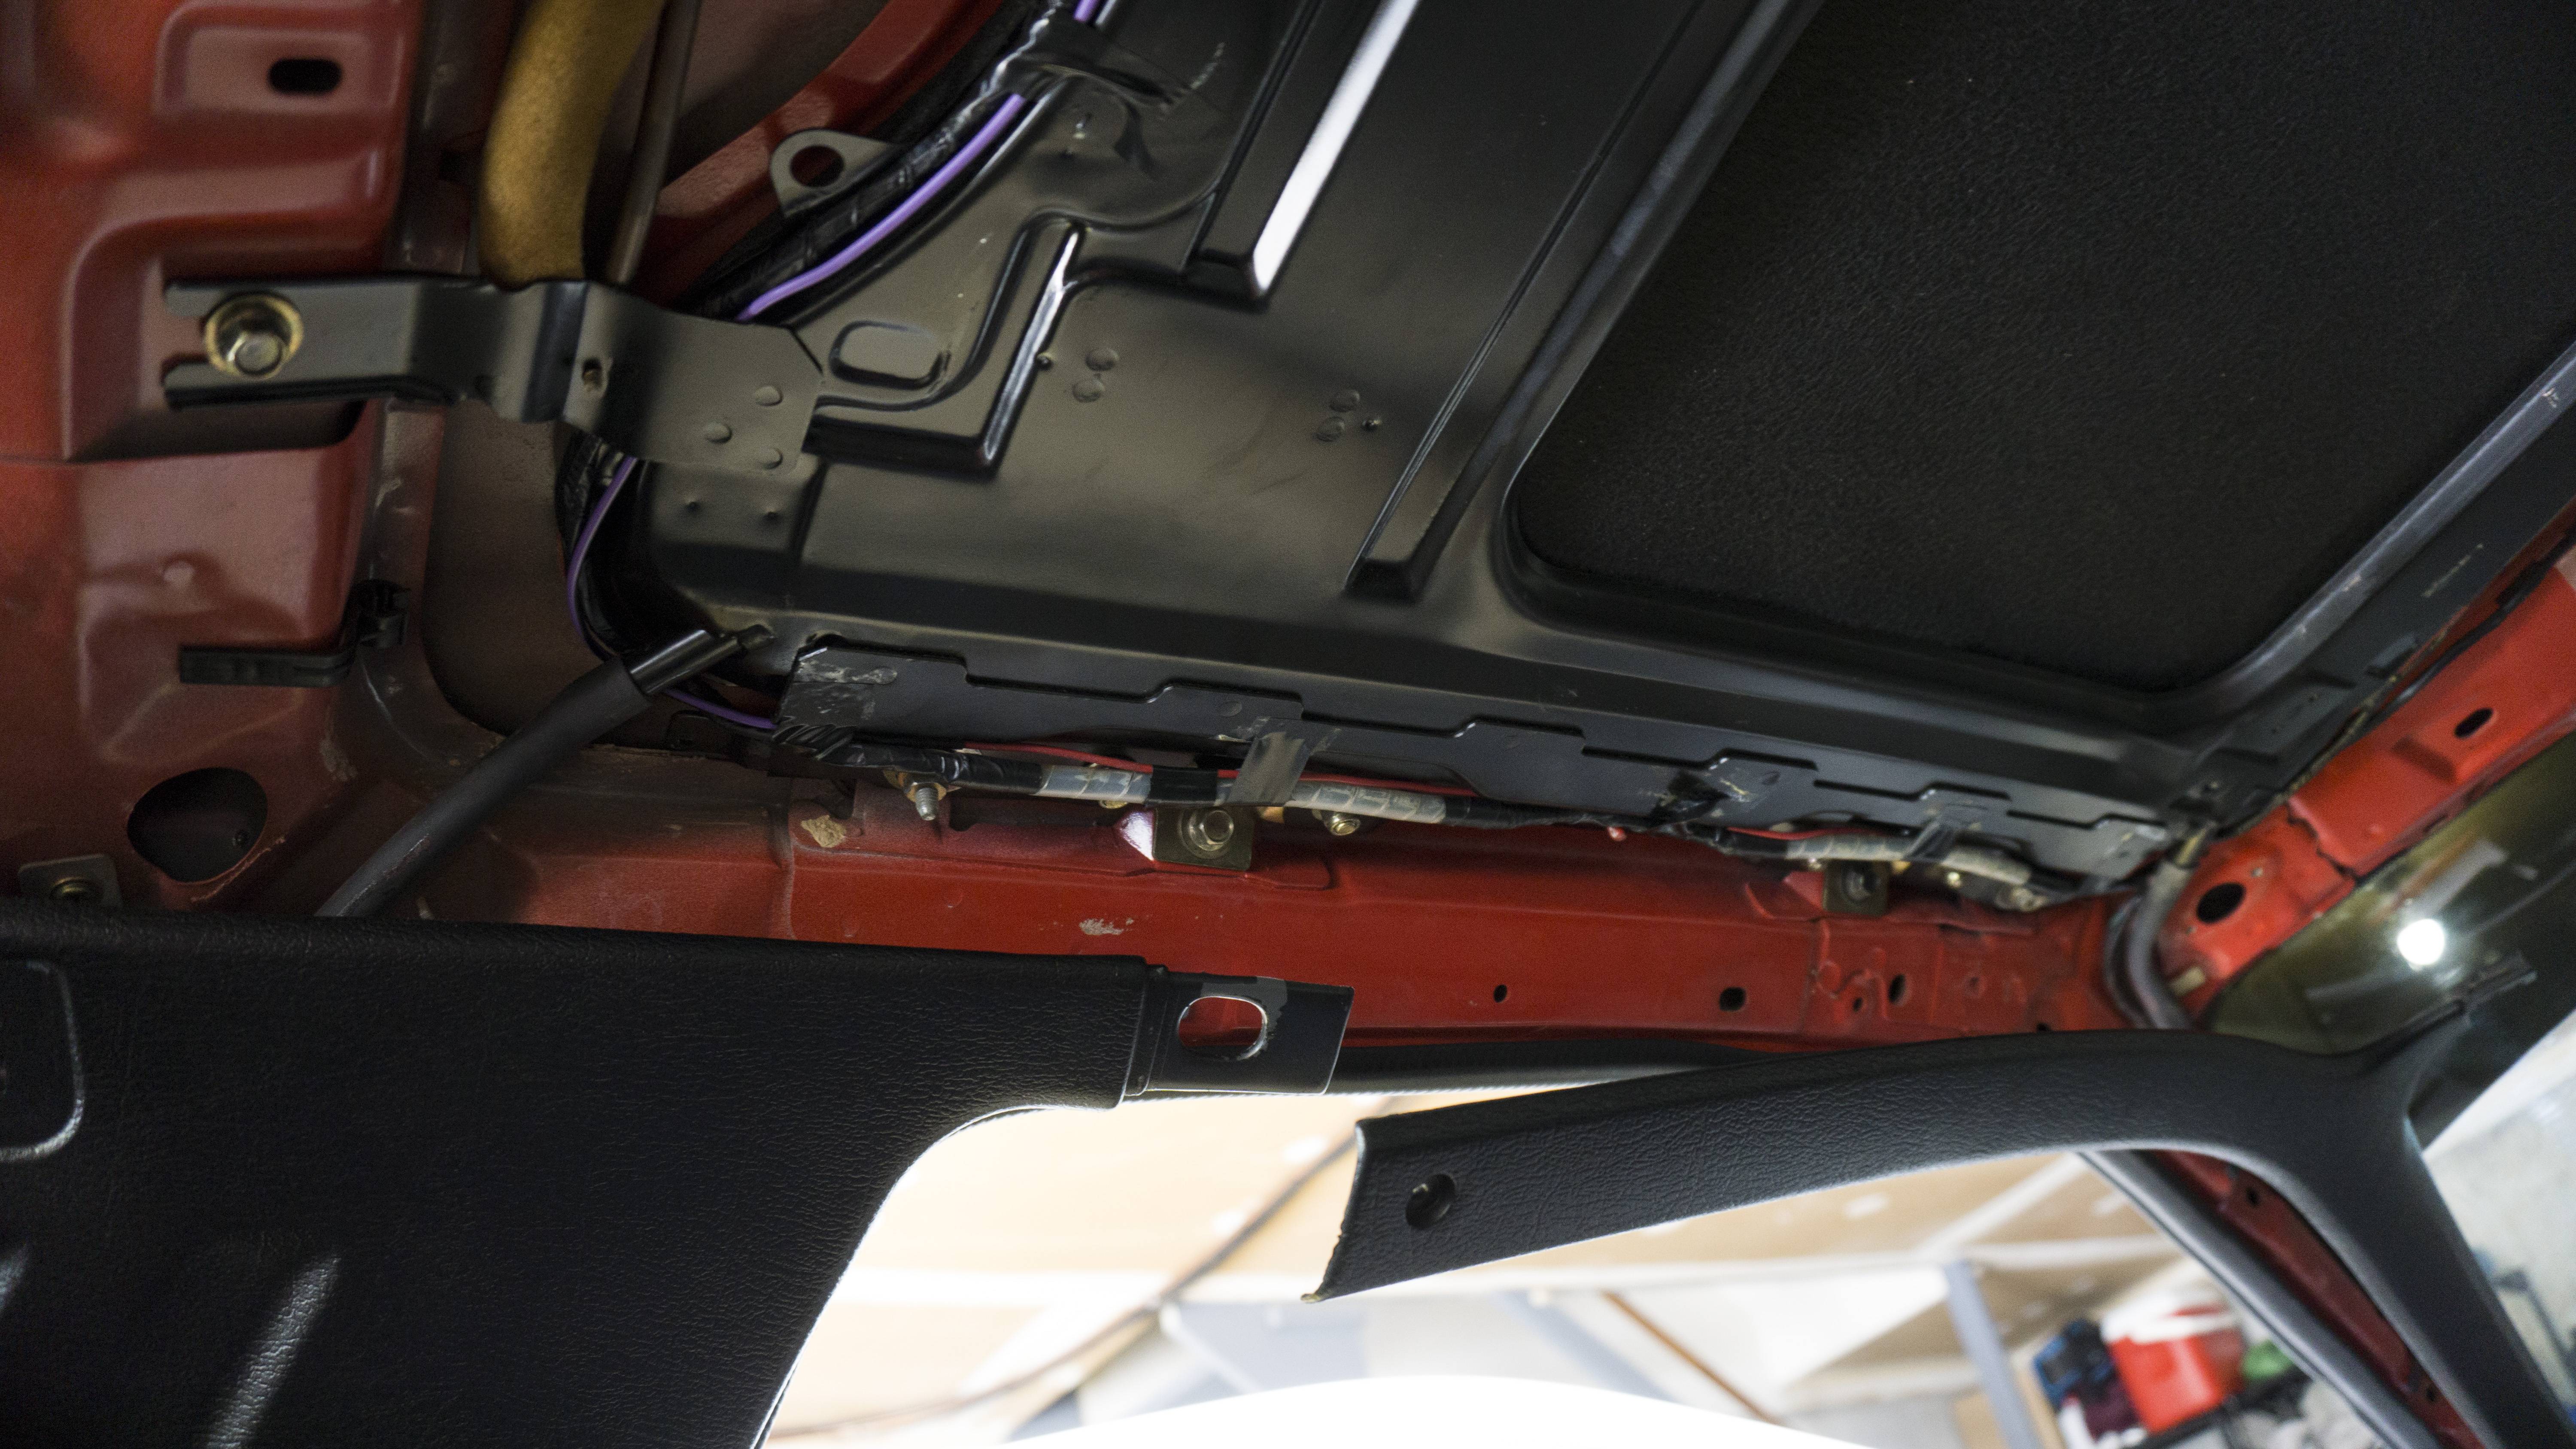
Here is the text version of the 451m Relay Sunroof Modification for the S4 Chassis. Everything can be connected at the sunroof motor EXCEPT the Violet wire which requires ran to the front (You can see the path I ran it in the pictures below this):
Relay Wire--------------Connect To
Small Blue---------------Yellow (Switch Side)
Large Blue/Black-------Yellow (Motor Side)
Small Green-------------Yellow/Red (Switch Side)
Large Green/Black-----Yellow/Red (Motor Side)
Large Violet-------------Green/Orange (Front of Car by Switches)
Small Red, Large White/Black, Large Brown/Black-----Ground (There is already a ground that is used by a black wire on the motor itself - I grounded everything there)
Here is the Relay install for the Sunroof:

Here is the sunroof cleaning before and after:
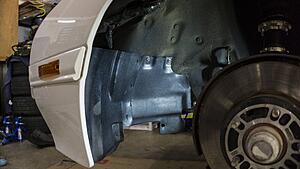
Here are the fender liners modified and installed:

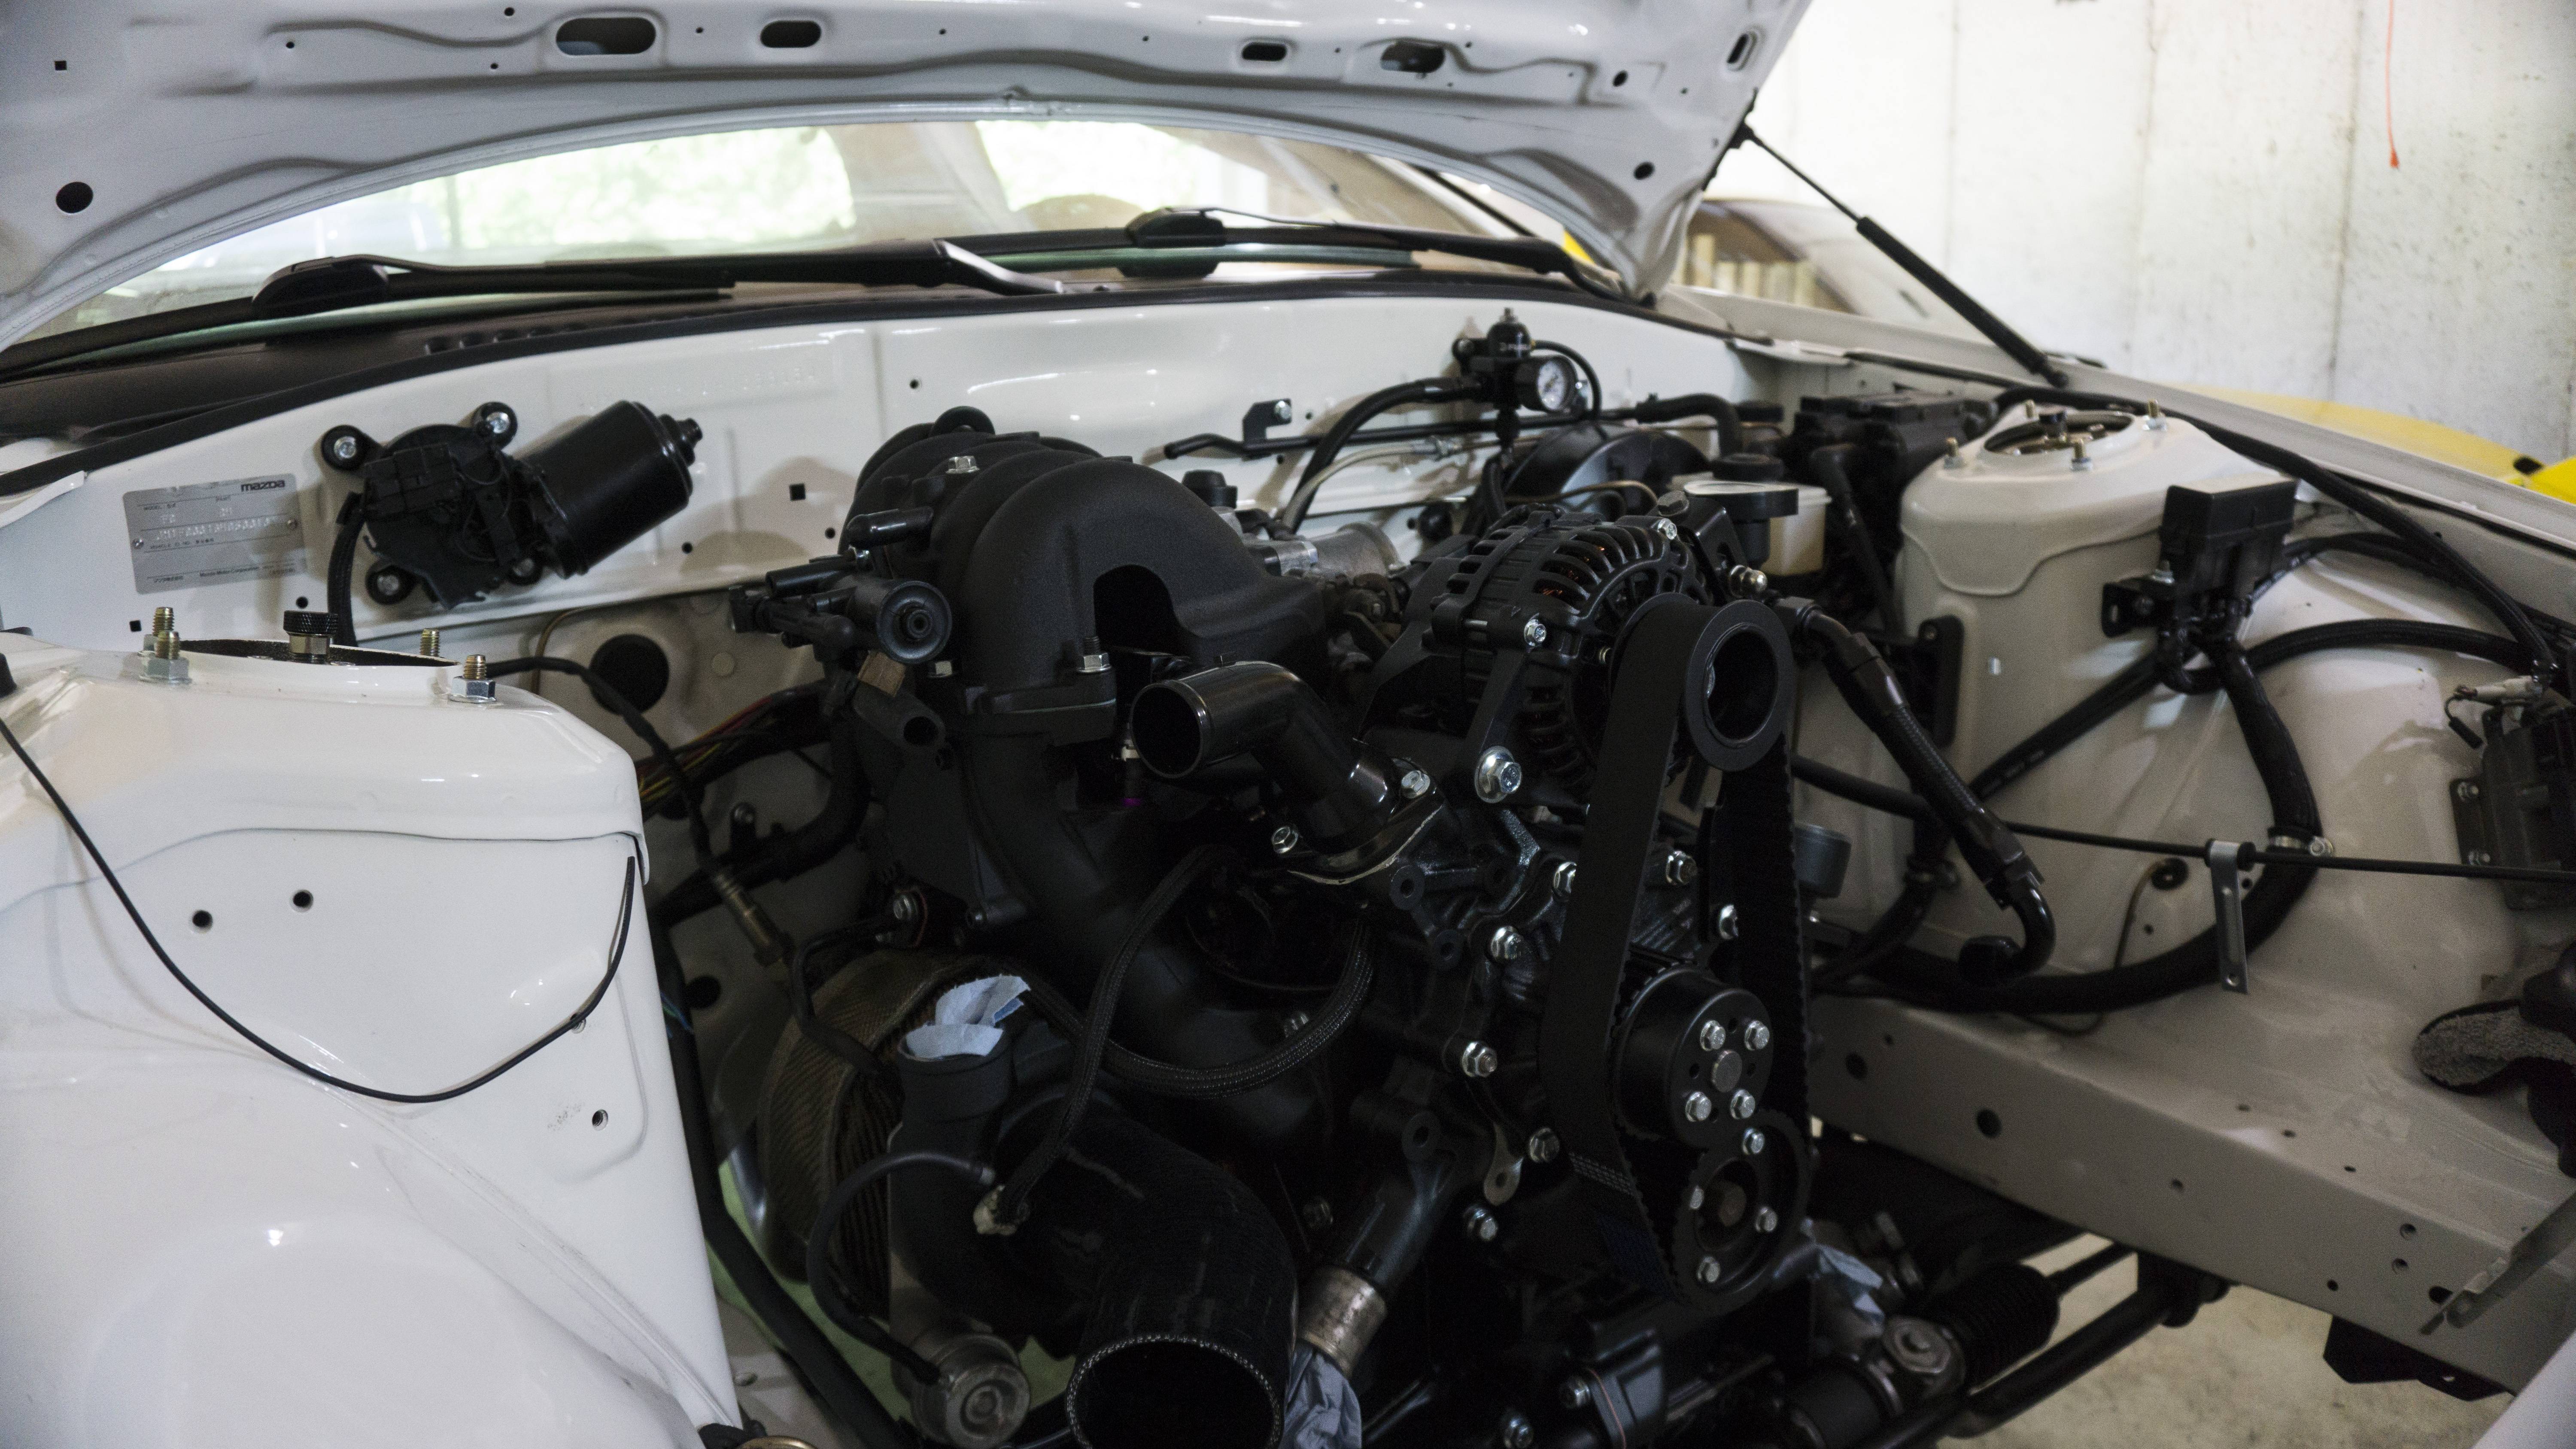
Here is the new alternator and how the motor currently sits:


Here is new triangle covers installed:
Here is all the new stuff that came in!:

Woah! Posting on a Saturday!? If you haven�t caught on - I usually only post status updates on Sundays. However, I wanted to get this one out because I didn�t want to deal with it tomorrow (selfish I know). I was able to get a lot of things knocked out this week - some of it will be detailed in the next update. I guess the biggest thing first - I�ve acquired a ton of brand new OEM parts again. Brand new tail lights, center piece, switches, rear view mirror and gaskets among other things. I also grabbed one of the last 86-88 Black A-Pillars that are available. I wanted to be better safe than sorry - ESPECIALLY given that these snap if you look at them funny. My alternator came back from powder coating. It looks super good and the engine as a whole is definitely coming together visually; I�m excited for the finished product. I was finally able to stop kicking the can down the road and get the fender liners I purchased almost a year ago modified. After getting them on I probably should have let the front one extend further upward, but there is always room for a version 2.0. I ended up fitting one of those fender grabbers from the top portion to assist lower down since the top portions won�t be used. I also was finally able to, like the door windows, get a 451m relay for the sunroof. Got it installed and the sunroof is working flawlessly, I�m curious if it worked this good from the factory to be honest. I highly recommend everyone perform the mod if they have a slow or assistance required sunroof. I also took the time to clean the tracks and apply new lithium grease as well. I�ll include the diagram that I used below (courtesy of my friend). In addition, I�ll have a text version at the end of this post. Since, I got my new window liners in and the side windows fitting well I was finally able to put on my interior side mirror triangles that I purchased new. The interior is really coming together and I�m super excited for it to be complete. I have a few little projects to finish up before I can put the seats in and finish it out.
I�m currently looking for MINT black interior pieces of the following:
Coupe Sun Visor
Rear Hatch Carpet
Center Console Switch Panel (Plastic piece in front of the center arm rest)
Here is the text version of the 451m Relay Sunroof Modification for the S4 Chassis. Everything can be connected at the sunroof motor EXCEPT the Violet wire which requires ran to the front (You can see the path I ran it in the pictures below this):
Relay Wire--------------Connect To
Small Blue---------------Yellow (Switch Side)
Large Blue/Black-------Yellow (Motor Side)
Small Green-------------Yellow/Red (Switch Side)
Large Green/Black-----Yellow/Red (Motor Side)
Large Violet-------------Green/Orange (Front of Car by Switches)
Small Red, Large White/Black, Large Brown/Black-----Ground (There is already a ground that is used by a black wire on the motor itself - I grounded everything there)
Here is the Relay install for the Sunroof:

Here is the sunroof cleaning before and after:
Here are the fender liners modified and installed:

Here is the new alternator and how the motor currently sits:
Here is new triangle covers installed:
Here is all the new stuff that came in!:
The following users liked this post:
Relisys190 (09-08-19)
09-12-19, 07:20 PM
#257
Thanks guys! Gotta get those new parts while they still exist. I'm having trouble sourcing some of them... ended up with a passenger side under hood insulation with no way to acquire a driver side lol....Guess I'll hang on to it in the slim hope a clean driver side pops up
09-15-19, 08:25 AM
#258
Update 9/15/19:
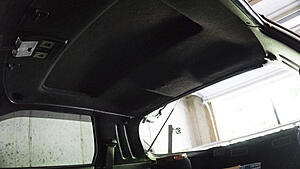
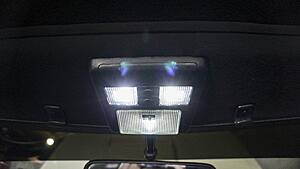
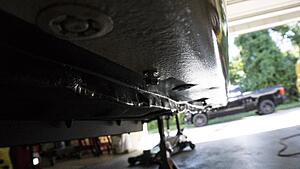
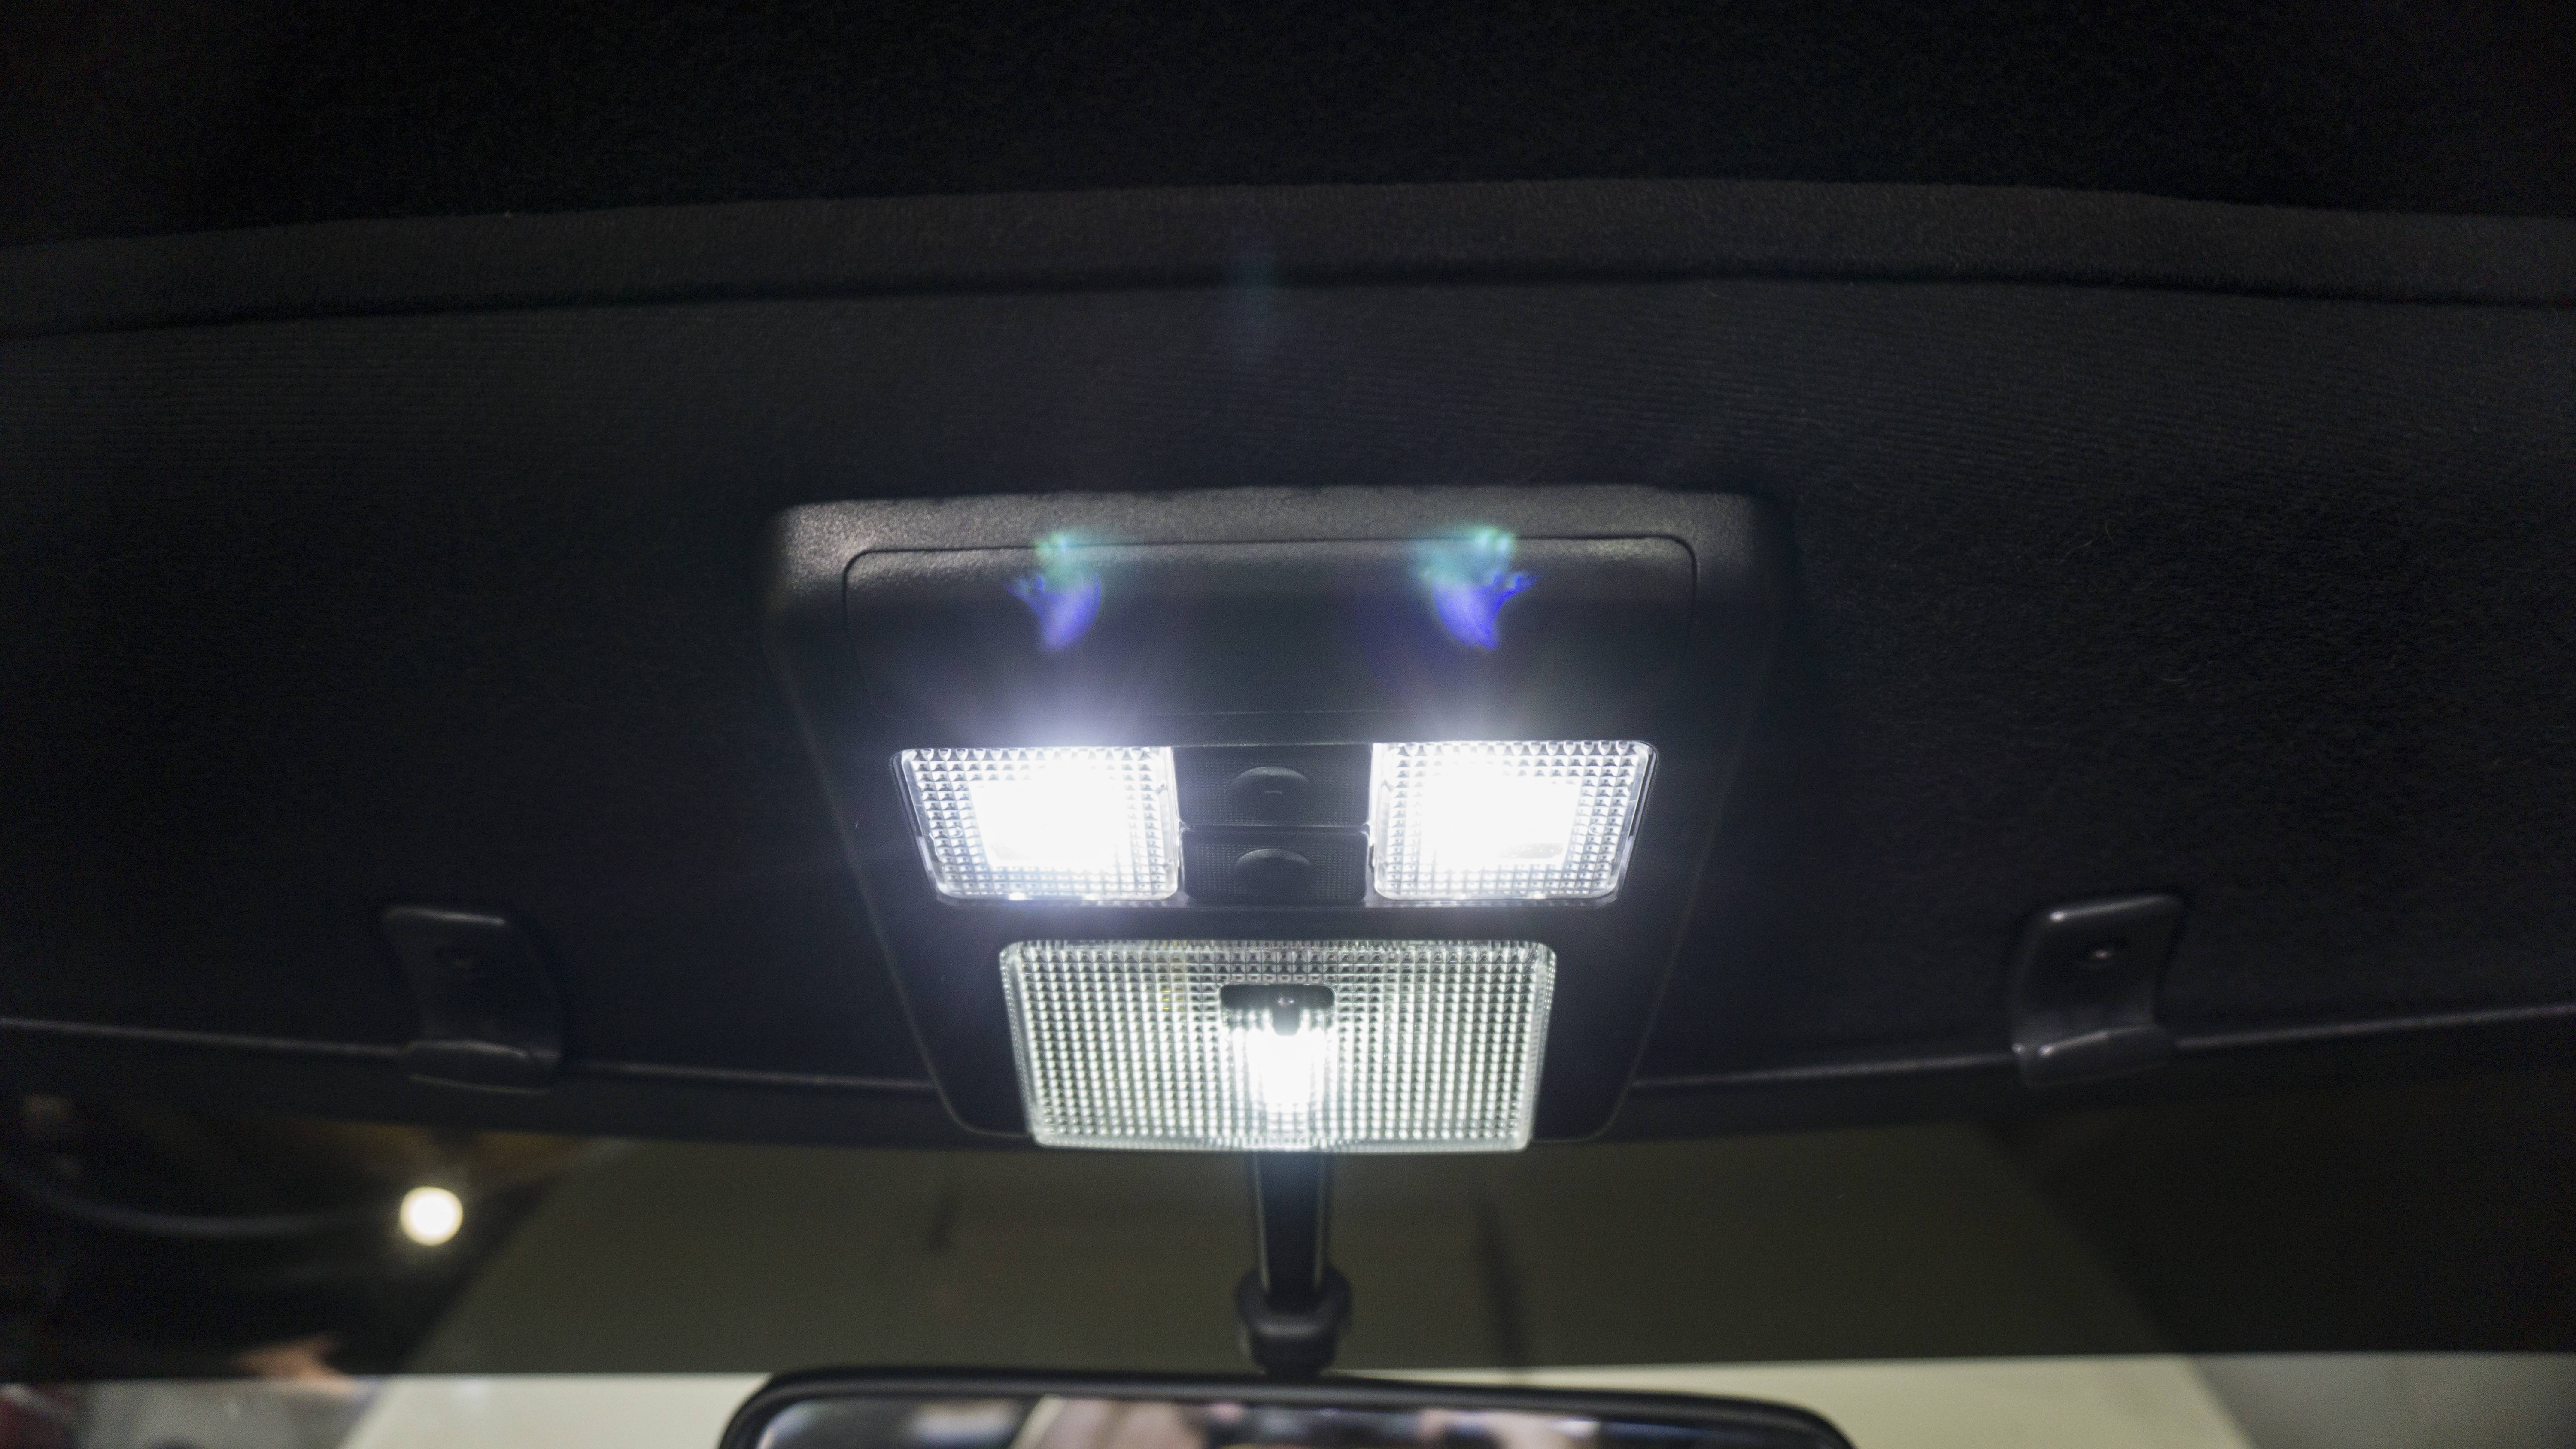
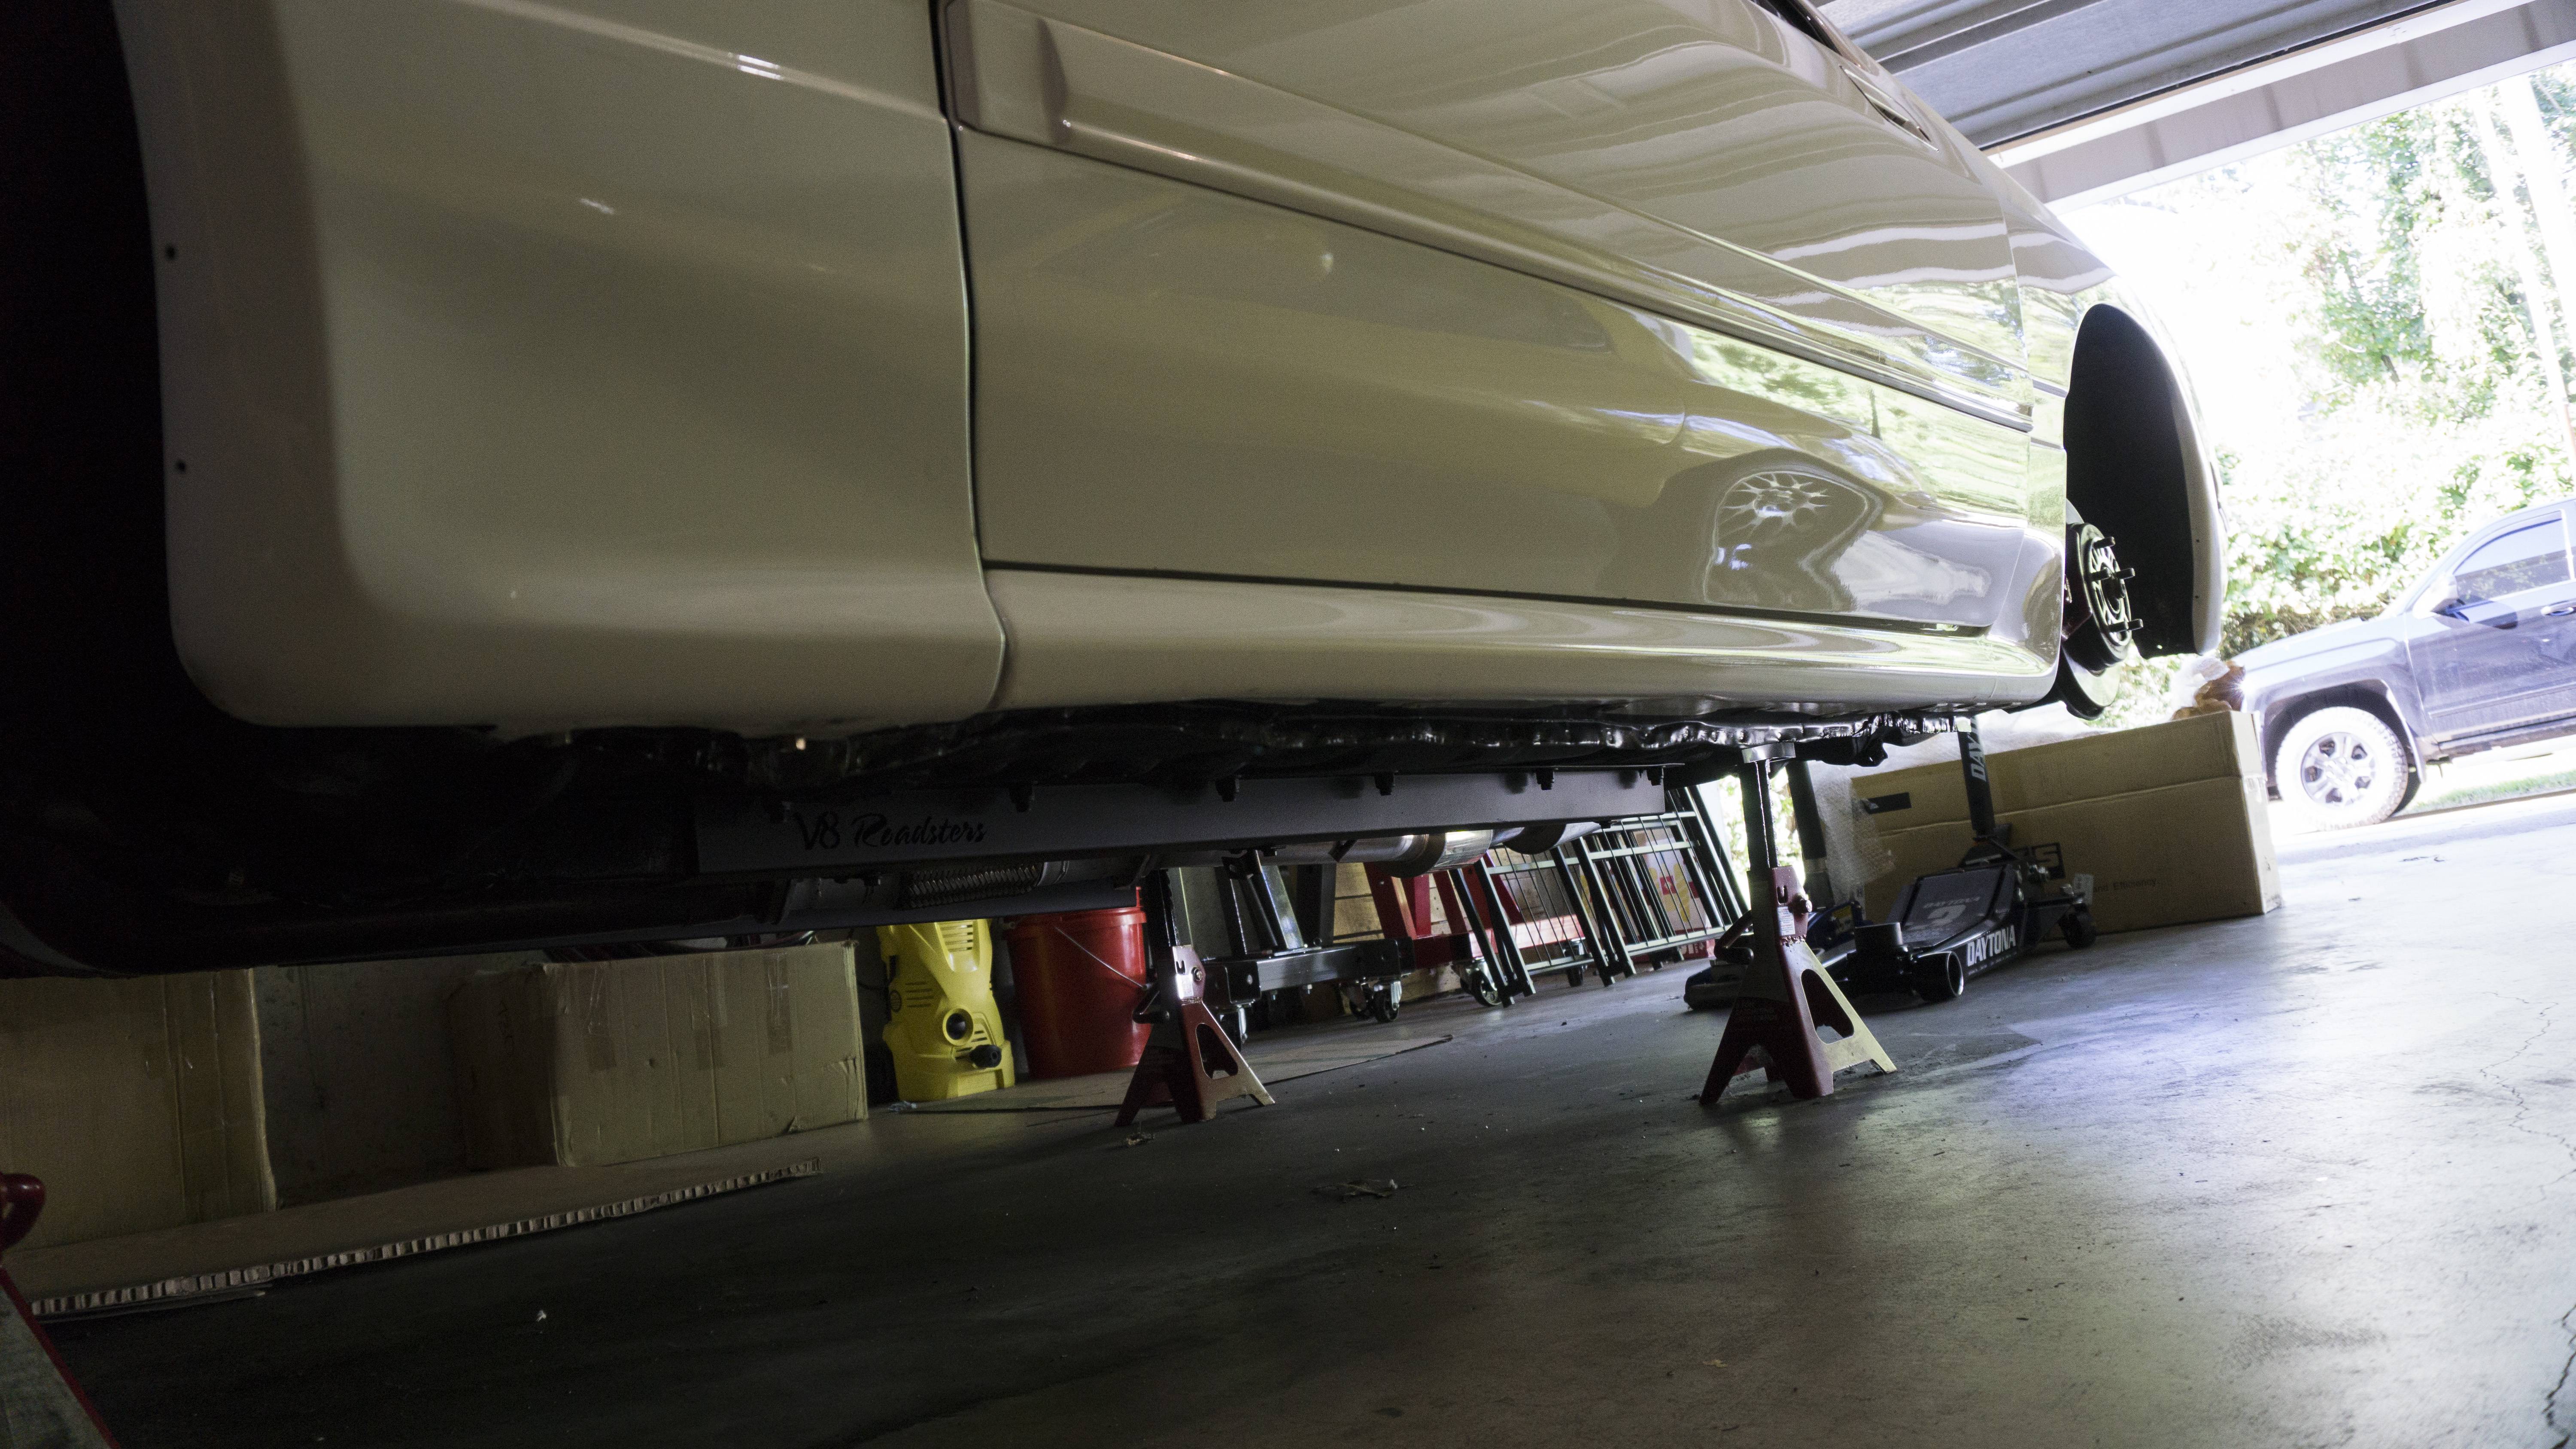
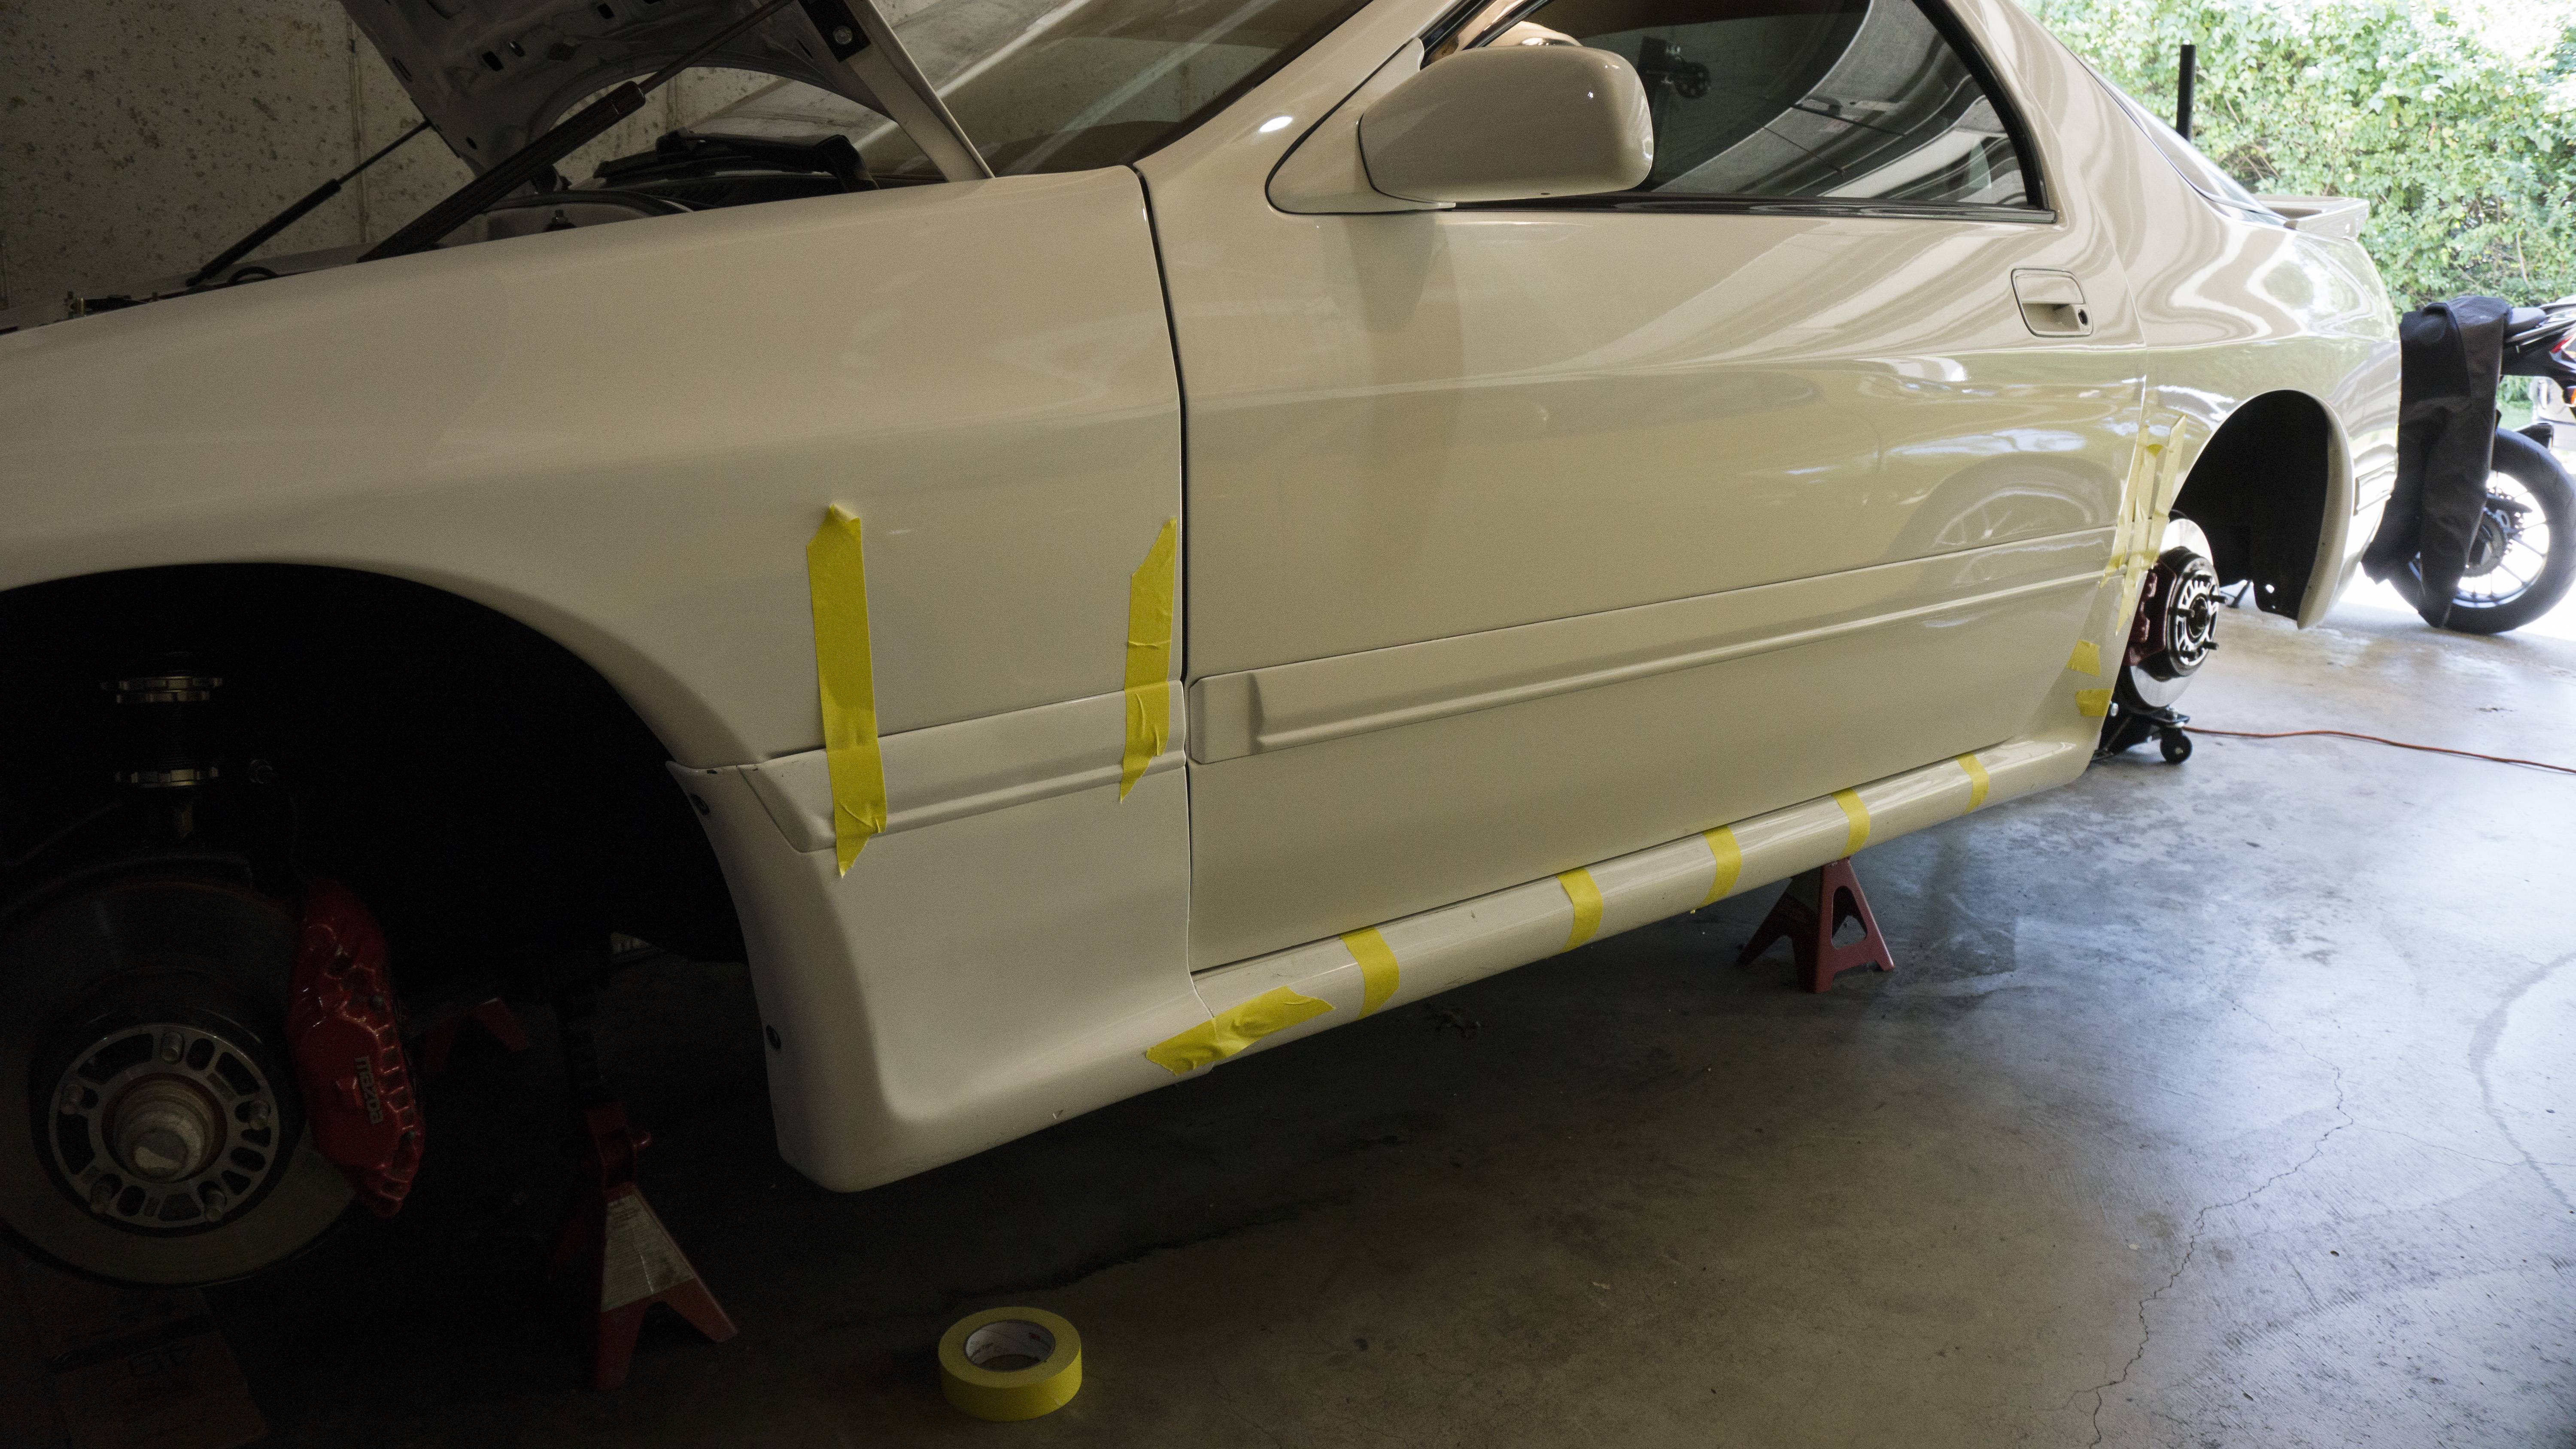
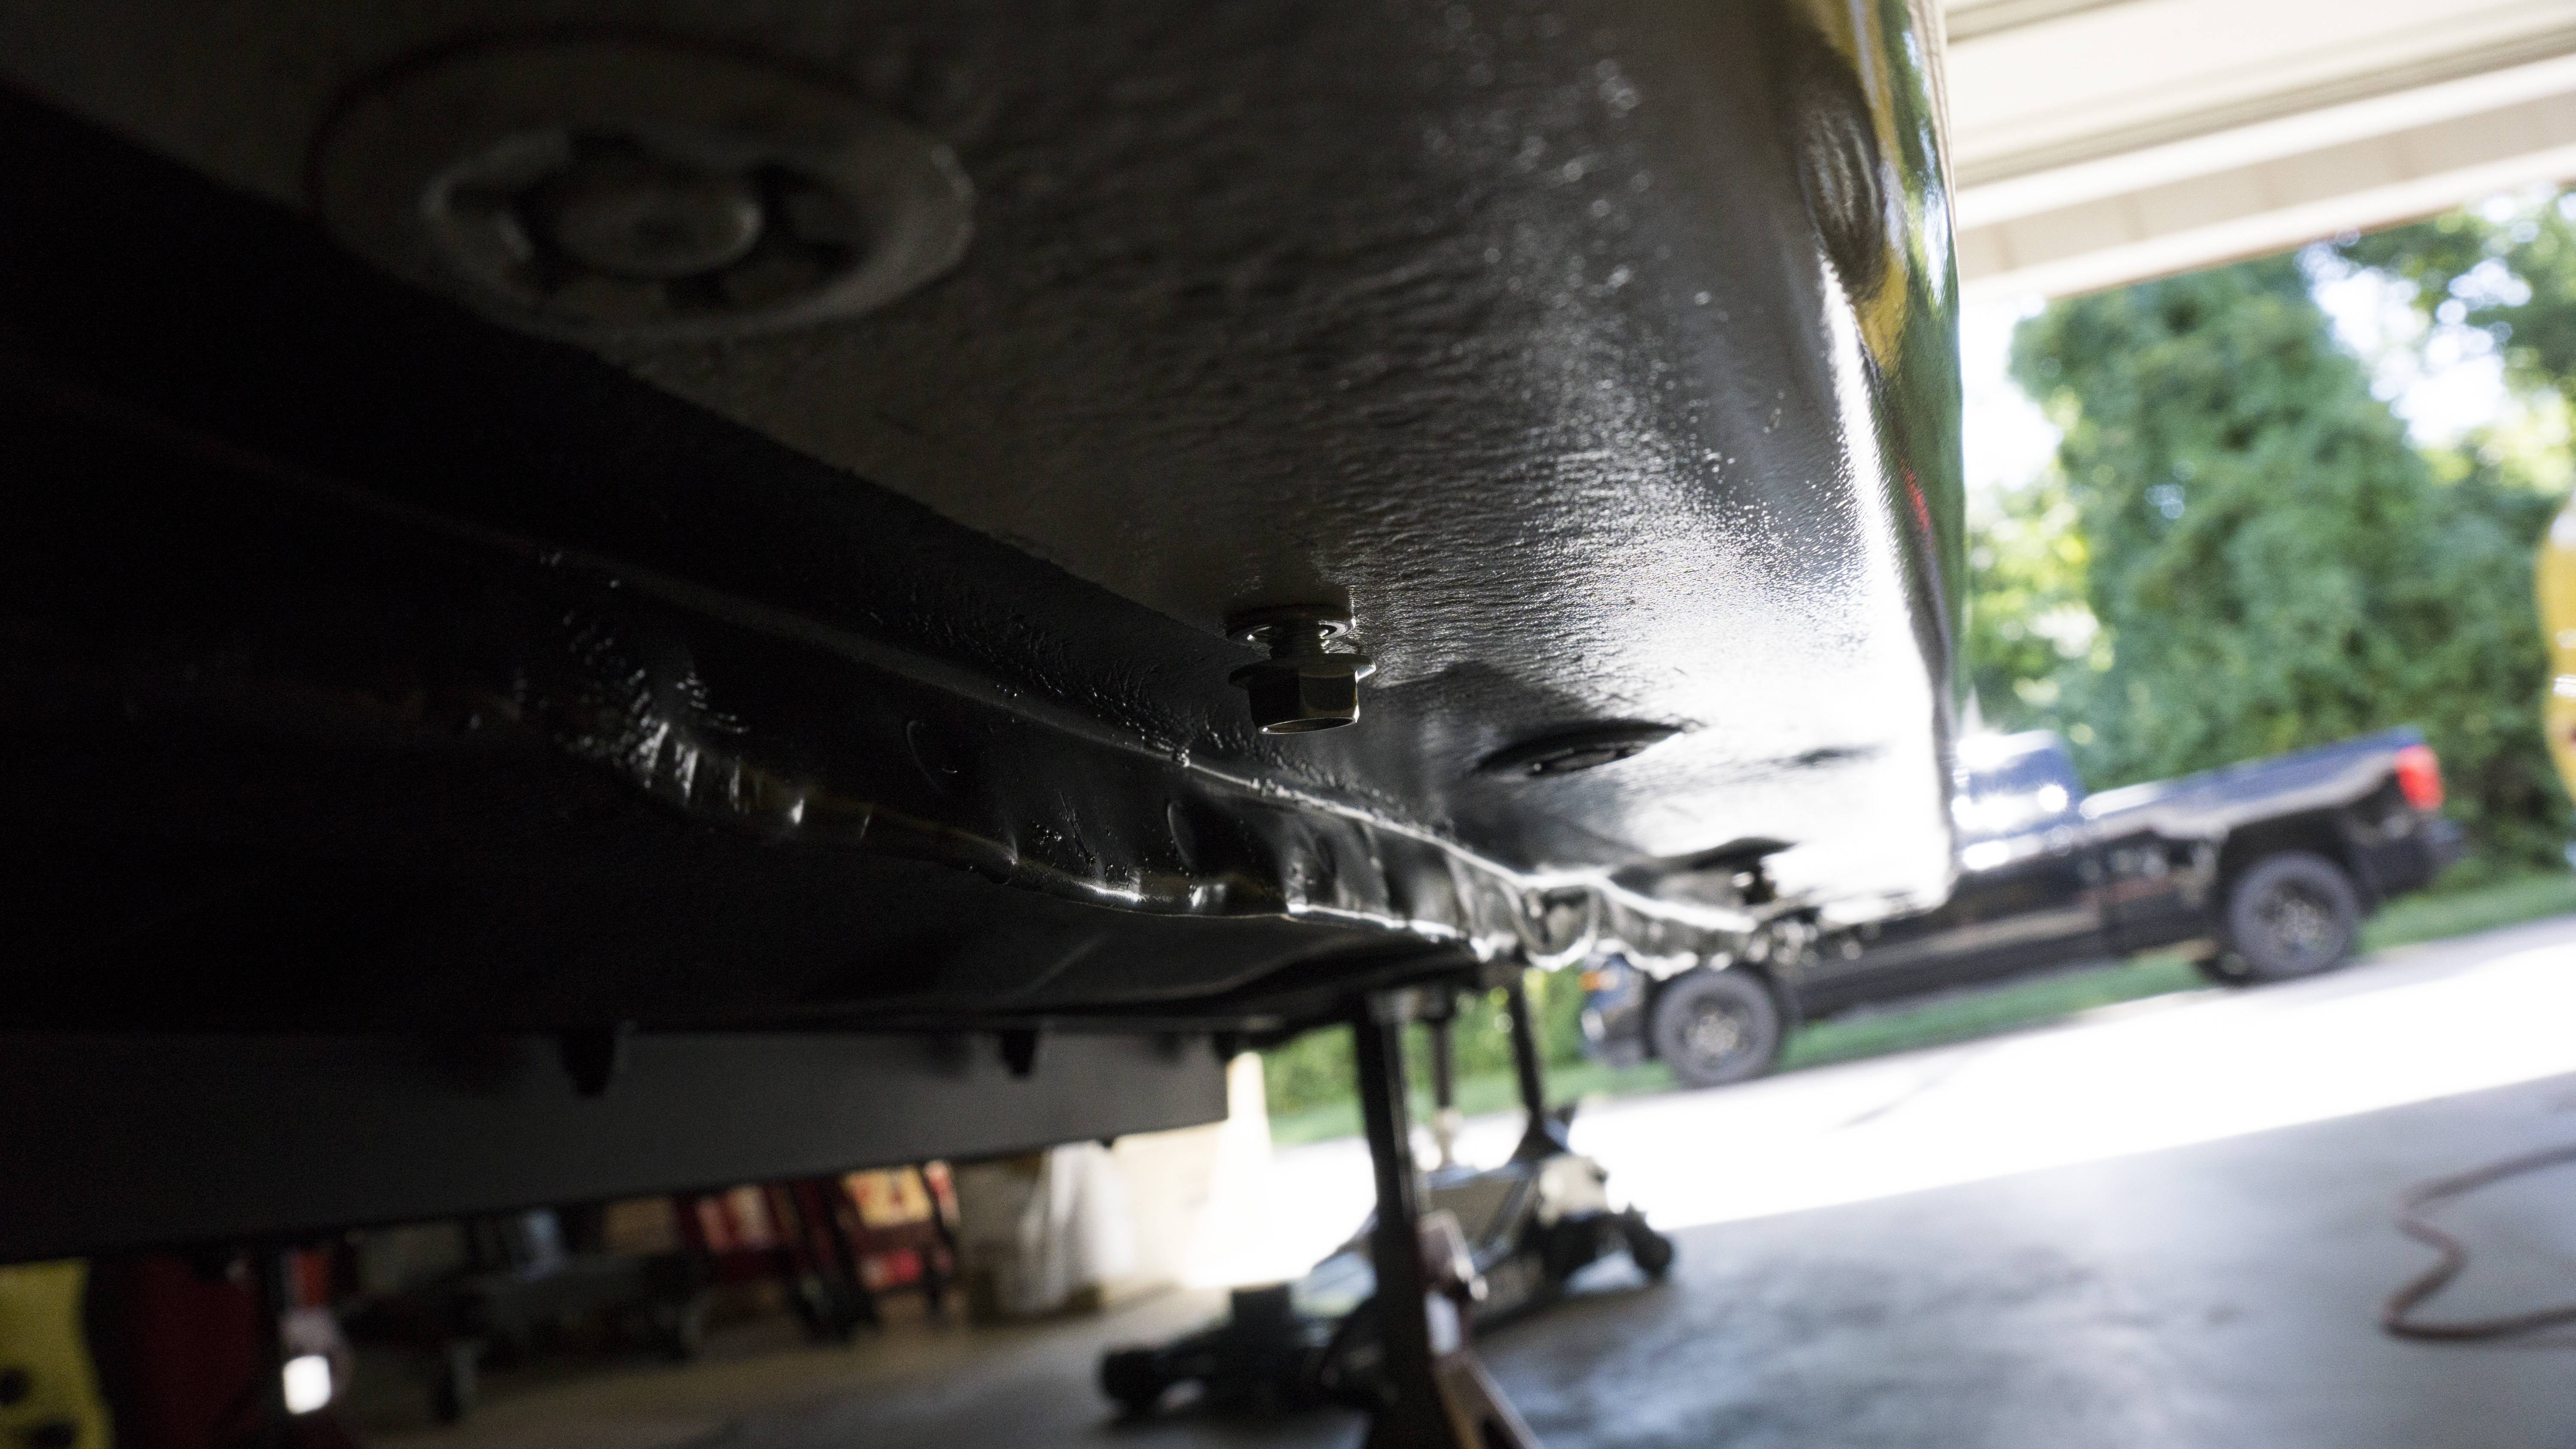
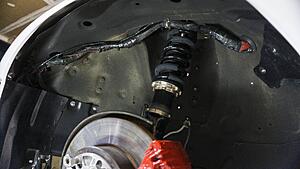
Still been cranking away on the FC when I get some spare time. Last time I was able to get the sunroof motor working much better - it was now time to finish that side up. I got the headliner installed back up there and put in my new (to me) black motor plug and the newer headliner hider strip (it goes around the metal braces that keep the headliner up). I was also finally able to turn on the new LEDs I installed in the dome light area. They look good! I do use them occasionally so I think they will come in handy when I use them next. I also finished modifying the auto belt trim. Since I have S5 Carpet in the car now I wanted to try and keep an OEM appearance and not leave that gaping hole in the floor. I took the trim and widened the top with a circle so the manual belt bolt could fit through it. I then lined the backside of it with that ABS plastic I purchased earlier (The same ones I used for the door cards). It turned out really well I think and looks OEM! I still have a couple of more things to do before I�m able to put the seats back in, but that day is soon approaching I think. I also, finally� finished up my pinch weld project. I didn�t have all the tools to finish it 100% correctly - I think I�d need a frame puller. However, it is miles better than it was originally. I topped it off with rust converter and then Epoxy paint. The backside received the same and then an additional coat of undercoating. Finishing the pinch welds allowed me to mock up the T2 side skirts that I finally finished modifying and cleaning. I used rivnuts on the bottom to give it more of an OEM install. The last thing I did was slap on the UIM manifold. It�ll definitely need to come off again, but at least it�s out of my office for now. I�m hoping by the next update the interior should be completely �done�. It�s always been �done�, I am never satisfied and continuously find new ways to improve things and look for better condition pieces.
Here are the pictures of what happened with the interior:
Here are the pinch welds and side skirts.

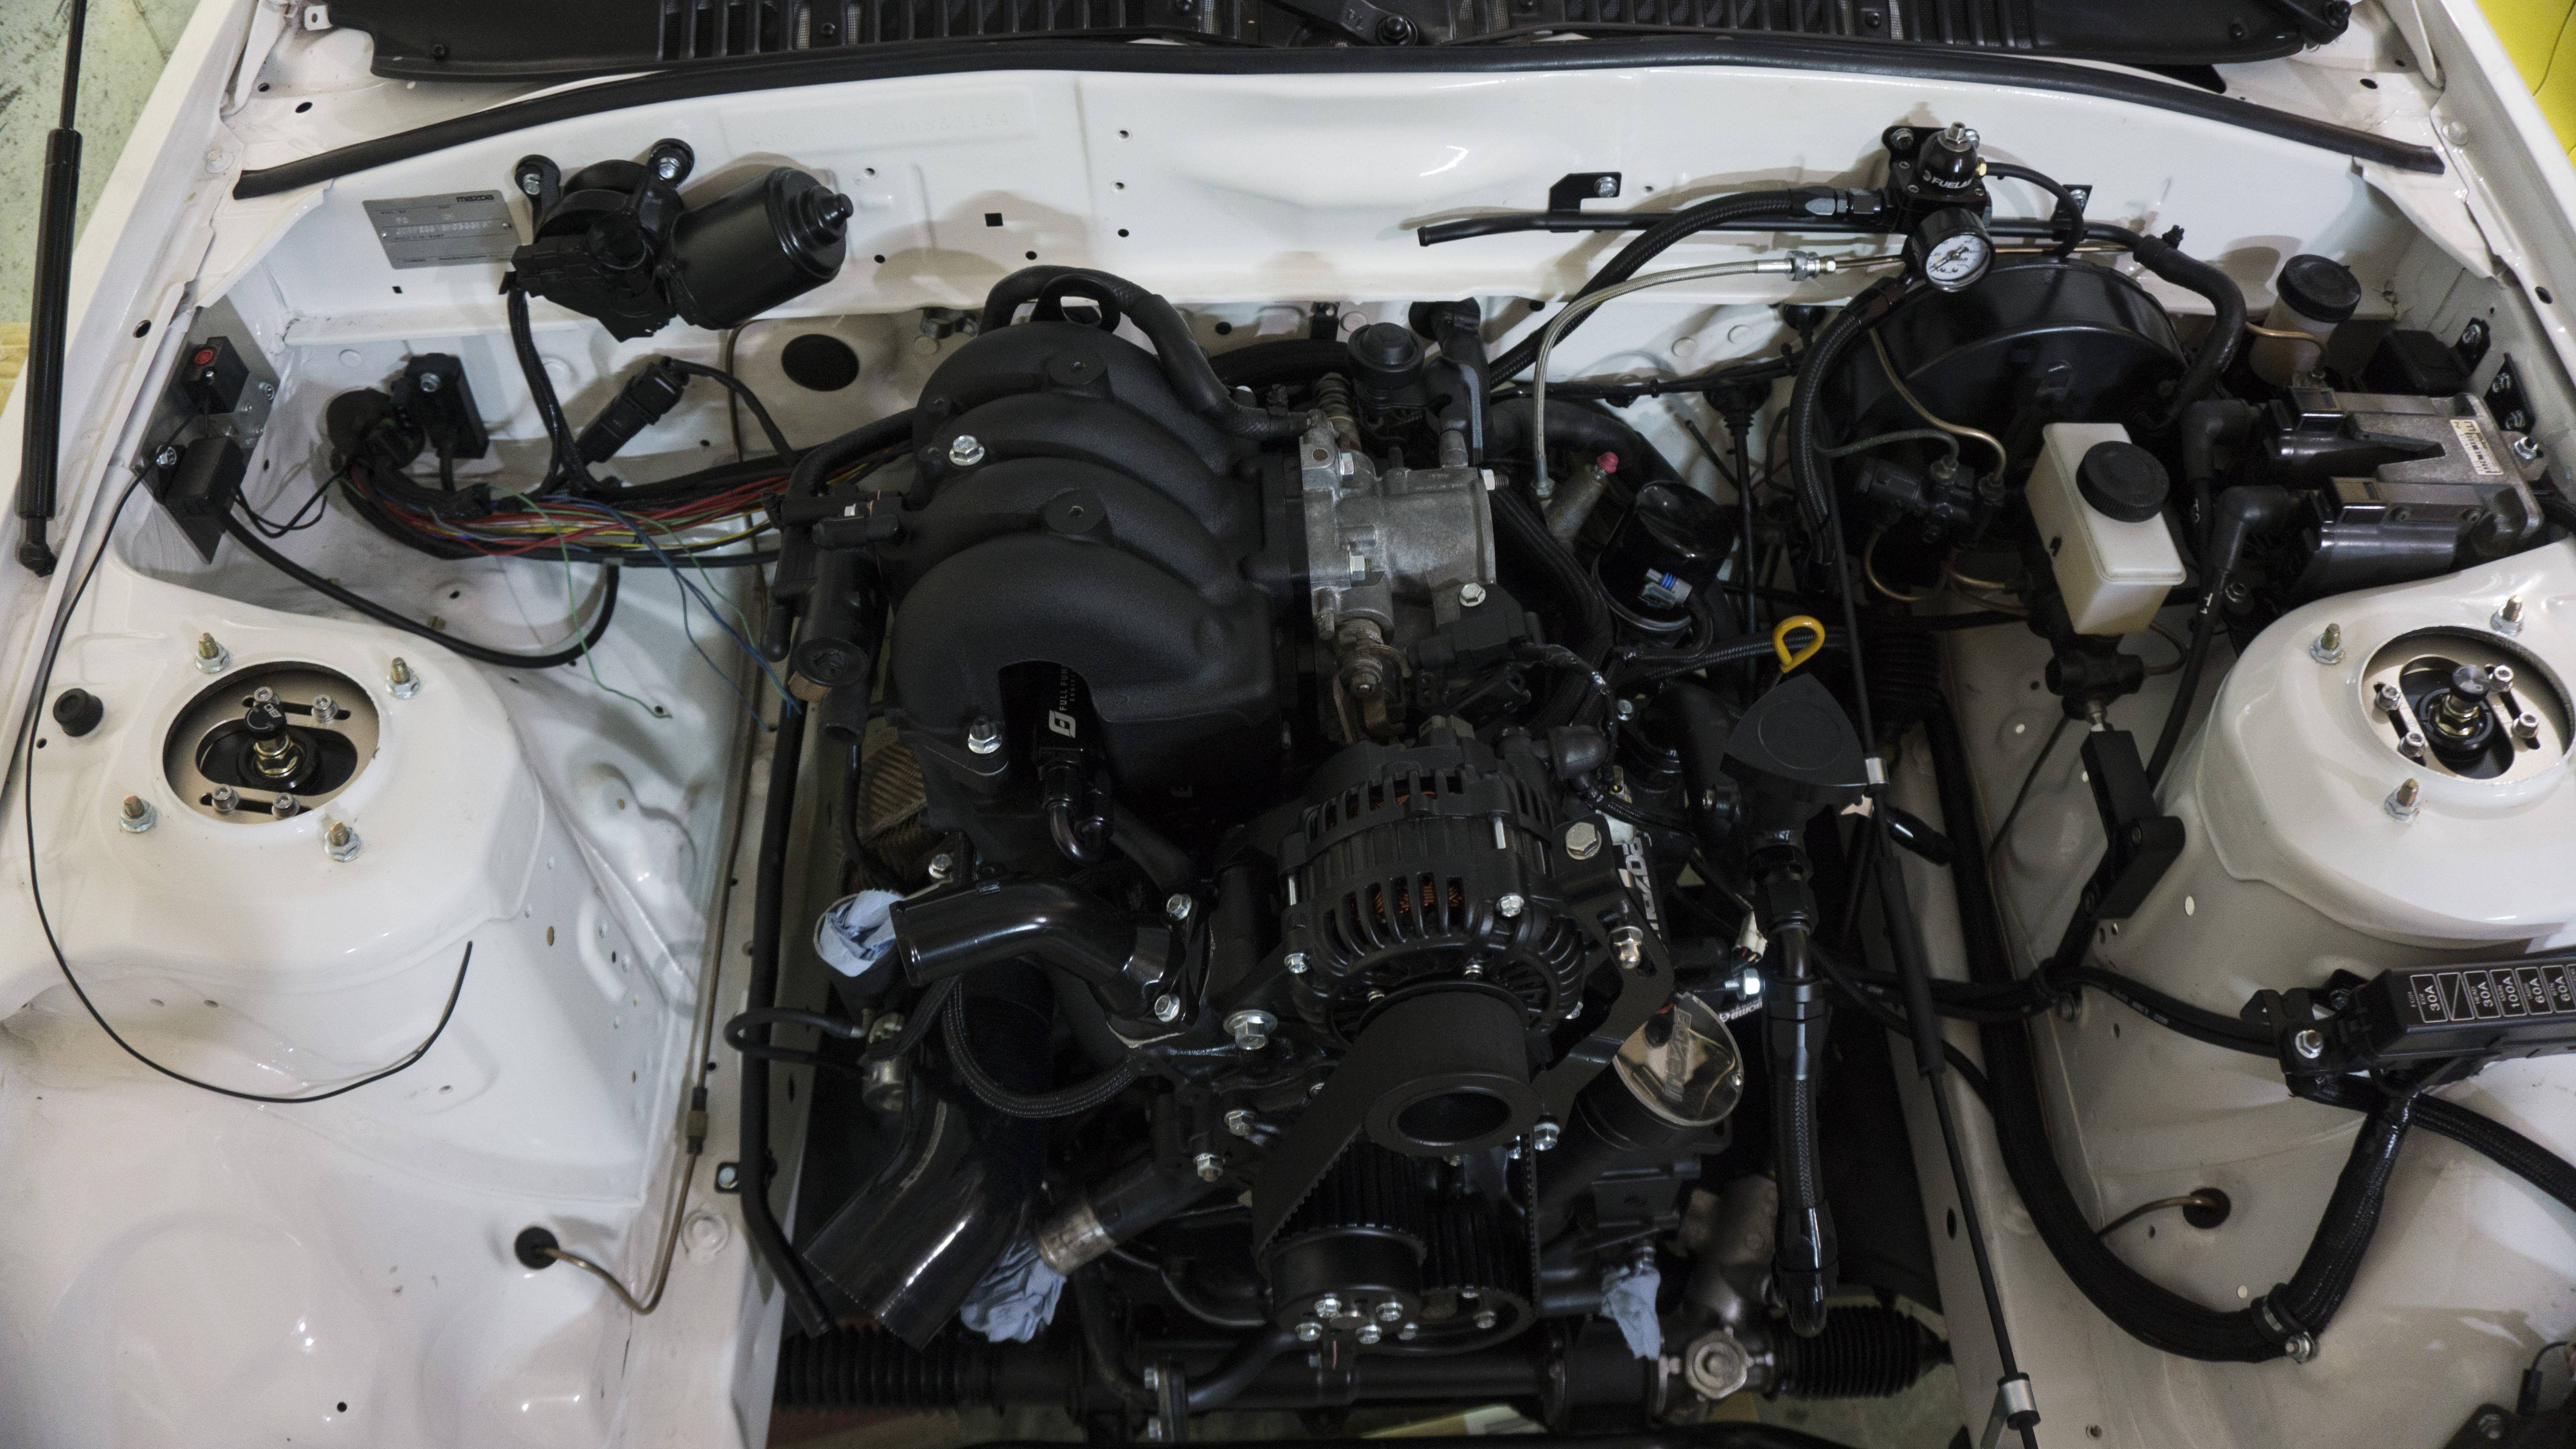
Here is the UIM finally on the engine:
Still been cranking away on the FC when I get some spare time. Last time I was able to get the sunroof motor working much better - it was now time to finish that side up. I got the headliner installed back up there and put in my new (to me) black motor plug and the newer headliner hider strip (it goes around the metal braces that keep the headliner up). I was also finally able to turn on the new LEDs I installed in the dome light area. They look good! I do use them occasionally so I think they will come in handy when I use them next. I also finished modifying the auto belt trim. Since I have S5 Carpet in the car now I wanted to try and keep an OEM appearance and not leave that gaping hole in the floor. I took the trim and widened the top with a circle so the manual belt bolt could fit through it. I then lined the backside of it with that ABS plastic I purchased earlier (The same ones I used for the door cards). It turned out really well I think and looks OEM! I still have a couple of more things to do before I�m able to put the seats back in, but that day is soon approaching I think. I also, finally� finished up my pinch weld project. I didn�t have all the tools to finish it 100% correctly - I think I�d need a frame puller. However, it is miles better than it was originally. I topped it off with rust converter and then Epoxy paint. The backside received the same and then an additional coat of undercoating. Finishing the pinch welds allowed me to mock up the T2 side skirts that I finally finished modifying and cleaning. I used rivnuts on the bottom to give it more of an OEM install. The last thing I did was slap on the UIM manifold. It�ll definitely need to come off again, but at least it�s out of my office for now. I�m hoping by the next update the interior should be completely �done�. It�s always been �done�, I am never satisfied and continuously find new ways to improve things and look for better condition pieces.
Here are the pictures of what happened with the interior:
Here are the pinch welds and side skirts.
Here is the UIM finally on the engine:
 09-22-19, 08:58 AM
#259
Update 9/22/19:
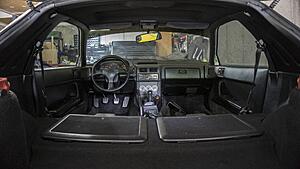
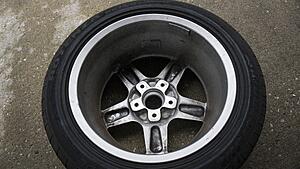
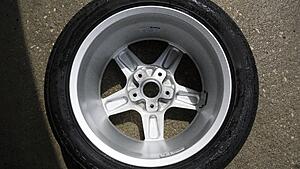
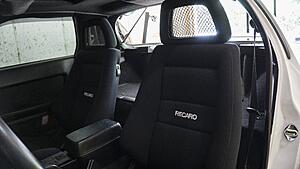
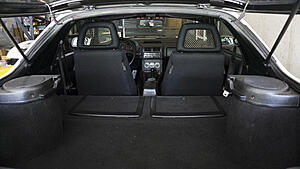
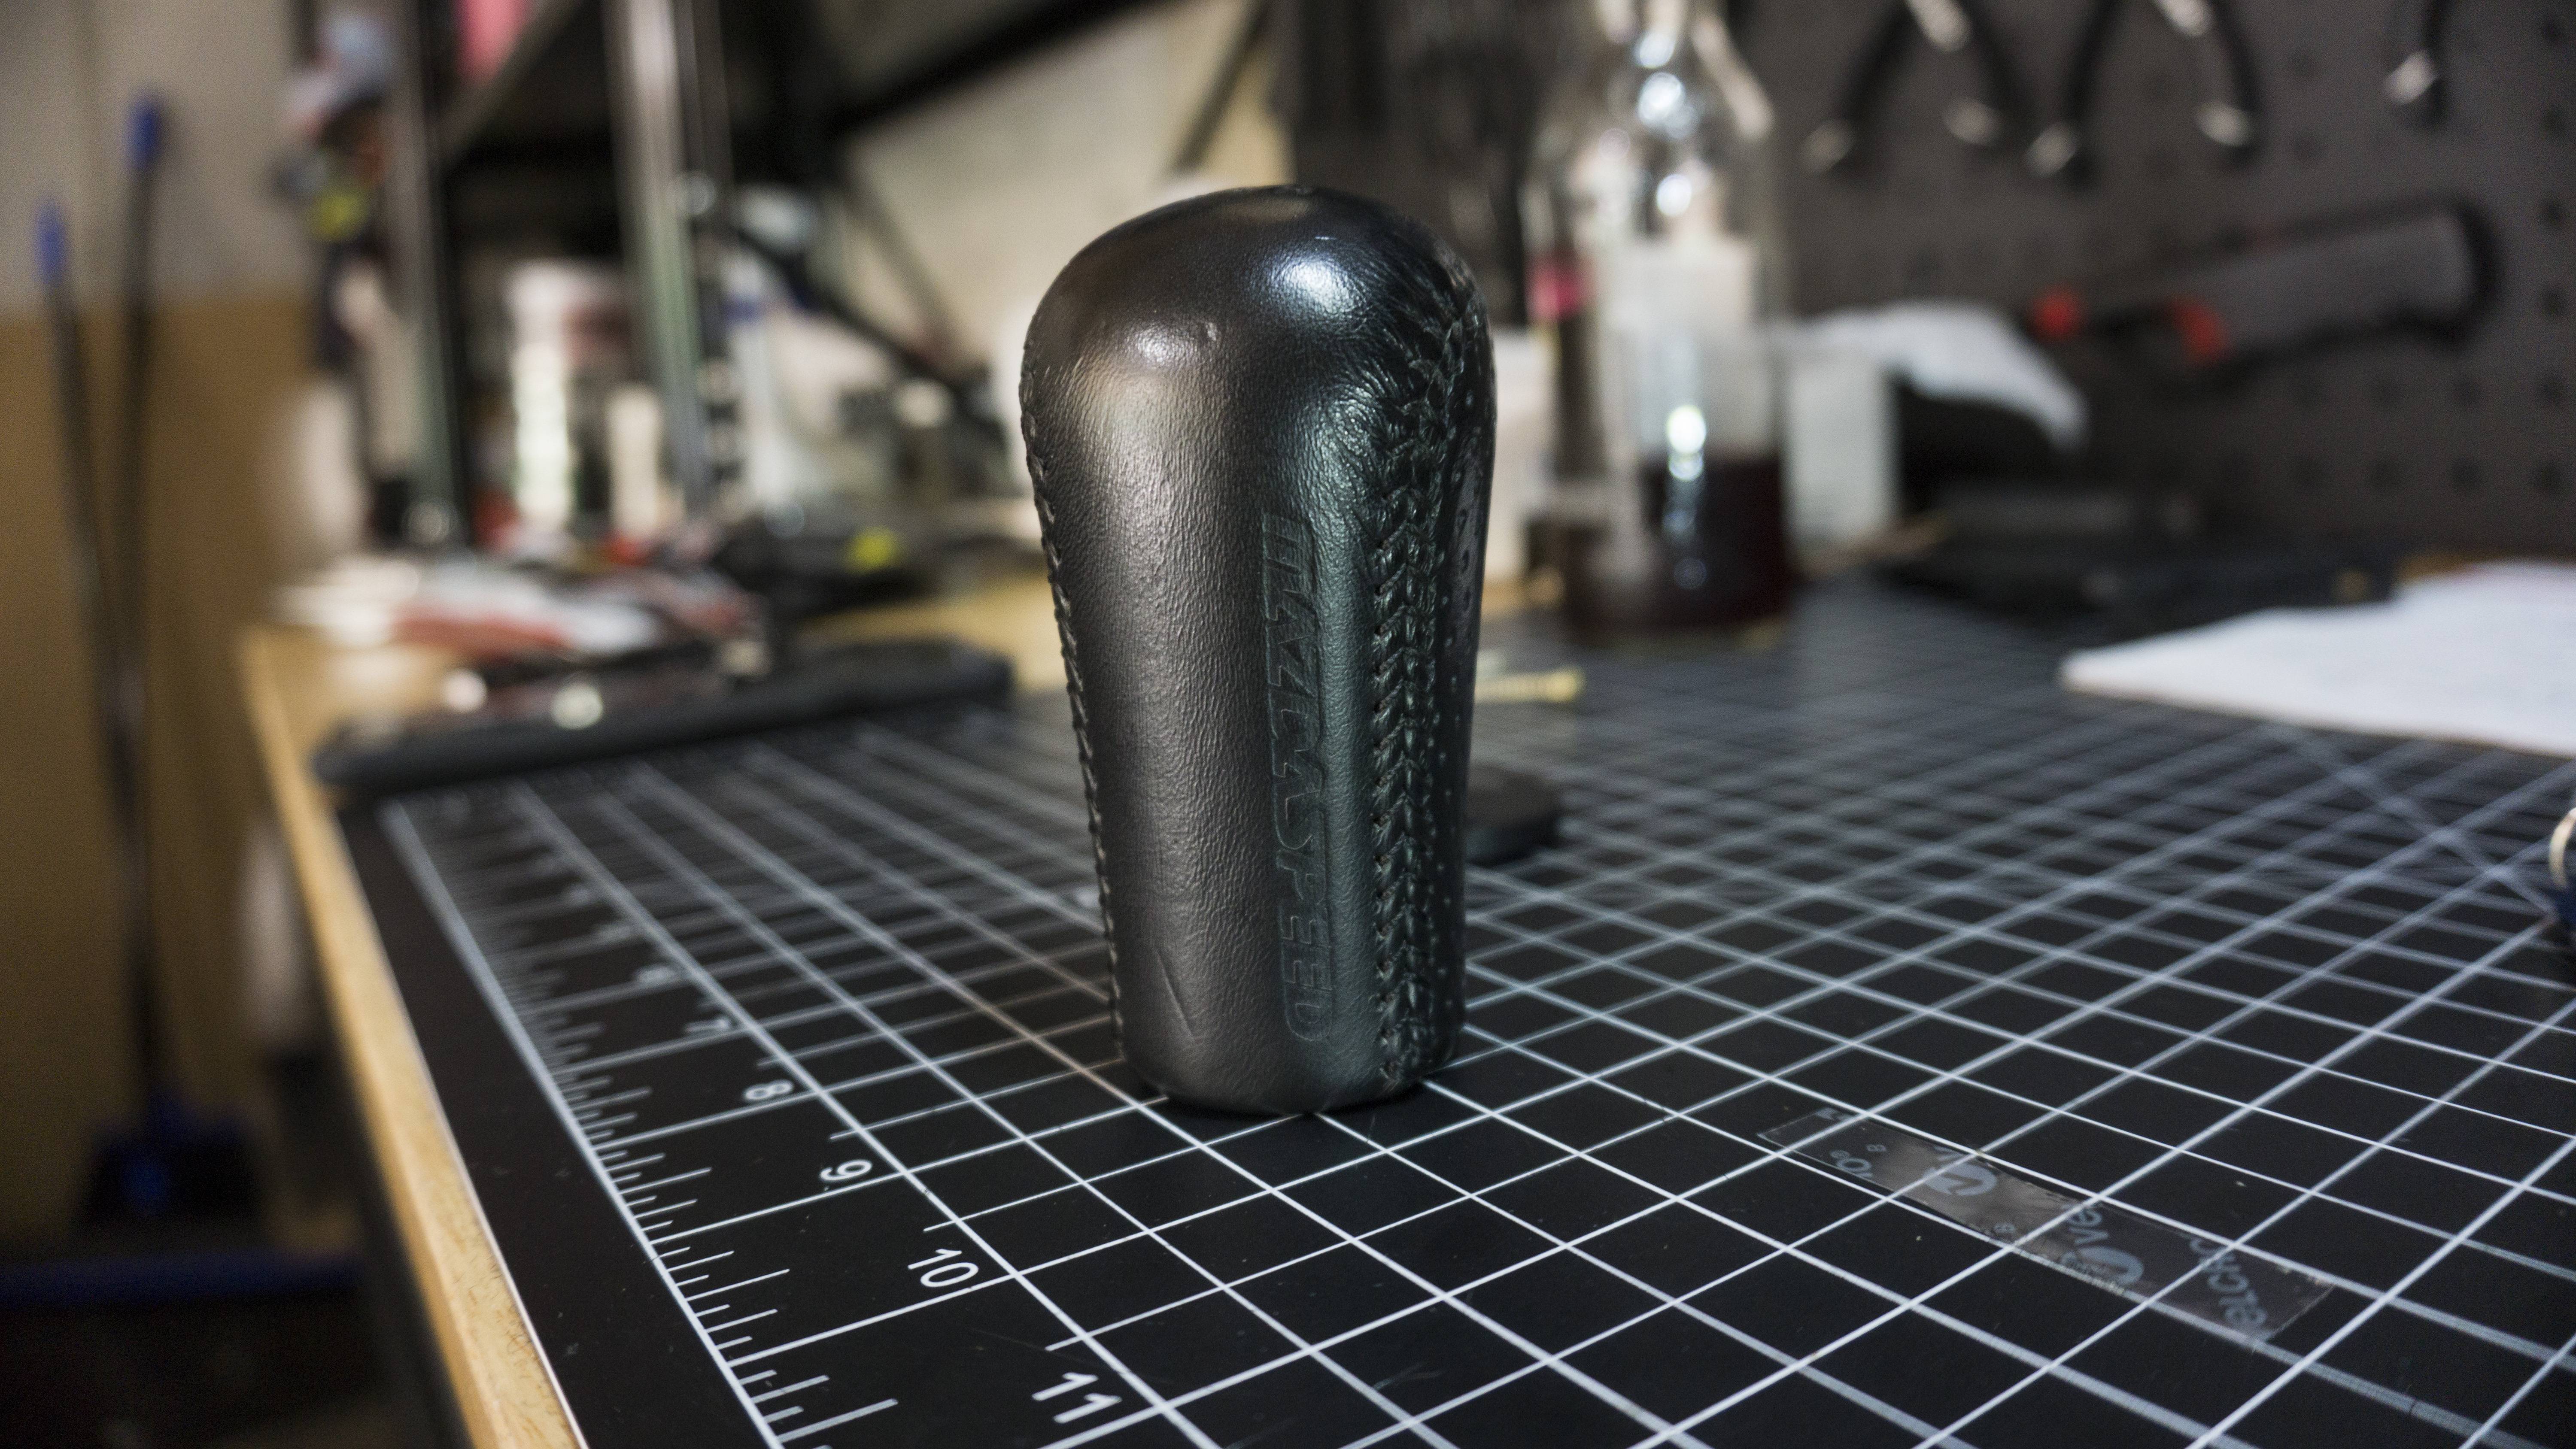
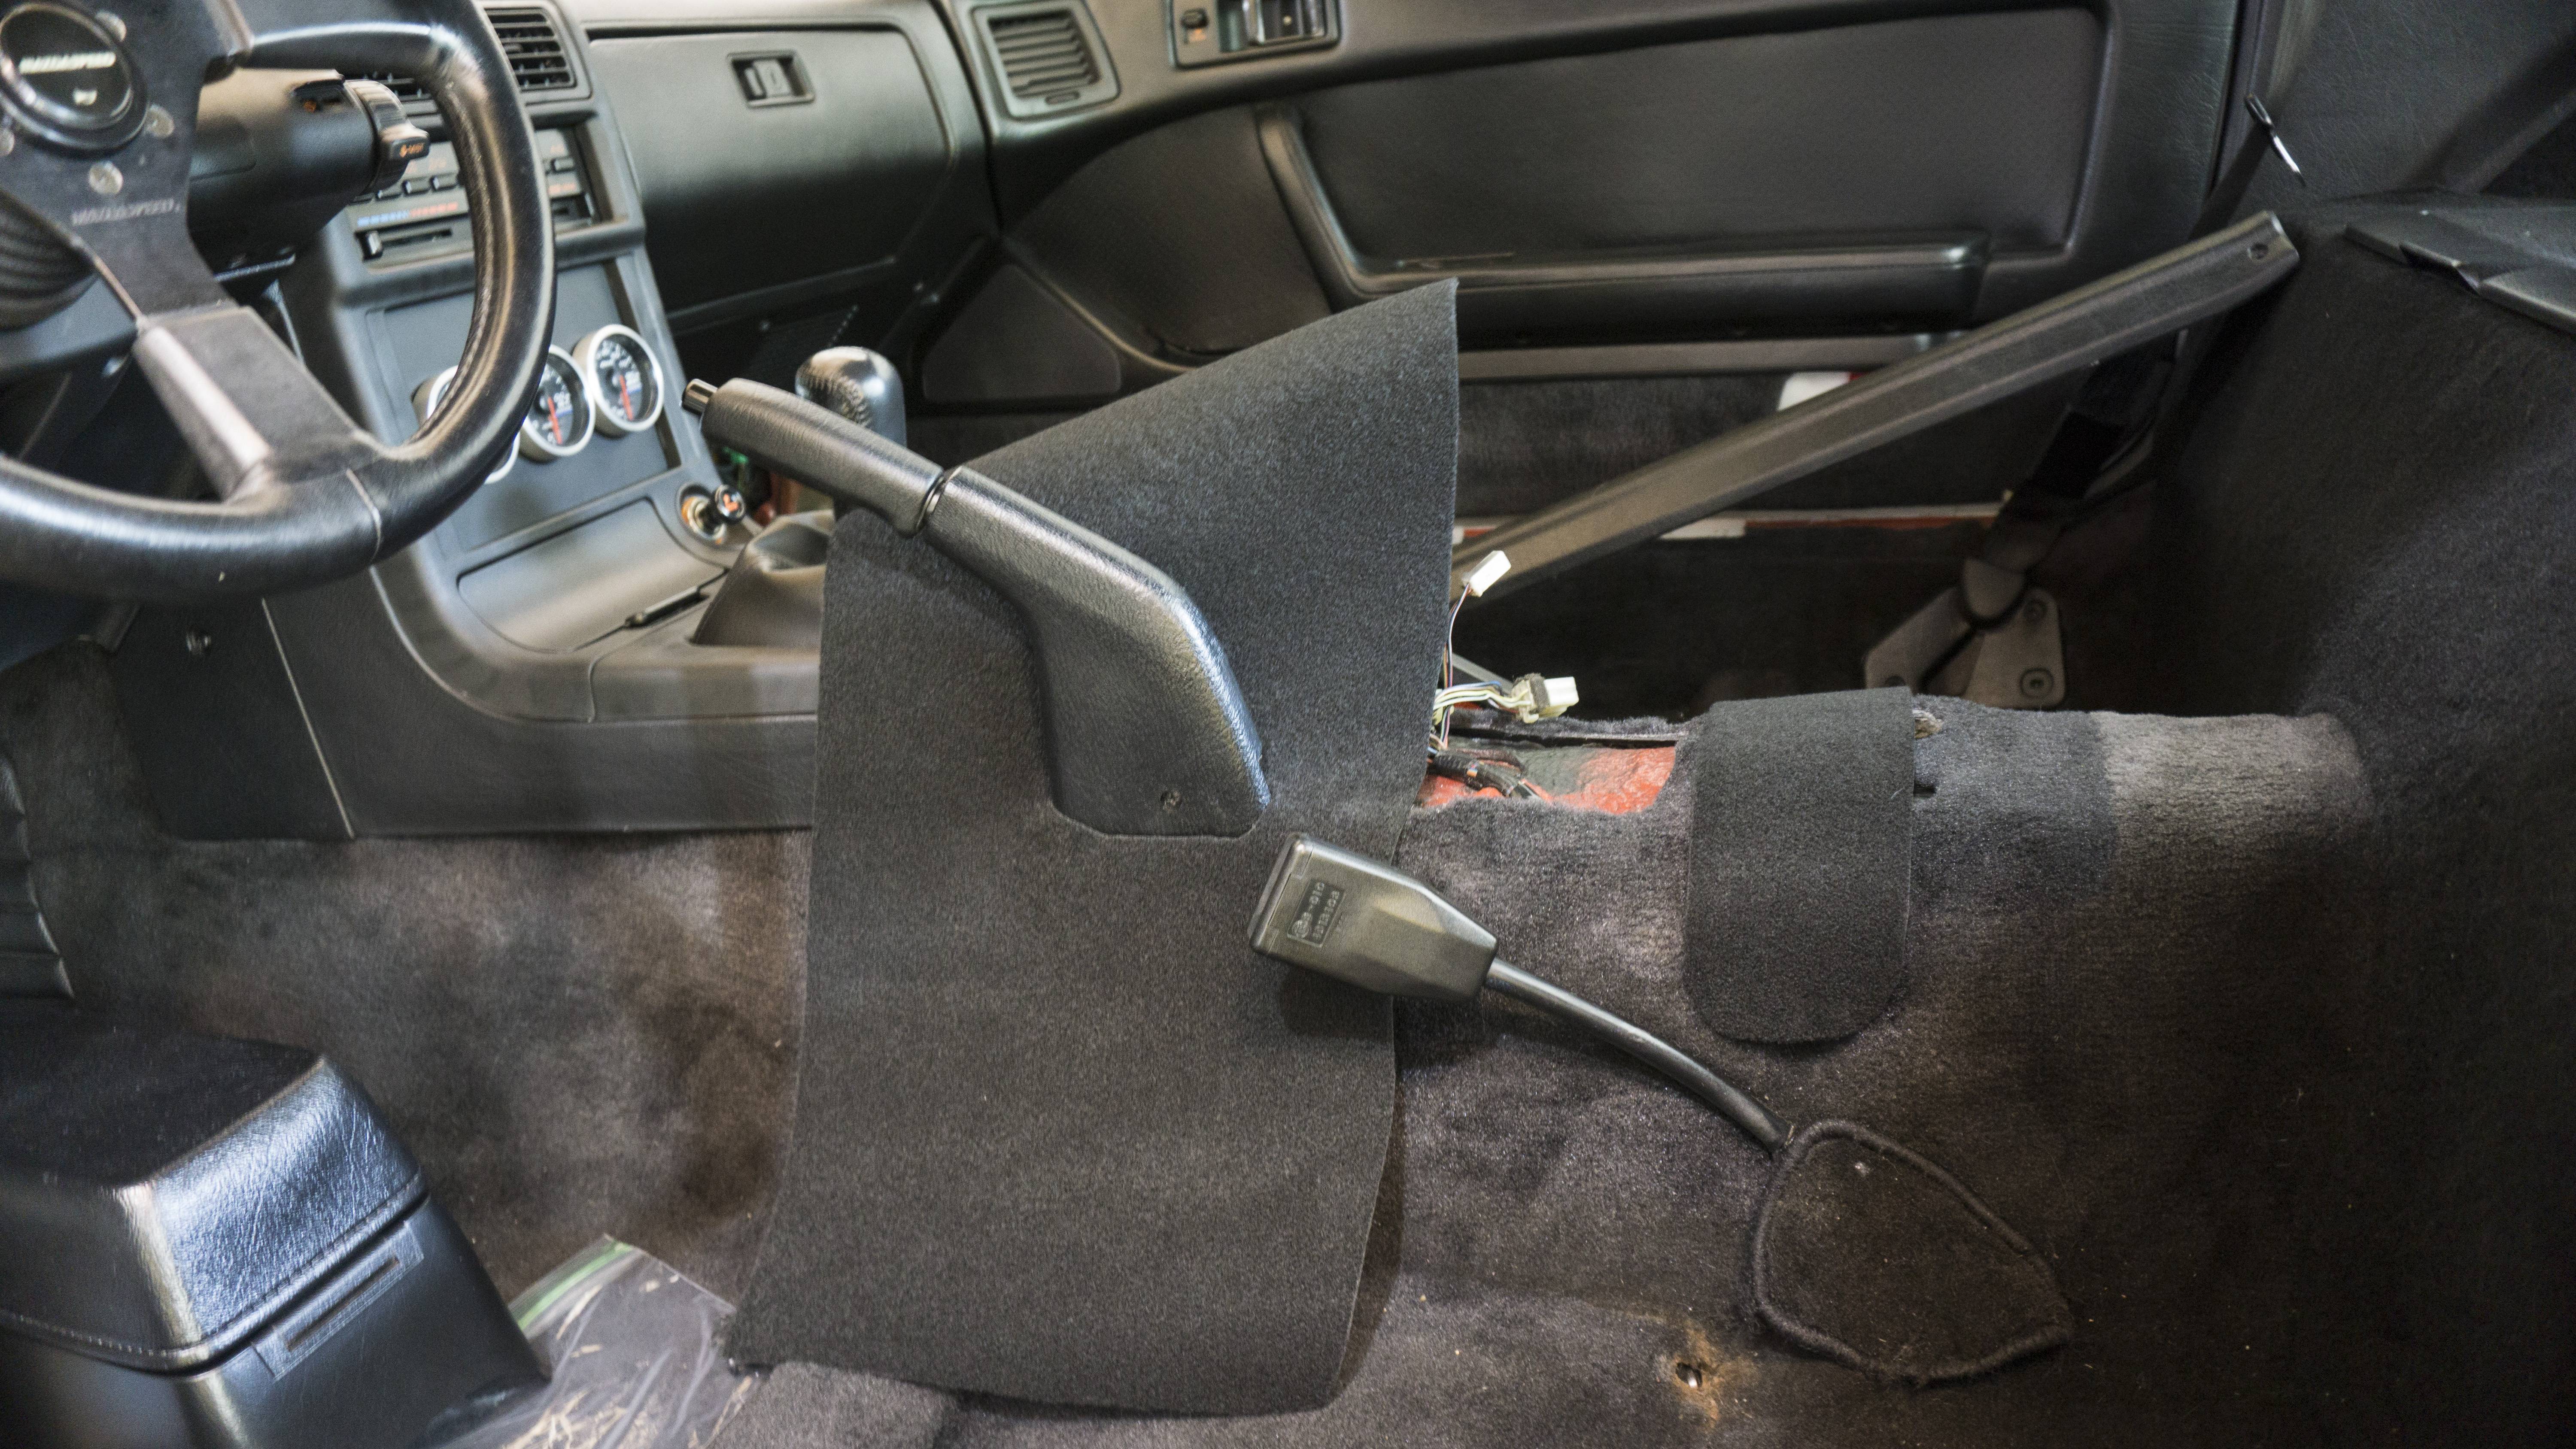
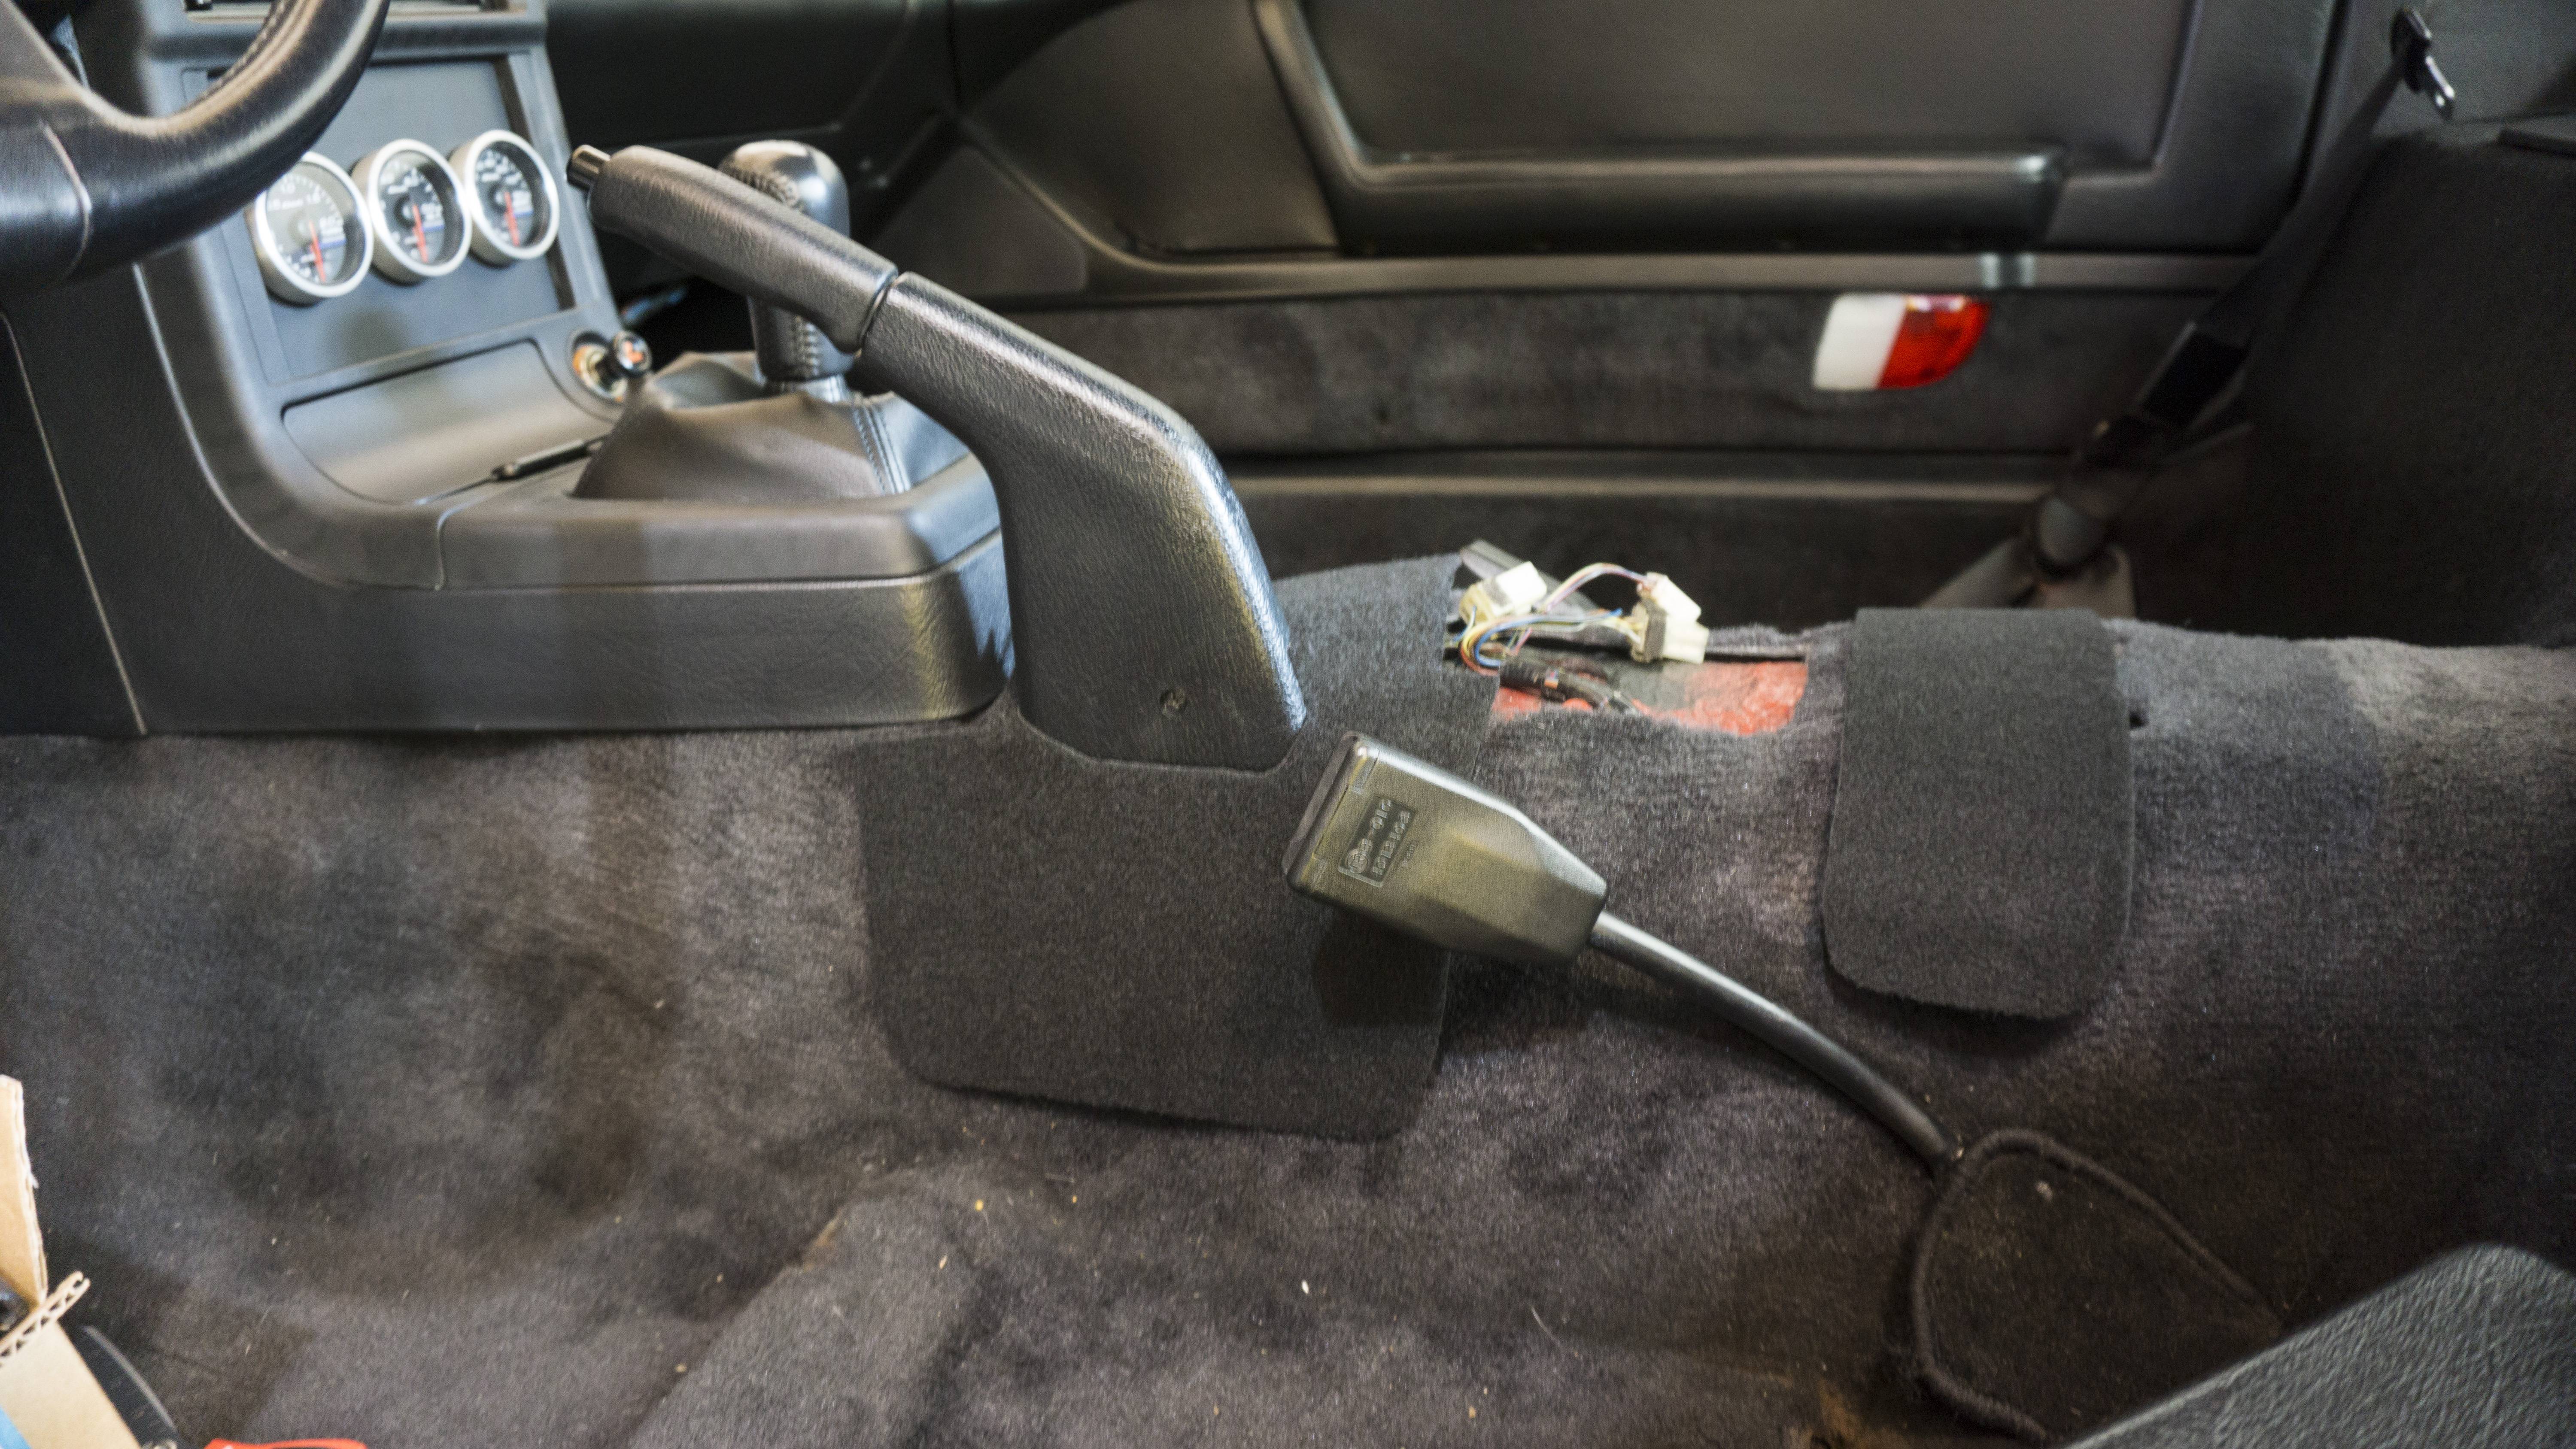
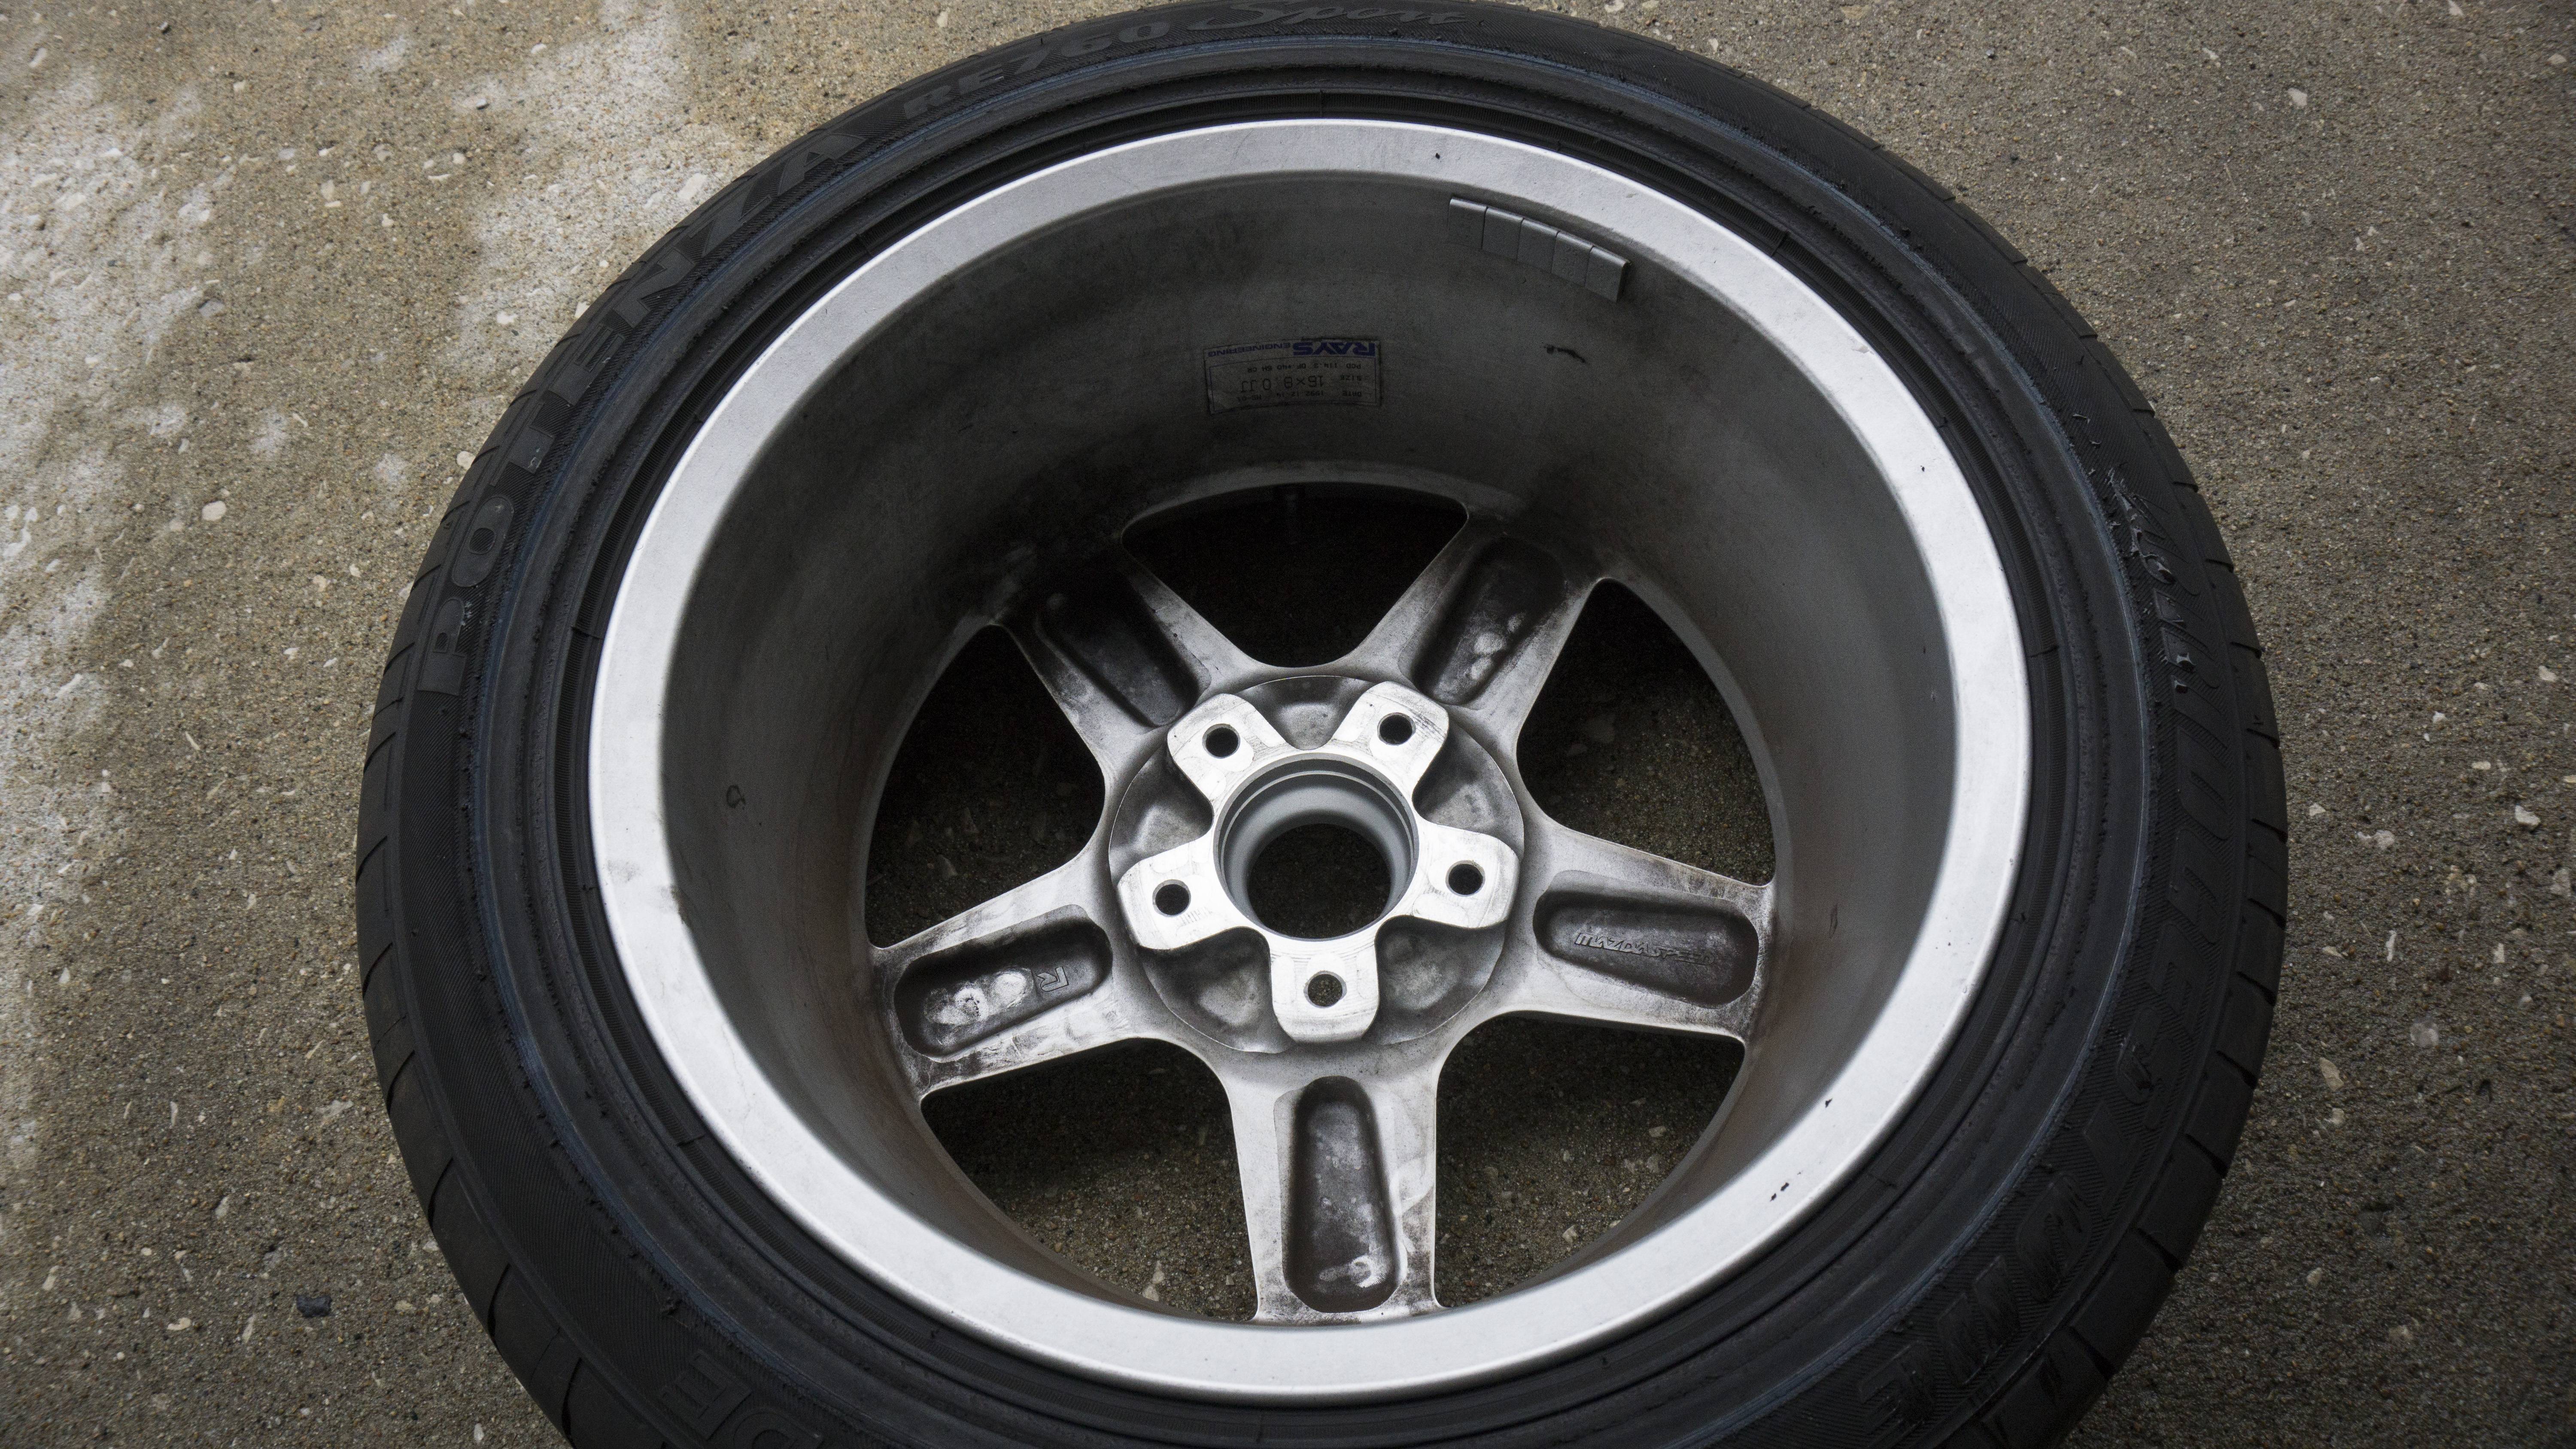
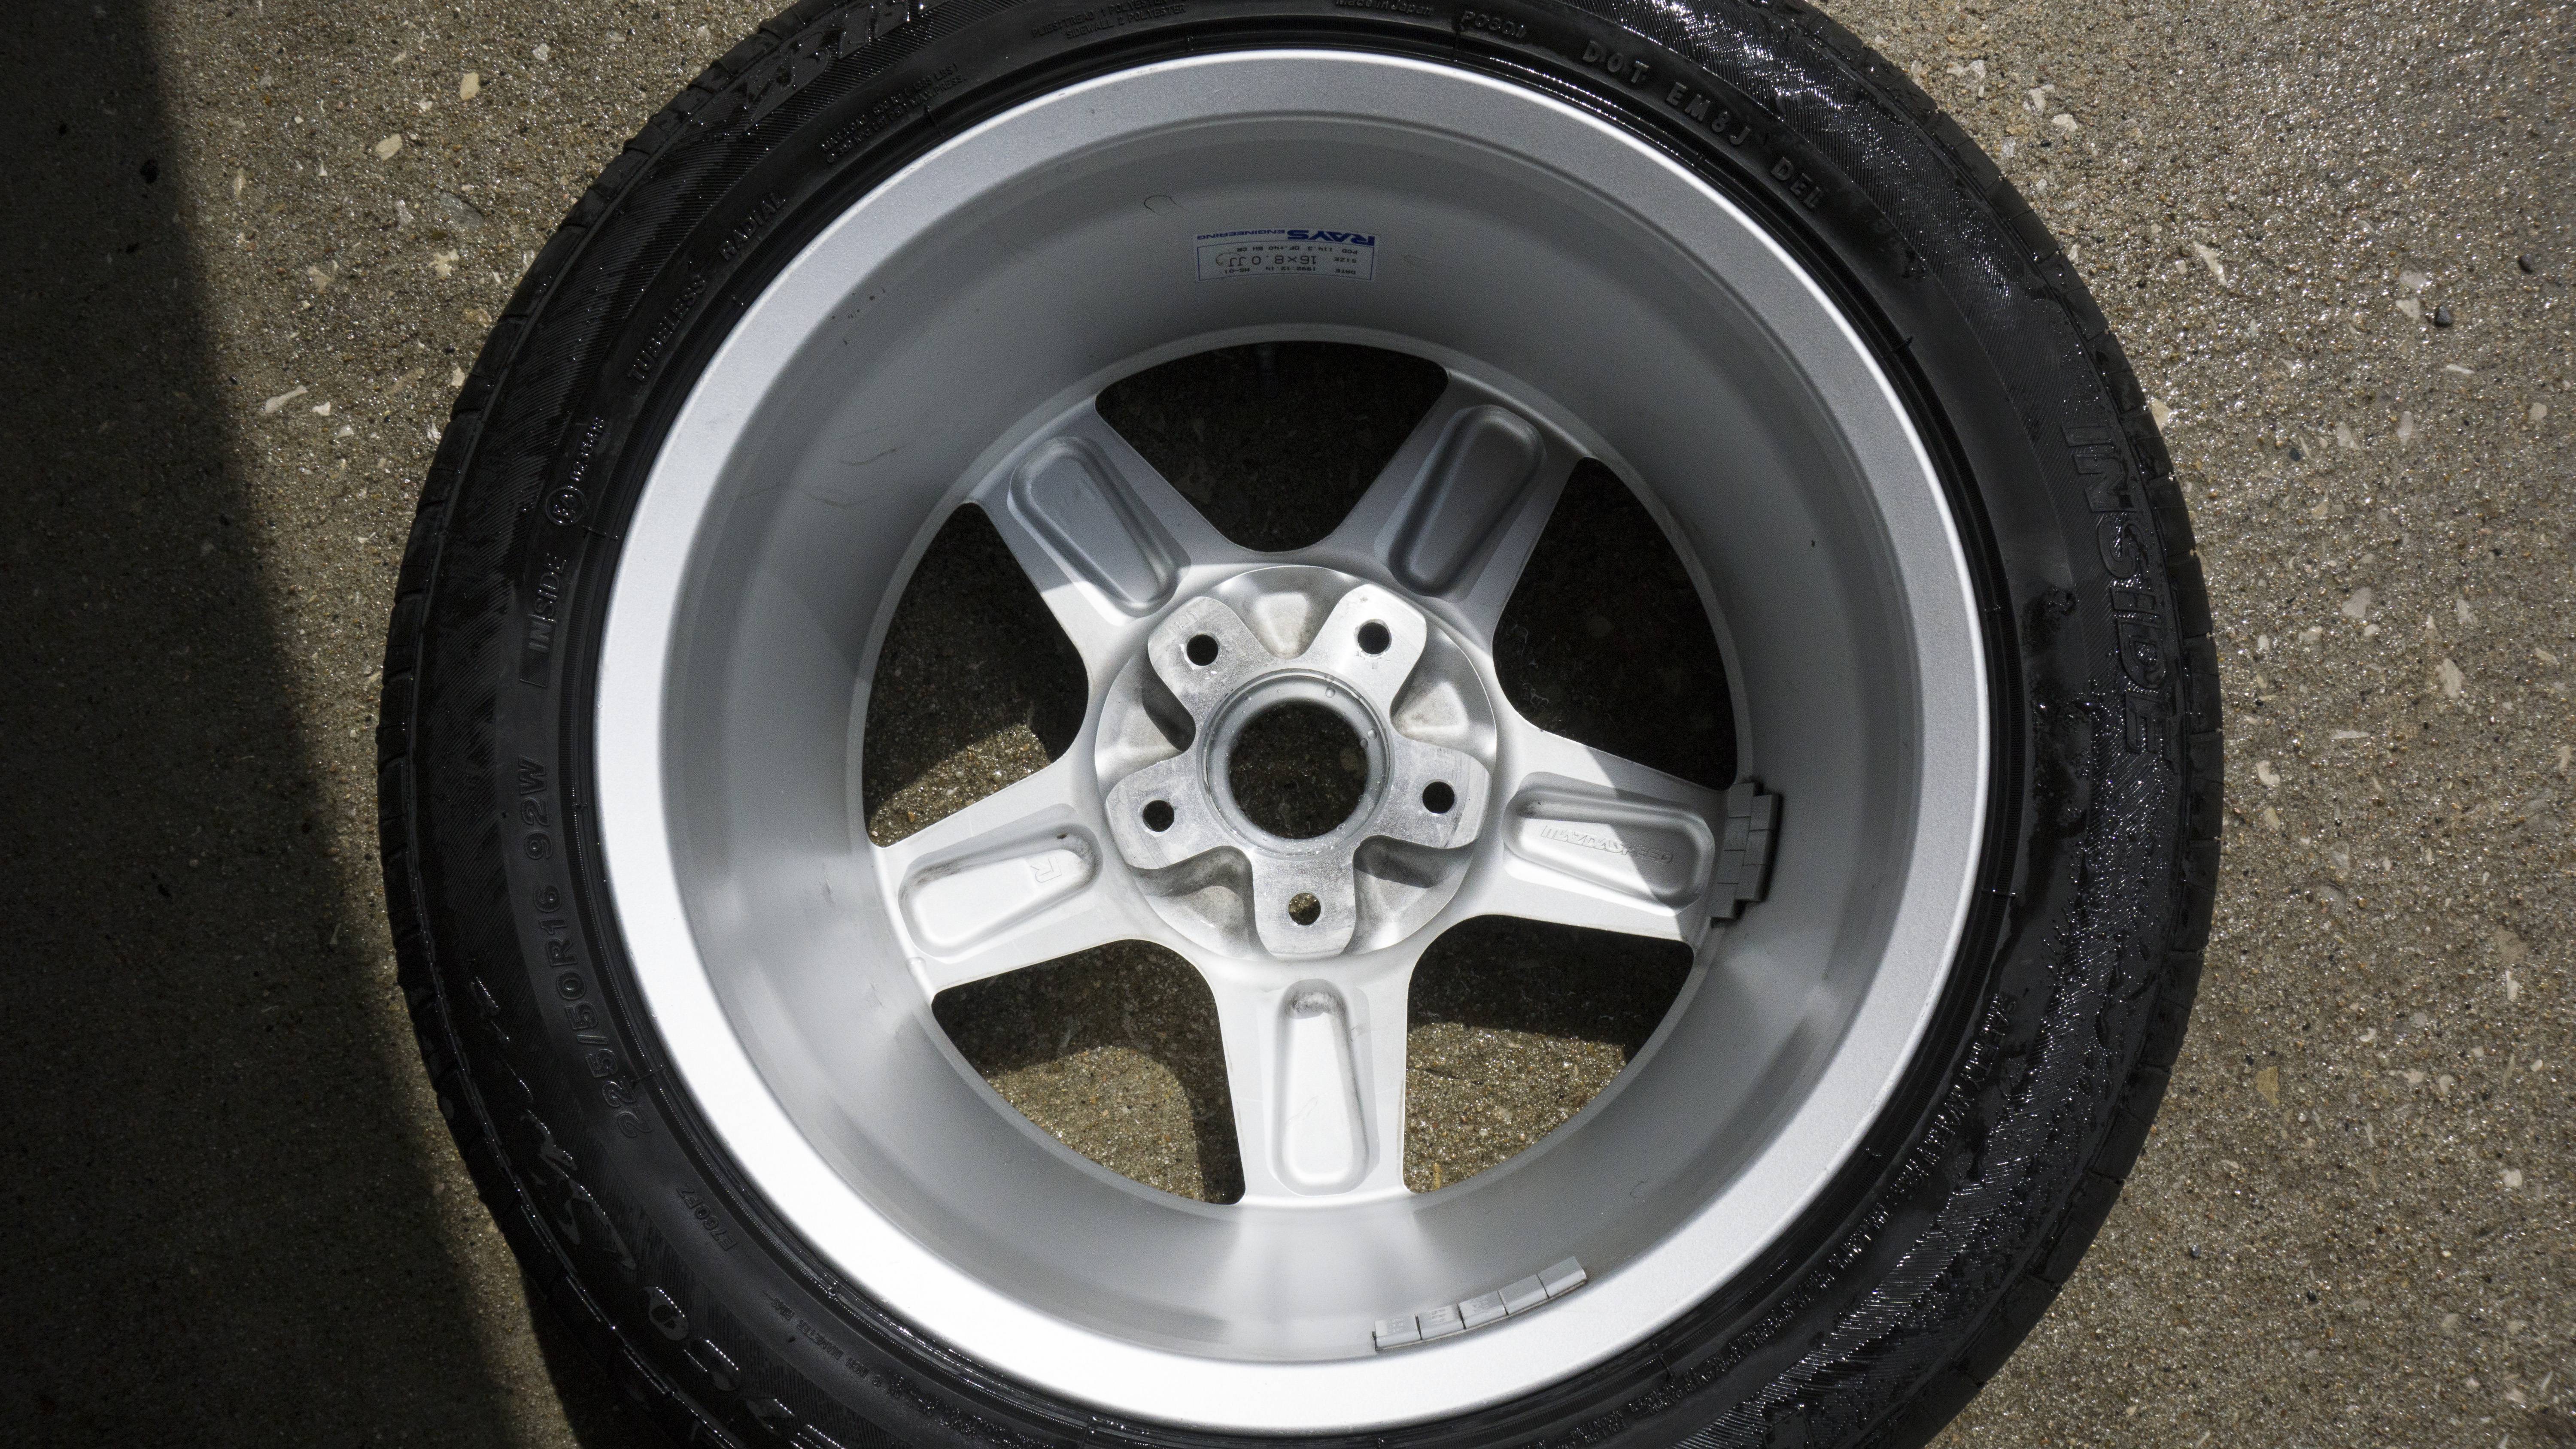
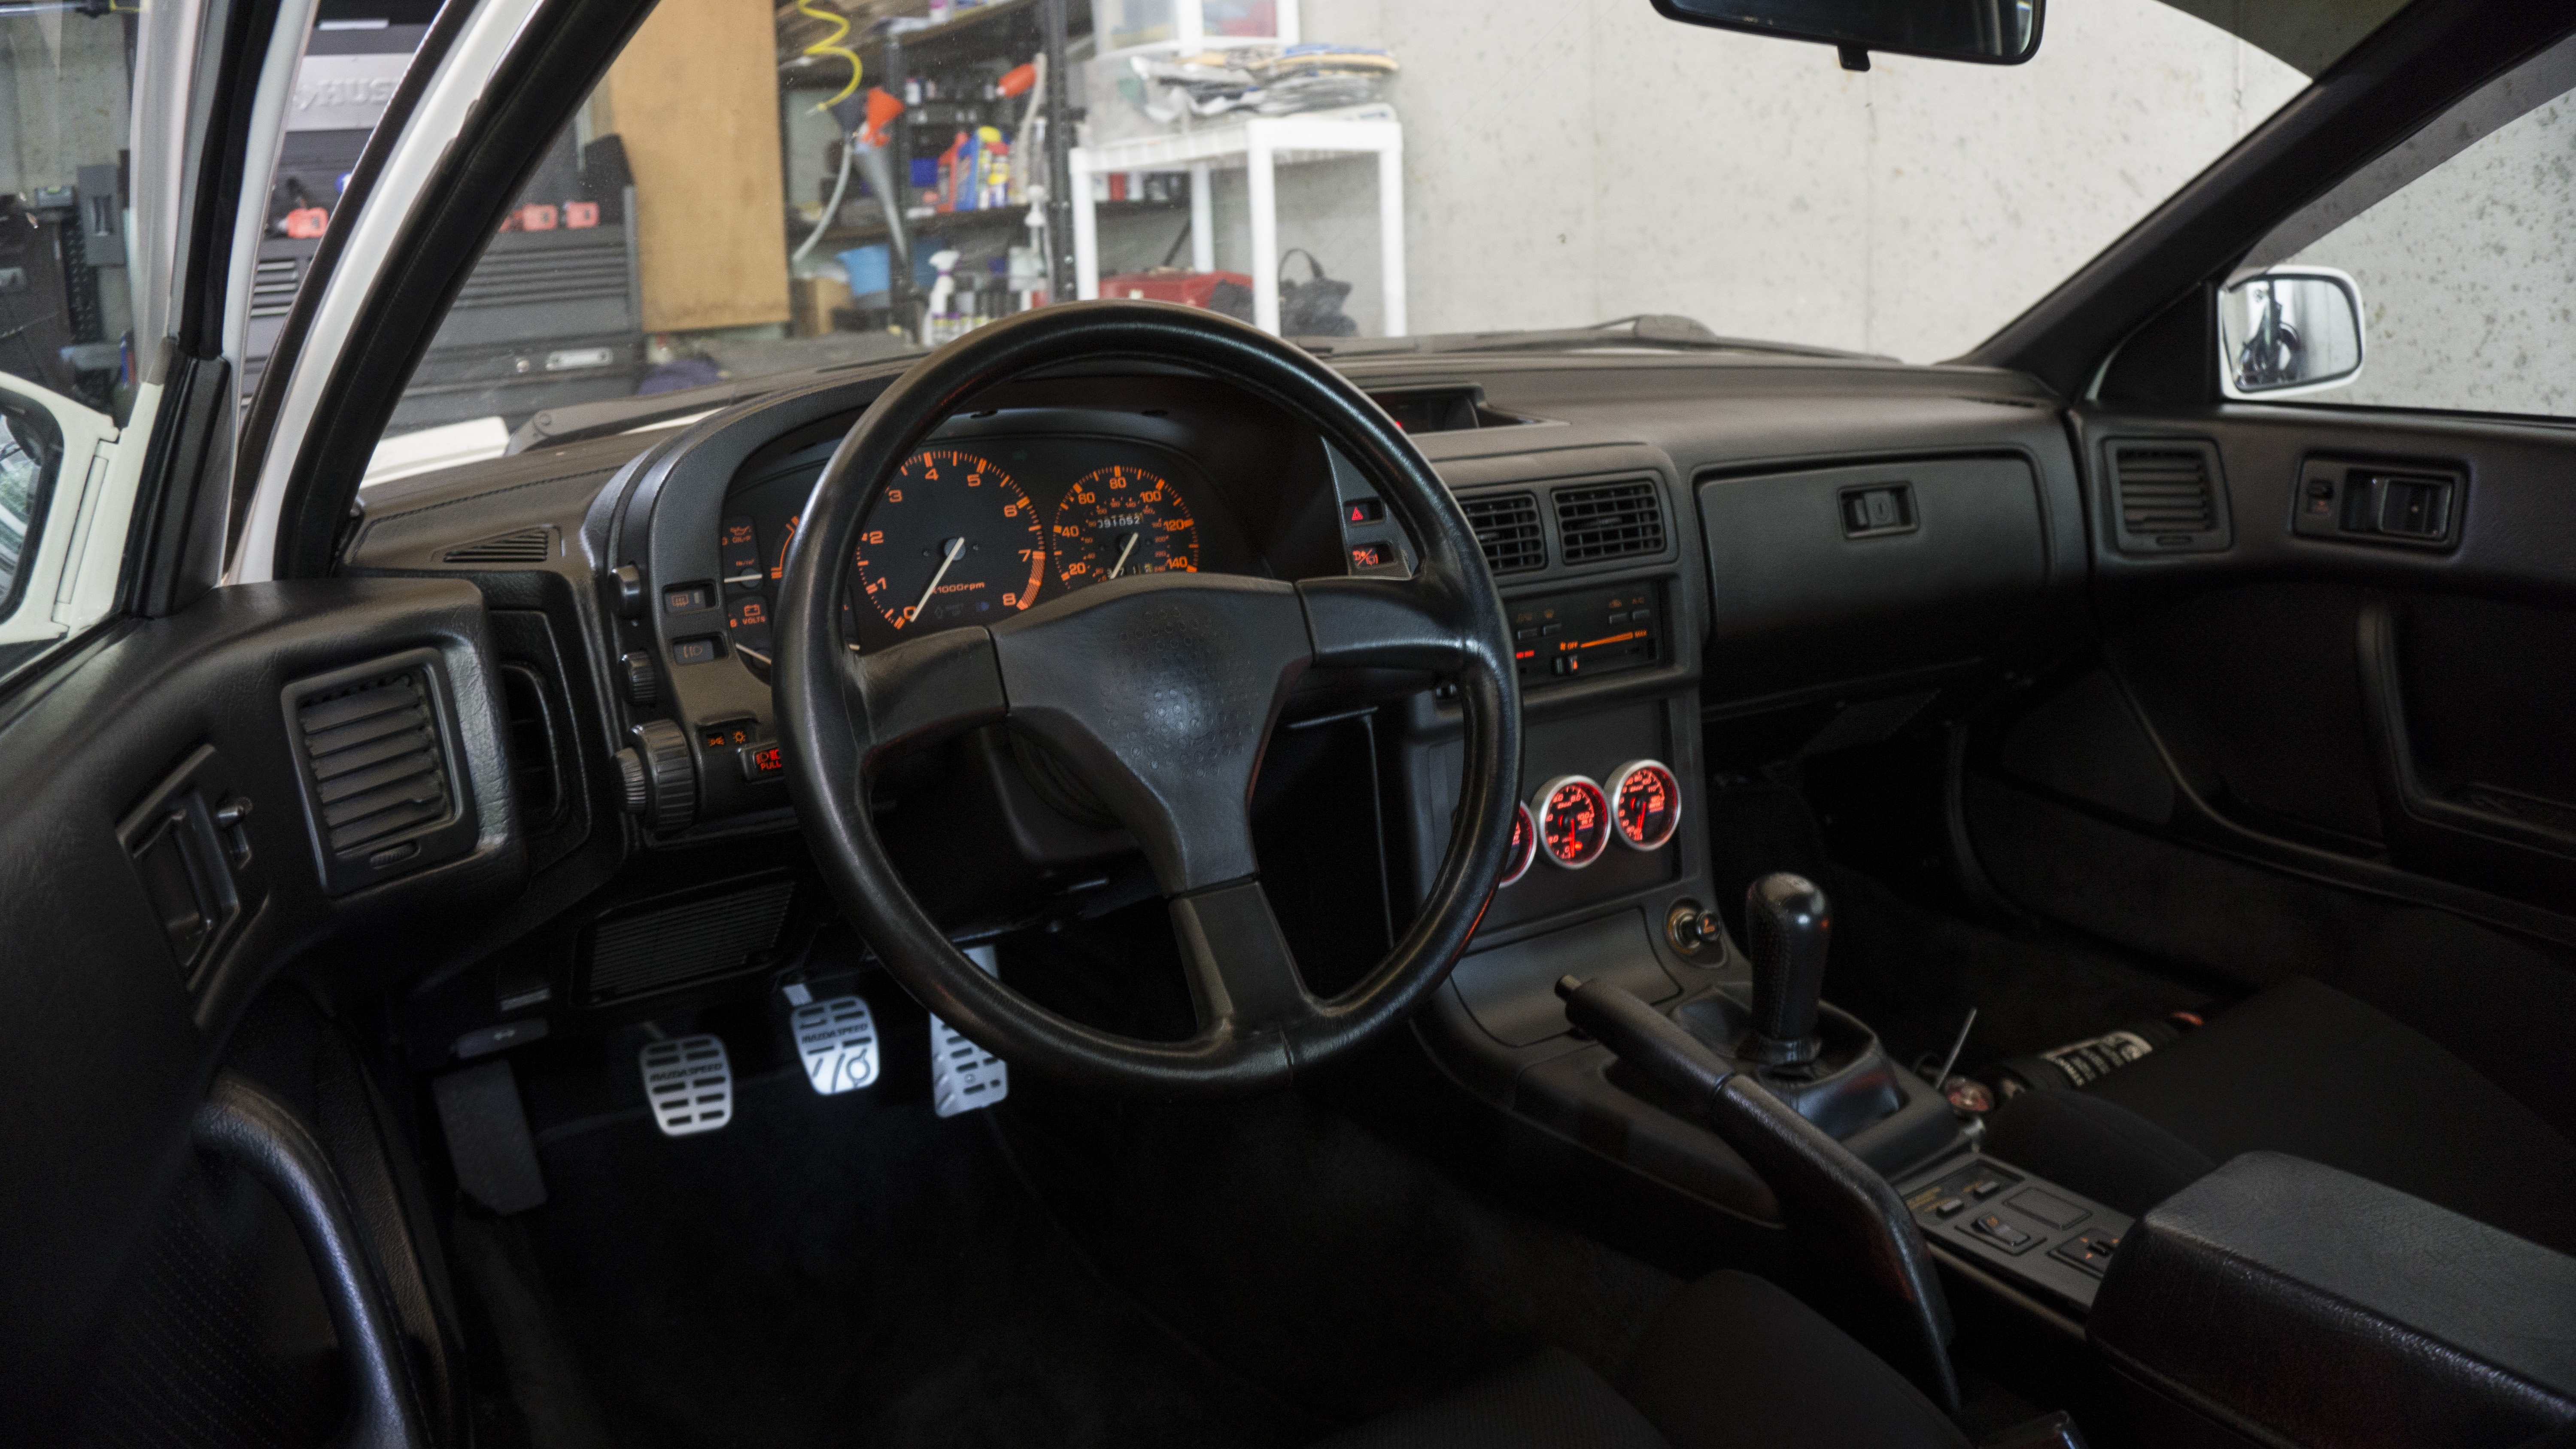
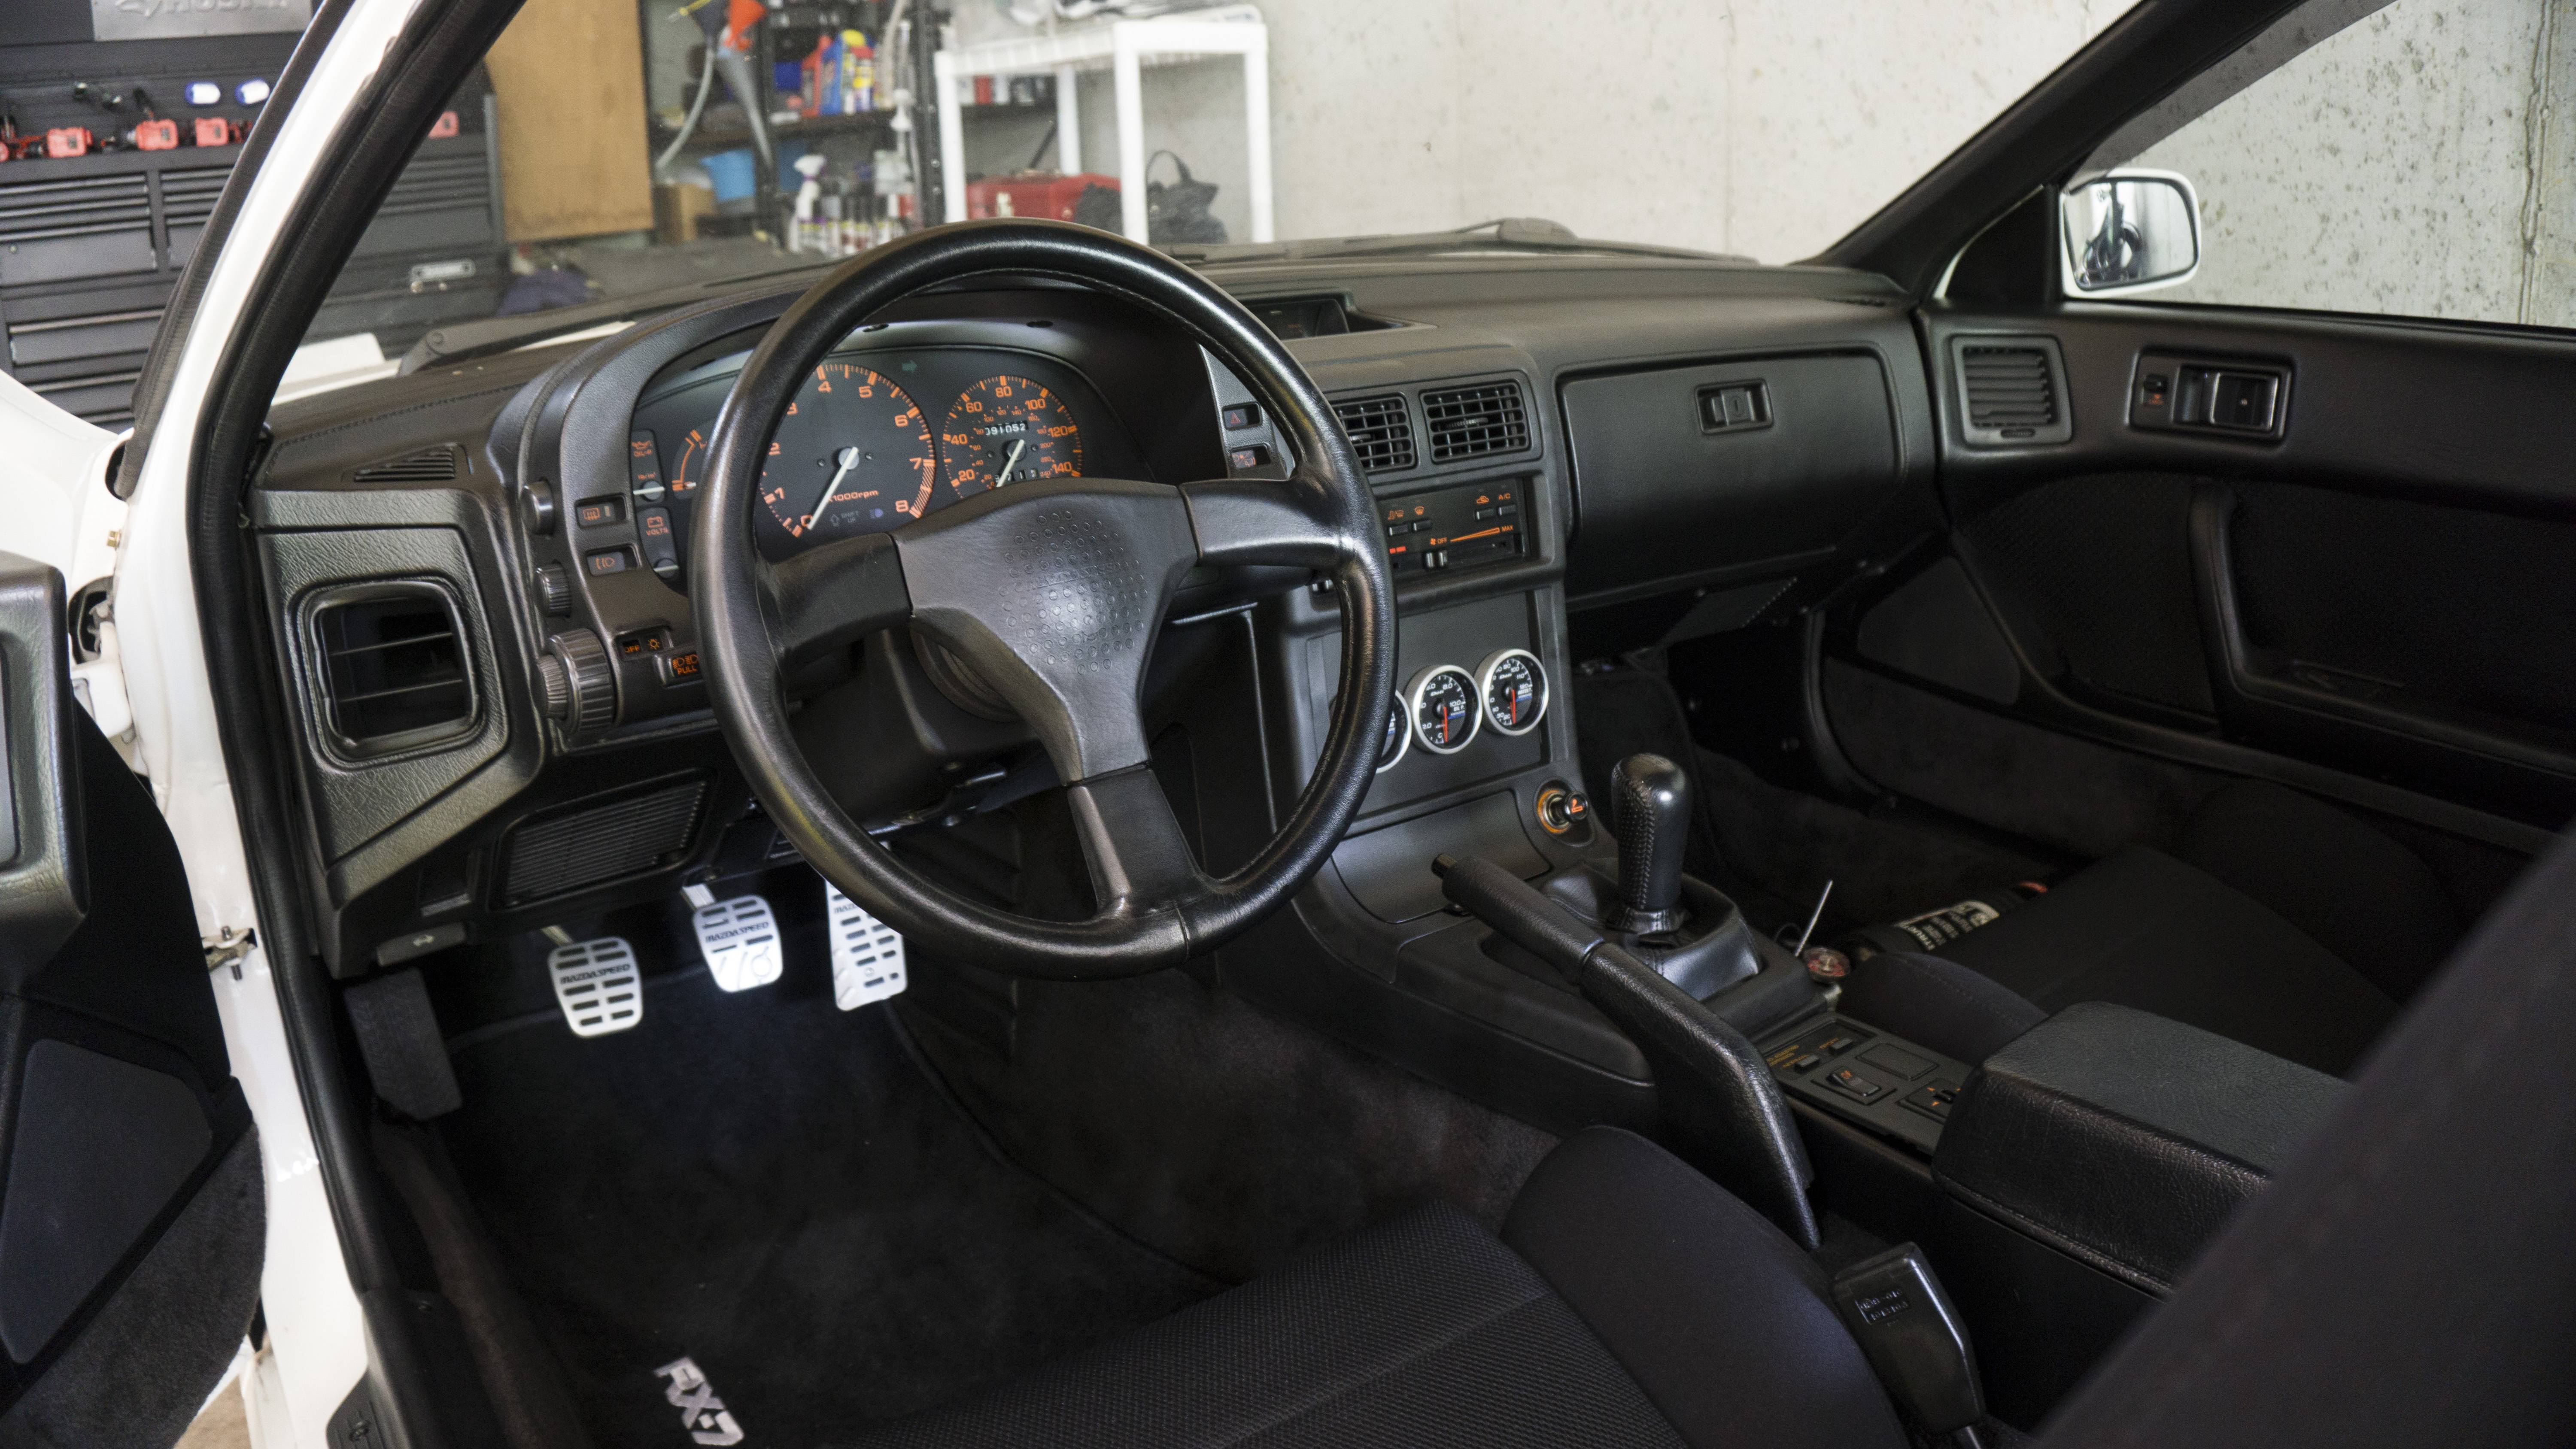
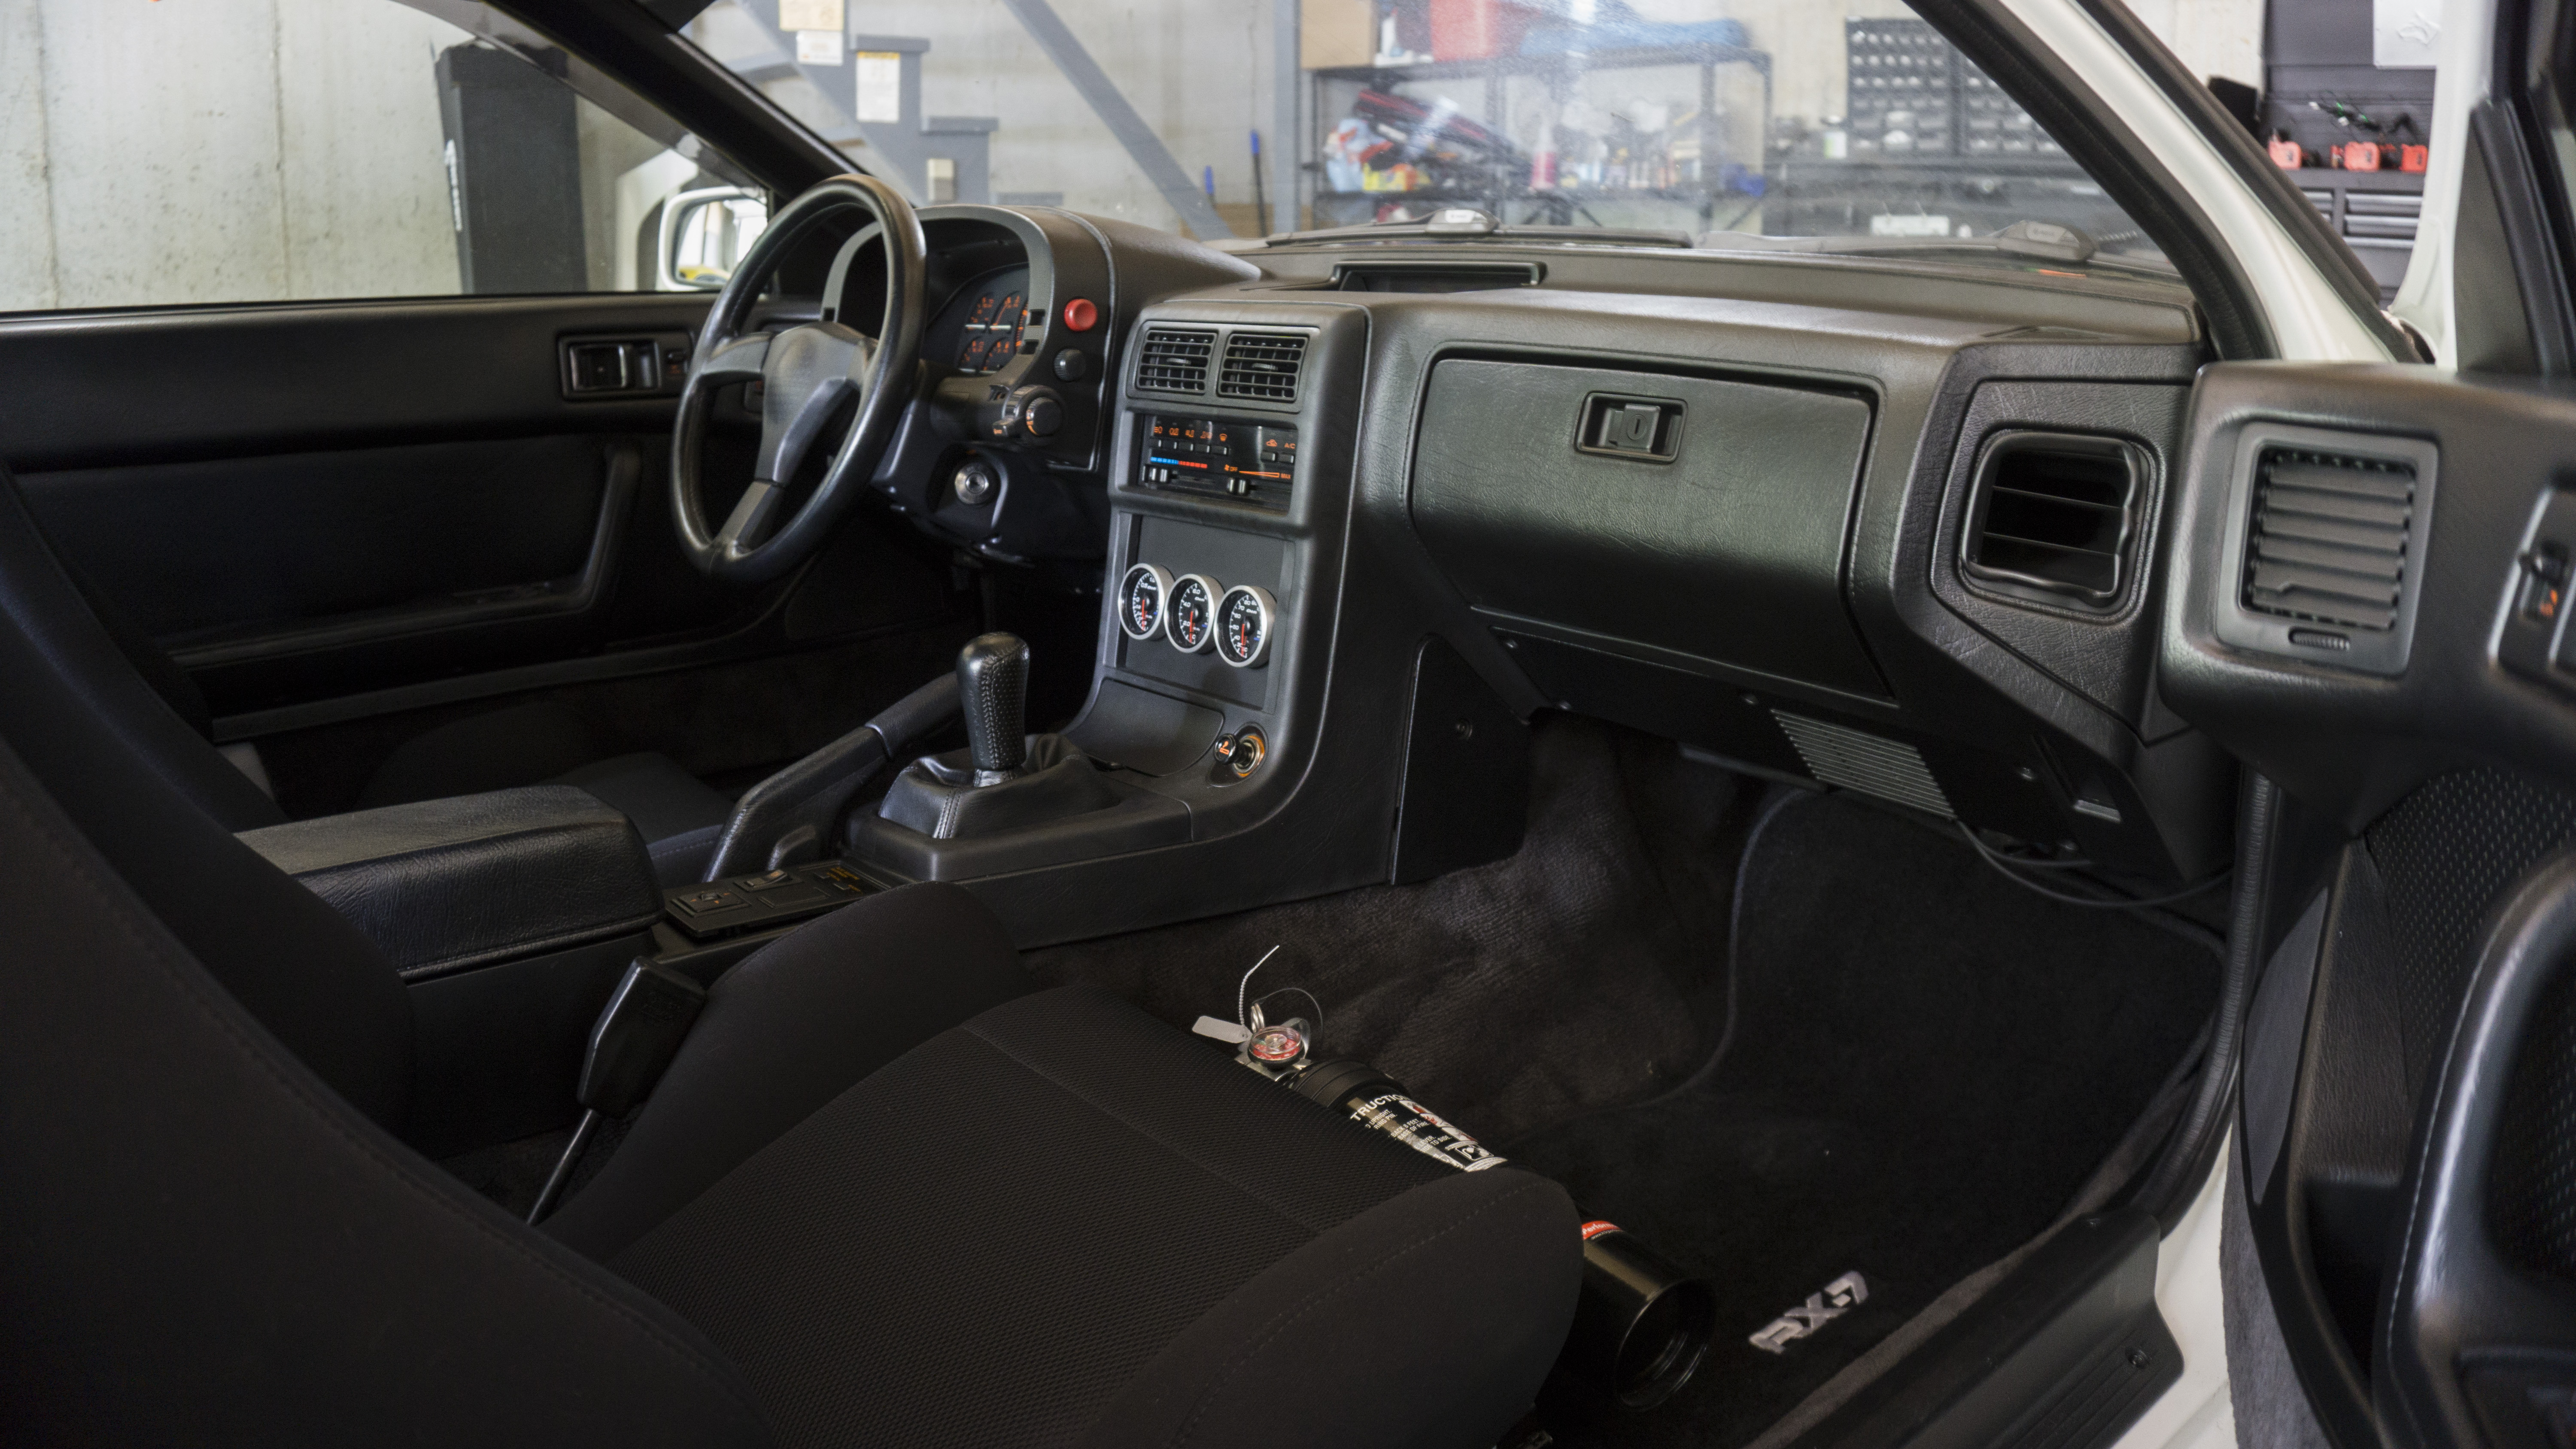
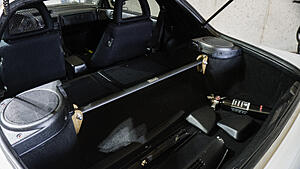
Finally! I was able to �finish� the interior of the car. There are still a few things I need to change out and tidy up, but I�d say it�s 98% complete. Also - are these cars ever really �finished�?. I purchased another MazdaSpeed shift **** - I keep finding better quality examples! I�m up to four now and I�m starting to feel like an addict. I�ll sell two of them though and recoup some of the cost. I ended up buying some automotive carpet and making some covers where the lap belts go in S5 cars, I also made a e-brake cover. I�ll try and source a real e-brake cover sometime. Honestly though, you can�t even see it with the seats in the car - so that�s just me being picky. I felt it was about time for the car to be back on the ground so I can dial in the new Coilovers so I went ahead and cleaned the wheels up. I�m incredibly satisfied that the barrels still look new after being washed. The last thing I did was get the seats in the car. They sit a little high, so I�m not sure what I�ll be able to do about that - I may try and find some Infini seats down the road or something, or get some custom brackets made.
This will probably be my last update for awhile. I�m running out of things to complete and the rest of them are incredibly small and probably not worth mentioning. As soon as I get my V-Mount kit in�.hopefully soon - I�ll be able to get some more work done on the car.
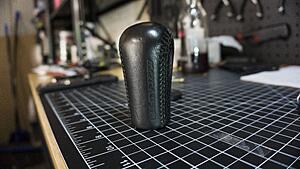
Here is the new MazdaSpeed shift ****:
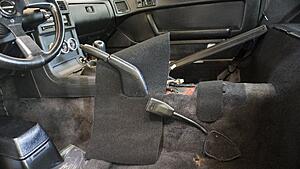
Here is the carpet covers I made:
Here are the wheels before and after:
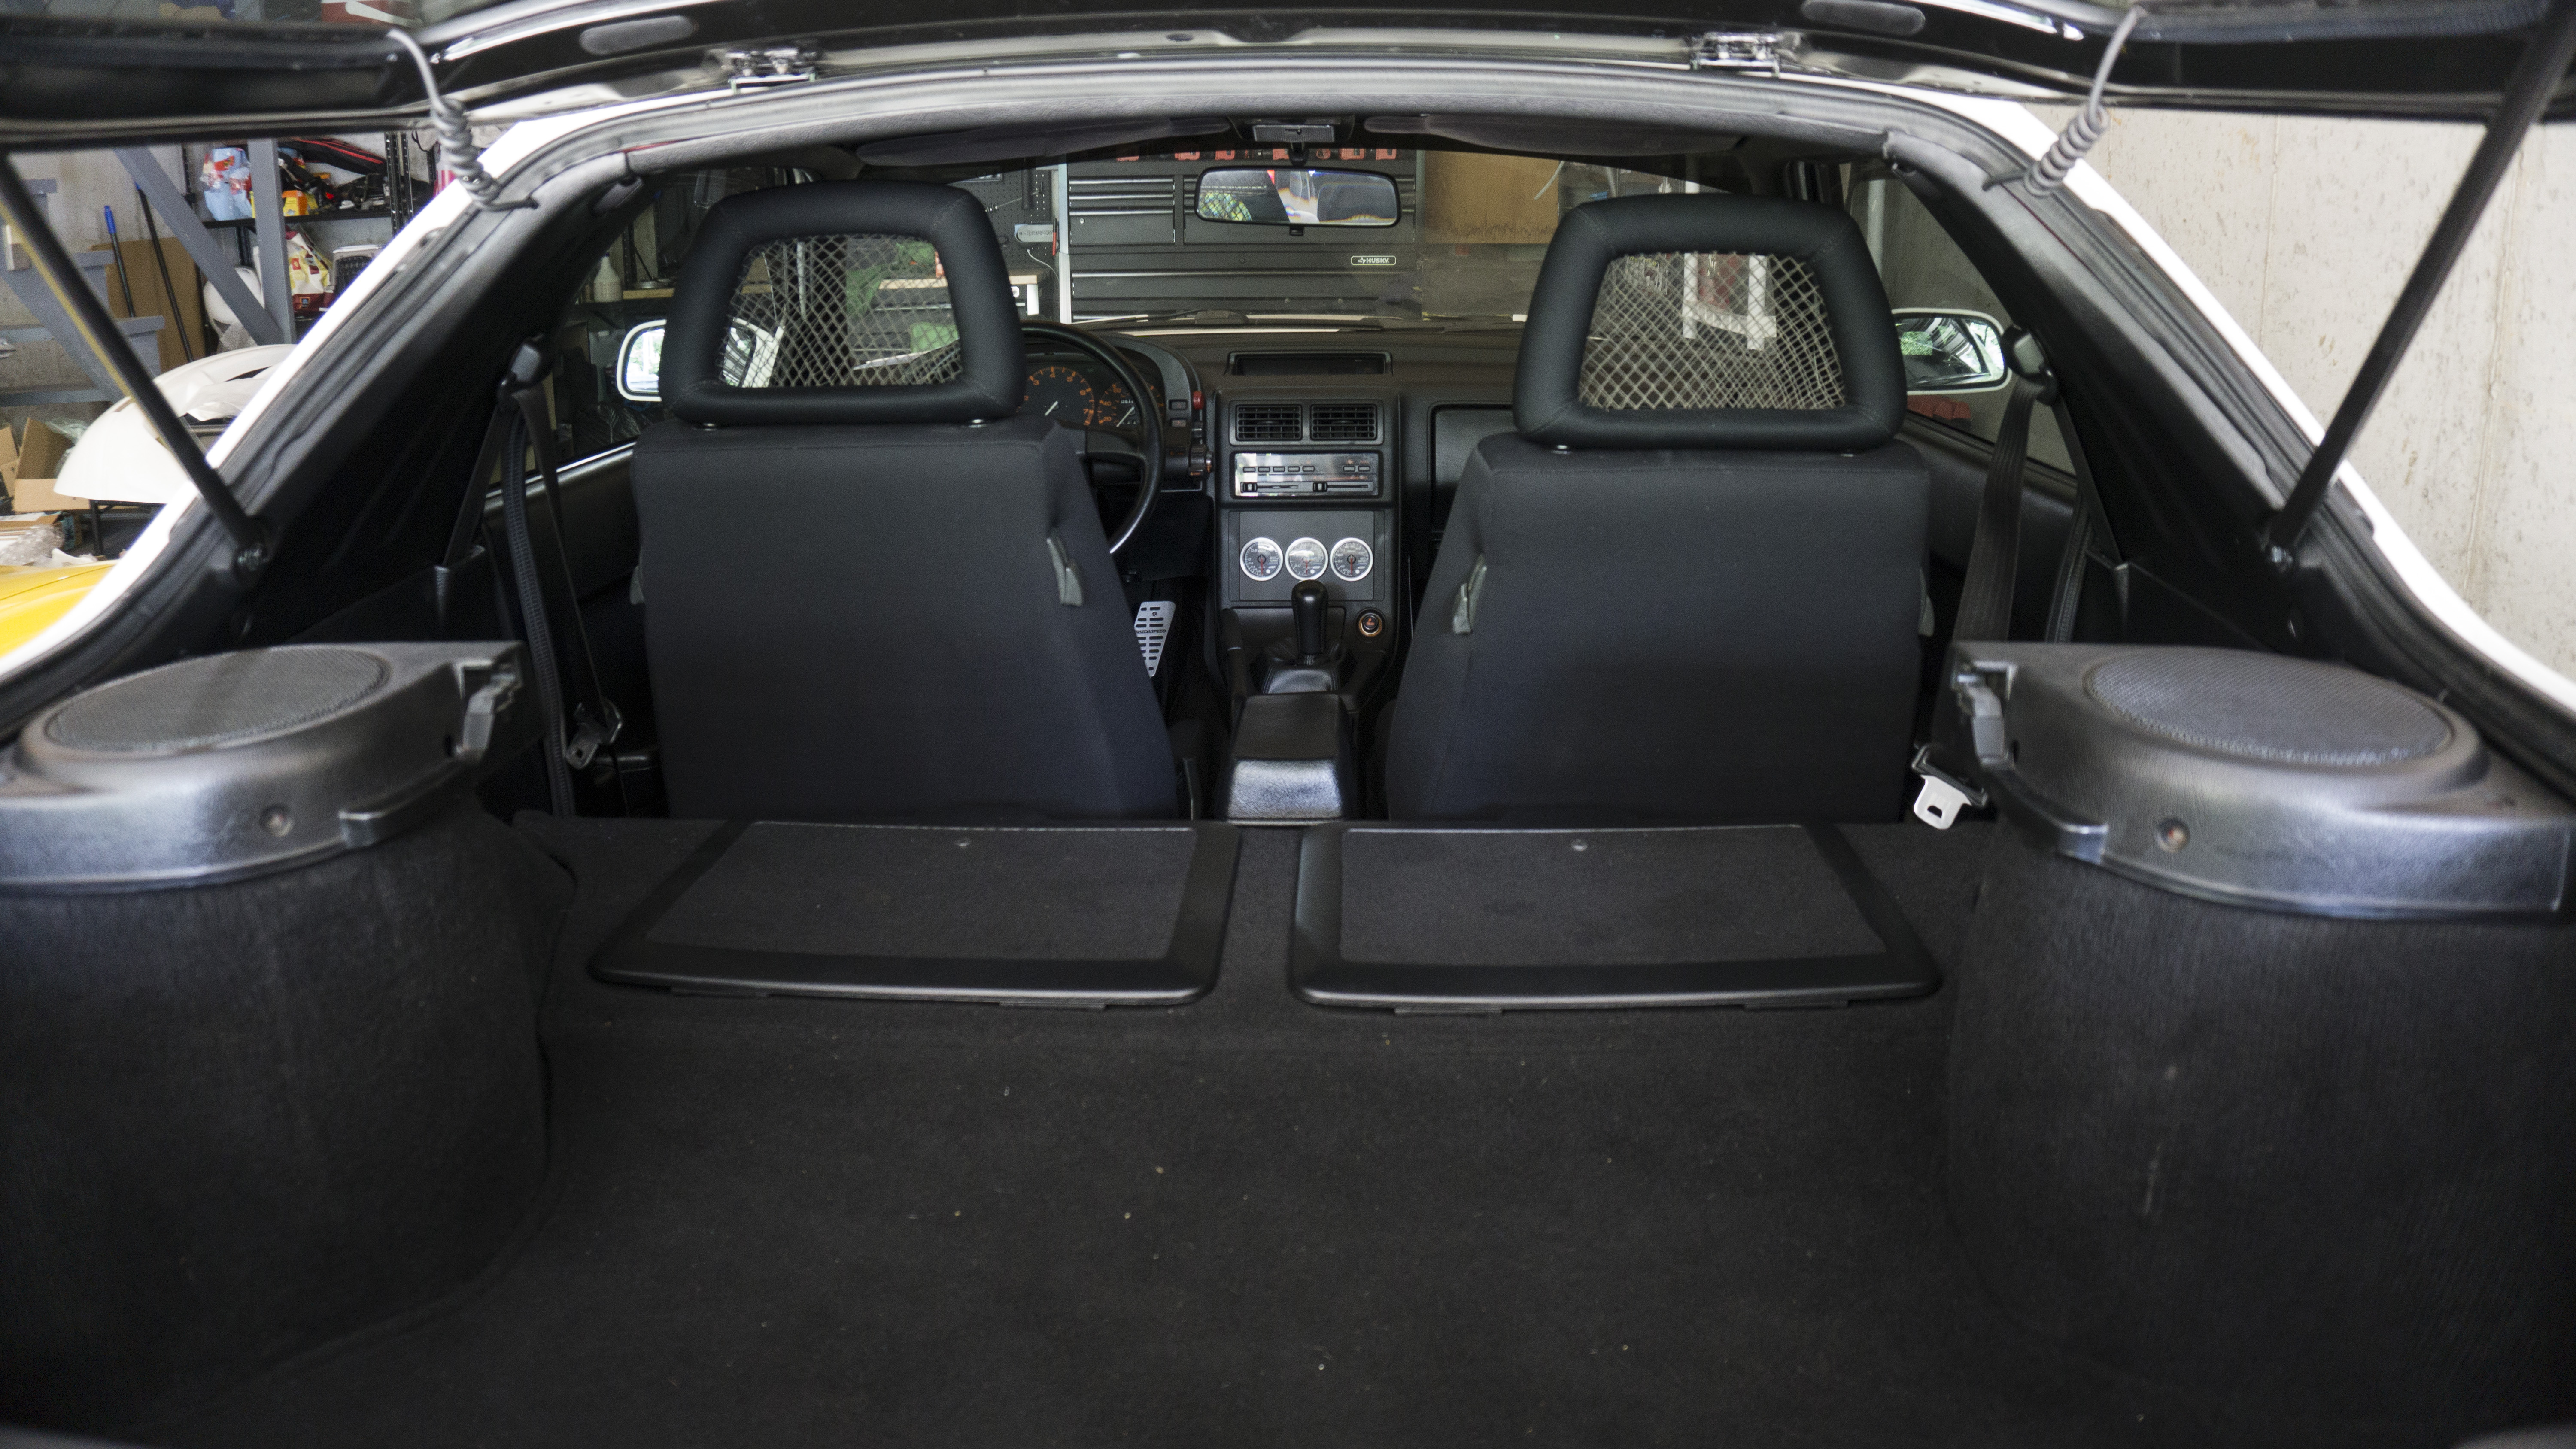
Here is the �finished� interior:
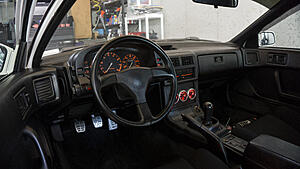
Finally! I was able to �finish� the interior of the car. There are still a few things I need to change out and tidy up, but I�d say it�s 98% complete. Also - are these cars ever really �finished�?. I purchased another MazdaSpeed shift **** - I keep finding better quality examples! I�m up to four now and I�m starting to feel like an addict. I�ll sell two of them though and recoup some of the cost. I ended up buying some automotive carpet and making some covers where the lap belts go in S5 cars, I also made a e-brake cover. I�ll try and source a real e-brake cover sometime. Honestly though, you can�t even see it with the seats in the car - so that�s just me being picky. I felt it was about time for the car to be back on the ground so I can dial in the new Coilovers so I went ahead and cleaned the wheels up. I�m incredibly satisfied that the barrels still look new after being washed. The last thing I did was get the seats in the car. They sit a little high, so I�m not sure what I�ll be able to do about that - I may try and find some Infini seats down the road or something, or get some custom brackets made.
This will probably be my last update for awhile. I�m running out of things to complete and the rest of them are incredibly small and probably not worth mentioning. As soon as I get my V-Mount kit in�.hopefully soon - I�ll be able to get some more work done on the car.
Here is the new MazdaSpeed shift ****:
Here is the carpet covers I made:
Here are the wheels before and after:
Here is the �finished� interior:
 10-19-19, 09:59 PM
#263
Update 10/19/19:
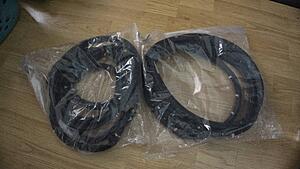
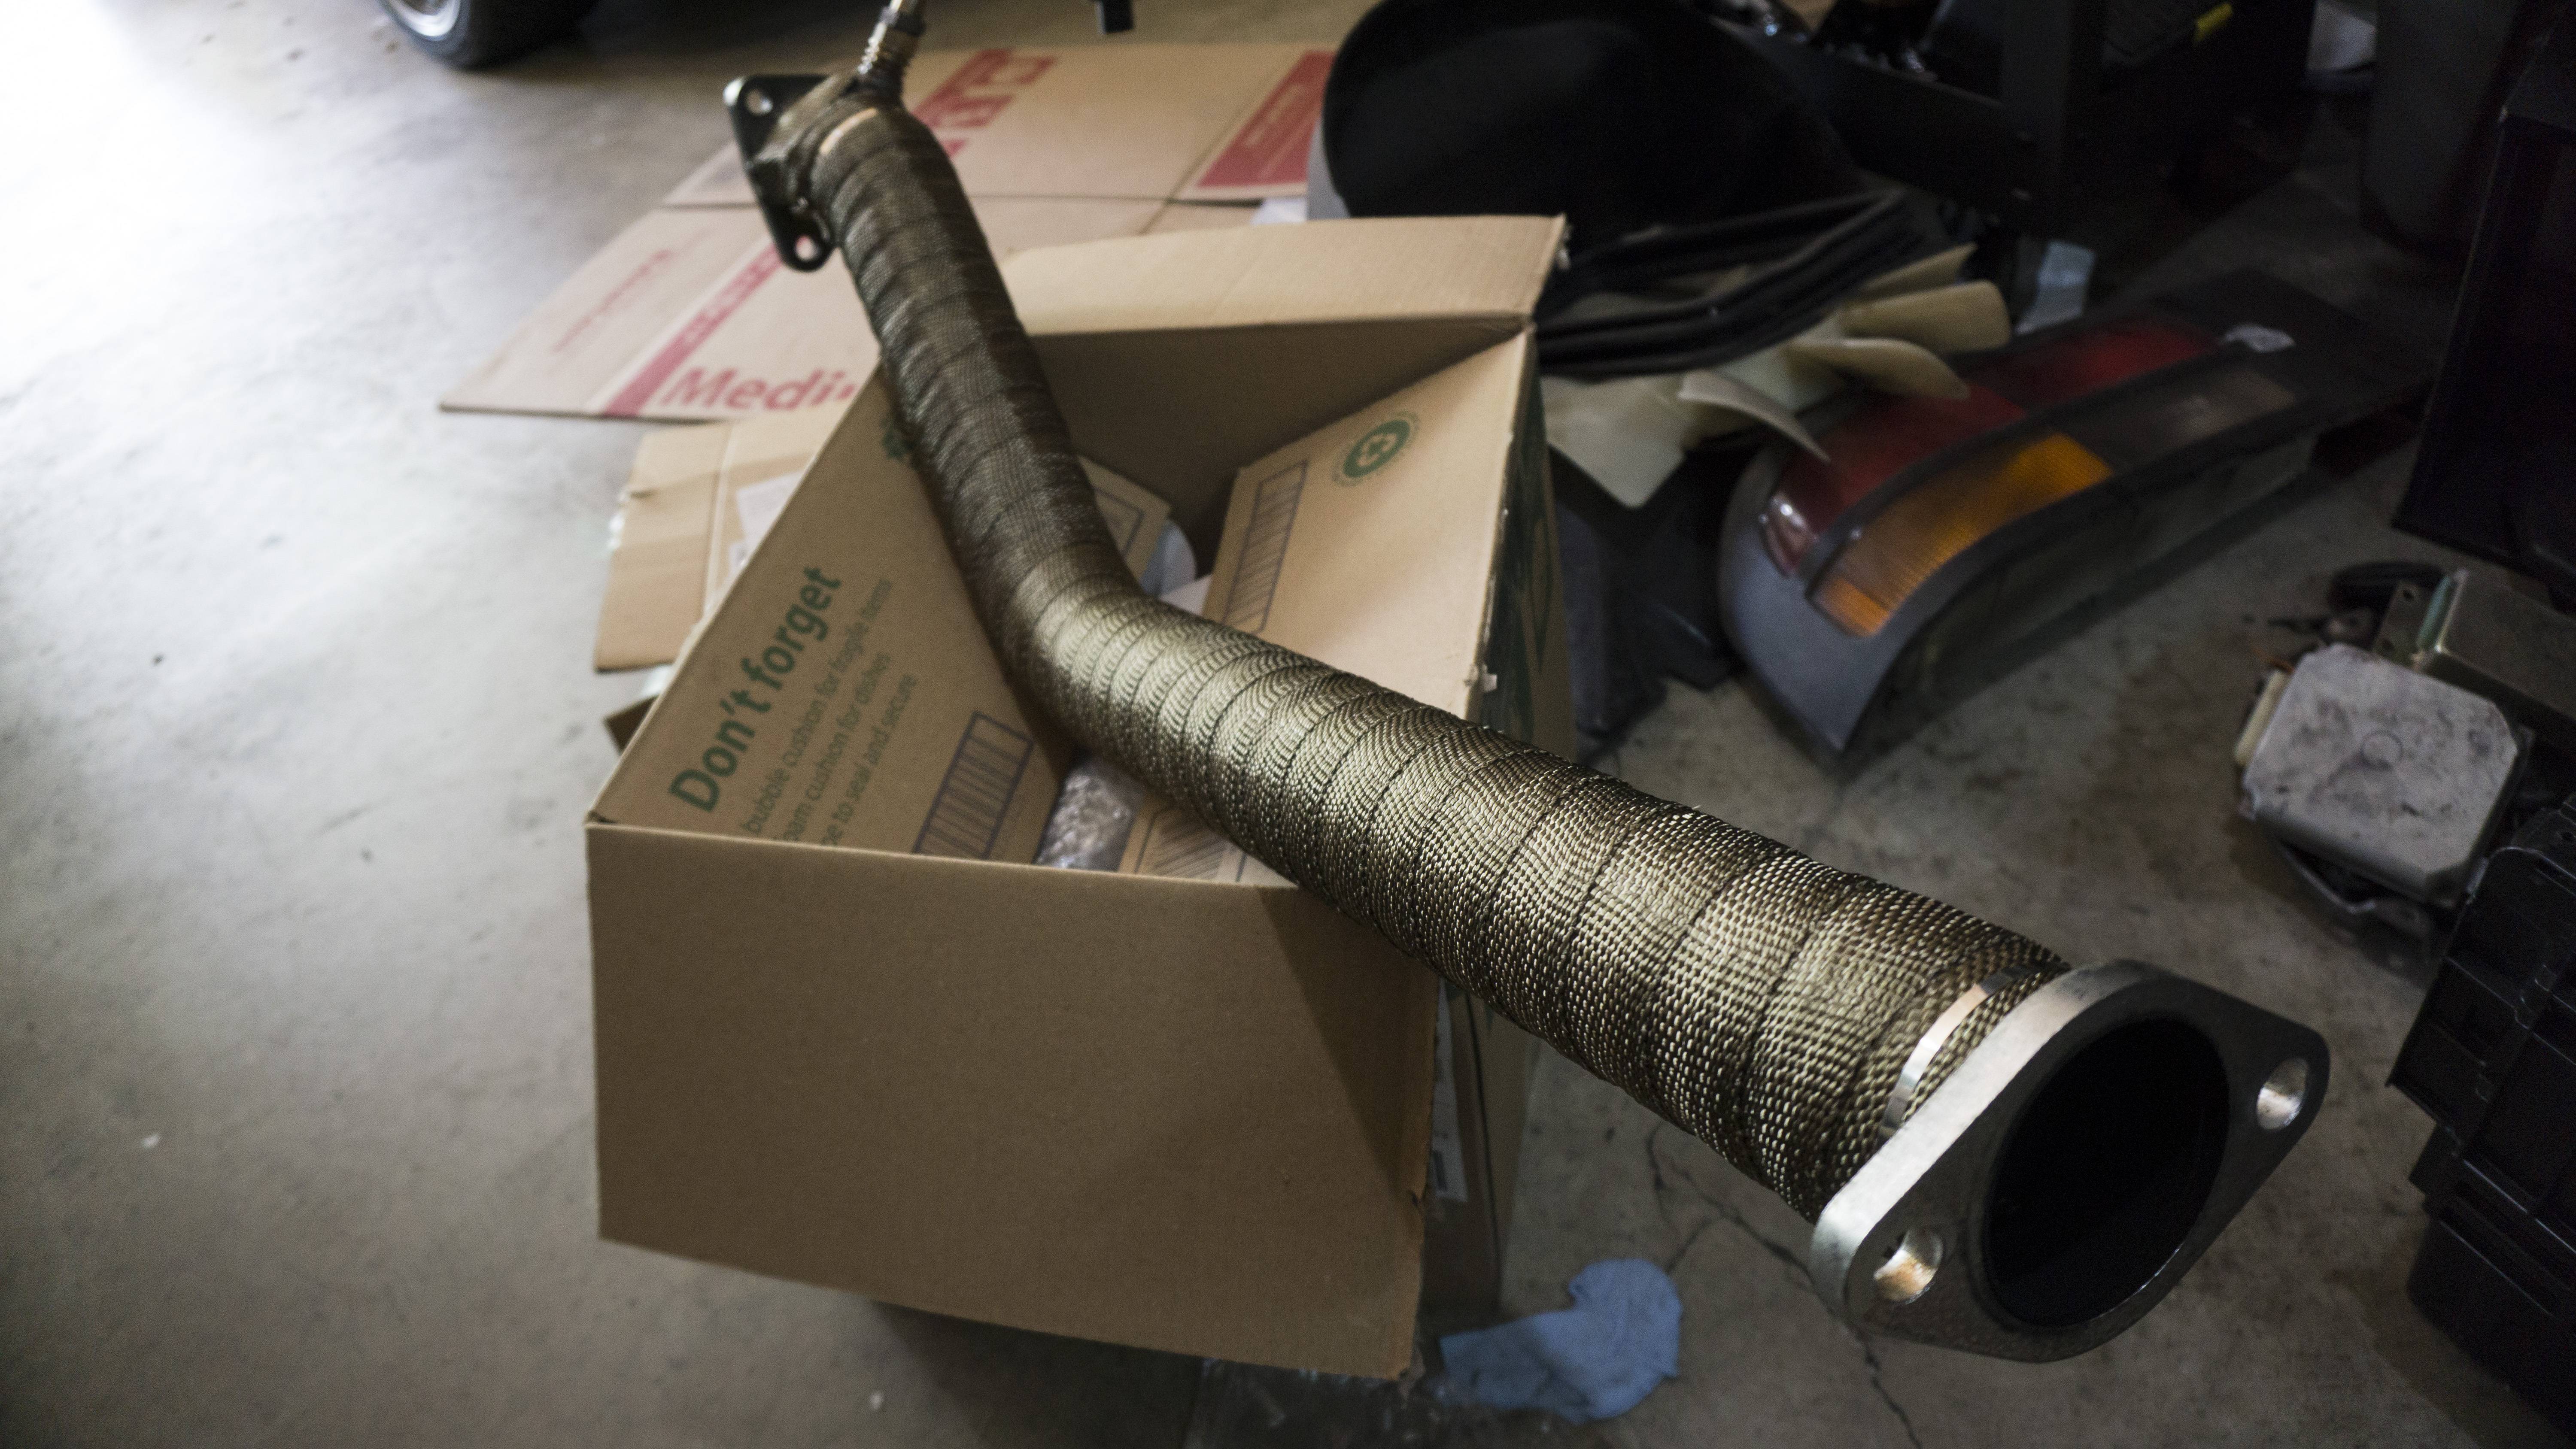
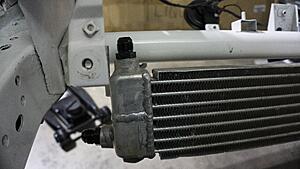
I wanted to put together a quick little update. I�ve still been working on the FC, but until I get my V-Mount kit in I�ve re-aligned focus over to the FD (if interested you can follow that build in my signature). I ended up heat wrapping my downpipe and getting it on. I think it turned out really well for my first time wrapping anything with heat wrap. I verified that my oil cooler will be in the same location in the v-mount setup, so I went ahead and installed brand new brackets and threw it on the car. I ended up buying a nicer oil cooler since mine was a little banged up. With my latest order from Atkins I threw in brand new outer door weather stripping. I�ve never had these on my car before, I�ve always held off putting them on since the door seemed to seal anyway. Glad they are on though and I think they really aid in bringing the car together. It�s been about a year since I drove the car last. I�m really excited to get this back on the road and looking good.
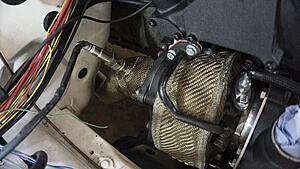
Here is the downpipe heat wrap:

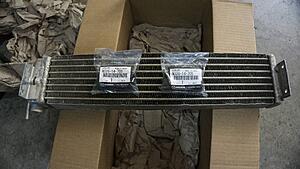
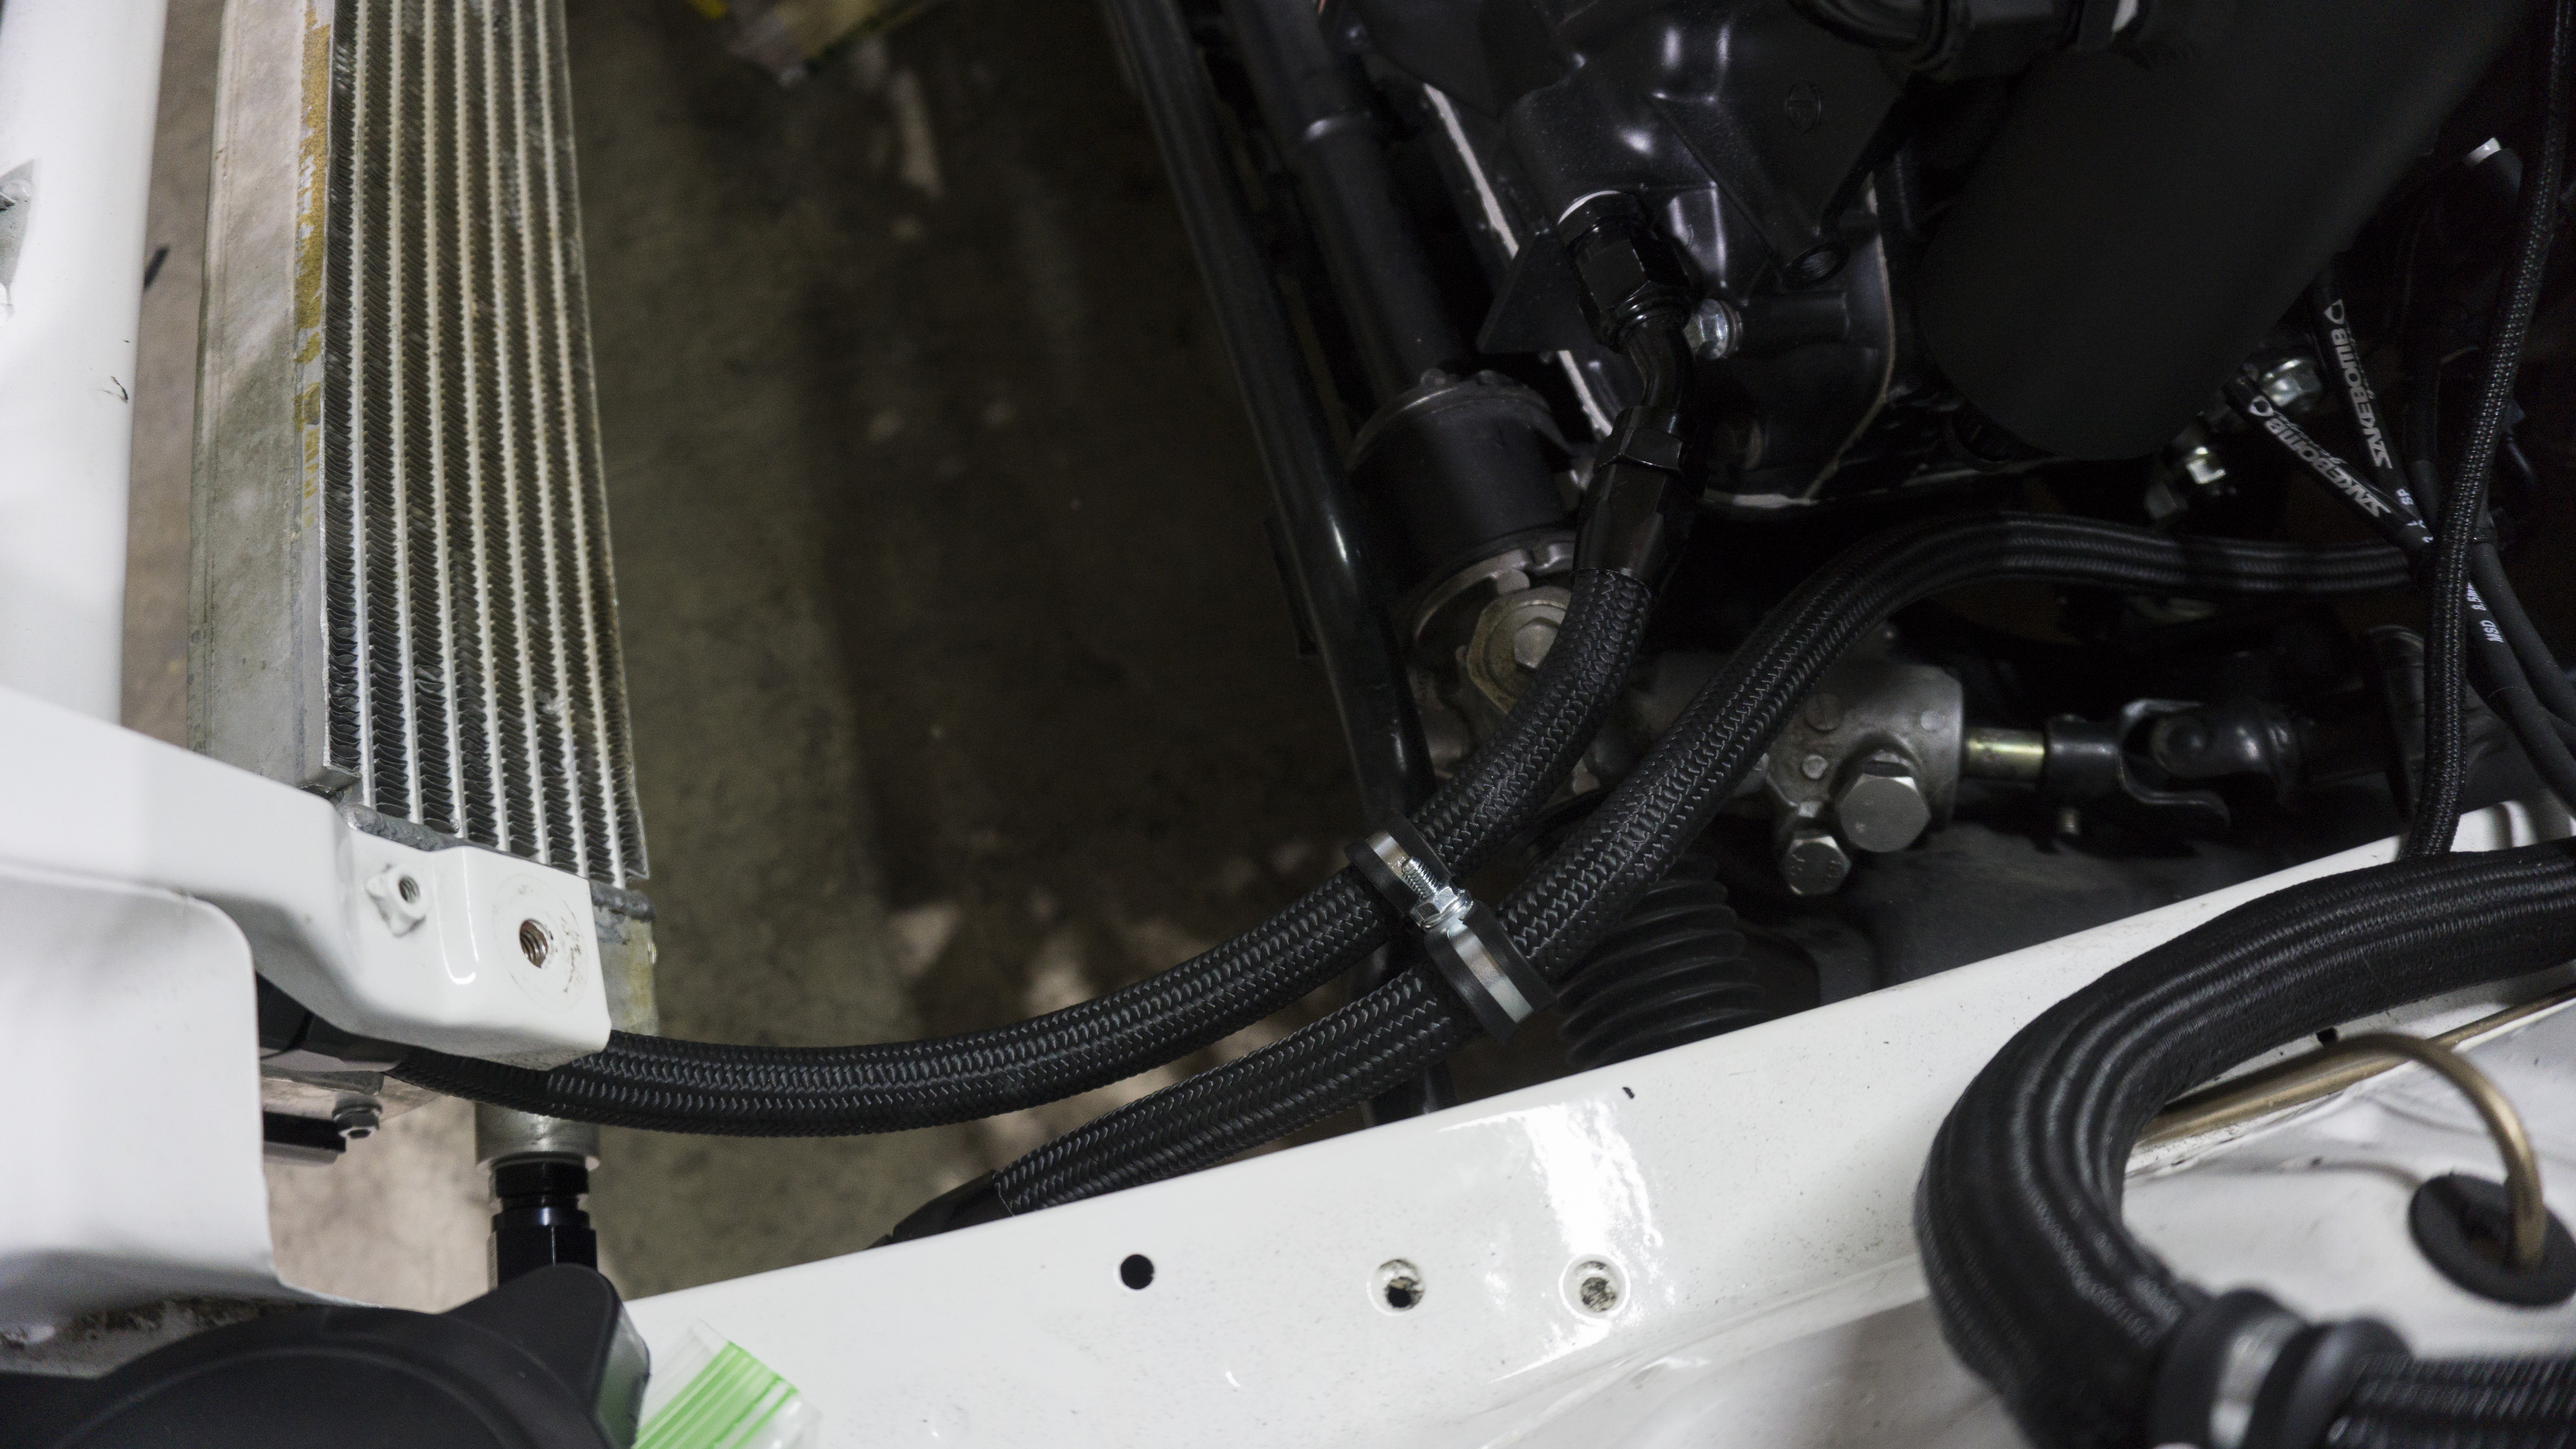
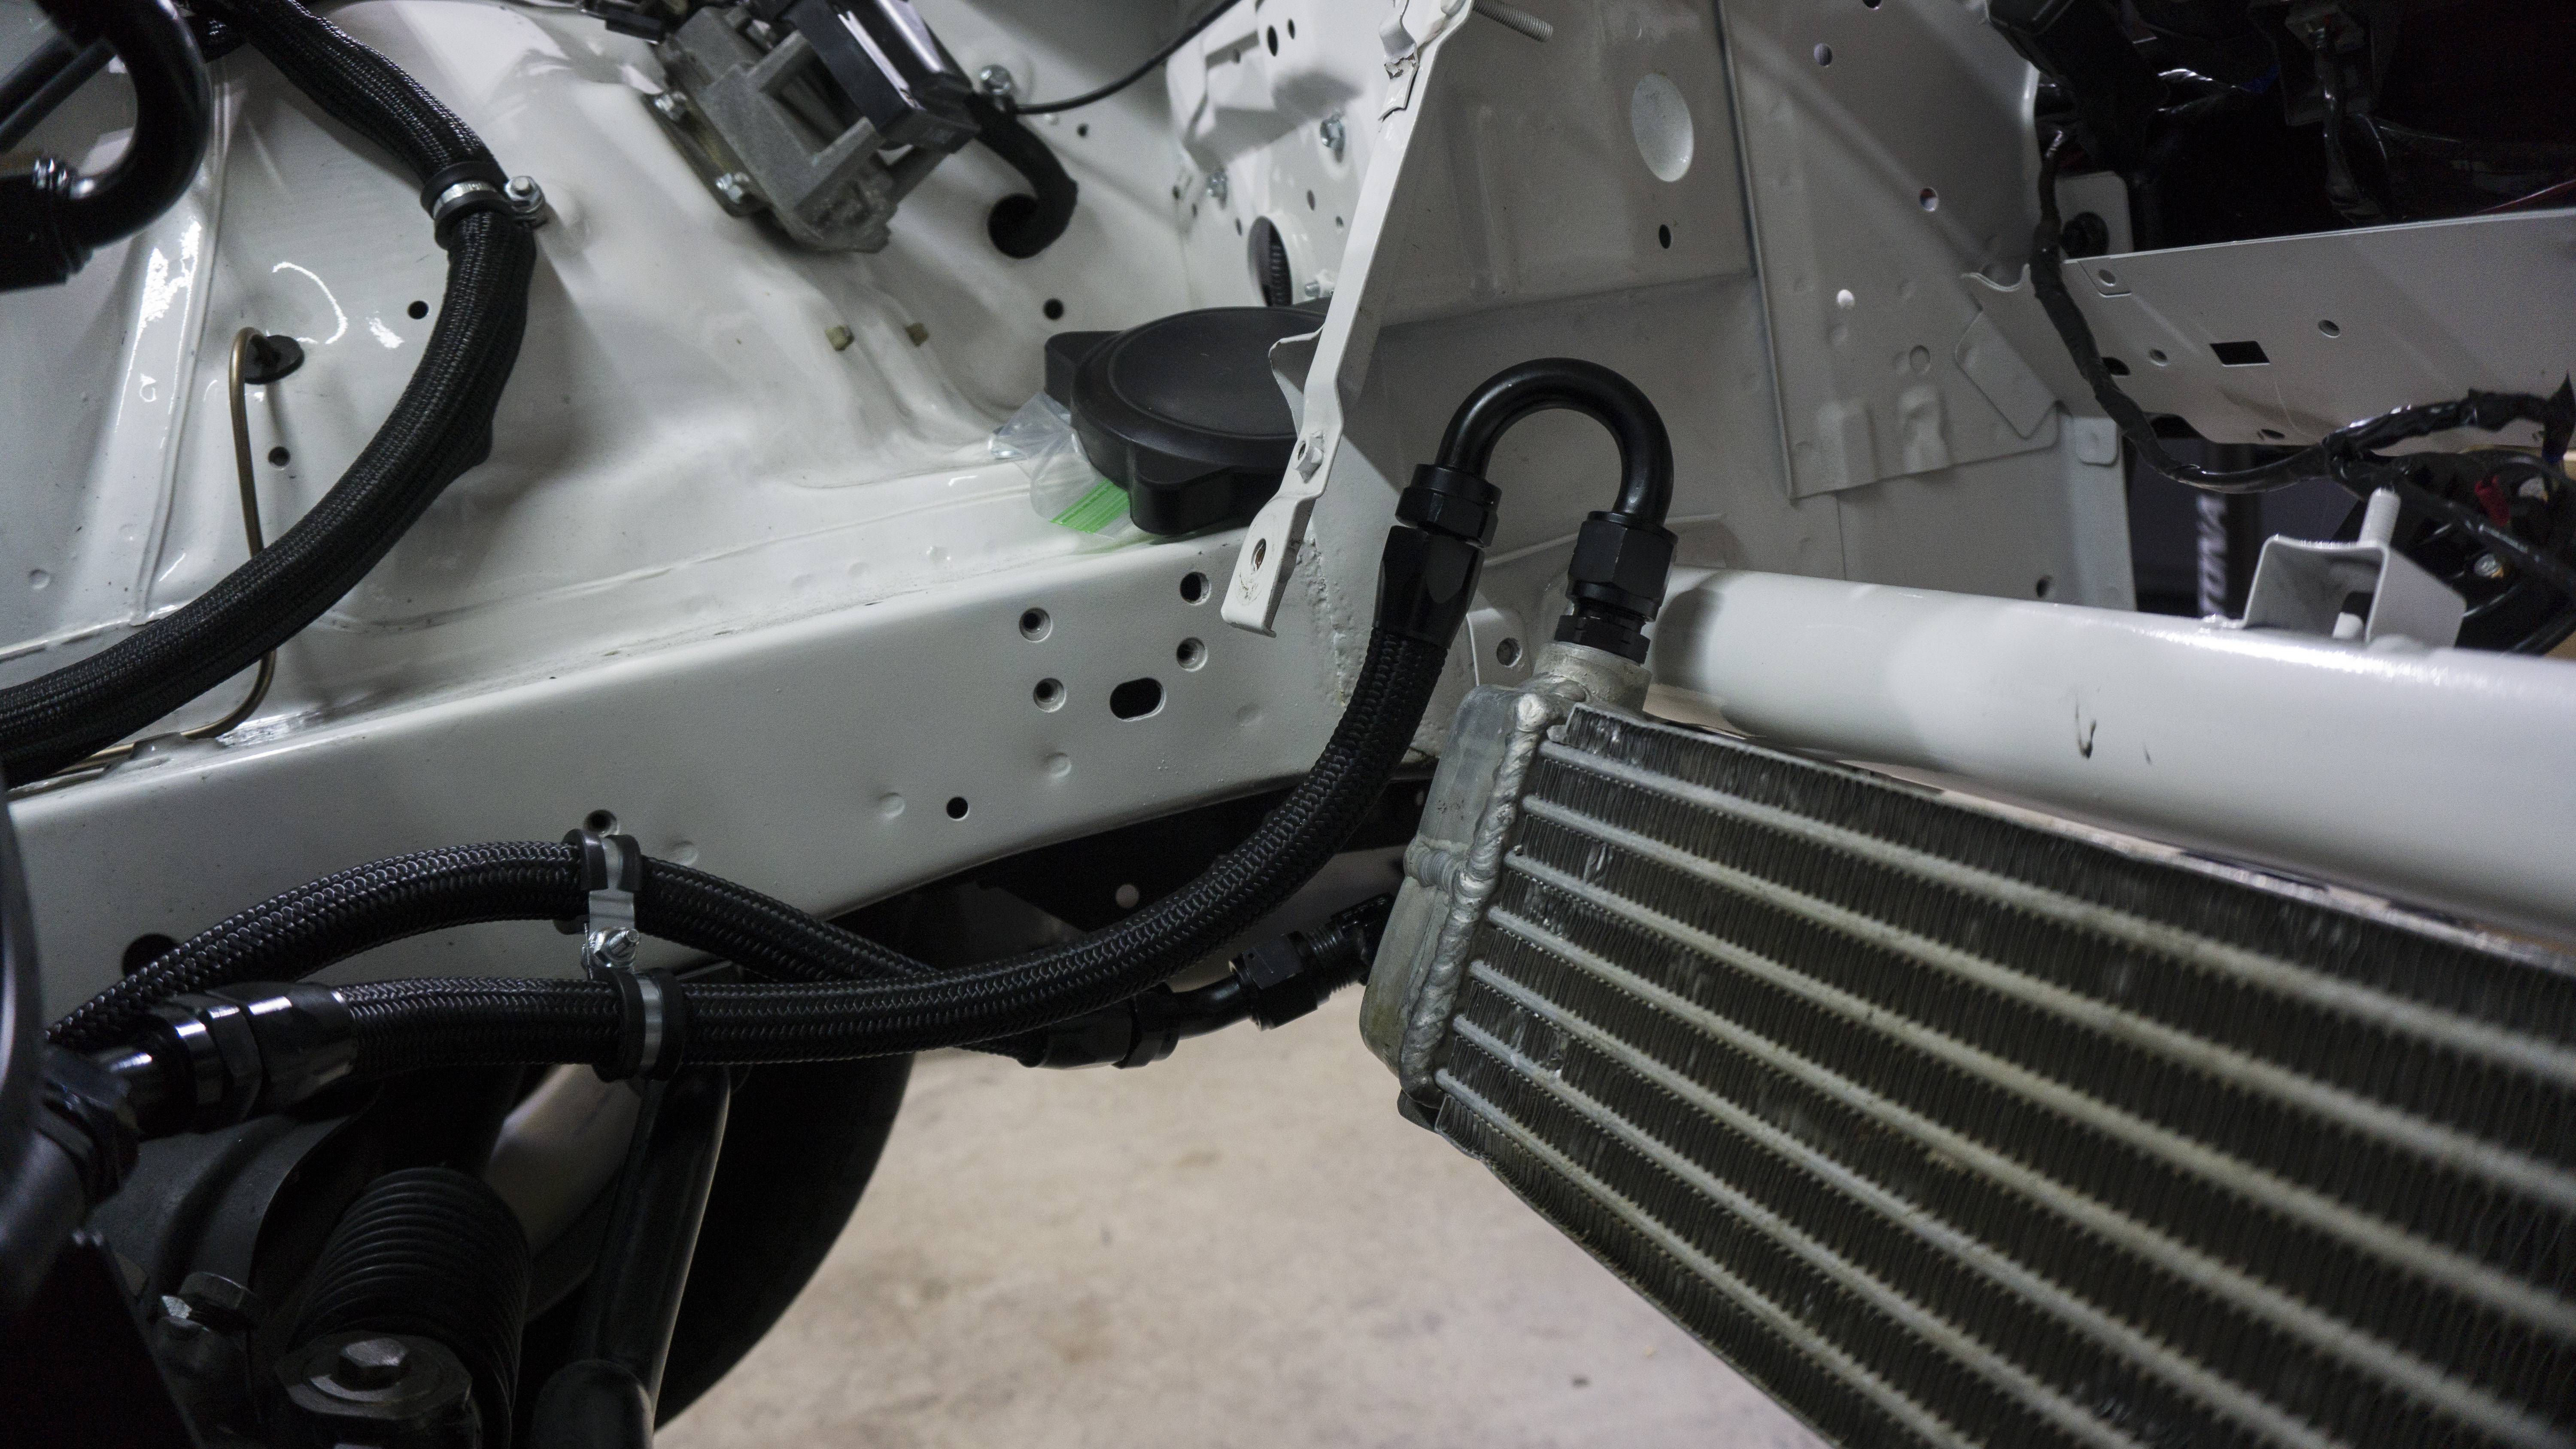
Here is the oil cooler:
Here is the outer door weather strip:
I wanted to put together a quick little update. I�ve still been working on the FC, but until I get my V-Mount kit in I�ve re-aligned focus over to the FD (if interested you can follow that build in my signature). I ended up heat wrapping my downpipe and getting it on. I think it turned out really well for my first time wrapping anything with heat wrap. I verified that my oil cooler will be in the same location in the v-mount setup, so I went ahead and installed brand new brackets and threw it on the car. I ended up buying a nicer oil cooler since mine was a little banged up. With my latest order from Atkins I threw in brand new outer door weather stripping. I�ve never had these on my car before, I�ve always held off putting them on since the door seemed to seal anyway. Glad they are on though and I think they really aid in bringing the car together. It�s been about a year since I drove the car last. I�m really excited to get this back on the road and looking good.
Here is the downpipe heat wrap:
Here is the oil cooler:

Here is the outer door weather strip:


Last edited by Akomix; 10-20-19 at 08:22 AM.
11-23-19, 05:23 PM
#264
Update 11/23/19:
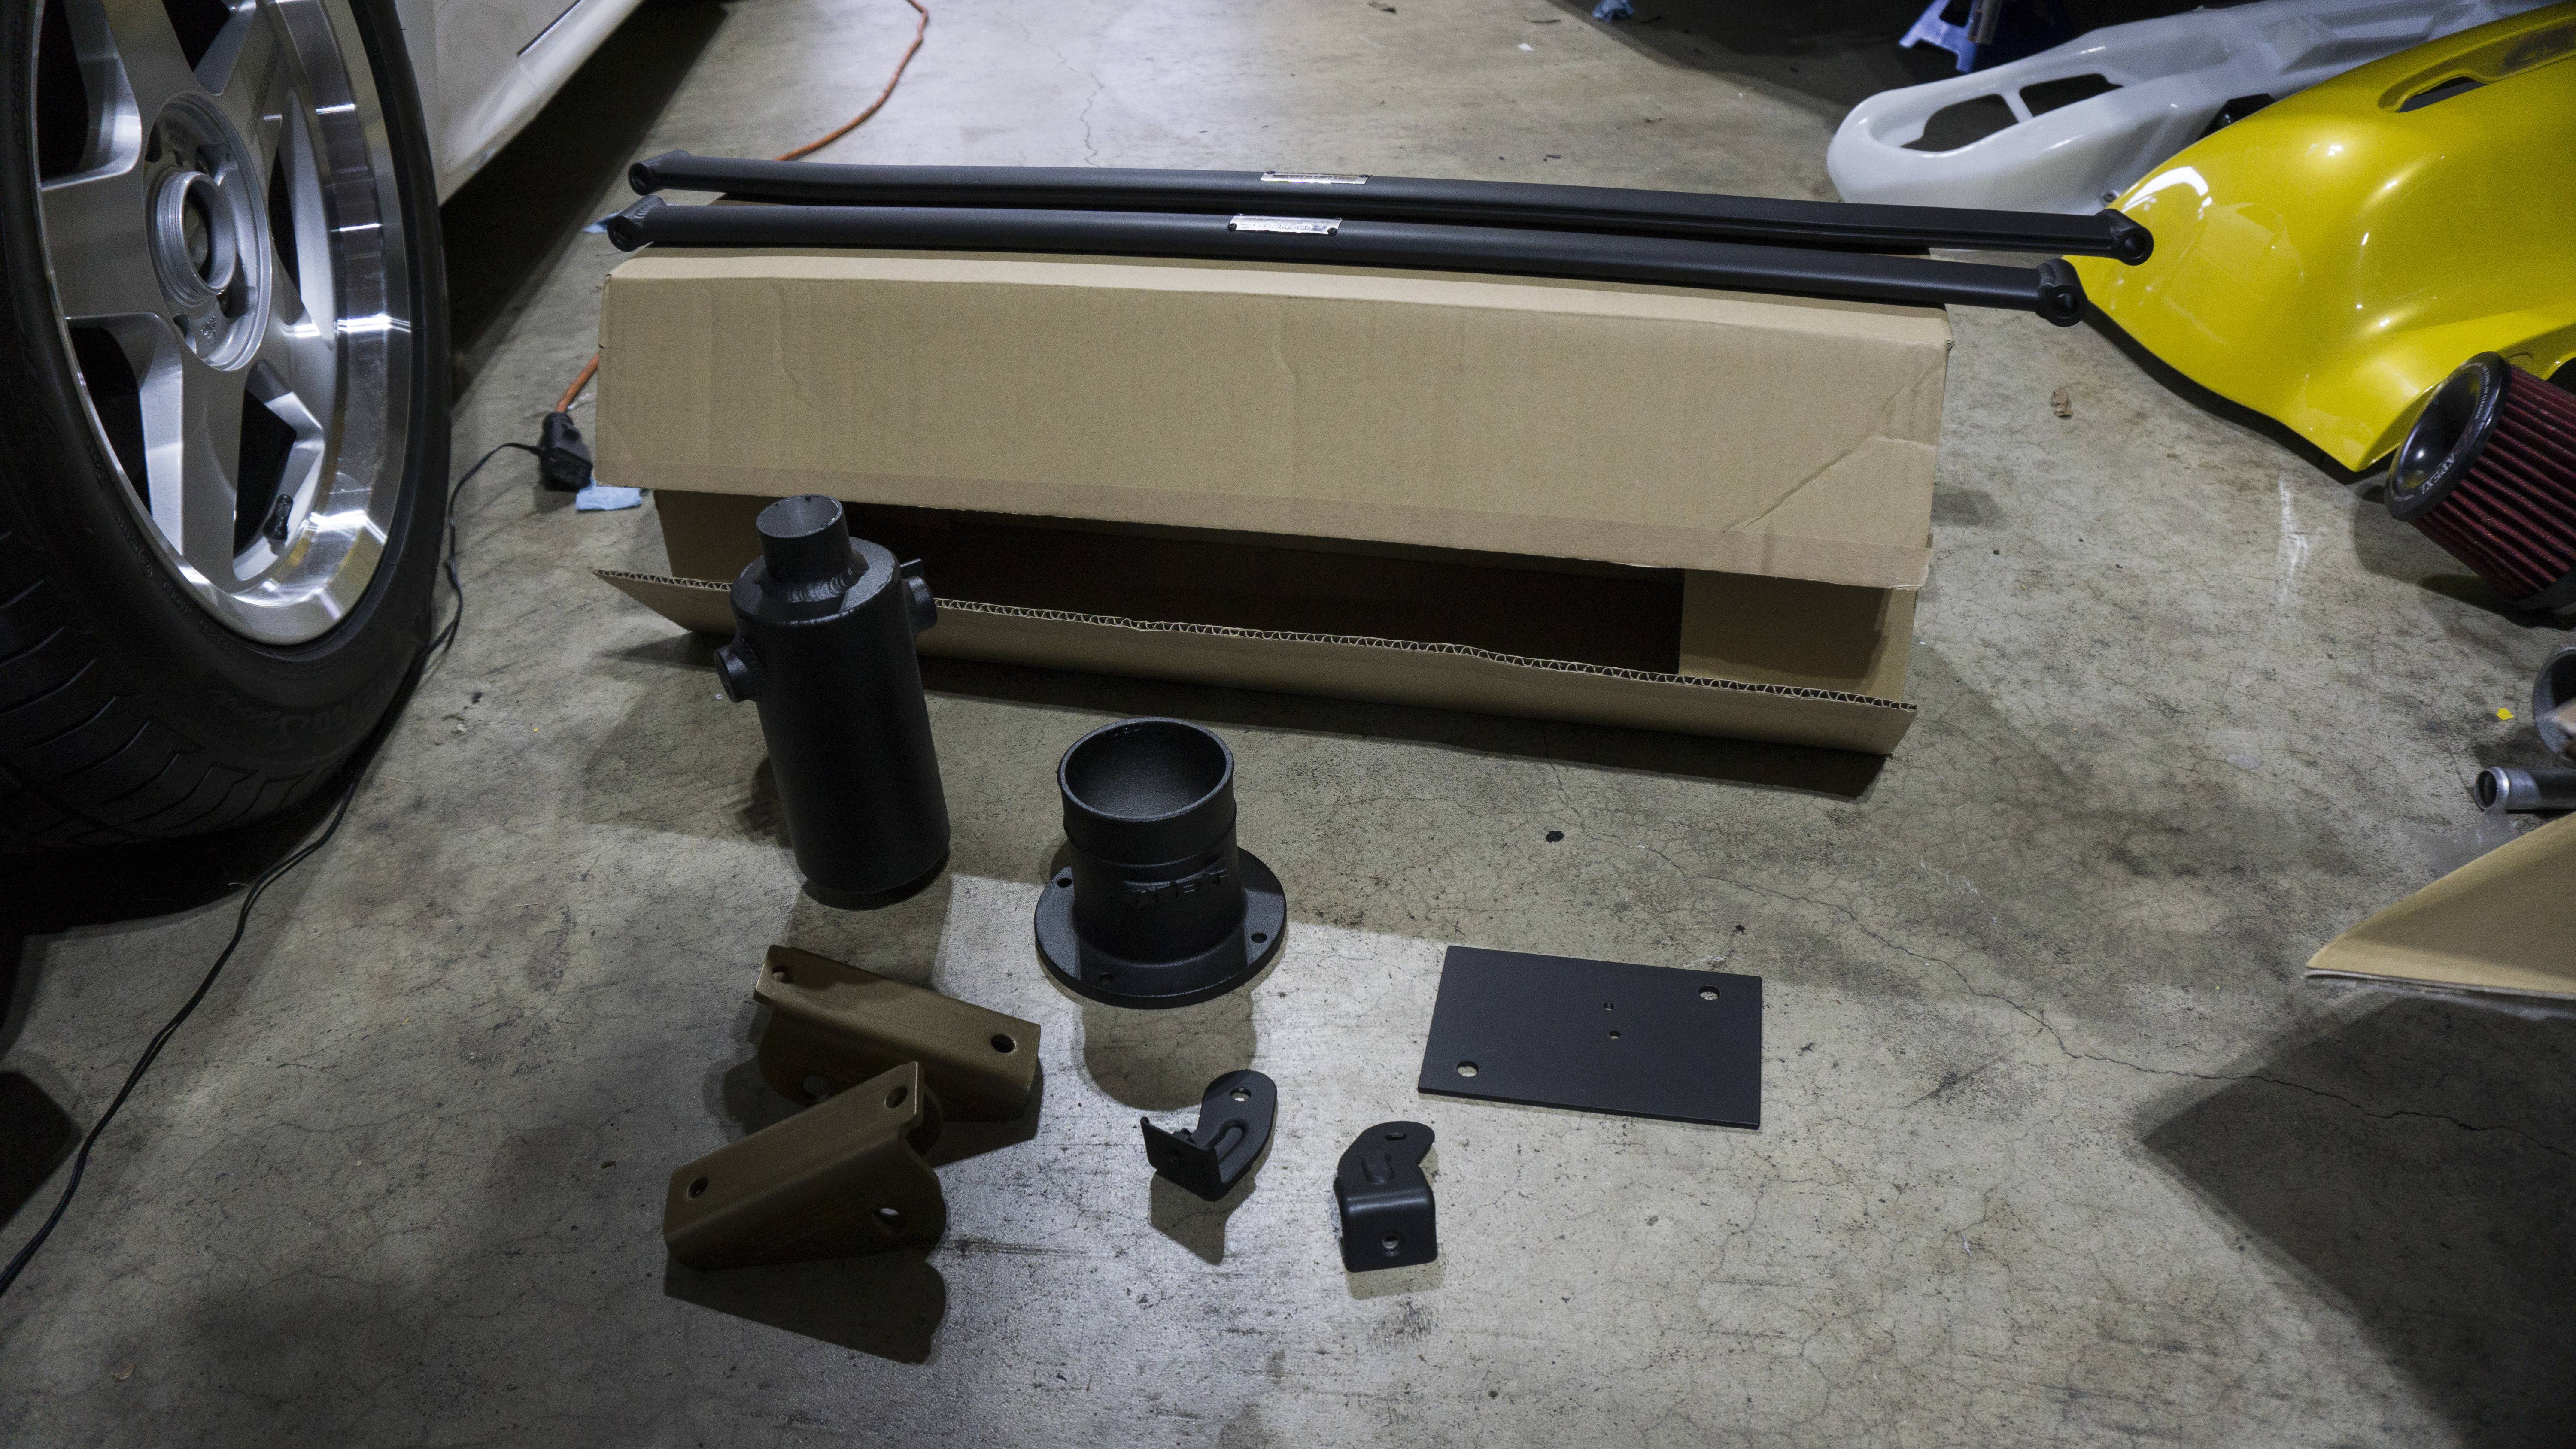
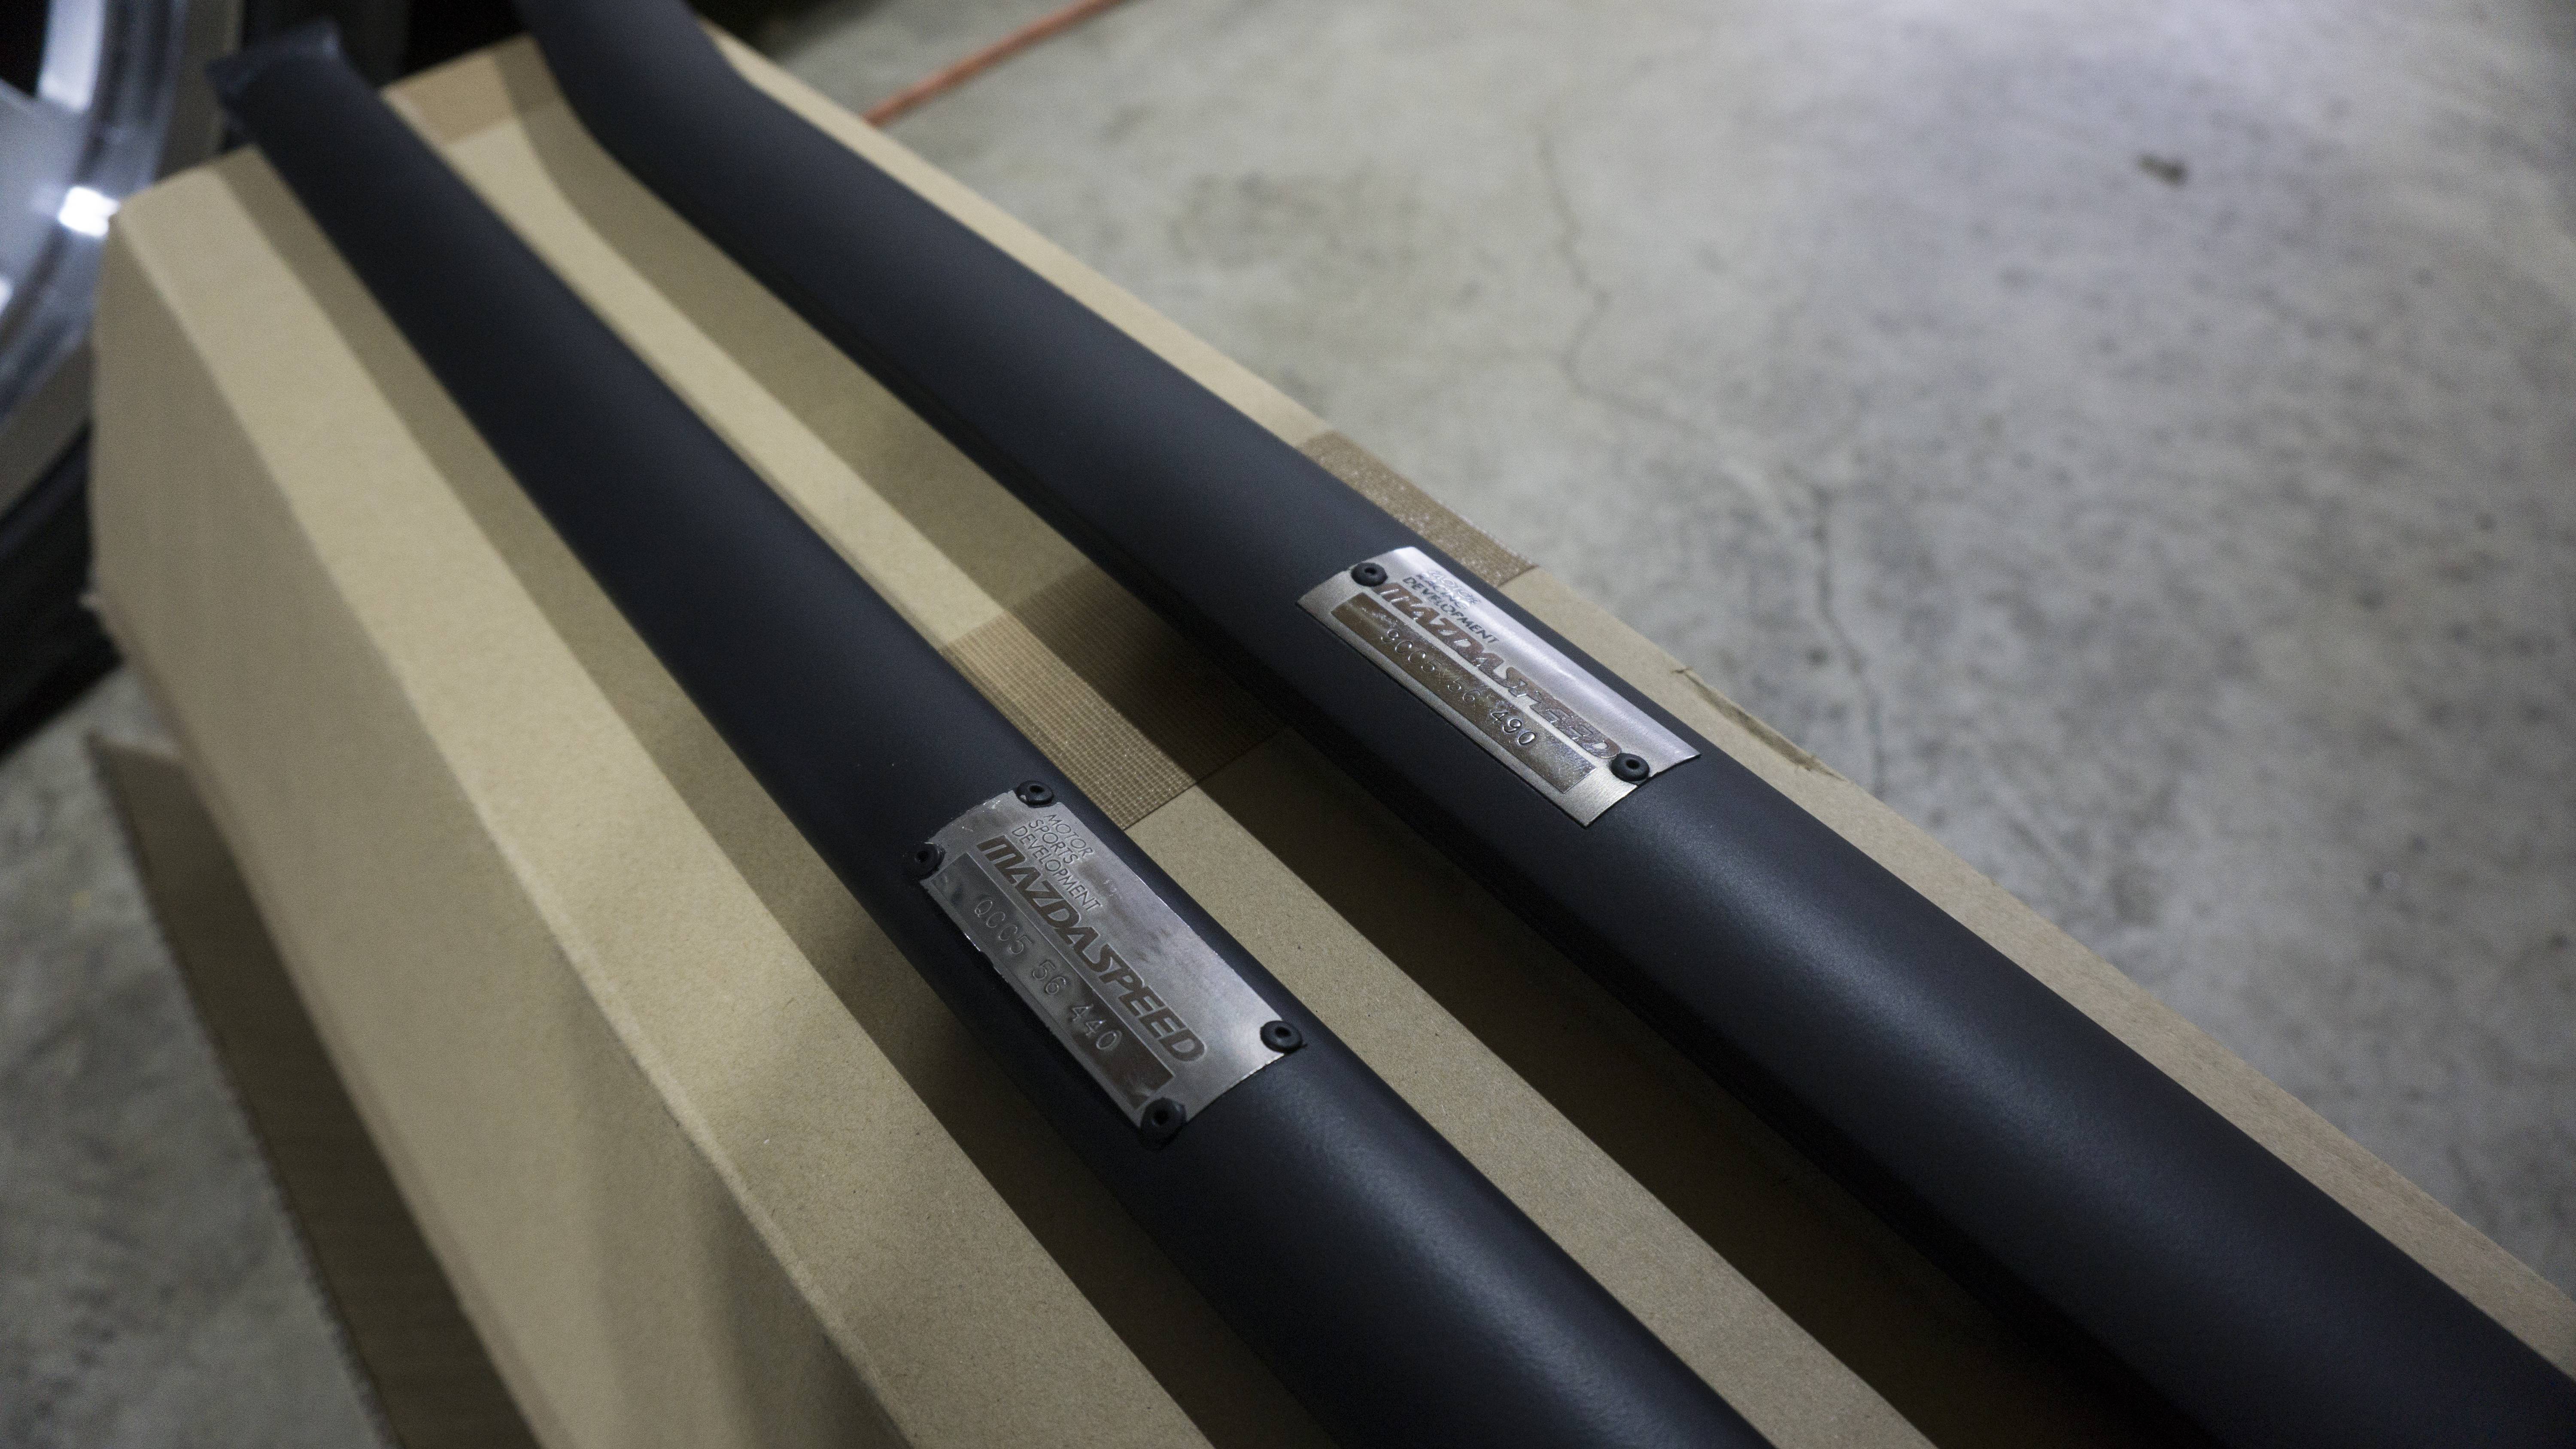
Wanted to post another short little update. Good news! My v-mount kit should be to me before the end of the year. I�ve been monitoring it�s progress as it�s being built and it looks great. I�m really excited to get it in and...take it straight to powder coating. What�s two more weeks waiting for it to look even better - I�ve waited this long. I got some of the stuff back from coating and before anyone says anything. I may have done something sacrilege - I powder coated my MazdaSpeed strut bars. However, I think they turned out really good. In the end, they can always be blasted back to aluminum. I�ll let you guys be the judge. I have a couple more things I need to do before the v-mount gets here, but should be able to knock that out. With any luck I�ll have two running cars come this spring and I�ll have a constant inner struggle to decide which one I want to drive. Should have some bigger updates coming soon! Fingers crossed anyway.
Here is everything that came in from powder:
Here is the strut bars:
Here is the routing and the bracket I chose for the boost control solenoid:

 12-16-19, 08:54 AM
#265
Update 12/16/19:
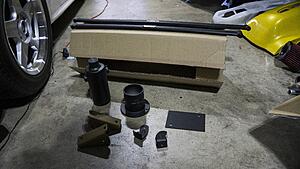
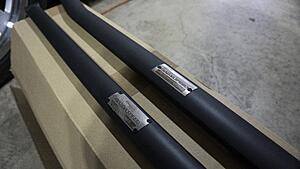
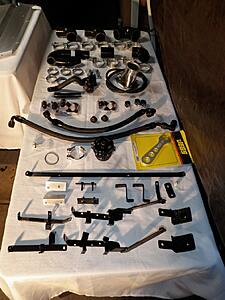
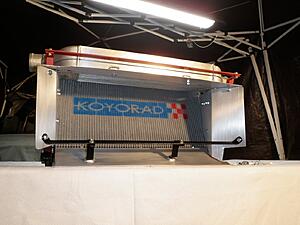
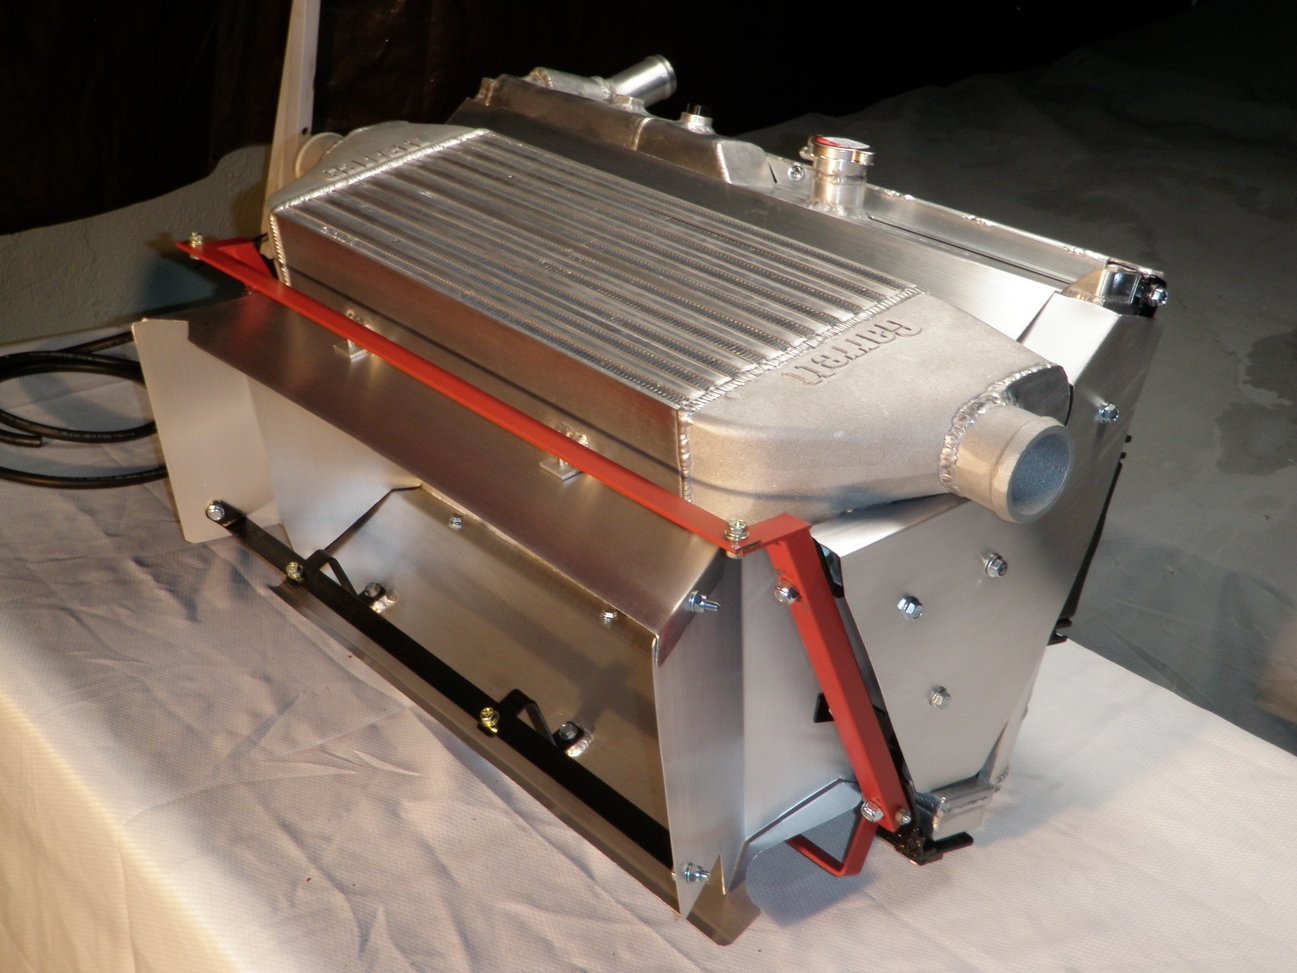
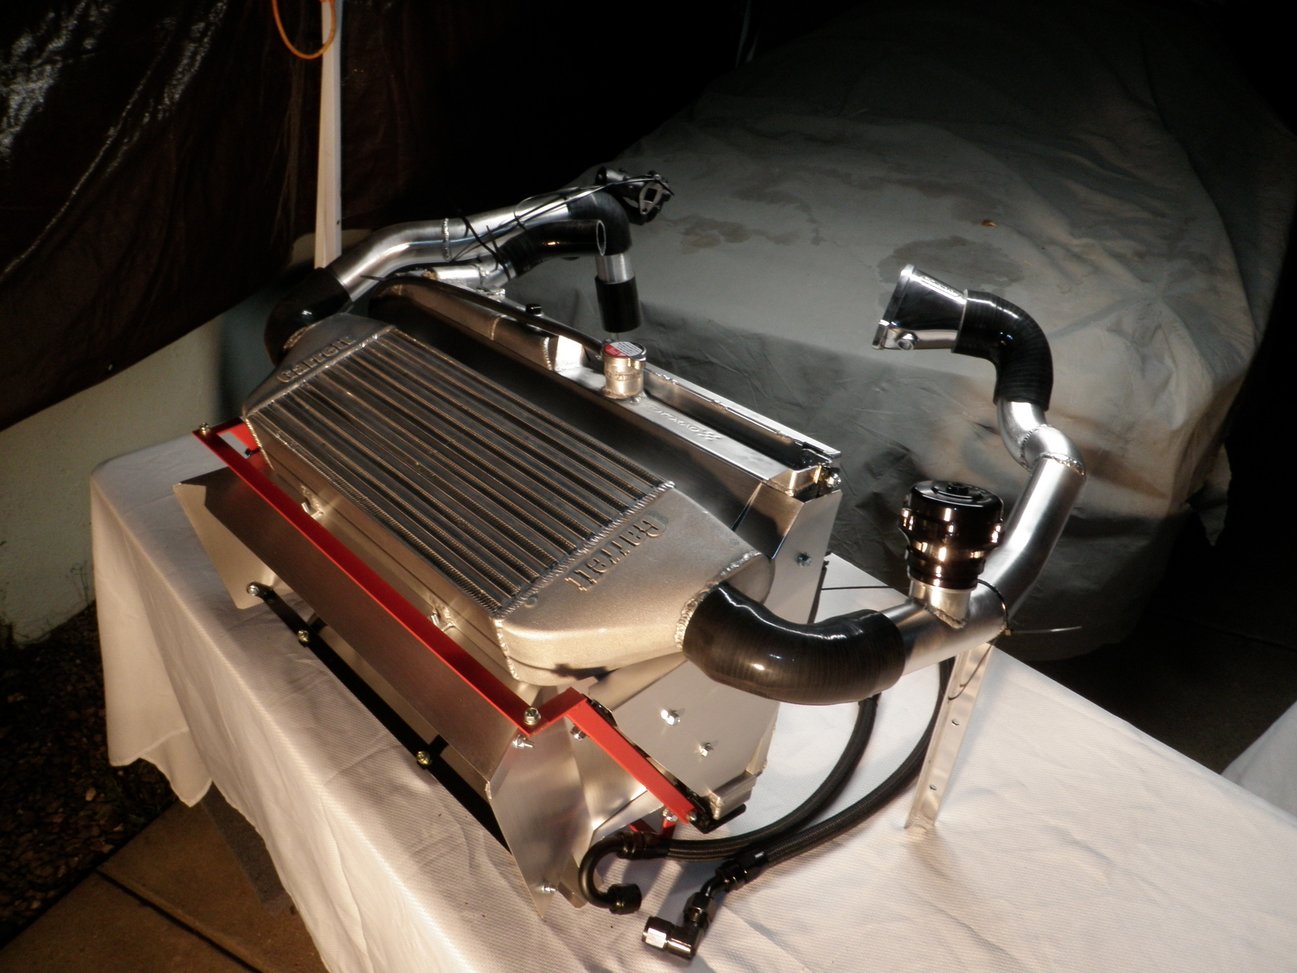
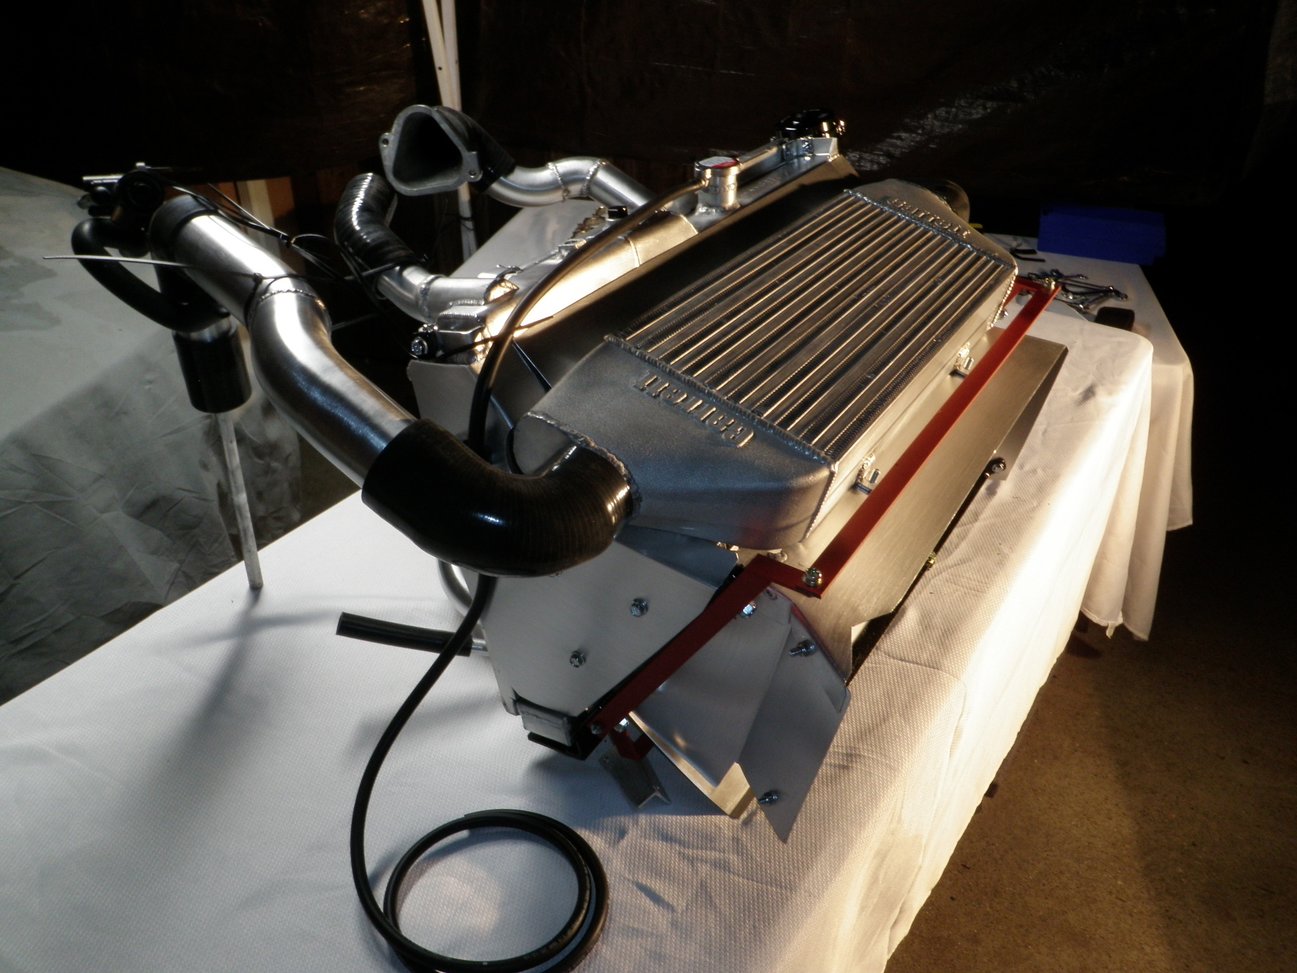
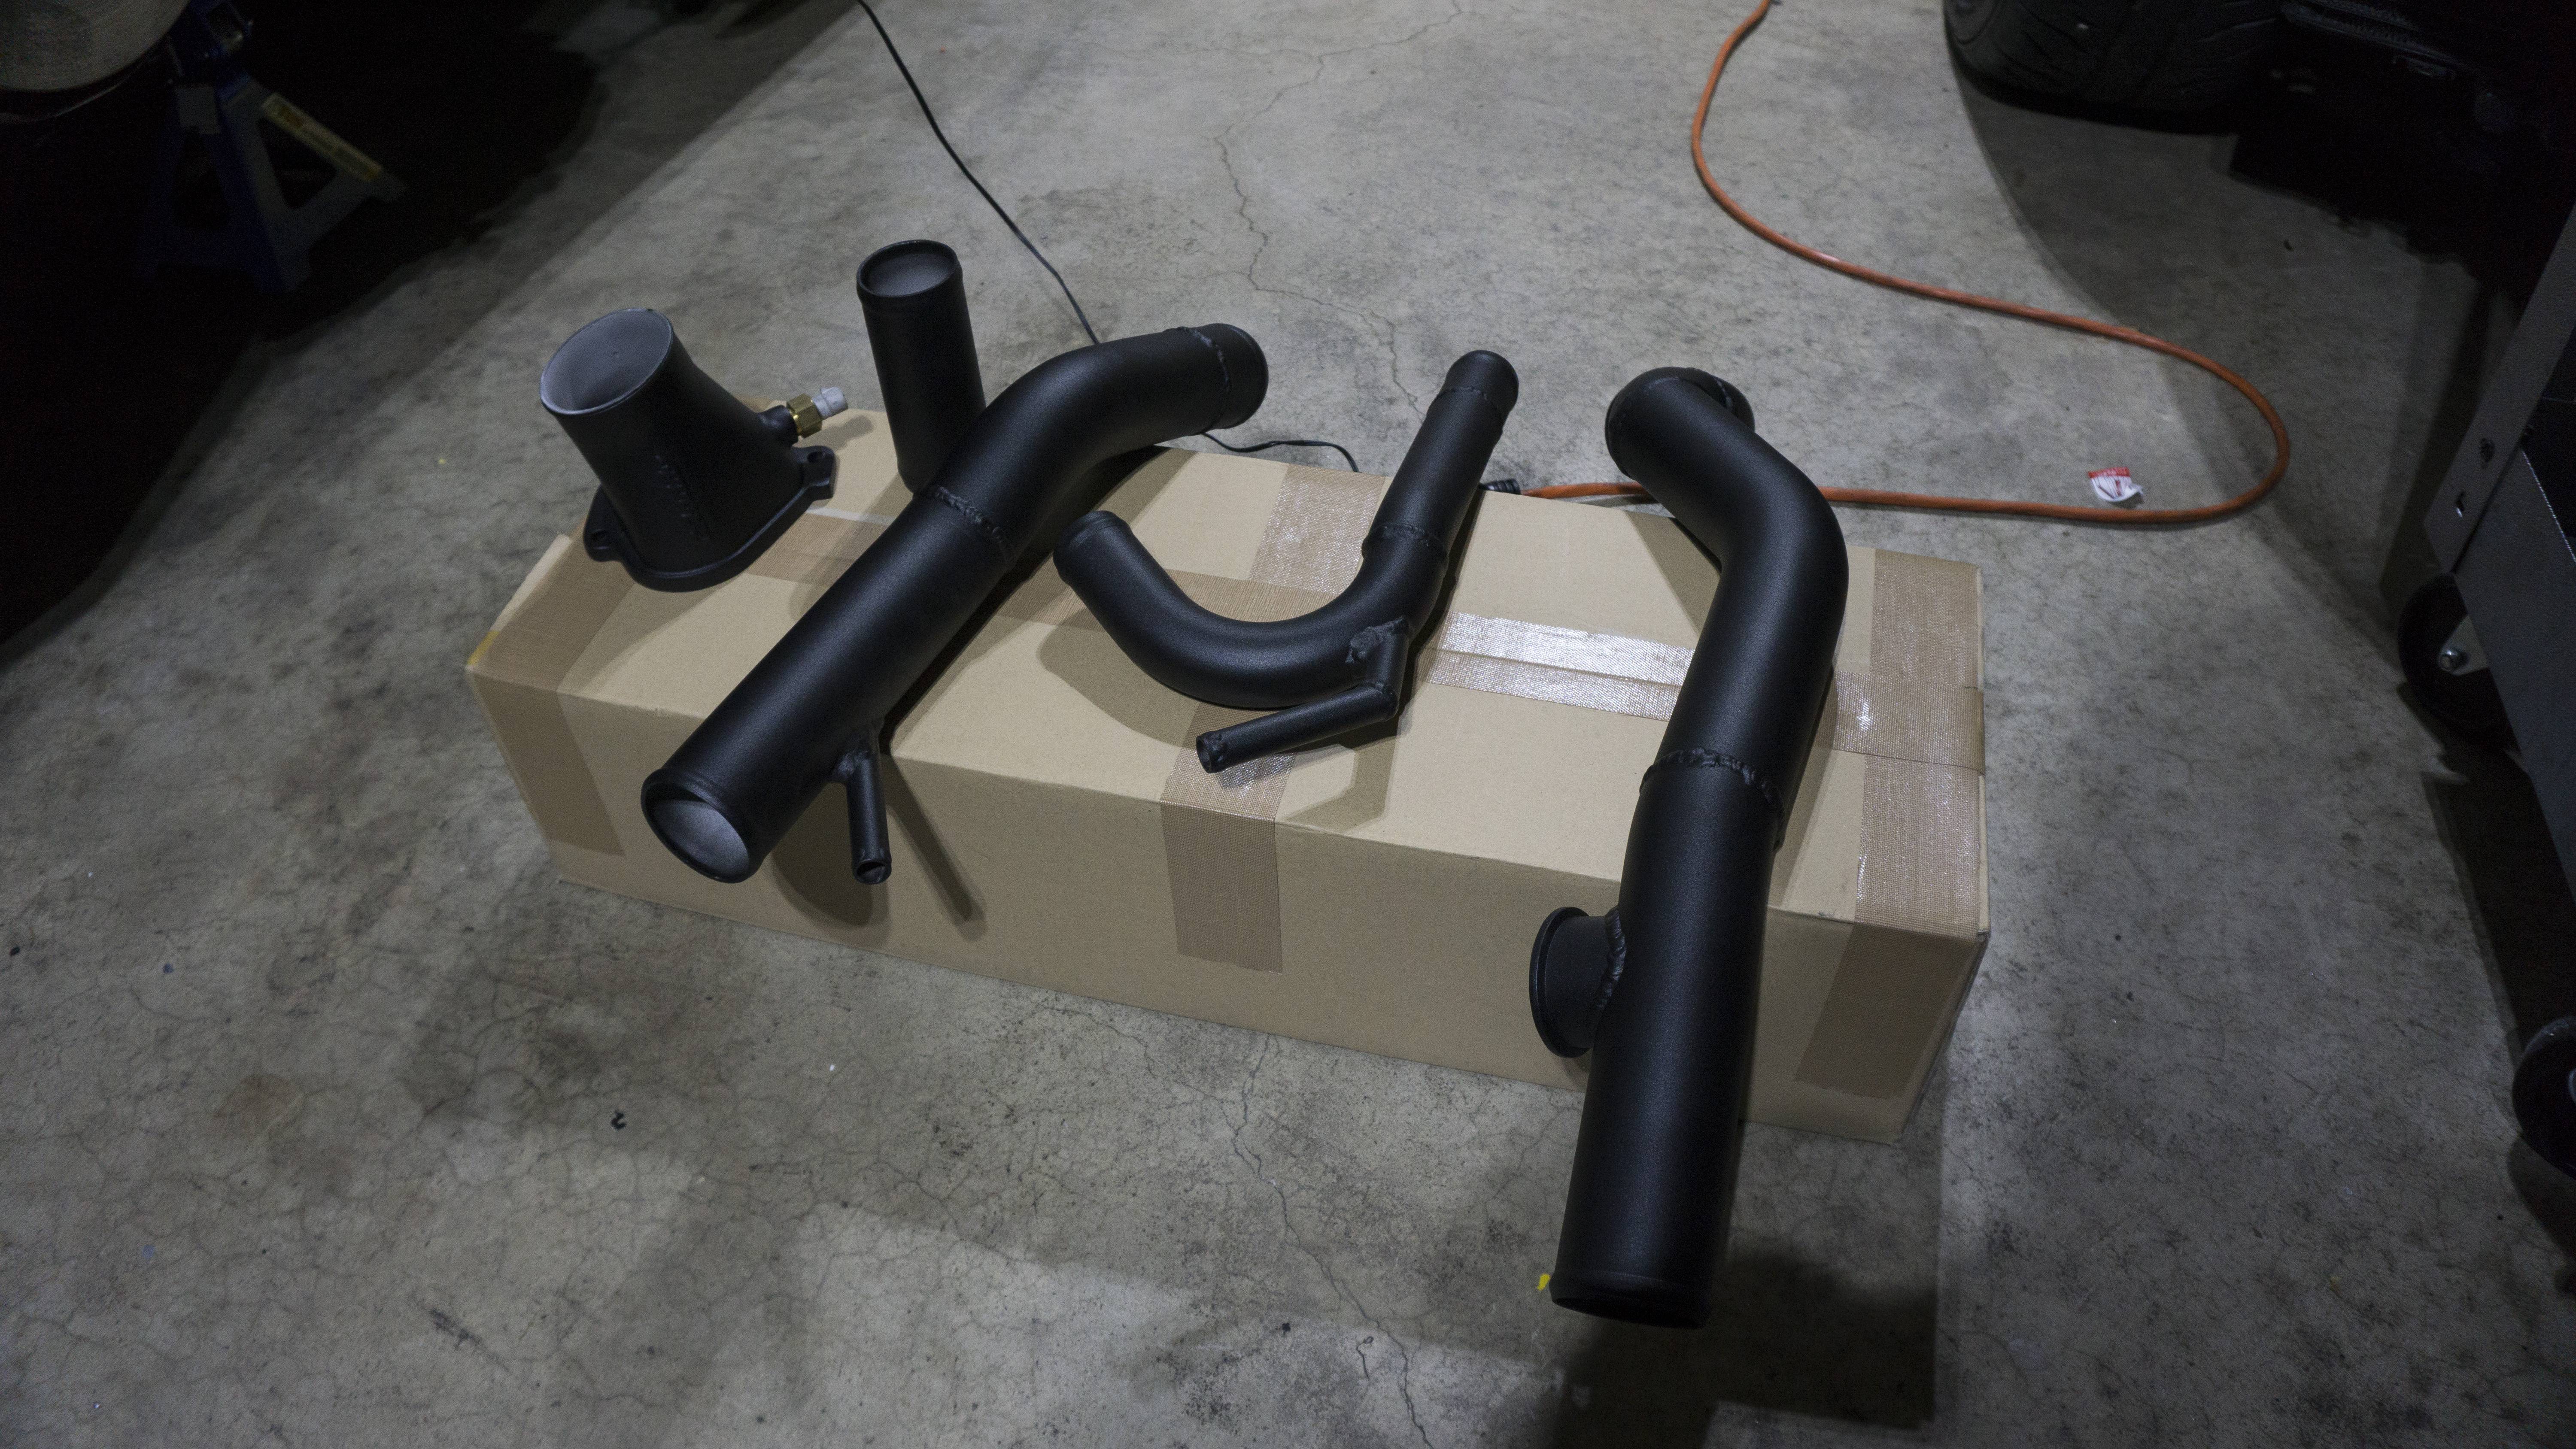
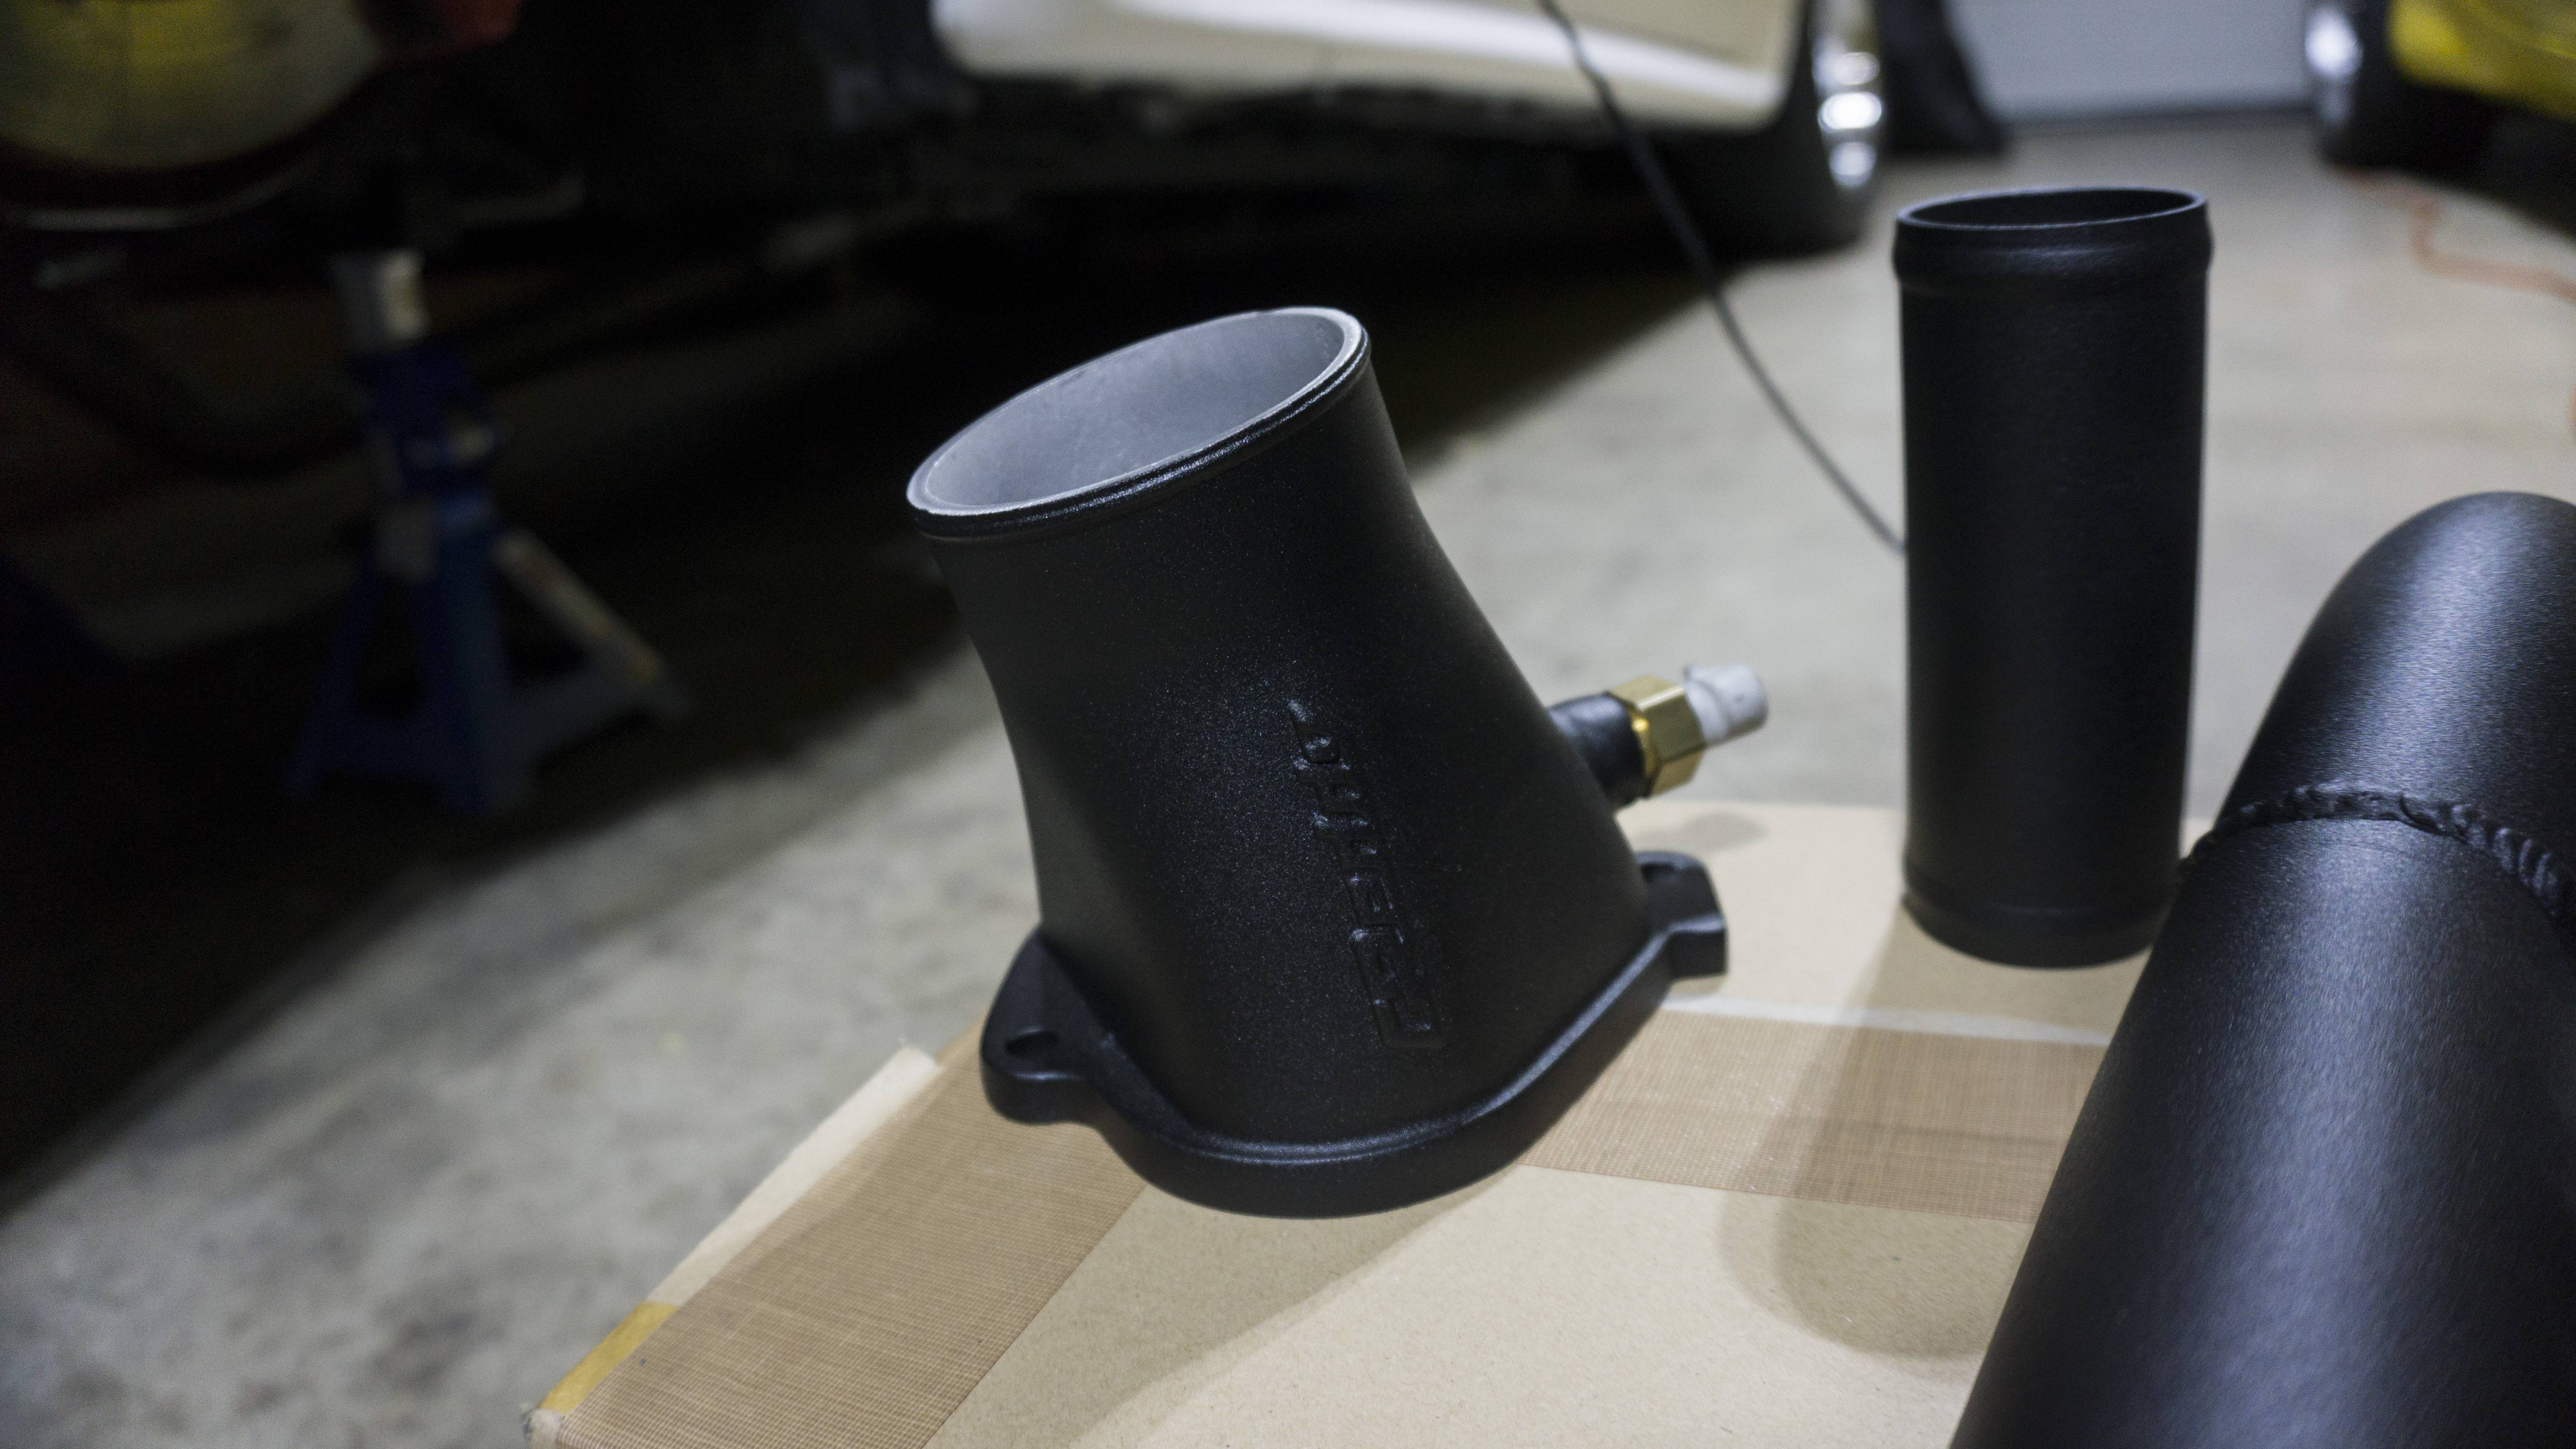
It�s finally on its way to me! The V-Mount kit is done and the FC is nearing driving completion. Once the kit gets here I�ll whisk it over to Powder and eagerly away it�s return. For now, I�ll drop some photos of the finished kit courtesy of Ben at Rotary Extreme. I think he did an outstanding job and I'm super excited to get the kit on and get the FC back on the road.
Here is everything that is coming with the kit:

Here is the kit assembled on a frame:


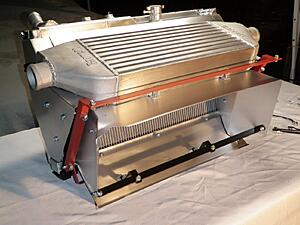

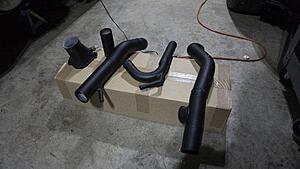
Here is the kit completely assembled with tubing:


It�s finally on its way to me! The V-Mount kit is done and the FC is nearing driving completion. Once the kit gets here I�ll whisk it over to Powder and eagerly away it�s return. For now, I�ll drop some photos of the finished kit courtesy of Ben at Rotary Extreme. I think he did an outstanding job and I'm super excited to get the kit on and get the FC back on the road.
Here is everything that is coming with the kit:


Here is the kit assembled on a frame:
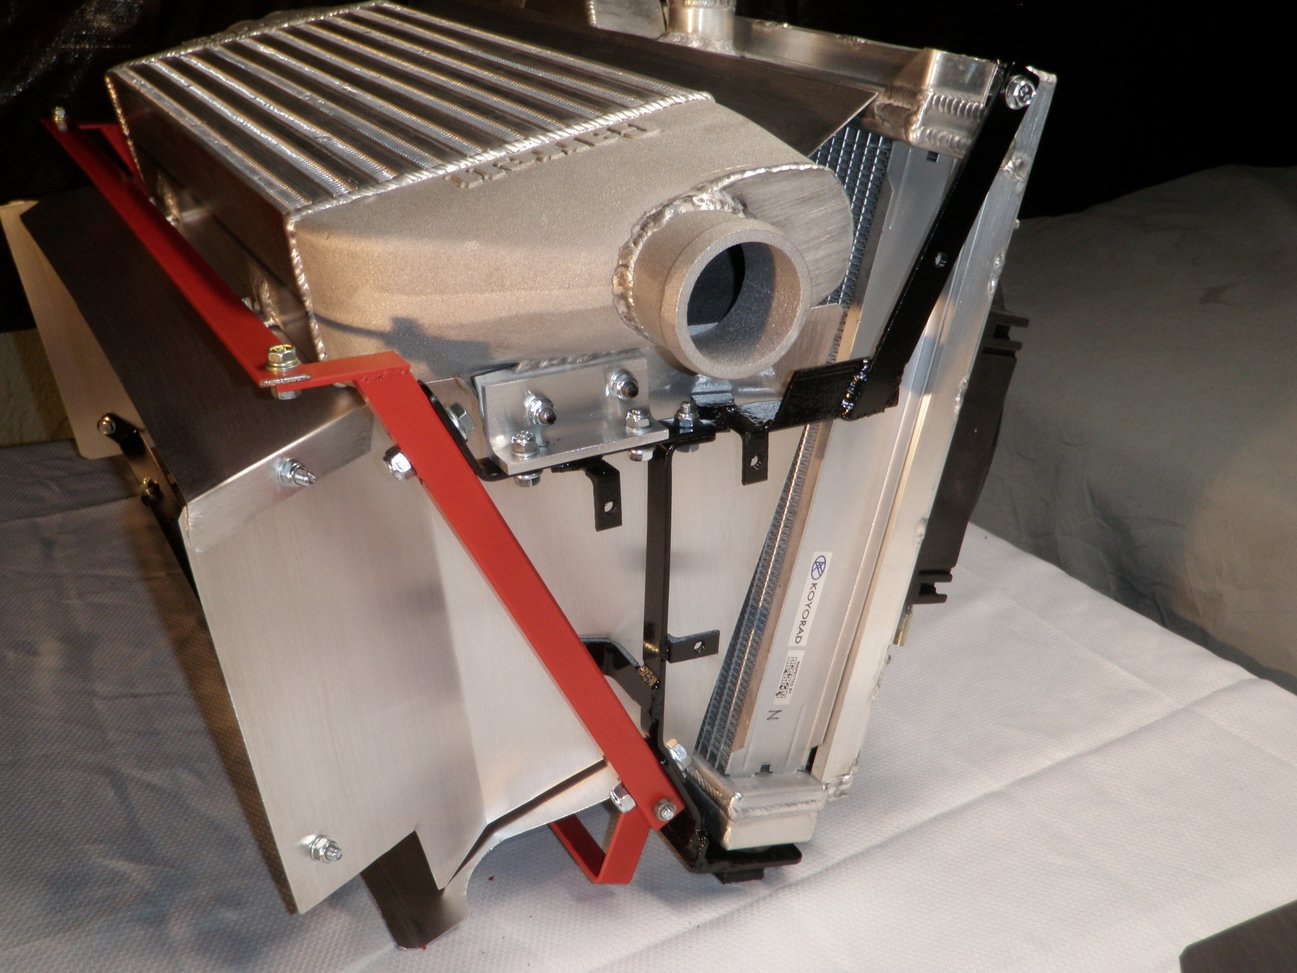

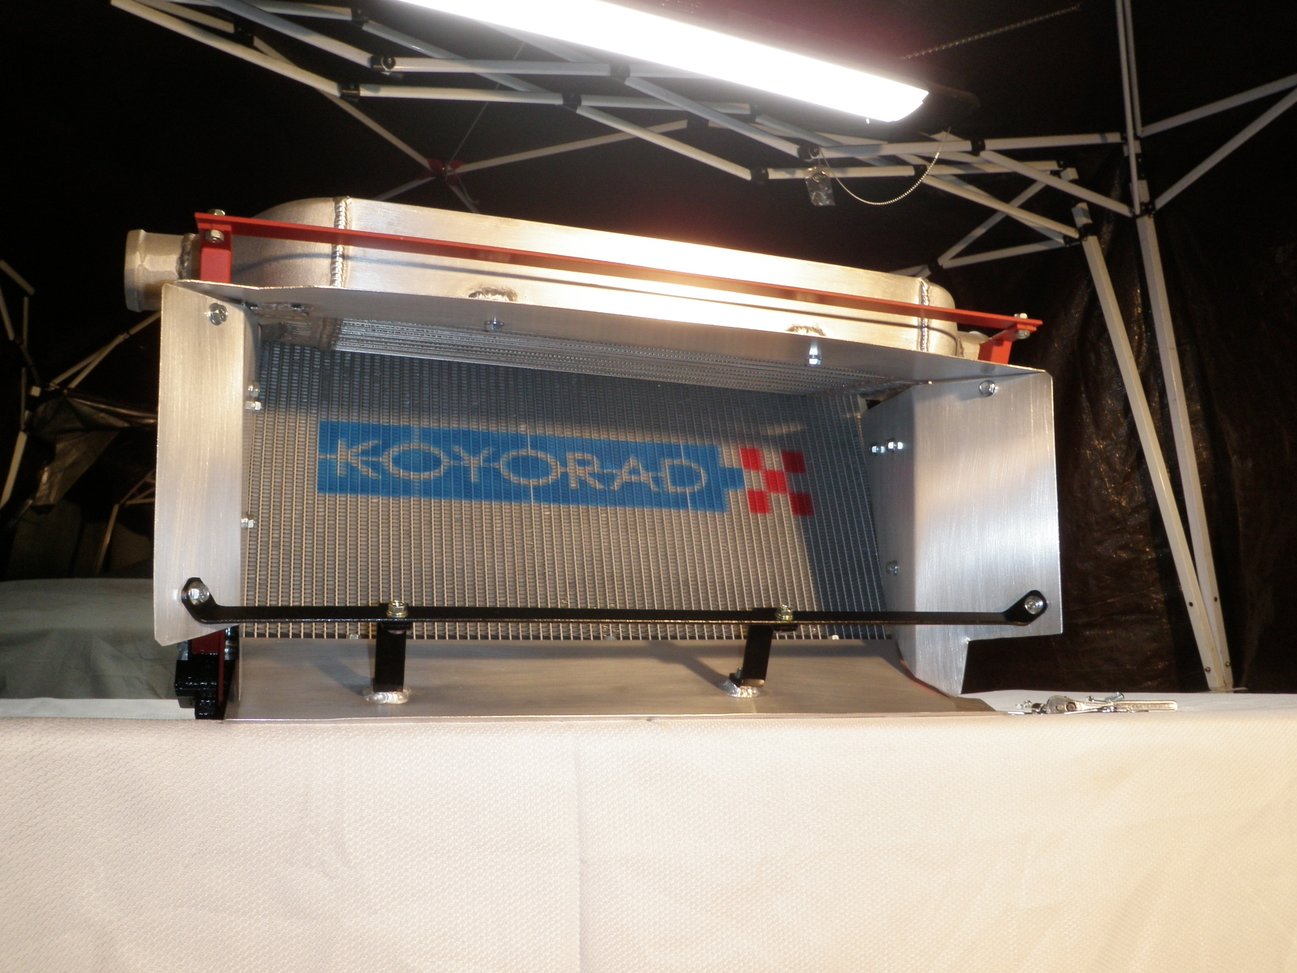
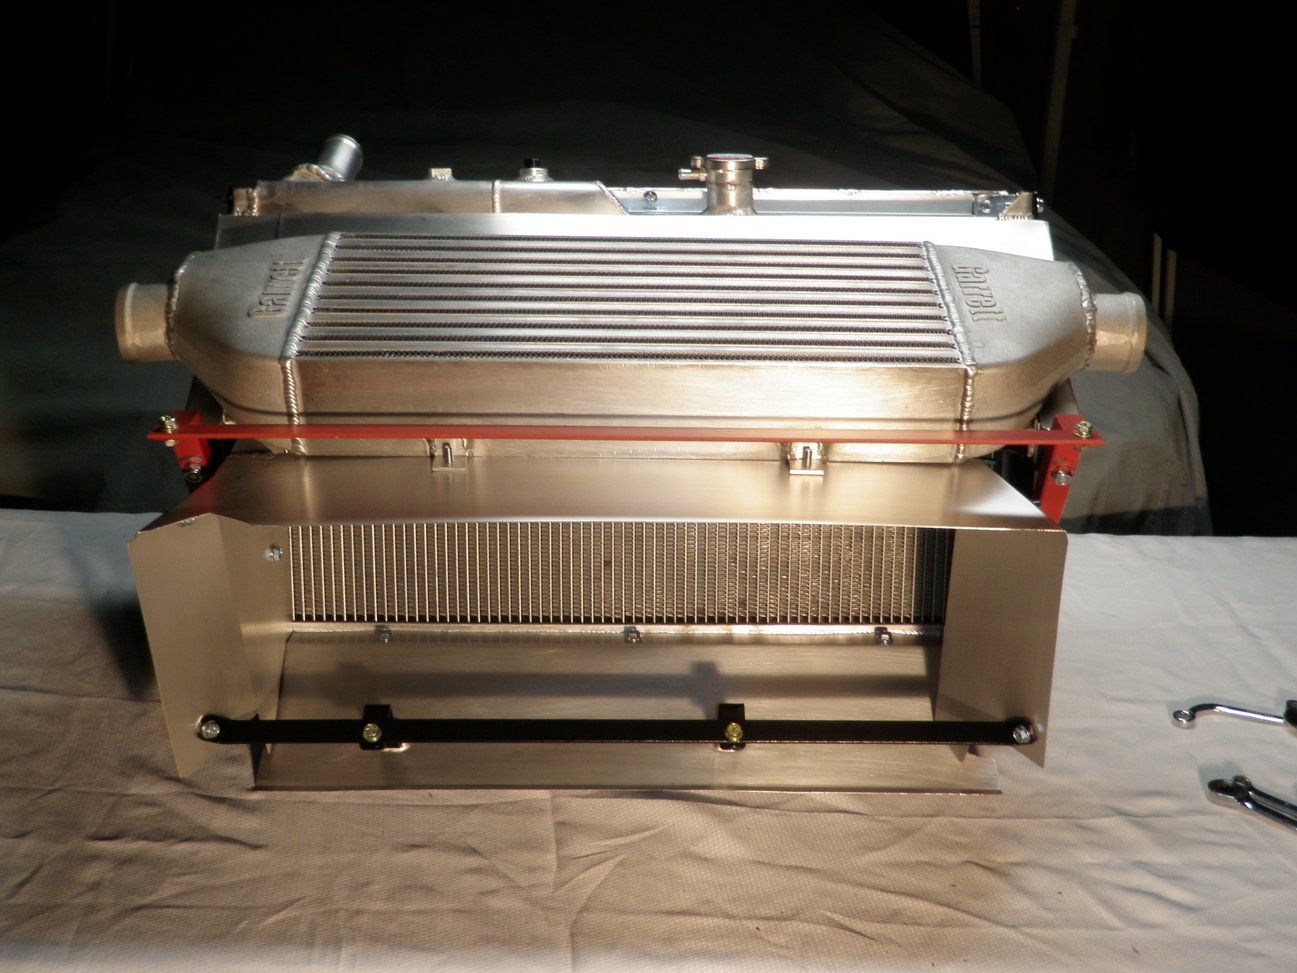
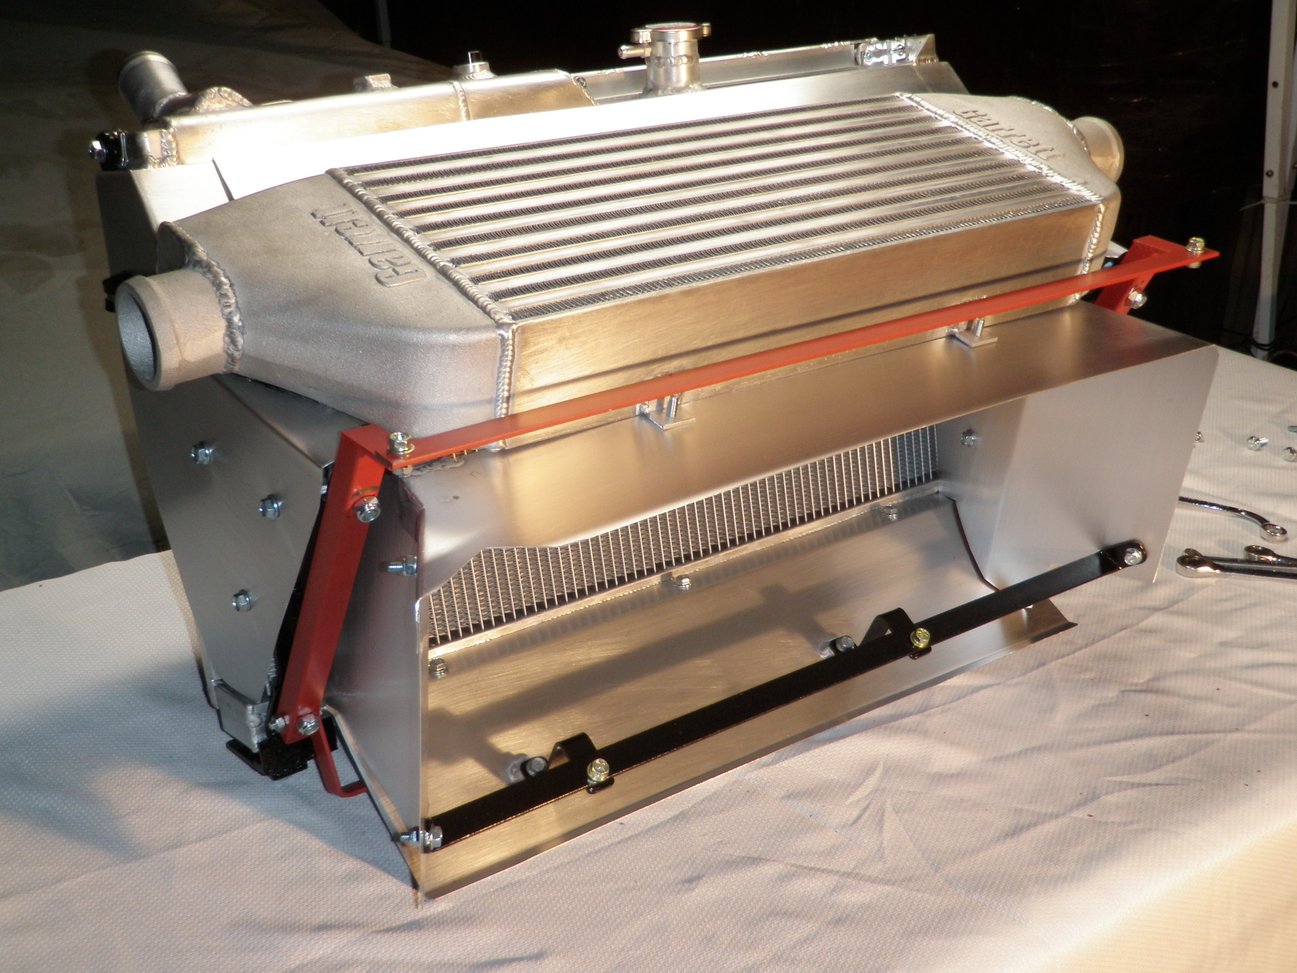
Here is the kit completely assembled with tubing:

The following users liked this post:
Relisys190 (12-17-19)


The following users liked this post:
Akomix (12-19-19)
12-22-19, 01:44 PM
#271
Update 12/22/19:
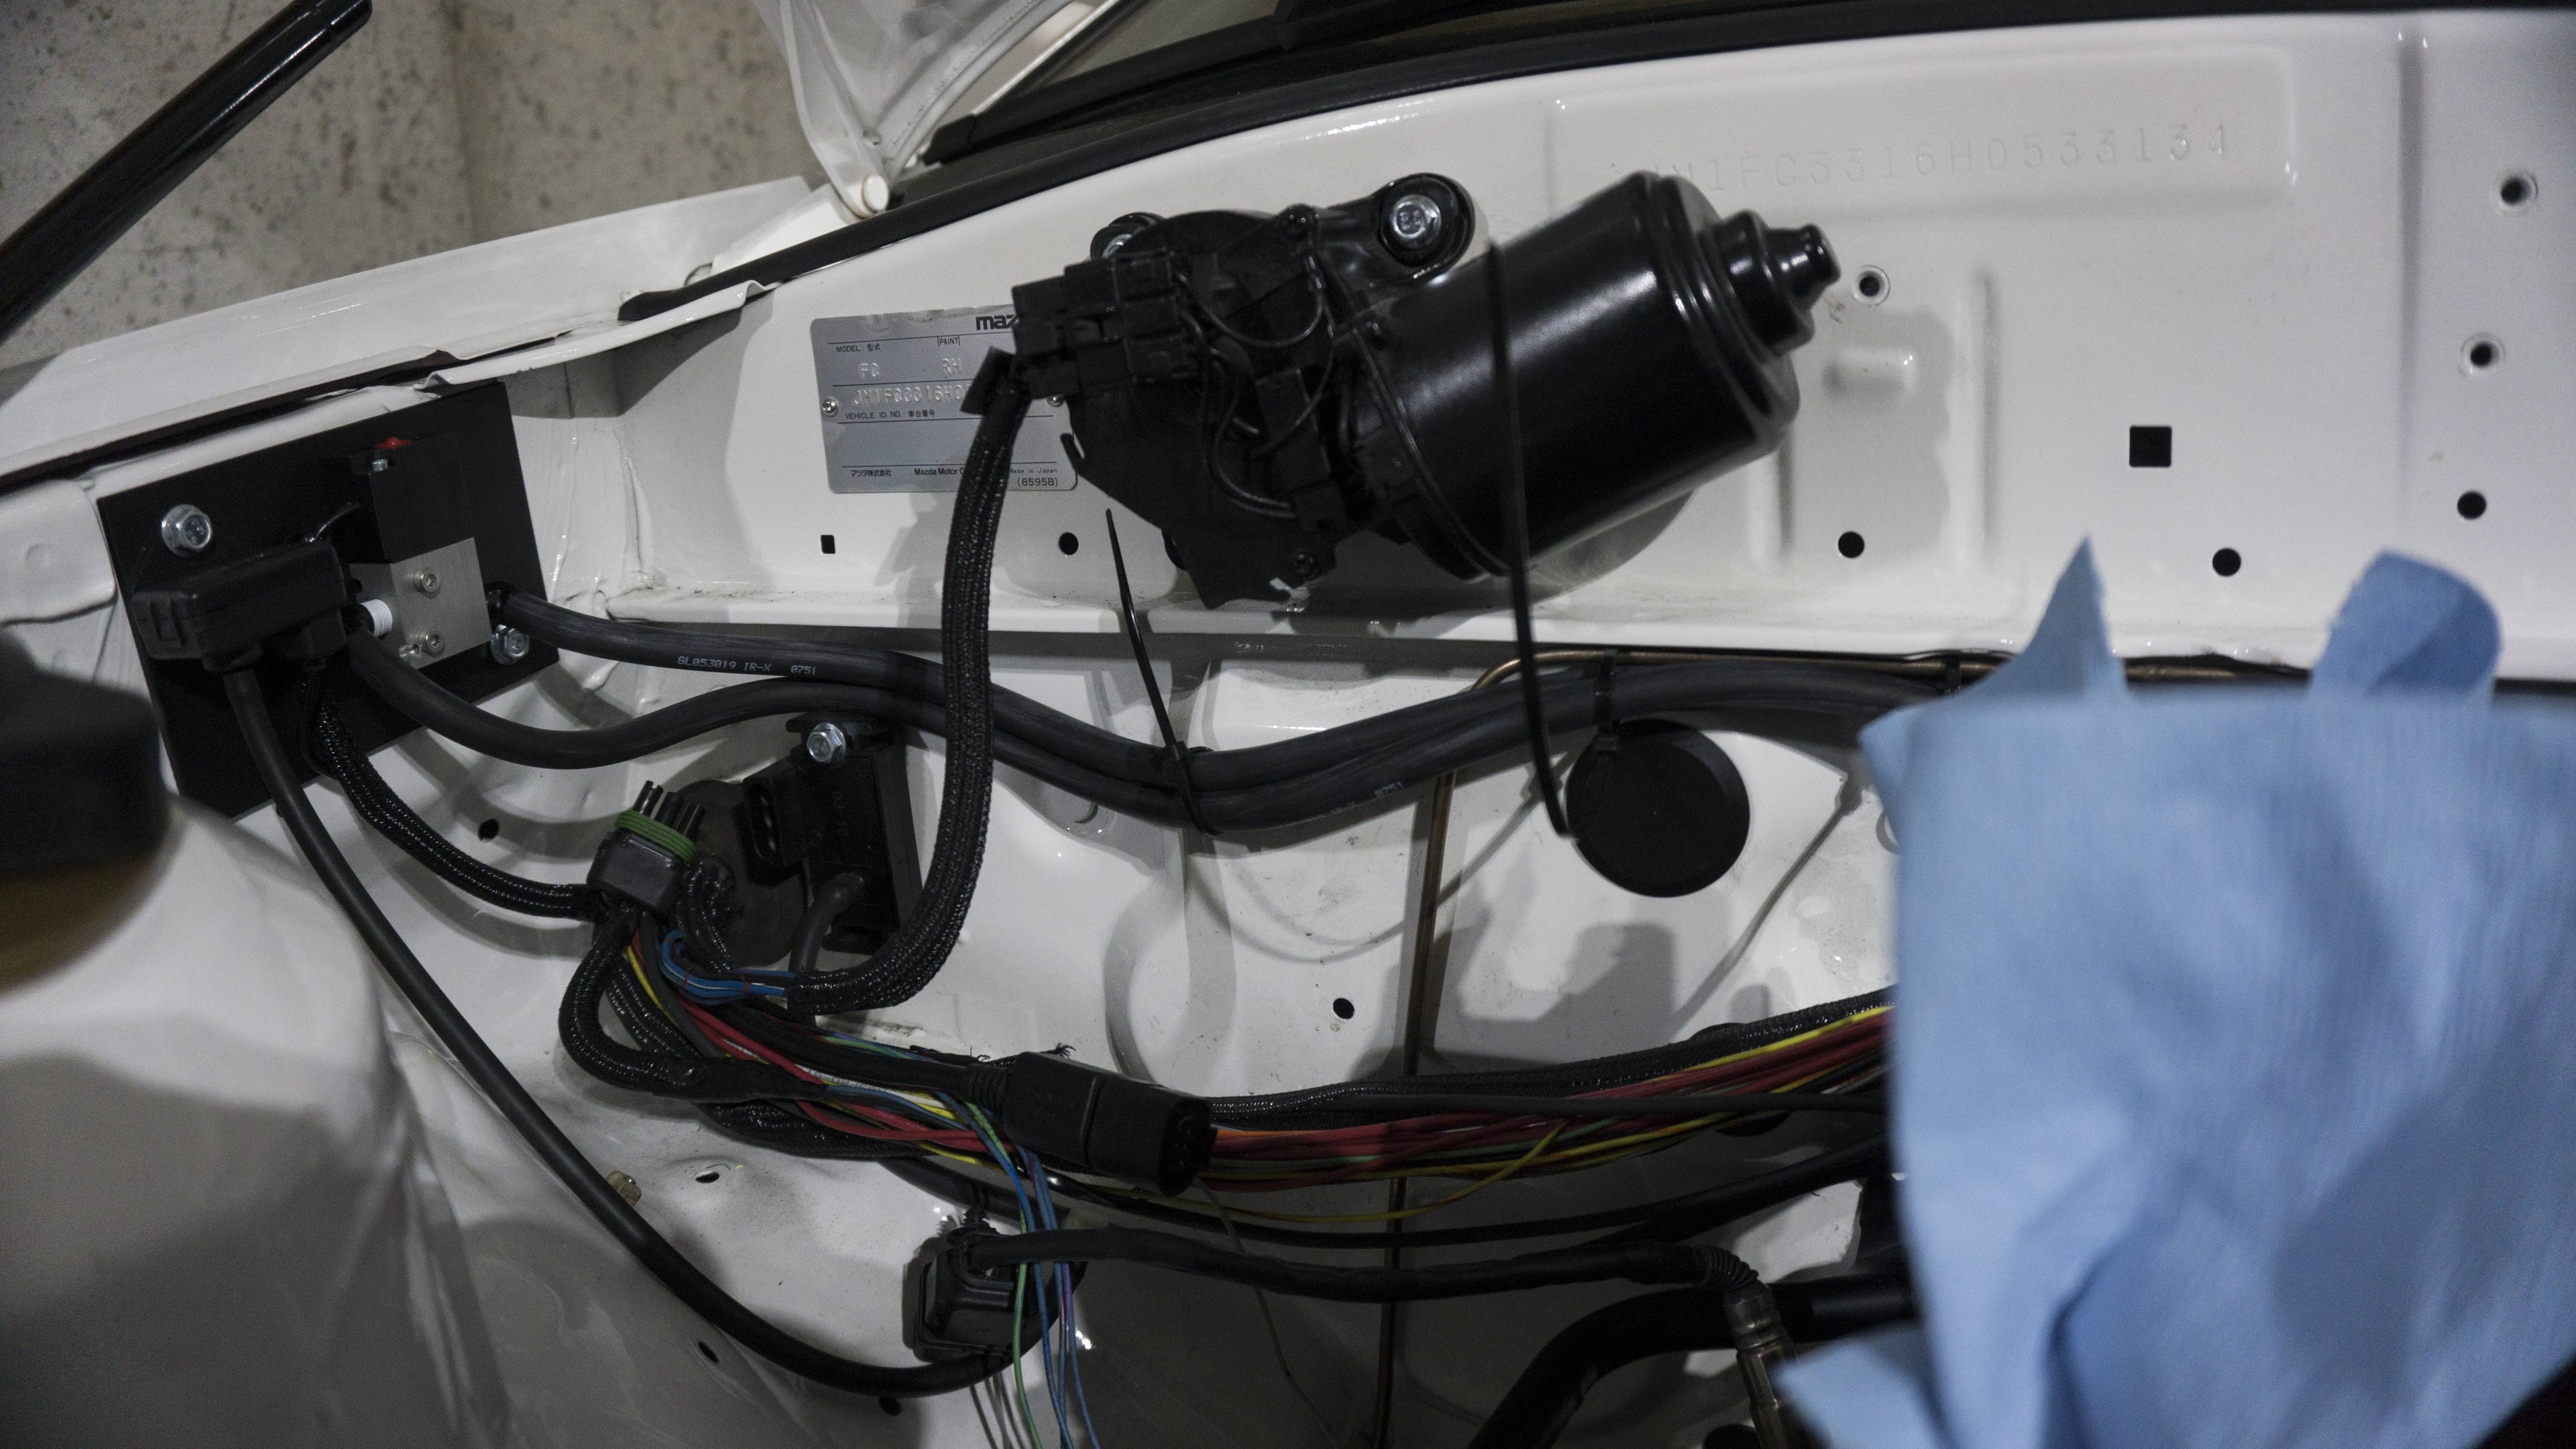
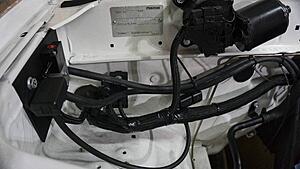
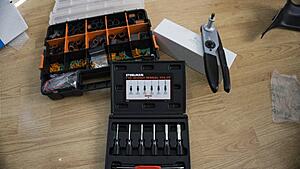
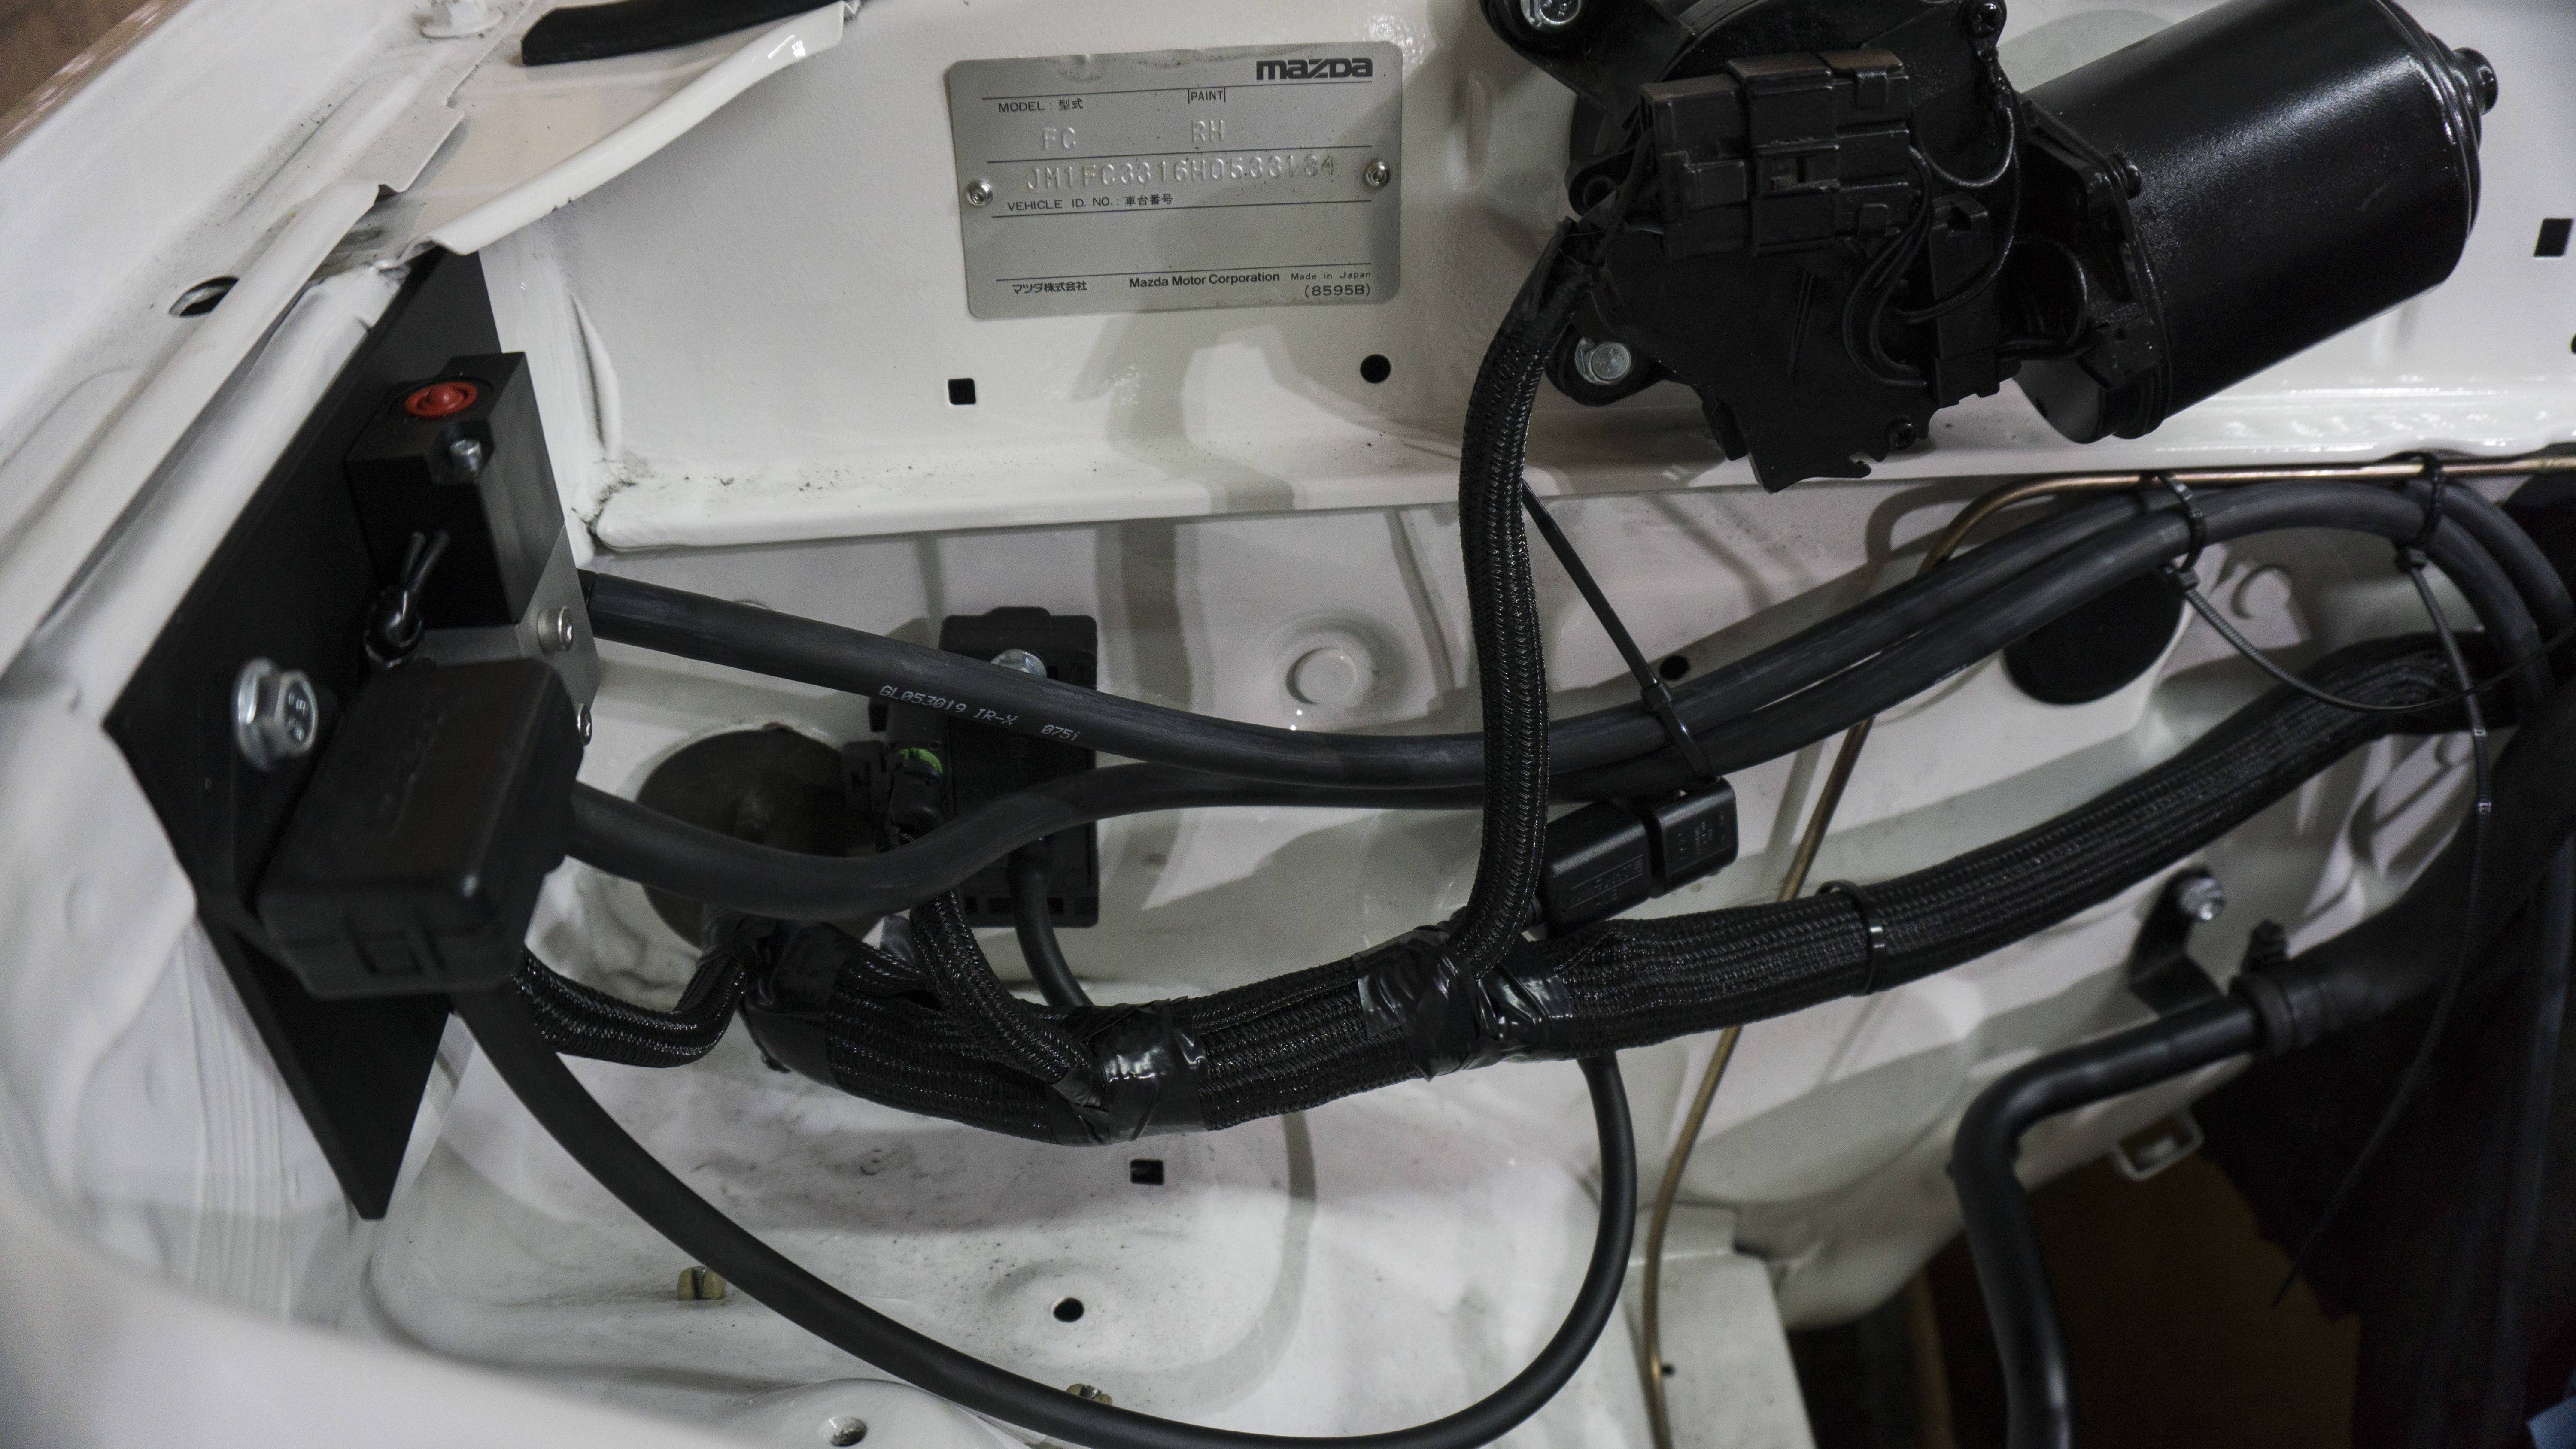
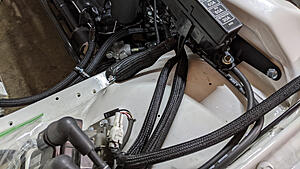
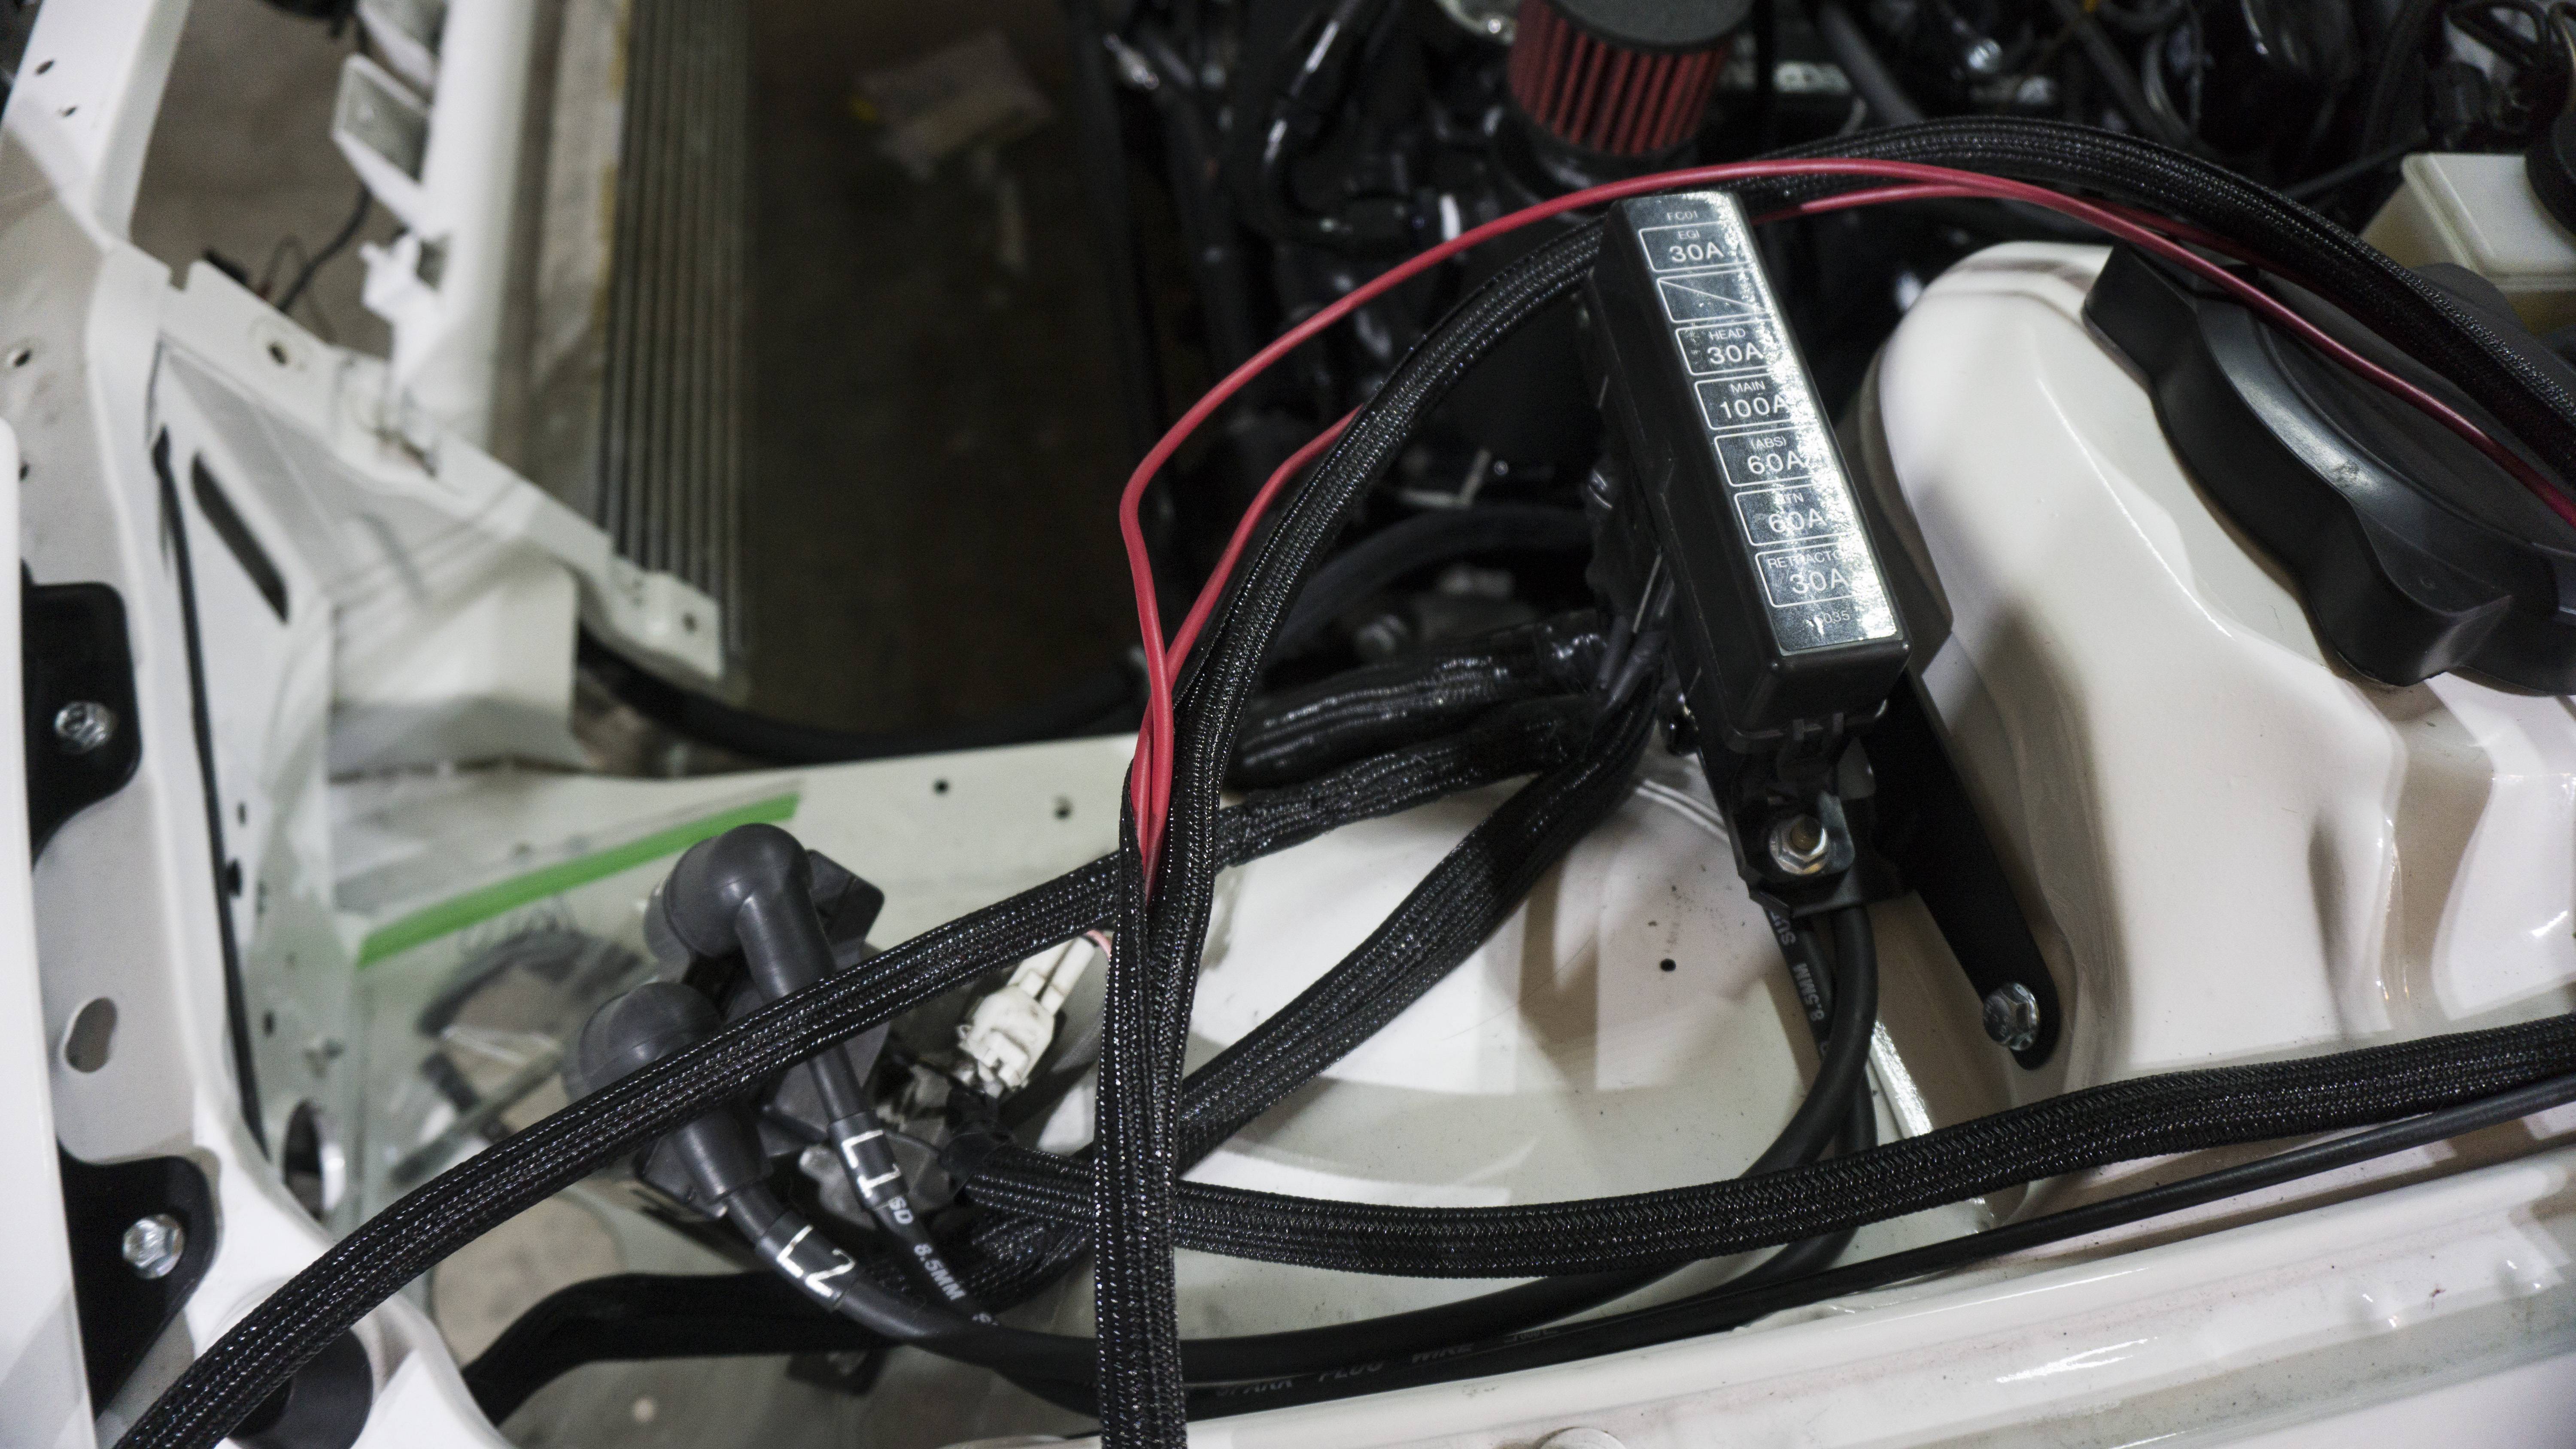
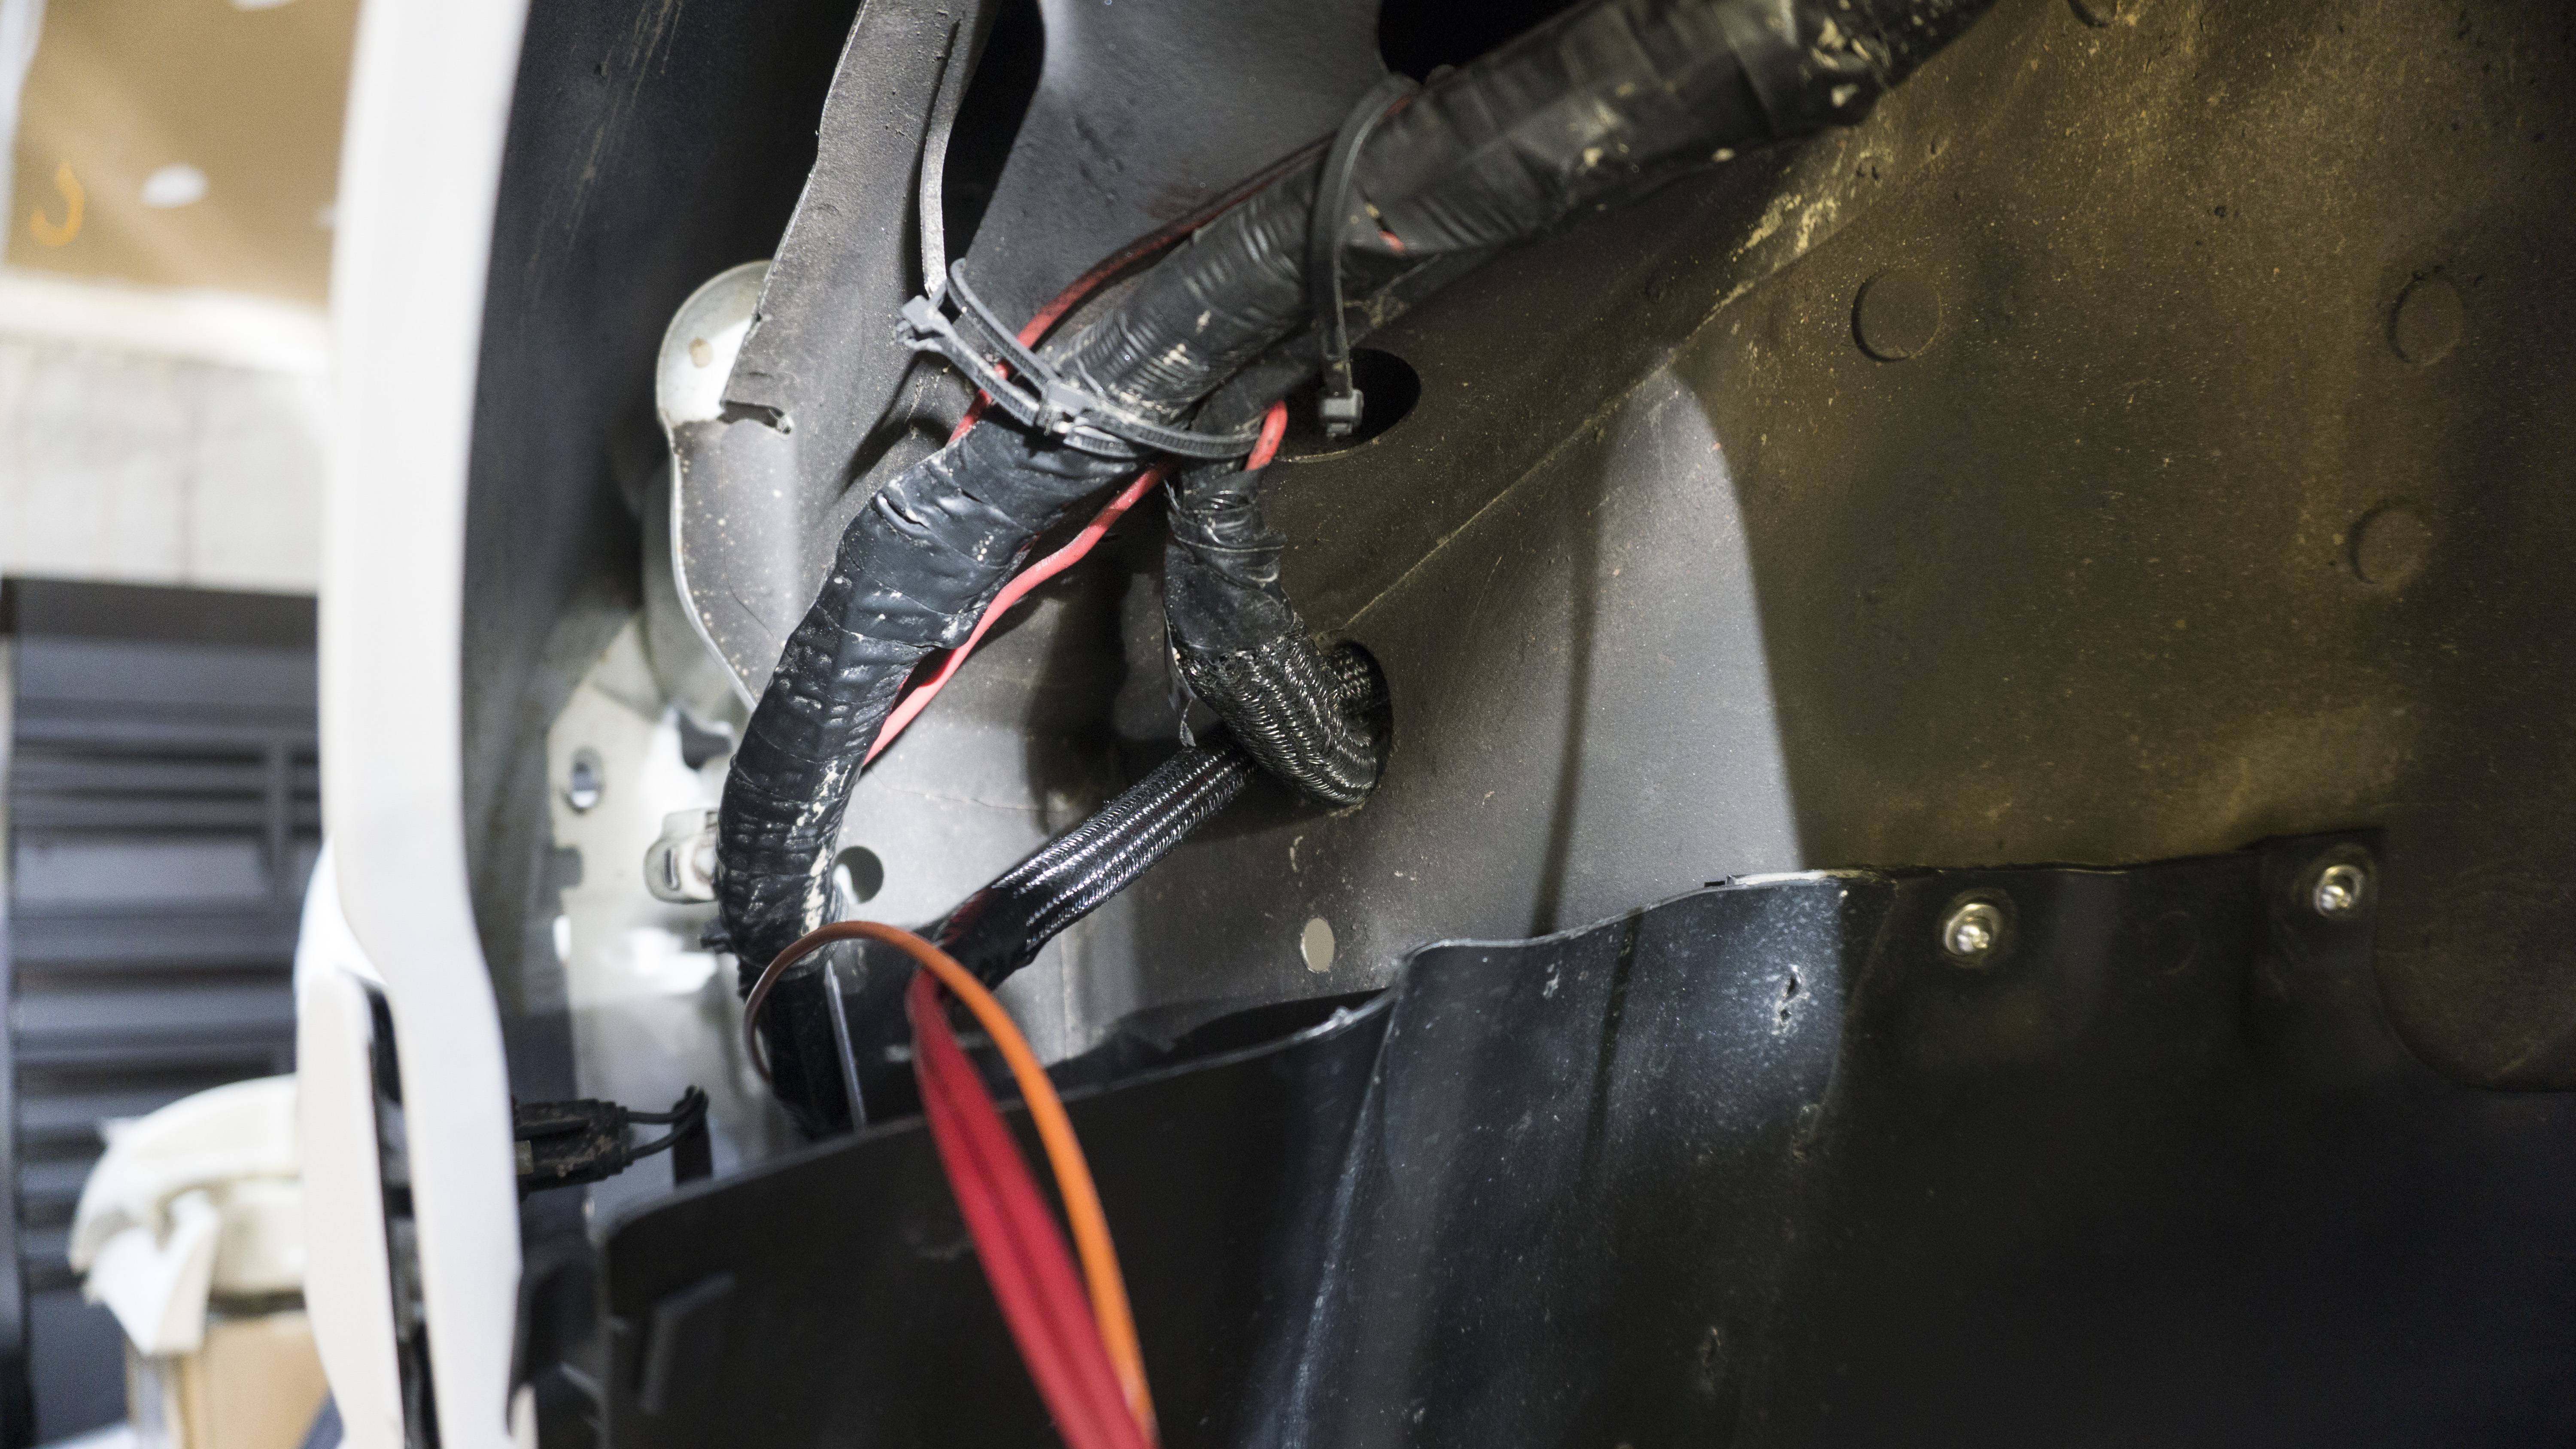
I ended up already taking everything to powder. I was waiting on my intakes to come in for the FD, but there is no telling when those will come off of backorder� I ended up running the oil cooler lines since it�s one of the only things I can do until I get everything back from coating. I temporarily ran the control wire from the MegaSquirt that will control the electric fans. I need to figure out how I�m going to run everything so I can�t finish that up completely. It did allow me to finish up that mess of wires near the engine harness grommet though. I also got a new tool that�s going to make me enjoy wiring again - Merry Christmas to myself. A Deutsch crimper and connectors. My friend let me fiddle around with his and I fell in love. They are so much better than weatherpack connectors and I can�t wait to go through and replace every single weatherpack on the FC. Deutsch will be my go-to connector moving forward.
This will probably be my last post until next year - I hope everyone has a great Holiday and a fantastic New Years!
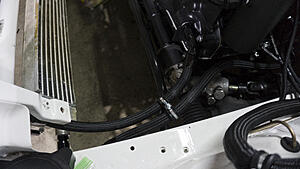
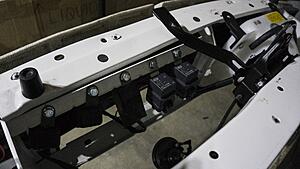
Here is the oil cooler lines ran:

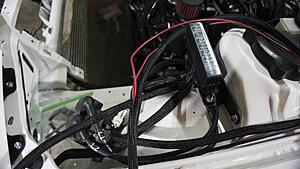
Here is the wiring harness stitched back up:
Here is the new Deutsch Crimper:
I ended up already taking everything to powder. I was waiting on my intakes to come in for the FD, but there is no telling when those will come off of backorder� I ended up running the oil cooler lines since it�s one of the only things I can do until I get everything back from coating. I temporarily ran the control wire from the MegaSquirt that will control the electric fans. I need to figure out how I�m going to run everything so I can�t finish that up completely. It did allow me to finish up that mess of wires near the engine harness grommet though. I also got a new tool that�s going to make me enjoy wiring again - Merry Christmas to myself. A Deutsch crimper and connectors. My friend let me fiddle around with his and I fell in love. They are so much better than weatherpack connectors and I can�t wait to go through and replace every single weatherpack on the FC. Deutsch will be my go-to connector moving forward.
This will probably be my last post until next year - I hope everyone has a great Holiday and a fantastic New Years!
Here is the oil cooler lines ran:

Here is the wiring harness stitched back up:
Here is the new Deutsch Crimper:
 12-27-19, 11:17 AM
#272
Update 12/27/19:
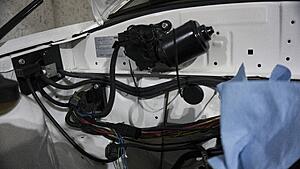
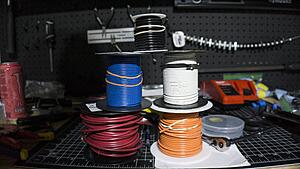
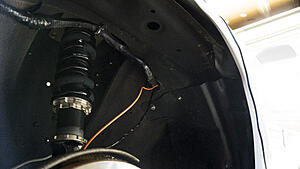
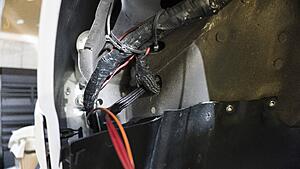
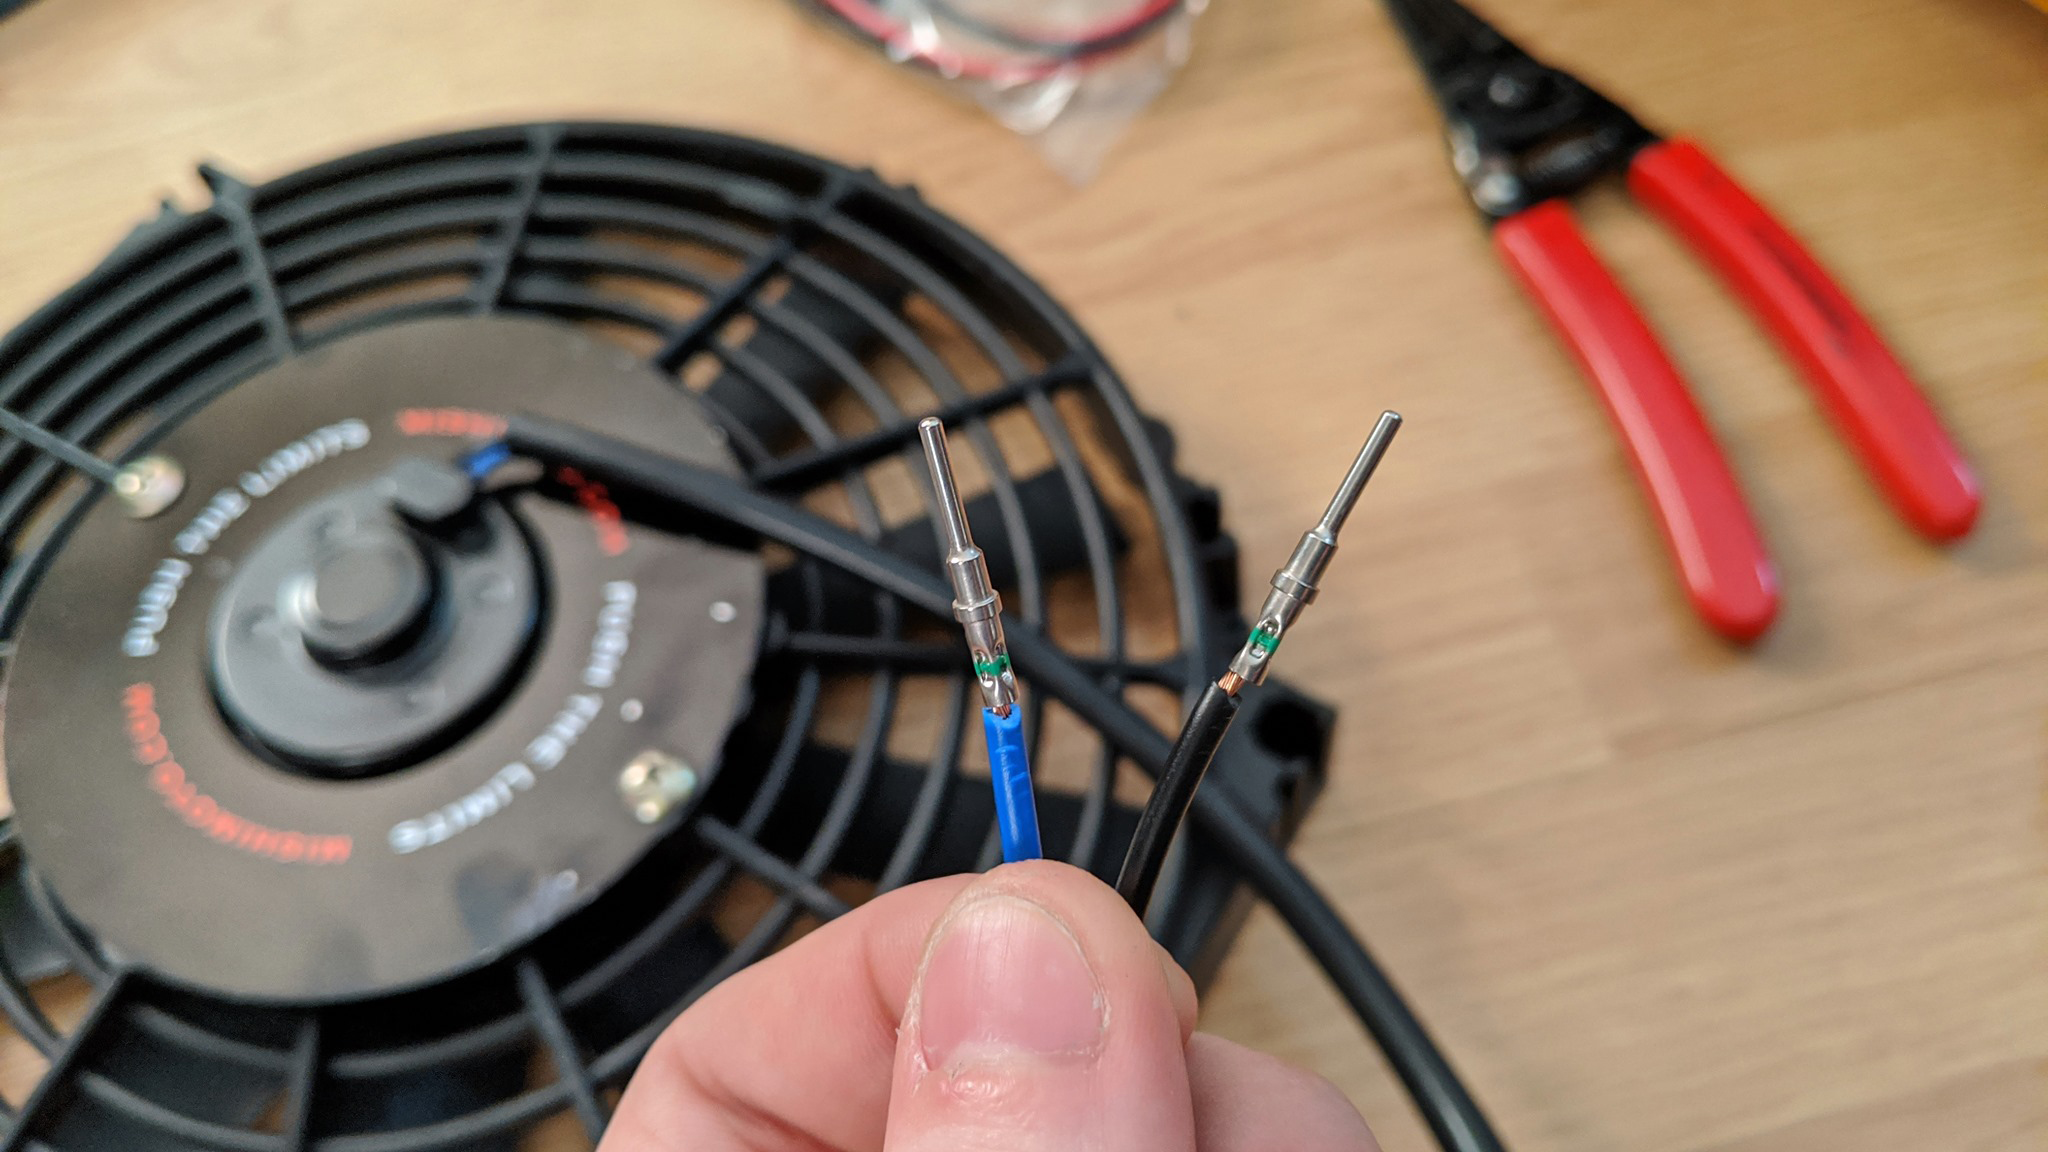
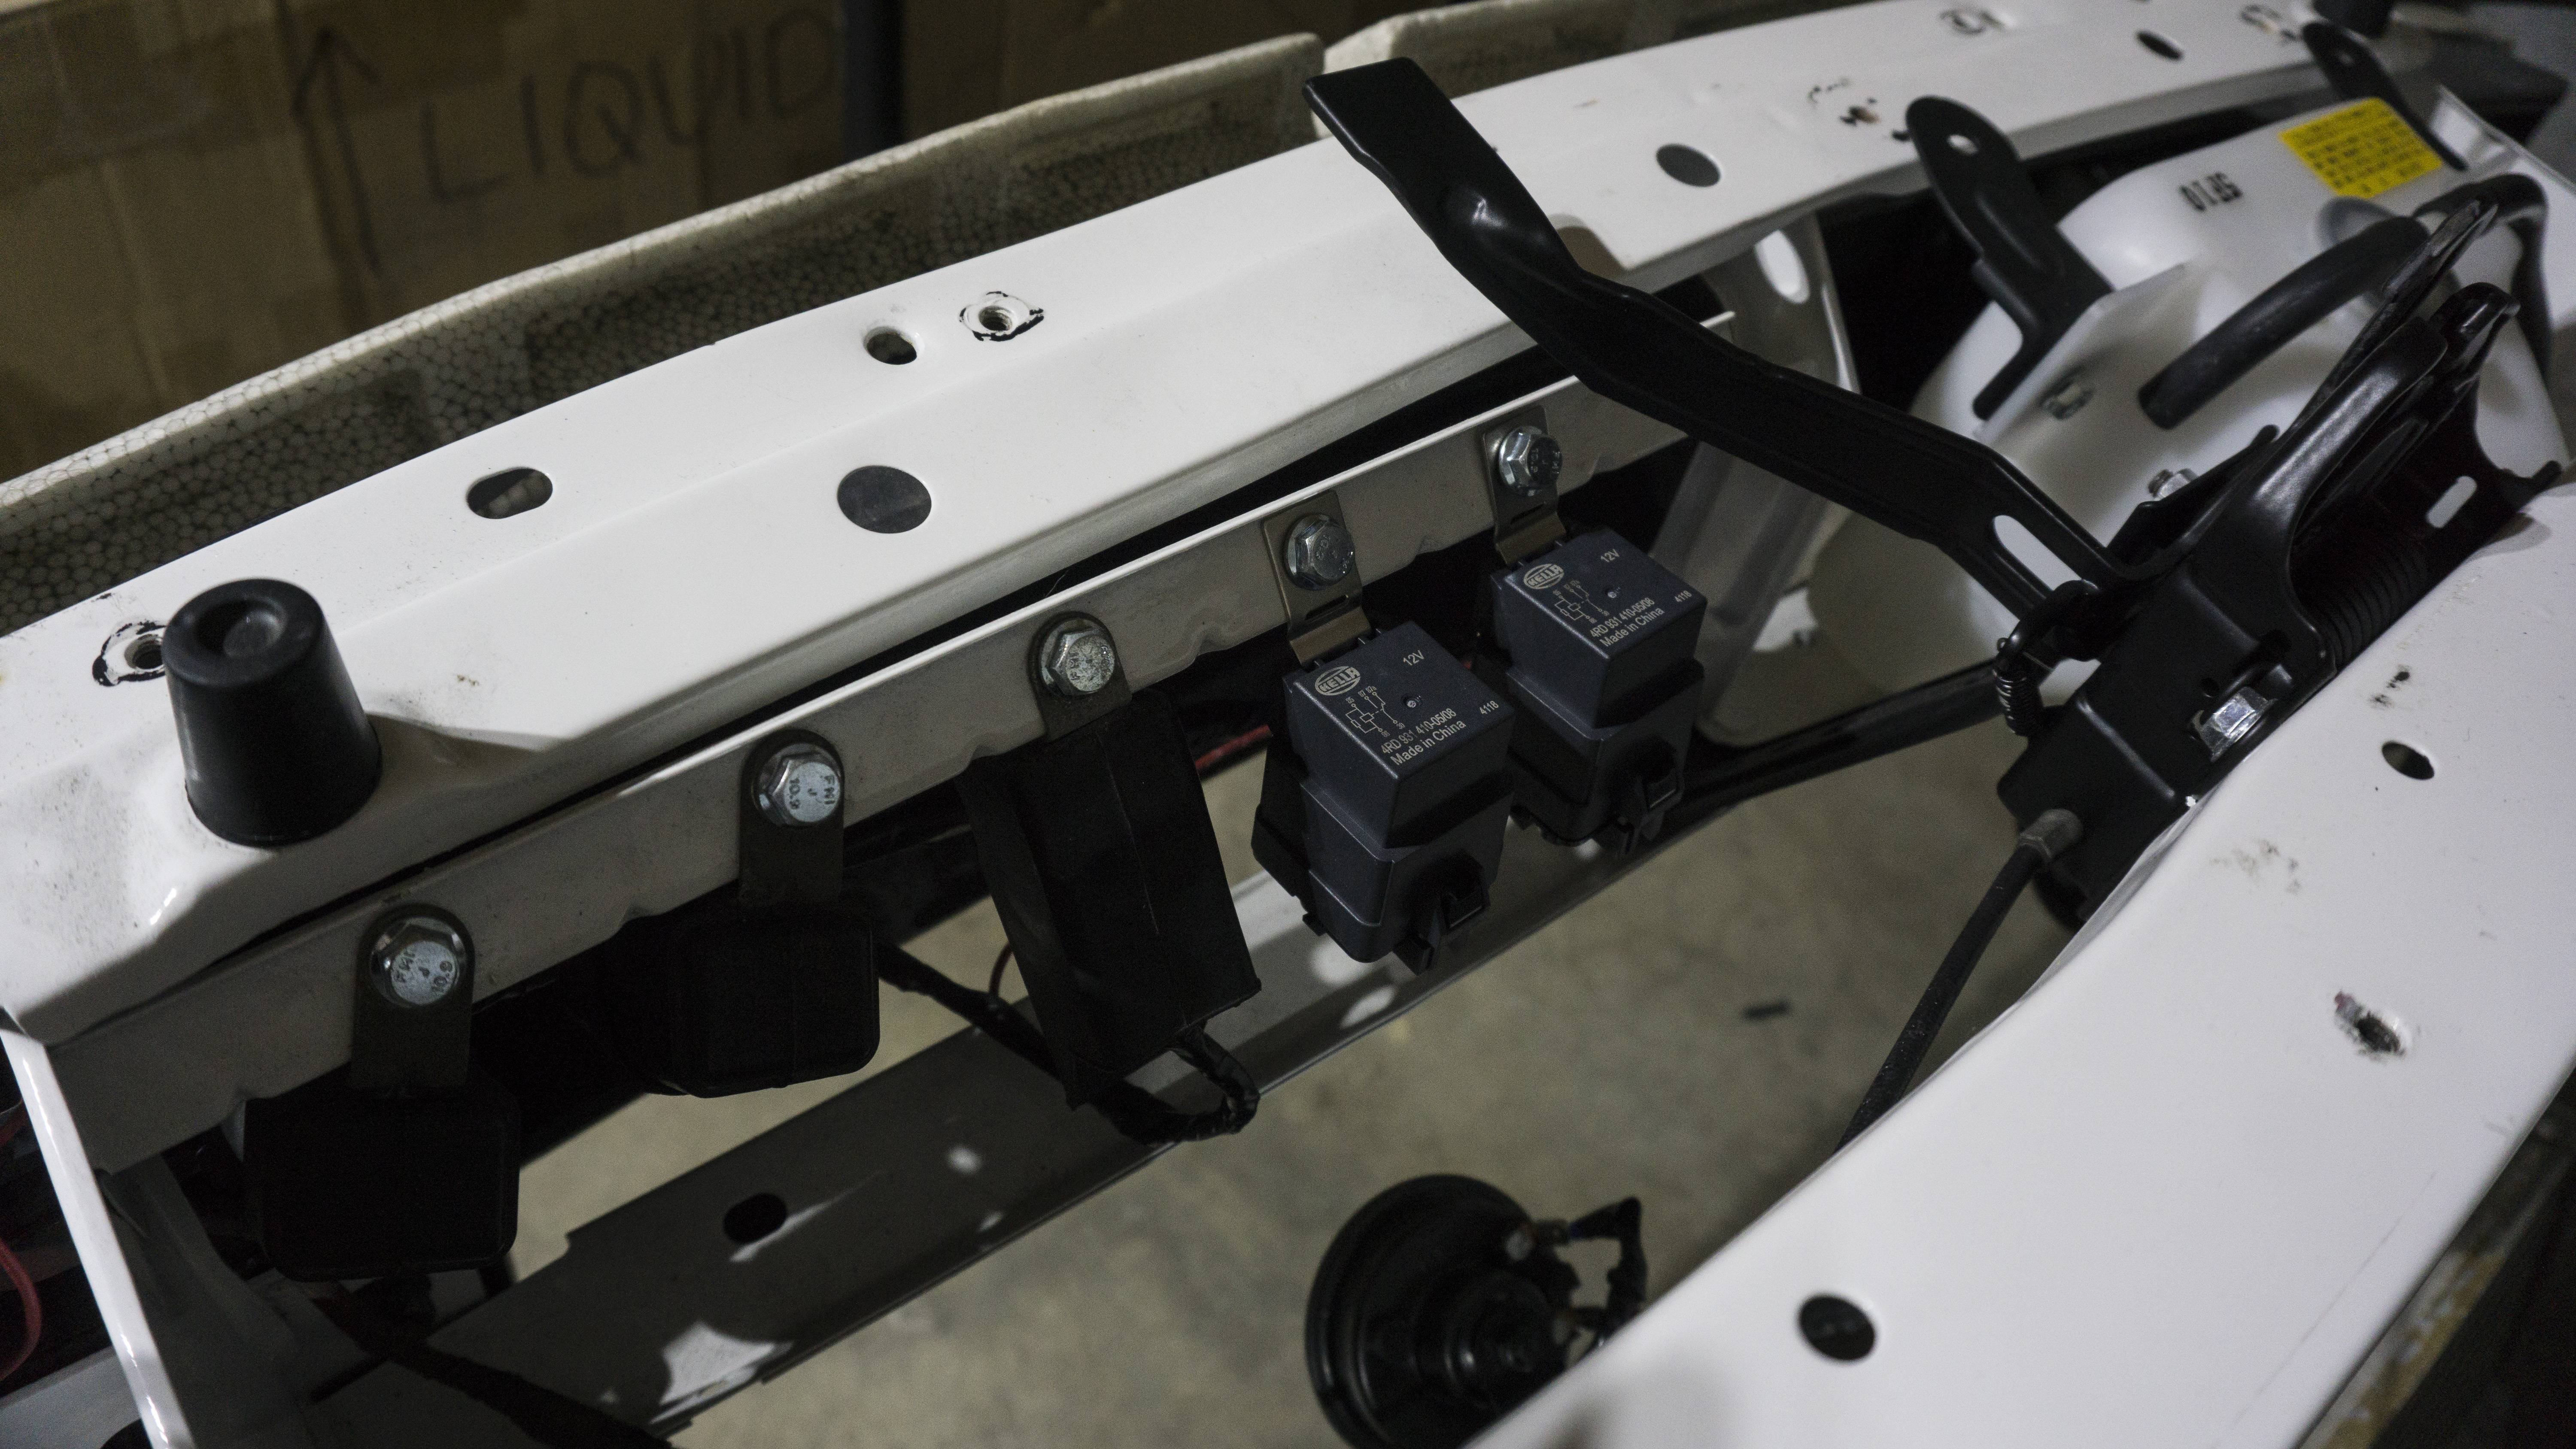
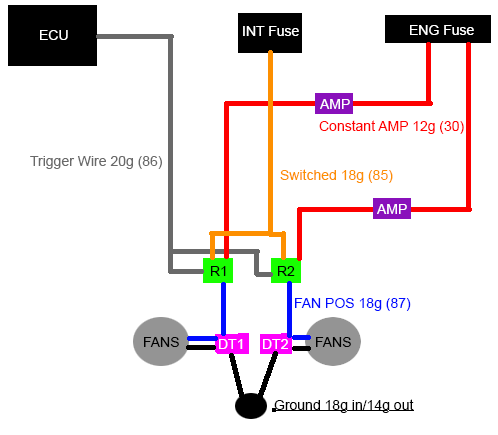
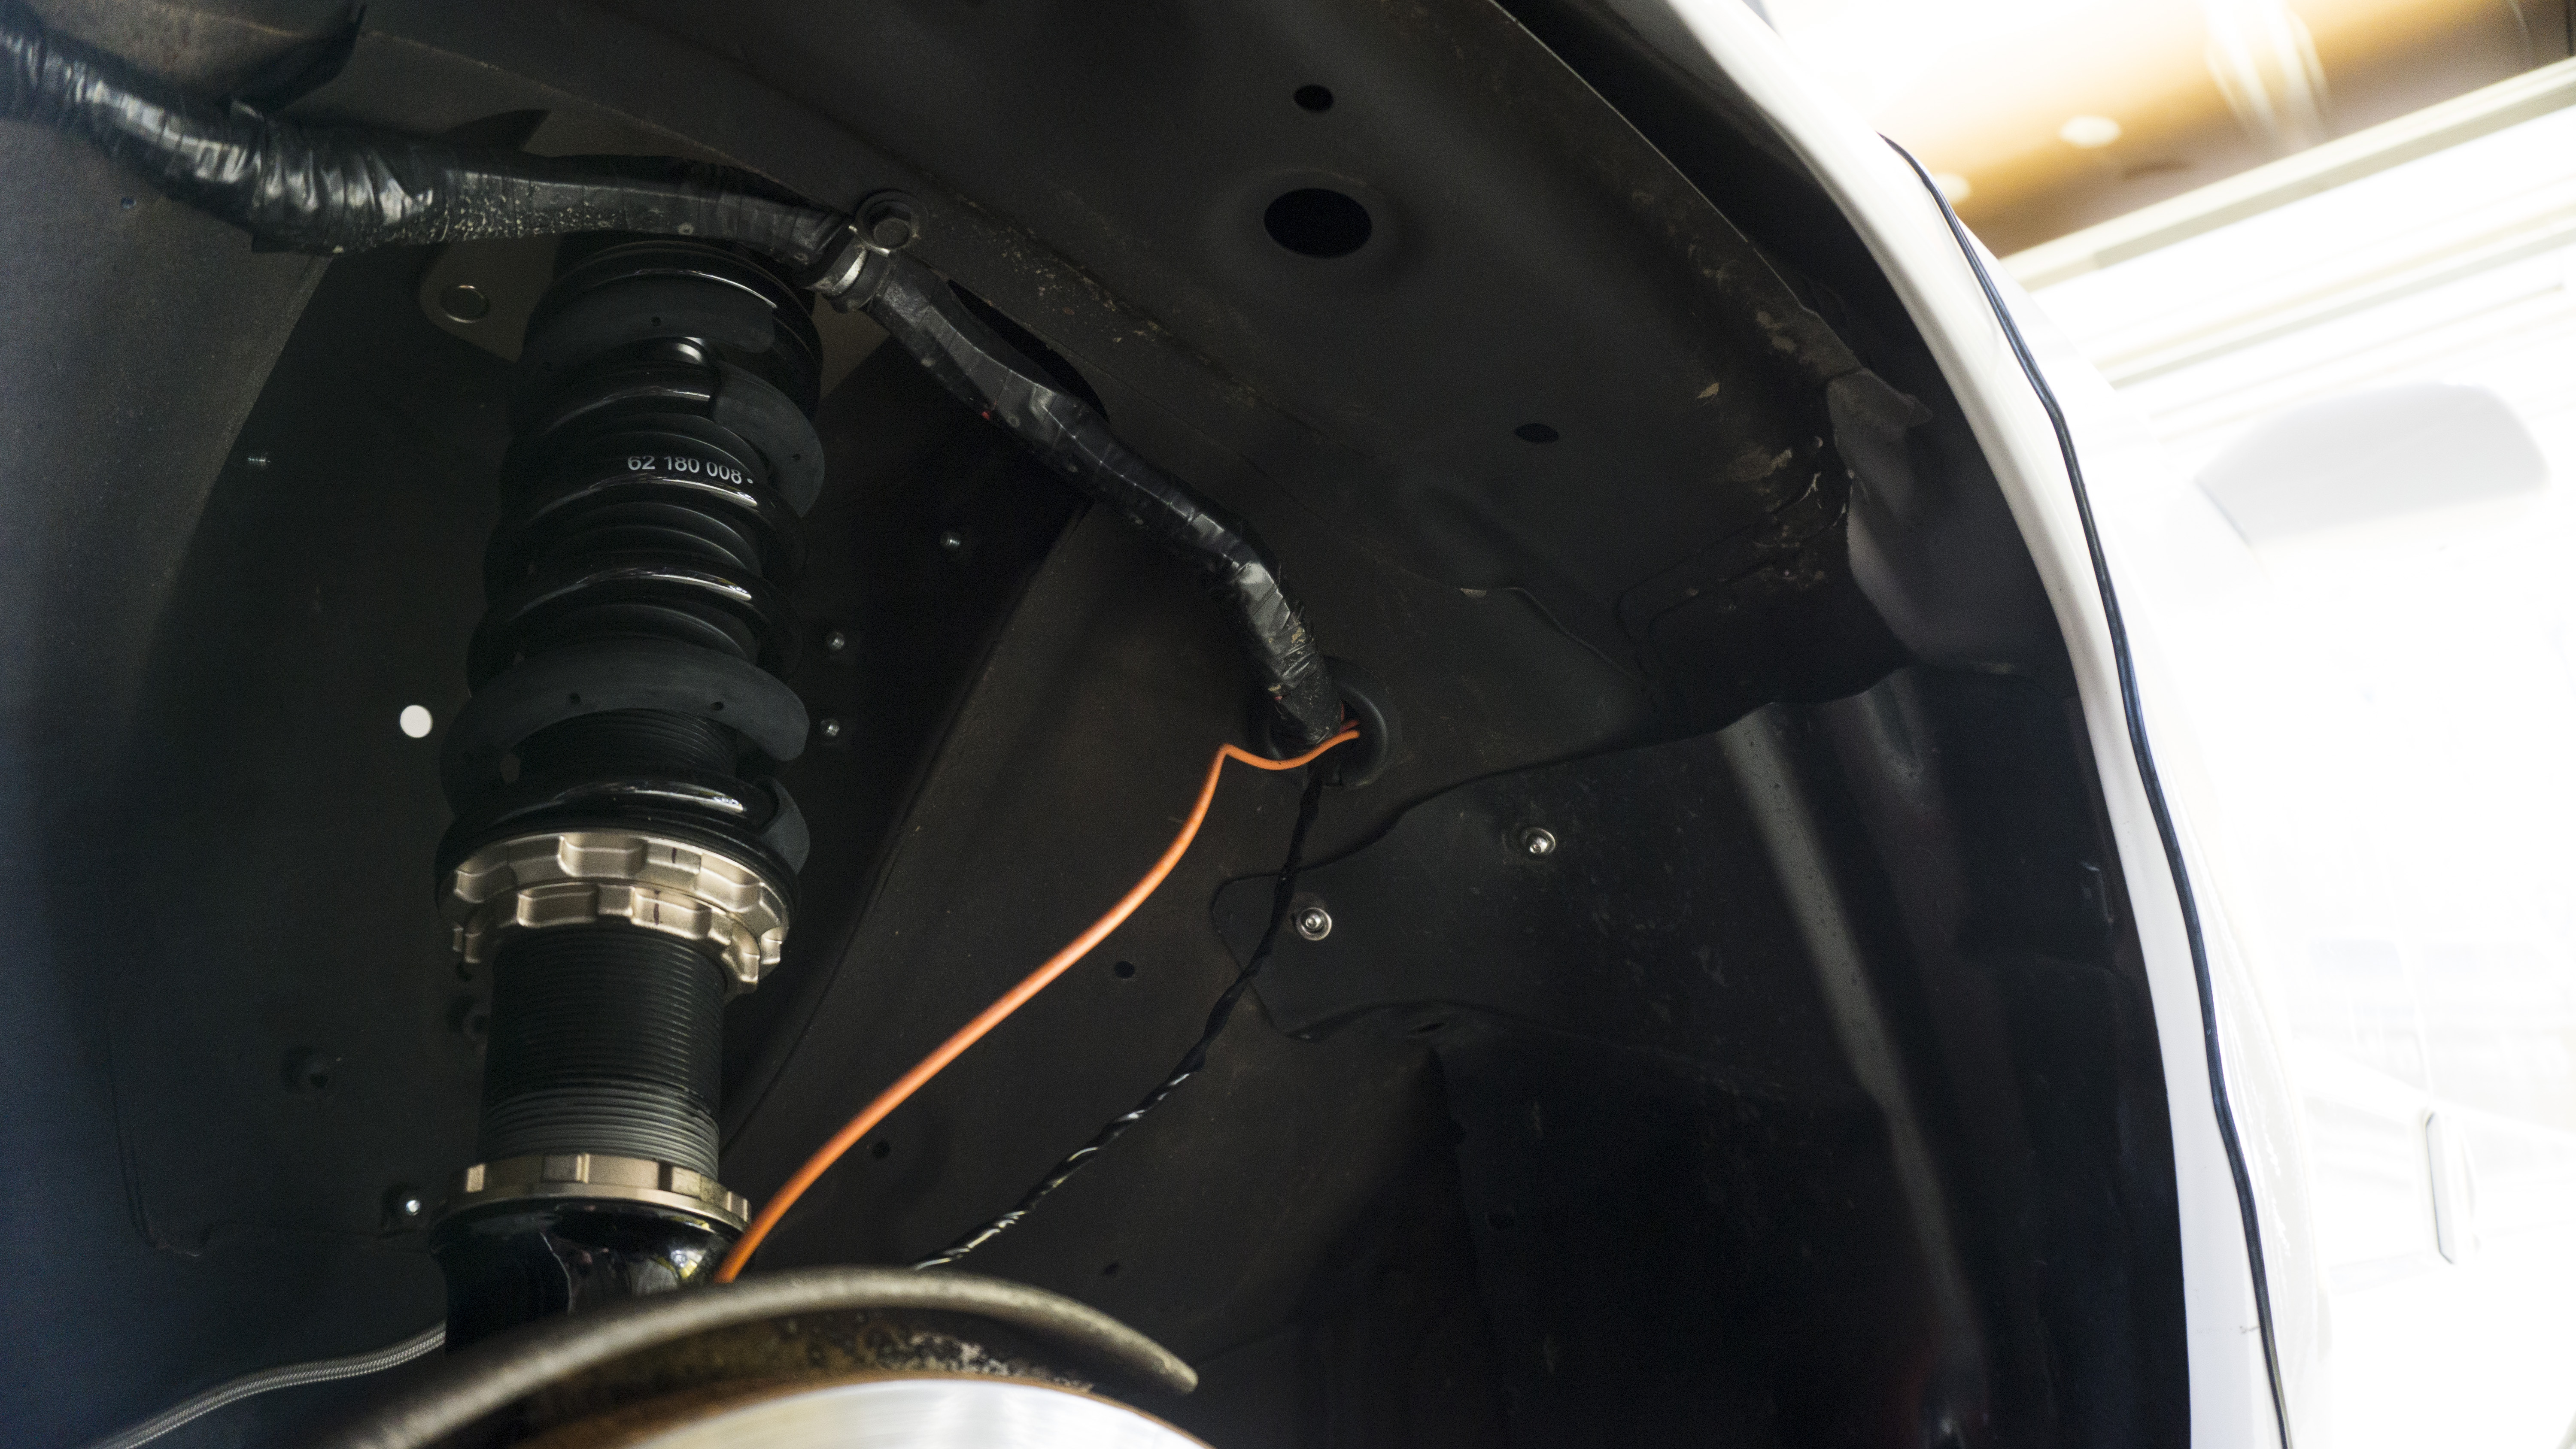
I hope everyone had a great Christmas holiday! Since I�m still waiting on everything to come back from powder I can�t really do that much. I decided to go ahead and start tackling the wiring for the fans. I had to order some wire to get everything I needed. I really shudder when I see people run the same color wire for every single thing. I really like keeping things color oriented - it definitely eases finding things in the future. I ended up getting to use my new Deutsch crimper and connectors already for the fans. I was going to make the relays be modular as well, but decided against it. I had to run a wire from the Megasquirt. I took it behind the brake booster and it�ll run along the fender. I also ran the ignition wire through the fender as well. I plan to keep them all together, but separate from the main electrical harness I have running there. I�ll attach a wiring diagram I made up in Paint below (It�s my first one I�ve ever made, so you can�t laugh). All the wires are currently hanging out of my fender. I can tidy them up, but can�t really finish running everything until I get the radiator and fans on. I hope to have those back next week so I can get the car running! Exciting times await.
I hope everyone has a great New Years!
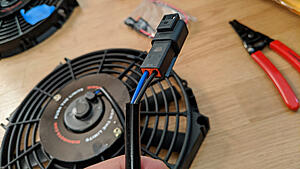
Here is the Fan Connectors:

Here are the goods and the wiring diagram I made:

Here is the constant wire:
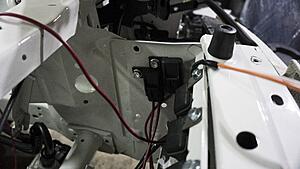
Here is how I have everything coming into the fender:
I hope everyone had a great Christmas holiday! Since I�m still waiting on everything to come back from powder I can�t really do that much. I decided to go ahead and start tackling the wiring for the fans. I had to order some wire to get everything I needed. I really shudder when I see people run the same color wire for every single thing. I really like keeping things color oriented - it definitely eases finding things in the future. I ended up getting to use my new Deutsch crimper and connectors already for the fans. I was going to make the relays be modular as well, but decided against it. I had to run a wire from the Megasquirt. I took it behind the brake booster and it�ll run along the fender. I also ran the ignition wire through the fender as well. I plan to keep them all together, but separate from the main electrical harness I have running there. I�ll attach a wiring diagram I made up in Paint below (It�s my first one I�ve ever made, so you can�t laugh). All the wires are currently hanging out of my fender. I can tidy them up, but can�t really finish running everything until I get the radiator and fans on. I hope to have those back next week so I can get the car running! Exciting times await.
I hope everyone has a great New Years!
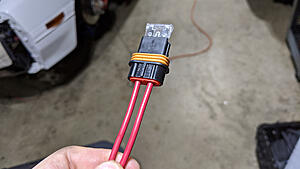
Here is the Fan Connectors:

Here are the goods and the wiring diagram I made:

Here is the constant wire:

Here is how I have everything coming into the fender:
 01-10-20, 09:15 PM
#273
Update 1/10/20:
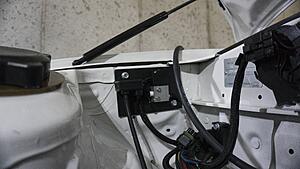
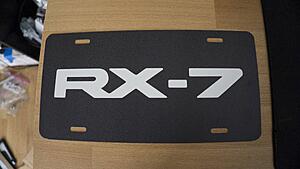
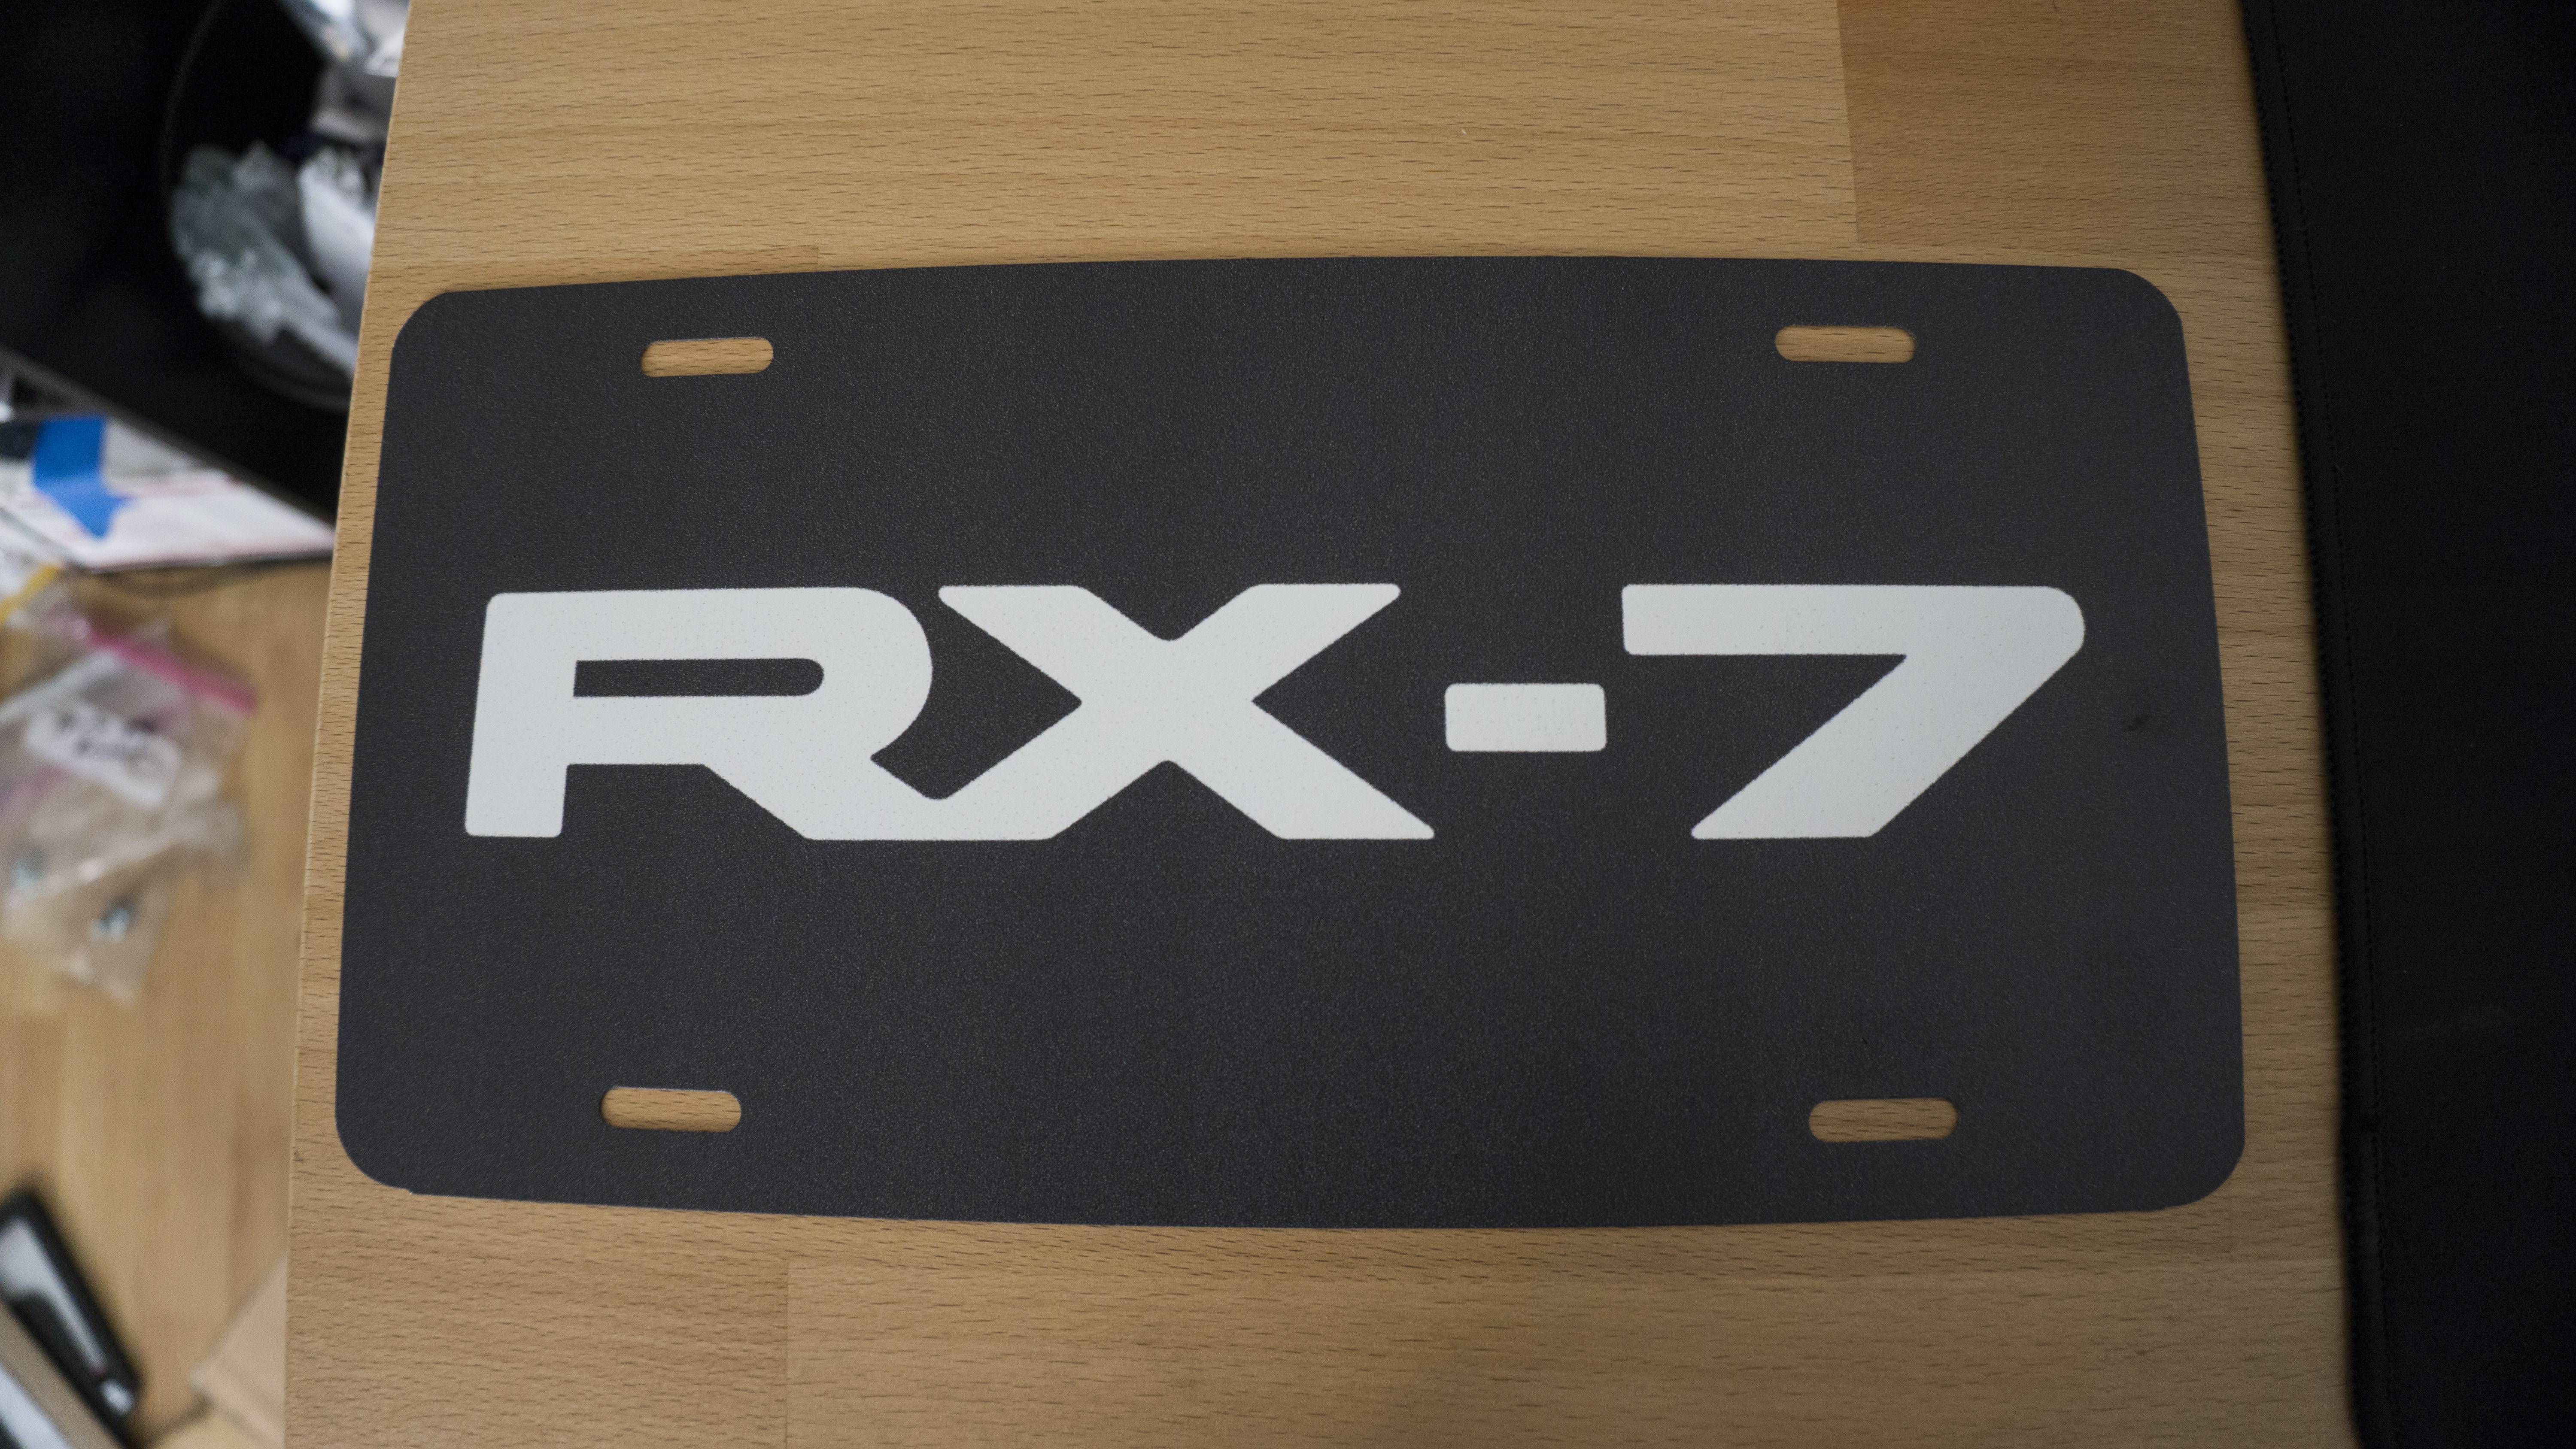
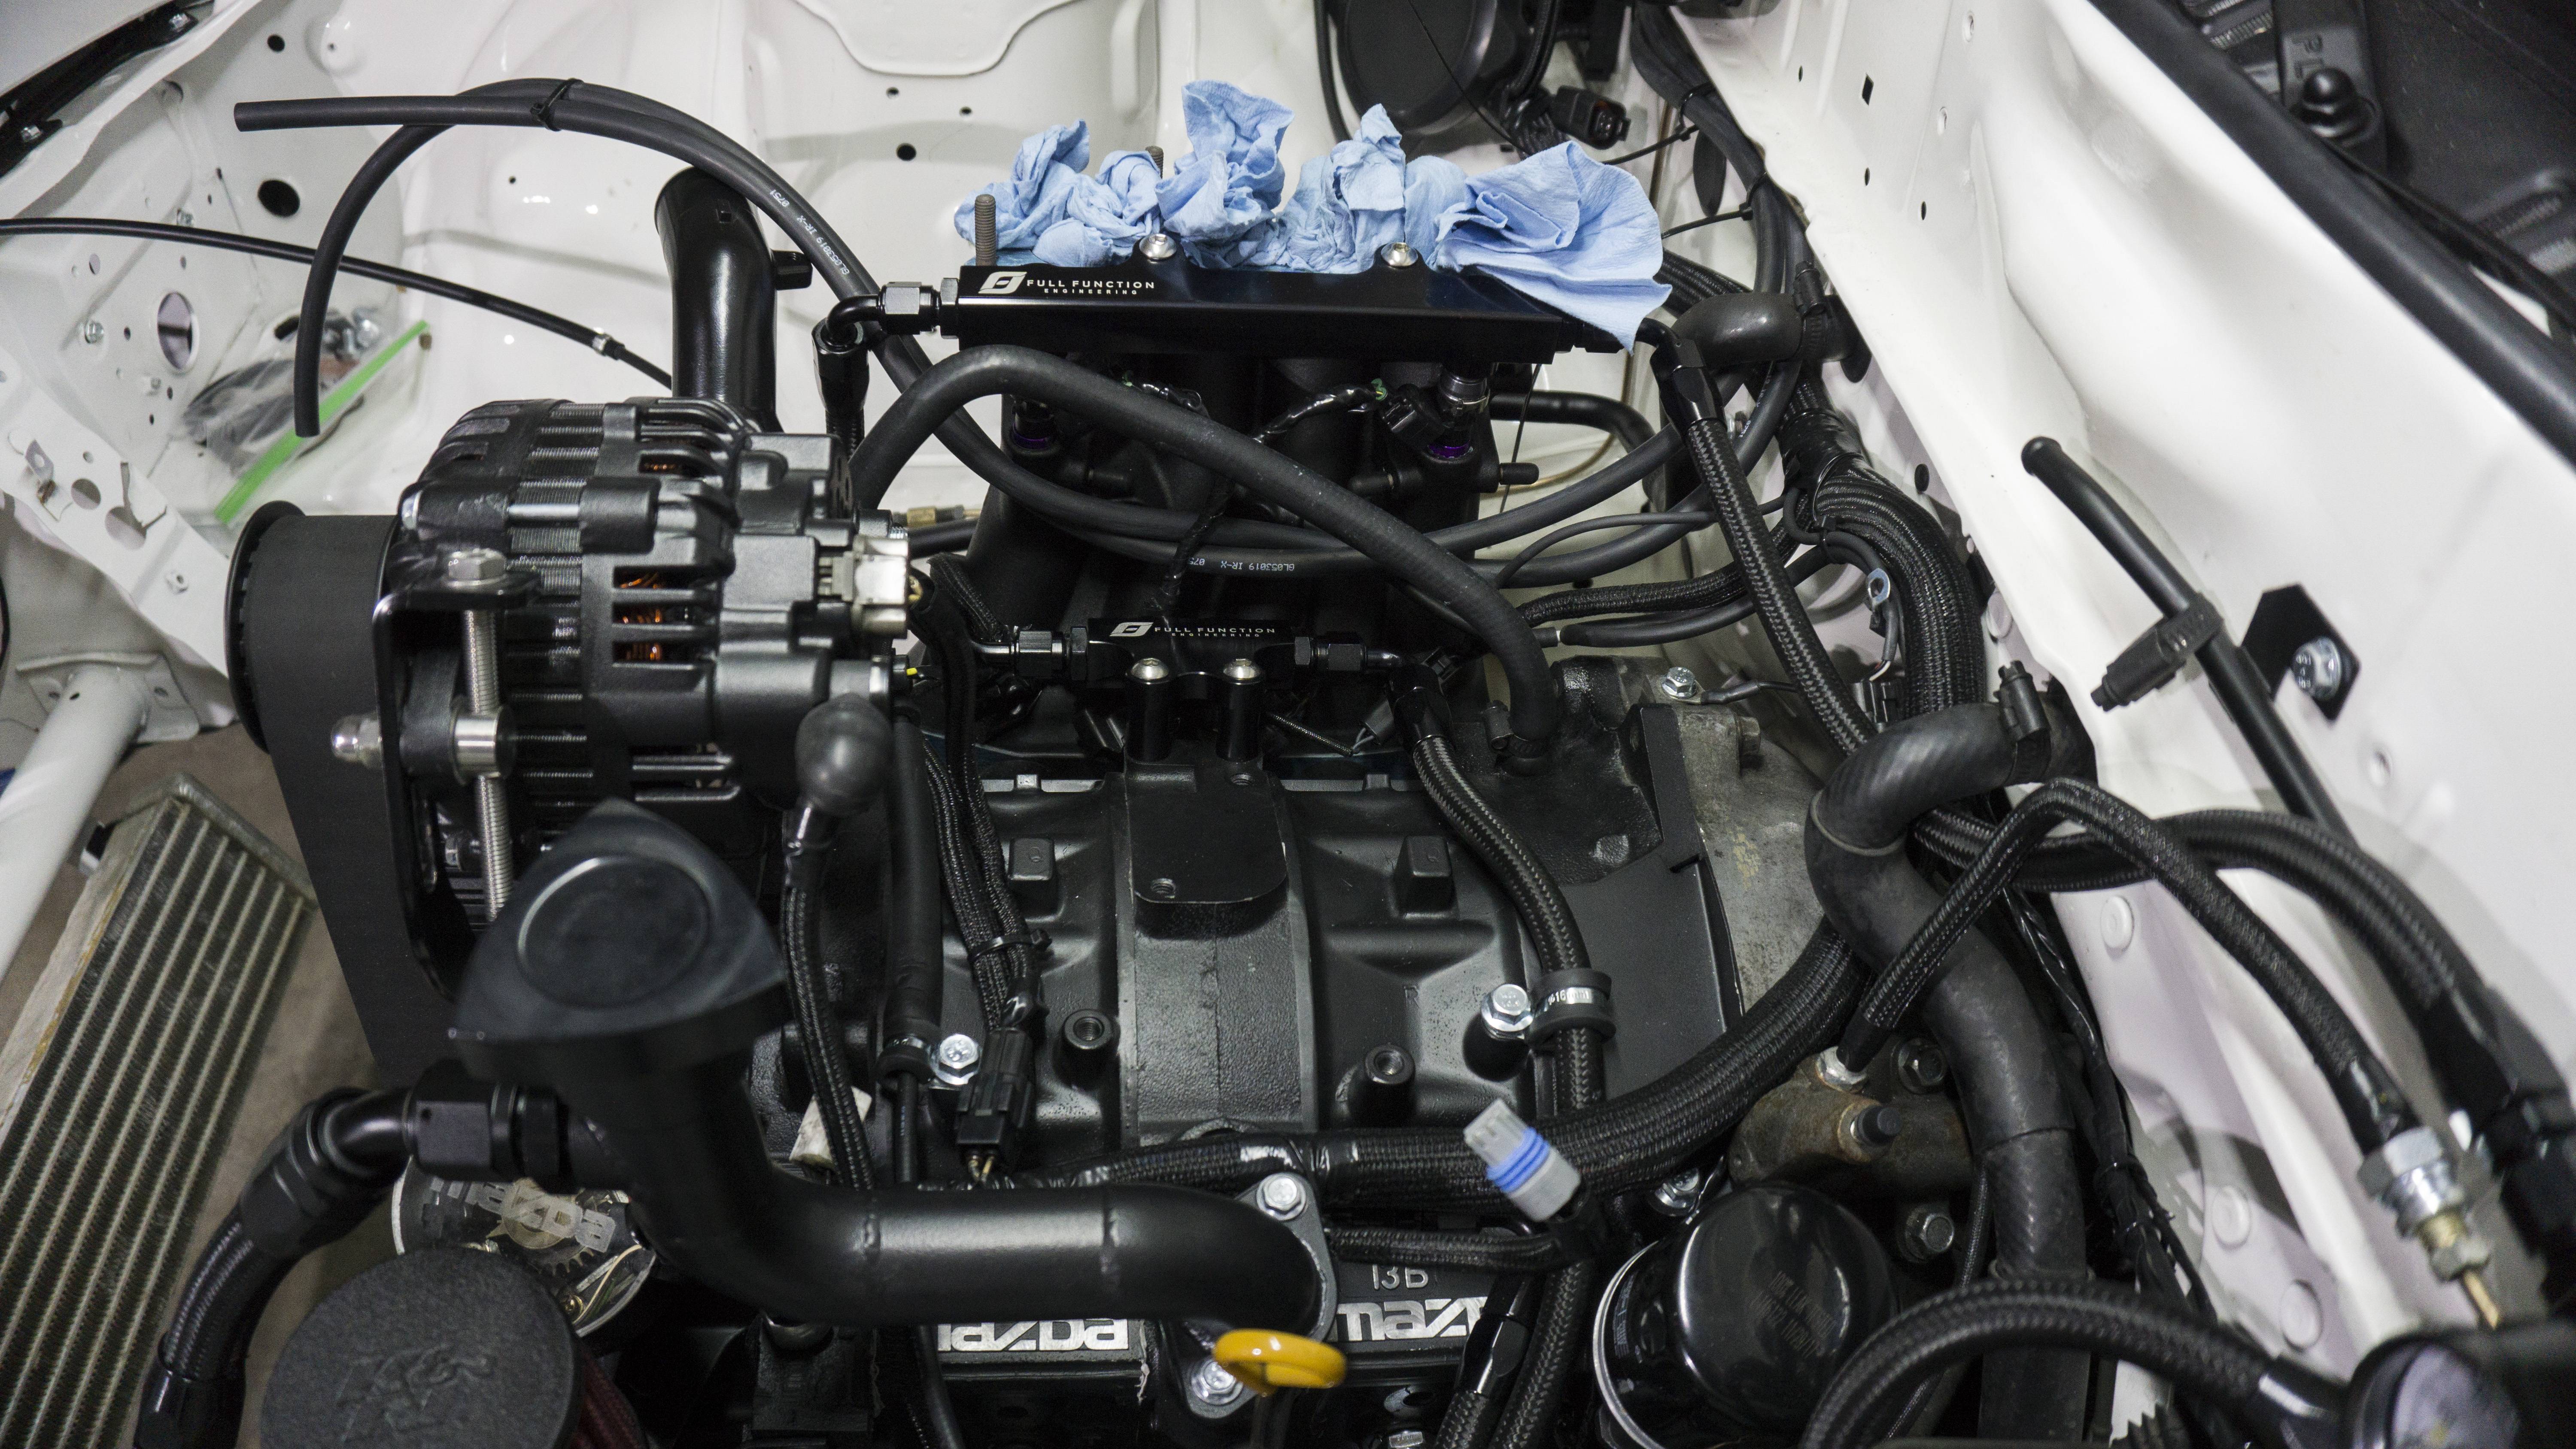
Woah, first update for the year - and it�s an exciting one! I�m expecting the car to be running this weekend. I picked up half of the stuff from powder today and I�m picking up the rest of it tomorrow. I�ve been doing as much pre-work as I can before starting on putting the V-Mount in the car. I finished running the wiring for the fans. I can�t complete it until the radiator is in the car, but it�s all there and ready. I found a convenient location for the inline fuses near the other relays. They are hidden under the cooling panel and still easy to access if I need to. Since I wasn�t happy with how I originally ran the fuel lines so I redid the primary to secondary connector. This works a lot better and I�m not sure why I didn�t think it would work the first time. I also tidied everything up under the UIM and put it all back together. Tomorrow I plan to go pick the rest of the stuff up from powder and get cracking. I also purchased something I thought was cool. It�s a vanity plate modeled after the showroom plate on Gran Turismo. I wanted to create plate consistency between the FC and the FD at events when I take them both out. I am just using magnets to hold it on so I can quickly slap it on and off. I will probably wait until next weekend to post the next update because I�d like to be the master of suspense.
Here is a picture of the vanity plate:
Here is all the wiring shenanigans for the fans that happened:
Here is half the stuff back from powder:

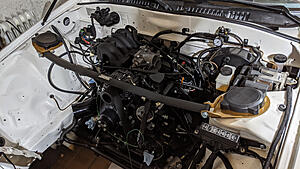
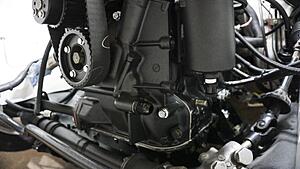
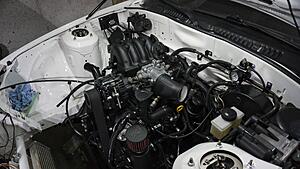
Here is a couple of the engine:
Woah, first update for the year - and it�s an exciting one! I�m expecting the car to be running this weekend. I picked up half of the stuff from powder today and I�m picking up the rest of it tomorrow. I�ve been doing as much pre-work as I can before starting on putting the V-Mount in the car. I finished running the wiring for the fans. I can�t complete it until the radiator is in the car, but it�s all there and ready. I found a convenient location for the inline fuses near the other relays. They are hidden under the cooling panel and still easy to access if I need to. Since I wasn�t happy with how I originally ran the fuel lines so I redid the primary to secondary connector. This works a lot better and I�m not sure why I didn�t think it would work the first time. I also tidied everything up under the UIM and put it all back together. Tomorrow I plan to go pick the rest of the stuff up from powder and get cracking. I also purchased something I thought was cool. It�s a vanity plate modeled after the showroom plate on Gran Turismo. I wanted to create plate consistency between the FC and the FD at events when I take them both out. I am just using magnets to hold it on so I can quickly slap it on and off. I will probably wait until next weekend to post the next update because I�d like to be the master of suspense.
Here is a picture of the vanity plate:
Here is all the wiring shenanigans for the fans that happened:


Here is half the stuff back from powder:
Here is a couple of the engine:

The following 2 users liked this post by Akomix:
JerryLH3 (01-13-20),
Relisys190 (01-10-20)
01-12-20, 05:48 PM
#274
Update 1/12/20:
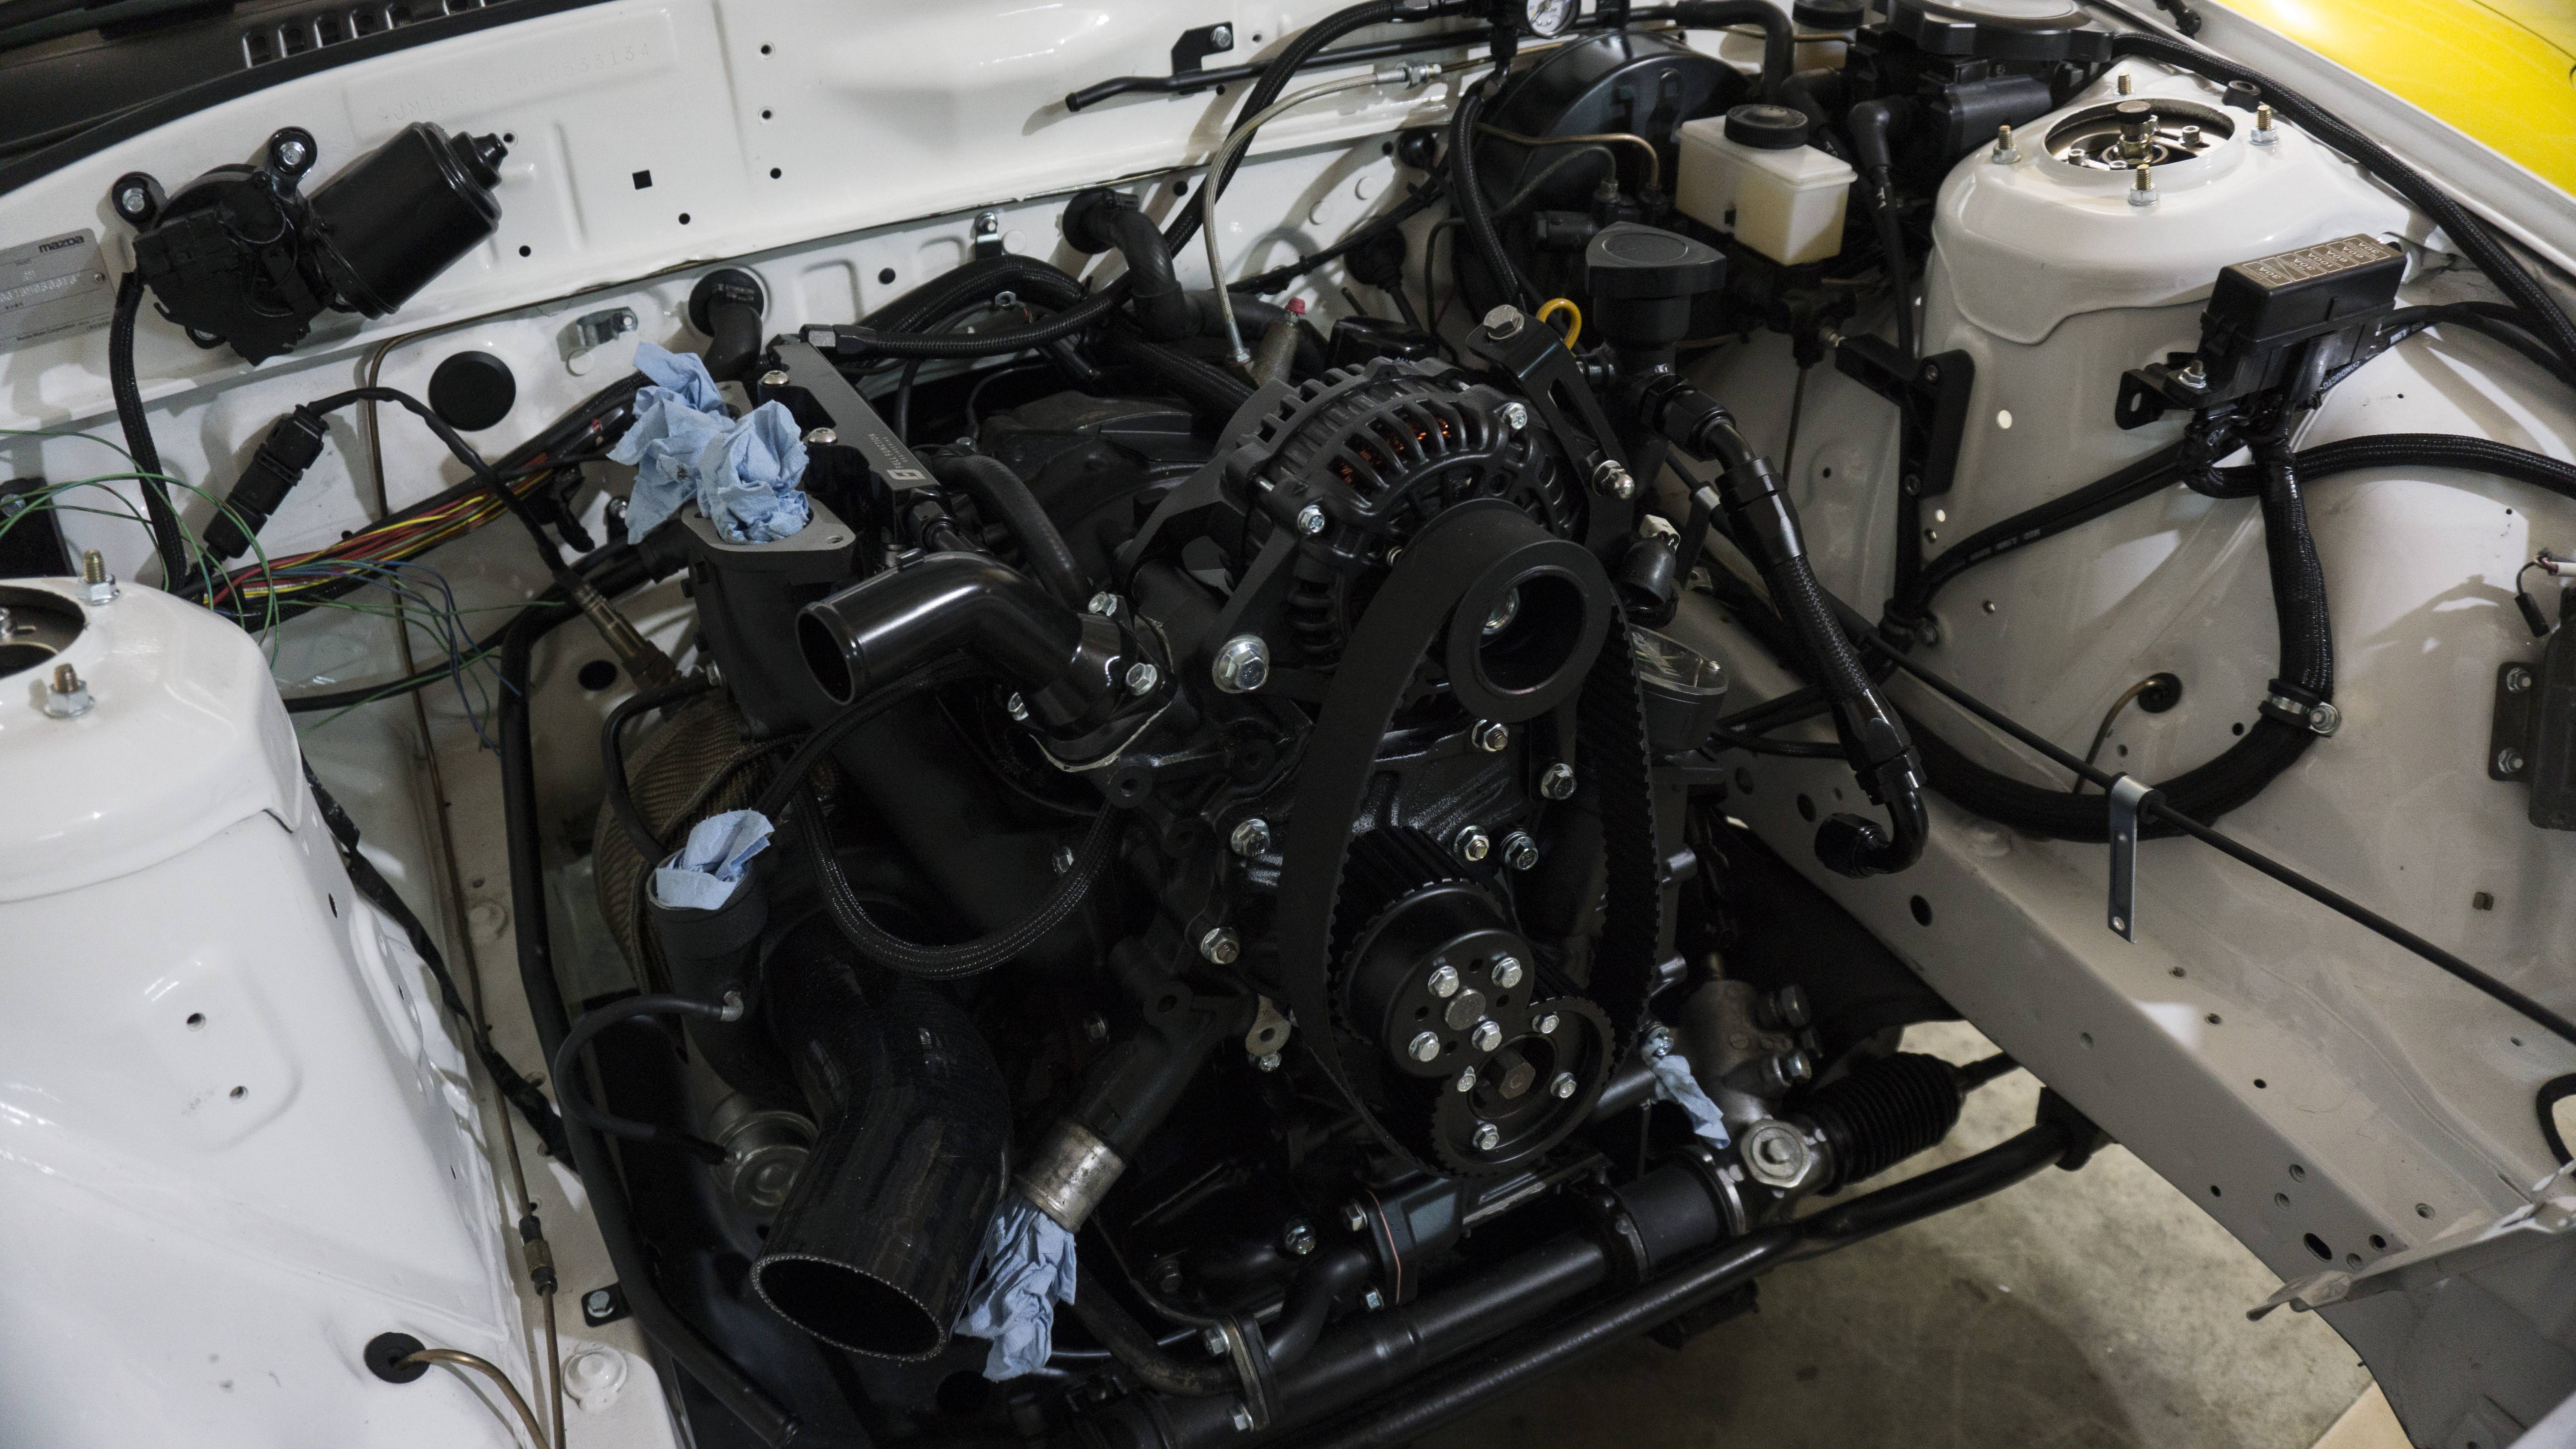
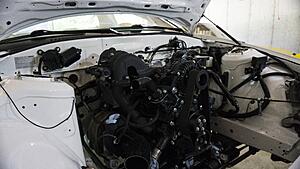
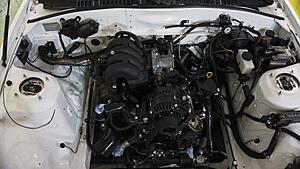
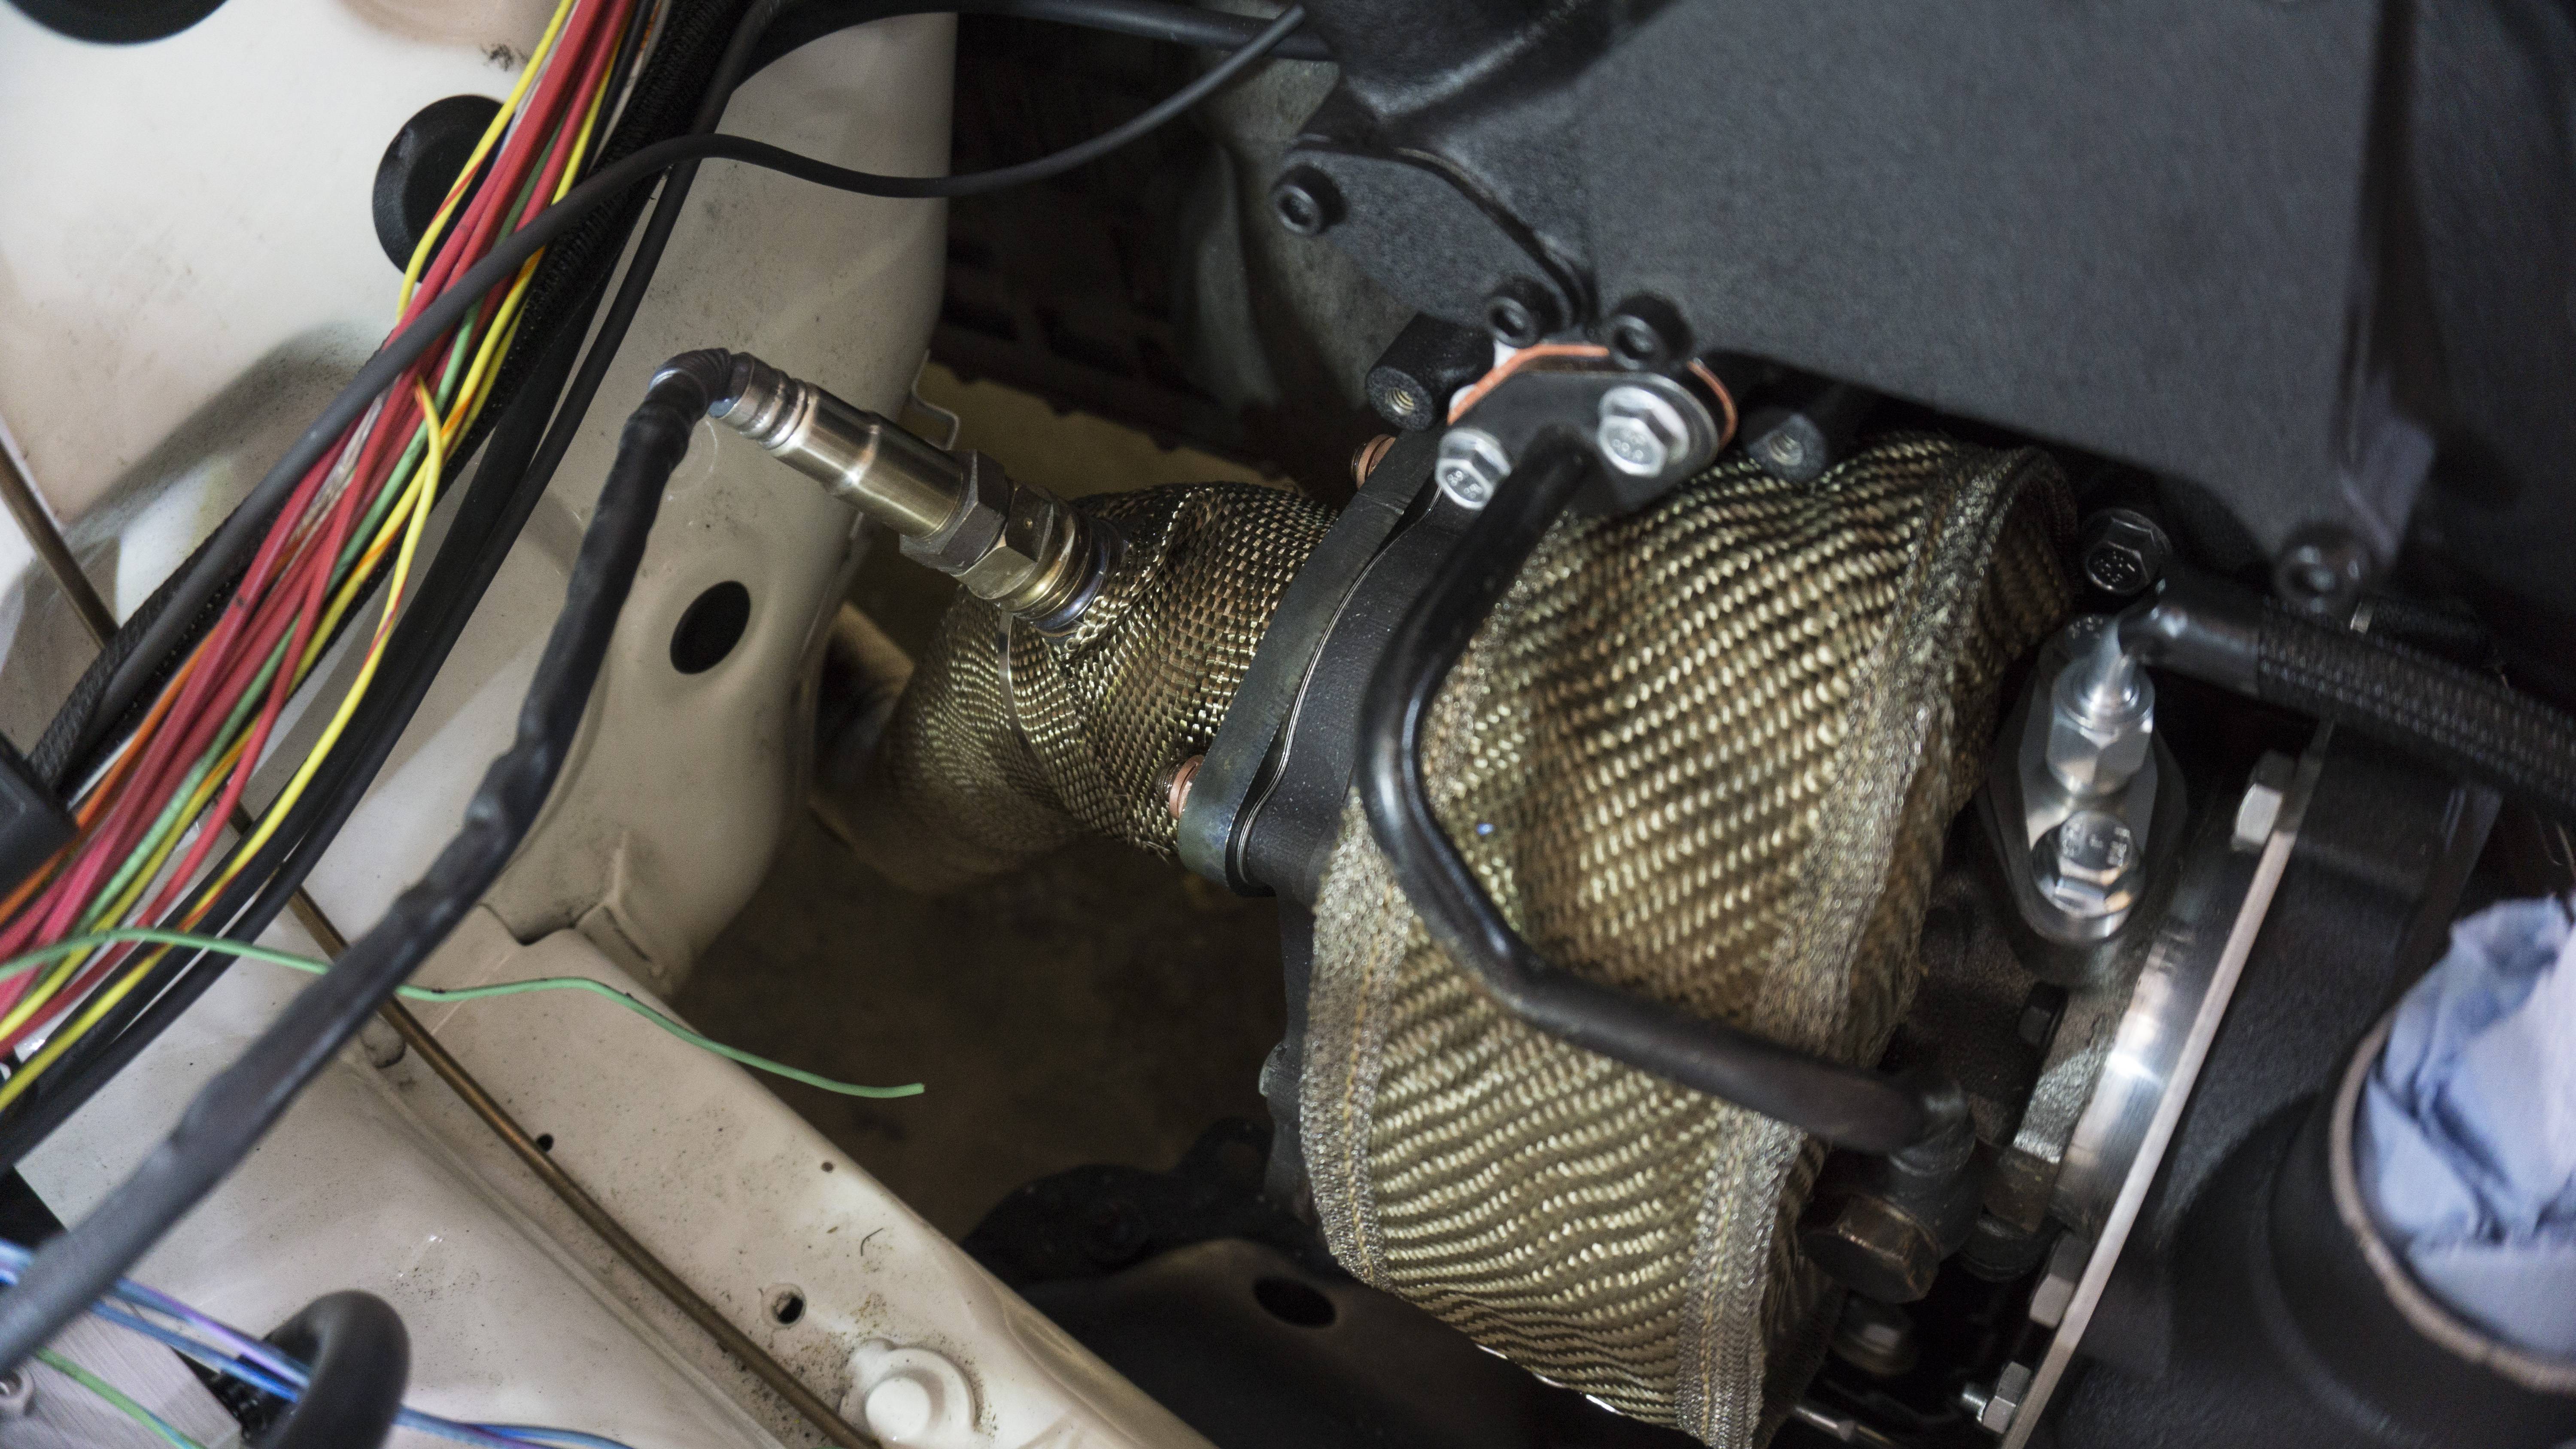
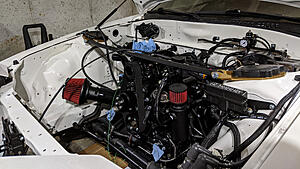
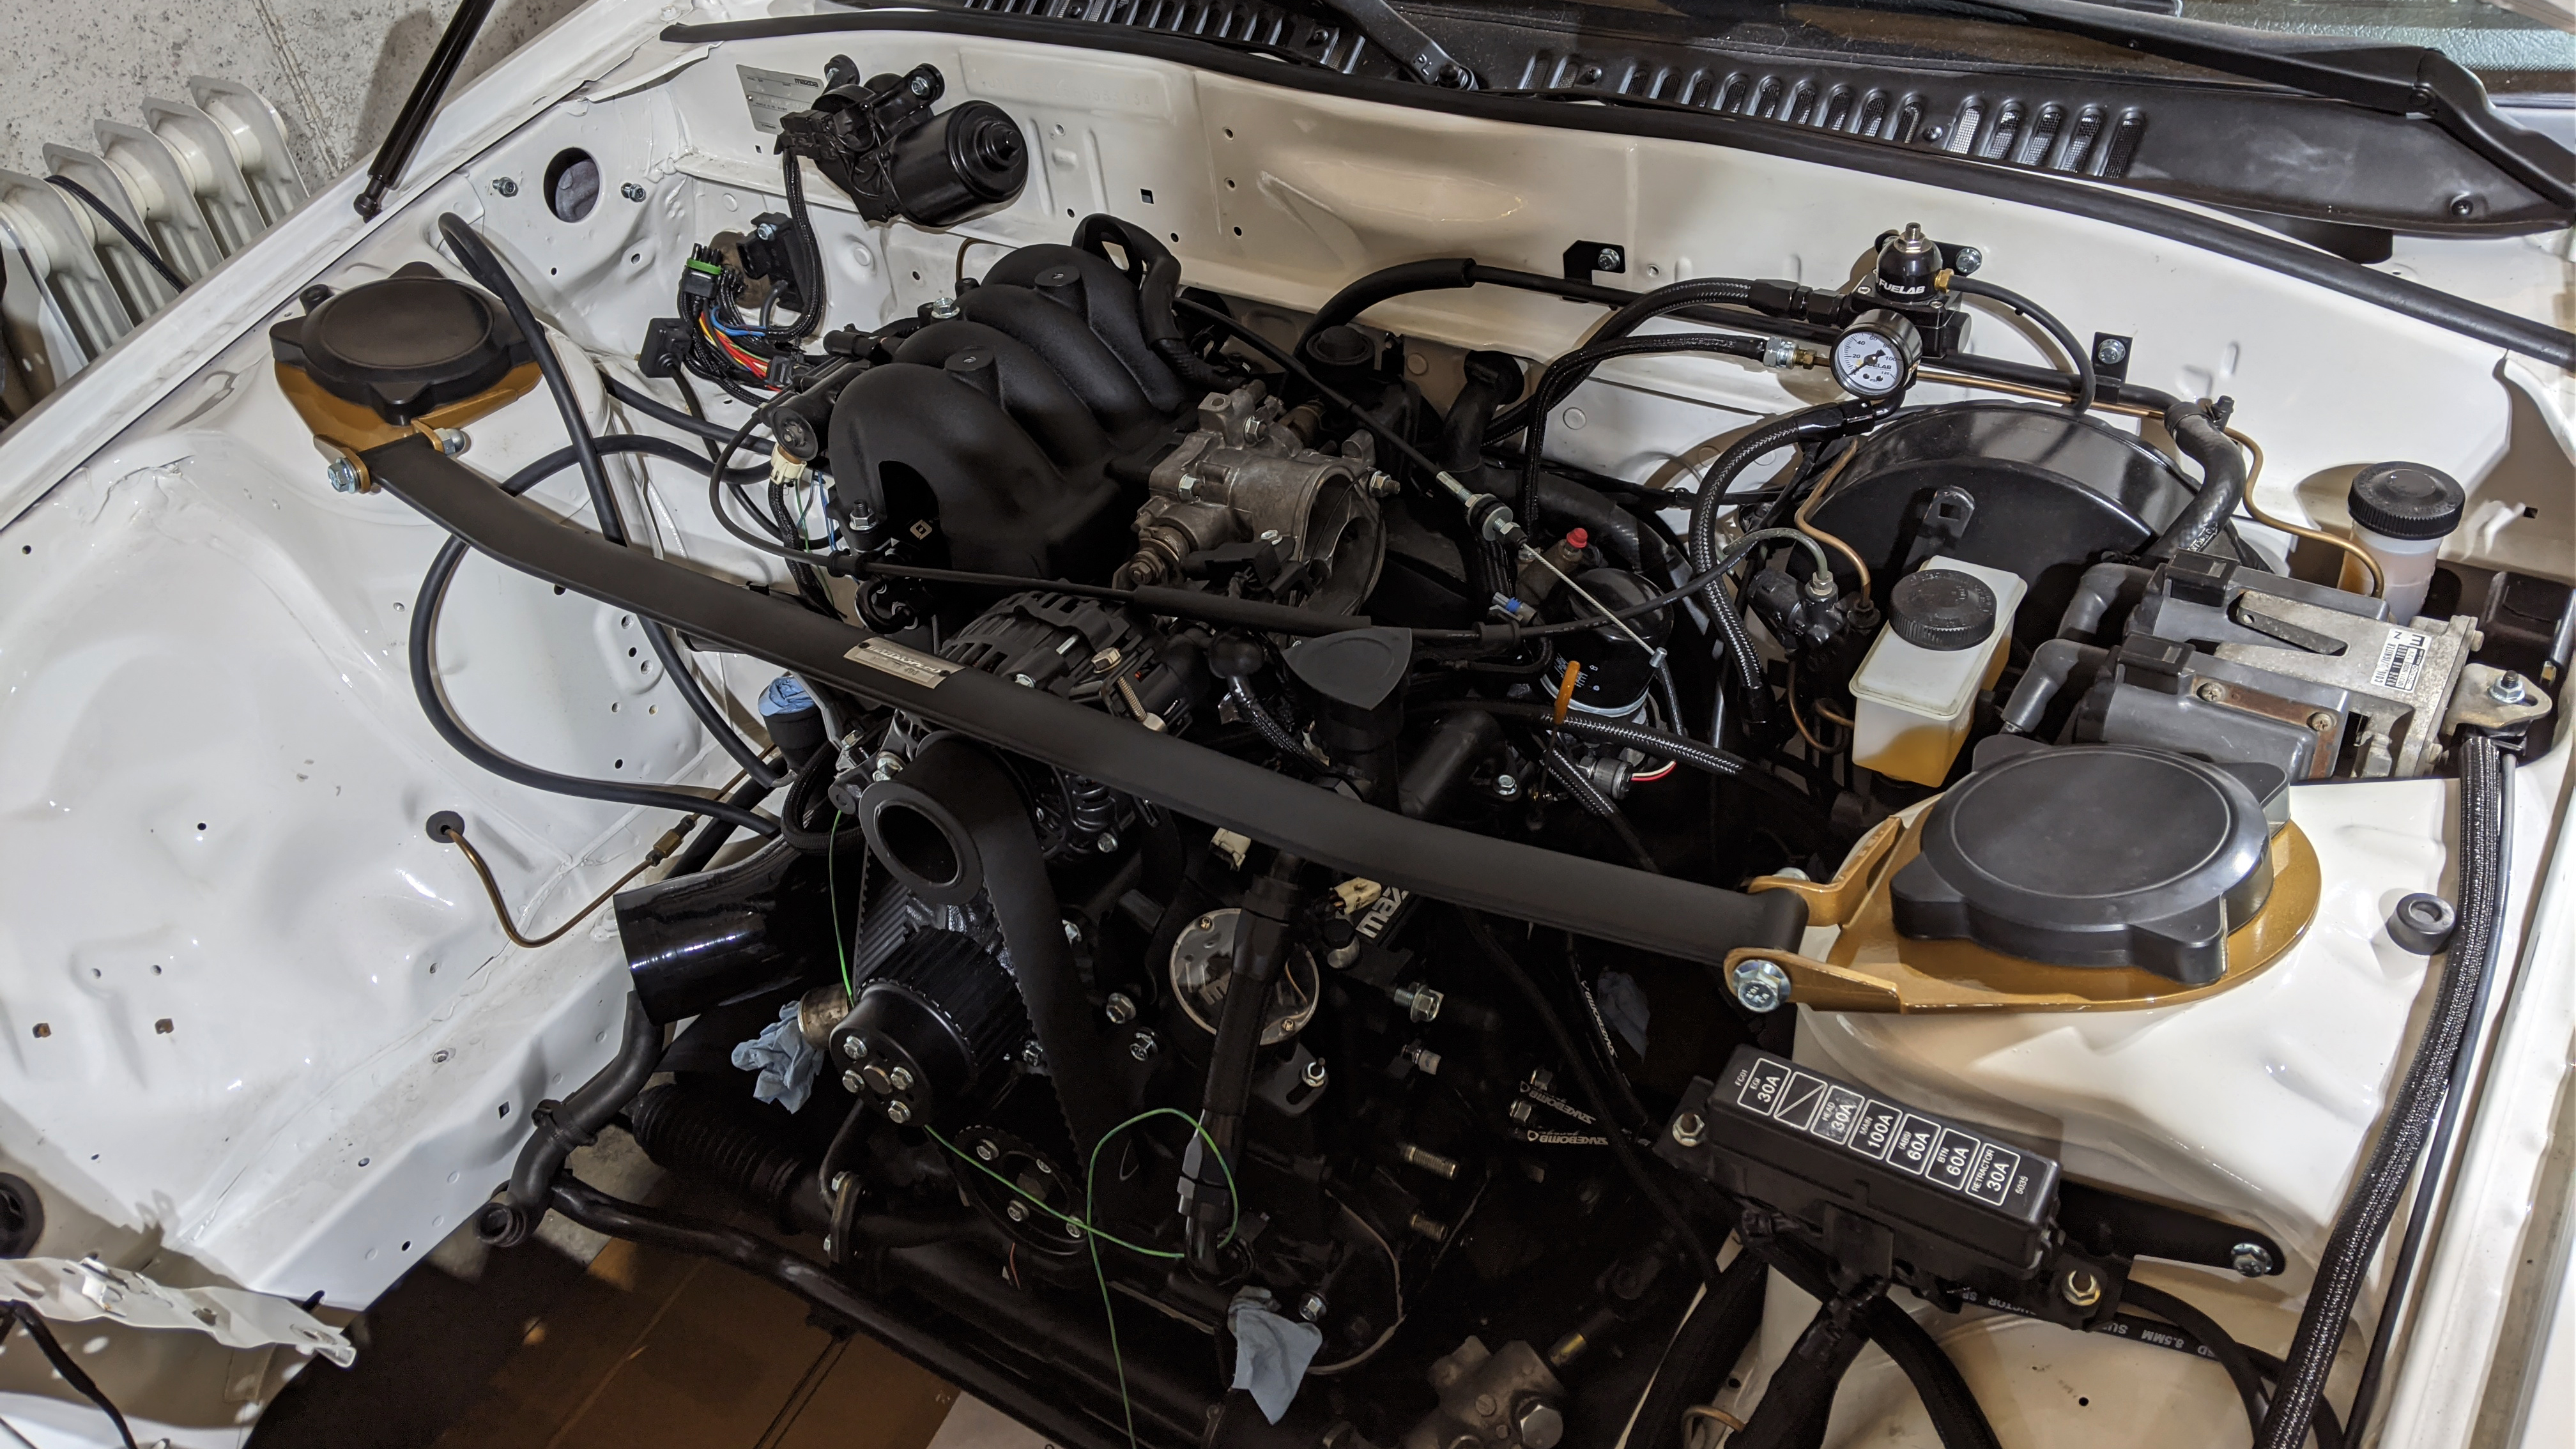
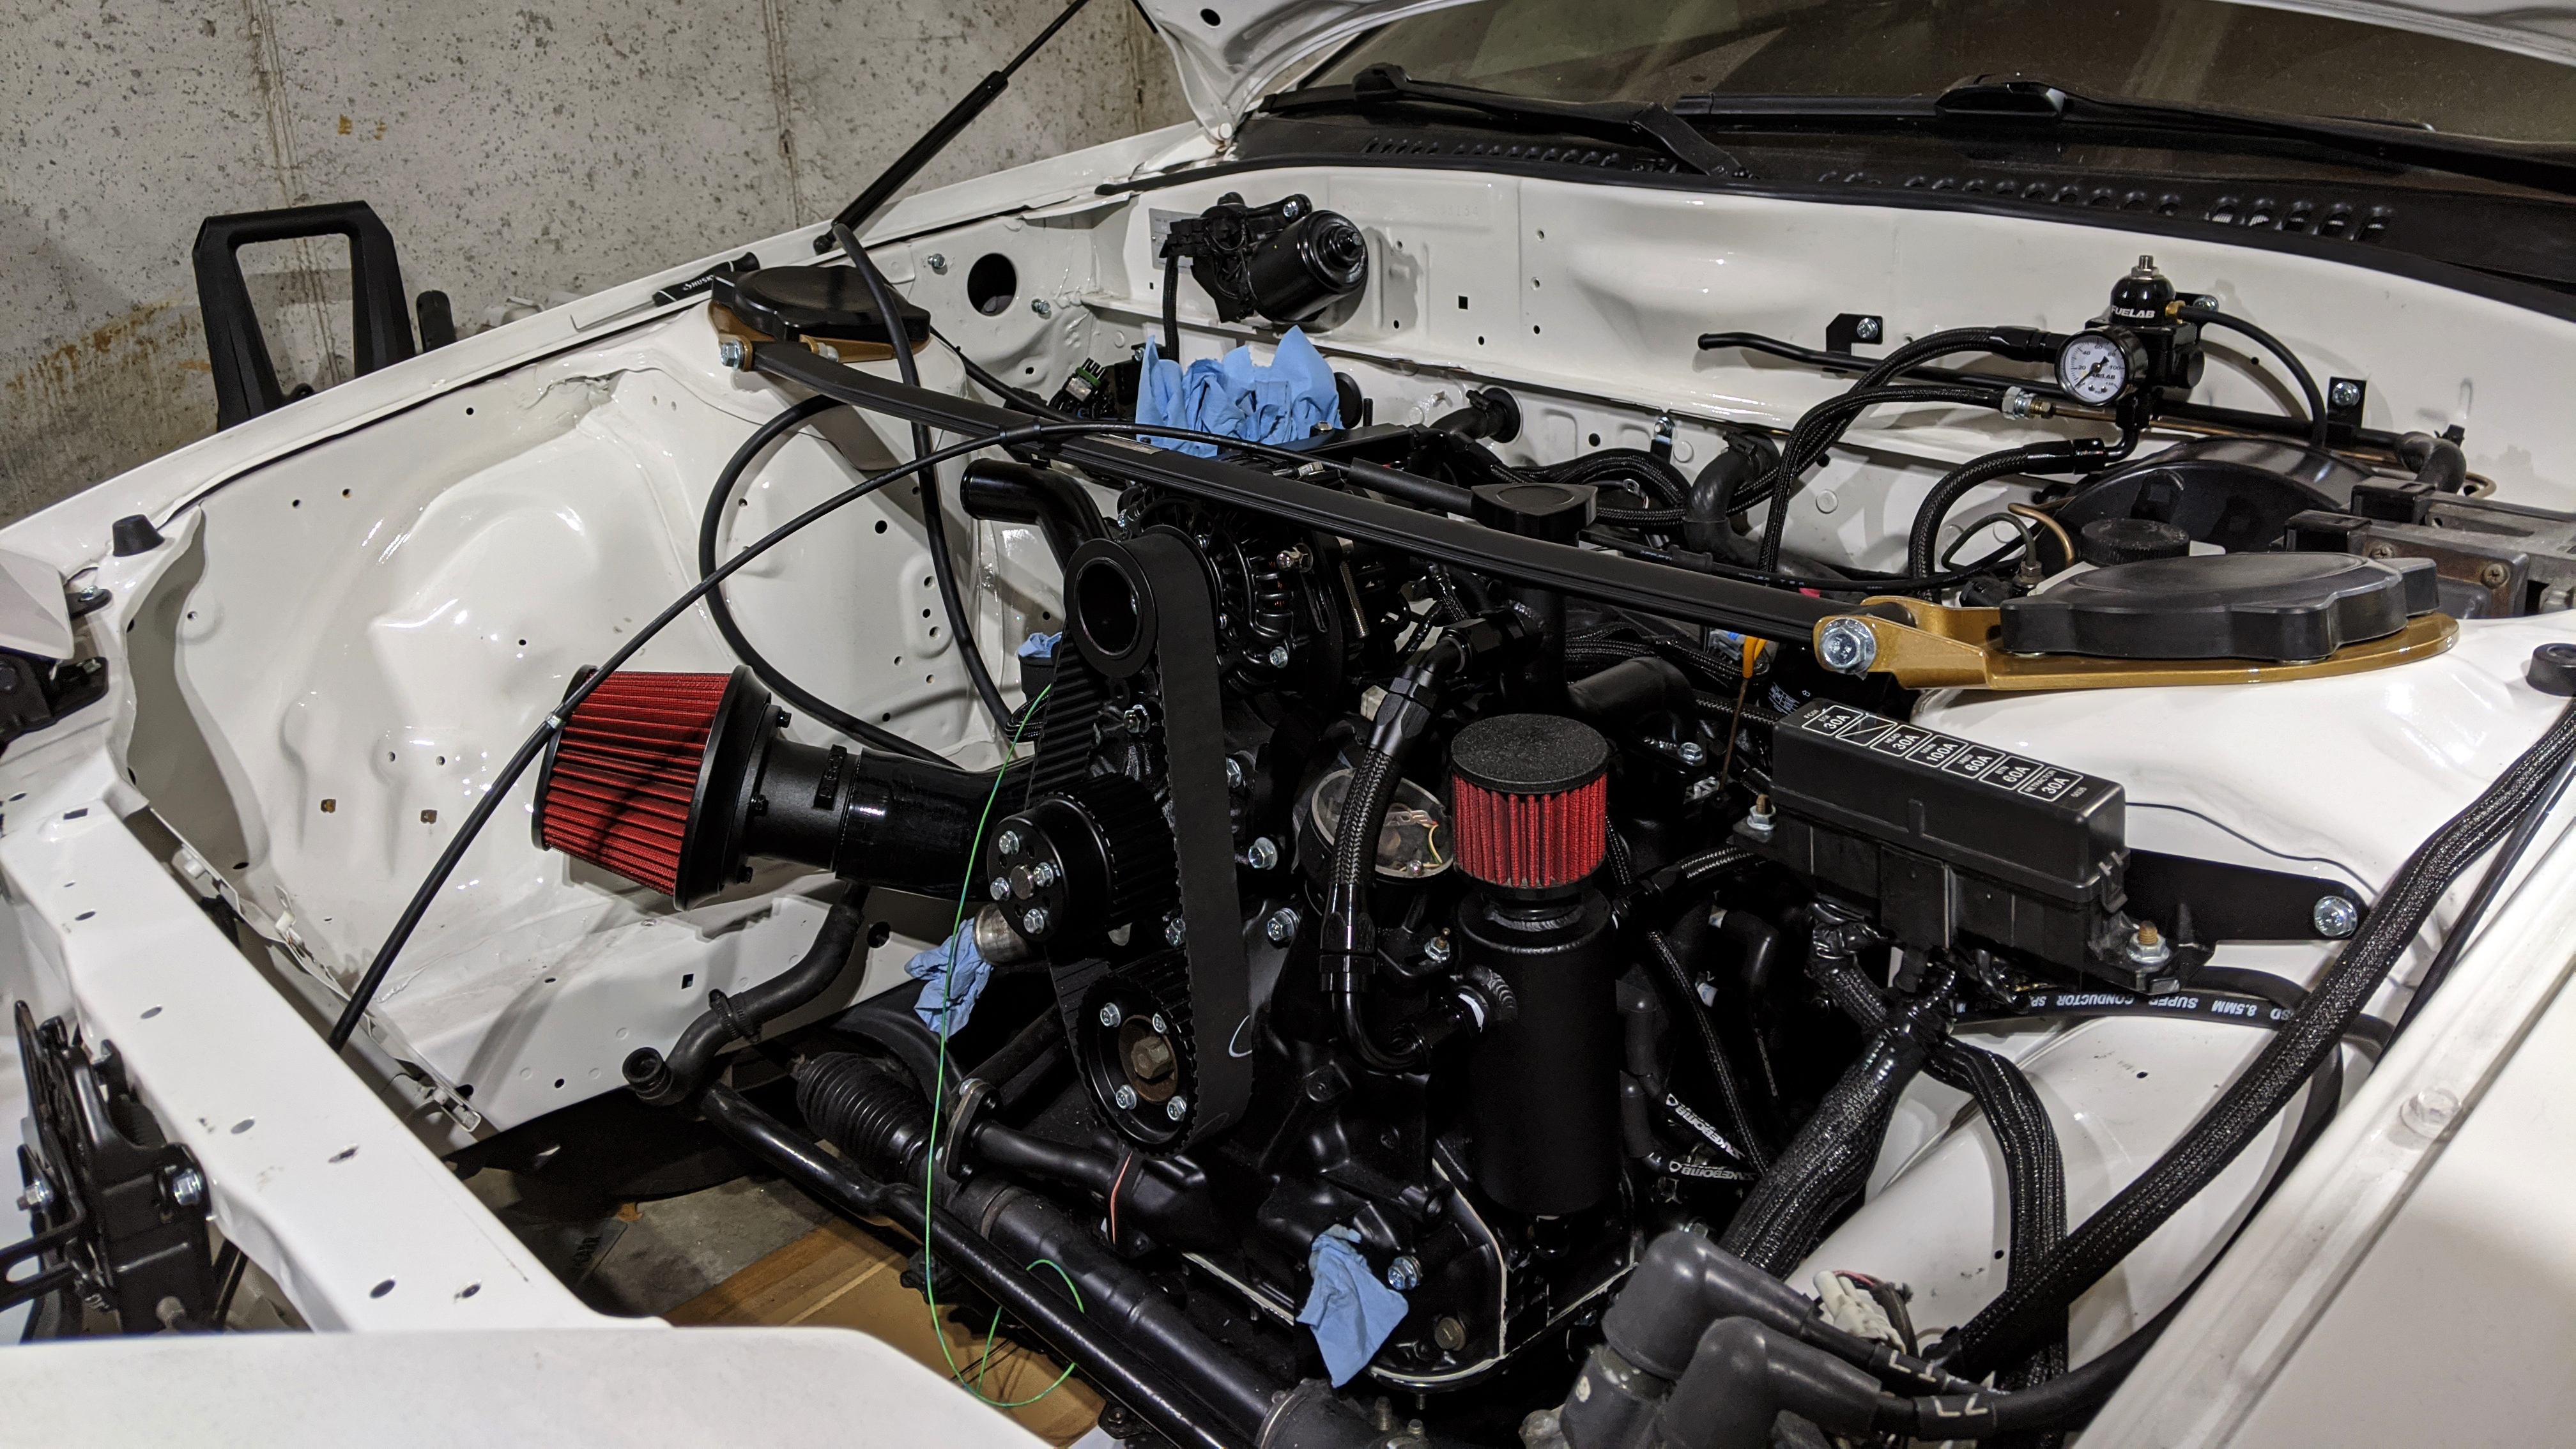
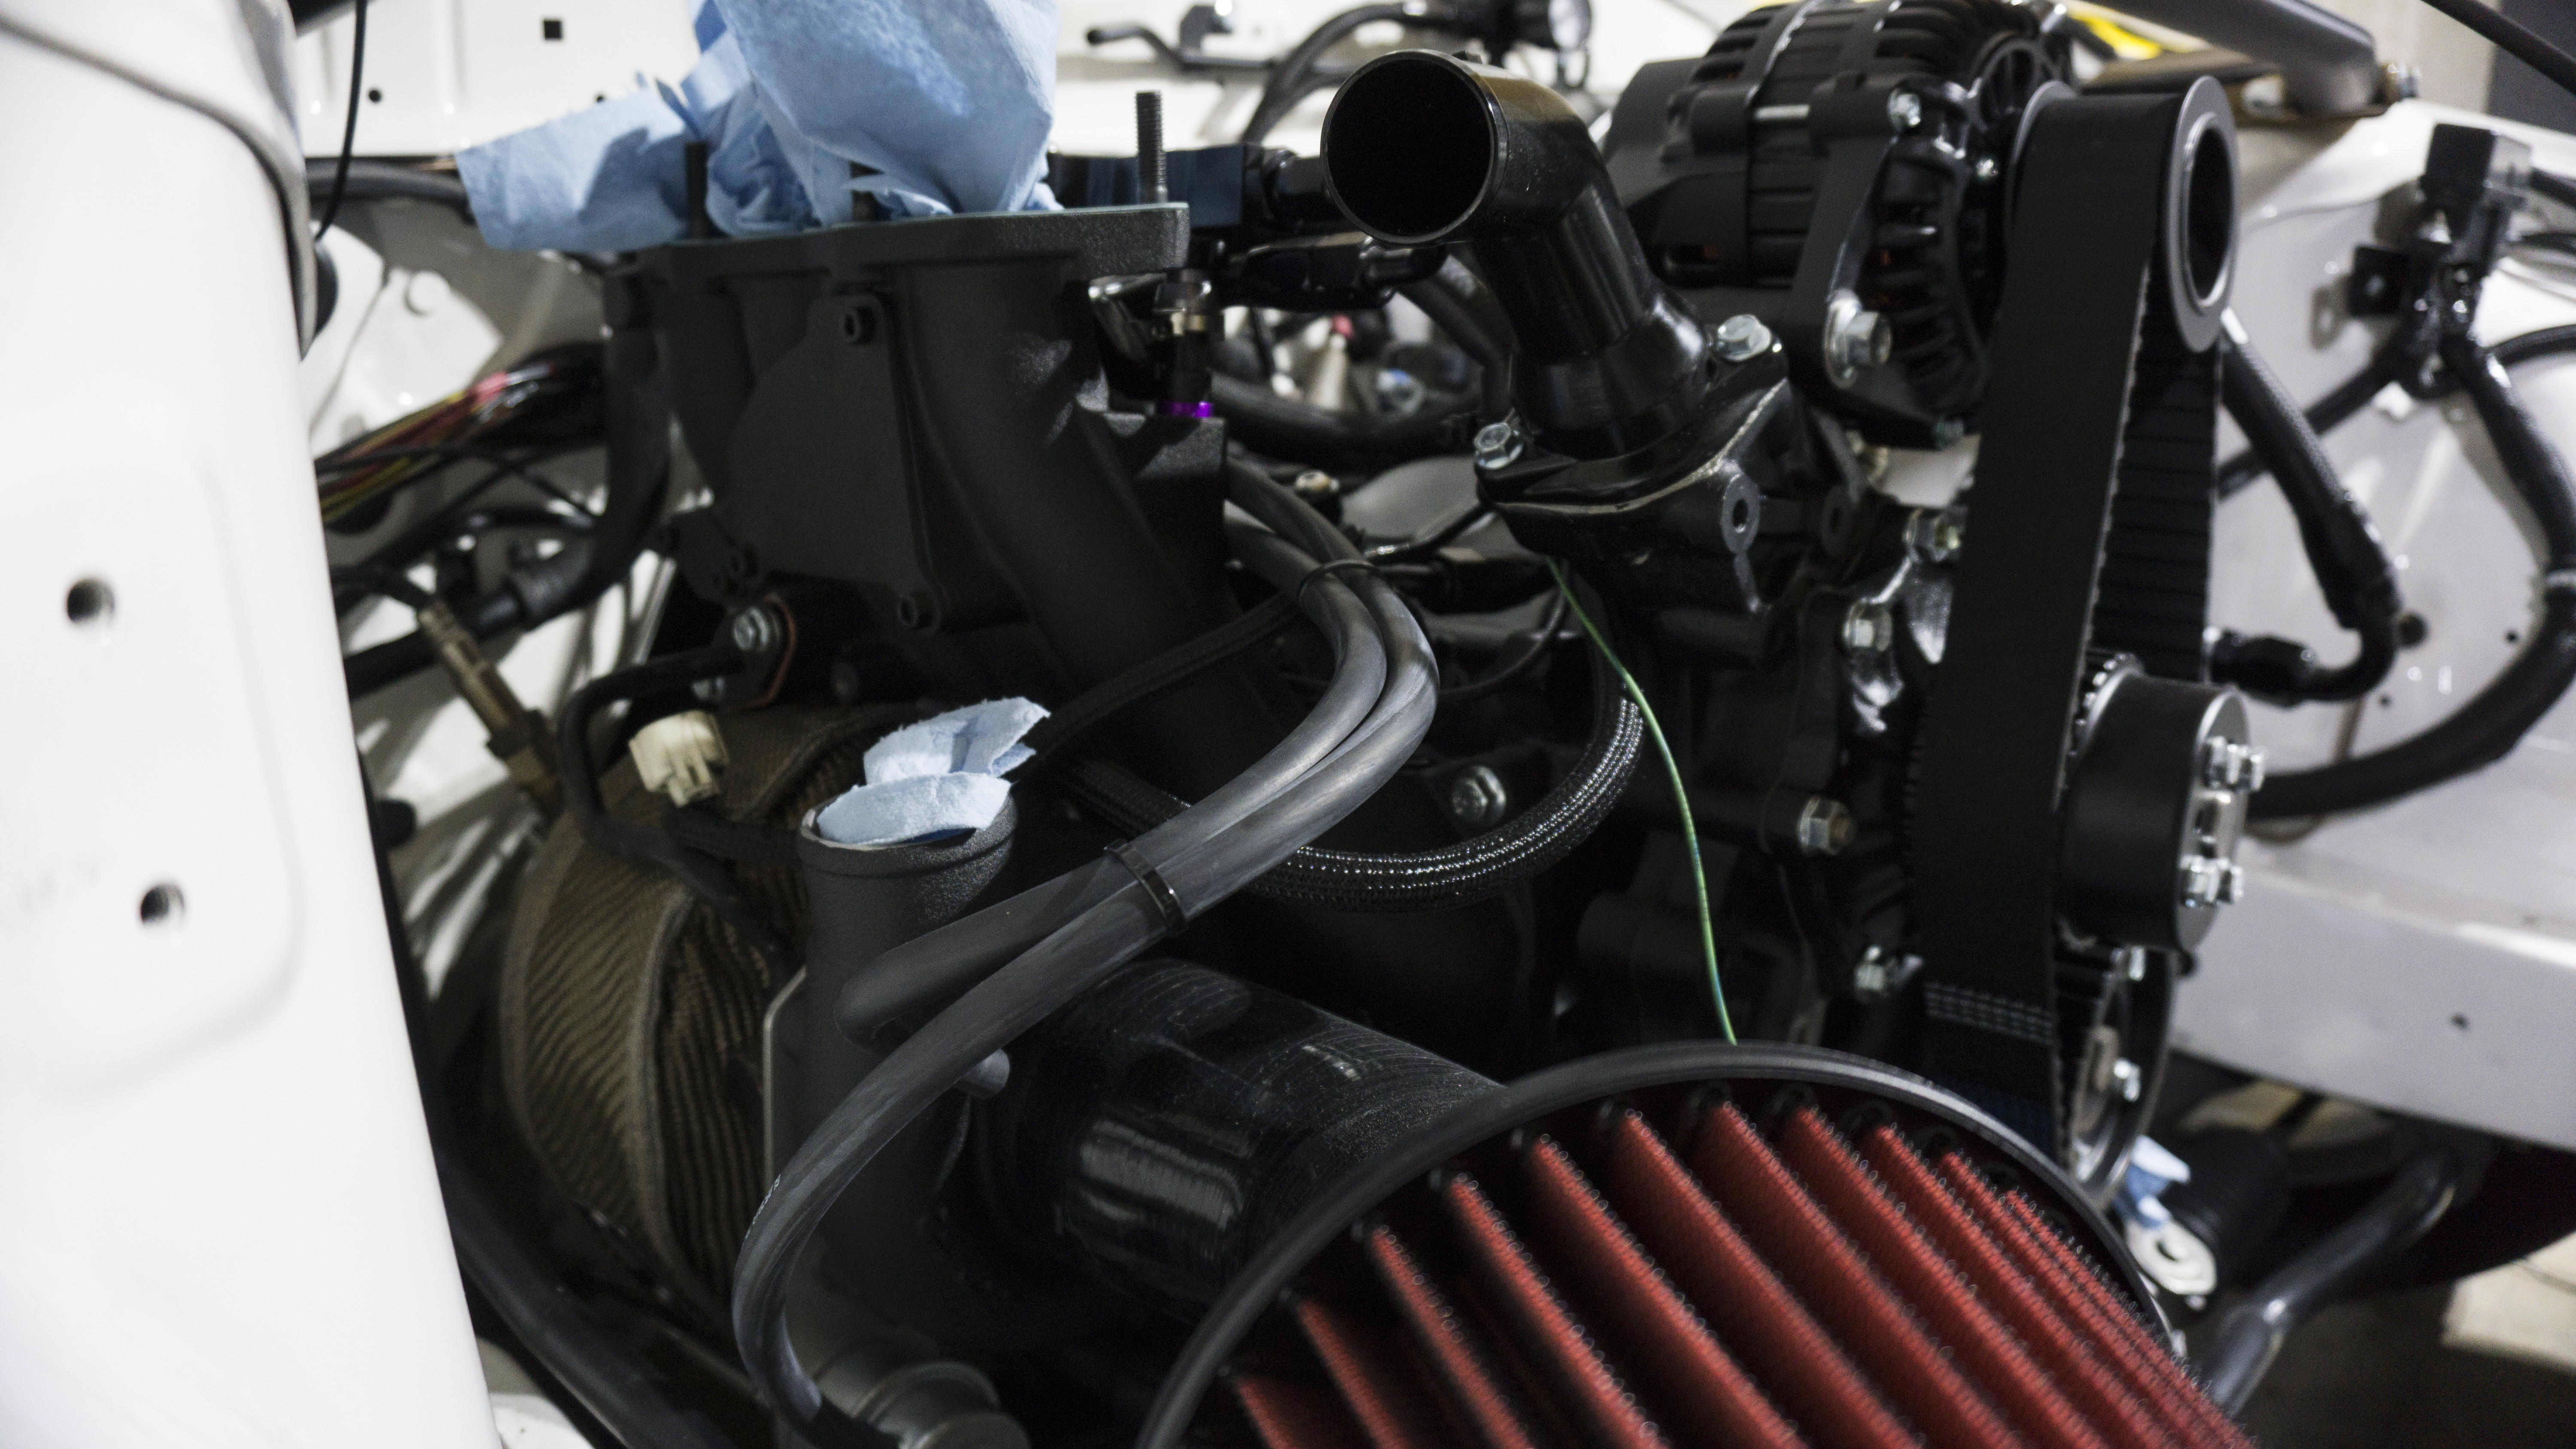
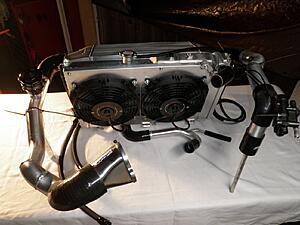
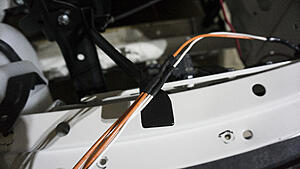
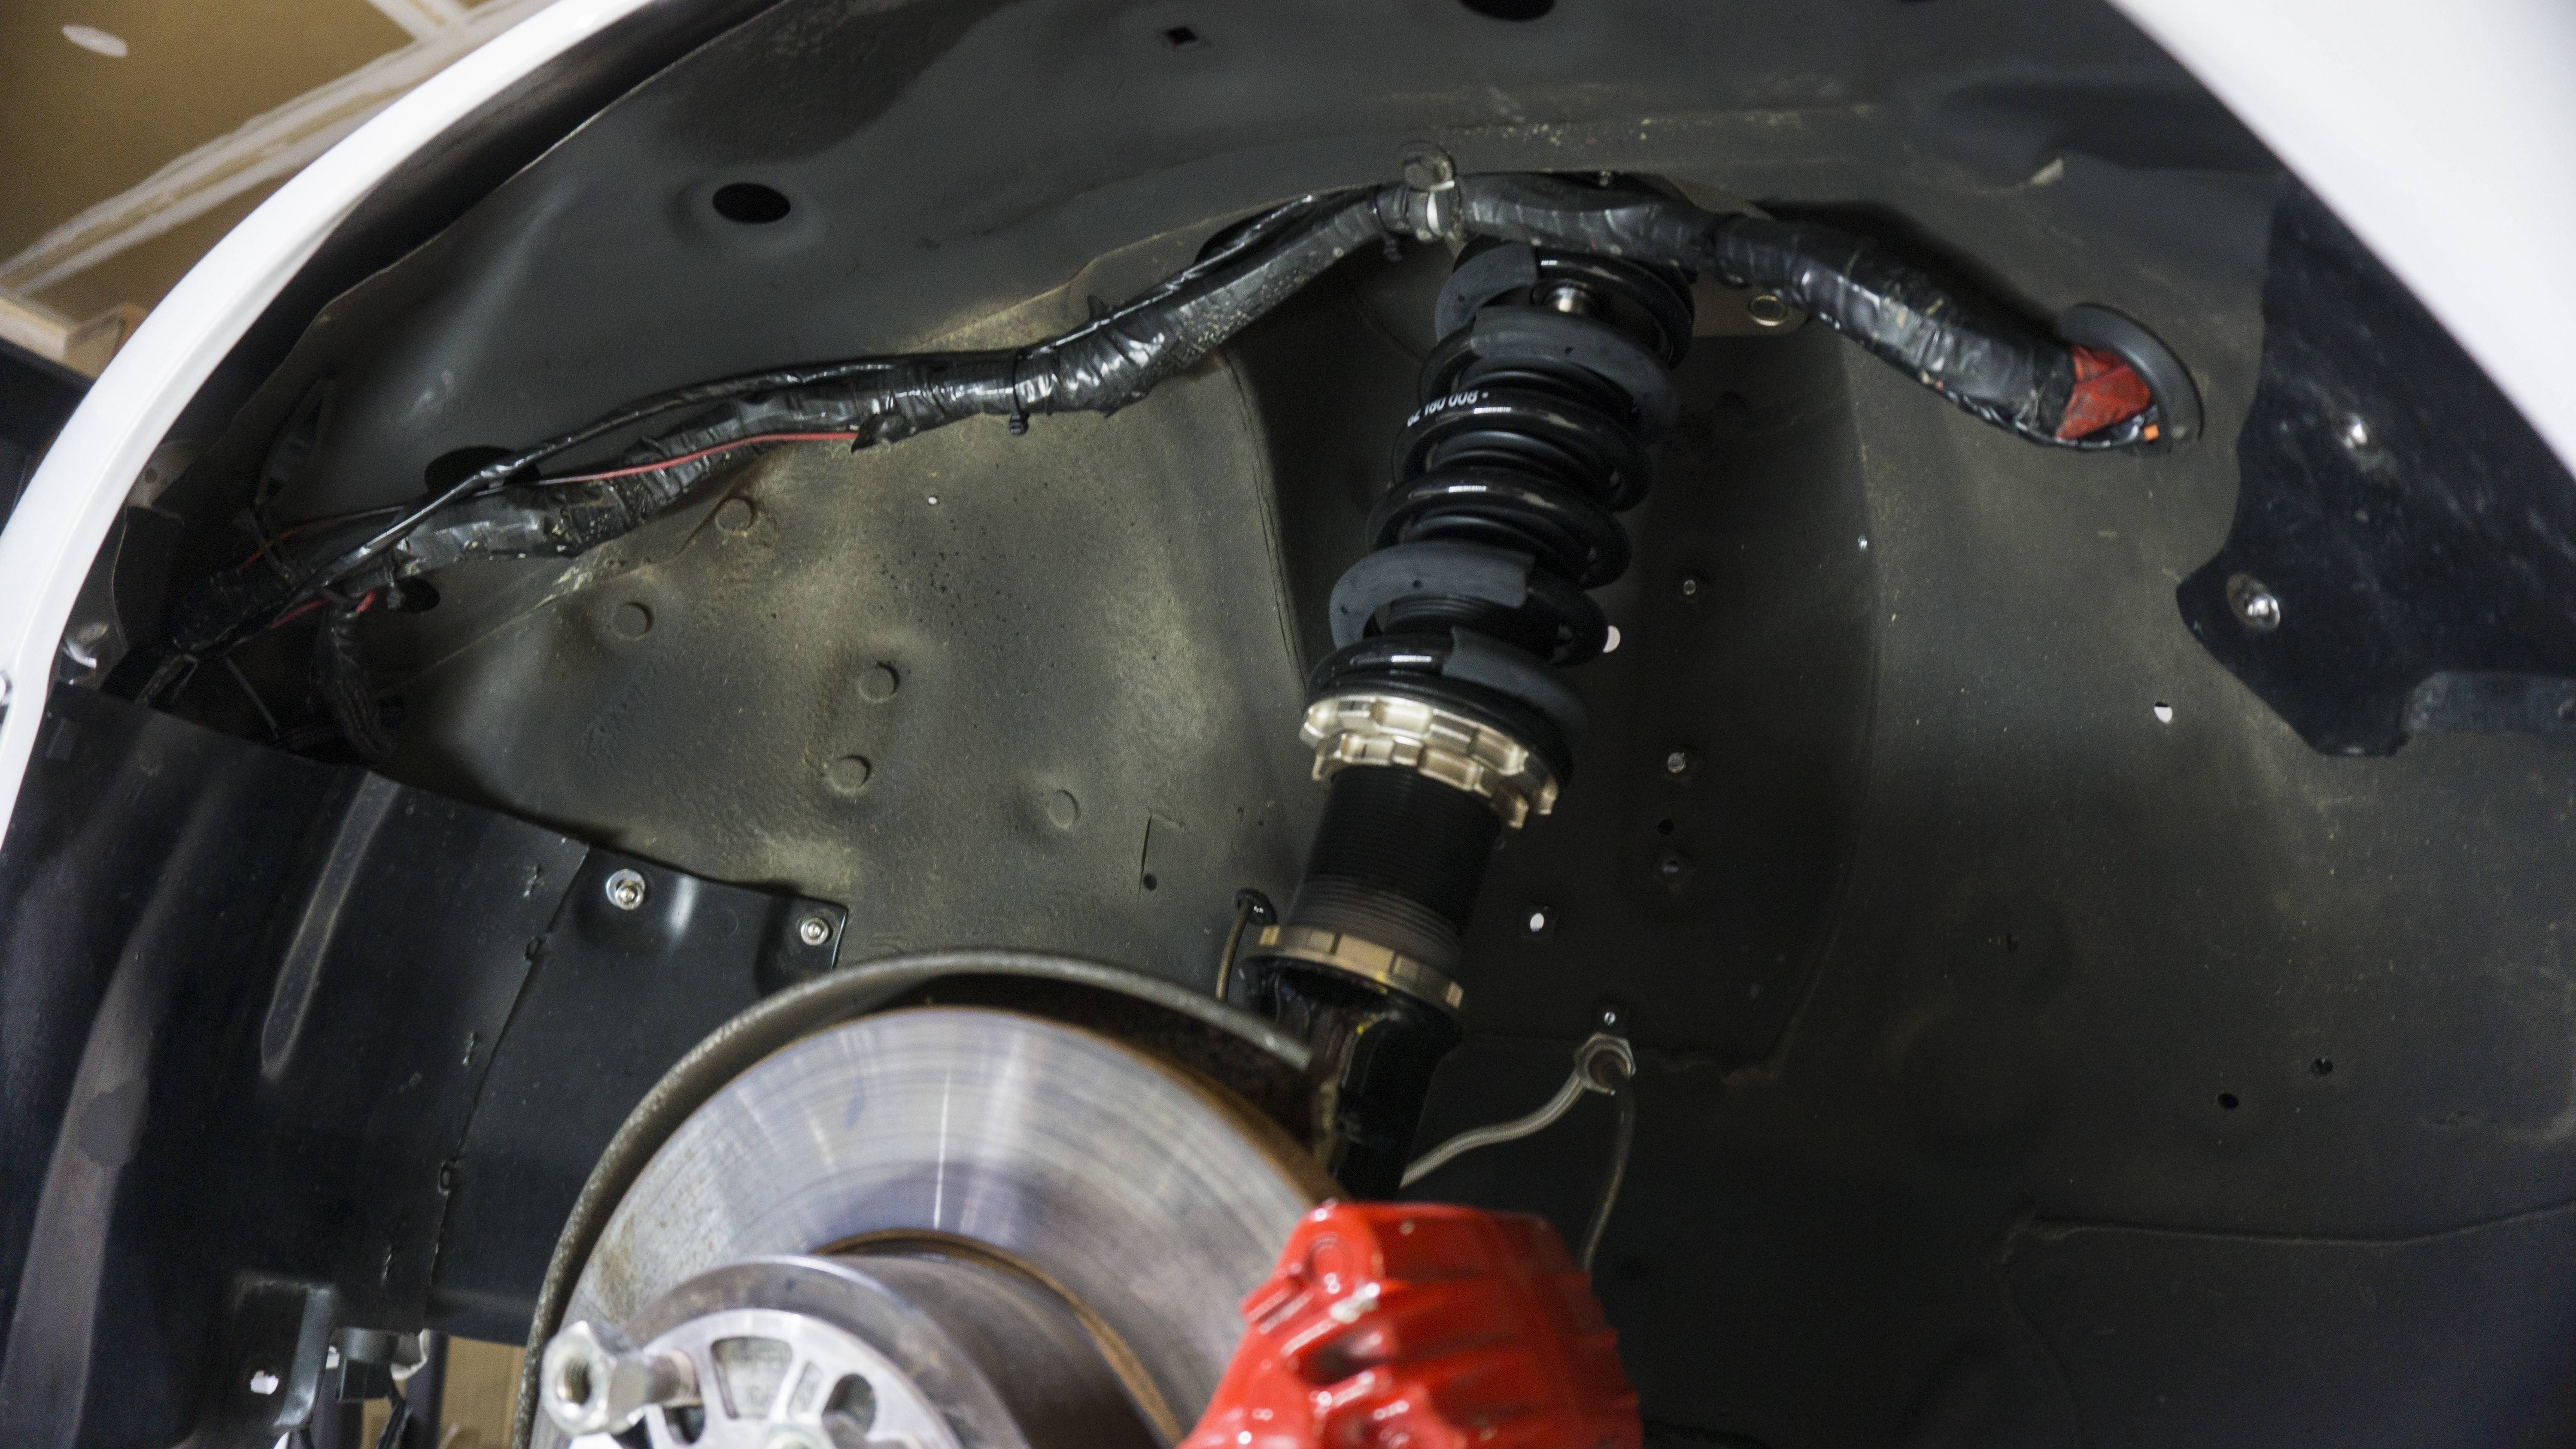
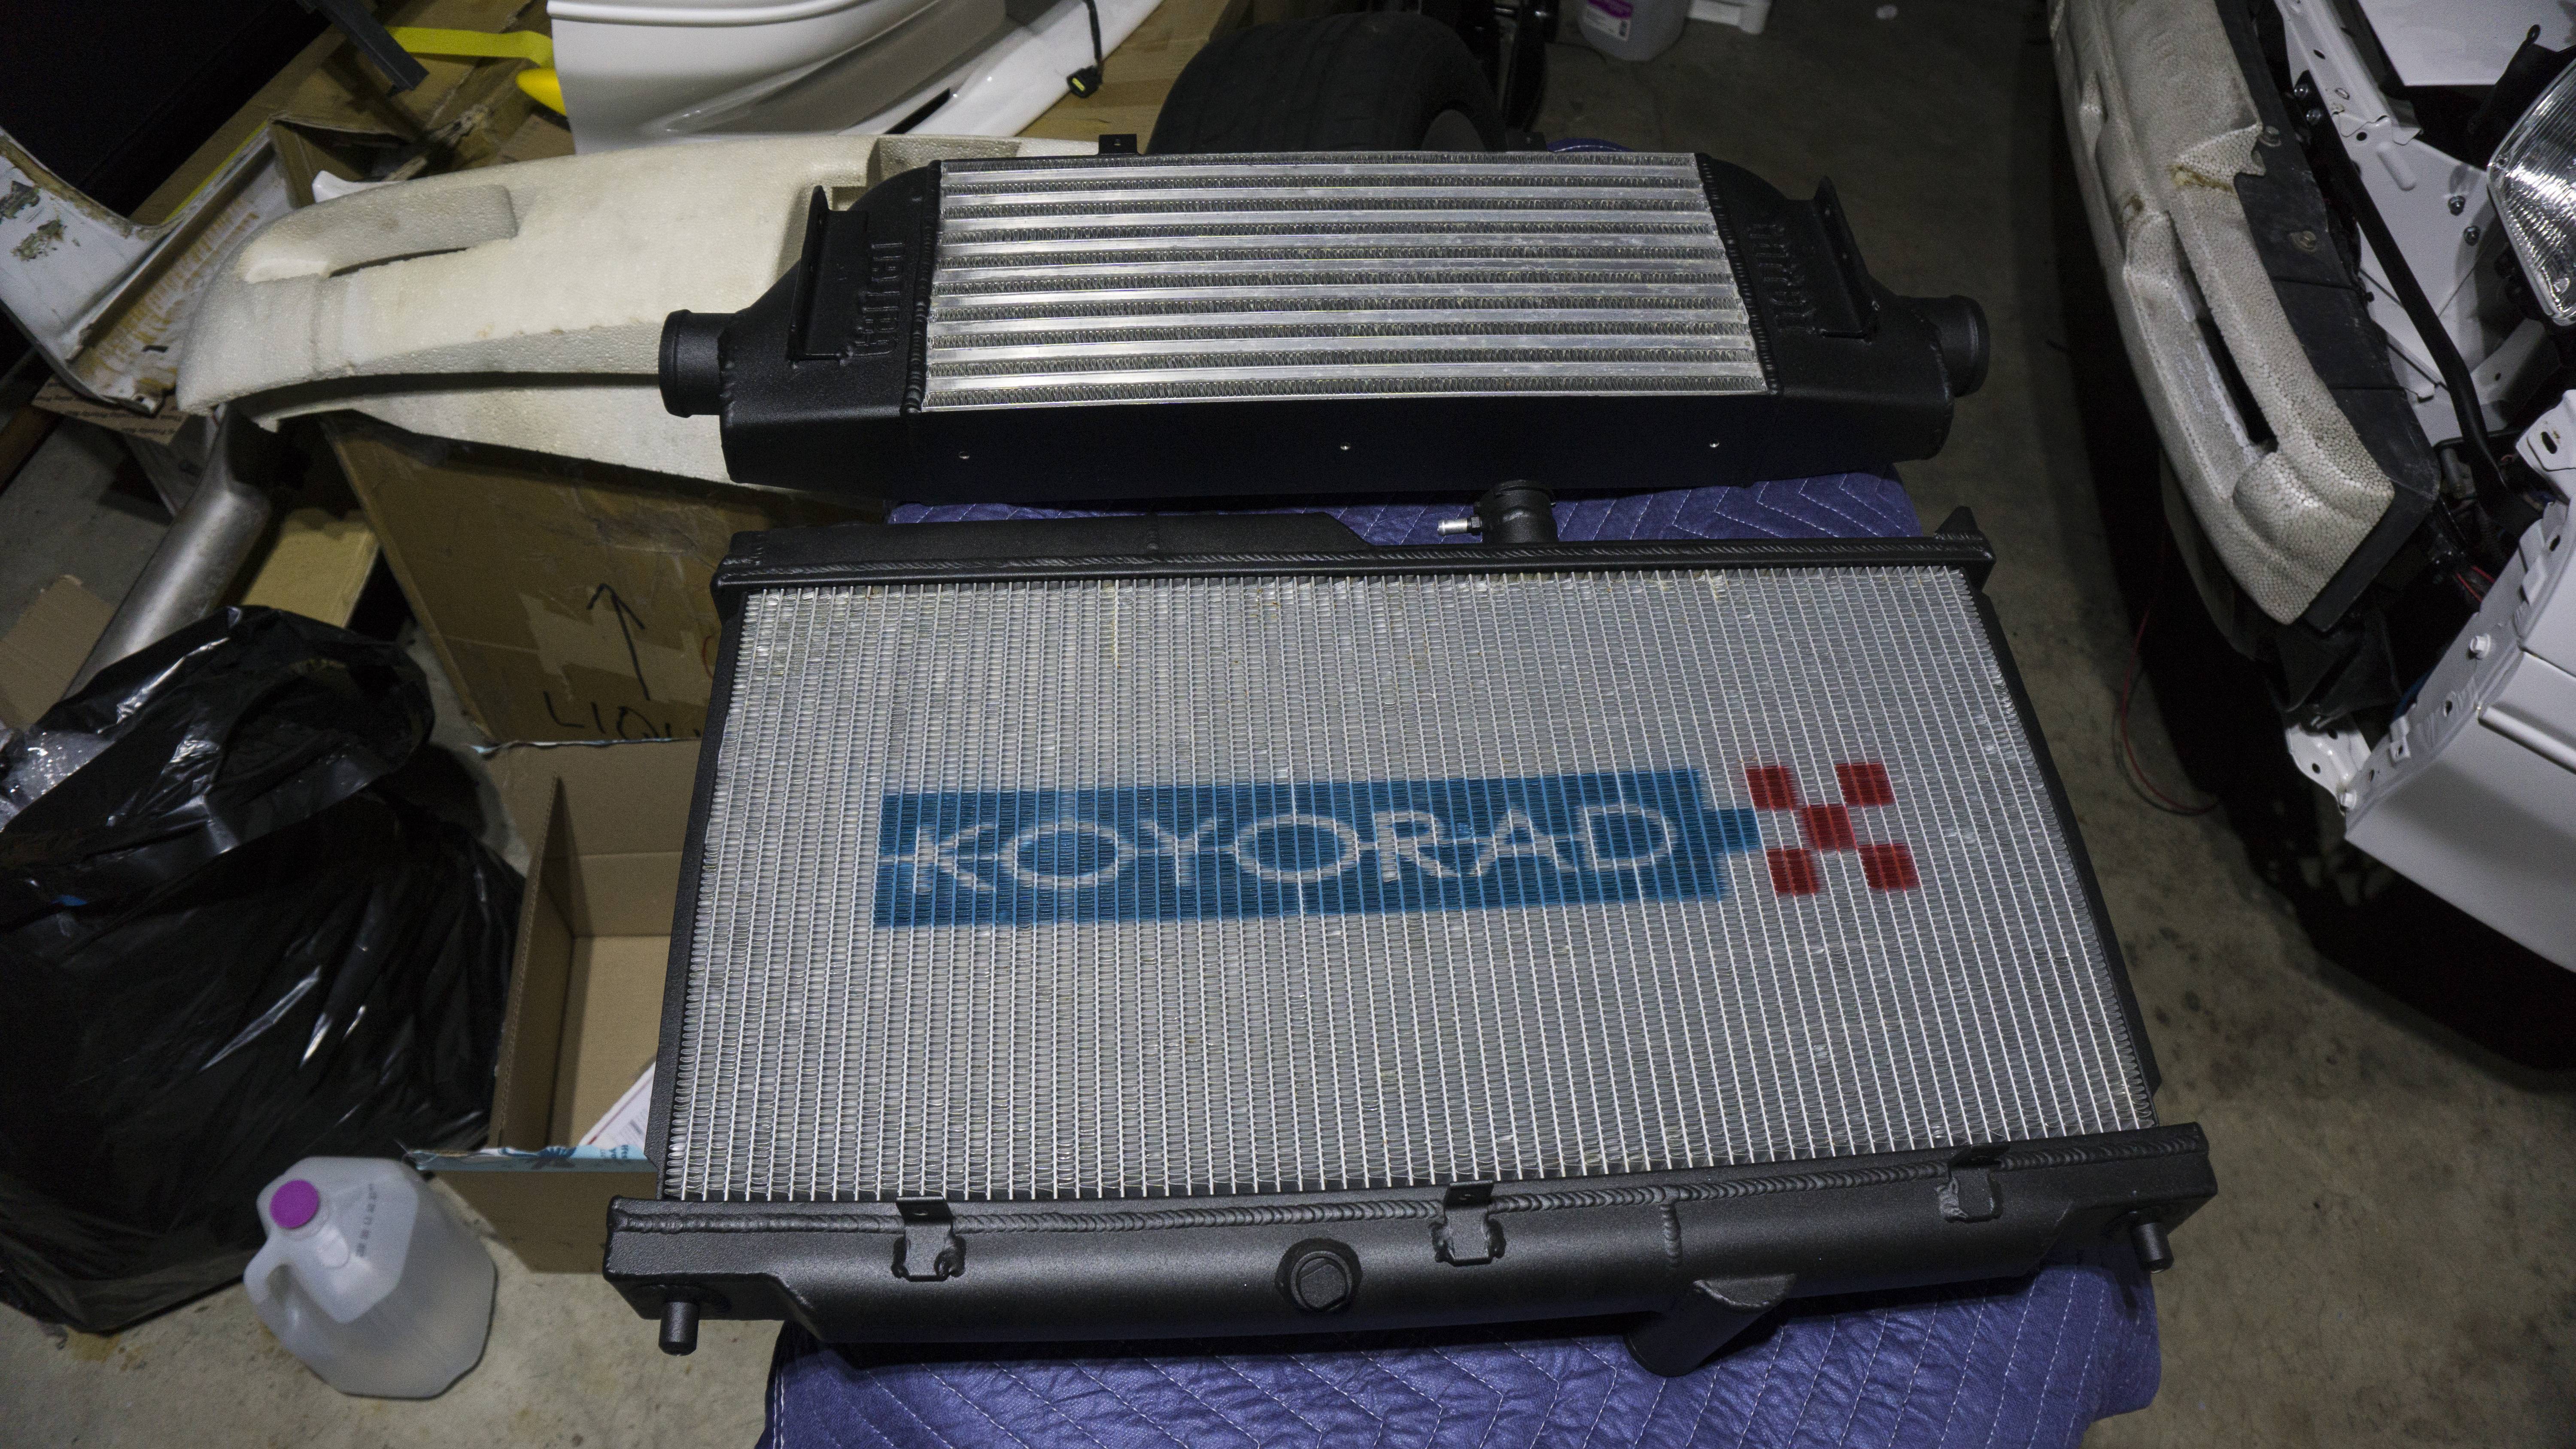
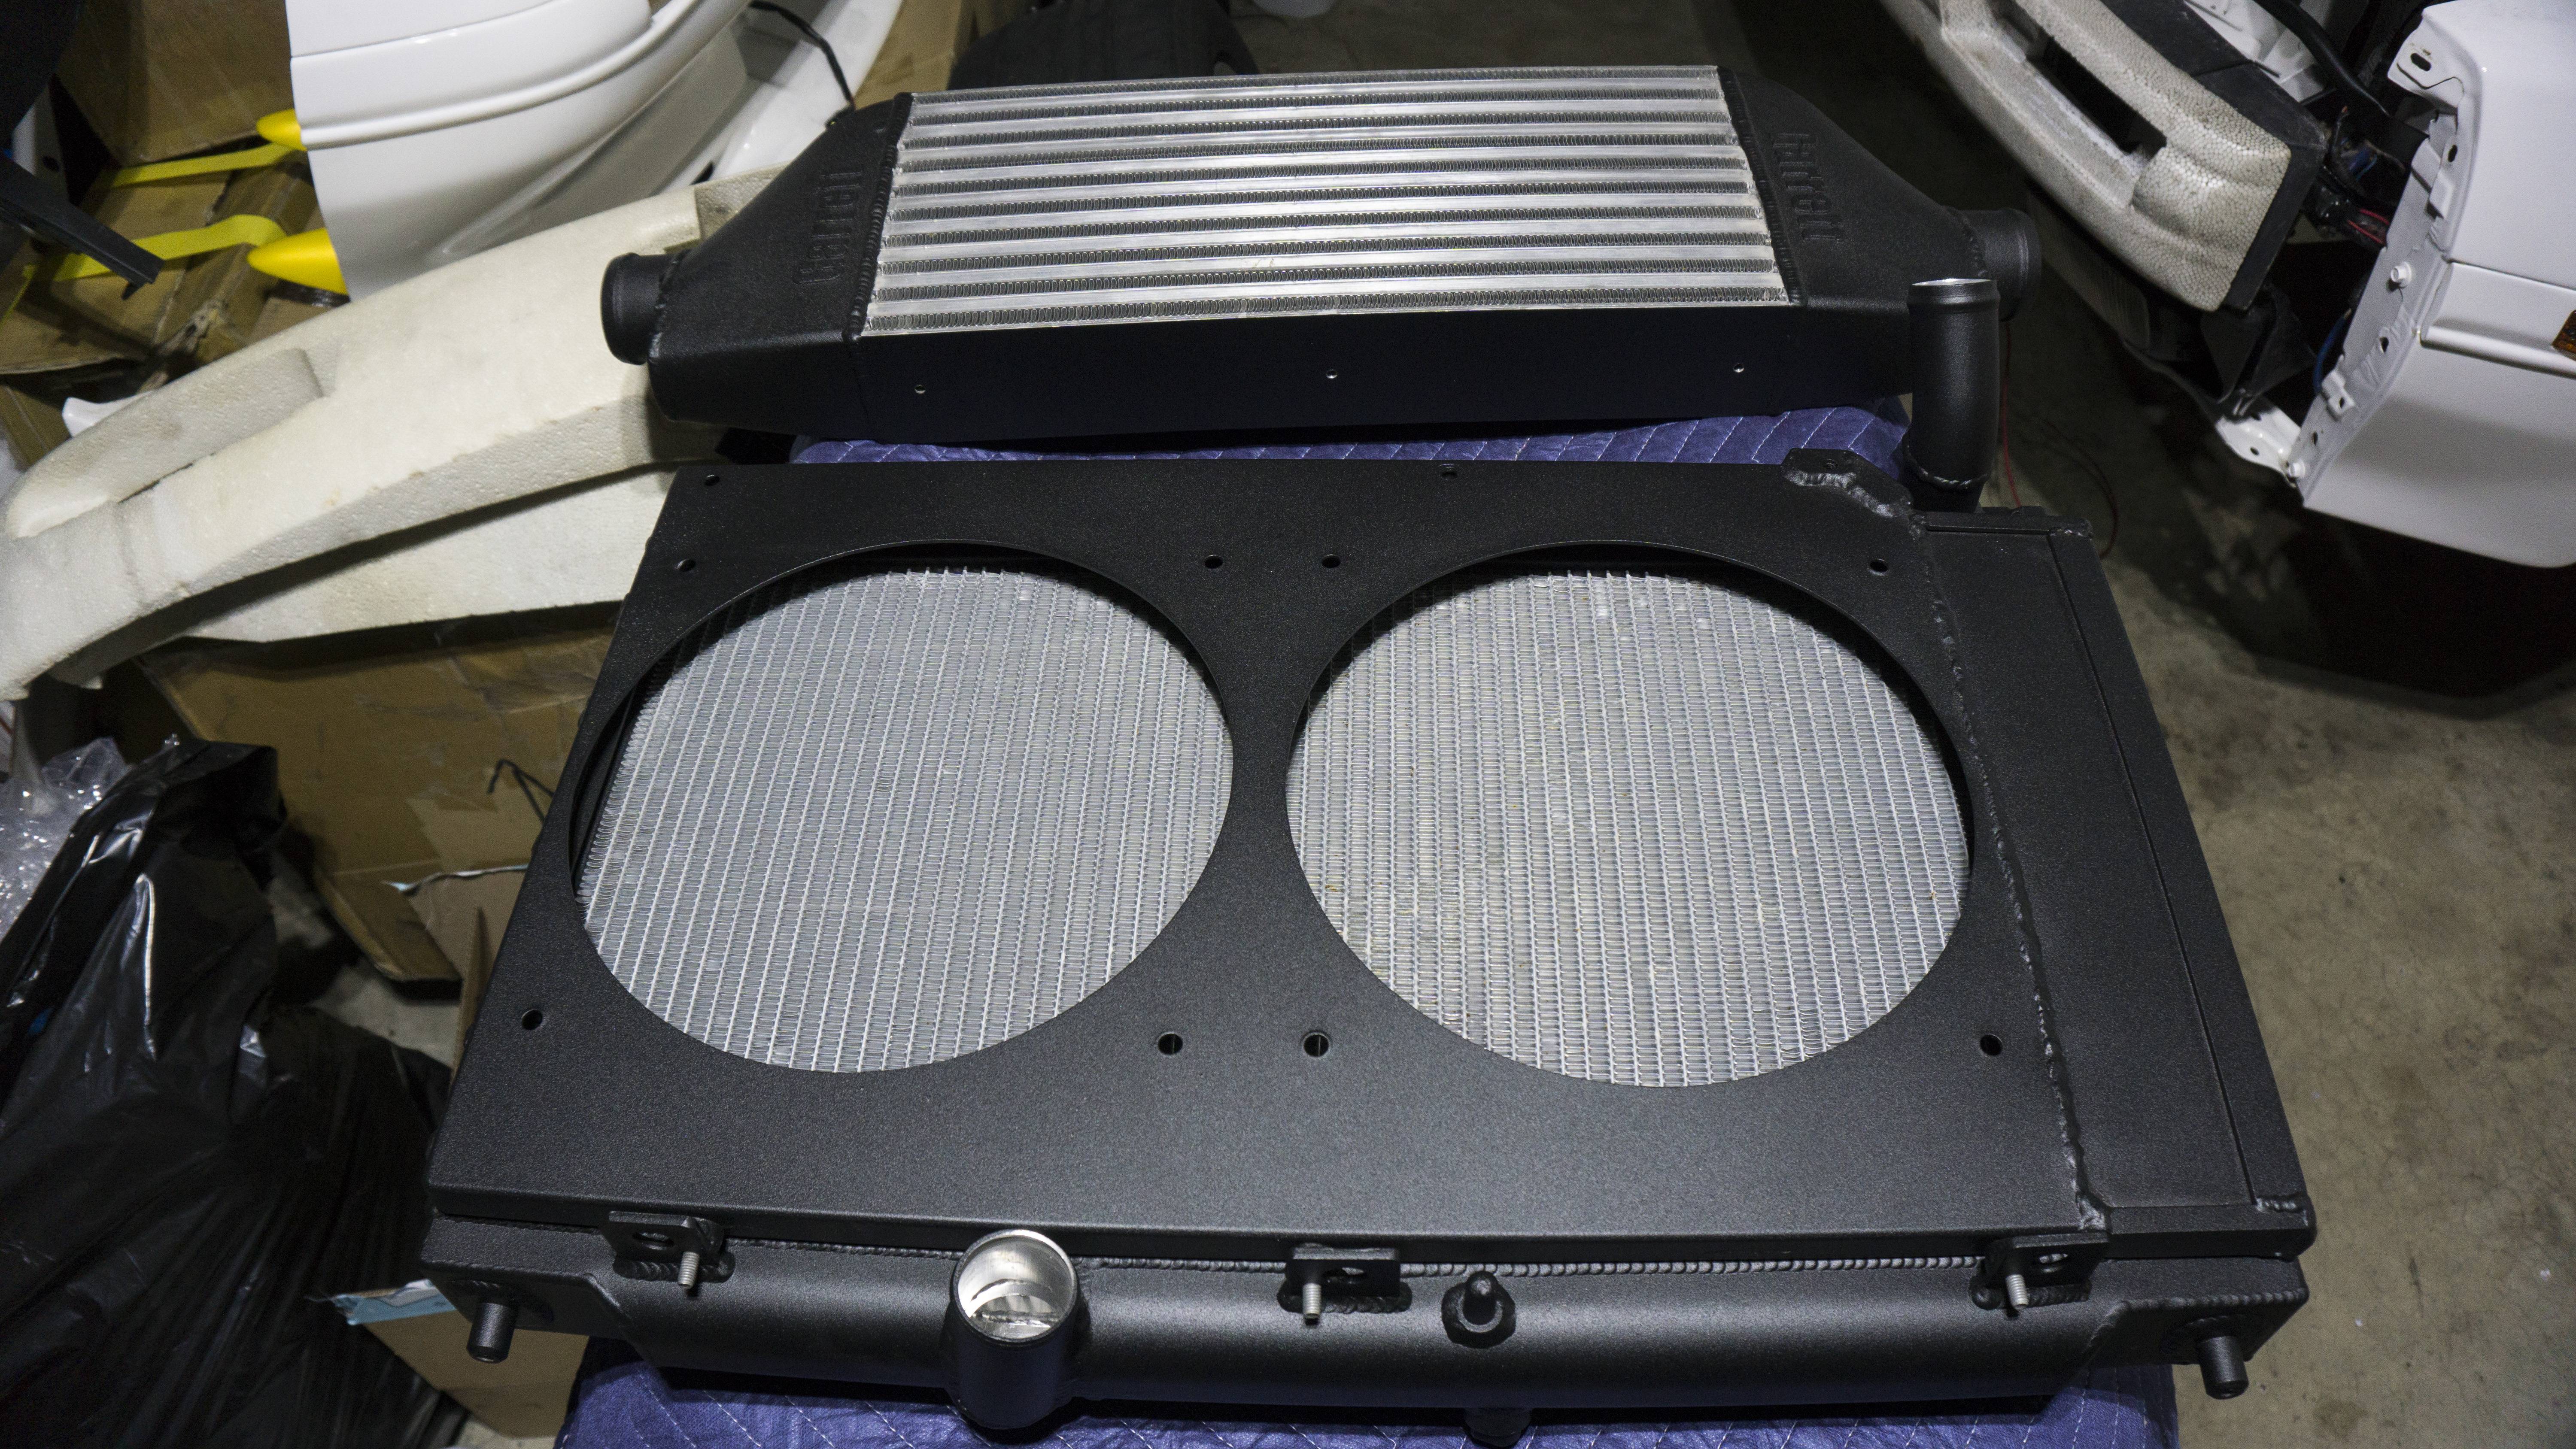
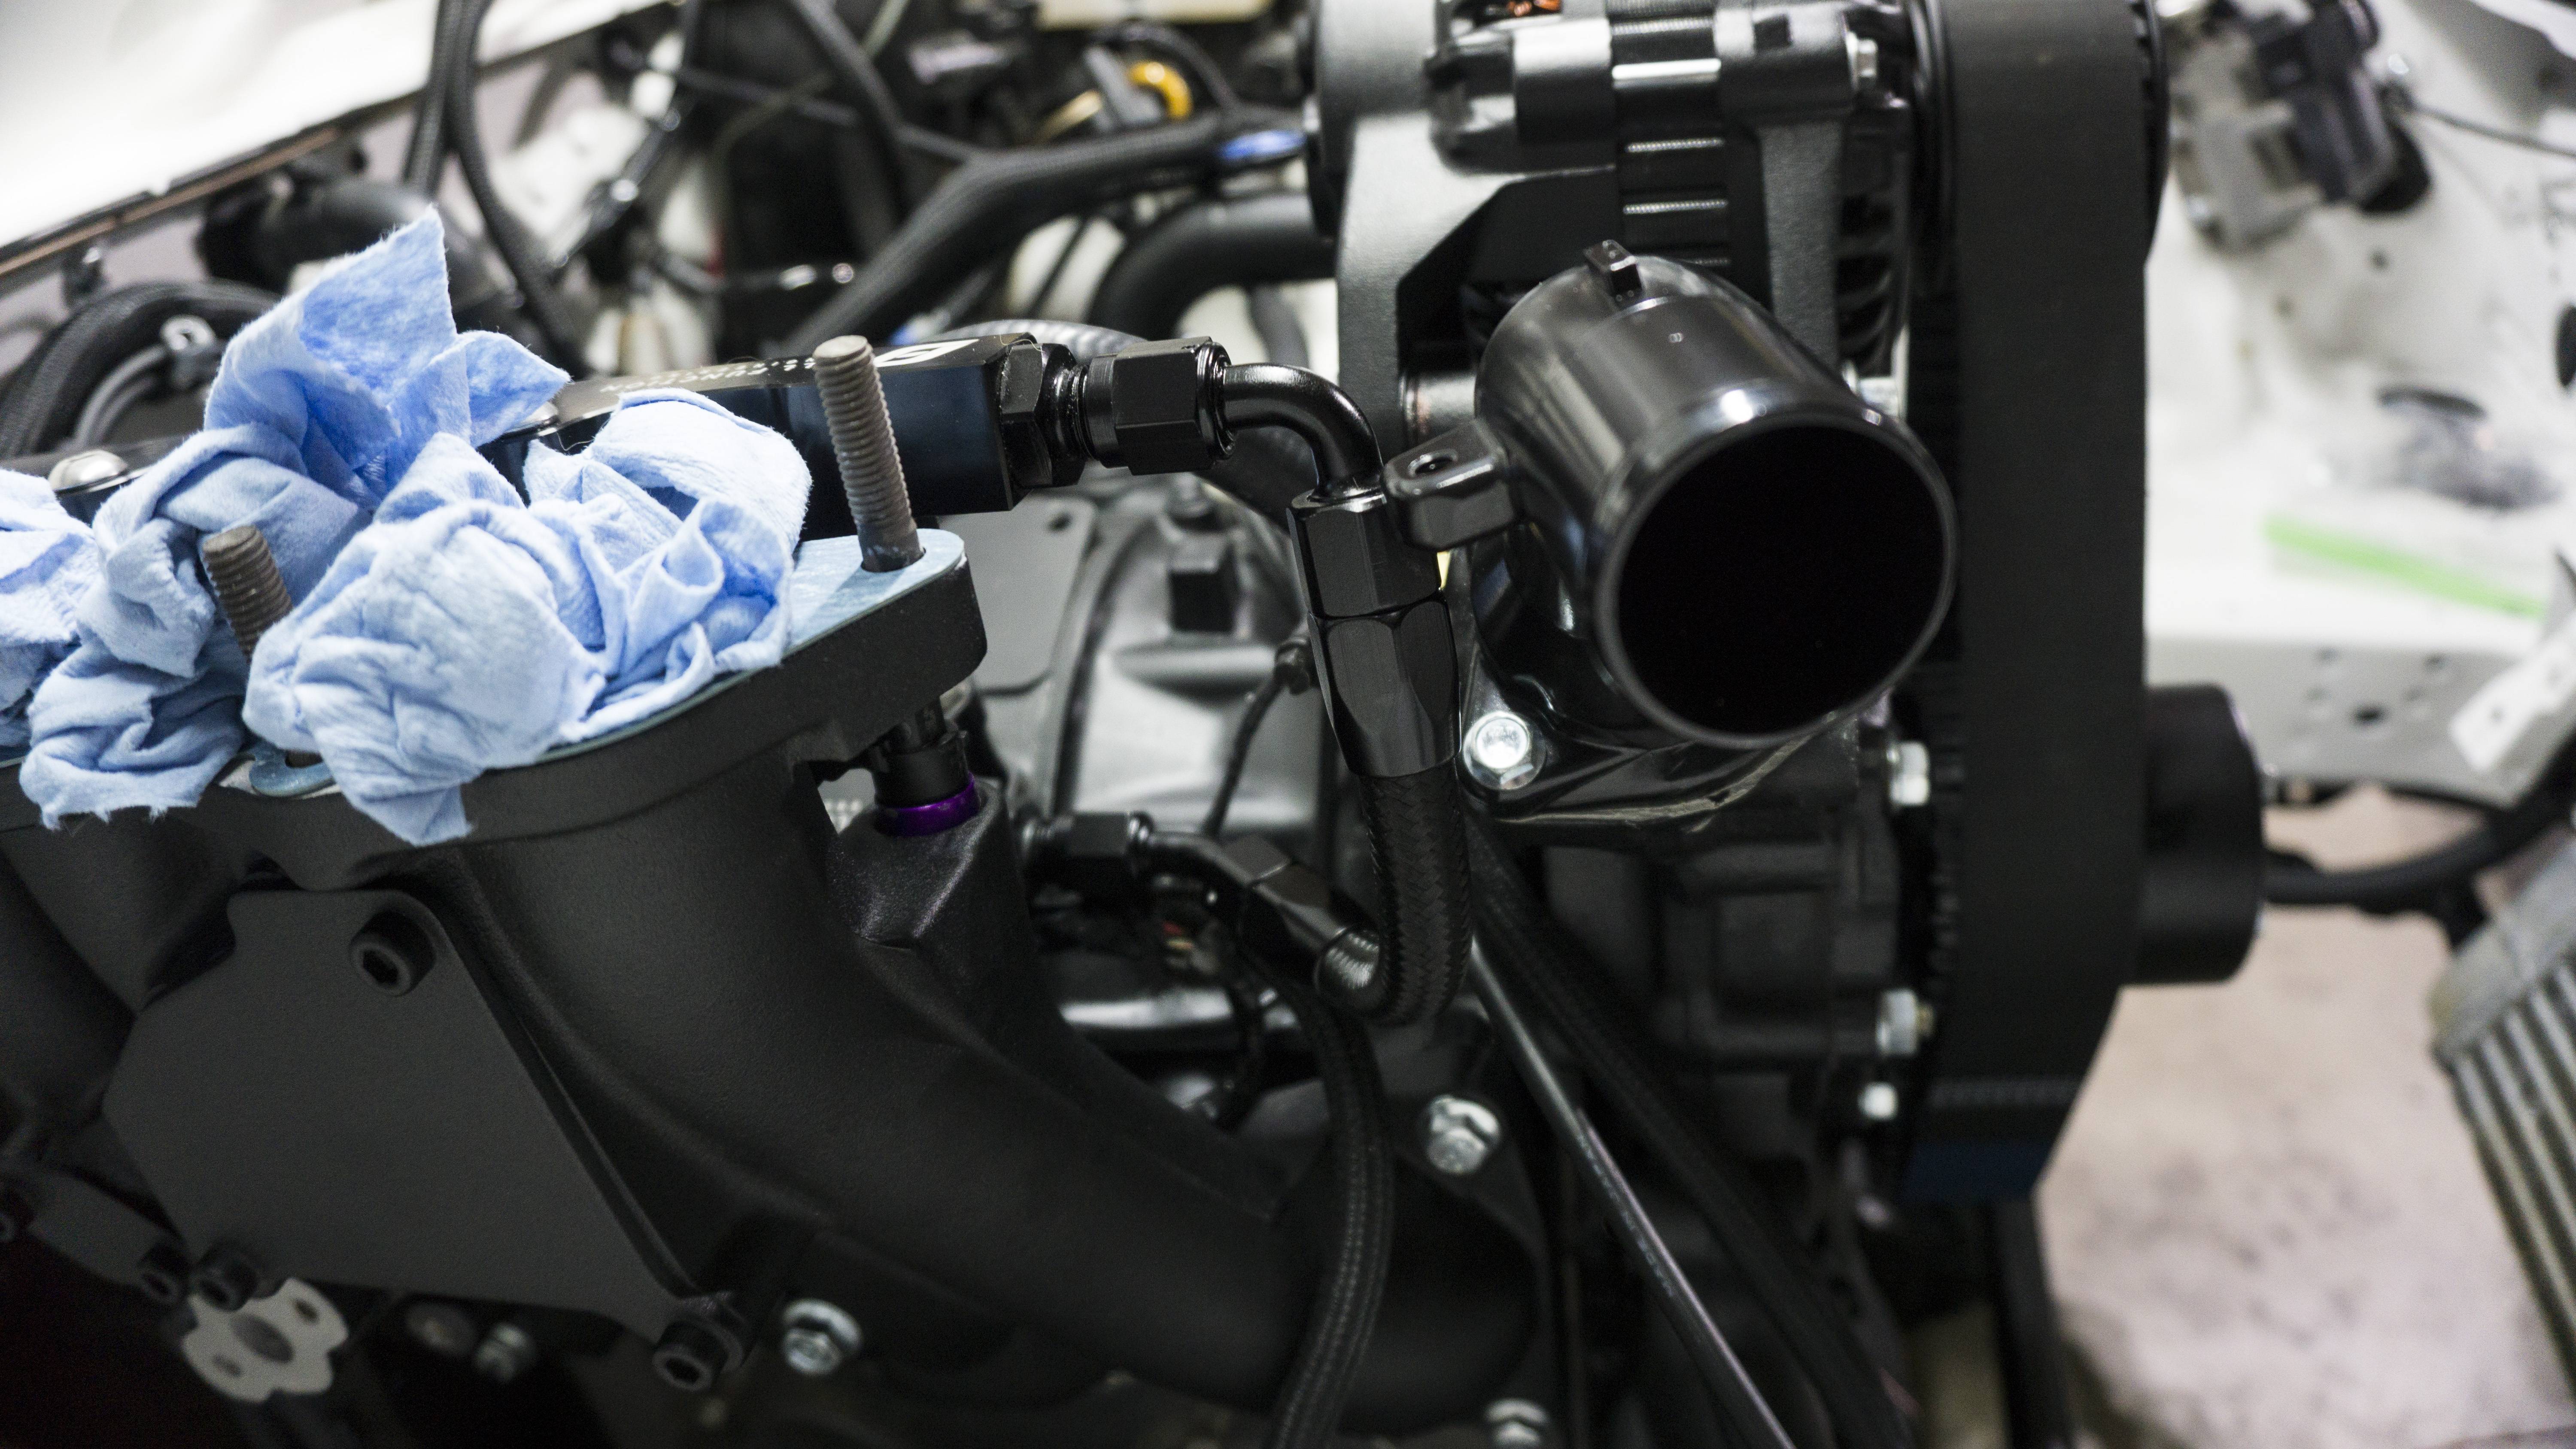
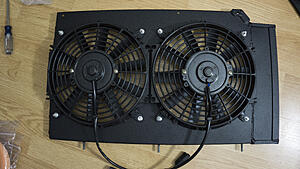
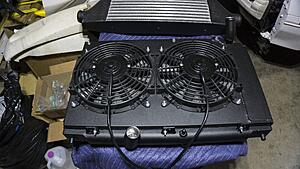
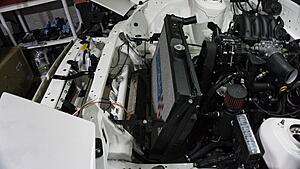
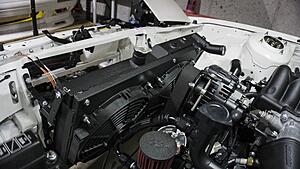
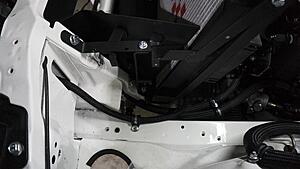
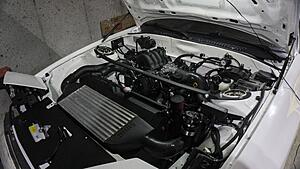
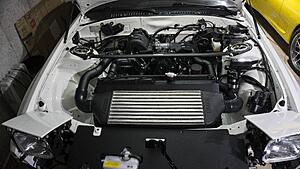
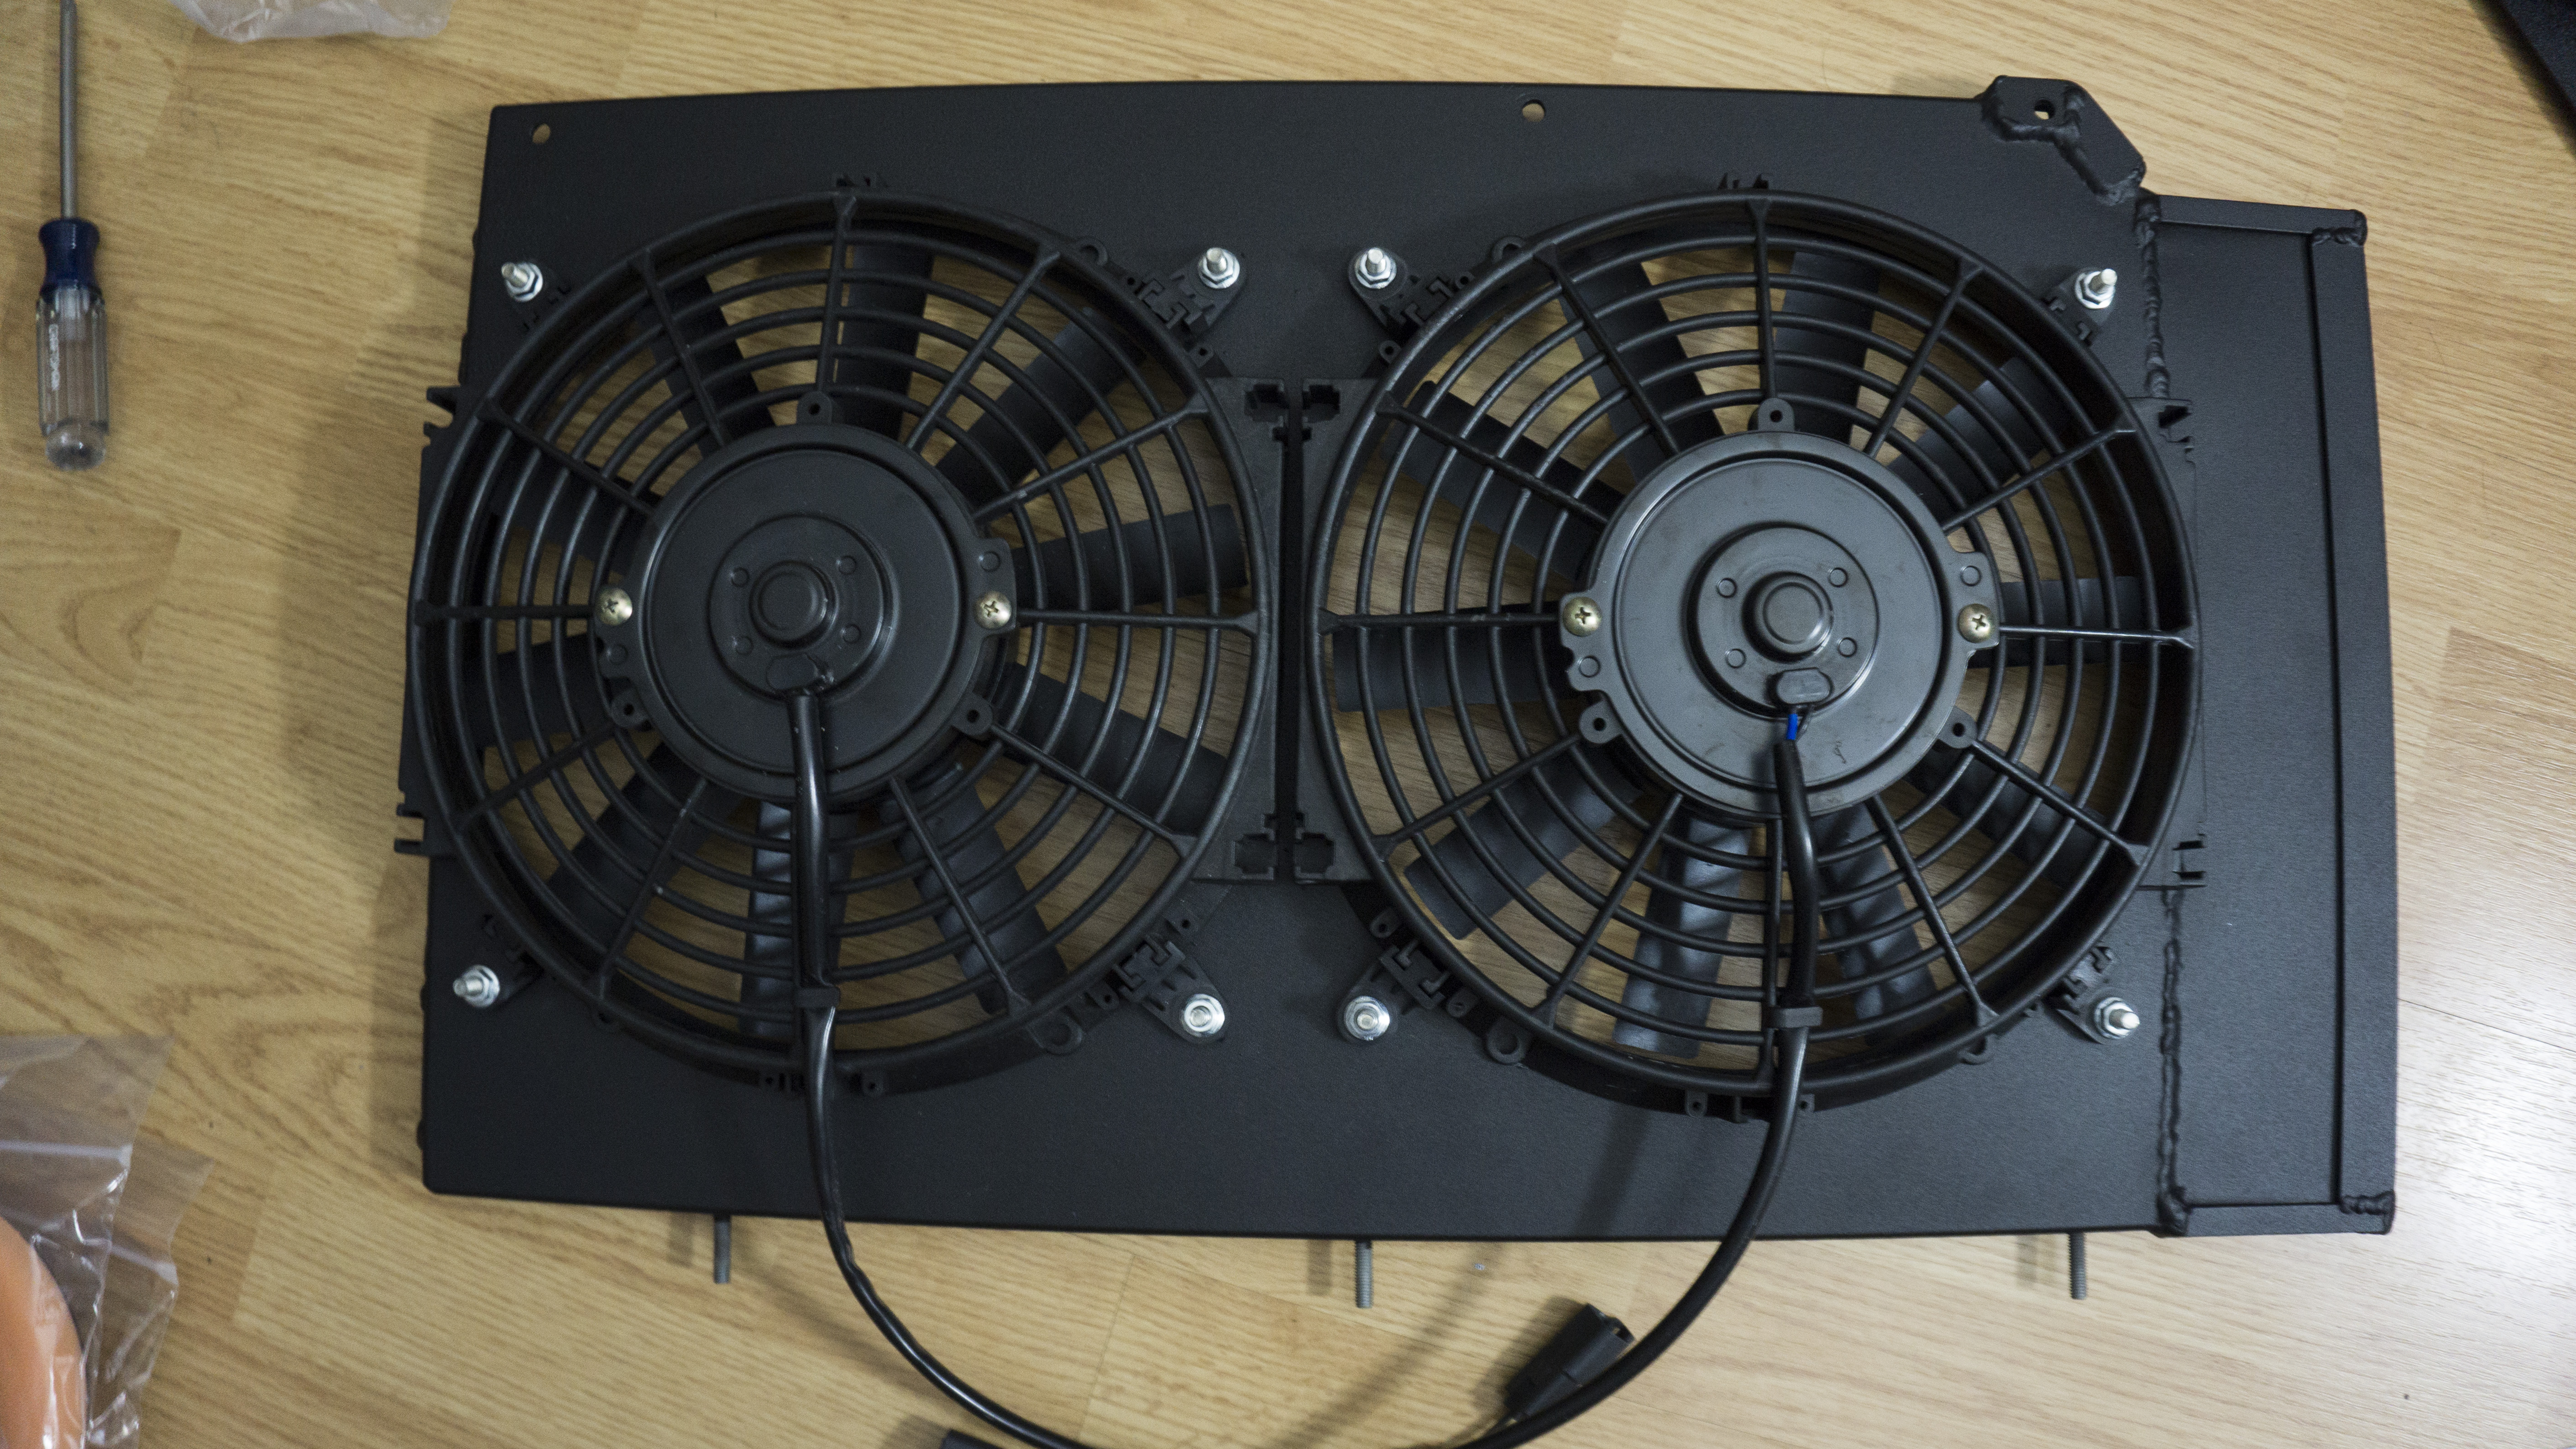
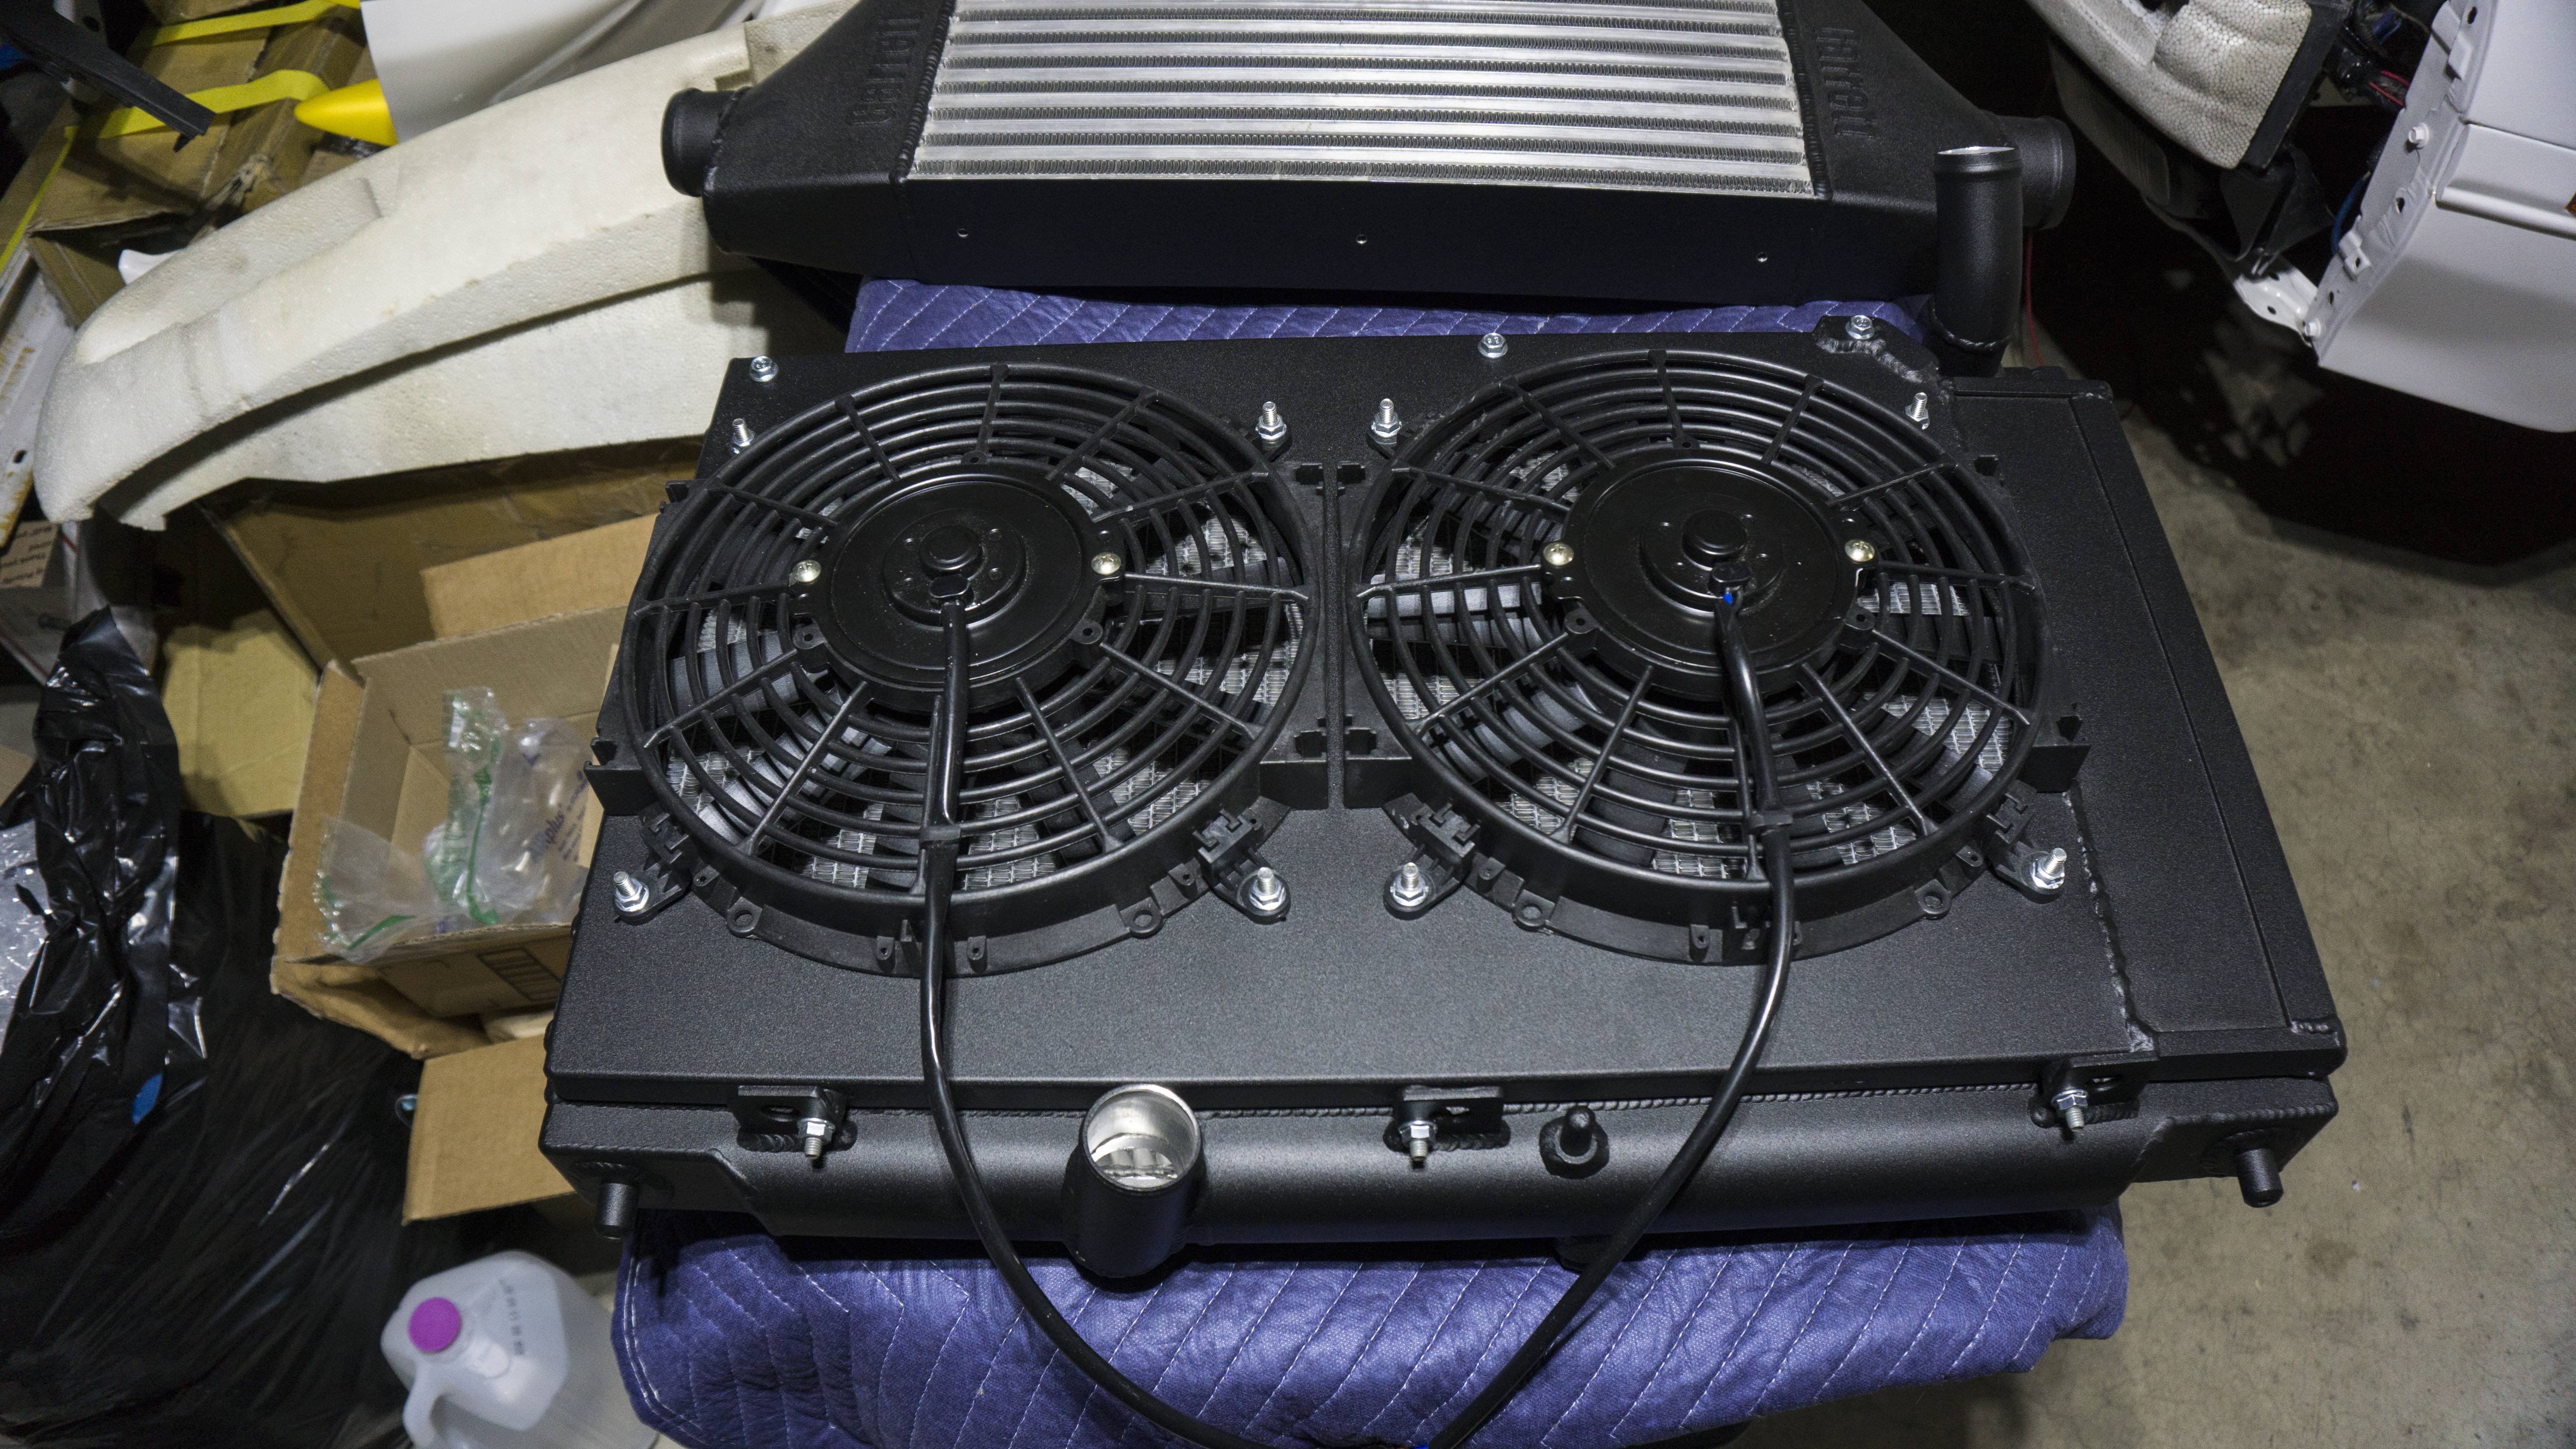
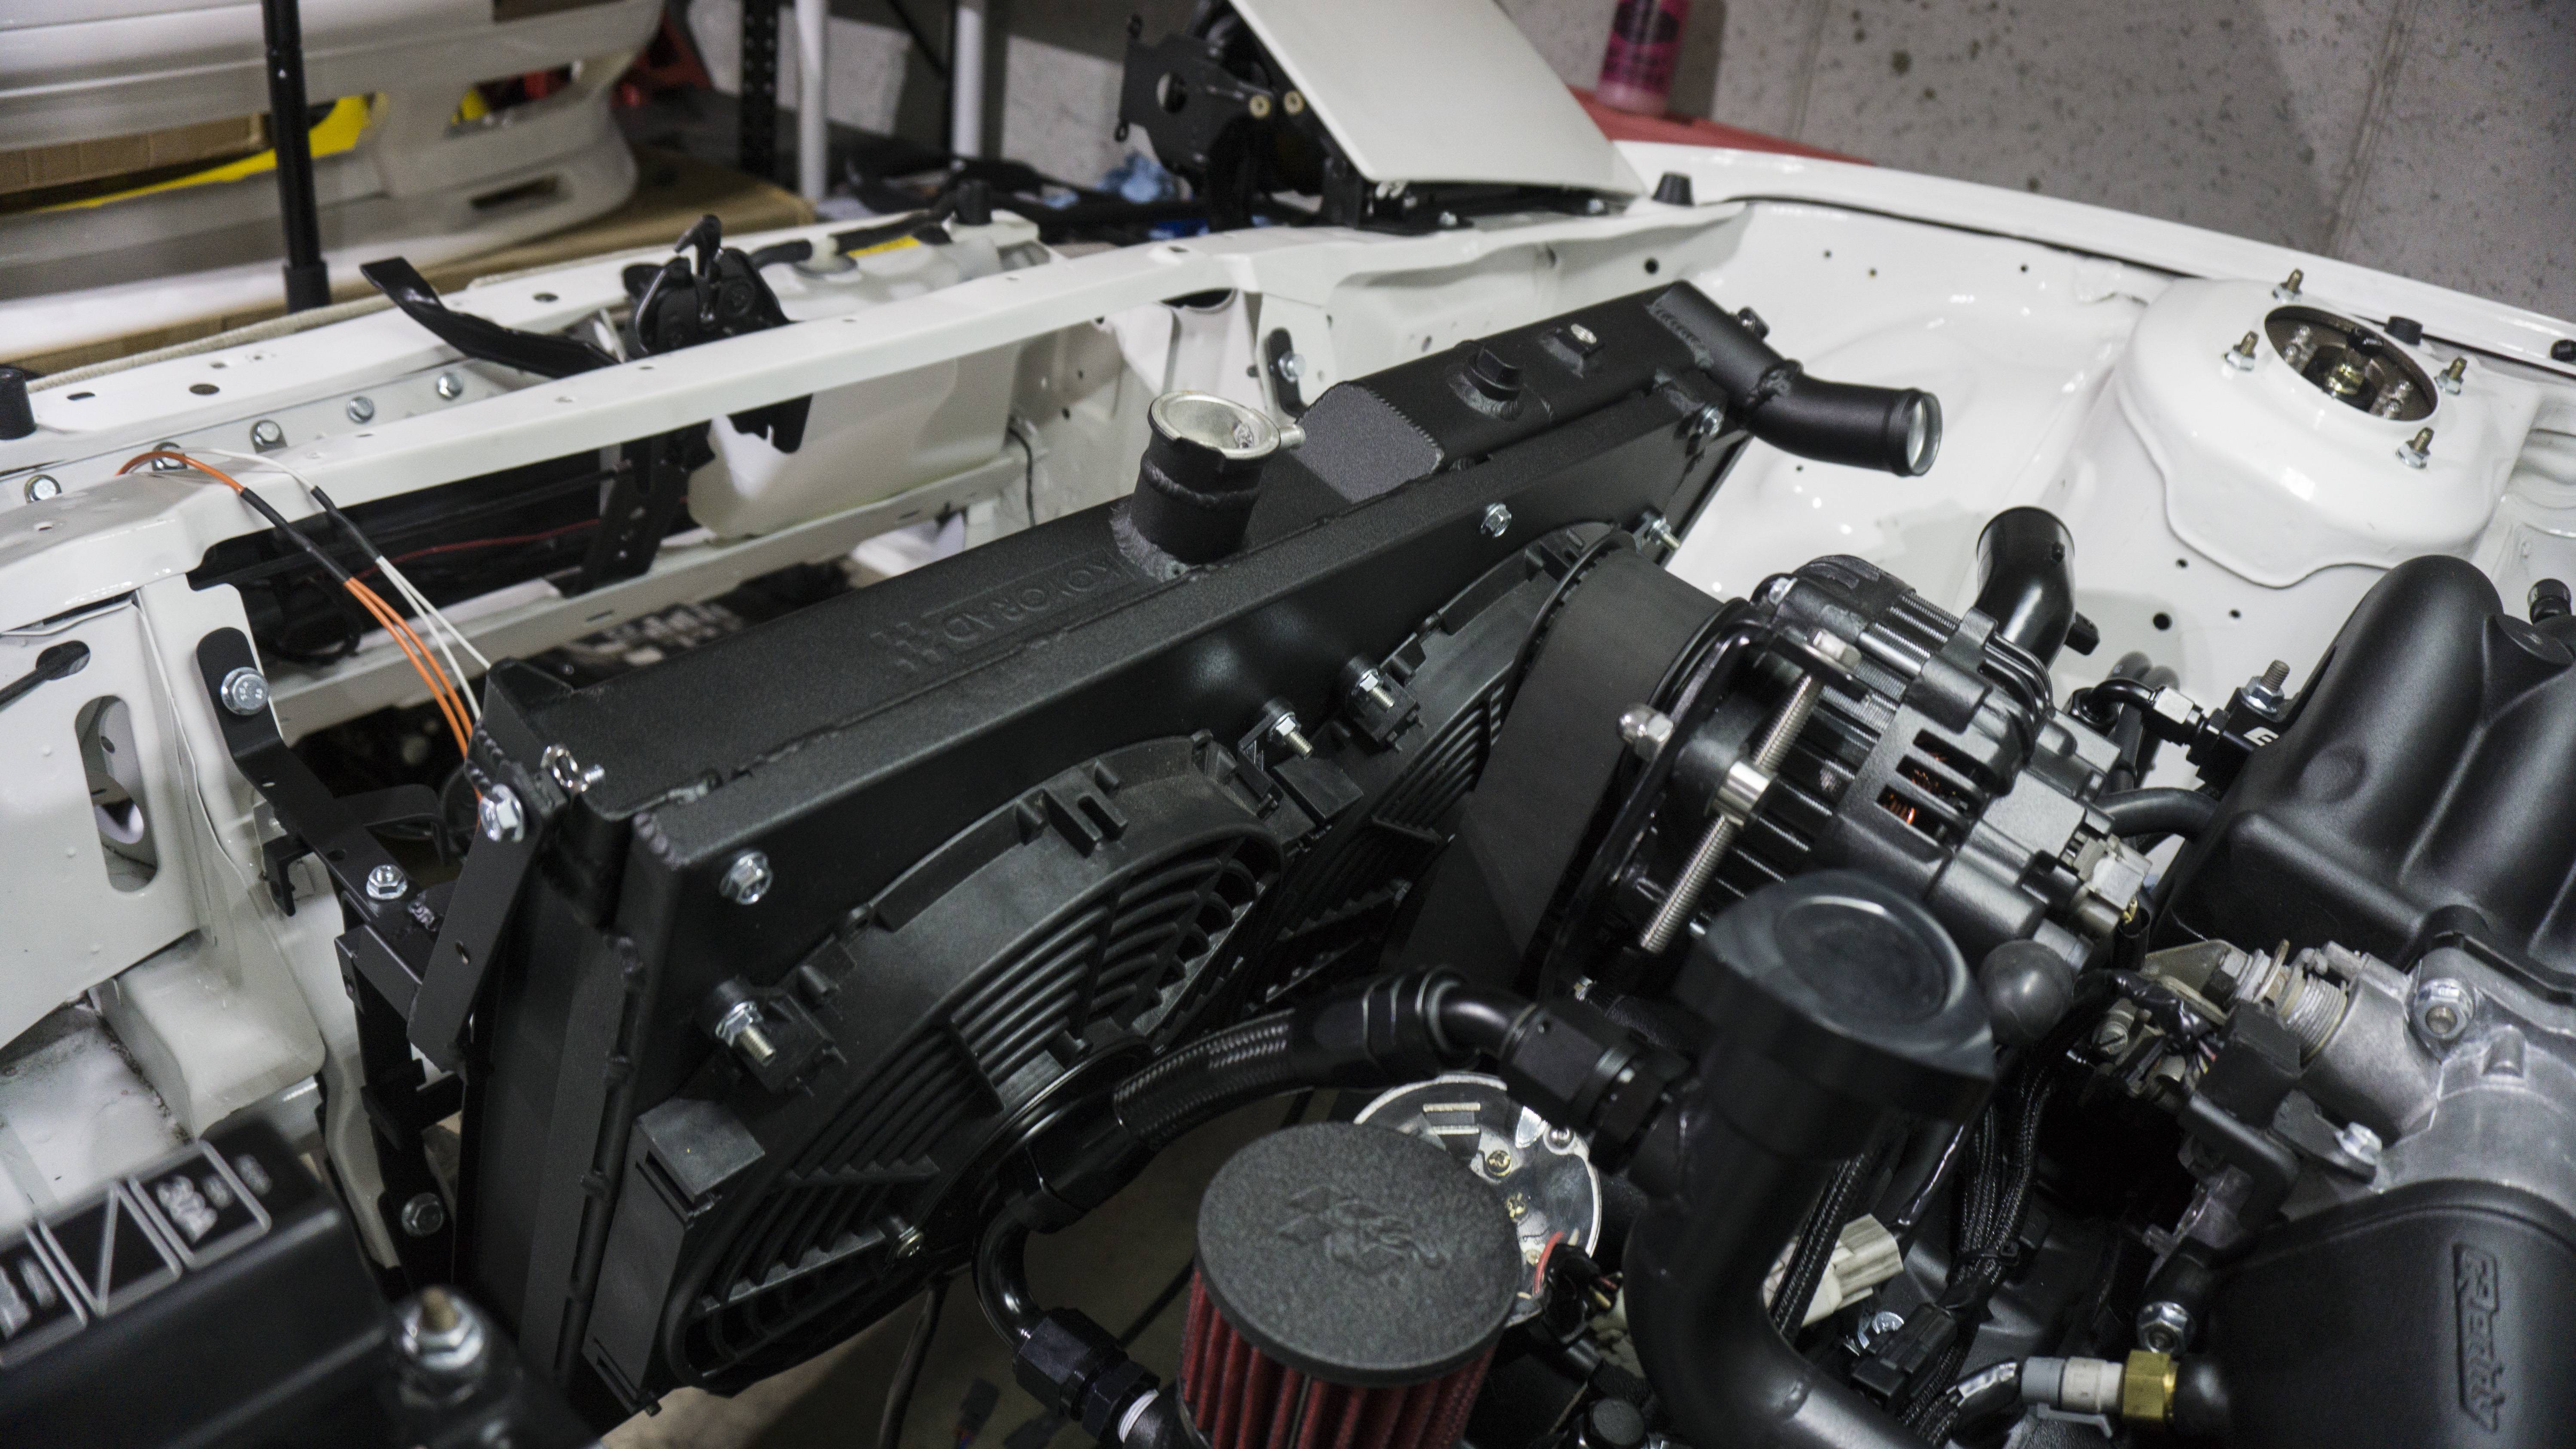
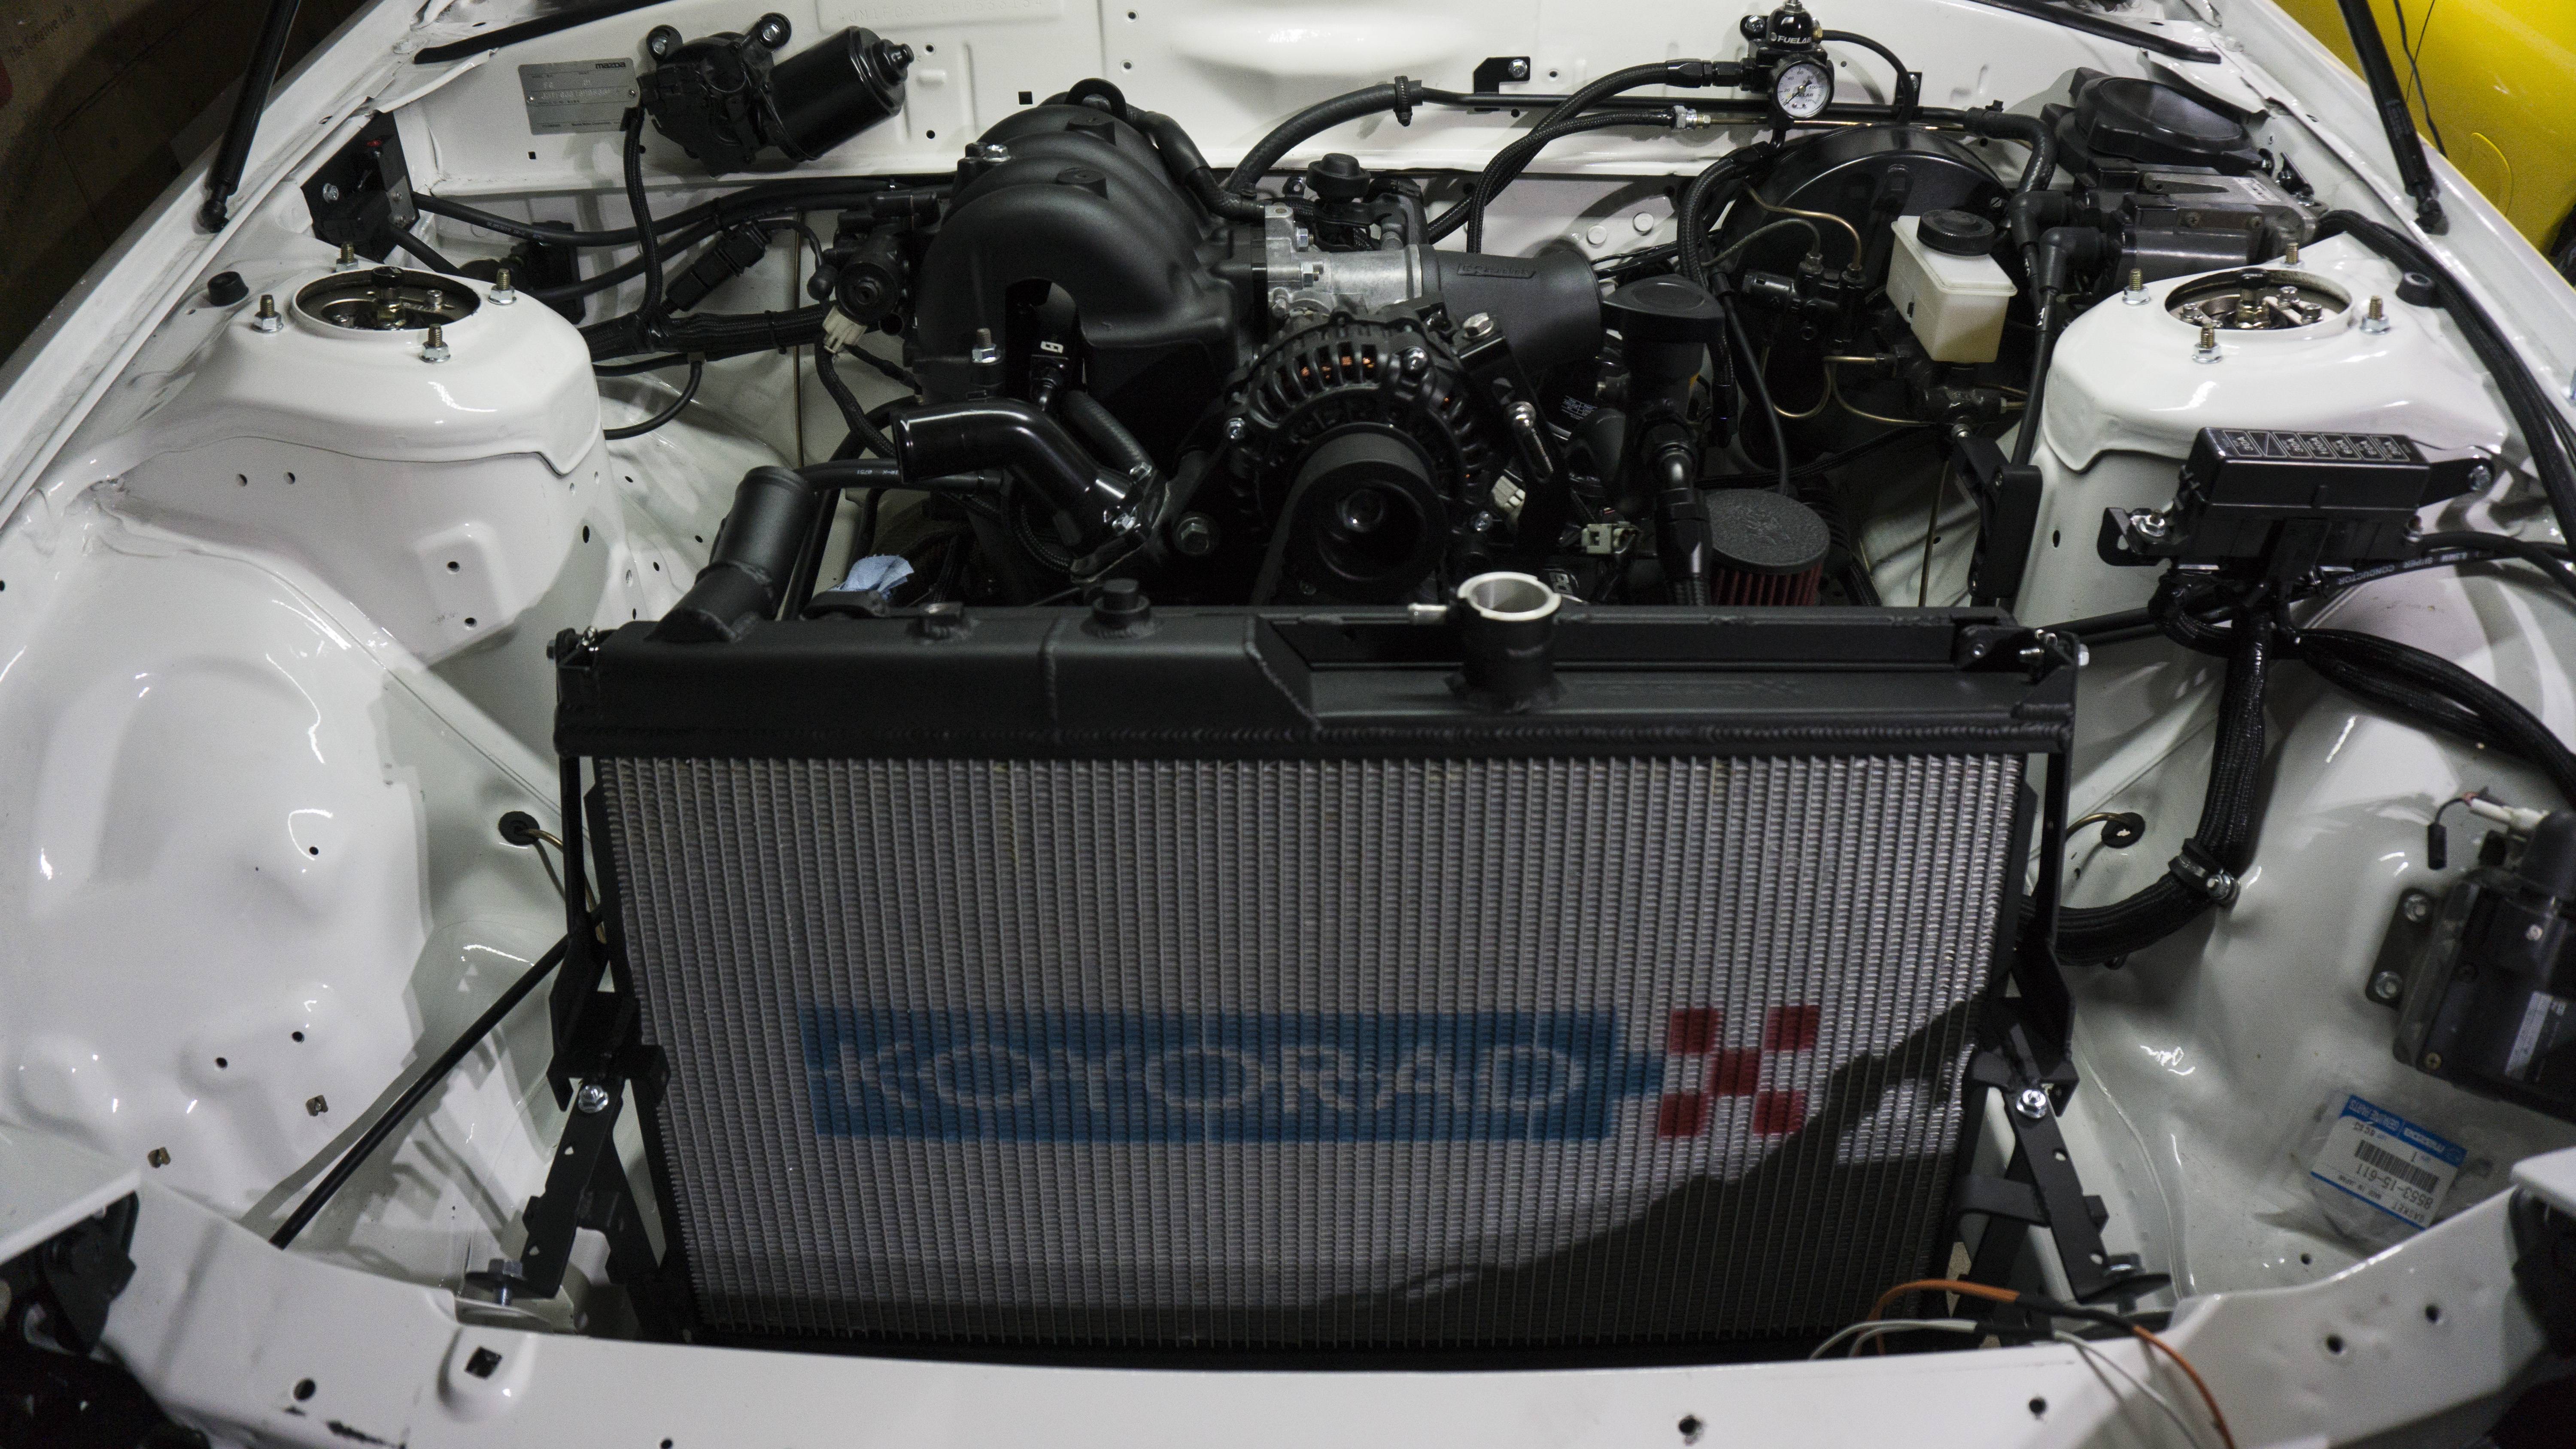
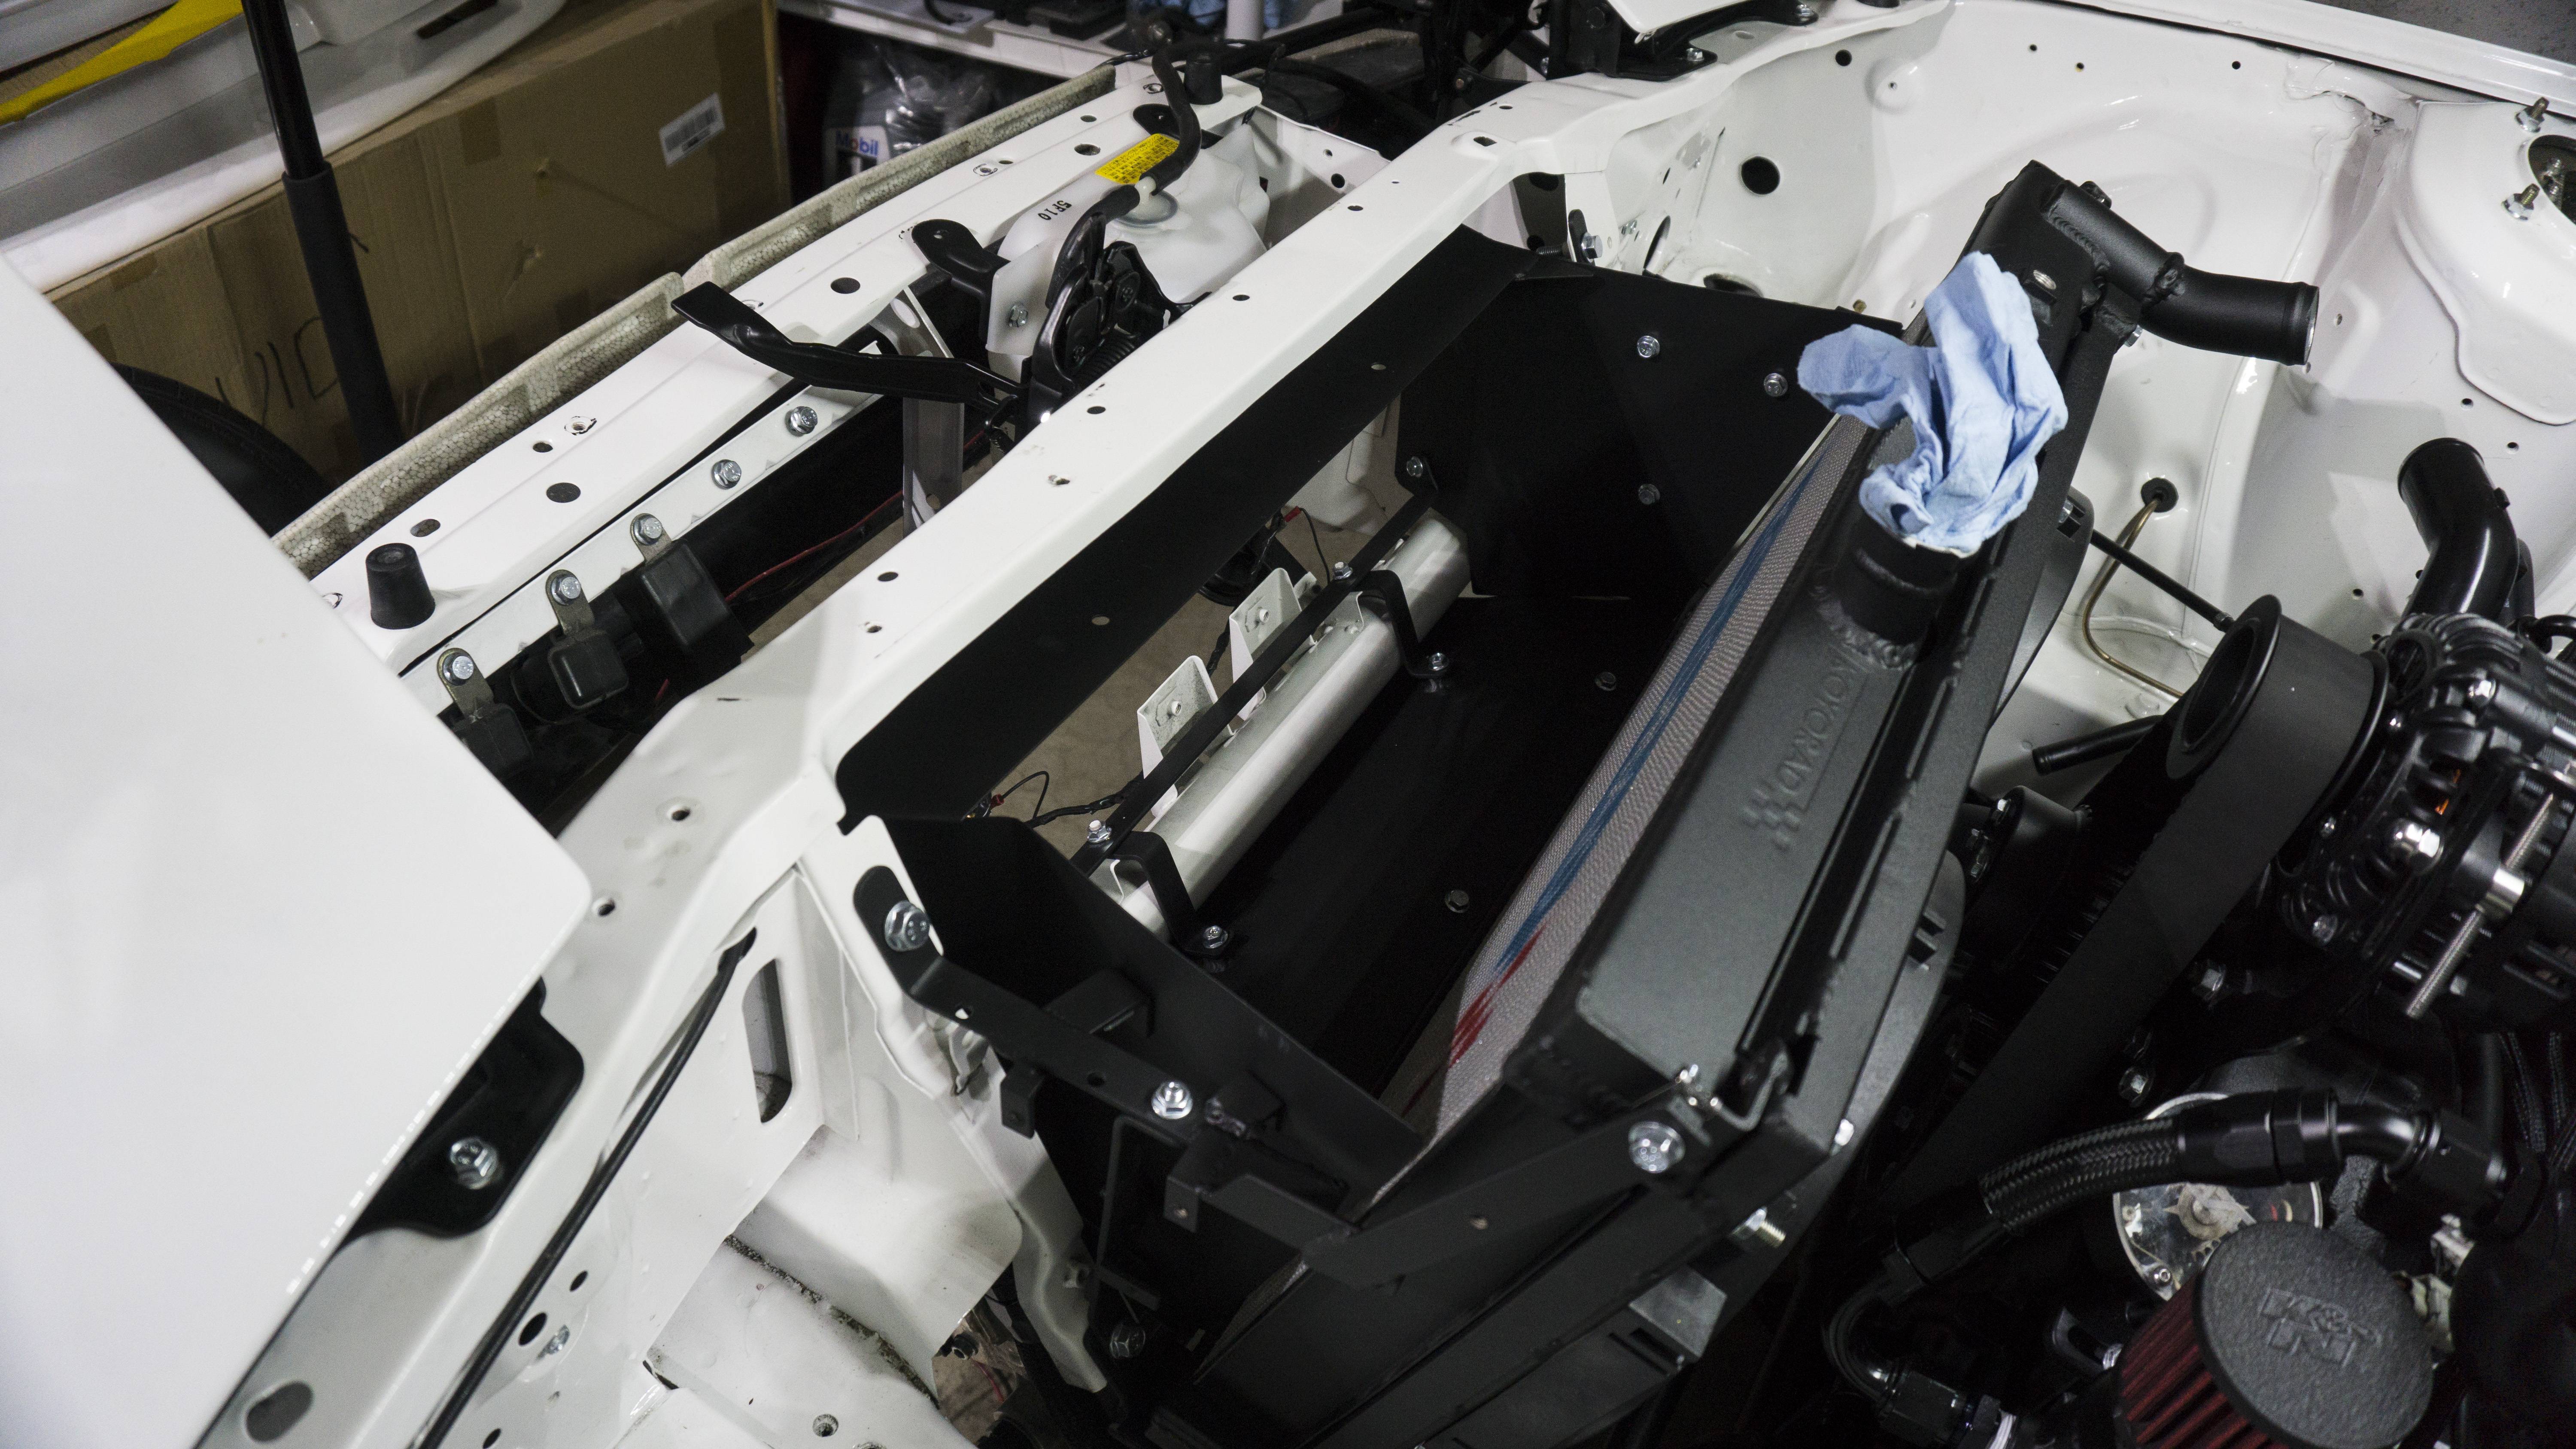
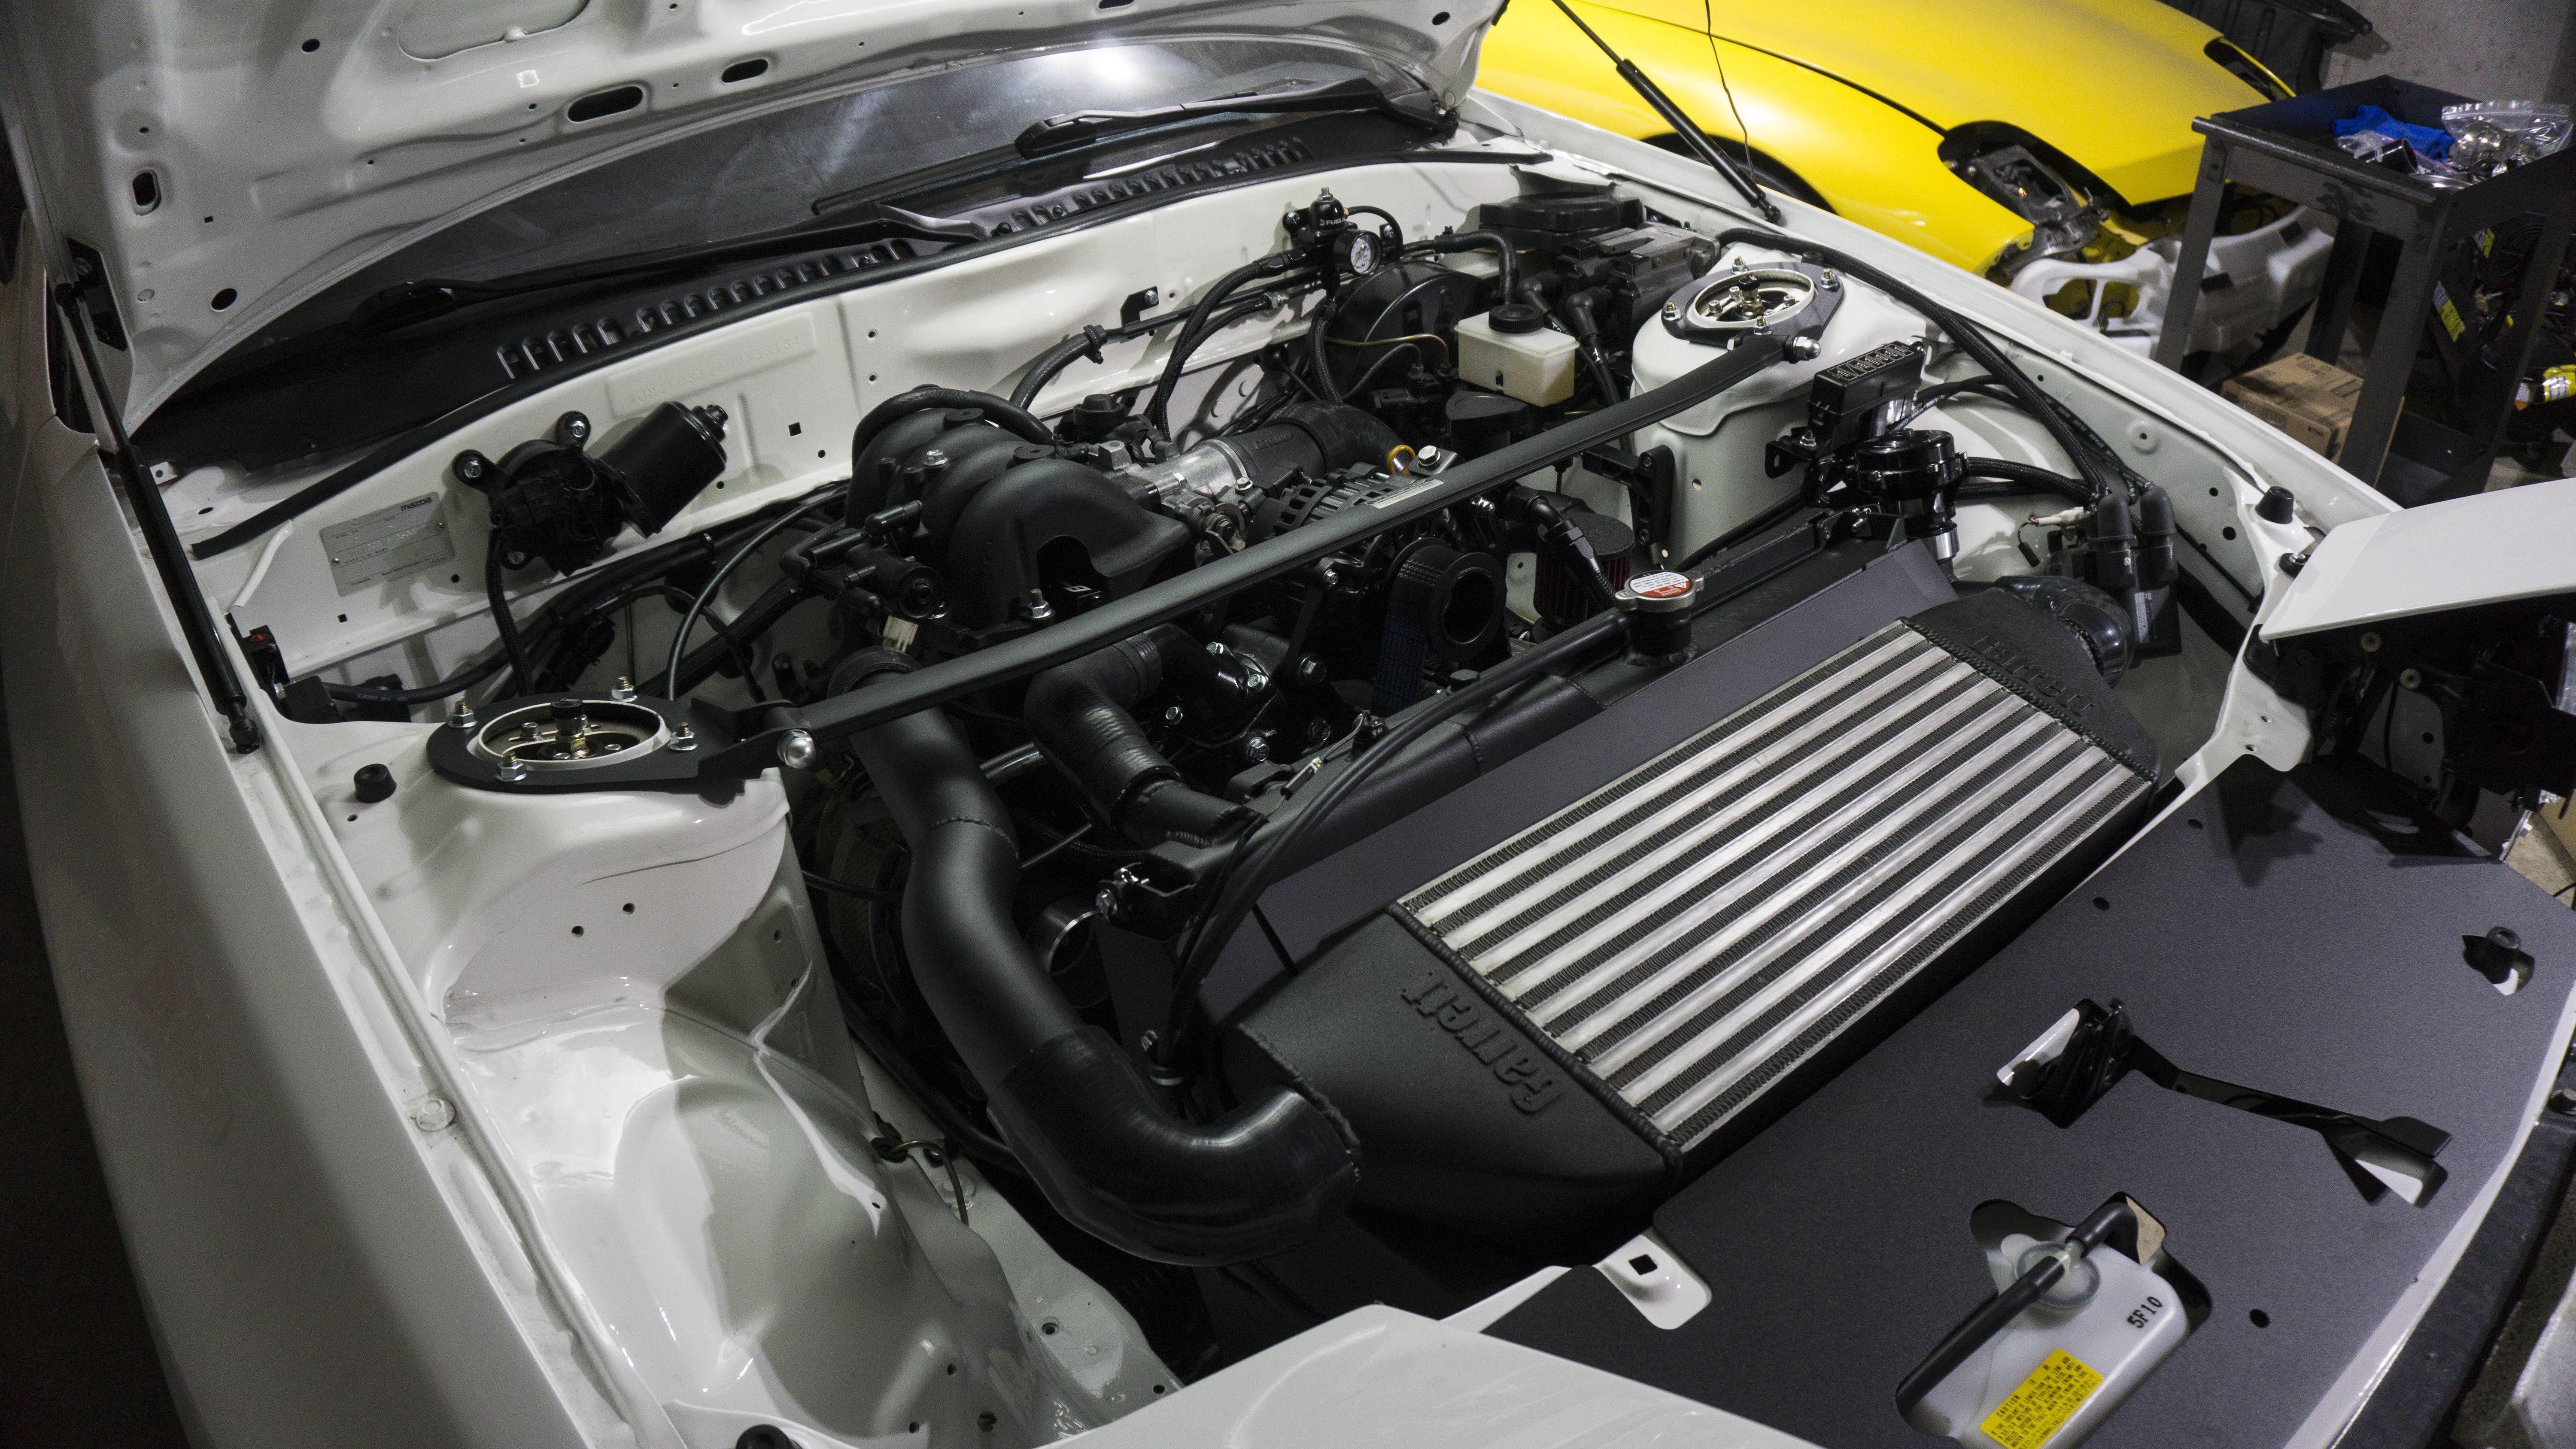
Two updates in one week? Absolutely - a lot got done yesterday and today so I wanted to go ahead and get this out. Alright, so I went and picked up the rest of the stuff from powder yesterday and immediately got to work. I got the fans on to the fan shroud, and got the shroud onto the radiator. I didn�t really like the Mishimoto backings. I thought they looked tacky, so I removed them for a clean black plastic look. I took pictures of every single thing I took apart, not that I really needed to Ben at Rotary Extreme gave me very detailed instructions on how to install the V-Mount kit. I got the radiator in and ran the wiring for the fans through a pass through on the driver side. I sheathed it so it matched the rest. I would have liked to make it invisible, but this doesn�t look bad. By the end of the day Saturday I had everything in the car. However, I filled it up with coolant and noticed it leaking from the Turbo to LIM flange. Ended up having to completely remove that and reapplying the gasket. Of course then the banjo bolt leaked - Had to torque that to 75-ish ft lbs in order for it not to leak. Sunday was getting the car to run. I spent most of the day troubleshooting oil pressure not building...apparently it doesn�t build as quickly as it should if it�s leaking from a couple of different places. I fixed all of those and got the car started. Ironically, there are still a ton of leaks left to fix. They are all slow ones though. My next planned steps are to pressure test the coolant system, dial in the oil fittings/banjo bolts that are leaking, and get 500 or so miles on the car.
Really the only things left are to get my hood fixed and get the side skirts sprayed and on. I think once that happens I can check another milestone off and wrap up the thread again...until the next time I do stuff.
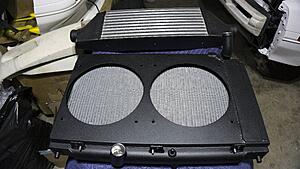
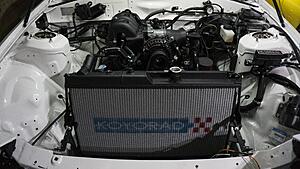
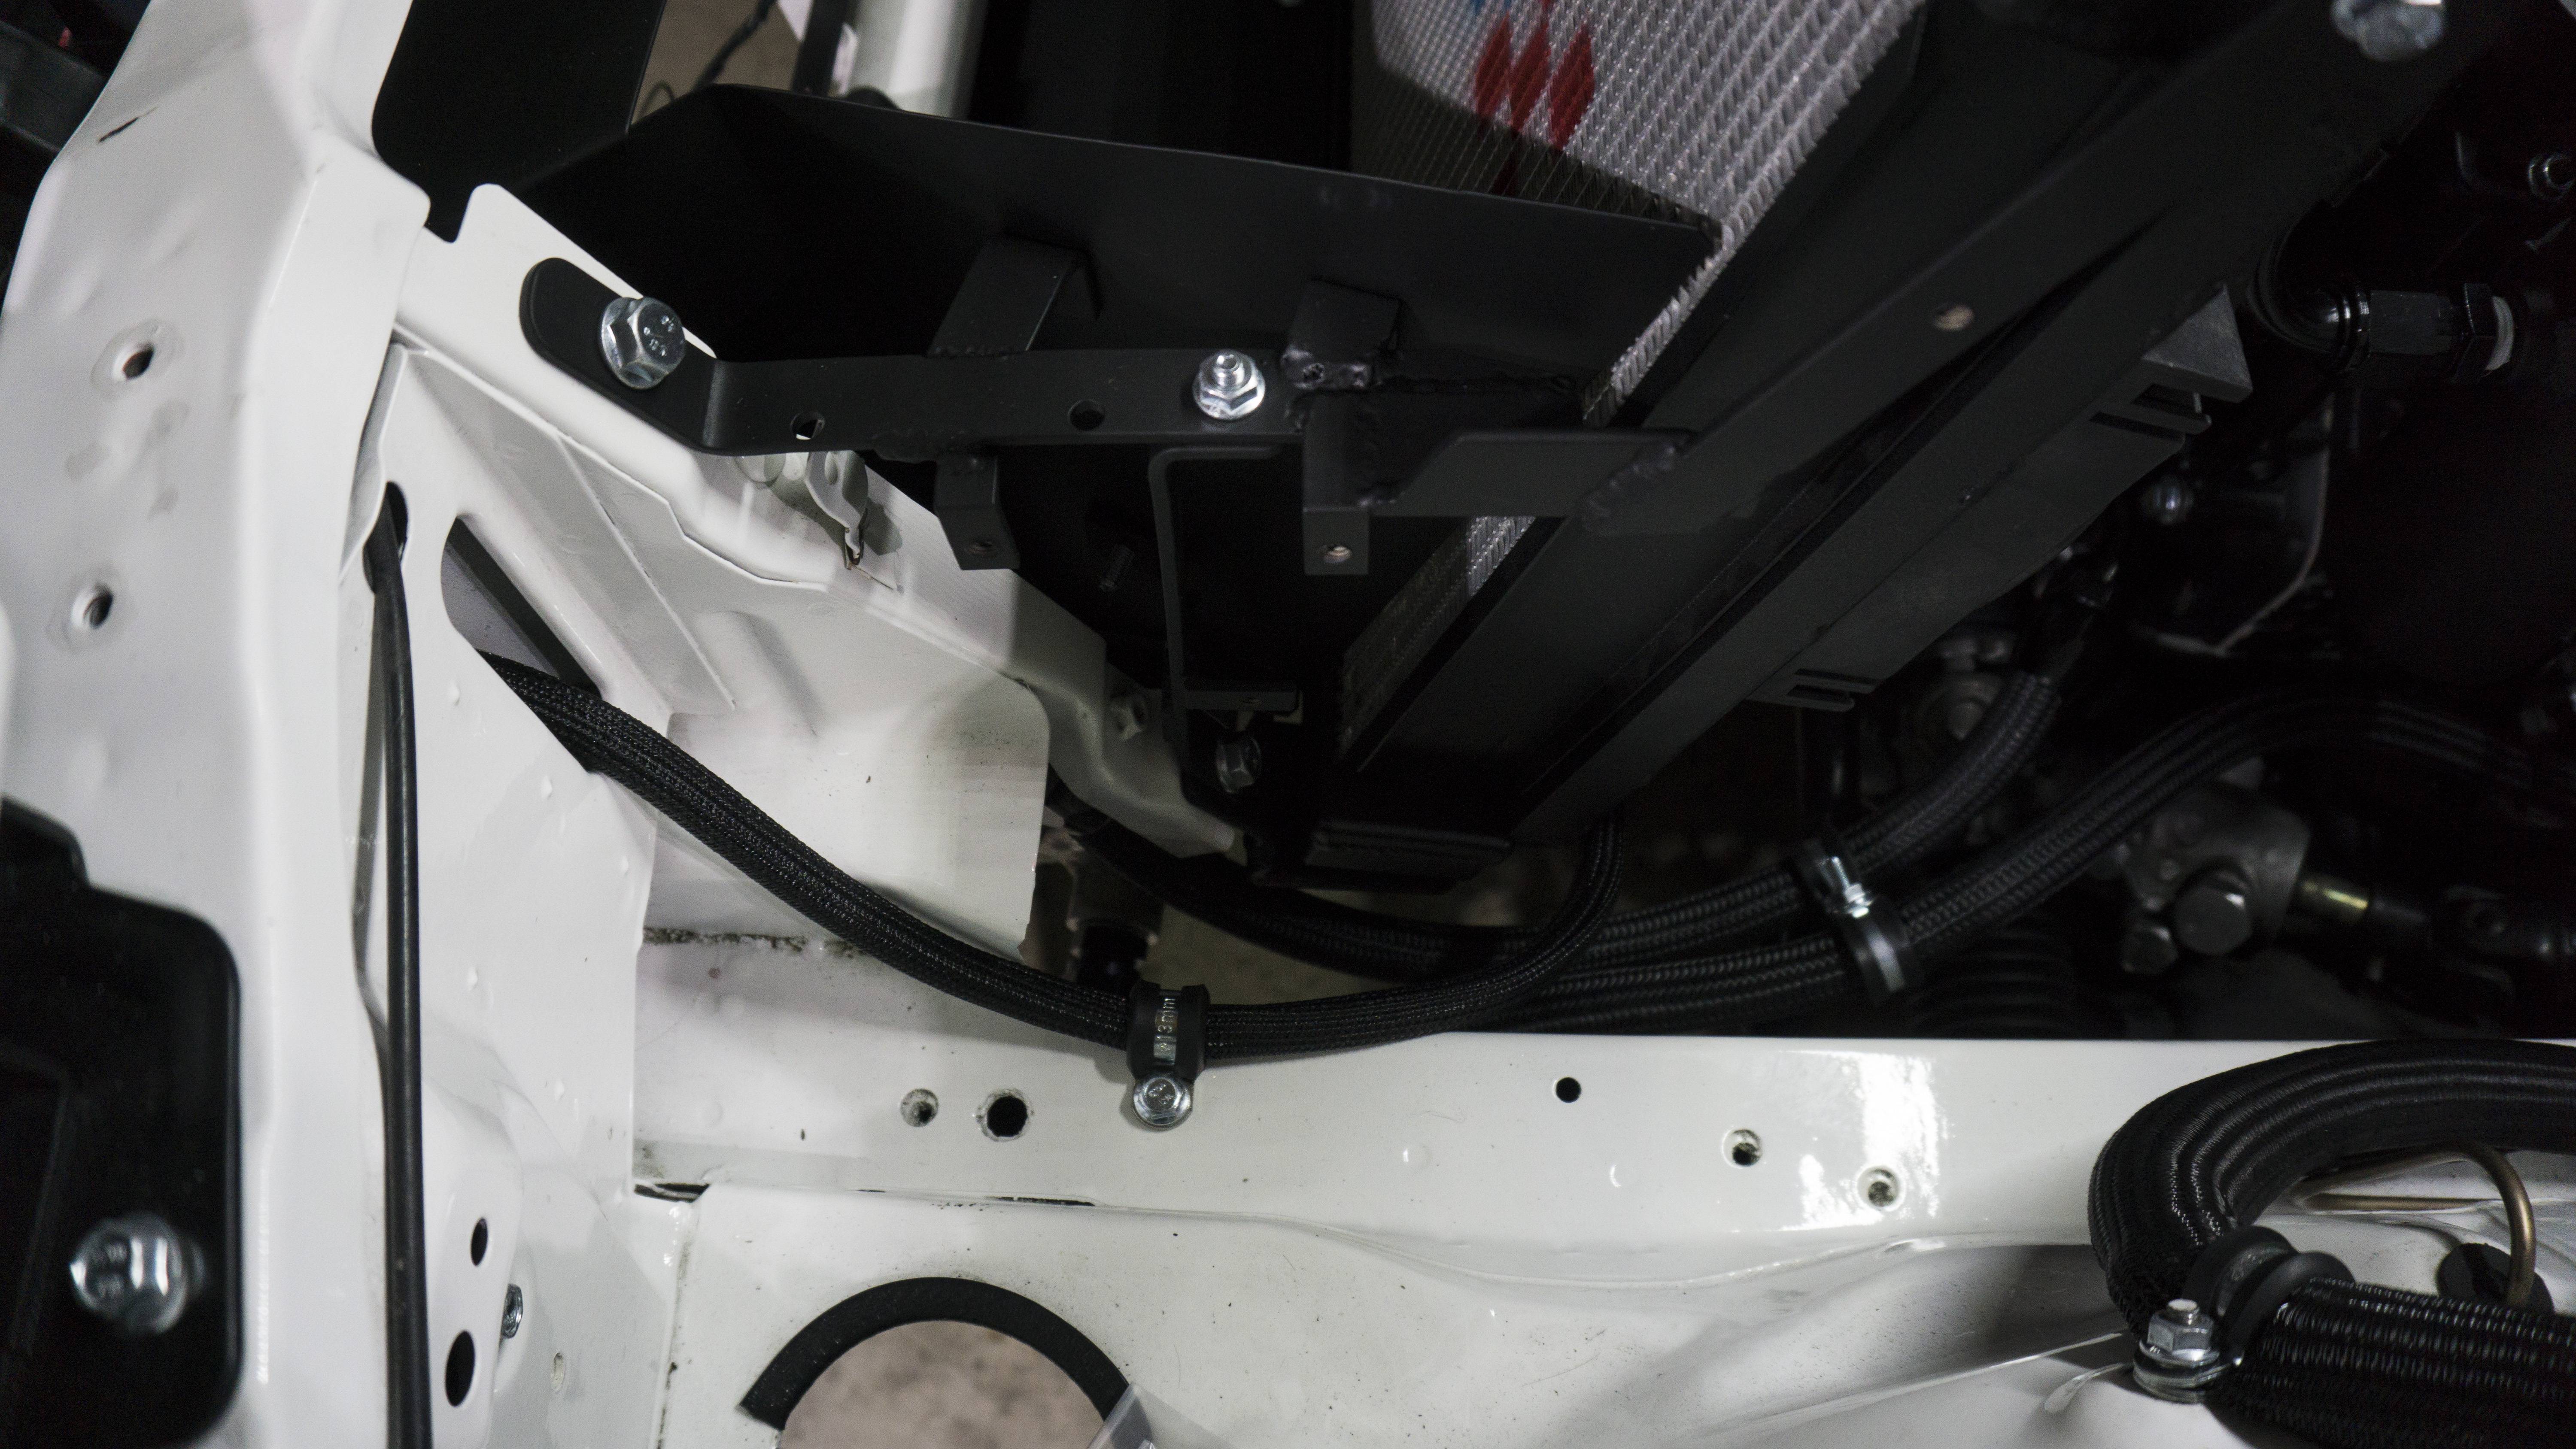
Here is the radiator fans and shroud:
Here is the radiator going into the car:
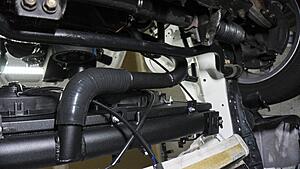
Here is the ducting and how I ran the fan wires:
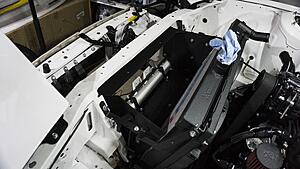
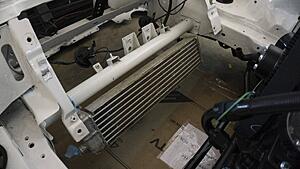
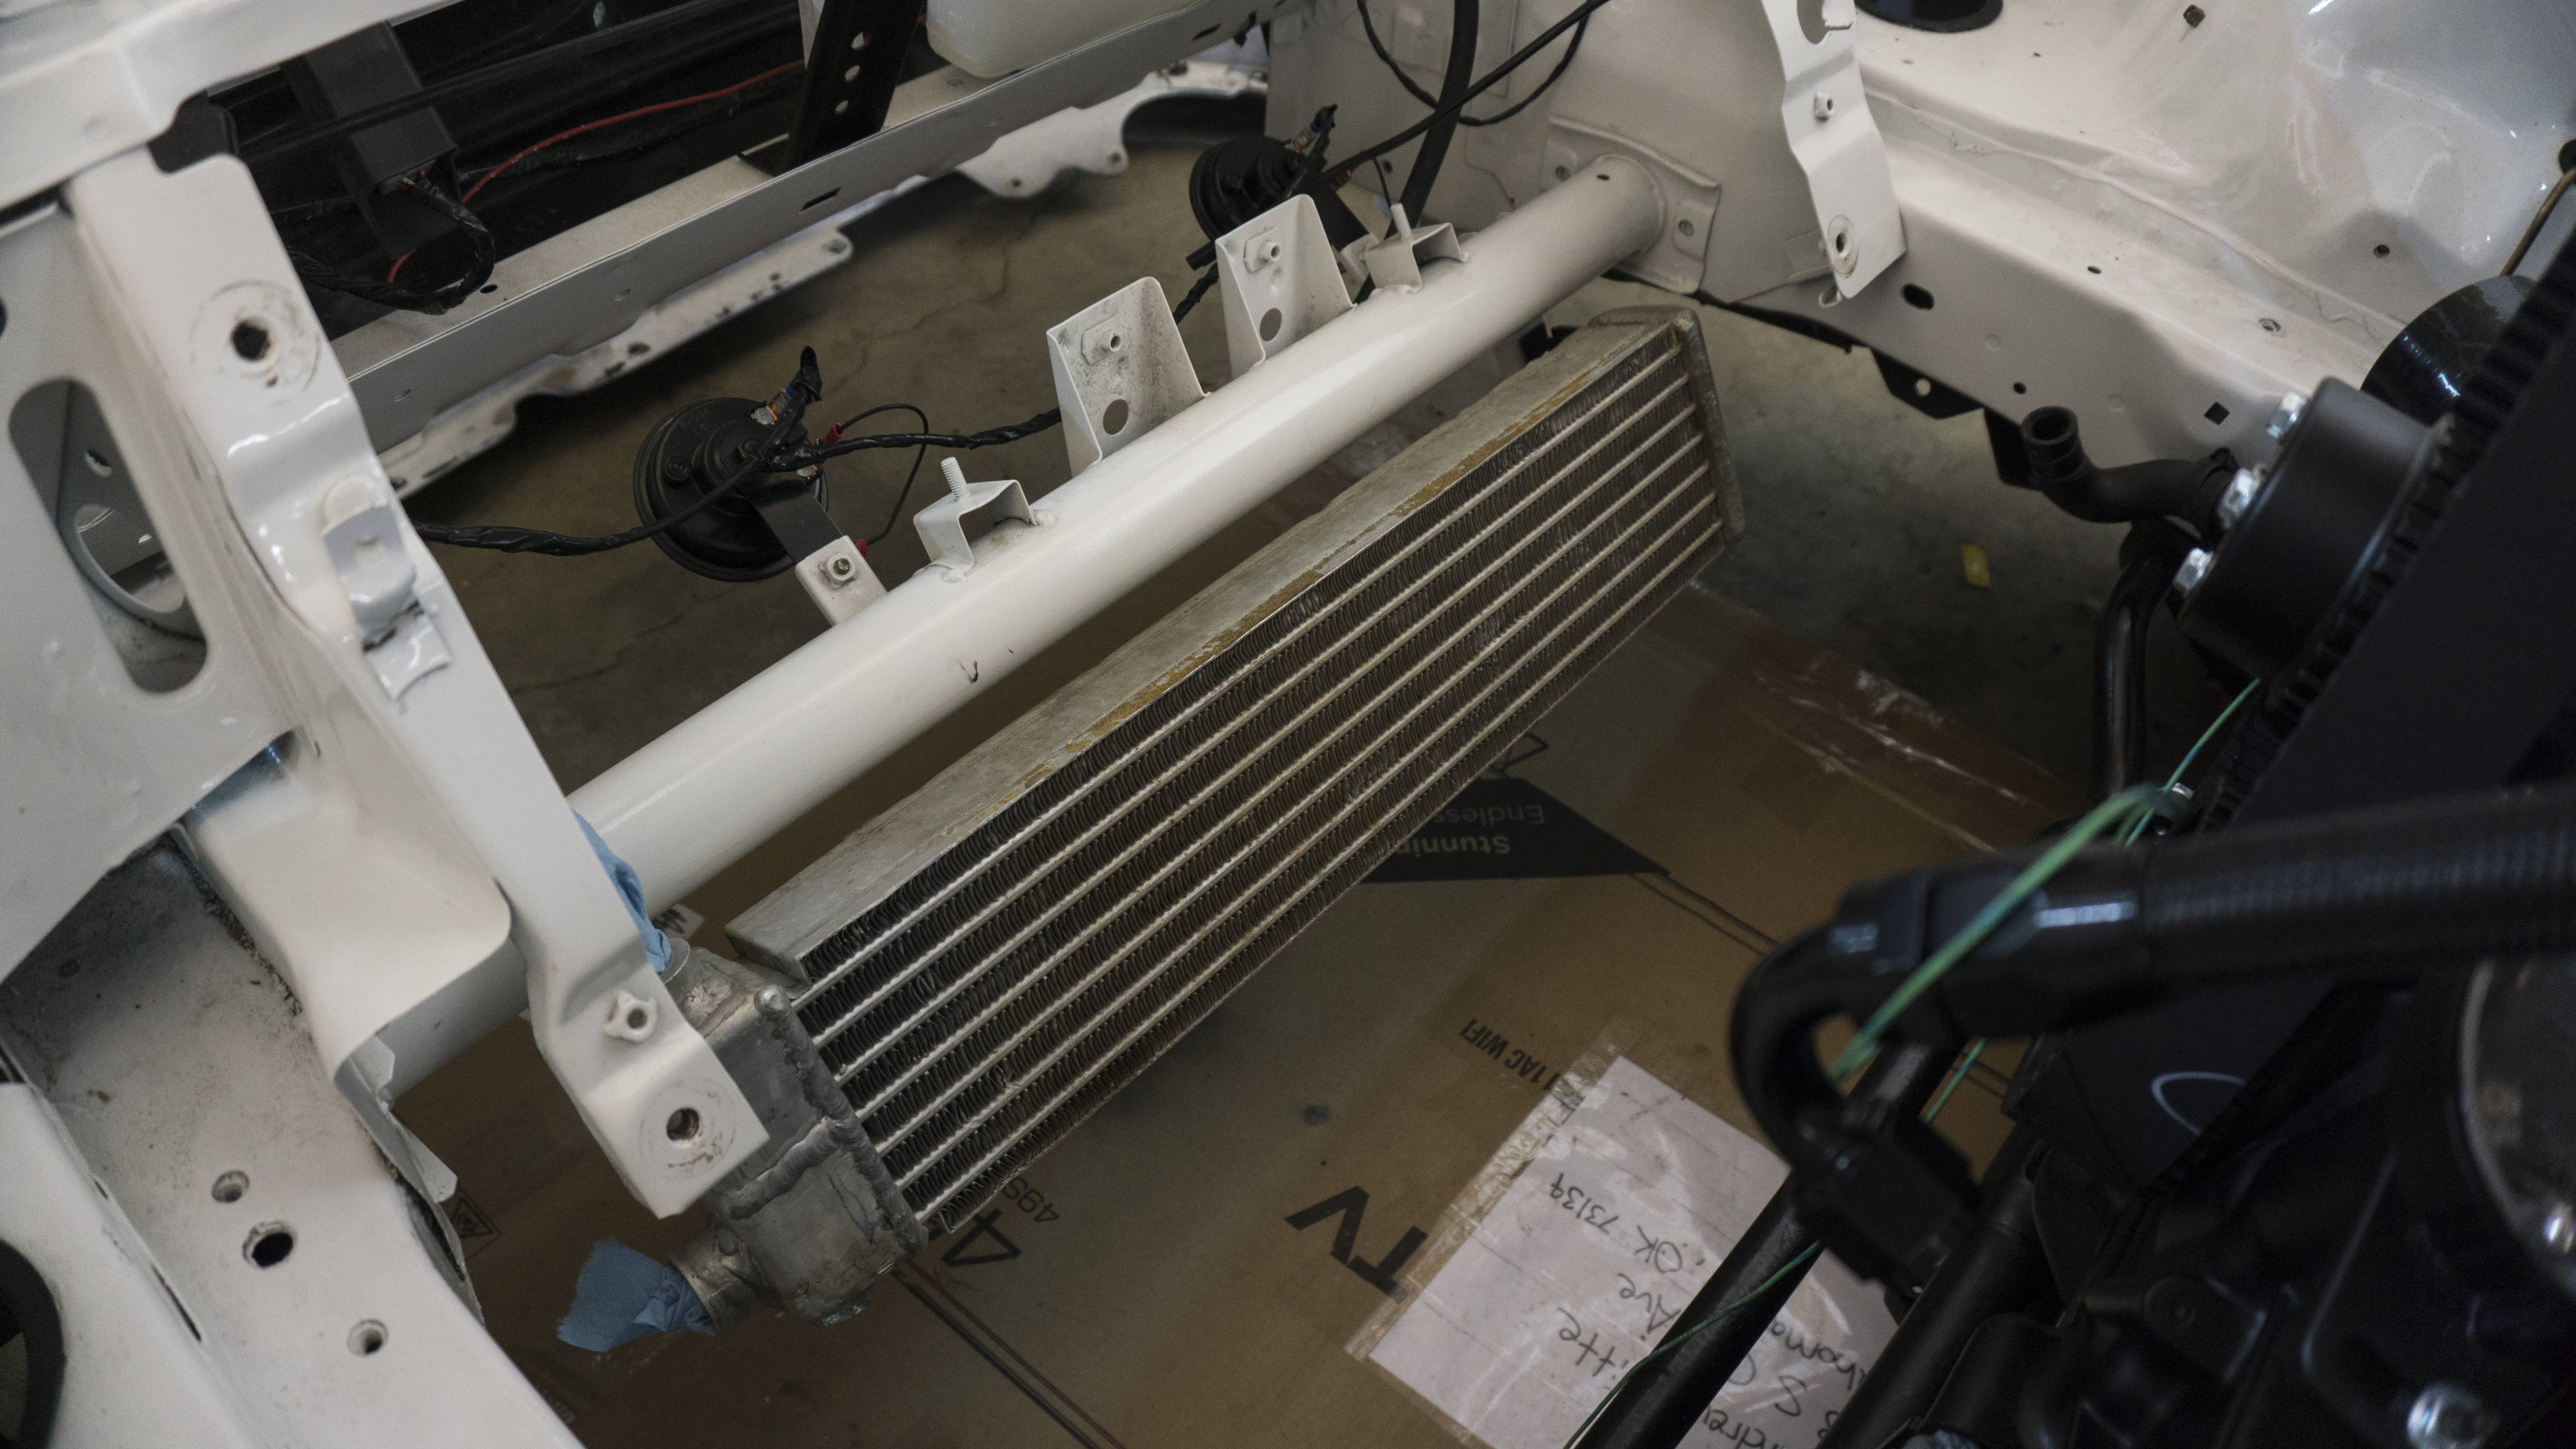
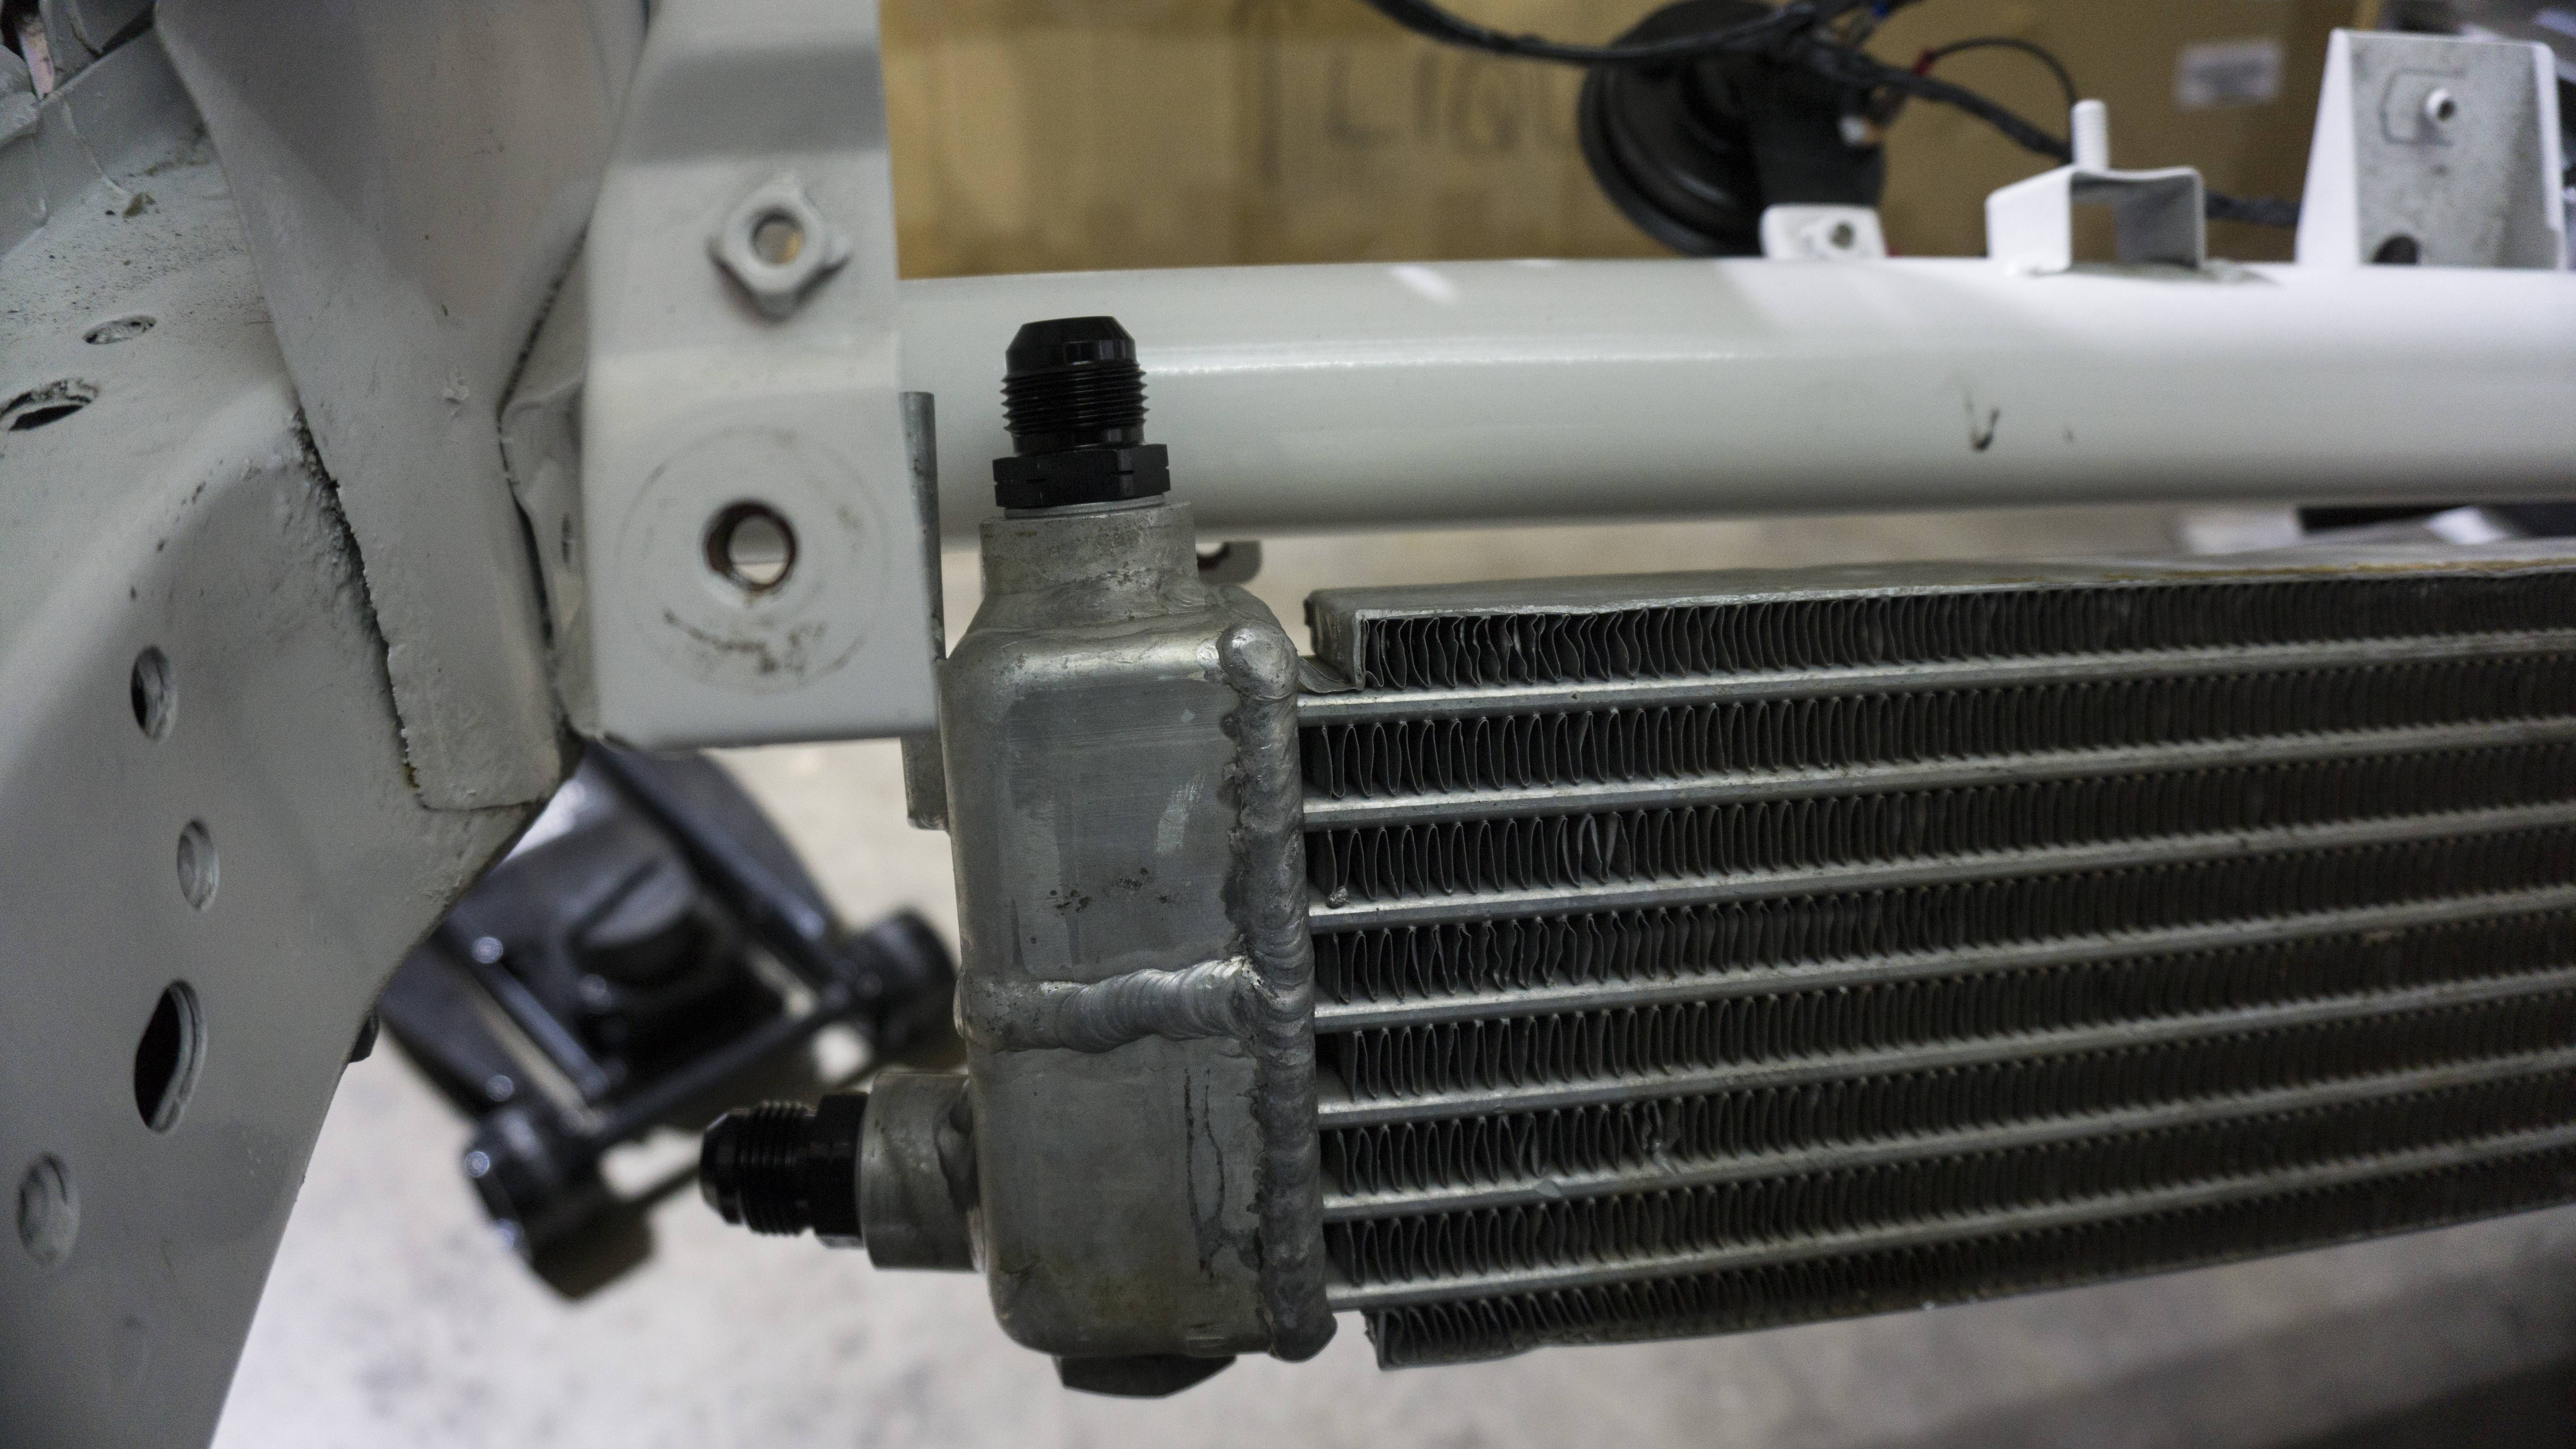
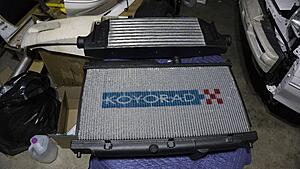
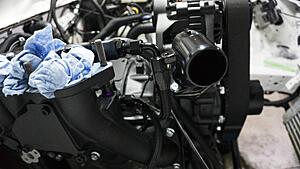
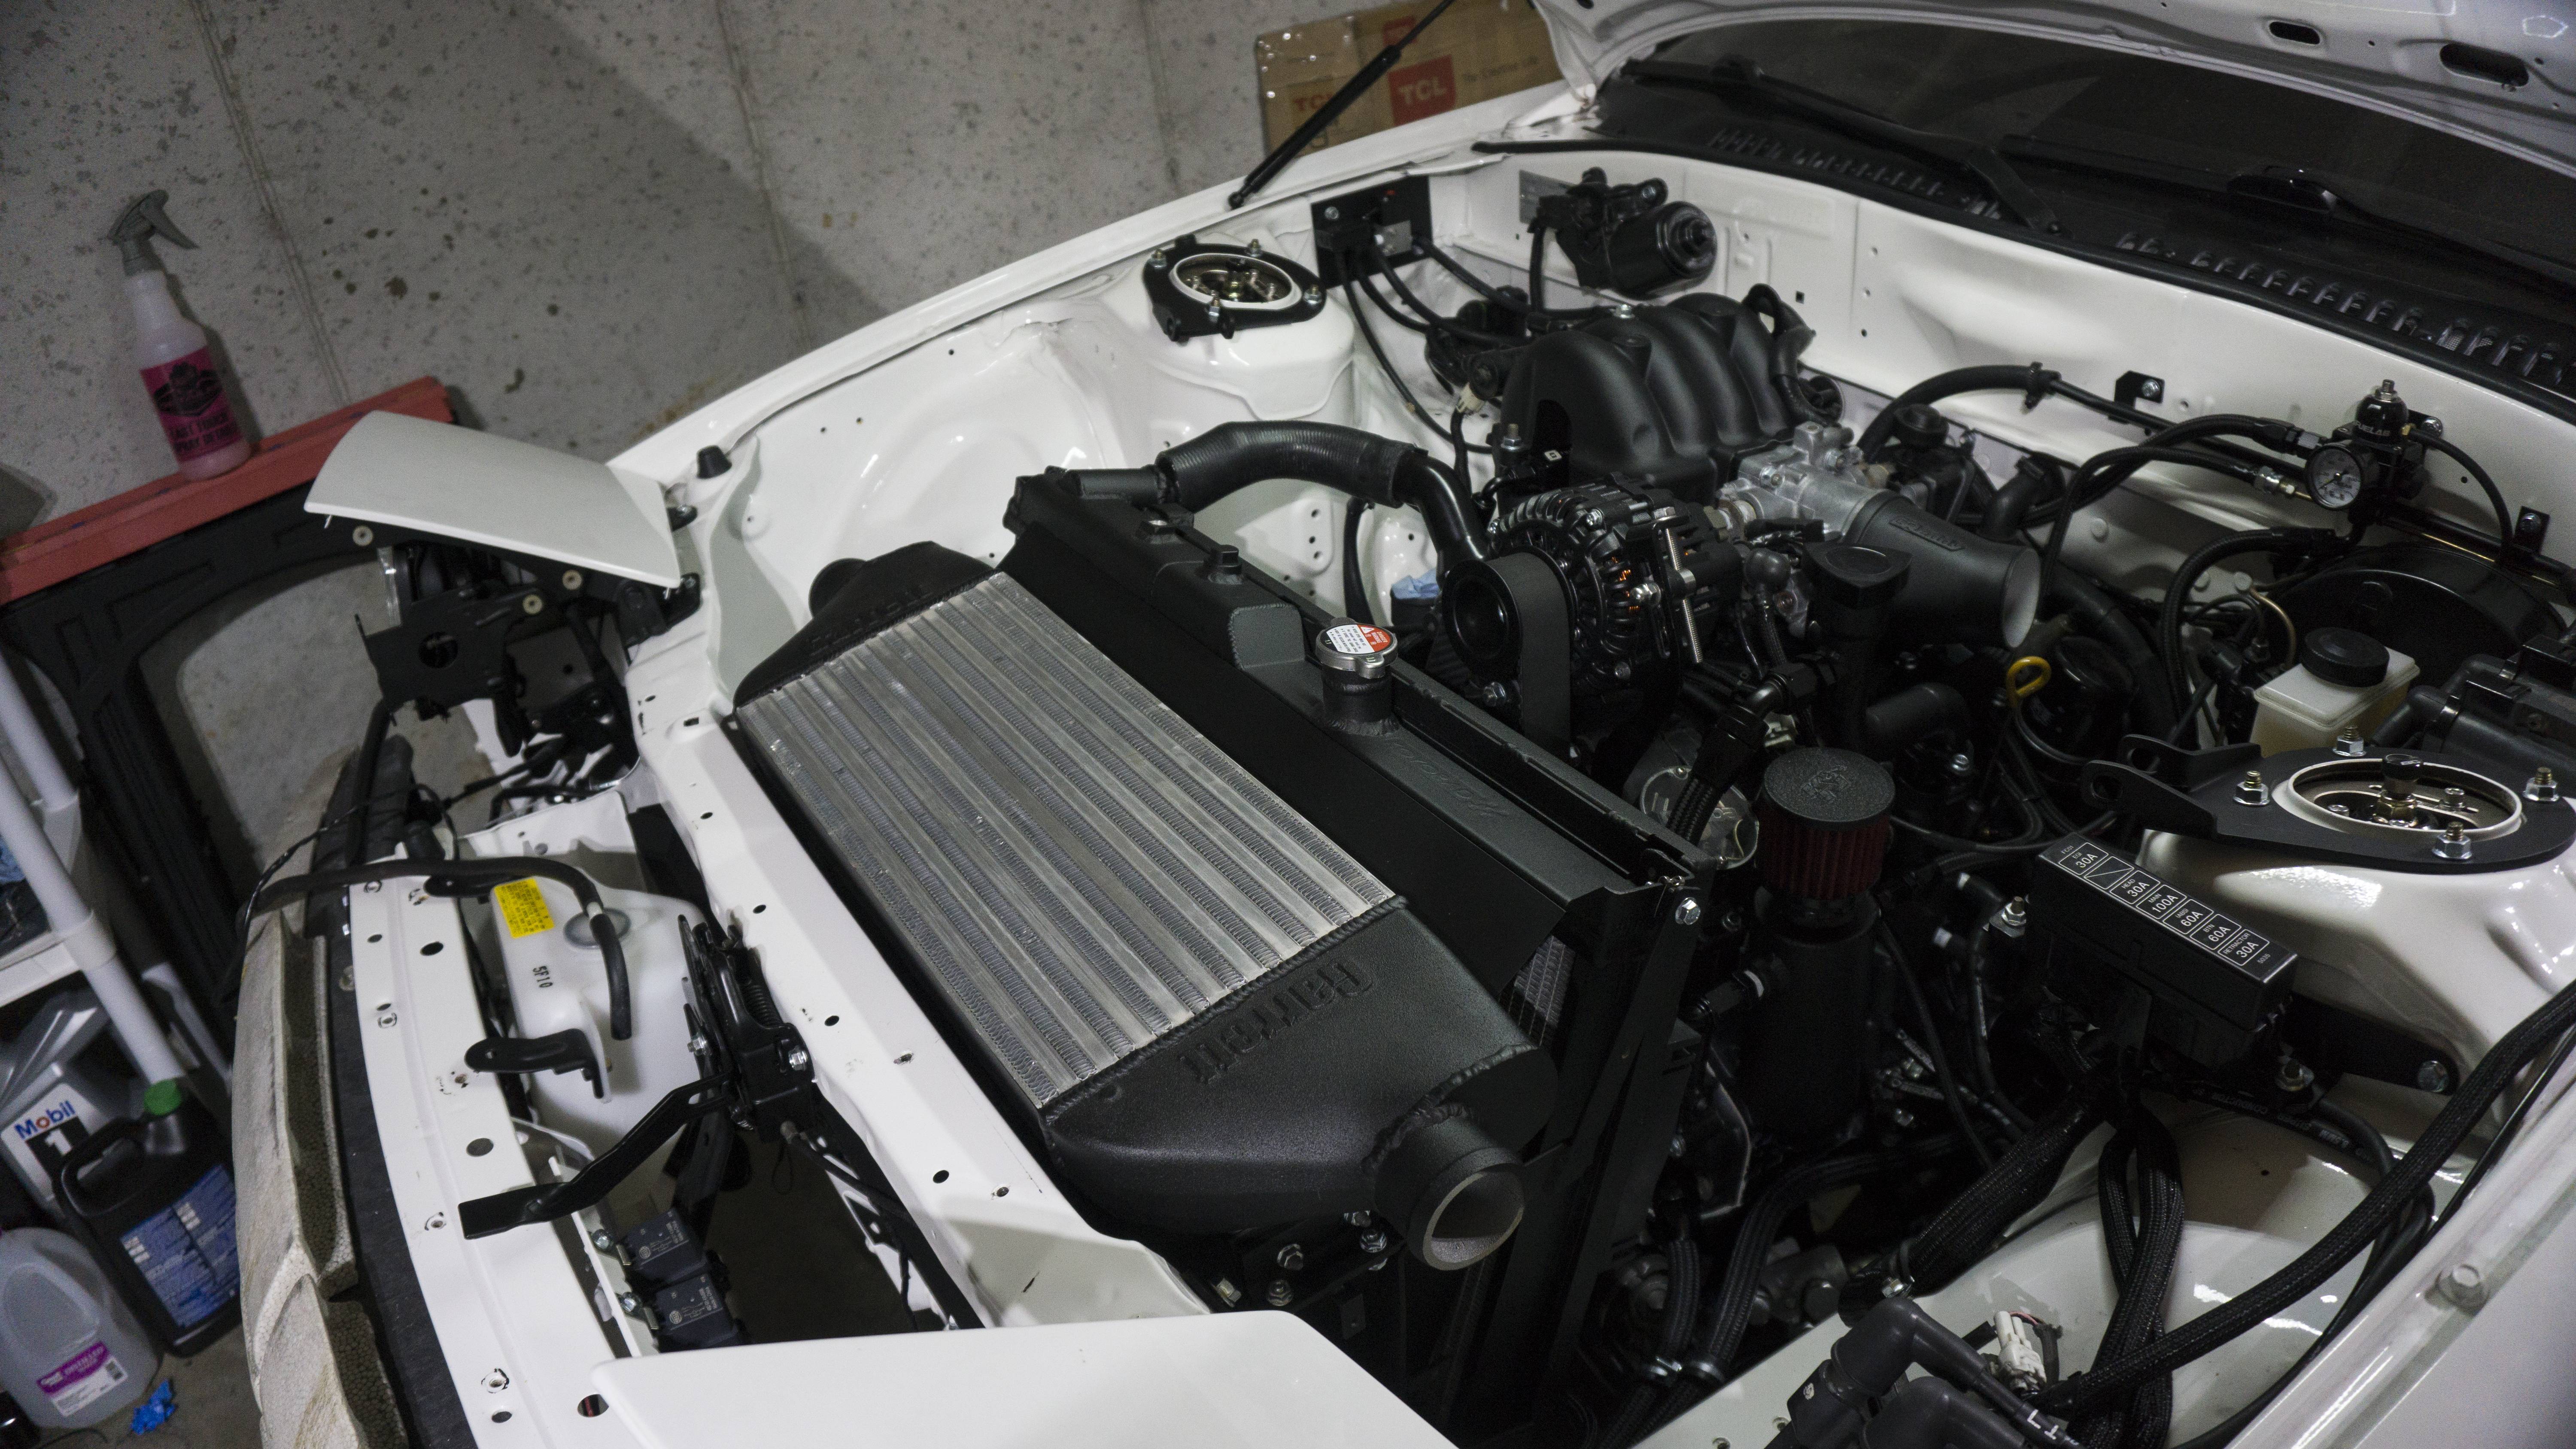
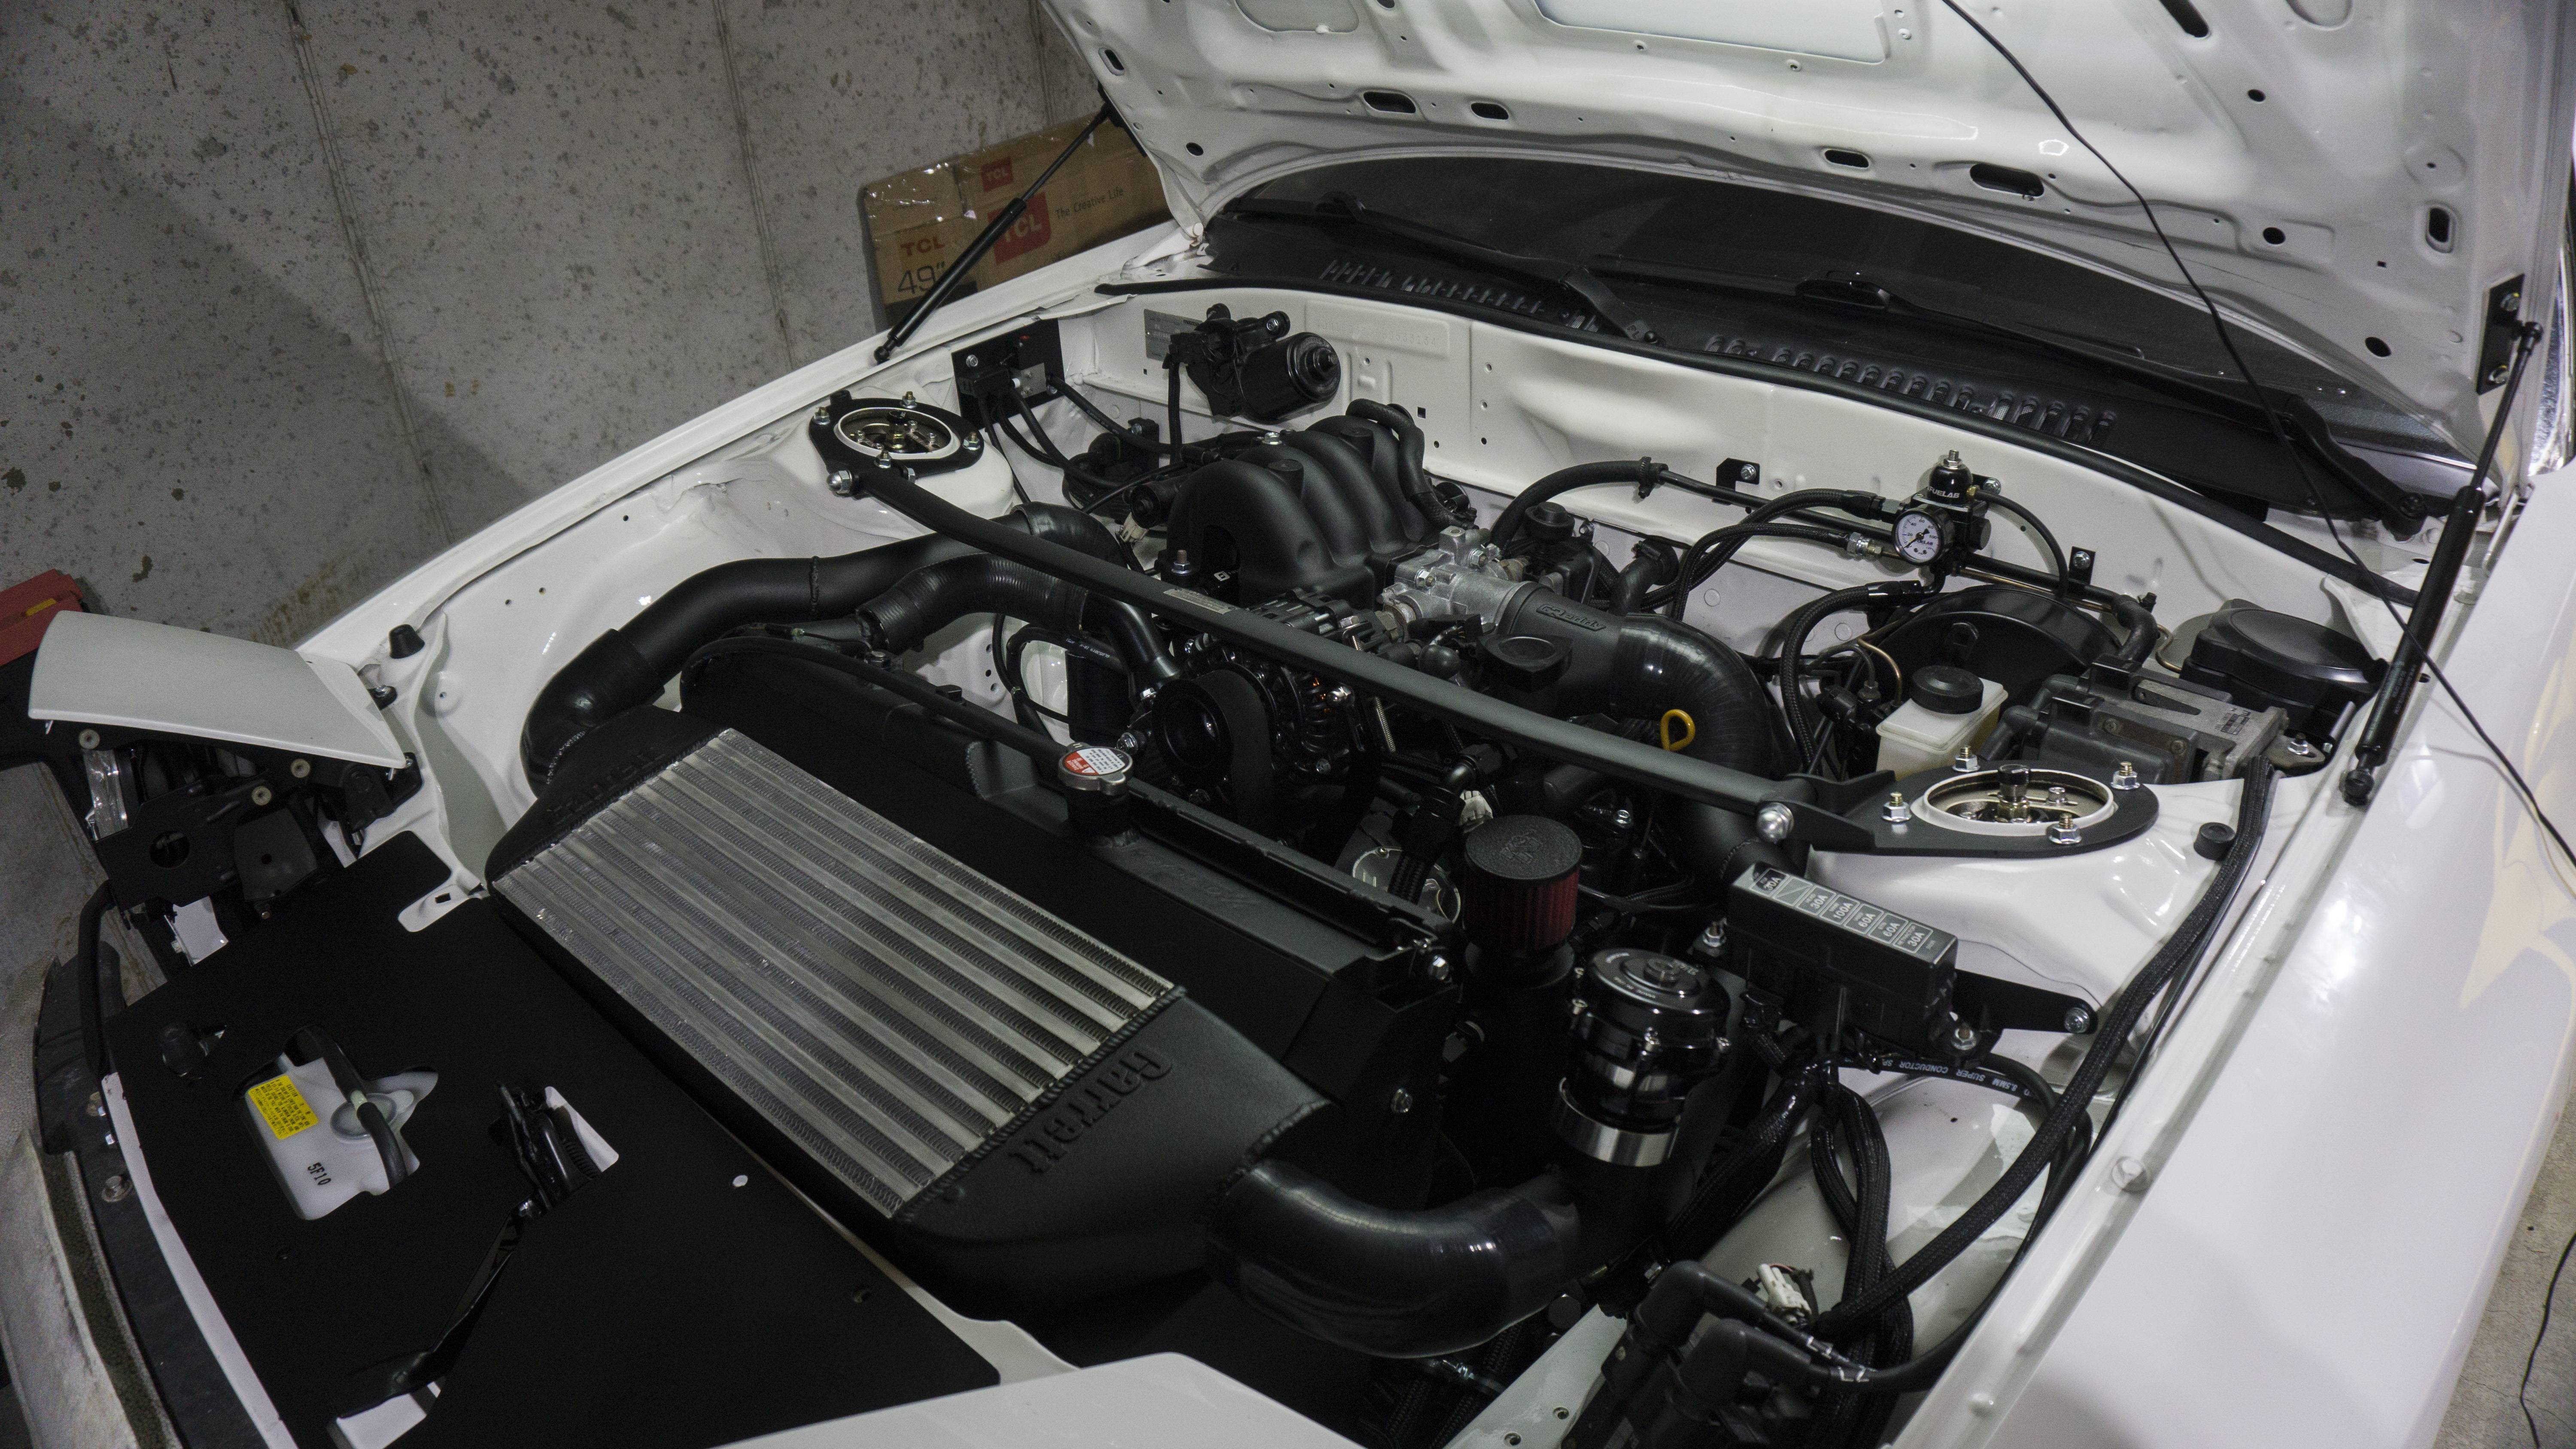
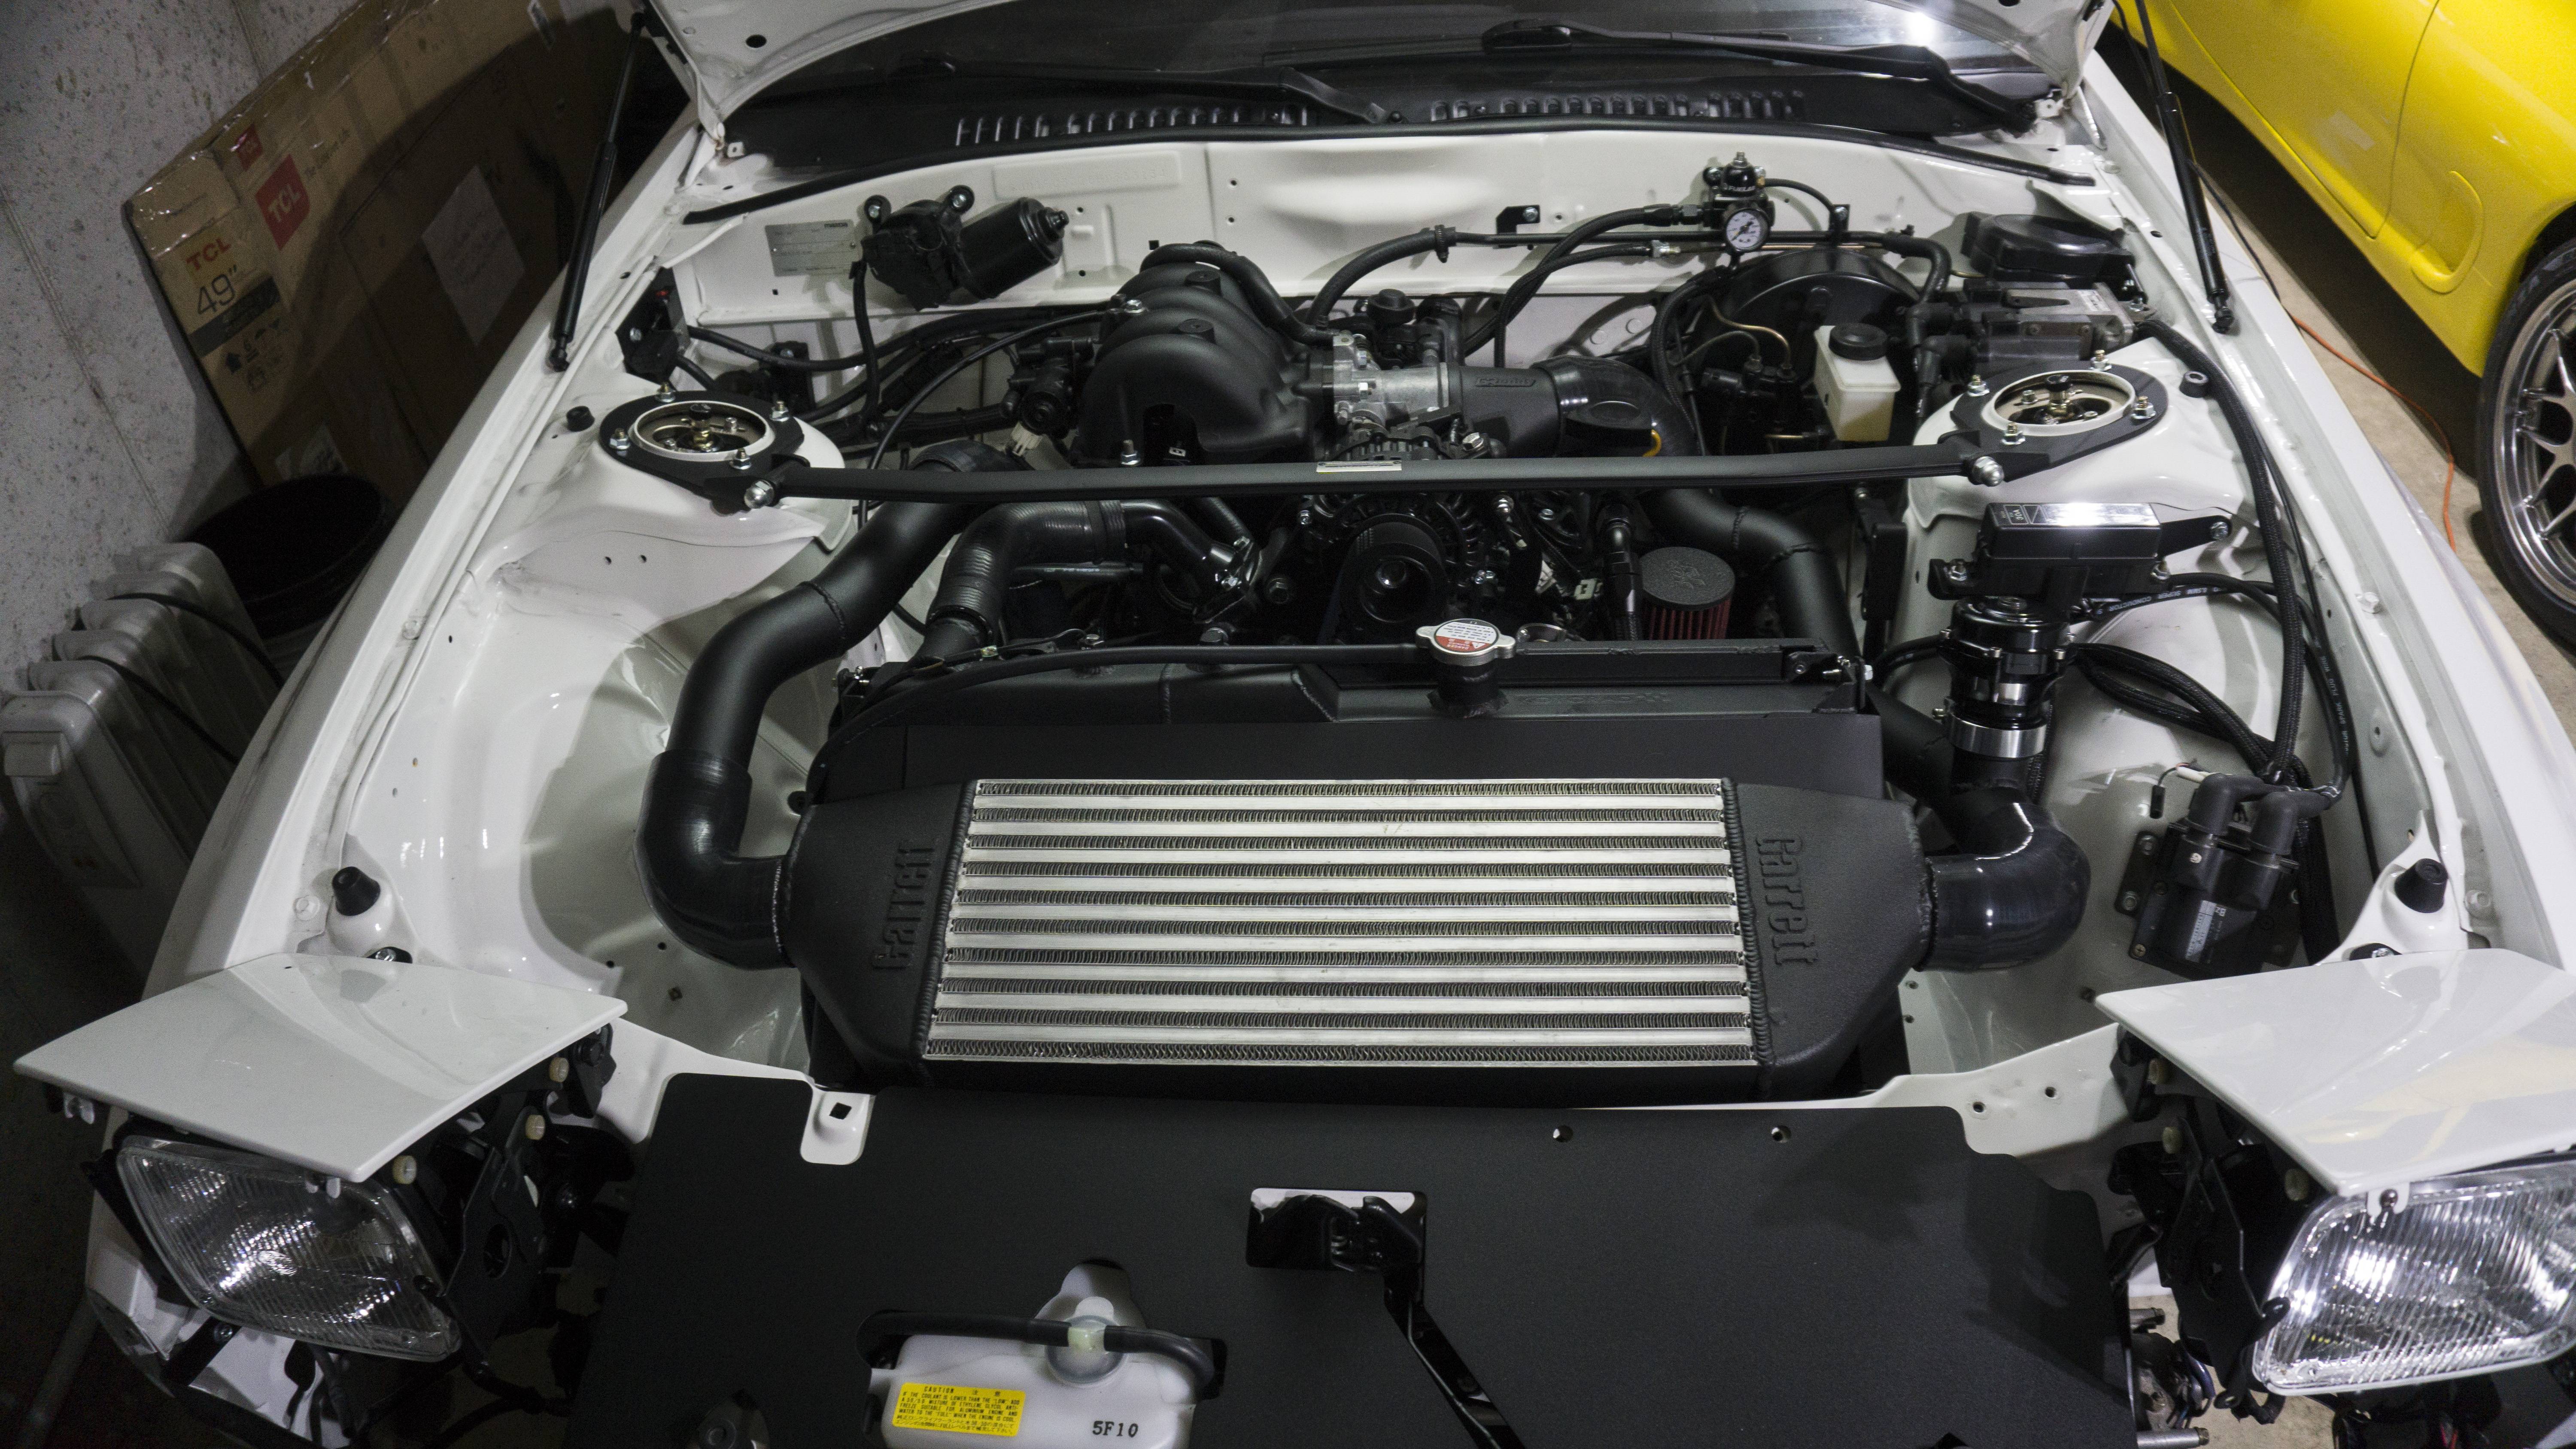
Here is the intercooler on:
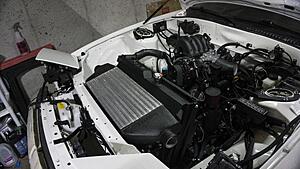
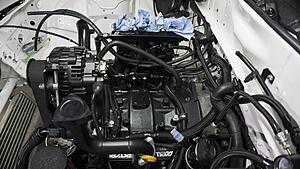
Here is everything mocked up:

Two updates in one week? Absolutely - a lot got done yesterday and today so I wanted to go ahead and get this out. Alright, so I went and picked up the rest of the stuff from powder yesterday and immediately got to work. I got the fans on to the fan shroud, and got the shroud onto the radiator. I didn�t really like the Mishimoto backings. I thought they looked tacky, so I removed them for a clean black plastic look. I took pictures of every single thing I took apart, not that I really needed to Ben at Rotary Extreme gave me very detailed instructions on how to install the V-Mount kit. I got the radiator in and ran the wiring for the fans through a pass through on the driver side. I sheathed it so it matched the rest. I would have liked to make it invisible, but this doesn�t look bad. By the end of the day Saturday I had everything in the car. However, I filled it up with coolant and noticed it leaking from the Turbo to LIM flange. Ended up having to completely remove that and reapplying the gasket. Of course then the banjo bolt leaked - Had to torque that to 75-ish ft lbs in order for it not to leak. Sunday was getting the car to run. I spent most of the day troubleshooting oil pressure not building...apparently it doesn�t build as quickly as it should if it�s leaking from a couple of different places. I fixed all of those and got the car started. Ironically, there are still a ton of leaks left to fix. They are all slow ones though. My next planned steps are to pressure test the coolant system, dial in the oil fittings/banjo bolts that are leaking, and get 500 or so miles on the car.
Really the only things left are to get my hood fixed and get the side skirts sprayed and on. I think once that happens I can check another milestone off and wrap up the thread again...until the next time I do stuff.
Here is the radiator fans and shroud:
Here is the radiator going into the car:


Here is the ducting and how I ran the fan wires:
Here is the intercooler on:
Here is everything mocked up:
The following users liked this post:
JerryLH3 (01-13-20)