From Zero to Hero: Heavy JDM Influenced Restoration

 08-02-21, 12:30 PM
#329
Update 8/2/2021
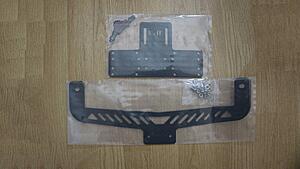
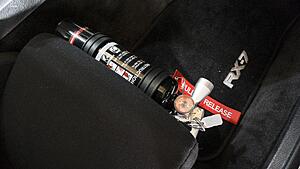
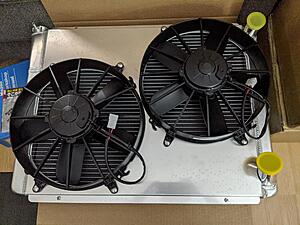
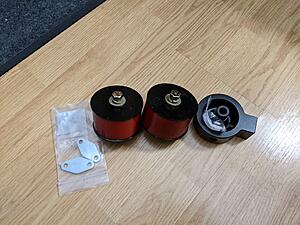
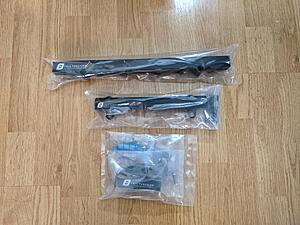
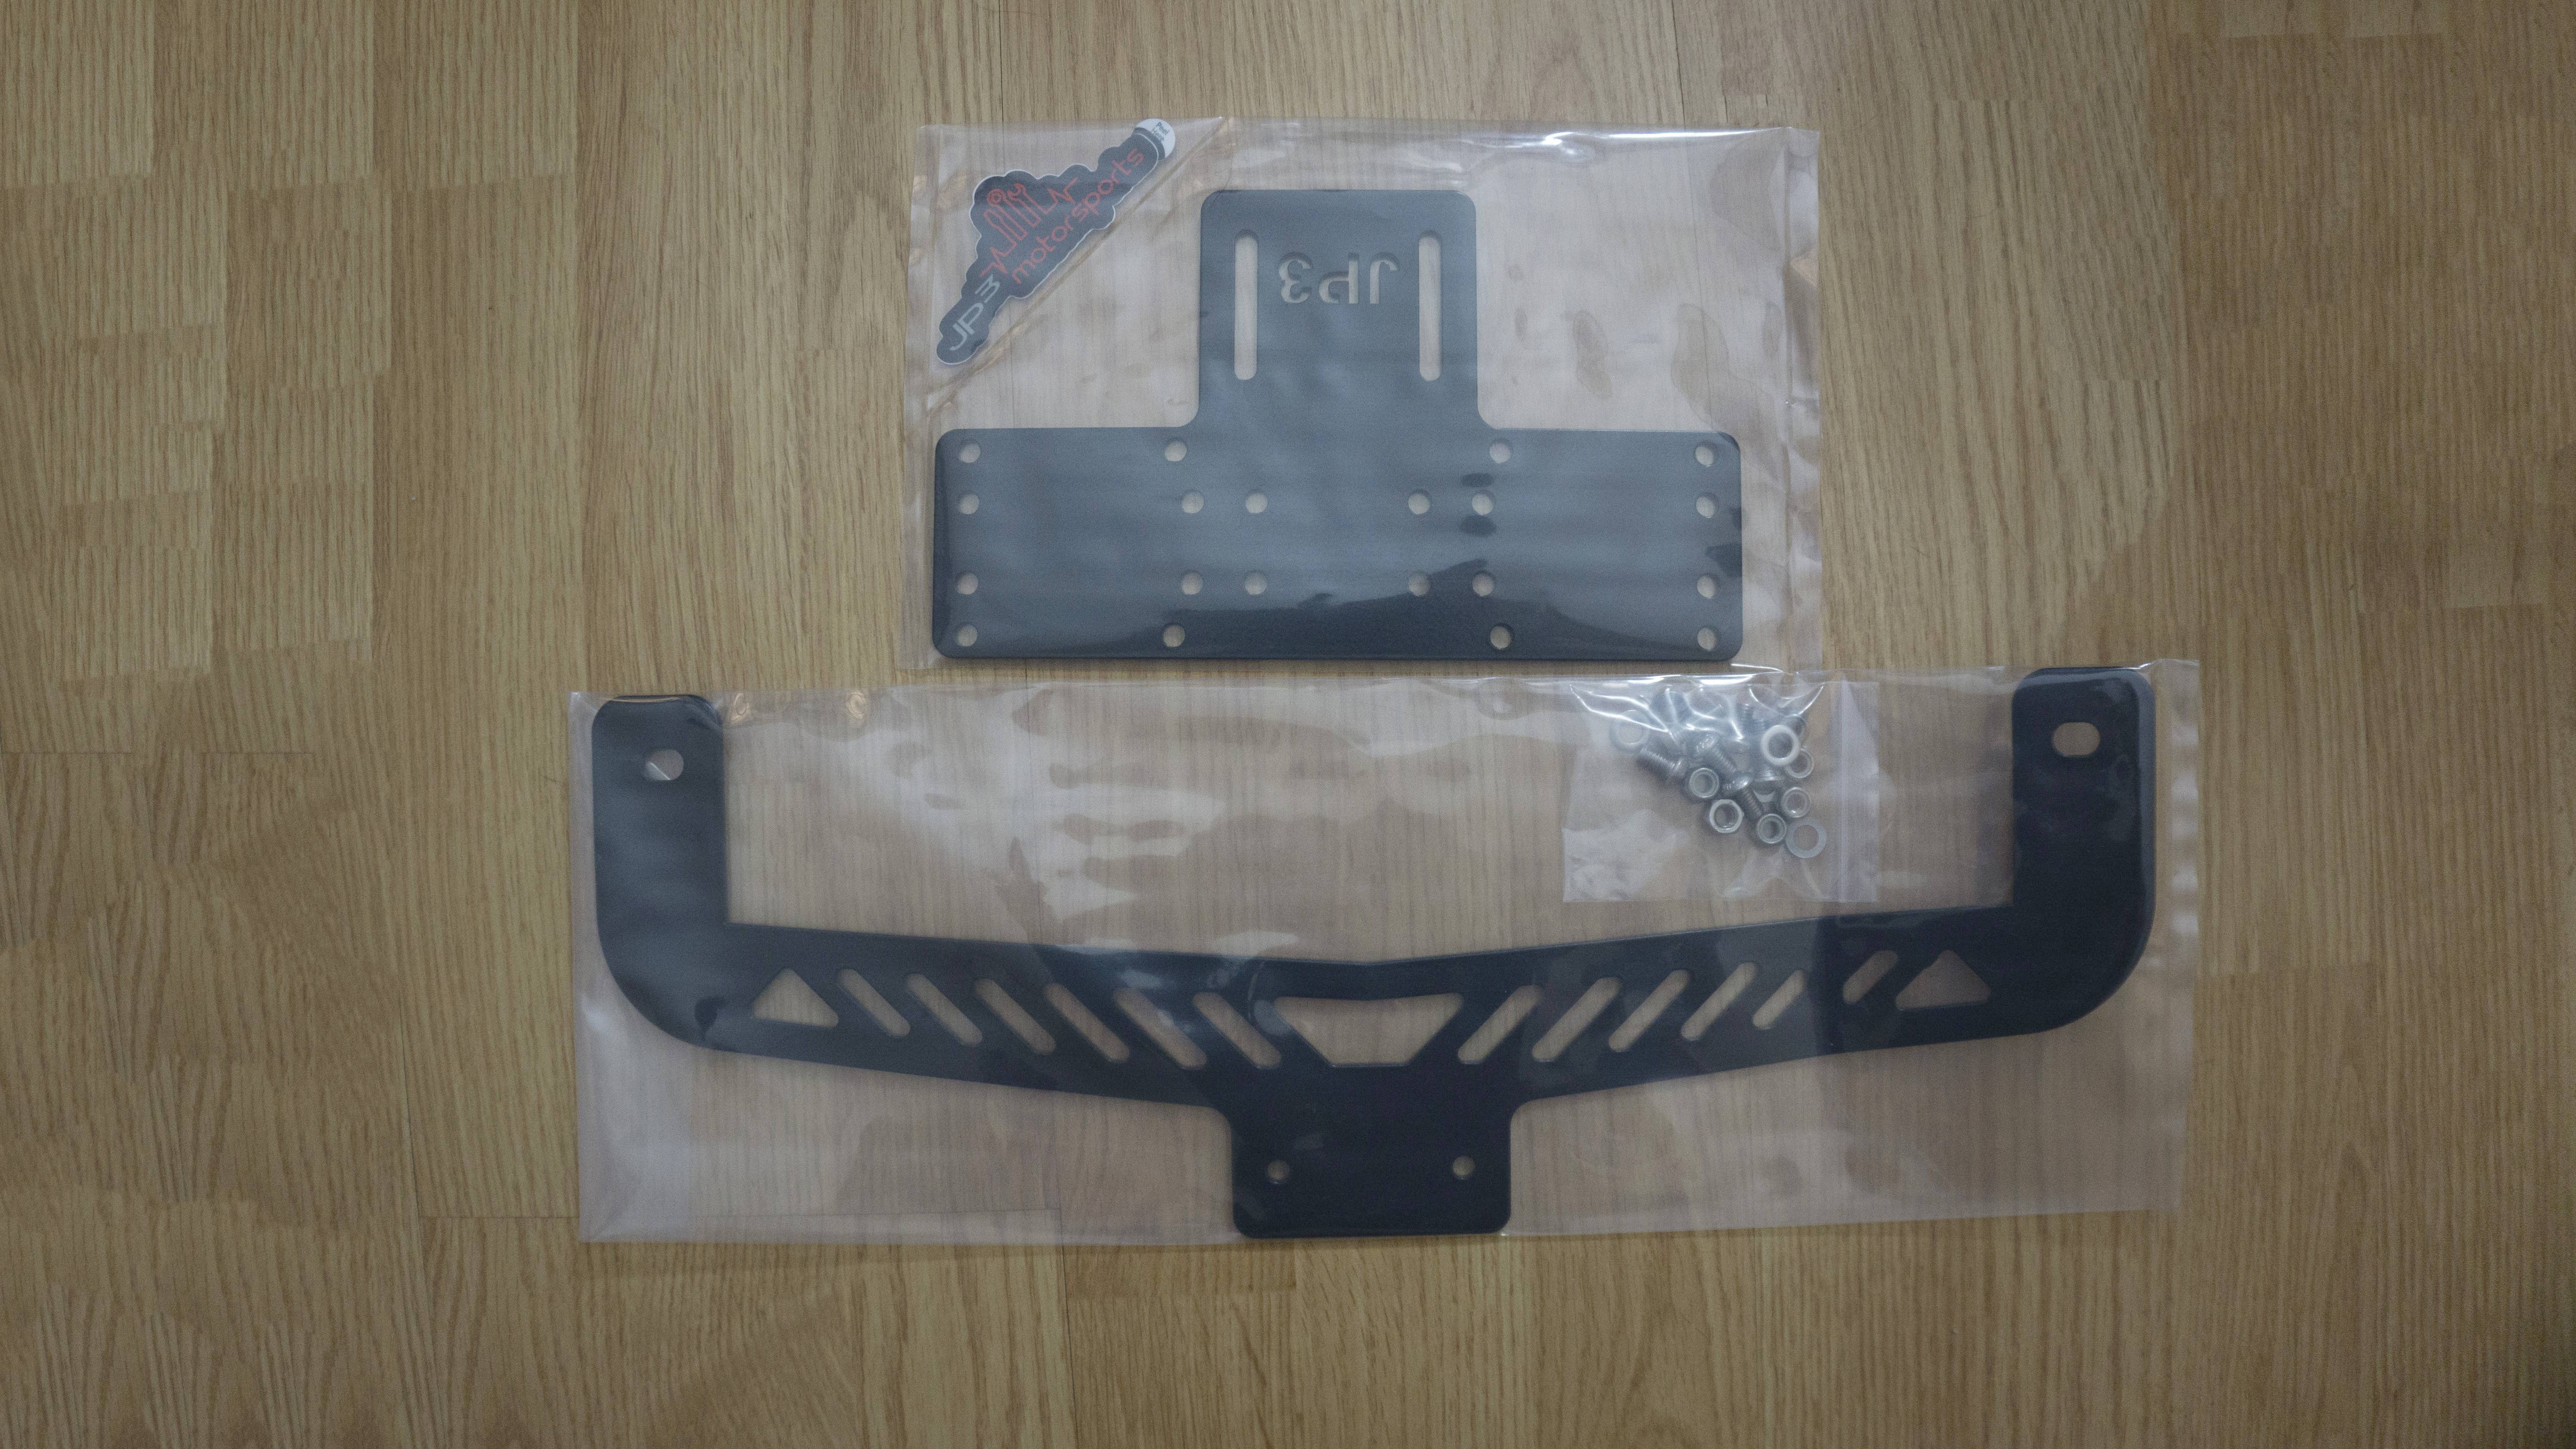
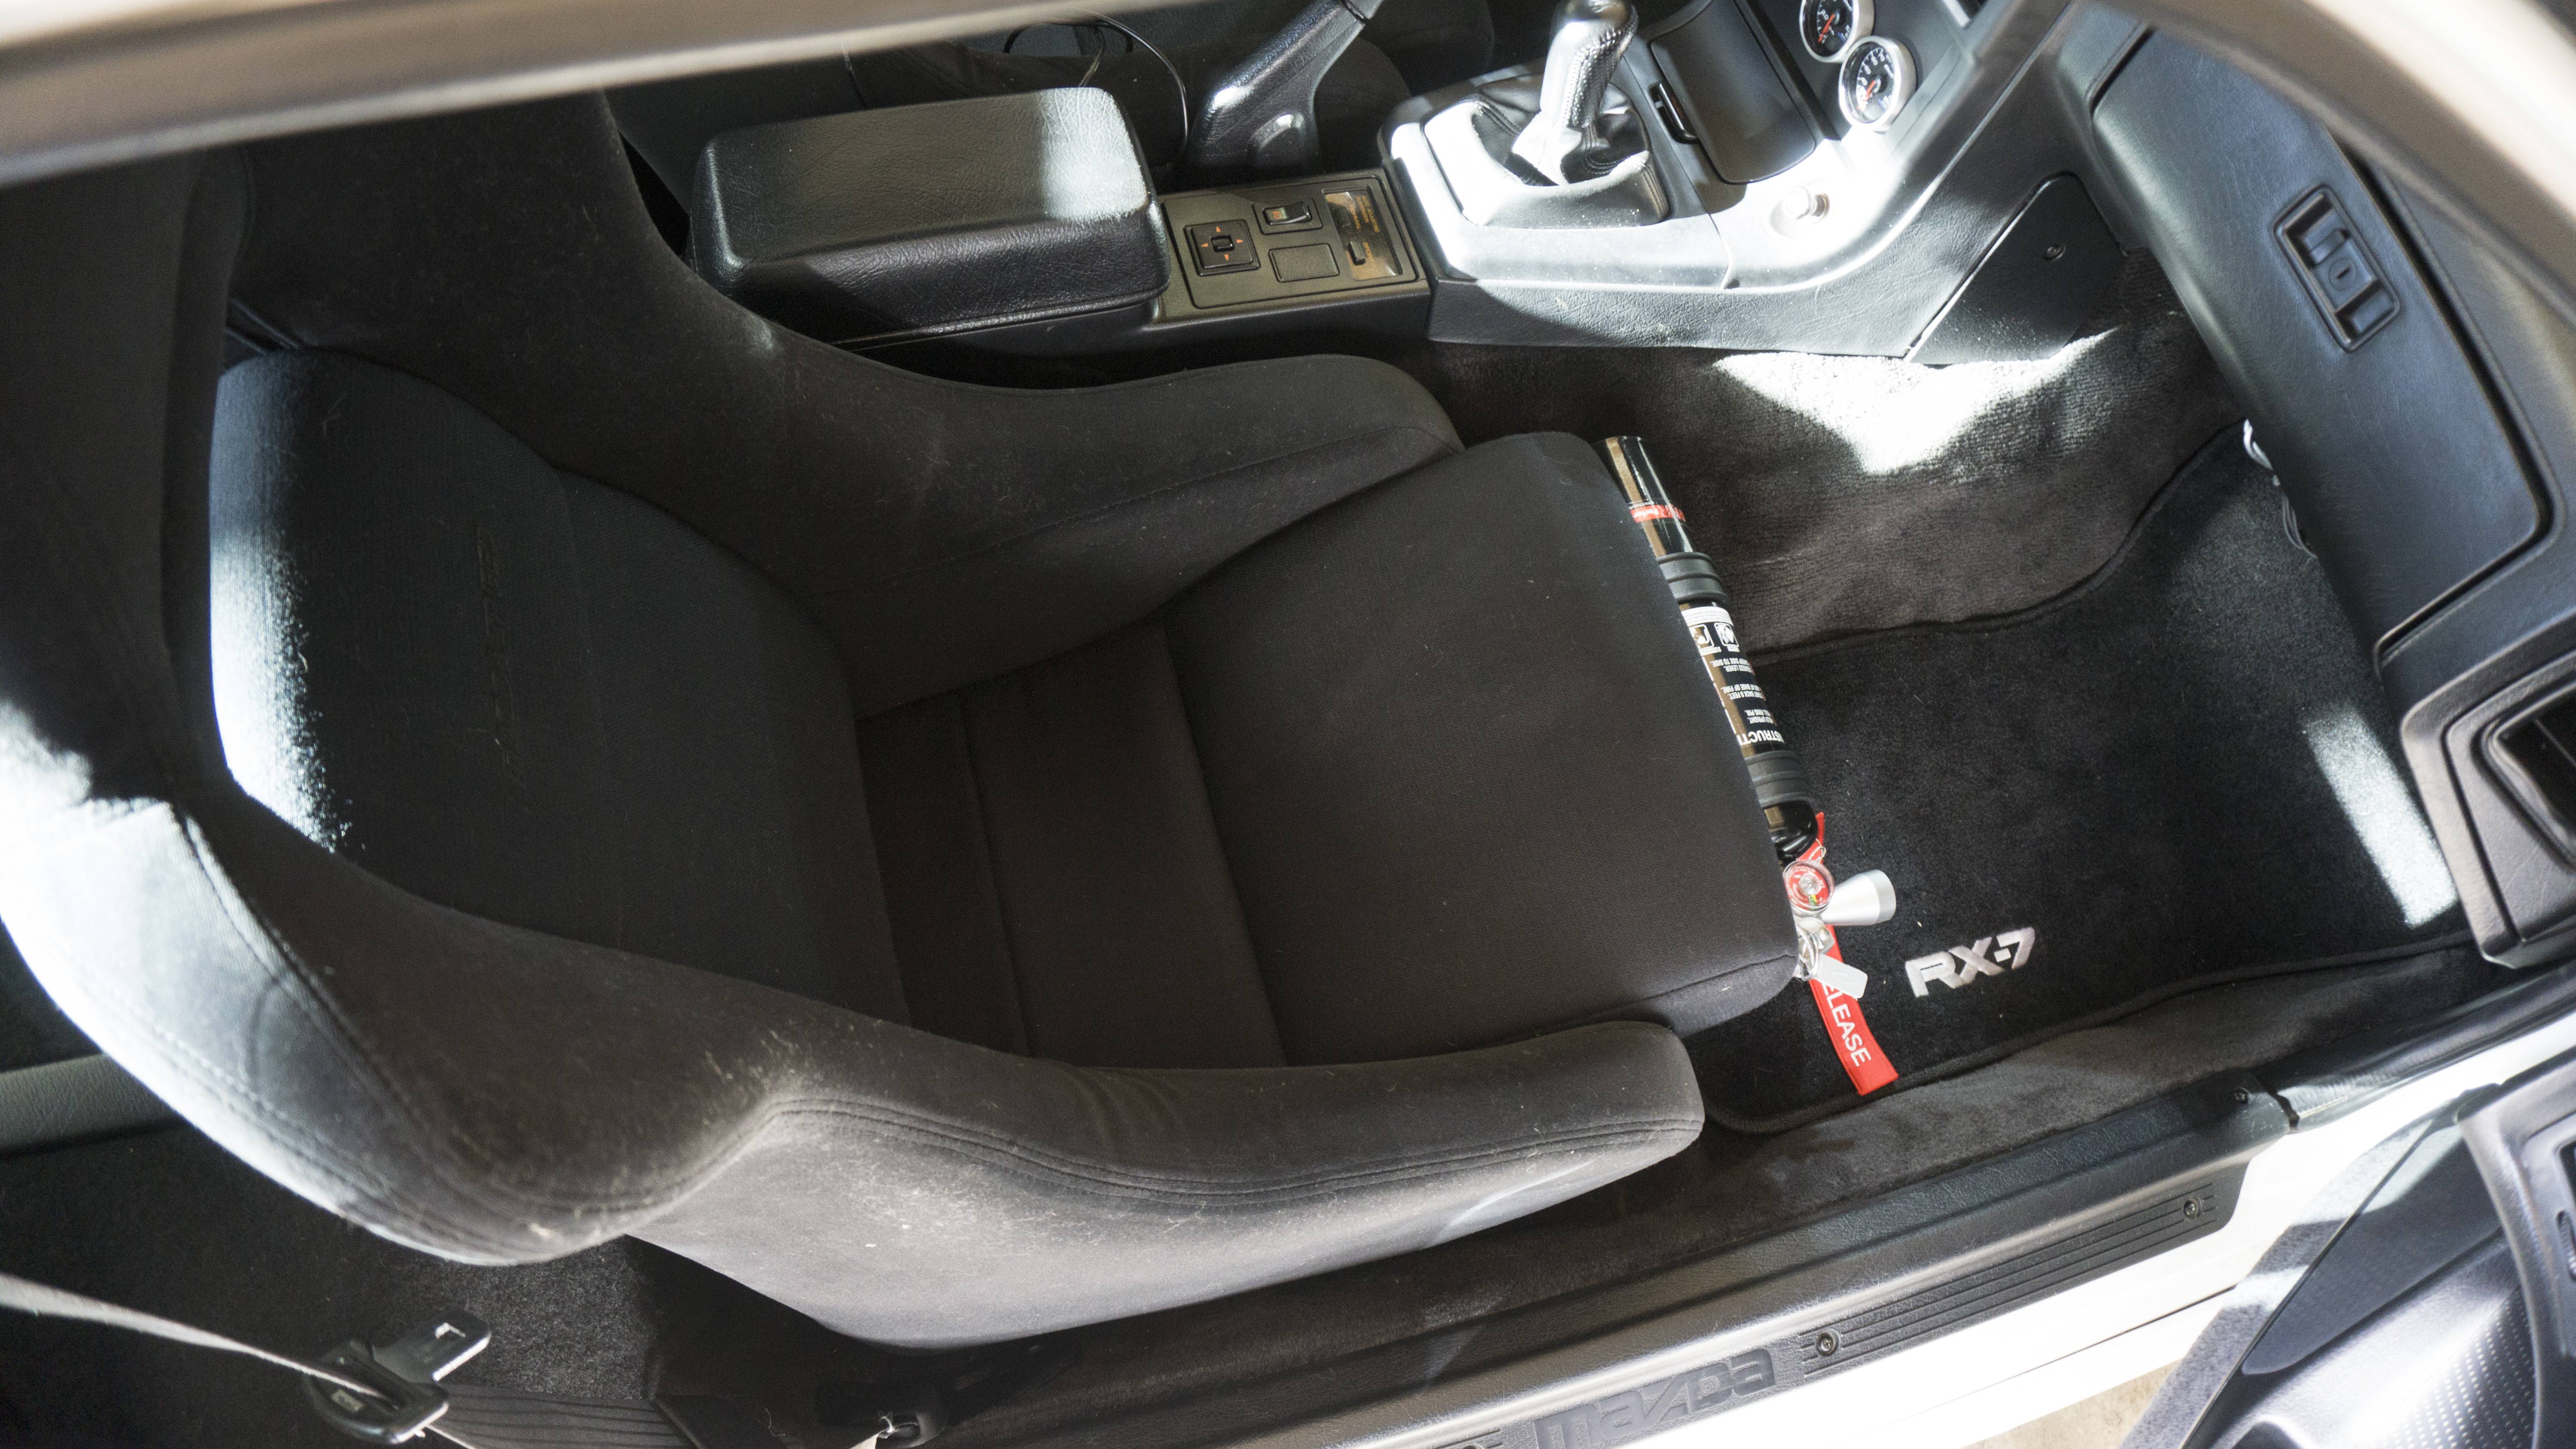
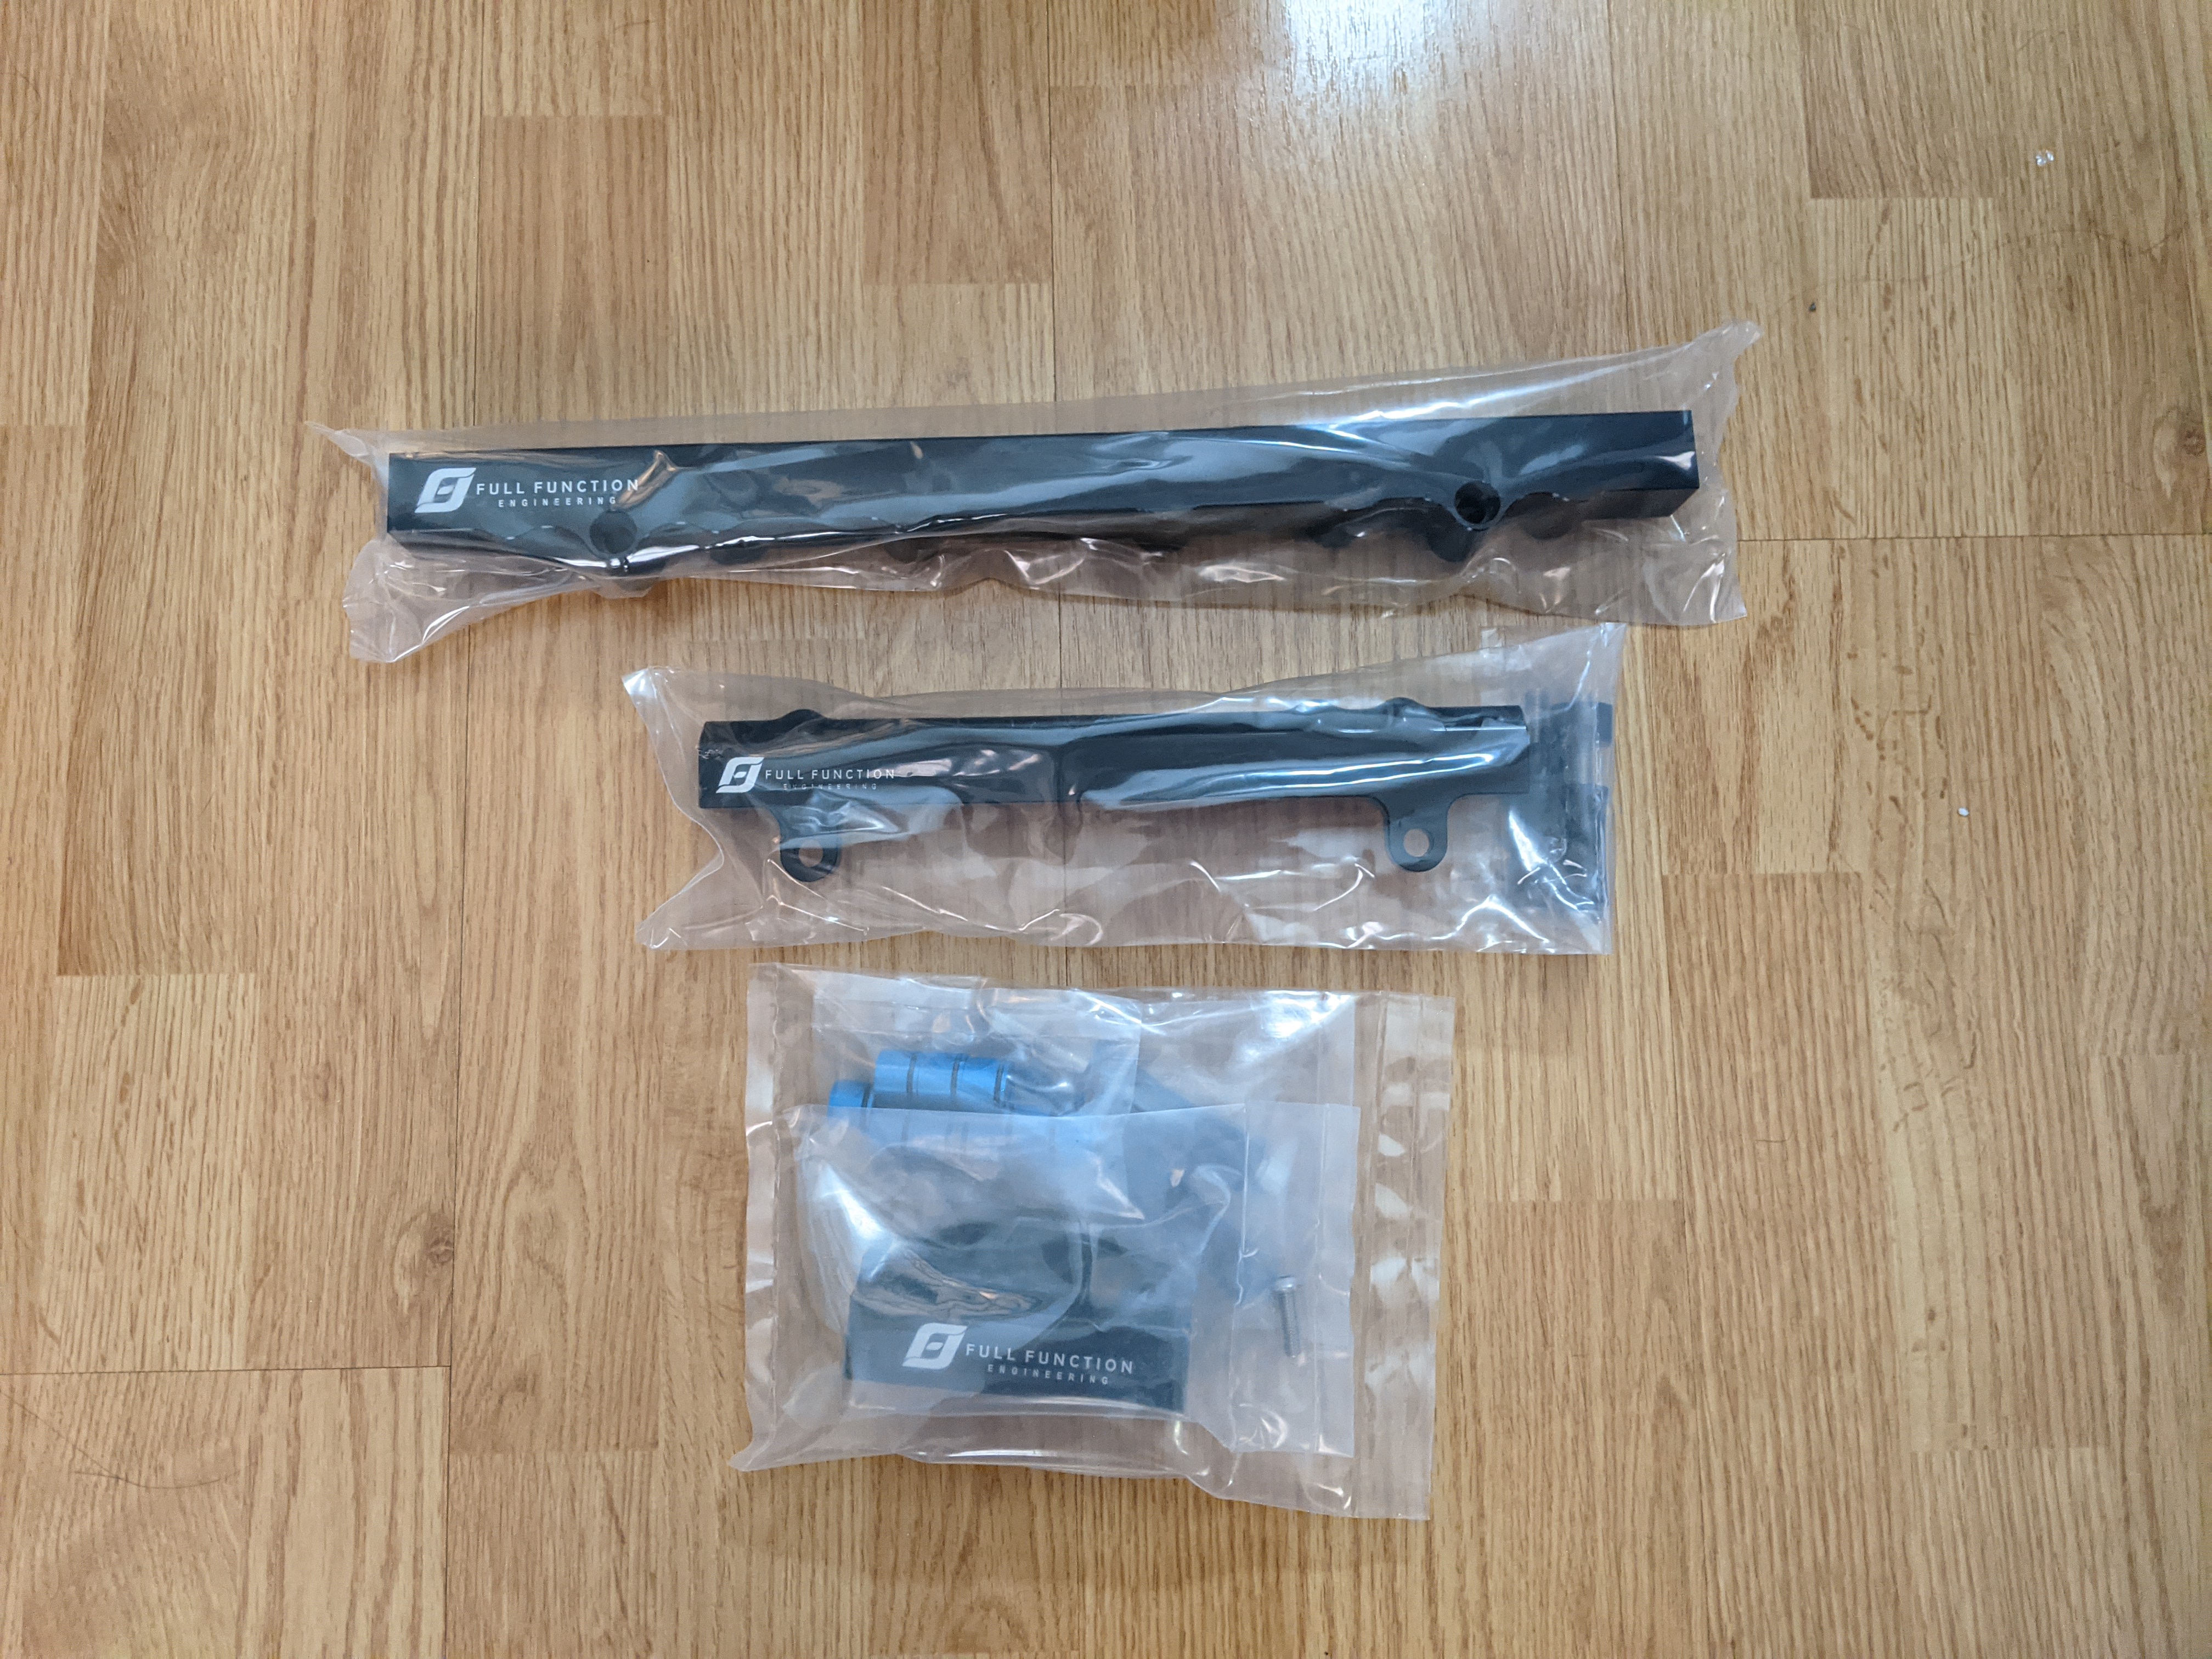
Woah! It�s been awhile. I decided I will be updating the thread in both places. Big things have been happening and I�m excited to, finally, provide an update on the car. I�ve finally gotten a fire extinguisher mounted back in the car again thanks to a JP3 Motorsports group buy. In addition, a ton of new 20b parts arrived for the next vision. I had AFCO make me a shroud and fan combo for their radiator that is a perfect fit for the FC. The fans can move some air too! They push out around 33-3400 CFM. A ton of other parts came in too including some FFE rails and Excessive shortened lower intake manifold.
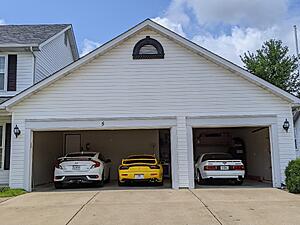
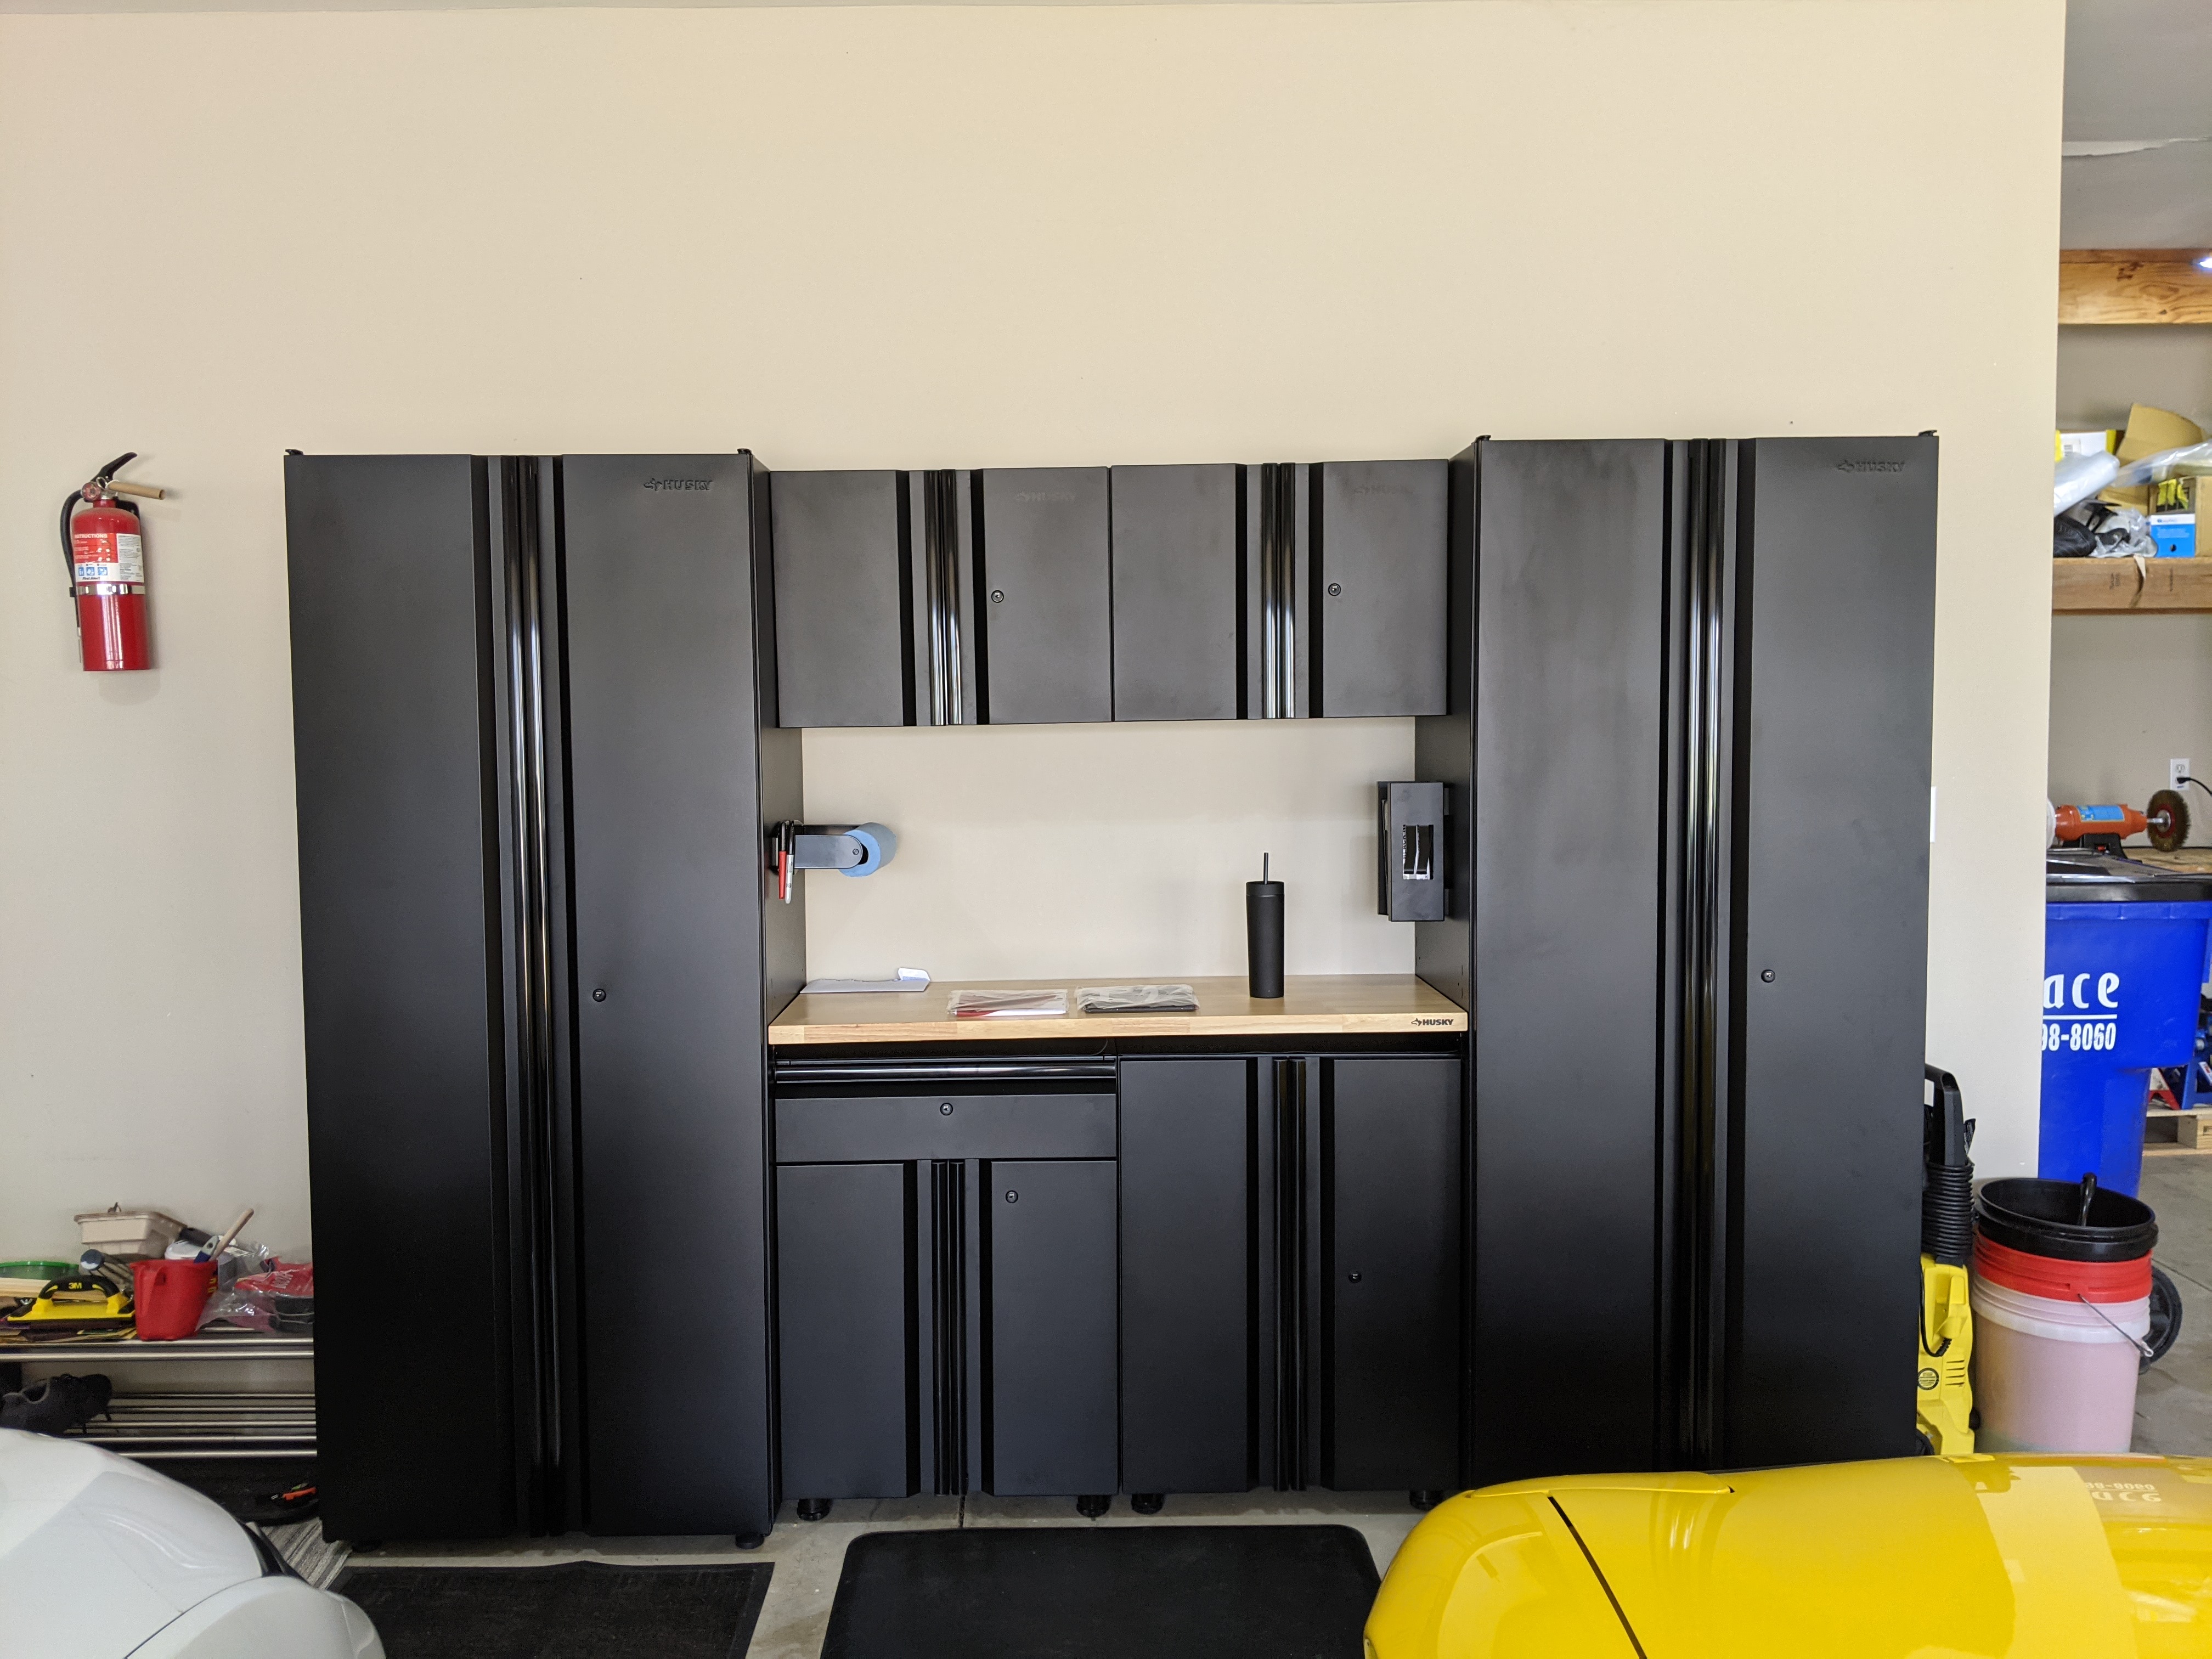
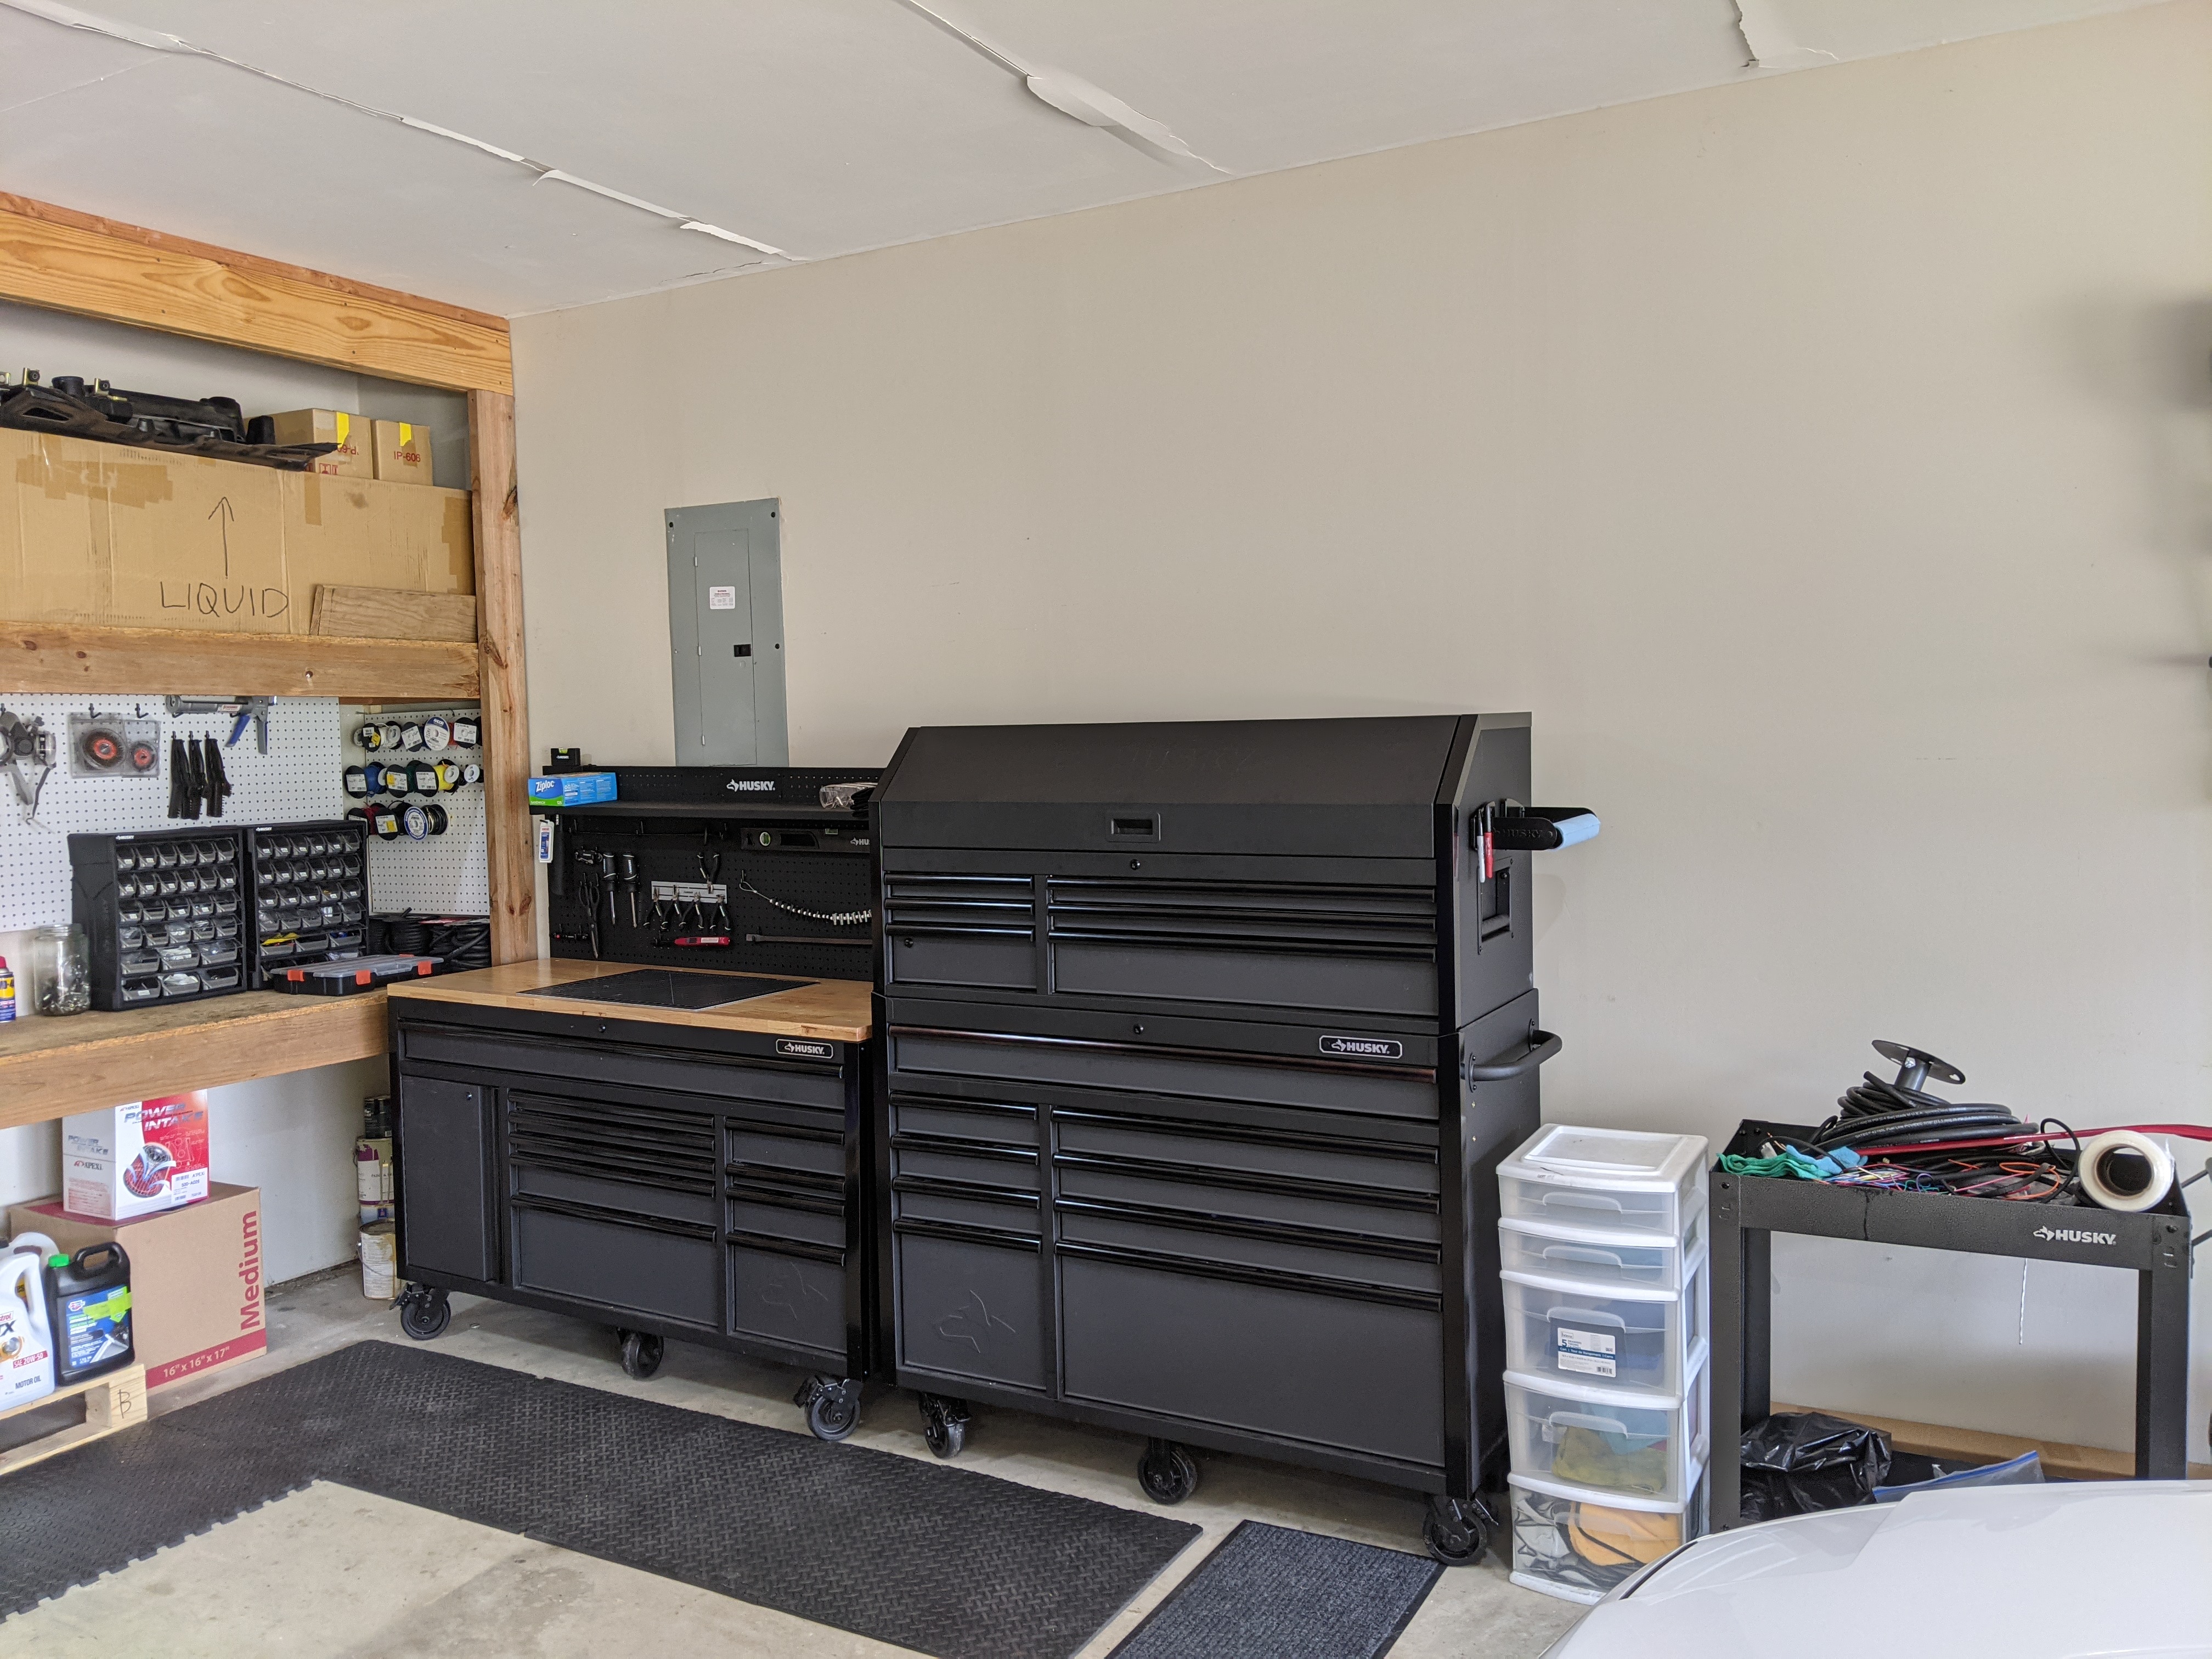
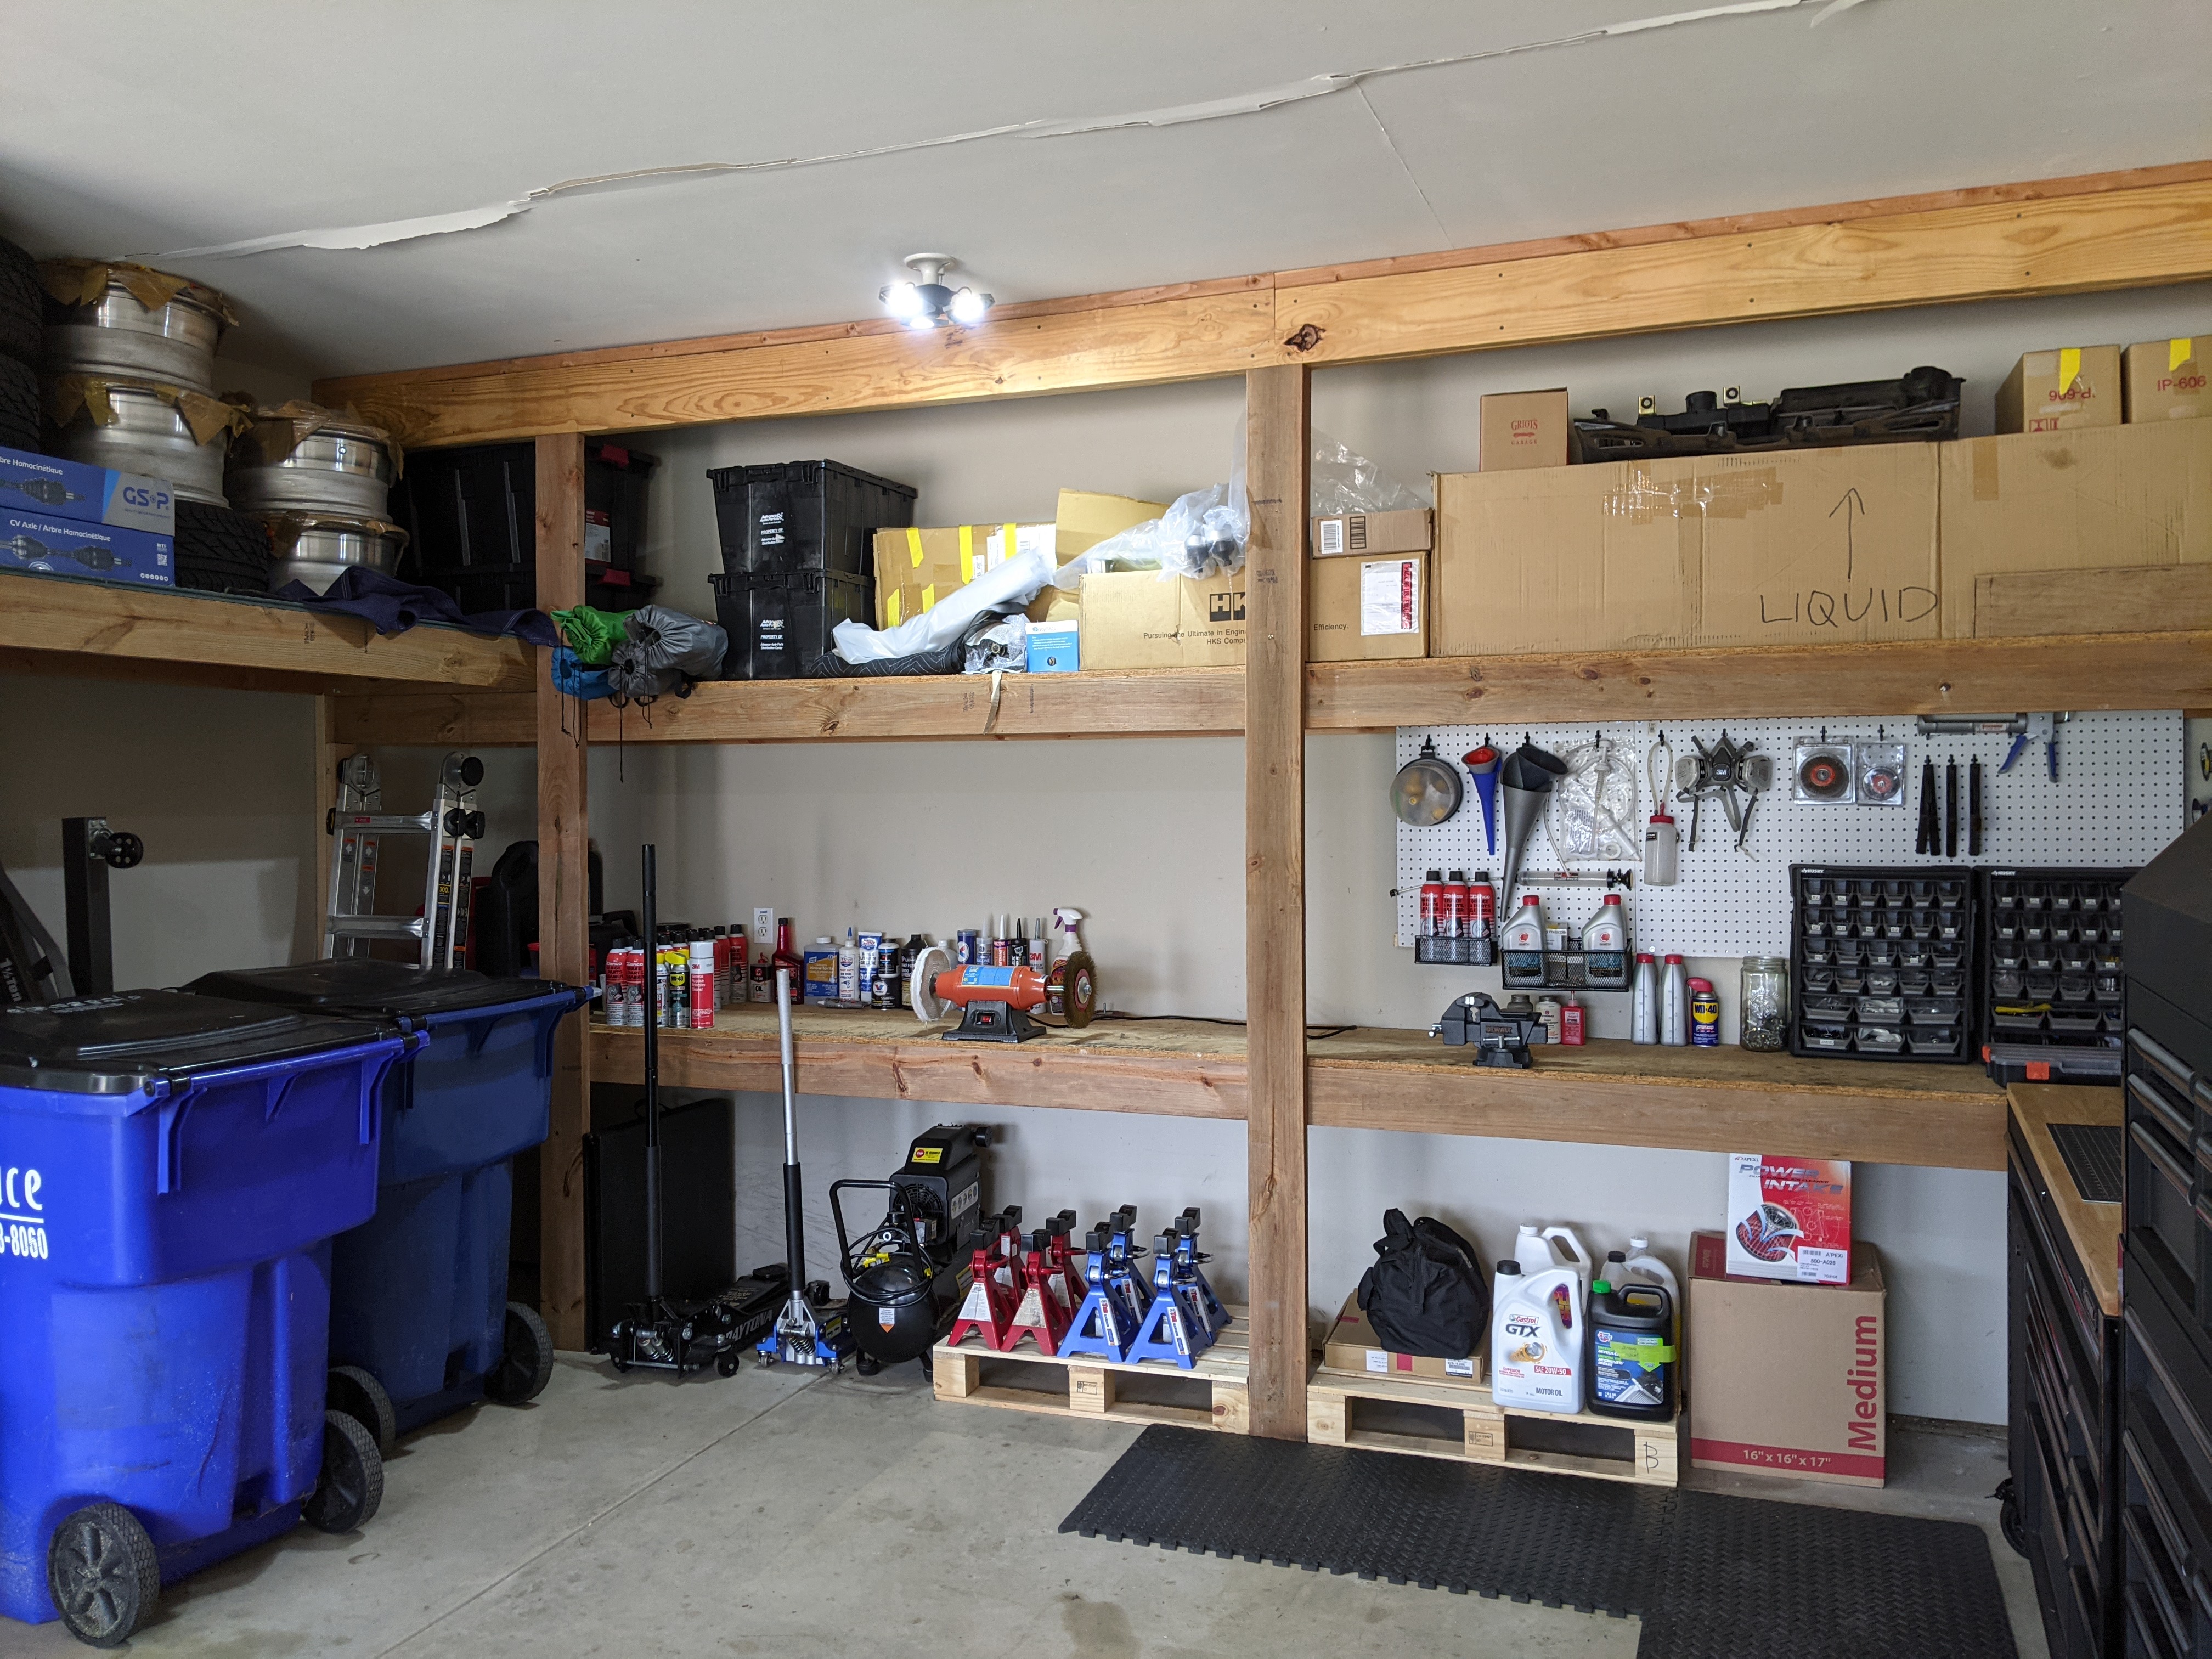
The biggest news probably of all. I have finally purchased a house! I�m so excited to finally have the room to do everything I want in the garage and have space for bigger tools (like a 20 ton press).
So what happens next? - Well, I start gutting the car again. I have a pretty lengthy time table put together for everything I want to do.
Below is a condensed list:
Replace all suspension related bushings
Drop both subframes for powder
Complete re-wire of engine harness using mil-spec quick disconnect
Complete re-sheathing and simplification of chassis electrical
Paint interior chassis satin black
Sunroof delete
And of course the 20b
I�m incredibly excited for this next adventure although I�m planning on it taking around 2 years. Until next time!
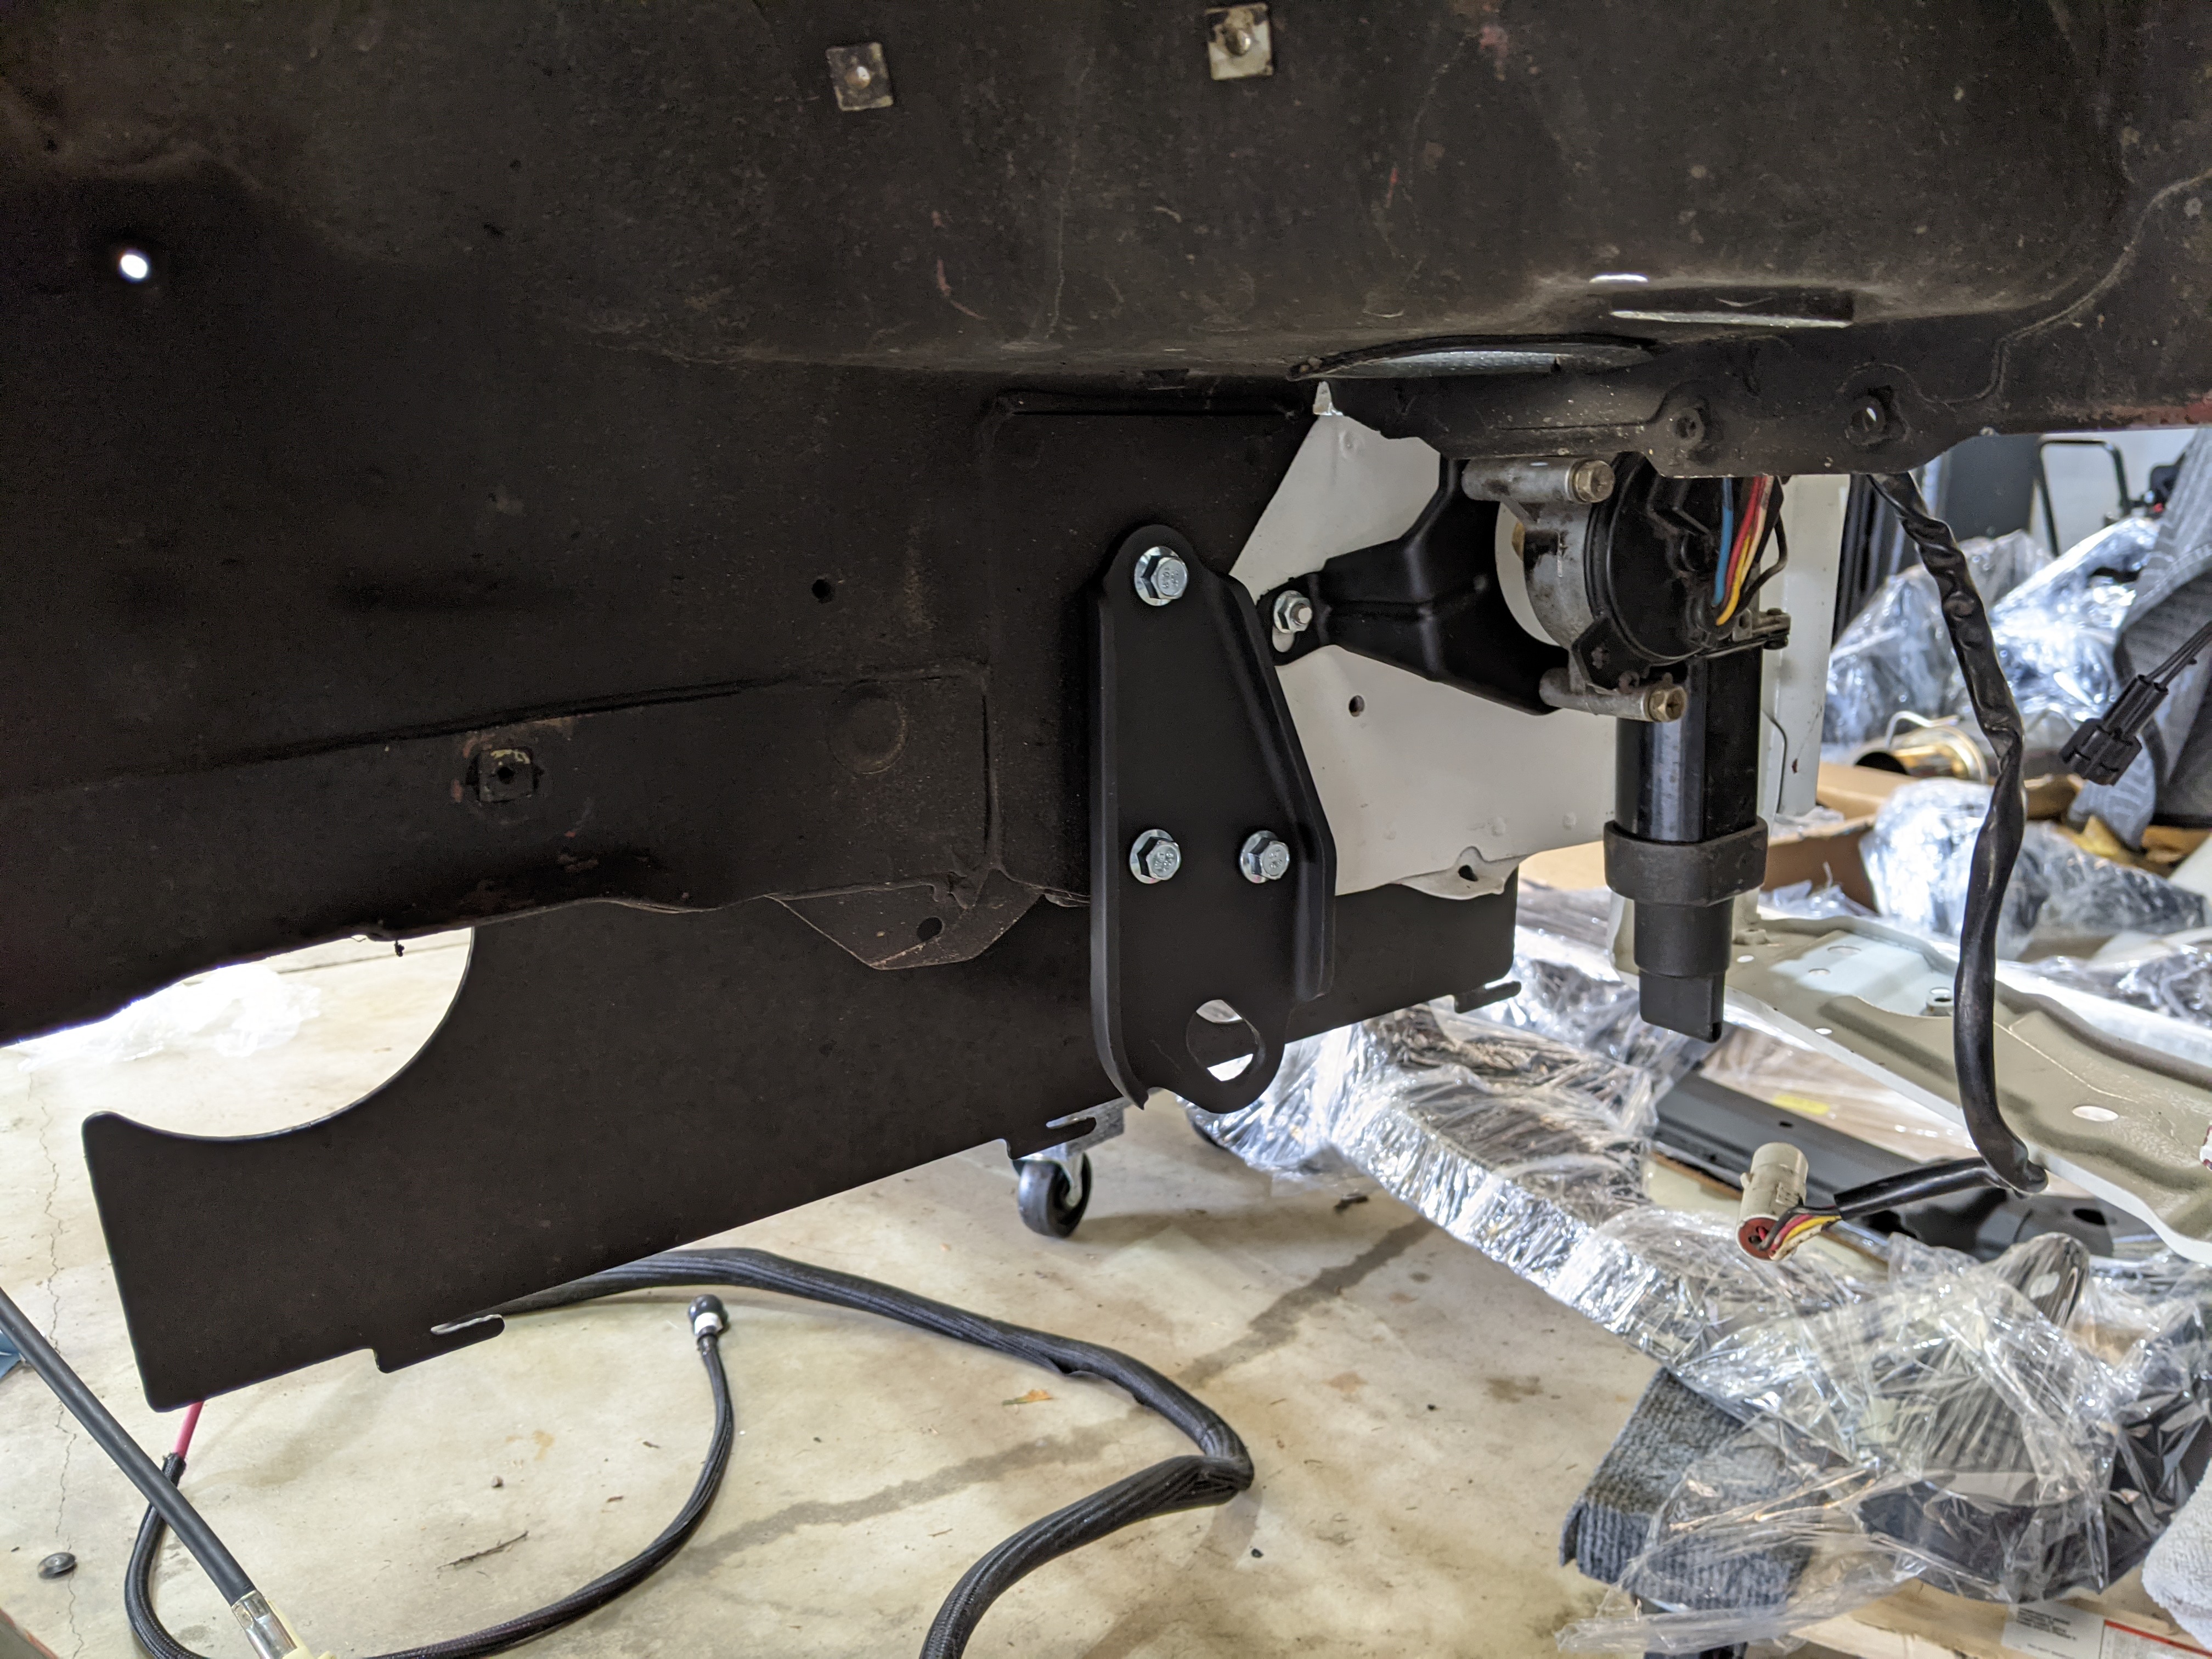
Here is the picture of the JP3 Fire Extinguisher Bracket:
Here is some of the 20b stuff that came in:

Here is the new garage!:


Woah! It�s been awhile. I decided I will be updating the thread in both places. Big things have been happening and I�m excited to, finally, provide an update on the car. I�ve finally gotten a fire extinguisher mounted back in the car again thanks to a JP3 Motorsports group buy. In addition, a ton of new 20b parts arrived for the next vision. I had AFCO make me a shroud and fan combo for their radiator that is a perfect fit for the FC. The fans can move some air too! They push out around 33-3400 CFM. A ton of other parts came in too including some FFE rails and Excessive shortened lower intake manifold.
The biggest news probably of all. I have finally purchased a house! I�m so excited to finally have the room to do everything I want in the garage and have space for bigger tools (like a 20 ton press).
So what happens next? - Well, I start gutting the car again. I have a pretty lengthy time table put together for everything I want to do.
Below is a condensed list:
Replace all suspension related bushings
Drop both subframes for powder
Complete re-wire of engine harness using mil-spec quick disconnect
Complete re-sheathing and simplification of chassis electrical
Paint interior chassis satin black
Sunroof delete
And of course the 20b
I�m incredibly excited for this next adventure although I�m planning on it taking around 2 years. Until next time!
Here is the picture of the JP3 Fire Extinguisher Bracket:

Here is some of the 20b stuff that came in:

Here is the new garage!:

The following 2 users liked this post by Akomix:
j9fd3s (08-03-21),
Relisys190 (08-02-21)
08-02-21, 02:34 PM
#330
REINCARNATED
iTrader: (4)
FC looks amazing man. Keep it up.
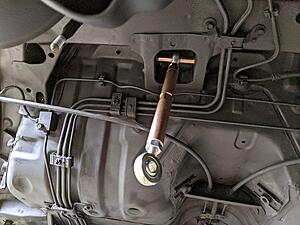
I noticed from a photo your FPR maybe hitting or rubbing on your hood?
Also, I love that lower suspension arm bar. Dang everything looks amazing!!
-M
I noticed from a photo your FPR maybe hitting or rubbing on your hood?
Also, I love that lower suspension arm bar. Dang everything looks amazing!!
-M
The following users liked this post:
Relisys190 (08-03-21)
08-03-21, 08:39 AM
#335
This was one of the driving factors to me going 20b NA. It lowers the amount of things I need to monitor and I can feel more at ease not having to take a laptop with me 24/7.

The following users liked this post:
Relisys190 (08-05-21)
09-13-21, 01:47 PM
#336
Update 9/13/2021
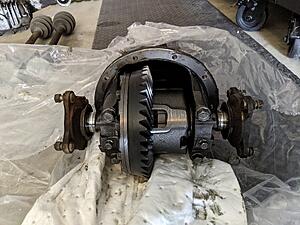
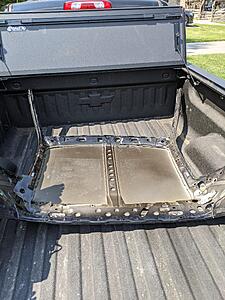
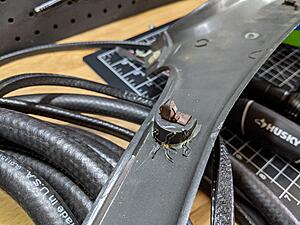
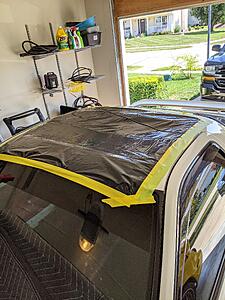
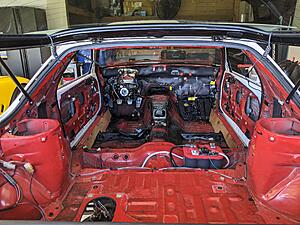
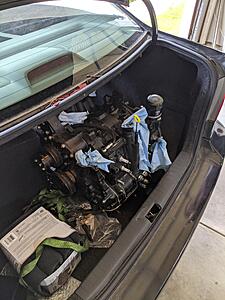
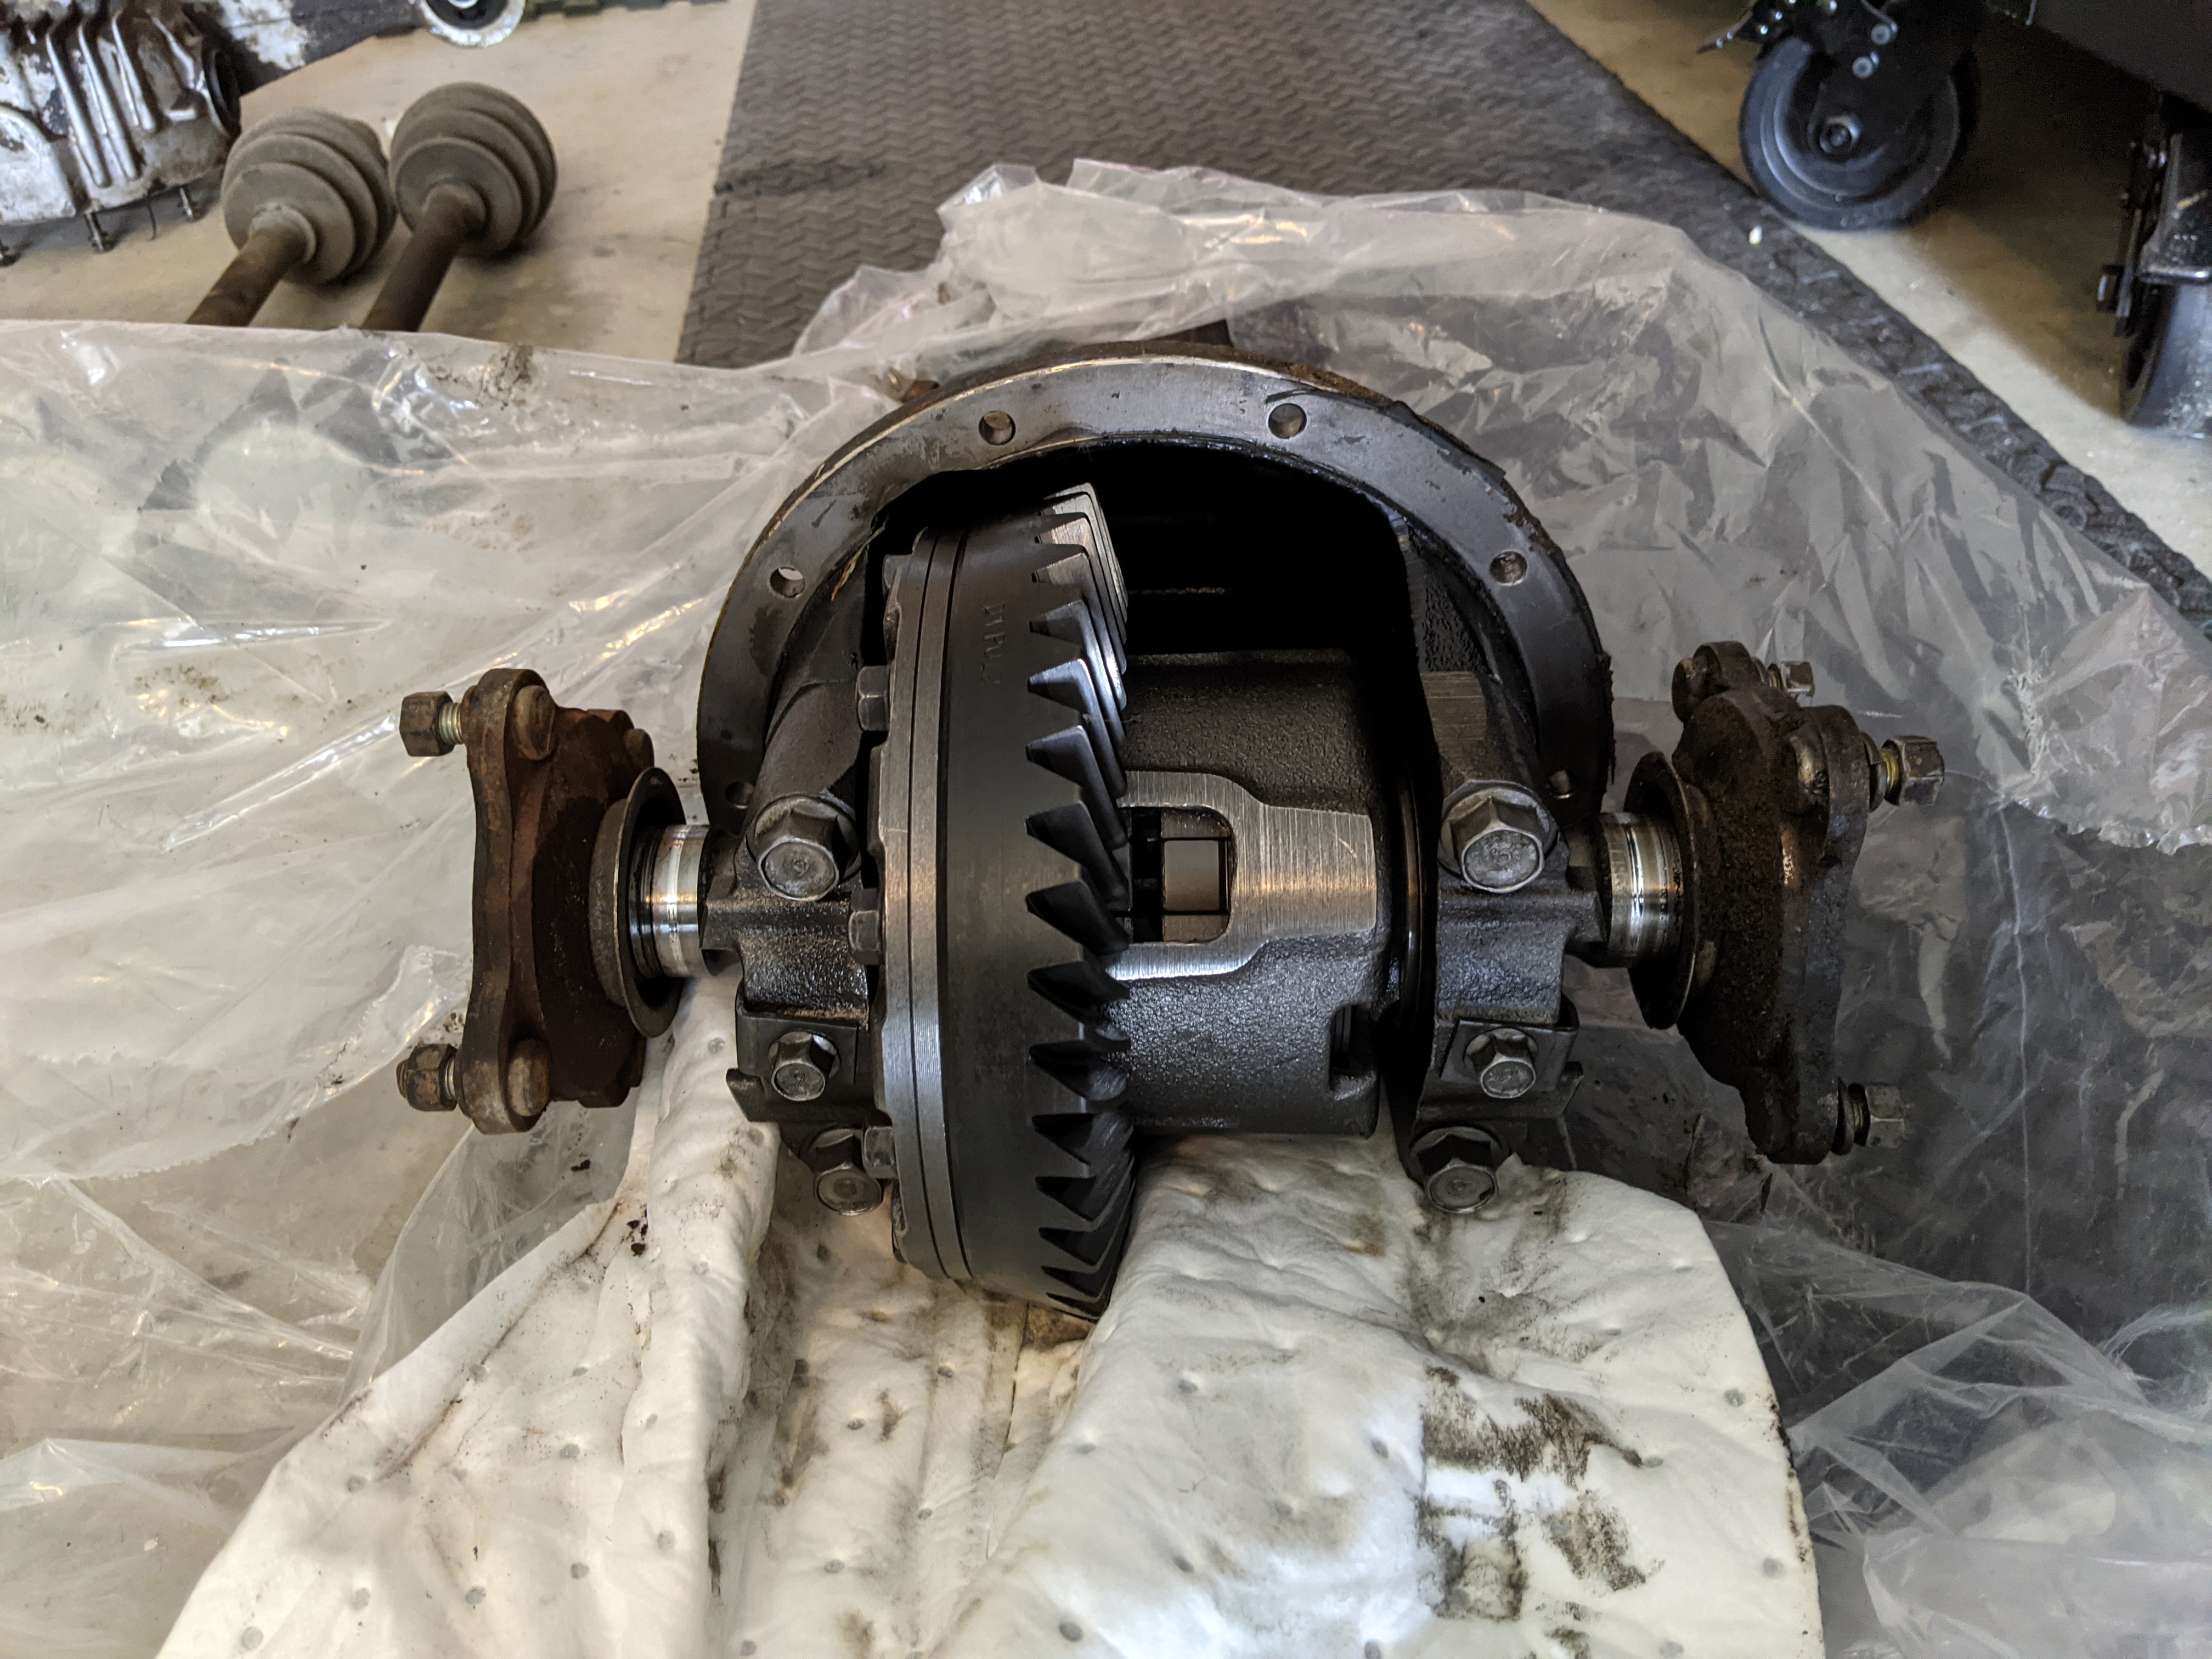
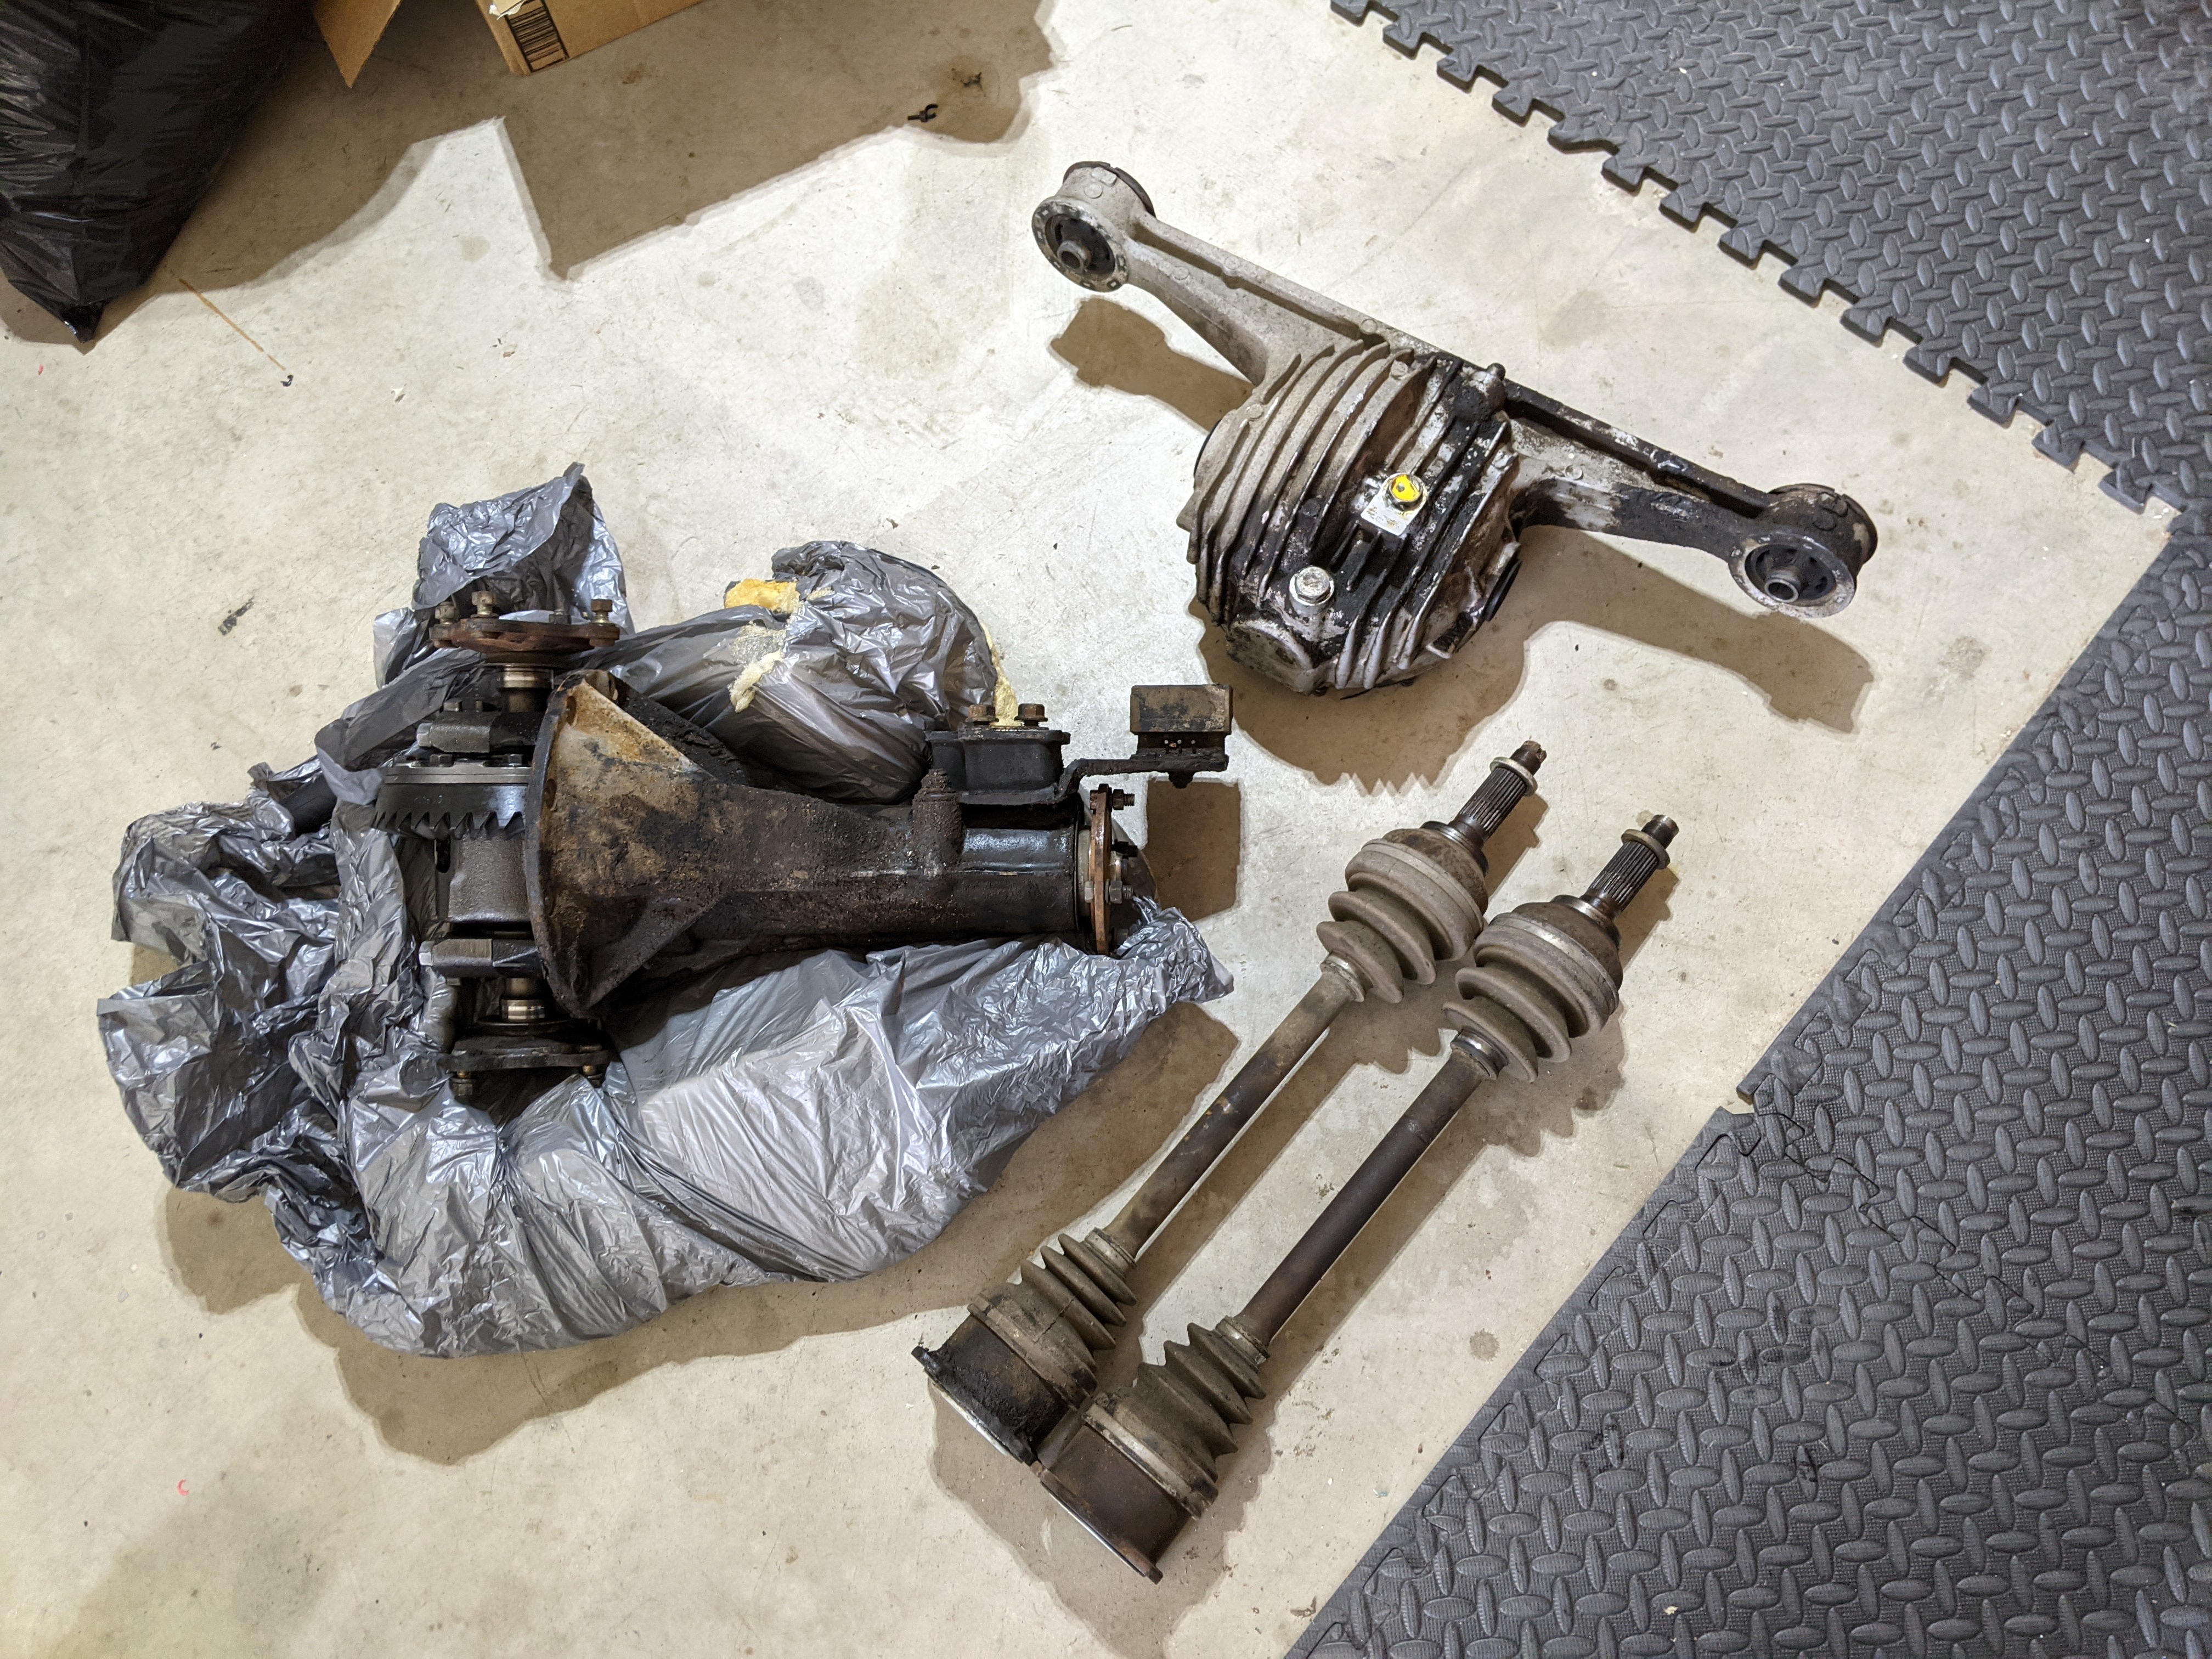
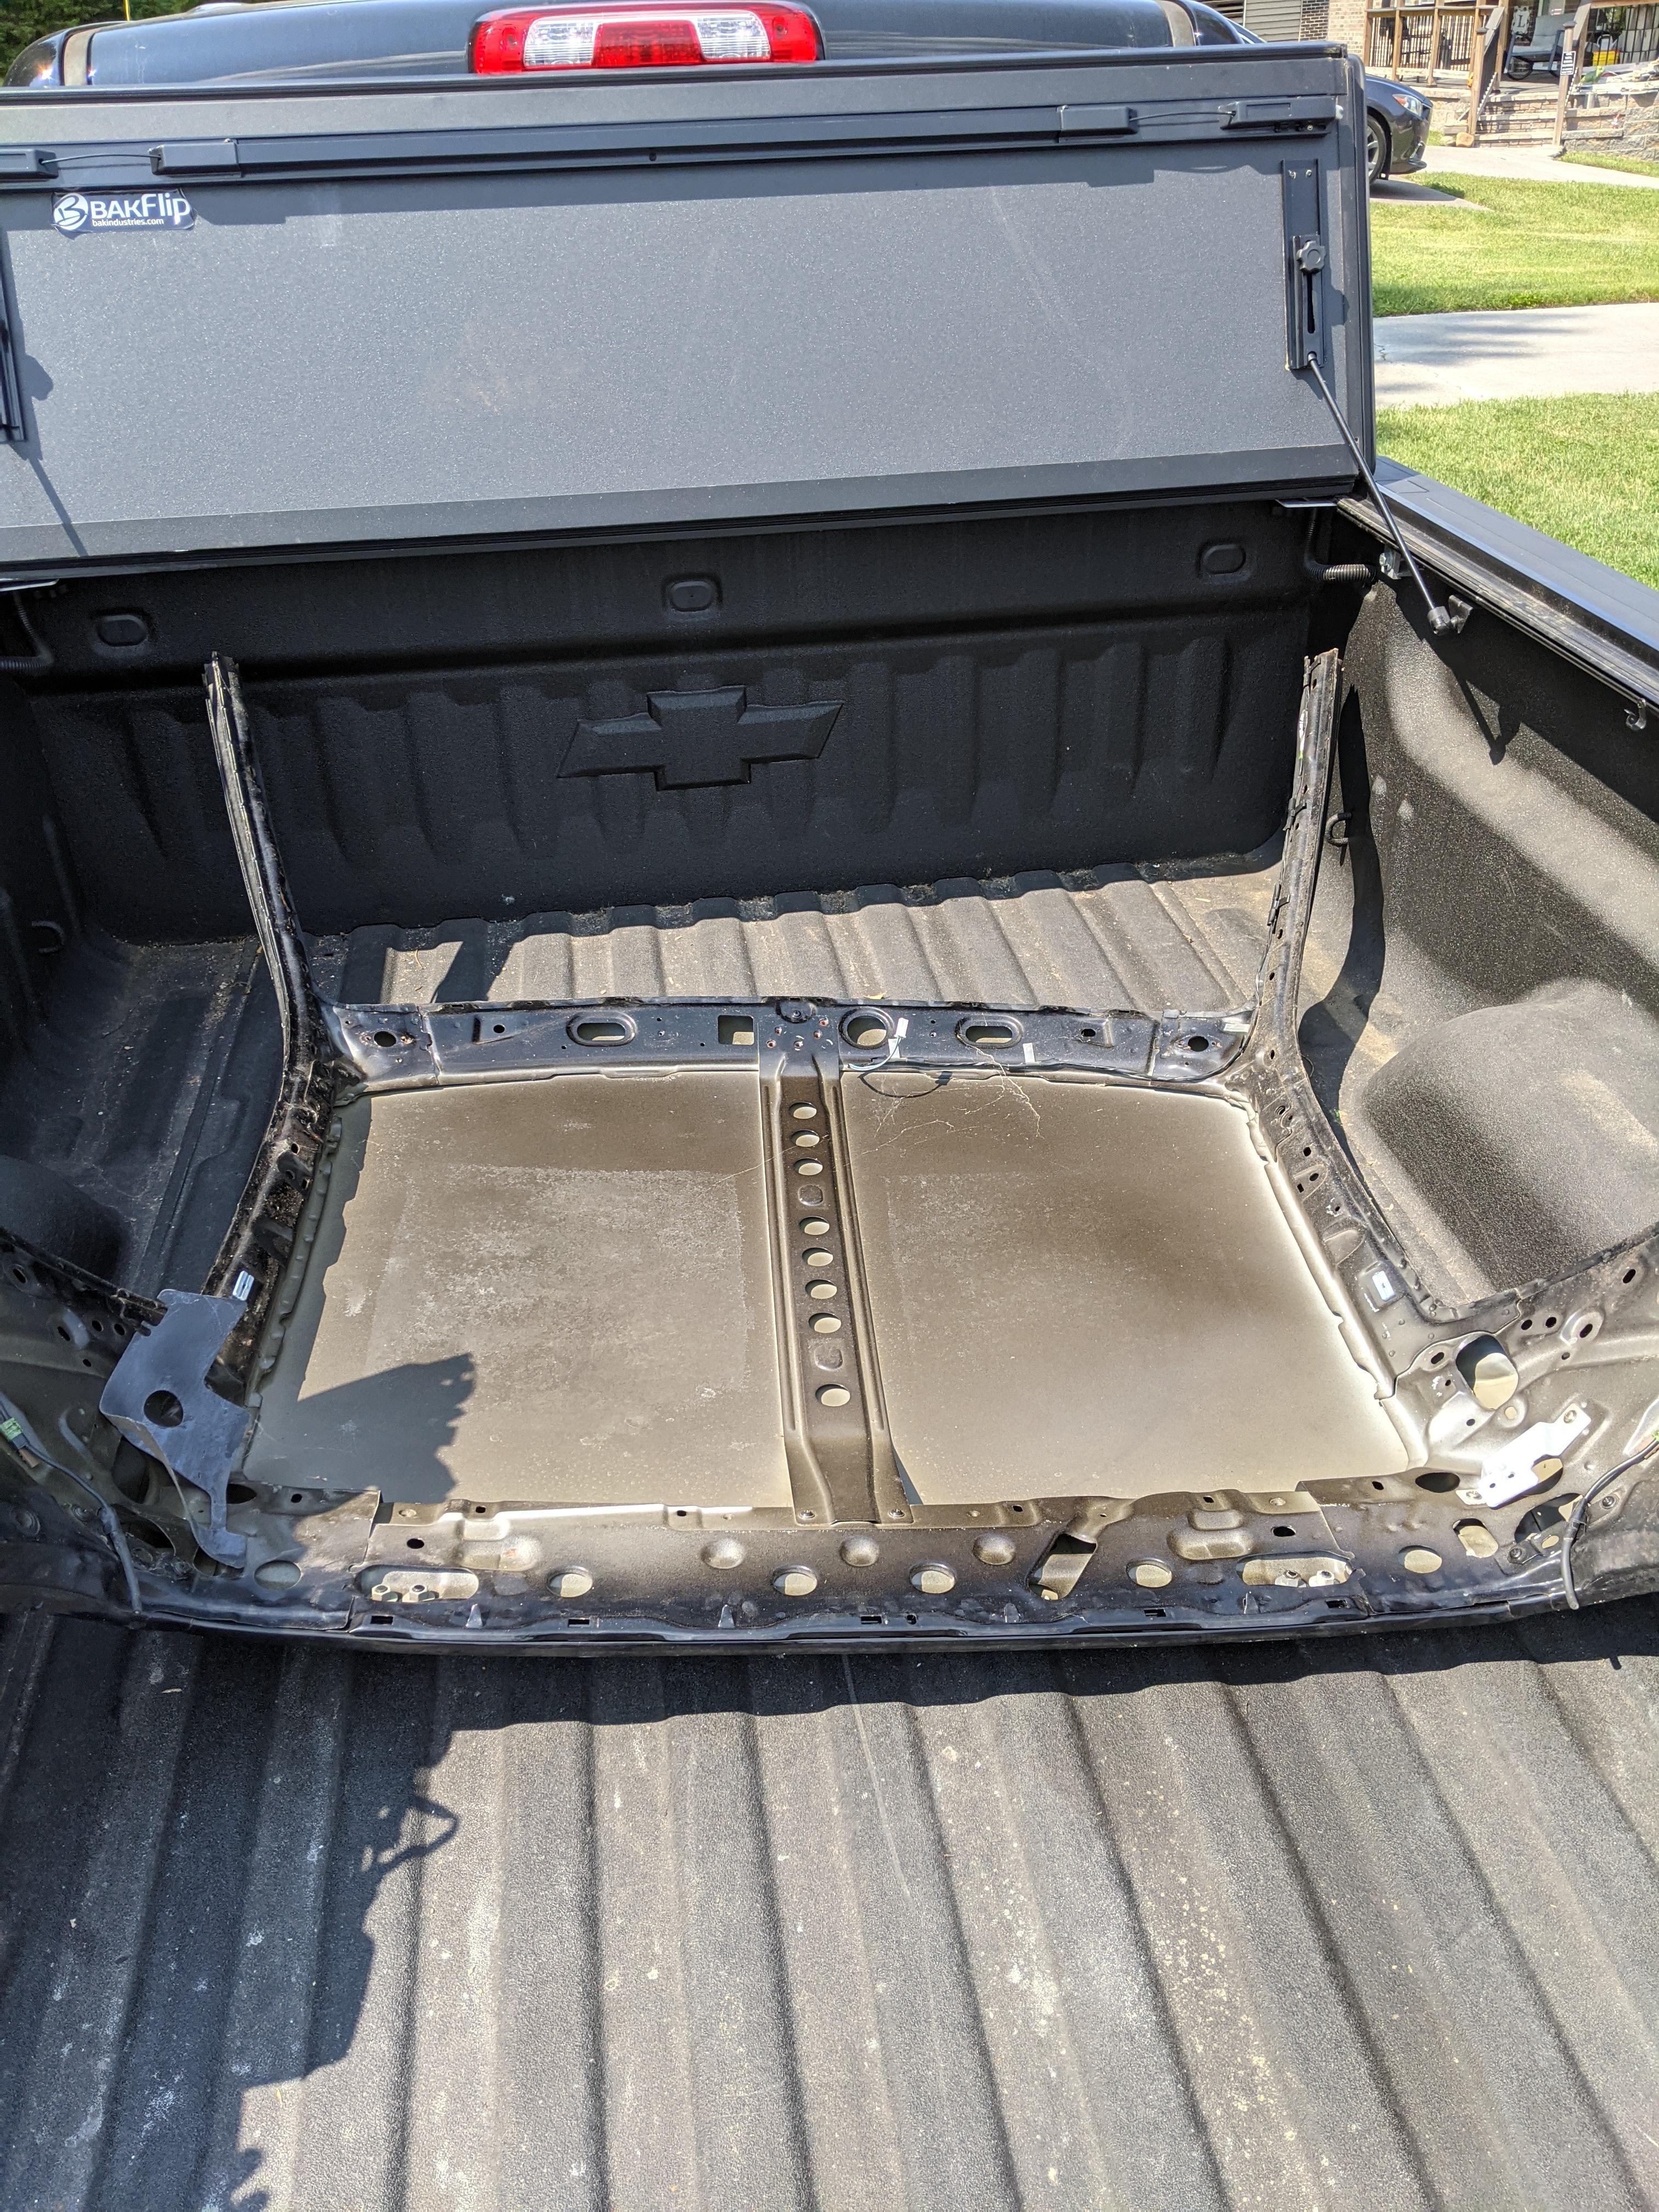
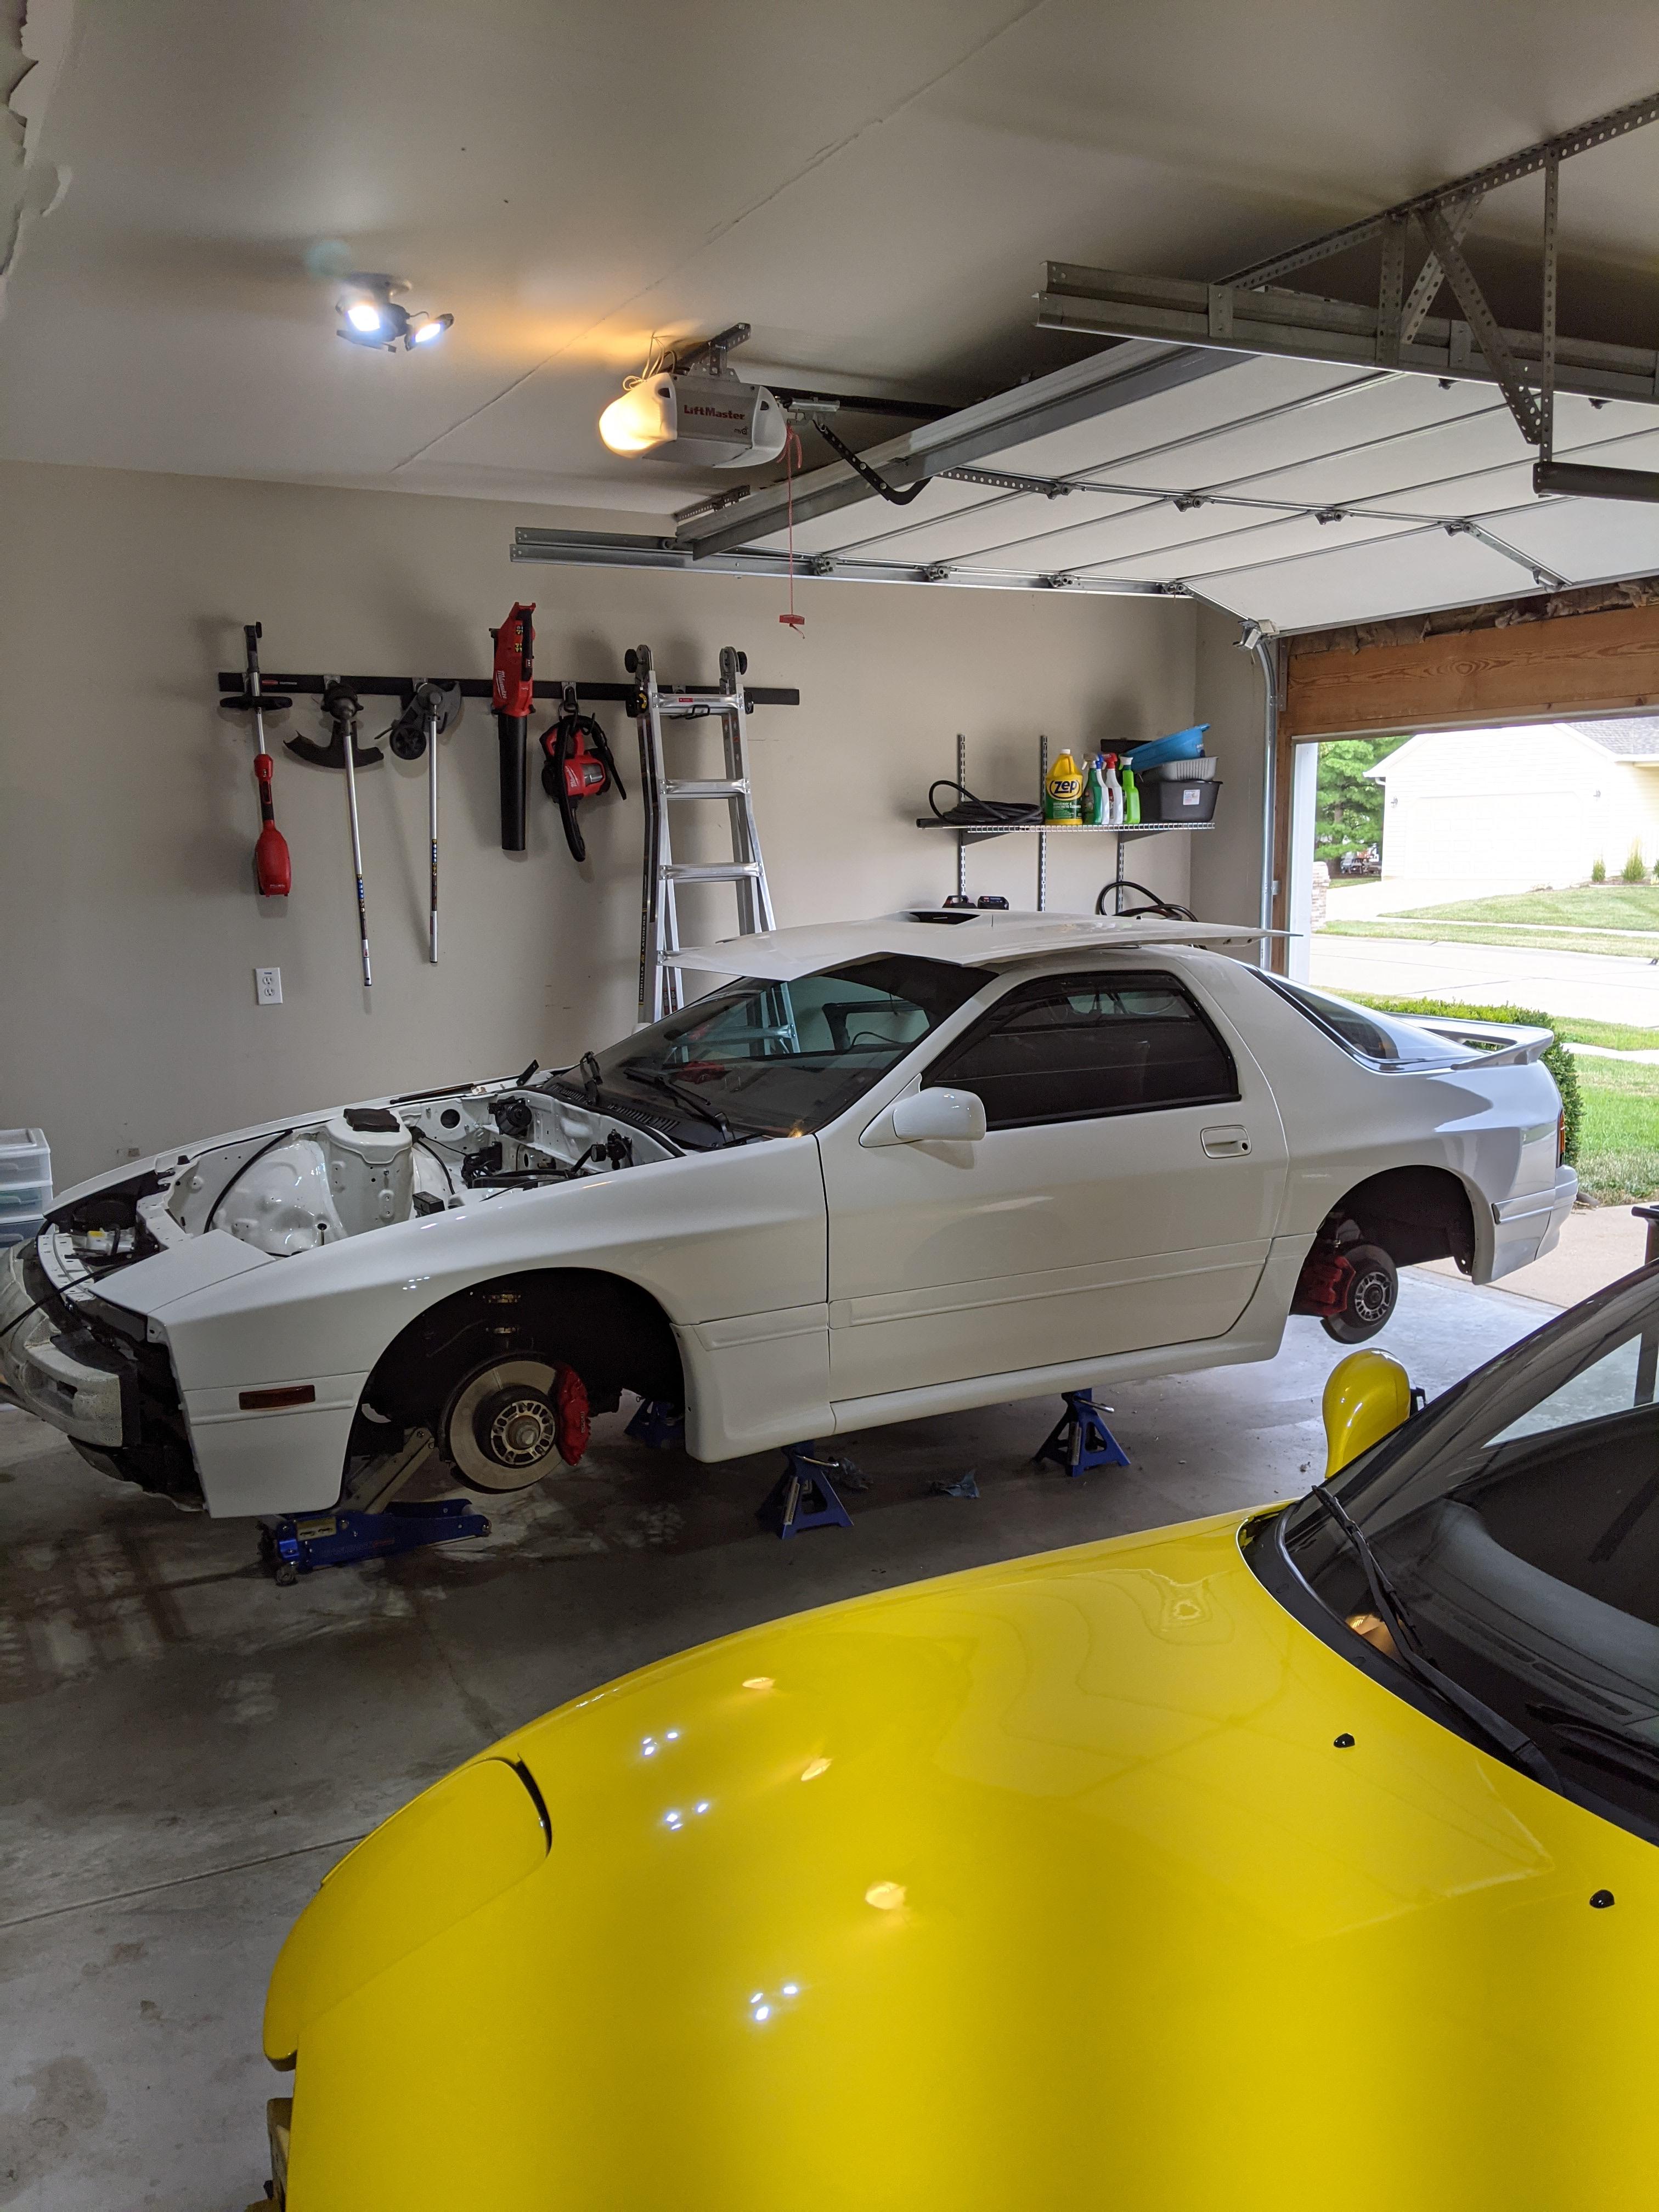
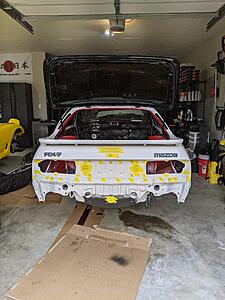
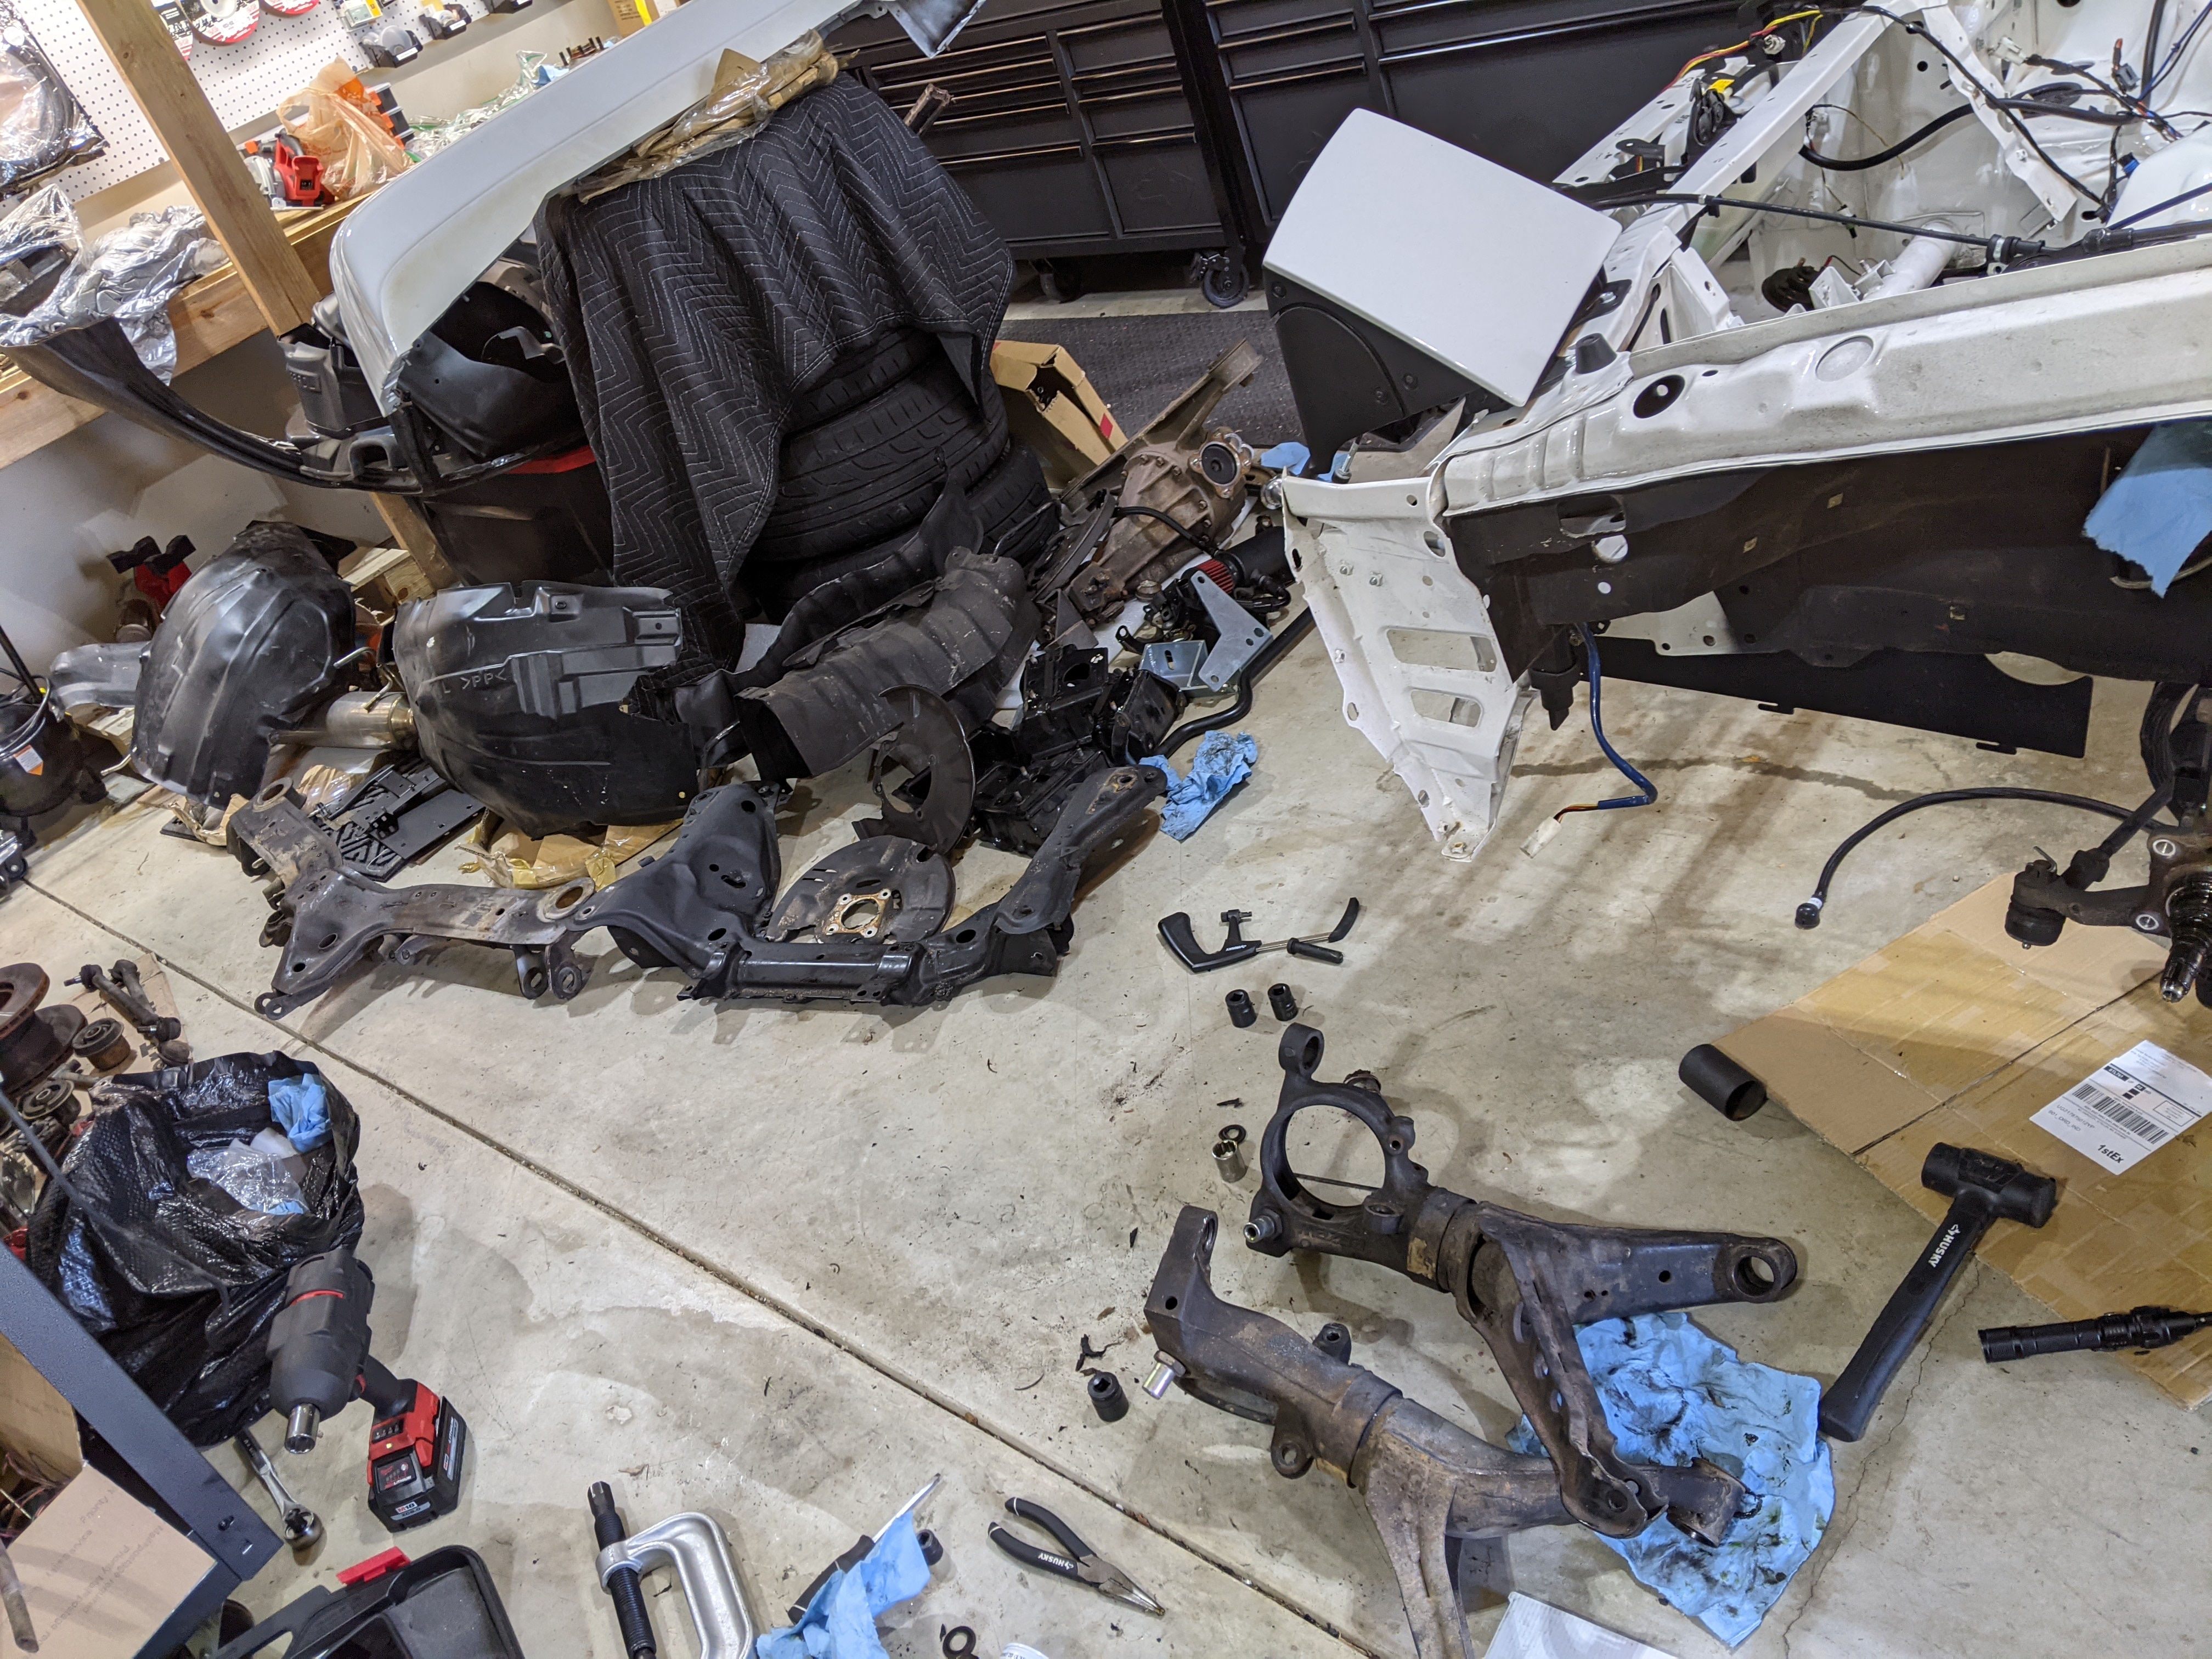
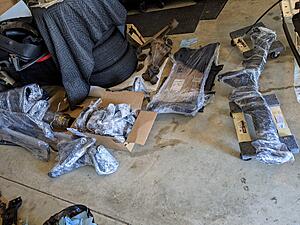
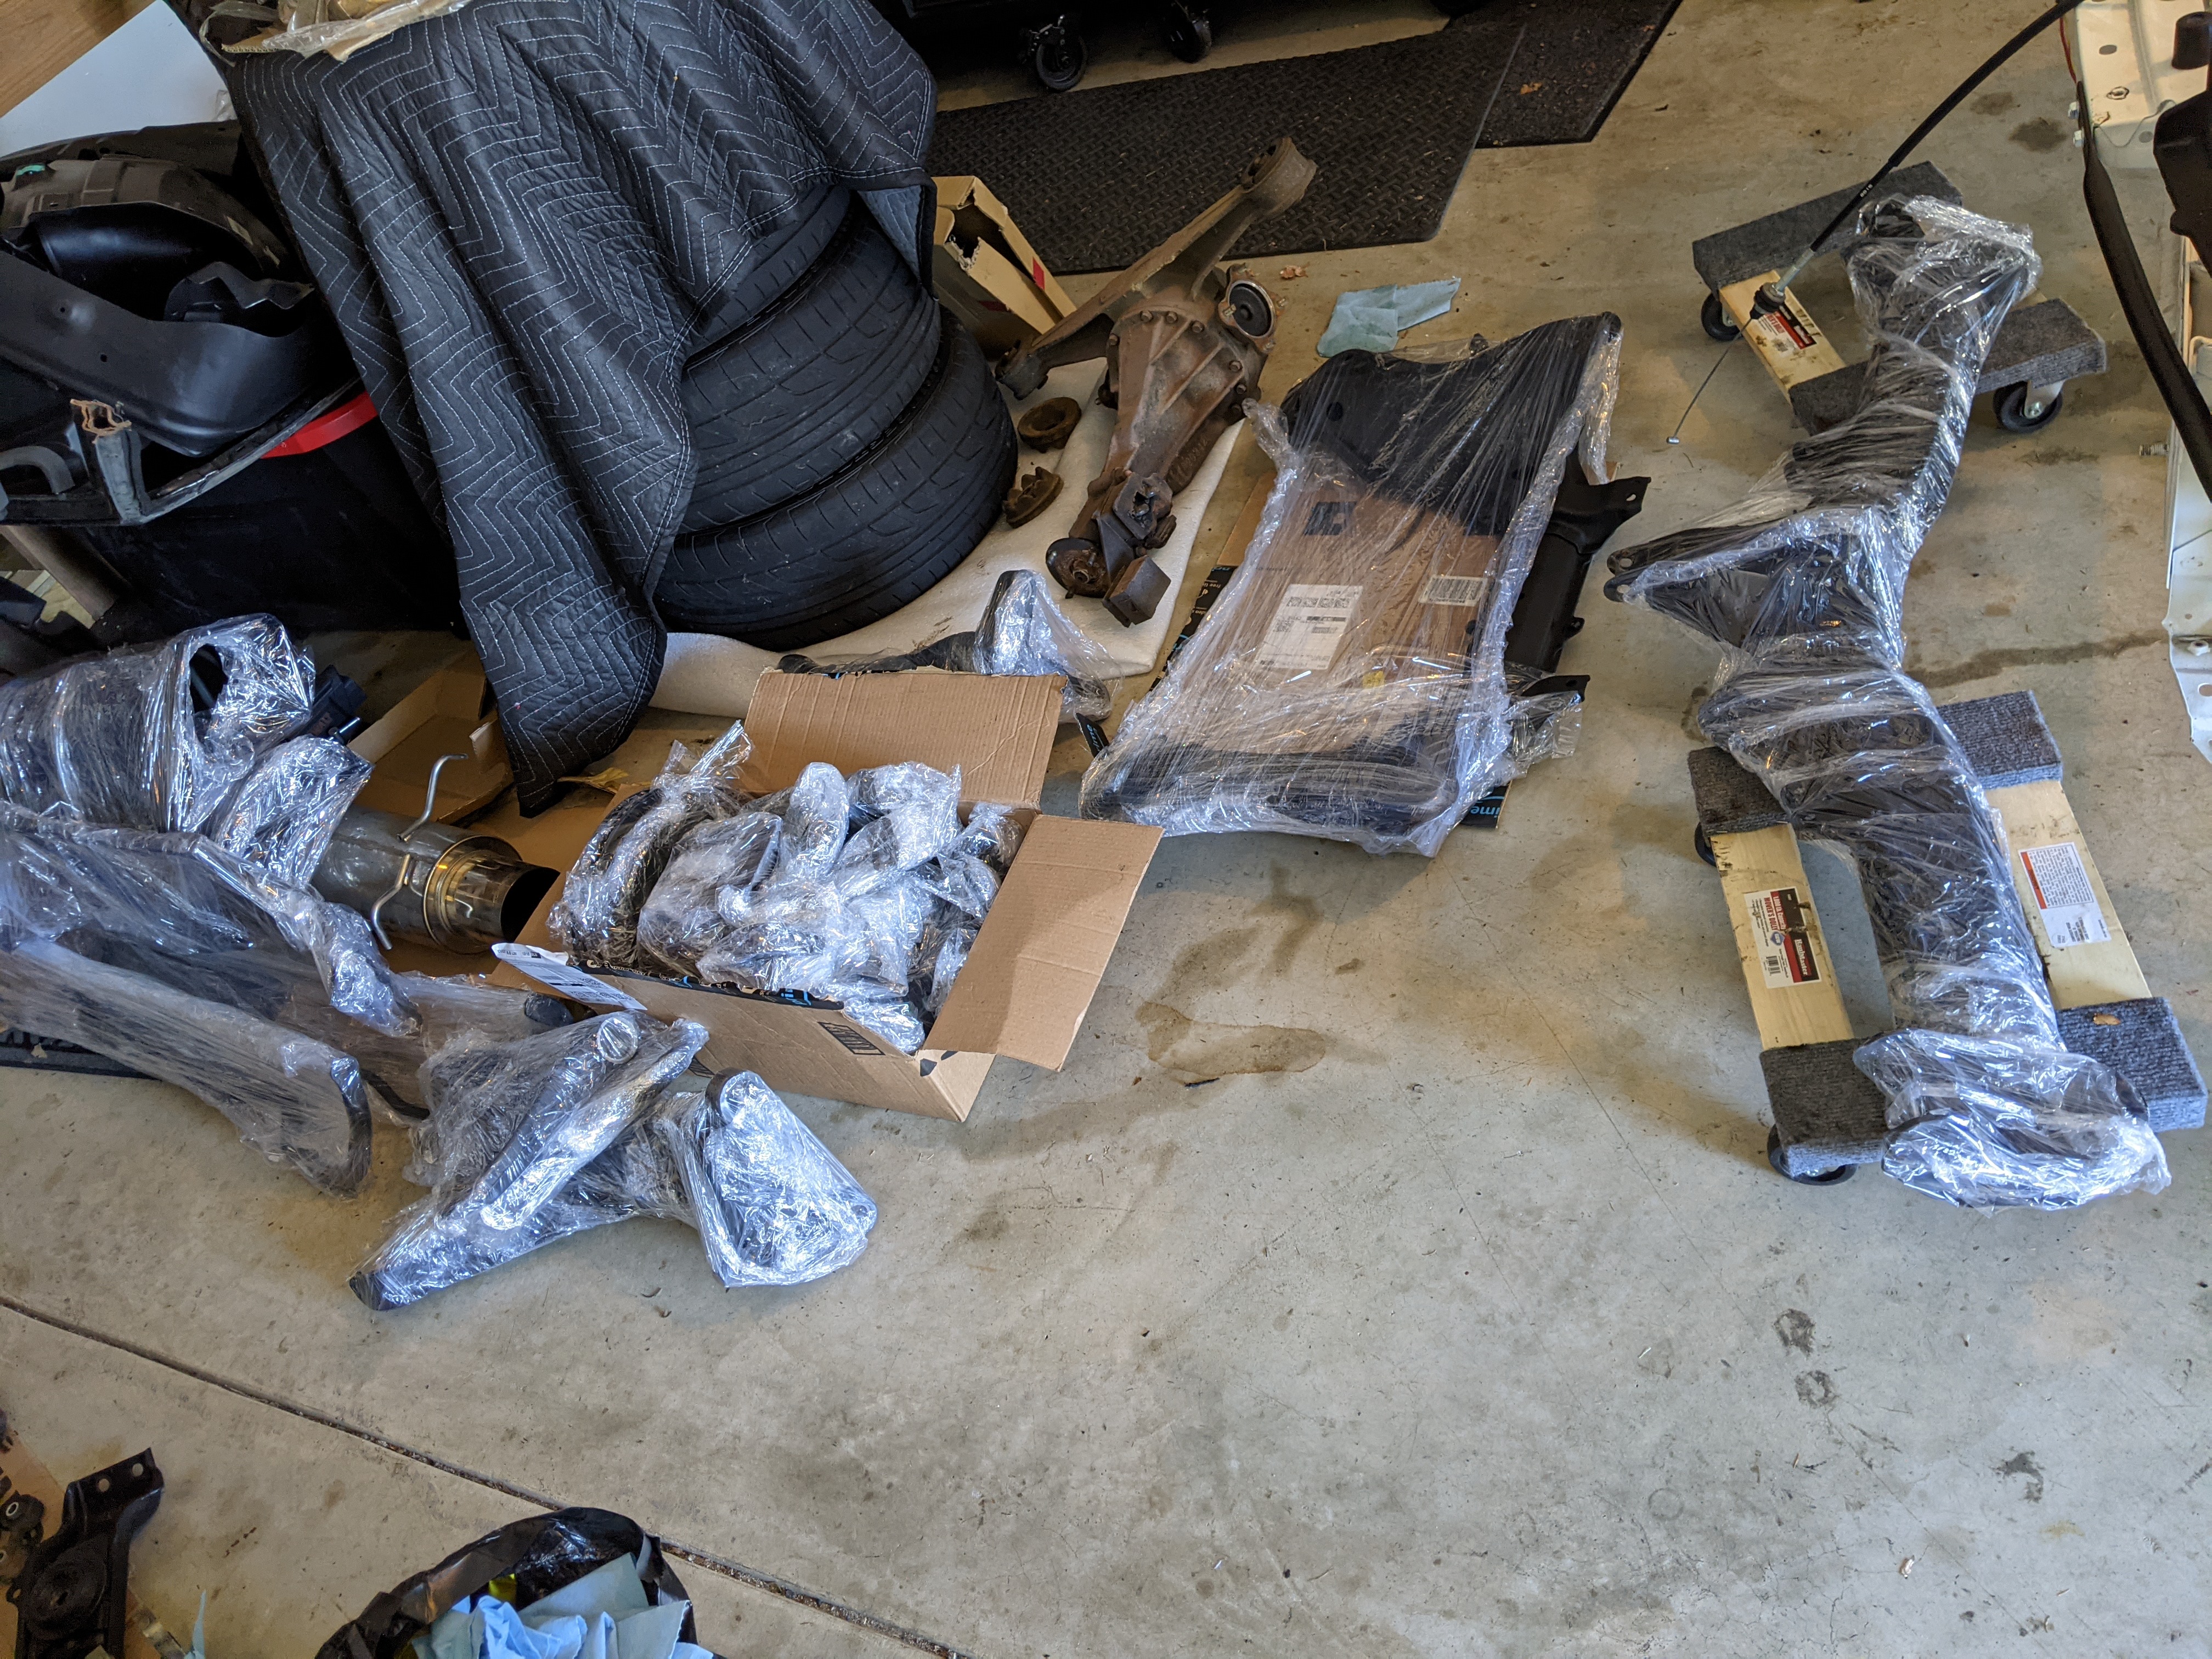
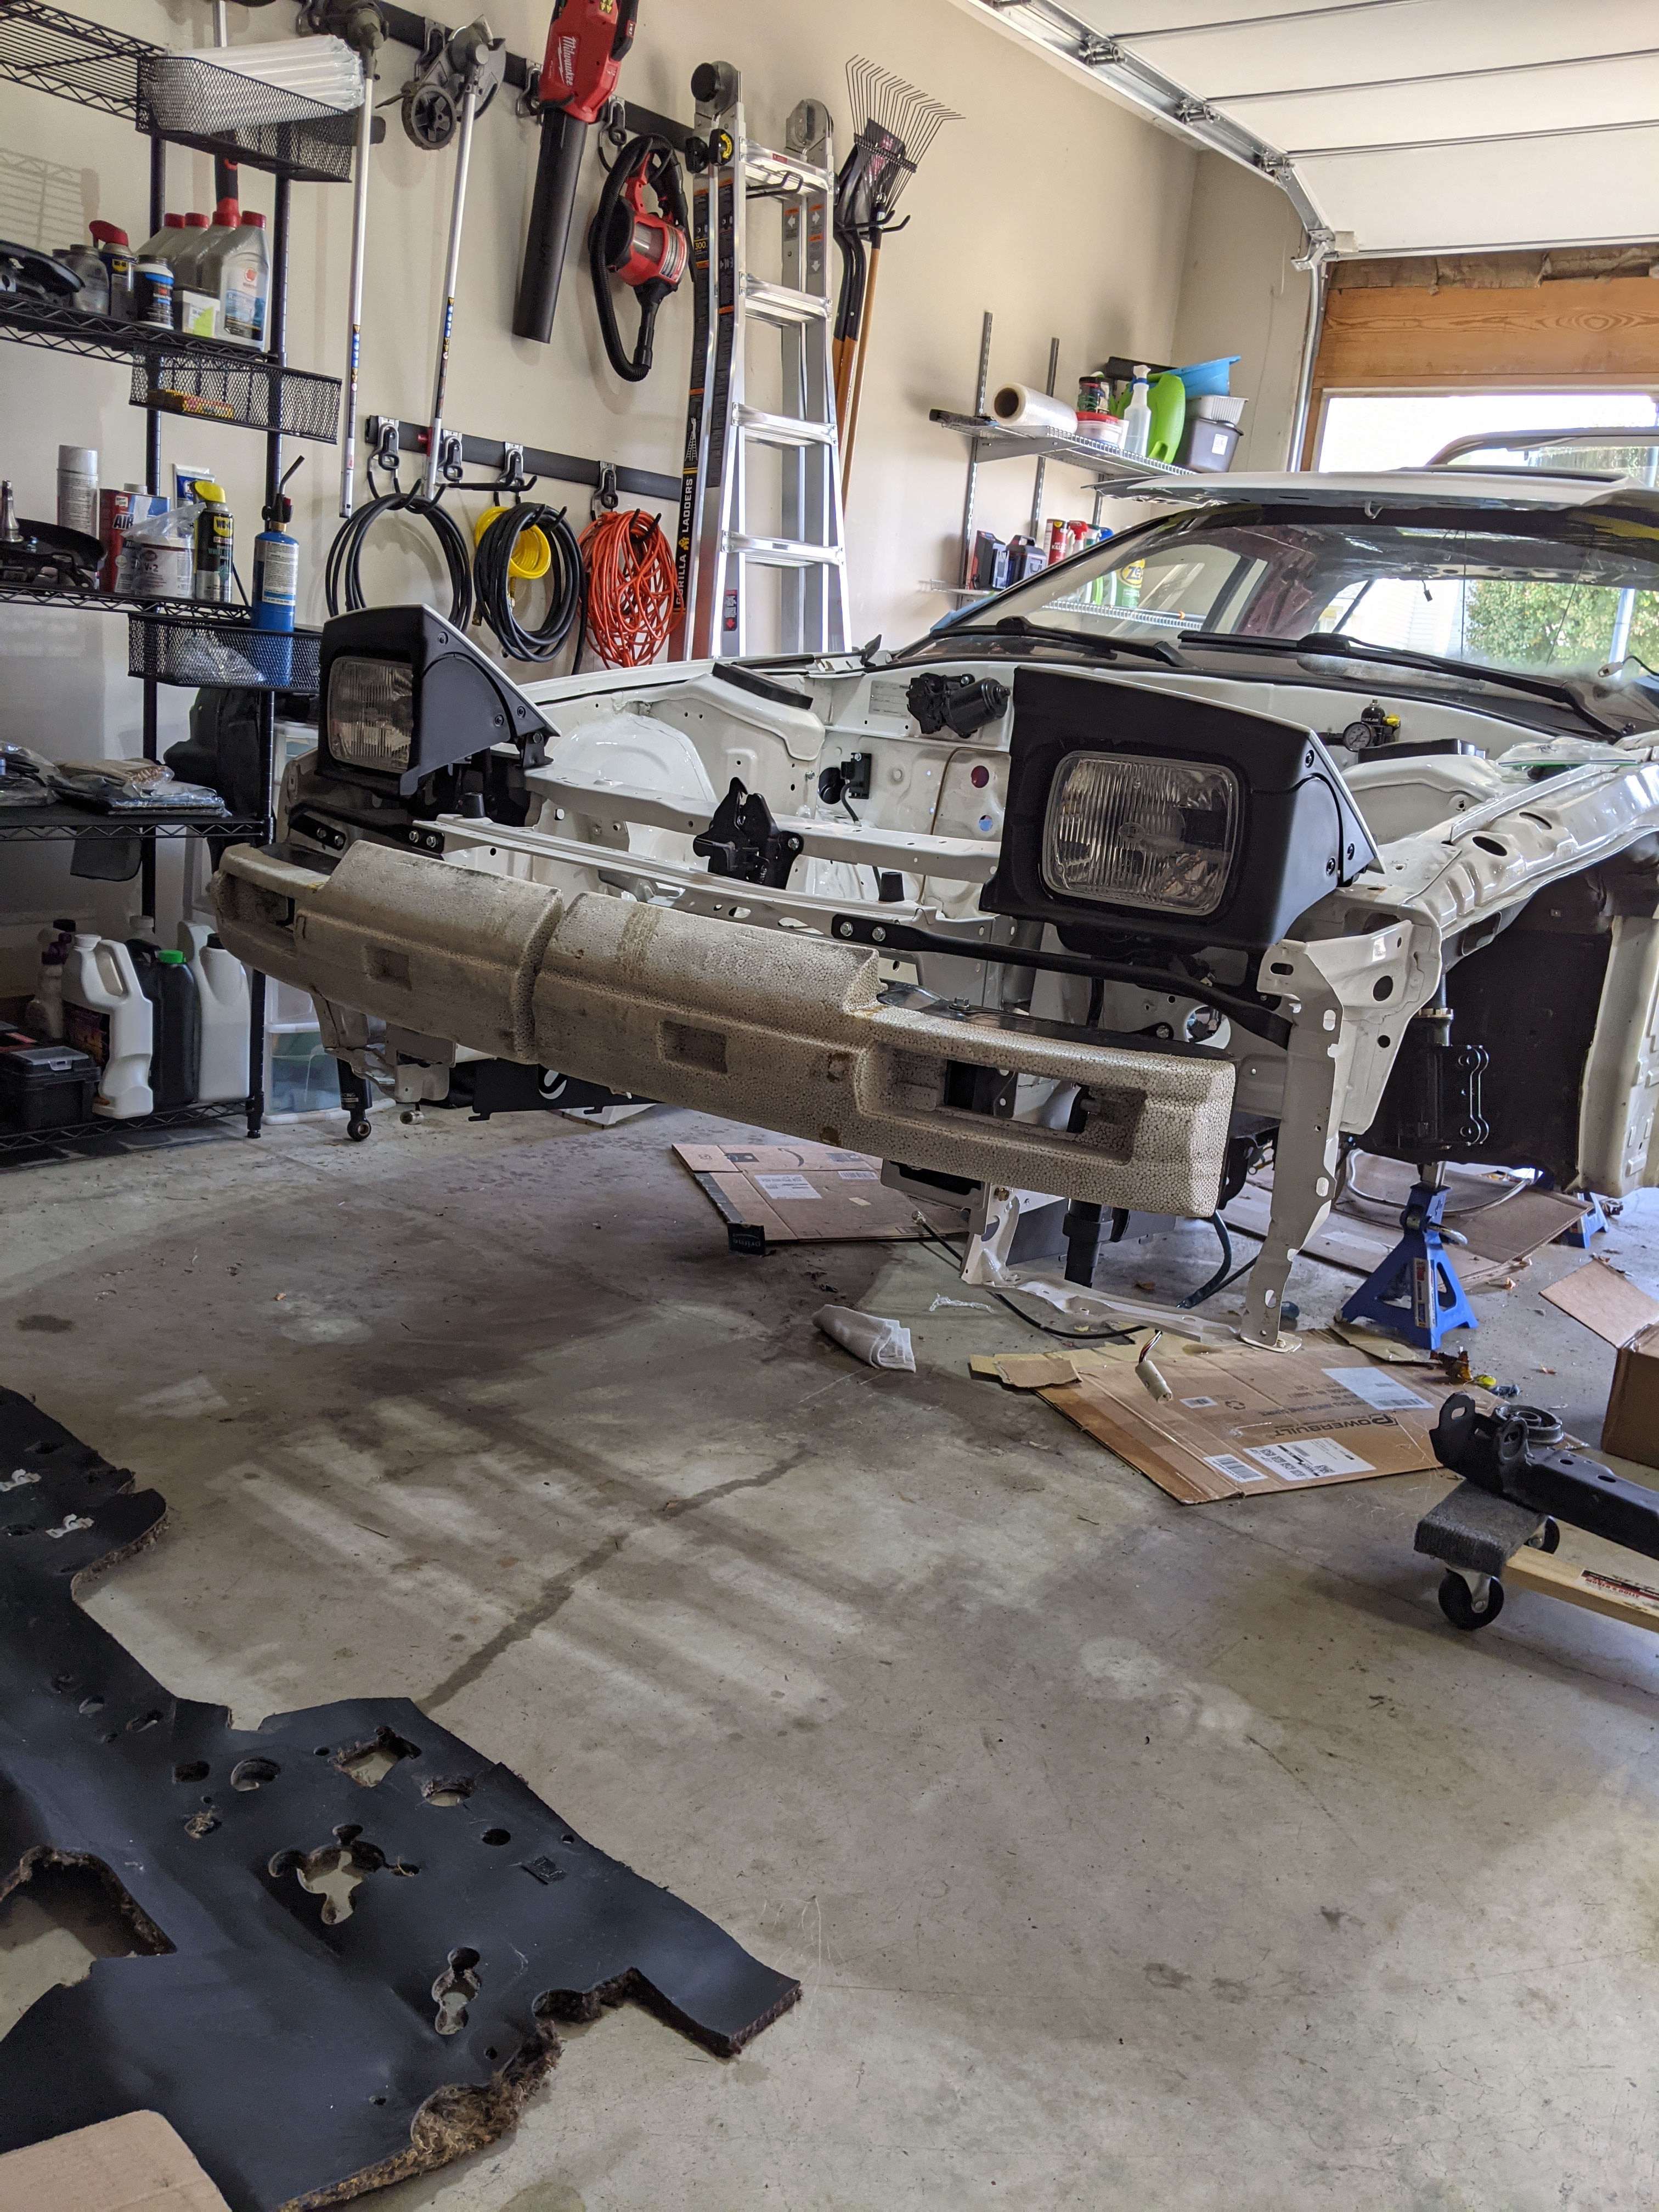
I wish I could start this post off with a shiny picture of the 20b intended for the build, but unfortunately I am unable to do that. However, a ton of progress has been made! We�ve successfully gutted the entire car again - for the 3rd or 4th time and hopefully last time. Broke a couple of mounting points on some plastics, but thanks to hot staple gun those were quickly mended. I was able to sell my entire setup (You can see the person who I sold the engine too load it in the back of his Jetta below lol). Gearing up for painting the chassis interior a satin black, dropping both subframes and re-doing all the bushings, and rewiring everything. I picked up some exciting things as I continue to progress further with the build. I was able to grab a S4 Turbo II Differential. I currently have a NA Clutch type so this TII Clutch type was the logical upgrade for me and allows the usage of the beefier axles. I also drove 17 hours in a single day to pick up a non-sunroof roof cut (which I will never do again lol). My body guy did not want to weld a delete in as he was concerned the roof would warp and be more of a headache. I also purchased a HF 20 ton press to knock out all the bushings on the FC and a few on the FD. I�m looking to officially purchase the 20b engine next March, but I still have a ton to do until then. I�m super anxious to get this more underway and be able to quickly proceed, but I just don�t have the same amount of time I had in college and I�m trying to do a couple of things to the FD to finish out my current vision for it.
Here is the differential that I purchased and the roof top

Here is the plastics I broke and mended

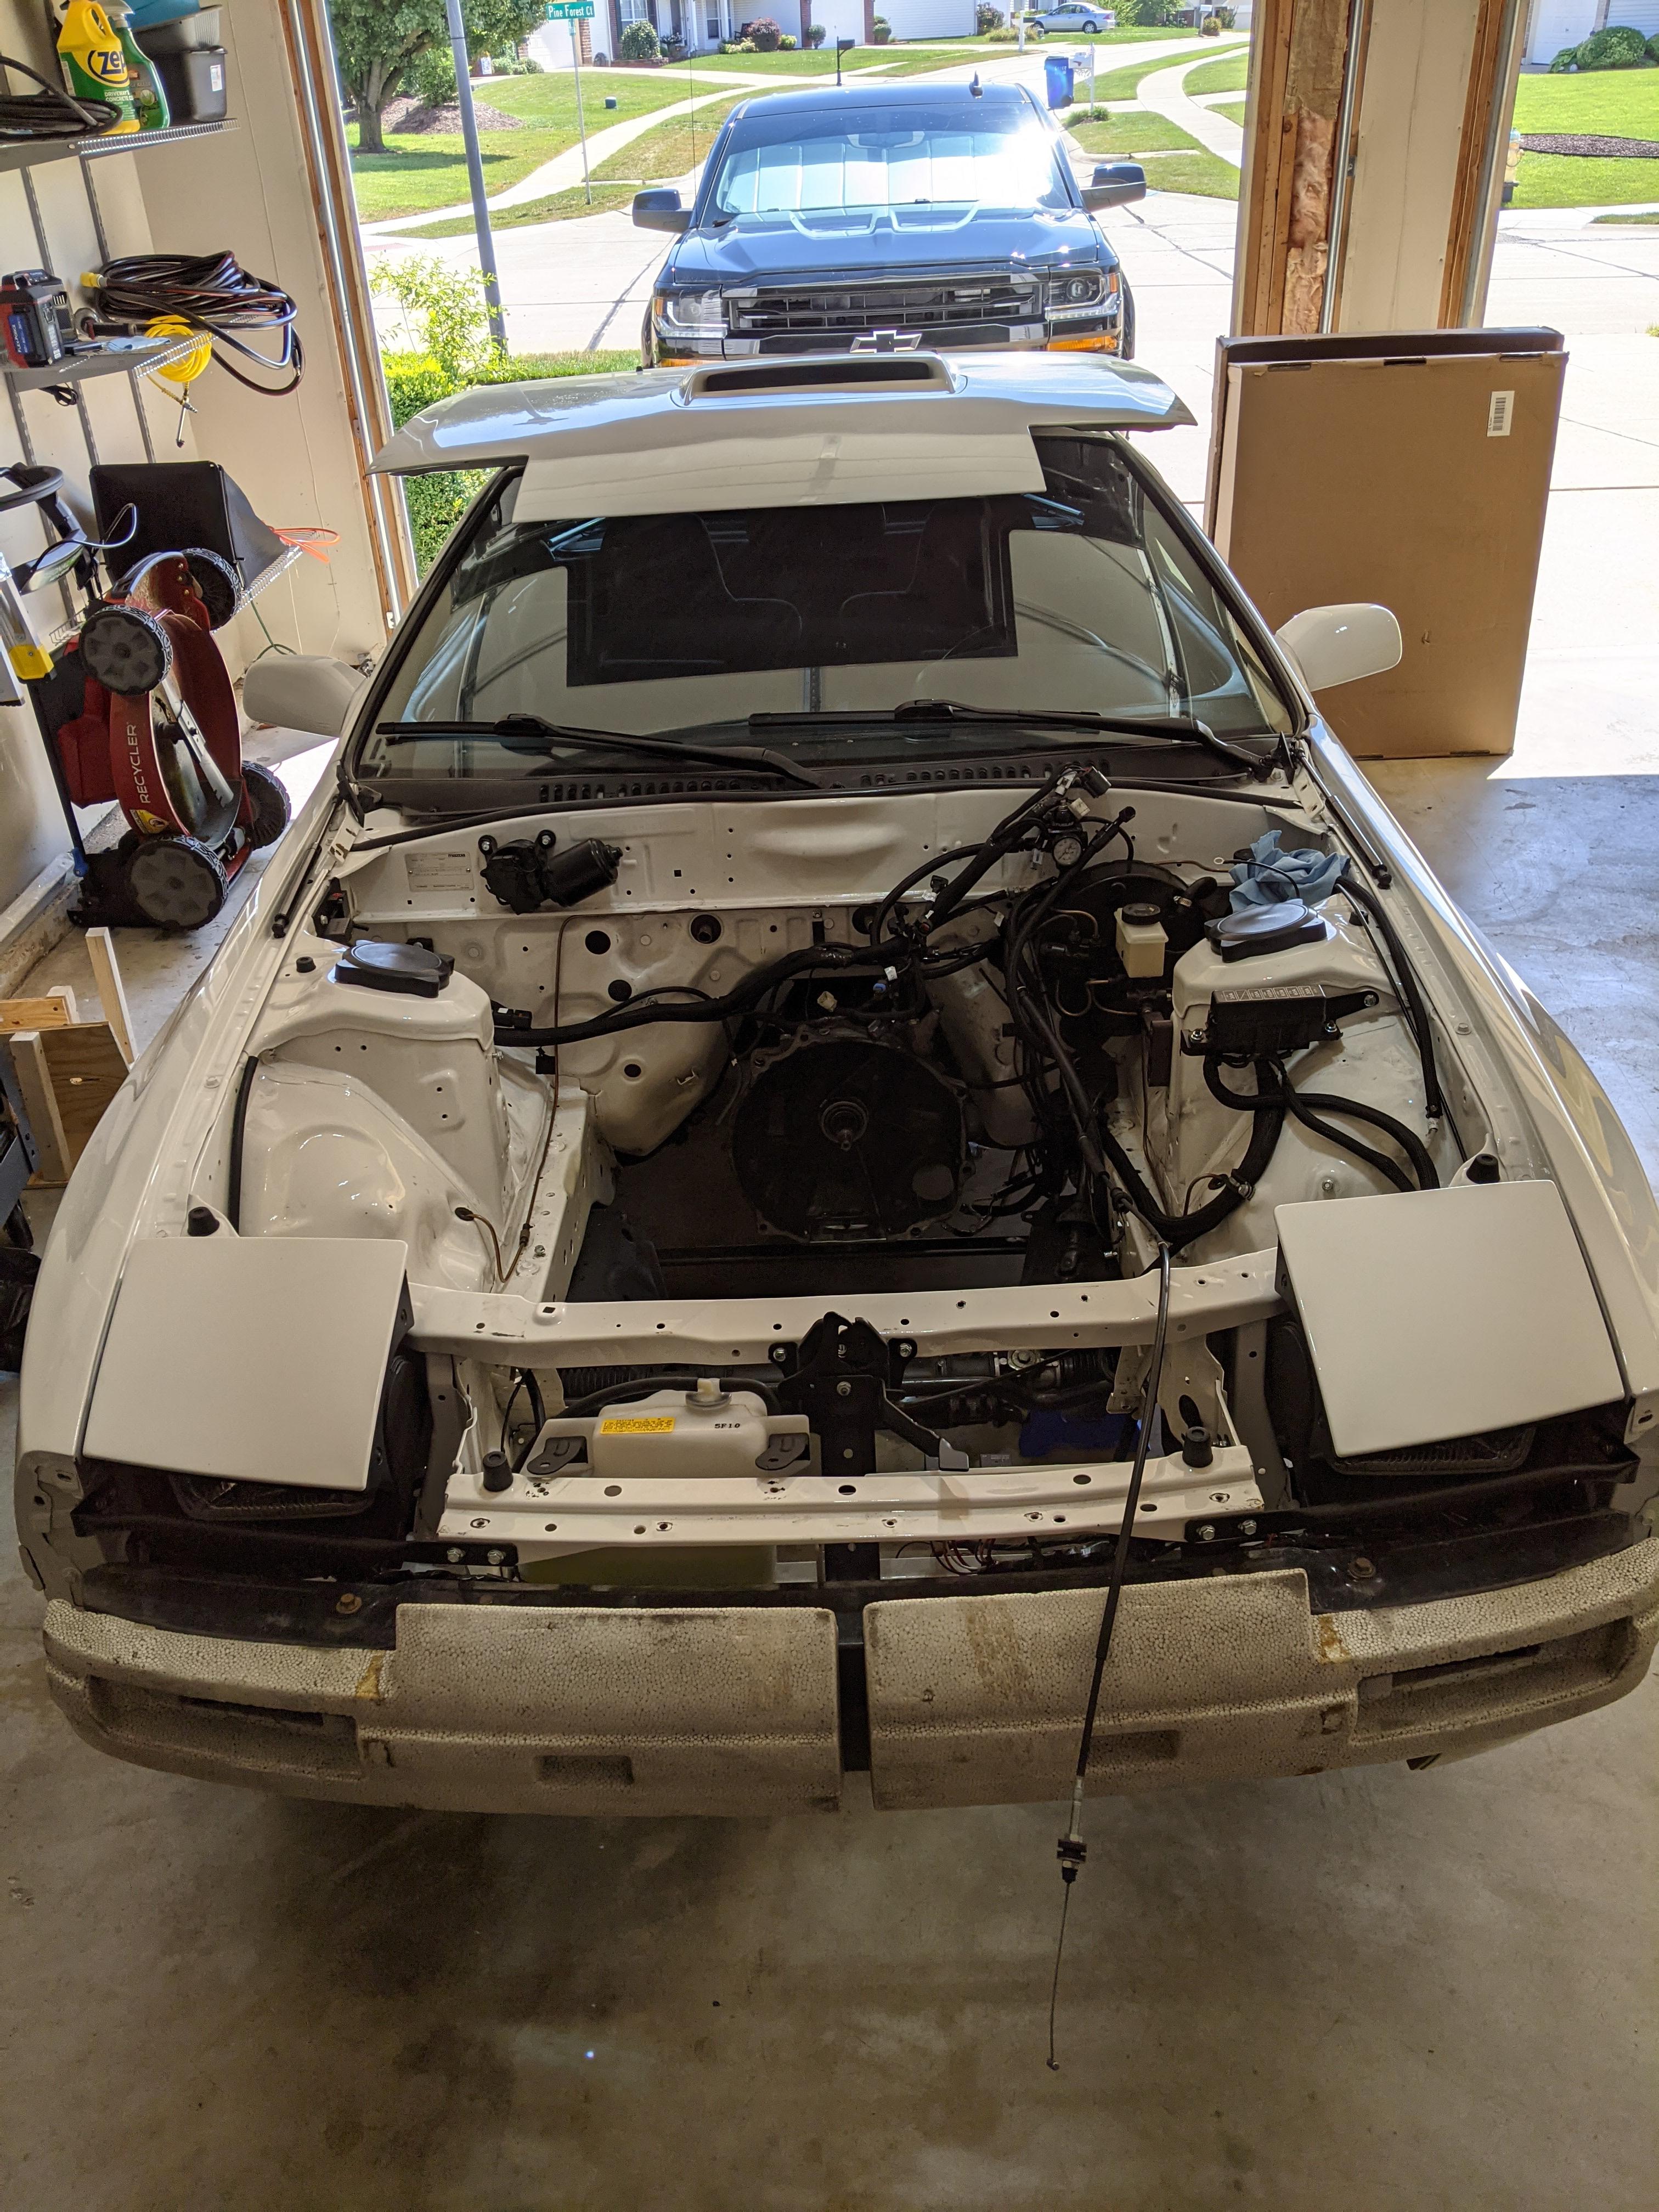
Here is how the car currently sits


Here is how my friend loaded the engine (lol)
I wish I could start this post off with a shiny picture of the 20b intended for the build, but unfortunately I am unable to do that. However, a ton of progress has been made! We�ve successfully gutted the entire car again - for the 3rd or 4th time and hopefully last time. Broke a couple of mounting points on some plastics, but thanks to hot staple gun those were quickly mended. I was able to sell my entire setup (You can see the person who I sold the engine too load it in the back of his Jetta below lol). Gearing up for painting the chassis interior a satin black, dropping both subframes and re-doing all the bushings, and rewiring everything. I picked up some exciting things as I continue to progress further with the build. I was able to grab a S4 Turbo II Differential. I currently have a NA Clutch type so this TII Clutch type was the logical upgrade for me and allows the usage of the beefier axles. I also drove 17 hours in a single day to pick up a non-sunroof roof cut (which I will never do again lol). My body guy did not want to weld a delete in as he was concerned the roof would warp and be more of a headache. I also purchased a HF 20 ton press to knock out all the bushings on the FC and a few on the FD. I�m looking to officially purchase the 20b engine next March, but I still have a ton to do until then. I�m super anxious to get this more underway and be able to quickly proceed, but I just don�t have the same amount of time I had in college and I�m trying to do a couple of things to the FD to finish out my current vision for it.
Here is the differential that I purchased and the roof top
Here is the plastics I broke and mended


Here is how the car currently sits


Here is how my friend loaded the engine (lol)

The following users liked this post:
driftxsequence (09-15-21)
09-16-21, 08:14 AM
#340
REINCARNATED
iTrader: (4)
Holy cow! Progress progress progress! Keep up the good work, looking forward to seeing more.
PS.. The hood struts, work well with the aluminum hood? Any link for purchase?
Thanks! -M
PS.. The hood struts, work well with the aluminum hood? Any link for purchase?
Thanks! -M
09-16-21, 06:47 PM
#341
I've become pretty fluent at ripping apart the FC interior lol
Last edited by Akomix; 09-16-21 at 08:02 PM.
 10-28-21, 05:59 PM
#343
Update 10/28/2021
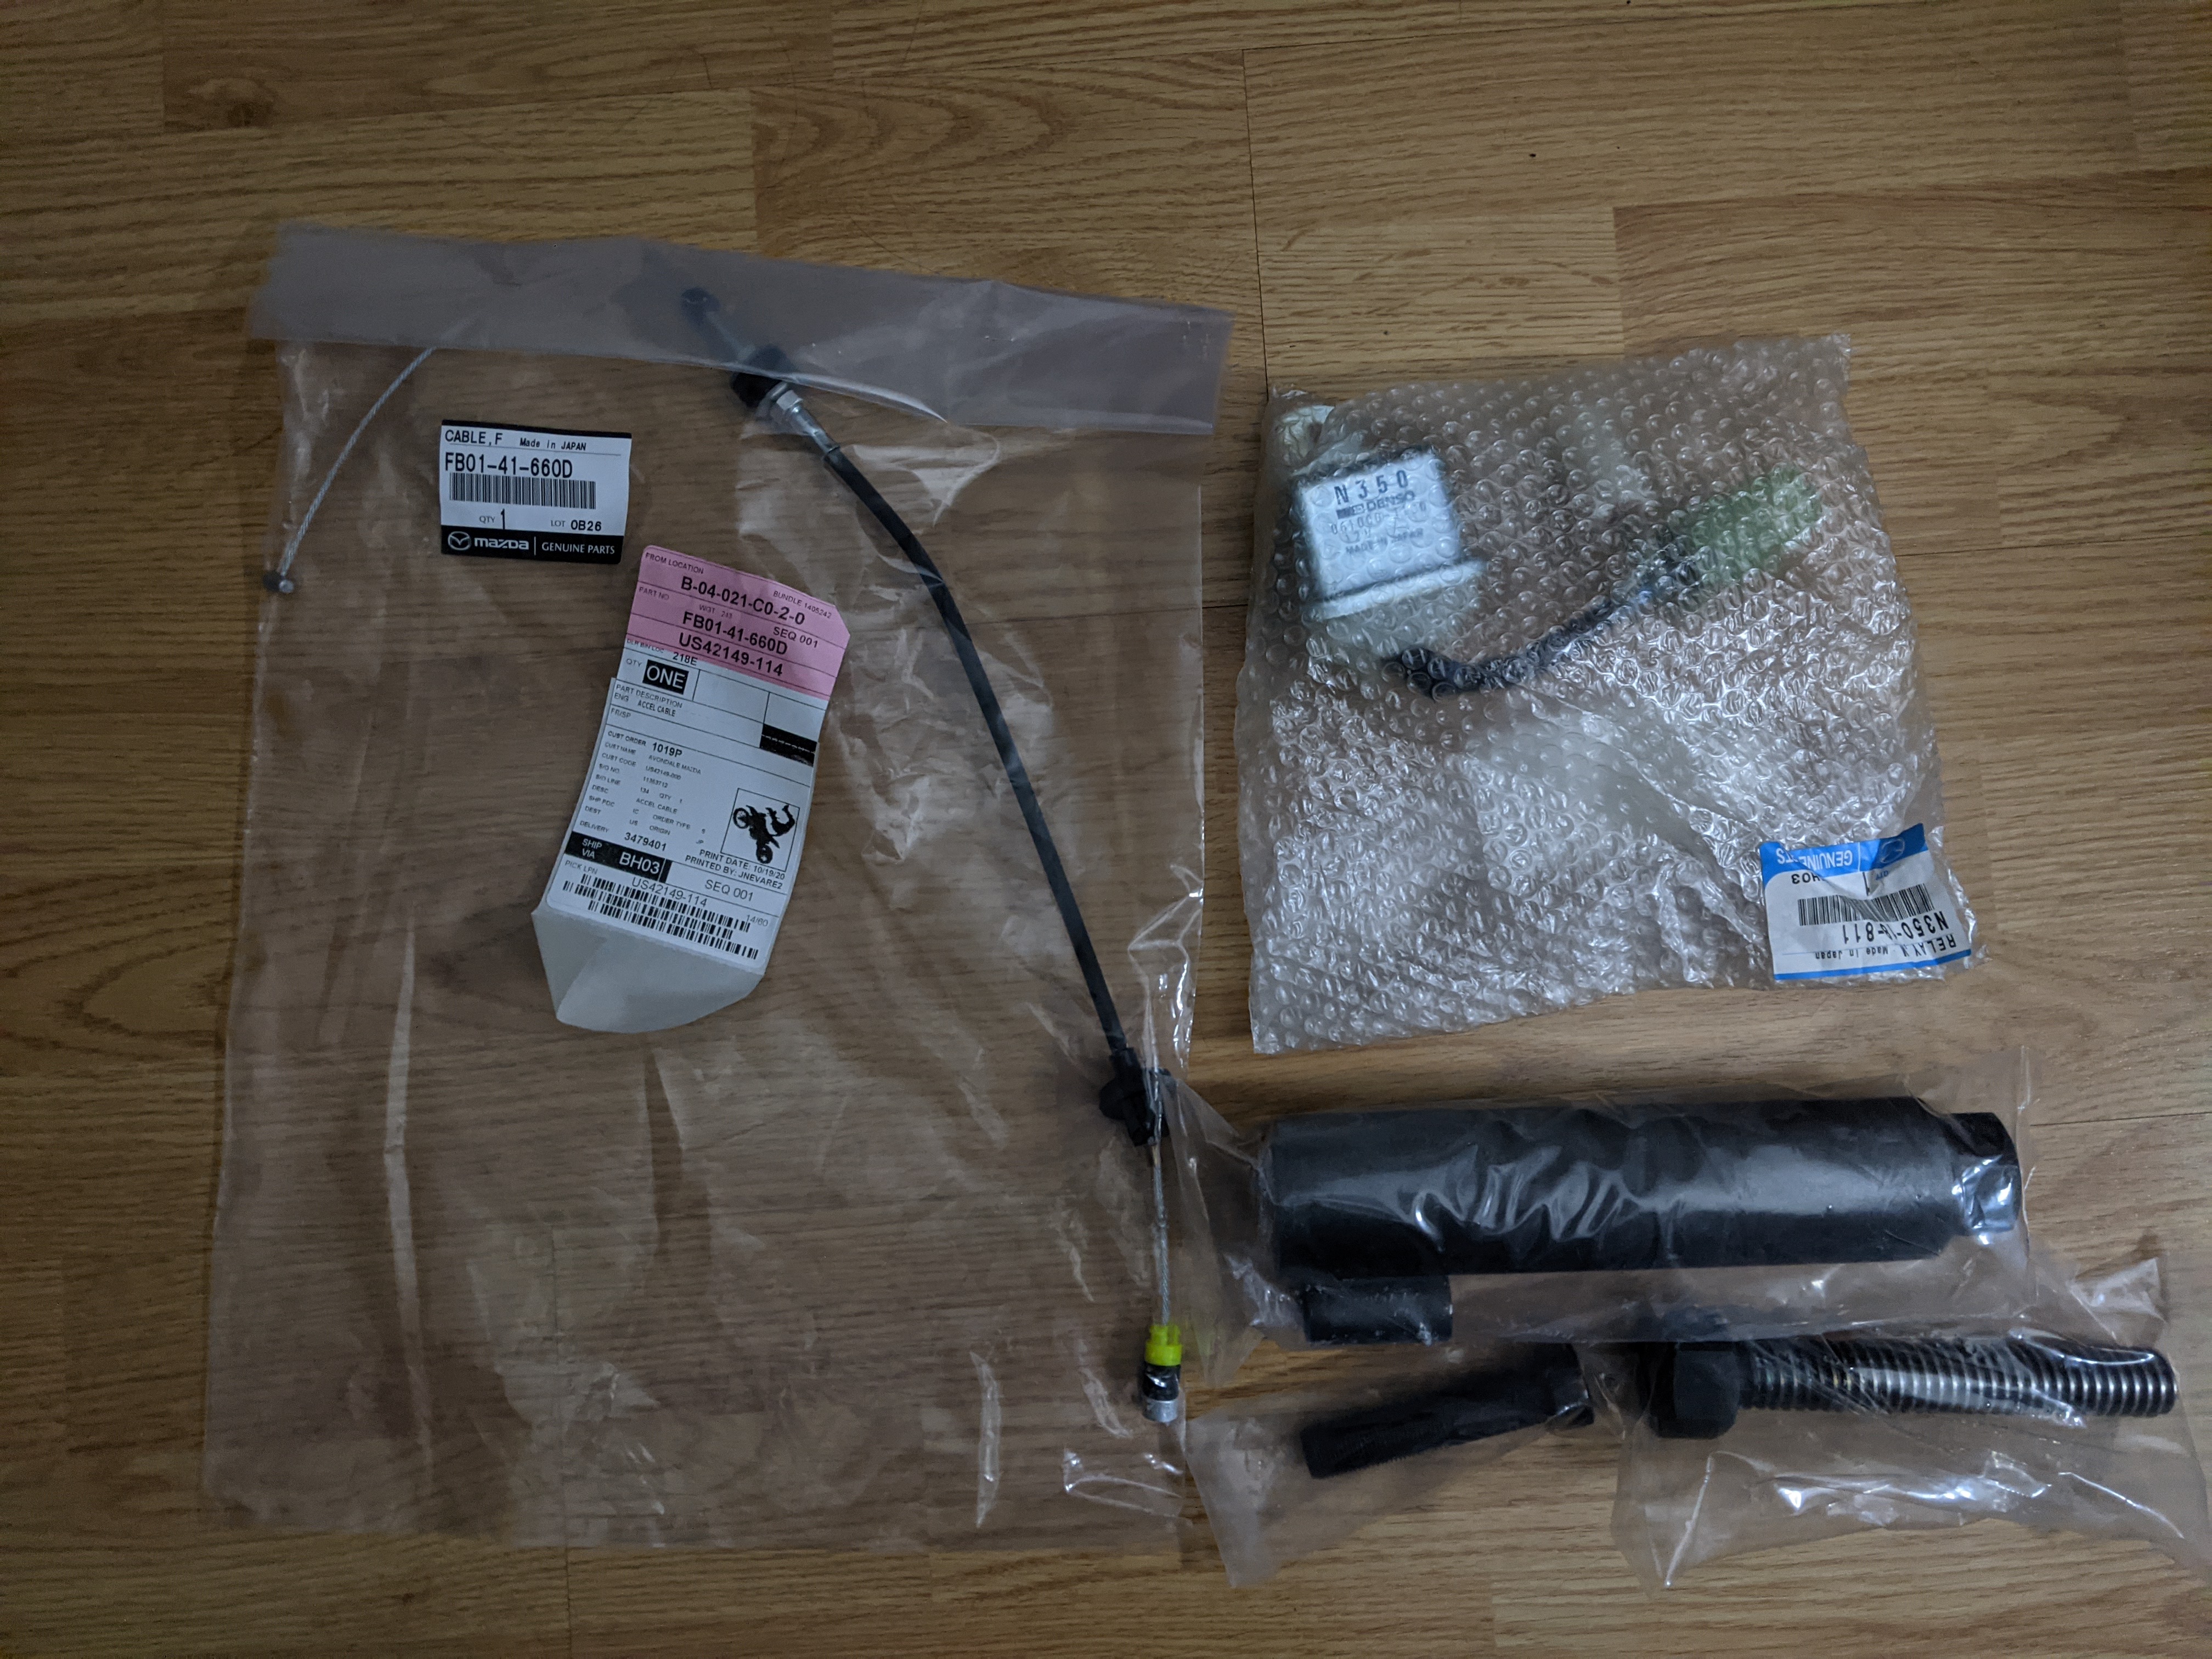
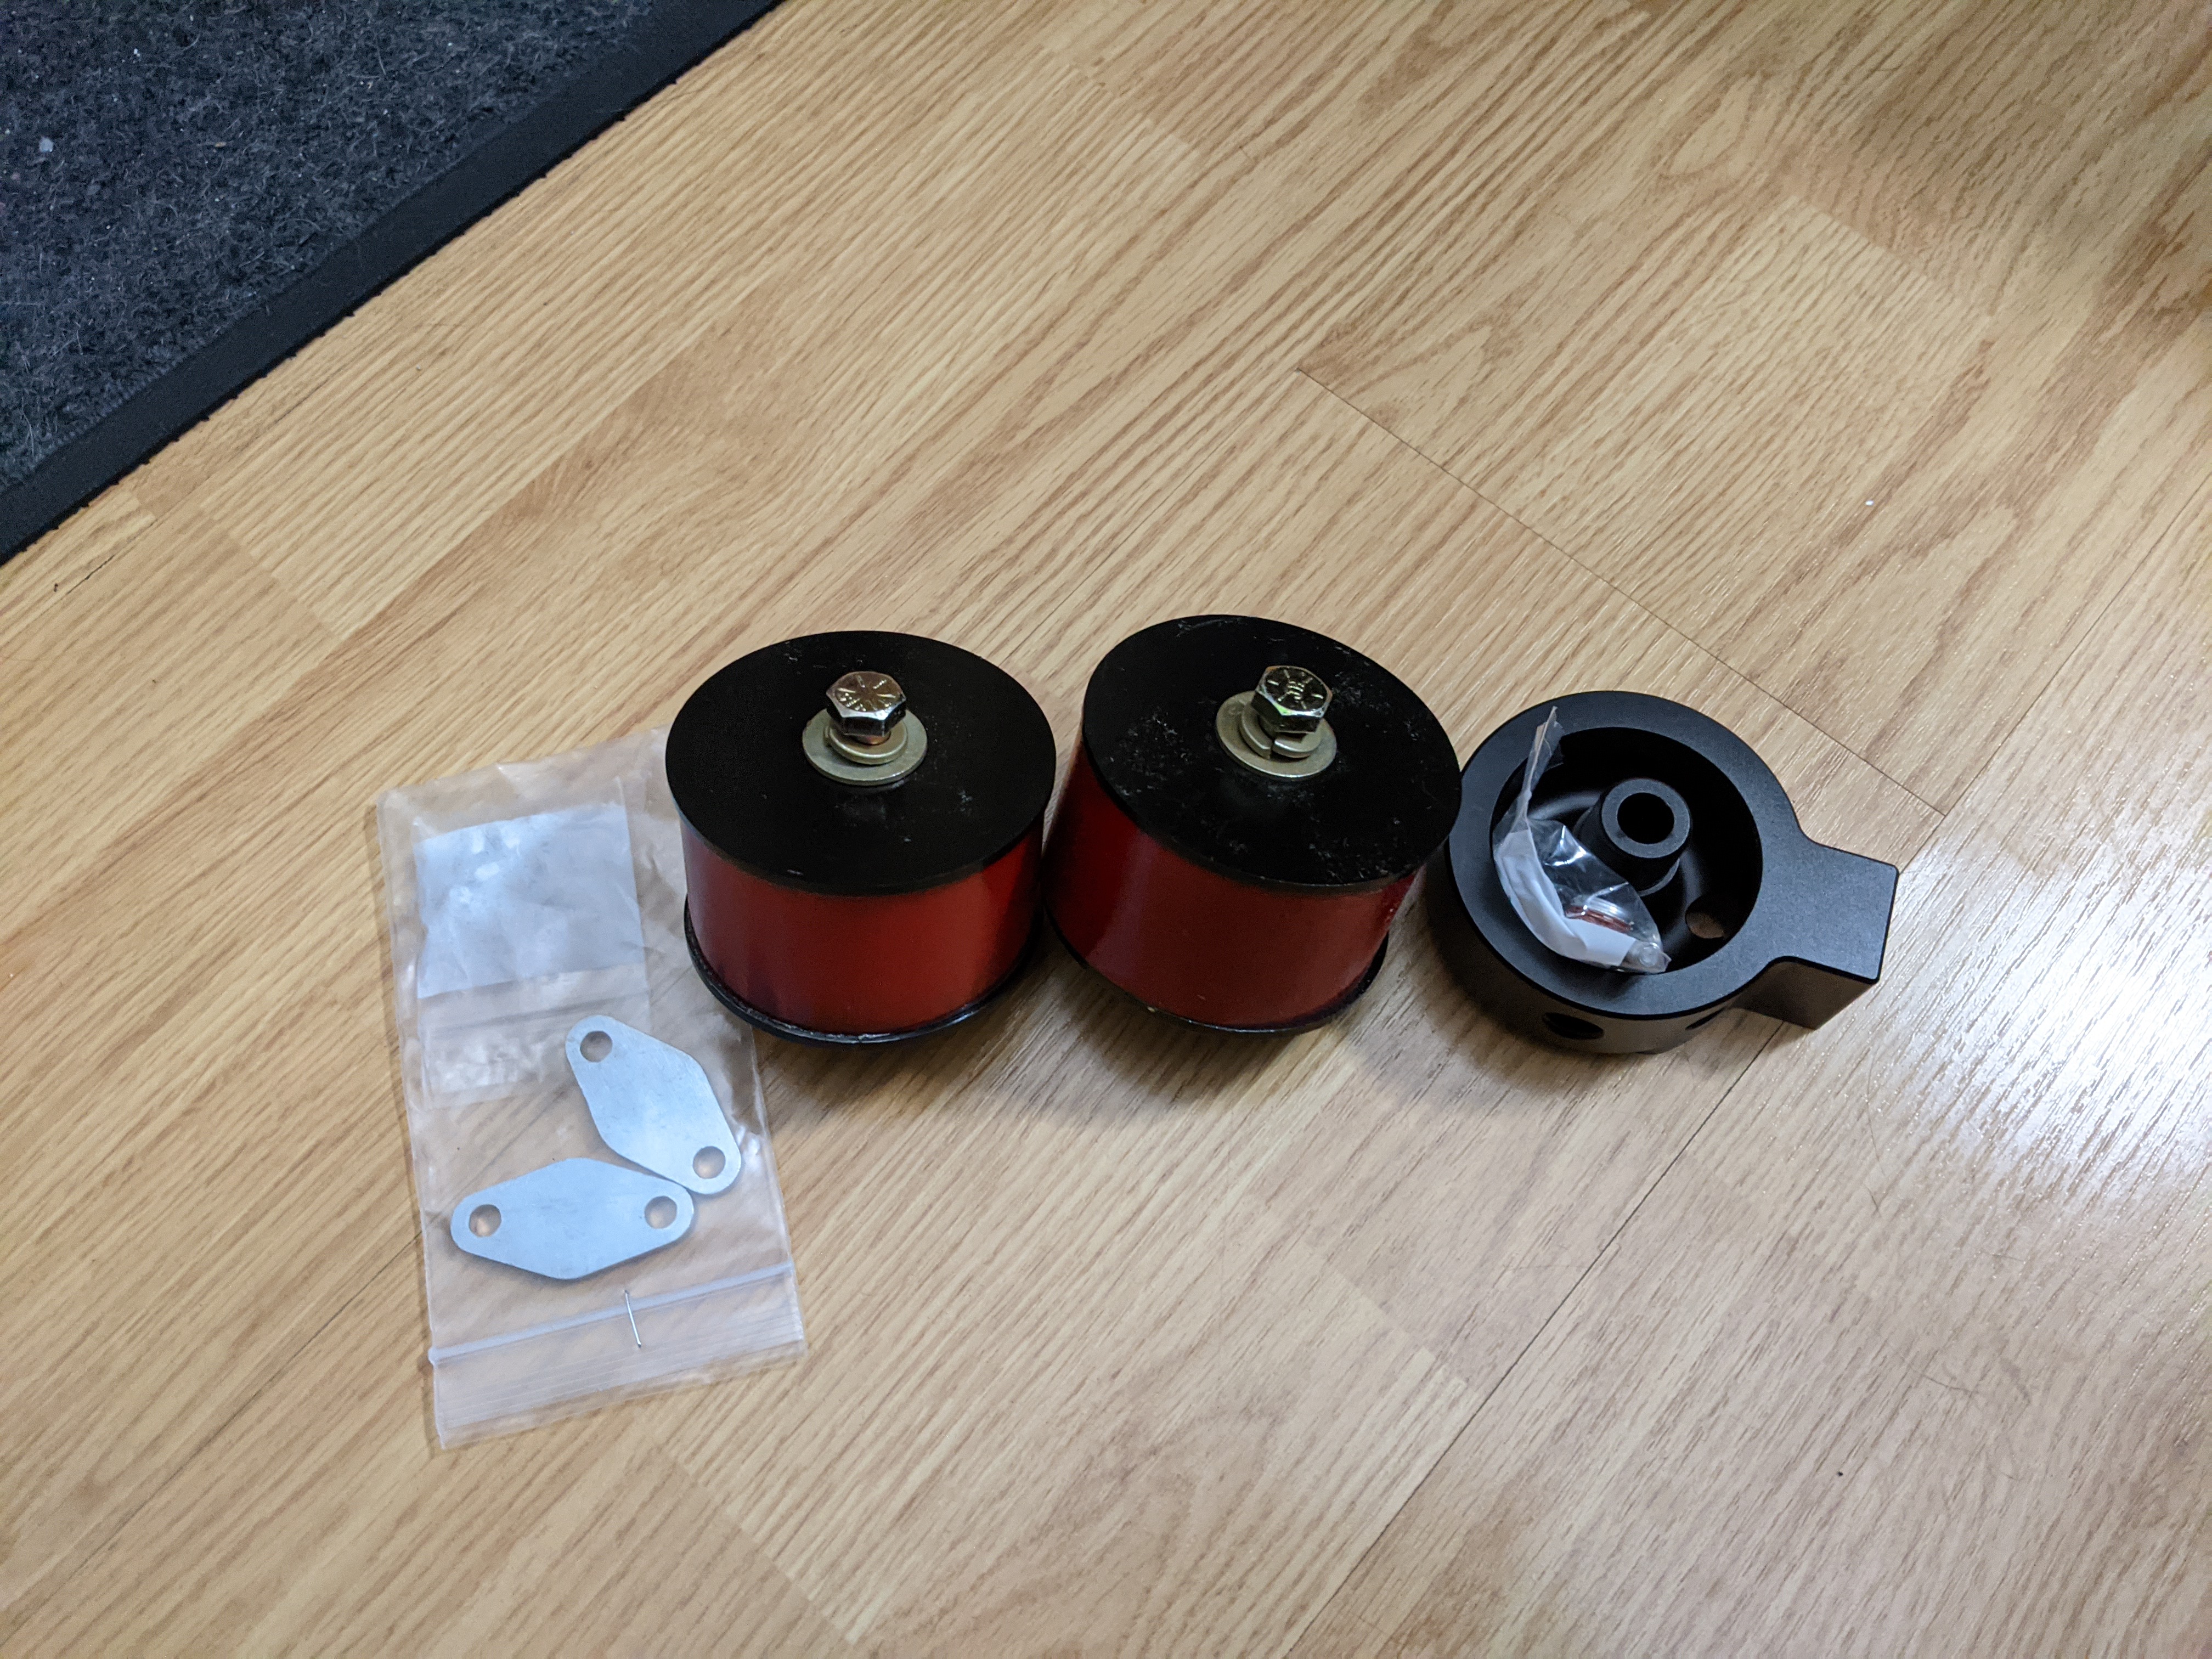
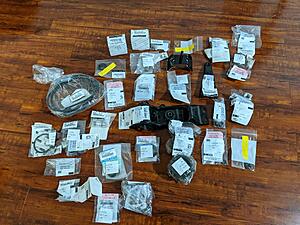
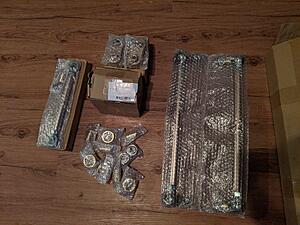
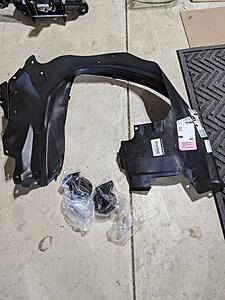
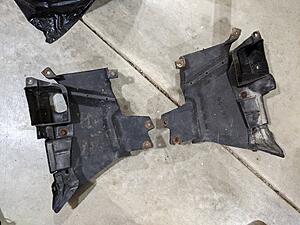
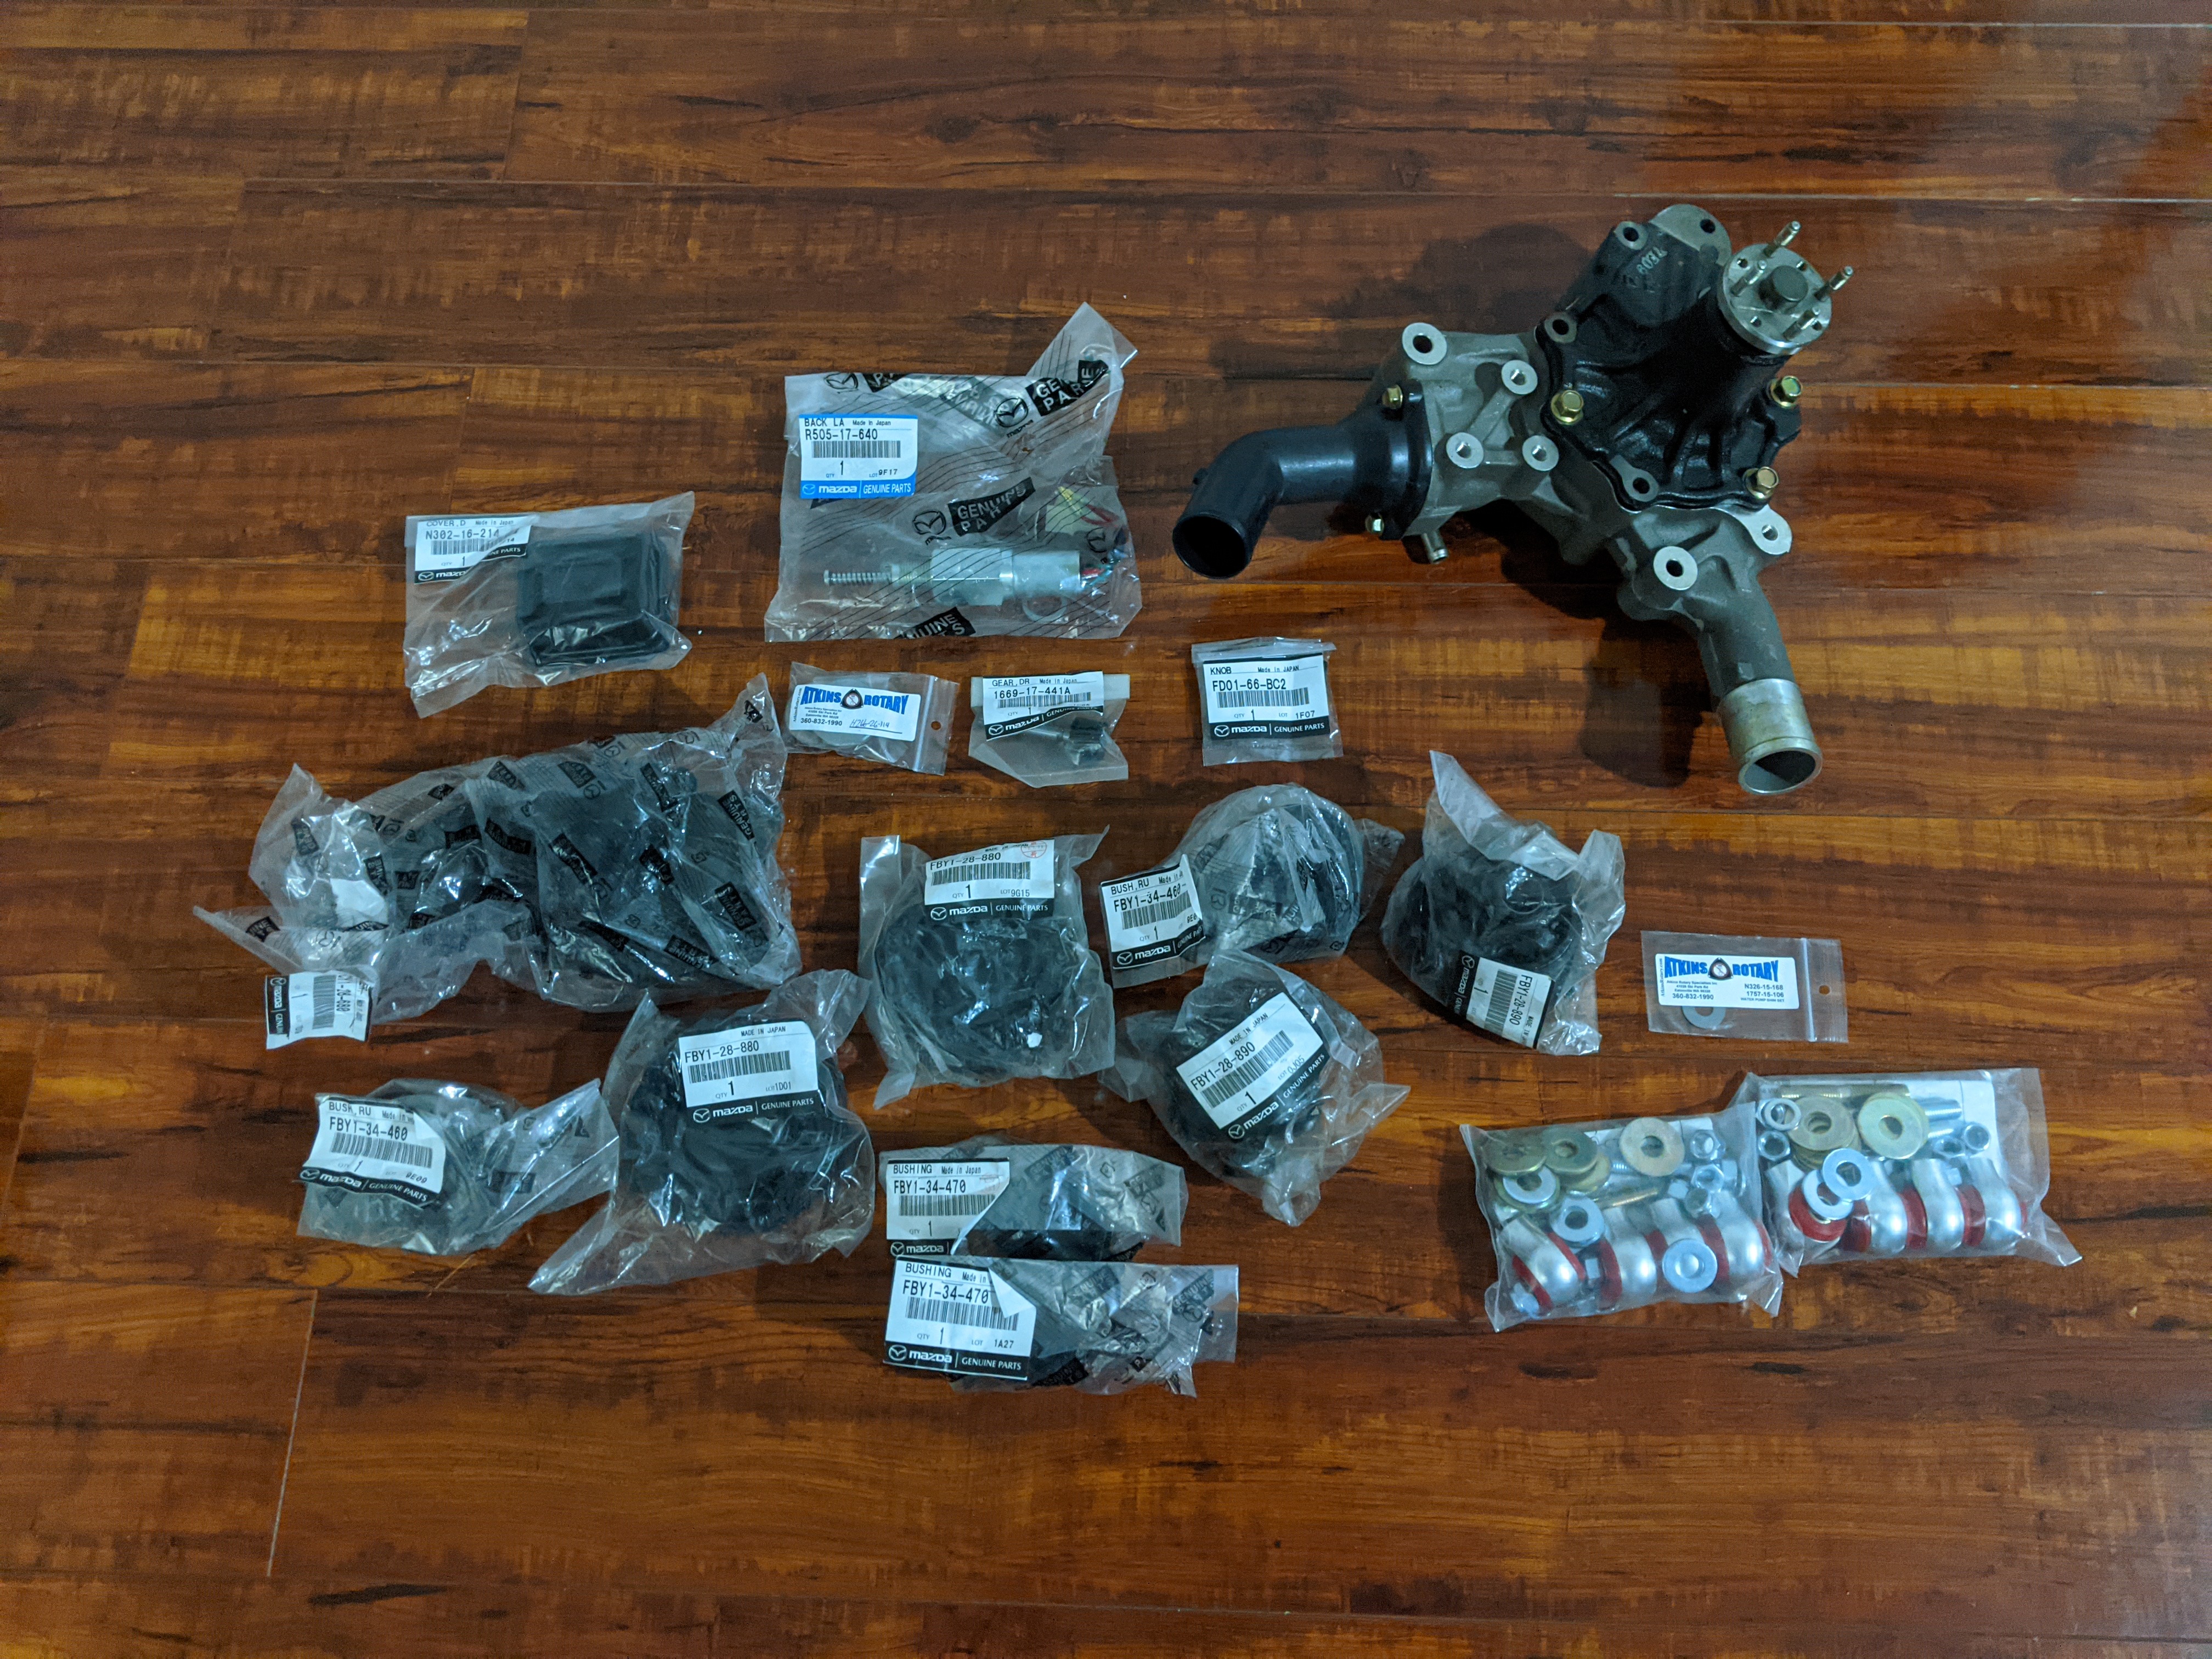
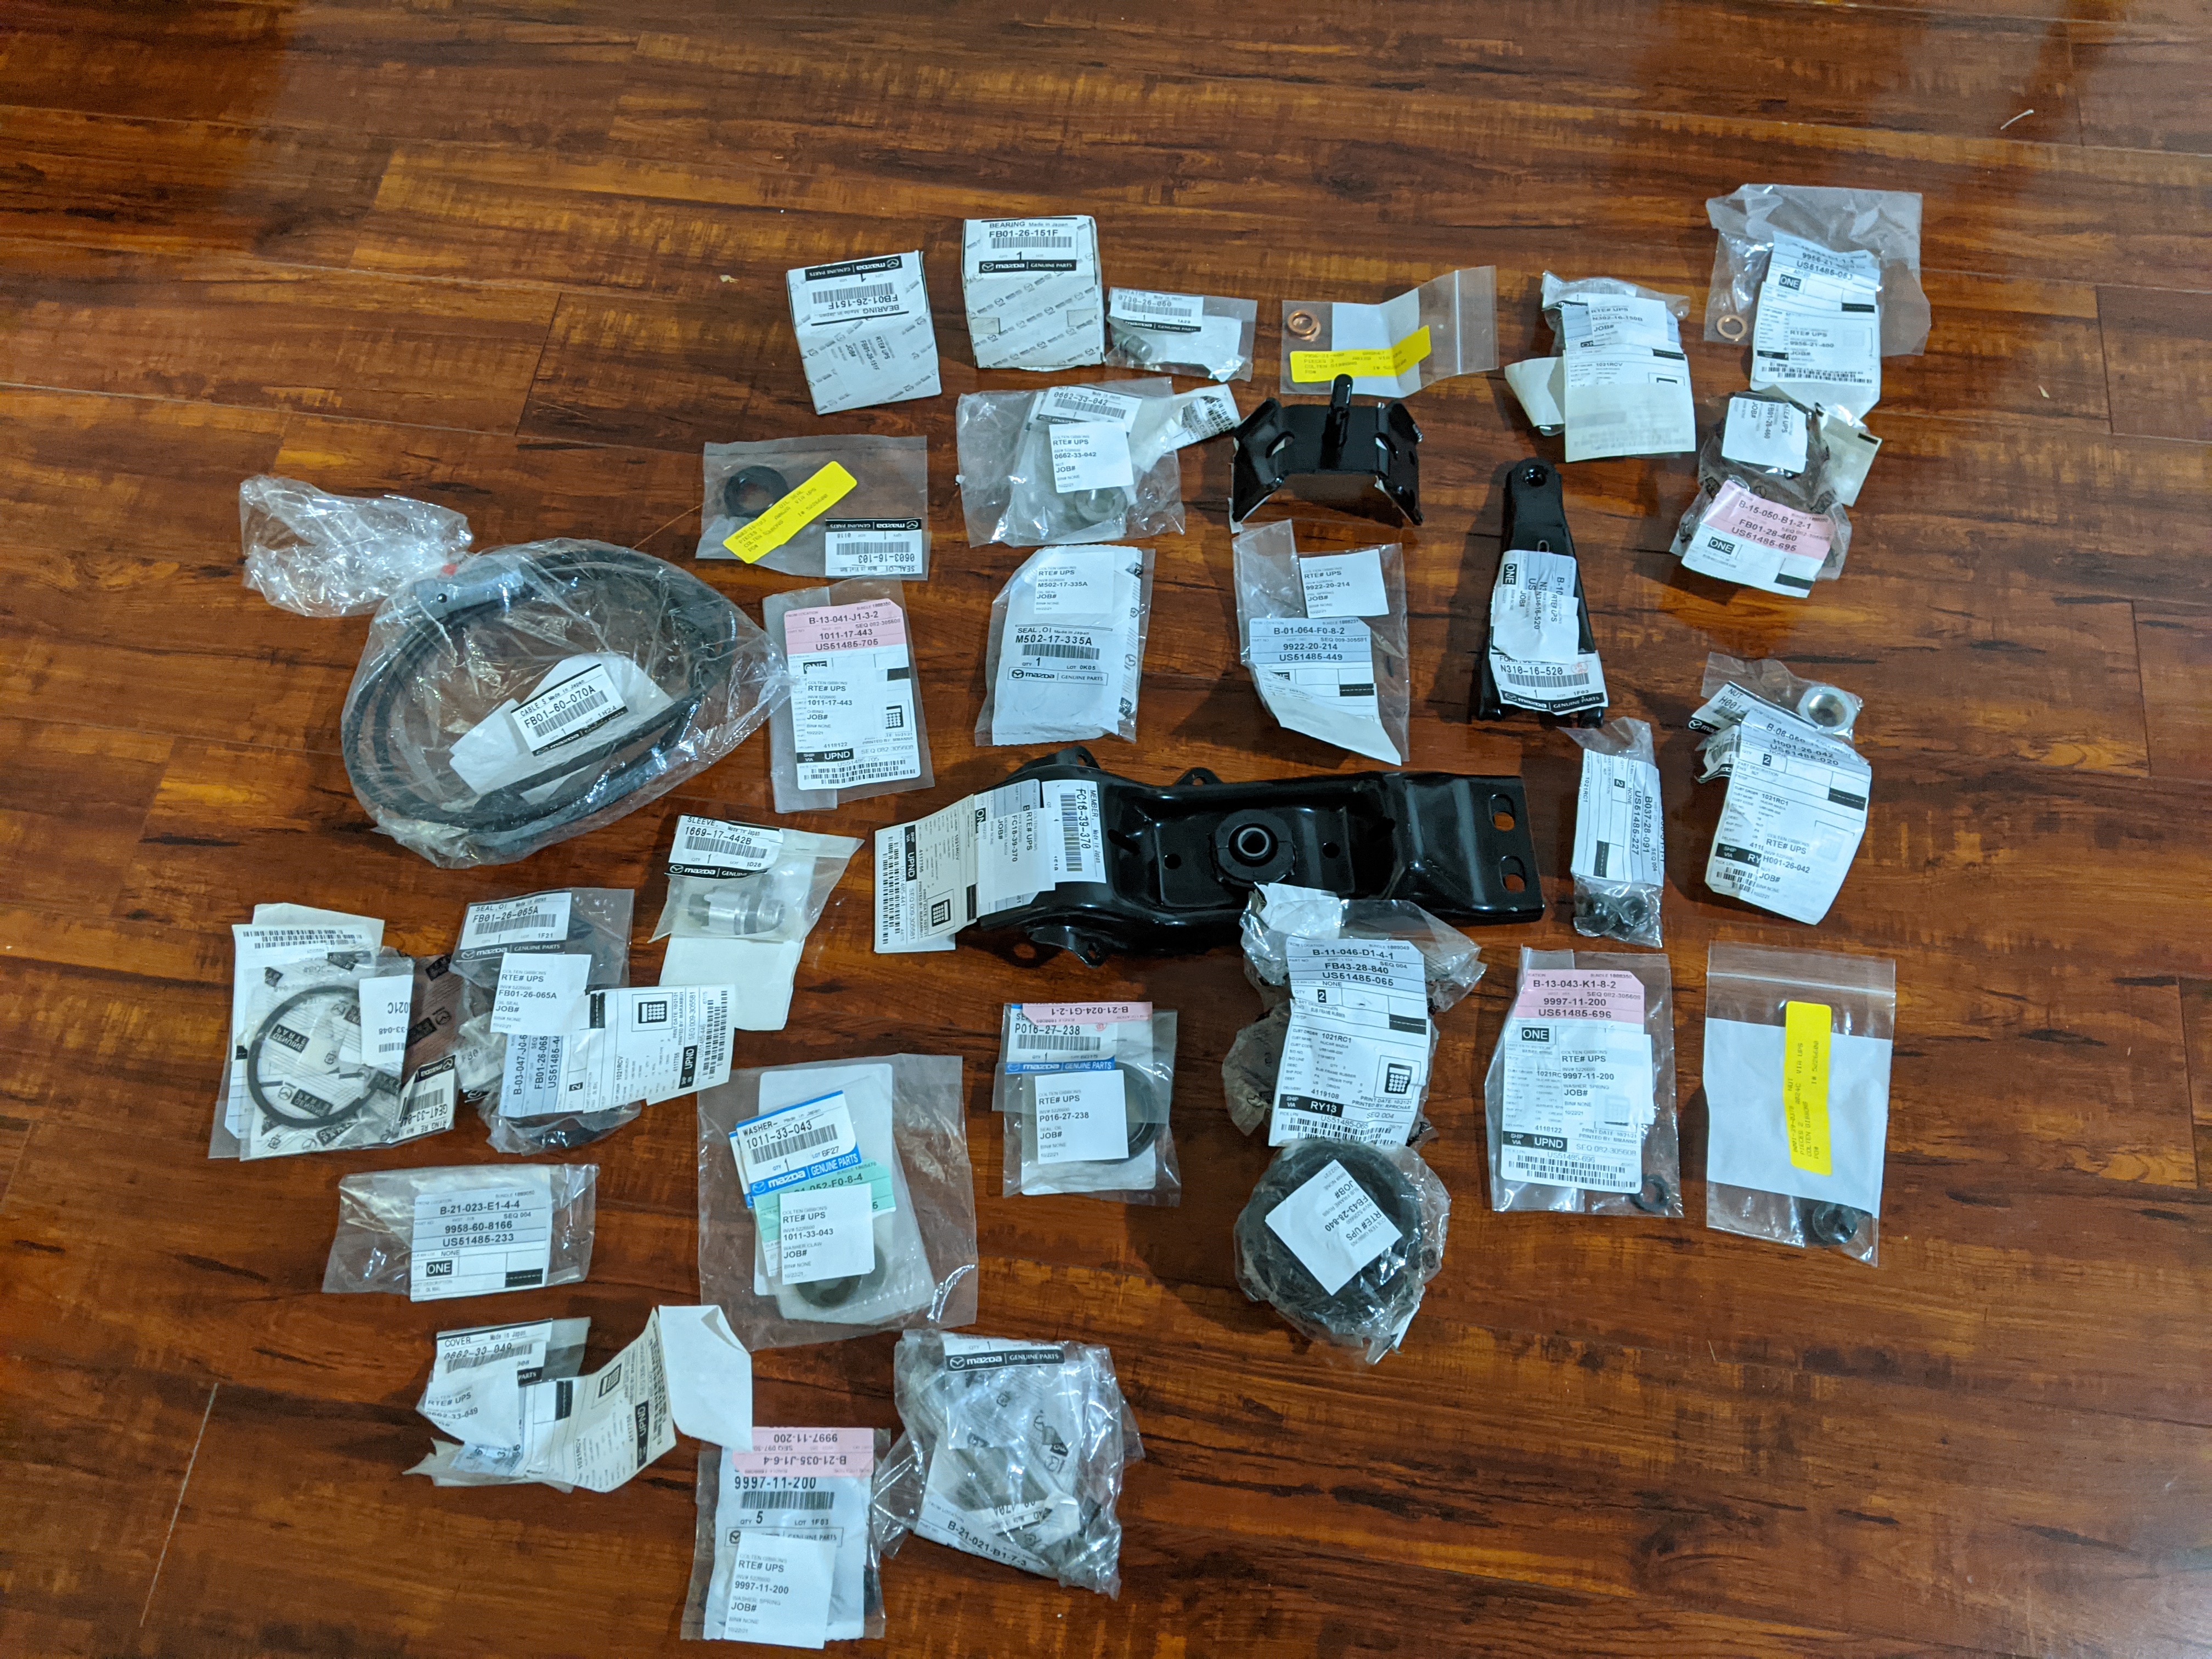
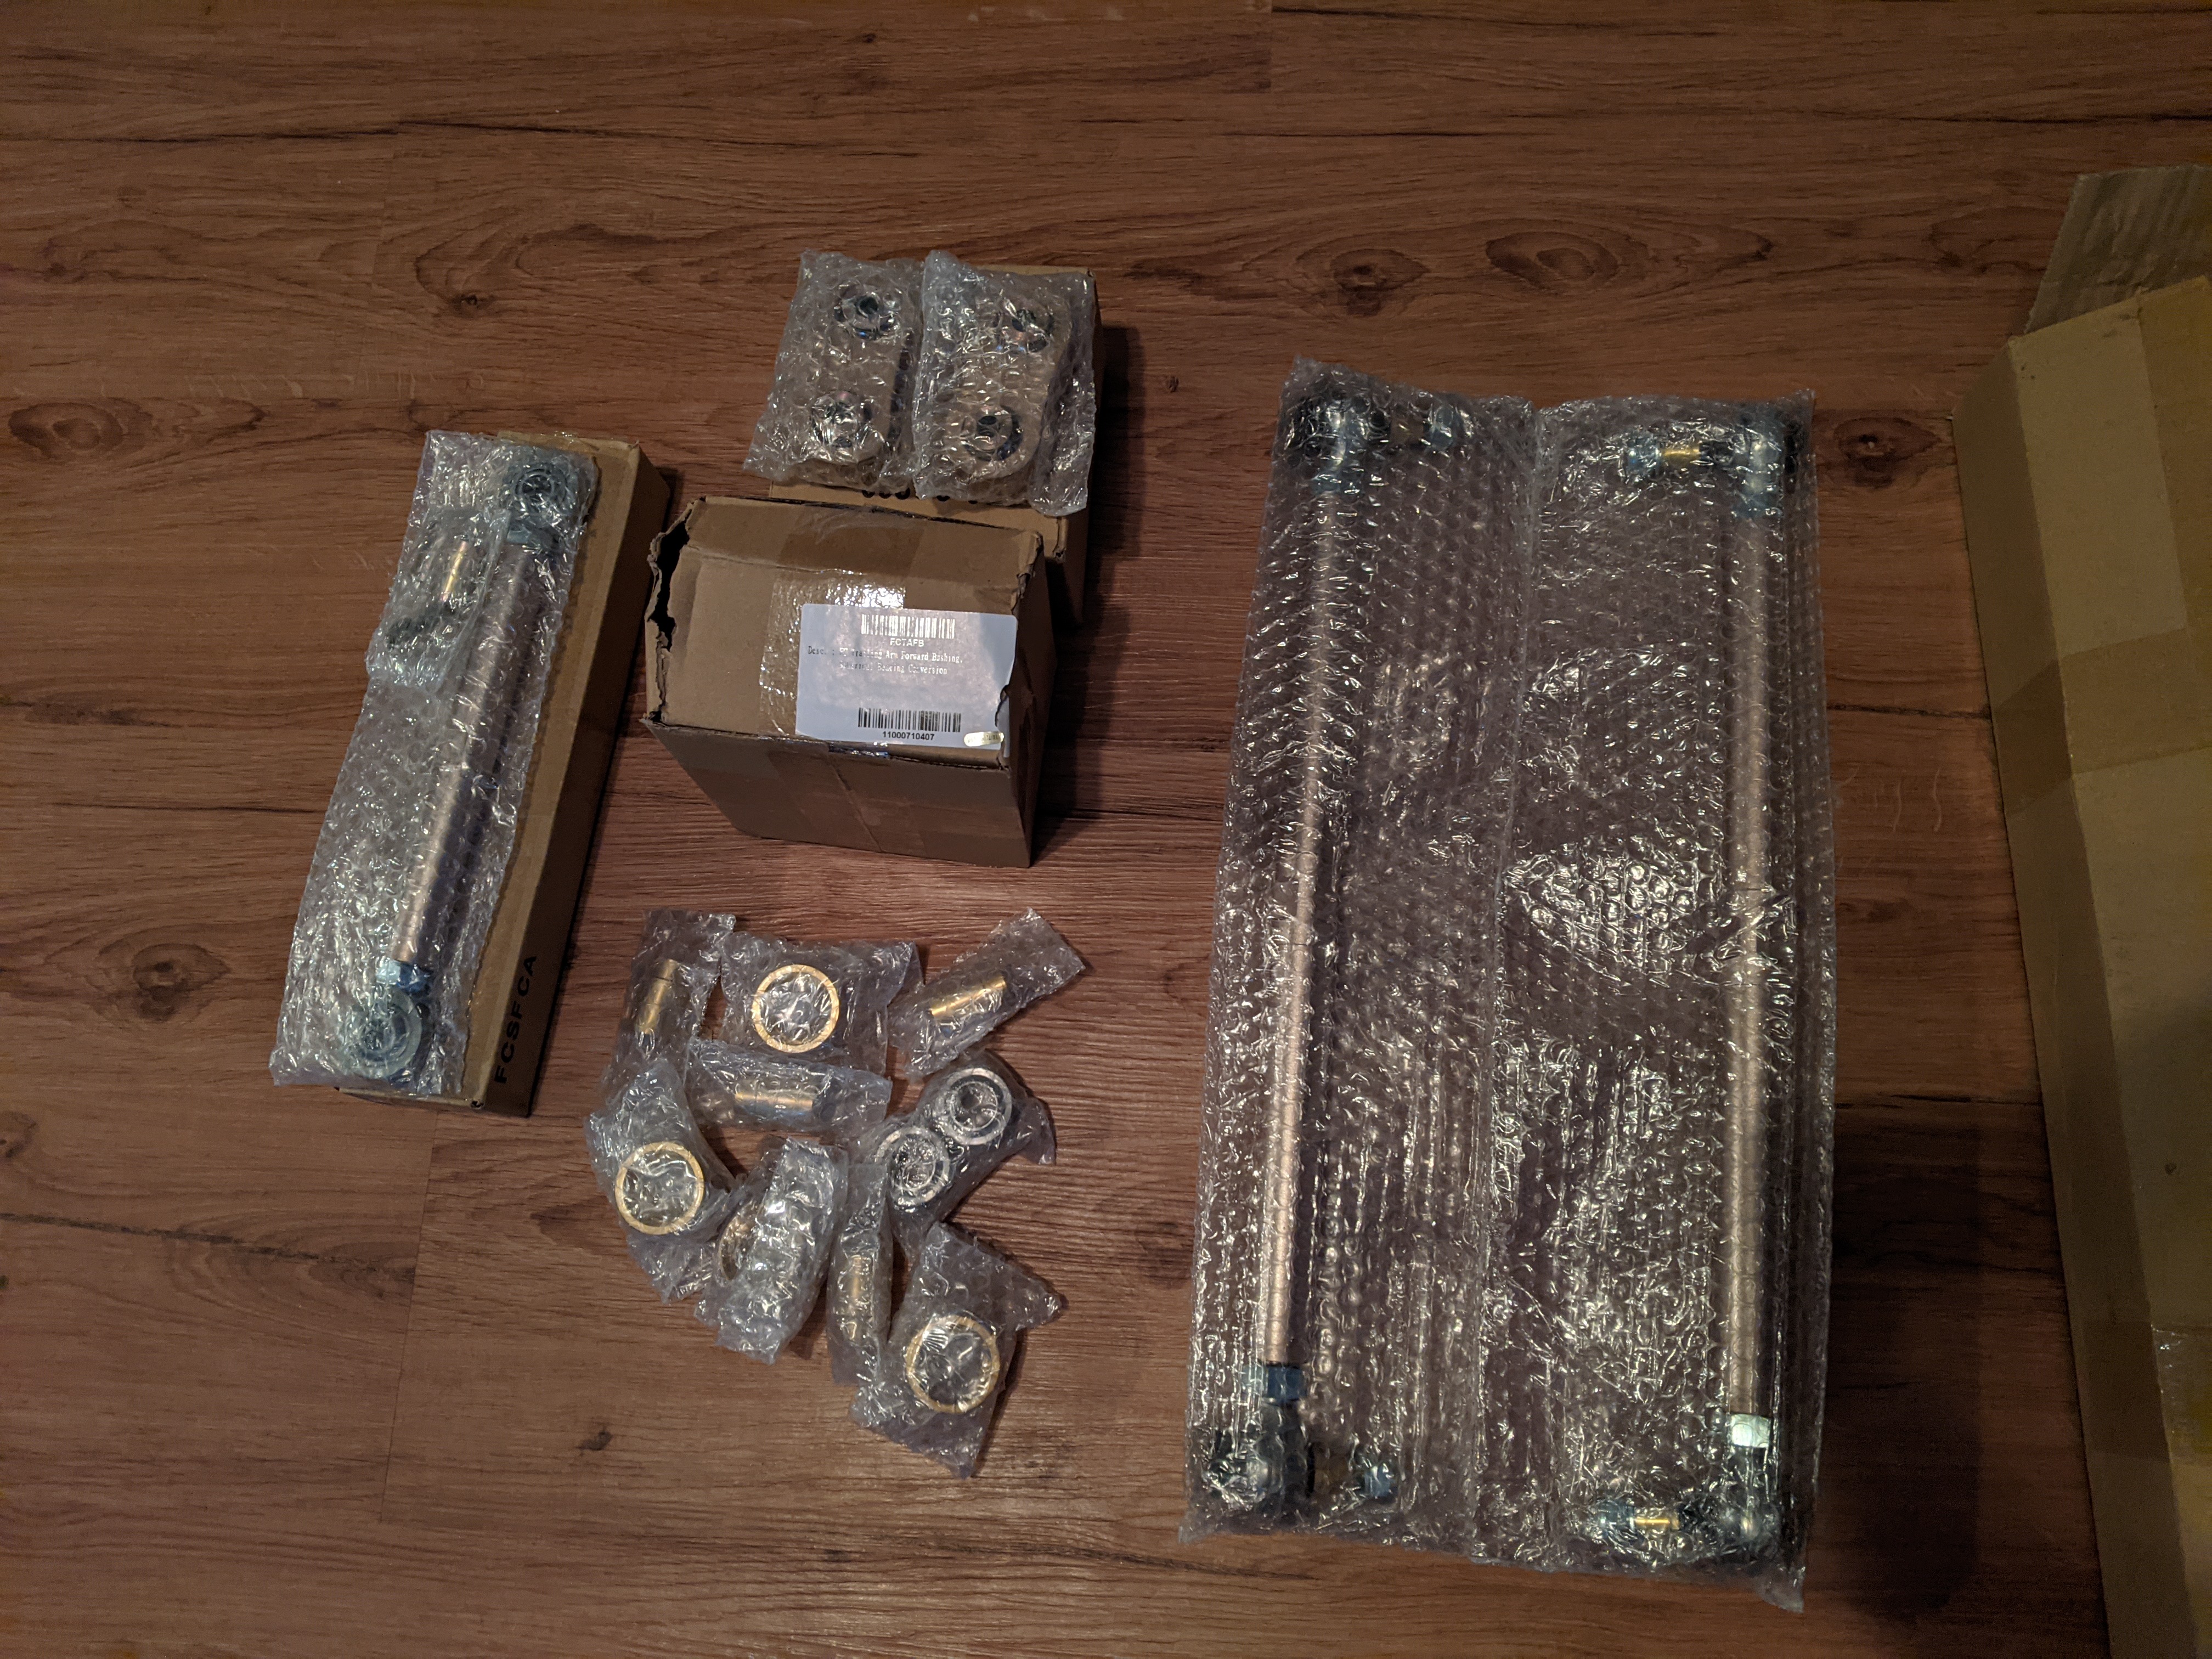
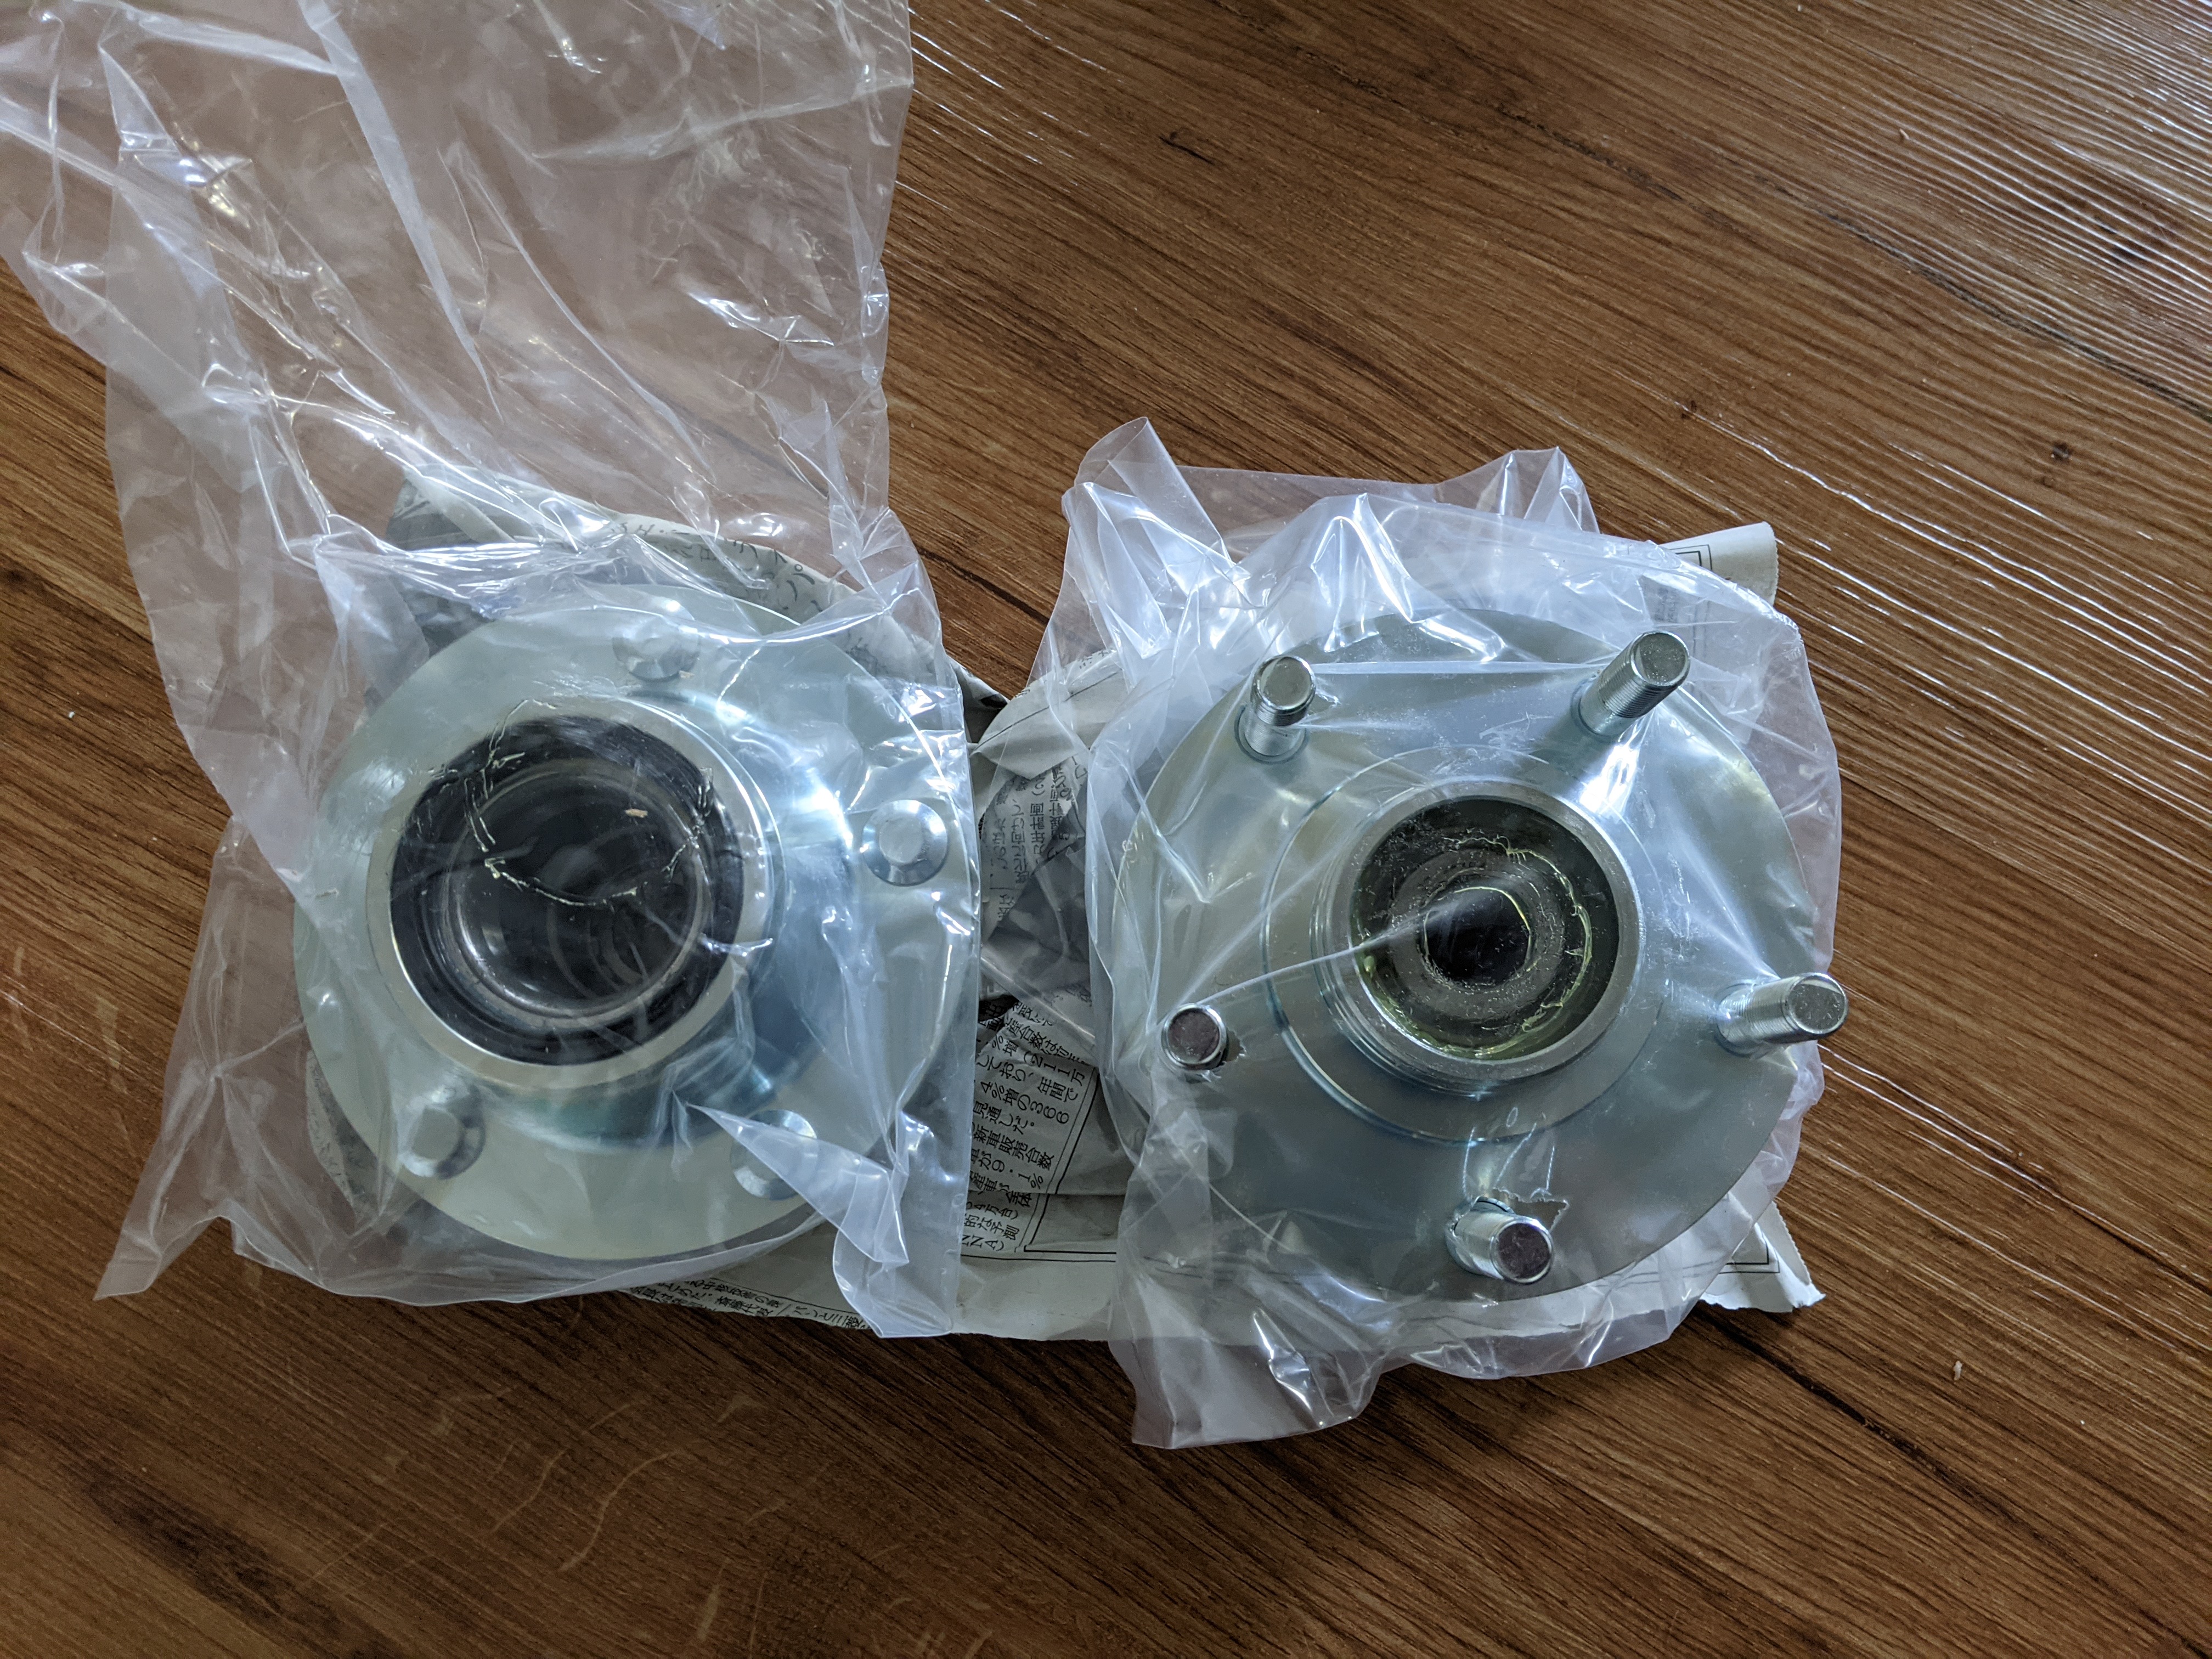
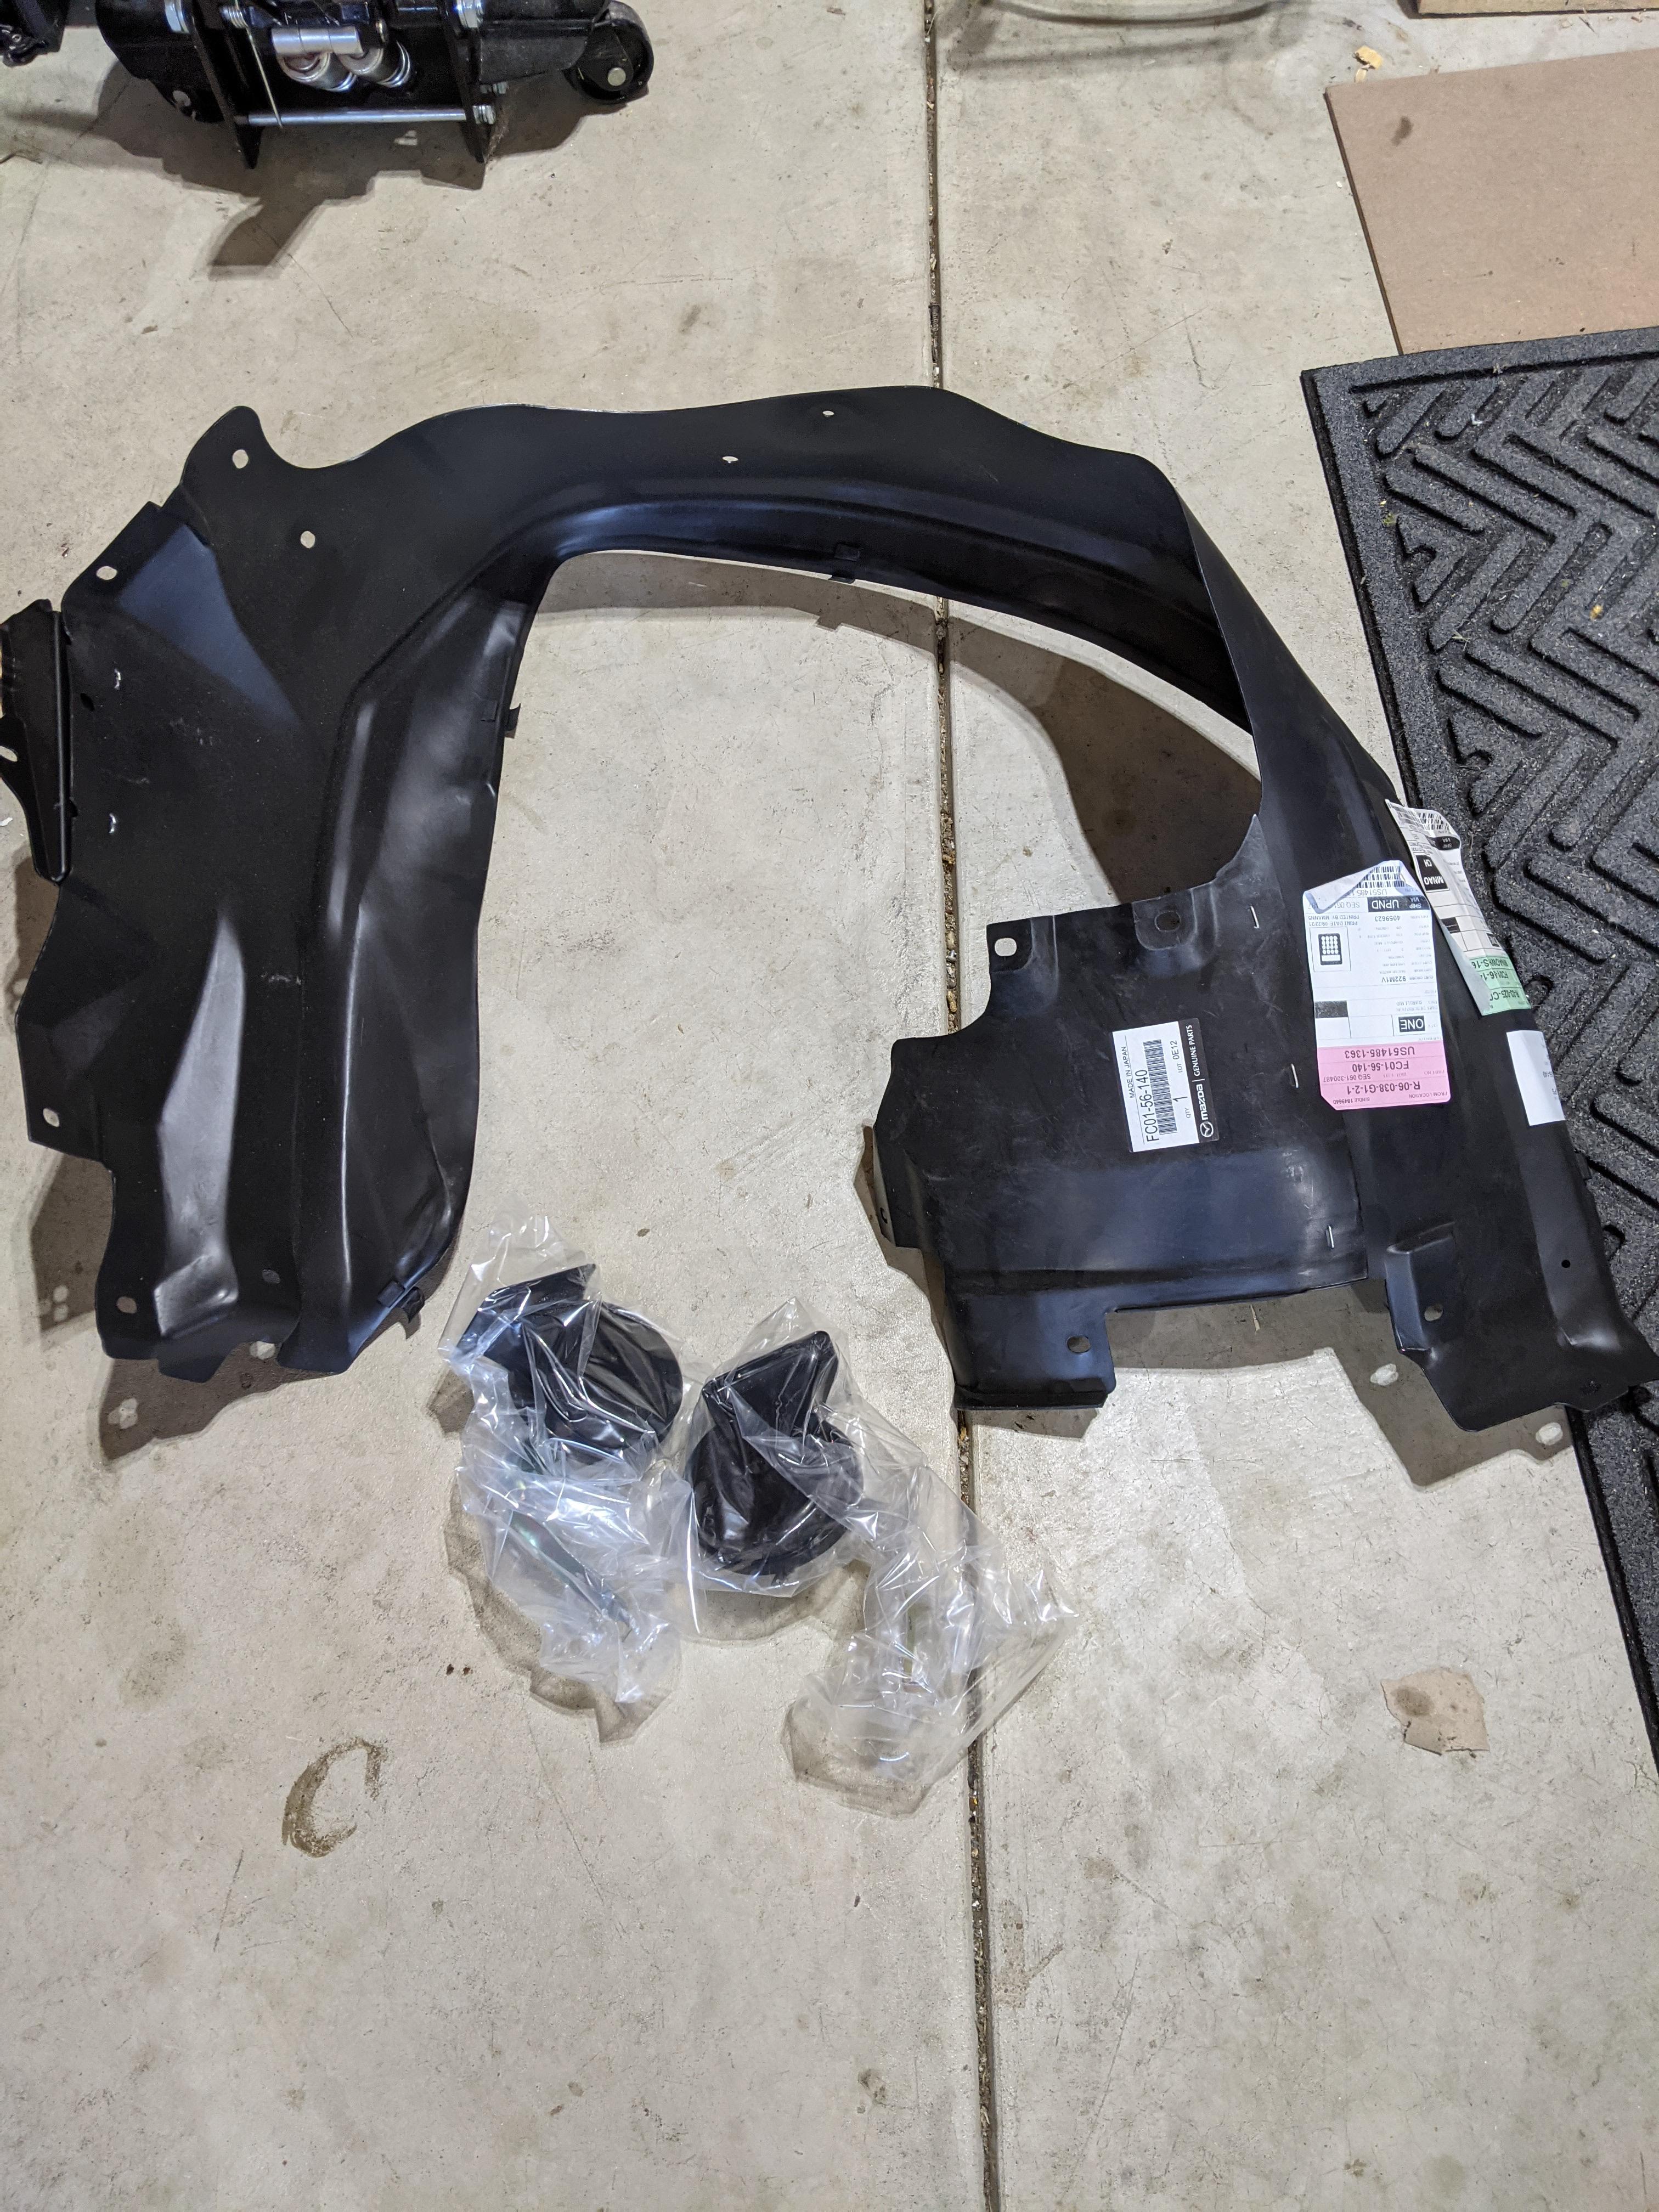
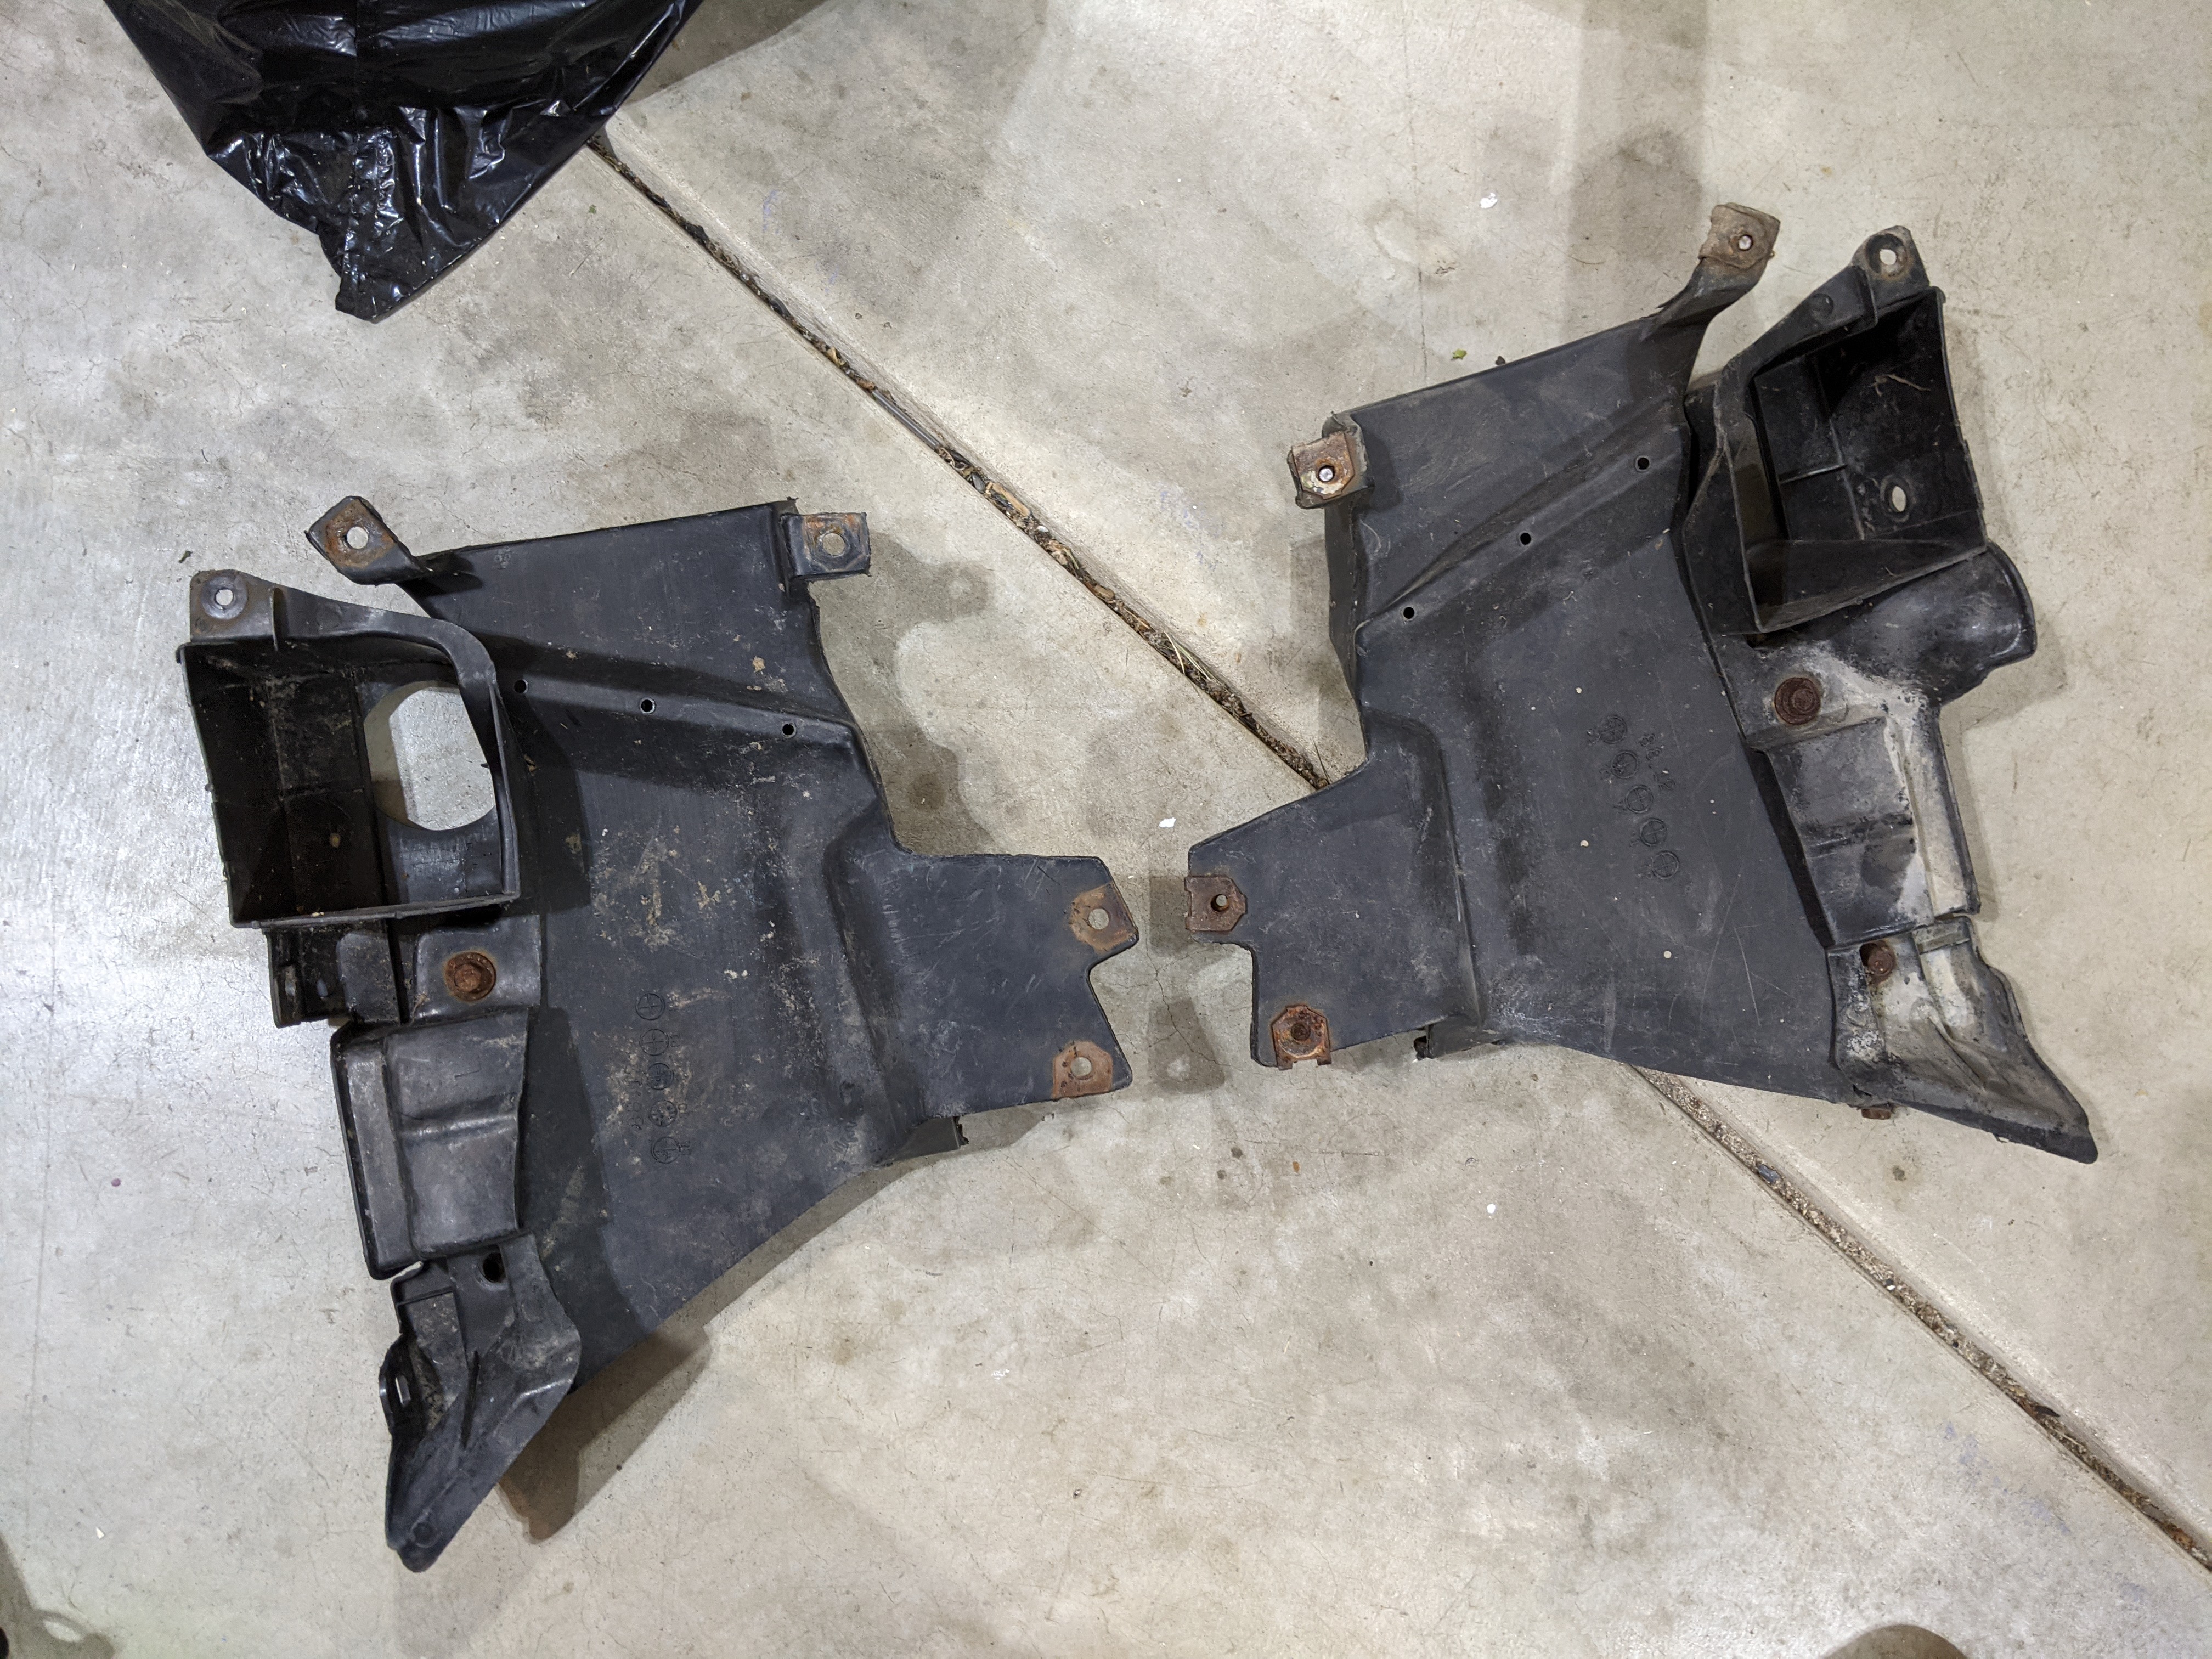
Slowly but surely things are coming together. Since this is an expensive endeavor I�ve split things up into sections to let the wallet cool down before the next one comes up. The first thing I�m tackling is an entire suspension overhaul. Which means a lot of things were purchased - some related, some not. I ended up purchasing some OEM brake cooling ducts to see if they were worth owning. In addition, I was able to source a brand new driver side fender liner and some RX-8 horns. I also, while not pictured, grabbed a used good condition passenger side fender liner. For the suspension re-work I�m trying to keep things stiff, but not so stiff I never want to take the car anywhere. I purchased some Parts Shop Max lateral rods, camber links, center subframe bar, and the trailing arm spherical bushings. In addition, I also bought some JJLR solid bushings for the trailing arm to the knuckle and some Racing Beat sway bar endlinks. Everything else purchased was Mazda Competition - and if I couldn�t find Mazda Competition I bought OEM. I think the only Mazda Comp bushing I was unable to find was the Rear Subframe to Chassis bushing. I also ordered some parts overnight from Japan (not really overnight, but really fast). Since the FC front hubs are both aluminum and not easy to service, I picked up some Steel GT-1 Motorsports front hubs from Japan. After I factored in the cost of new bearings (which these come with) it was 150/hub - not bad at all! I�m holding off on the sway bar bushings for now until I decide what exactly I want to do with them. I went a bit further than just bushings though and grabbed some stuff for the overall build. I bought new transmission mounts, speedometer cable, transmission seals, reverse light switch and bolts and nuts. I was unable to find a new 89-91 NA water pump assembly through Mazda so I bought one from Atkins. Since I�m not running a turbo on the 20b I thought this was the best option.
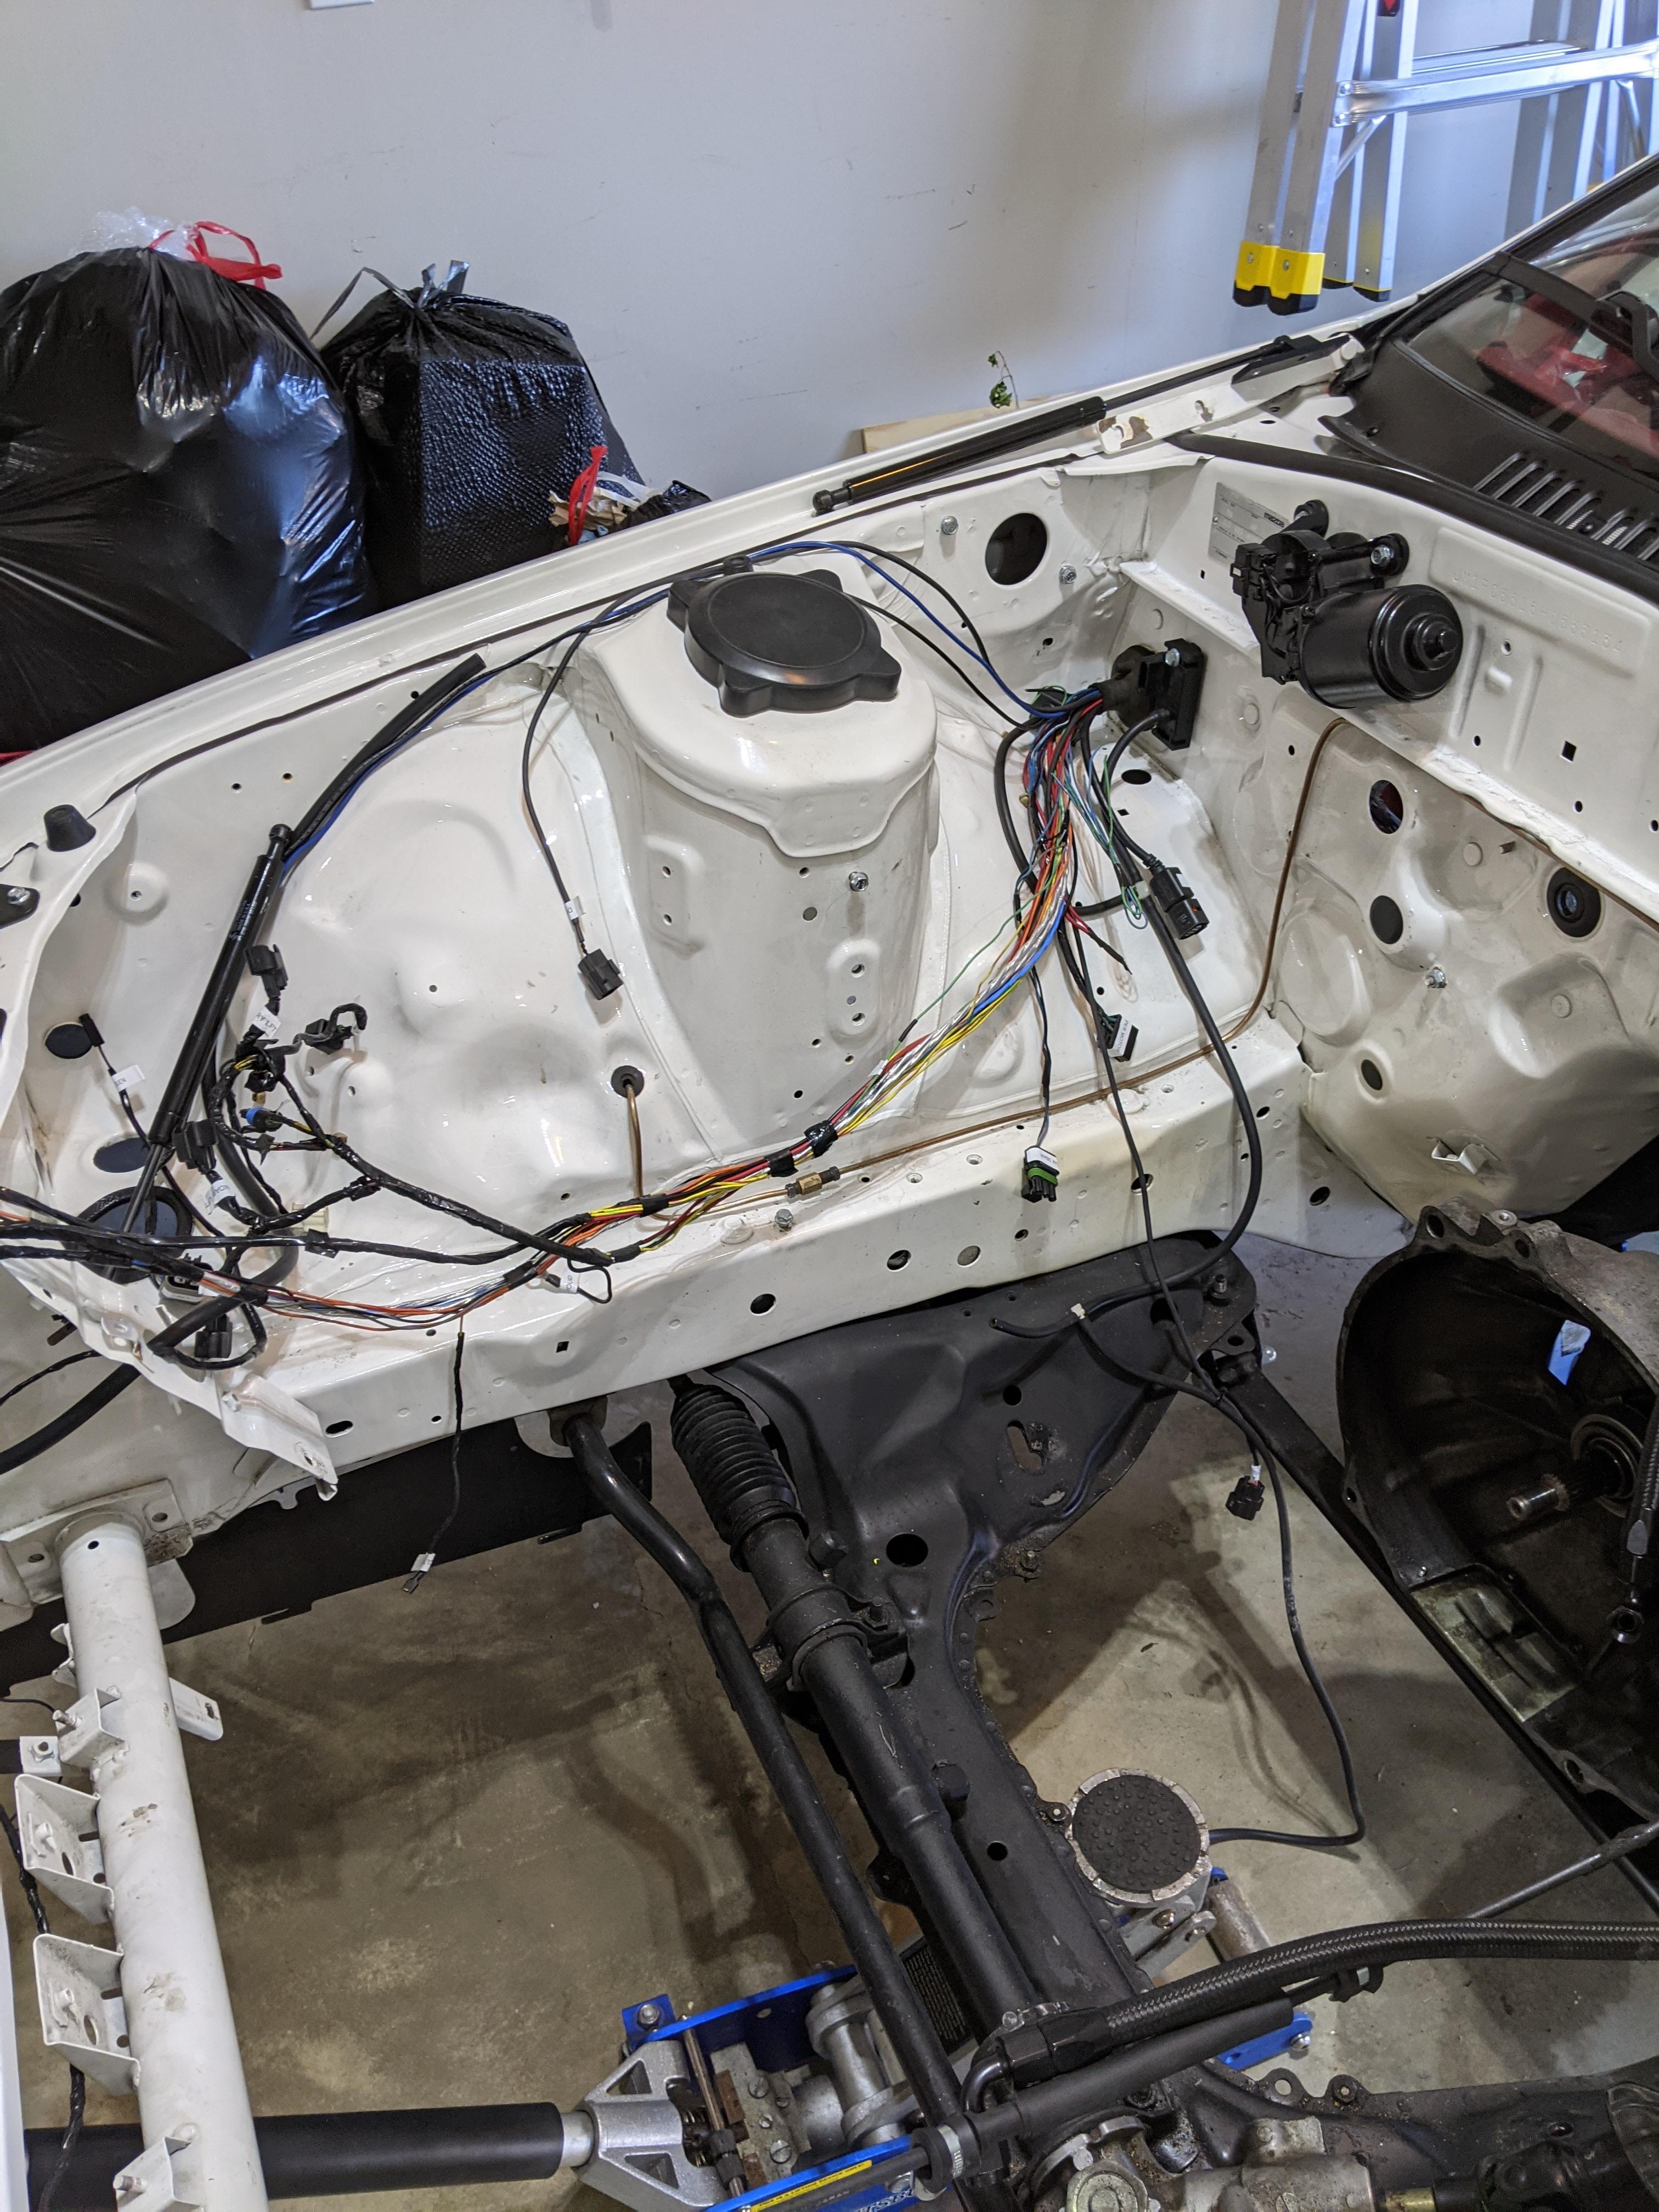
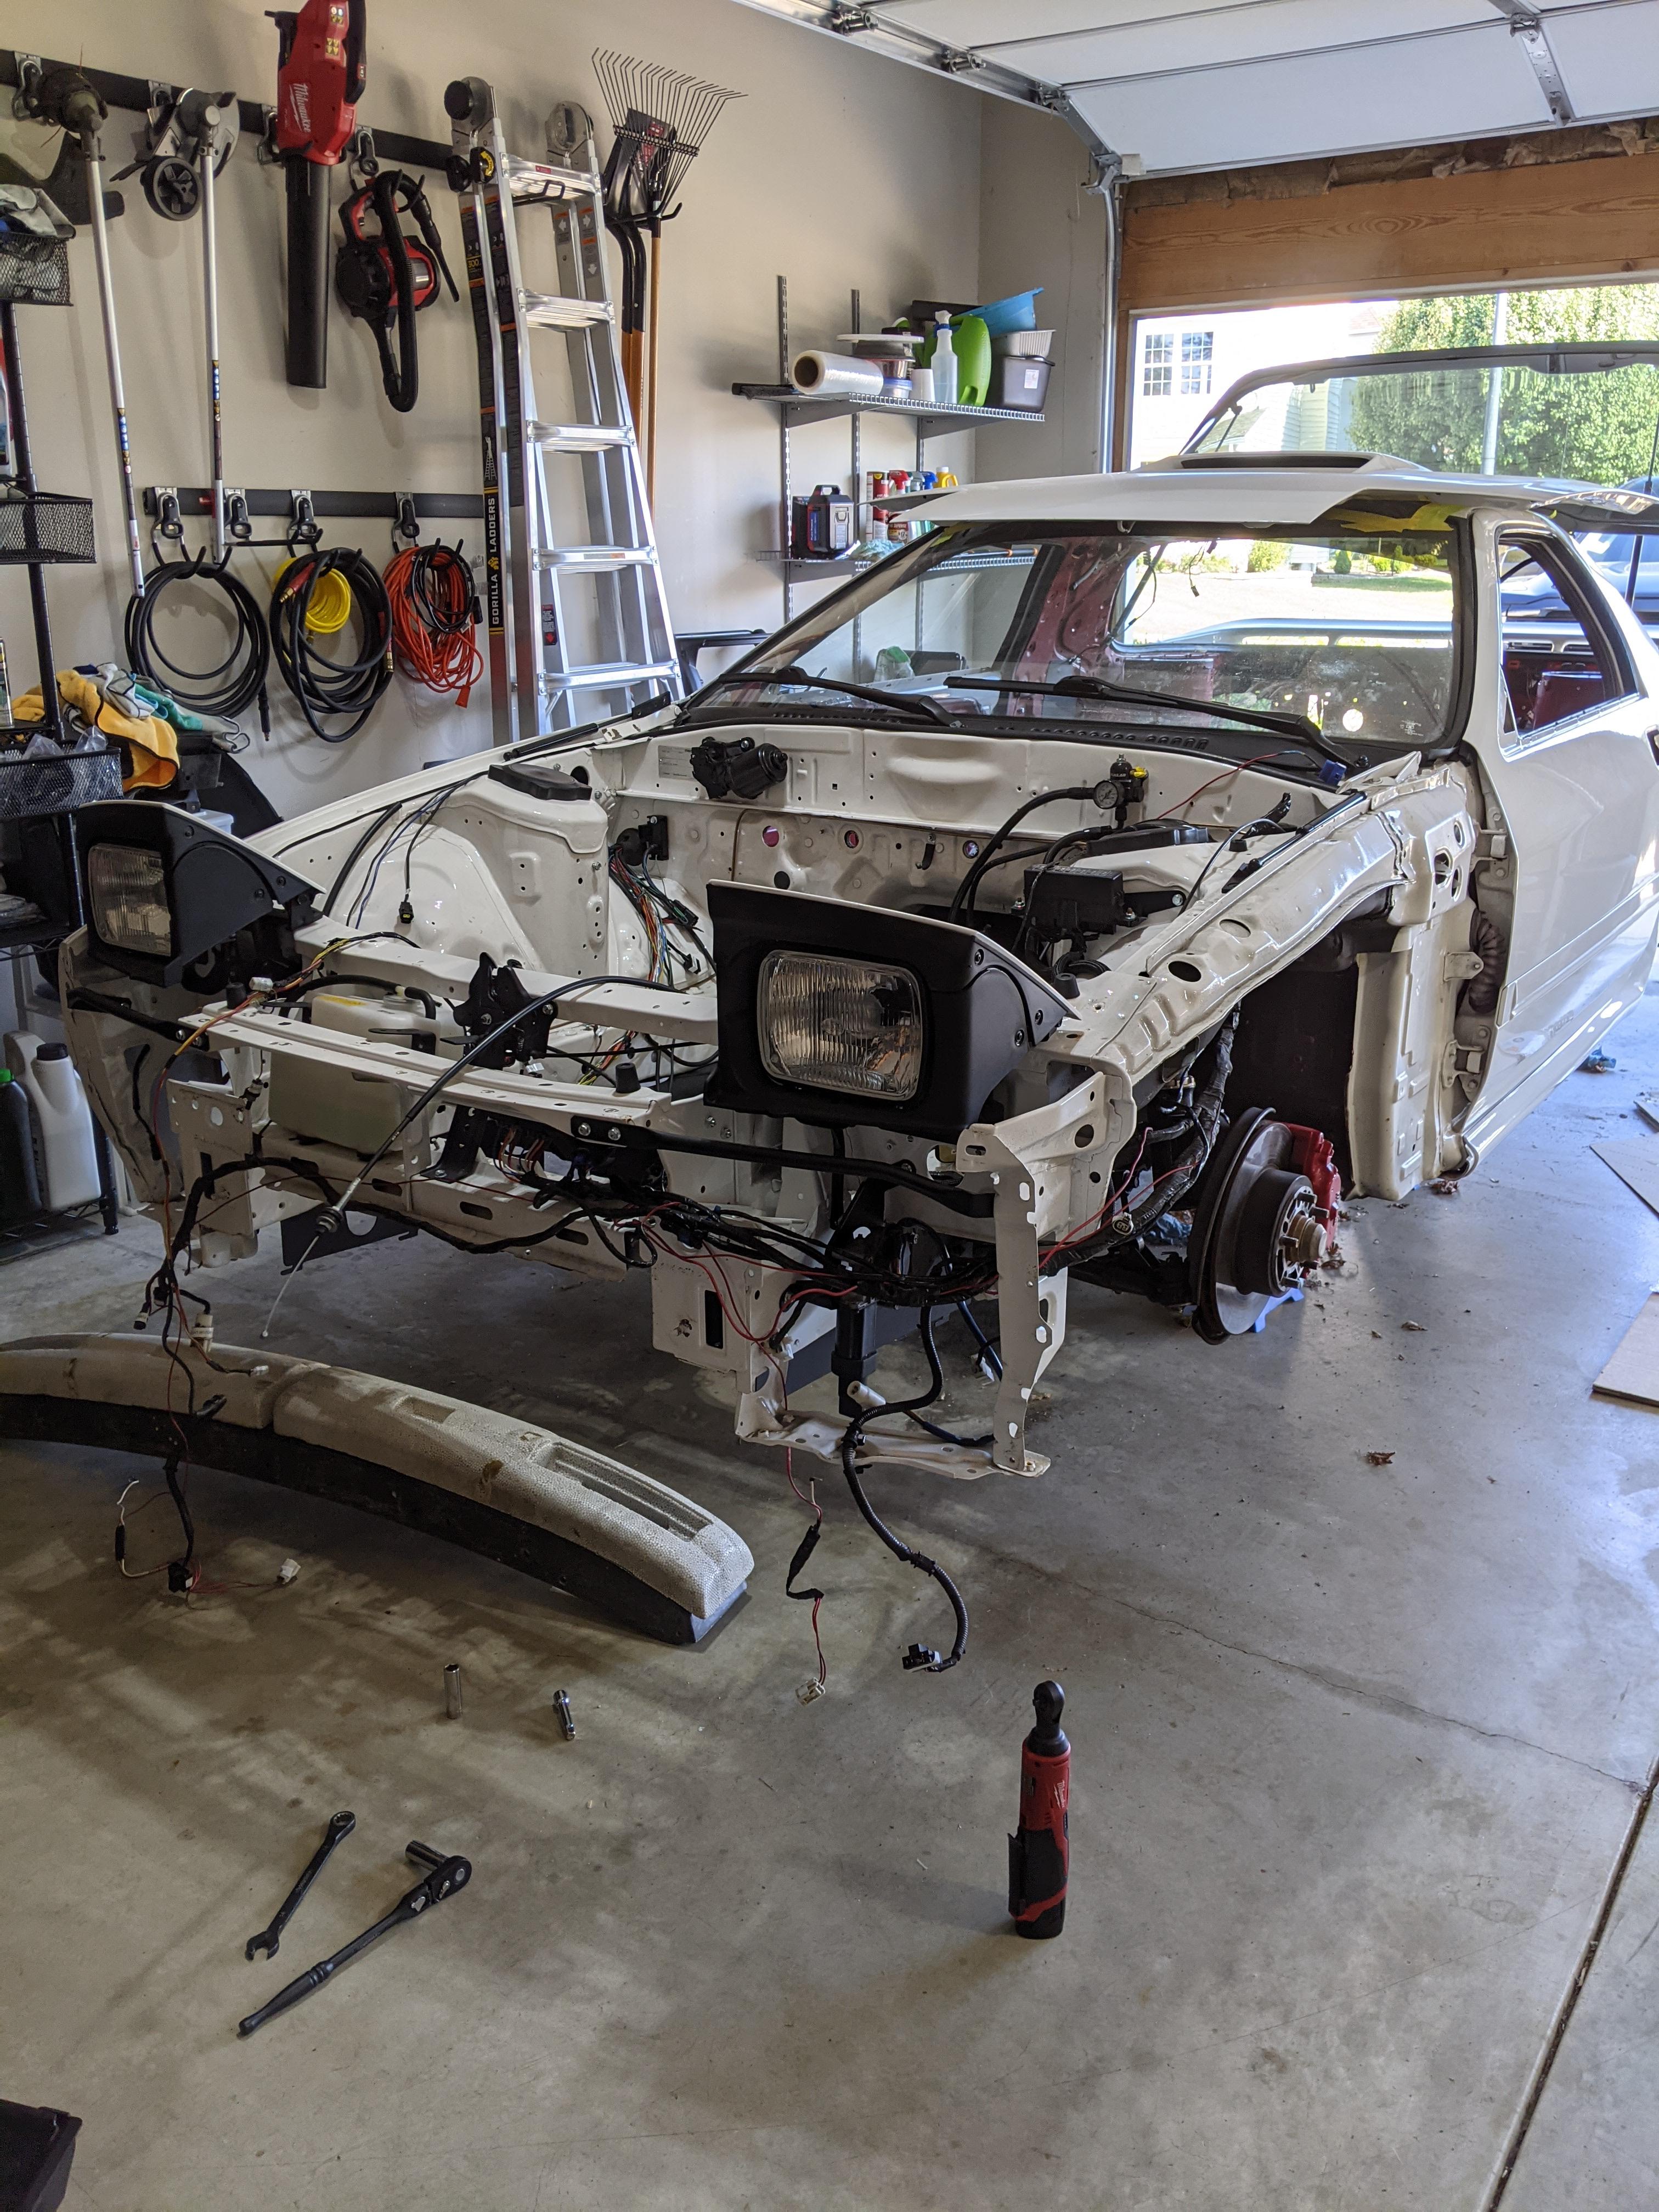
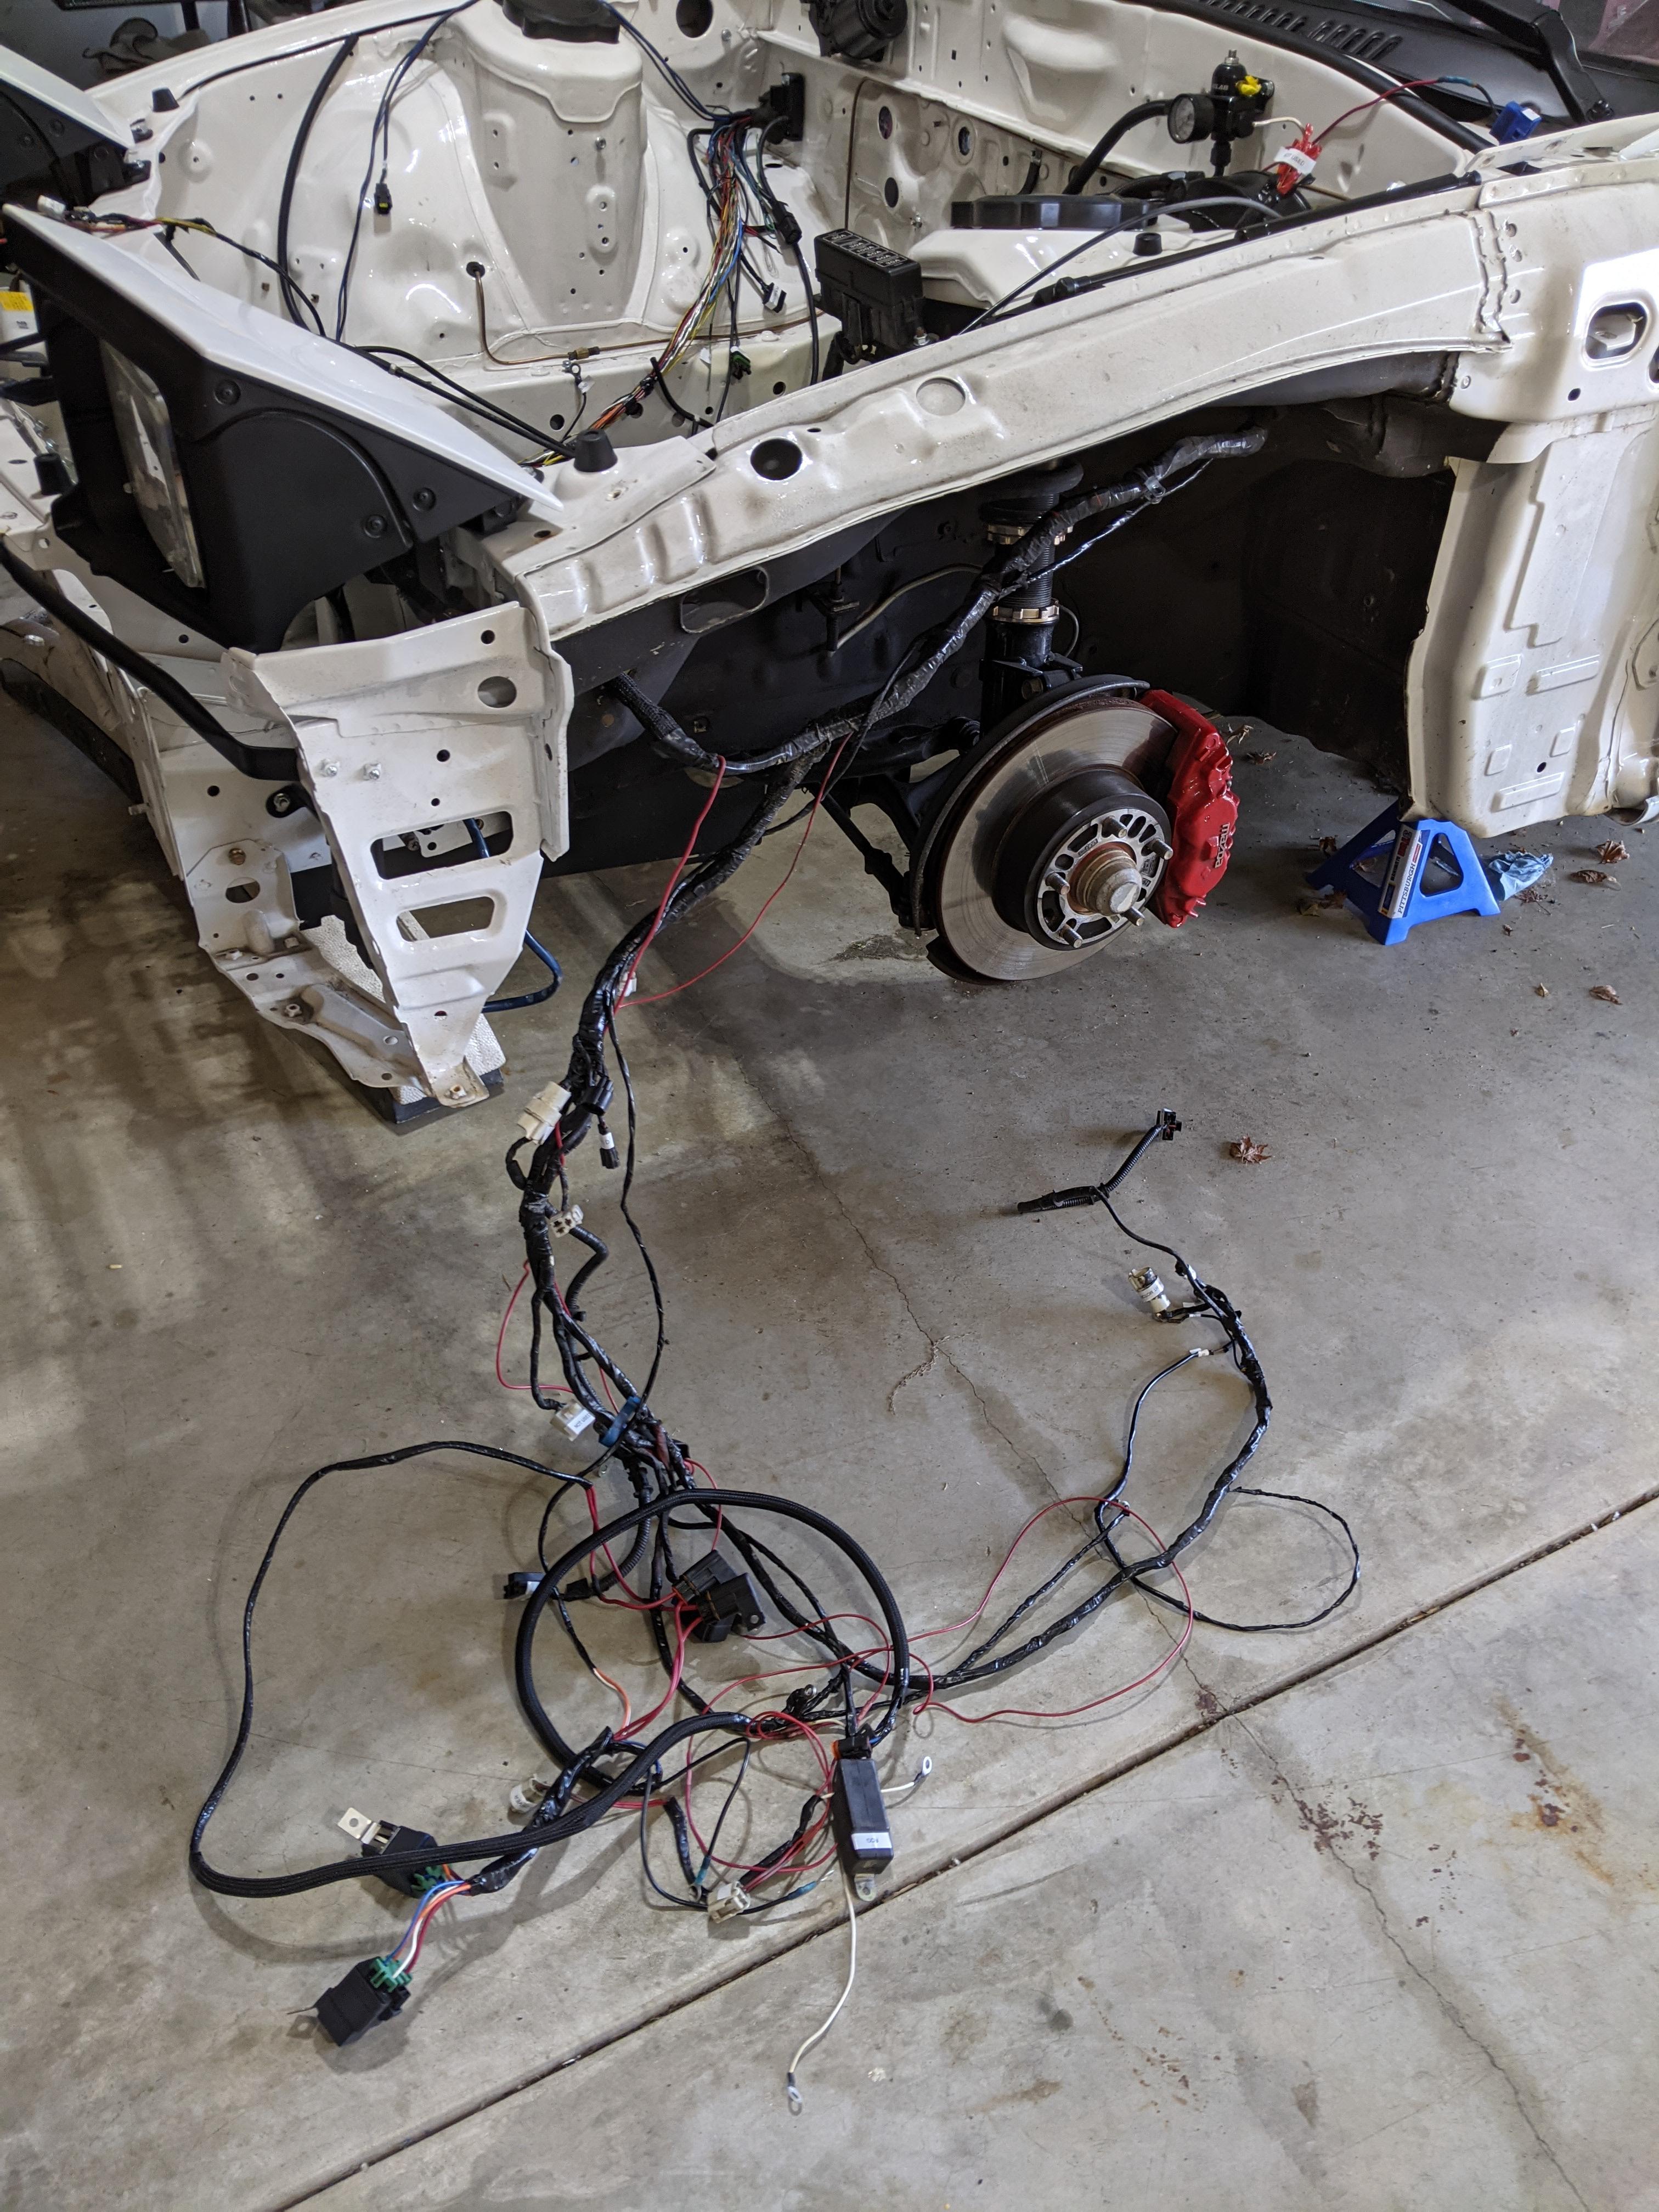
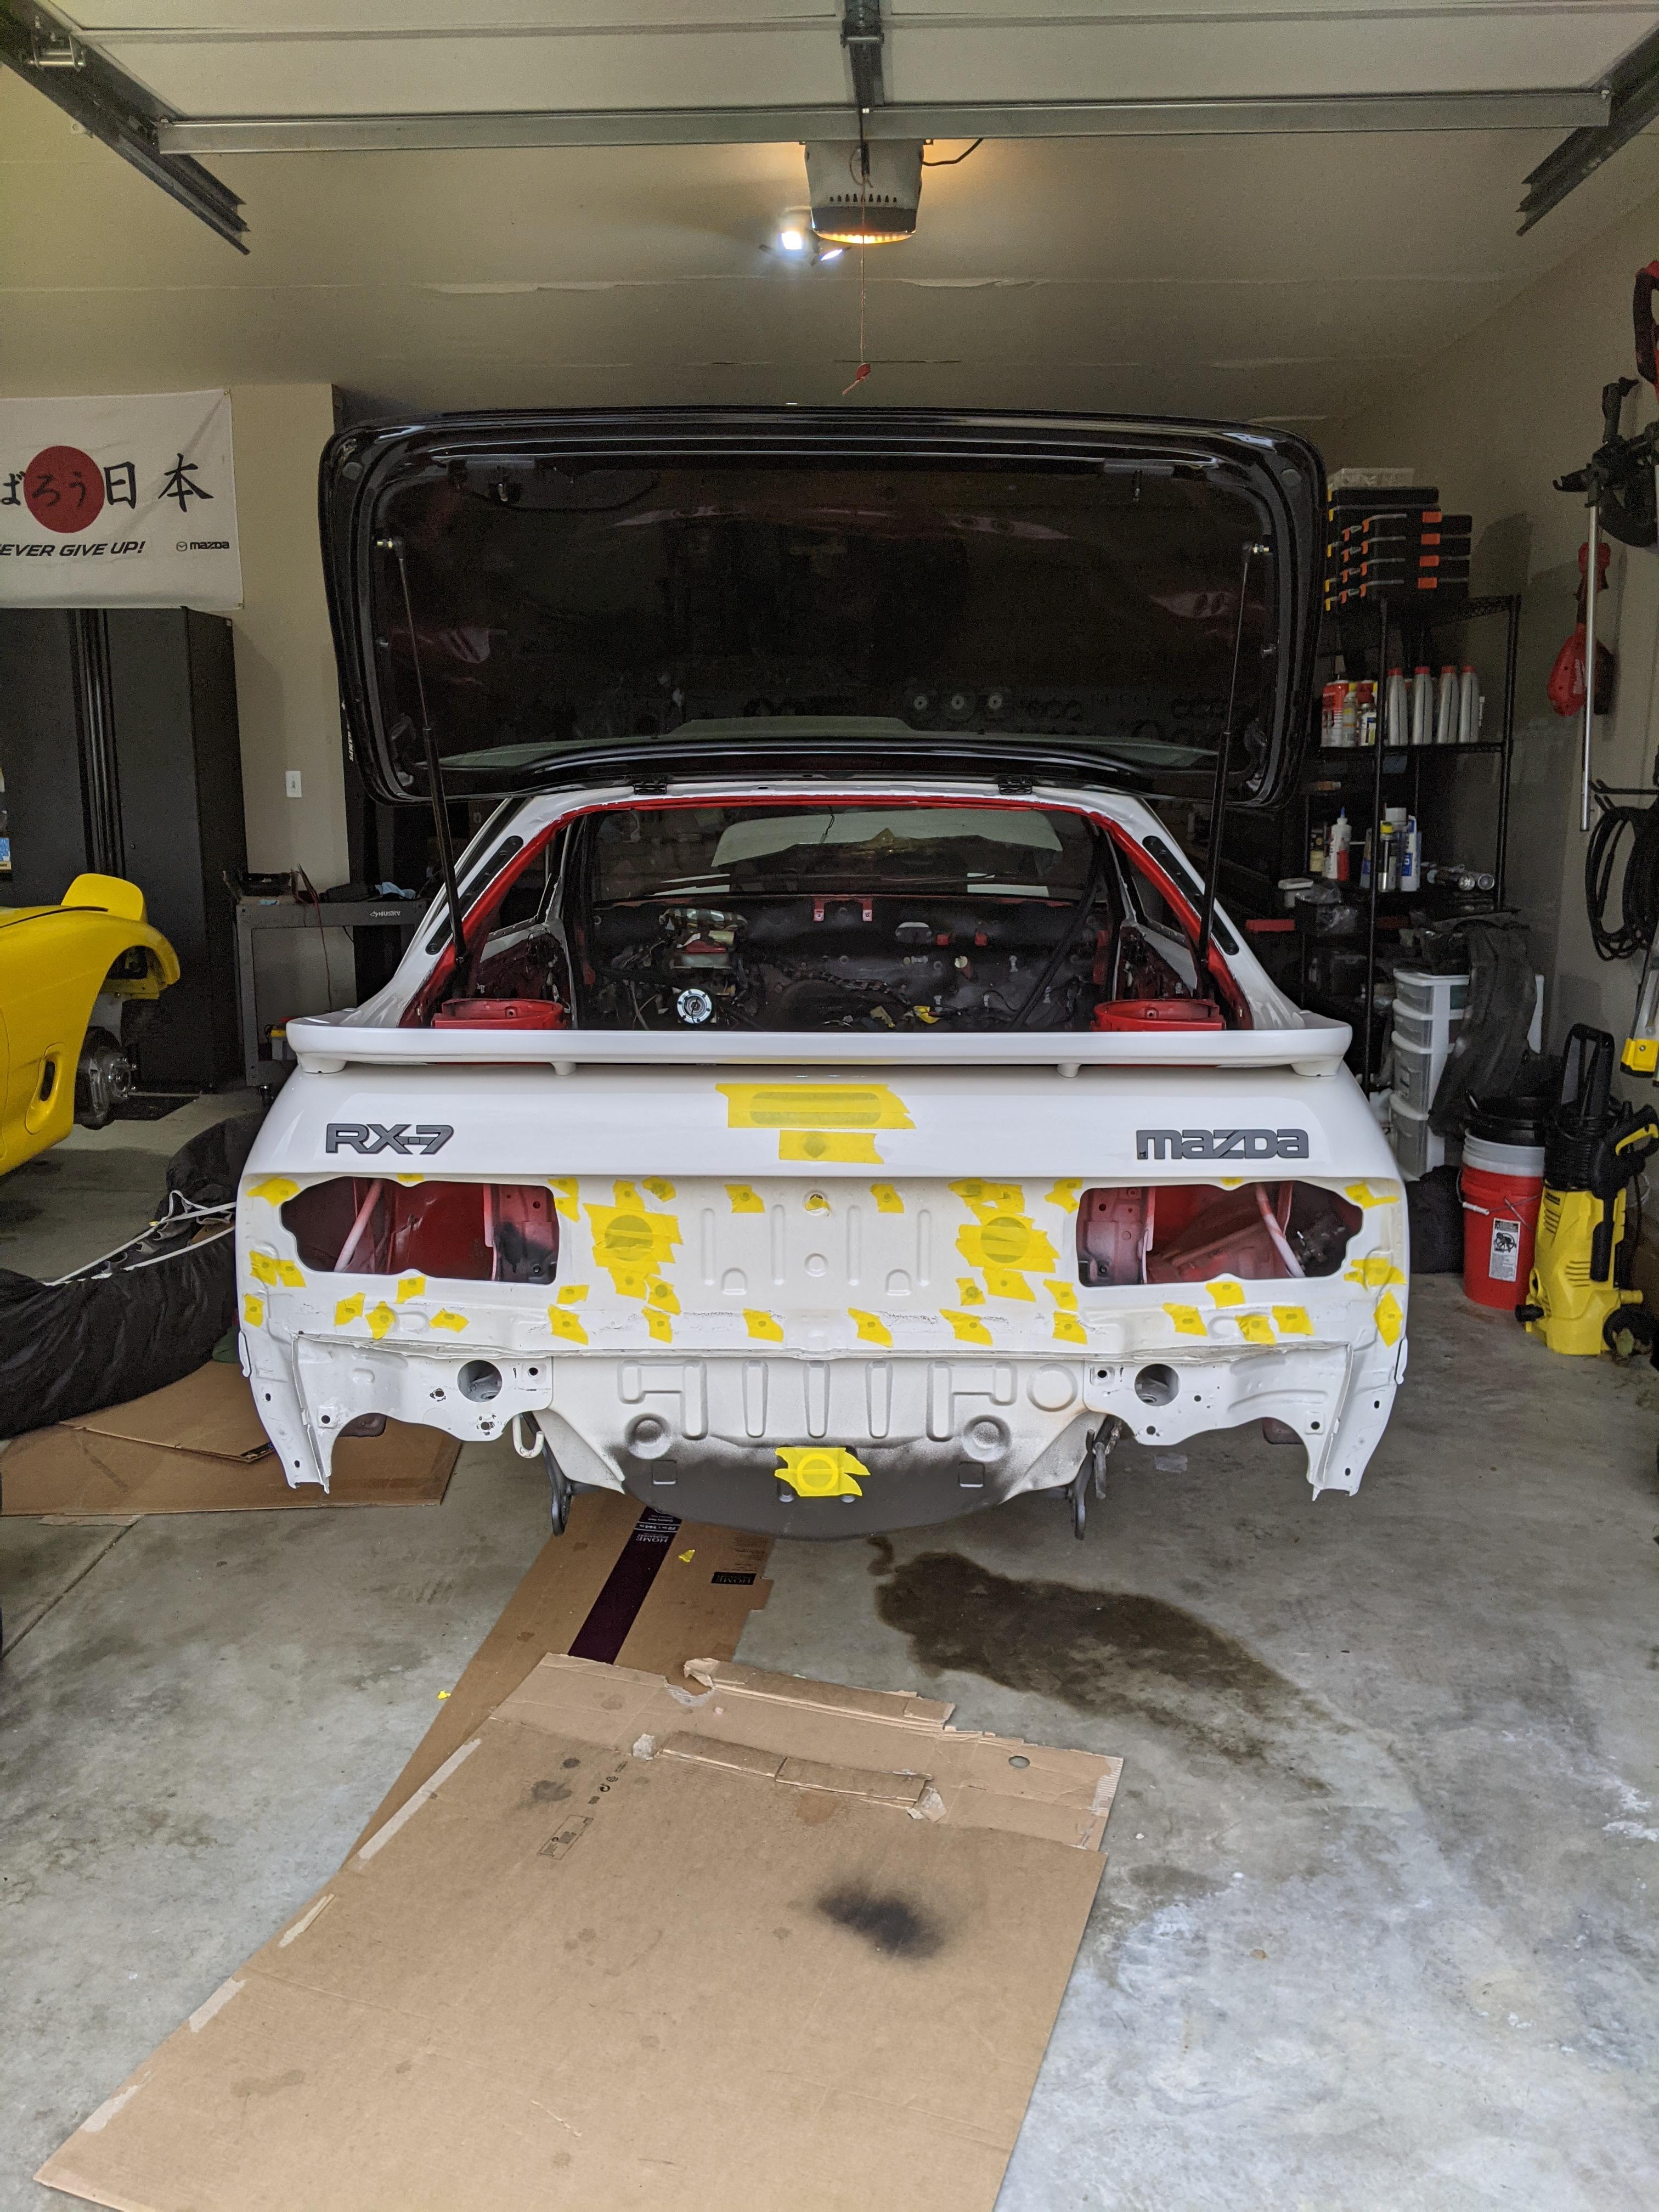
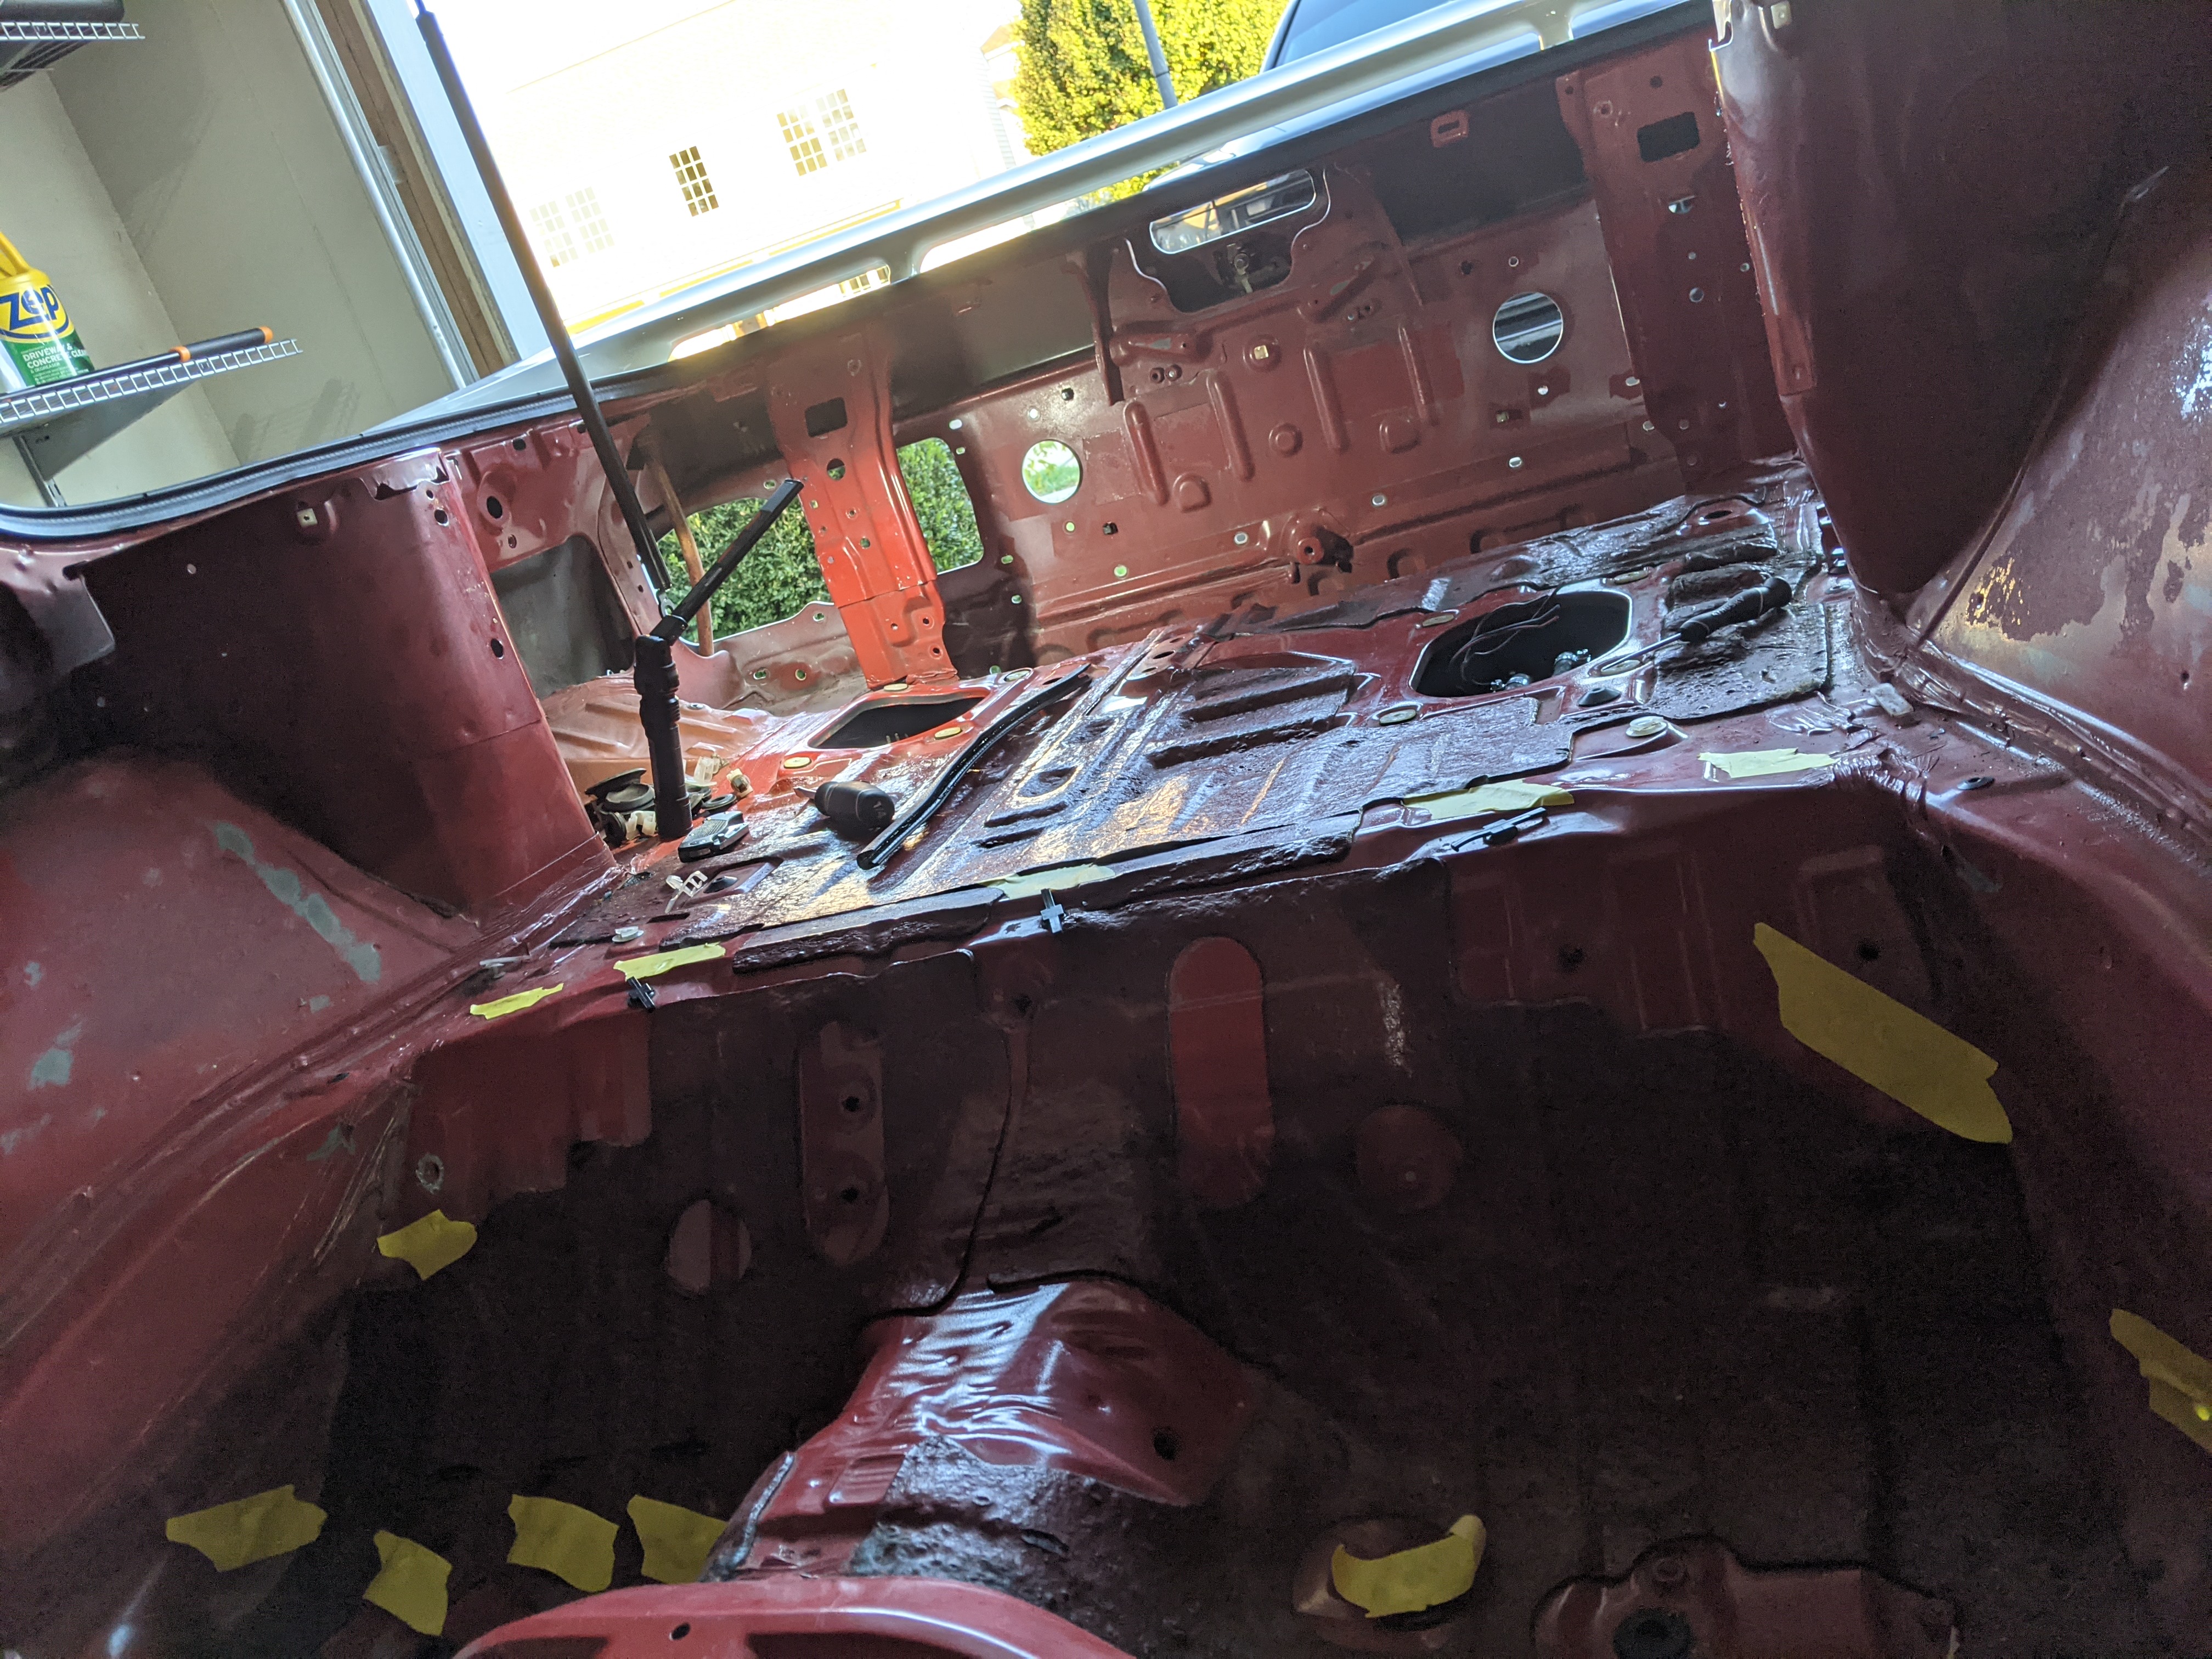
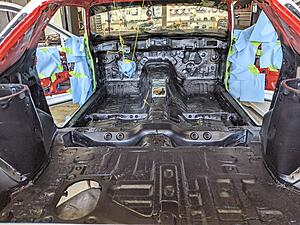
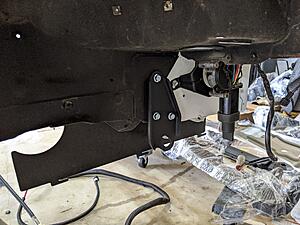
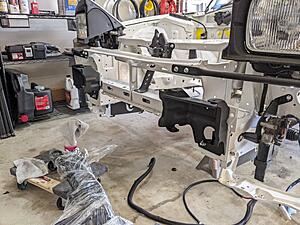
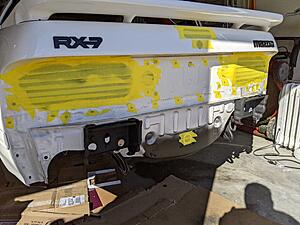
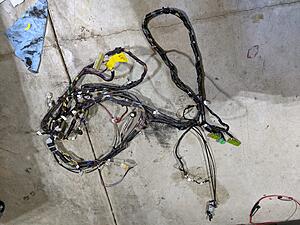
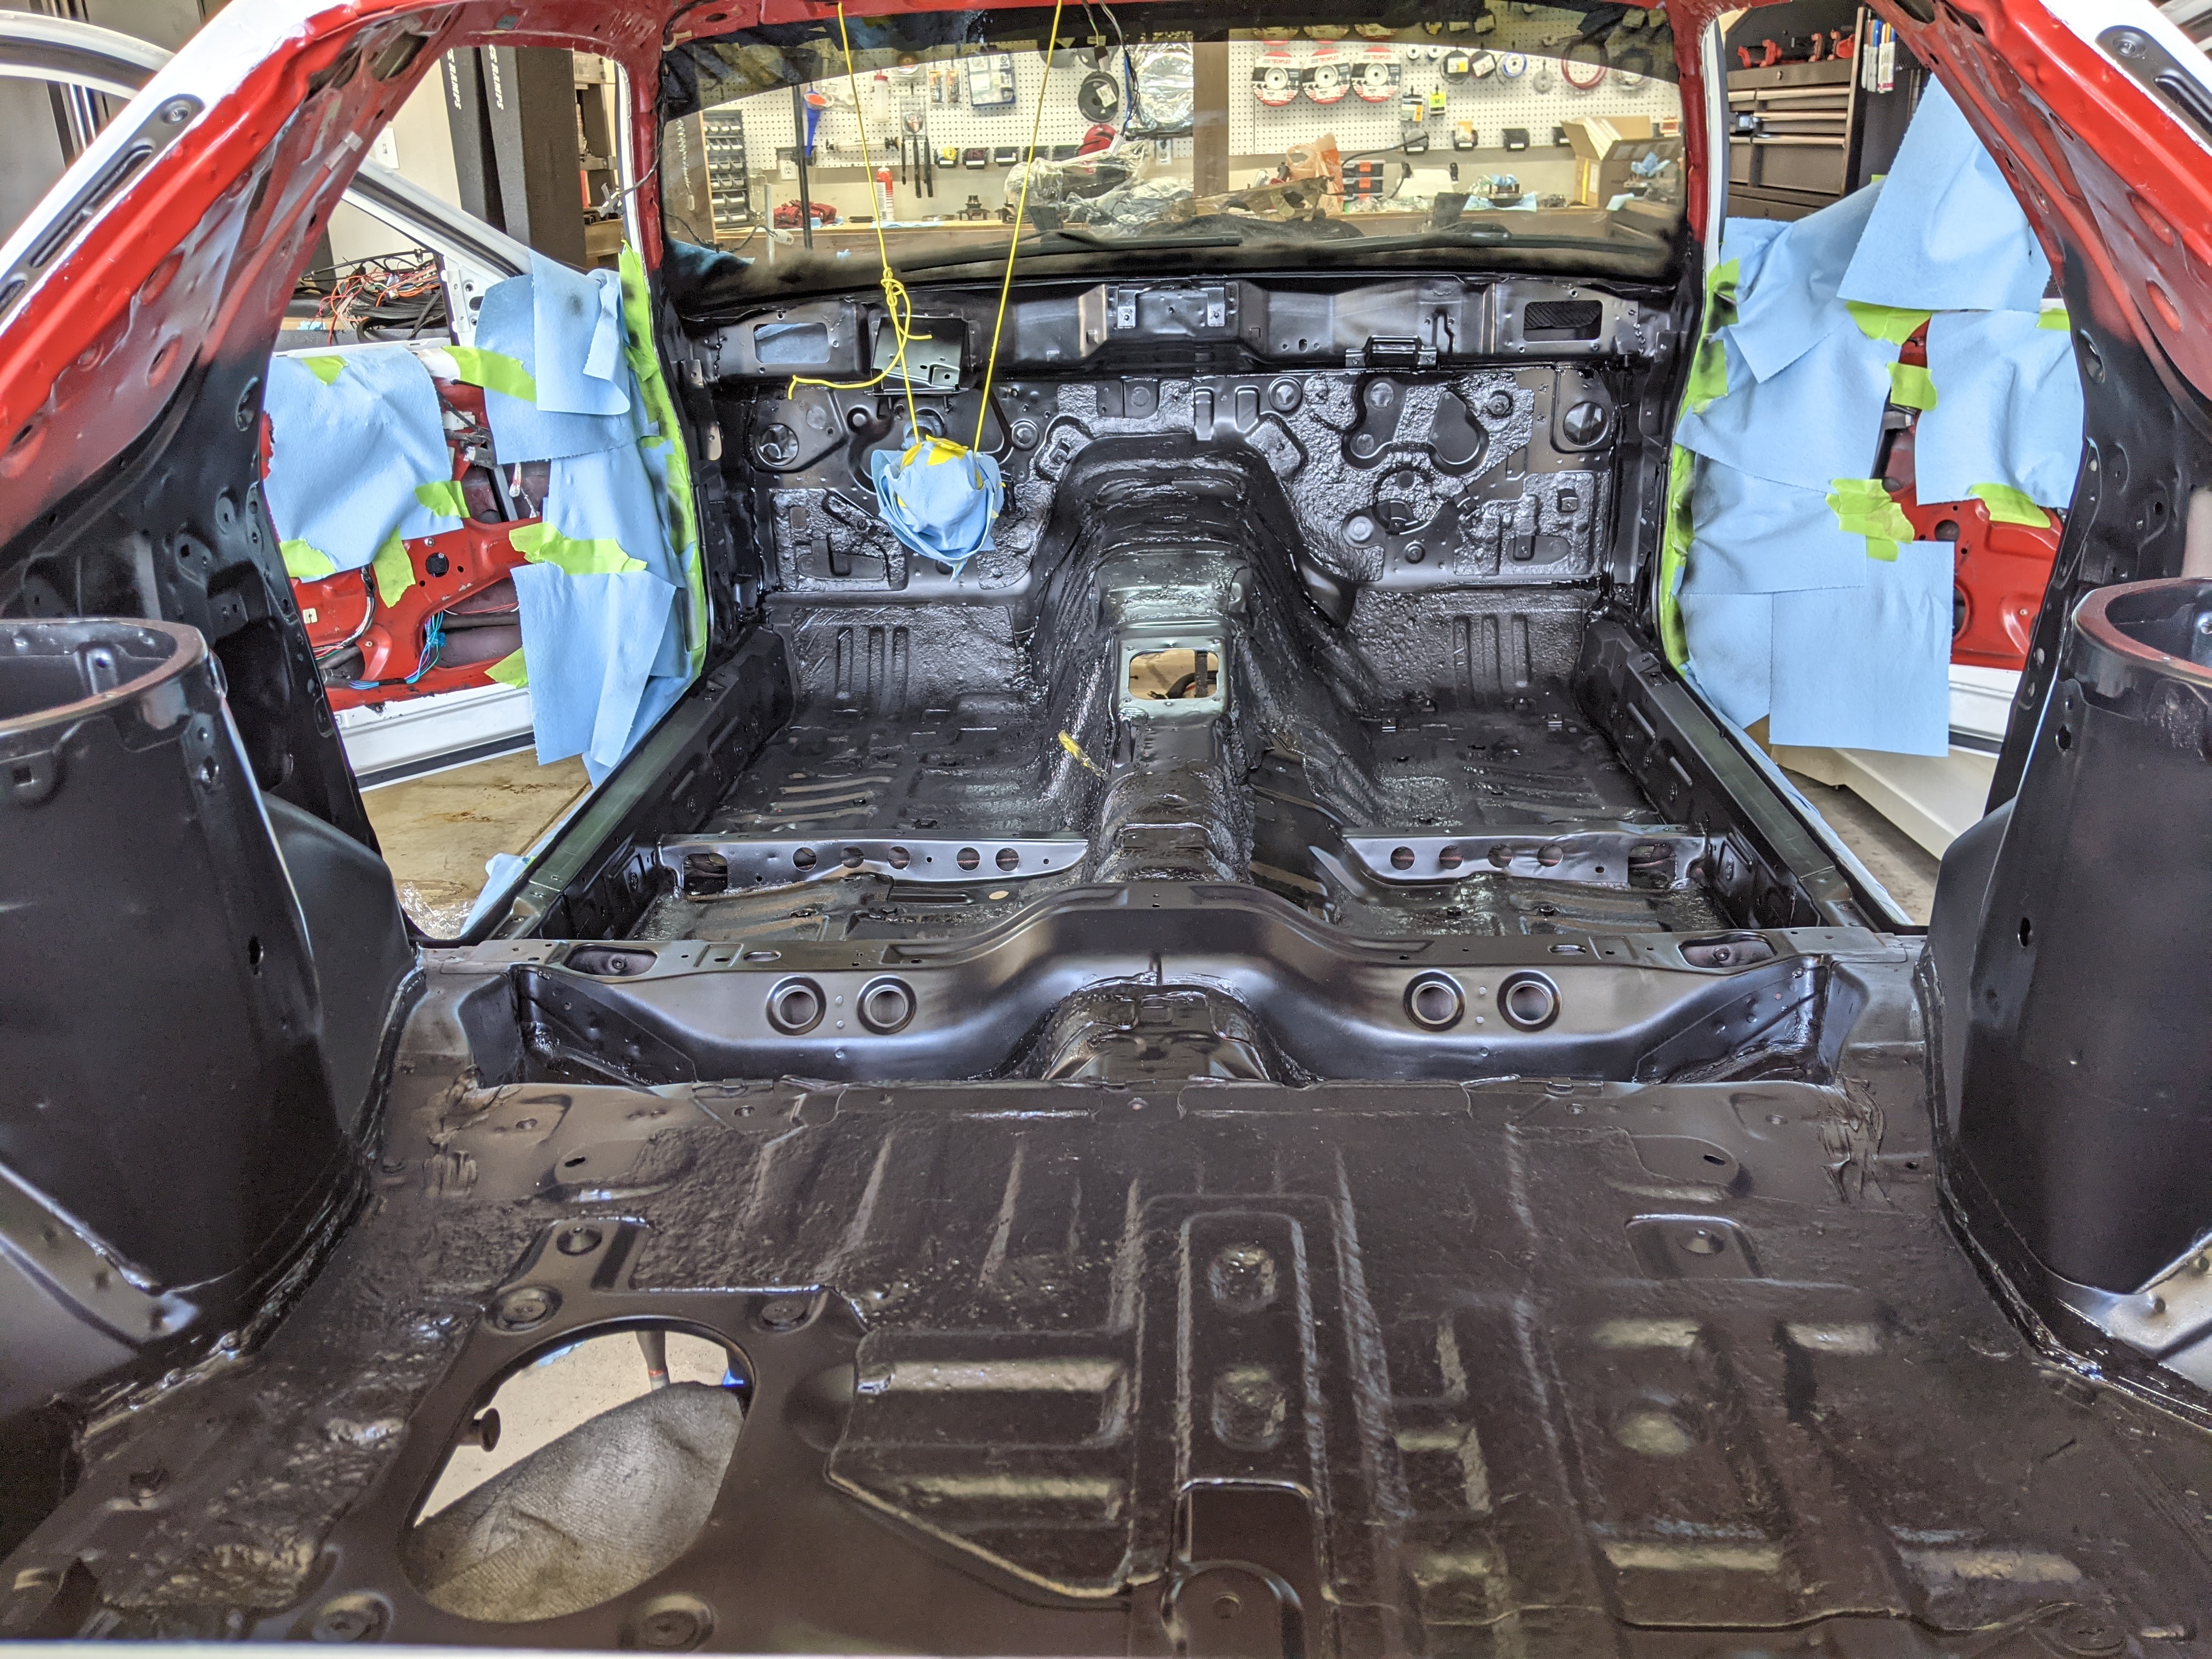
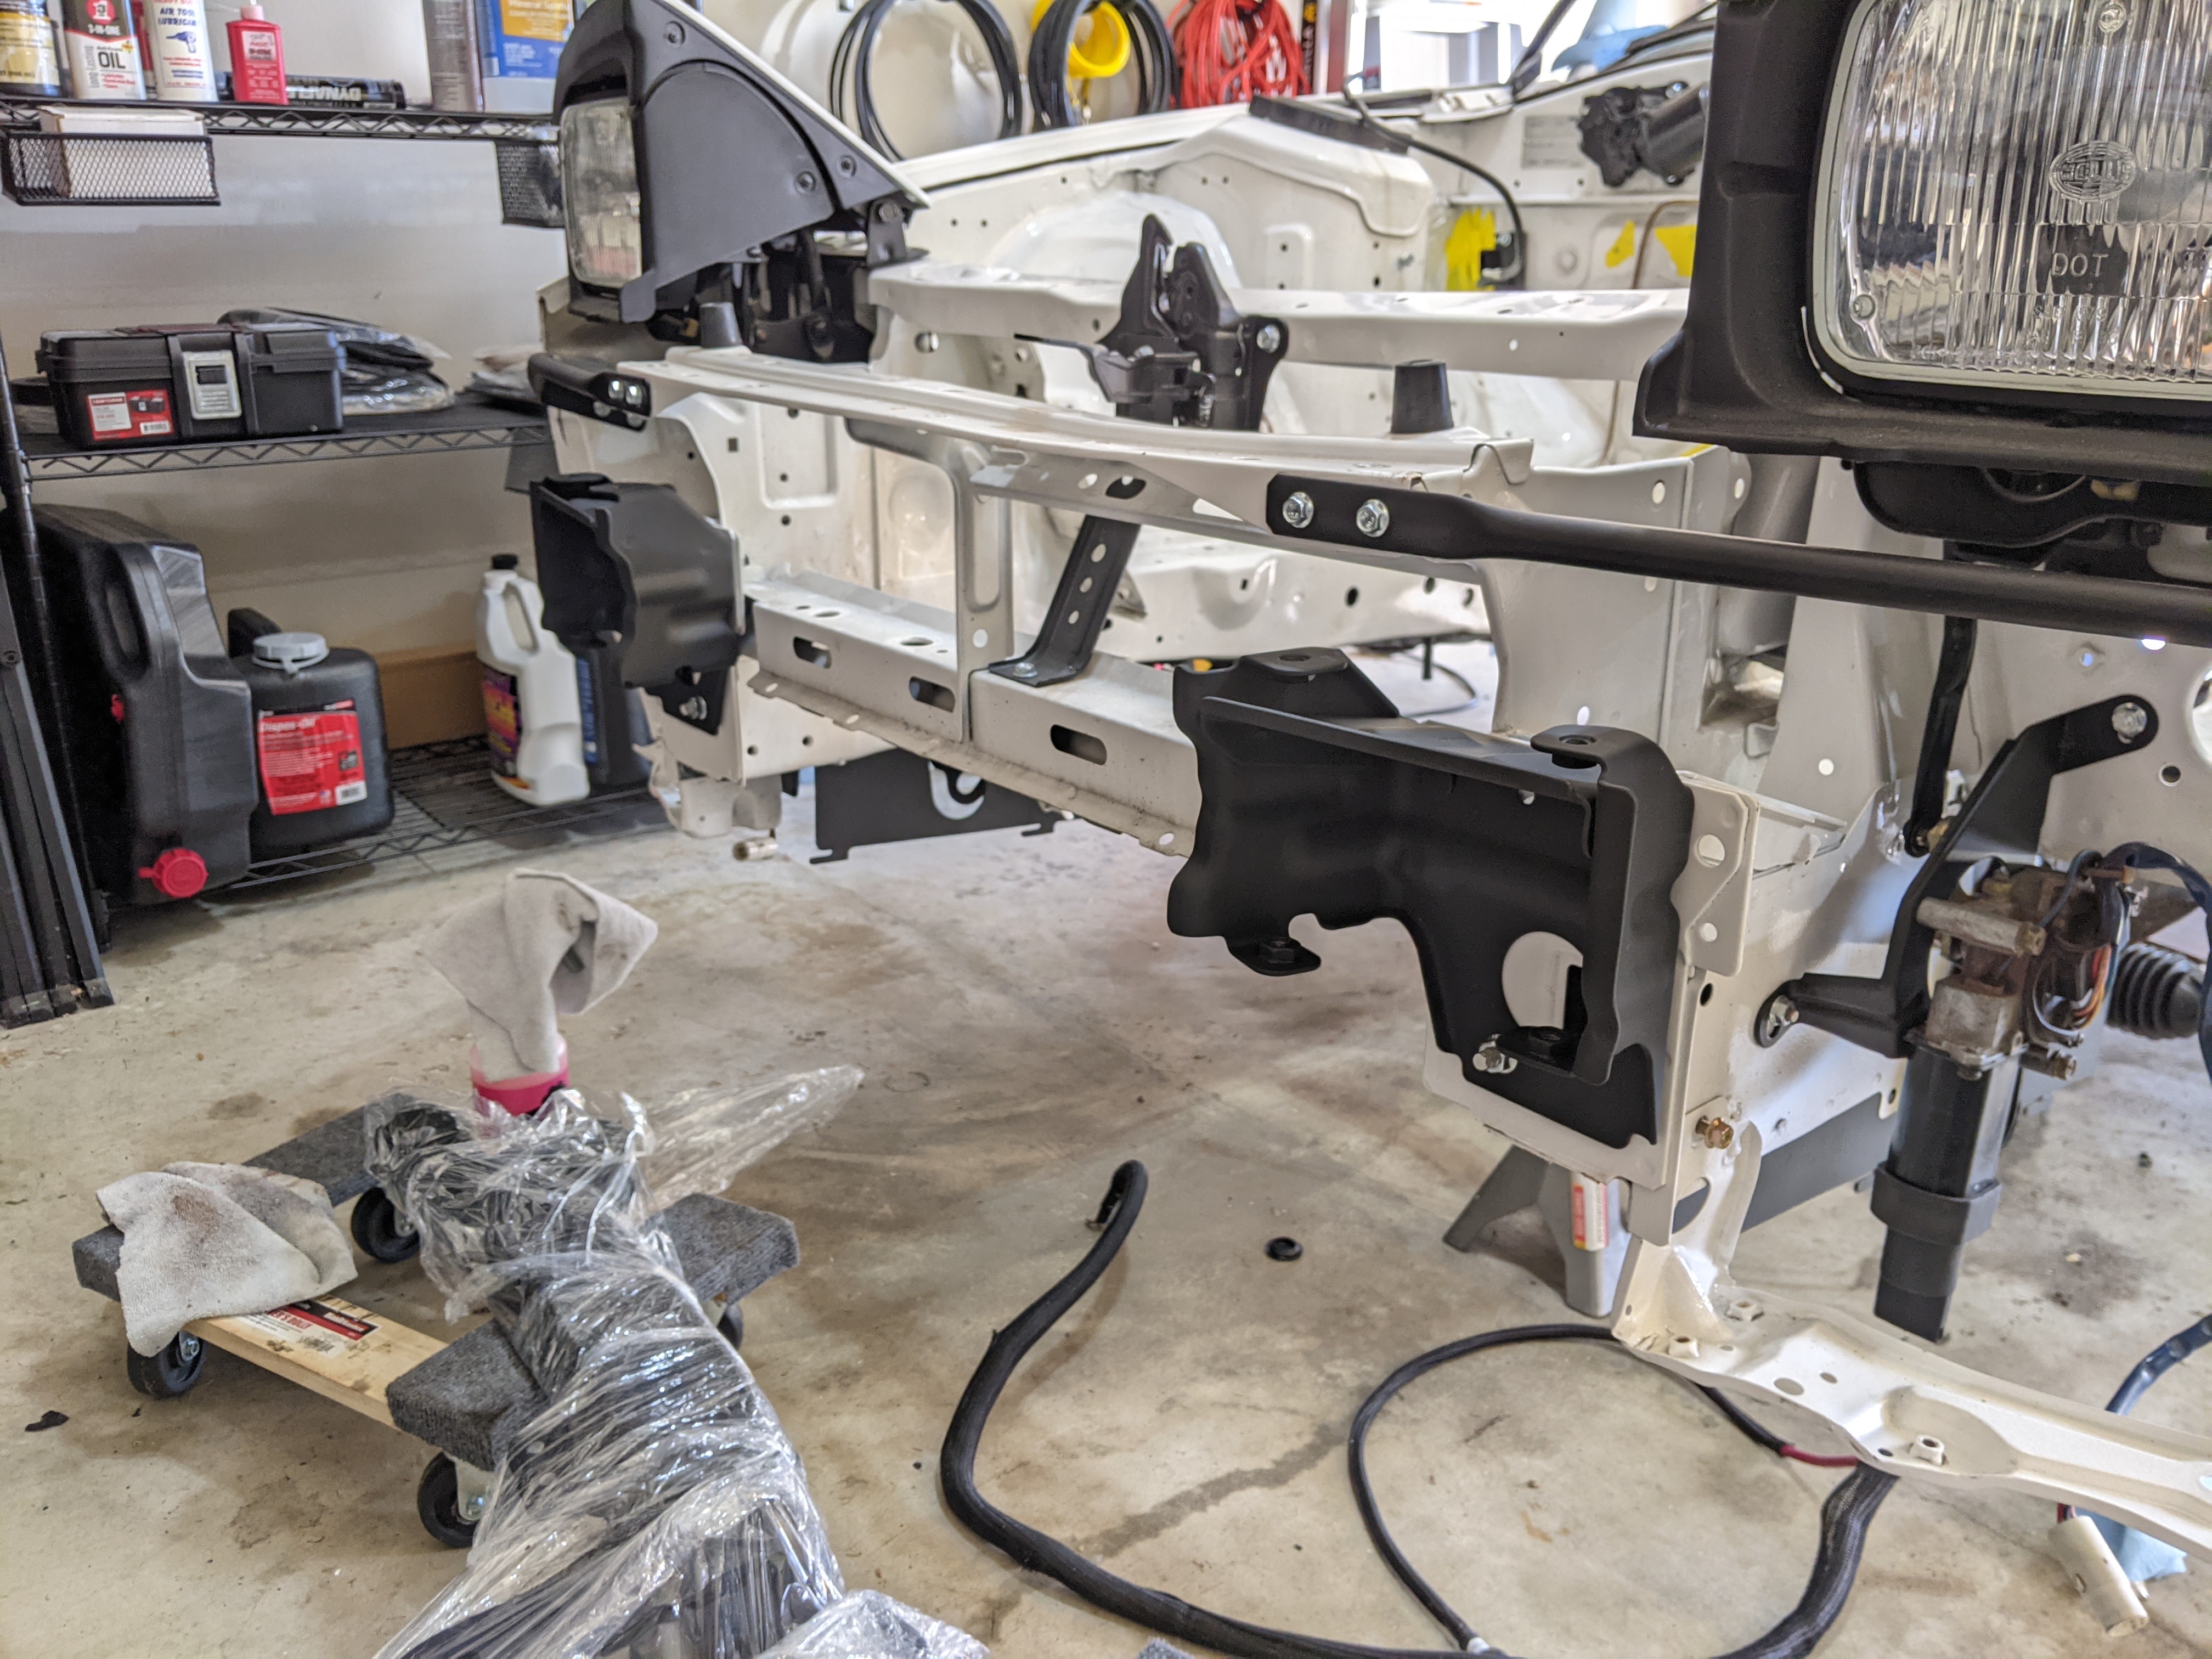
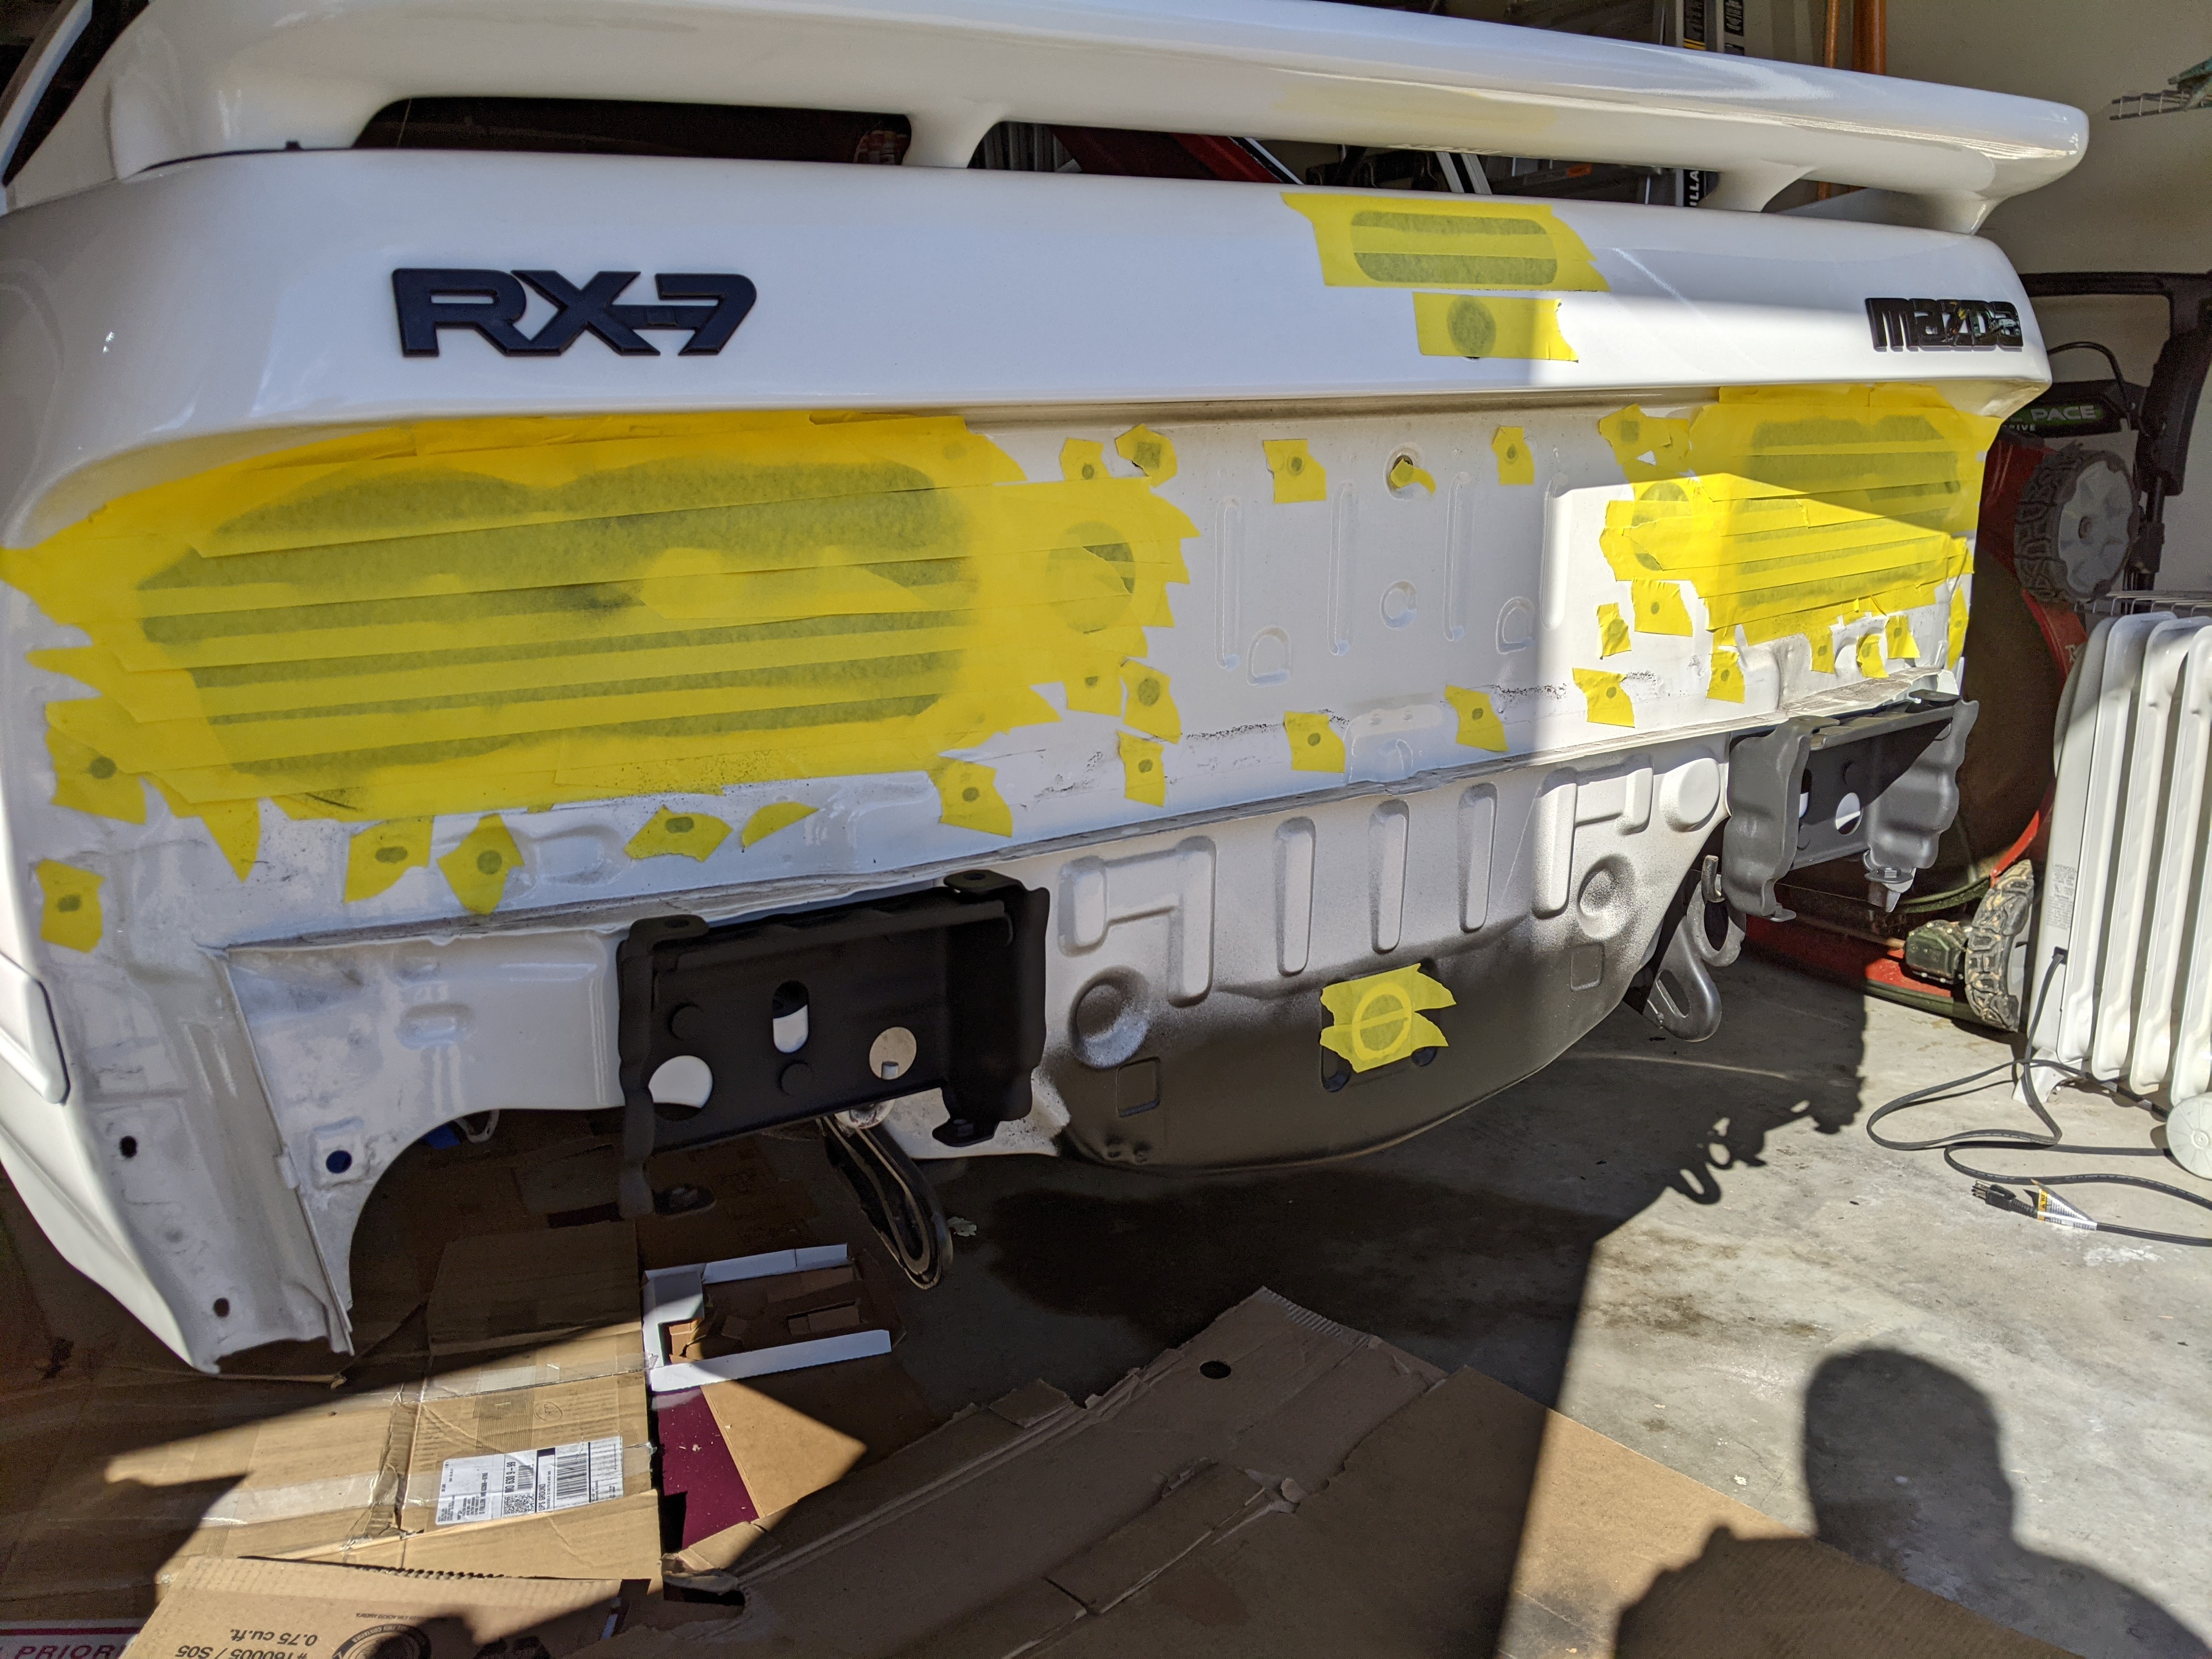
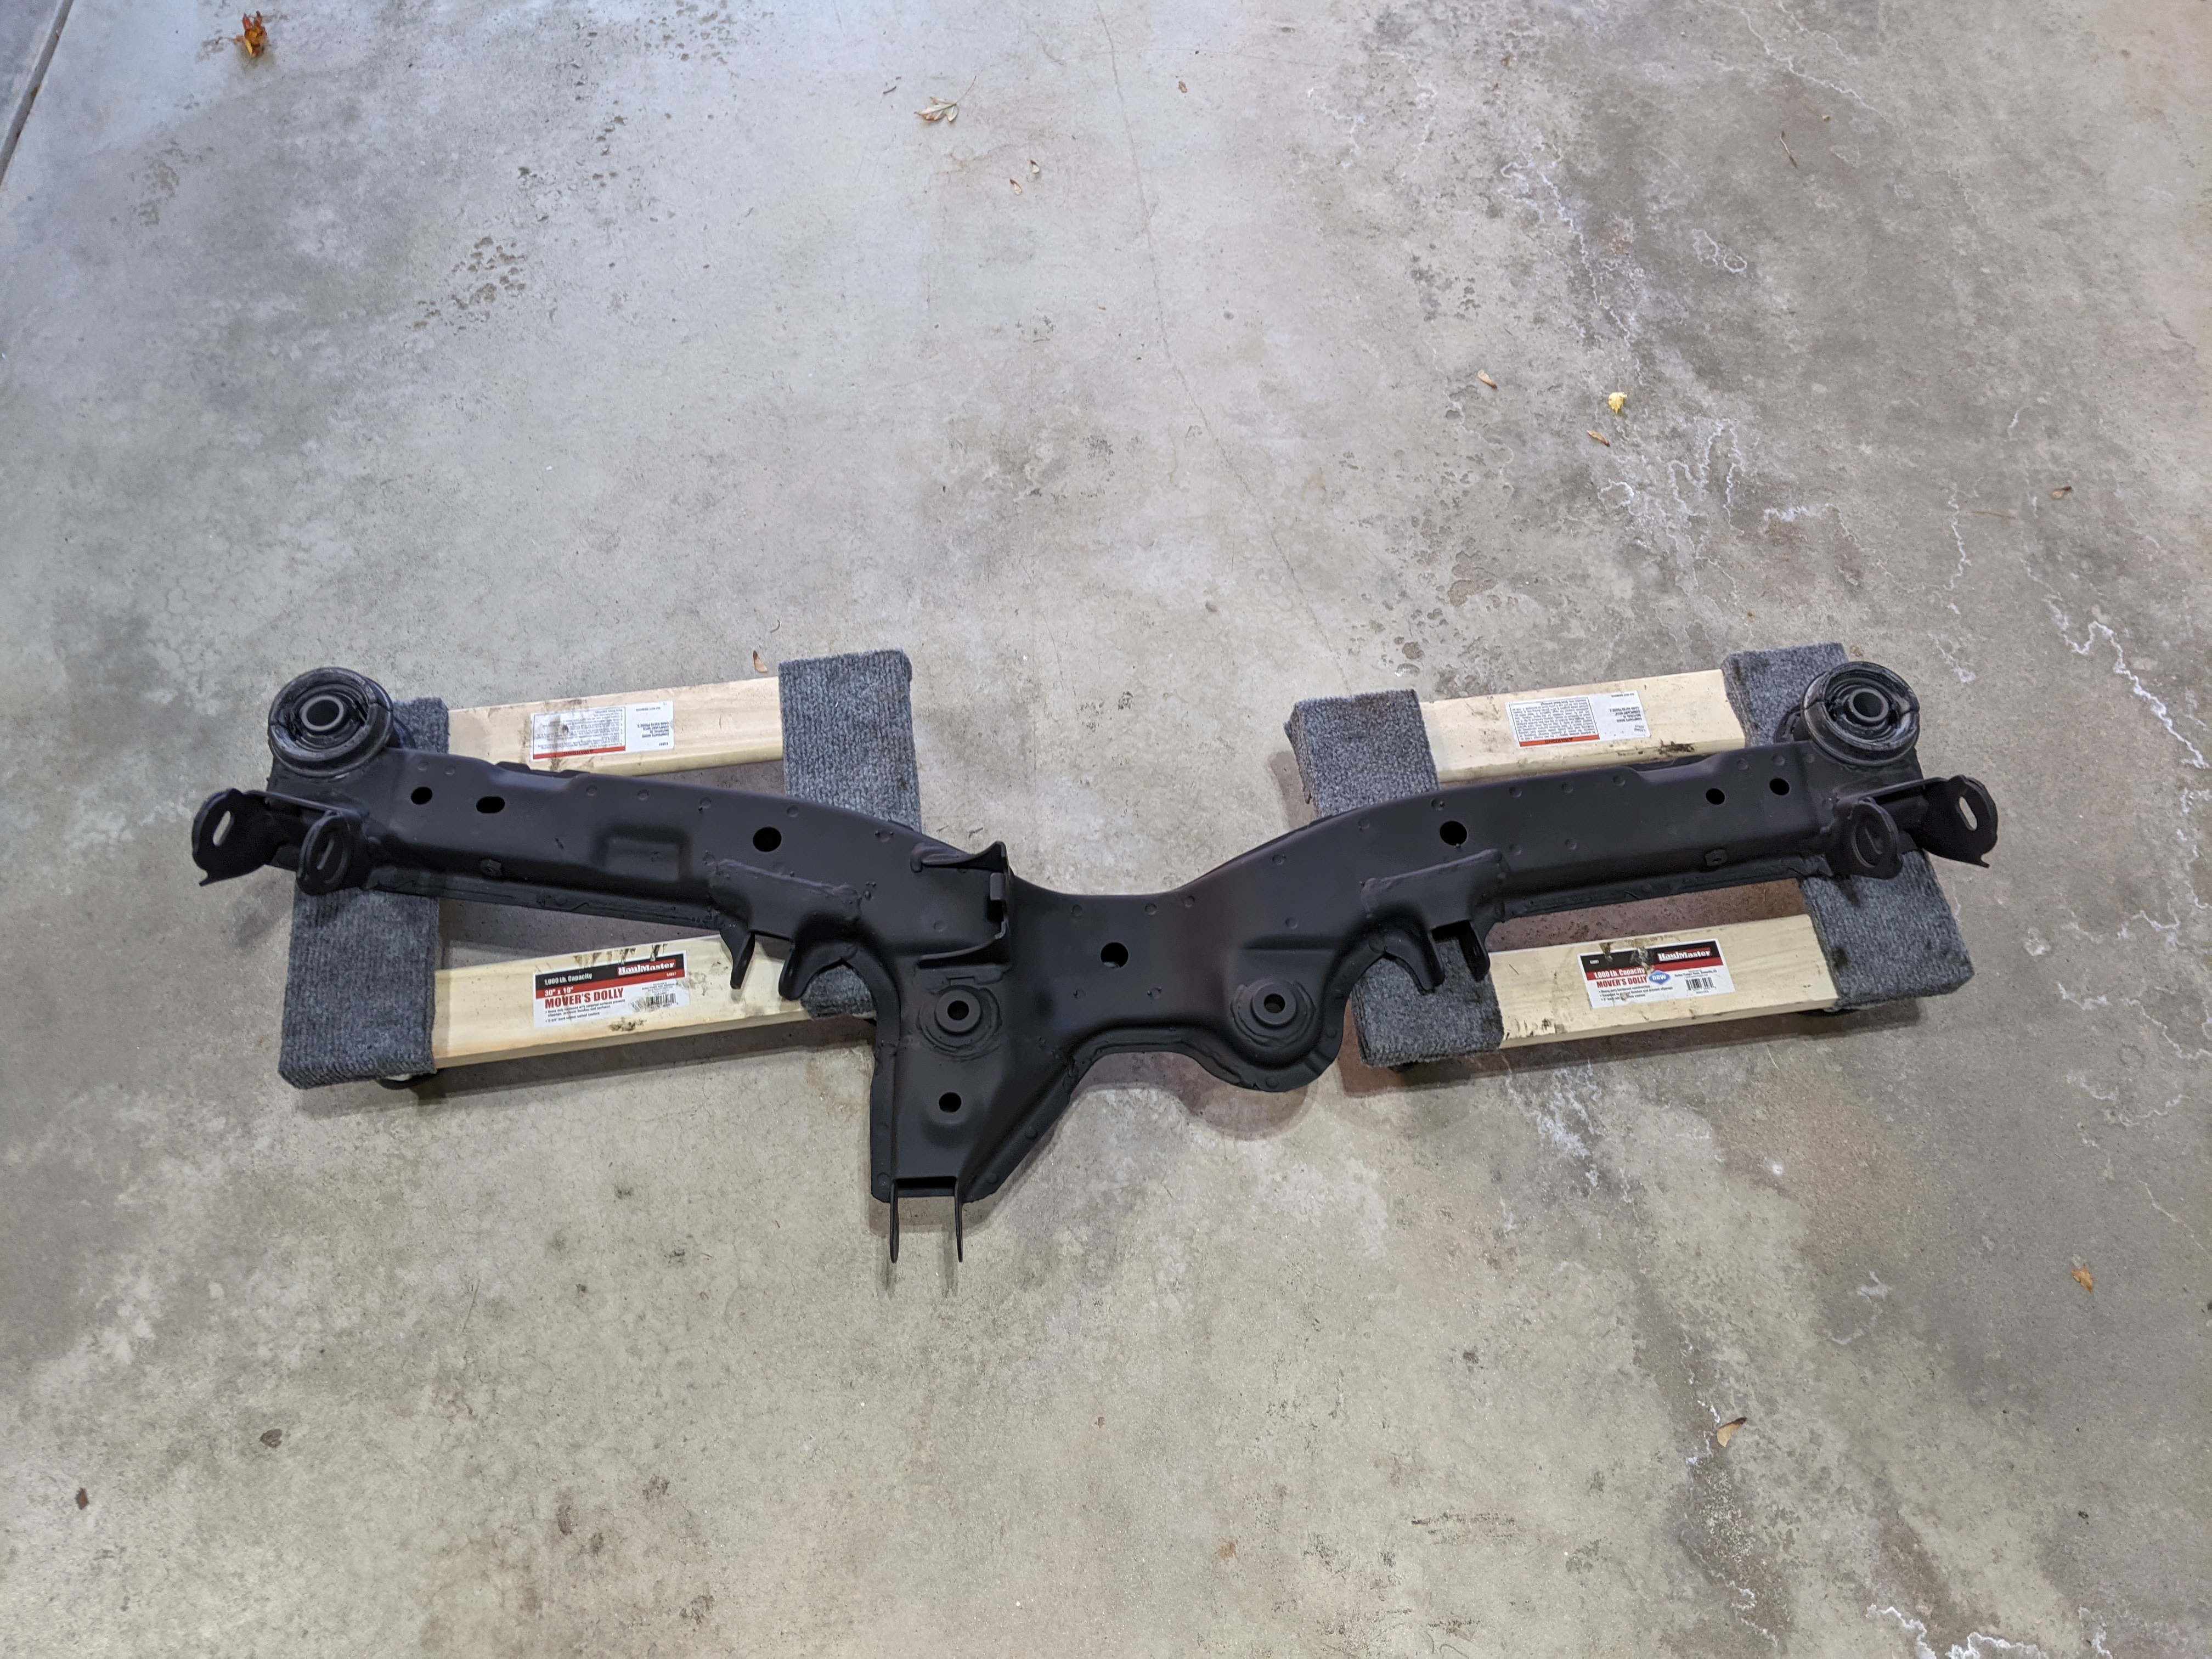
Enough about purchase history, let�s chat about what has gotten done. I have pretty much the entire car taken apart. I�ve taken off the chassis electrical harness to re-do some stuff. I�m going to sheath the entire thing and consolidate some things. I�m moving the fuse box under the front cooling panel and consolidating the front relays to a smaller form factor PDC (which will also house the fog light relay and fuses). In the rear, I dropped the rear subframe and have it completely broken down and ready for bushing removal (I�ll probably tackle that this weekend). Once bushing removal is complete I can get everything over to powder (I�m powdering everything but the knuckles). I also masked up the rear of the car in preparation for some interior spraying. I�m going to coat the entire inside in a nice satin black. Why spray paint versus an actual paint job? I made that decision based on a couple of reasons. The largest being the cost to have the interior done in the same color would be quite a bit larger than what I�m doing. The spray paint I�m using (VHT Chassis and Roll Bars) will always be readily available for quick touch ups if ever needed. I think overall, black makes more sense than if I had sprayed the same color as the car as it will help hide gaps (if any) from the interior.
I still have a ton of stuff to do, but I�m working towards it. My next focus areas are finishing up the suspension overhaul and getting it back up under the car (it takes up a lot of space real estate) and getting the interior sprayed. Once those two areas are complete I can switch focus back to electrical and knock it out.
Until next time!
Here is all the stuff that came in (in no particular order)


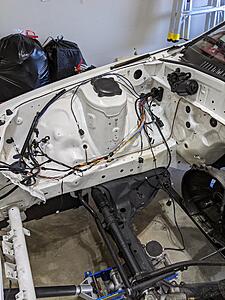
Here is the front harness and where I�m currently at


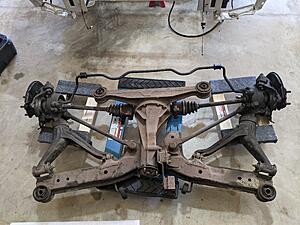
Here is the rear masked and the subframe dropped

Slowly but surely things are coming together. Since this is an expensive endeavor I�ve split things up into sections to let the wallet cool down before the next one comes up. The first thing I�m tackling is an entire suspension overhaul. Which means a lot of things were purchased - some related, some not. I ended up purchasing some OEM brake cooling ducts to see if they were worth owning. In addition, I was able to source a brand new driver side fender liner and some RX-8 horns. I also, while not pictured, grabbed a used good condition passenger side fender liner. For the suspension re-work I�m trying to keep things stiff, but not so stiff I never want to take the car anywhere. I purchased some Parts Shop Max lateral rods, camber links, center subframe bar, and the trailing arm spherical bushings. In addition, I also bought some JJLR solid bushings for the trailing arm to the knuckle and some Racing Beat sway bar endlinks. Everything else purchased was Mazda Competition - and if I couldn�t find Mazda Competition I bought OEM. I think the only Mazda Comp bushing I was unable to find was the Rear Subframe to Chassis bushing. I also ordered some parts overnight from Japan (not really overnight, but really fast). Since the FC front hubs are both aluminum and not easy to service, I picked up some Steel GT-1 Motorsports front hubs from Japan. After I factored in the cost of new bearings (which these come with) it was 150/hub - not bad at all! I�m holding off on the sway bar bushings for now until I decide what exactly I want to do with them. I went a bit further than just bushings though and grabbed some stuff for the overall build. I bought new transmission mounts, speedometer cable, transmission seals, reverse light switch and bolts and nuts. I was unable to find a new 89-91 NA water pump assembly through Mazda so I bought one from Atkins. Since I�m not running a turbo on the 20b I thought this was the best option.
Enough about purchase history, let�s chat about what has gotten done. I have pretty much the entire car taken apart. I�ve taken off the chassis electrical harness to re-do some stuff. I�m going to sheath the entire thing and consolidate some things. I�m moving the fuse box under the front cooling panel and consolidating the front relays to a smaller form factor PDC (which will also house the fog light relay and fuses). In the rear, I dropped the rear subframe and have it completely broken down and ready for bushing removal (I�ll probably tackle that this weekend). Once bushing removal is complete I can get everything over to powder (I�m powdering everything but the knuckles). I also masked up the rear of the car in preparation for some interior spraying. I�m going to coat the entire inside in a nice satin black. Why spray paint versus an actual paint job? I made that decision based on a couple of reasons. The largest being the cost to have the interior done in the same color would be quite a bit larger than what I�m doing. The spray paint I�m using (VHT Chassis and Roll Bars) will always be readily available for quick touch ups if ever needed. I think overall, black makes more sense than if I had sprayed the same color as the car as it will help hide gaps (if any) from the interior.
I still have a ton of stuff to do, but I�m working towards it. My next focus areas are finishing up the suspension overhaul and getting it back up under the car (it takes up a lot of space real estate) and getting the interior sprayed. Once those two areas are complete I can switch focus back to electrical and knock it out.
Until next time!
Here is all the stuff that came in (in no particular order)
Here is the front harness and where I�m currently at
Here is the rear masked and the subframe dropped


 10-29-21, 09:29 AM
#344
Moderator
iTrader: (3)
Join Date: Mar 2001
Location: https://www2.mazda.com/en/100th/
Posts: 30,826
Received 2,594 Likes
on
1,842 Posts
if you're painting the inside of the car, its easier to brush on the paint and then use the spray for hard to reach places. the spray paint fogs up the inside of the car really fast, and its terrible
11-09-21, 07:24 AM
#345
Update 11/9/2021
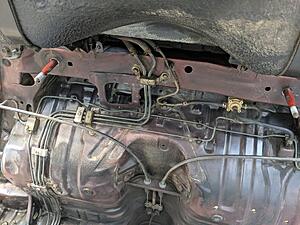
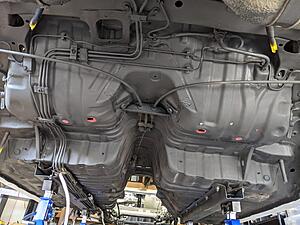
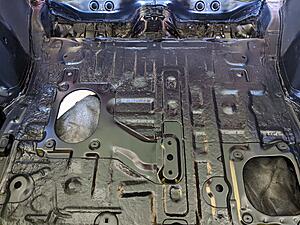
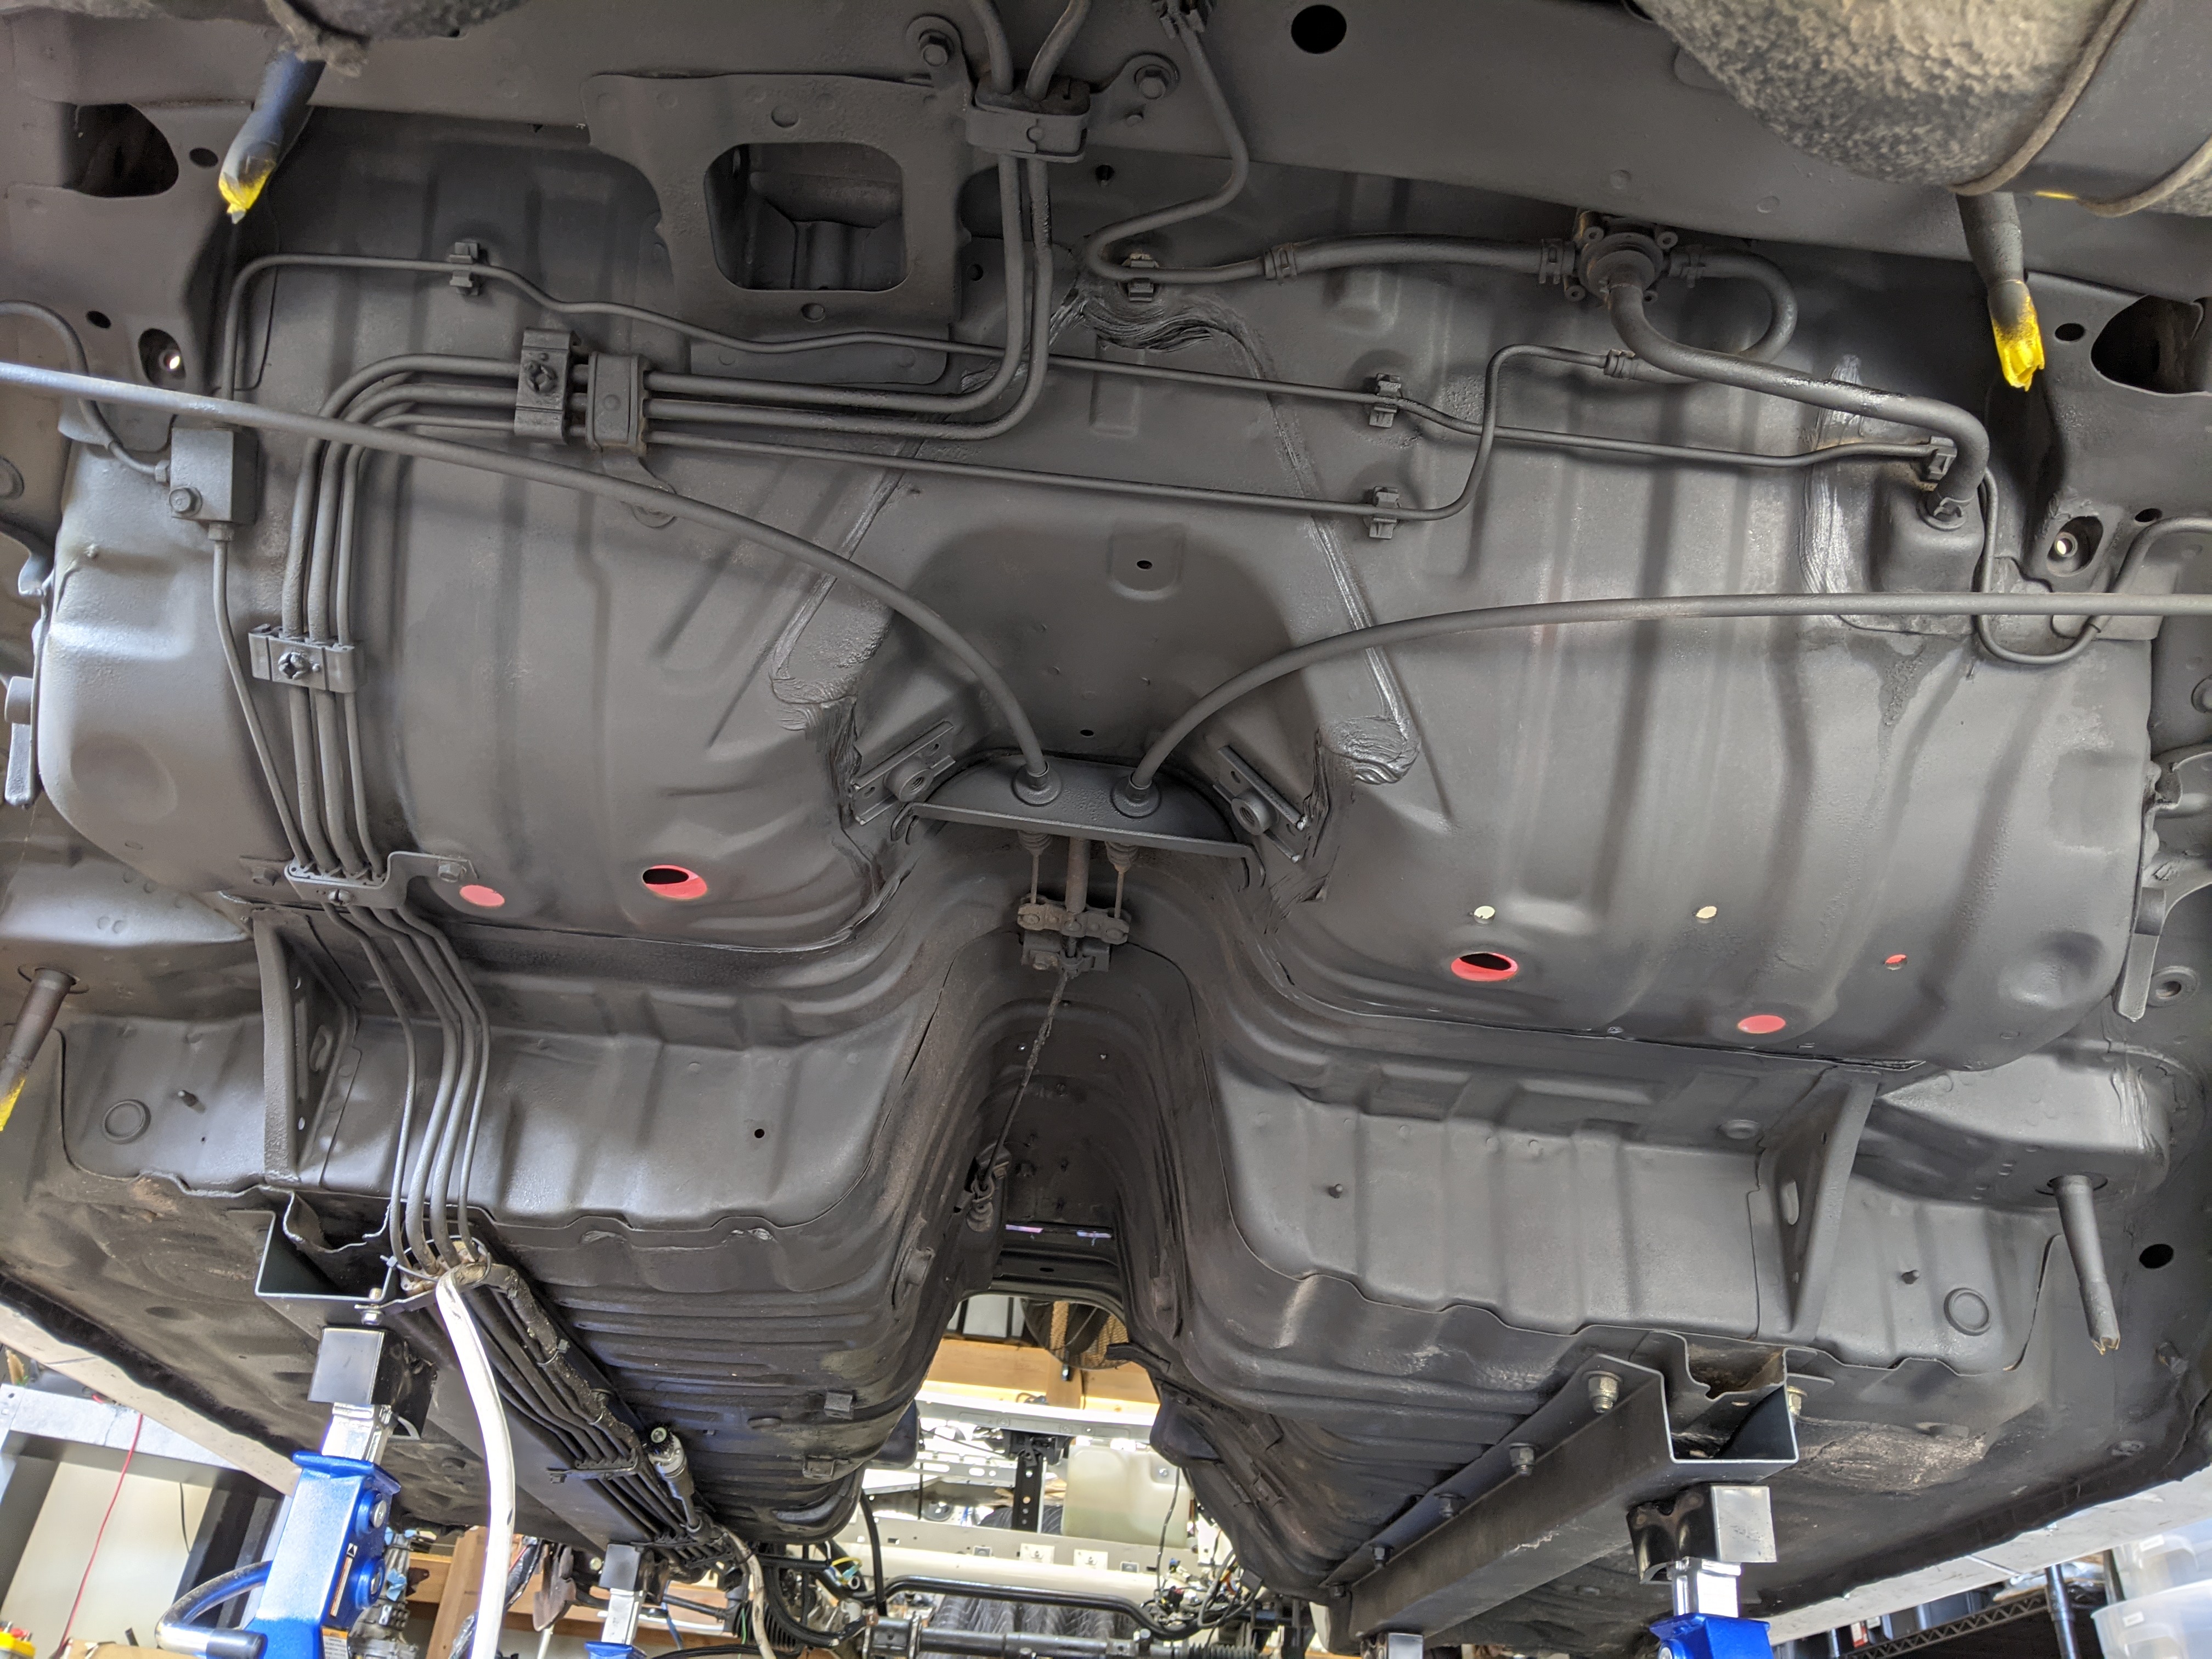
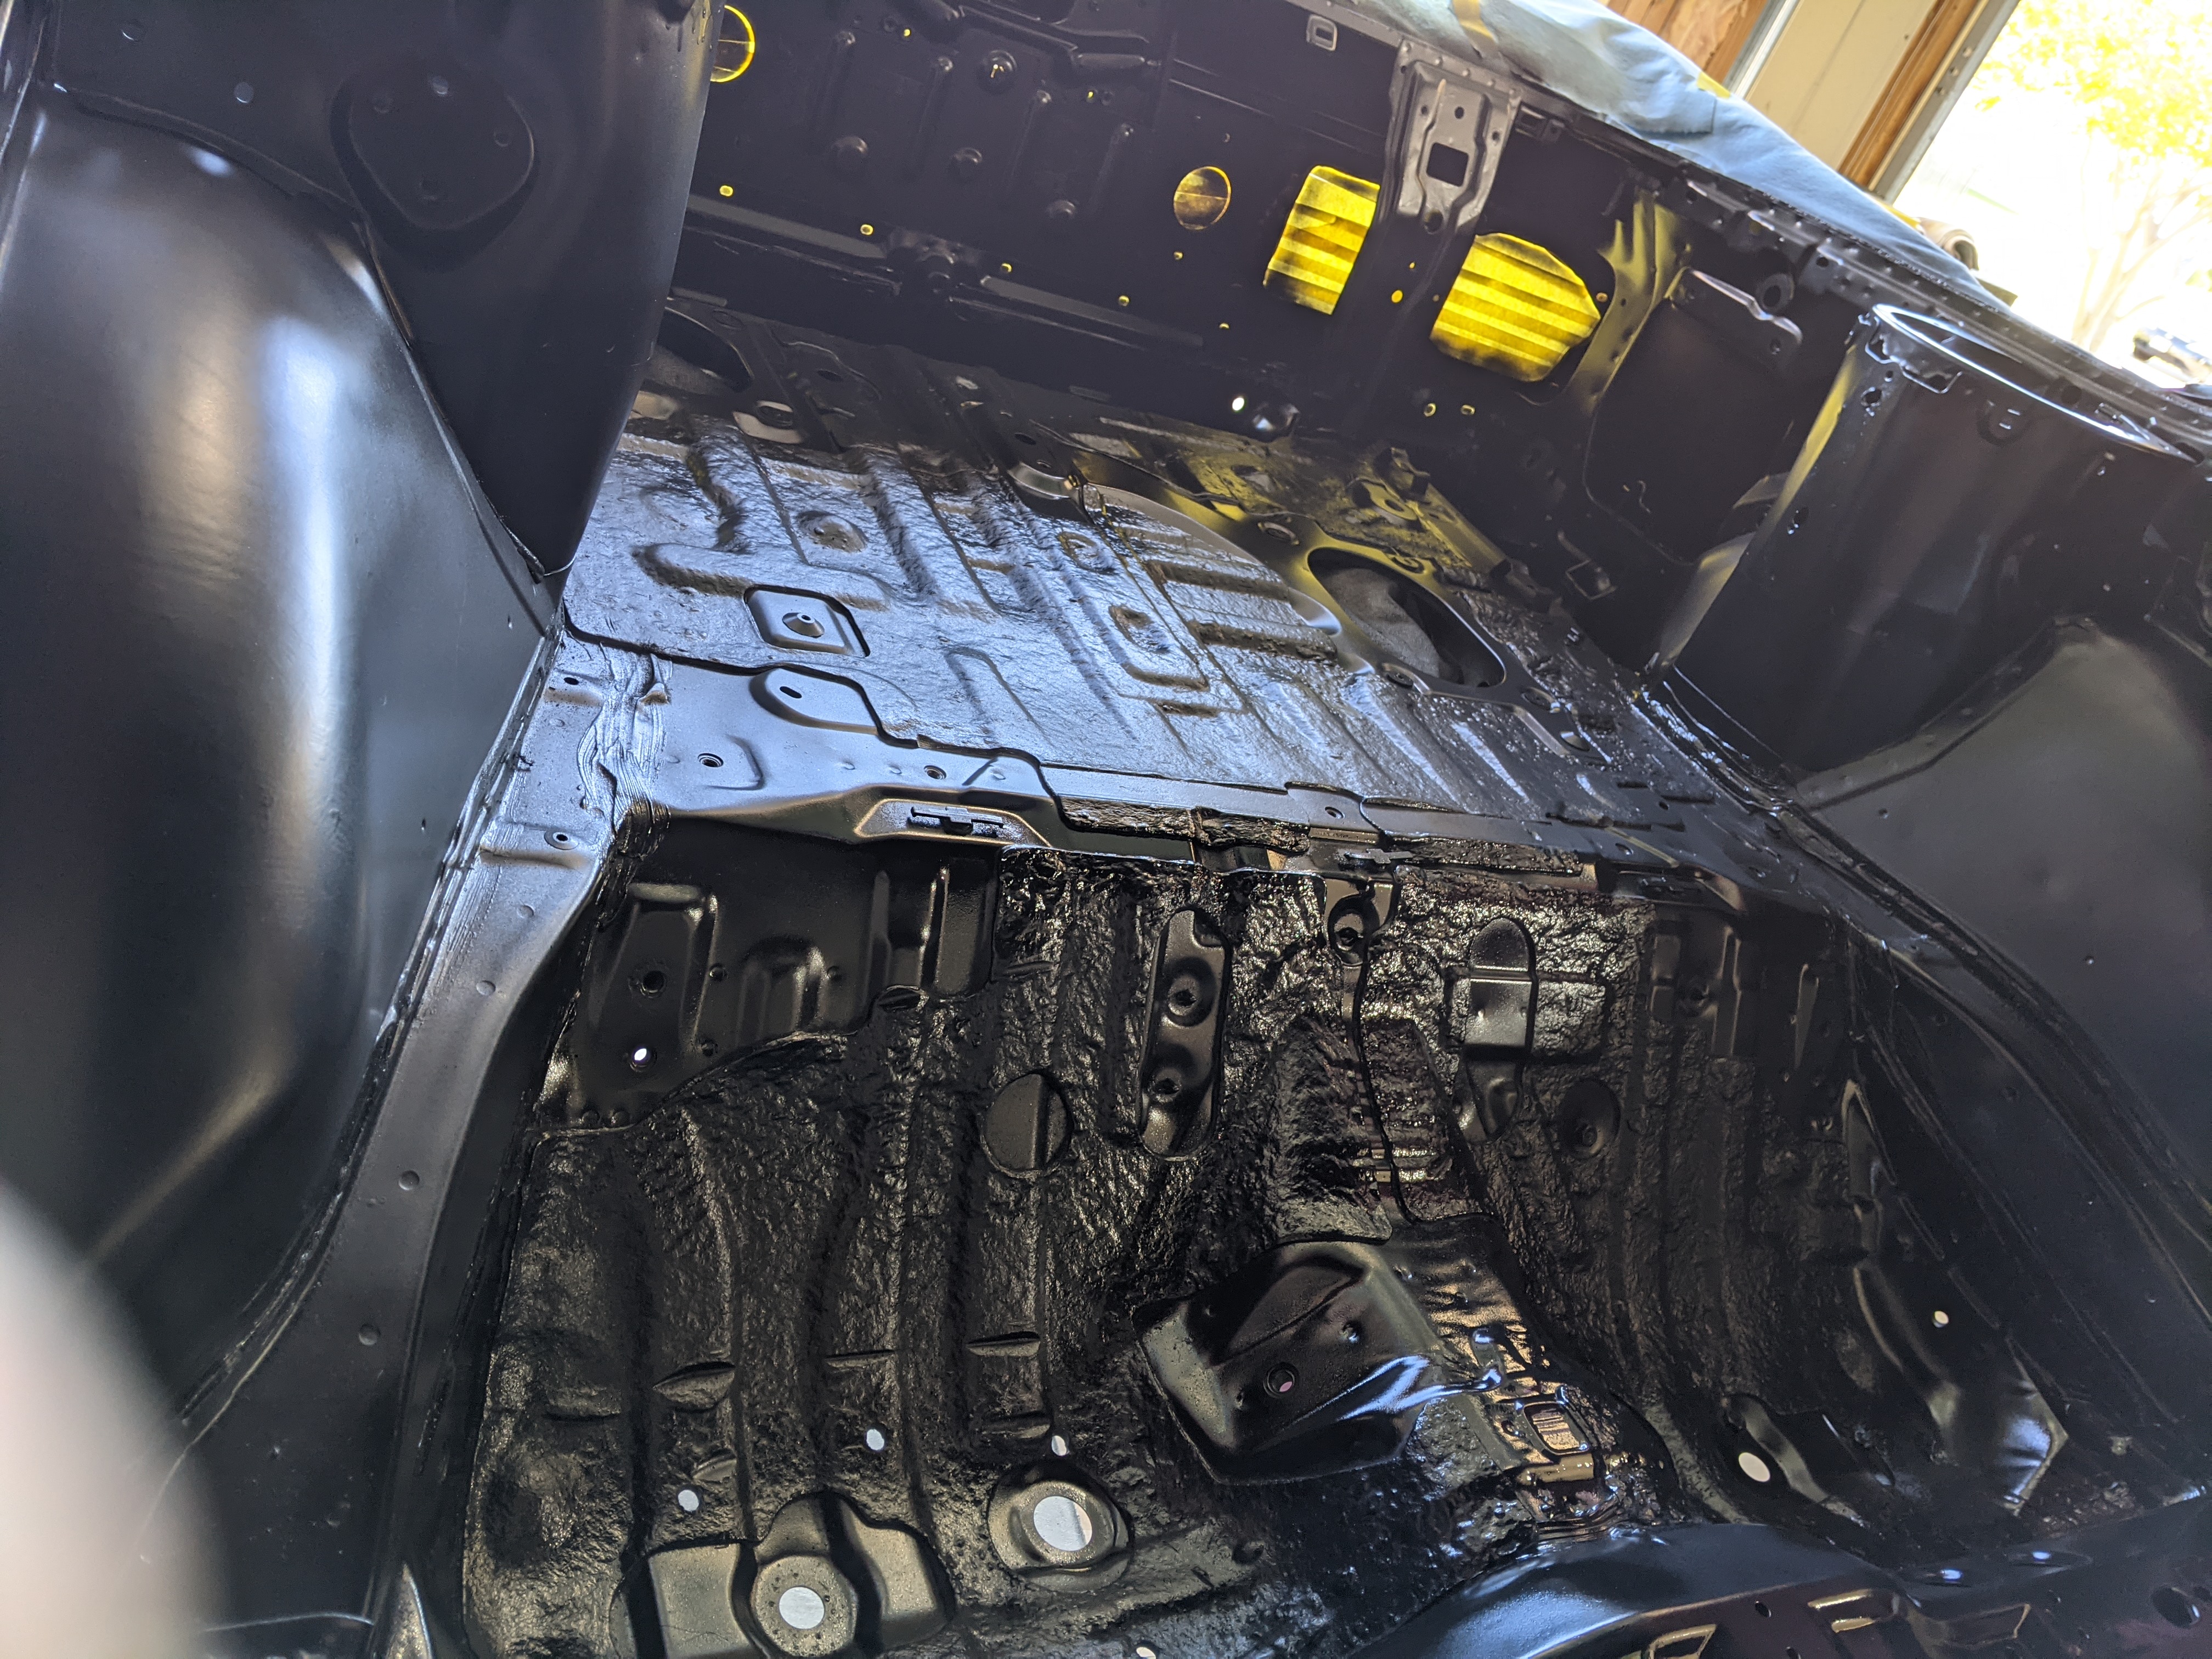
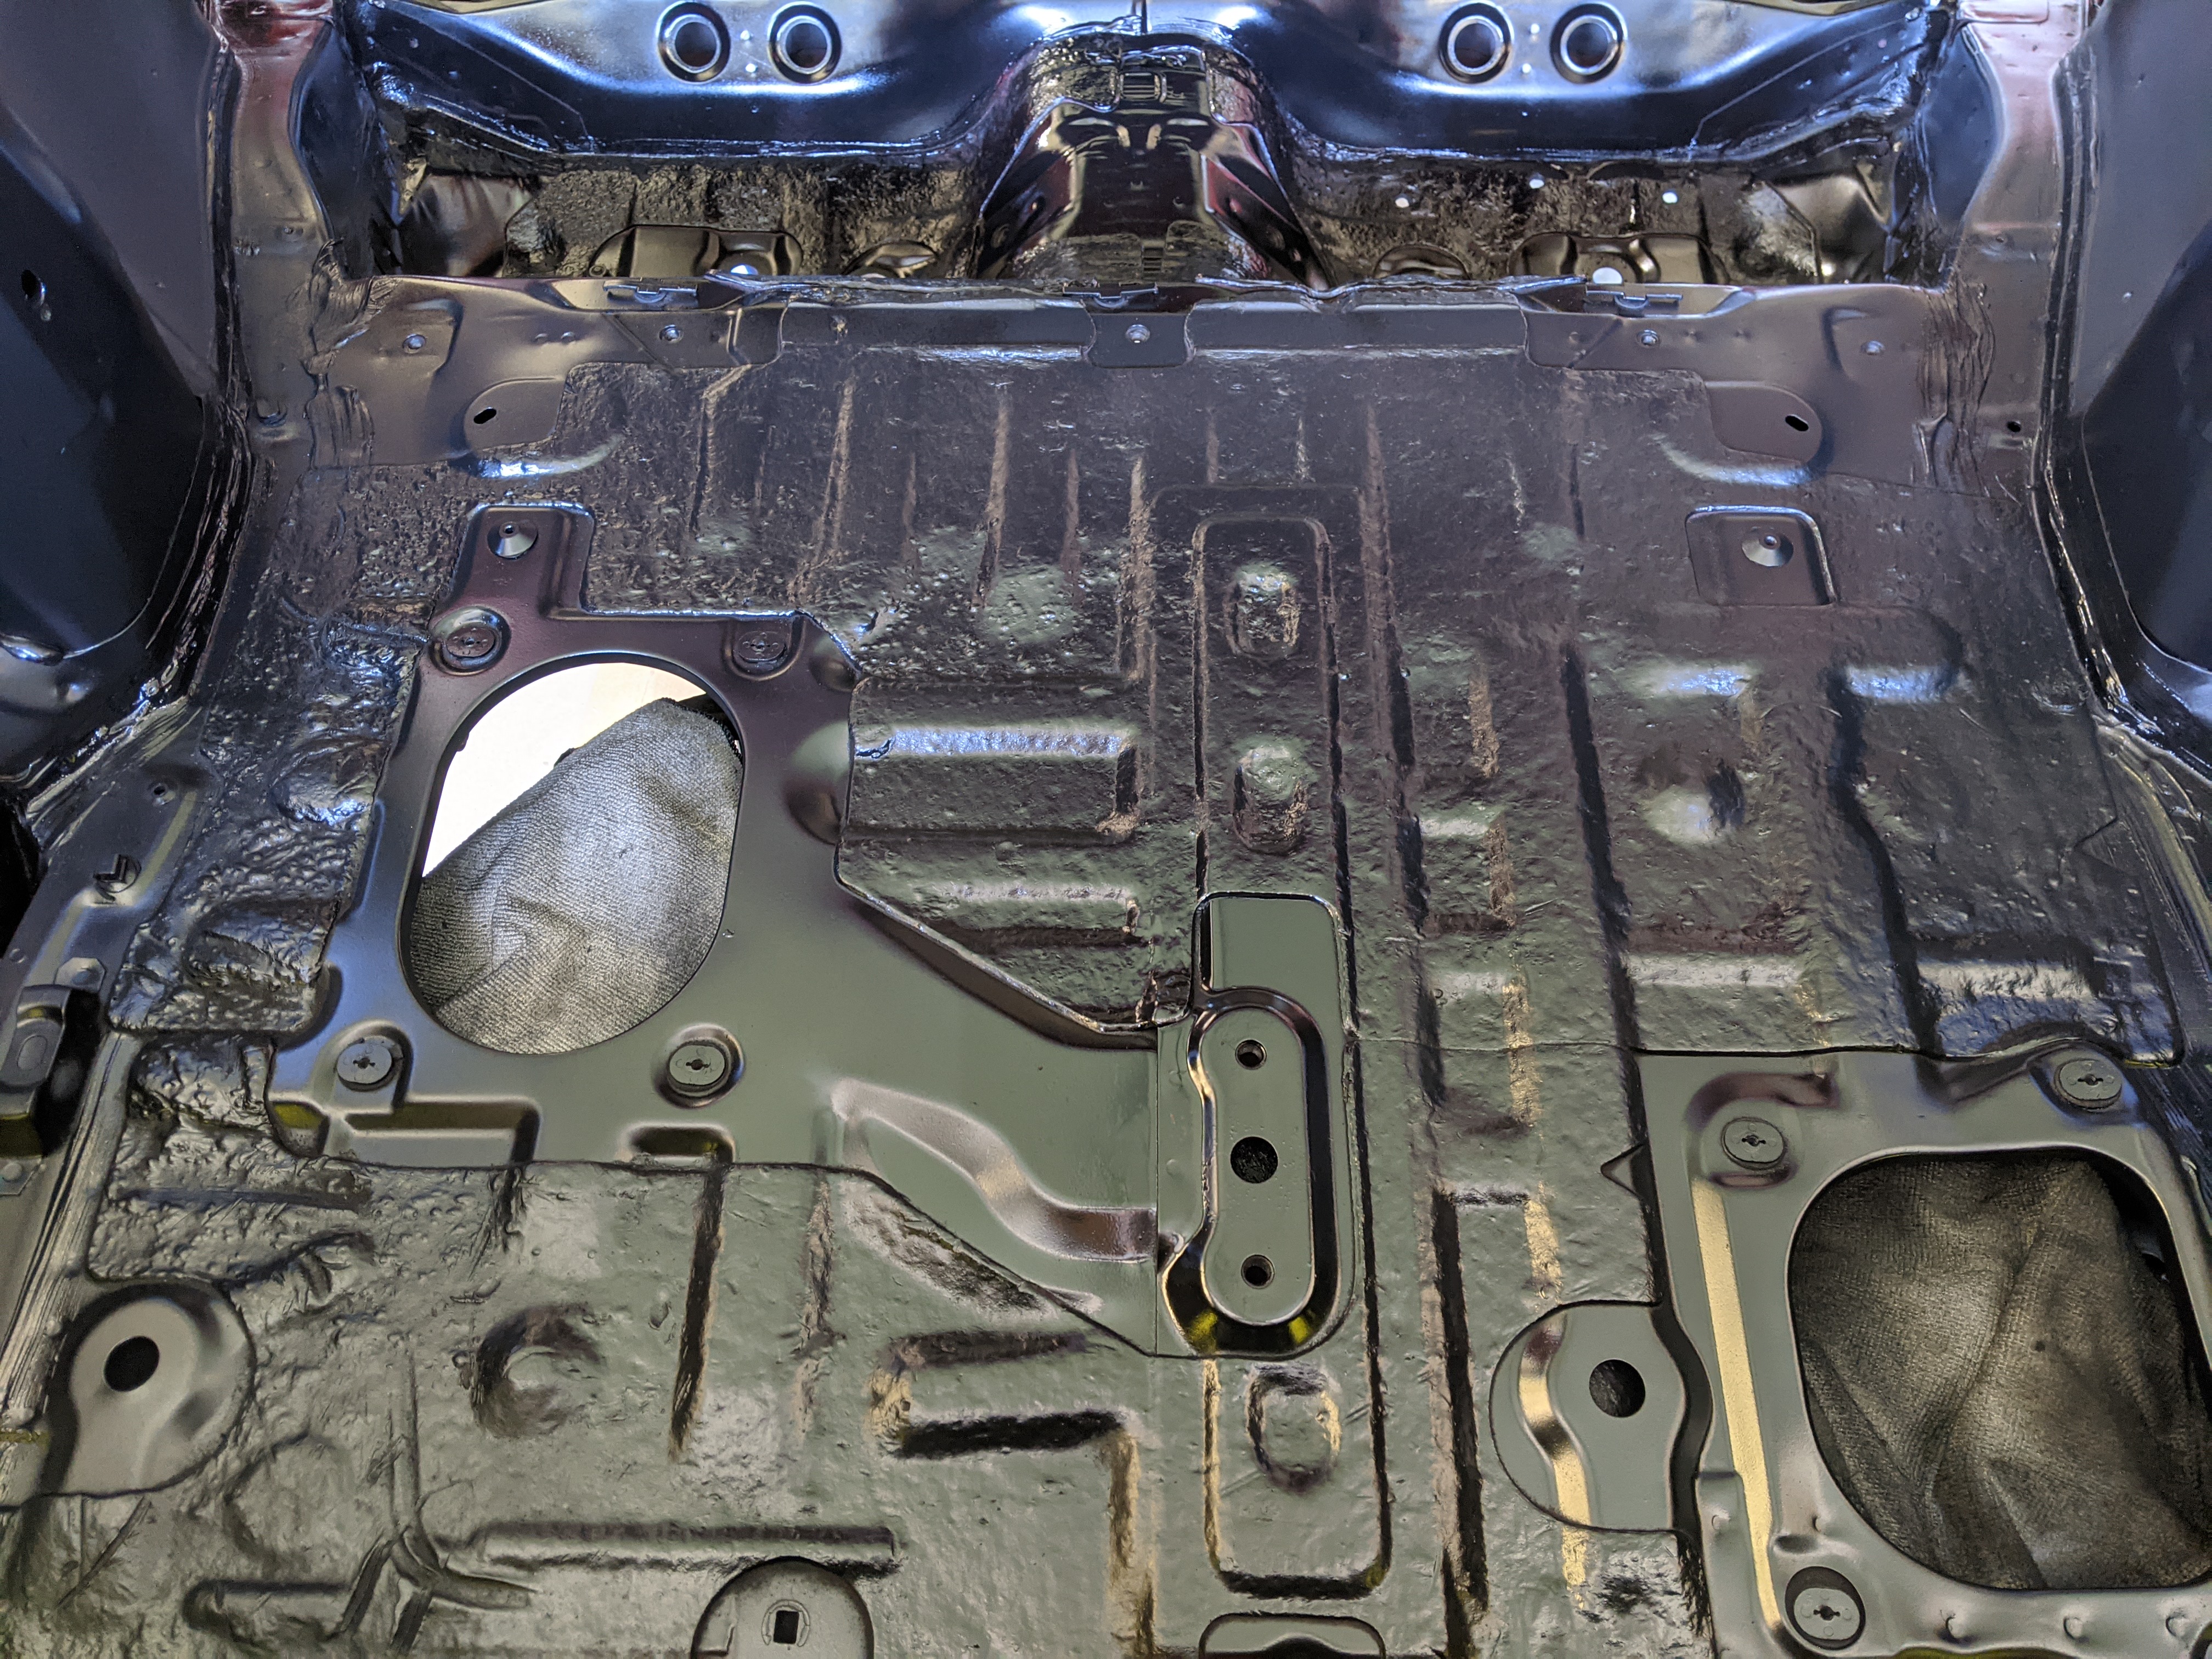
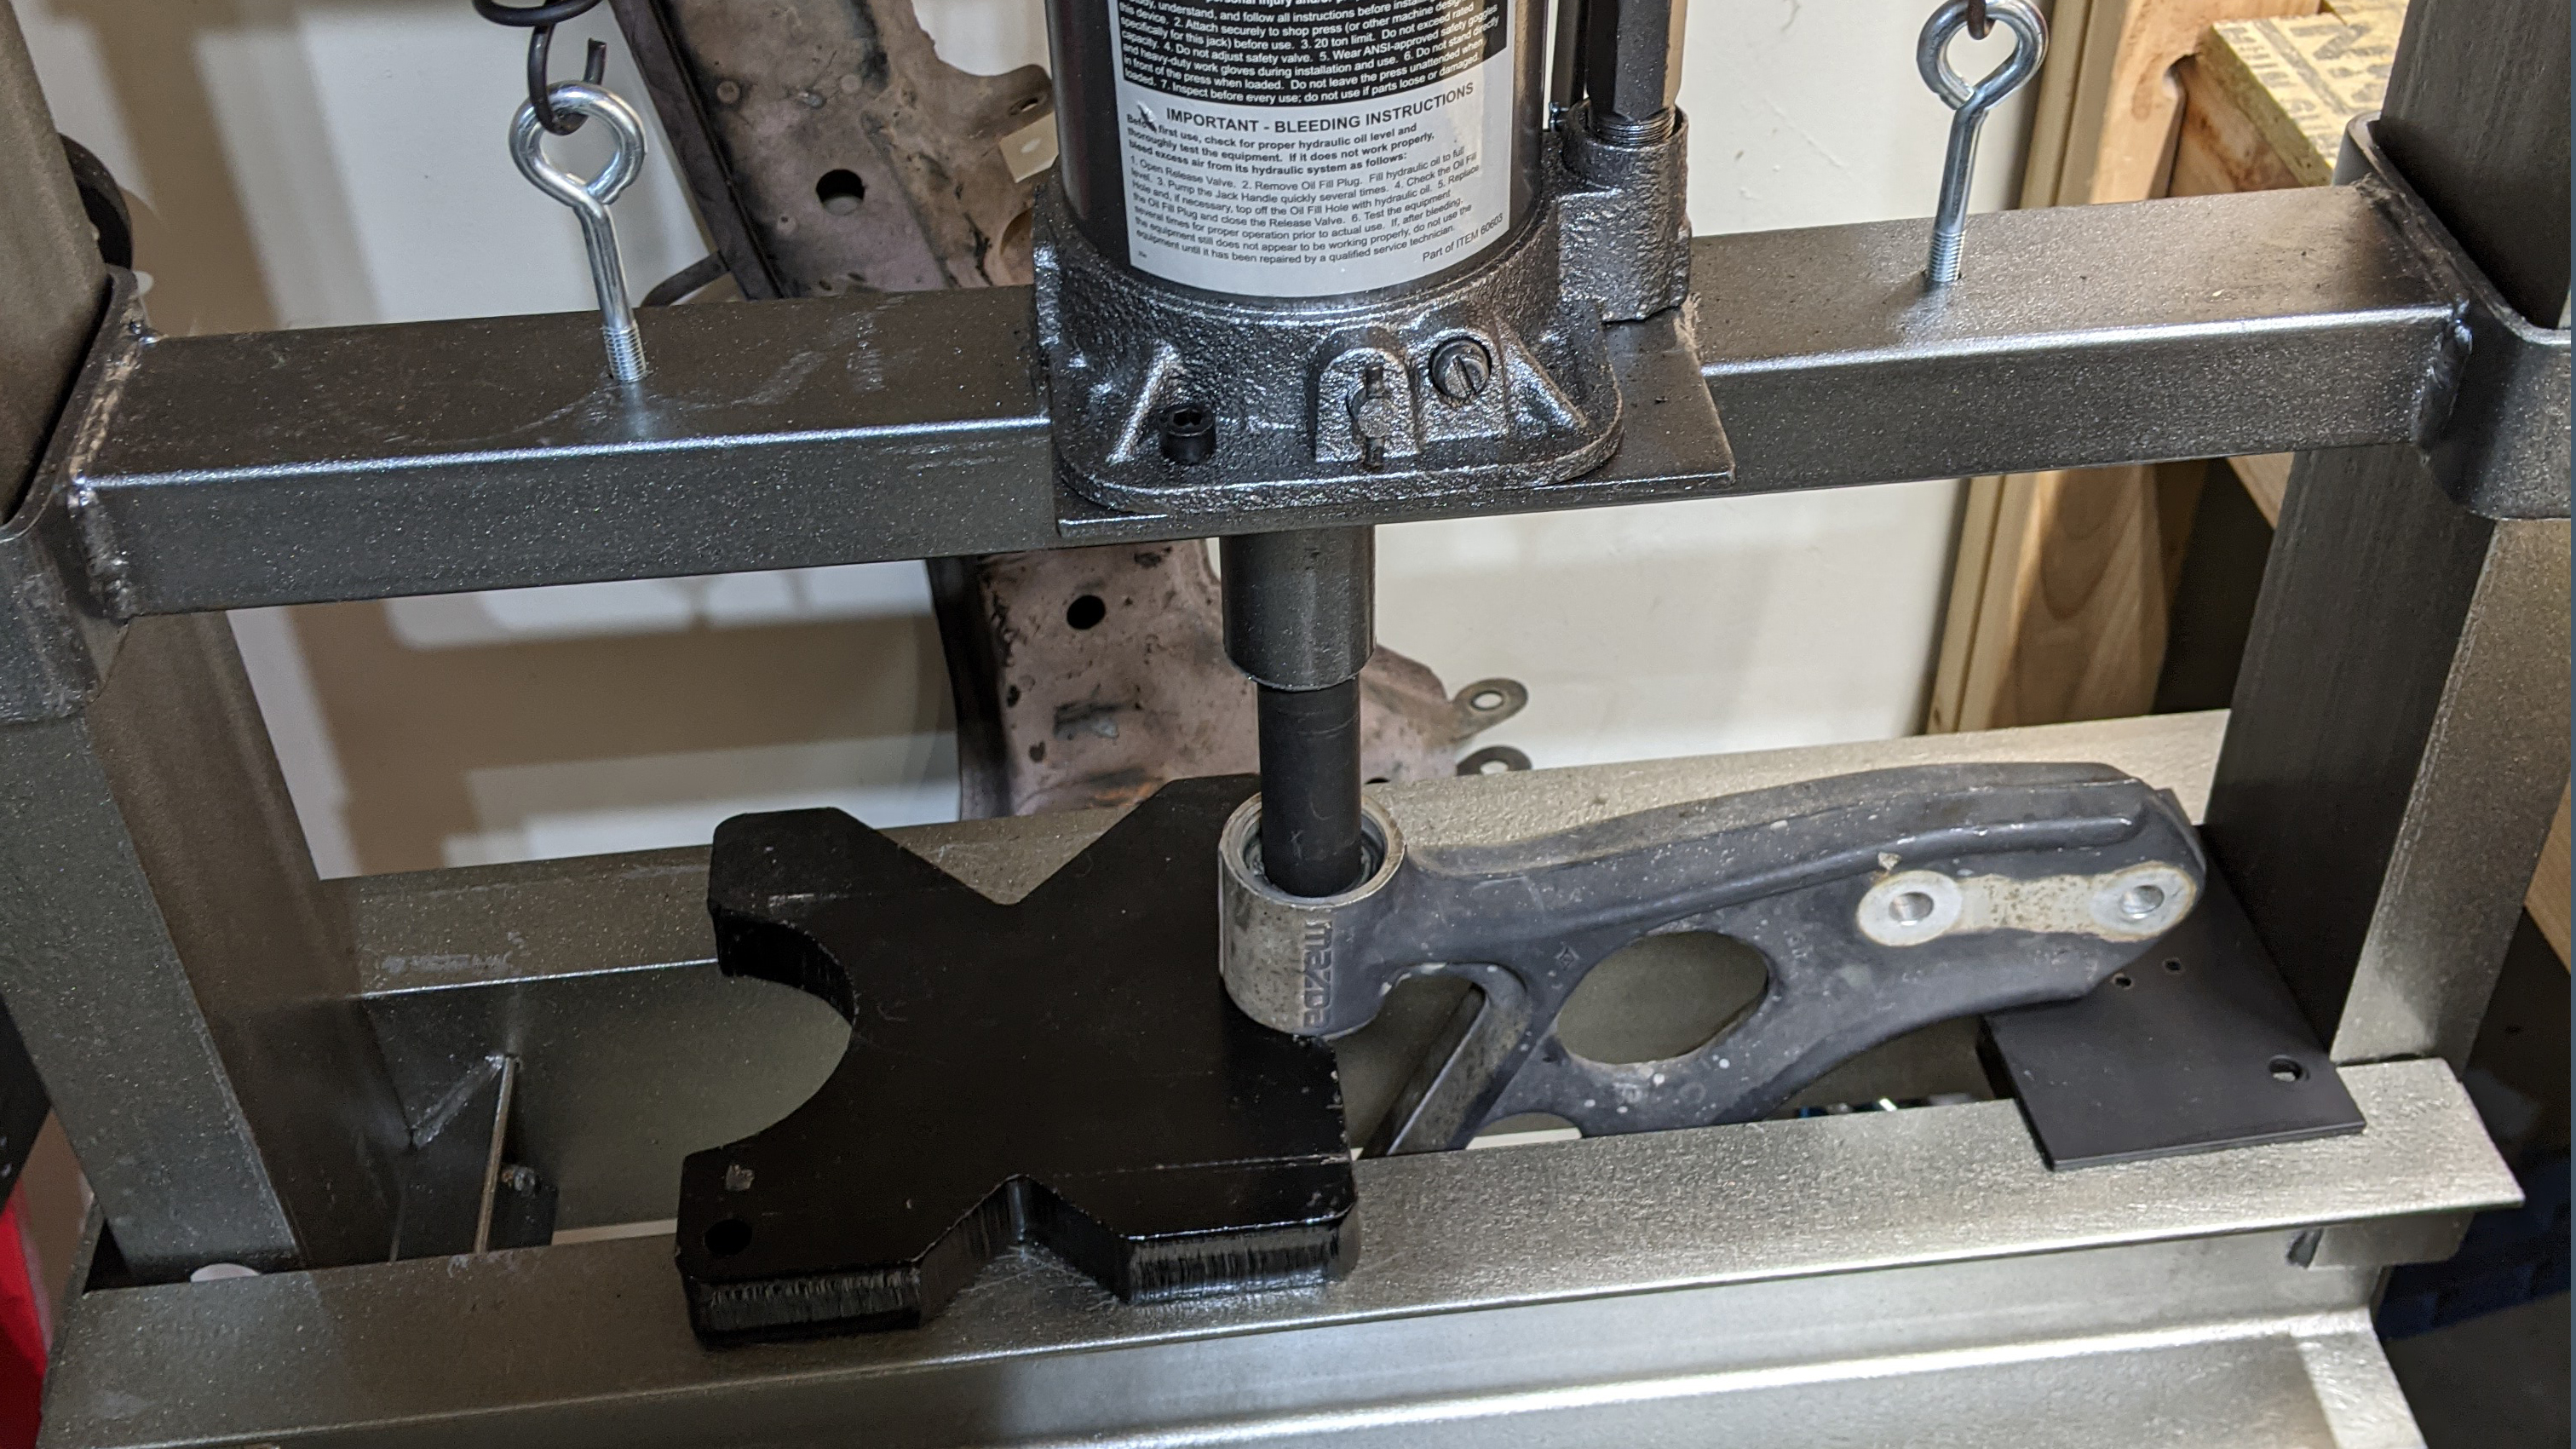
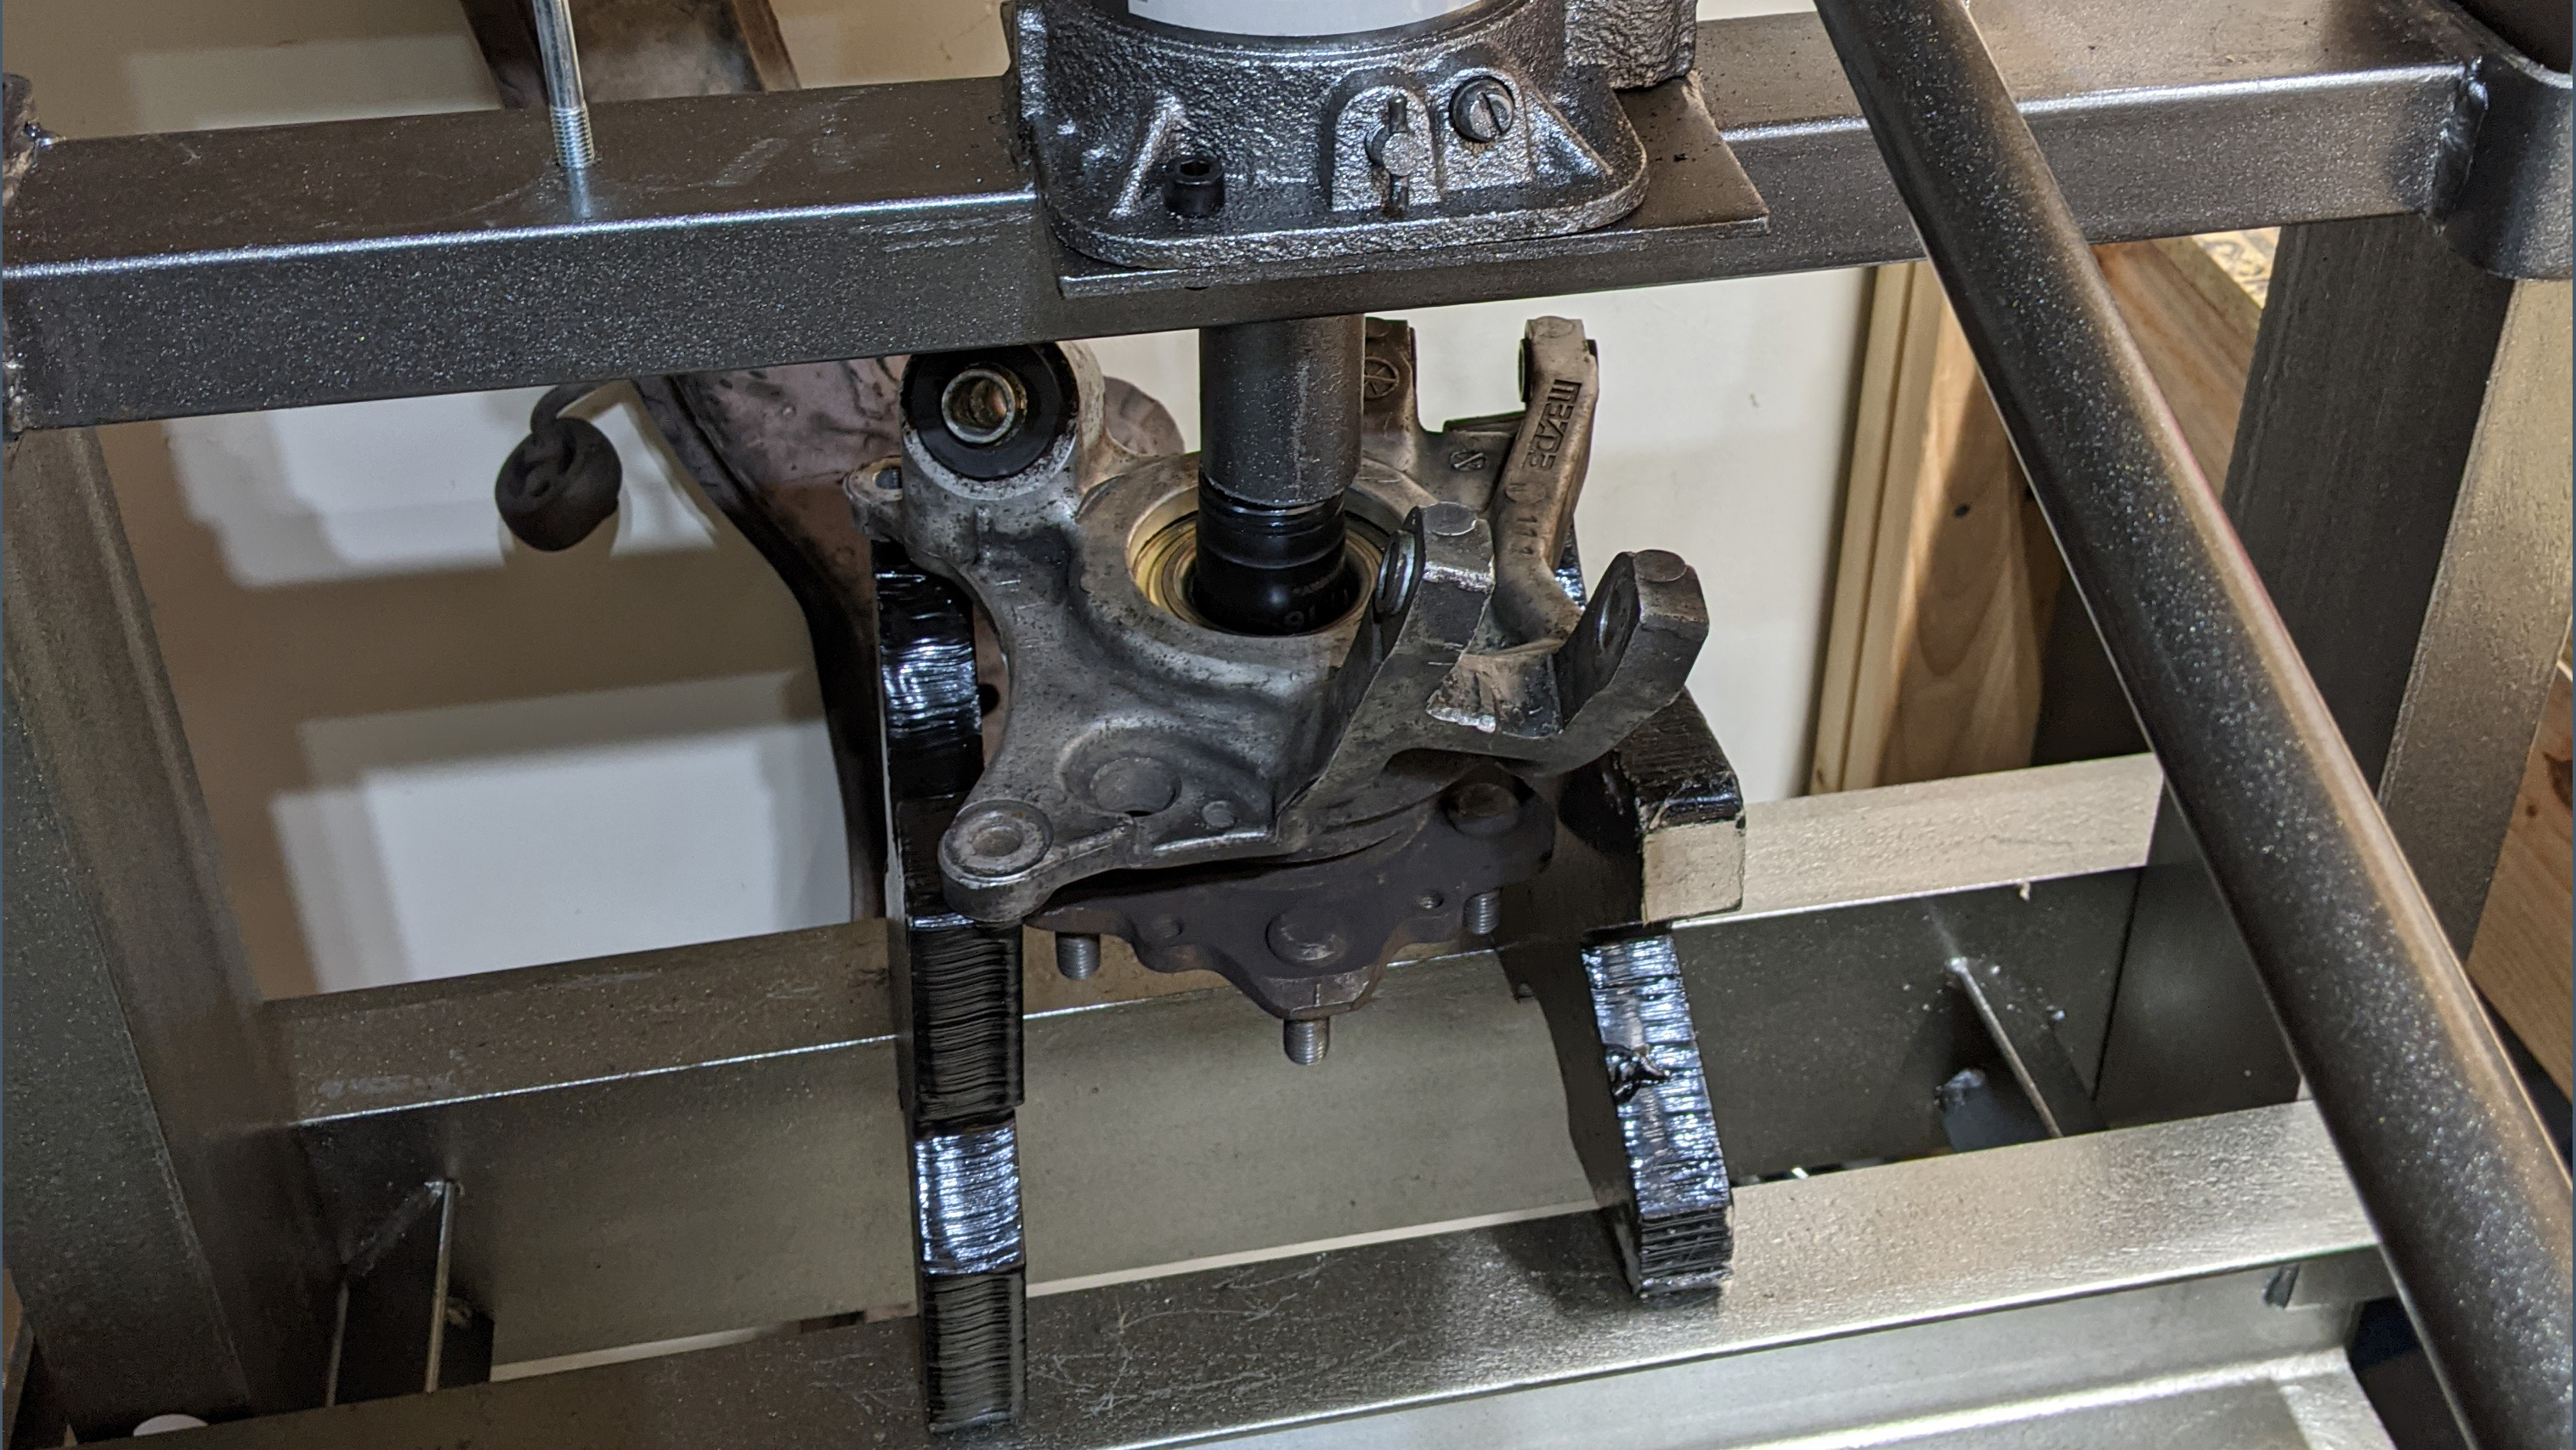
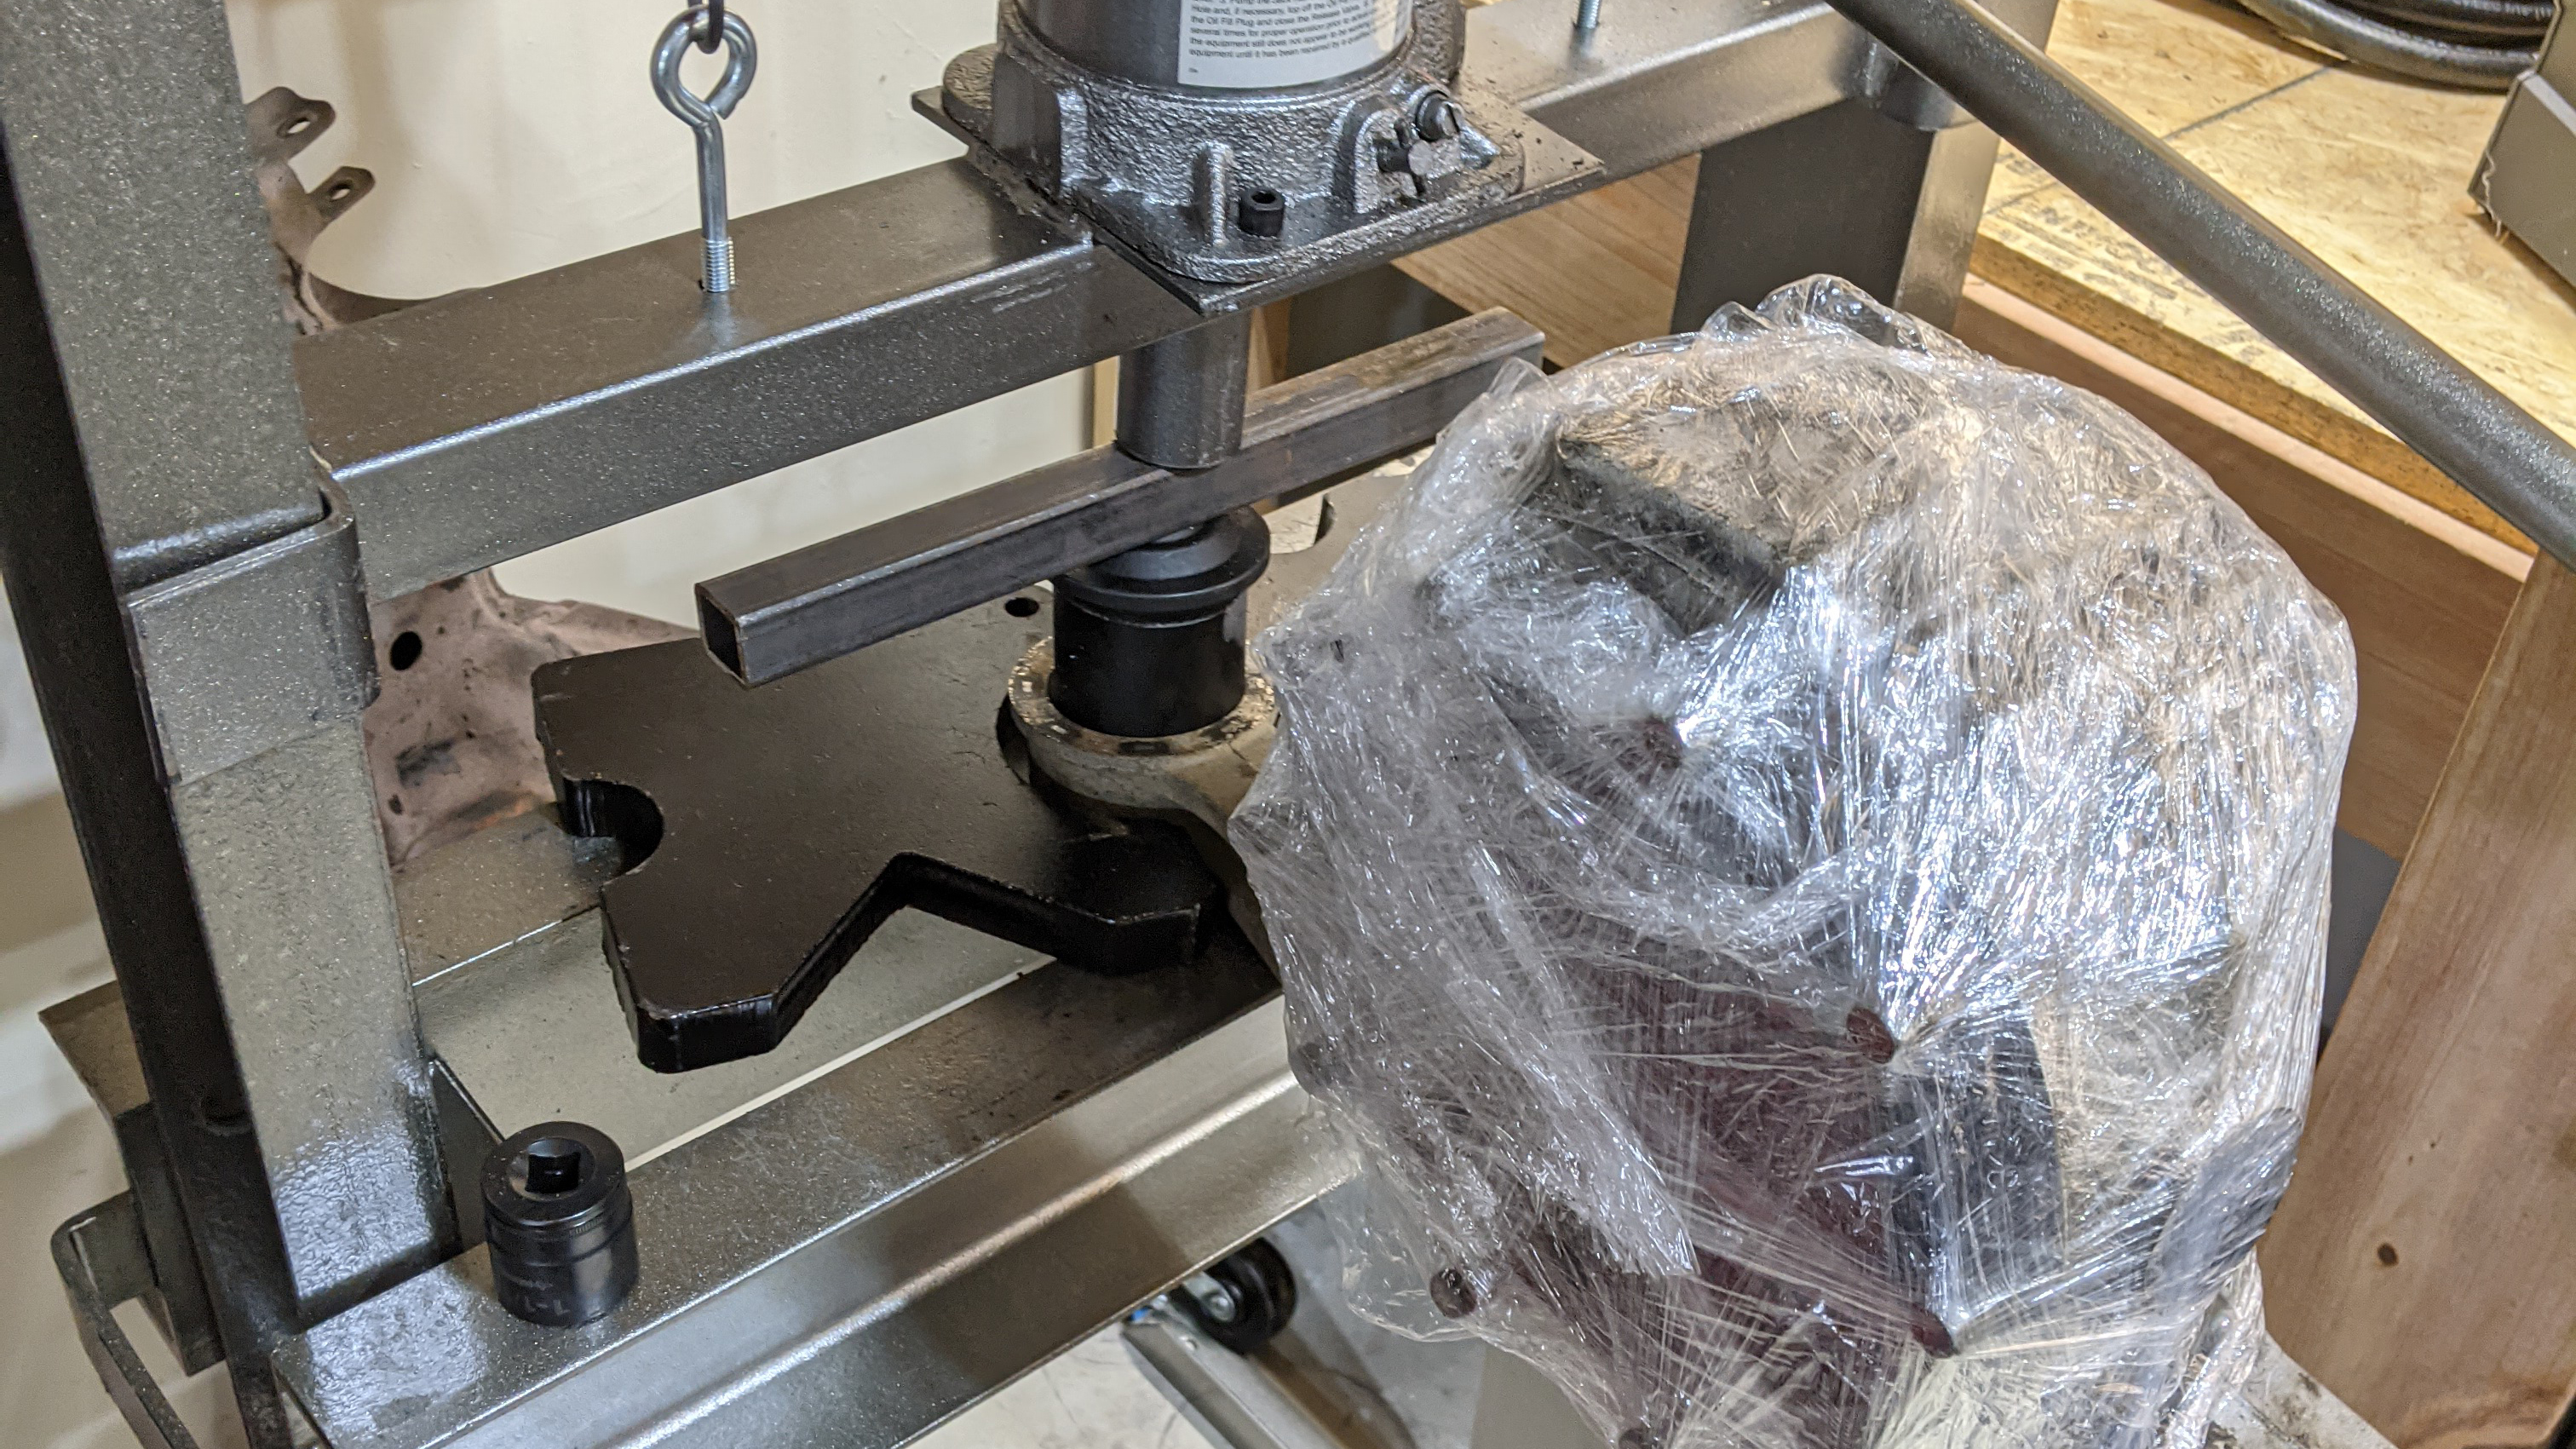
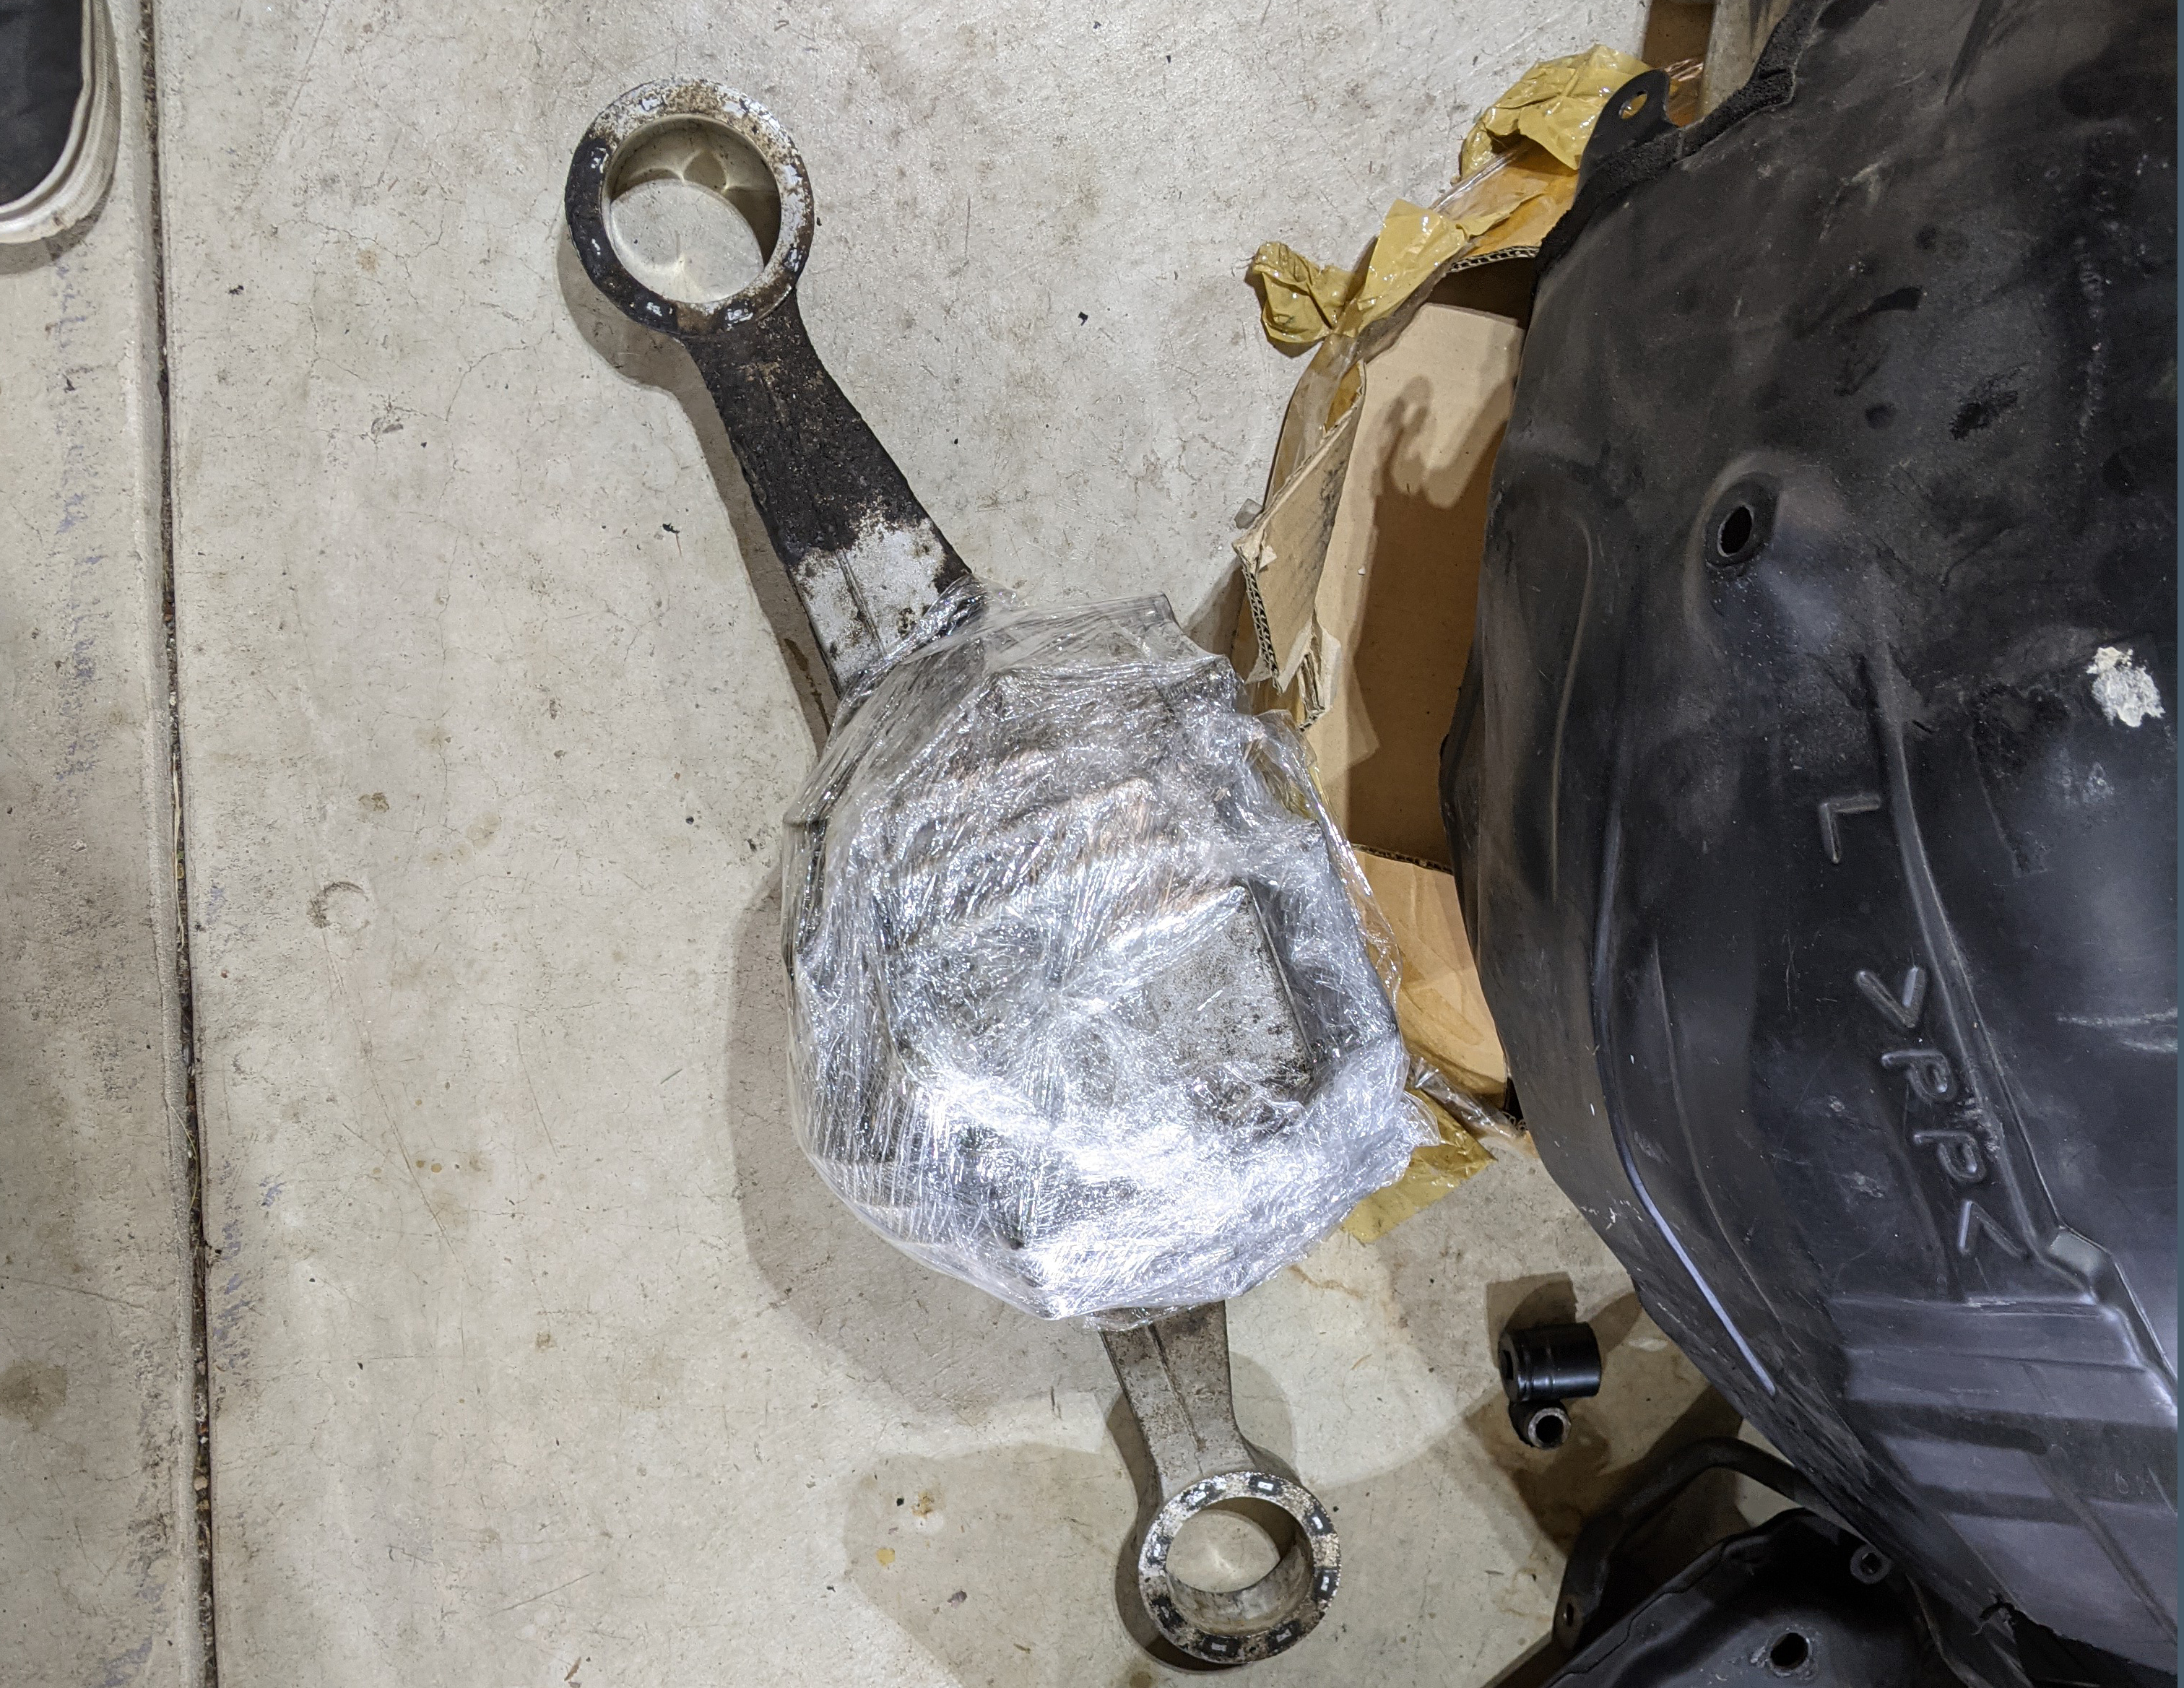
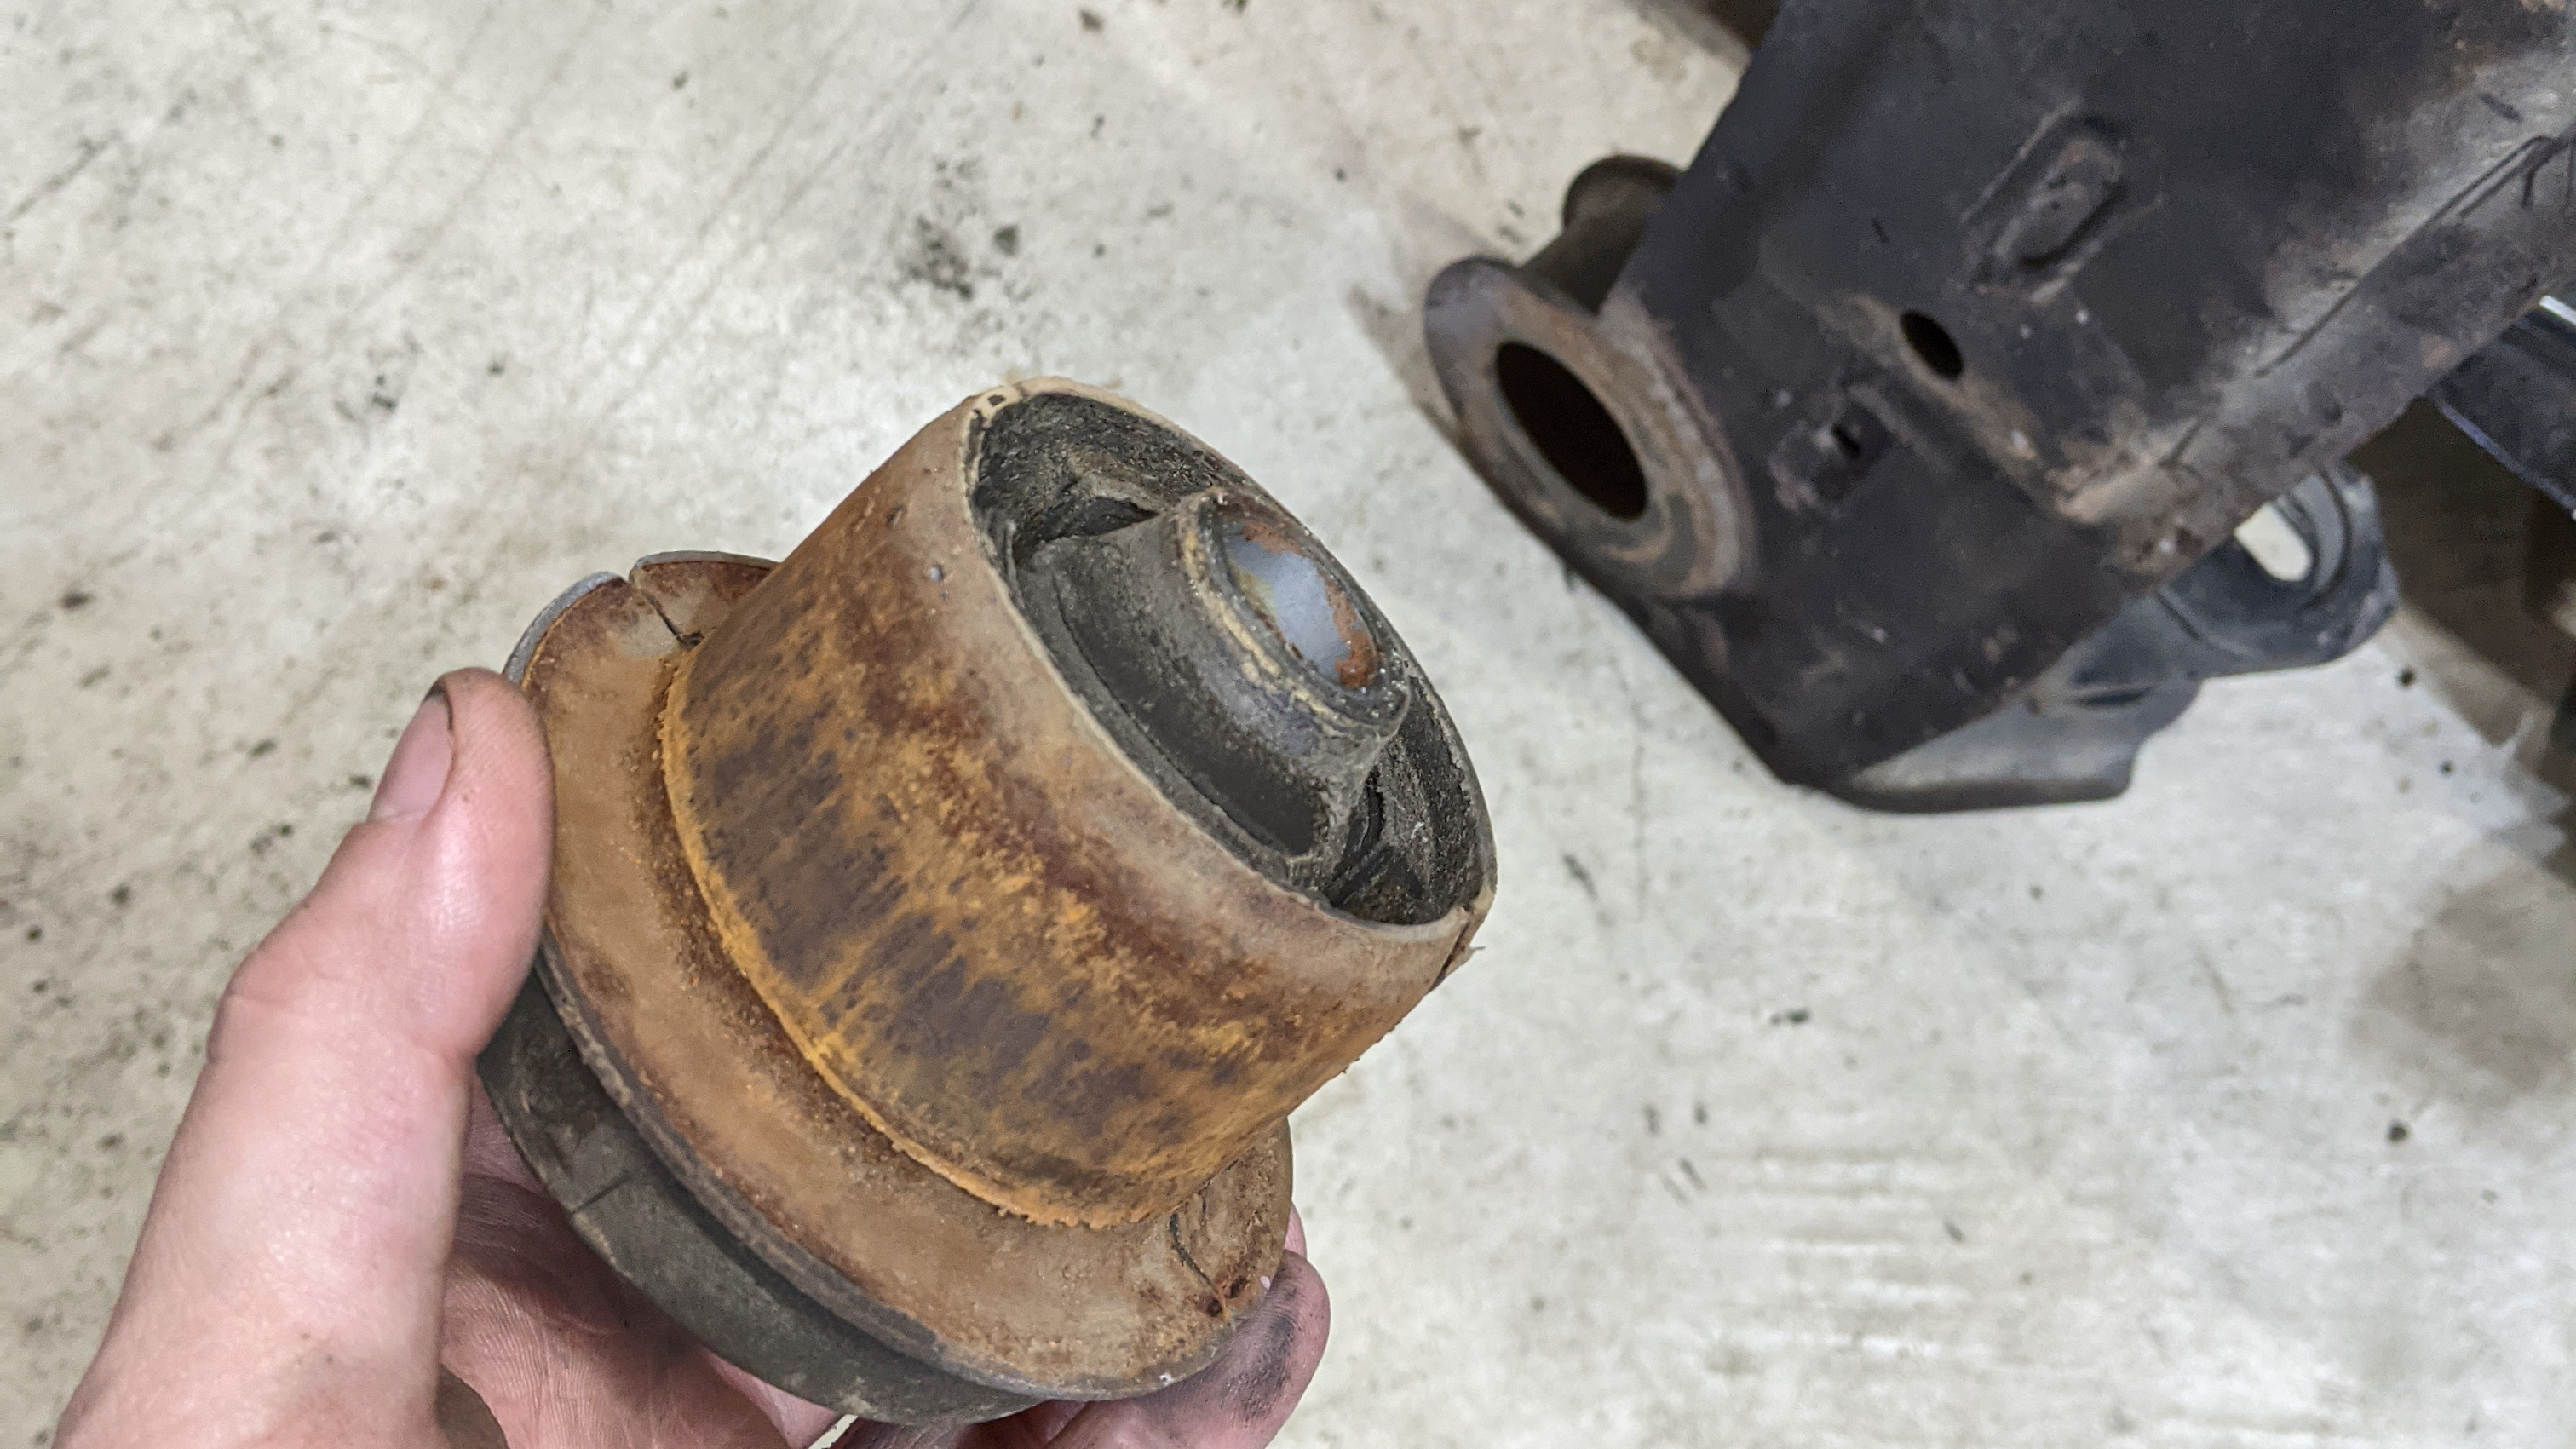
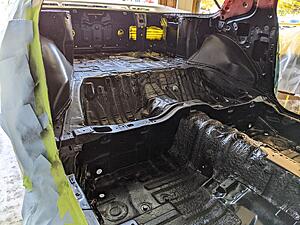
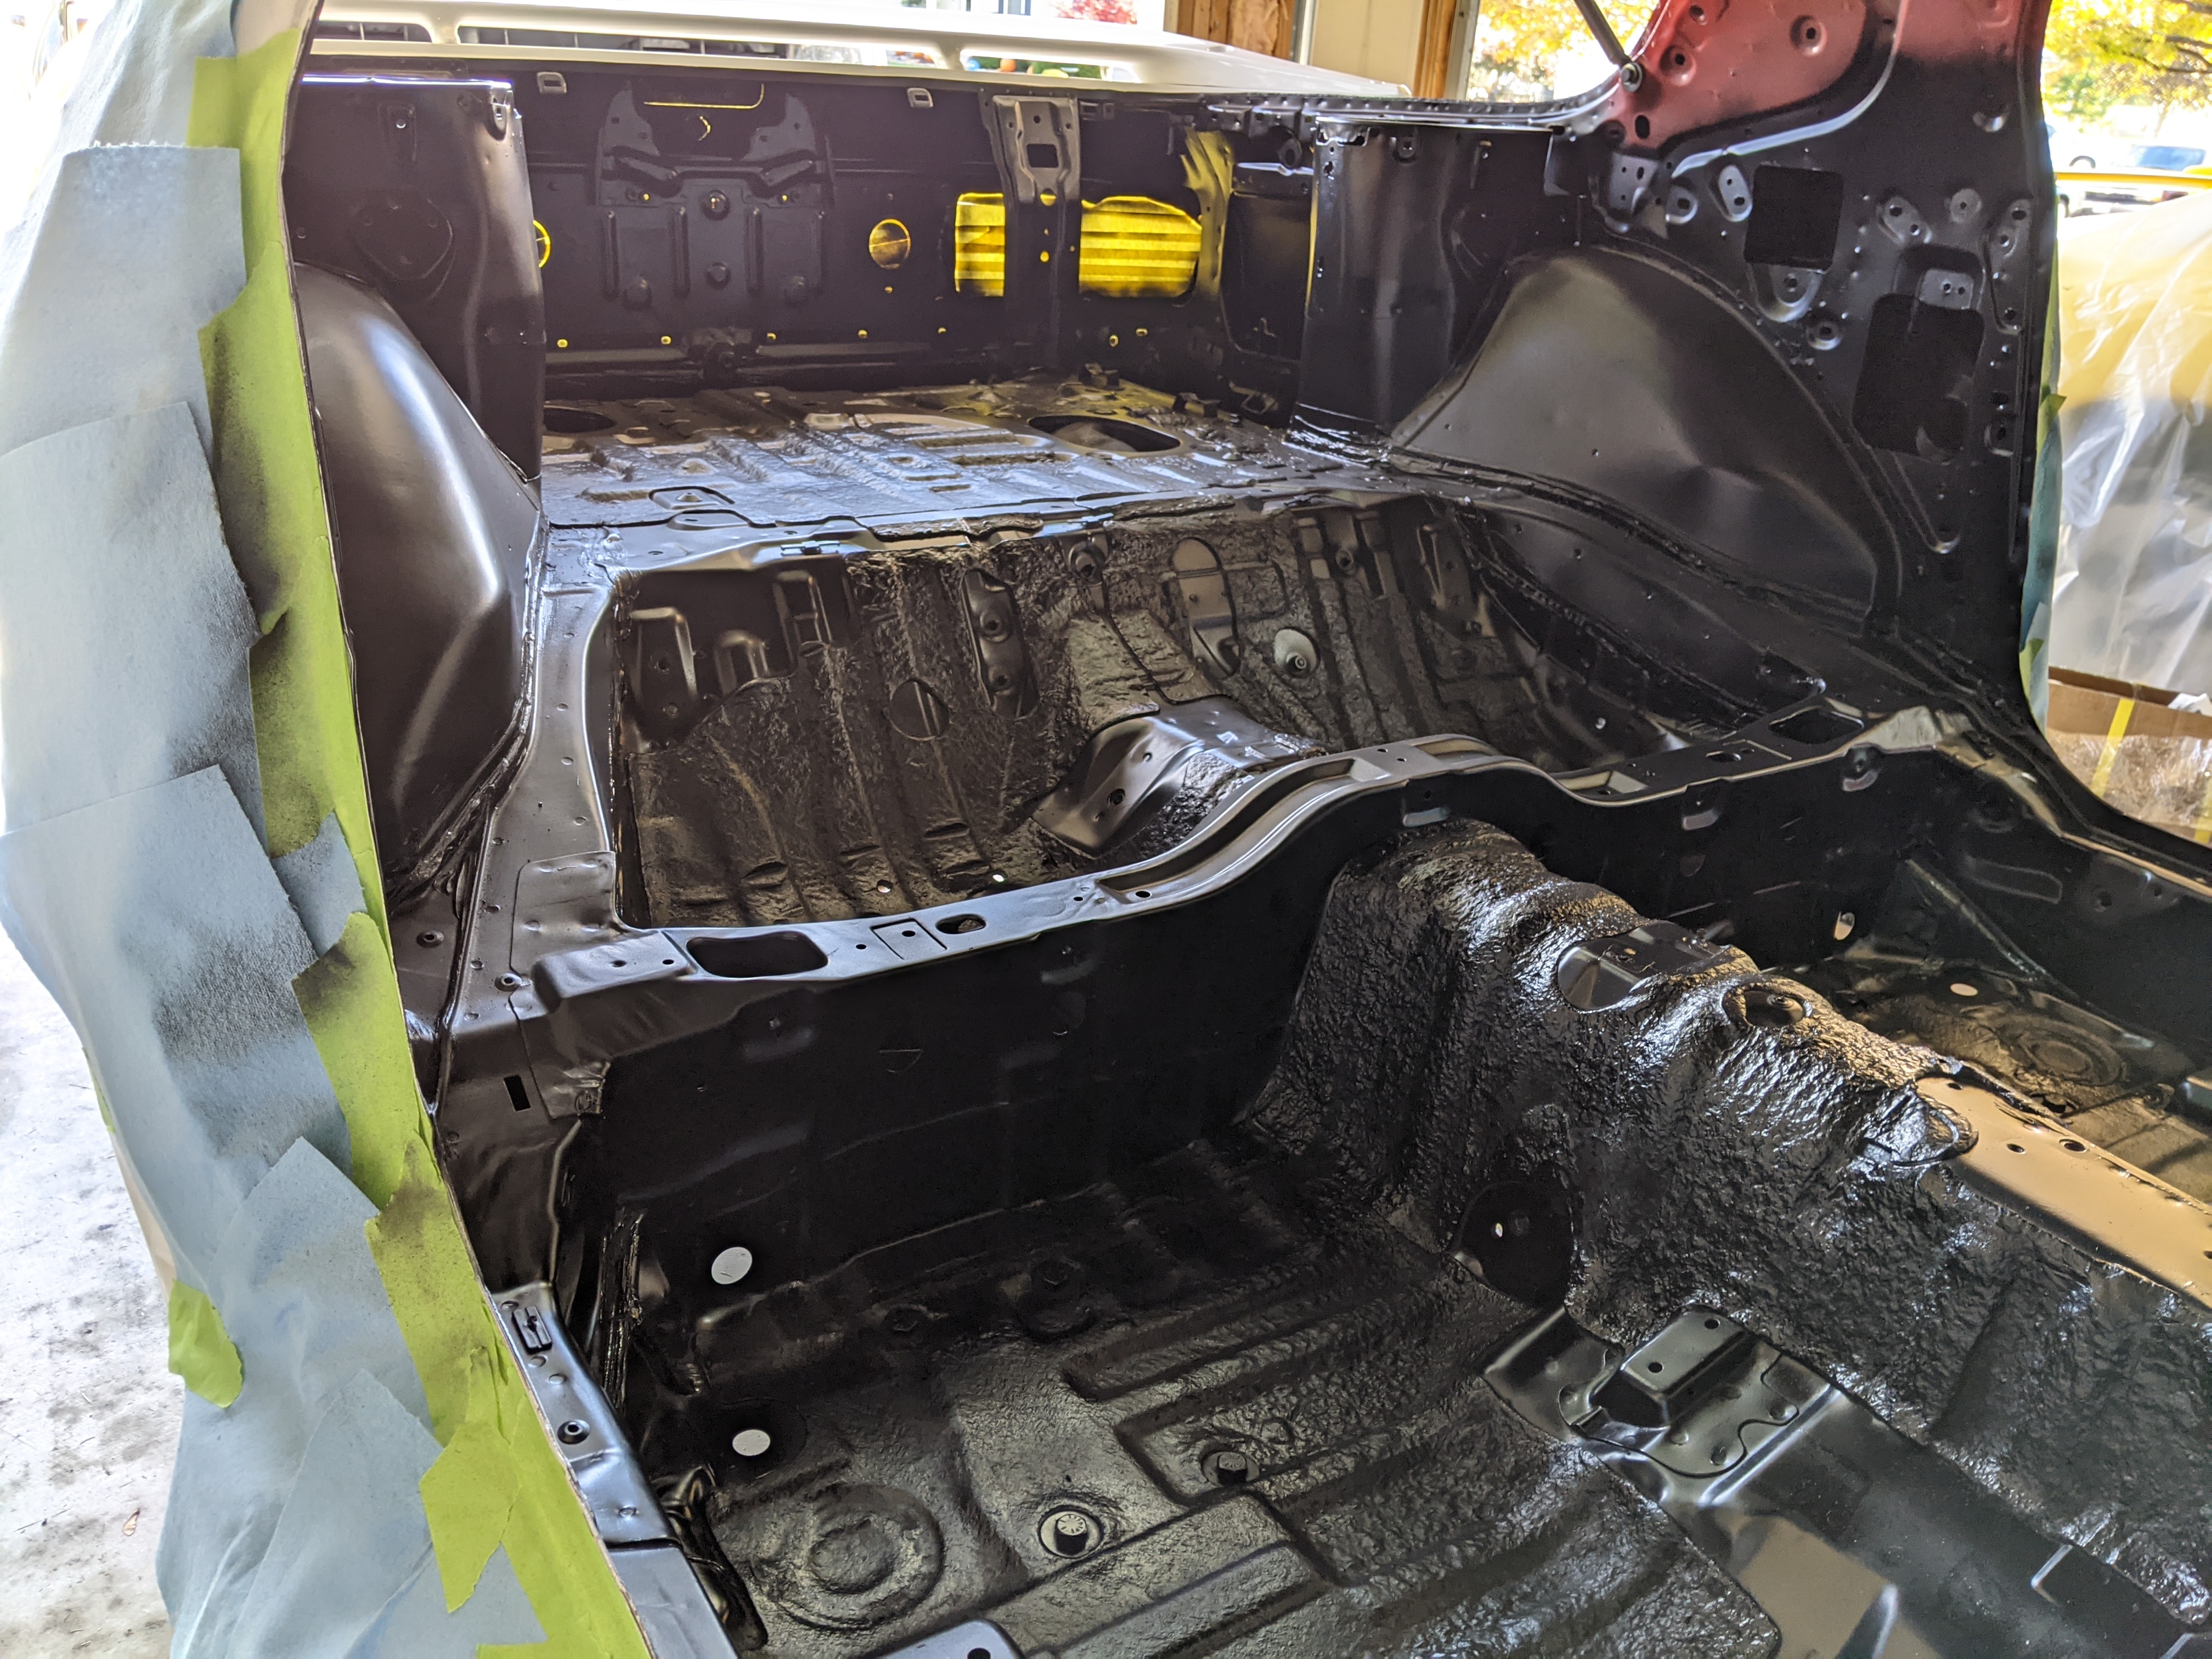
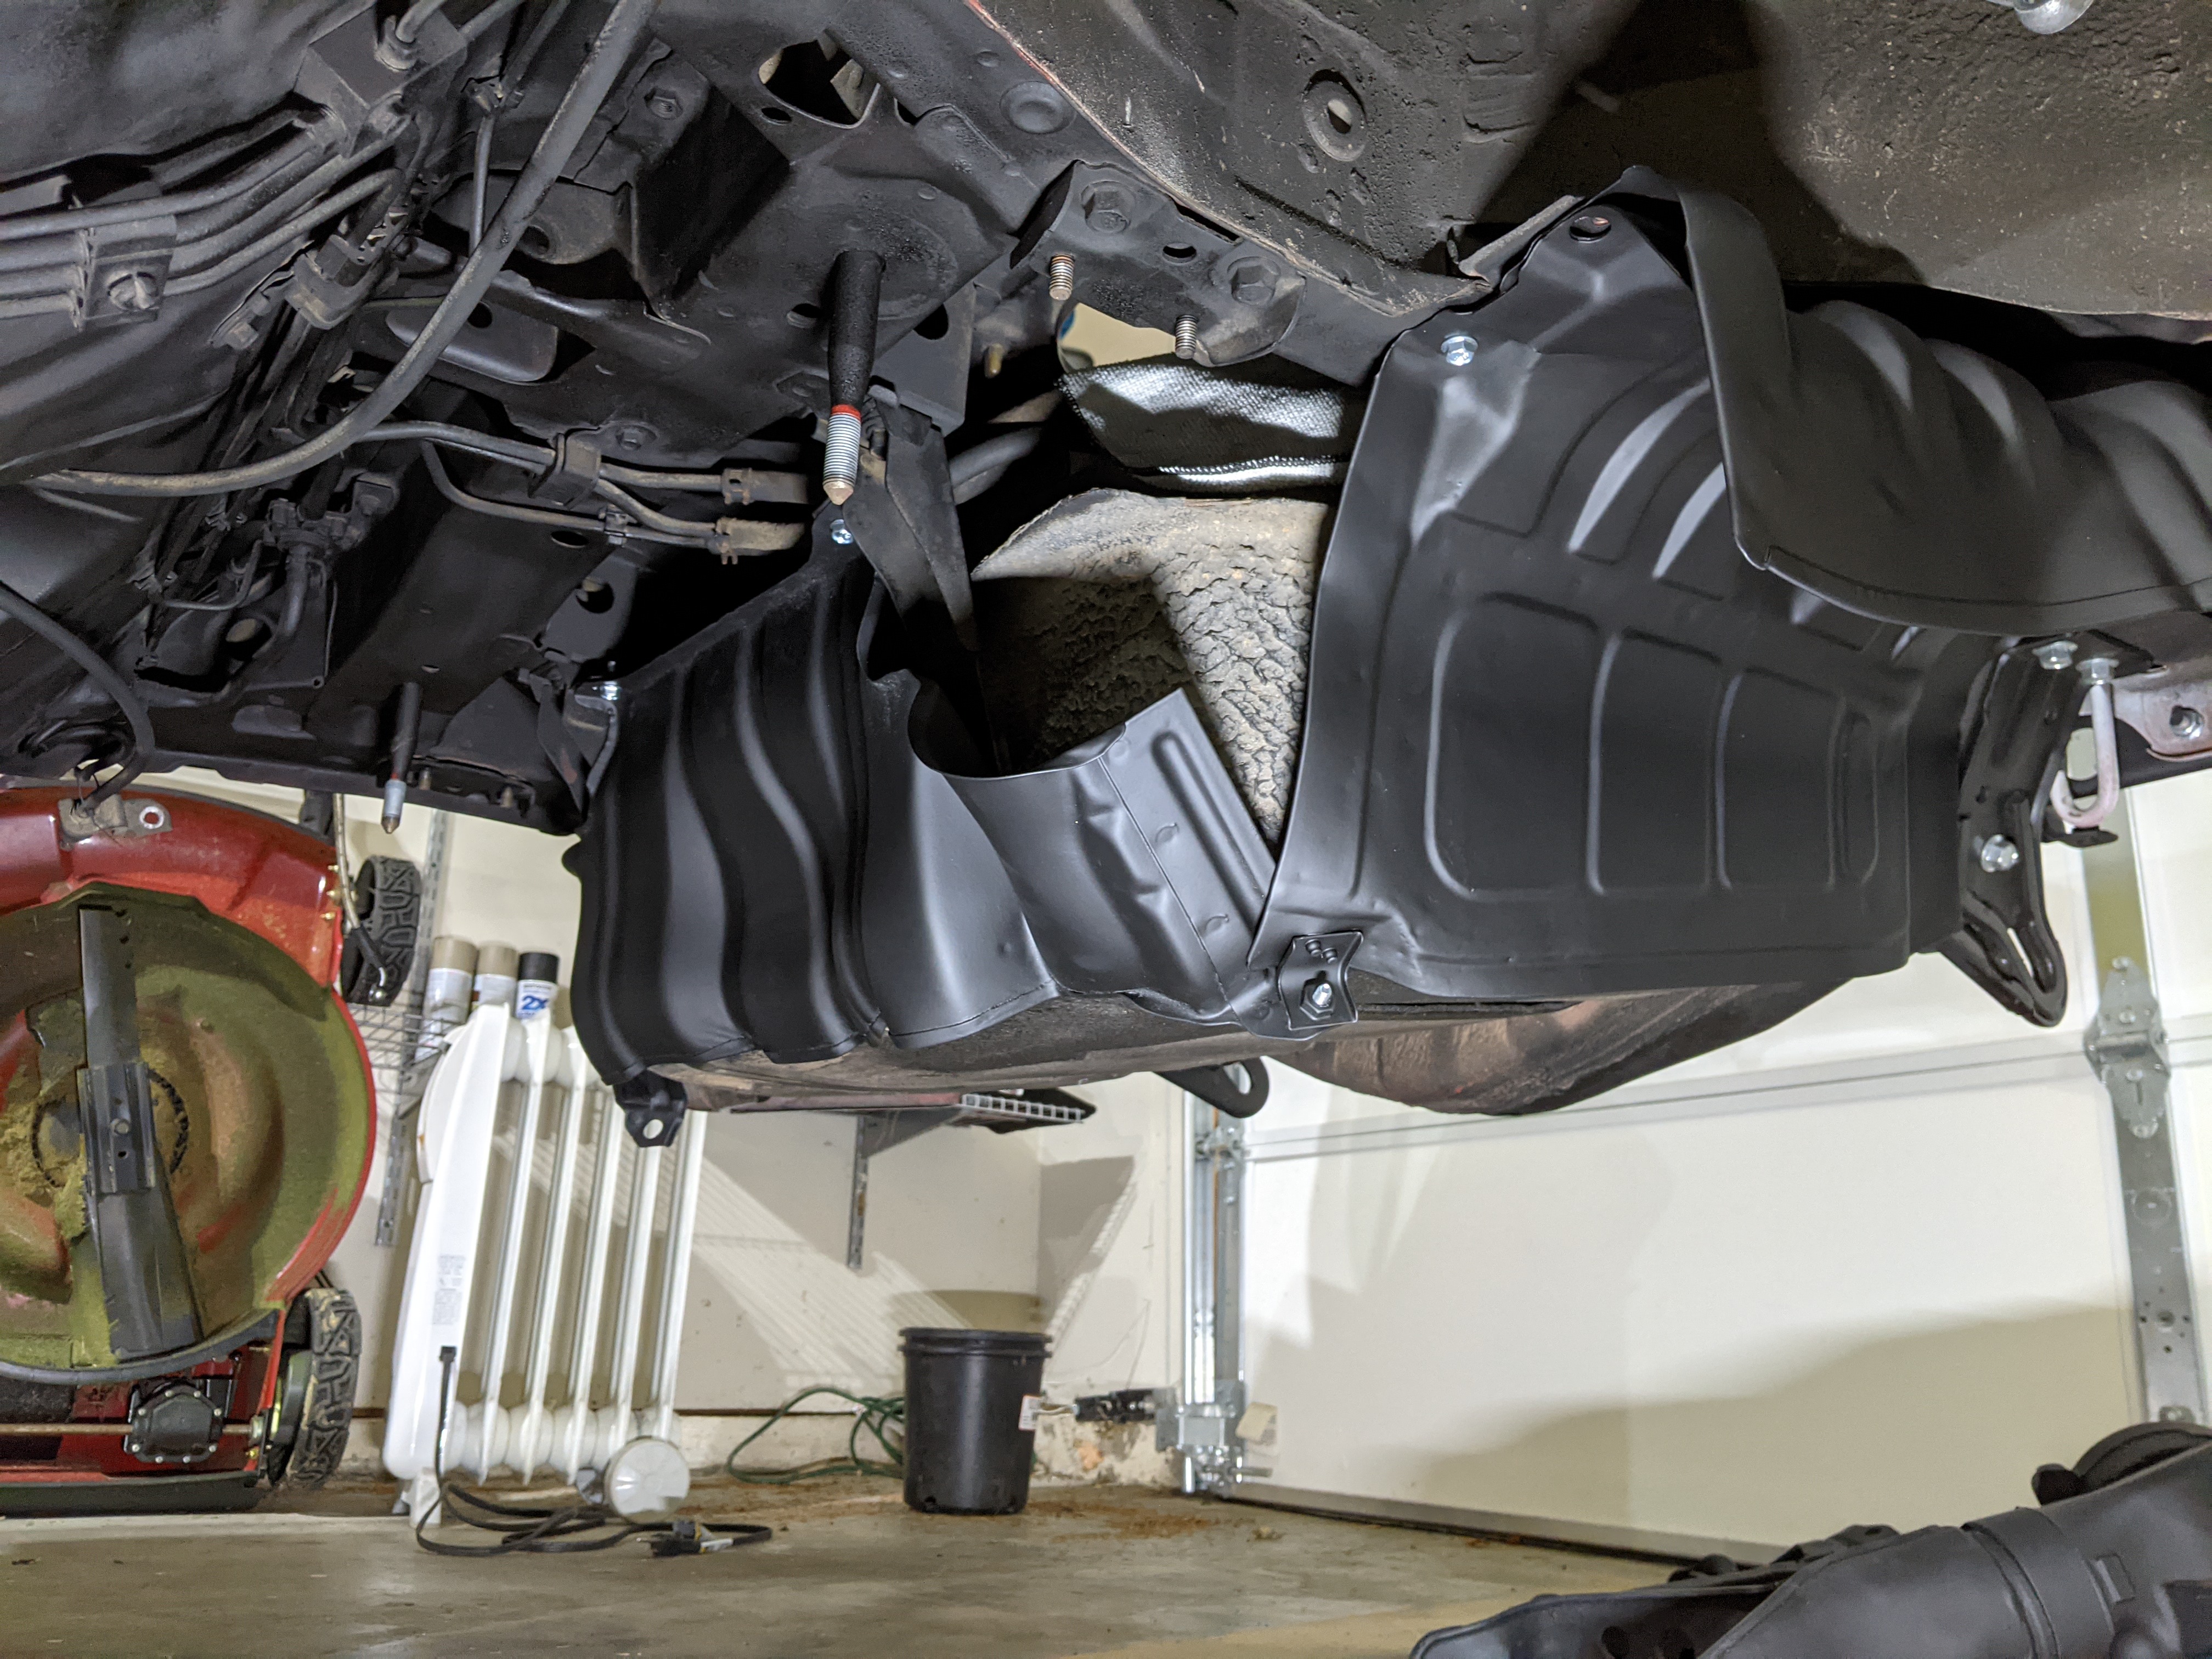
We are full steam ahead on the FC project. Since the rear subframe was out I went ahead and undercoated the chassis area under the subframe. I think it turned out excellent and now the underside of the FC is, officially, all the same color. In addition, we also have the entire rear of the FC sprayed as well. I ended up doing it in sections so I had a much easier time being maneuverable. I think it turned out really nice! Except...for the seam sealed areas. The paint didn’t play well with that and turned tacky. I’m not overly concerned since it’s under the carpet and if a little paint transfer happens that’s okay as well. However, I may go back and sand those seamed sealed areas and try again. I’m excited for the interior not to be red anymore. The last thing that was accomplished was the removal of all the bushings and bearings from the suspension components. Fortunately all came out extremely easy with the use of the press (even the usually stubborn diff and subframe bushings). I’m happy to report that I did not have to use an air chisel for the subframe bushing and the metal collar came out with the bushing. I sent all the stuff off to powder and hope to have them back in a couple of weeks.
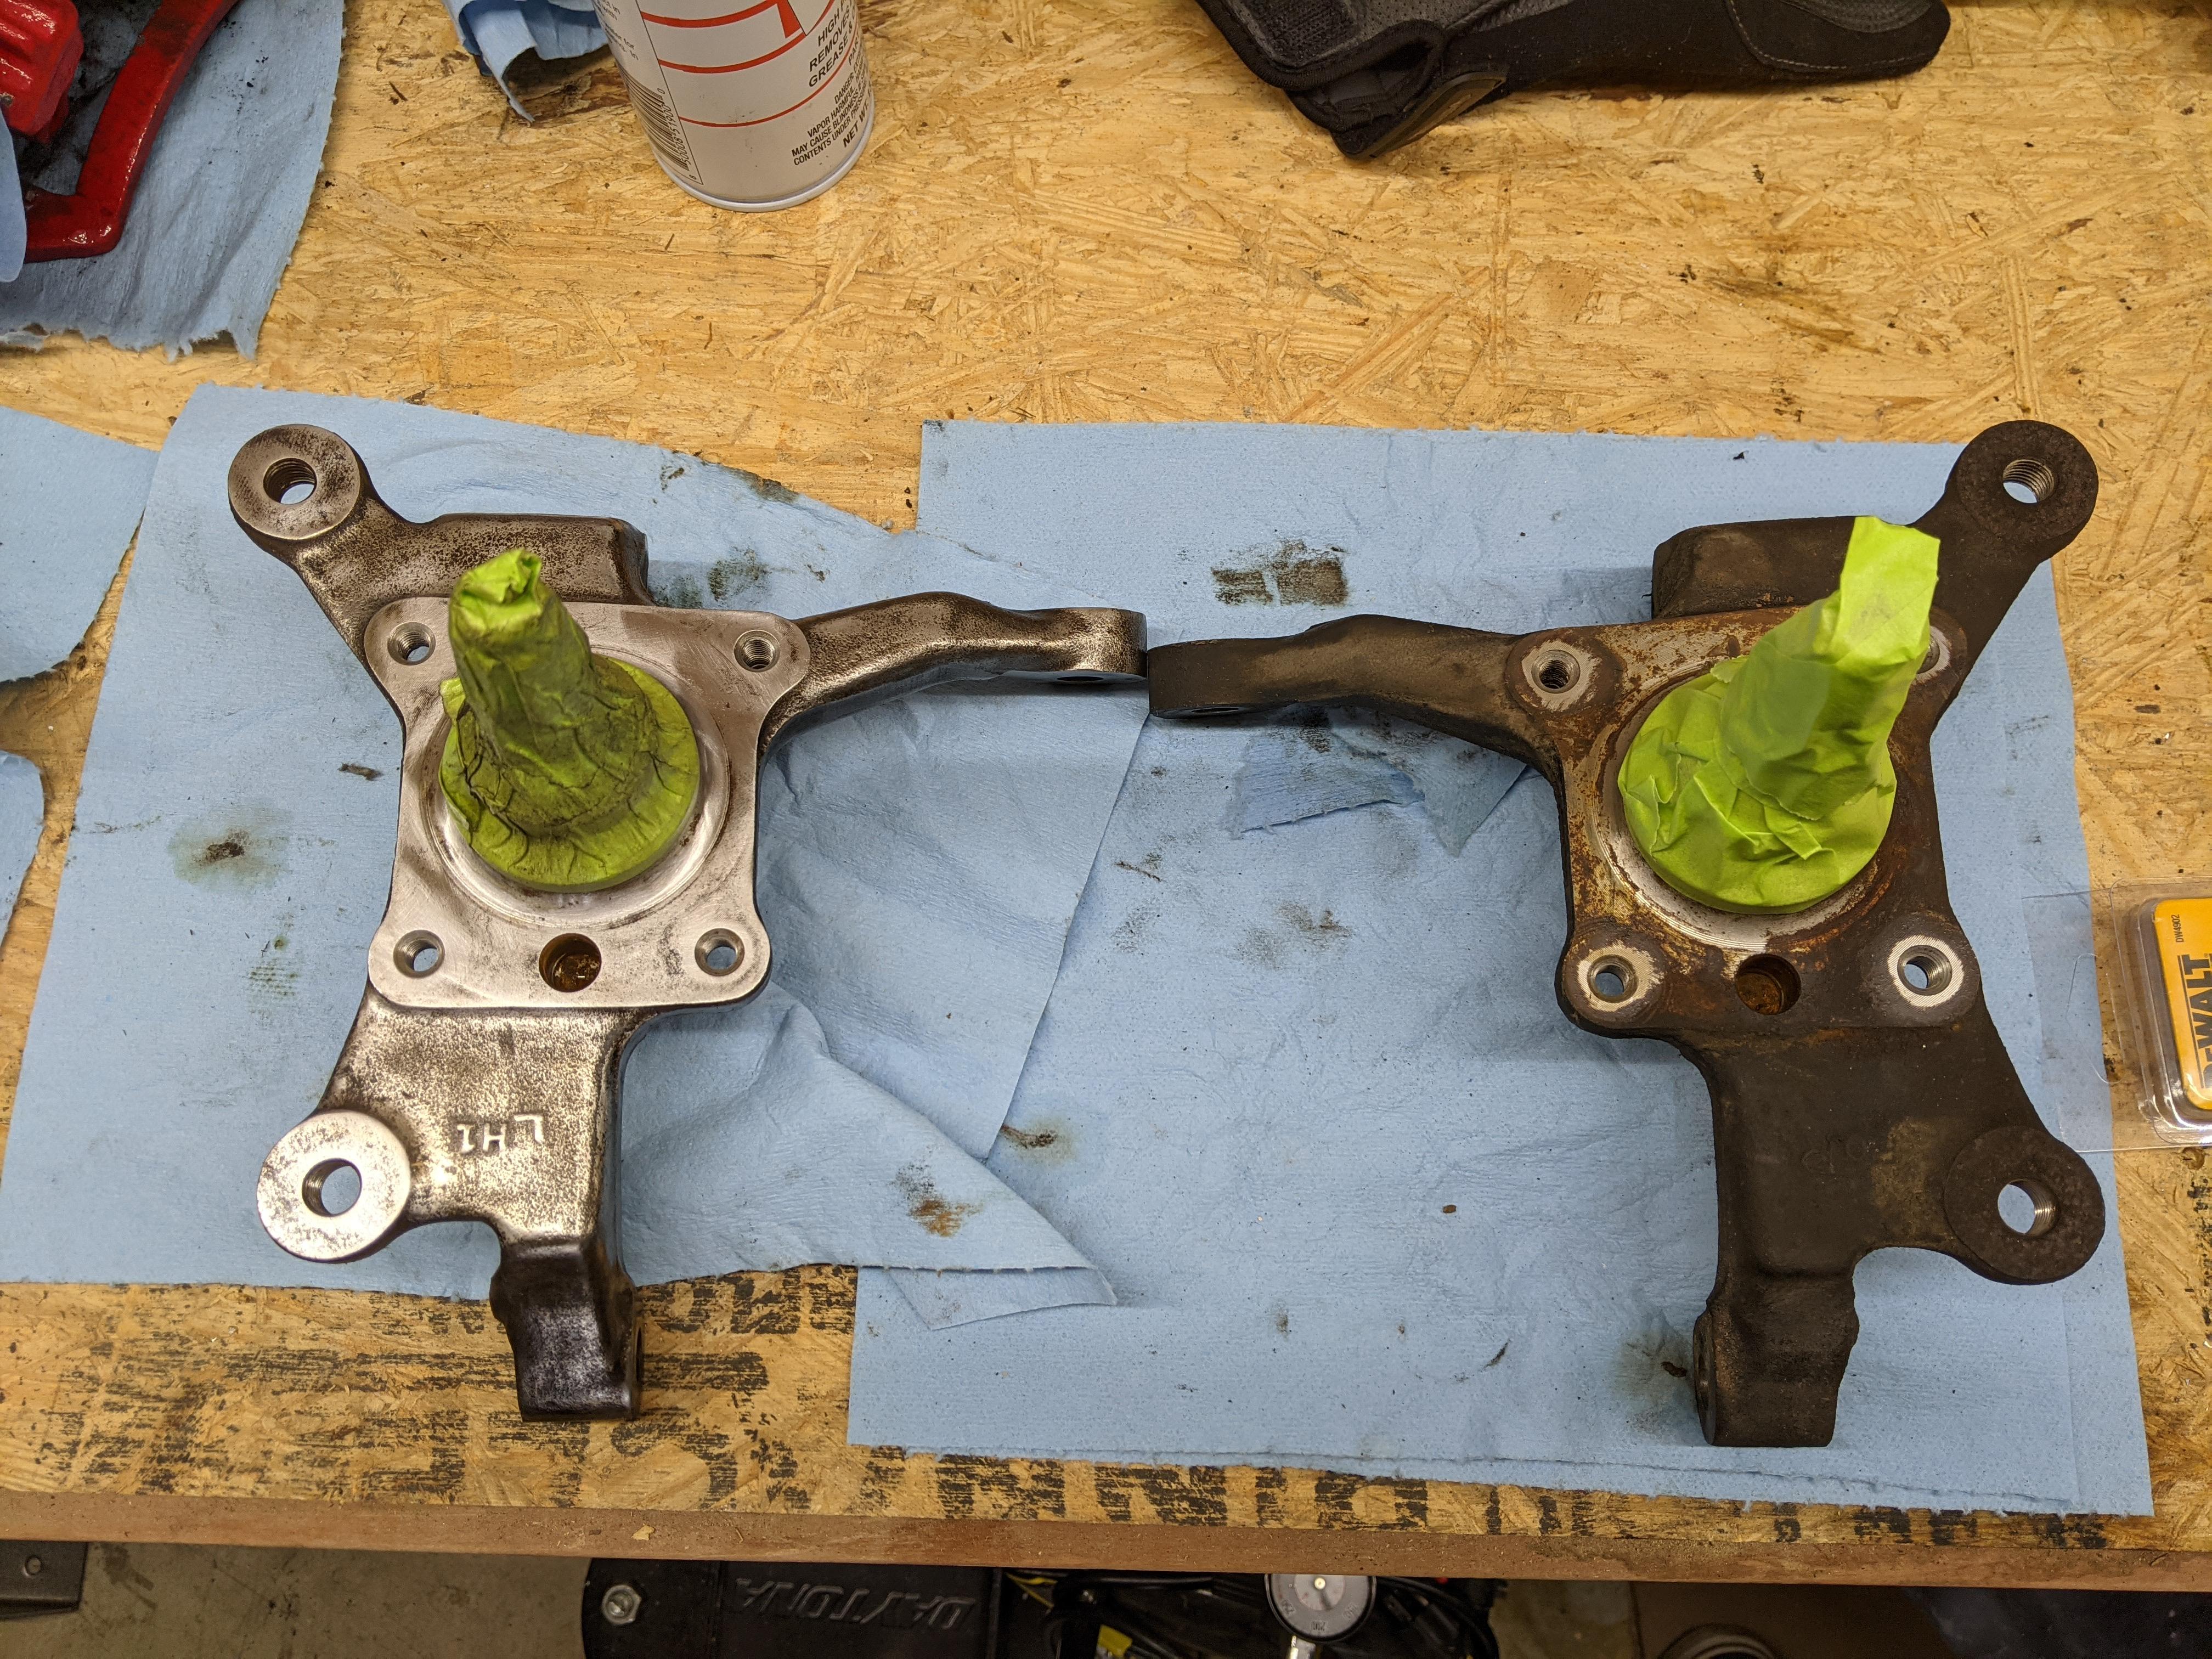
While the stuff is off to powder I plan on focusing on a couple of projects I still have to do to knock out the suspension. A long time ago I sourced some FD calipers and had them powdered; I’m going to get those rebuilt and on the car. I plan to rebuild the rear calipers as well and respray them (this time correctly with proper masking). I still need to clean both the front and rear knuckles and clear them. I’ve thought about painting the recessed Mazda logos black and shaving the raised logos on the suspension components - still debating. The last thing I need to do is remove the wiring harness completely from the car and get to spraying to finish out the front.
Here is the undercoating saga
Here is the spraying the rear saga


Here is the bushing saga


We are full steam ahead on the FC project. Since the rear subframe was out I went ahead and undercoated the chassis area under the subframe. I think it turned out excellent and now the underside of the FC is, officially, all the same color. In addition, we also have the entire rear of the FC sprayed as well. I ended up doing it in sections so I had a much easier time being maneuverable. I think it turned out really nice! Except...for the seam sealed areas. The paint didn’t play well with that and turned tacky. I’m not overly concerned since it’s under the carpet and if a little paint transfer happens that’s okay as well. However, I may go back and sand those seamed sealed areas and try again. I’m excited for the interior not to be red anymore. The last thing that was accomplished was the removal of all the bushings and bearings from the suspension components. Fortunately all came out extremely easy with the use of the press (even the usually stubborn diff and subframe bushings). I’m happy to report that I did not have to use an air chisel for the subframe bushing and the metal collar came out with the bushing. I sent all the stuff off to powder and hope to have them back in a couple of weeks.
While the stuff is off to powder I plan on focusing on a couple of projects I still have to do to knock out the suspension. A long time ago I sourced some FD calipers and had them powdered; I’m going to get those rebuilt and on the car. I plan to rebuild the rear calipers as well and respray them (this time correctly with proper masking). I still need to clean both the front and rear knuckles and clear them. I’ve thought about painting the recessed Mazda logos black and shaving the raised logos on the suspension components - still debating. The last thing I need to do is remove the wiring harness completely from the car and get to spraying to finish out the front.
Here is the undercoating saga

Here is the spraying the rear saga
Here is the bushing saga

The following 2 users liked this post by Akomix:
driftxsequence (11-23-21),
j9fd3s (11-09-21)
11-22-21, 08:14 AM
#346
Update 11/22/2021
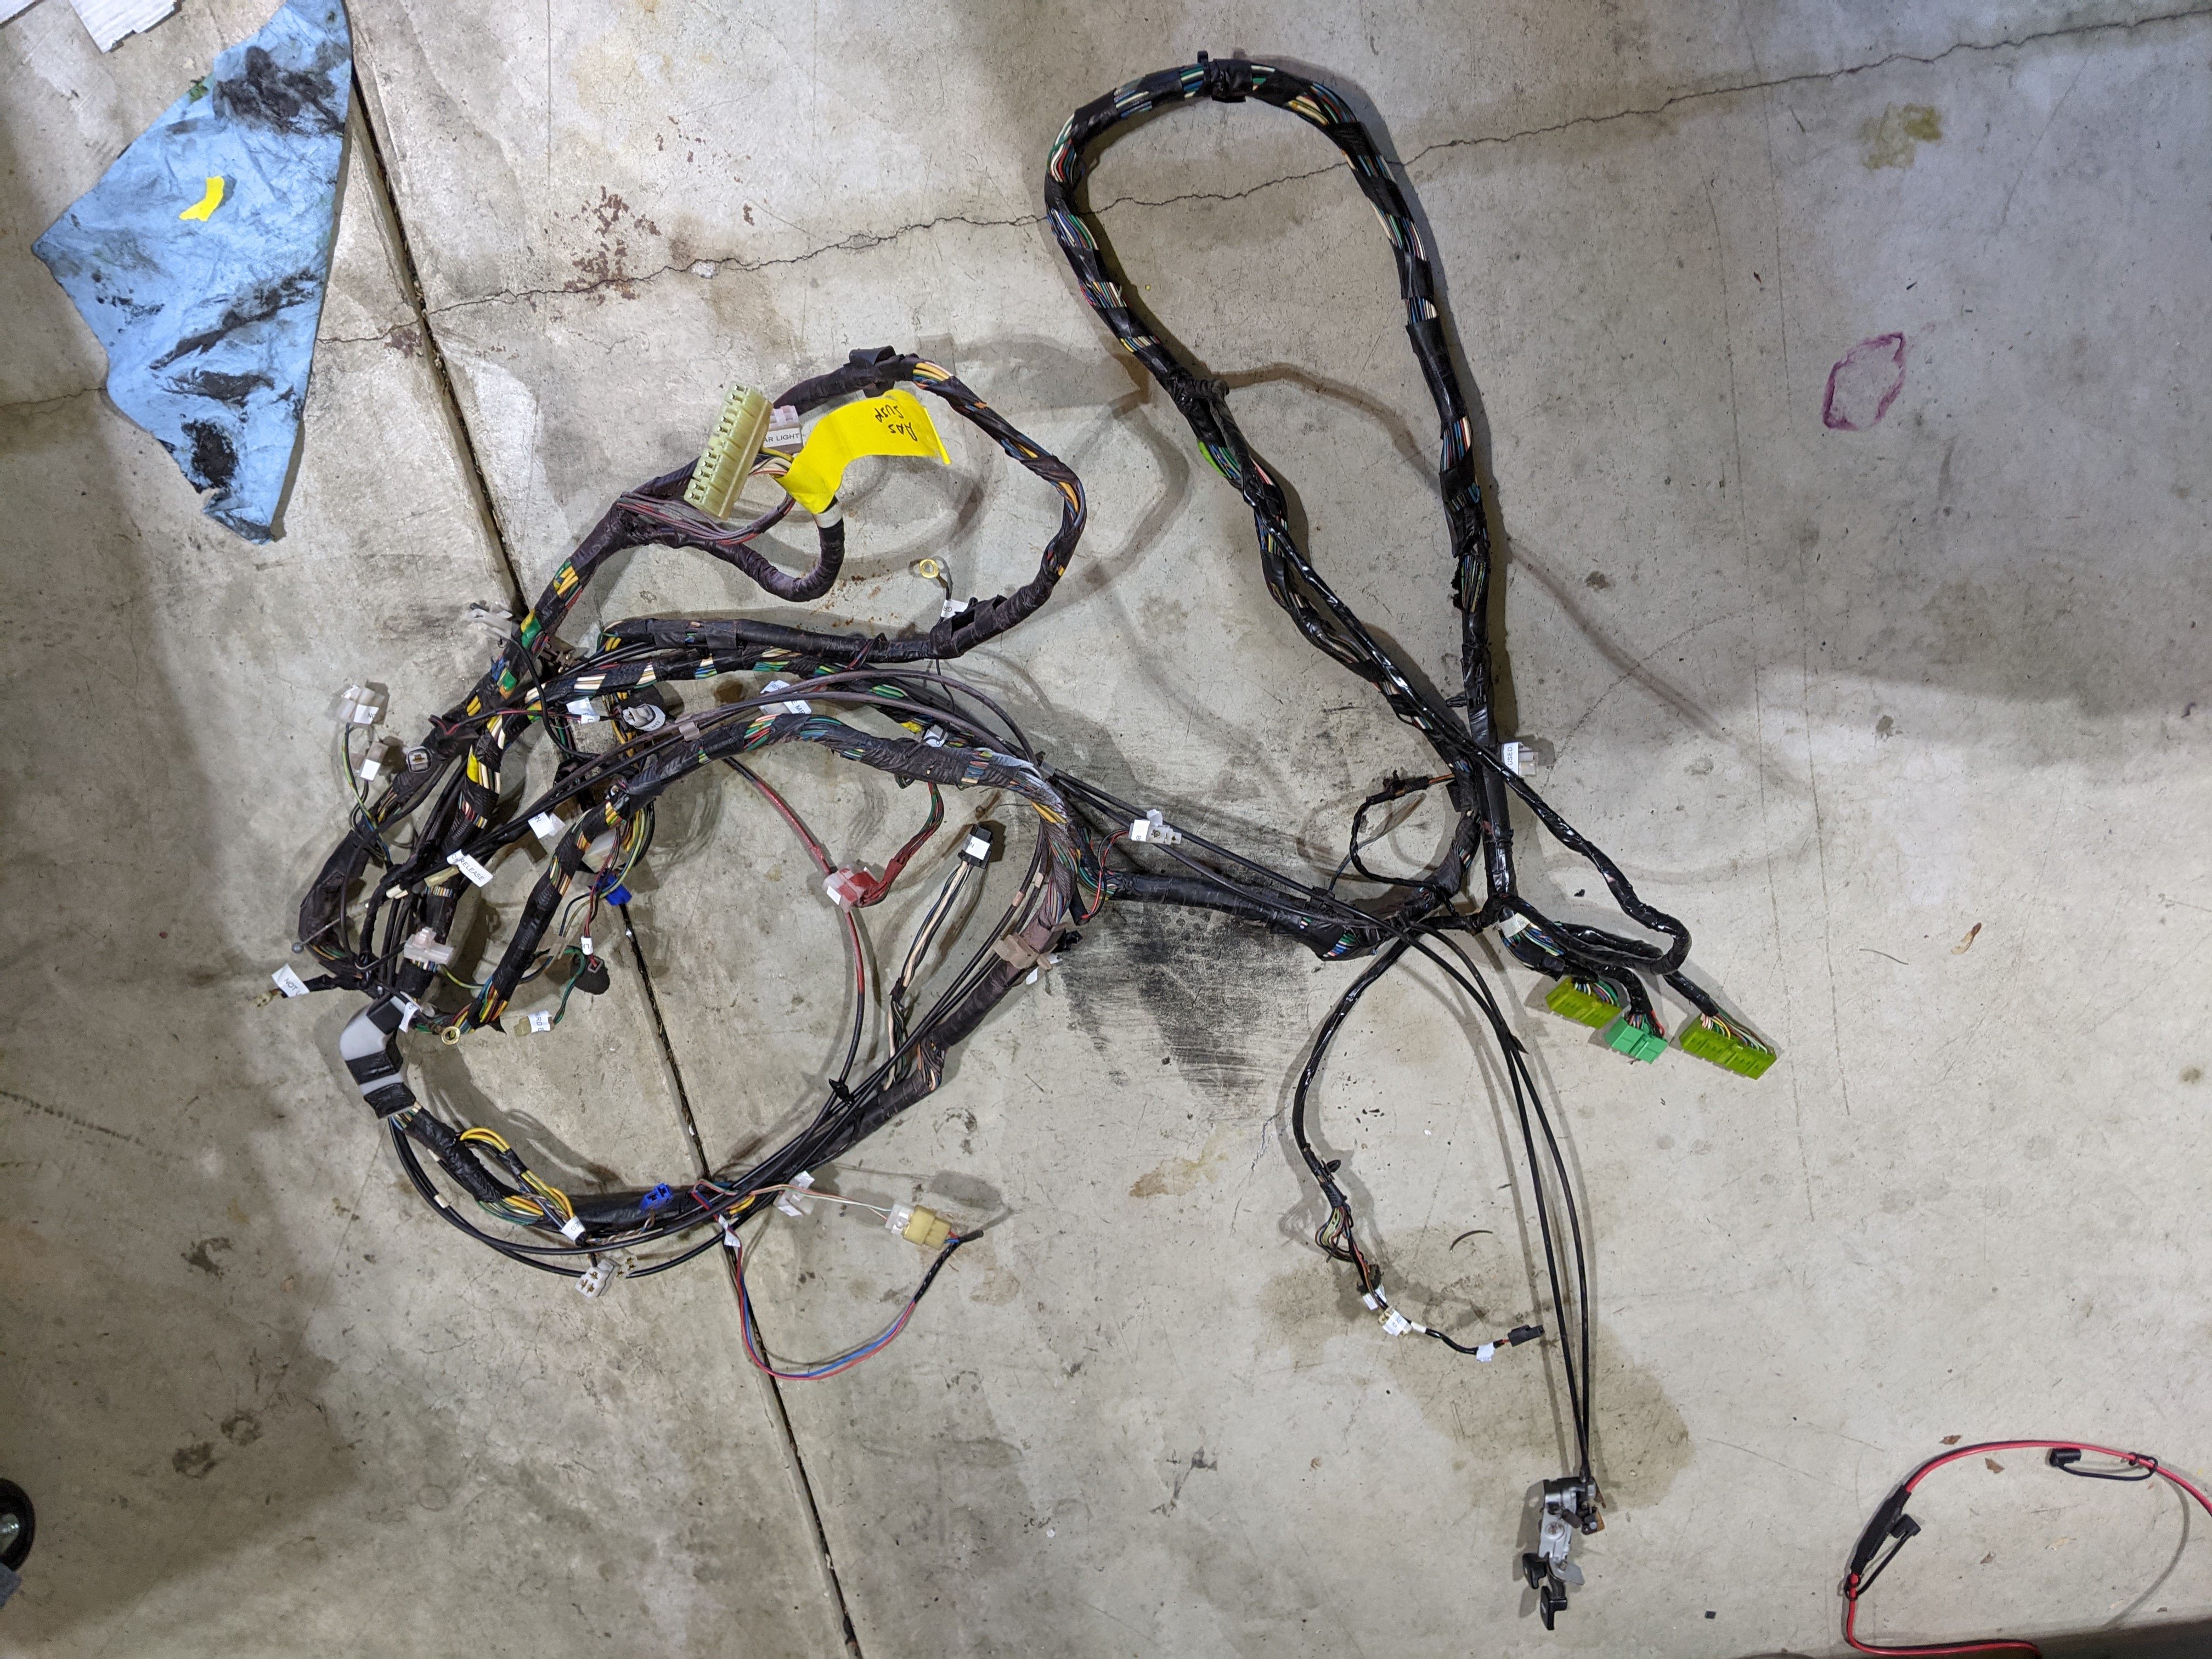
Been another busy couple of weeks. Finally got all the harnesses removed from the car. This allowed me to finish spraying the interior of the car. I think it came out really good! Best part is I can immediately touch it up with paint if something scratches or scrapes (or if I missed spots which I�m seeing a growing trend of). In addition, all of the stuff I took to powder coating came back. I�ve been throwing some of the things on the car. Next steps are to get the new bushings pressed in, knuckles prepped, and get the excess removed from the harnesses. I was trying to get the car back on the ground before winter hits, but I�m not sure I�ll make that mark.
Until next time!
Here is the interior fully sprayed

Here is the powder coated goodness

Here is the harnesses finally removed

Been another busy couple of weeks. Finally got all the harnesses removed from the car. This allowed me to finish spraying the interior of the car. I think it came out really good! Best part is I can immediately touch it up with paint if something scratches or scrapes (or if I missed spots which I�m seeing a growing trend of). In addition, all of the stuff I took to powder coating came back. I�ve been throwing some of the things on the car. Next steps are to get the new bushings pressed in, knuckles prepped, and get the excess removed from the harnesses. I was trying to get the car back on the ground before winter hits, but I�m not sure I�ll make that mark.
Until next time!
Here is the interior fully sprayed

Here is the powder coated goodness
Here is the harnesses finally removed
The following users liked this post:
driftxsequence (11-23-21)
12-04-21, 10:45 AM
#347
Update 12/4/2021
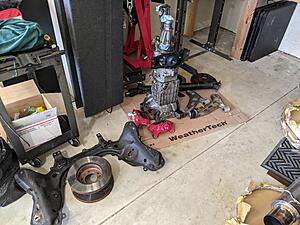
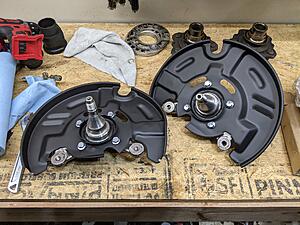
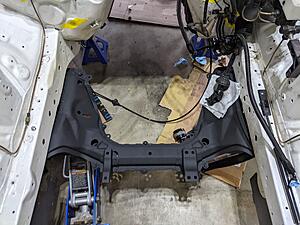
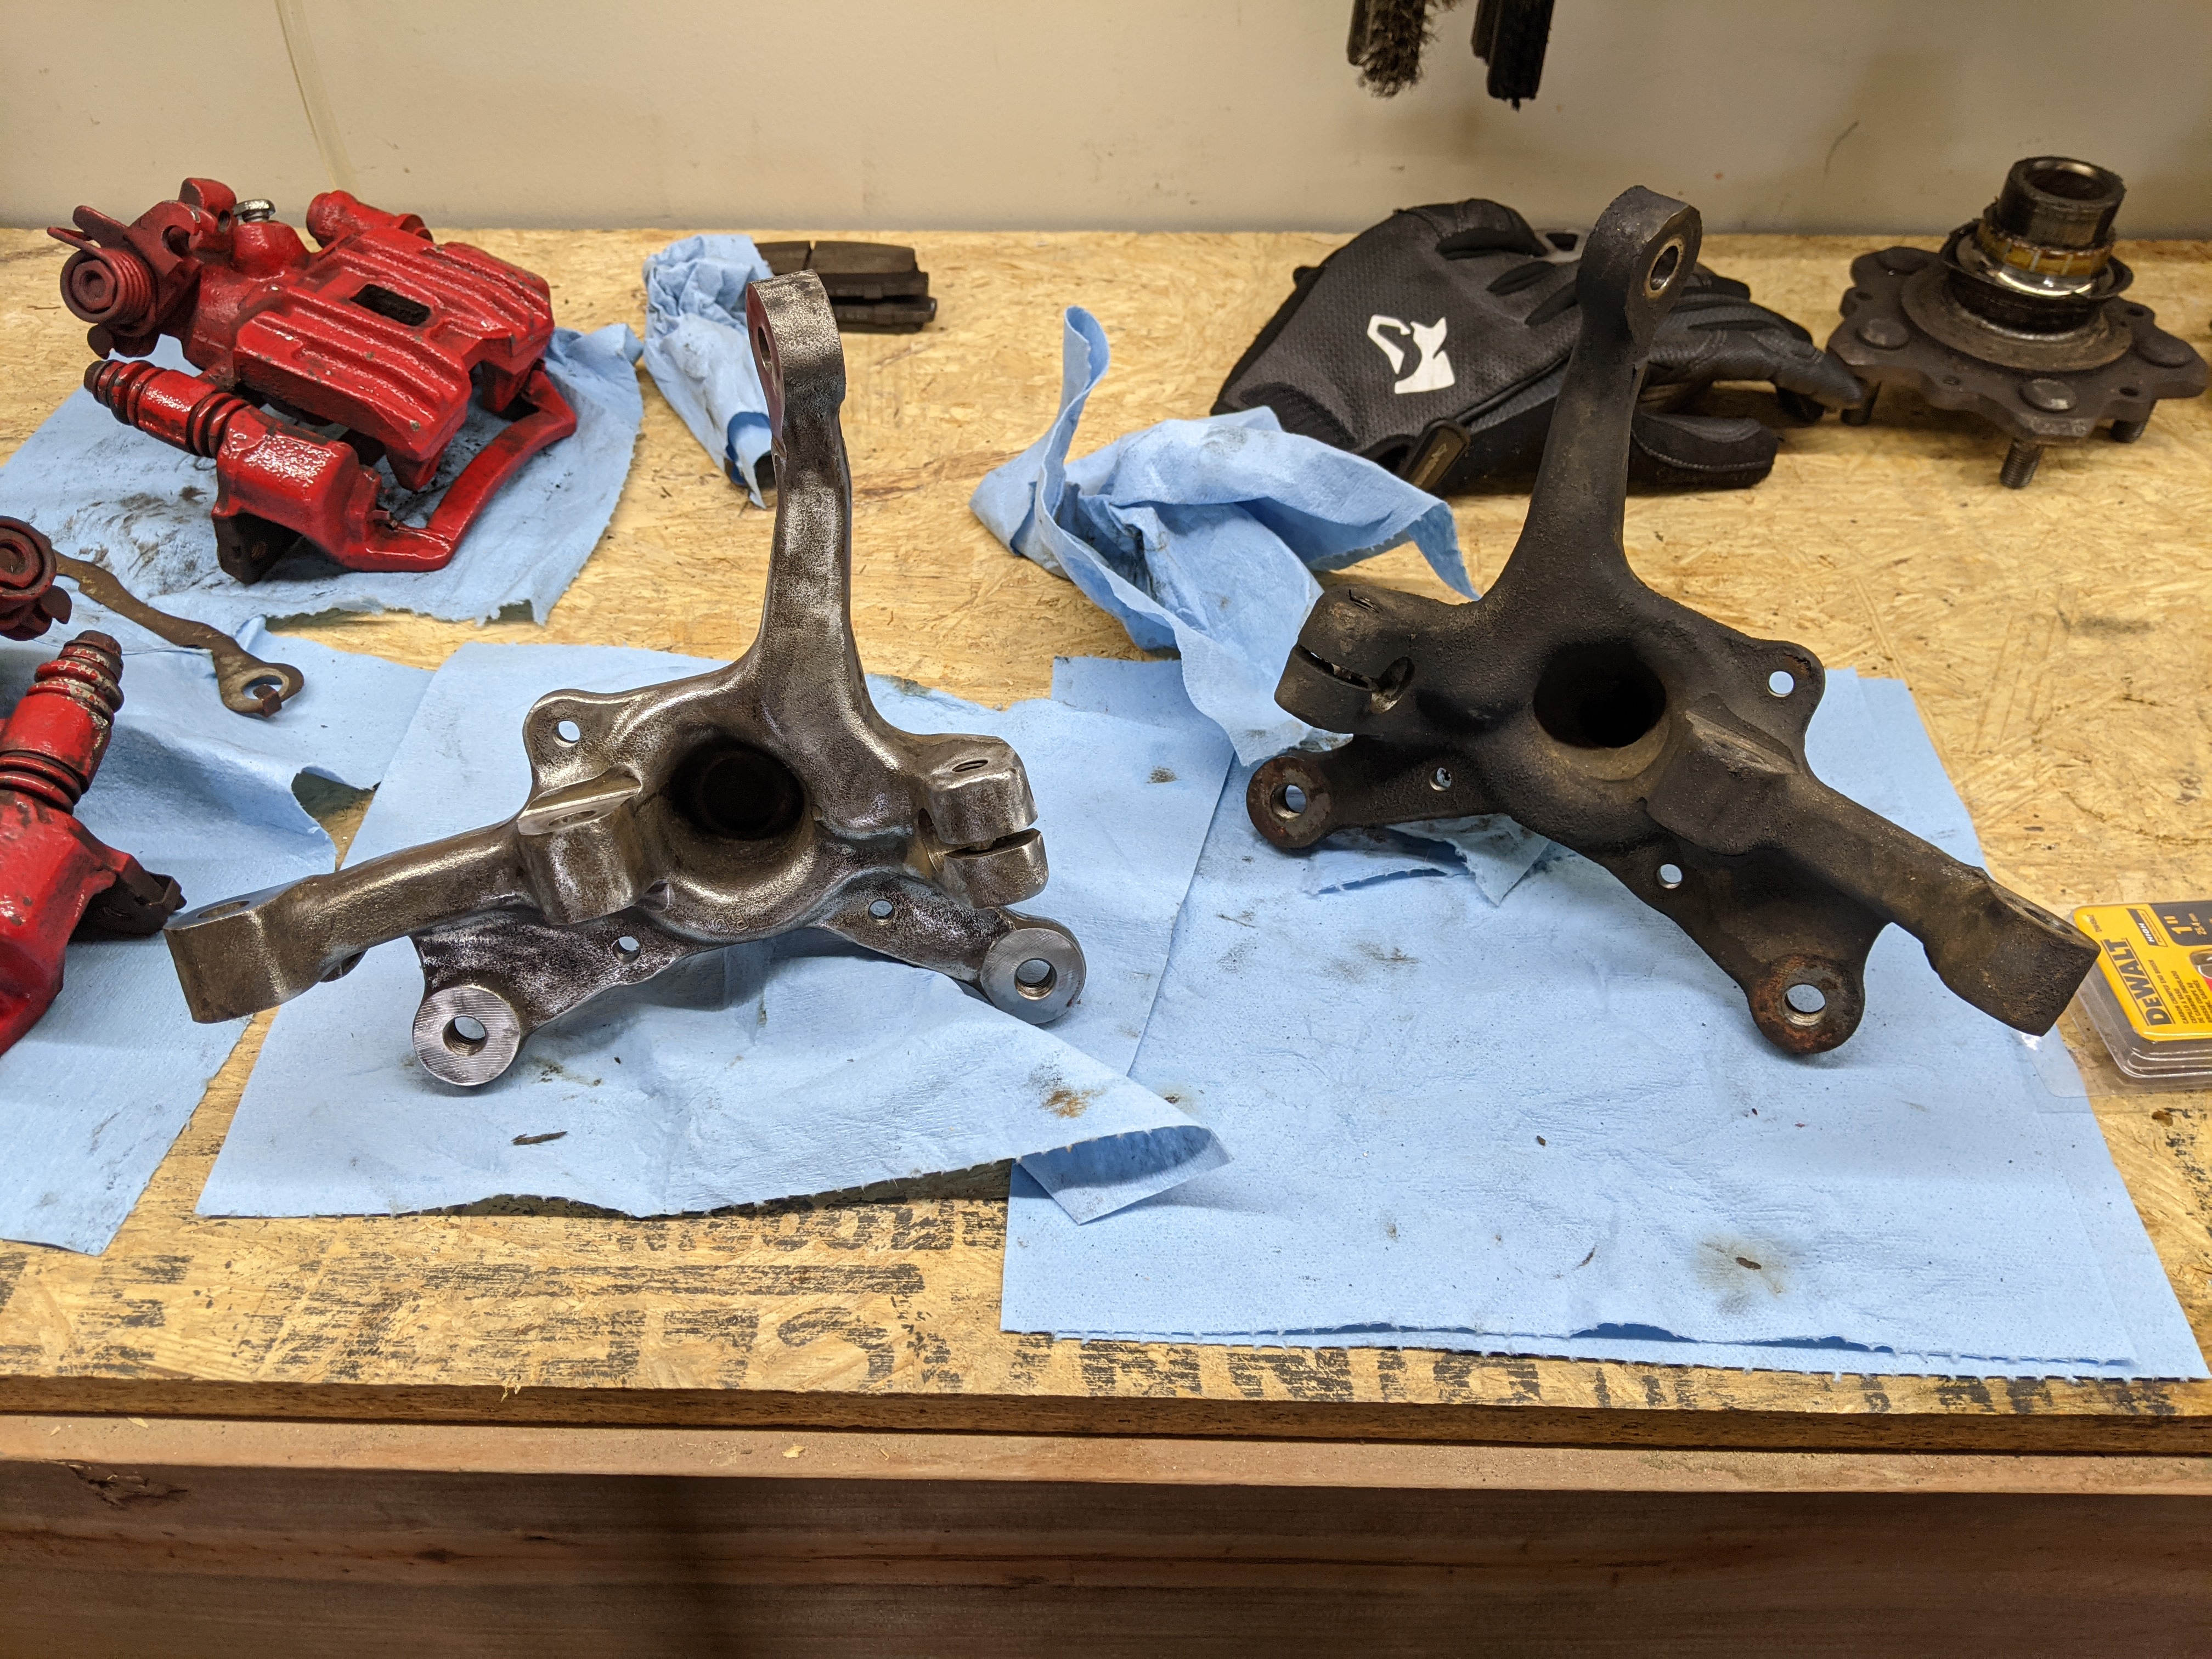
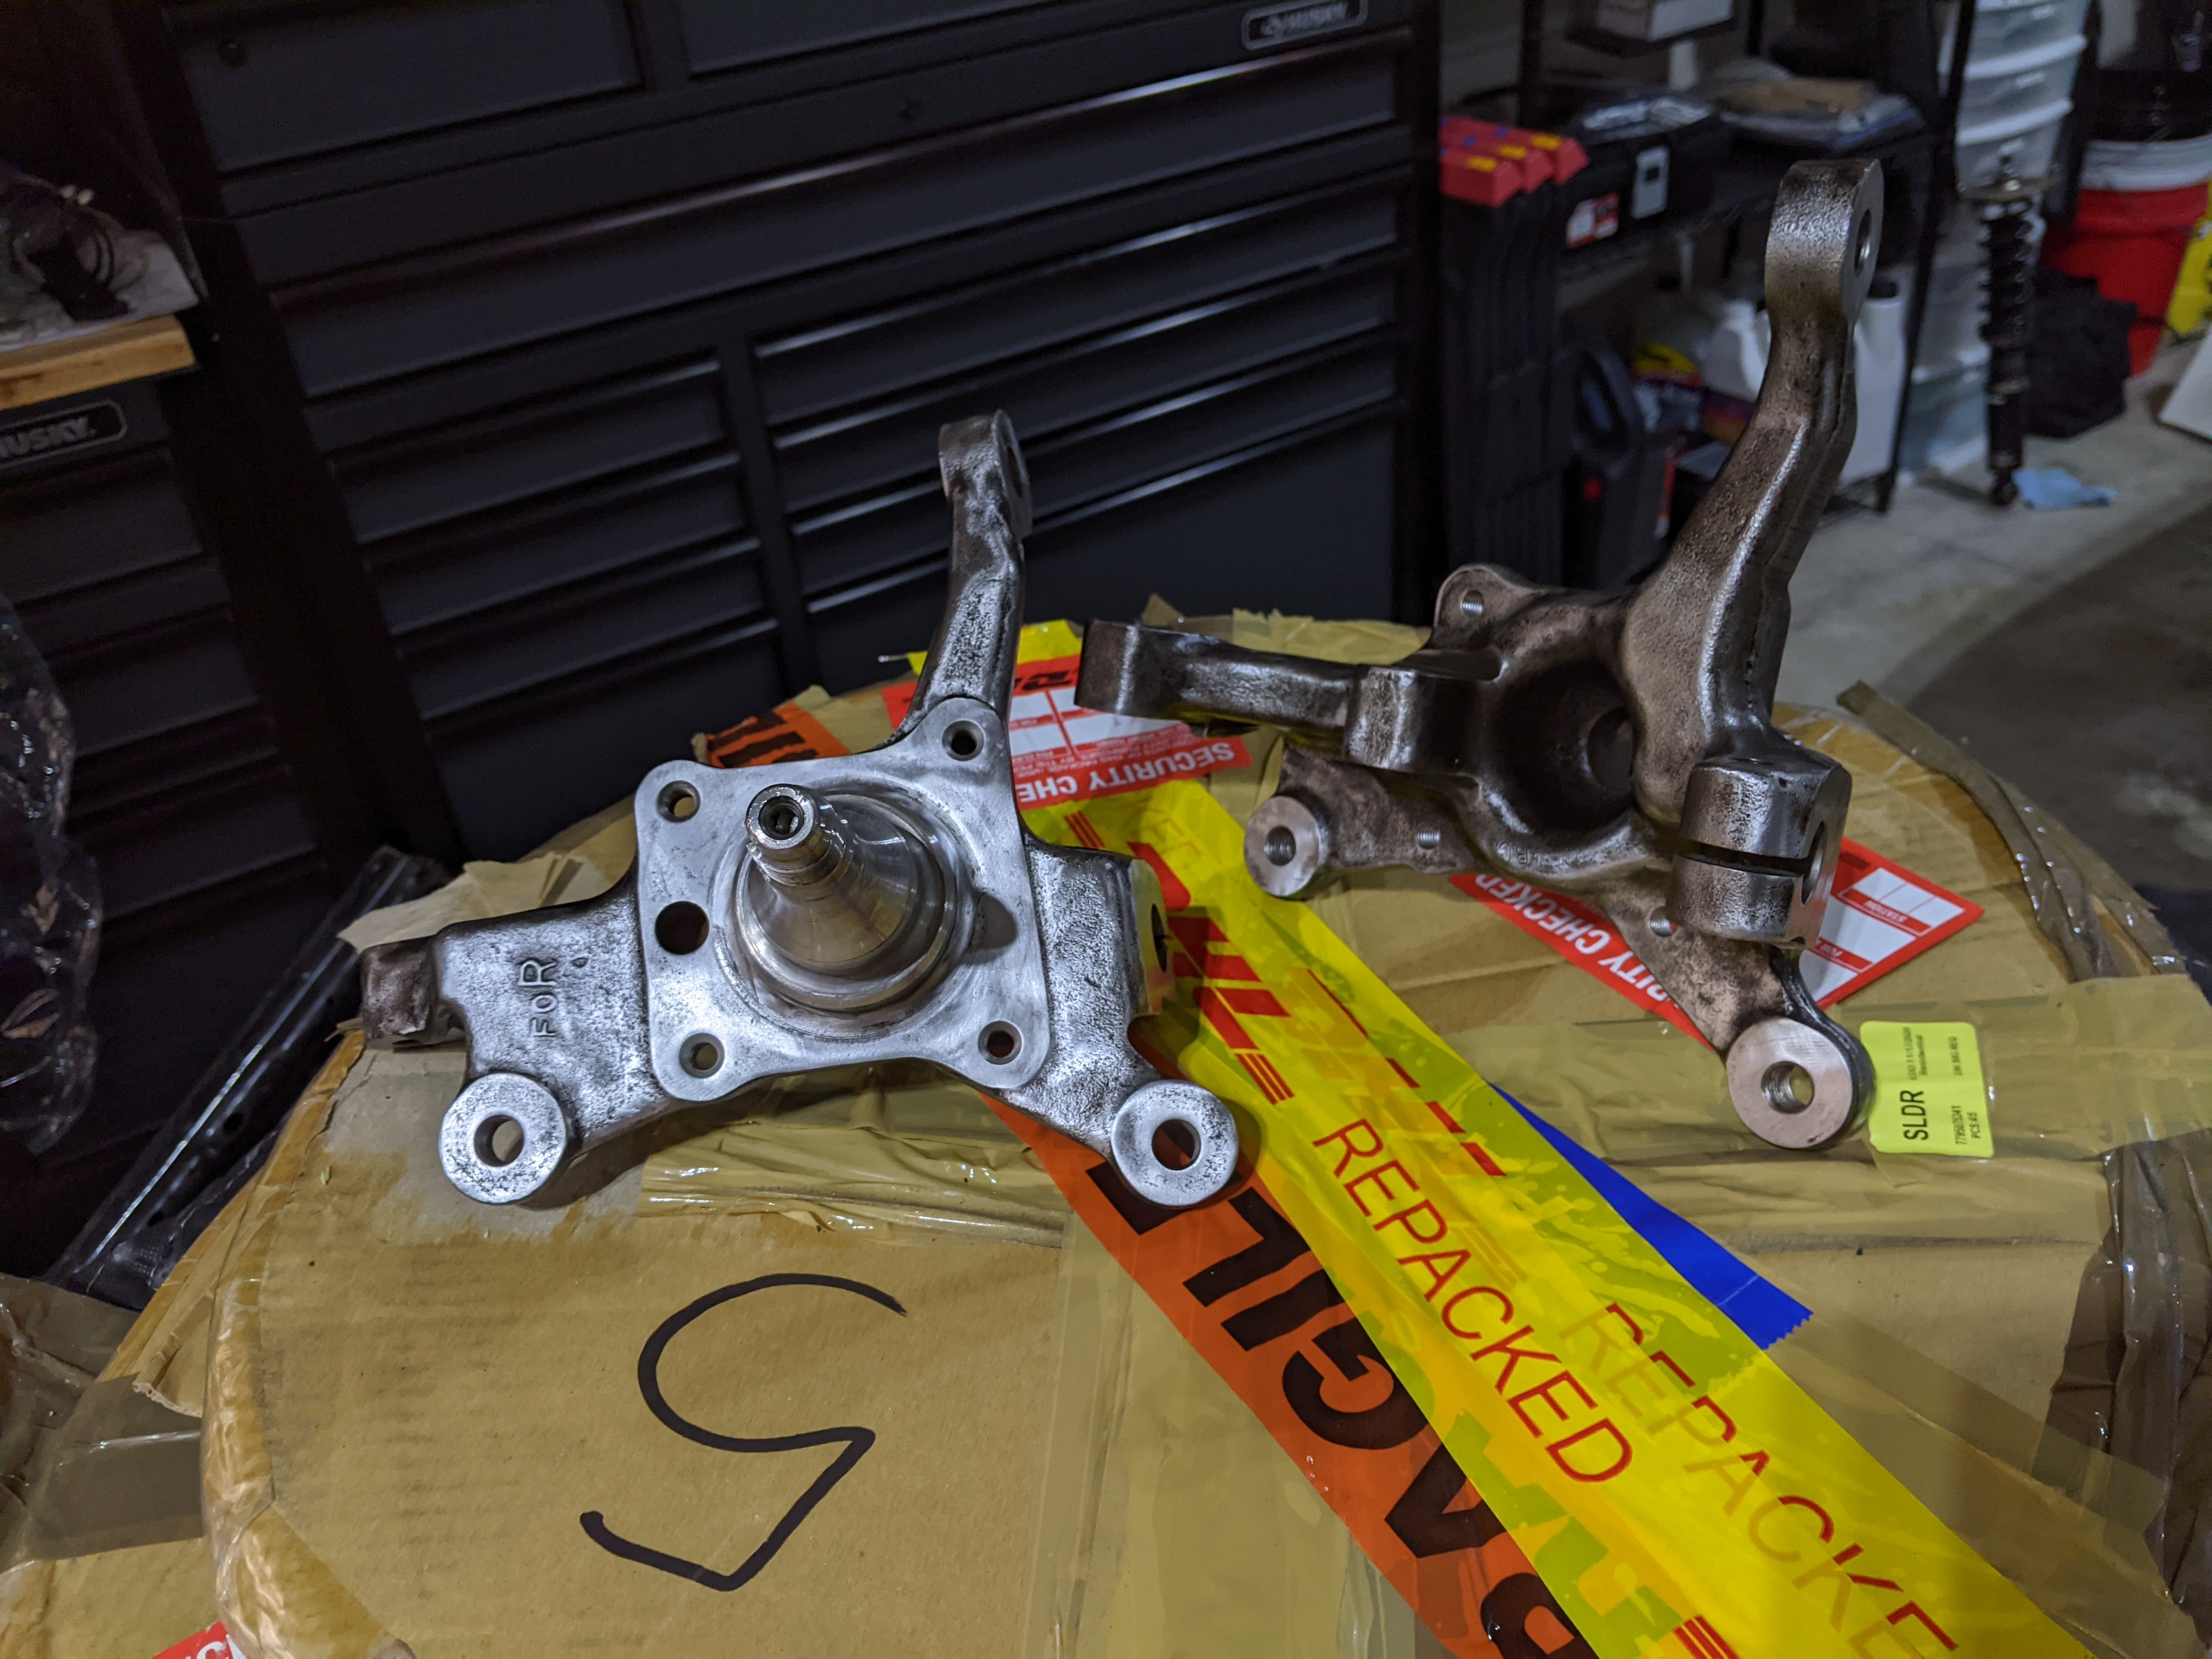
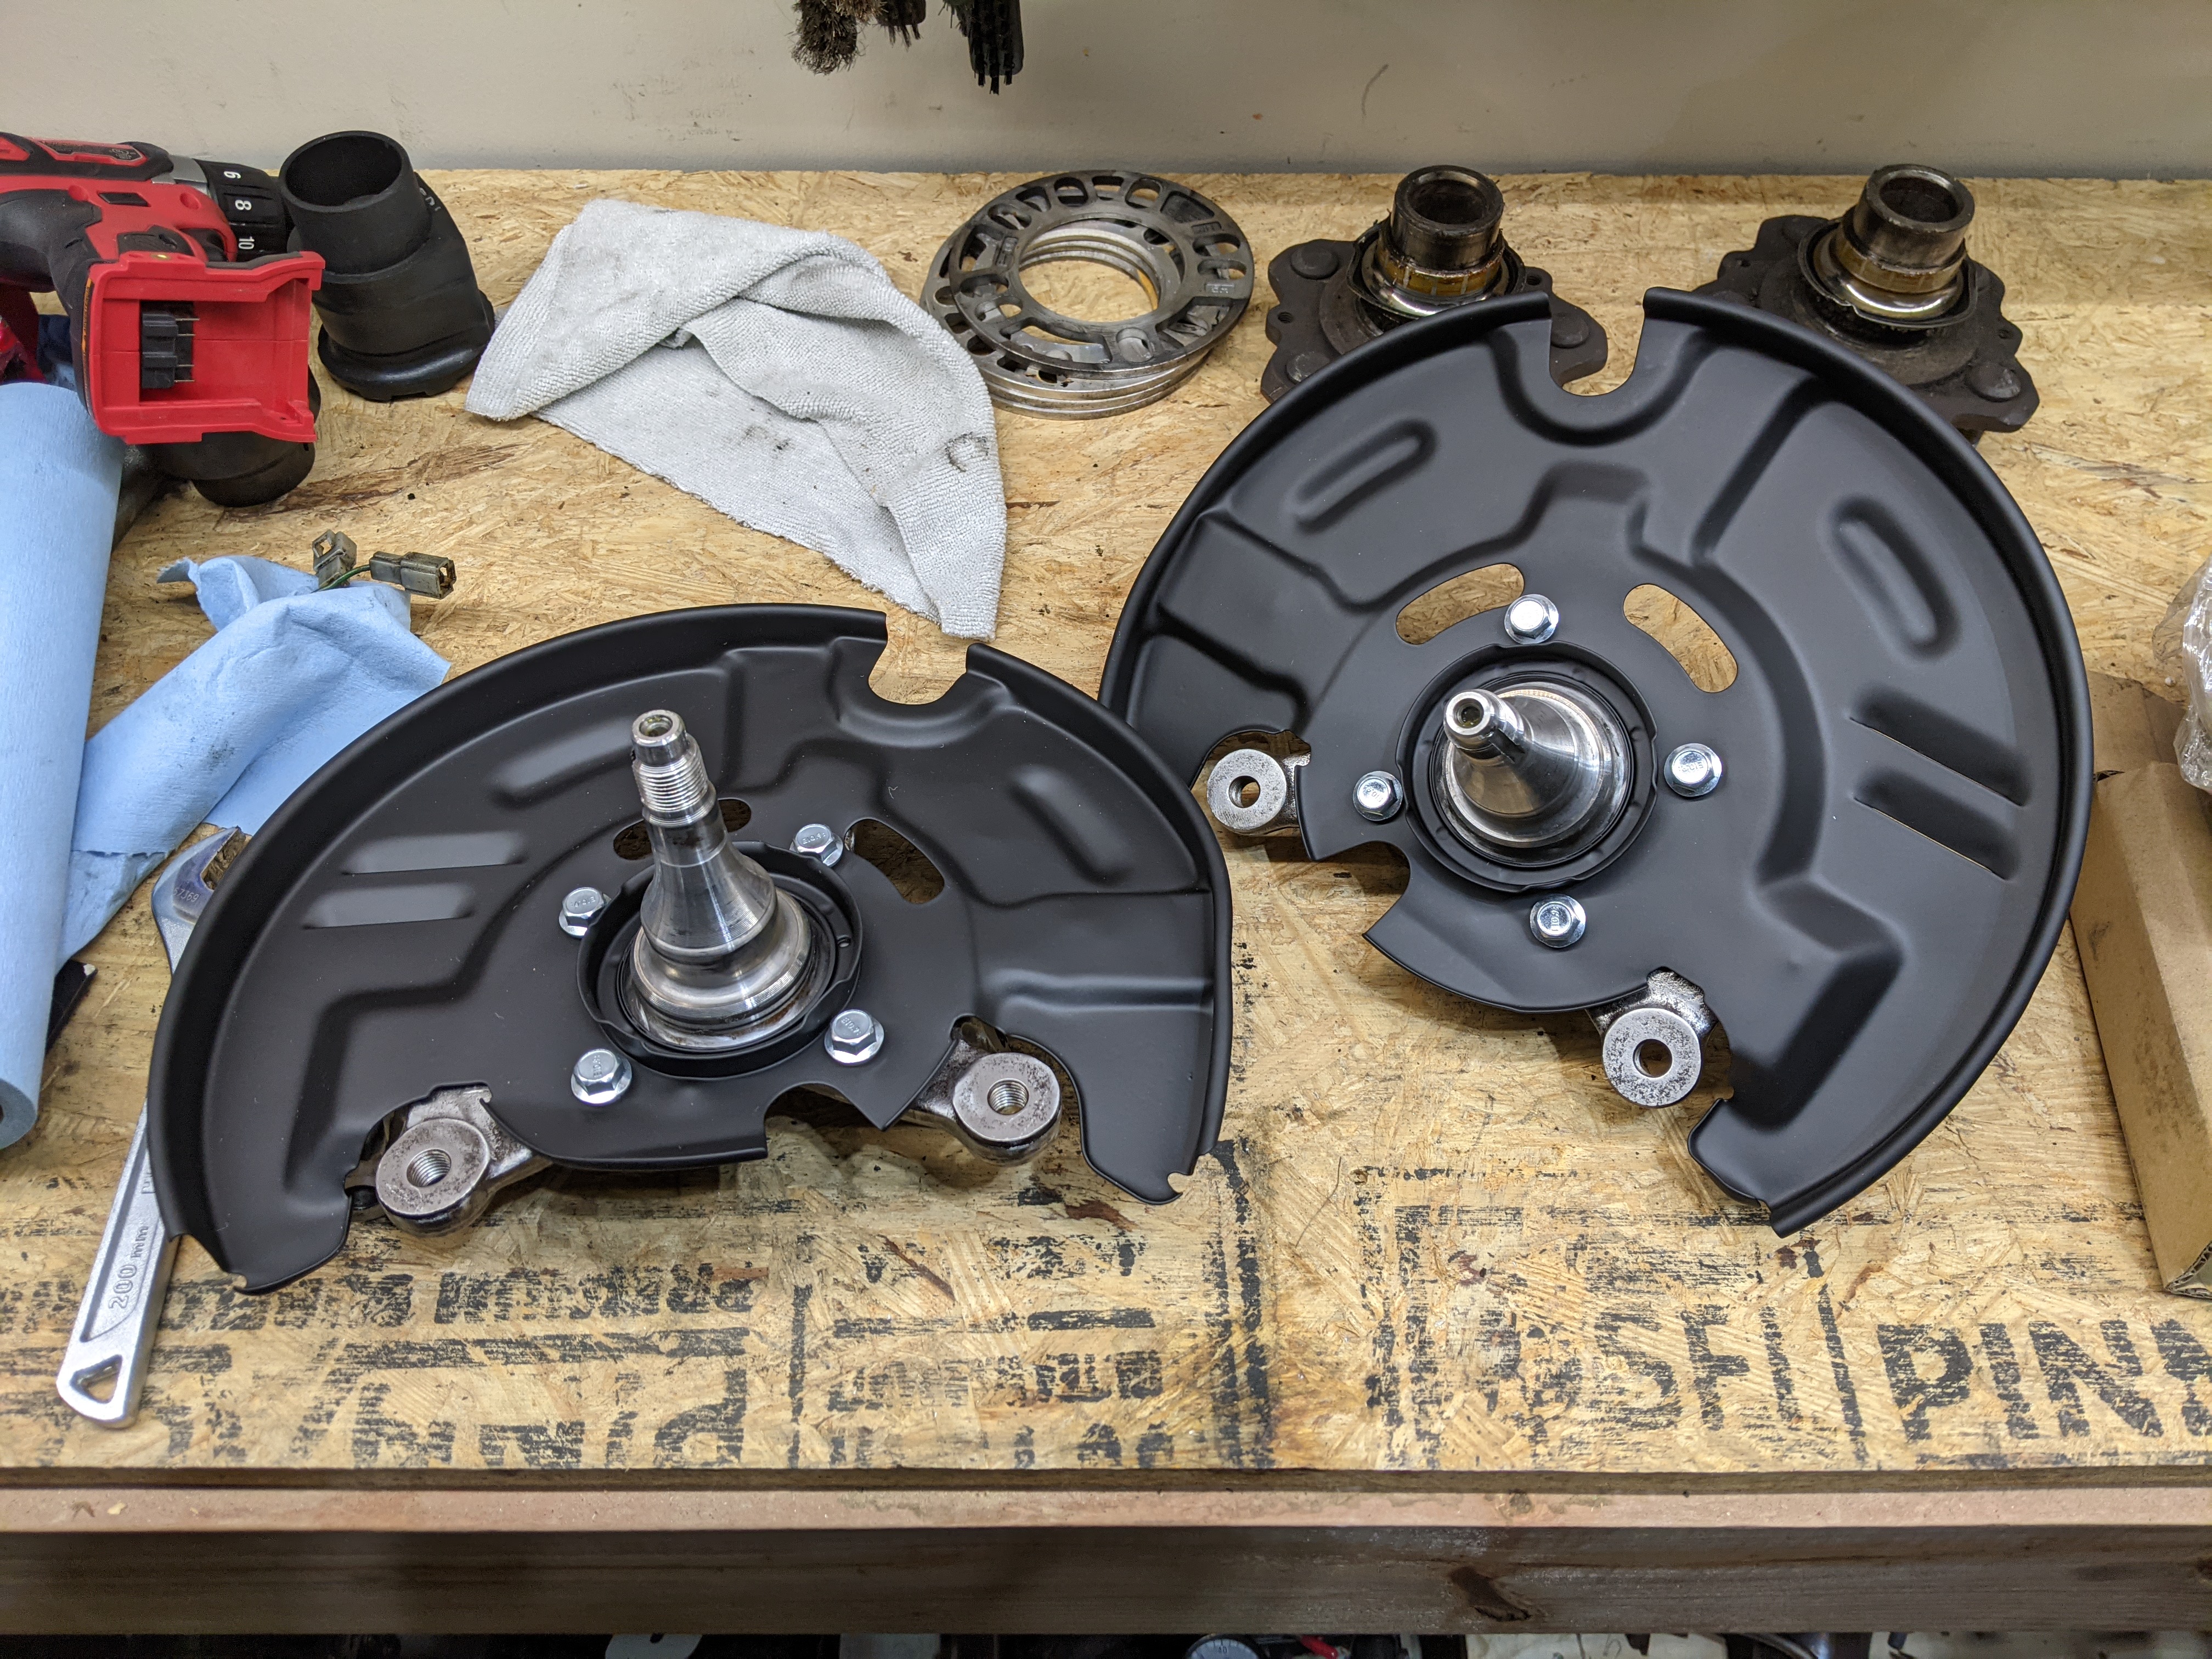
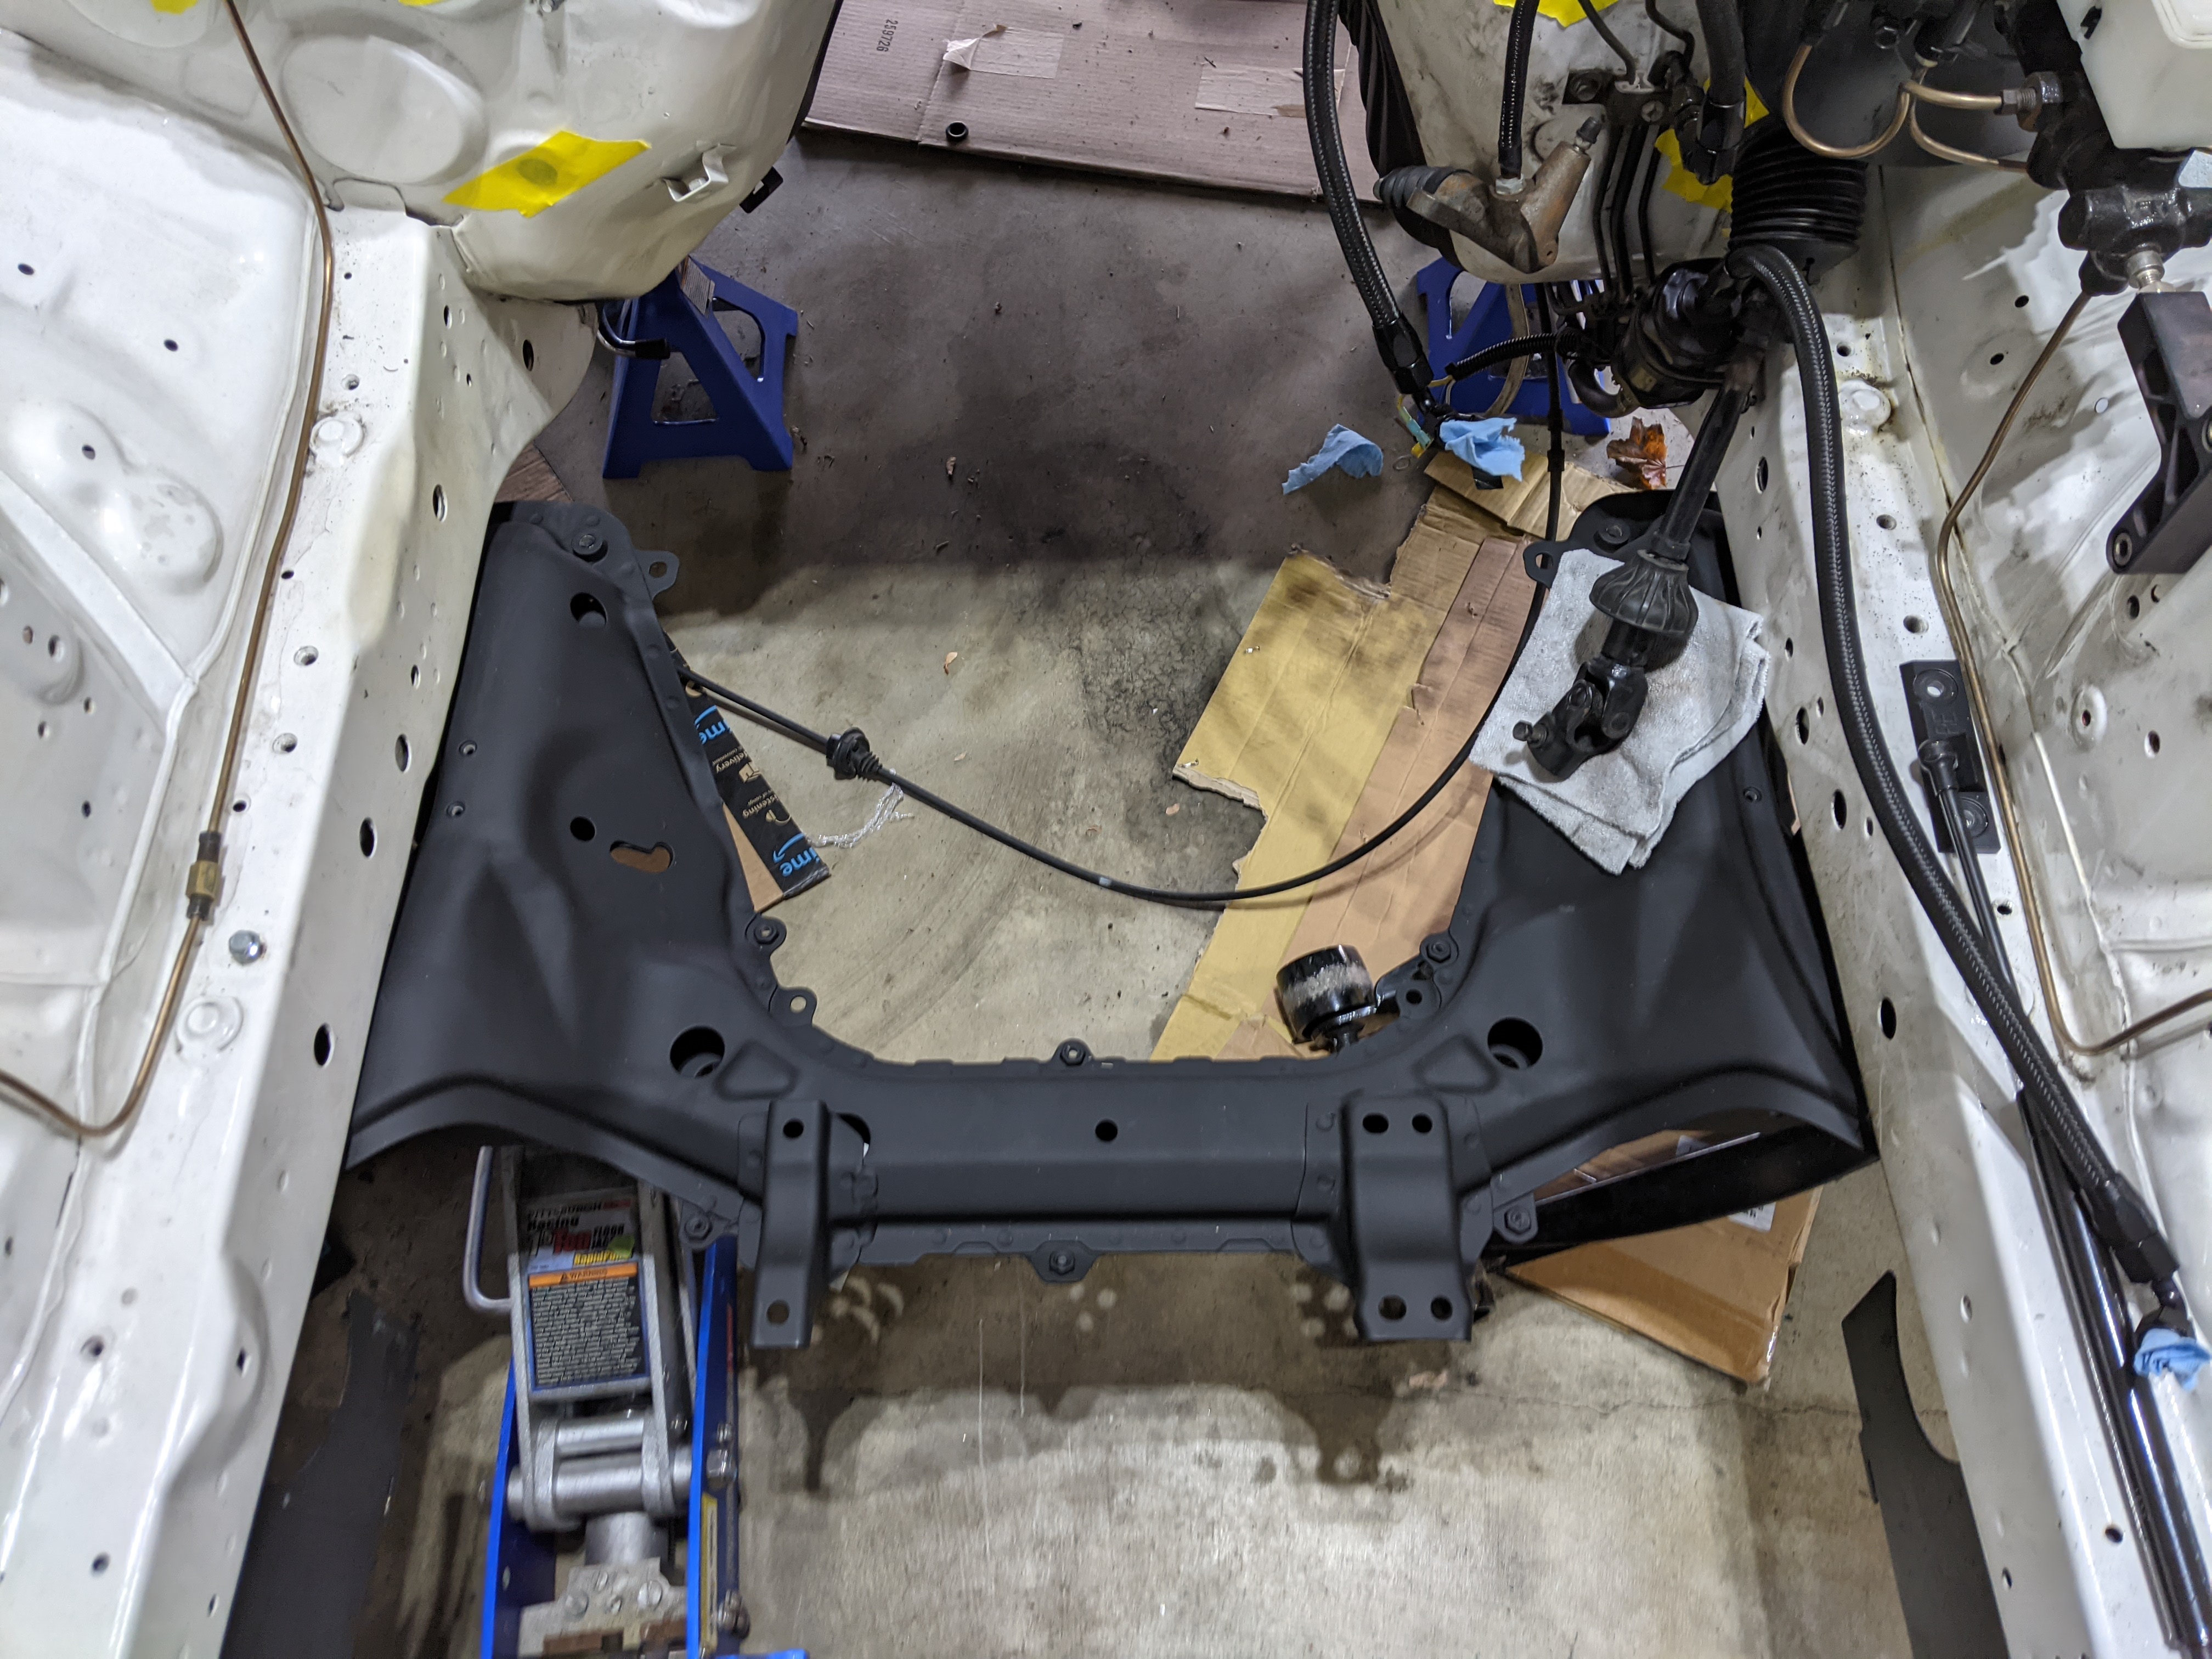
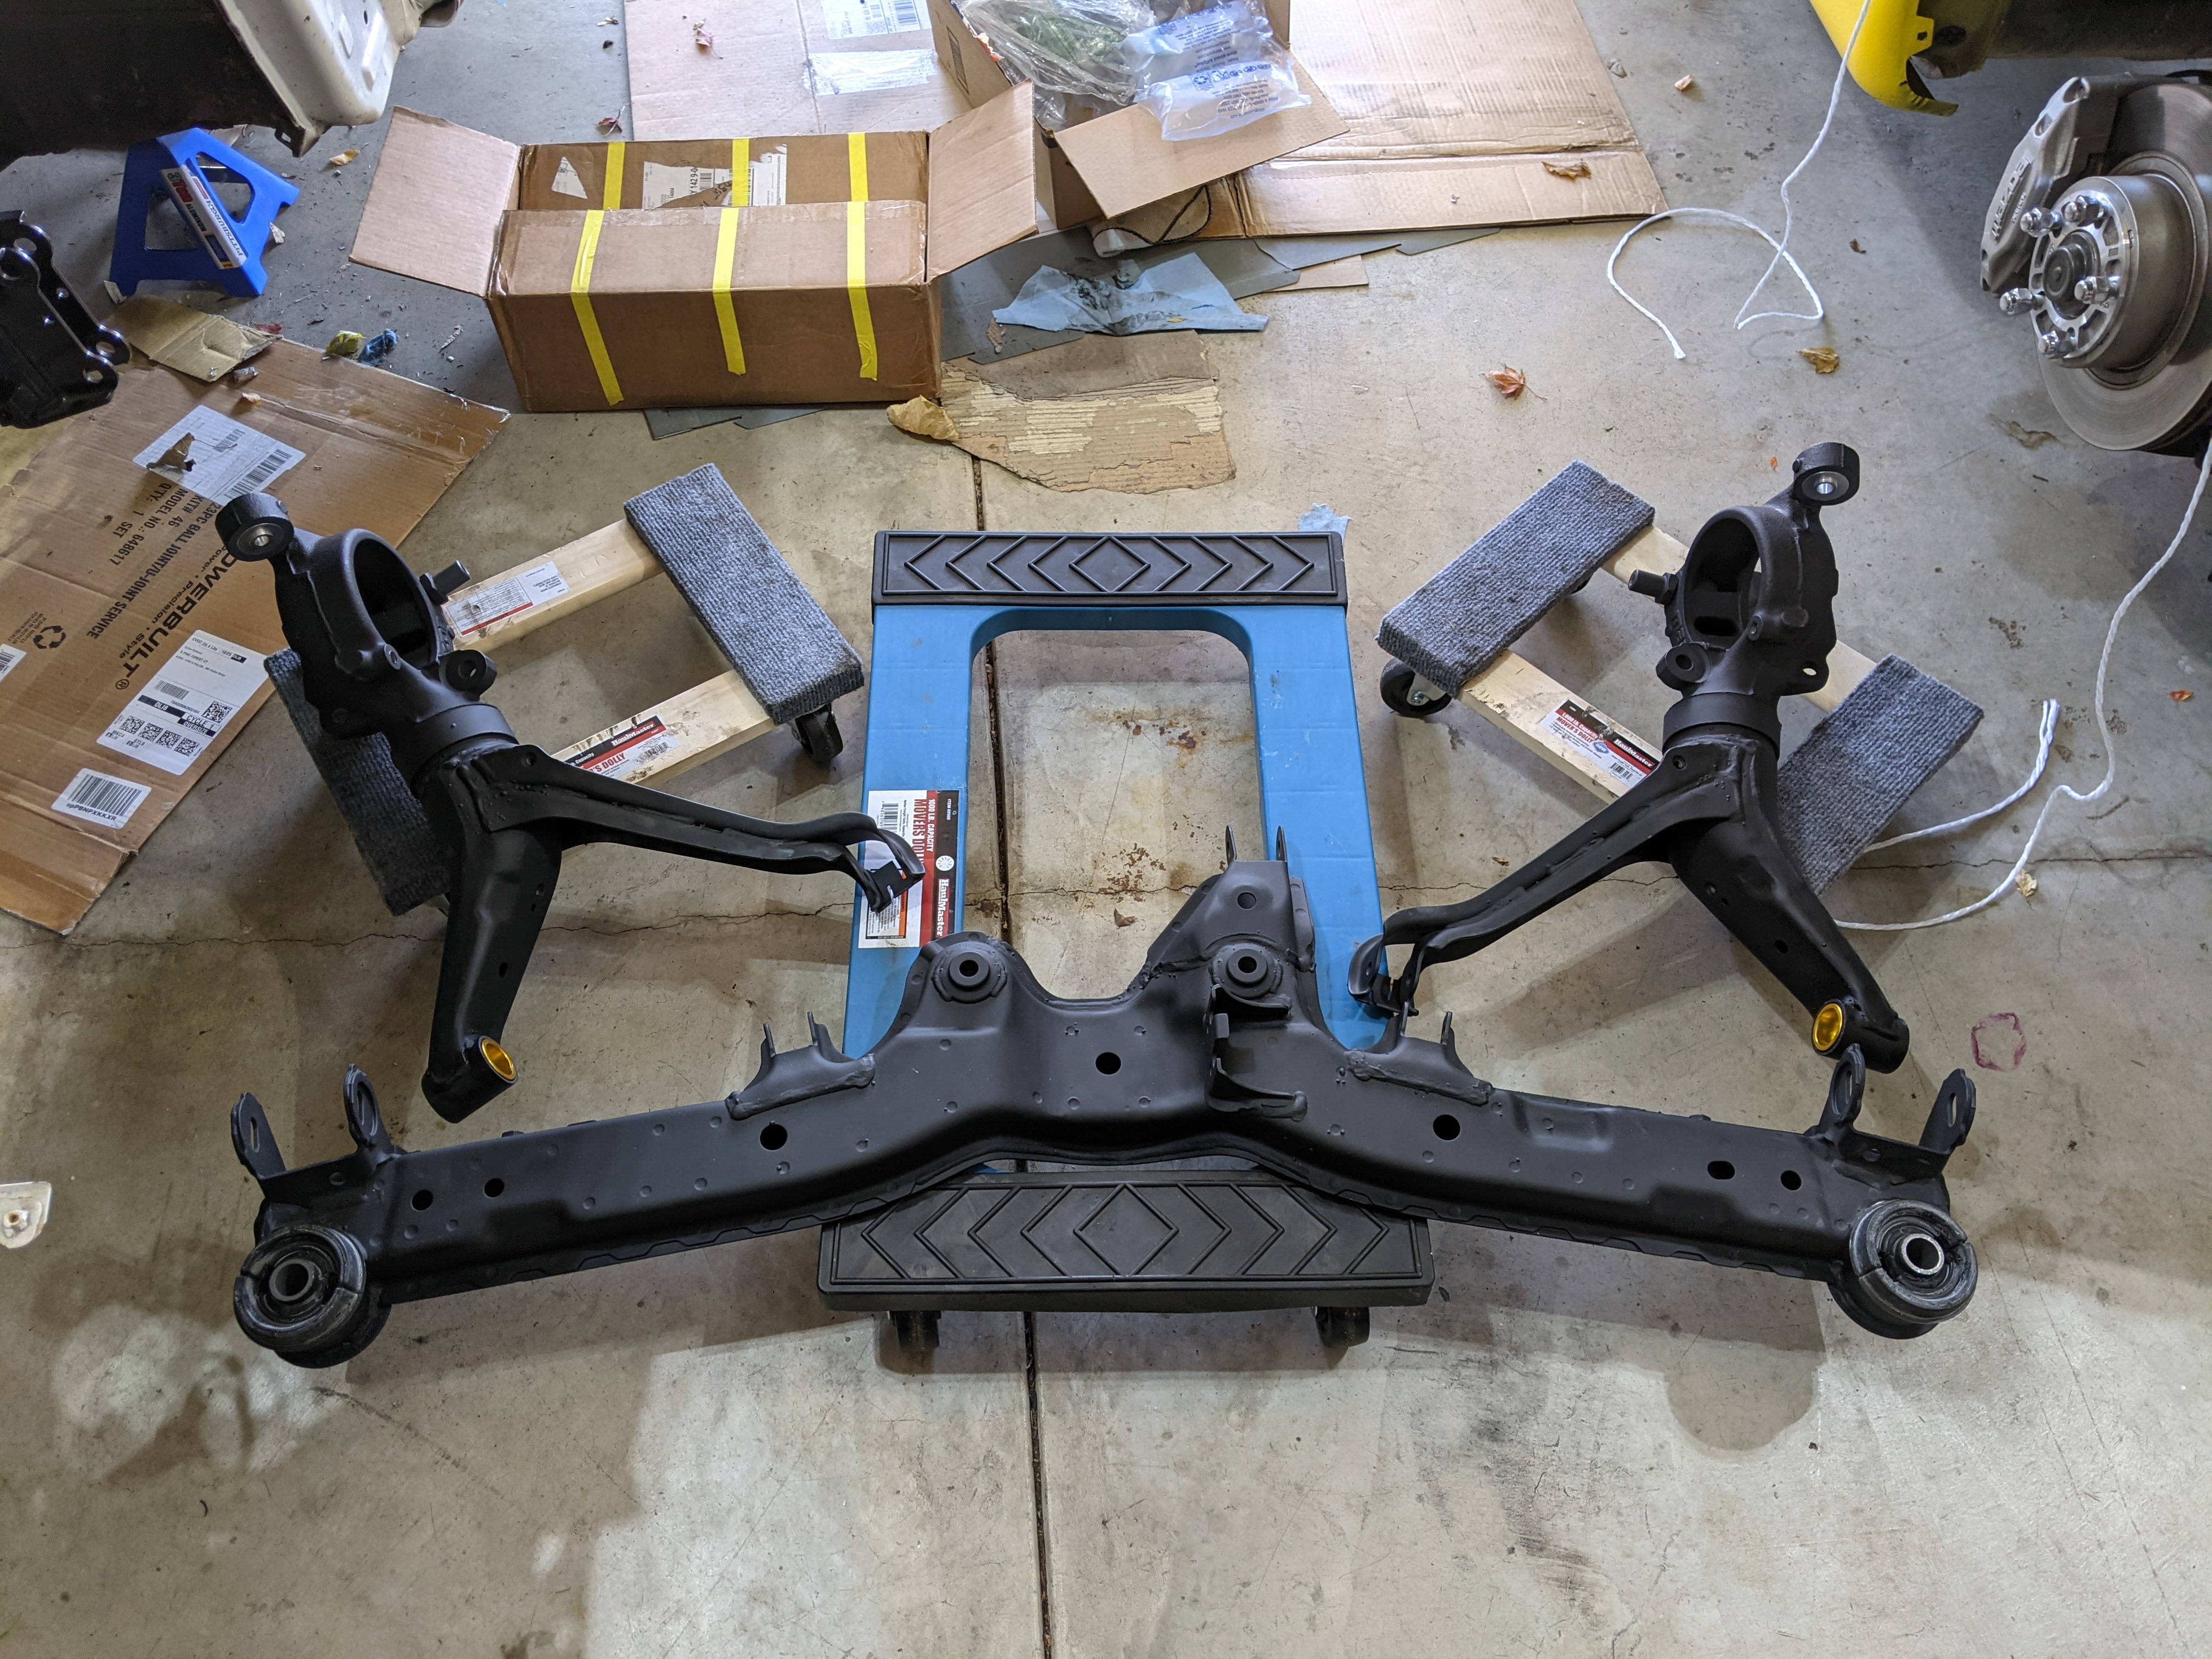
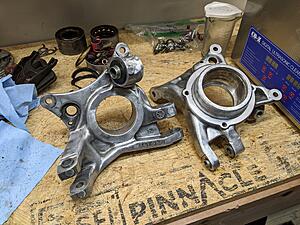
We are still moving right along. Been concentrating on suspension so I can get the car back on the ground and scooted to where I want. I need the space for a new project/daily I picked up (more on that next update). Speaking of updates and before we begin. I usually have a lot more done and to show than my current posting once every two weeks, but due to time constraints I�m just unable to keep up with it all. So these updates are a bit behind where I actually am, but not too far. With that being said, let�s get started! I knocked out the front knuckles by getting them cleaned and cleared. I was also able to get the dust shields on and utilized new hardware and locking nuts (I think the front knuckles turned out fantastic). I was also able to get the front subframe on. I just need to get the steering rack cleaned up and cleared and it�ll go back on too. I have majority of the suspension bushings pressed in and ready to roll. I decided to powder the rear diff cover and the transmission bell housing so I need to get that stuff over before the rest of this can progress to the end. We are certainly getting there - until next time!
Here is the front knuckle saga


Here is the subframe back in the car
Here is all the bushing fun


We are still moving right along. Been concentrating on suspension so I can get the car back on the ground and scooted to where I want. I need the space for a new project/daily I picked up (more on that next update). Speaking of updates and before we begin. I usually have a lot more done and to show than my current posting once every two weeks, but due to time constraints I�m just unable to keep up with it all. So these updates are a bit behind where I actually am, but not too far. With that being said, let�s get started! I knocked out the front knuckles by getting them cleaned and cleared. I was also able to get the dust shields on and utilized new hardware and locking nuts (I think the front knuckles turned out fantastic). I was also able to get the front subframe on. I just need to get the steering rack cleaned up and cleared and it�ll go back on too. I have majority of the suspension bushings pressed in and ready to roll. I decided to powder the rear diff cover and the transmission bell housing so I need to get that stuff over before the rest of this can progress to the end. We are certainly getting there - until next time!
Here is the front knuckle saga
Here is the subframe back in the car
Here is all the bushing fun


The following 2 users liked this post by Akomix:
j9fd3s (12-06-21),
Relisys190 (12-05-21)
12-17-21, 11:20 AM
#348
Update 12/17/21
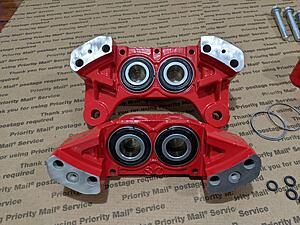
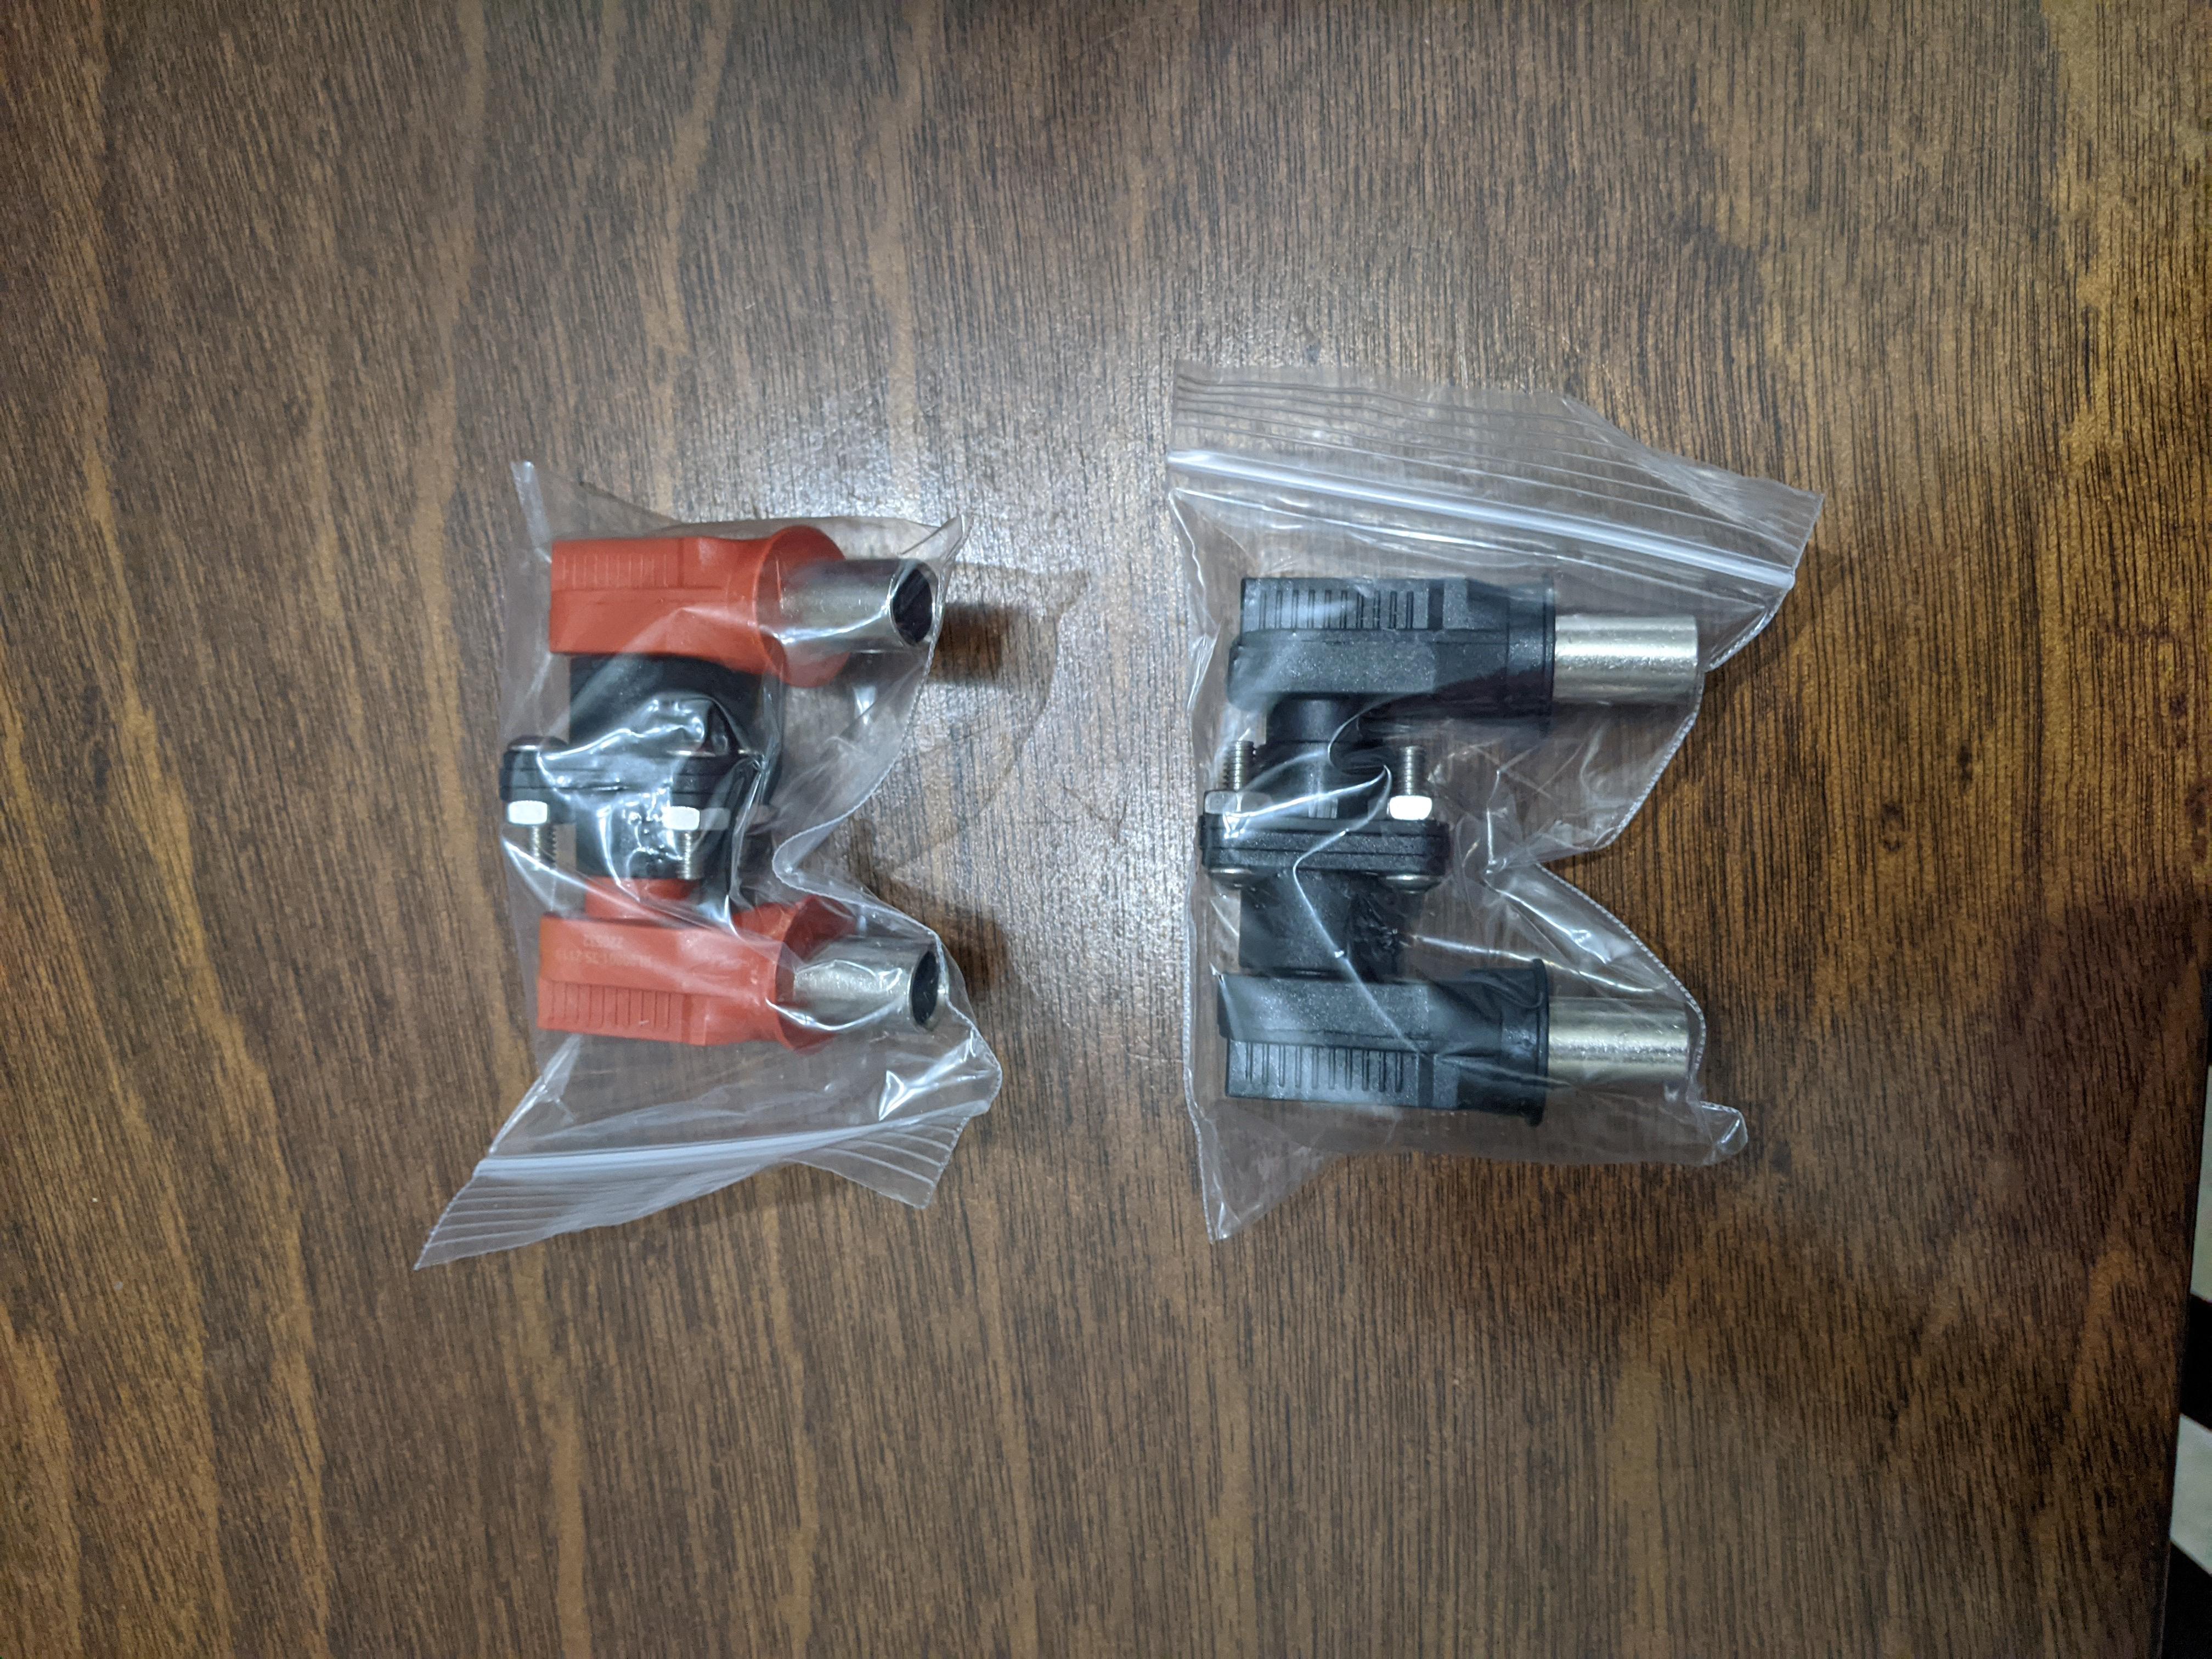
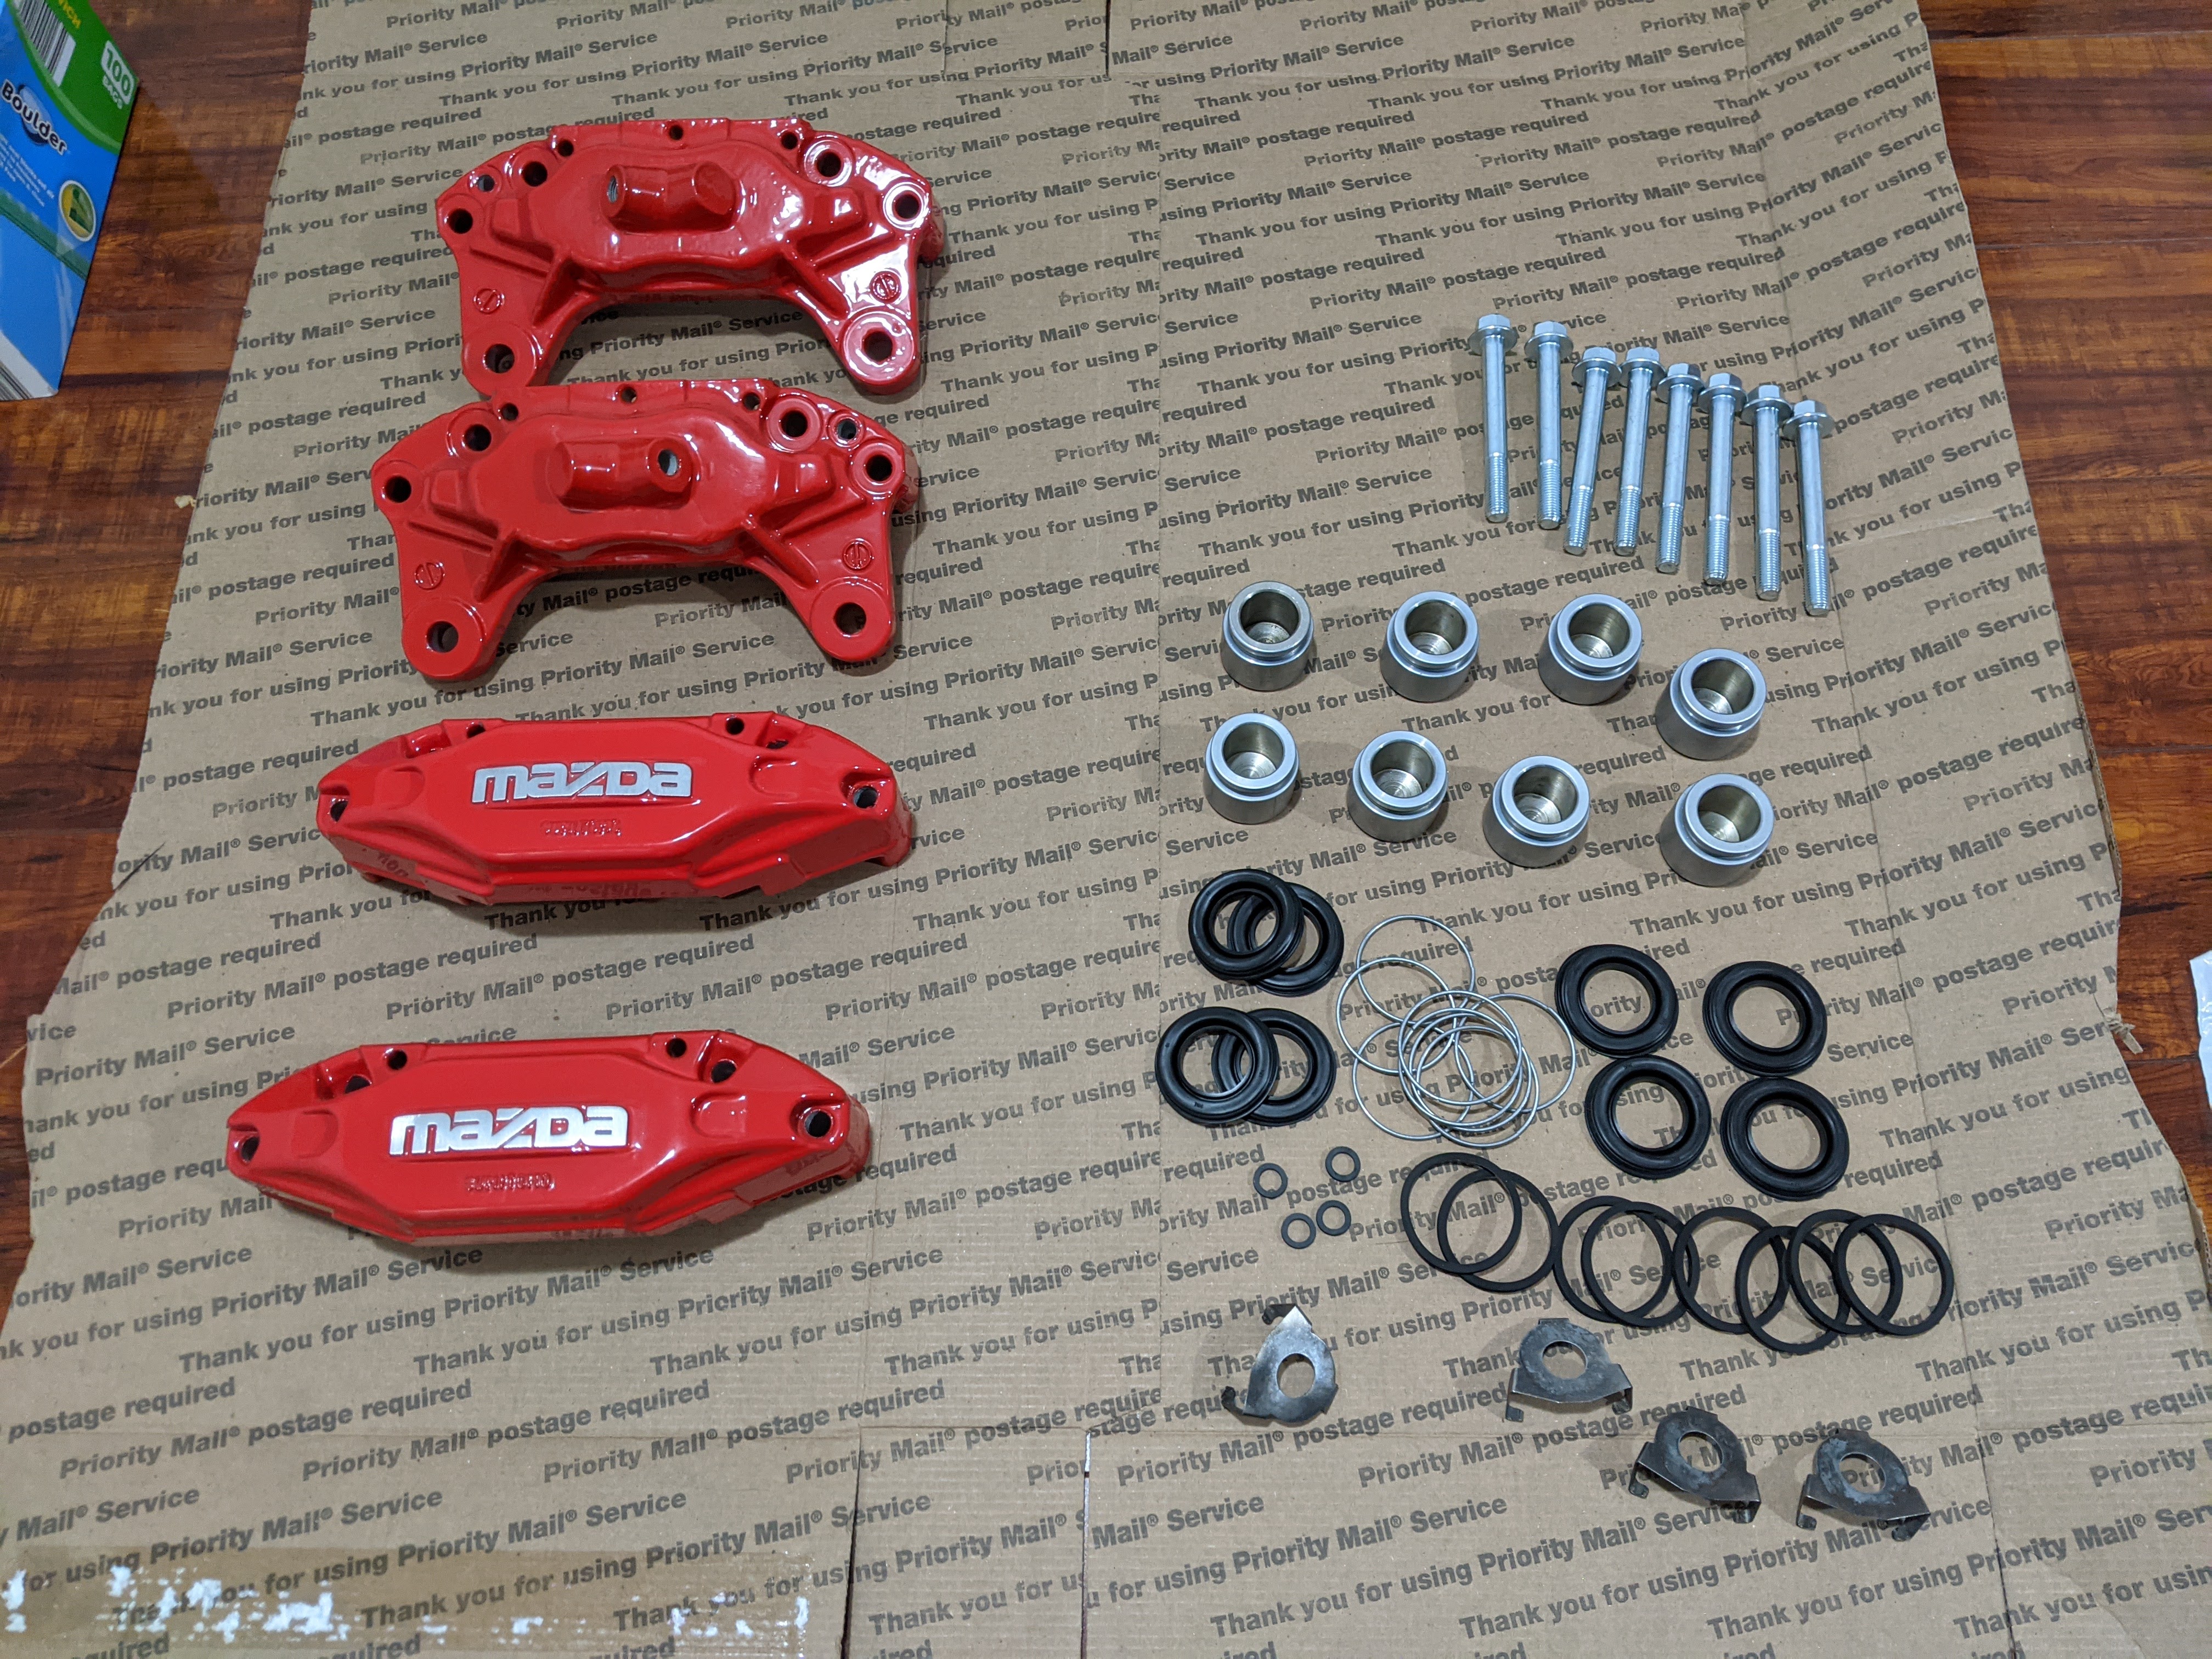
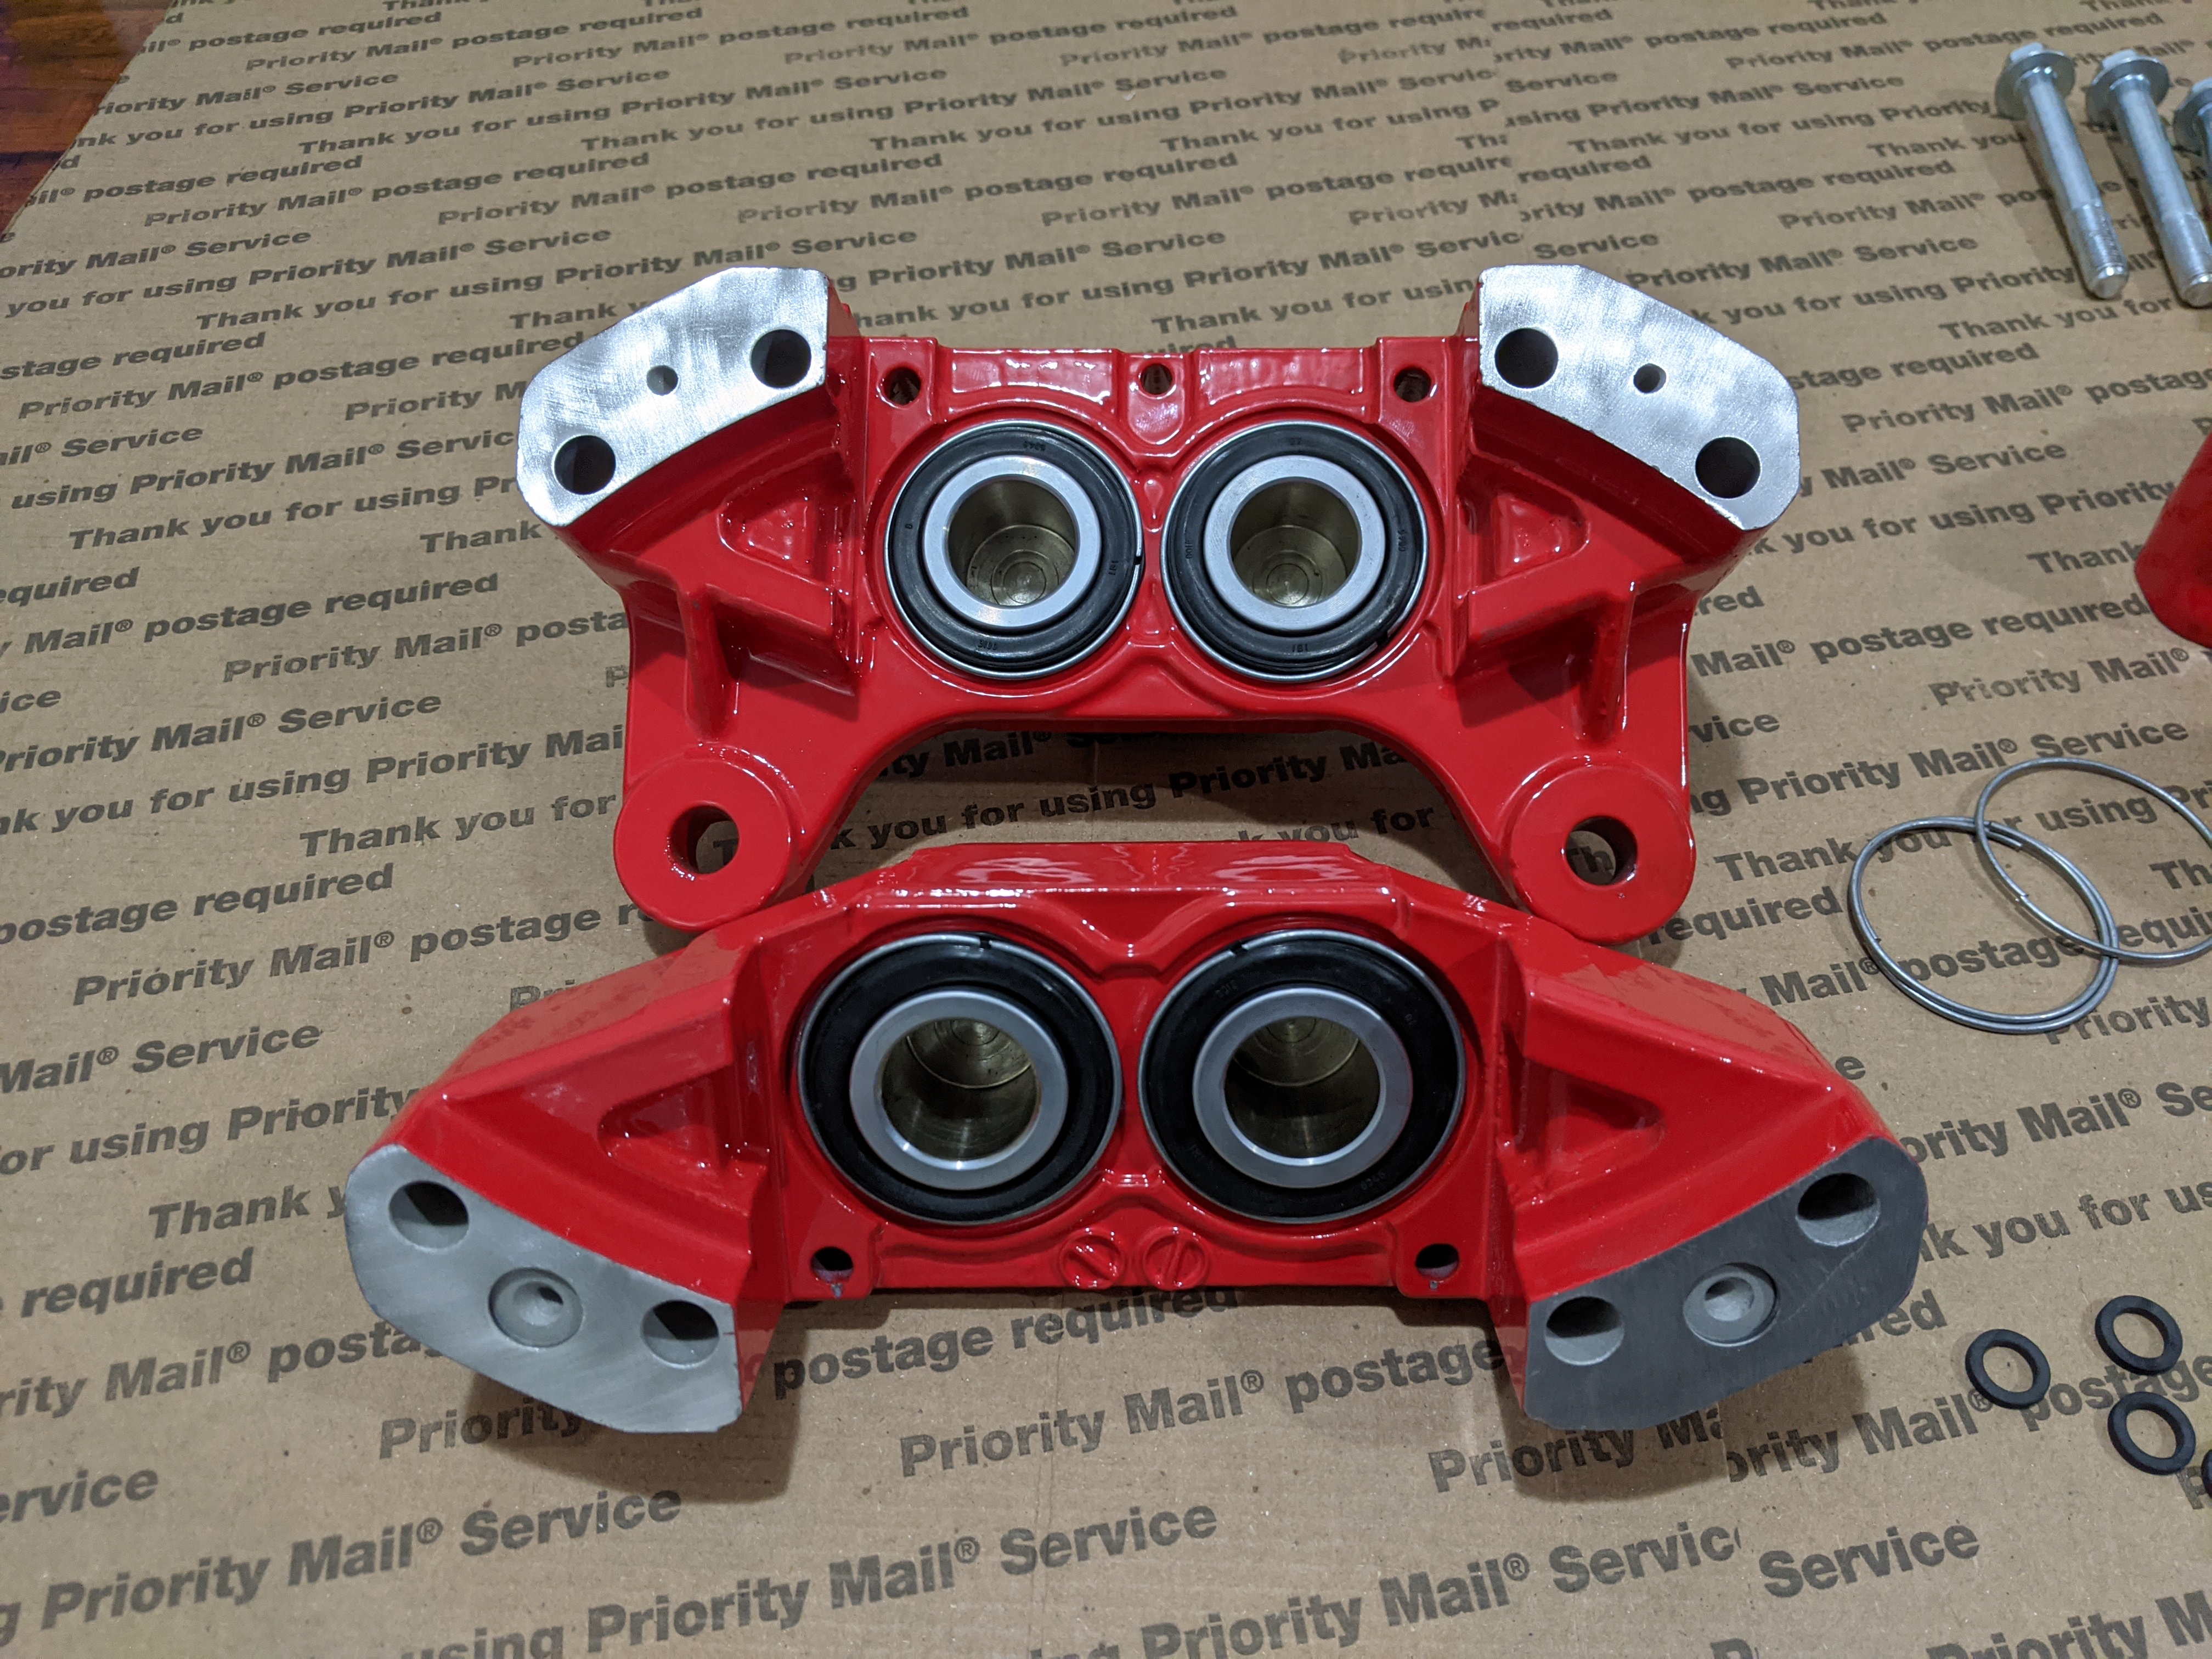
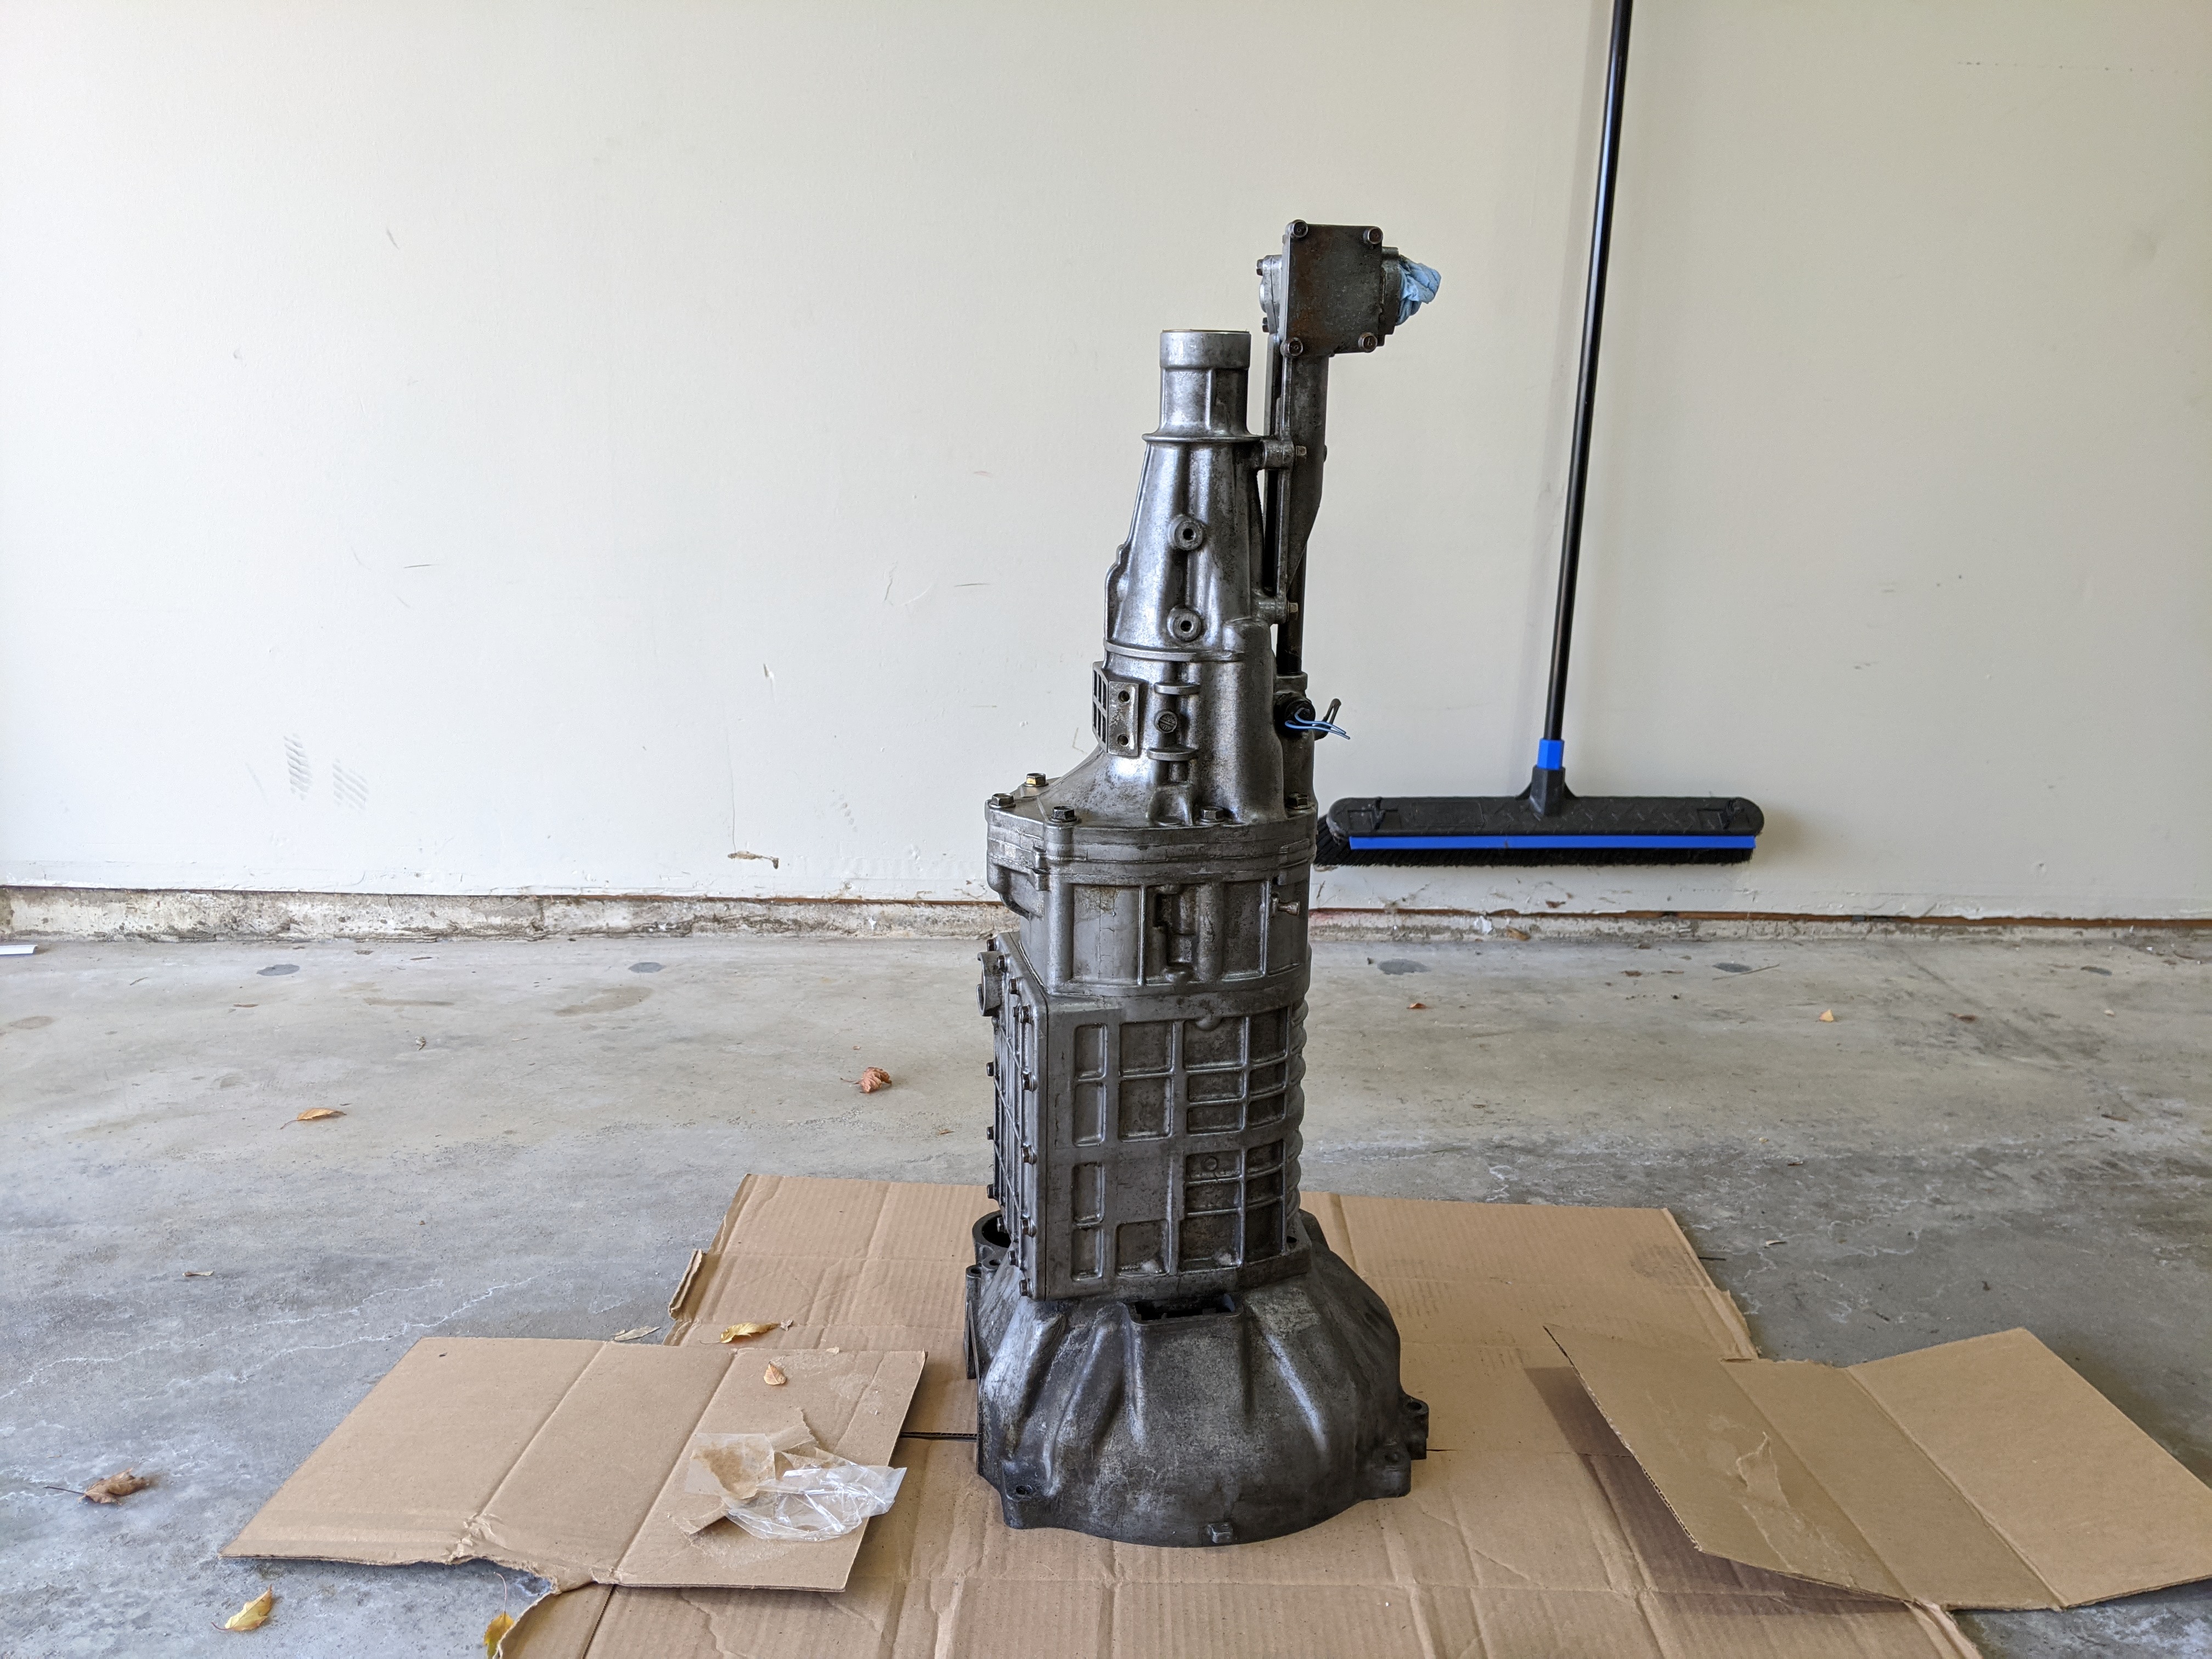
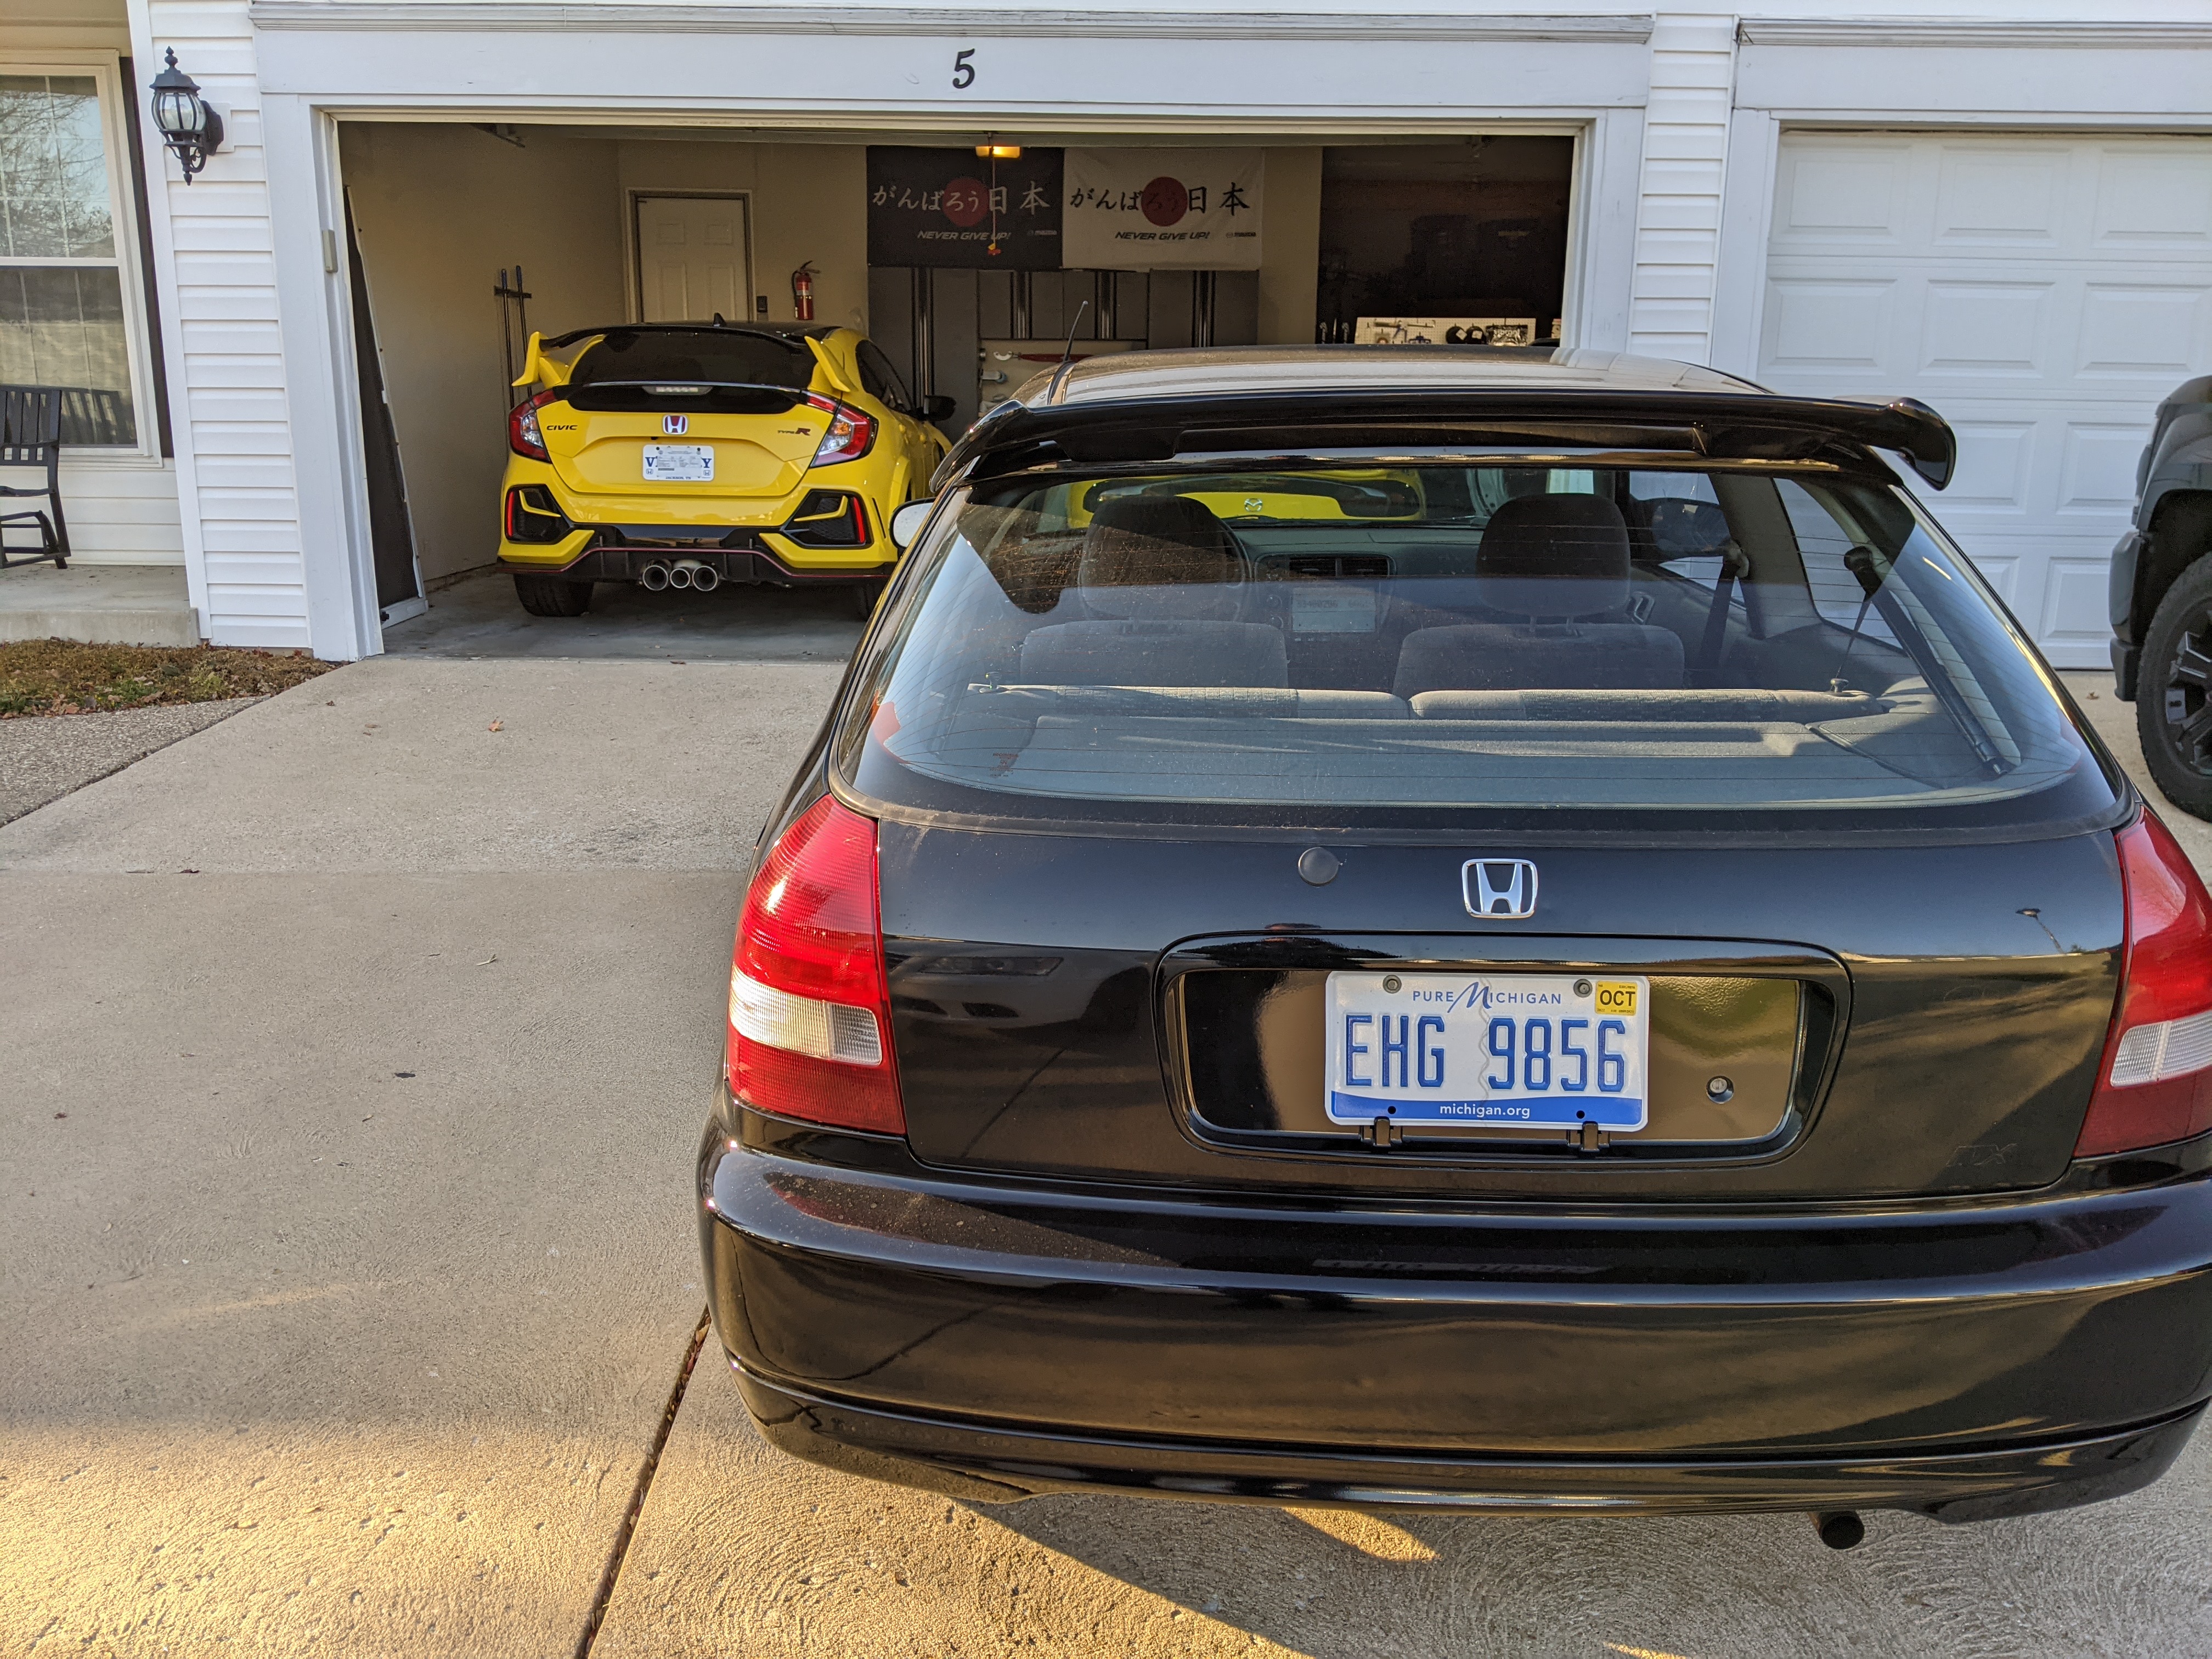
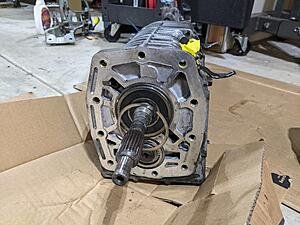
Here we are again - another two weeks, another update. Still pressing forward with everything. Decided to use proper passthroughts for the firewall instead of a hole and grommet. I plan on passing through a power and ground cable for a direct link to the battery. I decided to utilize Amphenol Radlock connectors to facilitate that. They are really nifty, however they are not fully sealed so some care needs to be given to placement. I also was able to finish my front caliper overhaul. Brand new pistons, boots, seals, and bolts. They turned out gorgeous and I�m ecstatic to get them on the car. One word of caution if you powder your front calipers - make sure you mask off the entire circle surrounding the piston. I did not have that done and had to grind a bit of the powder off so the dust boot tension ring could grip enough to keep the dust boot on (it kept wanting to slide off). I�ve also finally begun working on the interior front to rear electrical harness. I was able to get all the old electrical tape off - which was a sticky mess. I plan on condensing and removing what is not needed before utilizing Tessa tape to enshroud it. For exterior ran wires I plan to use a blend of sheathing (exterior chassis) and DR-25 (Engine Harness). I also threw on the RX-8 horns and the front reinforcement bar. The last thing I have to showcase was the transmission, I cleaned and cleared the entire transmission as I wasn�t a fan of the painted look. The bellhousing and all the misc plates on the transmission went to powder however. The new project I talked about last time is a new to me 2000 EK Hatch. My fiance got me in the Honda mood with her new CTR and left me really wanting something in the same vein. I was able to pick it up fairly cheap and am excited to dig into it too and learn about the piston side of the world (I�ve only ever worked on Rotaries).
Until next time!
Here is the amphenol radlock connectors

Here is the front caliper rebuild


Here is the wiring harness de-sheathed
Here is the horn and re-bar install

Here is the cleared transmission

Here is the EK Hatch
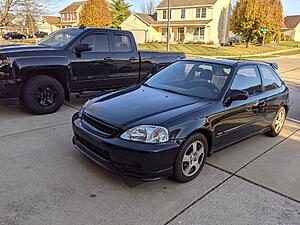

Here we are again - another two weeks, another update. Still pressing forward with everything. Decided to use proper passthroughts for the firewall instead of a hole and grommet. I plan on passing through a power and ground cable for a direct link to the battery. I decided to utilize Amphenol Radlock connectors to facilitate that. They are really nifty, however they are not fully sealed so some care needs to be given to placement. I also was able to finish my front caliper overhaul. Brand new pistons, boots, seals, and bolts. They turned out gorgeous and I�m ecstatic to get them on the car. One word of caution if you powder your front calipers - make sure you mask off the entire circle surrounding the piston. I did not have that done and had to grind a bit of the powder off so the dust boot tension ring could grip enough to keep the dust boot on (it kept wanting to slide off). I�ve also finally begun working on the interior front to rear electrical harness. I was able to get all the old electrical tape off - which was a sticky mess. I plan on condensing and removing what is not needed before utilizing Tessa tape to enshroud it. For exterior ran wires I plan to use a blend of sheathing (exterior chassis) and DR-25 (Engine Harness). I also threw on the RX-8 horns and the front reinforcement bar. The last thing I have to showcase was the transmission, I cleaned and cleared the entire transmission as I wasn�t a fan of the painted look. The bellhousing and all the misc plates on the transmission went to powder however. The new project I talked about last time is a new to me 2000 EK Hatch. My fiance got me in the Honda mood with her new CTR and left me really wanting something in the same vein. I was able to pick it up fairly cheap and am excited to dig into it too and learn about the piston side of the world (I�ve only ever worked on Rotaries).
Until next time!
Here is the amphenol radlock connectors
Here is the front caliper rebuild

Here is the wiring harness de-sheathed
Here is the horn and re-bar install

Here is the cleared transmission
Here is the EK Hatch

The following users liked this post:
hkp (12-23-21)
01-05-22, 10:00 AM
#349
Update 1/5/22
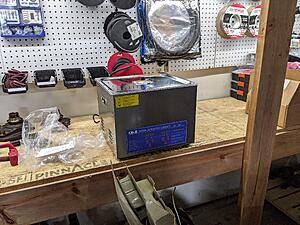
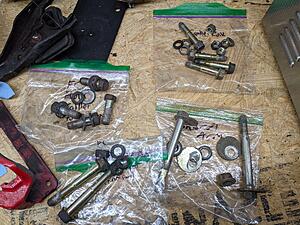
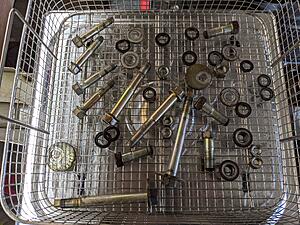
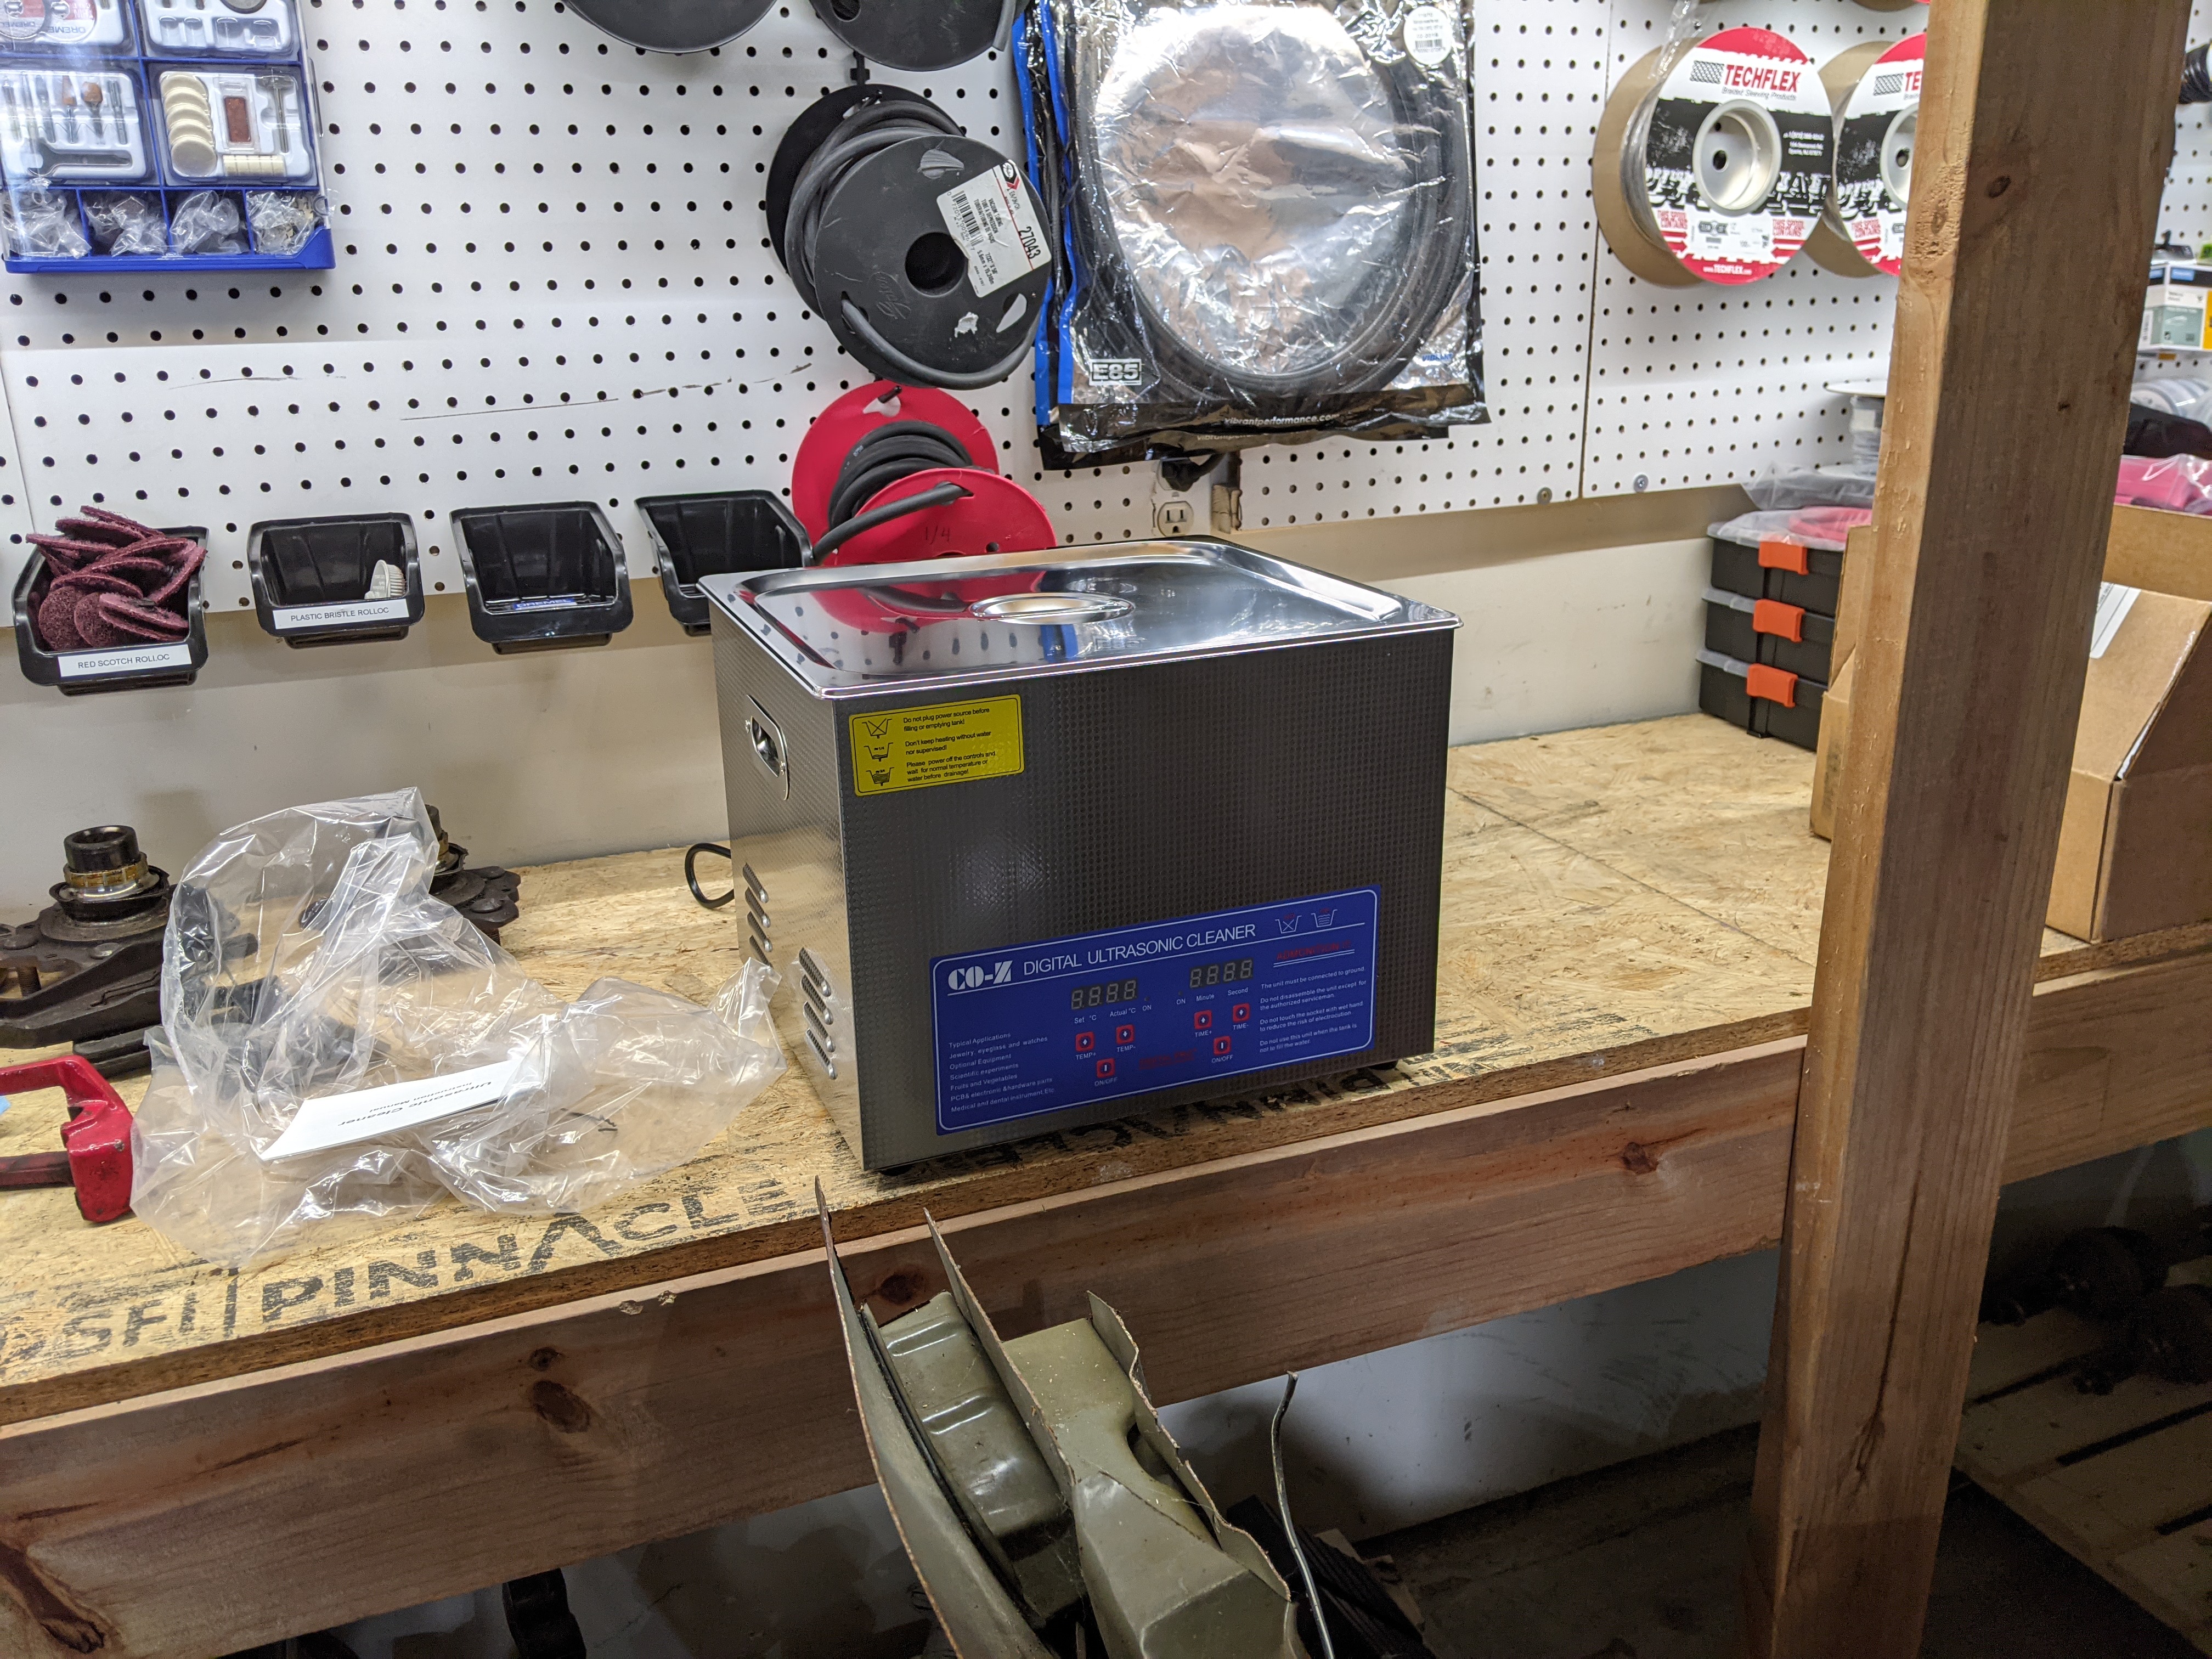
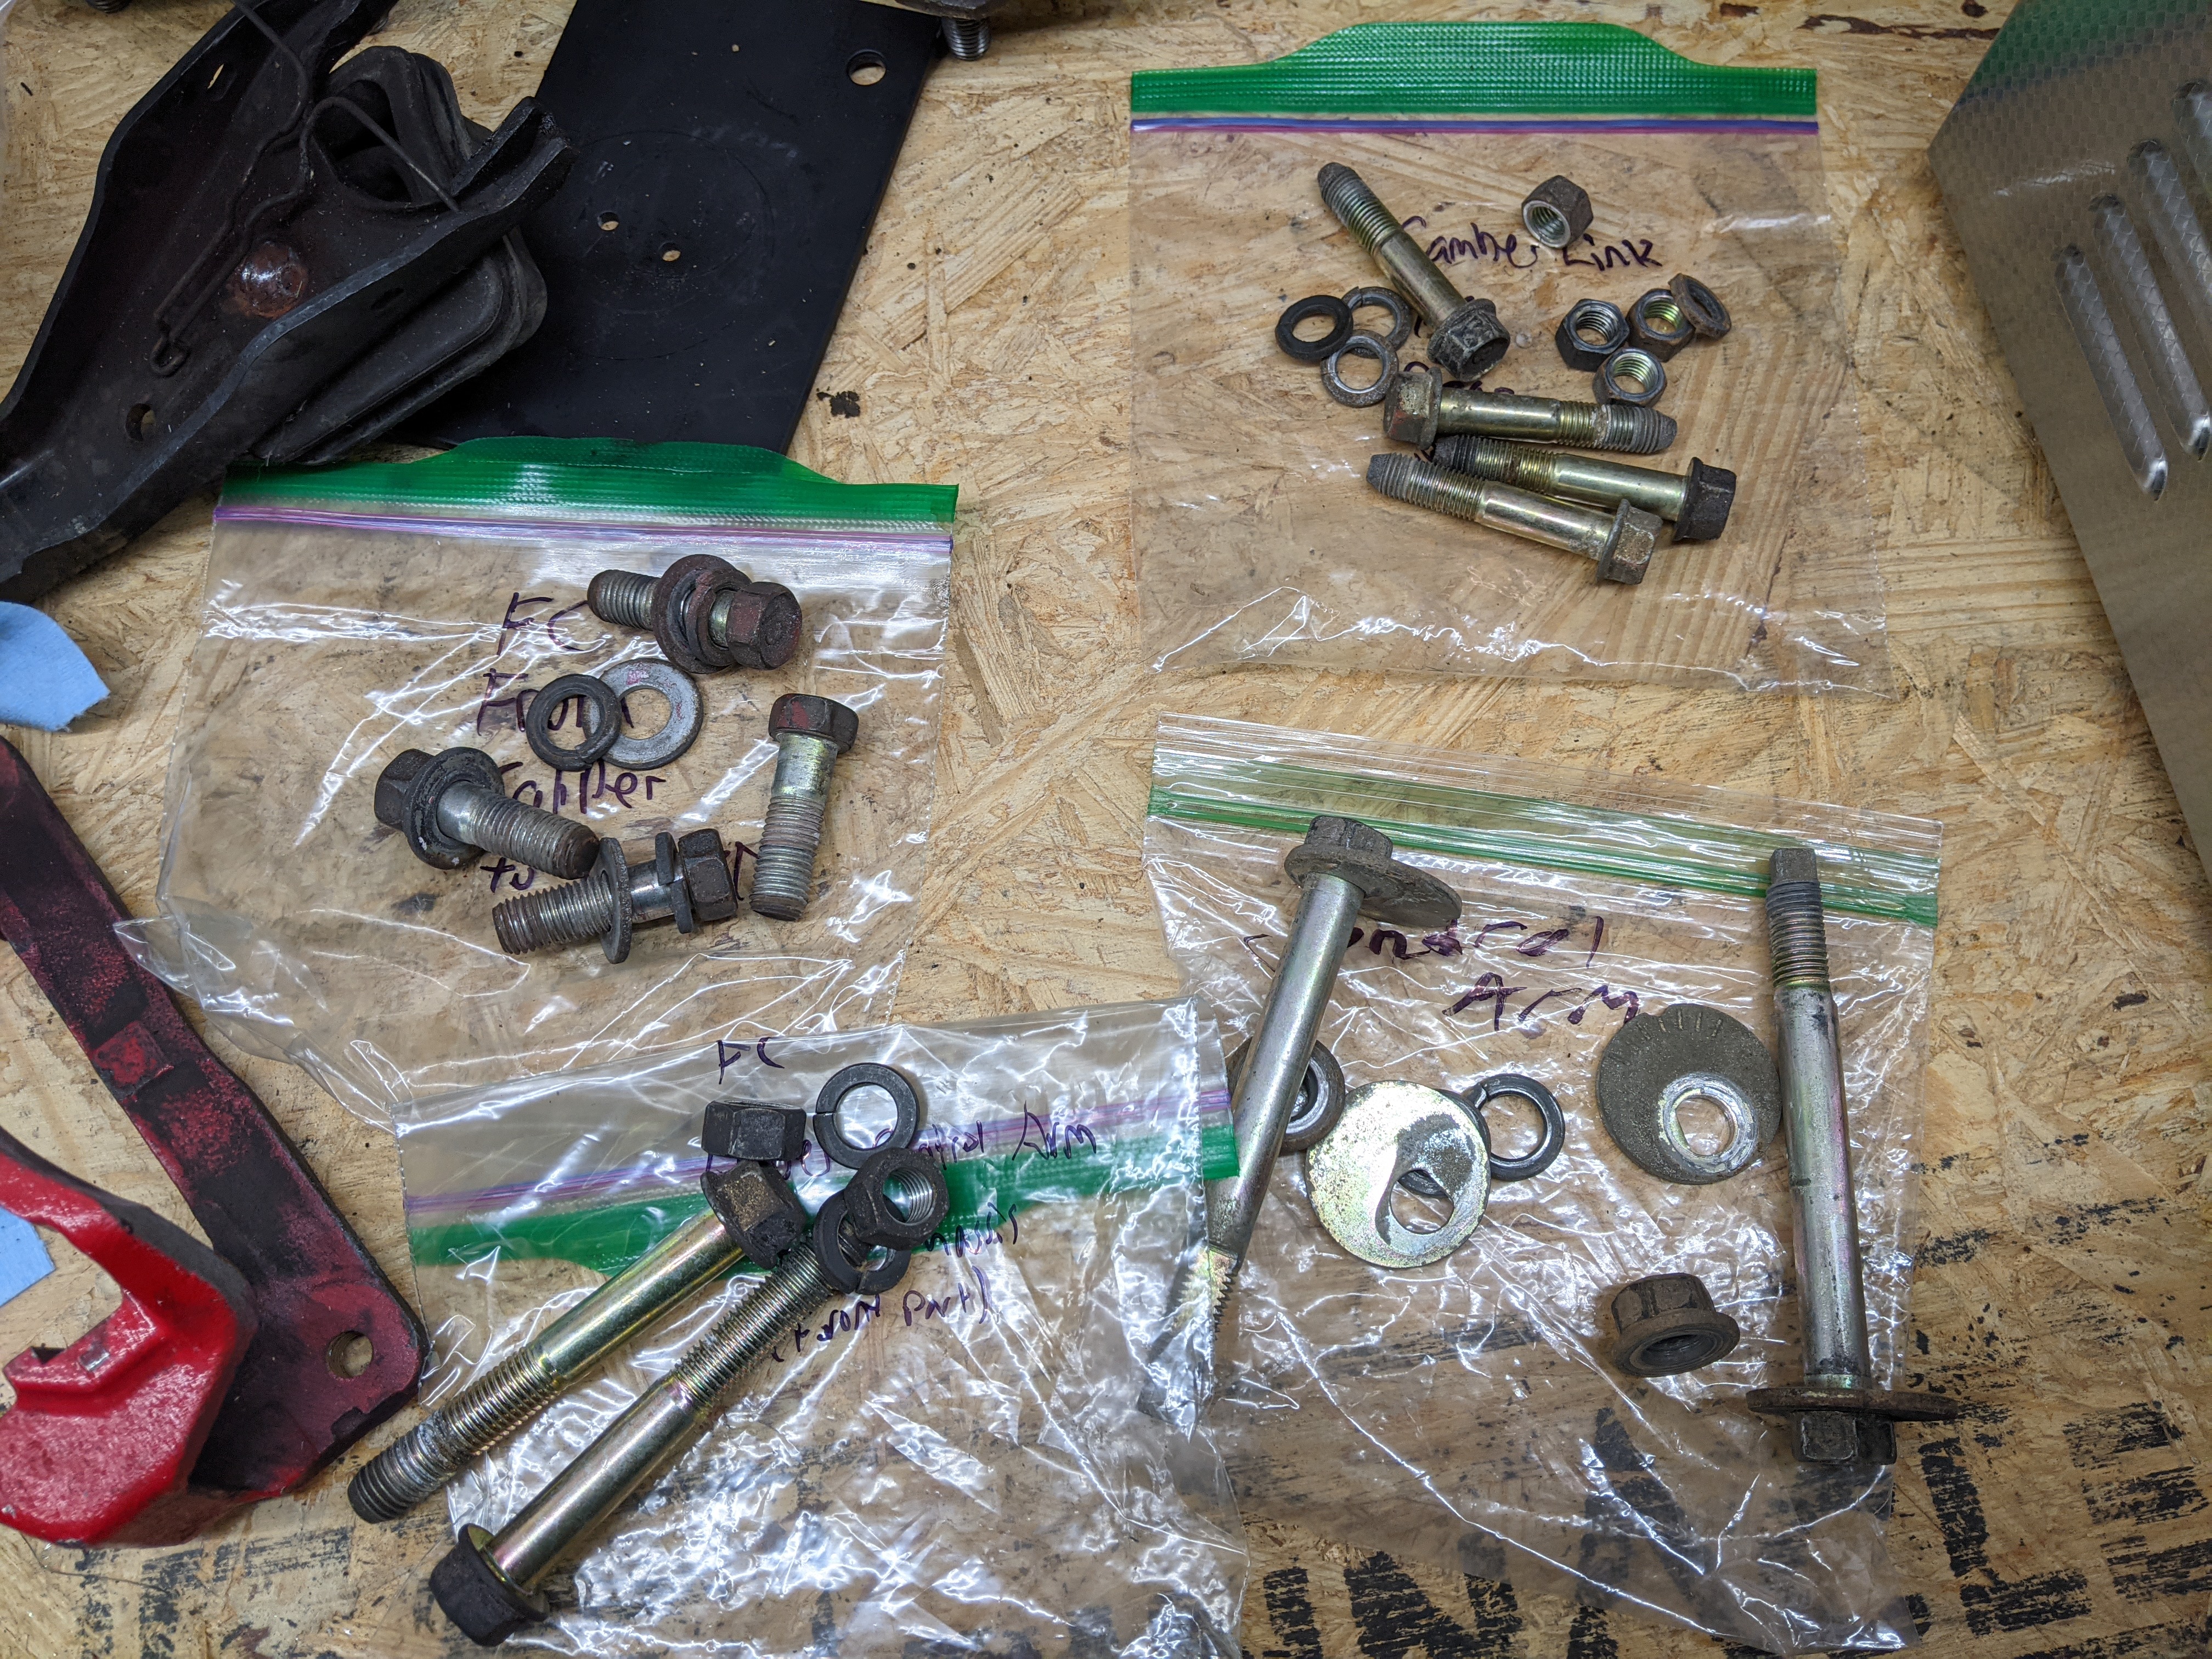
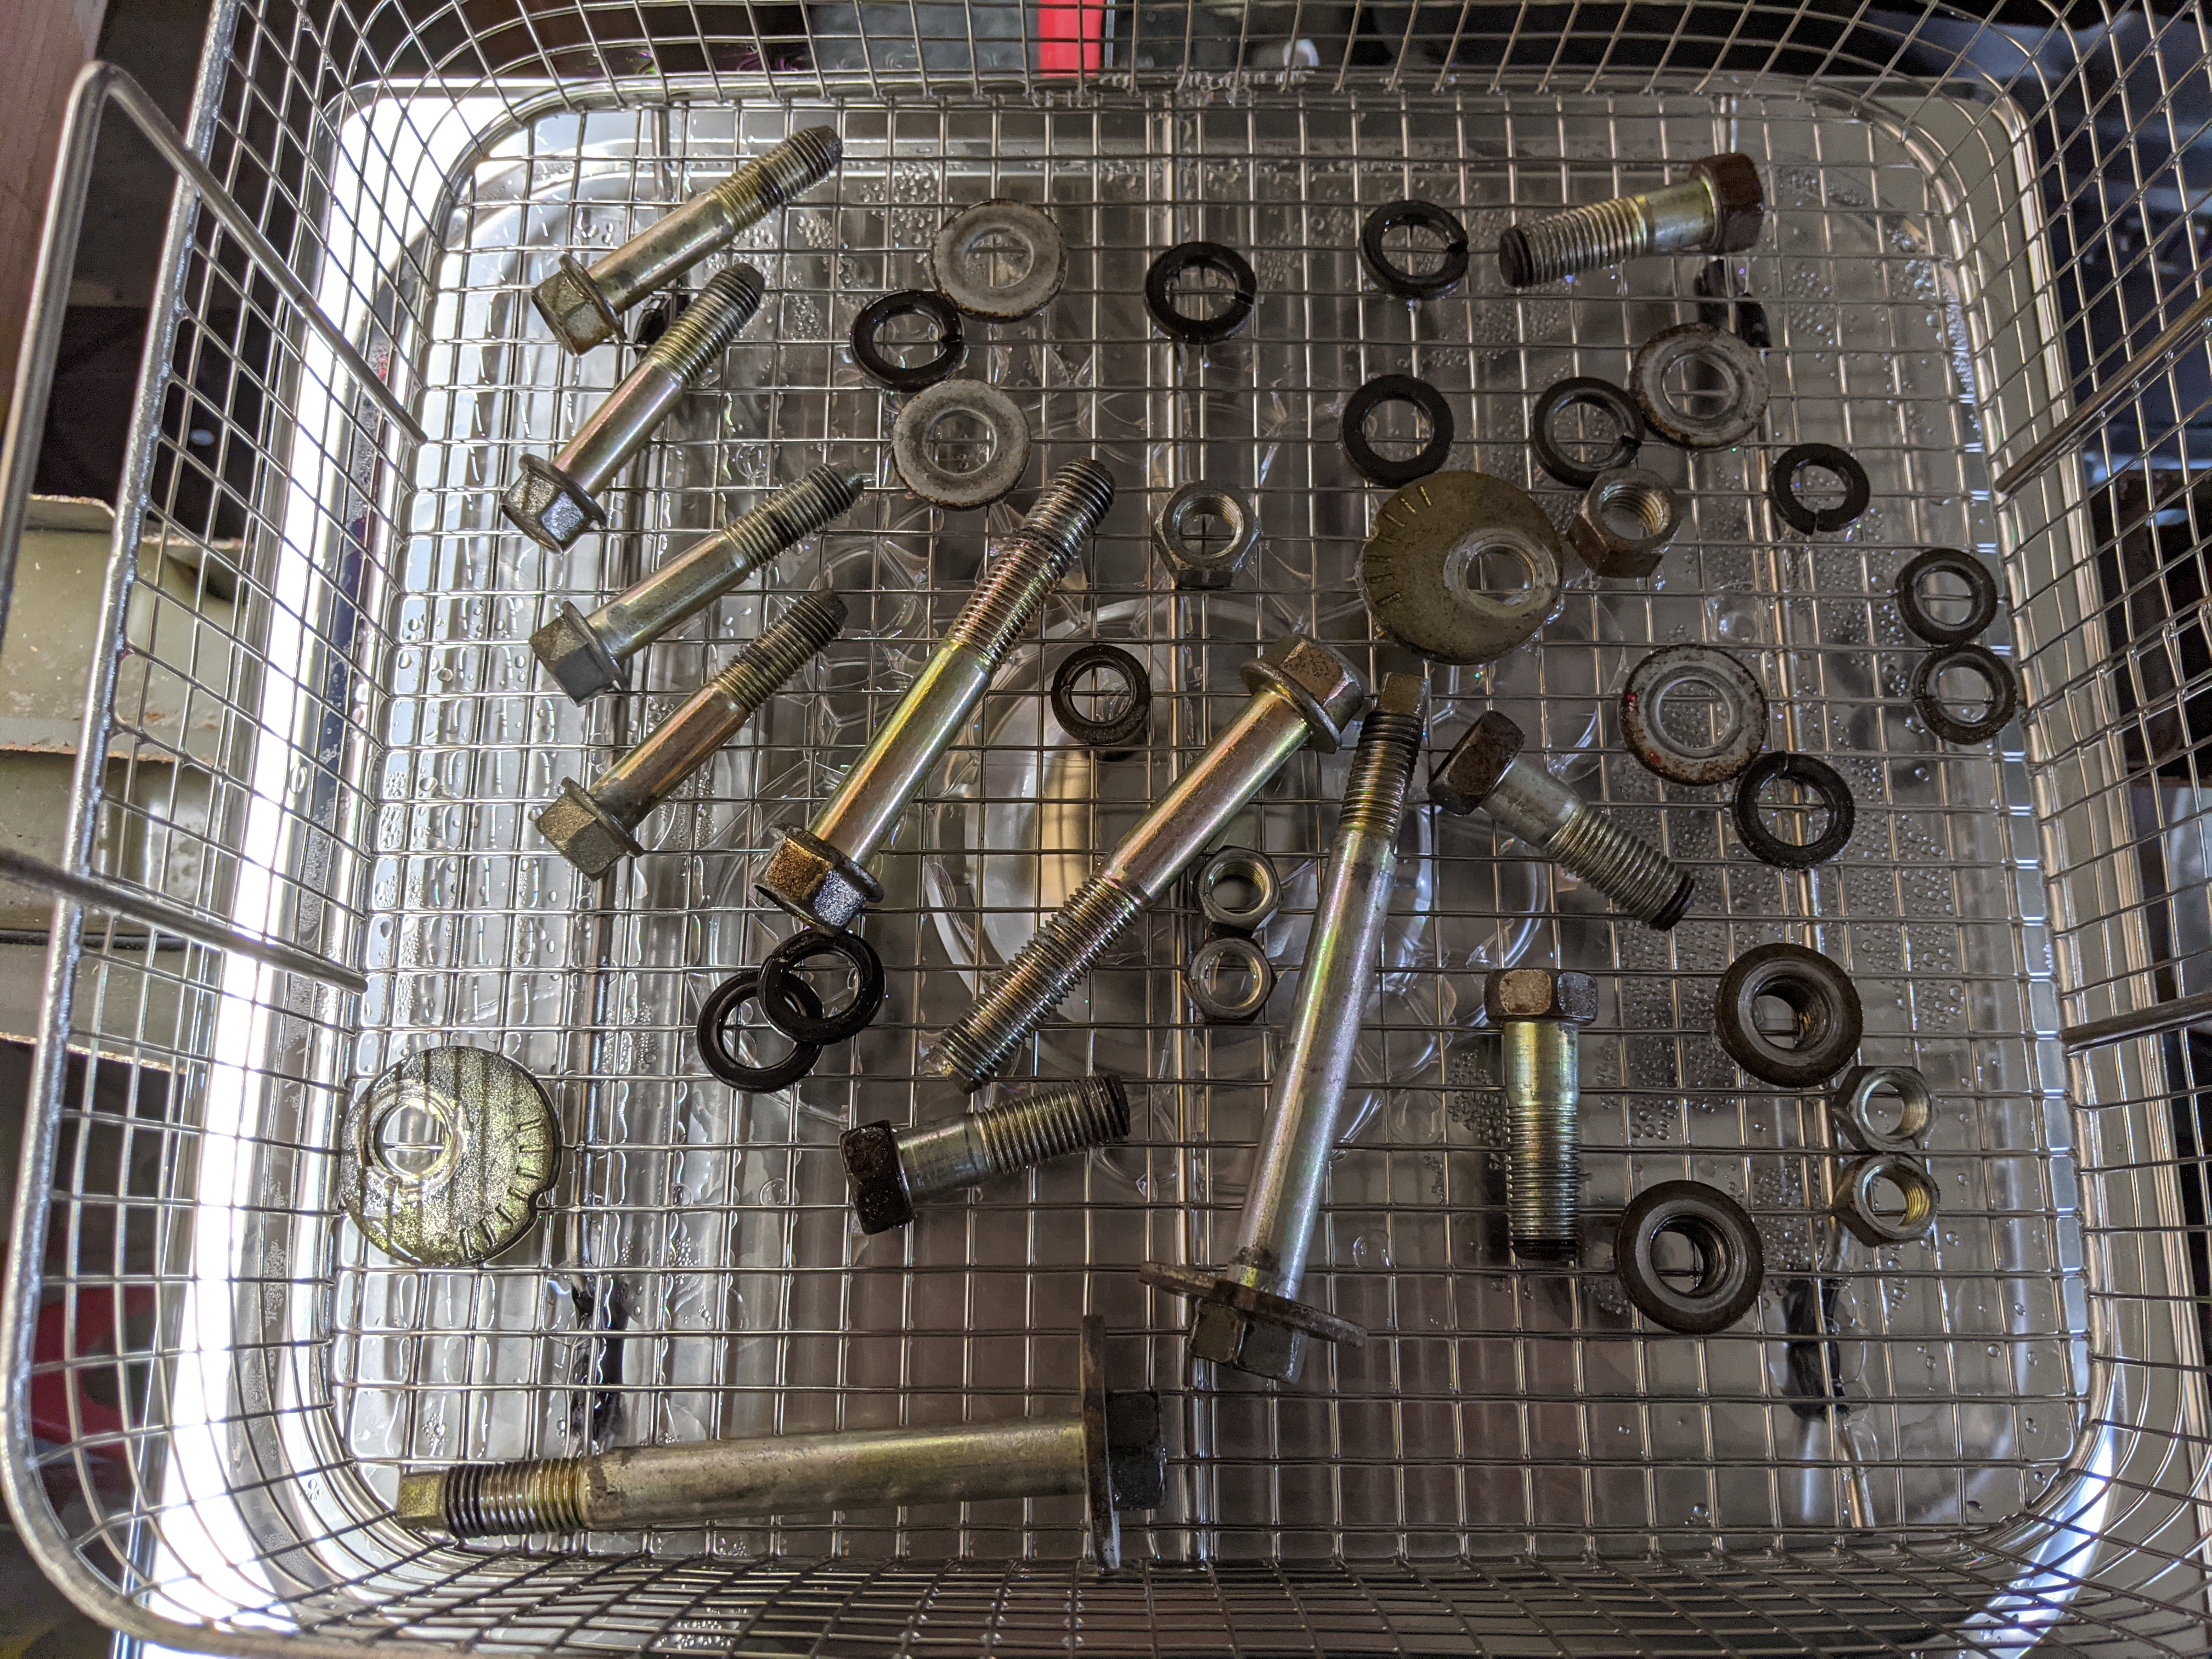
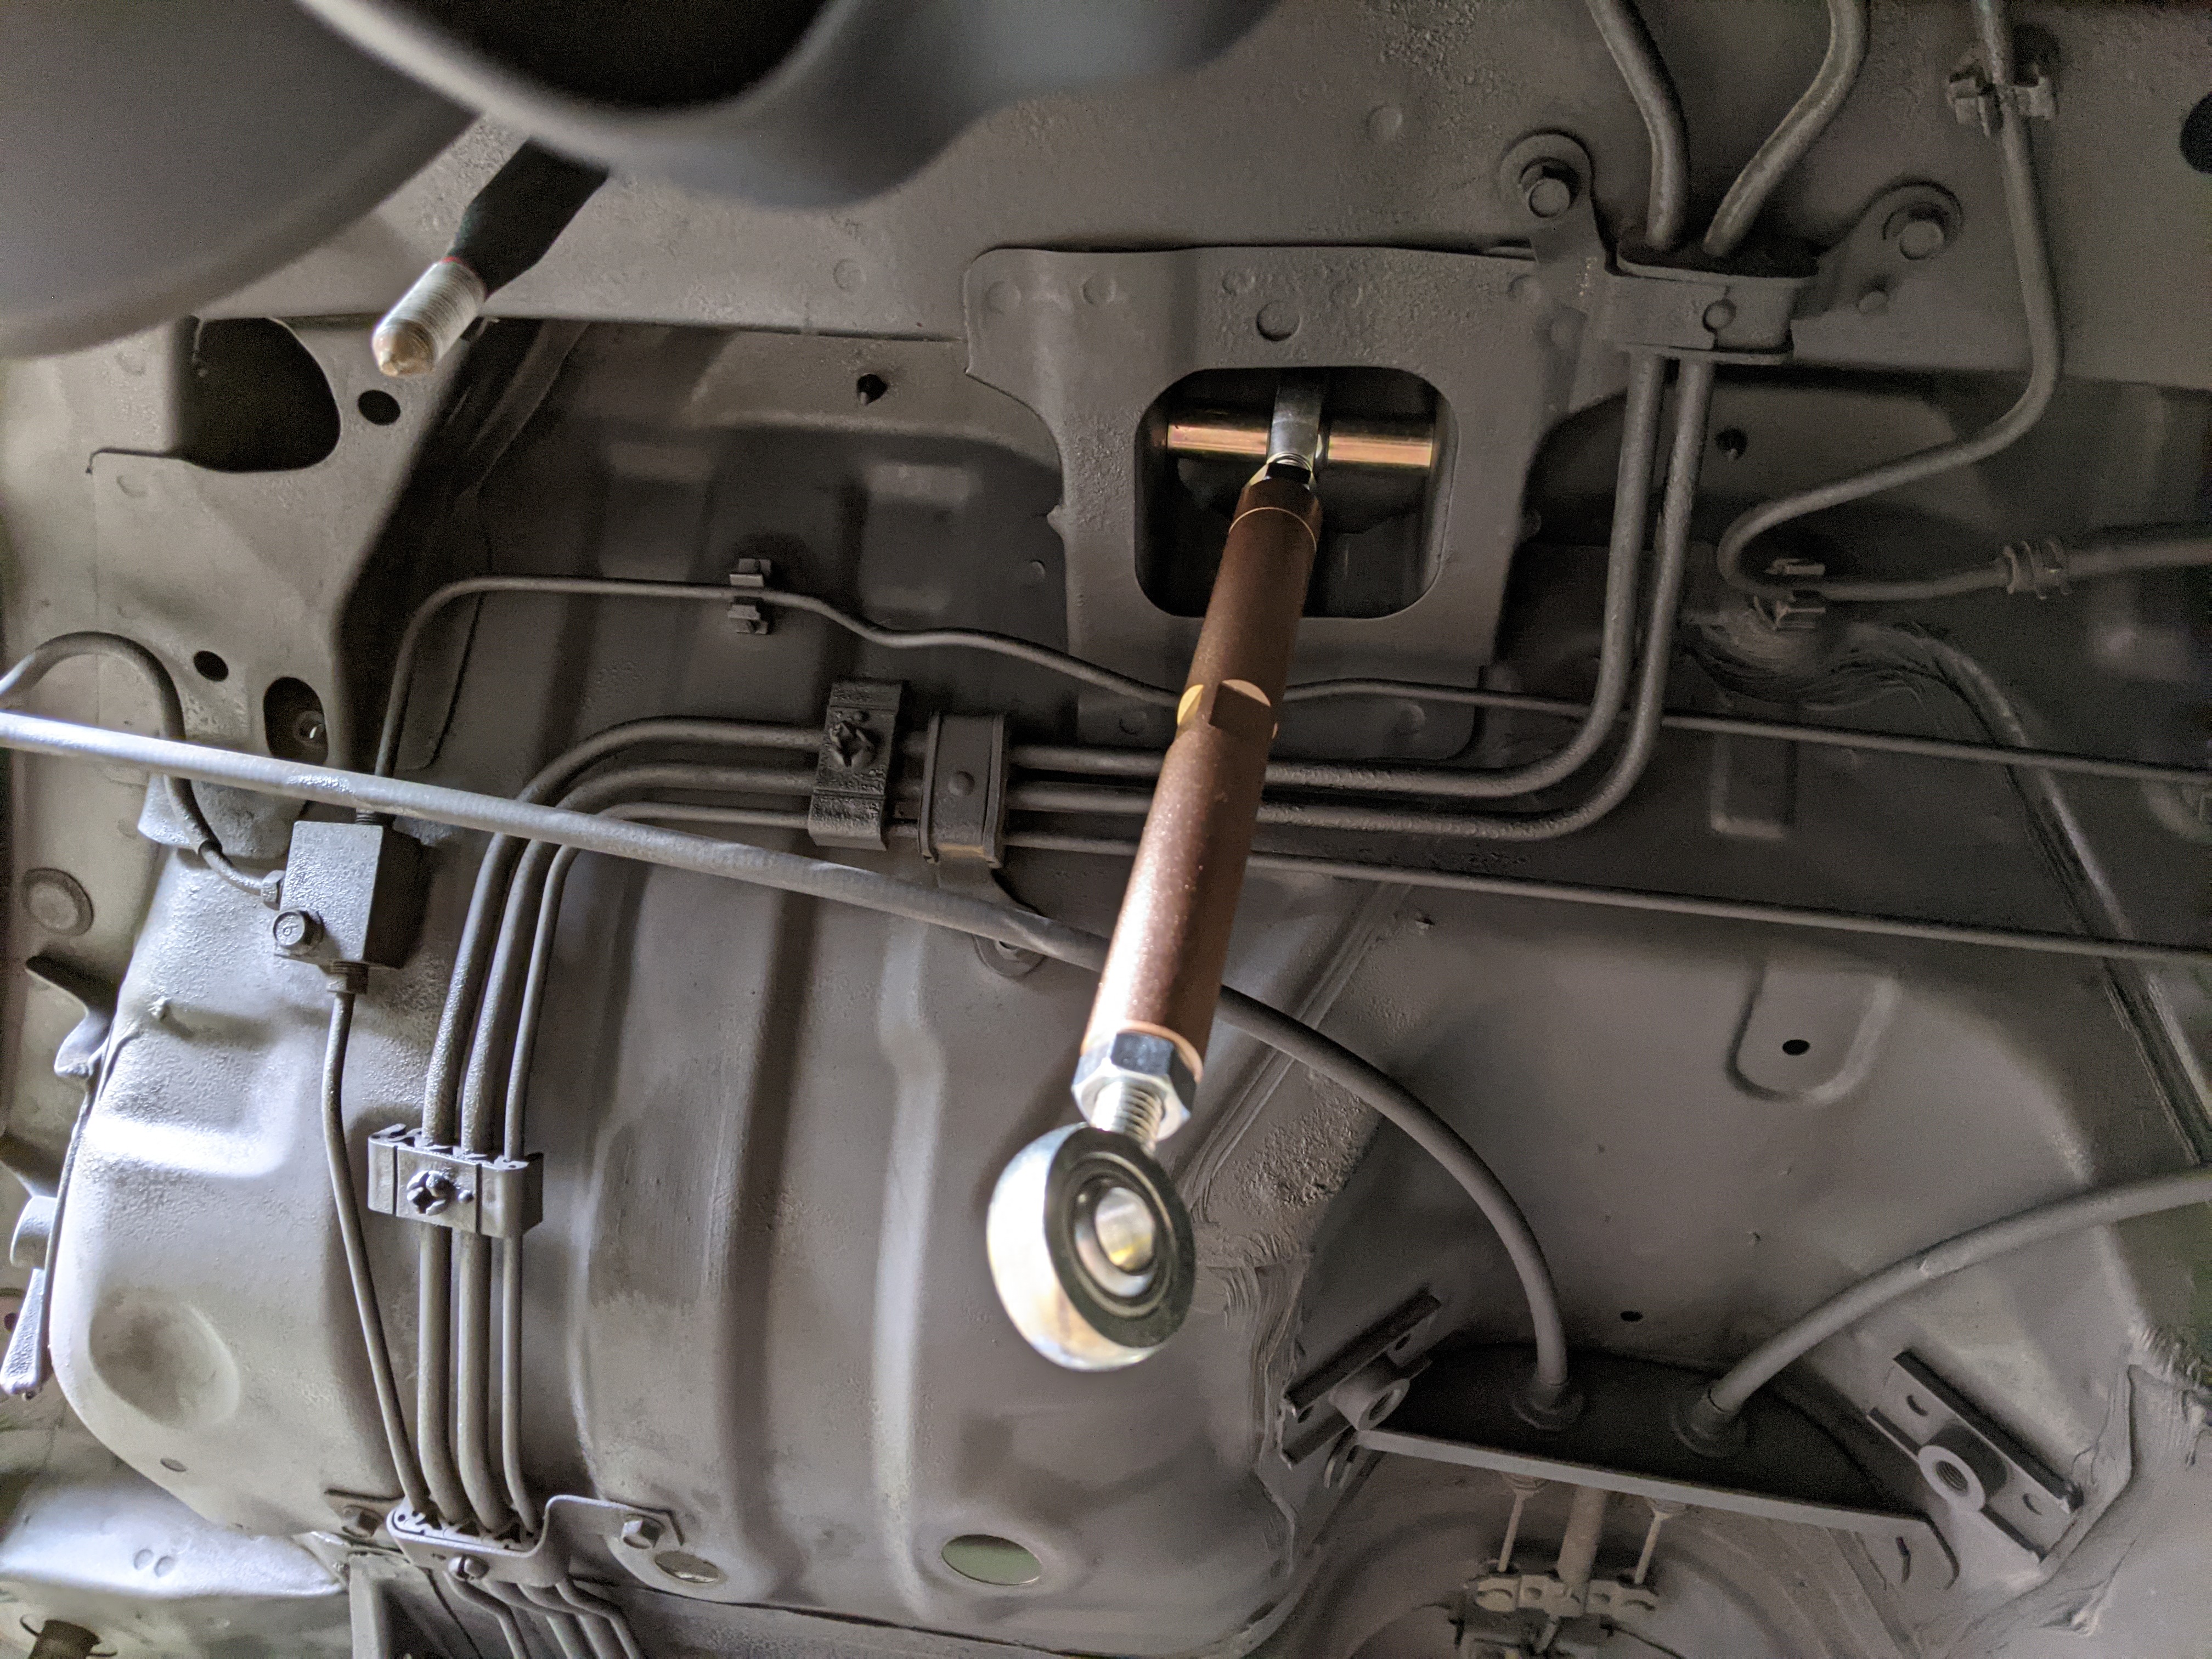
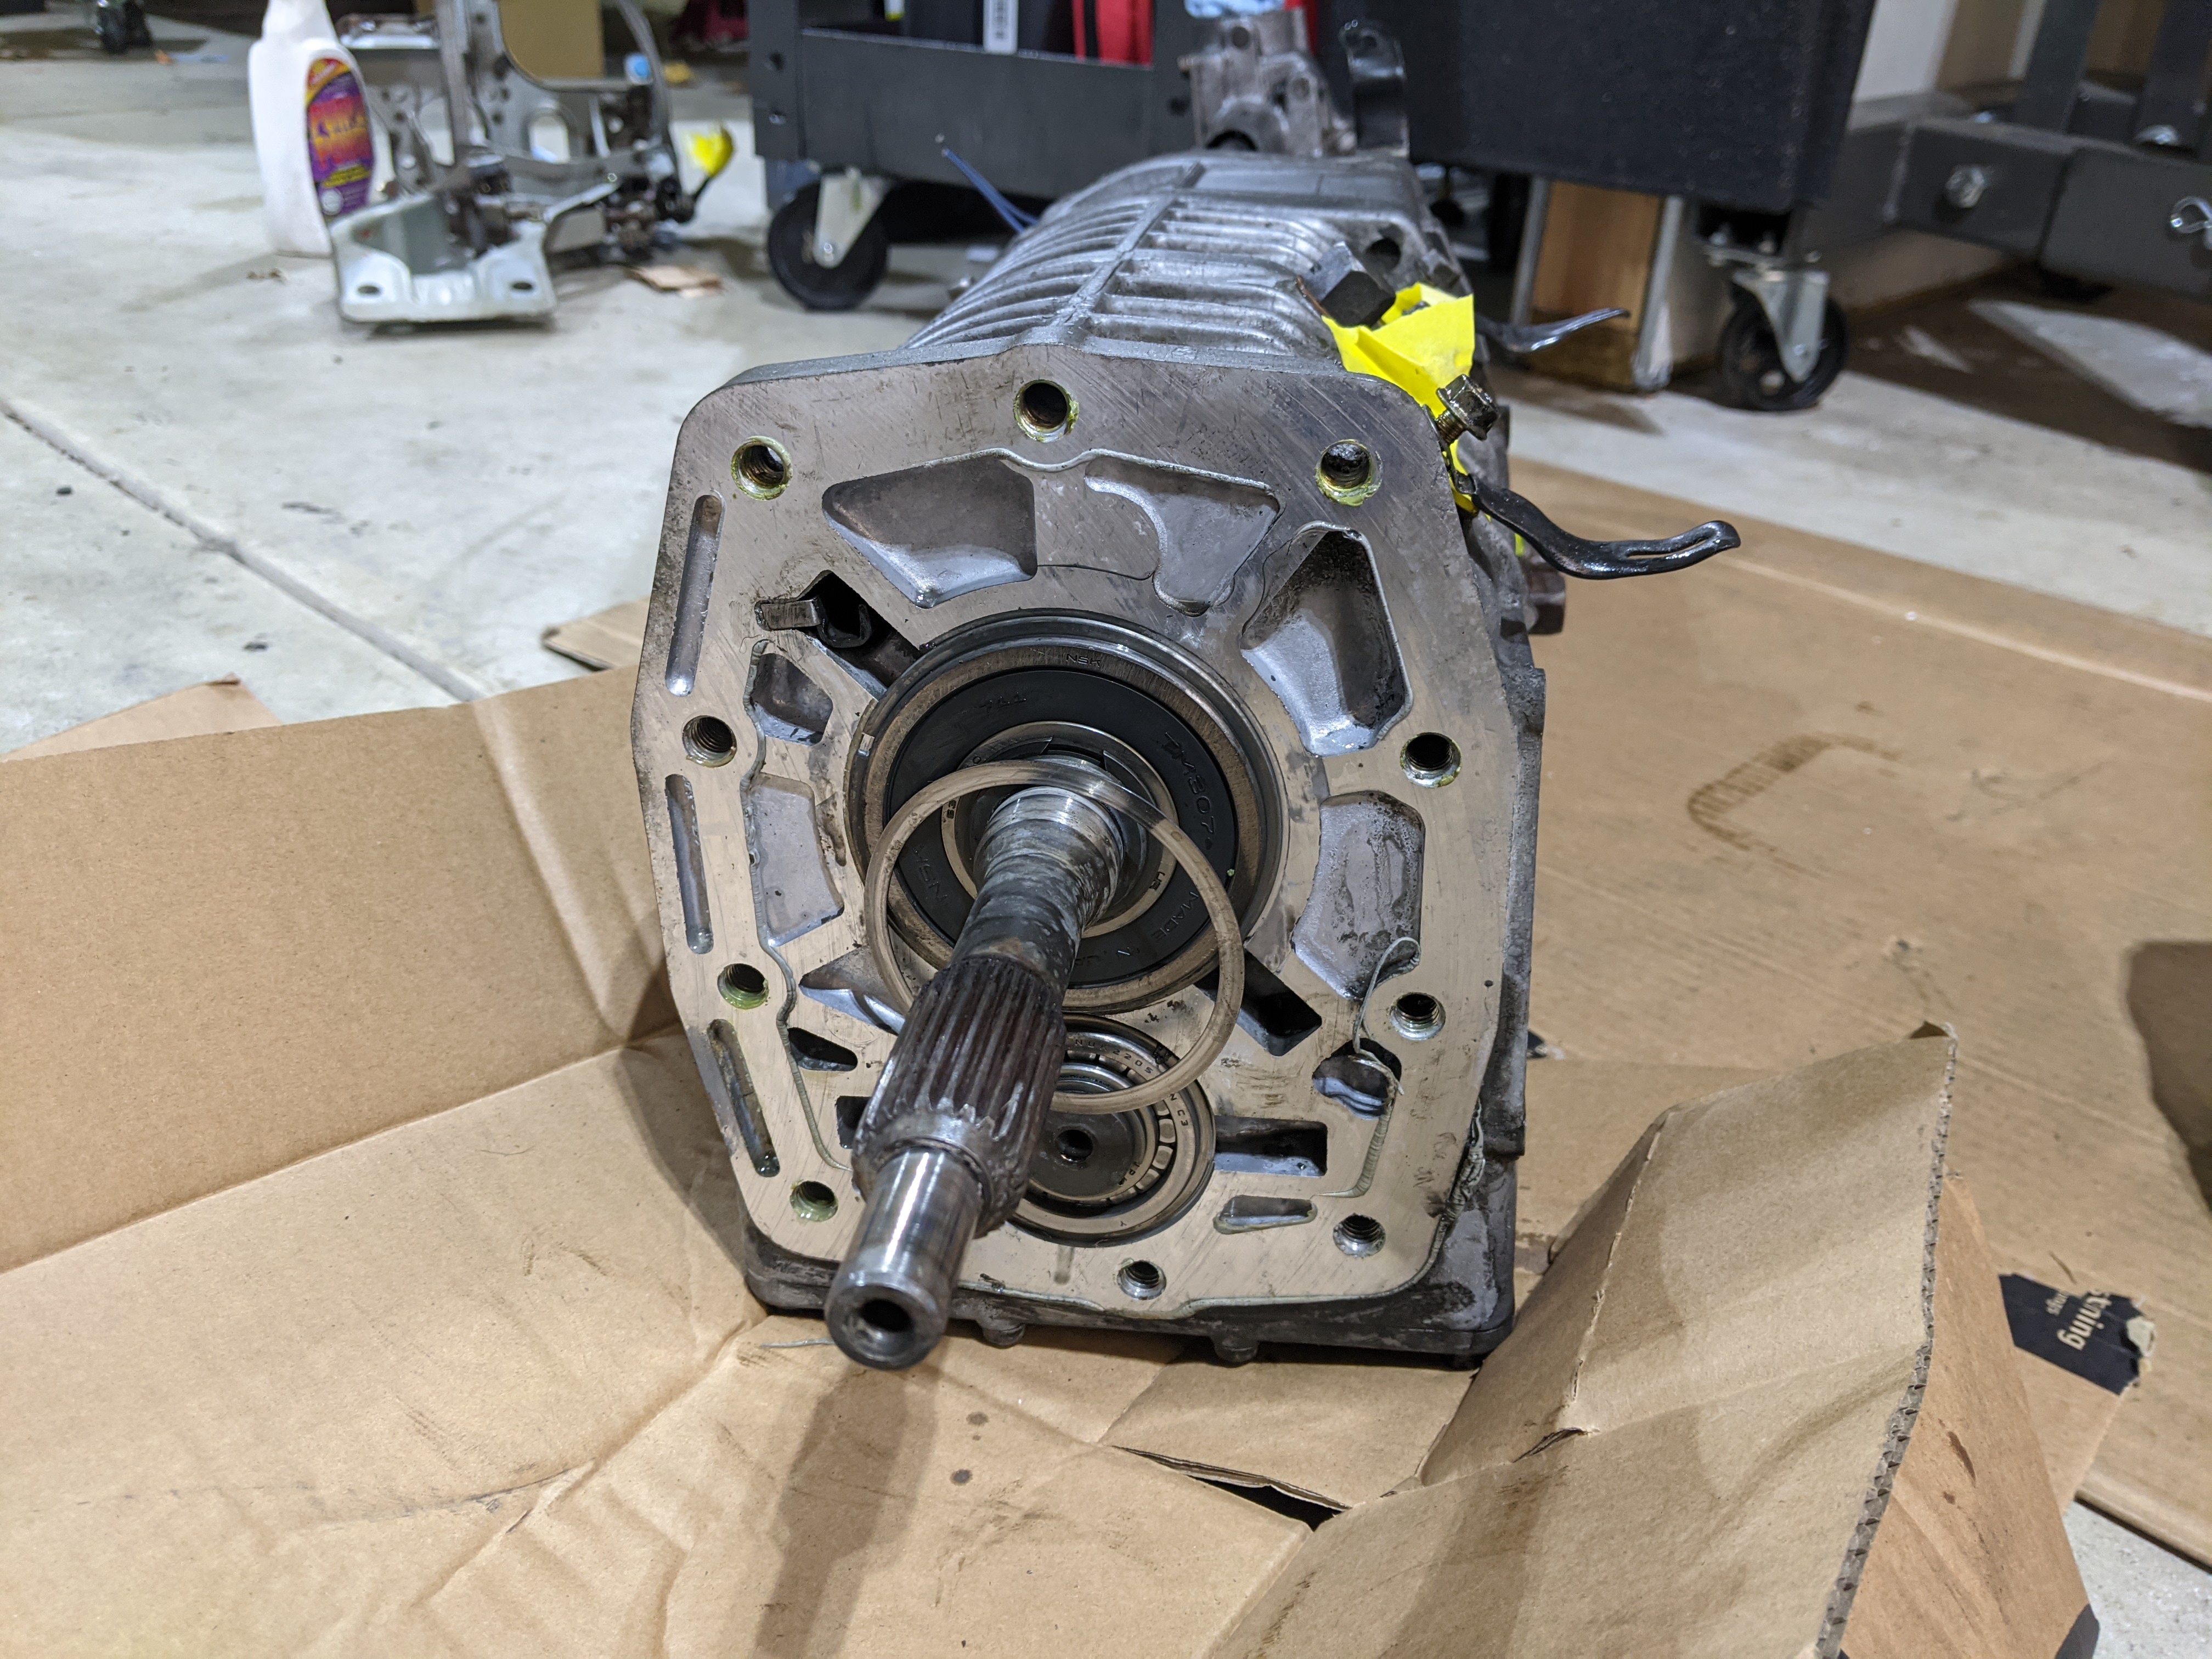
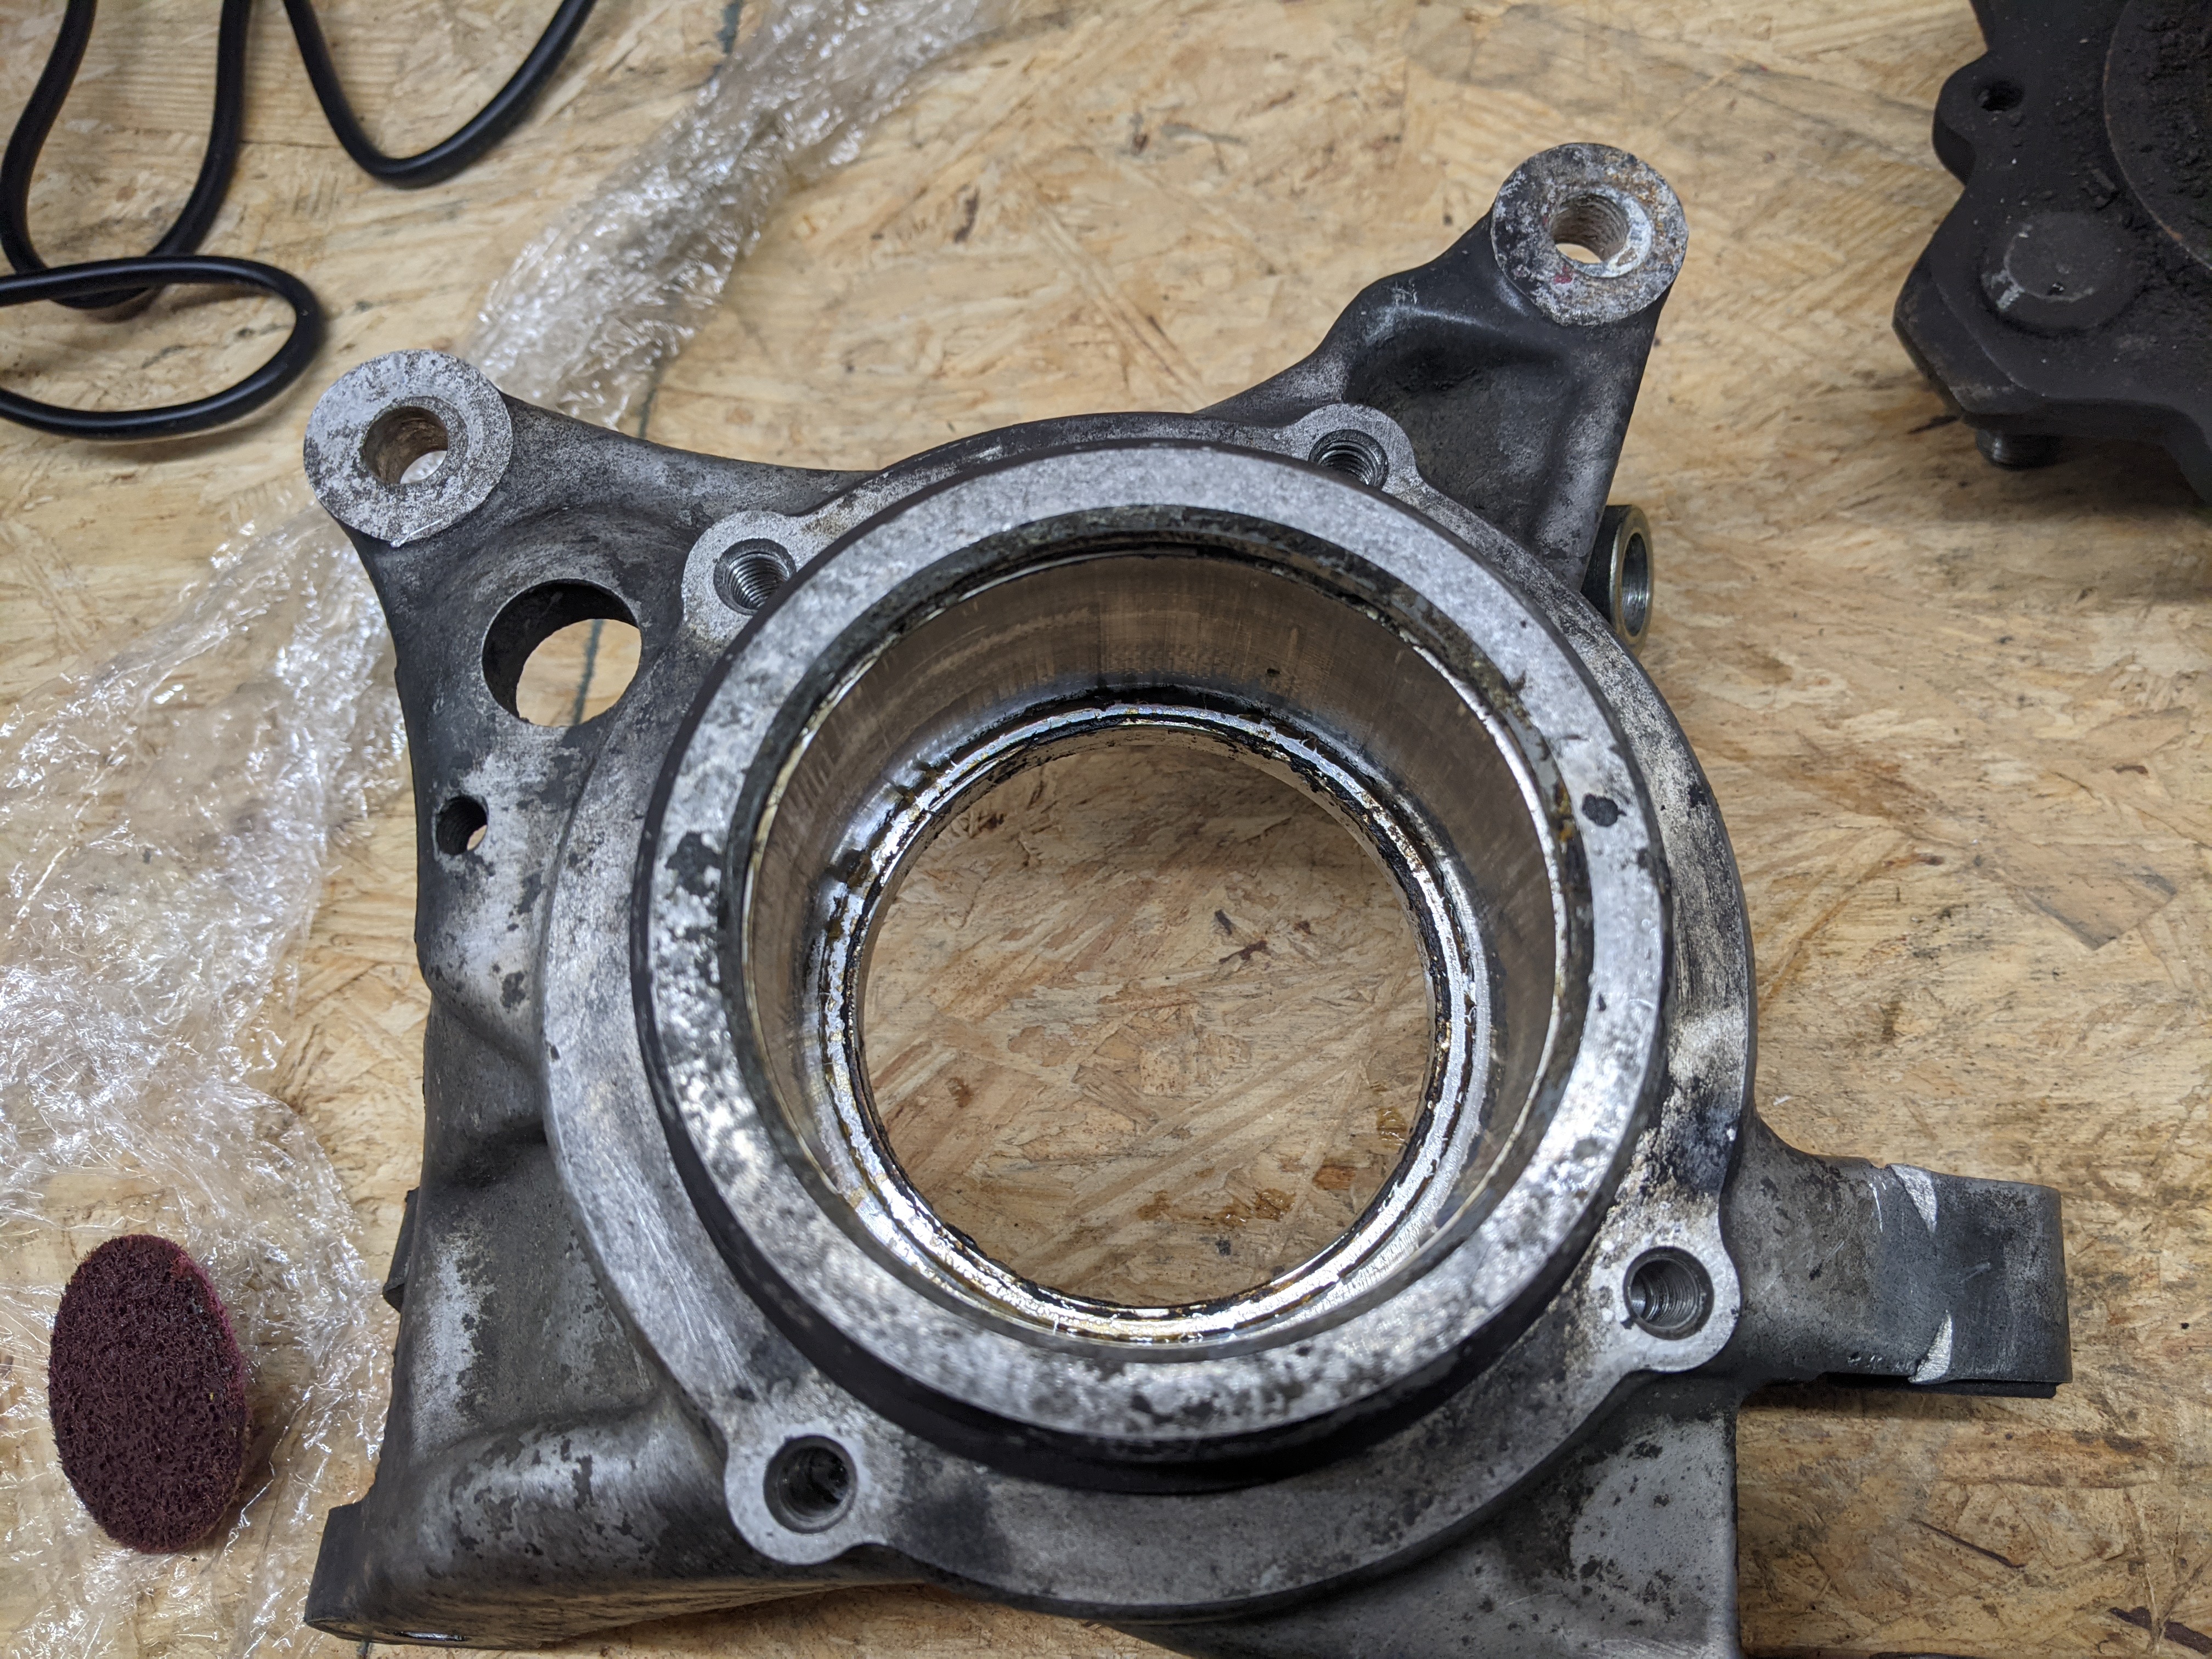
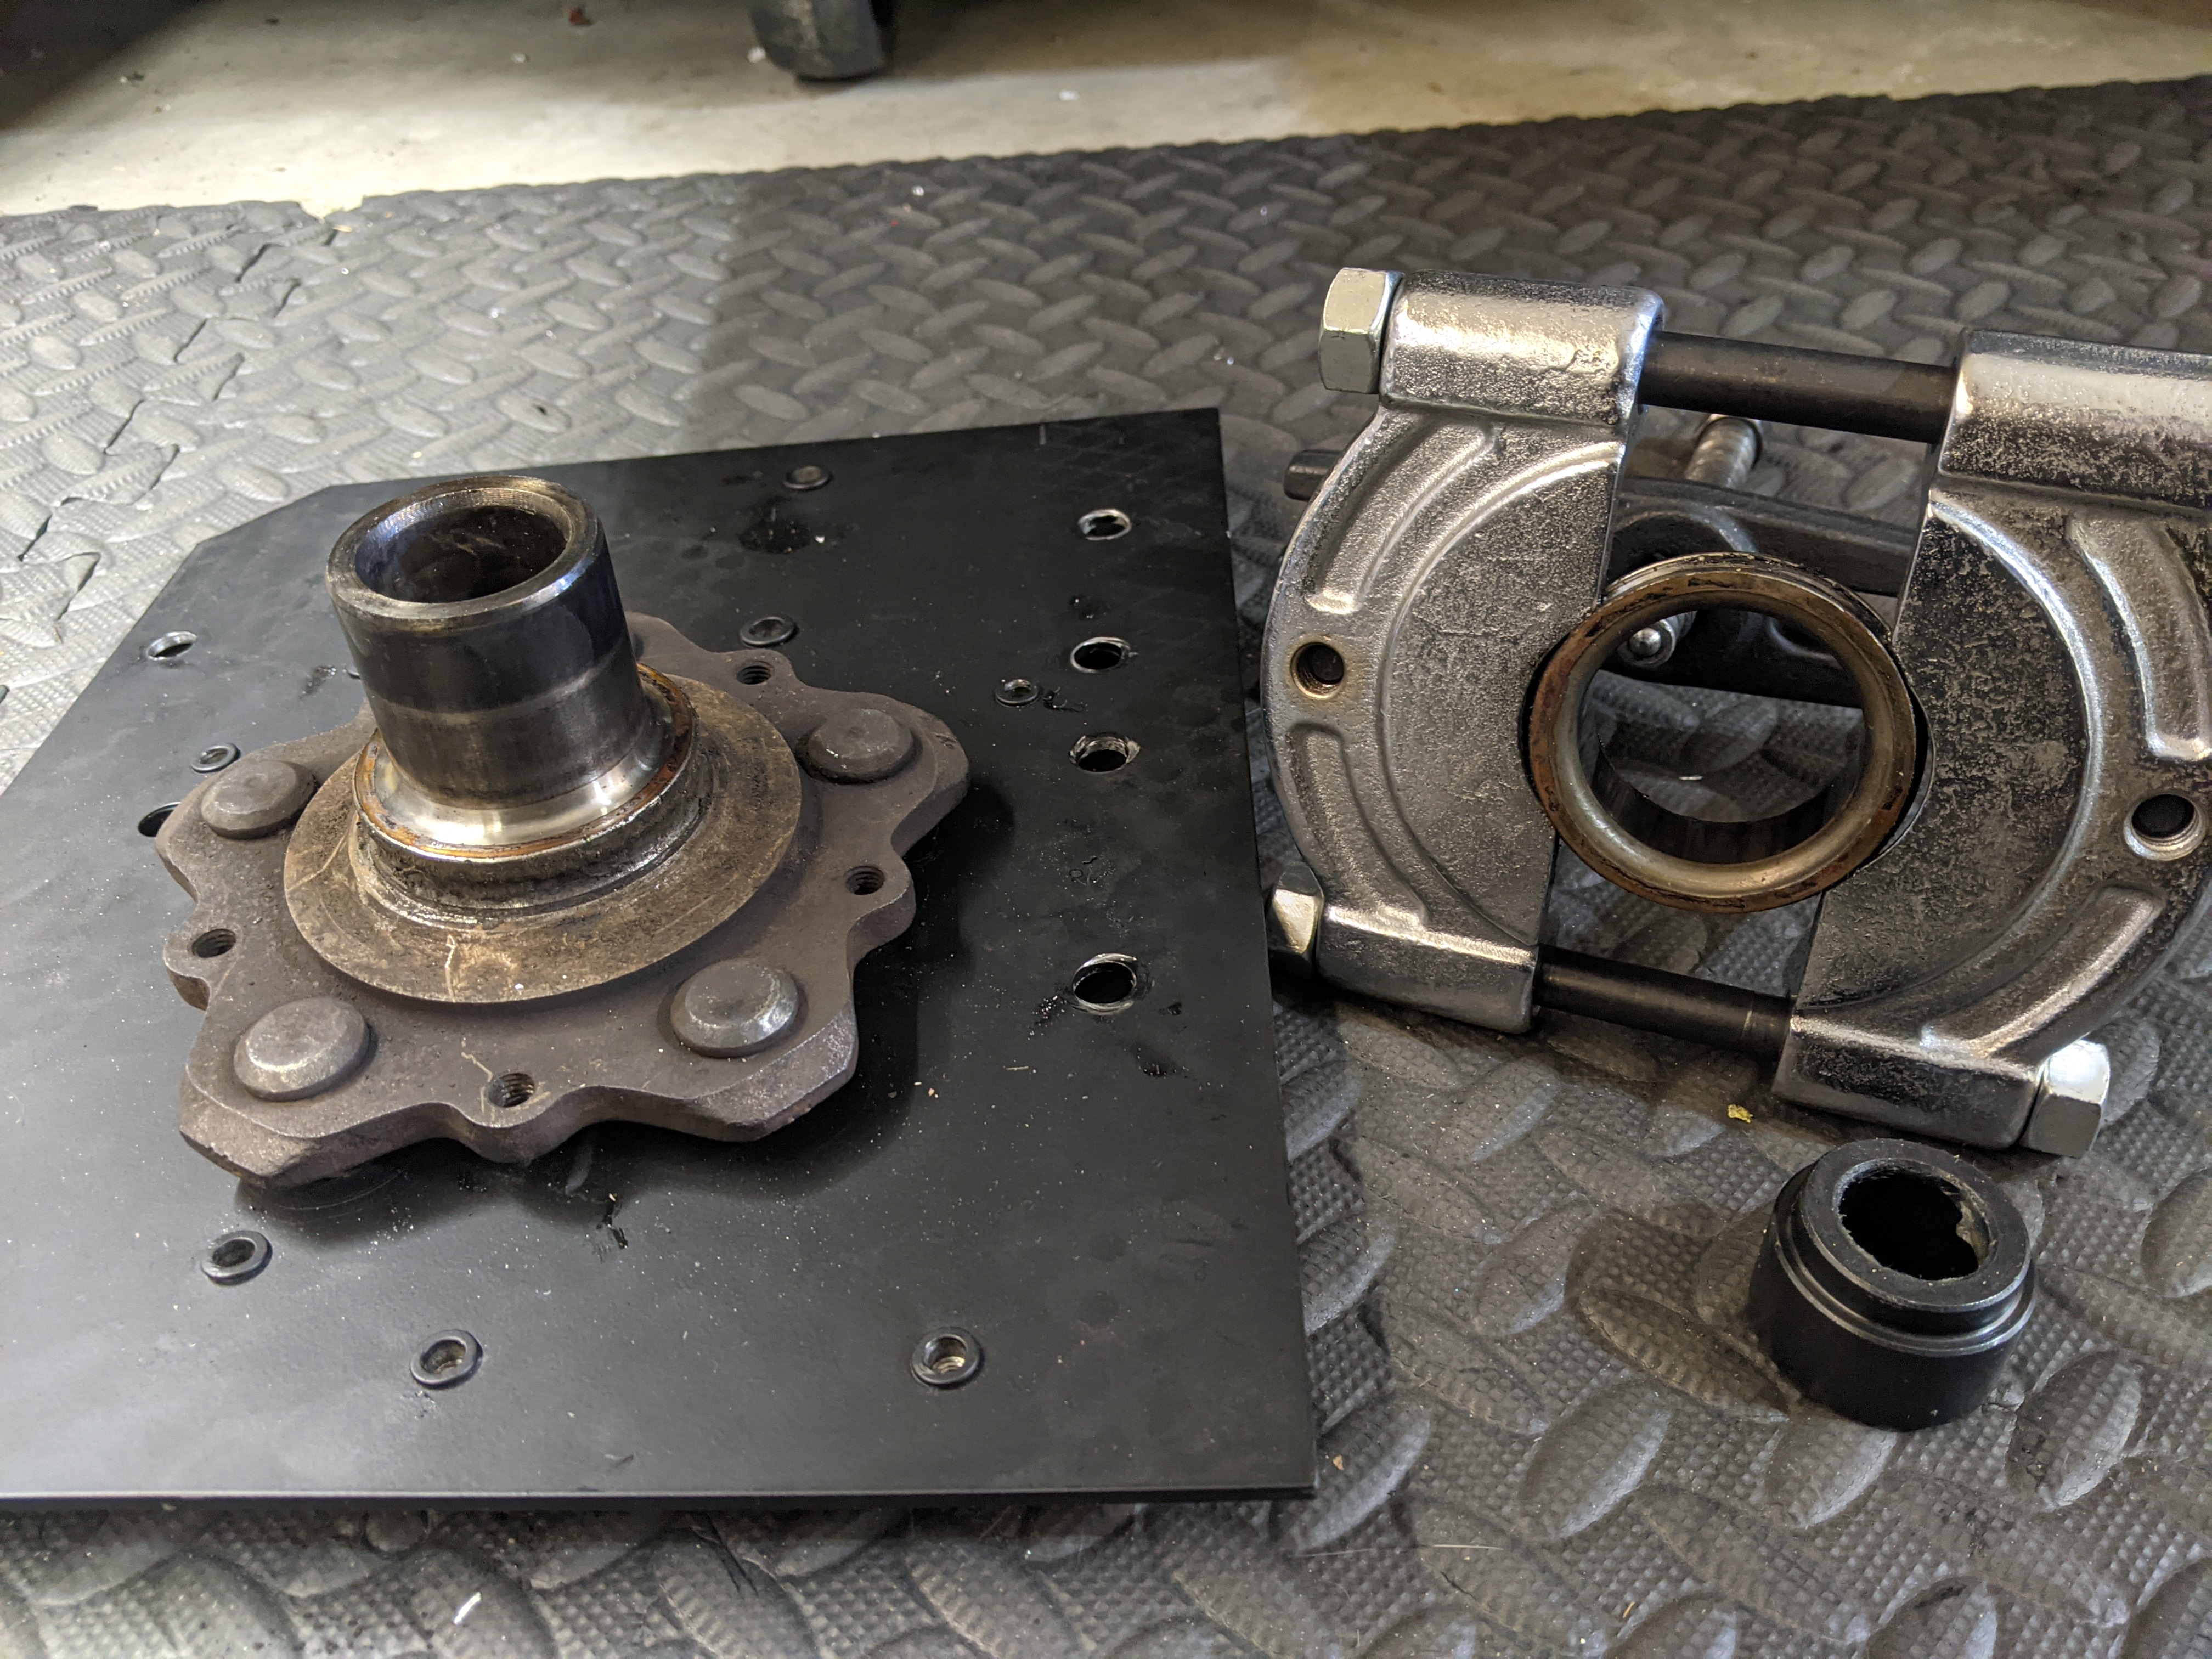
Happy new years! We are still progressing right along with the suspension overhaul. It was becoming increasingly expensive to buy all new bolts and misc hardware for everything. I picked up an ultrasonic parts washer to allow me to reuse a lot of the hardware I have. So far, it�s worked incredibly well. It�s not brand spanking new incredibly well, but it�s in good enough territory that it won�t throw my OCD off. Bene hard at work on getting things ready for the suspension to go back on the car. Got most of it put together and am currently waiting on the diff cover and transmission stuff to come back from powder. I�ve taken the bellhousing and a lot of the transmission brackets over to powder. In addition, I�ve finally gotten the rear hub wheel bearing pressed out. I went ahead and cleaned the assembly up and shot it with clear. I still need to finish the hubs themselves and then they will be ready to go in. The short goal is currently to get the car back on the ground and on dollies so I can fit both the FC and the EK on the right side of the garage. Once that is complete I plan to re-focus back on the wiring and interior finishing (I still need to put back in all the clips etc).
Until next time!
Here is the parts cleaner and a before and after
Here is the rear suspension happenings
Here is a few pictures of the transmission

Here is the rear wheel bearing progress
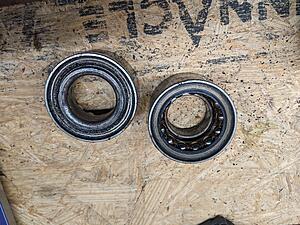

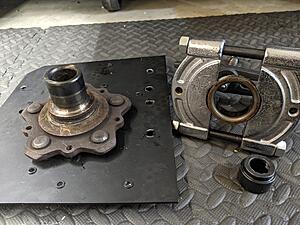
Happy new years! We are still progressing right along with the suspension overhaul. It was becoming increasingly expensive to buy all new bolts and misc hardware for everything. I picked up an ultrasonic parts washer to allow me to reuse a lot of the hardware I have. So far, it�s worked incredibly well. It�s not brand spanking new incredibly well, but it�s in good enough territory that it won�t throw my OCD off. Bene hard at work on getting things ready for the suspension to go back on the car. Got most of it put together and am currently waiting on the diff cover and transmission stuff to come back from powder. I�ve taken the bellhousing and a lot of the transmission brackets over to powder. In addition, I�ve finally gotten the rear hub wheel bearing pressed out. I went ahead and cleaned the assembly up and shot it with clear. I still need to finish the hubs themselves and then they will be ready to go in. The short goal is currently to get the car back on the ground and on dollies so I can fit both the FC and the EK on the right side of the garage. Once that is complete I plan to re-focus back on the wiring and interior finishing (I still need to put back in all the clips etc).
Until next time!
Here is the parts cleaner and a before and after
Here is the rear suspension happenings

Here is a few pictures of the transmission
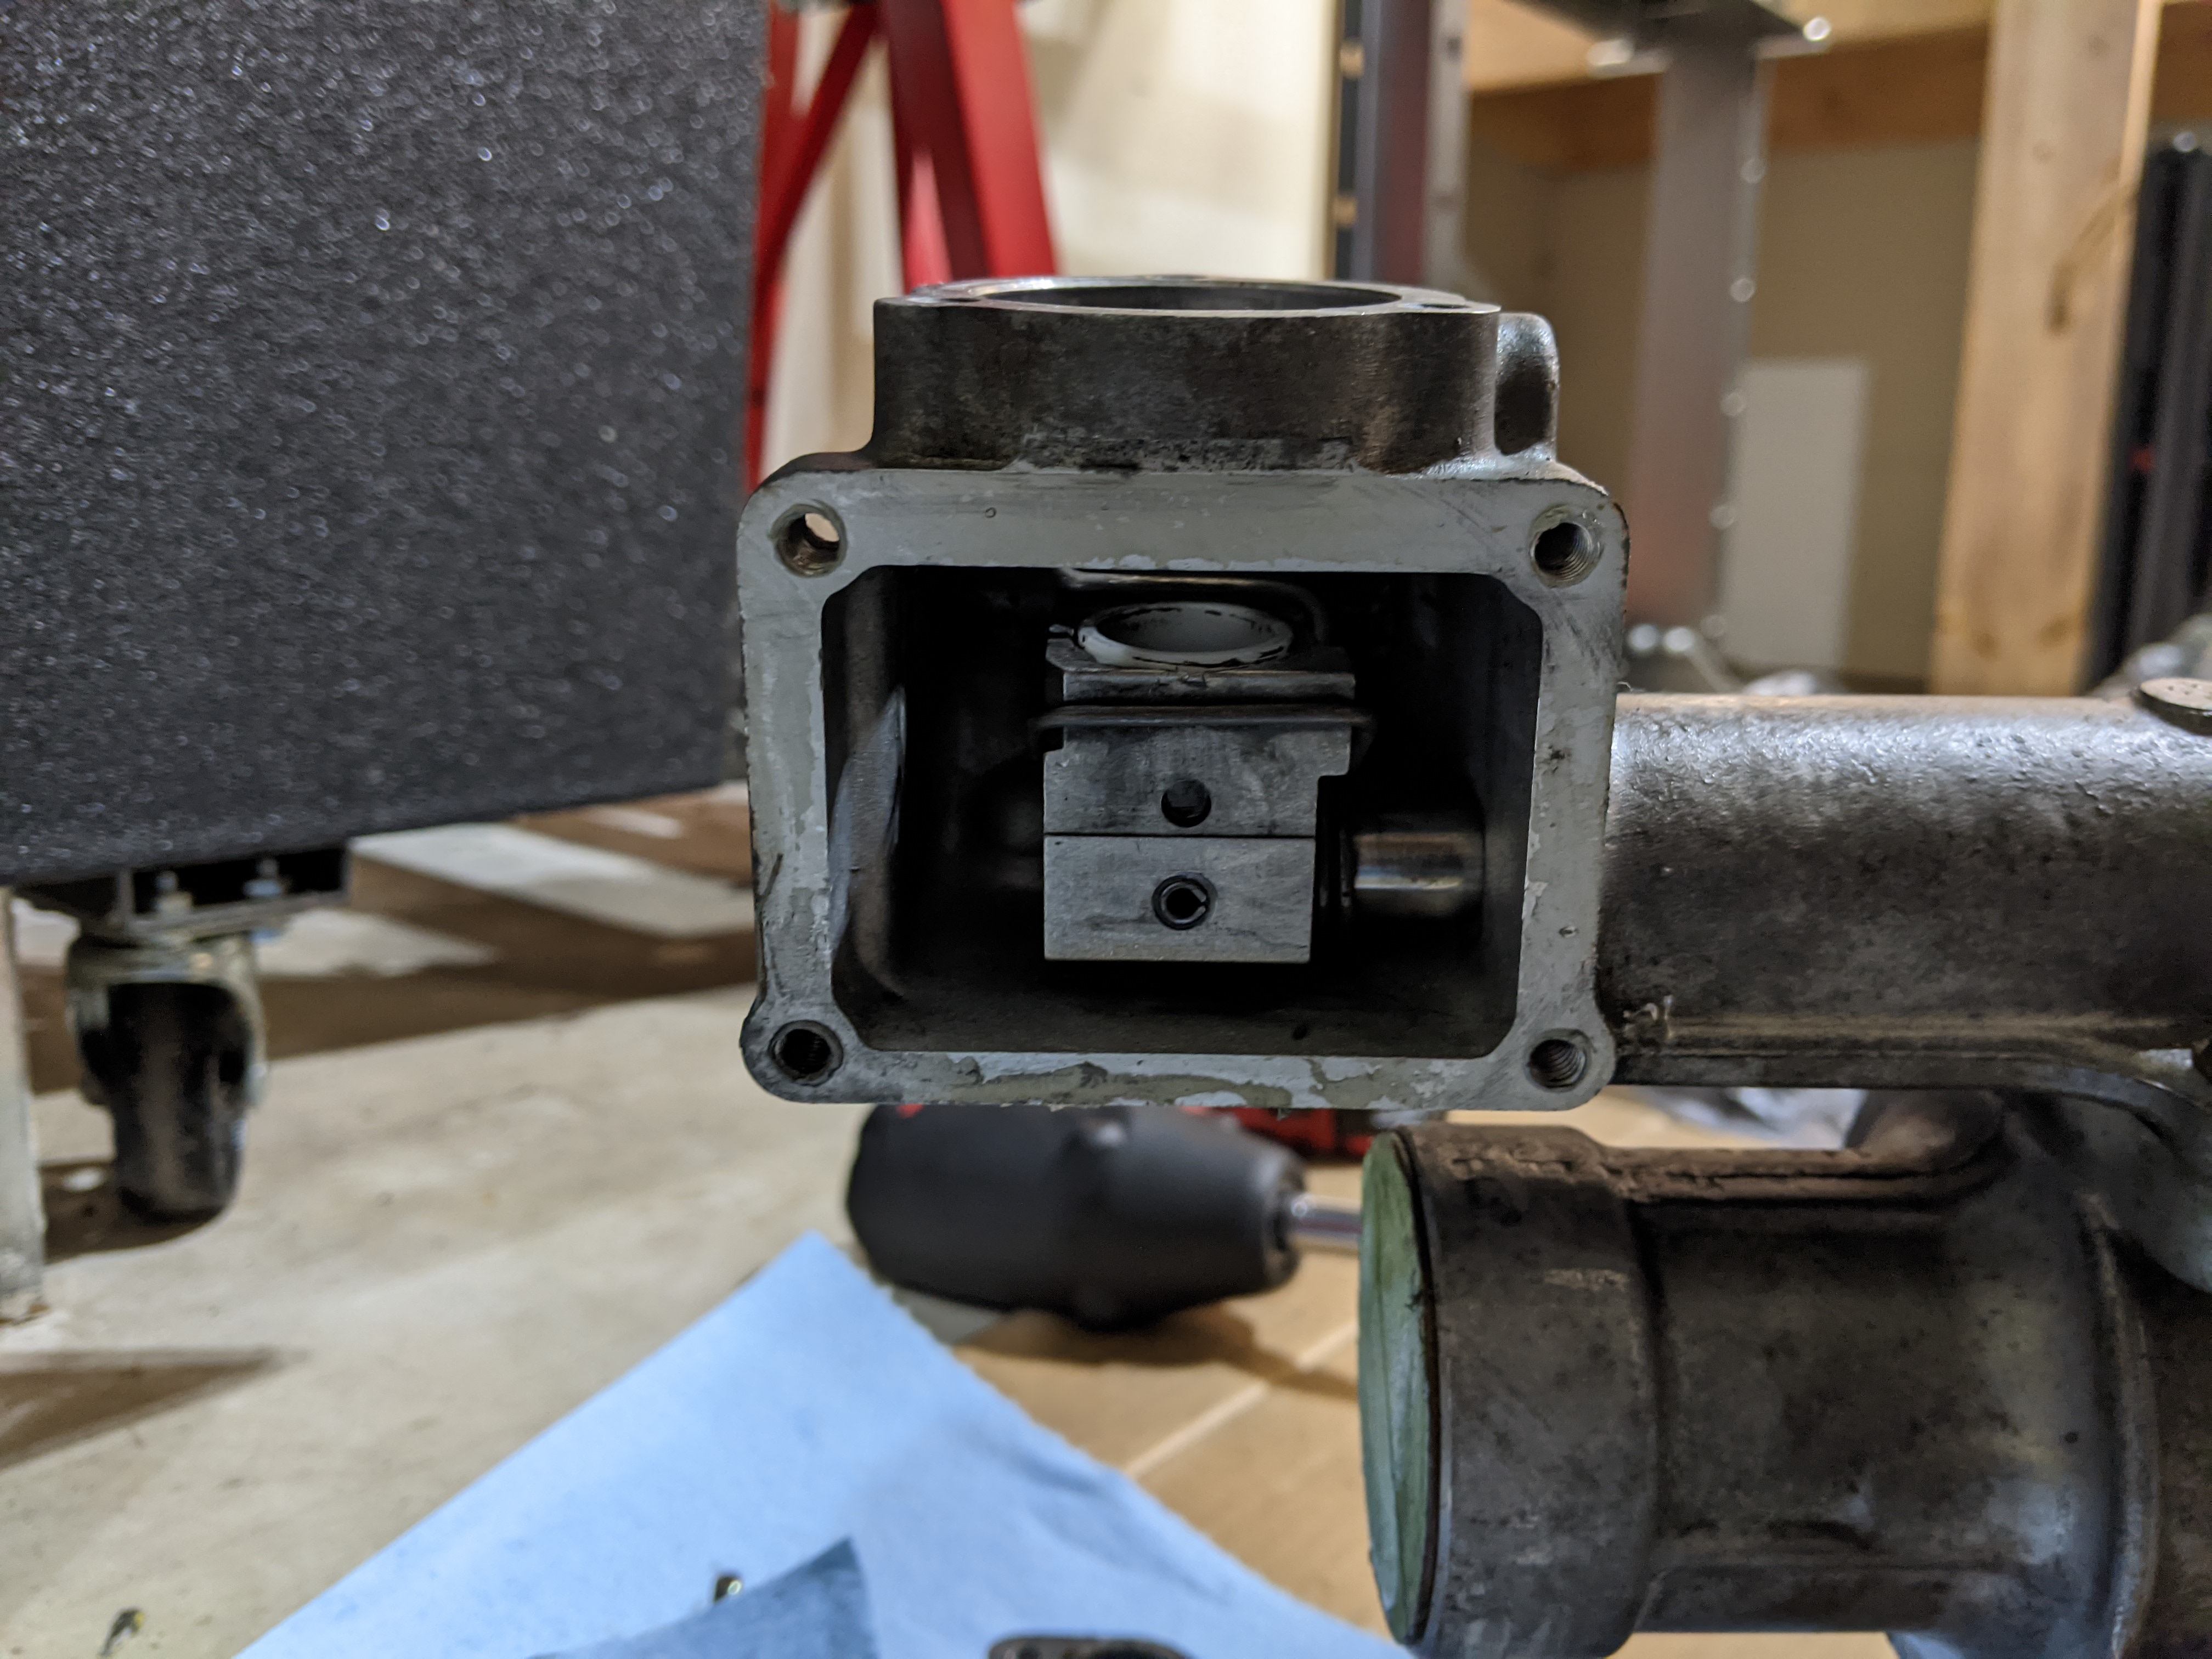
Here is the rear wheel bearing progress

 01-18-22, 04:12 PM
#350
Update 1/18/22
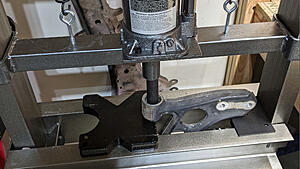
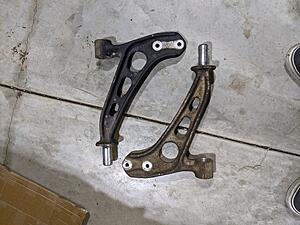
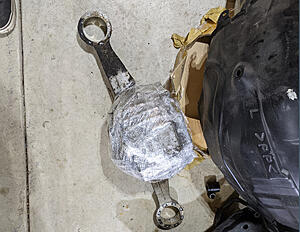
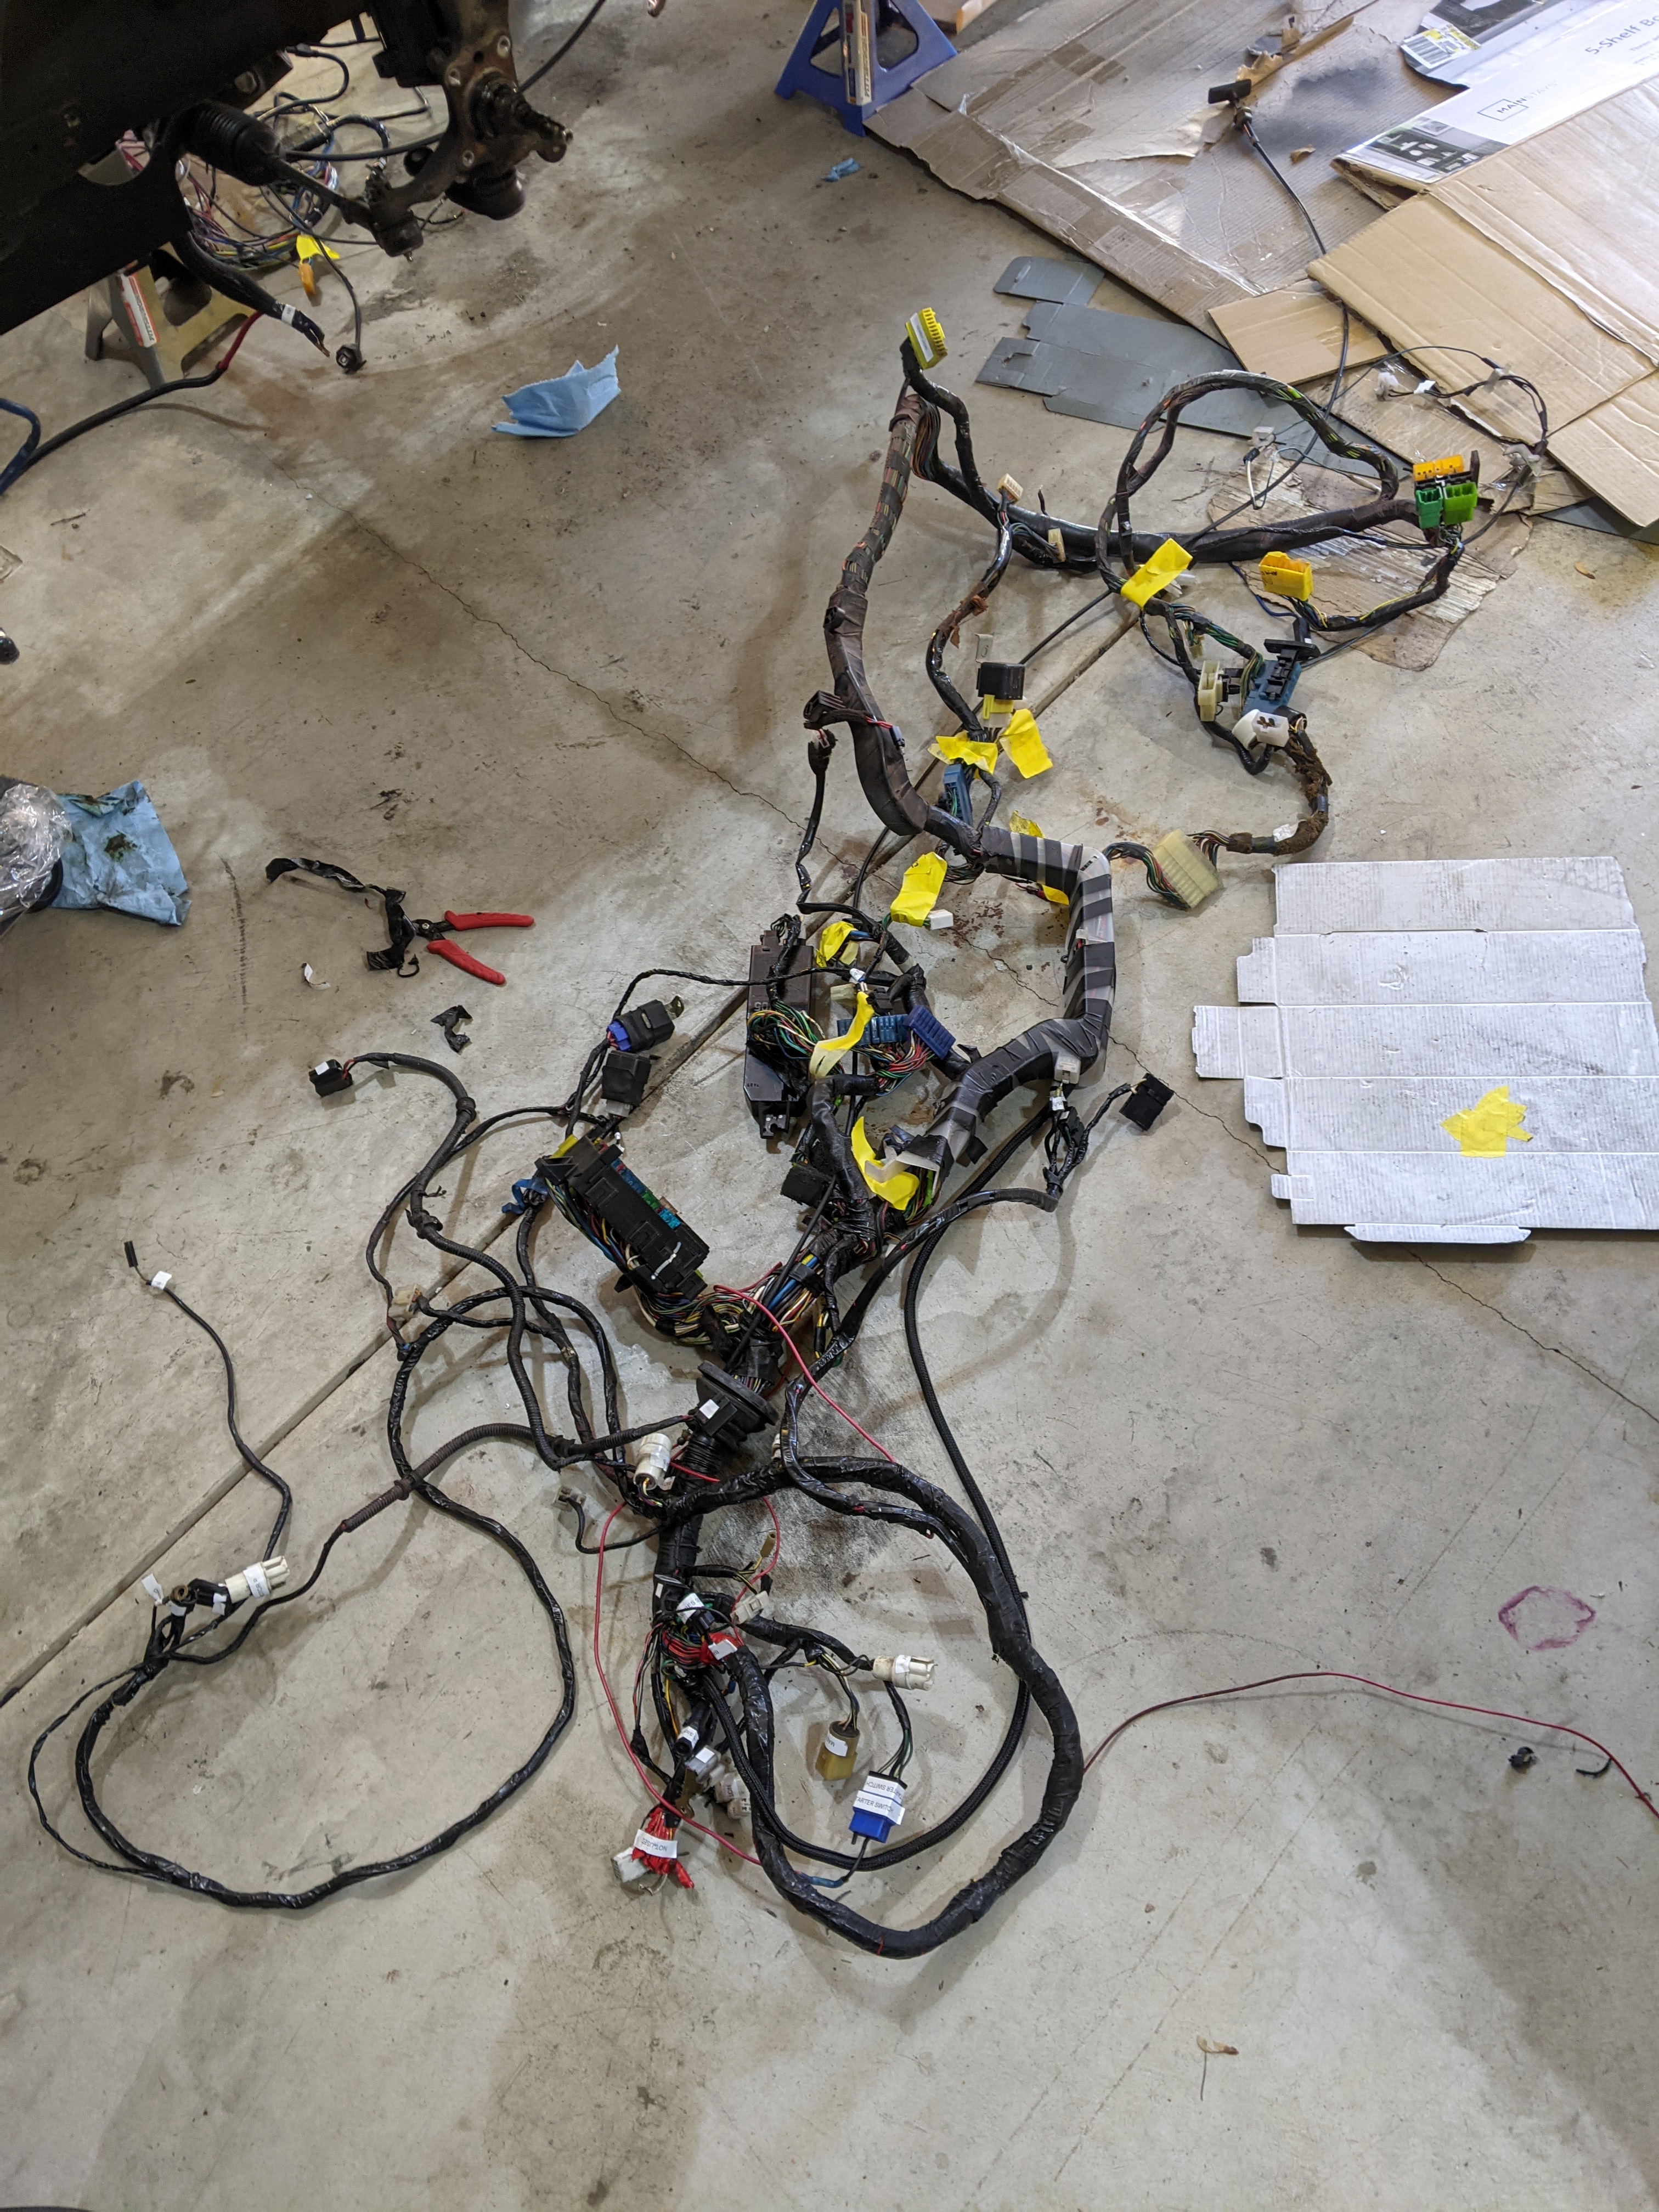
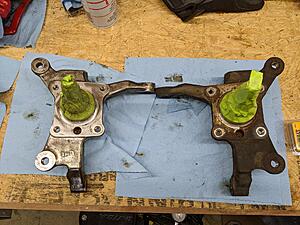
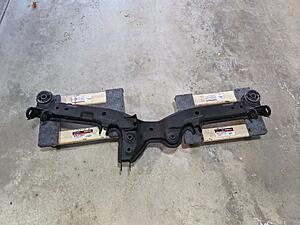
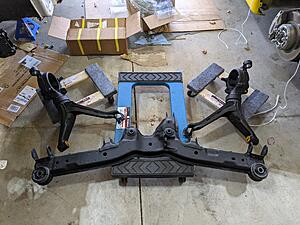
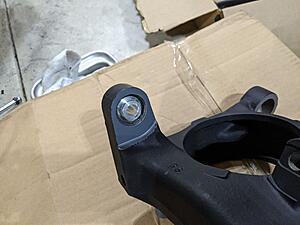
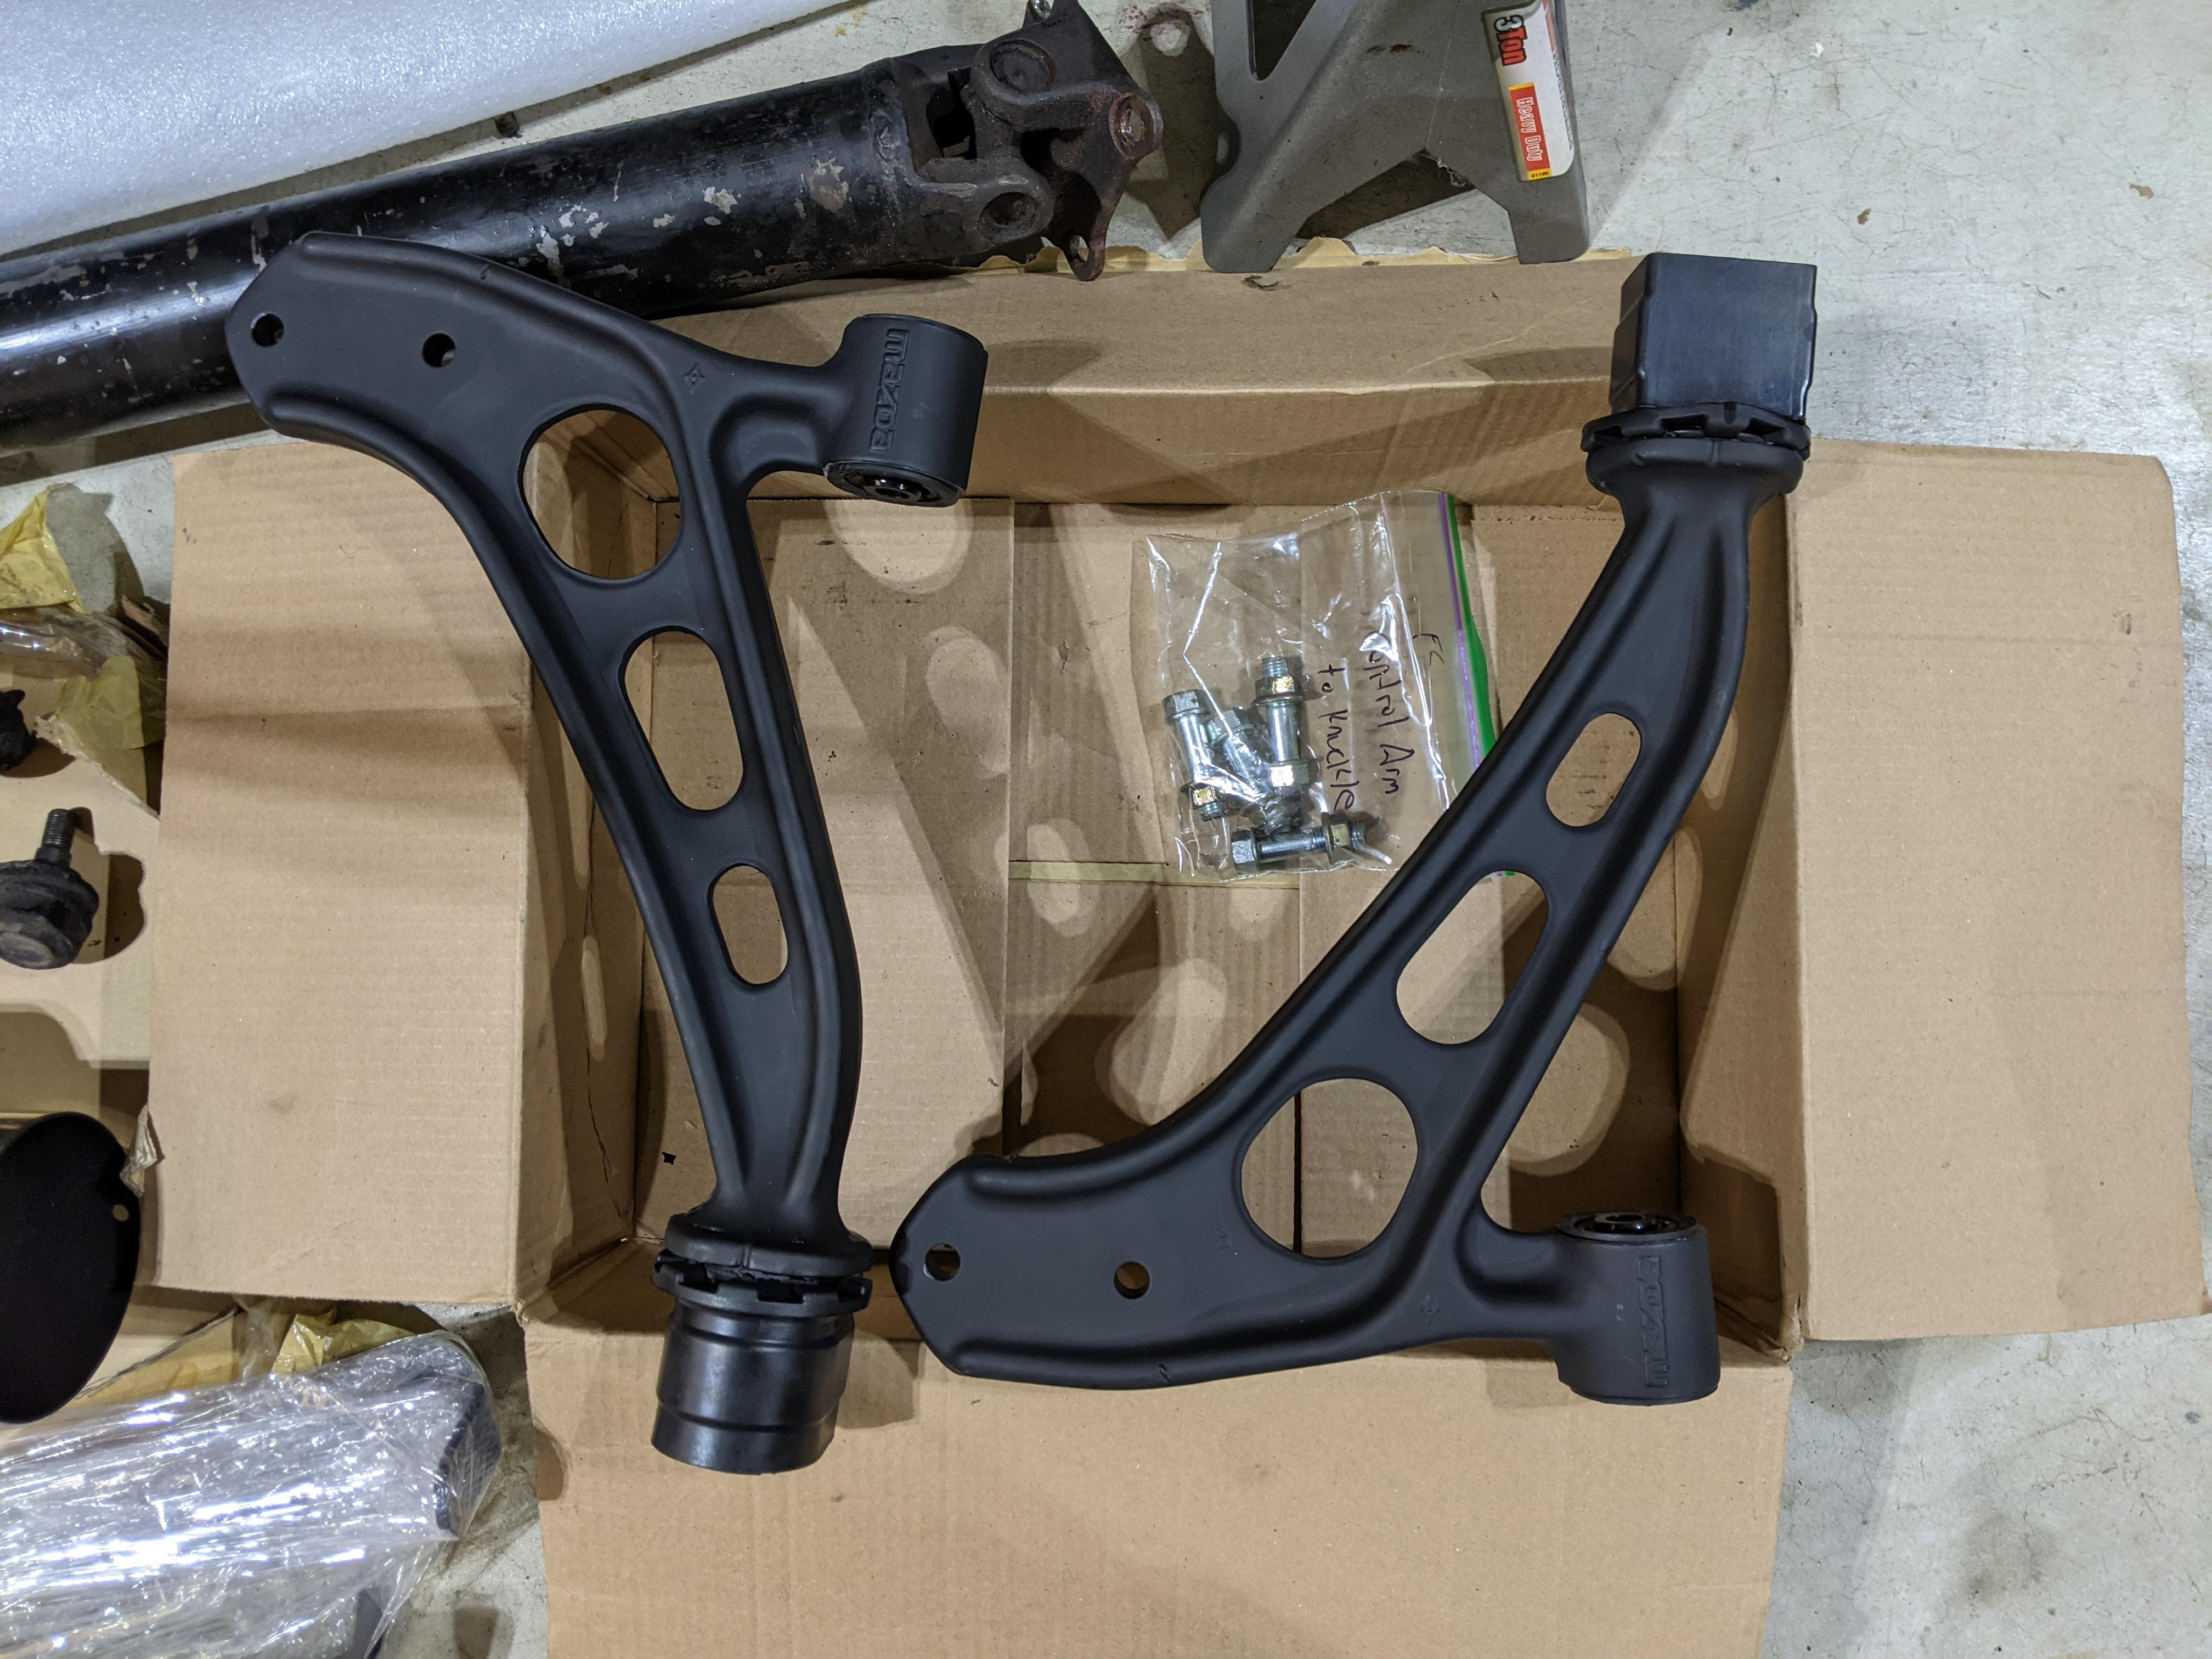
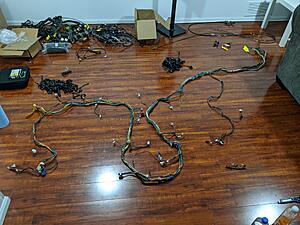
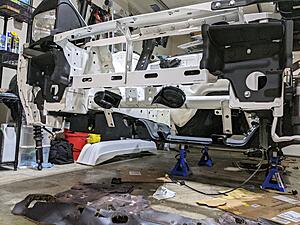
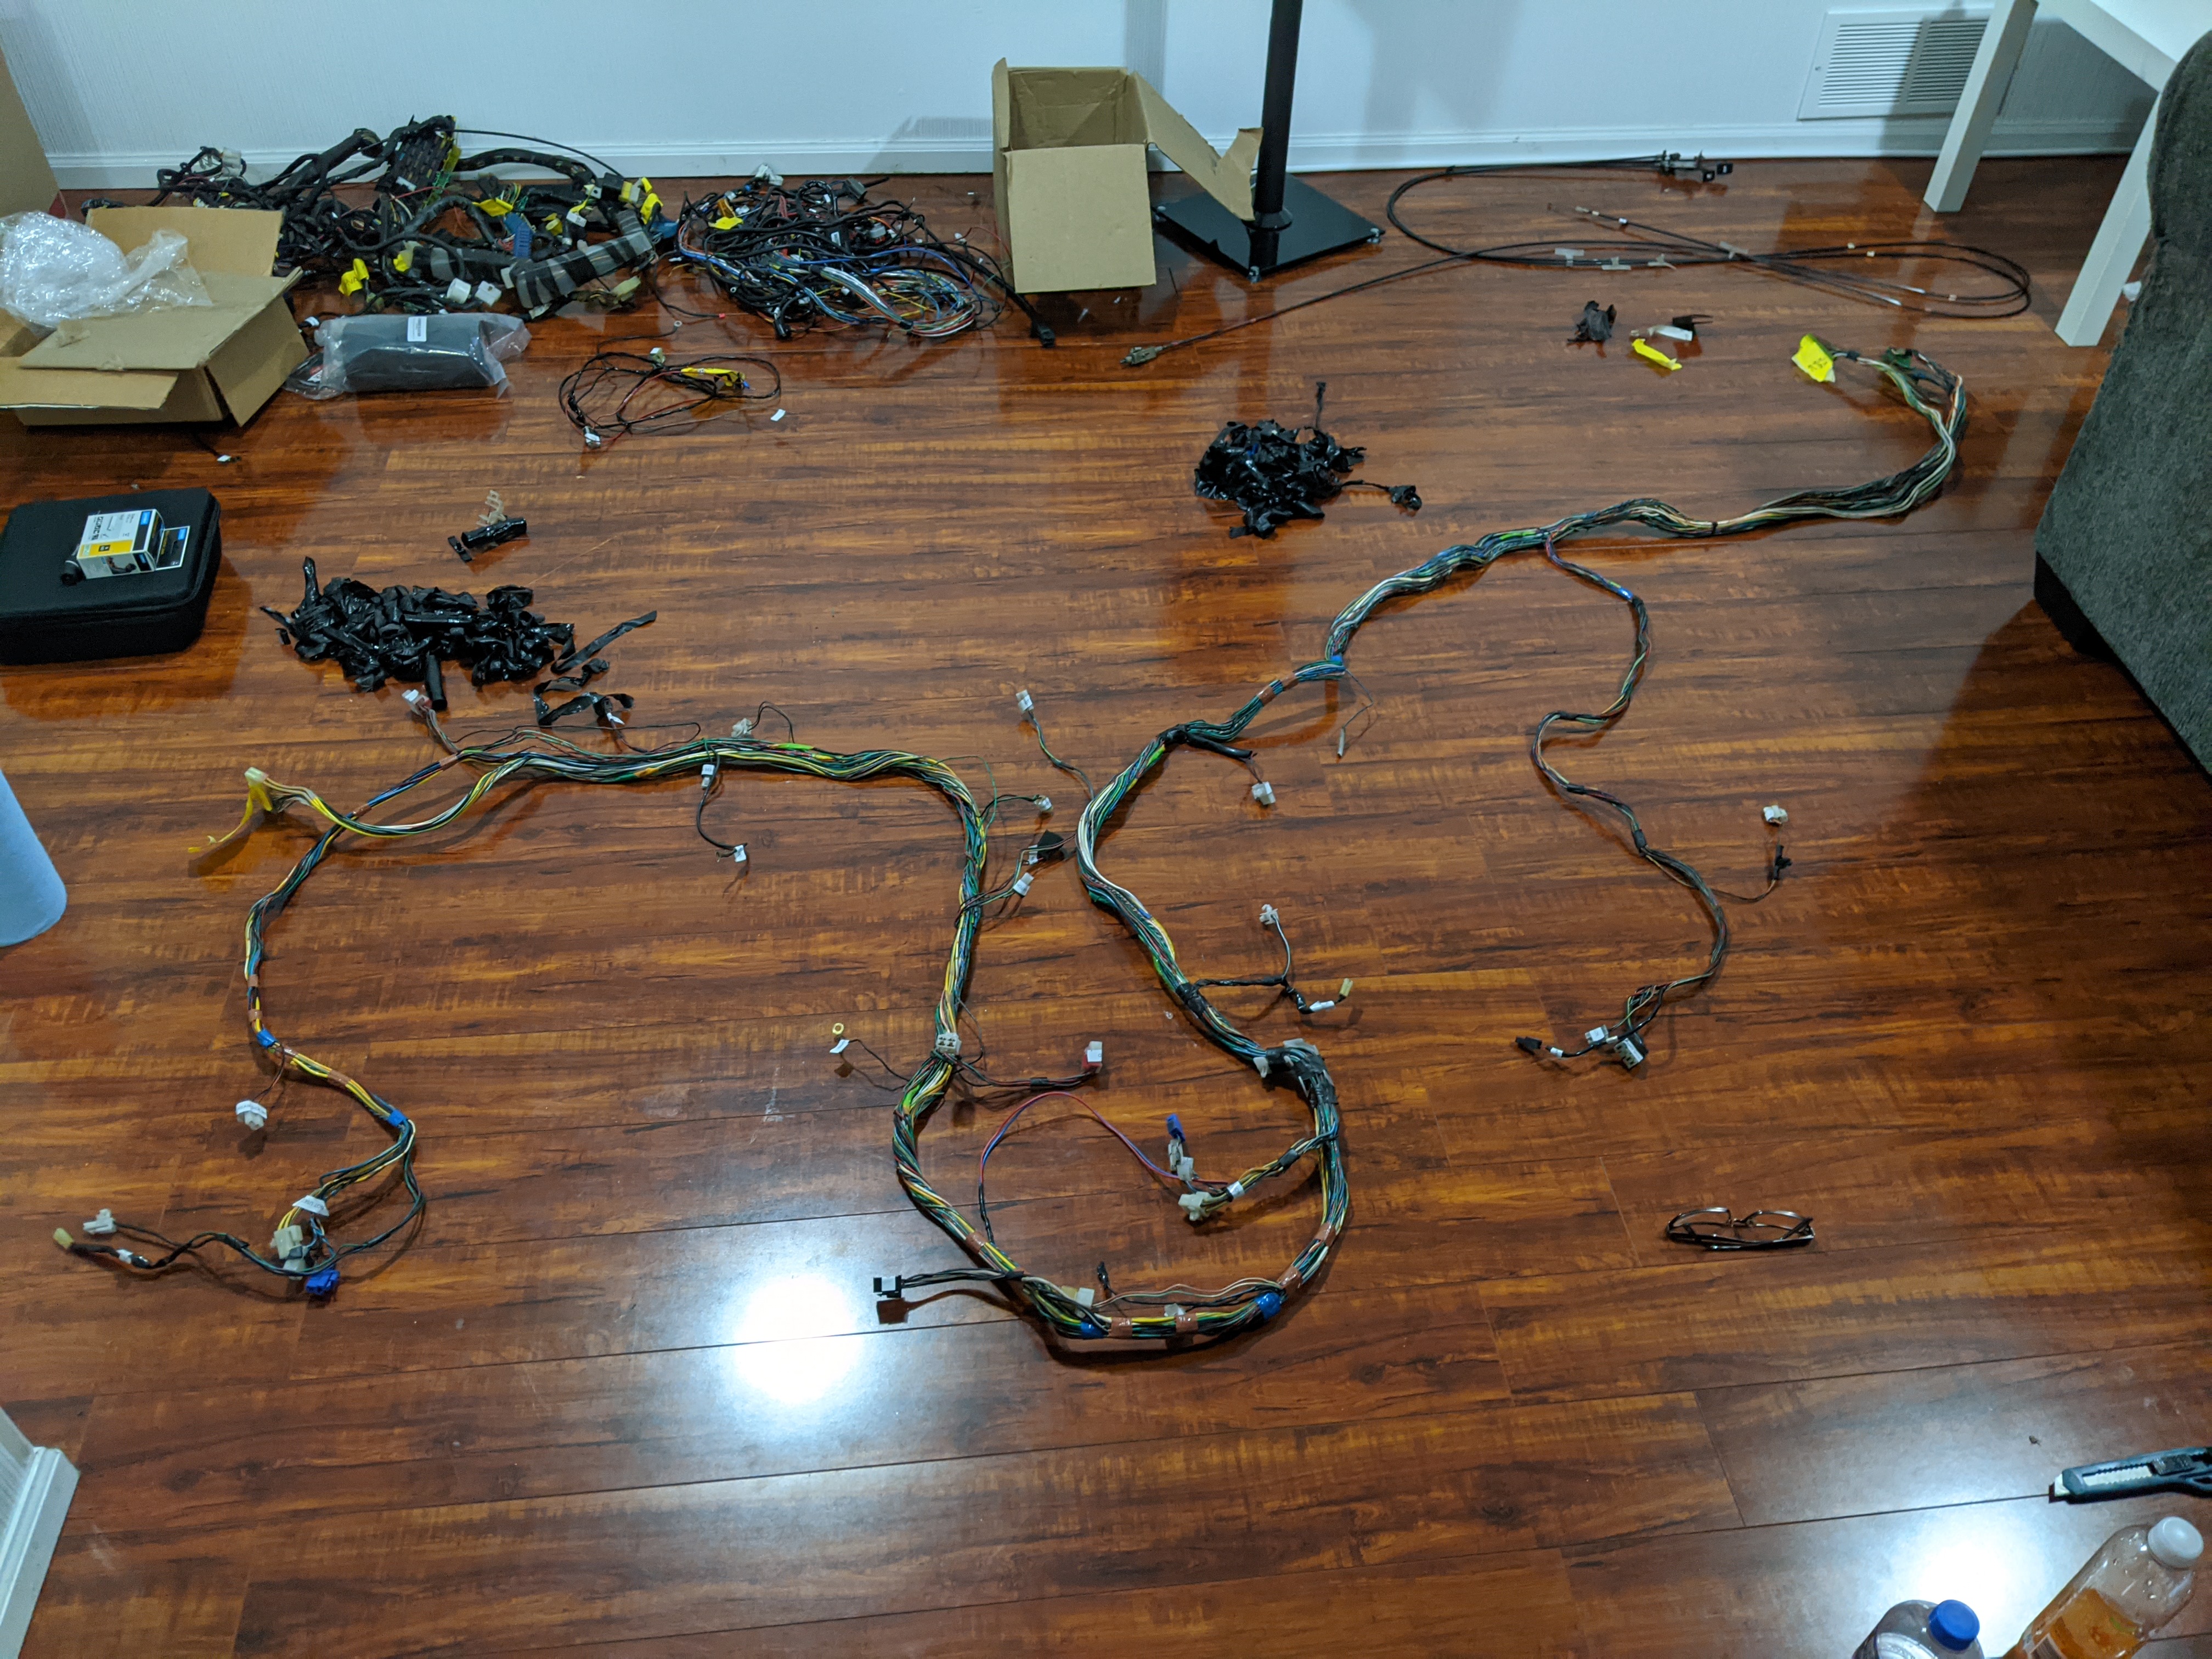
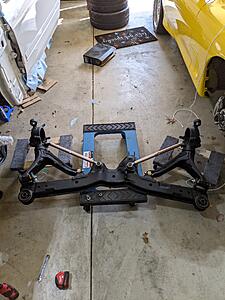
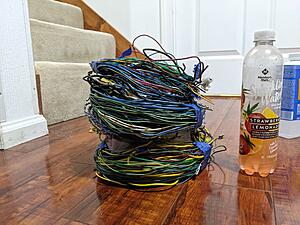
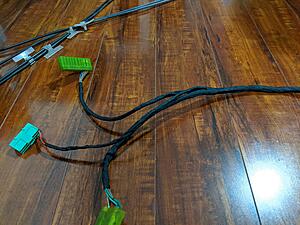
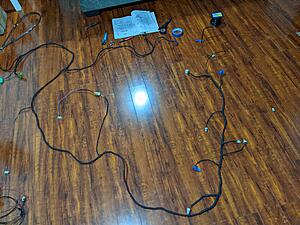
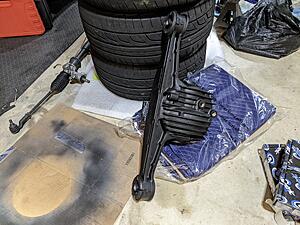
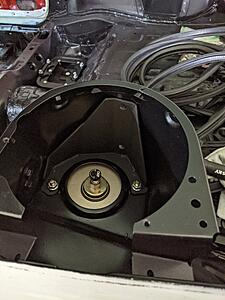
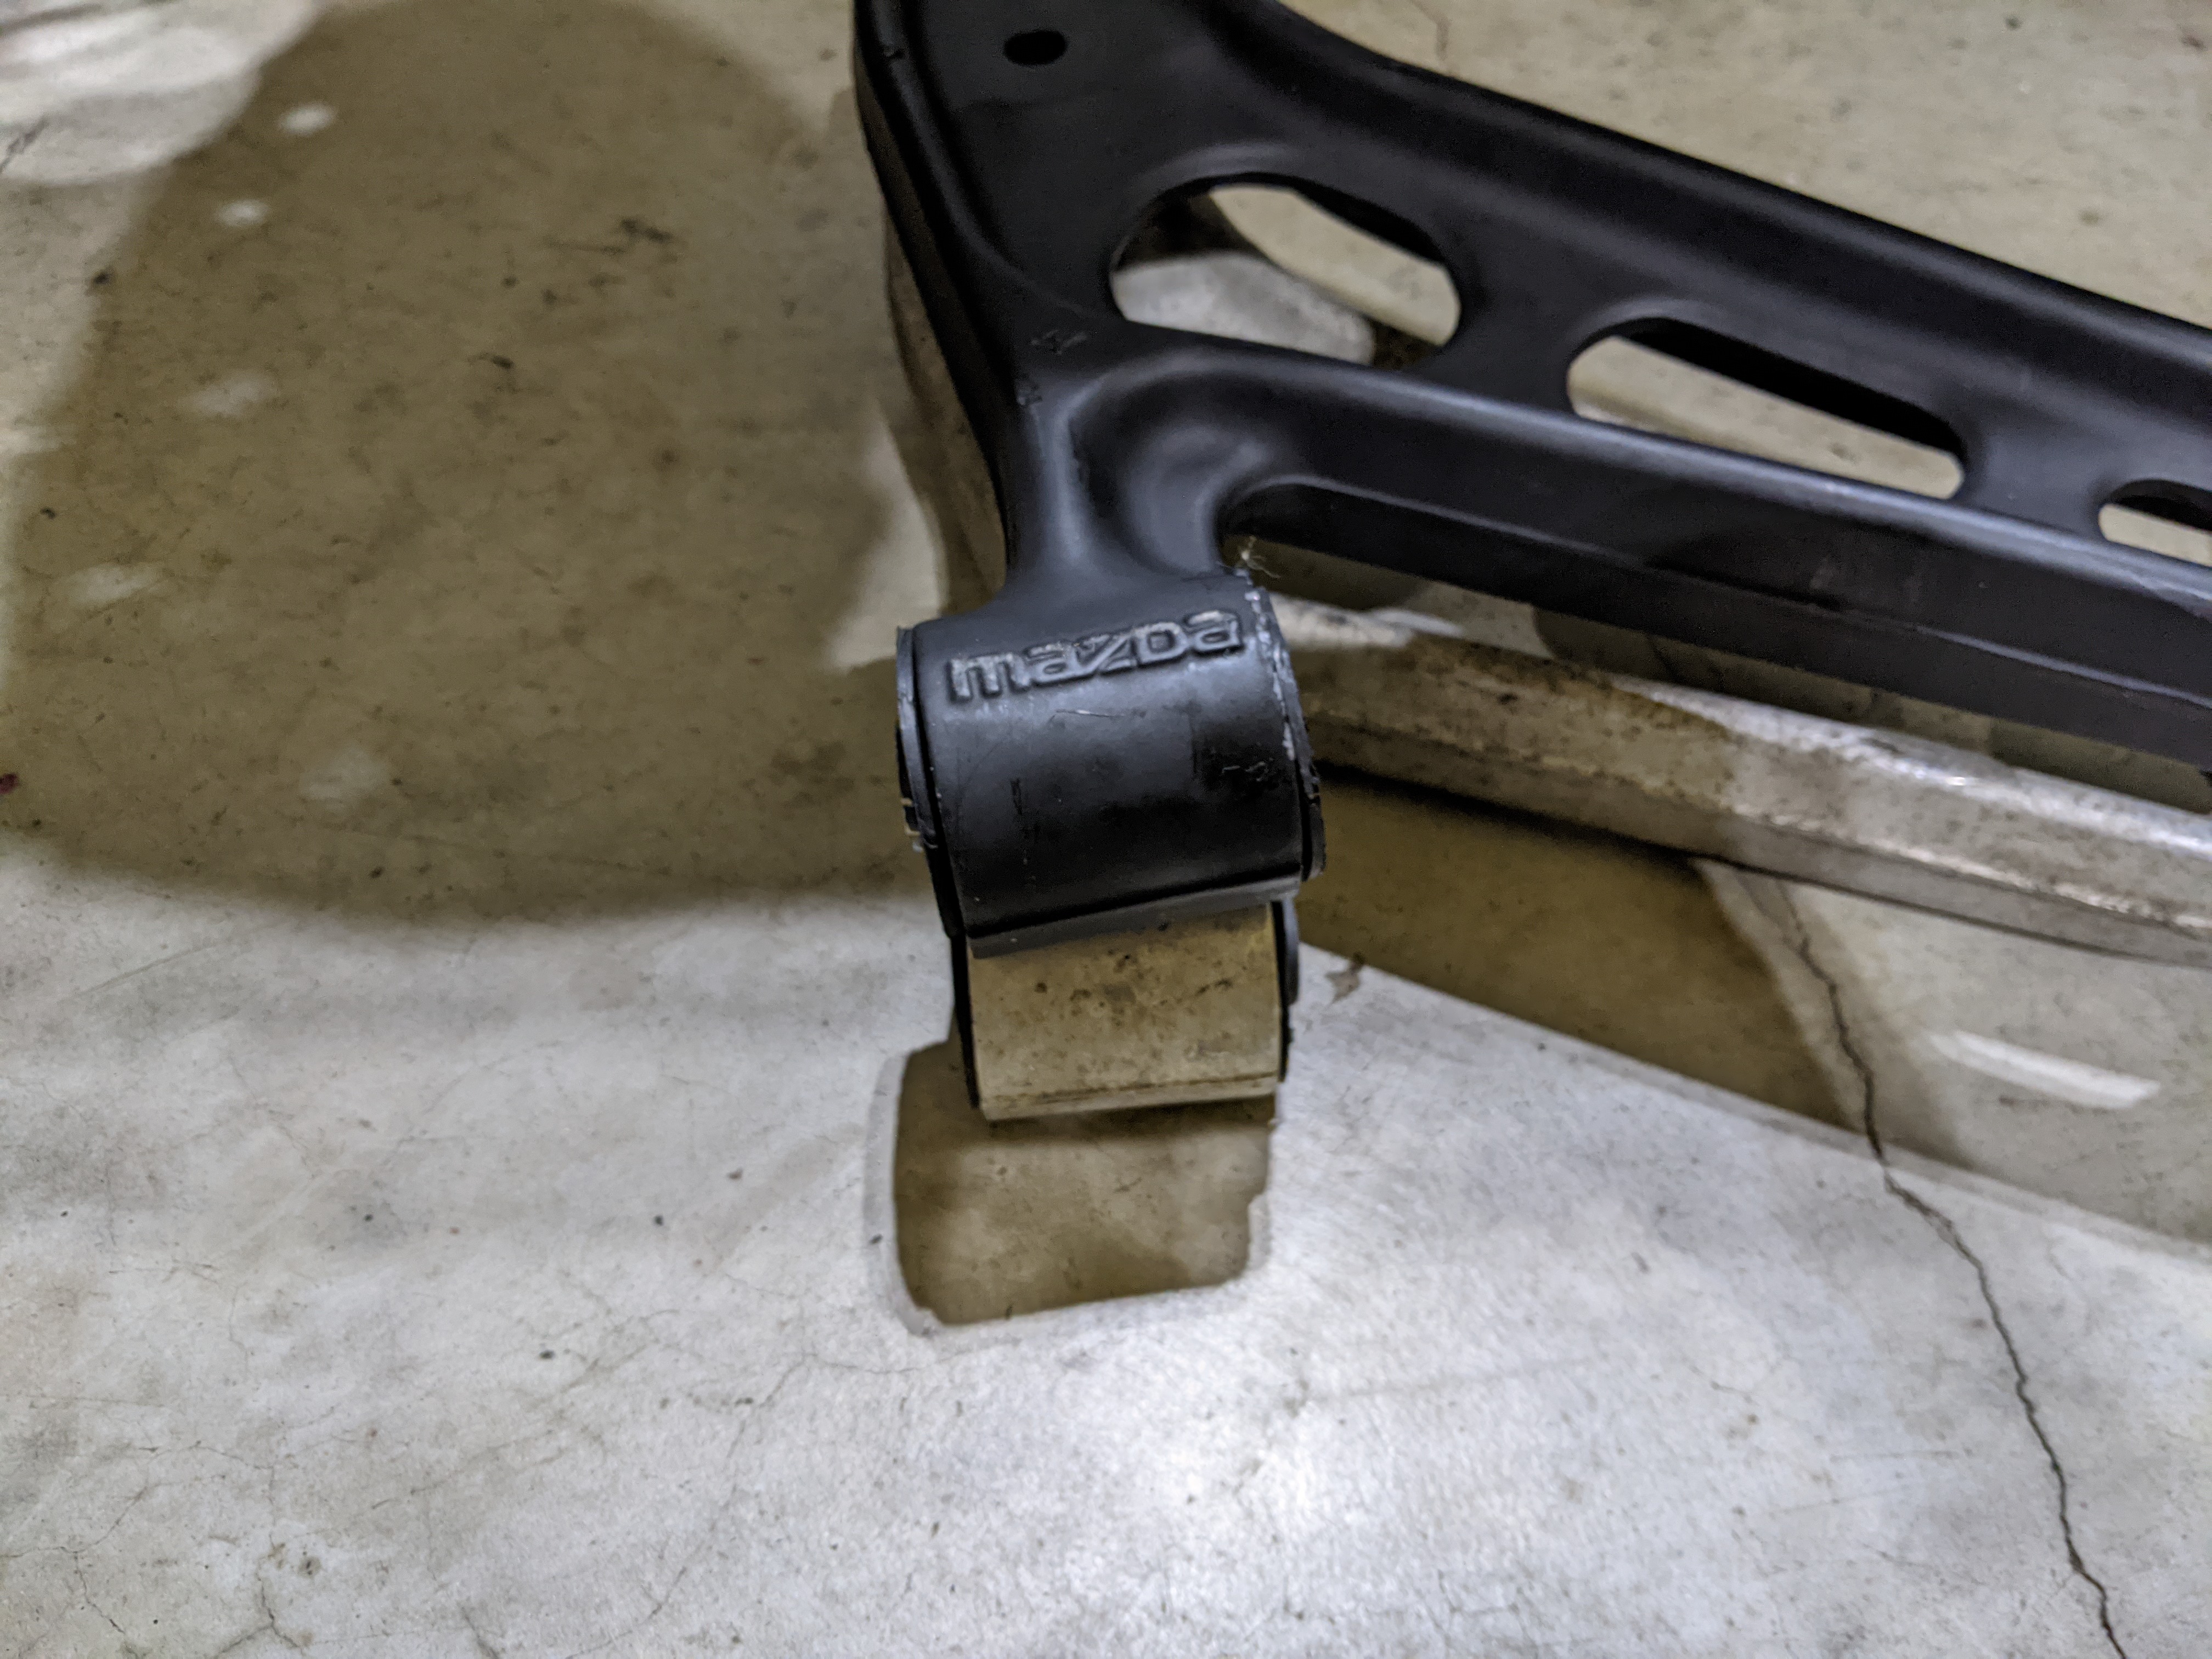
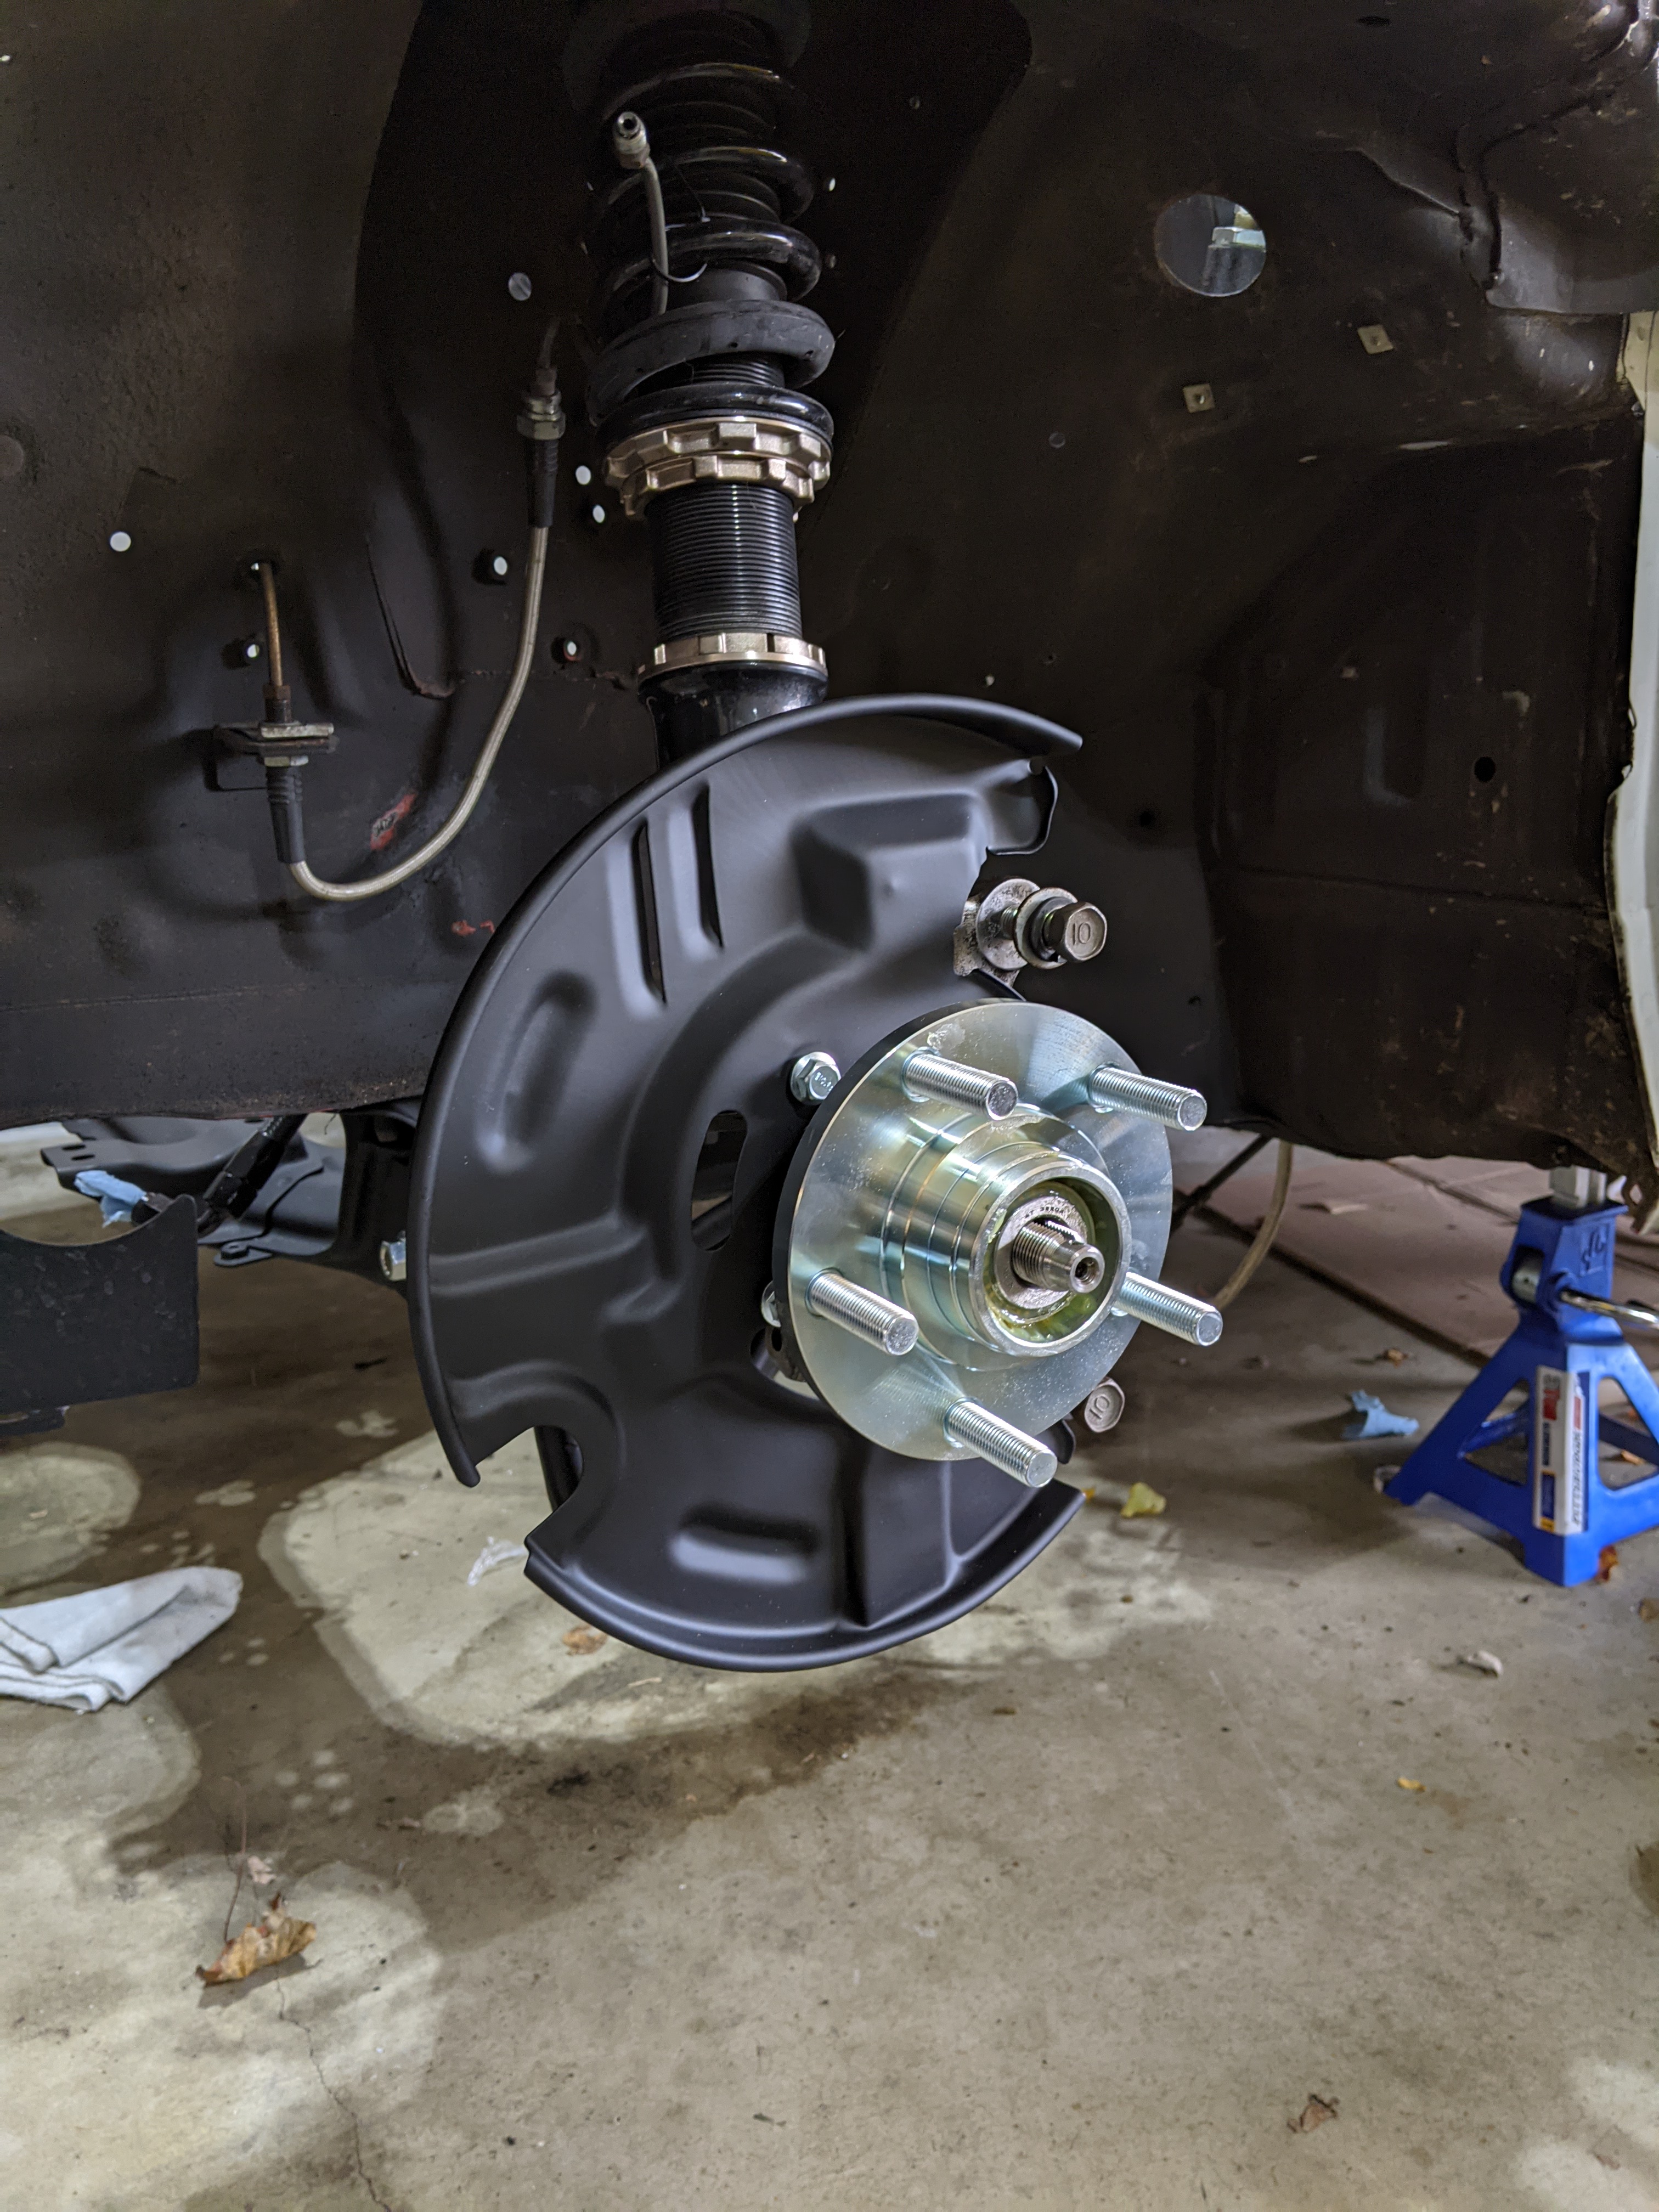
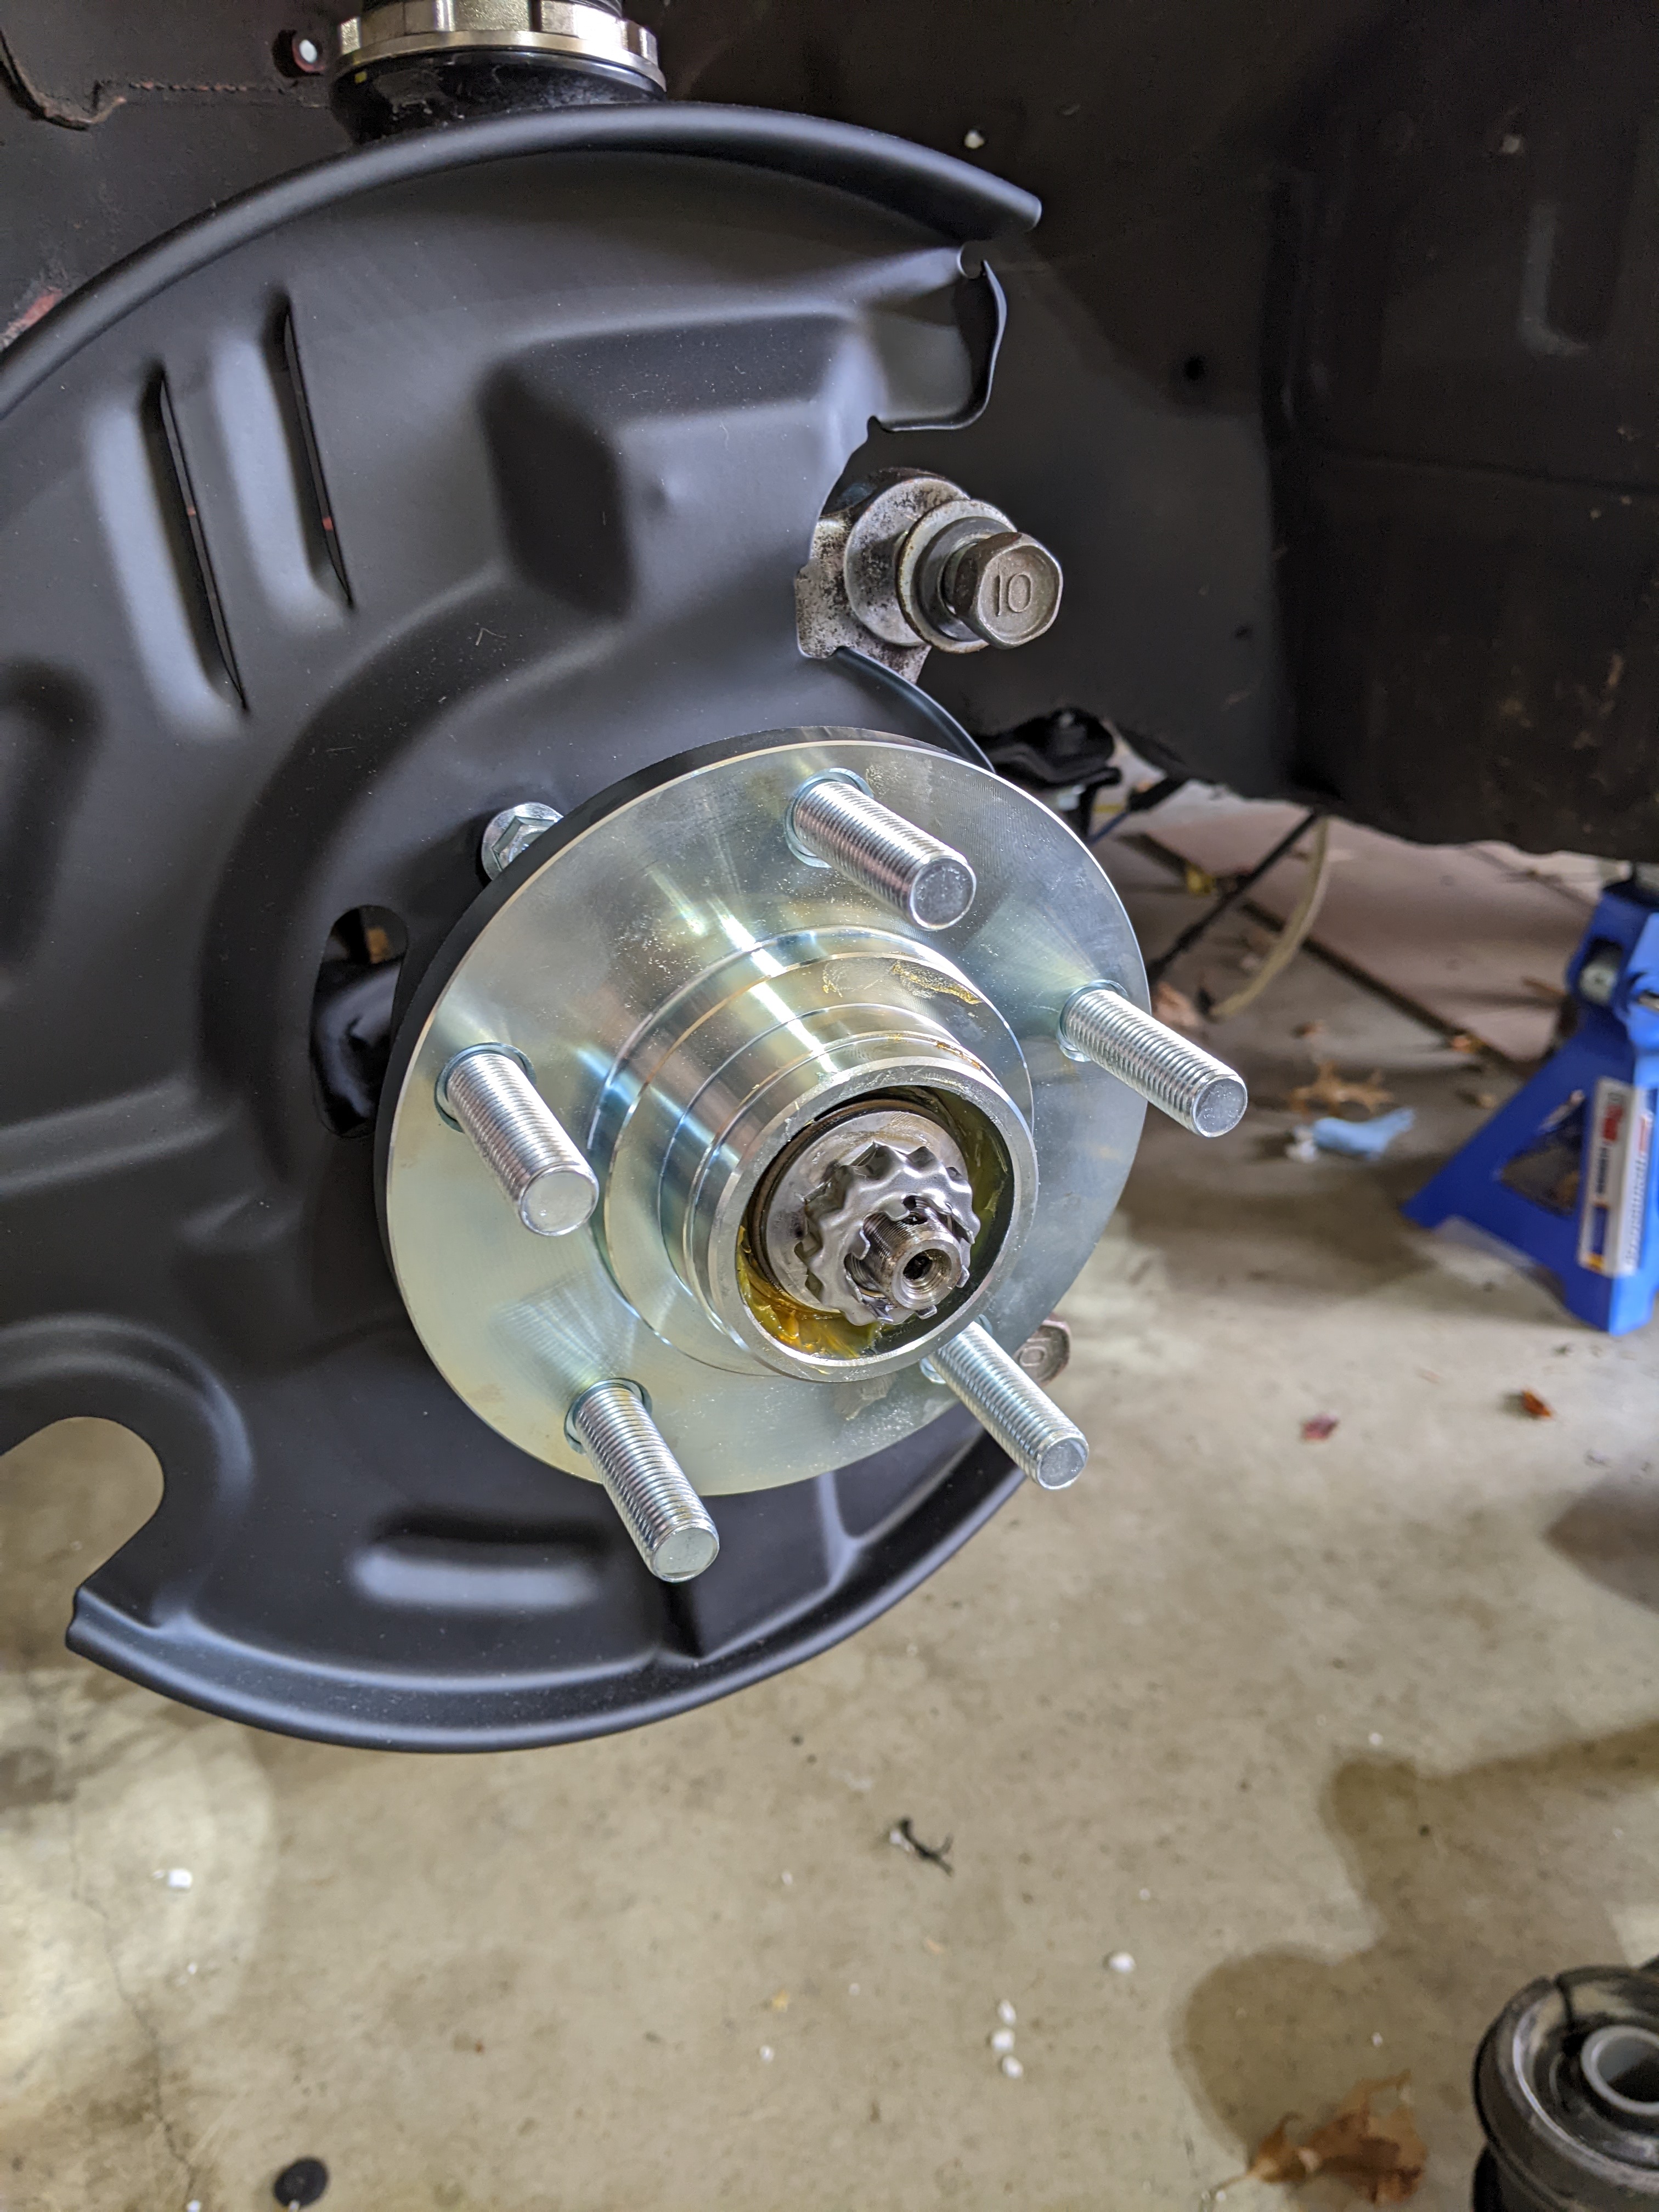
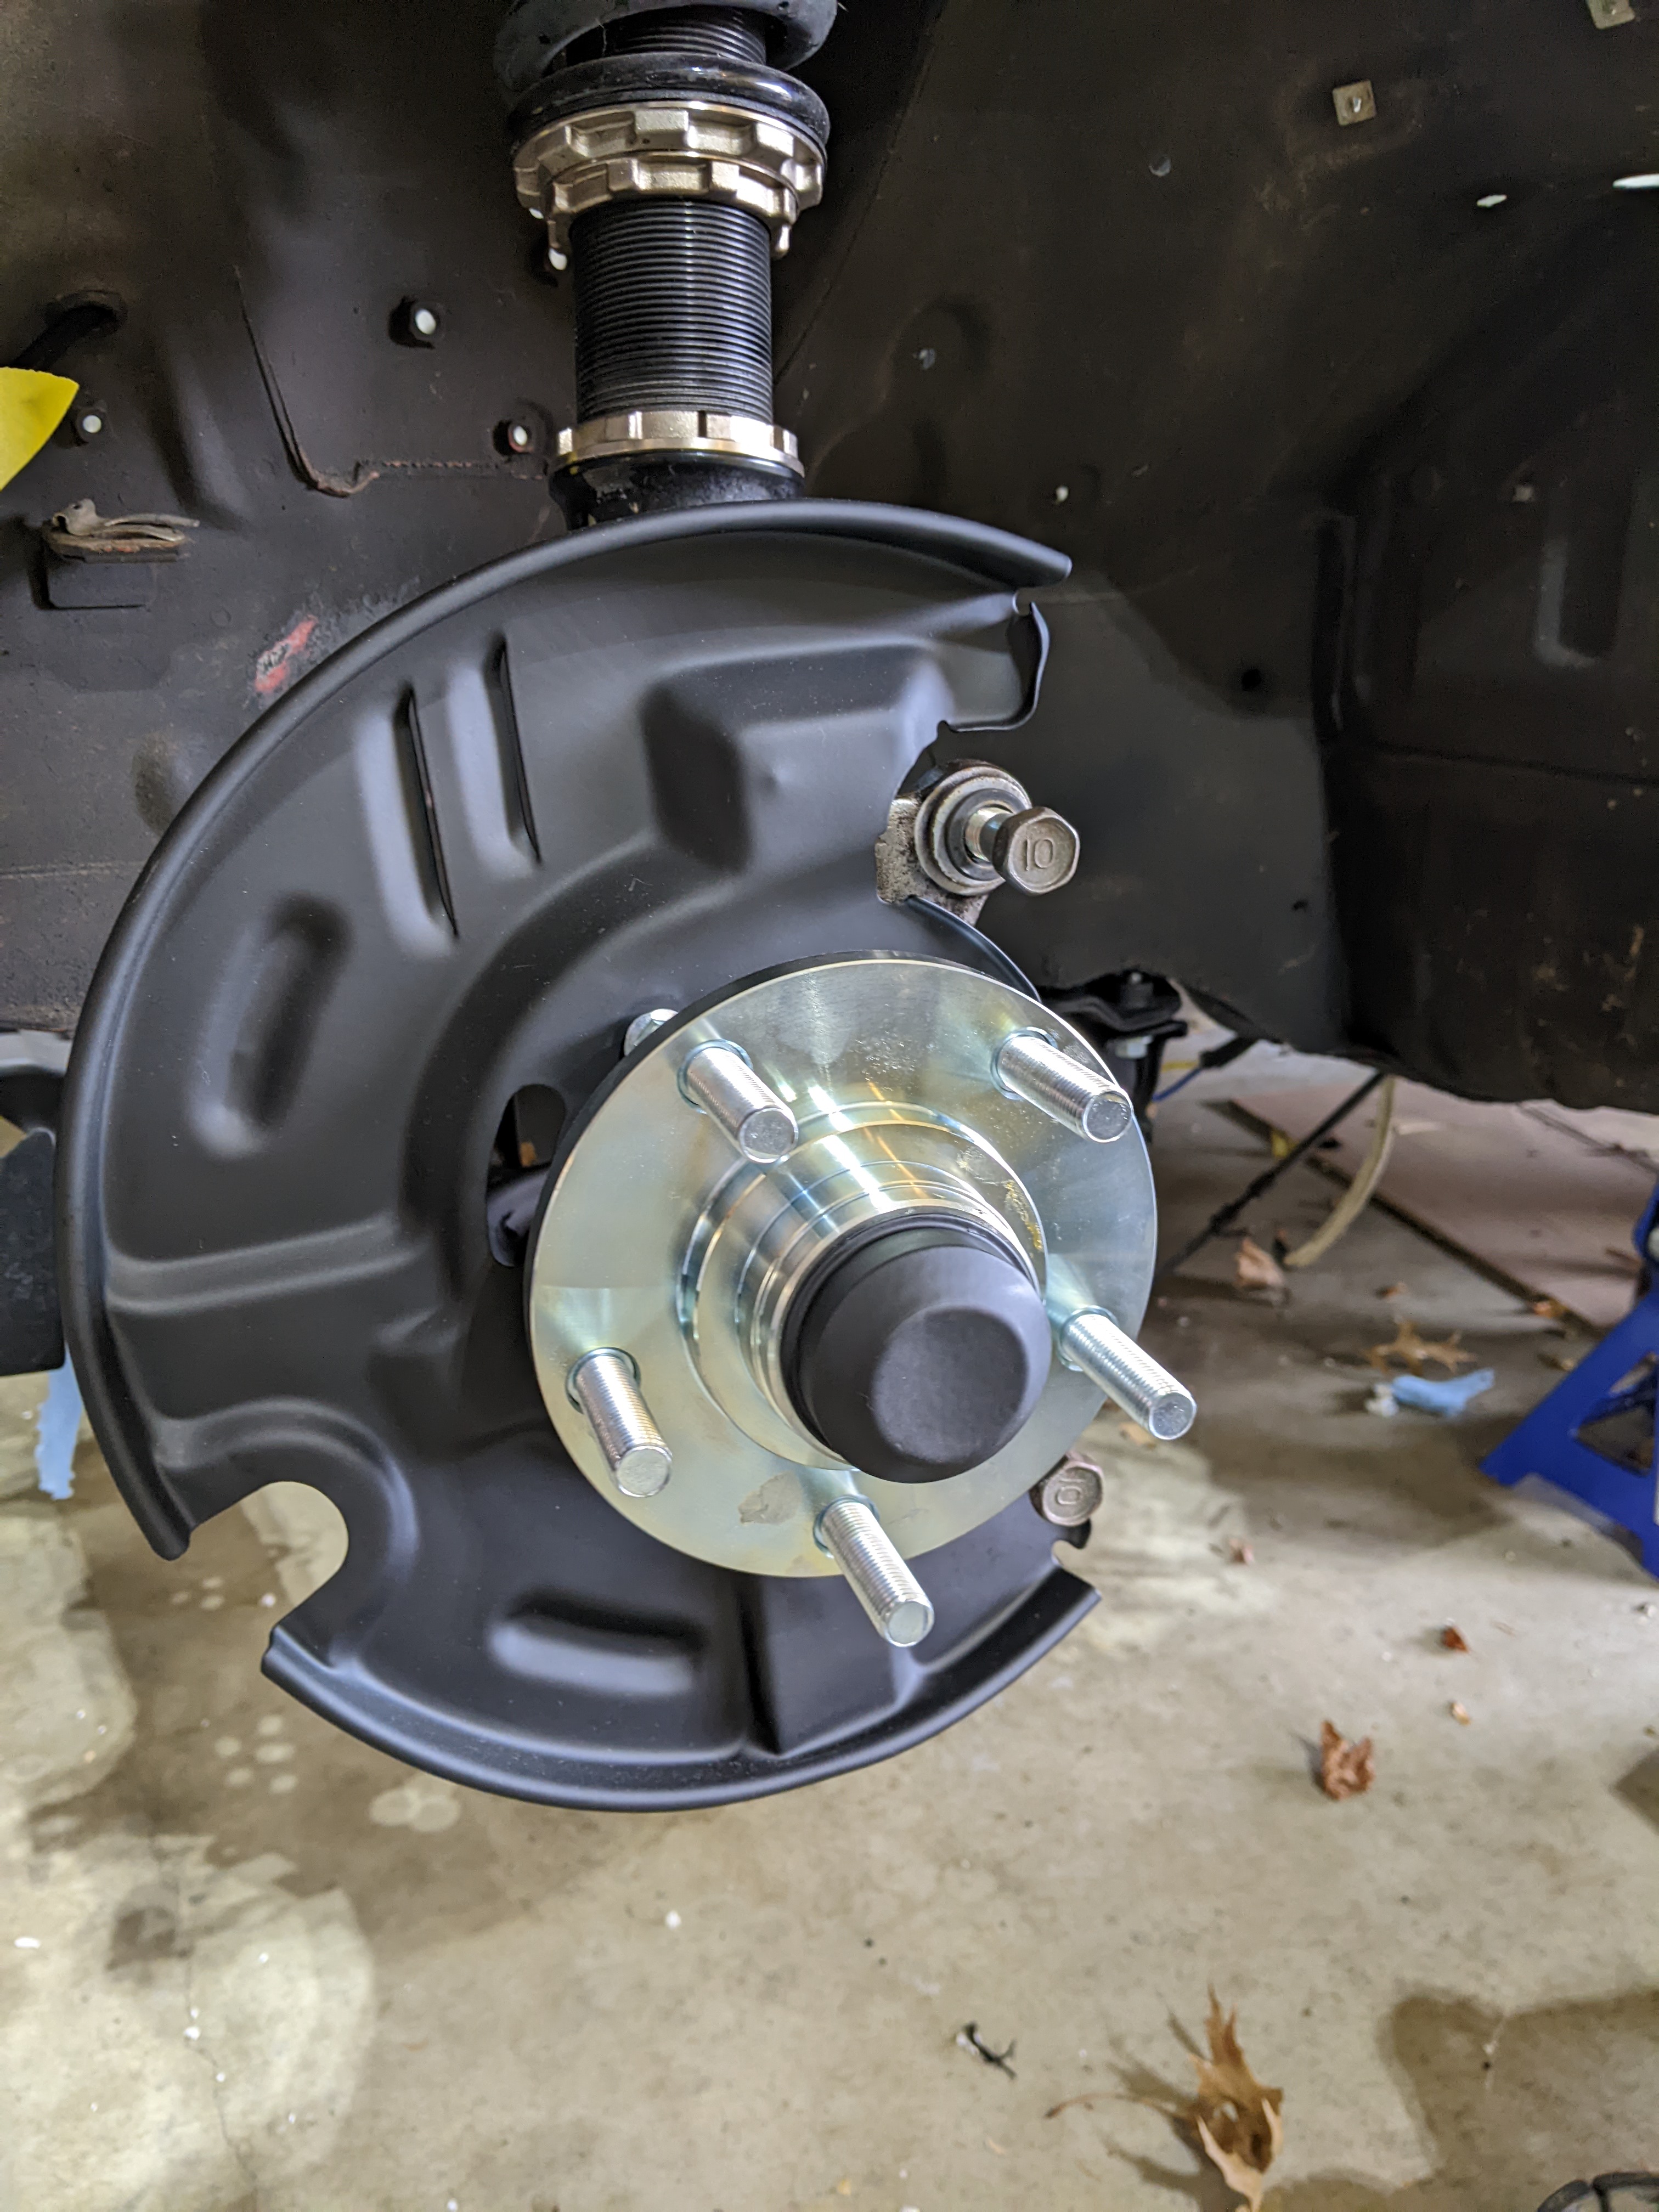
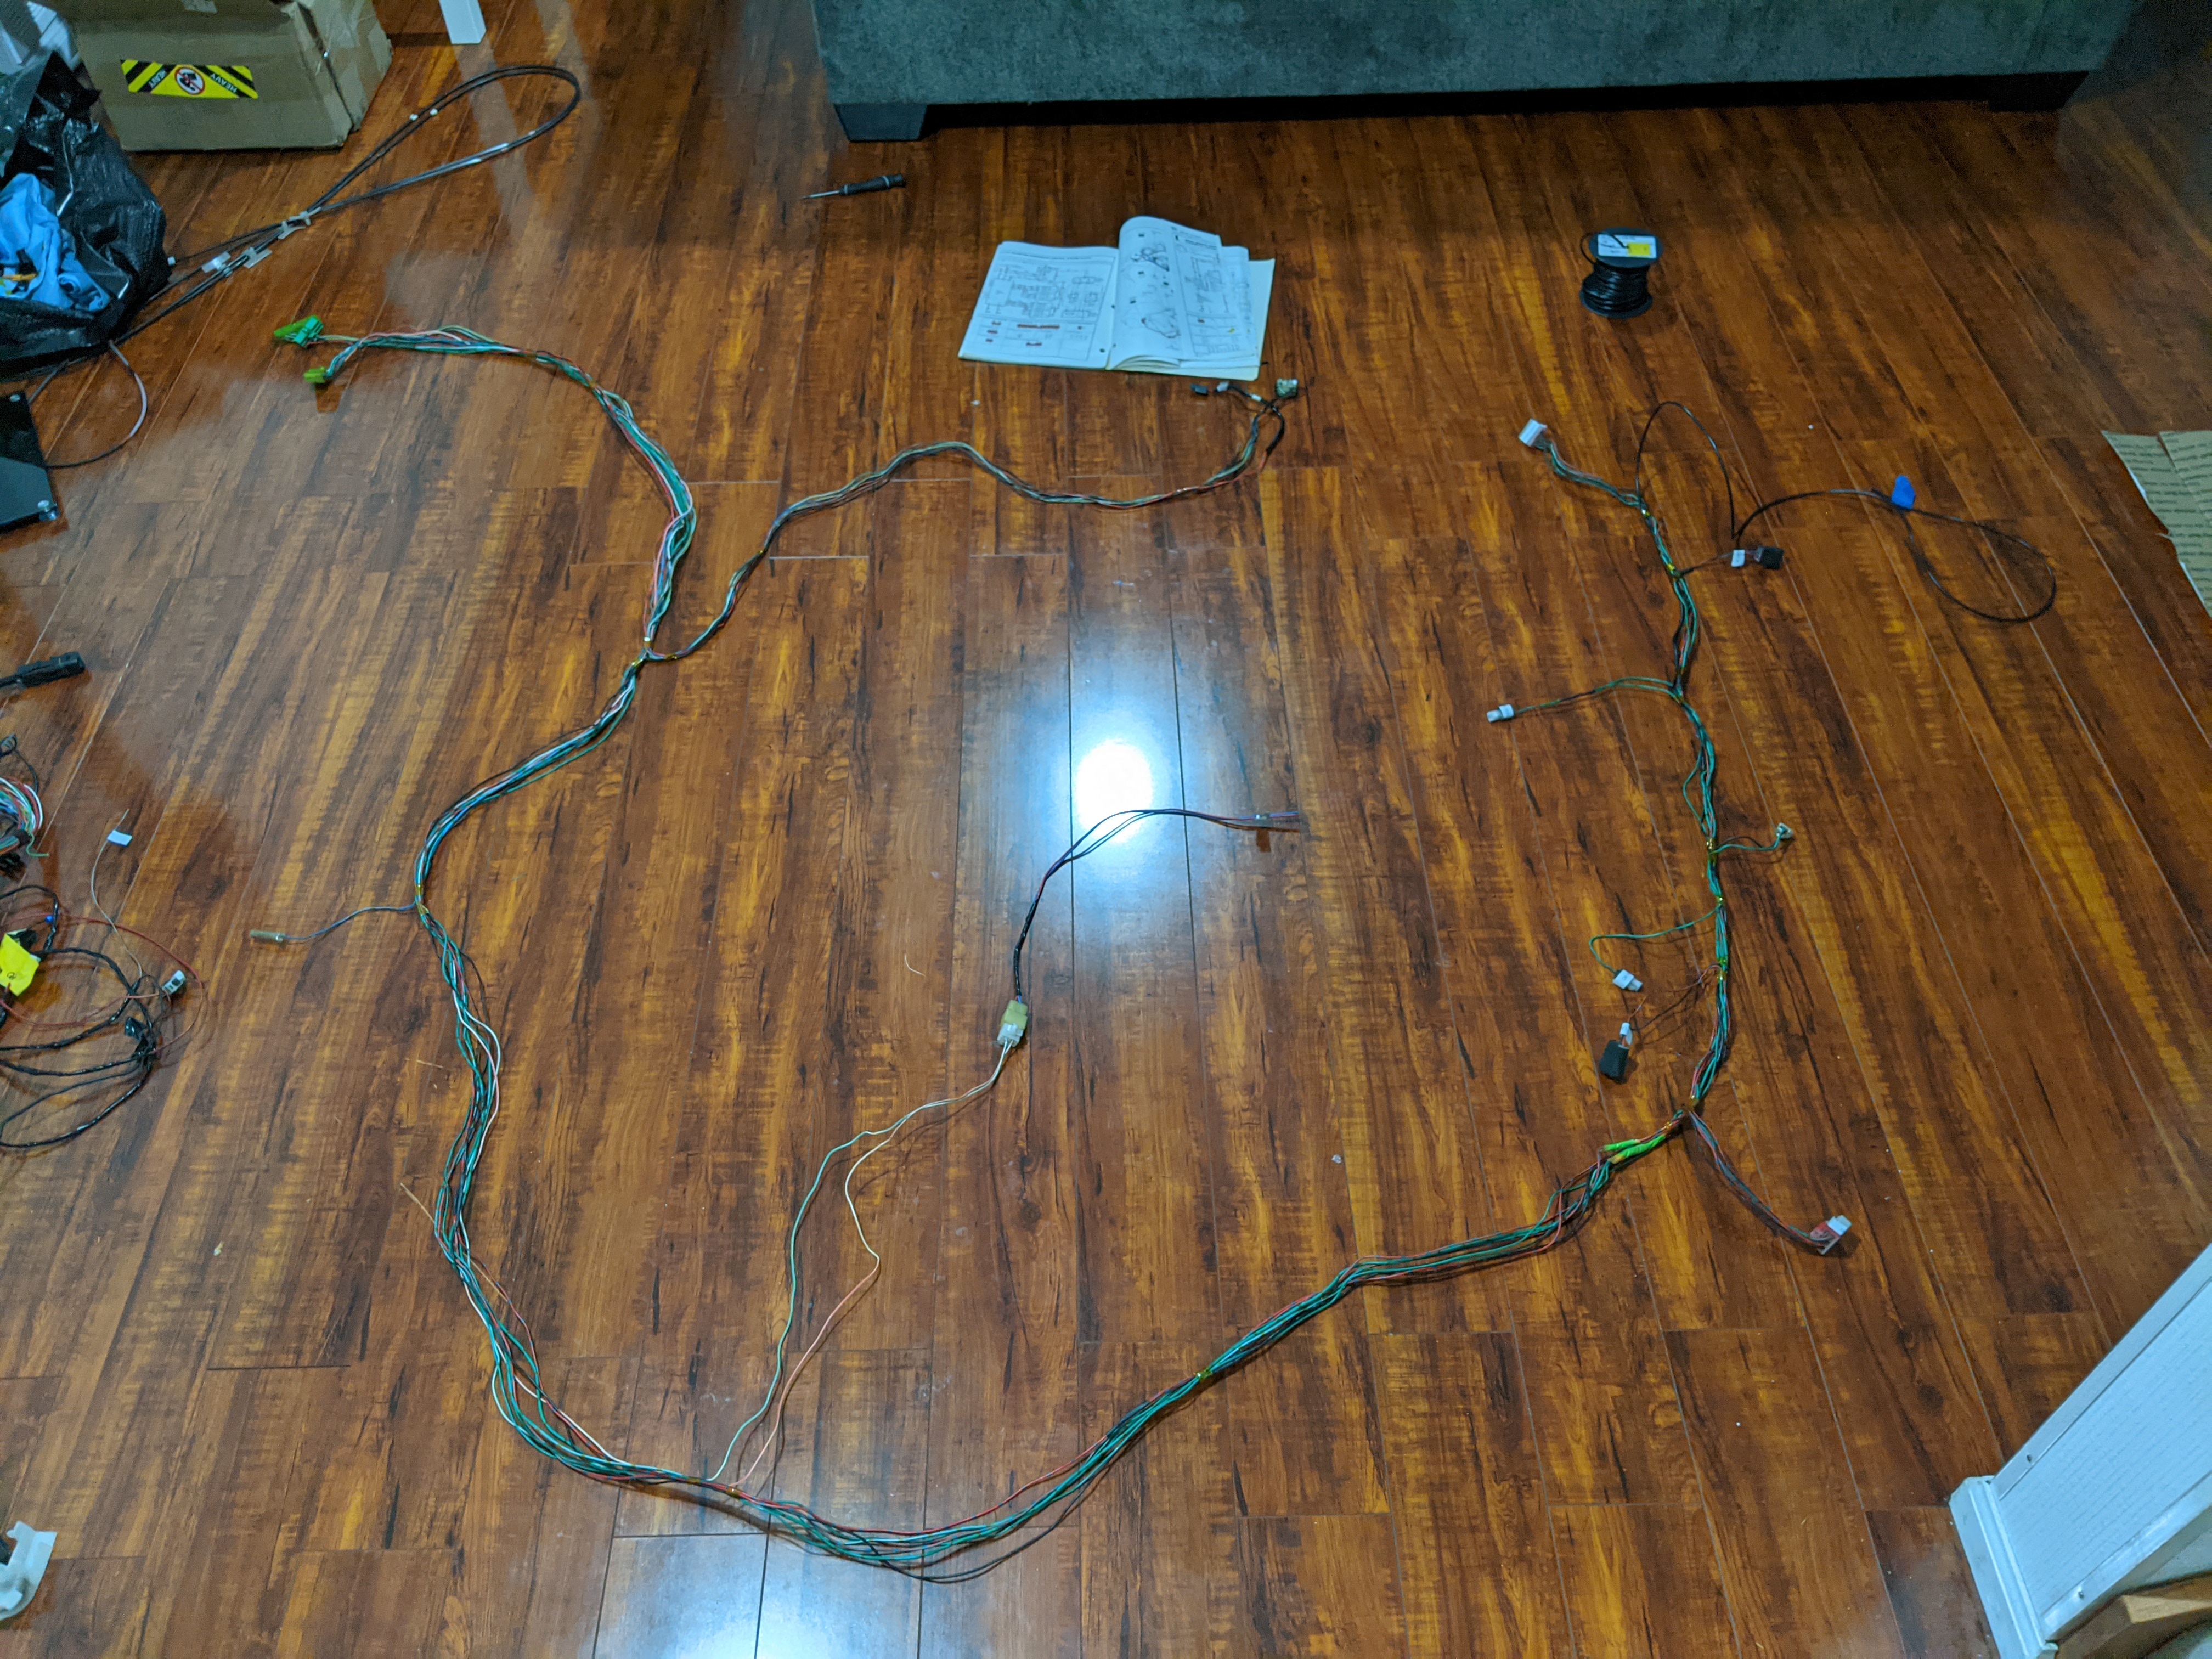
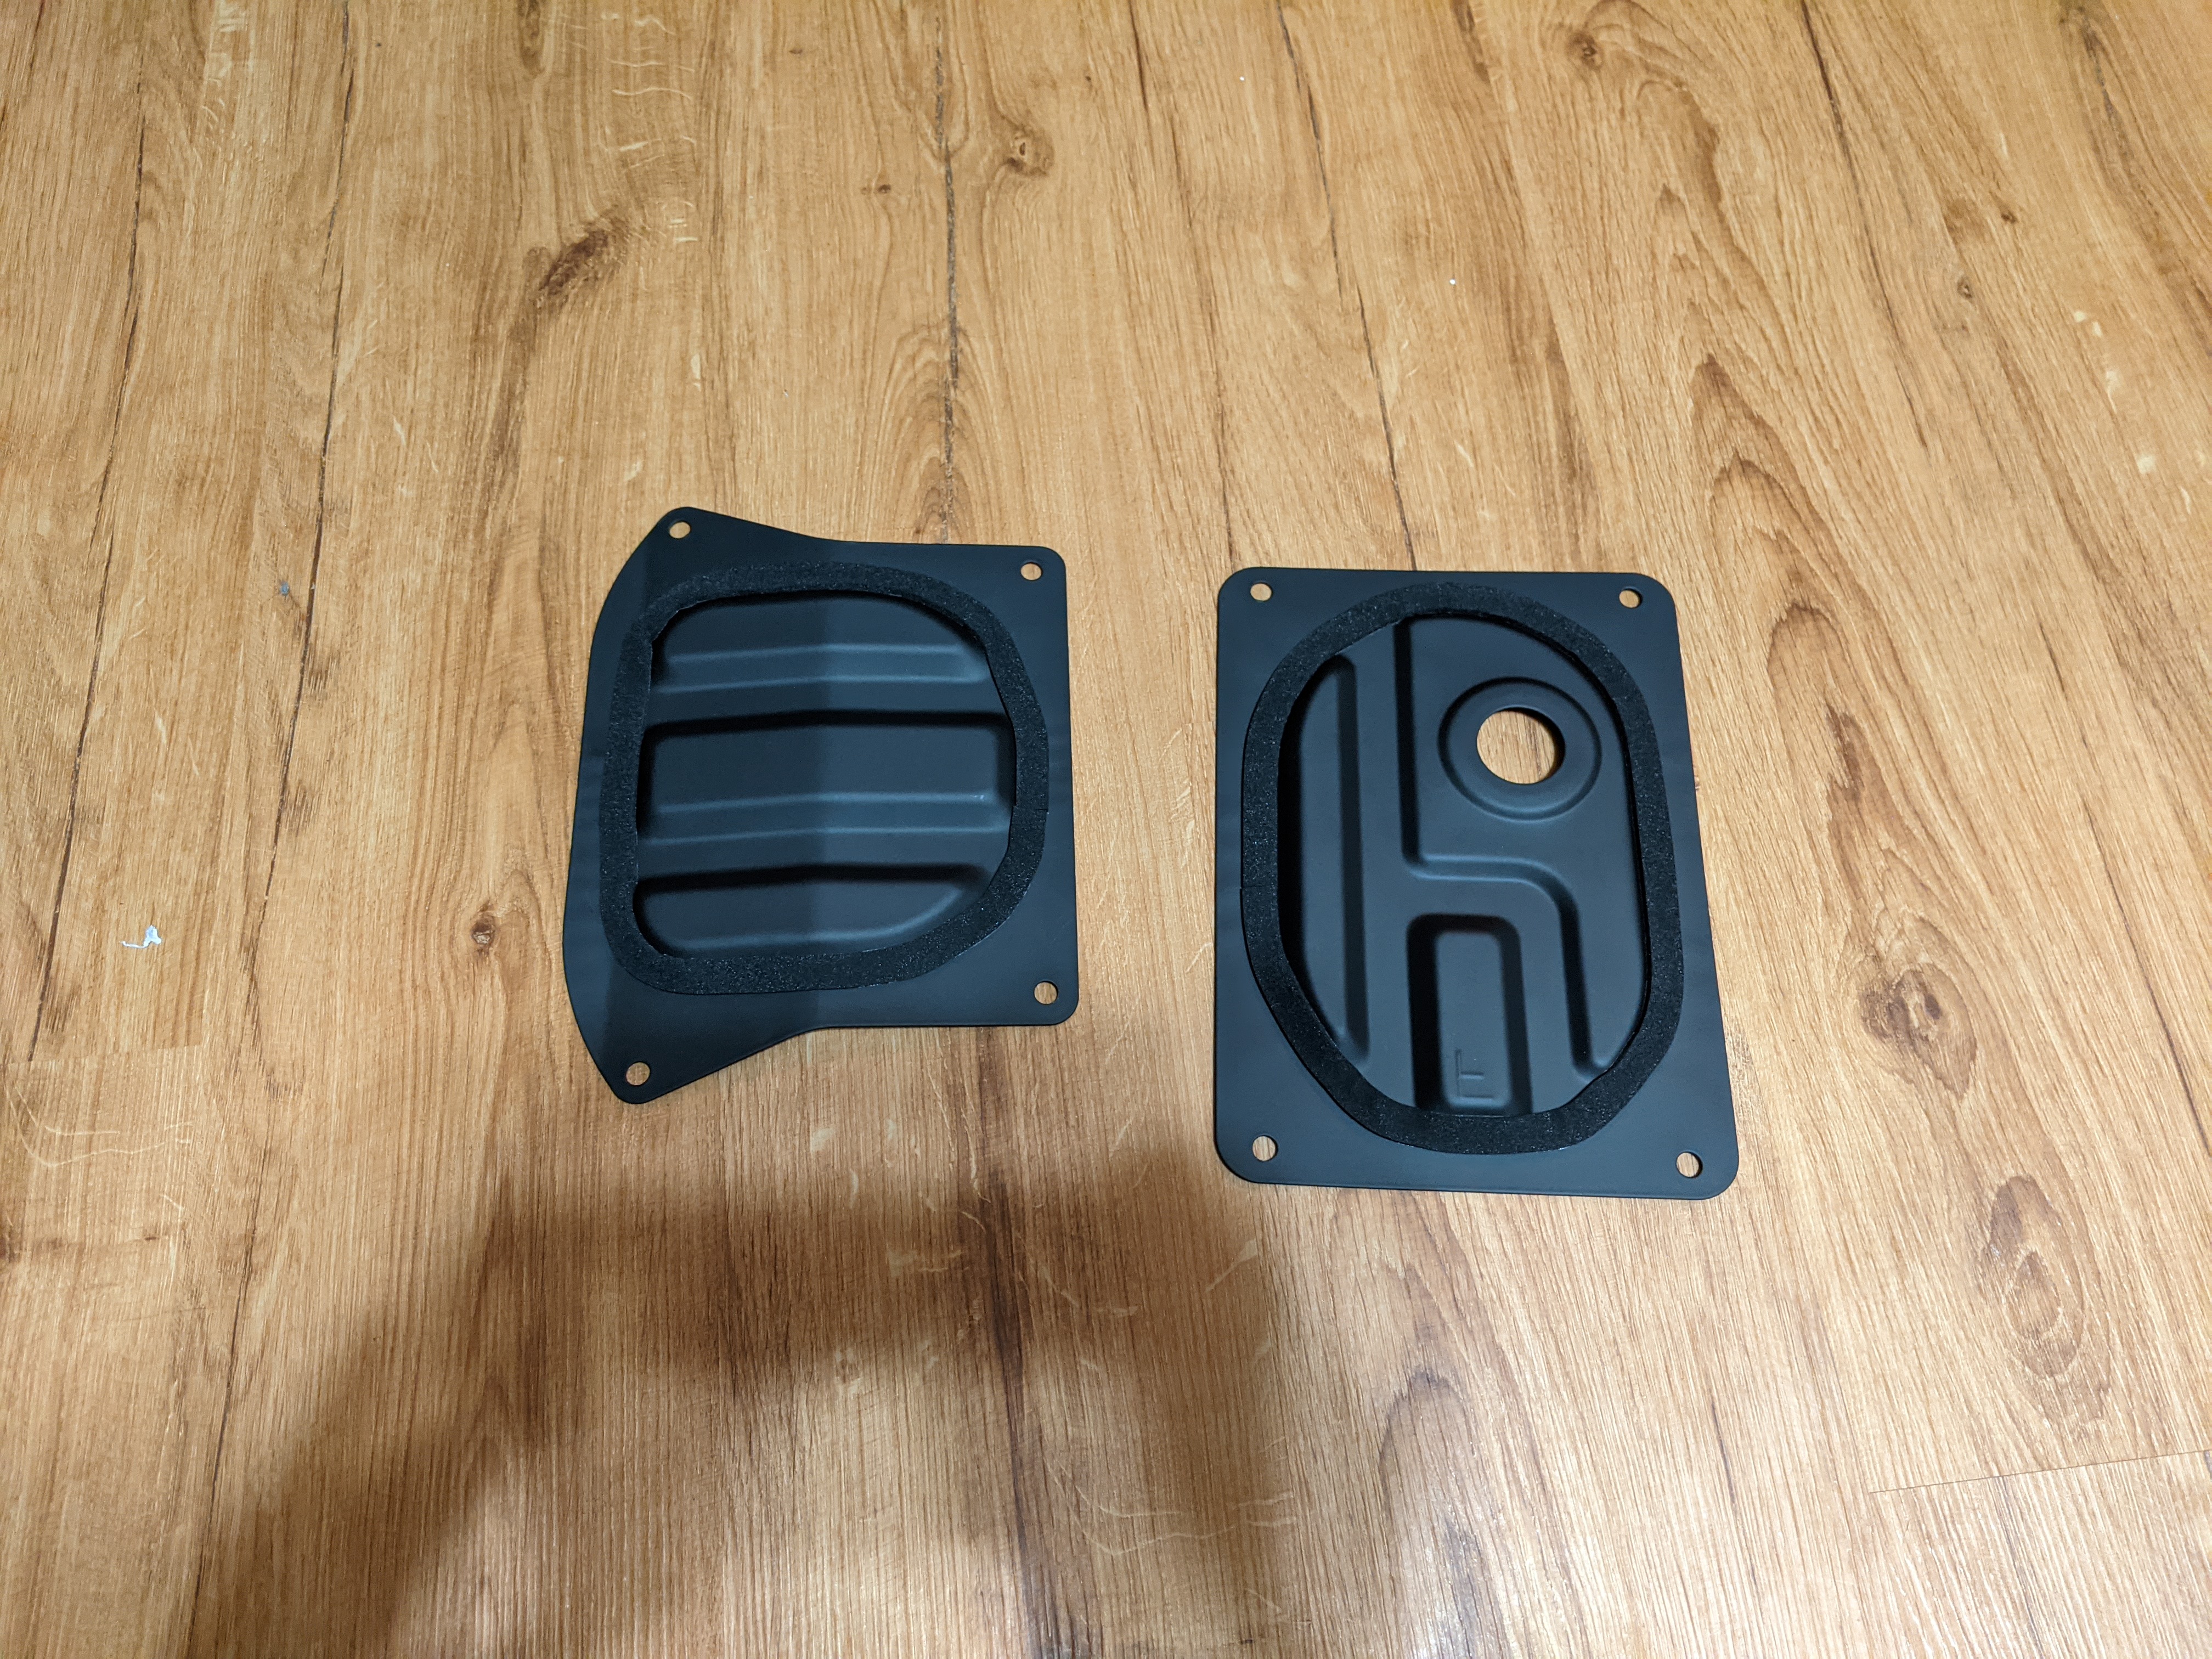
It�s starting to get a bit colder so updates might be a bit more sparse. Things are still progressing steadily even with the financial hiatus I�ve placed the car on. Fortunately, there are still a lot of things I can do to the car that doesn�t require me to spend money on it. For this update I have quite a few different things to showcase. I went to put the front suspension on and discovered that my passenger side LCA was tweaked - like bad. I have a picture below to show the differences between the tweaked and a new one I sourced; and for future reference, it should go in without much hassle lol. Getting that back from powder allowed me to get the front suspension fully on minus the steering rack (I still need to clean and clear it). I used a brand new washer, nut, and castle to tie it all together. I had never frictional force before, but I wanted to ensure the front hub assembly was within factory spec so I bought a hanging fish scale. I also put together my rear fuel tank covers with new foam seal tape and got the new bushings pressed into the differential cover (Not pictured, but I also ground off the powder for the sealing surfaces for the plugs). I�ve made quite a bit of progress on the harness having finally completed the rear interior chassis harness. I was able to remove a lot of wiring (all de-pinned and not cut). The savings didn�t really amount to much (6-7 lbs with computer), but It did help slim down the physical harness by quite a bit. I sheathed it in Tesa tape which is a really nice tape for interior stuff. The last thing I did was slap in the rear MS strut bar bracket in the speaker towers.
Until next time!
Here is the tweaked lower control arm
Here is all the front hub assembly that happened
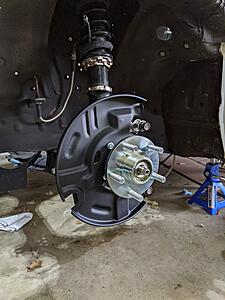

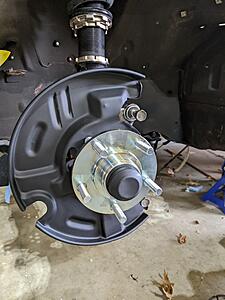
Here is the rear wiring harness saga

Here is the powdered goods that came back and their assembly

It�s starting to get a bit colder so updates might be a bit more sparse. Things are still progressing steadily even with the financial hiatus I�ve placed the car on. Fortunately, there are still a lot of things I can do to the car that doesn�t require me to spend money on it. For this update I have quite a few different things to showcase. I went to put the front suspension on and discovered that my passenger side LCA was tweaked - like bad. I have a picture below to show the differences between the tweaked and a new one I sourced; and for future reference, it should go in without much hassle lol. Getting that back from powder allowed me to get the front suspension fully on minus the steering rack (I still need to clean and clear it). I used a brand new washer, nut, and castle to tie it all together. I had never frictional force before, but I wanted to ensure the front hub assembly was within factory spec so I bought a hanging fish scale. I also put together my rear fuel tank covers with new foam seal tape and got the new bushings pressed into the differential cover (Not pictured, but I also ground off the powder for the sealing surfaces for the plugs). I�ve made quite a bit of progress on the harness having finally completed the rear interior chassis harness. I was able to remove a lot of wiring (all de-pinned and not cut). The savings didn�t really amount to much (6-7 lbs with computer), but It did help slim down the physical harness by quite a bit. I sheathed it in Tesa tape which is a really nice tape for interior stuff. The last thing I did was slap in the rear MS strut bar bracket in the speaker towers.
Until next time!
Here is the tweaked lower control arm
Here is all the front hub assembly that happened
Here is the rear wiring harness saga


Here is the powdered goods that came back and their assembly


The following users liked this post:
j9fd3s (01-19-22)