
From Zero to Hero: Heavy JDM Influenced Restoration
 04-17-16, 09:21 AM
#176
Update 4/17/16:
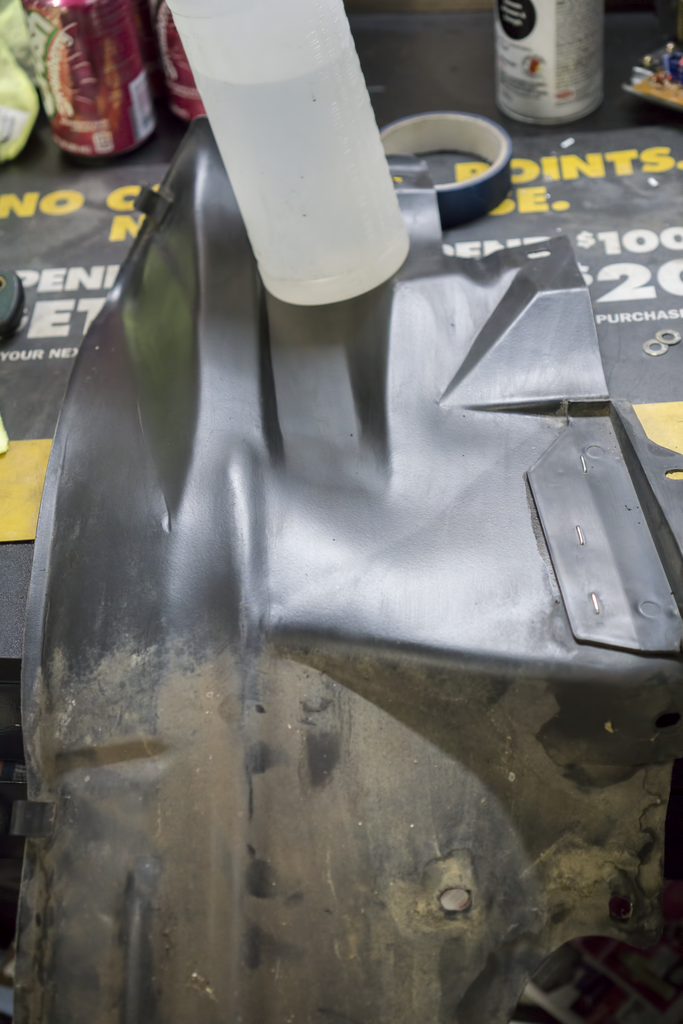
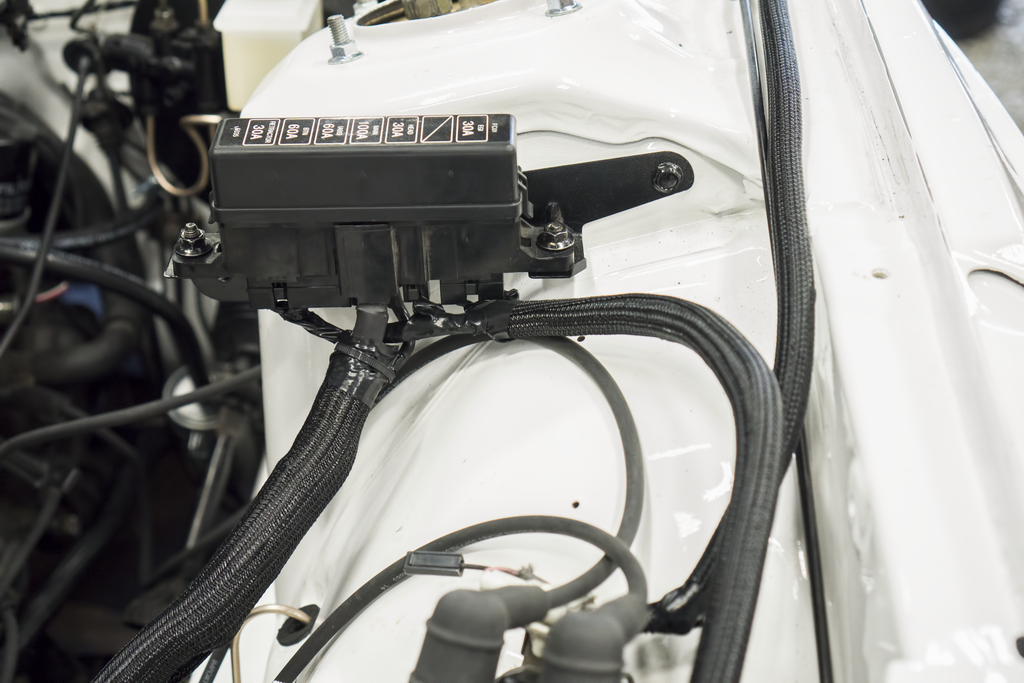
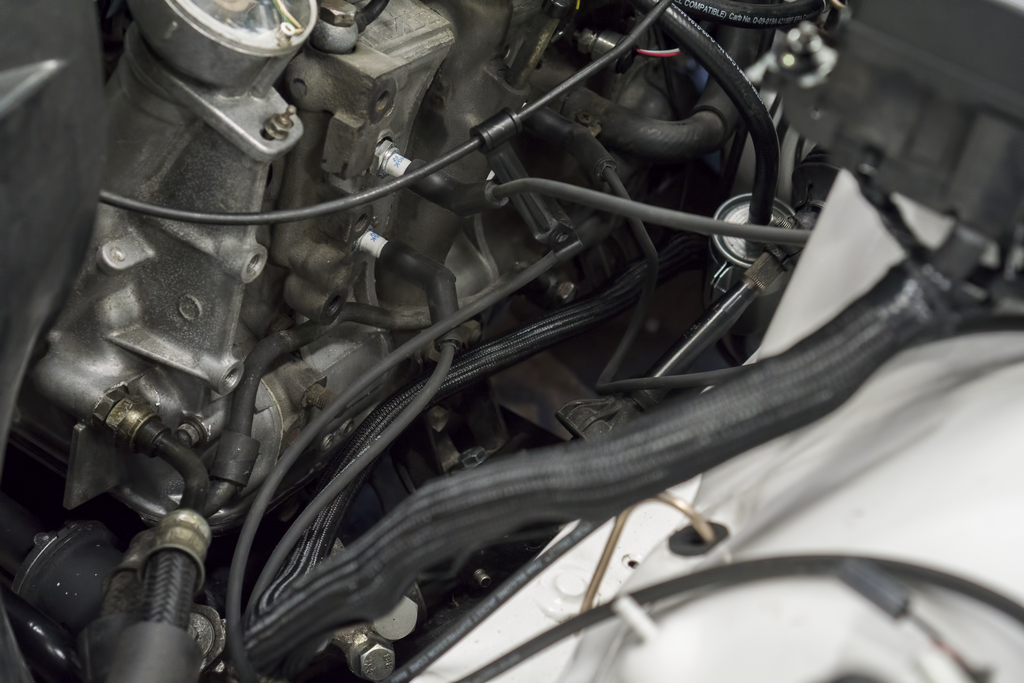
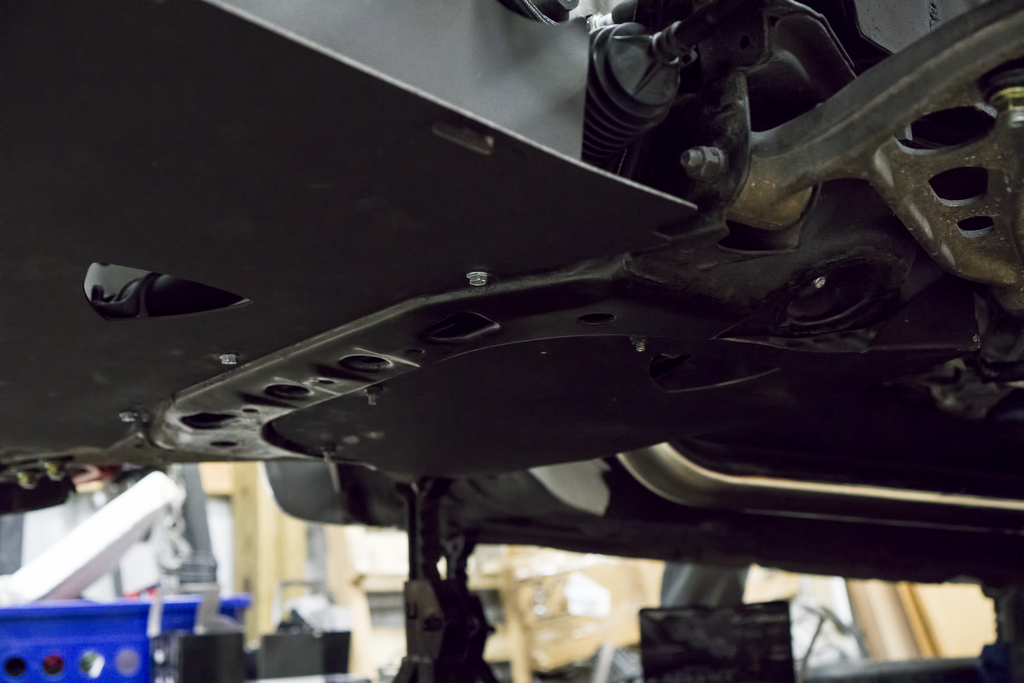
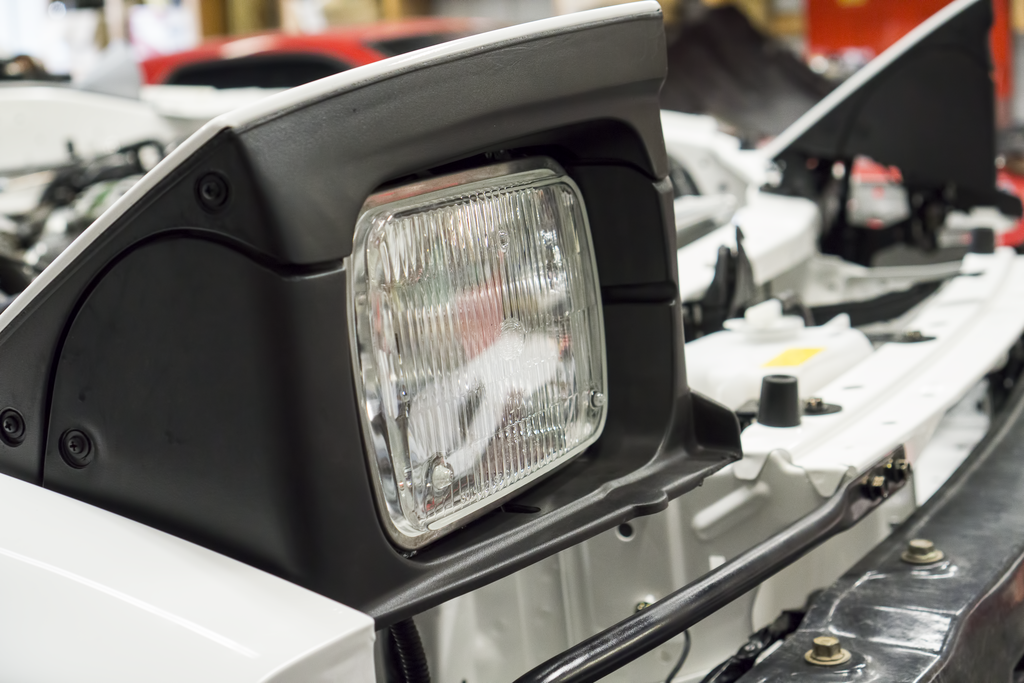
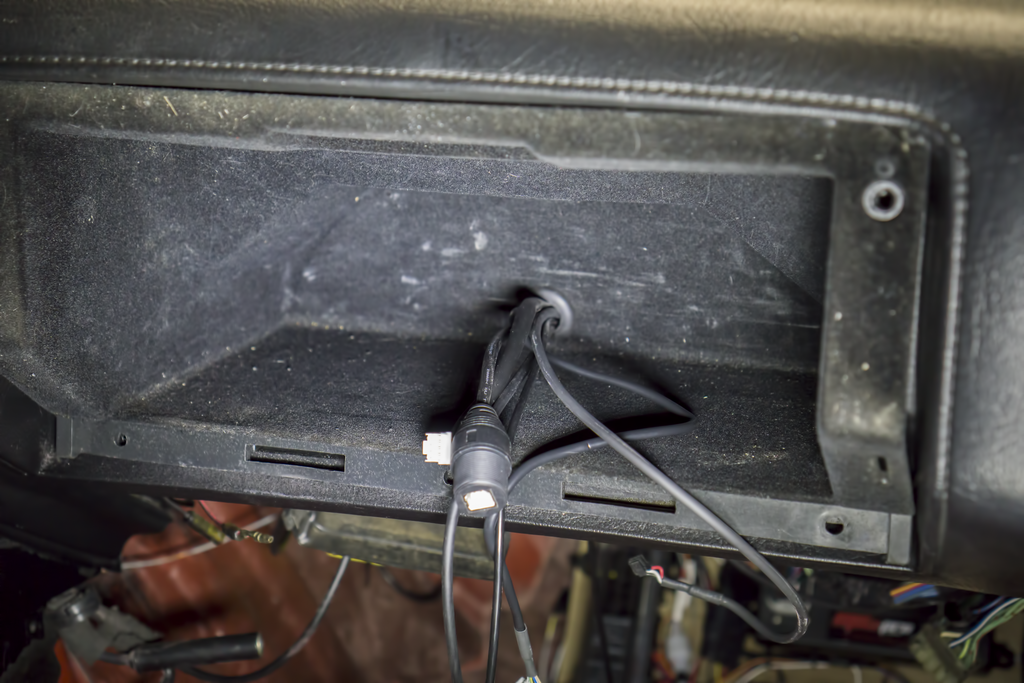
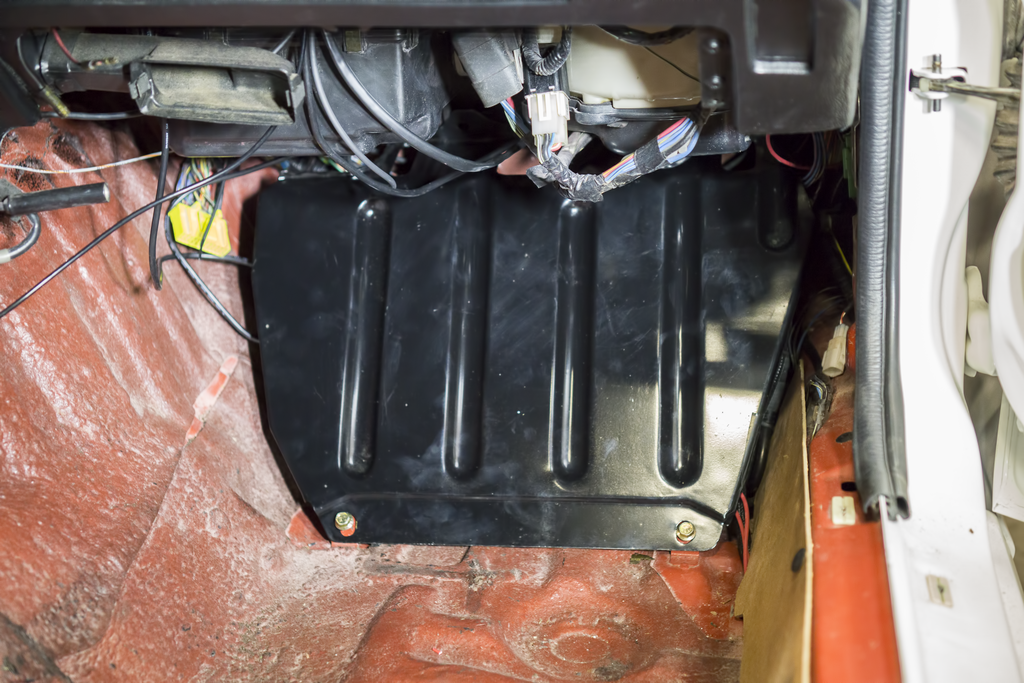
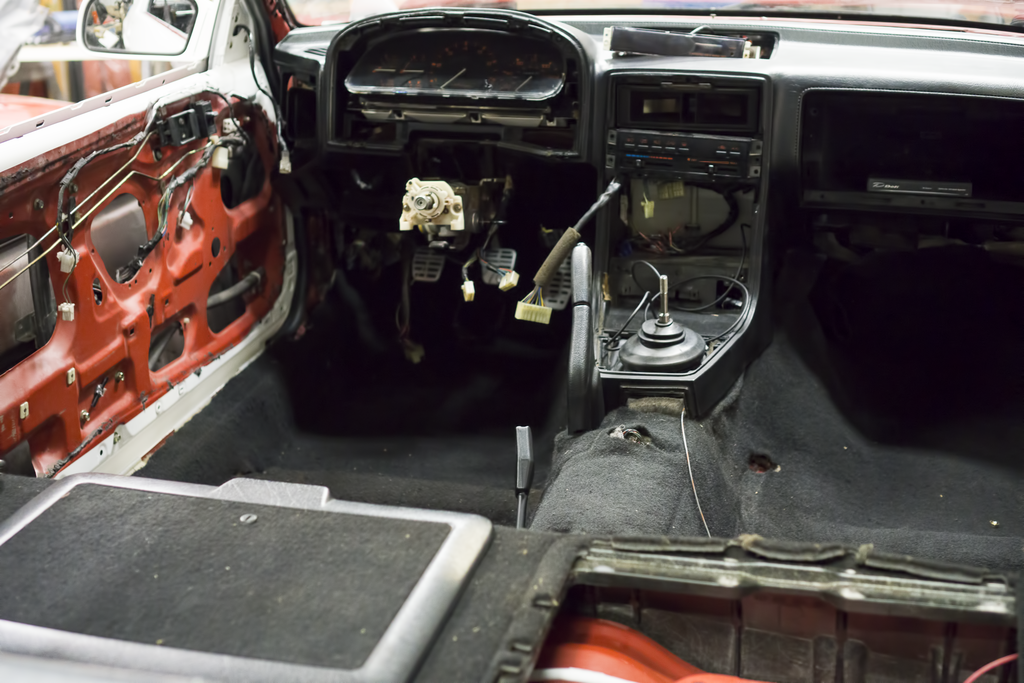
It�s been a steady week of progress. I finally got around to cleaning the fender liners. Those should go on soon. We are finishing up running the fog lights, then that will allow the fender liners to go on. Some more engine bay shrouding happened. This is my first time doing engine bay shrouding. I am quite proud of the cable management and shrouding in my computer, but this is an entirely new game. For the first time dealing with splits etc, I think it�s okay. I went ahead and got on my final underbelly panel. The undercarriage is officially done now, minus that last rear sway bar that needs to go on. I also decided to put on the headlight shrouds and toppers. Interior wiring is still making steady progress. It�s about time for the dash to go back in permanently. I hooked up my afr gauge, it does work, but since I wasn�t receiving a signal it spat out a laughable reading. Got the defi gauges in and working (the ones that are white in the pictures below are due to not having a signal). The control unit will reside in the glove box with the actual controller in the ash tray. Since we got everything ran to the ECU that was needed we could finally get the cover over it and throw in the front carpet. I must say, it is much nicer resting my knee on the carpet than on the metal lol. I�m going over to work on it later today, but decided to go ahead and post what I had. I�m hoping to drive the car back to my place by the end of this week. That will allow me to get the Shine parts on and finish up getting the rest of the �pretty� parts on.
Here is an in progress of the fender liners:
Here are some shots of the bay wiring that�s going on:
Finally the last underbelly panel is on:
Here are the headlight shrouds:
Here�s how we routed things into the glove box (will clean it up later):
Here�s the ECU cover and the front carpet:
Here�s all the fun light-up stuff:
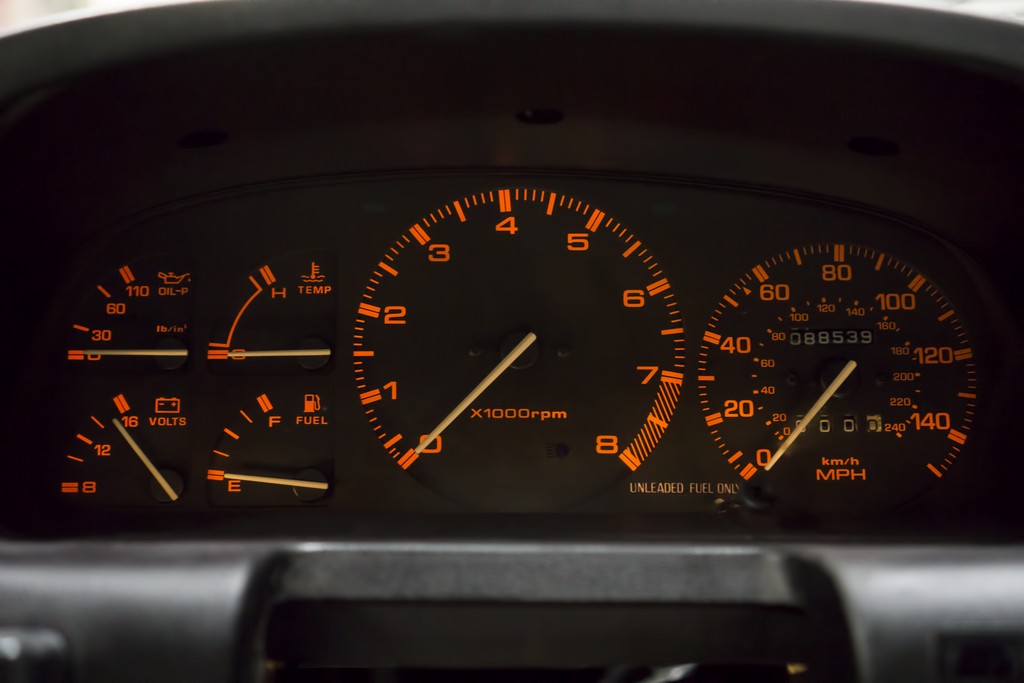
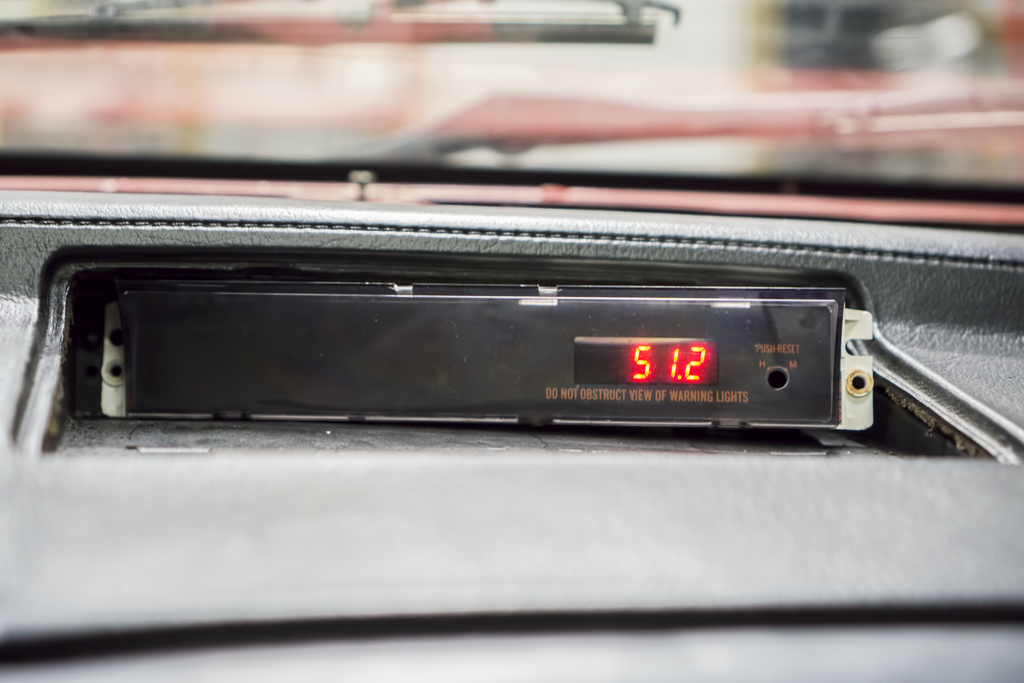
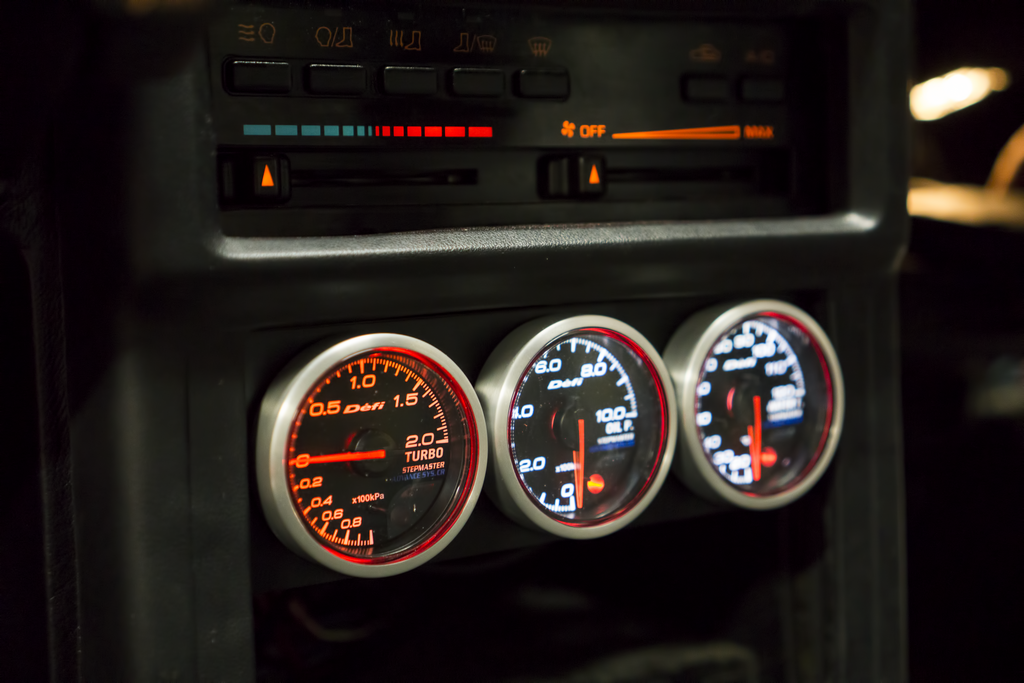
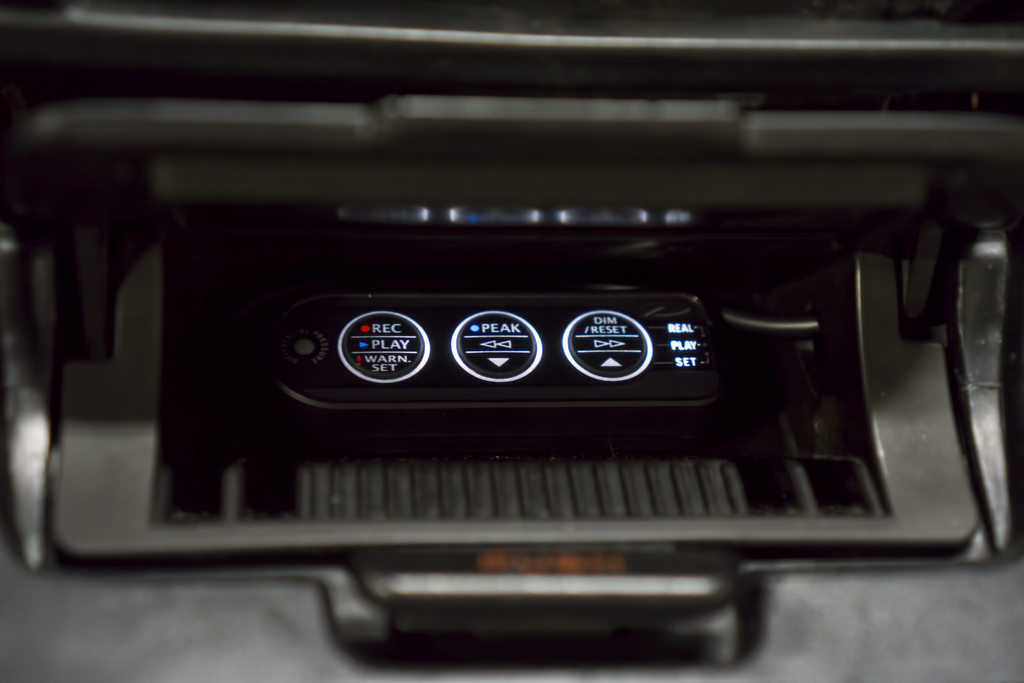
It�s been a steady week of progress. I finally got around to cleaning the fender liners. Those should go on soon. We are finishing up running the fog lights, then that will allow the fender liners to go on. Some more engine bay shrouding happened. This is my first time doing engine bay shrouding. I am quite proud of the cable management and shrouding in my computer, but this is an entirely new game. For the first time dealing with splits etc, I think it�s okay. I went ahead and got on my final underbelly panel. The undercarriage is officially done now, minus that last rear sway bar that needs to go on. I also decided to put on the headlight shrouds and toppers. Interior wiring is still making steady progress. It�s about time for the dash to go back in permanently. I hooked up my afr gauge, it does work, but since I wasn�t receiving a signal it spat out a laughable reading. Got the defi gauges in and working (the ones that are white in the pictures below are due to not having a signal). The control unit will reside in the glove box with the actual controller in the ash tray. Since we got everything ran to the ECU that was needed we could finally get the cover over it and throw in the front carpet. I must say, it is much nicer resting my knee on the carpet than on the metal lol. I�m going over to work on it later today, but decided to go ahead and post what I had. I�m hoping to drive the car back to my place by the end of this week. That will allow me to get the Shine parts on and finish up getting the rest of the �pretty� parts on.
Here is an in progress of the fender liners:

Here are some shots of the bay wiring that�s going on:


Finally the last underbelly panel is on:

Here are the headlight shrouds:

Here�s how we routed things into the glove box (will clean it up later):

Here�s the ECU cover and the front carpet:


Here�s all the fun light-up stuff:


 04-19-16, 07:32 AM
#181
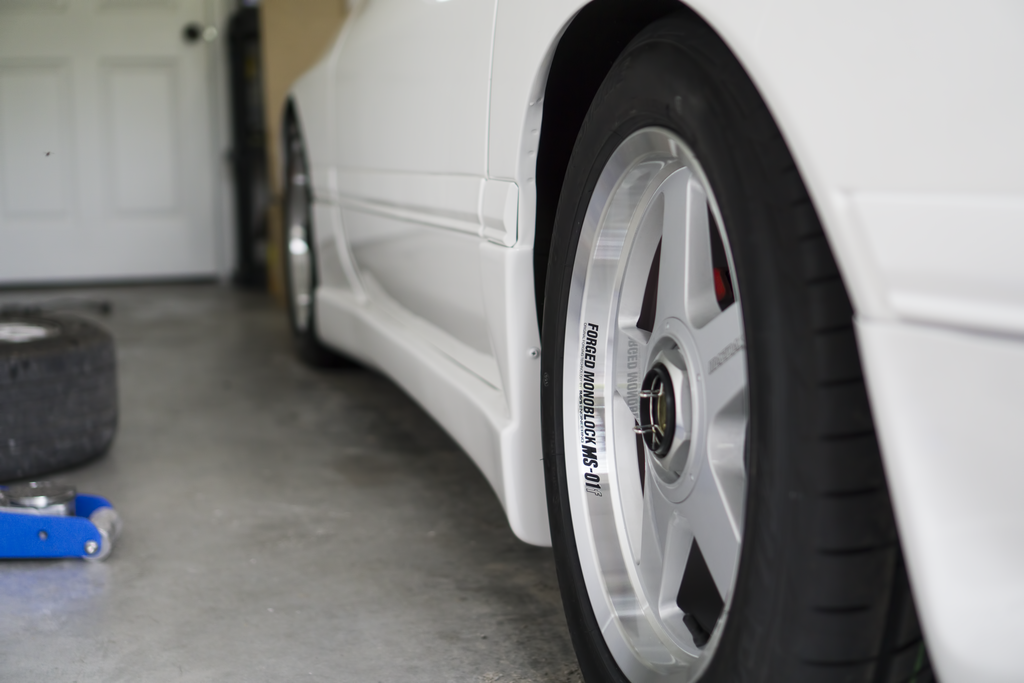
The material is Aluminum. I sprayed it with undercoating on both sides. LRB Speed makes the panel. You can reach his website here: http://lrbspeed.com/
04-24-16, 02:55 PM
#182
Update 4/24/16:
Wow, a lot has happened since the last update. I bought some new stuff. I bought brand new OEM center vents, idiot cluster bezel, and a parking brake hand grip thing. The biggest news is: the car is finally home. We were originally supposed to bring it home Friday, but hit a lot of snags. It seems none of us thought it a good idea to tighten all of the coolant hoses. We about emptied the radiator of coolant on our first test drive. Slowly, we found out all the things we had forgotten and got it home the next day. A few of the current problems are that I have the AFR gauge tied into the wrong wire so it�s pulling the wrong information. There is also a small coolant leak coming from the coolant level sensor. I�m not sure what I want to do about that yet. When we got the car home we had a small cookout and slapped on a few aero pieces. The left side rear guard needs some more work. 3M wasn�t working as intended. The next two weeks will be buttoning the rest of the car up. I should have wheels and front lip going on next week. I am going to get the side glass in as well (hopefully). Expect the next update to have a lot of pictures.
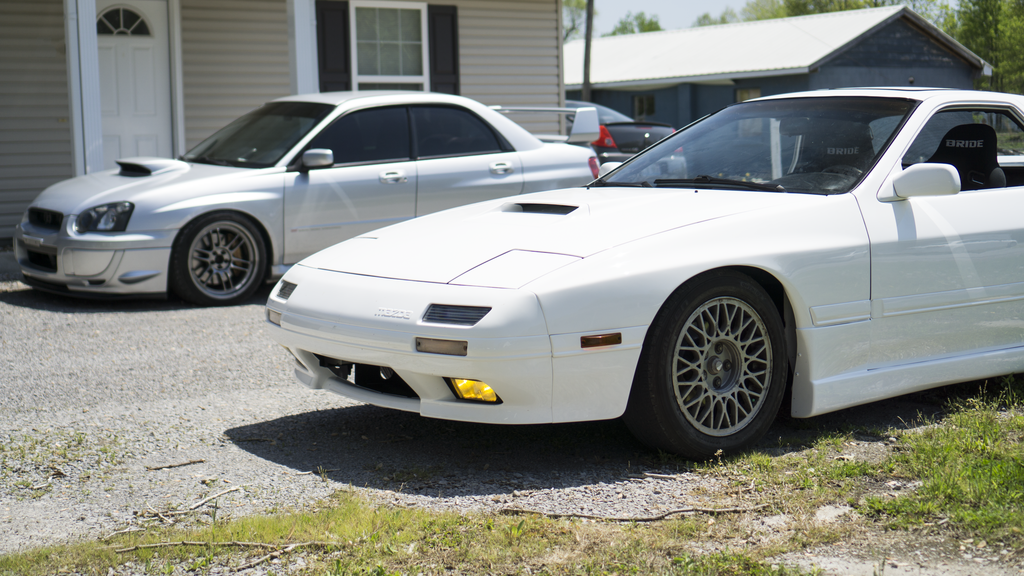
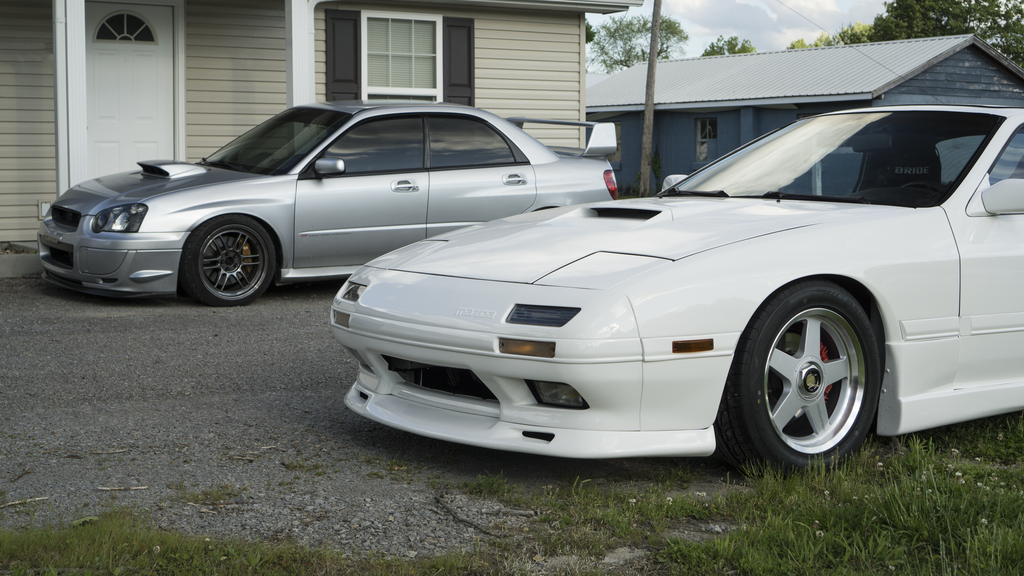
Finally the two cars can be side by side:
Here are the rest of the pictures:


Wow, a lot has happened since the last update. I bought some new stuff. I bought brand new OEM center vents, idiot cluster bezel, and a parking brake hand grip thing. The biggest news is: the car is finally home. We were originally supposed to bring it home Friday, but hit a lot of snags. It seems none of us thought it a good idea to tighten all of the coolant hoses. We about emptied the radiator of coolant on our first test drive. Slowly, we found out all the things we had forgotten and got it home the next day. A few of the current problems are that I have the AFR gauge tied into the wrong wire so it�s pulling the wrong information. There is also a small coolant leak coming from the coolant level sensor. I�m not sure what I want to do about that yet. When we got the car home we had a small cookout and slapped on a few aero pieces. The left side rear guard needs some more work. 3M wasn�t working as intended. The next two weeks will be buttoning the rest of the car up. I should have wheels and front lip going on next week. I am going to get the side glass in as well (hopefully). Expect the next update to have a lot of pictures.
Finally the two cars can be side by side:

Here are the rest of the pictures:


The following users liked this post:
RochX7 (09-18-21)
 04-30-16, 06:41 PM
#186
rx7 killer
Man, this had been the most detailed and restored thread I've seen a couple years now, f-ing great job man, you made me want to do the same on mine, unfortunately I don't have that kind of space nor storage to do so keep it up can't wait to see it all completed
04-30-16, 07:00 PM
#187
Thanks guys! I keep wishing I had the skills to do more with it. I had originally planned on a mil-spec harness and a few other things that were just way above my skill-level. Maybe for the next build
 .
. In other news, I had a fuel injector die on me while at a gas station. I was stranded for 6 hours lol. Got her home and got her back up and running though!
 I thought you're wiring was pretty skilled already !
05-01-16, 03:37 PM
I thought you're wiring was pretty skilled already !
05-01-16, 03:37 PM
#189
Update 5/1/2016:
Not a lot has happened this past week. The car was down for a couple of days and I was forced to miss my alignment appointment. I did decide to throw the wheels on to test fit them. I also have 95% of the interior in now. The 3M i had used for the rear guards didn�t really work well, seeking another solution for that. I took the car back to the paint guy today, he�s doing his final buff work on the car. I have rescheduled my alignment for Wednesday. As soon as I get the car back the front lip and wheels can go on permanently. I�m hoping to have some �completed� pictures next Friday.
Here�s two shots of the test fitment:


The following users liked this post:
rotary#10 (01-10-19)
The following users liked this post:
rotary#10 (01-10-19)
05-08-16, 09:15 AM
#193
Update 5/8/16:
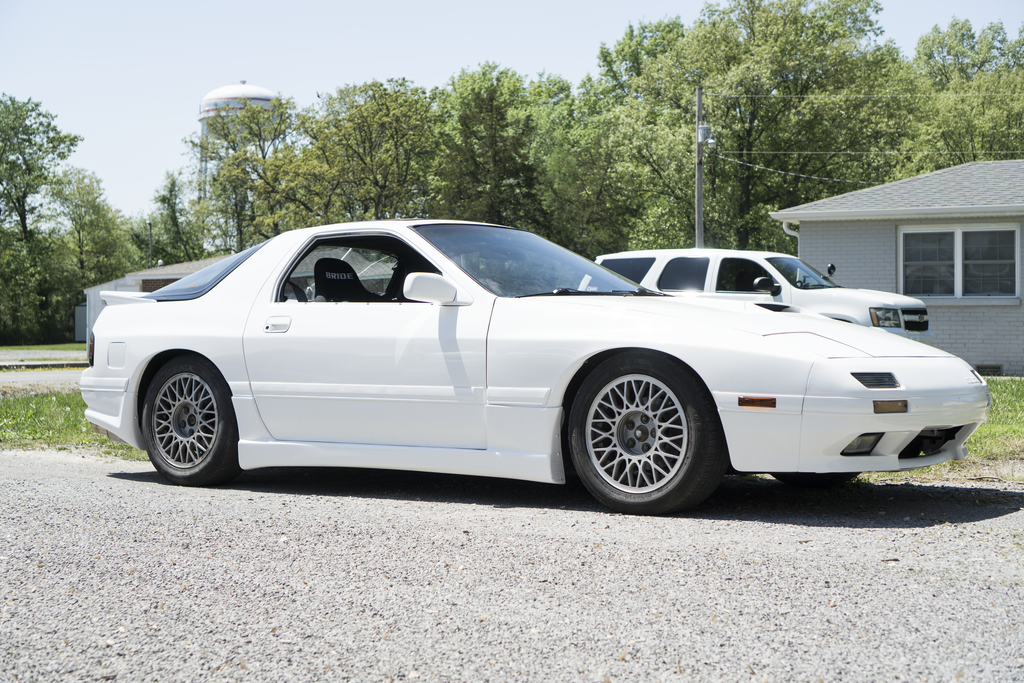
I suppose this update will be a bit different. It will be structured similarly like my OP. The car, for the most part, has been completed. I�m taking it to it�s first meet today (exciting!). There are a few kinks to still work out and some things I�d still like to get, but won�t be able to before I leave this next Saturday for my internship. I went ahead and purchased an exhaust guard from Modulus Motorsports and will be putting it on when I return, with maybe a few other goodies. The wheels were scraping against the struts and I had to rush out and get an 8mm spacer for them. I have since ordered a pair of 3mm�s that will be going on shortly.
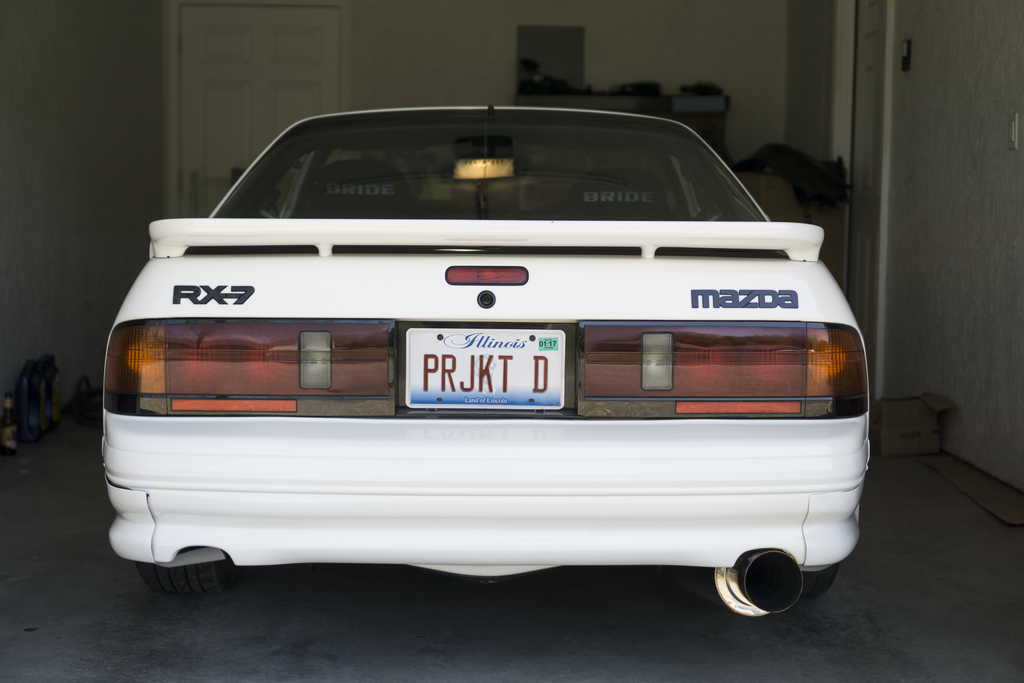
The End Result of Hard Work:
What a long road this has been. I recently re-read my own thread and I was in awe at just how far the car has come. I must admit, when I first moved down here to go to school I knew very little about cars. I didn�t even know how to change my own oil in the STi. Through a project it�s amazing to see how, not only the car progresses, but how yourself as a person as well. If I could take away one thing through all of this it is that patience and commitment are the keys to a good build. Throughout the build I�ve used many parts made from companies that are just starting out, even prototyping a few. Their products are great and they are really helping in keeping older cars alive and looking good. Support these vendors such as: LRB Speed, Modulus Motorsports, and GRZ and don�t be afraid to ask these vendors for a specialty part that they don�t offer yet.
Is this the End?
Of course not! It will be the end up weekly Sunday updates though. I�ll only update now when something cool happens or I fix something (there is a lot to fix still!). I have plans that are to take place once this engine goes, but until then I�d like to enjoy the car for awhile. I�m still always searching for a 10th AE interior swap and I�d like to invest in some Racing Beat front and rear sways, but for now I�m mostly content.
Here is the completed Mod List (for the time being):
Exterior:
626 Fuel Cap
Aluminum Door Striker Covers
GRZ Rear Wiper Delete
HELLA Vision Plus Housings
JDM Fog Lights
JDM Folding Mirrors
JDM Rear Side Moldings
JDM Side Markers
JDM Turn Signals
LRB Speed Aero Belly Pan
LRB Speed Belly Pan
Miata Antenna Delete
Modulus Motorsport Exhaust Guard
Rize Japan Ballast-Less LED Headlight Bulbs
Shine Auto Front Lip
Shine Auto Spec-R Sideskirts
Shine Auto Spec-RE Rear Aero Guards
Sokie Tech Hood Dampeners
Suspension/Drivetrain:
MazdaSpeed Front Strut Bar
MazdaSpeed Rear Strut Bar
Racing Beat DTSS Eliminators
Rotary Shack Short Throw Shifter
RP Stainless Steel D.O.T. Lines
Solid Aluminum Transmission Mounts
STANCE Super Sport Coilovers
Engine:
APEXi GT Spec Downpipe
APEXi N1 EVO Cat-Back Exhaust
APEXi Power Intake
Atkins Rotary Oil Cap
Bonez Race Pipe with Welded in Flex-Pipe
Fluidyne Radiator
Gilmer Drive Pulley Kit
HKS Blow Off Valve
Lightweight Flywheel
LRB Speed Block-Off Plates
LRB Speed CAS Cover
LRB Speed Radiator Cooling Panel
Megasquirt 3 Pro
Optima RedTop 34R Battery
Solid Aluminum Motor Mounts
Stainless Steel Clutch Line
Street Port 13BT
Walbro 255 Fuel Pump
Interior:
Bride Type FG Seat Rails
Bride Zeta III Sport-C Seats
Custom RX-7 Floor Mats
Defi Advance CR Gauges (Boost, Oil Press, Water Temp)
Innovate LC-2 Wideband with Square LCD
JBL GT7-4 Speakers (X4)
LRB Speed Aluminum Defroster Vents
LRB Speed Aluminum Side Vents
LRB Speed Single Din Gauge Pod
MazdaSpeed 03.5 Pedals
MazdaSpeed B-Spec Steering Wheel
MazdaSpeed Leather Shift ****
MOMO Hub Adapter
Pioneer DEH-X6800BT
Redline Shift Boot
Wheels/Tires:
RAYS MazdaSpeed MS-01f 16x8 +40
Bridgestone Potenza RE760 Sport 225/50/16
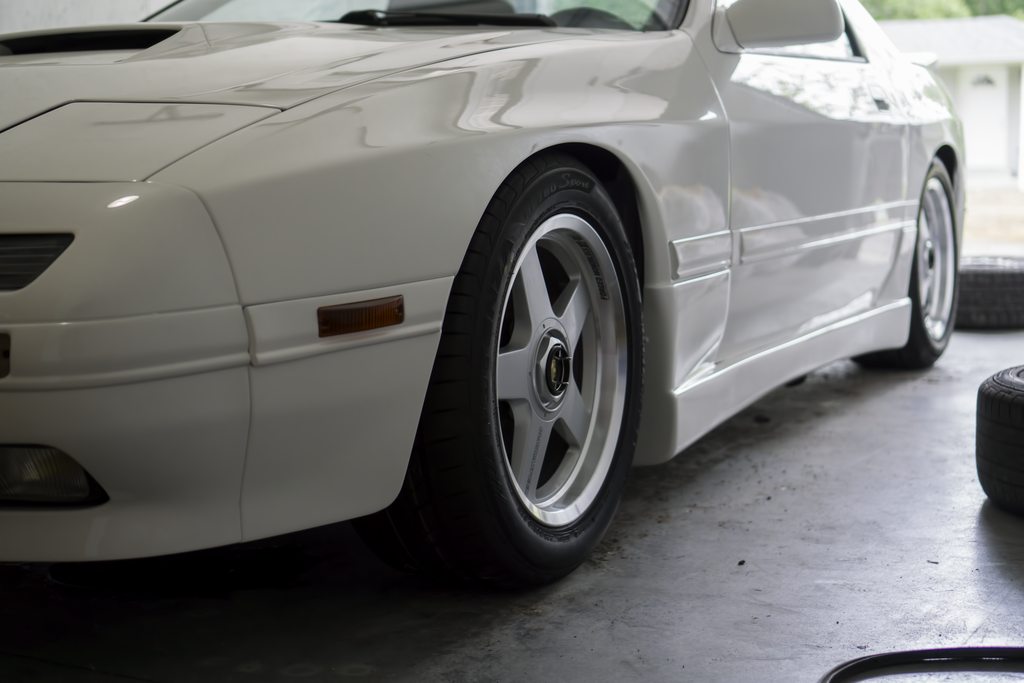
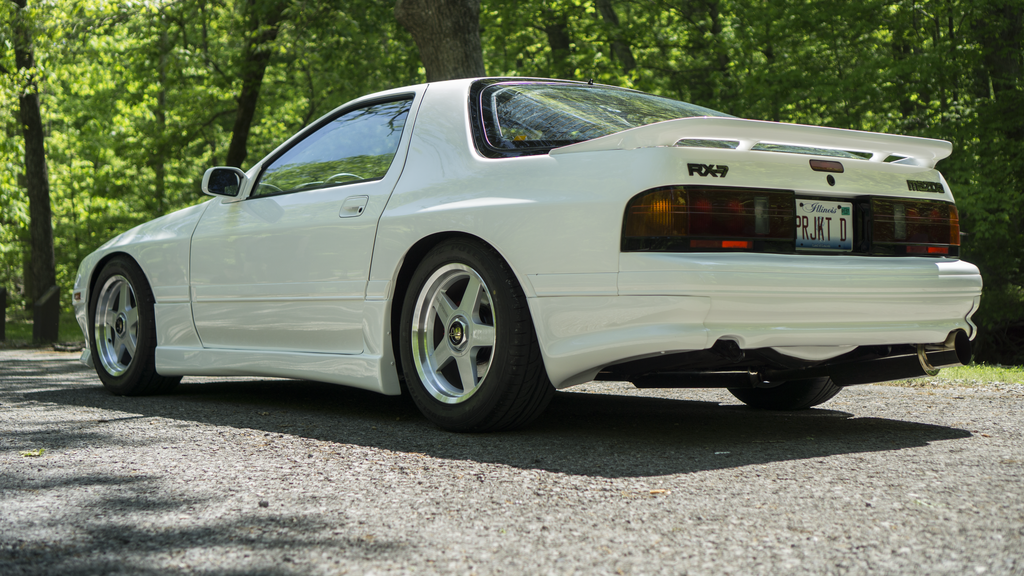
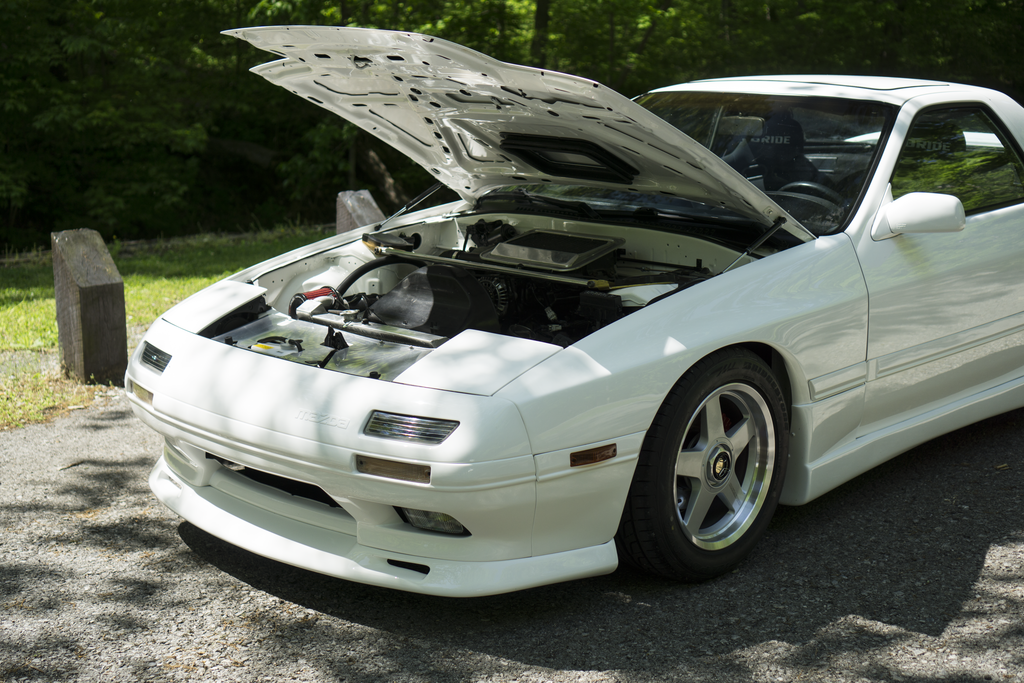
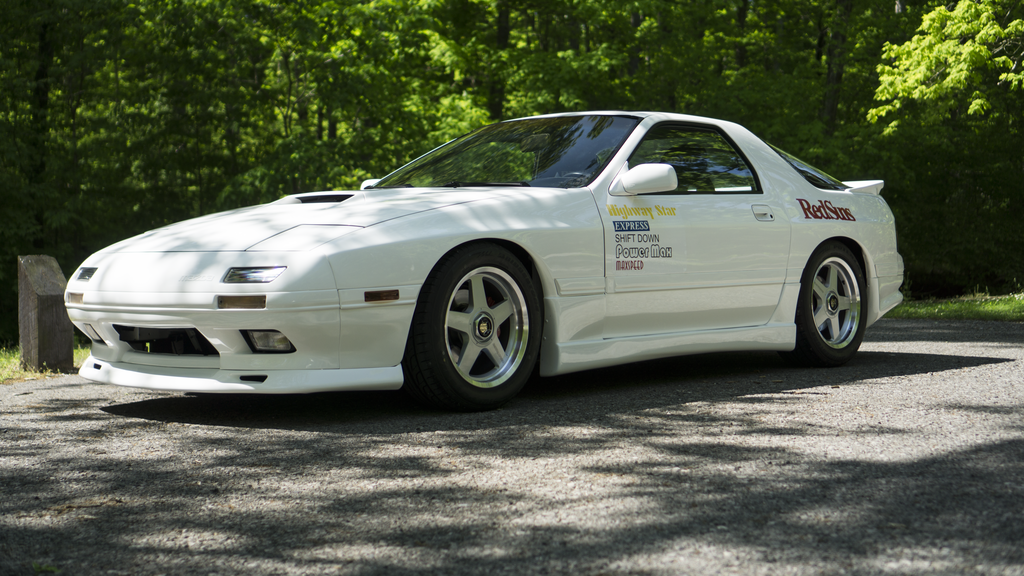
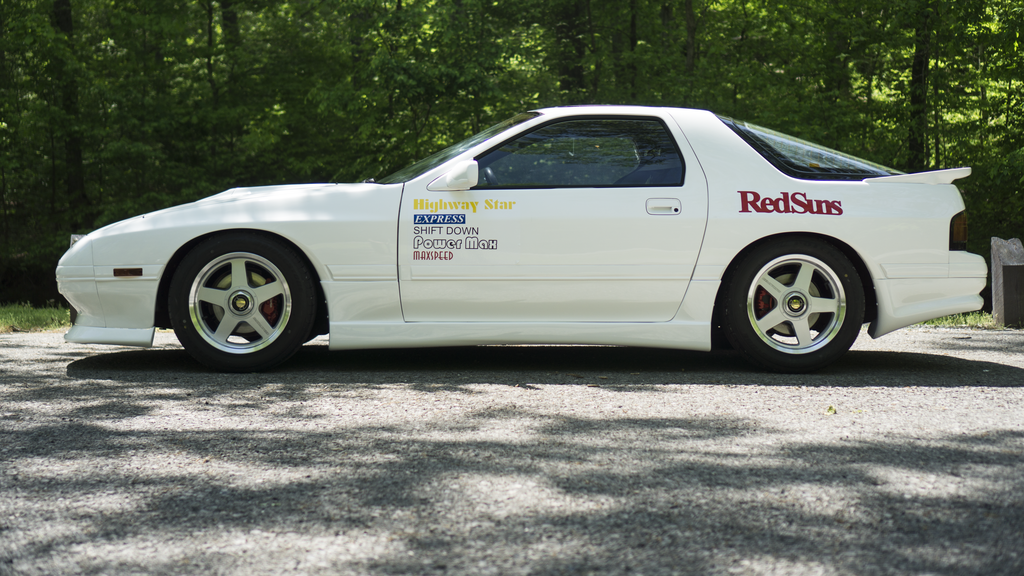
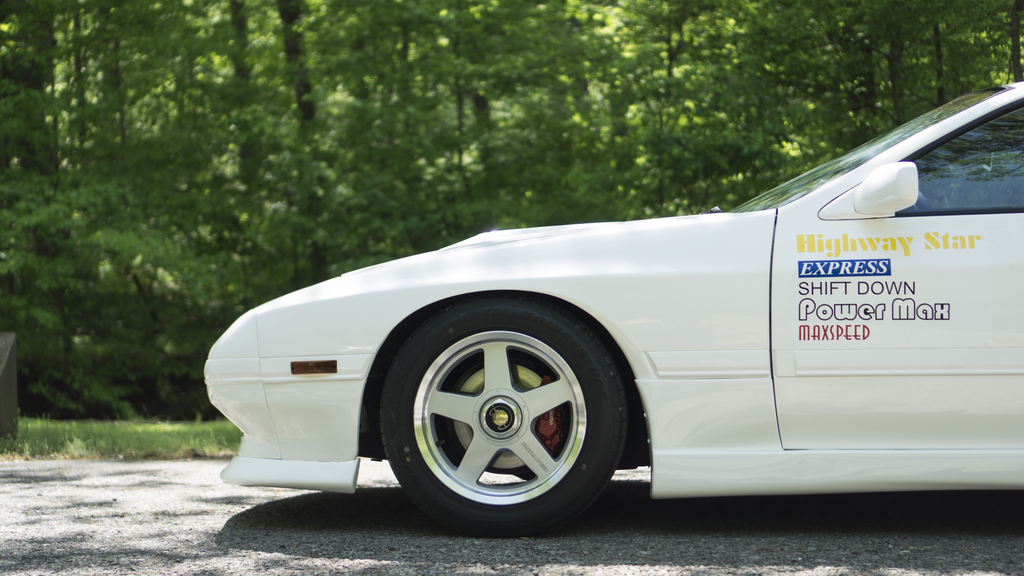
Finally Some Pics!:
Here is when I just finished getting everything on:

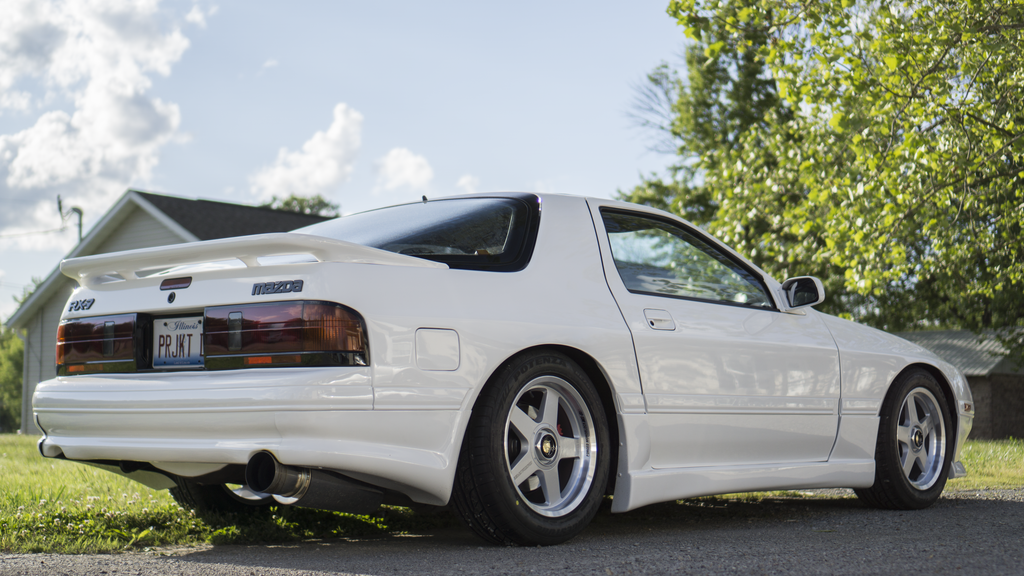
Here are some shots I took the other day in our local park:
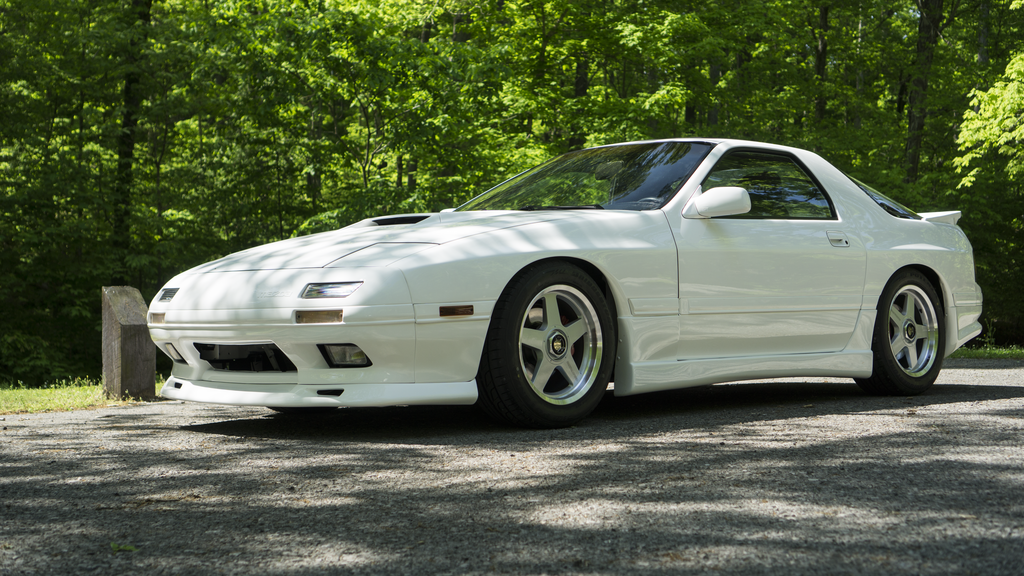
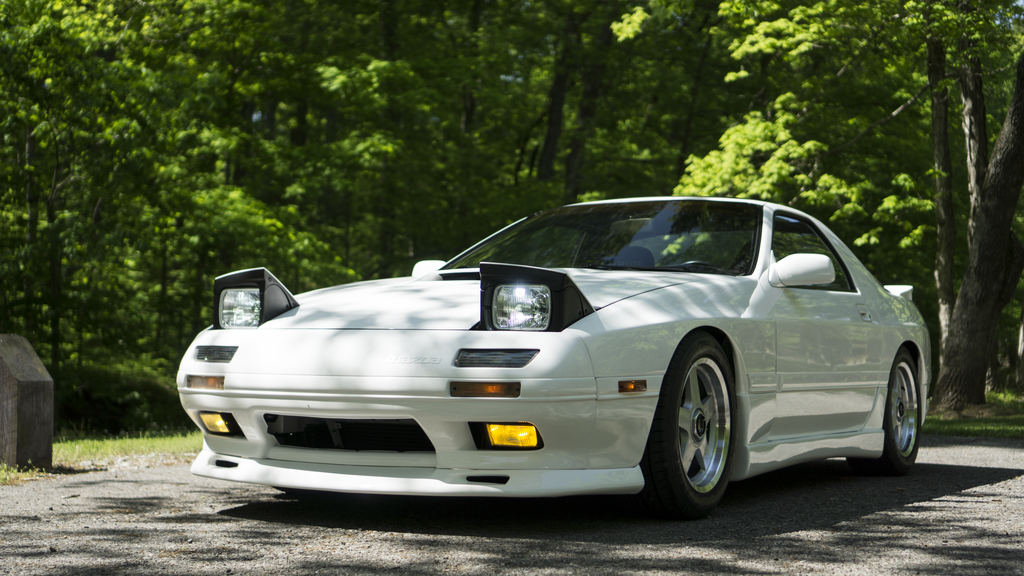
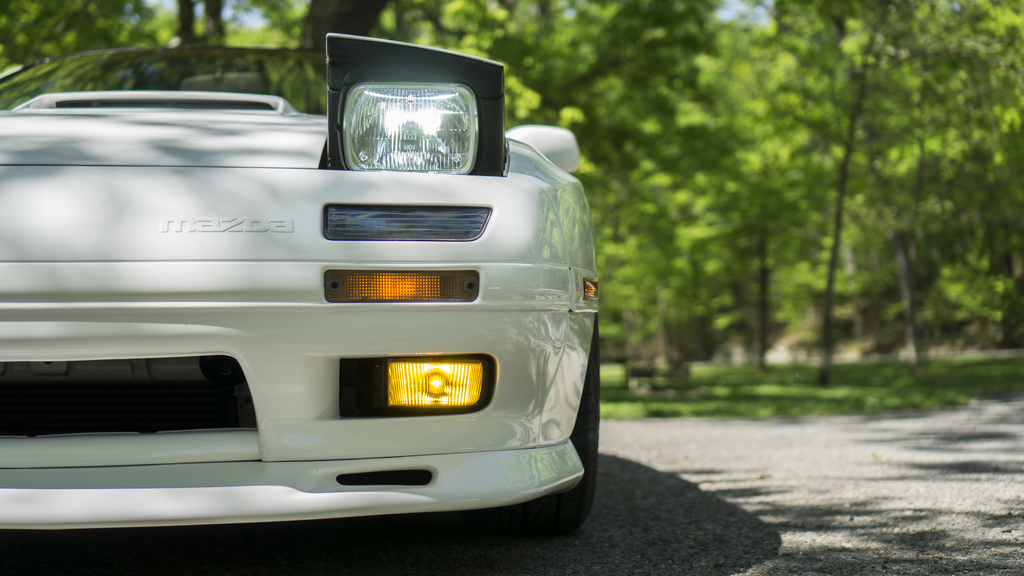
Here is something for you Initial D fans:
Thank You:
If you've been with me this far I wanted to say thank you. I know there are a lot of things one could do instead of reading build threads, but I appreciate you giving myself and my car your time. If you have a build thread of your own shoot me a link, I would love to read it.
Thank you.
I suppose this update will be a bit different. It will be structured similarly like my OP. The car, for the most part, has been completed. I�m taking it to it�s first meet today (exciting!). There are a few kinks to still work out and some things I�d still like to get, but won�t be able to before I leave this next Saturday for my internship. I went ahead and purchased an exhaust guard from Modulus Motorsports and will be putting it on when I return, with maybe a few other goodies. The wheels were scraping against the struts and I had to rush out and get an 8mm spacer for them. I have since ordered a pair of 3mm�s that will be going on shortly.
The End Result of Hard Work:
What a long road this has been. I recently re-read my own thread and I was in awe at just how far the car has come. I must admit, when I first moved down here to go to school I knew very little about cars. I didn�t even know how to change my own oil in the STi. Through a project it�s amazing to see how, not only the car progresses, but how yourself as a person as well. If I could take away one thing through all of this it is that patience and commitment are the keys to a good build. Throughout the build I�ve used many parts made from companies that are just starting out, even prototyping a few. Their products are great and they are really helping in keeping older cars alive and looking good. Support these vendors such as: LRB Speed, Modulus Motorsports, and GRZ and don�t be afraid to ask these vendors for a specialty part that they don�t offer yet.
Is this the End?
Of course not! It will be the end up weekly Sunday updates though. I�ll only update now when something cool happens or I fix something (there is a lot to fix still!). I have plans that are to take place once this engine goes, but until then I�d like to enjoy the car for awhile. I�m still always searching for a 10th AE interior swap and I�d like to invest in some Racing Beat front and rear sways, but for now I�m mostly content.
Here is the completed Mod List (for the time being):
Exterior:
626 Fuel Cap
Aluminum Door Striker Covers
GRZ Rear Wiper Delete
HELLA Vision Plus Housings
JDM Fog Lights
JDM Folding Mirrors
JDM Rear Side Moldings
JDM Side Markers
JDM Turn Signals
LRB Speed Aero Belly Pan
LRB Speed Belly Pan
Miata Antenna Delete
Modulus Motorsport Exhaust Guard
Rize Japan Ballast-Less LED Headlight Bulbs
Shine Auto Front Lip
Shine Auto Spec-R Sideskirts
Shine Auto Spec-RE Rear Aero Guards
Sokie Tech Hood Dampeners
Suspension/Drivetrain:
MazdaSpeed Front Strut Bar
MazdaSpeed Rear Strut Bar
Racing Beat DTSS Eliminators
Rotary Shack Short Throw Shifter
RP Stainless Steel D.O.T. Lines
Solid Aluminum Transmission Mounts
STANCE Super Sport Coilovers
Engine:
APEXi GT Spec Downpipe
APEXi N1 EVO Cat-Back Exhaust
APEXi Power Intake
Atkins Rotary Oil Cap
Bonez Race Pipe with Welded in Flex-Pipe
Fluidyne Radiator
Gilmer Drive Pulley Kit
HKS Blow Off Valve
Lightweight Flywheel
LRB Speed Block-Off Plates
LRB Speed CAS Cover
LRB Speed Radiator Cooling Panel
Megasquirt 3 Pro
Optima RedTop 34R Battery
Solid Aluminum Motor Mounts
Stainless Steel Clutch Line
Street Port 13BT
Walbro 255 Fuel Pump
Interior:
Bride Type FG Seat Rails
Bride Zeta III Sport-C Seats
Custom RX-7 Floor Mats
Defi Advance CR Gauges (Boost, Oil Press, Water Temp)
Innovate LC-2 Wideband with Square LCD
JBL GT7-4 Speakers (X4)
LRB Speed Aluminum Defroster Vents
LRB Speed Aluminum Side Vents
LRB Speed Single Din Gauge Pod
MazdaSpeed 03.5 Pedals
MazdaSpeed B-Spec Steering Wheel
MazdaSpeed Leather Shift ****
MOMO Hub Adapter
Pioneer DEH-X6800BT
Redline Shift Boot
Wheels/Tires:
RAYS MazdaSpeed MS-01f 16x8 +40
Bridgestone Potenza RE760 Sport 225/50/16
Finally Some Pics!:
Here is when I just finished getting everything on:


Here are some shots I took the other day in our local park:


Here is something for you Initial D fans:


Thank You:
If you've been with me this far I wanted to say thank you. I know there are a lot of things one could do instead of reading build threads, but I appreciate you giving myself and my car your time. If you have a build thread of your own shoot me a link, I would love to read it.
Thank you.
The following users liked this post:
rotary#10 (01-10-19)
05-08-16, 09:31 PM
#195
Let me know how that wire sheathing holds up. I was planning on doing that for my ECU harness. My concern is how it will hold up passing over the turbo/manifold....
Epic quality build. I am blown away with the details and how quickly you are able to finish the mini projects.
P.S how does the trim for the front glass come off? I'd love give mine some love.
Epic quality build. I am blown away with the details and how quickly you are able to finish the mini projects.
P.S how does the trim for the front glass come off? I'd love give mine some love.
05-09-16, 08:47 AM
#196
Thank you, I'll try and grab some shots before I leave.
The side trim comes off first, there are screws that hold it in place as it runs alongside the front windshield. Then you can remove the top trim as well.
I'll let you know about the sheathing, as far as I know it's grade A stuff. My friend who recommended it, uses it on his builds all the time.
Let me know how that wire sheathing holds up. I was planning on doing that for my ECU harness. My concern is how it will hold up passing over the turbo/manifold....
Epic quality build. I am blown away with the details and how quickly you are able to finish the mini projects.
P.S how does the trim for the front glass come off? I'd love give mine some love.
Epic quality build. I am blown away with the details and how quickly you are able to finish the mini projects.
P.S how does the trim for the front glass come off? I'd love give mine some love.
I'll let you know about the sheathing, as far as I know it's grade A stuff. My friend who recommended it, uses it on his builds all the time.
05-09-16, 10:32 AM
#199
Thank you, I'm not sure I'll ever be willing to sell though.
I have two set of stock lugs and just used them. They work great. I'll link below:
https://www.mazdatrix.com/wheel1.htm
I have the 86-92, but the generic open ended should work as well.
https://www.mazdatrix.com/wheel1.htm
I have the 86-92, but the generic open ended should work as well.

 where did u get all the stickers tho?