
Jap Spec Series 5 FC3S - Twin turbo rew conversion!


Thread Starter
Full Member
Joined: Feb 2011
Posts: 186
Likes: 5
From: Australia
Jap Spec Series 5 FC3S - Twin turbo rew conversion!
My first rotor!
Wanted a rotor as my first car, althou because the rents were helping out with cash and knew they had ***** :twisted: soo.
They didnt let me, Insted got a Ls Integra but thats for a different forum... finally got rid of that thing and was set on finding an FC.
Pre Purchase
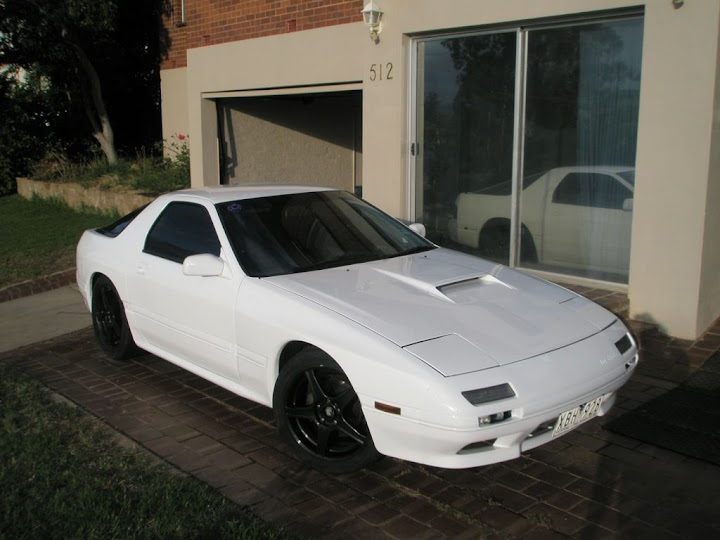
This came up for the right price and in the right area, wanted an infini for their light weight but as they are impossible too find, this lightly optioned series5 seamed to be a great substitute.
No AC, abs, cruise, sunroof, electric mirrors = Weight saving
It needed work but nothing major soo bout it mid december in 2009
Mods
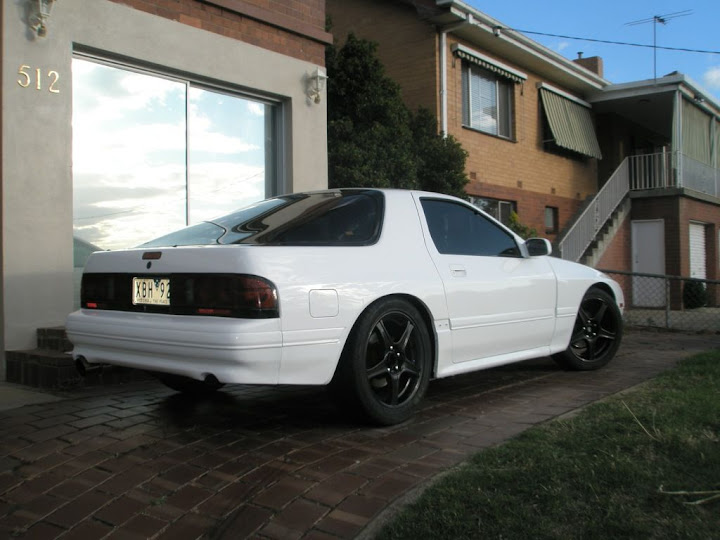
3" Turbo back exhaust with DRIFT Cannon
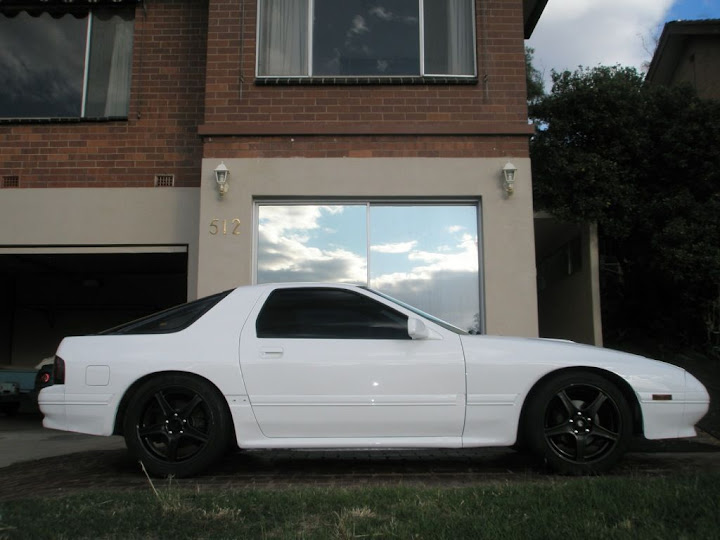
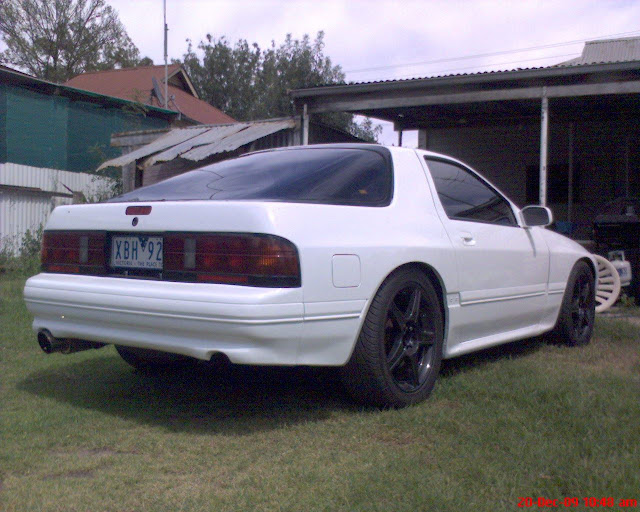
17� Black rims with 235 tyres unknown brand
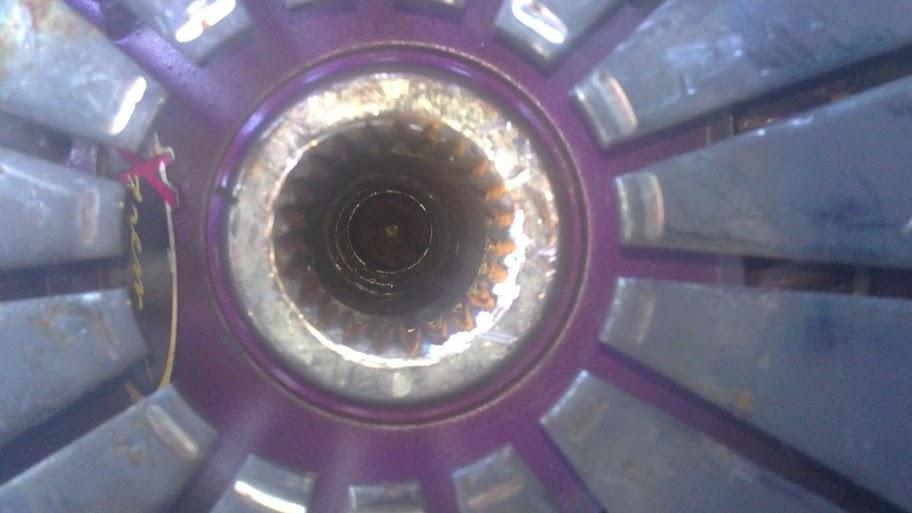
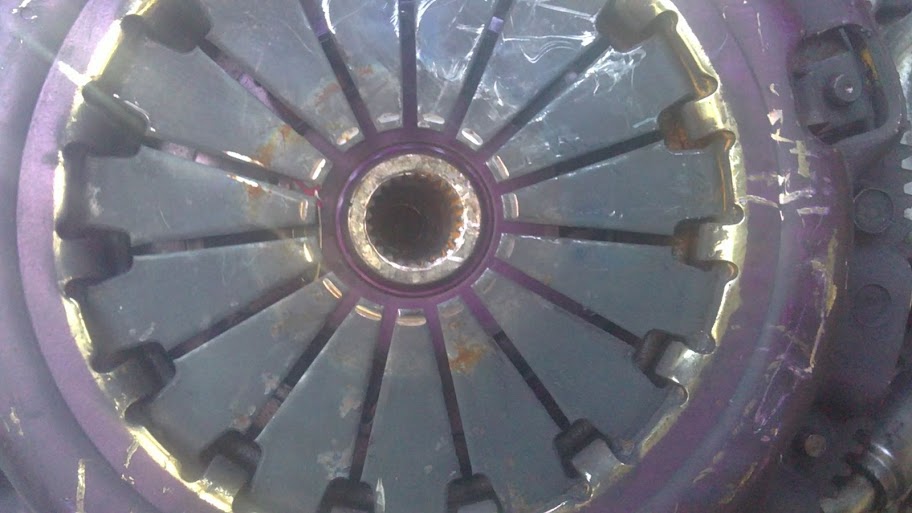
Single brass button clutch unknown brand
ohlins adjustable shocks king springs
Boggard turbo timer
fresh white respray
removed and filled rear spoiler
black window tint
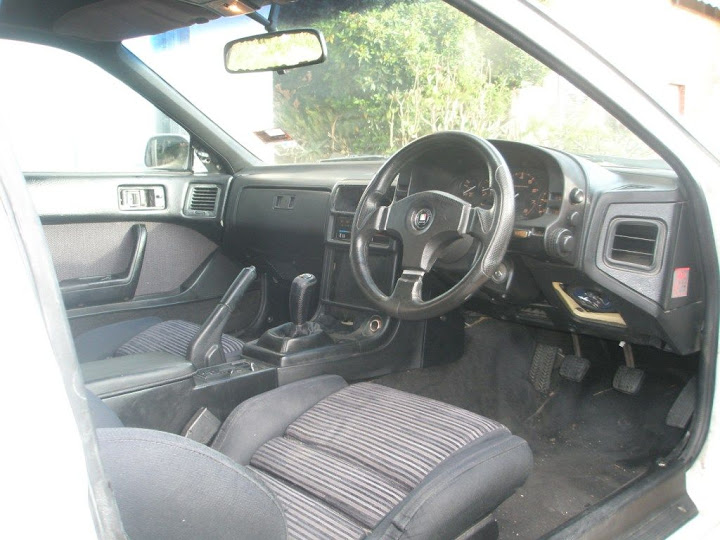
auto technica steering wheel
Aircon removed
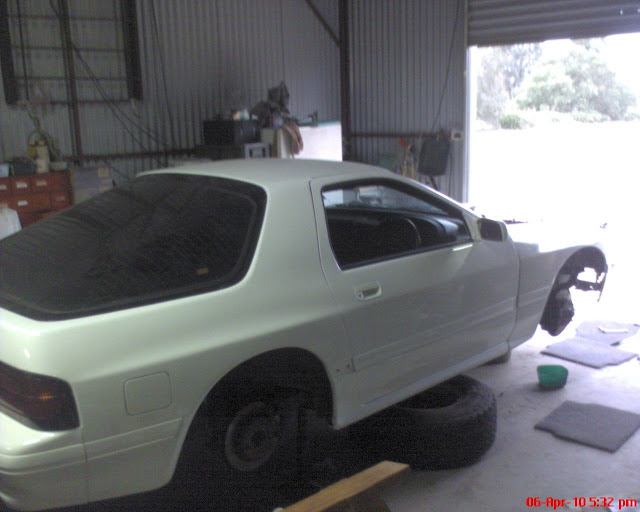
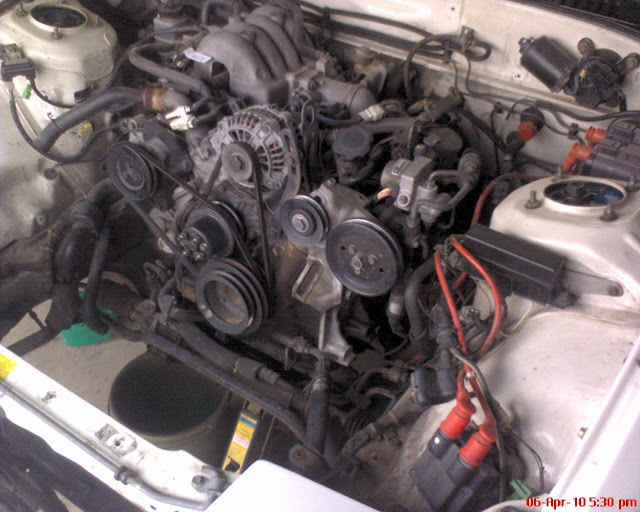
I knew the rear suspension was fucked, the springs are sitting out of the seats in this shot
Interior was typical for an import missing heaps but what was there was in near perfect condition :shock:
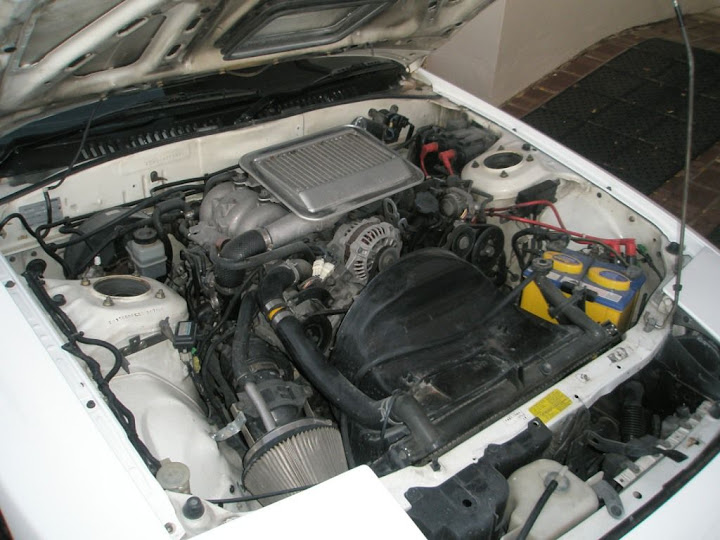
Unmodified motor except for a blitz pod filter and adaptor
Now
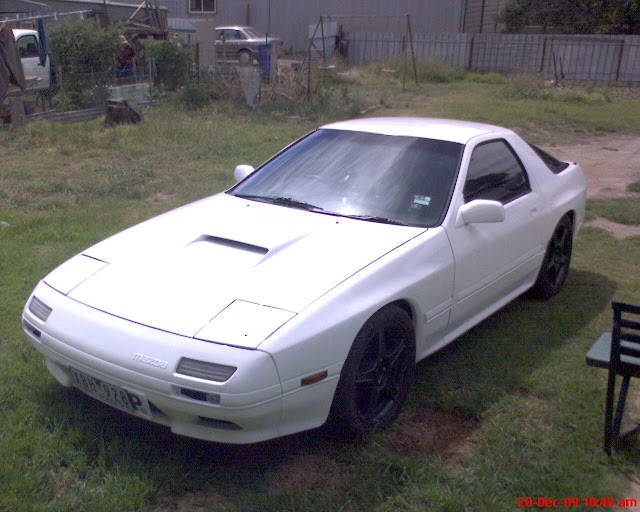
When i got it home and put the springs in their seats had a tough stance for 17's, and yeah drove it on my p's like that for 3months [-X
Some Purchases
Cusco Camber tops

Jap Super Streets with out mounts

Intima Pads

Pioneer OLE and bluetooth Head unit (still only has 2 speakers #-o )

Got the rest of the moulds and a new passenger side window seal and the spare OEM wheel and tyres.
Havent got arround to putting them on yet as theyre not painted
Wanted a rotor as my first car, althou because the rents were helping out with cash and knew they had ***** :twisted: soo.
They didnt let me, Insted got a Ls Integra but thats for a different forum... finally got rid of that thing and was set on finding an FC.
Pre Purchase
This came up for the right price and in the right area, wanted an infini for their light weight but as they are impossible too find, this lightly optioned series5 seamed to be a great substitute.
No AC, abs, cruise, sunroof, electric mirrors = Weight saving
It needed work but nothing major soo bout it mid december in 2009
Mods
3" Turbo back exhaust with DRIFT Cannon
17� Black rims with 235 tyres unknown brand
Single brass button clutch unknown brand
ohlins adjustable shocks king springs
Boggard turbo timer
fresh white respray
removed and filled rear spoiler
black window tint
auto technica steering wheel
Aircon removed
I knew the rear suspension was fucked, the springs are sitting out of the seats in this shot
Interior was typical for an import missing heaps but what was there was in near perfect condition :shock:
Unmodified motor except for a blitz pod filter and adaptor
Now
When i got it home and put the springs in their seats had a tough stance for 17's, and yeah drove it on my p's like that for 3months [-X
Some Purchases
Cusco Camber tops
Jap Super Streets with out mounts
Intima Pads
Pioneer OLE and bluetooth Head unit (still only has 2 speakers #-o )
Got the rest of the moulds and a new passenger side window seal and the spare OEM wheel and tyres.
Havent got arround to putting them on yet as theyre not painted
Thread Starter
Full Member
Joined: Feb 2011
Posts: 186
Likes: 5
From: Australia
A week or 2 after getting my full license and teins installed, same time as Corowa Autofest (30th jan for my own records)she decided shed had enough after 130 thousand kms on the clock...
I wasnt even having fun when it happened driving a friend arround getting beers ready to go out that night pulled up, let the turbo timer doo her thing went inside picked up some stuff came back out turned over once or twice then clunk and lock :punch:
Nothing
Checked fuses then thougth the started must have died soo prob didnt the worst possible thing i could have done to her, pushed her out into the street on a bit of a slope then push started her, which did nothing except lock the wheels for a meter ](*,)
So yeah well and truely seized decided too right myself off that night too :puke2:
Got her back to my old mans shed and left her to sit for a few months while i went back to melbourne, got some time over easter and started pulling her apart
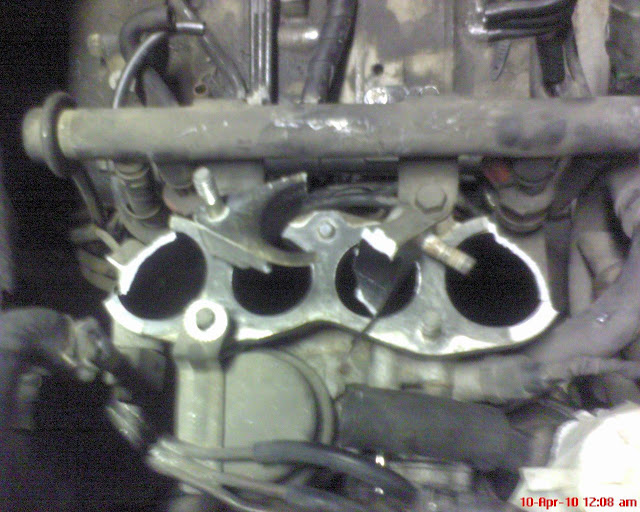
Somehow broke the lower intake manifold which made removal a little harder
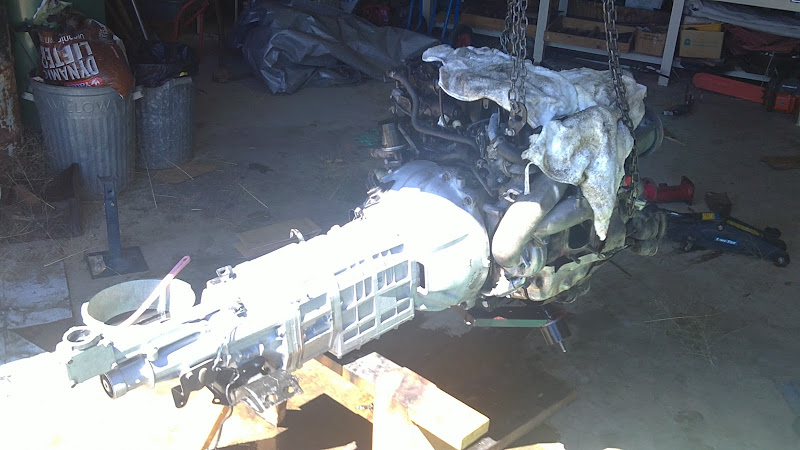
Various stages of removal
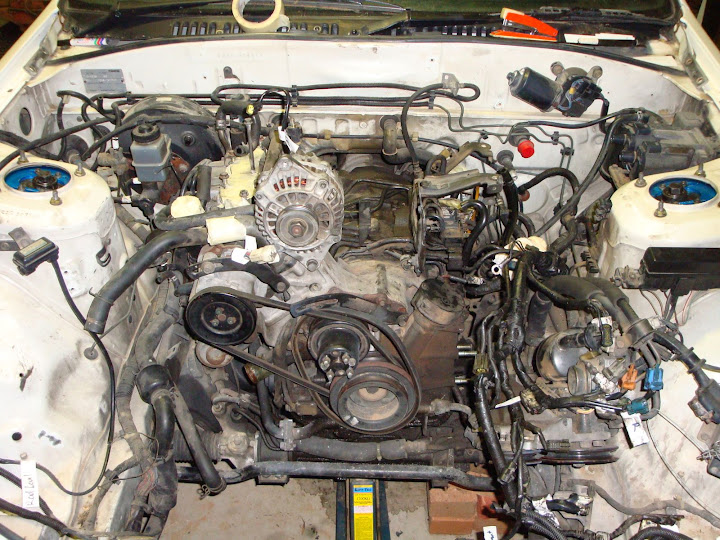
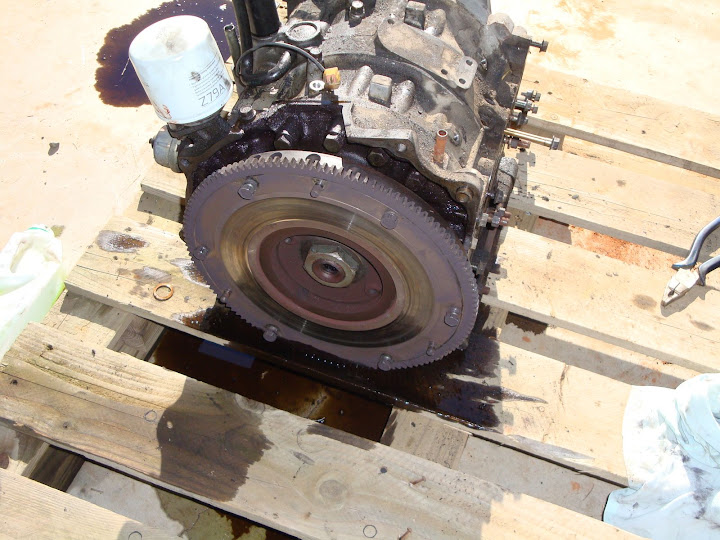
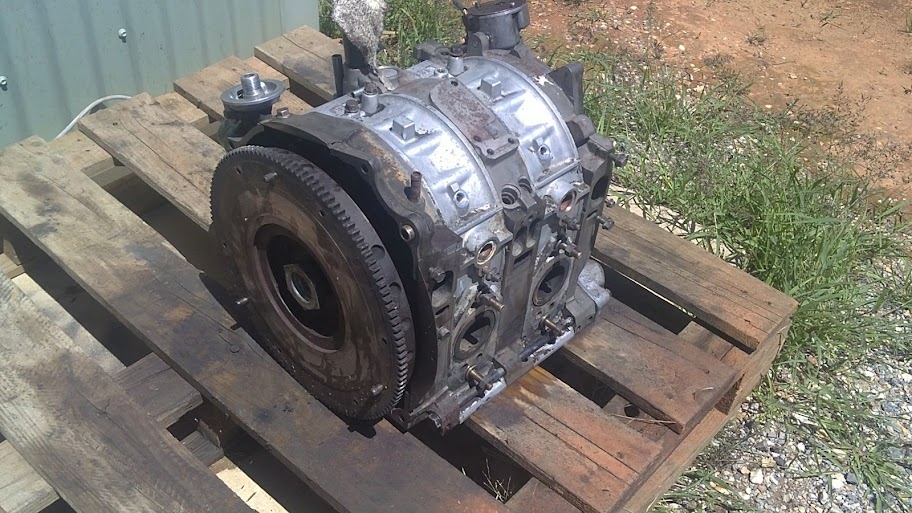
Then as of last week finally completed the task and got the motor out
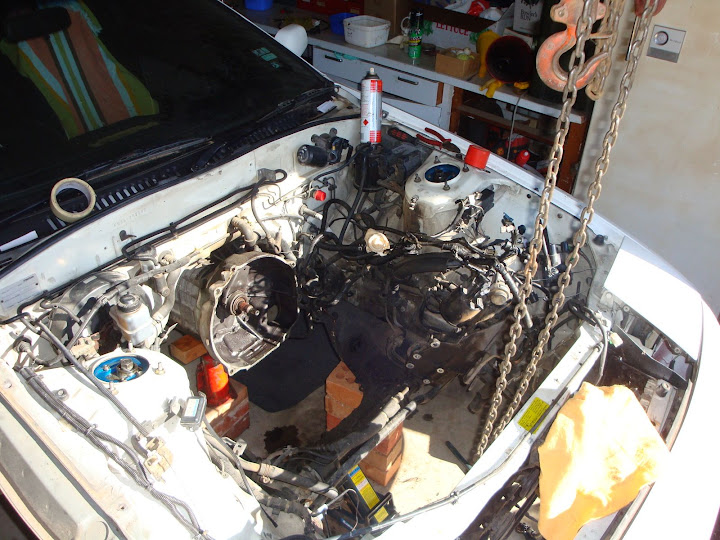
And got it down too as much as i could with my limited tools

I wasnt even having fun when it happened driving a friend arround getting beers ready to go out that night pulled up, let the turbo timer doo her thing went inside picked up some stuff came back out turned over once or twice then clunk and lock :punch:
Nothing
Checked fuses then thougth the started must have died soo prob didnt the worst possible thing i could have done to her, pushed her out into the street on a bit of a slope then push started her, which did nothing except lock the wheels for a meter ](*,)
So yeah well and truely seized decided too right myself off that night too :puke2:
Got her back to my old mans shed and left her to sit for a few months while i went back to melbourne, got some time over easter and started pulling her apart
Somehow broke the lower intake manifold which made removal a little harder
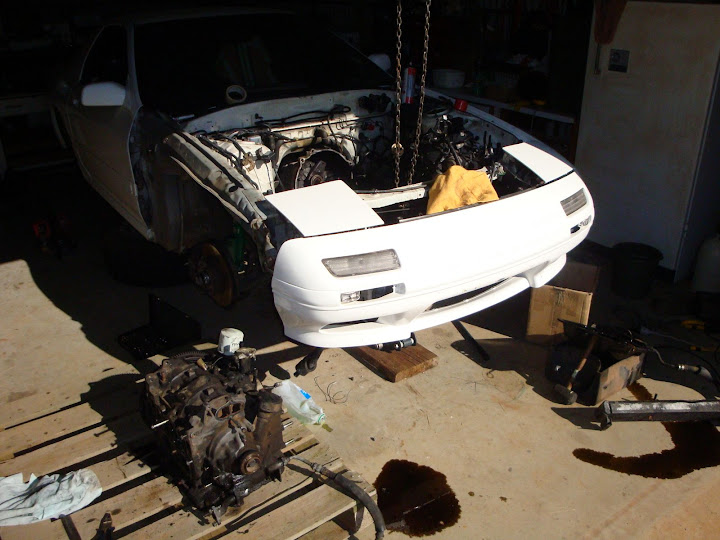
Various stages of removal
Then as of last week finally completed the task and got the motor out
And got it down too as much as i could with my limited tools
Thread Starter
Full Member
Joined: Feb 2011
Posts: 186
Likes: 5
From: Australia
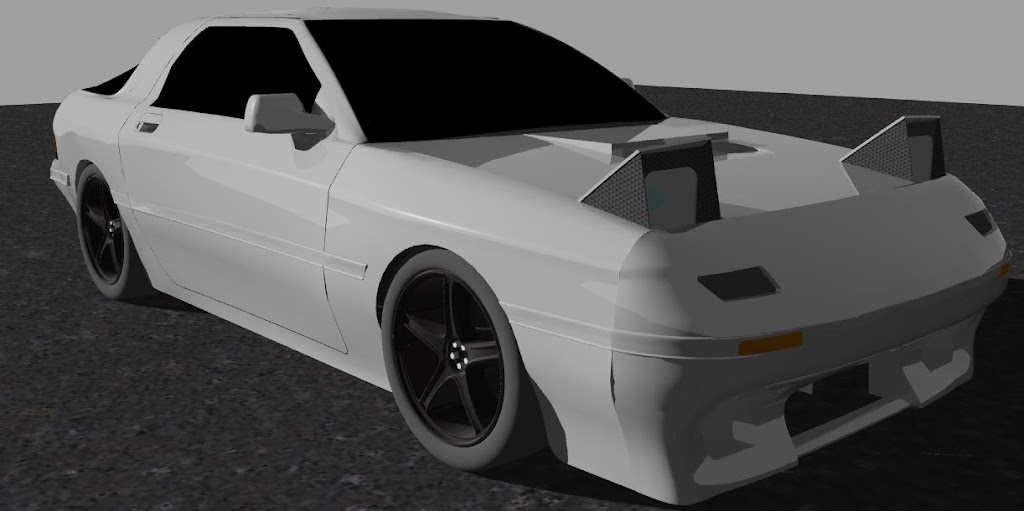
Also a cheeky little plug, this is what ive doing while the fc is off the road haha
3D CAD Rotor and Fc3s
A few things that i should probably fix up while the motor is out, what are you opinions how bad does it look?
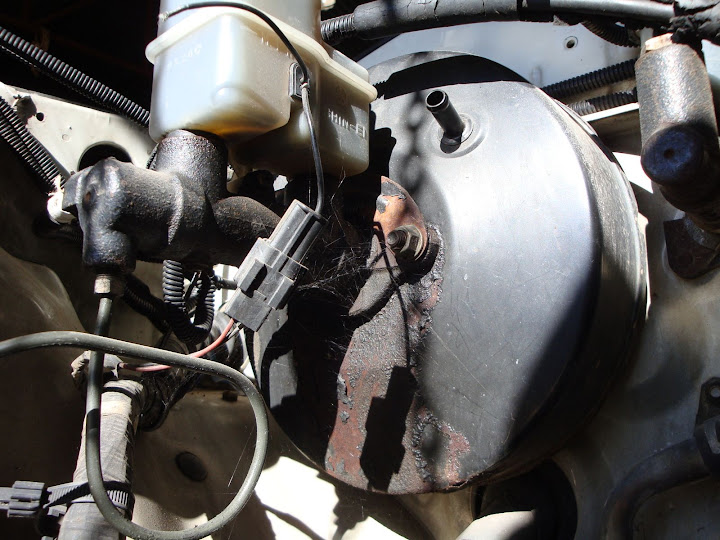
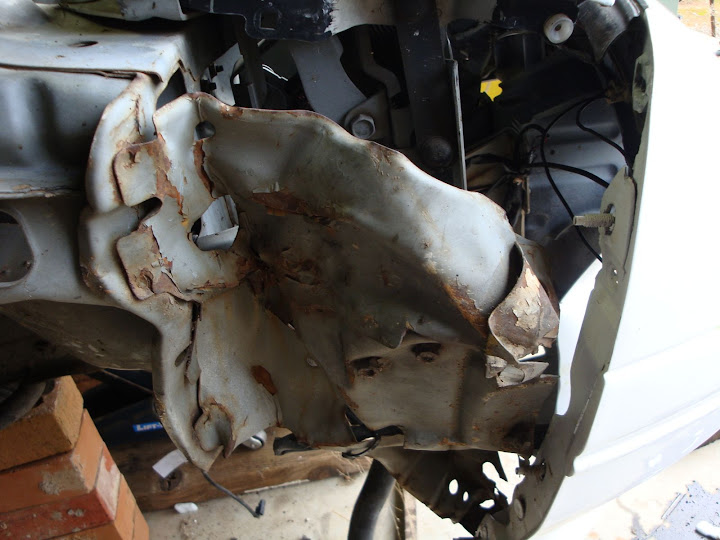
She had also had some slight damage to the front right which id like to fix as the mounting for the whiper resivoir had been pushed and rubbing on the wheel and has a hole in it, which apparently isnt road worthy :shoot:
Will take some pictures its mainly damaged the metal that holds the fenders together...
3D CAD Rotor and Fc3s
A few things that i should probably fix up while the motor is out, what are you opinions how bad does it look?
She had also had some slight damage to the front right which id like to fix as the mounting for the whiper resivoir had been pushed and rubbing on the wheel and has a hole in it, which apparently isnt road worthy :shoot:
Will take some pictures its mainly damaged the metal that holds the fenders together...
Thread Starter
Full Member
Joined: Feb 2011
Posts: 186
Likes: 5
From: Australia
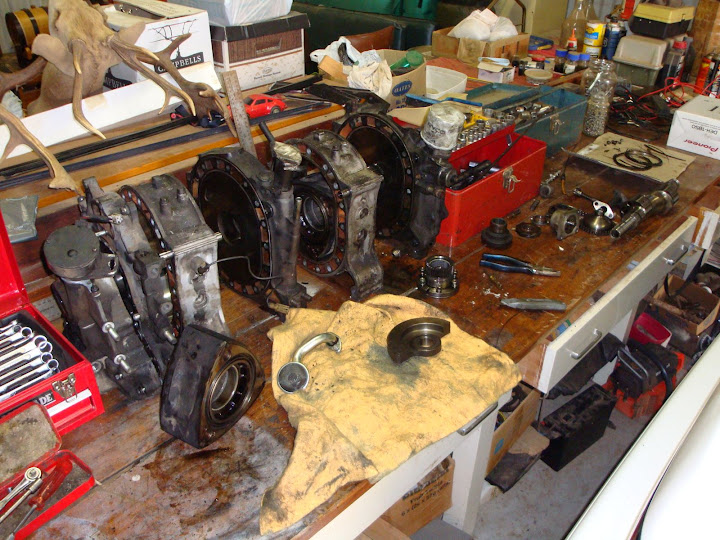
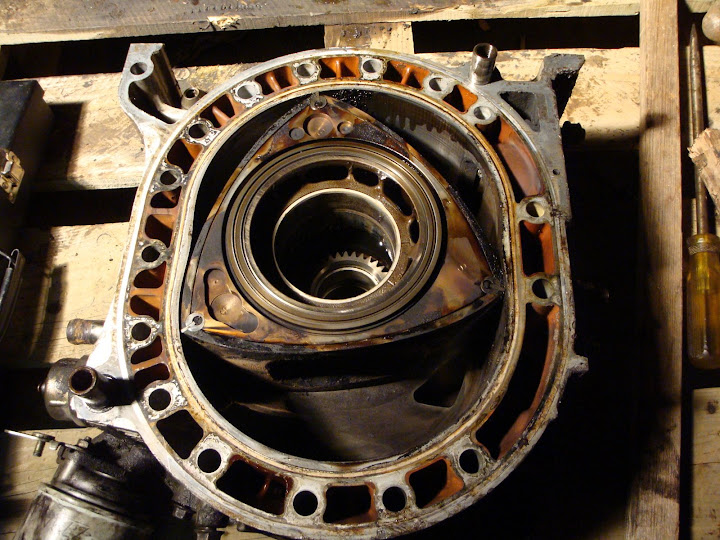
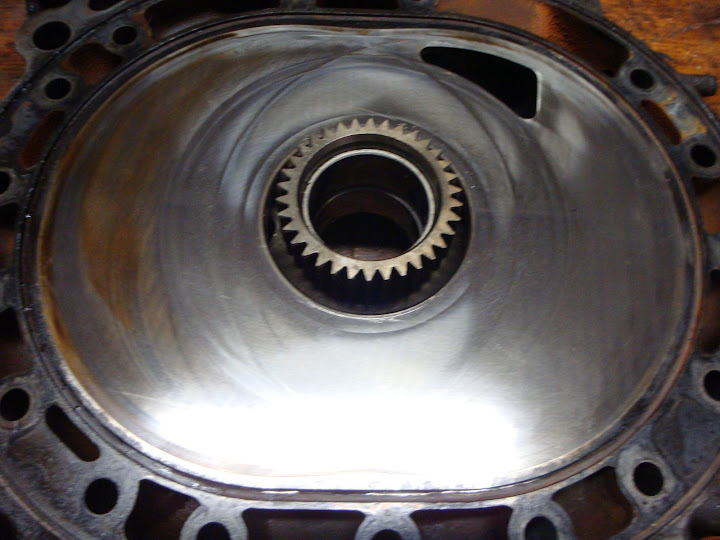
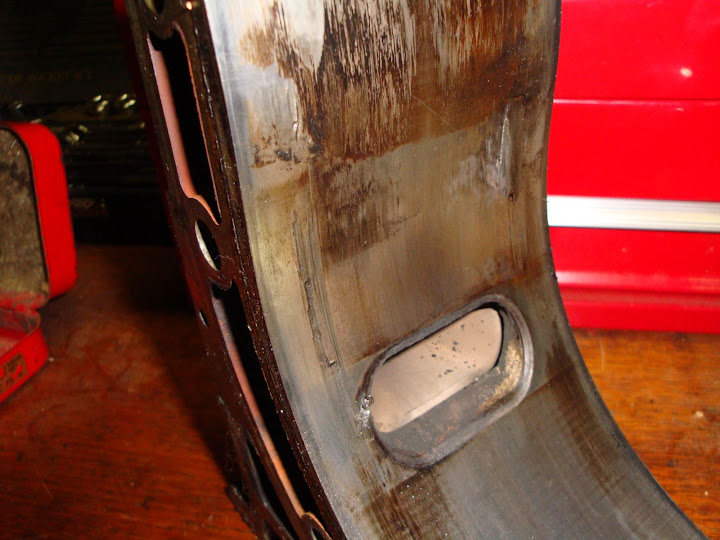
Knew something wasnt quiet right once i couldnt get the rear end plate off first, soo took the front end plate to reveal this

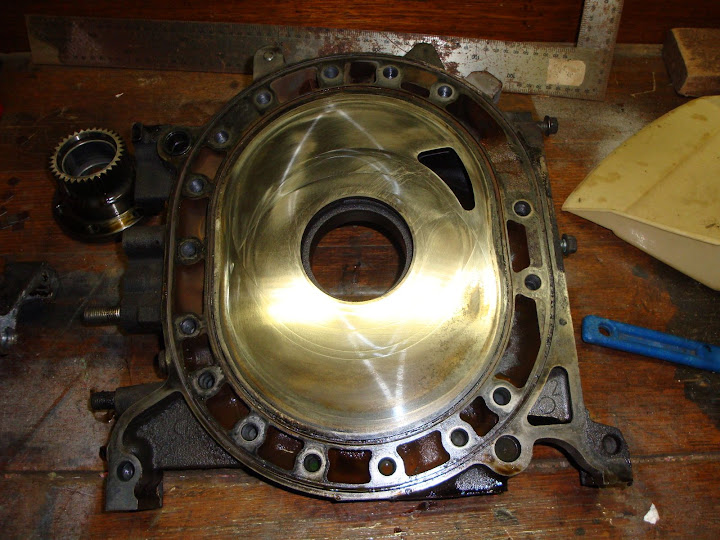
Which on first inspection seamed okay one slight mark in the end plate but other then that looks in good condition
Front rotor in good condition soo far too, needs to be cleaned to confirm but no chipping on apex grooves, lots of carbon thou...
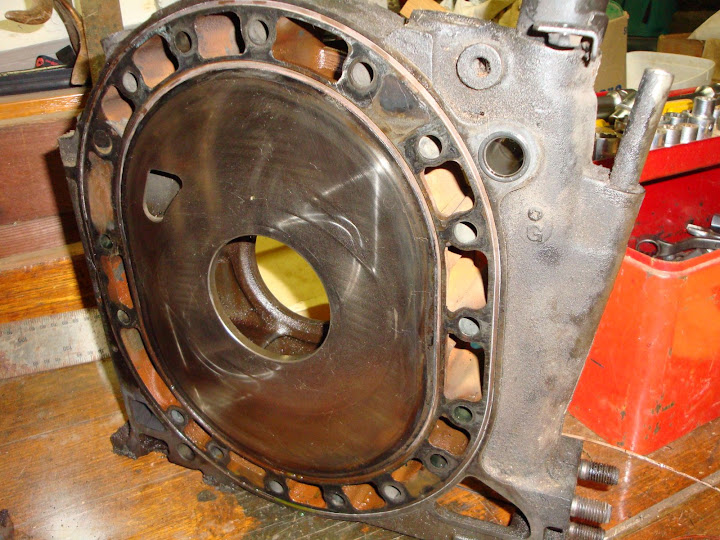
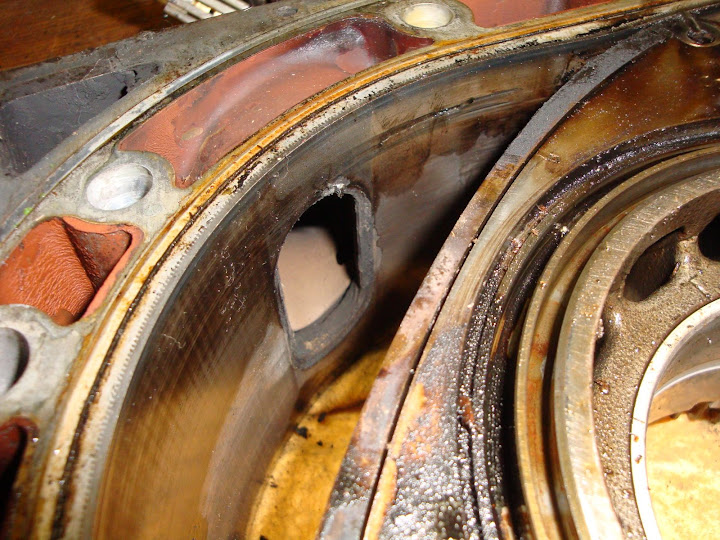
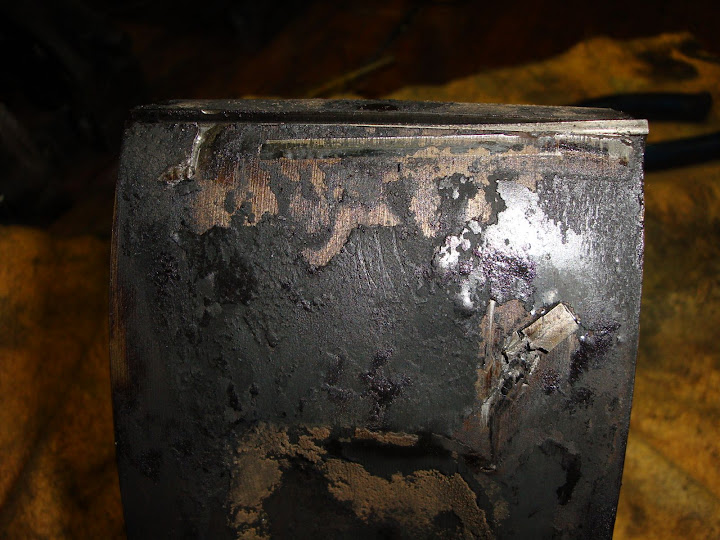
Then noticed a deep groove in the housing near the exhaust port
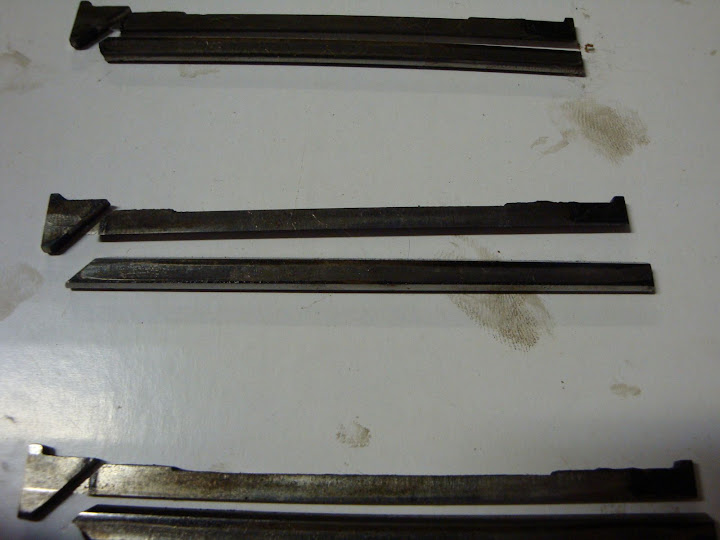
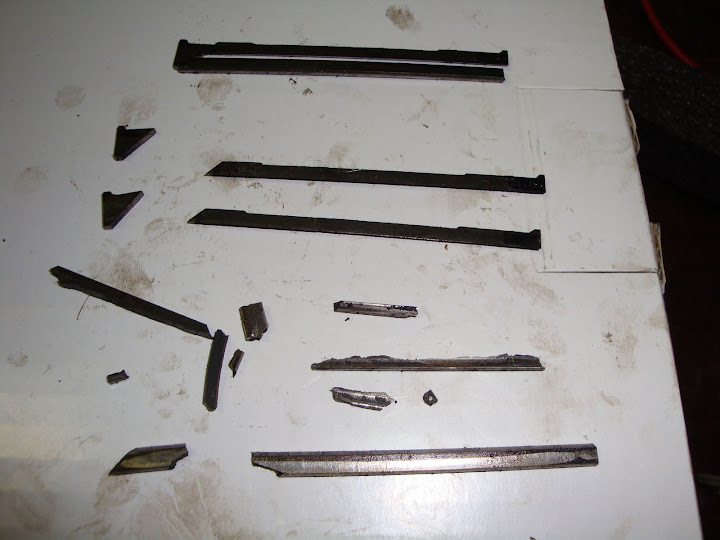
So checked the apex seals two of them are missing peices :cry:
Which on first inspection seamed okay one slight mark in the end plate but other then that looks in good condition
Front rotor in good condition soo far too, needs to be cleaned to confirm but no chipping on apex grooves, lots of carbon thou...
Then noticed a deep groove in the housing near the exhaust port
So checked the apex seals two of them are missing peices :cry:
Thread Starter
Full Member
Joined: Feb 2011
Posts: 186
Likes: 5
From: Australia
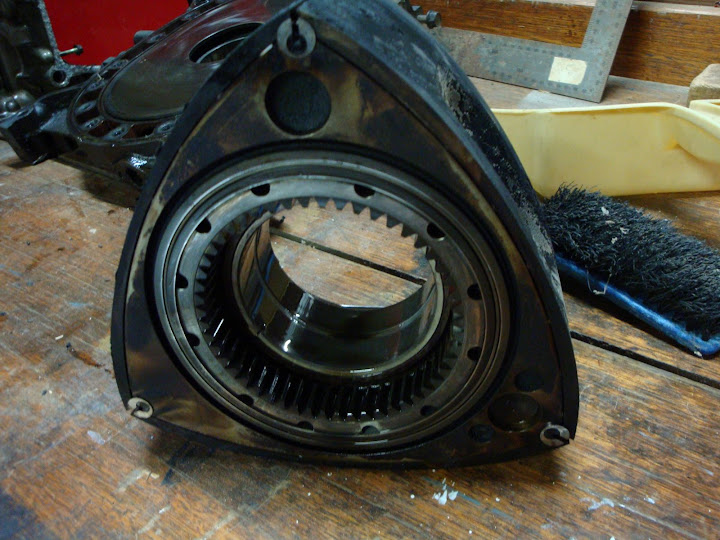
Because the engine was seized the eccentric shaft was holding the rear housing and end plates together, eventually got them apart by hitting the rear of the e-shaft quiet a few times and knock it out...
Mid plate also looks fine on both sides one side having the same mark on it as the front plate
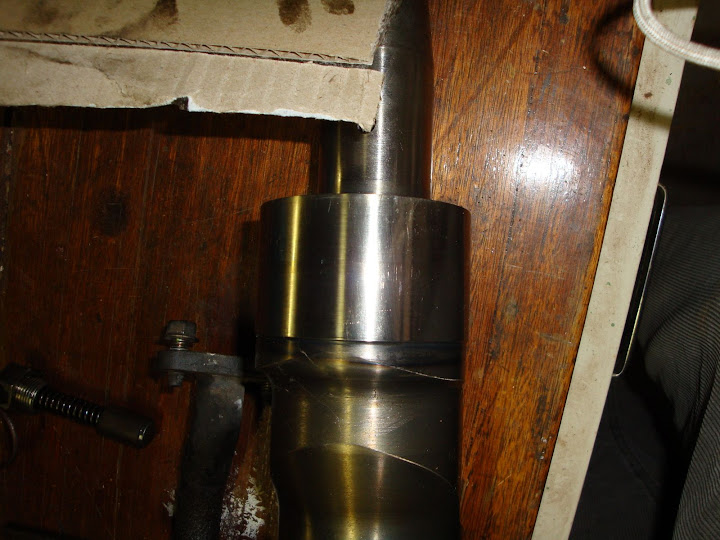
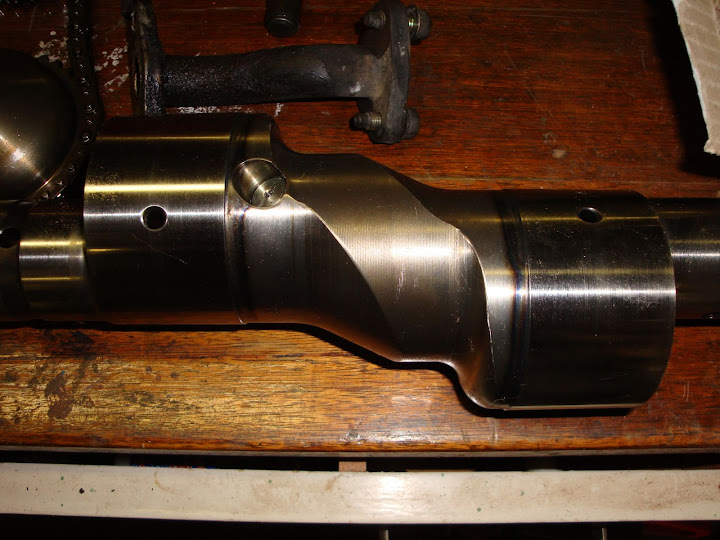
E-shaft has a few marks on it from where i had pushed it out from the rotor but doesnt appear to have any unusual wear marks on it, not that i really know what they look like.
Can see marks on the rear lobe here from pushing it out here
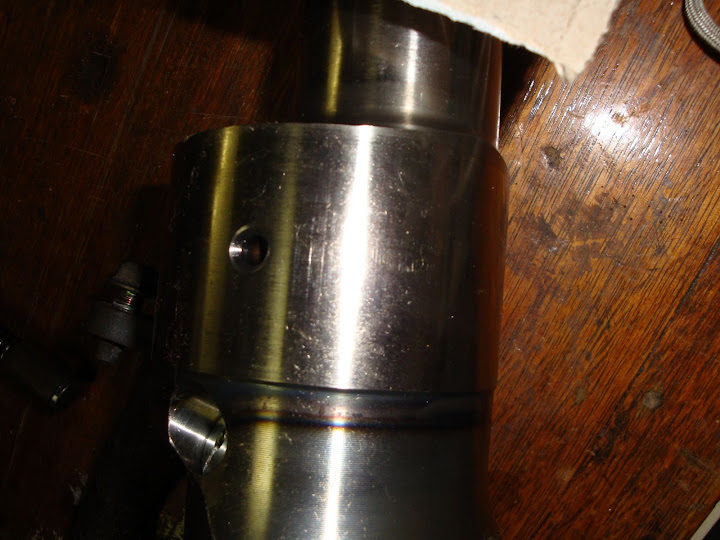
Front lobe has no marks on it
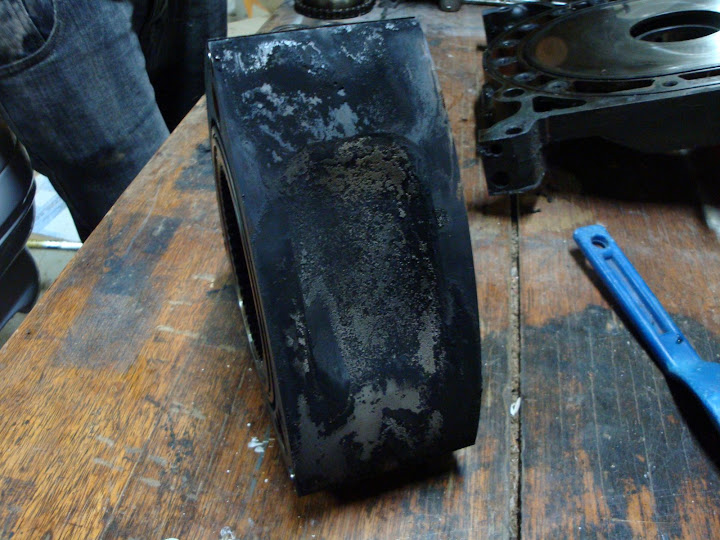
Rear Rotor embedded into the housing which must have deformed the dowel pins as the end plate was not wanting to be seperated what soo ever
Finally seperated them this is the rear face, note the distance its off from the housing and lack of apex seal :cry:

Hard too see but it was slightly off centre on the housing too, not very much but it was, could have happened when i was trying to remove the e-shaft thou
Wear on the housing, and a peice of the exhaust port was half removed
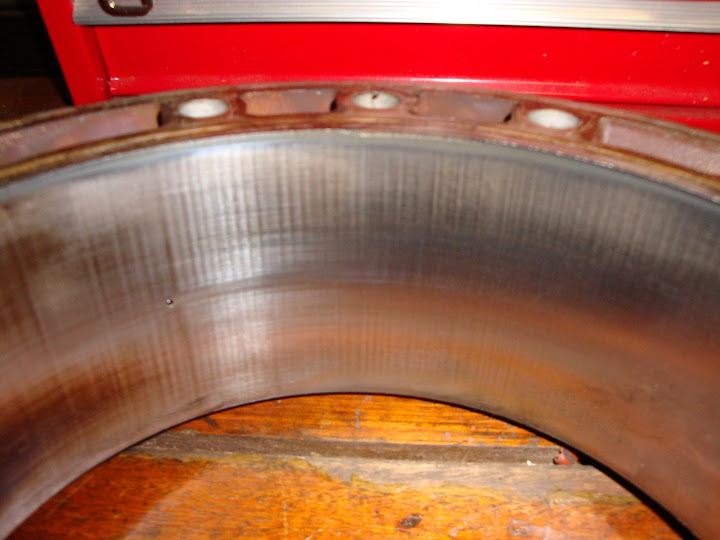
Rear endplate again has the same marks on it as other endplate this one being the deapest as shown close up
Just inside of the side seal burn marks
So from what i can tell, these are fooked
Front housing
Rear housing
Rear Rotor
The rest looks alright but end plates will probably need machining, and hopefully the e-shaft is fine. may be able to use the rear rotor if i went to 3mm seals but i cant see how bad the damage is just quiet yet
But overall shes fingered lol
Mid plate also looks fine on both sides one side having the same mark on it as the front plate
E-shaft has a few marks on it from where i had pushed it out from the rotor but doesnt appear to have any unusual wear marks on it, not that i really know what they look like.
Can see marks on the rear lobe here from pushing it out here
Front lobe has no marks on it
Rear Rotor embedded into the housing which must have deformed the dowel pins as the end plate was not wanting to be seperated what soo ever
Finally seperated them this is the rear face, note the distance its off from the housing and lack of apex seal :cry:
Hard too see but it was slightly off centre on the housing too, not very much but it was, could have happened when i was trying to remove the e-shaft thou
Wear on the housing, and a peice of the exhaust port was half removed
Rear endplate again has the same marks on it as other endplate this one being the deapest as shown close up
Just inside of the side seal burn marks
So from what i can tell, these are fooked
Front housing
Rear housing
Rear Rotor
The rest looks alright but end plates will probably need machining, and hopefully the e-shaft is fine. may be able to use the rear rotor if i went to 3mm seals but i cant see how bad the damage is just quiet yet
But overall shes fingered lol
Thread Starter
Full Member
Joined: Feb 2011
Posts: 186
Likes: 5
From: Australia
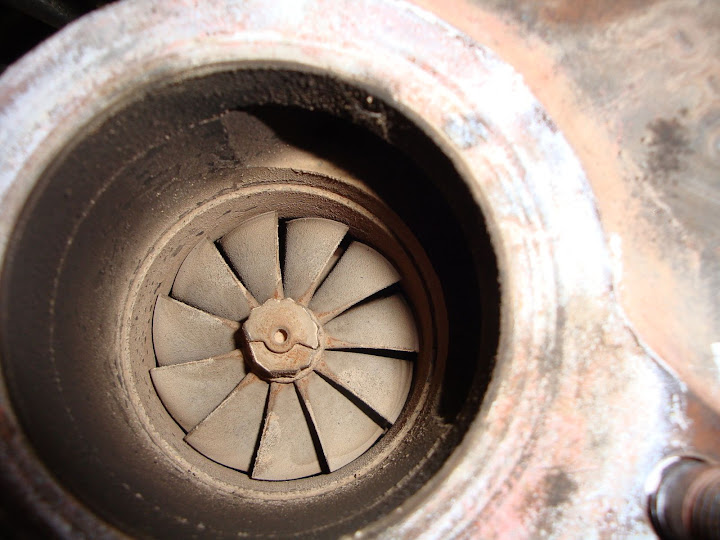
It looks fine from these few no shaft play and the only marks on the blades are from where i touched them

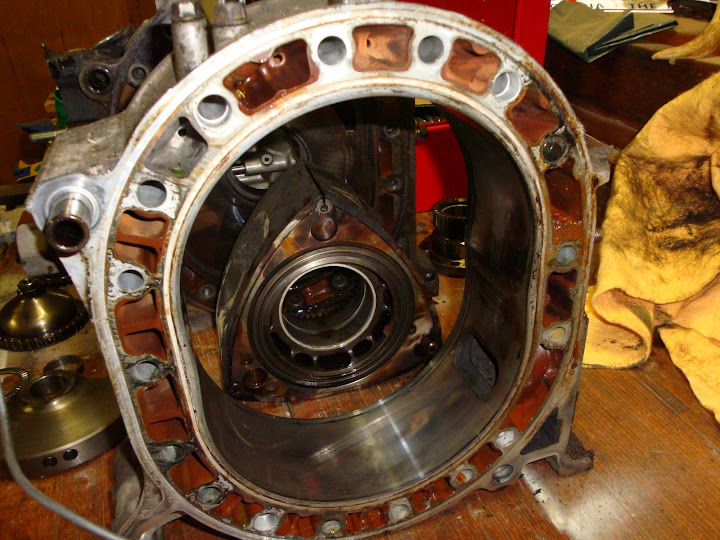
This is the result after i removed the rear rotor from the housing again with quiet a large hammer im pretty sures its fooked
Bits of apex seal embedded into the rotor deformed apex groove and chips out of the rotor :cry:
More bits of metal in the rotor, uncleaned for photos

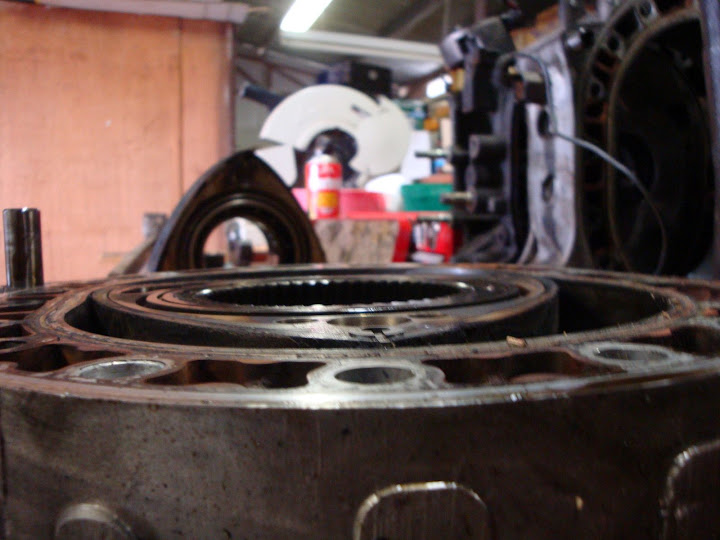
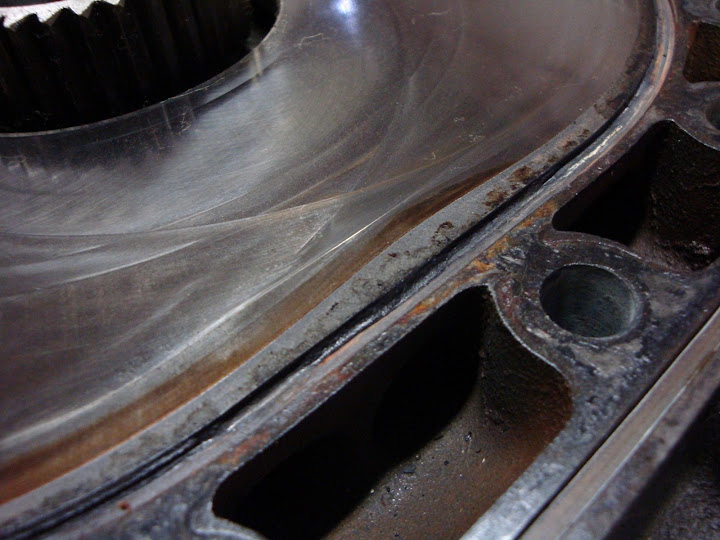
Rear housing damage = fucked housing :laugh:
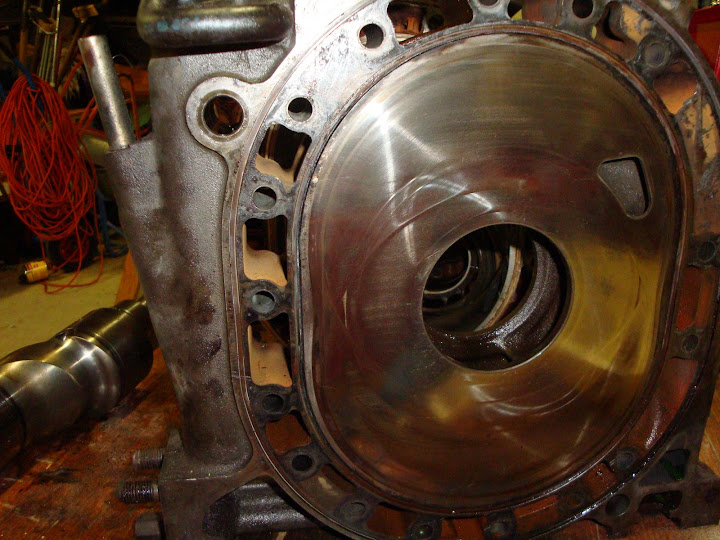
Chatter marks on top of housing, possible reason for engine failure :-k
Whats left of the rear rotors apex seals
This is the result after i removed the rear rotor from the housing again with quiet a large hammer im pretty sures its fooked
Bits of apex seal embedded into the rotor deformed apex groove and chips out of the rotor :cry:
More bits of metal in the rotor, uncleaned for photos
Rear housing damage = fucked housing :laugh:
Chatter marks on top of housing, possible reason for engine failure :-k
Whats left of the rear rotors apex seals
Trending Topics
Thread Starter
Full Member
Joined: Feb 2011
Posts: 186
Likes: 5
From: Australia
Freaken over uni, all i want to do is fix my FC!!!!
Been buying small little boring peices when they come up cheap interior peices and other little things i need for road worthy...
Also picked up a really straight slightly worn na bonet for $1 off ebay hahaha
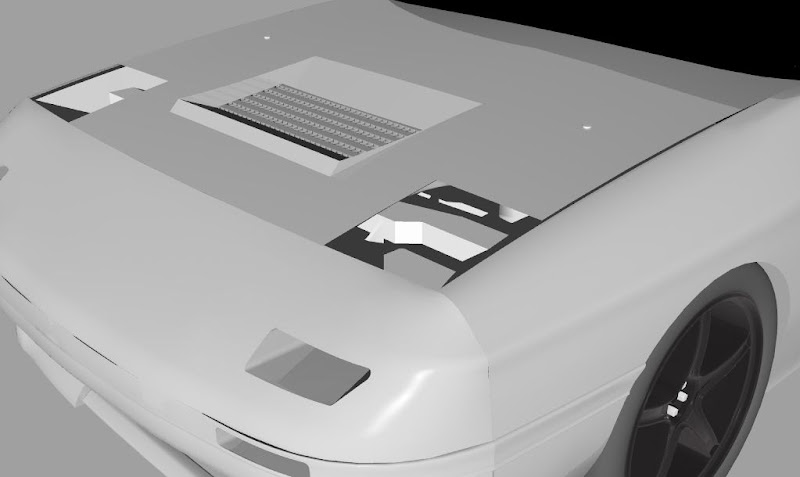
Wanted it because i always wanted to do a v mount and therefore need to have a vented bonet.
Anyway going to give a shot at doing it my self too 8-[
Fav design bit evo style, had a few others but my computer keeps dieing! and i lose my work...
Been buying small little boring peices when they come up cheap interior peices and other little things i need for road worthy...
Also picked up a really straight slightly worn na bonet for $1 off ebay hahaha
Wanted it because i always wanted to do a v mount and therefore need to have a vented bonet.
Anyway going to give a shot at doing it my self too 8-[
Fav design bit evo style, had a few others but my computer keeps dieing! and i lose my work...
Thread Starter
Full Member
Joined: Feb 2011
Posts: 186
Likes: 5
From: Australia
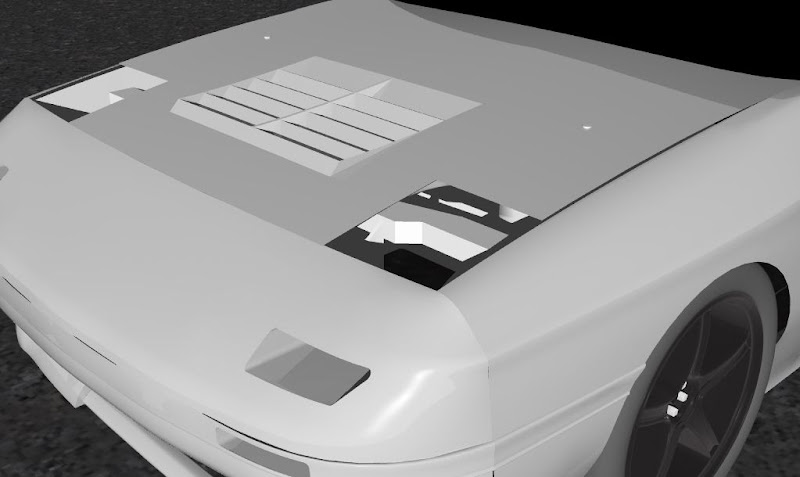
Wow i didnt realise how bad those renders were i mean i was trying to keep the lines as straight as possble soo it will be somewhat what like it will actually turn out but dam...
but i think ive got my heart set on an evo style one more like this better render too :laugh:
use some of that cheap mesh **** from super cheap and bondo the curves in by hand
This way i wouldnt even have to cut into the cross beams (i beleive evos too still have them run under the vent aswell), does that make it still legal or are any holes defectable???
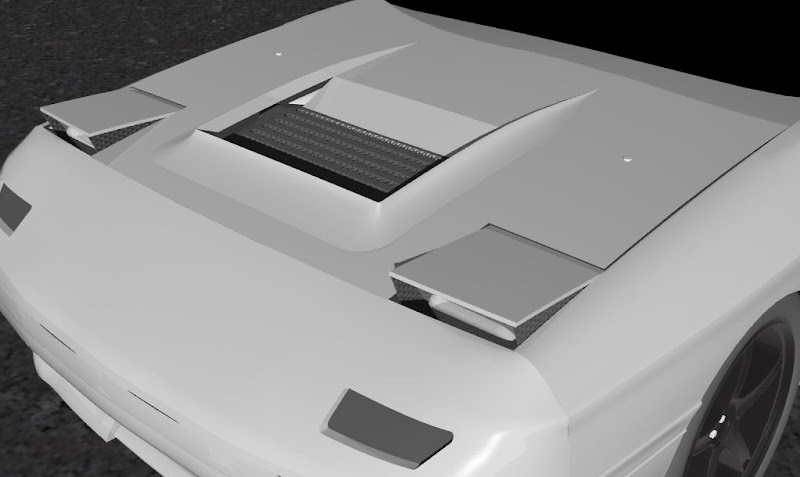
sleep eyes 8)
but i think ive got my heart set on an evo style one more like this better render too :laugh:
use some of that cheap mesh **** from super cheap and bondo the curves in by hand
This way i wouldnt even have to cut into the cross beams (i beleive evos too still have them run under the vent aswell), does that make it still legal or are any holes defectable???
sleep eyes 8)
Thread Starter
Full Member
Joined: Feb 2011
Posts: 186
Likes: 5
From: Australia
Actually had some time to work on the car this week 
Degreased the left side of the engine, semi polished all the brackets i took off and semi polished all the bolts i took off too hahaha
Just cleaned up some bits and peices while i wait for the front cut to come
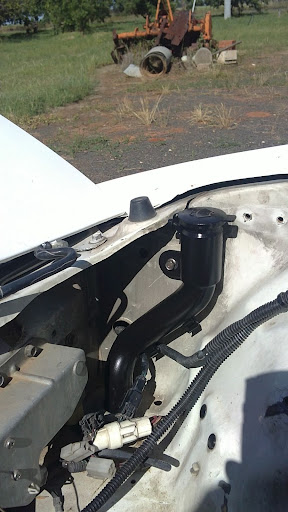
Painted the washer bottle filler spout came up pretty good i think looks a **** tone better then the gay plastic
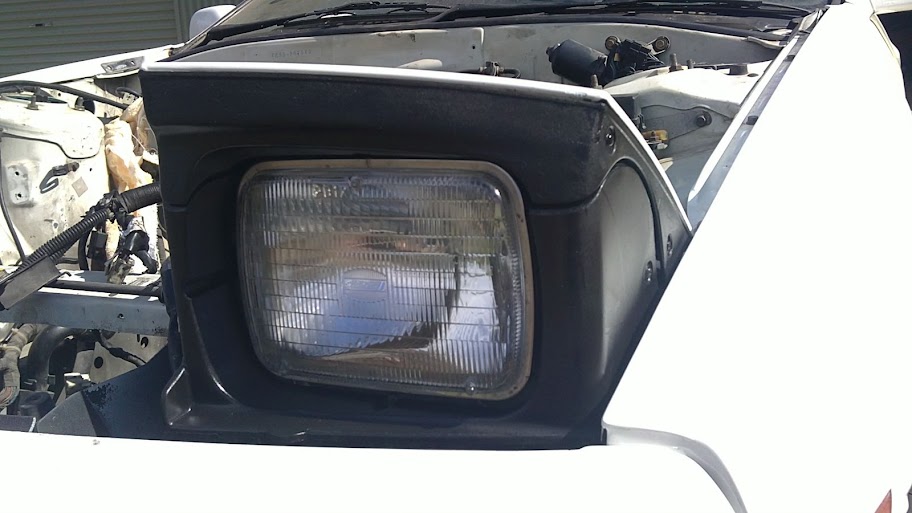
Painted and cleaned head lights and covers
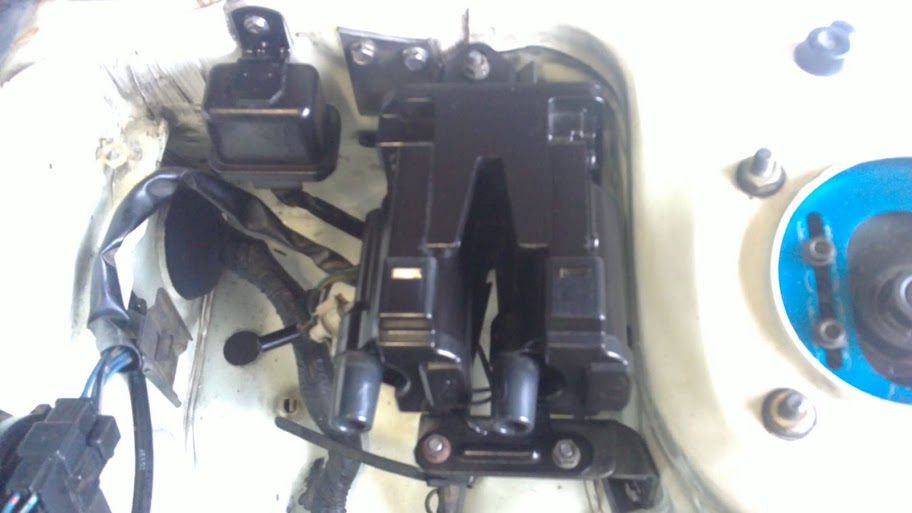
Painted the Tailing coils and what ever that box thing was lol
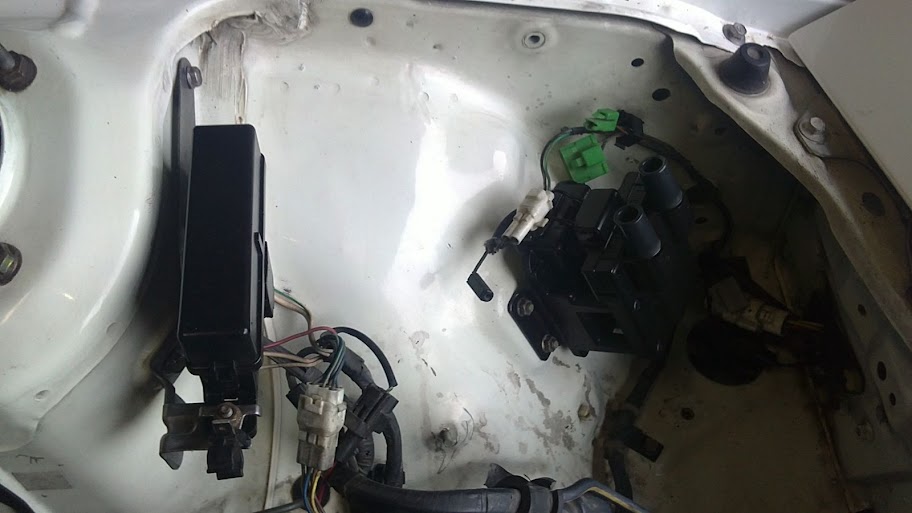
Painted the fuse box and leading coils, couldnt get that black **** off unfortunately
Degreased the left side of the engine, semi polished all the brackets i took off and semi polished all the bolts i took off too hahaha
Just cleaned up some bits and peices while i wait for the front cut to come
Painted the washer bottle filler spout came up pretty good i think looks a **** tone better then the gay plastic
Painted and cleaned head lights and covers
Painted the Tailing coils and what ever that box thing was lol
Painted the fuse box and leading coils, couldnt get that black **** off unfortunately
Thread Starter
Full Member
Joined: Feb 2011
Posts: 186
Likes: 5
From: Australia
Would love to paint the bay,
unfortunately i dont really have the time and more importantly dont have a spray gun, let alone a compressor and i cant justify paying someone to do it,
also locally i dont think there is a spray painter, be a good 75-100kms away :laugh:
Also actually properly removed the engine loom, i didnt realise there was another plug just before the firewall for a good 30mins ](*,) hahaha
Also means another thing that probably needs re wiring,
found this on the net i know its for a Apexi power fc but as the share the same harness as a stock fd harness it will be the same
Apexi PFC Install
Fd Ignitor Install
Thread Starter
Full Member
Joined: Feb 2011
Posts: 186
Likes: 5
From: Australia
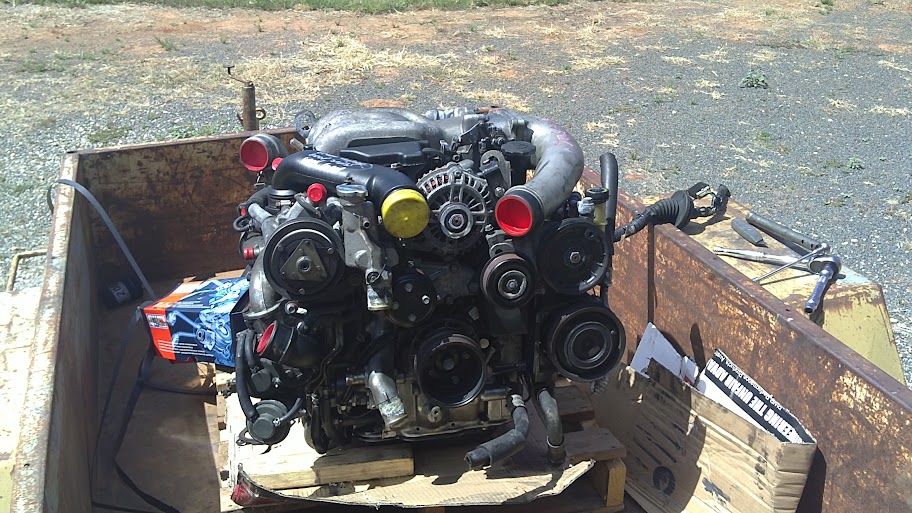
:bounce2: Bought my fd engine :bounce2:
And some MMR Engine mounts and dtss eliminators, as they were cheap and hopefully a good mix of durability and not harsh on other components,
Still need to work out an intercooler thermo fans and if the budget allows the fd twin oil coolers...
at this stage still v-mount IC aswell
And some MMR Engine mounts and dtss eliminators, as they were cheap and hopefully a good mix of durability and not harsh on other components,
Still need to work out an intercooler thermo fans and if the budget allows the fd twin oil coolers...
at this stage still v-mount IC aswell
Thread Starter
Full Member
Joined: Feb 2011
Posts: 186
Likes: 5
From: Australia
Okay soo finally got arround to starting to put the rew motor in, and i got my engine mounts and dtss eliminators.
Also picked up the s6 throttle cable, the clip for the firewall is fuckn hard to remove!!!

fd Gear box if anyone wants it...
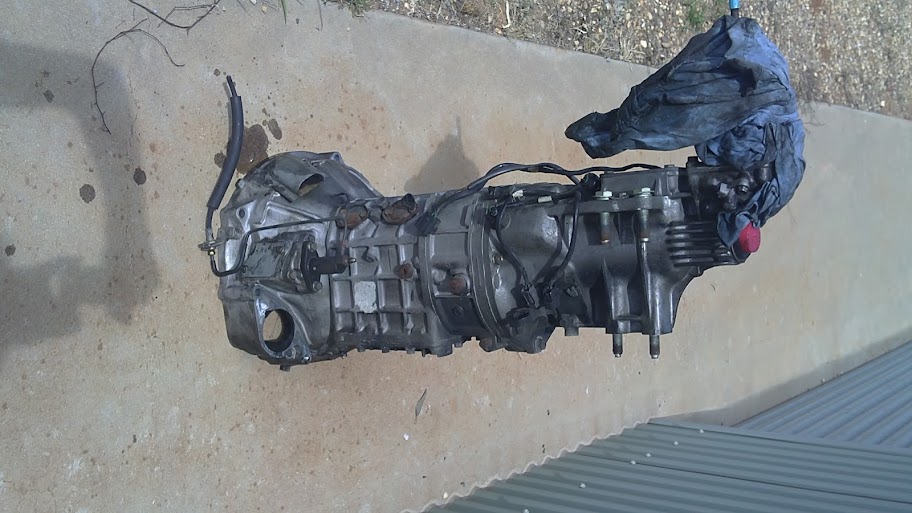
Also picked up the s6 throttle cable, the clip for the firewall is fuckn hard to remove!!!
fd Gear box if anyone wants it...
Thread Starter
Full Member
Joined: Feb 2011
Posts: 186
Likes: 5
From: Australia
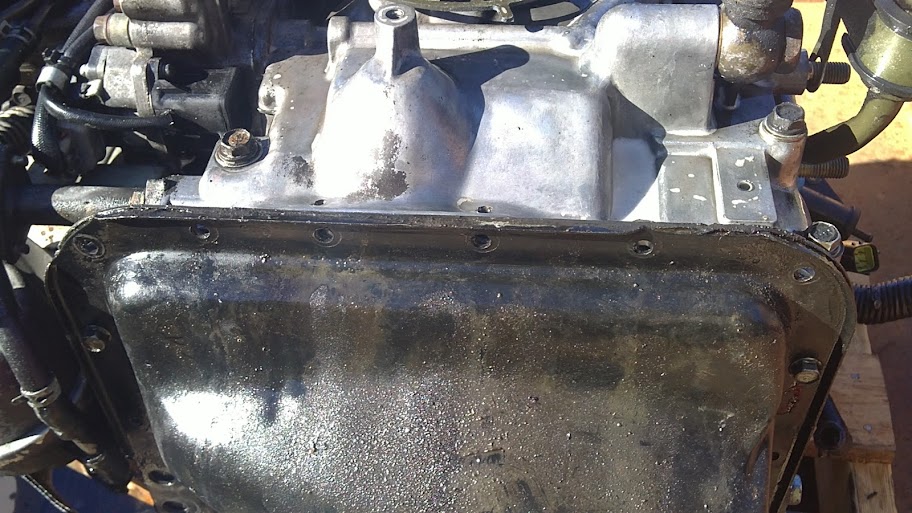
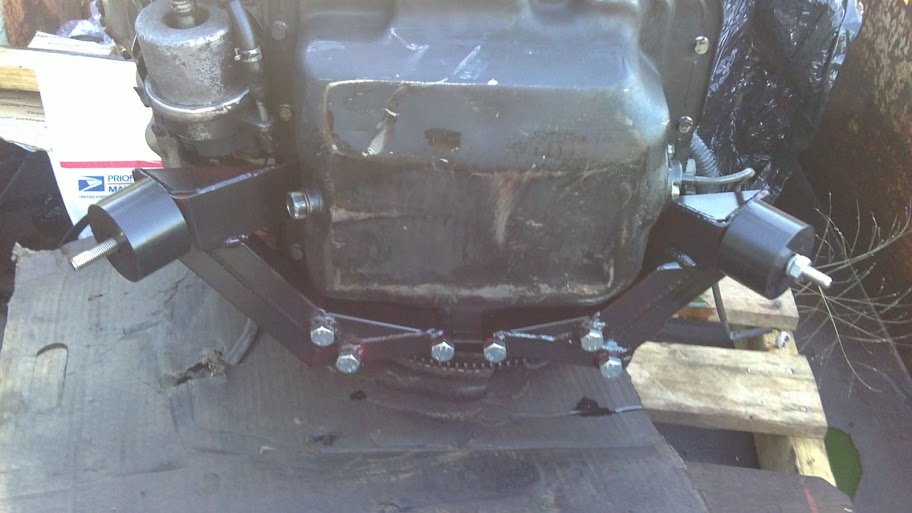
And too disprove all the bullshit about this conversion which is scattered all over the internet!!!
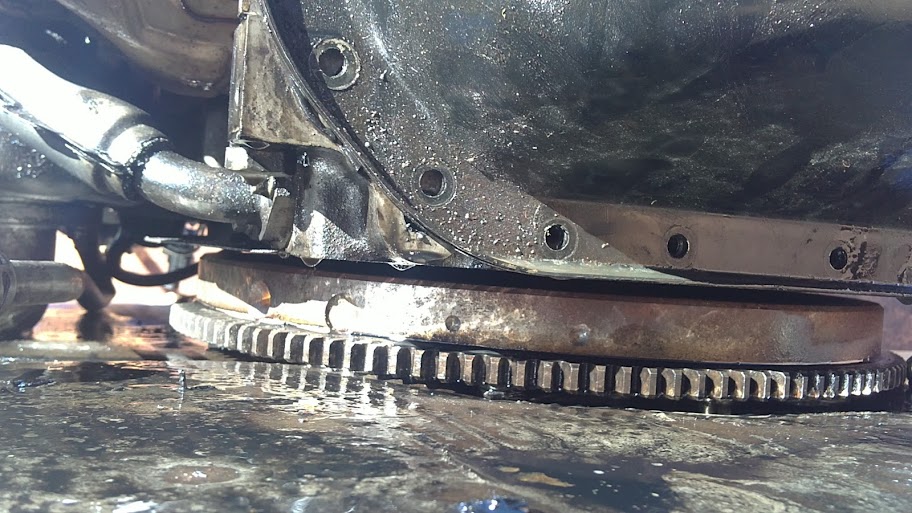
You can NOT adapt the fc engine mounts to the rew block by drilling and tapping the centre plate!!!
drivers side mount YES
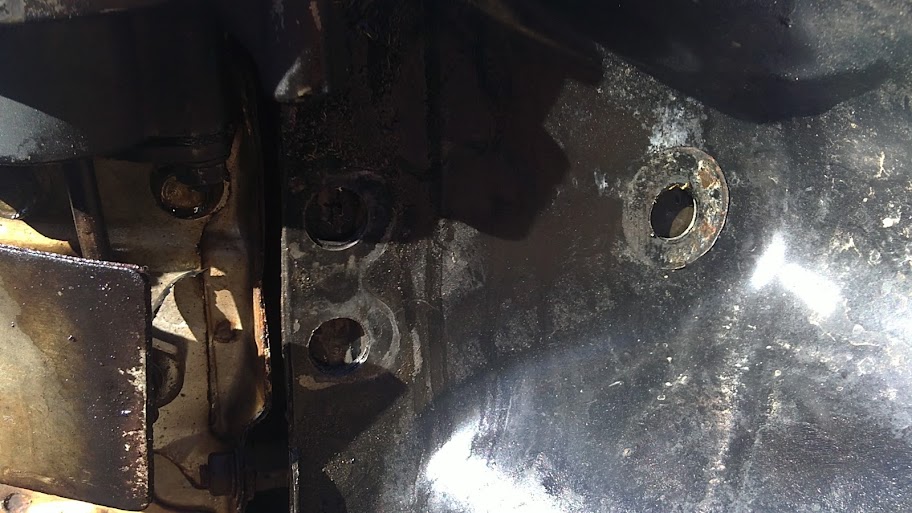
Passenger side NO, there is one hole for the mount it will either rotate or bend the mount!!!
The fc sump WILL line up reasonably well to the fd block even with the fd timming cover!!!
You can NOT adapt the fc engine mounts to the rew block by drilling and tapping the centre plate!!!
drivers side mount YES
Passenger side NO, there is one hole for the mount it will either rotate or bend the mount!!!
The fc sump WILL line up reasonably well to the fd block even with the fd timming cover!!!
Thread Starter
Full Member
Joined: Feb 2011
Posts: 186
Likes: 5
From: Australia
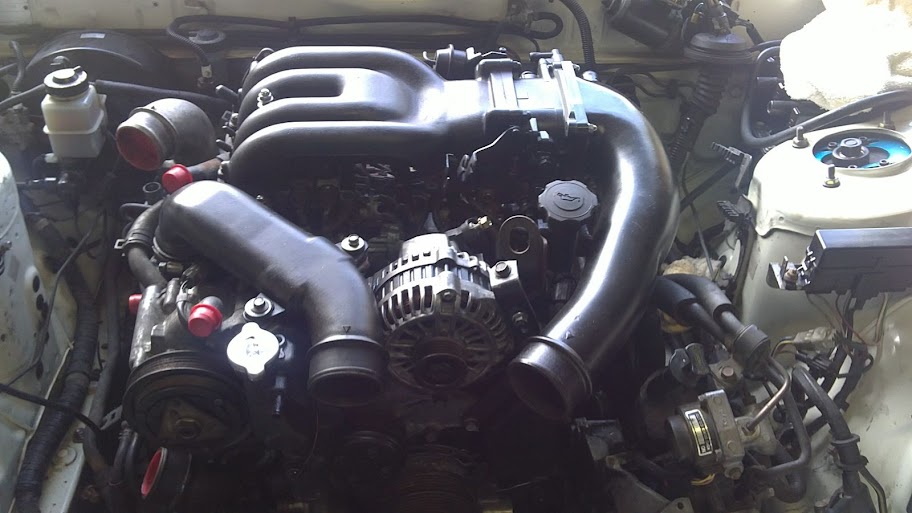
Cos i cant really get anywhere without mounting the engine first!
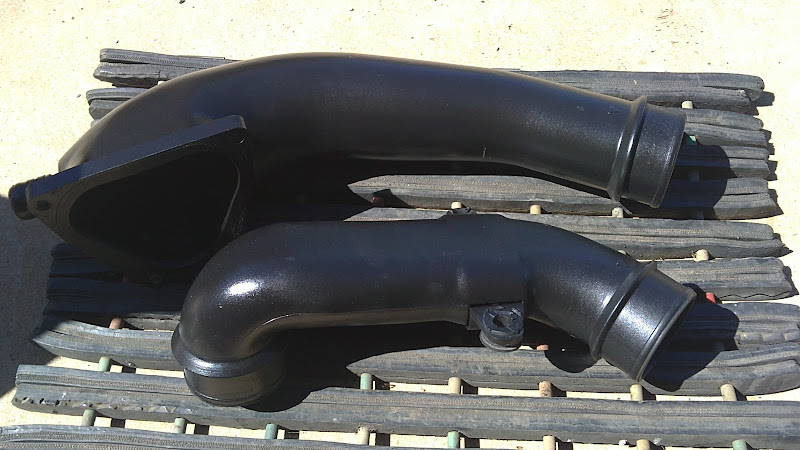
Ive been cleaning and paiting the more visiable of parts as they were in poor visual condition
Throttle Body
I did paint over the springs and other stuff but gave them a spray with a lubricant first soo the paint shouldnt stick

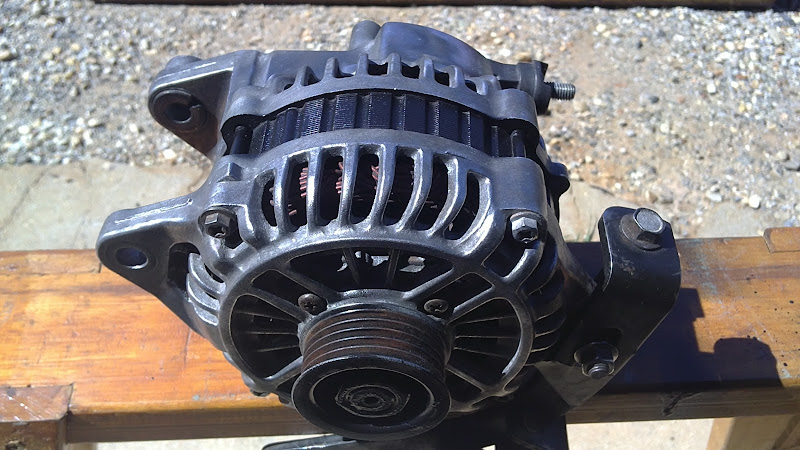
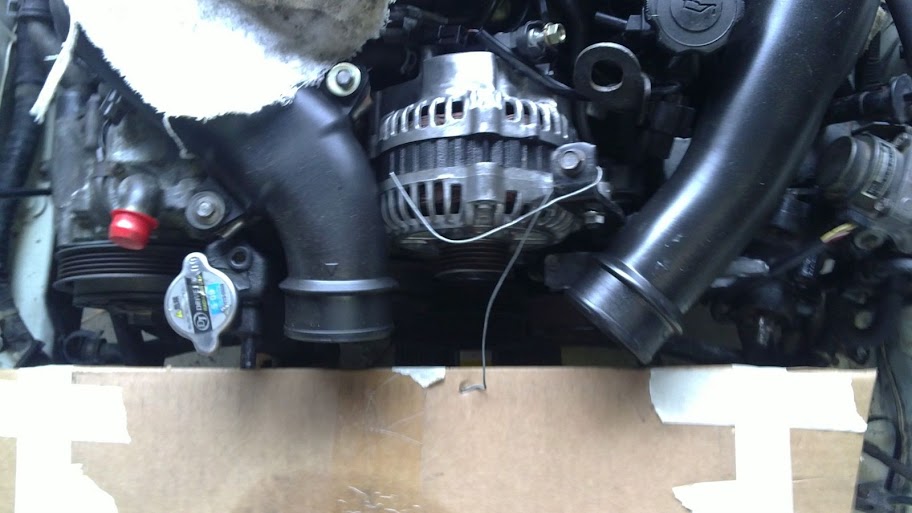
Semi polished and painted Alt
Intake pipes
Ive been cleaning and paiting the more visiable of parts as they were in poor visual condition
Throttle Body
I did paint over the springs and other stuff but gave them a spray with a lubricant first soo the paint shouldnt stick
Semi polished and painted Alt
Intake pipes
Thread Starter
Full Member
Joined: Feb 2011
Posts: 186
Likes: 5
From: Australia
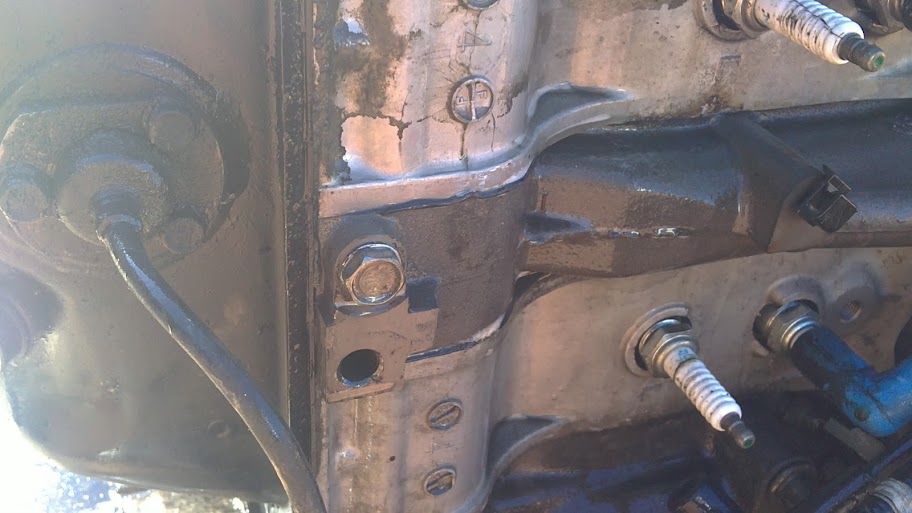
I'm not too sure what you mean by this, i know this where the fc mounts were having to be drilled and tapped :|
Its the passenger side mount that cant be simply drilled and tapped to fit the fc mount...
Im going these mounts, but i do understand your reasons for putting in a new K member Jarmez
Online store |

These are my reasons for this
1) Adding a K-Frame would possibly cost me 4 times as much then buying these mounts!
As im hoping these will get away with about being engineered :-" and i dont have fd engine mounts
2) There are now 4 points of mounting to the fd block.
3) The main mounting point isnt as well used to distrubte the forces from drive train effeciency but is still there.
4) Forces can still run in axis through the original fc mounting points.
Its the passenger side mount that cant be simply drilled and tapped to fit the fc mount...
Im going these mounts, but i do understand your reasons for putting in a new K member Jarmez
Online store |
These are my reasons for this
1) Adding a K-Frame would possibly cost me 4 times as much then buying these mounts!
As im hoping these will get away with about being engineered :-" and i dont have fd engine mounts
2) There are now 4 points of mounting to the fd block.
3) The main mounting point isnt as well used to distrubte the forces from drive train effeciency but is still there.
4) Forces can still run in axis through the original fc mounting points.
Thread Starter
Full Member
Joined: Feb 2011
Posts: 186
Likes: 5
From: Australia
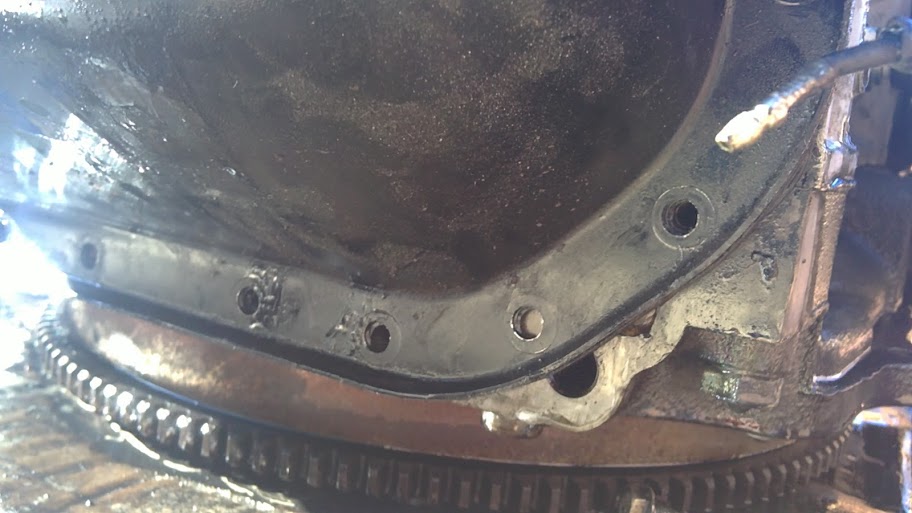
The fun really starts now!
Mounts are here slightly different to the ones pictured but they look a little better,
welds are a little better aswell


The gap between them and the oil pan is a little more the expected but they will still be loaded ones the engine is in
I also didnt like them red haha soo black it was just a thin coat soo they dont look like dogs *****

Mounts are here slightly different to the ones pictured but they look a little better,
welds are a little better aswell
The gap between them and the oil pan is a little more the expected but they will still be loaded ones the engine is in
I also didnt like them red haha soo black it was just a thin coat soo they dont look like dogs *****
Thread Starter
Full Member
Joined: Feb 2011
Posts: 186
Likes: 5
From: Australia
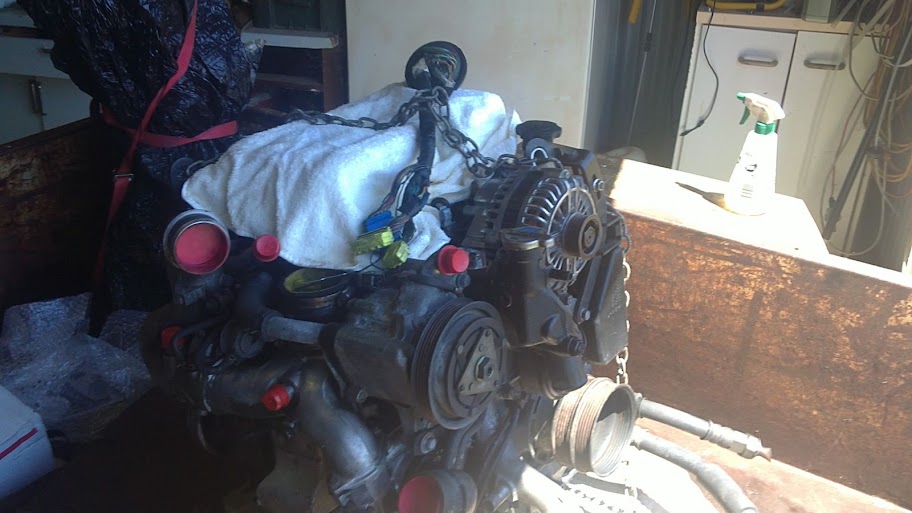
Ready to be dropped in
:mrgreen: :mrgreen: :mrgreen:
Quick bit too eat then well lift the engine up push the car back in and drop the motor in
This is definately how i should have taken the motor out rather then trying to lower and pull it too the side was difficult to say the least


Also dry built the old s5 motor now has a replaced rotor just needs a seal kit and will run,
any takers?

:mrgreen: :mrgreen: :mrgreen:
Quick bit too eat then well lift the engine up push the car back in and drop the motor in
This is definately how i should have taken the motor out rather then trying to lower and pull it too the side was difficult to say the least
Also dry built the old s5 motor now has a replaced rotor just needs a seal kit and will run,
any takers?
Thread Starter
Full Member
Joined: Feb 2011
Posts: 186
Likes: 5
From: Australia
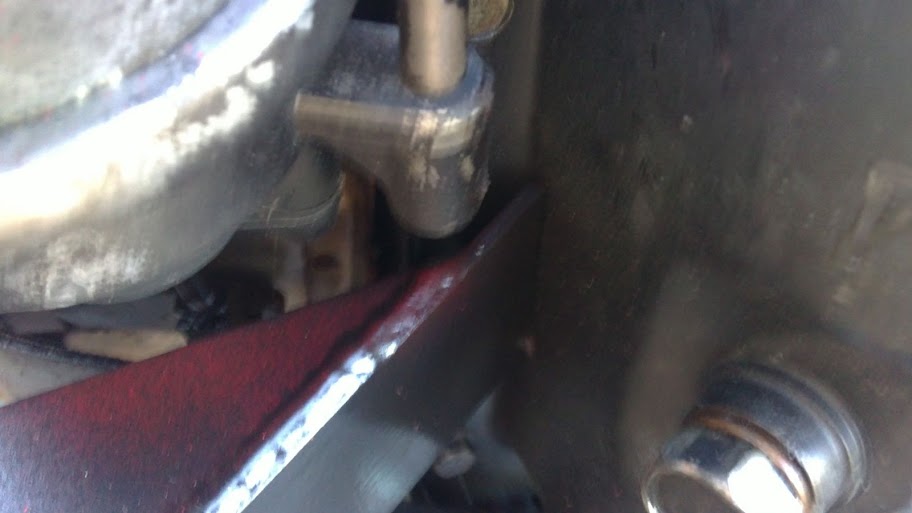
Another problem that according to the net there wasnt meant to be,
Clearance issues!!!
the power steering lines on the drivers side collect with the lower waste gate actuator soo i had to bend the top line up and forwards and the rear line down

Also could have been slight problems mating the gear box and engine, not aligning the clutch properly???
looks alright?
Not that it really maters now! cos in my battles this happened
gear box oil has a very different smell...
Clearance issues!!!
the power steering lines on the drivers side collect with the lower waste gate actuator soo i had to bend the top line up and forwards and the rear line down
Also could have been slight problems mating the gear box and engine, not aligning the clutch properly???
looks alright?
Not that it really maters now! cos in my battles this happened
gear box oil has a very different smell...

Thread Starter
Full Member
Joined: Feb 2011
Posts: 186
Likes: 5
From: Australia
I havent looked into removing the air pump at all,
im going to try and get it plumbed back into the exhaust and everything.
itll make it heaps easier to get a blueslip, and the gains from removing it are very slim.
If i went with the s5 timming cover and s5 turbo this would probably be finished by now,
but i wont a fully work sequential twin turbo, with all the other better creature comforts of the fd motor,
eg the timming sensor is much more acurate, it uses a map sensor rather then an afm and also later down the track i will have heaps of plug and play ecu options as im using the fd ecu.
as for the s6 box, ive got enough on my plate and then added time and effort doesnt out way the benefits...
I dont know what to do with the powersteering, ive got a tech thread
power steering swaps
And to link my clutch thread
Thread Starter
Full Member
Joined: Feb 2011
Posts: 186
Likes: 5
From: Australia
Soo trial fits for the vmount,
This was and still is the plan will allow for easy plumbing and mounting,


IC box is slightly over sized but the front will still need to sit under the support beam,
radiator possition looks reasonably well and will clear everything fine


This was and still is the plan will allow for easy plumbing and mounting,
IC box is slightly over sized but the front will still need to sit under the support beam,
radiator possition looks reasonably well and will clear everything fine
Thread Starter
Full Member
Joined: Feb 2011
Posts: 186
Likes: 5
From: Australia
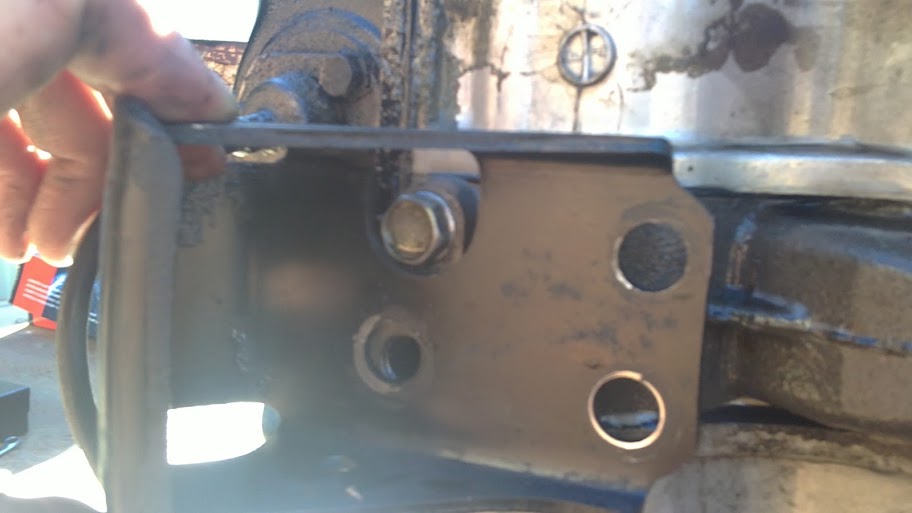
Also had to put some spacers on the mounts too clear the PS rack lines worked a treat
this might have just been needed because the mmr mounts could be shorter, but i still had to bend the lines and clearance is still minimal


this might have just been needed because the mmr mounts could be shorter, but i still had to bend the lines and clearance is still minimal
Thread Starter
Full Member
Joined: Feb 2011
Posts: 186
Likes: 5
From: Australia
Ended up having to take the box out,
oh well was a good chance to give it a good clean amazing how well it came up!
This was a nice surprise,
for this heater hoses all i had to do was turn it arround and put it under the waste gate pipe

And im going to make custom lines from here for the power steering
is this the same place, that fd lines connect to the rack?
cos i might just get a new line.

oh well was a good chance to give it a good clean amazing how well it came up!
This was a nice surprise,
for this heater hoses all i had to do was turn it arround and put it under the waste gate pipe
And im going to make custom lines from here for the power steering
is this the same place, that fd lines connect to the rack?
cos i might just get a new line.
Thread Starter
Full Member
Joined: Feb 2011
Posts: 186
Likes: 5
From: Australia
Lifting the bonnet would be a good idea anyway and i have my other bonnet that i can use too work out how much i need to grind away to get the thing to close...
Little bits of progress while i was waiting for the rest of the bits
Cleaned up the starter and a lick of paint

Another issue!!!!
Fd im guessing use twin feed fuel rails, fc do not!

Little bits of progress while i was waiting for the rest of the bits
Cleaned up the starter and a lick of paint
Another issue!!!!
Fd im guessing use twin feed fuel rails, fc do not!
Last edited by squeakm; Nov 5, 2013 at 10:56 PM. Reason: boring