
3-rotor 20B FC Drift Build


Hello all,
I've had this '89 FC since 2003, been drifting it since 2007... I also have a write-up on doing a s5 13B-T into an s5 NA, which I wrote in 2007 on rx7club.com in the archive section.
Now back to the 3 rotor swap:
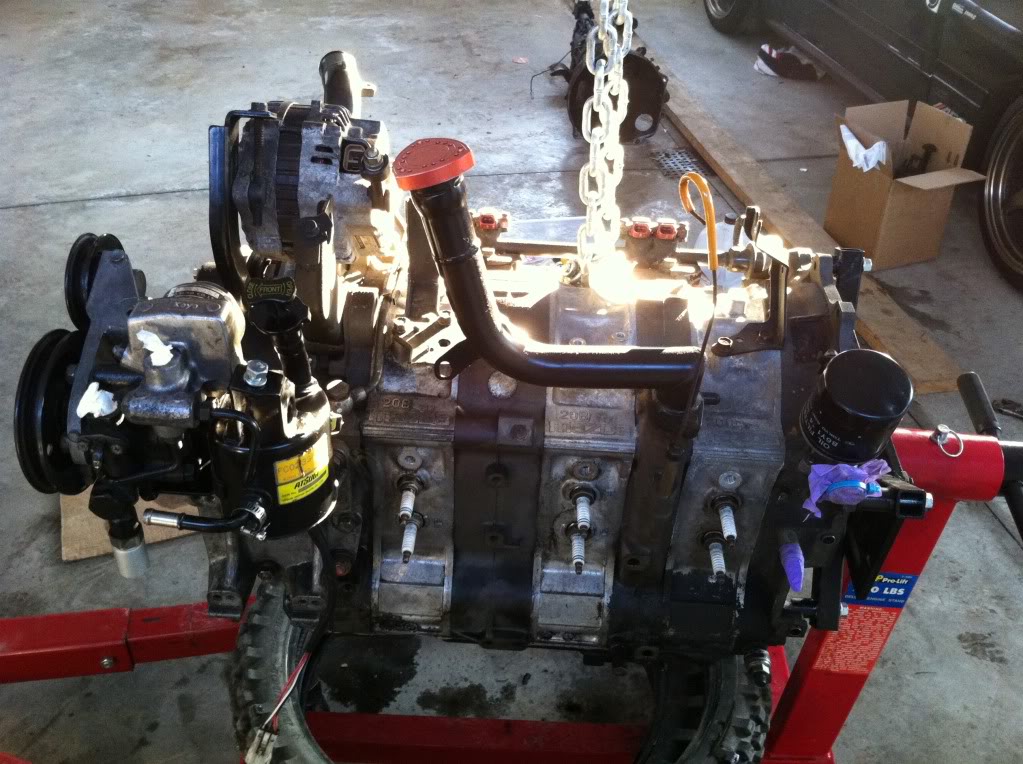
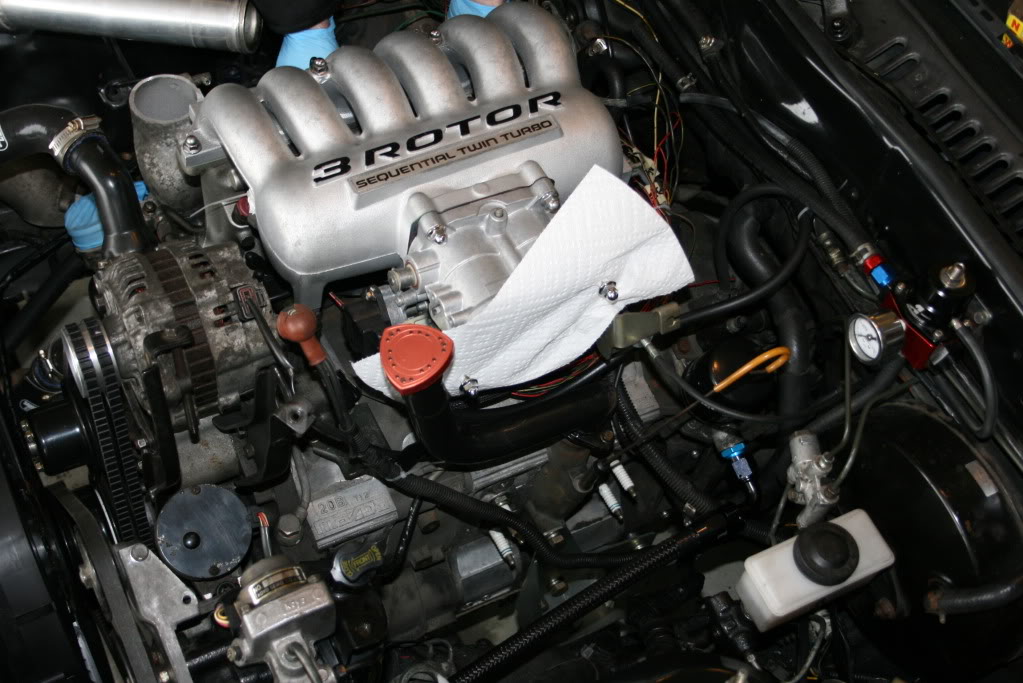
Last winter me and my friend swapped a Cosmo 20B, and now that the little turbo blew, I'm getting ready to switch to a single turbo setup for next drift season. This swap is not you're typical swap where everything is done 100%, we did the swap on a budget... I don't have years to make a perfect build and I need the car running every summer so I can go and drift and compete. The 20B swap was done in my friends garage, with no lift and only a few power tools... so I was very limited to what I had at my disposal. I used a Microtech LT-16, with my old 13B-T timing map that I created from "expert" advice from rx7club.com lol, which I was running the previous years, and then I street tuned the AFRs since I didn't have the funds to have a professional tune. The car ran great this summer, despite be breaking a diff in May, then blowing the turbo in August.
Here are the main engine mods:
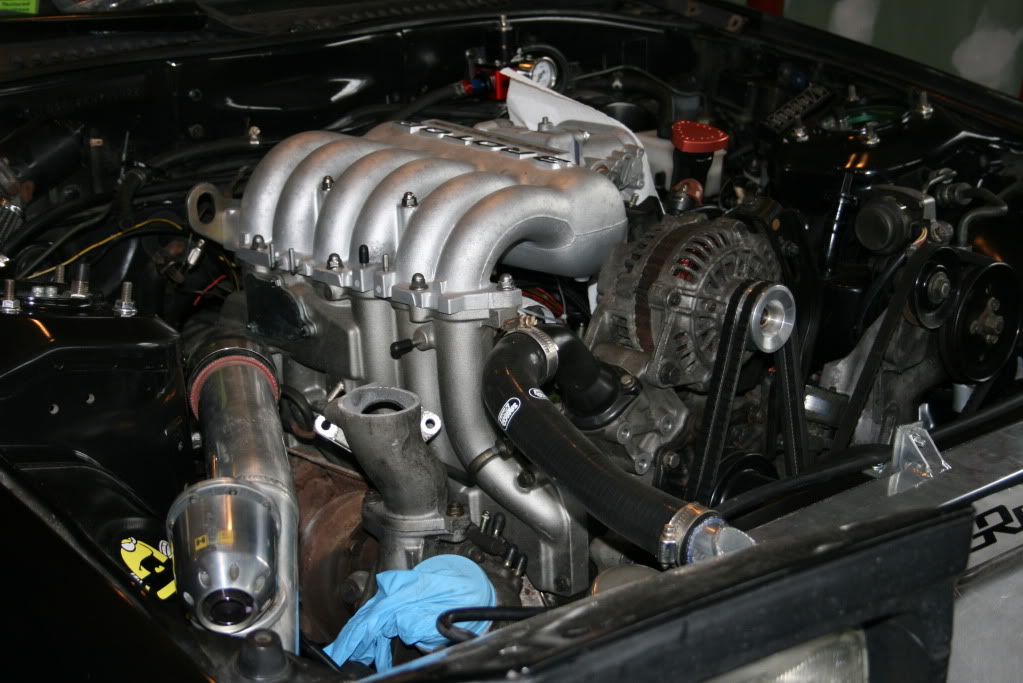
- 3-rotor 20B engine swap (No, I did not have the money to rebuild the engine )
)
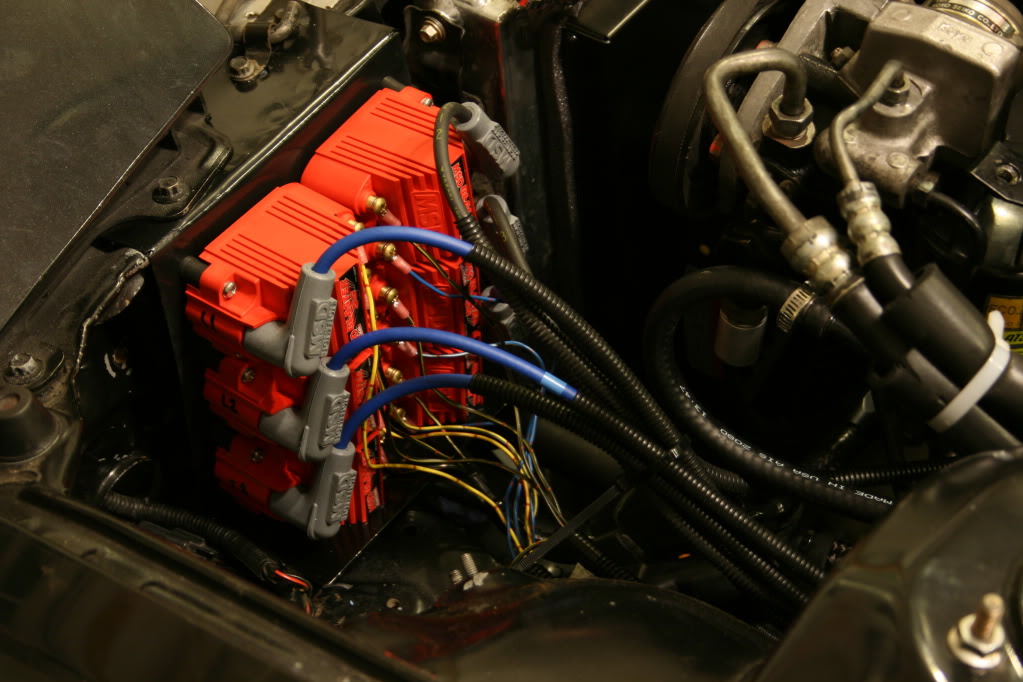
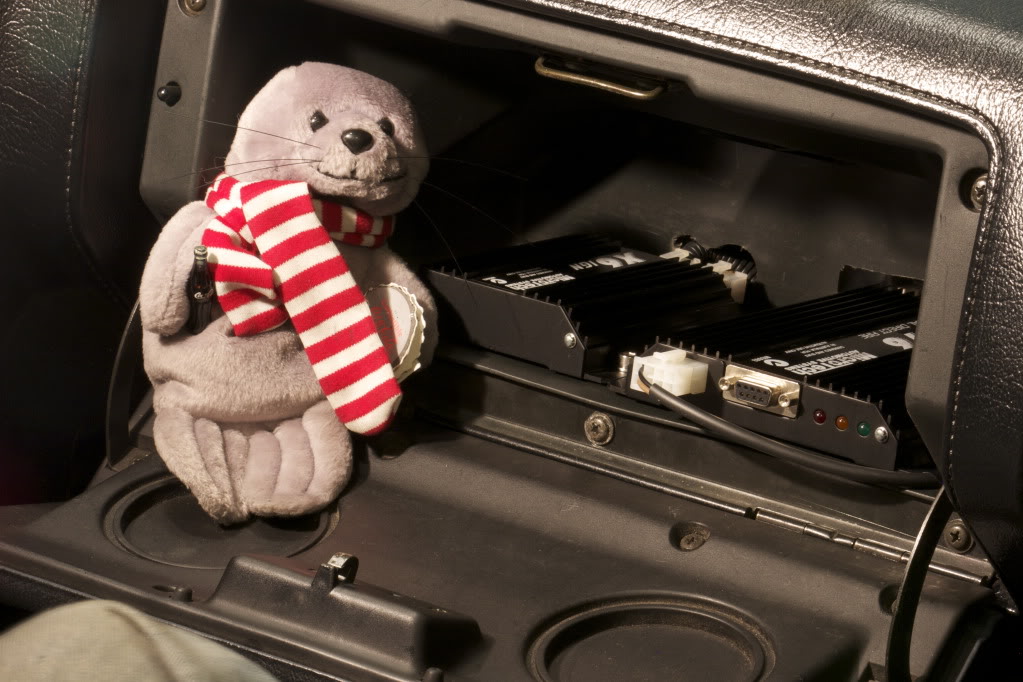
- Microtech LT-16 ECU & igniter
- Blaster SS coil packs
- 550/1000cc injectors
- Aeromotive FPR
- Walboro 255
- Single turbo conversion (to be decided)
- Custom HKS 3” straight exhaust
- Dual-pass Koyo radiator
- Dual oil coolers
- Custom FMIC
For more pictures and other mods that I have done to the car on the course of it's life, please visit my website... and VIDEOS:
http://www.killer20b.com
Also check out the fan page to support my 2012 sponsorship effort by LIKING my facebook fan page!!!
Calin Gogonea's Killer 20B
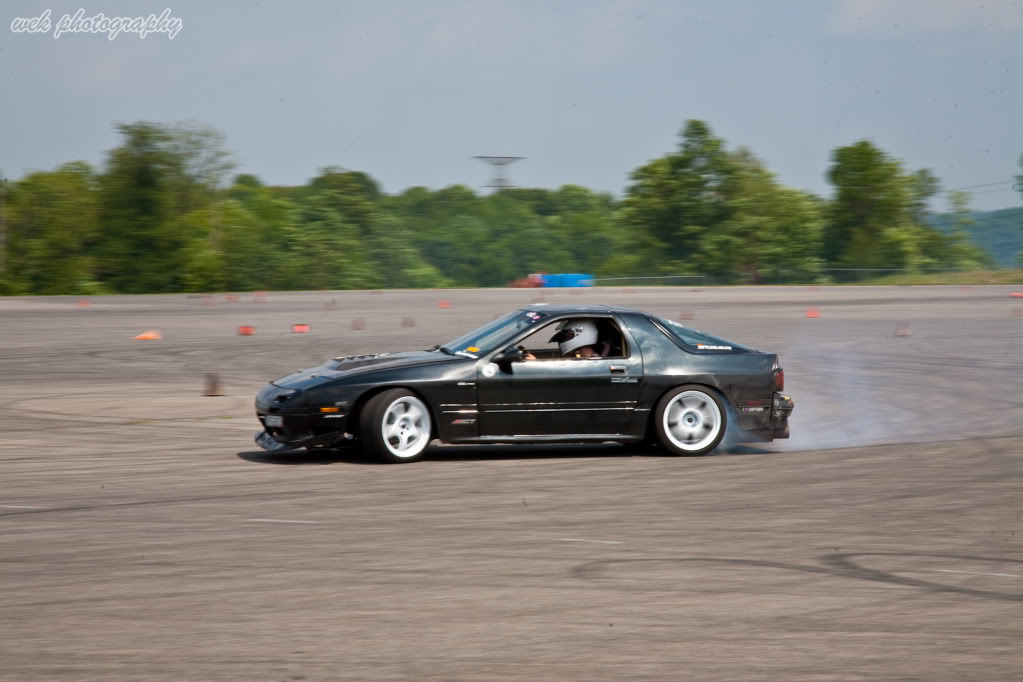
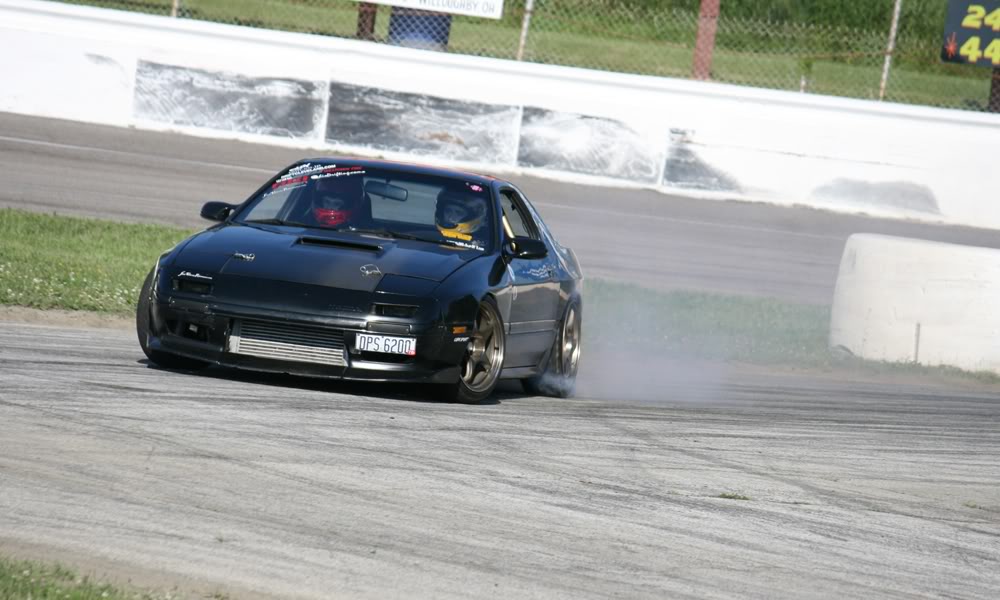
Here are some pics of the build from last winter and some action shots from the past:
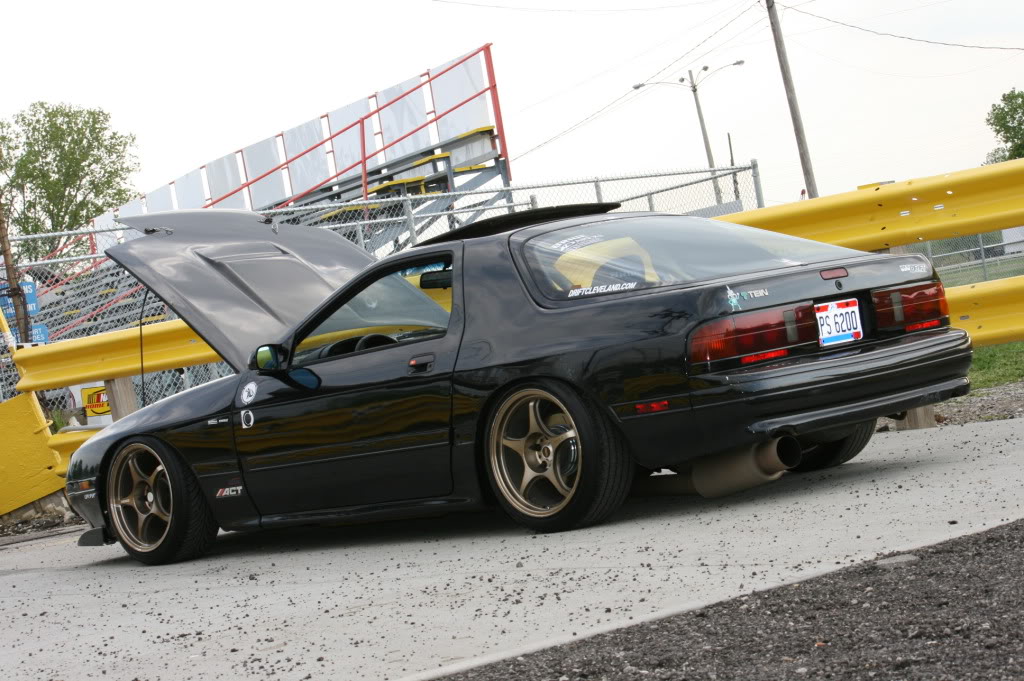
Couple 2010 pics before the transformation:
Let me know what you guys think,
Calin
I've had this '89 FC since 2003, been drifting it since 2007... I also have a write-up on doing a s5 13B-T into an s5 NA, which I wrote in 2007 on rx7club.com in the archive section.
Now back to the 3 rotor swap:
Last winter me and my friend swapped a Cosmo 20B, and now that the little turbo blew, I'm getting ready to switch to a single turbo setup for next drift season. This swap is not you're typical swap where everything is done 100%, we did the swap on a budget... I don't have years to make a perfect build and I need the car running every summer so I can go and drift and compete. The 20B swap was done in my friends garage, with no lift and only a few power tools... so I was very limited to what I had at my disposal. I used a Microtech LT-16, with my old 13B-T timing map that I created from "expert" advice from rx7club.com lol, which I was running the previous years, and then I street tuned the AFRs since I didn't have the funds to have a professional tune. The car ran great this summer, despite be breaking a diff in May, then blowing the turbo in August.
Here are the main engine mods:
- 3-rotor 20B engine swap (No, I did not have the money to rebuild the engine
)- Microtech LT-16 ECU & igniter
- Blaster SS coil packs
- 550/1000cc injectors
- Aeromotive FPR
- Walboro 255
- Single turbo conversion (to be decided)
- Custom HKS 3” straight exhaust
- Dual-pass Koyo radiator
- Dual oil coolers
- Custom FMIC
For more pictures and other mods that I have done to the car on the course of it's life, please visit my website... and VIDEOS:
http://www.killer20b.com
Also check out the fan page to support my 2012 sponsorship effort by LIKING my facebook fan page!!!
Calin Gogonea's Killer 20B
Here are some pics of the build from last winter and some action shots from the past:
Couple 2010 pics before the transformation:
Let me know what you guys think,
Calin
Passion for Racing
Joined: Aug 2010
Posts: 1,066
Likes: 2
From: Crown Point, Indiana
I am loving this... My dream is to one day have a single turbo 20B DD FC in my garage next to a 12A FB and a 13B-REW FD.
Keep going with your build, very quality for a budget build!
Keep going with your build, very quality for a budget build!
Impressive build. Really like how you did it on a budget just like mine is. Everything looks very clean and well done.
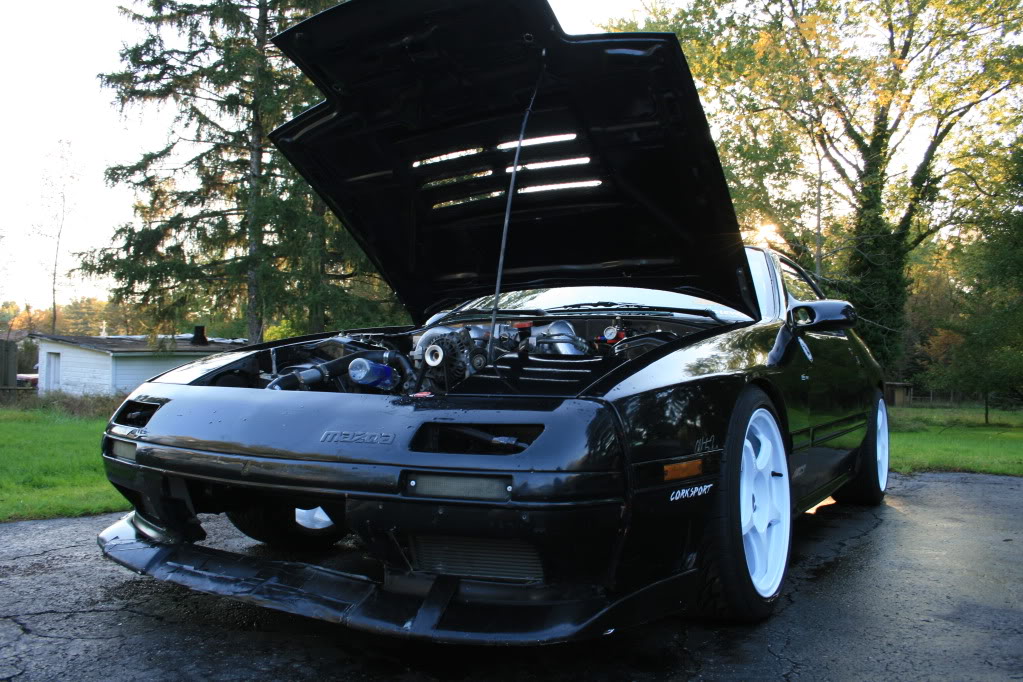
How did you reinforce the front end? Looks like there's no crossmember on the bottom anymore, or radiator support on top. Not trying to nitpick, it just worries me when the only thing tying the front end together is the bumper structure.
Got a couple suggestions:
You might consider reconstructing the top of the radiator support with some flat steel bar. Another suggestion would be to re-create the stock crossmember on the bottom too.
I hope yoou take the time this winter and re-do many things.. the car has tons of potential. Do you have plans for it this winter besides putting a turbo on it or are you trying to get some attention toward the sponser?
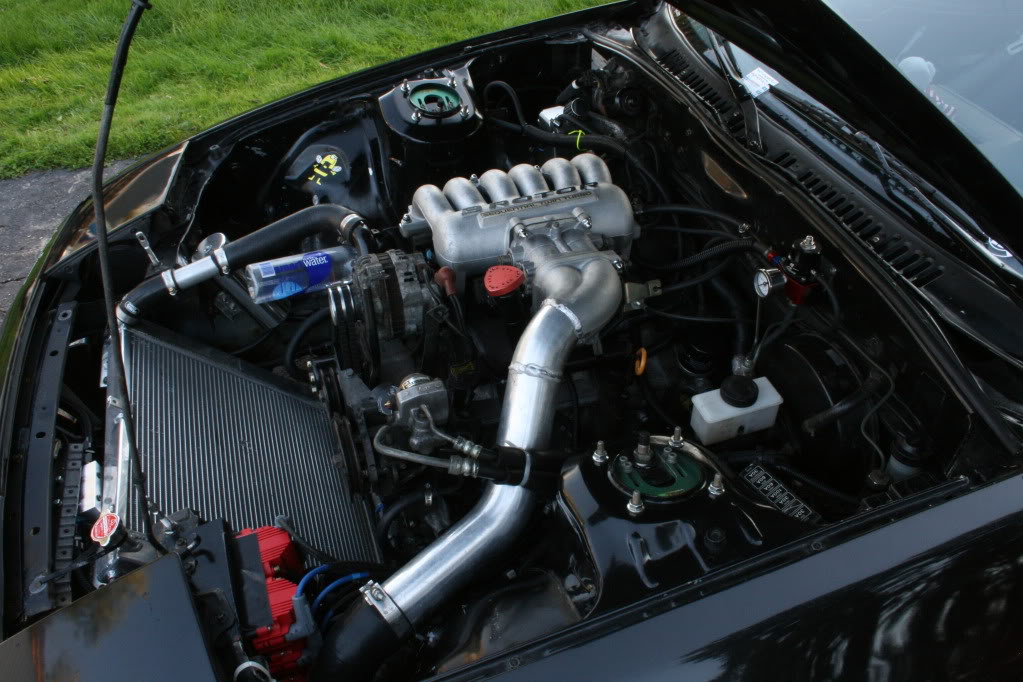
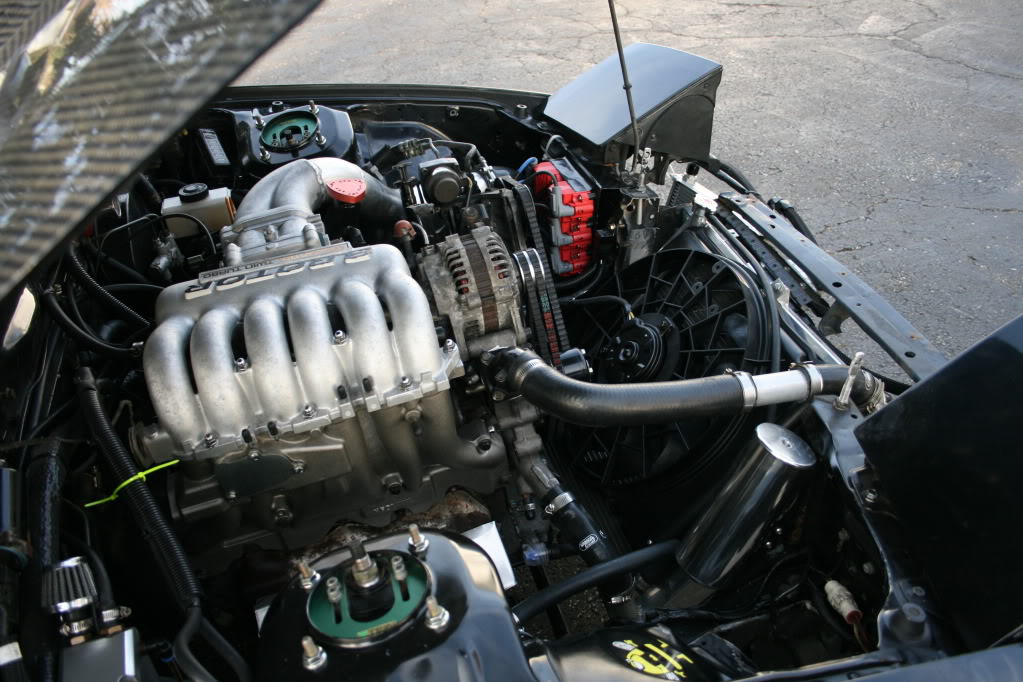
One thing I forgot to mention is that originally I had the radiator completely vertical, allowing me only about 4" between the main pulley and the radiator. This forced me to get a really thin fan which only outputted 2400 CFM on high. I KNOW! That's way too low, and even with 2 dual 25 row oil coolers up front running in serial, I was having severe overheating issues. I would basically go from 180 to 260 in two laps drifting. I know, you should never let your temps go so height, but when you're drifting.... well you don't care much about anything else that's happening.
So once I parked the car in August, after blowing the small turbo, I decided to further relocate my radiator and make room for a real fan... the 4400 CFM+ Ford Taurus fan lol. I have the 120 AMP Cosmo alternator, with a 70AMP relay and the fan is installed and operational already.
YES! That seal has been in my glove box since 2004... haha
In any case, I am planning on finishing my cage before next season starts... I want a partial sponsorship with either Defined Autoworks or Banzai Racing in terms of engine building and tuning. Then some sort of tire sponsorship... I have realized this year that I can't sustain this car anymore at the level I want to compete now in drifting.
There are many other things I want to do such as:
-full engine rebuild (DOH!)
-widebody
-switch to 10" wide wheels to fit wider tires when I make 400+ rwhp
-3 point fire supression system
-front collision bar (might do this when I finish the cage)
-upgrade fuel system, external pump, surge tank
-diff cooler, trans cooler
-etc.
Well you get my point. I always have many plans for the car, and sadly they keep getting pushed into the next year because I really just want to drifting in the summer and I don't want to park the car for years.
I saw this car at a few local events in Ohio, the car is very well built/set up for a budget build, the car is quite insane, and the driver can back it up.
Keep up the good work!
Keep up the good work!
Trending Topics

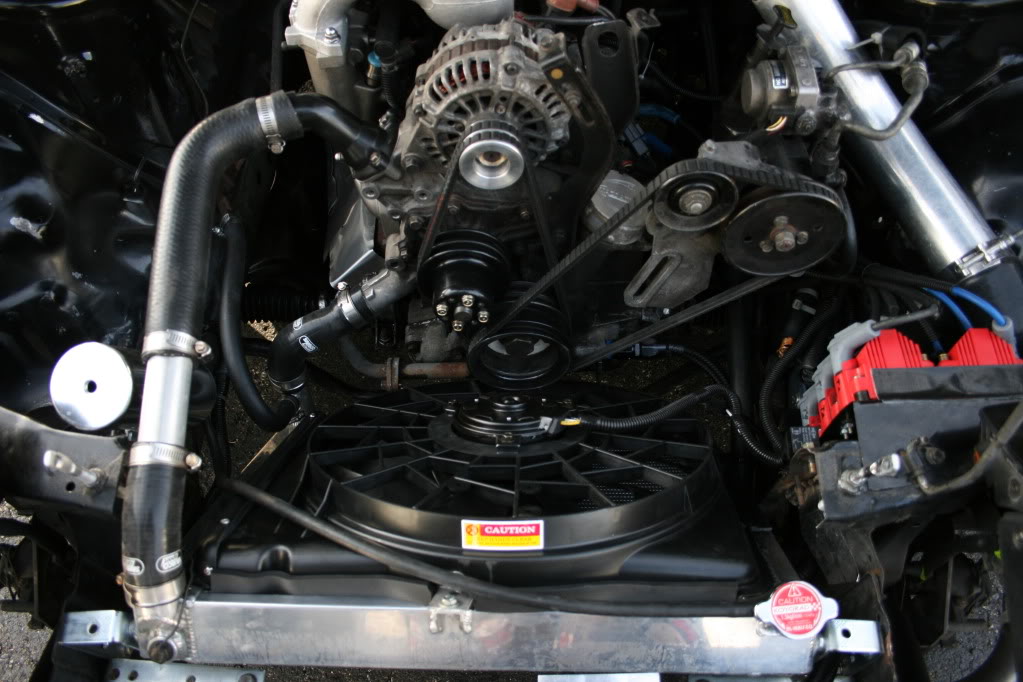
Believe it or not, the cross-member is right there lol, the radiator is actually sitting/pivoting on it. I am currently making the custom radiator brackets so I can fit the Ford Taurus fan between the main pulley+ power-steering pulley and radiator... which I already have, just need to finish those brackets. I'll post pics of this once I'm done in the new couple of weeks.
One thing I forgot to mention is that originally I had the radiator completely vertical, allowing me only about 4" between the main pulley and the radiator. This forced me to get a really thin fan which only outputted 2400 CFM on high. I KNOW! That's way too low, and even with 2 dual 25 row oil coolers up front running in serial, I was having severe overheating issues. I would basically go from 180 to 260 in two laps drifting. I know, you should never let your temps go so height, but when you're drifting.... well you don't care much about anything else that's happening.
So once I parked the car in August, after blowing the small turbo, I decided to further relocate my radiator and make room for a real fan... the 4400 CFM+ Ford Taurus fan lol. I have the 120 AMP Cosmo alternator, with a 70AMP relay and the fan is installed and operational already.
 Please say you padded it so it won't fatigue and crack. Aaron Cake was very clear in the E-fan how-to when he said that the radiator core is not meant to support ANY weight.
All things considered, now might be the best time to rework the radiator mounts since the engine is already out. My build thread might give you some ideas too. Another suggestion would be to check out Christopher W's GTUS 20B conversion, as Logan came up with a clever mounting system for his car's radiator.
Also, the Cosmo's alternator only puts out 100 amps, not 120 unless yours was rebuilt. Before starting my conversion, I had a taurus fan and it was pushing the FD alternator a bit harder than I felt comfortable with. That's why I went to a 130 amp Taurus Alternator, pulling the FD one as soon as I noticed it was having trouble keeping up with the fan. While the Taurus fan is brutally powerful, it takes a lot of juice to keep the beast happy.
The radiator is sitting on the crossmember?? Please say you padded it so it won't fatigue and crack. Aaron Cake was very clear in the E-fan how-to when he said that the radiator core is not meant to support ANY weight.
...
Also, the Cosmo's alternator only puts out 100 amps, not 120 unless yours was rebuilt. Before starting my conversion, I had a taurus fan and it was pushing the FD alternator a bit harder than I felt comfortable with. That's why I went to a 130 amp Taurus Alternator, pulling the FD one as soon as I noticed it was having trouble keeping up with the fan. While the Taurus fan is brutally powerful, it takes a lot of juice to keep the beast happy.
Please say you padded it so it won't fatigue and crack. Aaron Cake was very clear in the E-fan how-to when he said that the radiator core is not meant to support ANY weight....
Also, the Cosmo's alternator only puts out 100 amps, not 120 unless yours was rebuilt. Before starting my conversion, I had a taurus fan and it was pushing the FD alternator a bit harder than I felt comfortable with. That's why I went to a 130 amp Taurus Alternator, pulling the FD one as soon as I noticed it was having trouble keeping up with the fan. While the Taurus fan is brutally powerful, it takes a lot of juice to keep the beast happy.
Thanks for the advice and keep �em coming, I appreciate all the input.

Yes, the engine is bone stock� probably never been rebuilt since 1990.
As I mentioned before, I was having severe overheating issues. I know that having a v-mount IC setup would helps temp a lot, but I intend to crack this heating issue by keeping the sexy looking FMIC setup. I don�t know how my new cooling setup will be for next year but these are the steps I have implemented to help solve my overheating issues.
- Koyo dual pass radiator (had it before, is it good enough?)
- Still have FC water pump (weakness, need to rethink� maybe electric?)
- Switched to the Ford Taurus fan
- Slanted radiator with vented hood, directing about 50% of hot air from radiator out the engine bay
- Dual oil coolers in serial (I might add a little fan as well on one of them as well)
- I will rethink ducting, but I did not notice significant temp changes this year while drifting with really solid ducting between bumper->IC->Rad + undertray
- I am also cutting out the vents on the hood bigger for next year
- Run distilled water with water-wetter (have already been doing this)
- Exhaust and turbo properly wrapped
- Other extreme plans such as water injection, fuel cooler, etc. (this will be future plans)
In any case, I�m only planning to make around 400rwhp for next year, so I�m hoping I�ll be able to get away with these cooling mods for next year.
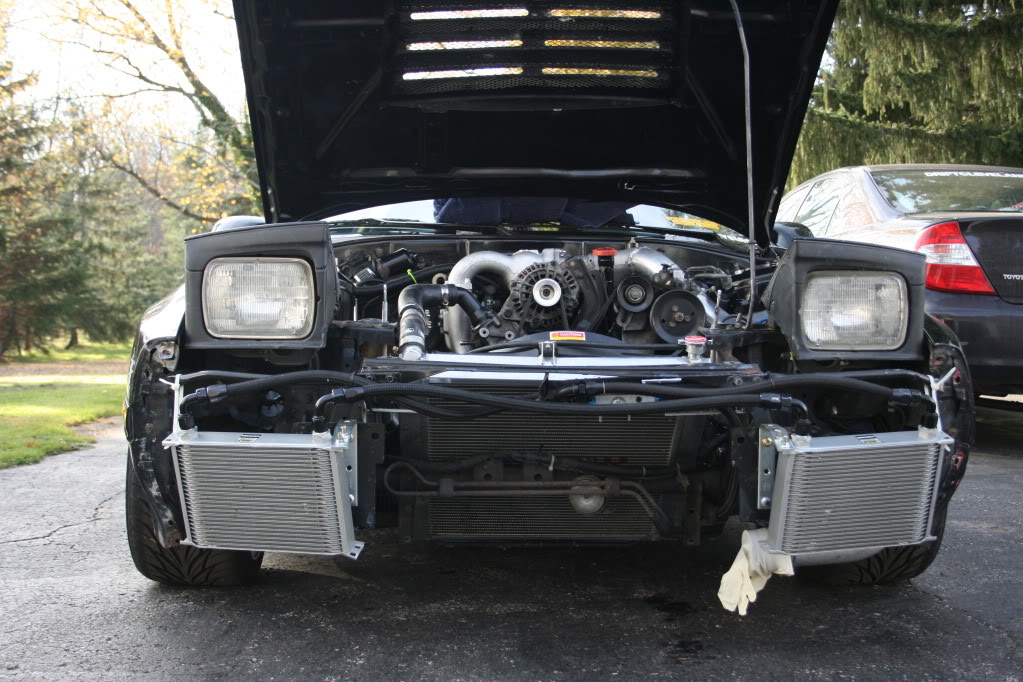
Anyways here are some pics of the finished (99%) radiator setup for next year� keep in mind that the FMIC is missing in action in the pics.
As I mentioned before, I was having severe overheating issues. I know that having a v-mount IC setup would helps temp a lot, but I intend to crack this heating issue by keeping the sexy looking FMIC setup. I don�t know how my new cooling setup will be for next year but these are the steps I have implemented to help solve my overheating issues.
- Koyo dual pass radiator (had it before, is it good enough?)
- Still have FC water pump (weakness, need to rethink� maybe electric?)
- Switched to the Ford Taurus fan
- Slanted radiator with vented hood, directing about 50% of hot air from radiator out the engine bay
- Dual oil coolers in serial (I might add a little fan as well on one of them as well)
- I will rethink ducting, but I did not notice significant temp changes this year while drifting with really solid ducting between bumper->IC->Rad + undertray
- I am also cutting out the vents on the hood bigger for next year
- Run distilled water with water-wetter (have already been doing this)
- Exhaust and turbo properly wrapped
- Other extreme plans such as water injection, fuel cooler, etc. (this will be future plans)
In any case, I�m only planning to make around 400rwhp for next year, so I�m hoping I�ll be able to get away with these cooling mods for next year.
Anyways here are some pics of the finished (99%) radiator setup for next year� keep in mind that the FMIC is missing in action in the pics.


Radiator is way too small for a 20B. k2rd used to make a nice unit that would work better. I would personally cut the front end of the car off, and stick something from headlight to headlight in there..


Also, I will not be doing a v-mount (mainly based on the fact that I love the look of a FM (call me superficial if you want), so I need to think outside the box. I am considering changing the radiator to a Griffin, but money is tight this winter and I need to get the car running again... I think I will wait and see how my temps are doing next season and make a decision from there. Also I know there is a Red Bull 20B drift Rx8 is making over 500rwhp with a front mount, so it’s clear that adequate cooling can be achieved in drifting with a 20B + FMIC.
Actually our mounts were designed for the 20B and happened to fit the 13b-re. We have customers making 800+whp on our mounts without a single failure, so I highly doubt they are going to fail at your power levels. This is the second time I have heard this in the last few weeks, so I can only guess there is someone trying to hype up another product. Just remember our brackets have been out for 8+ years and are time tested on cars all over the world.
Last edited by Banzai-Racing; Nov 9, 2011 at 08:42 AM.
Actually our mounts were designed for the 20B and happened to fit the 13b-re. We have customers making 800+whp on our mounts without a single failure, so I highly doubt they are going to fail at your power levels. This is the second time I have heard this in the last few weeks, so I can only guess there is someone trying to hype up another product. Just remember our brackets have been out for 8+ years and are time tested on cars all over the world.
Ironically the other person that PMed recently was also from OH, so I can only guess this would be the individual with the "uncertainty". I suggest you push them until they break (which I doubt you will be able to do) before buying into someone else's "uncertainty" that may be just trying to get you to buy a different product for whatever personal reason they have.
You do know that the 20B weighs more than the 13b, so it does matter that you are using the 13b stock rubber mounts. The mounts will compress more, this can be overcome by shimming them, if you insist on using stock mounts. Another problem we see all the time is people don't bother to reinstall the stock mount "cups" when installing the Mazdaspeed mounts, this lowers the engine appx 1/8" on both sides. That being said installing a 20B is an engine conversion after all and there are hundreds of things that need to be done besides dropping the engine in the bay. When installed properly there are no rack issues.
You do know that the 20B weighs more than the 13b, so it does matter that you are using the 13b stock rubber mounts. The mounts will compress more, this can be overcome by shimming them, if you insist on using stock mounts. Another problem we see all the time is people don't bother to reinstall the stock mount "cups" when installing the Mazdaspeed mounts, this lowers the engine appx 1/8" on both sides. That being said installing a 20B is an engine conversion after all and there are hundreds of things that need to be done besides dropping the engine in the bay. When installed properly there are no rack issues.
Last edited by Banzai-Racing; Nov 9, 2011 at 10:16 AM.
Ironically the other person that PMed recently was also from OH, so I can only guess this would be the individual with the "uncertainty". I suggest you push them until they break (which I doubt you will be able to do) before buying into someone else's "uncertainty" that may be just trying to get you to buy a different product for whatever personal reason they have.
You do know that the 20B weighs more than the 13b, so it does matter that you are using the 13b stock rubber mounts. The mounts will compress more, this can be overcome by shimming them, if you insist on using stock mounts. Another problem we see all the time is people don't bother to reinstall the stock mount "cups" when installing the Mazdaspeed mounts, this lowers the engine appx 1/8" on both sides. That being said installing a 20B is an engine conversion after all and there are hundreds of things that need to be done besides dropping the engine in the bay. When installed properly there are no rack issues.
You do know that the 20B weighs more than the 13b, so it does matter that you are using the 13b stock rubber mounts. The mounts will compress more, this can be overcome by shimming them, if you insist on using stock mounts. Another problem we see all the time is people don't bother to reinstall the stock mount "cups" when installing the Mazdaspeed mounts, this lowers the engine appx 1/8" on both sides. That being said installing a 20B is an engine conversion after all and there are hundreds of things that need to be done besides dropping the engine in the bay. When installed properly there are no rack issues.
I did use the �cups� when installing the Mazdaspeed mounts.
I actually called Banzai Racing last winter before I purchased the motor mounts, and I specifically asked if they worked with the stock mounts and I was informed that they would. There was no mention of lack of clearance with the factory mounts due to their compression under the extra weight.
I get this isn�t a �properly� done swap or car build.
FYI. The only reason I bought the Microtech LT-16 ECU for my 20B sway was because I was impressed with the quality of work you guys did on the FD, and I was planning to have the single turbo conversion and engine build/tune done at Banzai Racing.

Thanks, I will probably do the same. Do you remember how much you shimmed it by? Does your hood rub a lot on the manifold?