
Project Naomi V : Finally PAINT!

Thread Starter
Joined: May 2002
Posts: 5,972
Likes: 37
From: Ottawa, Soviet Canuckistan
Project Naomi V : Finally PAINT!
A new year brings new pictures of the project - and what delicious pictures they are!
For anyone looking for the other project threads:
Project Naomi I : New Project on an Old Favourite
Project Naomi II : Giant Rotisserie Pictures Update
Project Naomi III : End of Summer 2010 Update
Project Naomi IV : Almost Off The Rotisserie
Project Naomi V : Finally PAINT!
Project Naomi VI : IT LIVES!
Project Naomi VII : Coming Home
-----
Before we get to the good stuff though, it's been many months since last update, so there are a few intermediate pics to get through first!
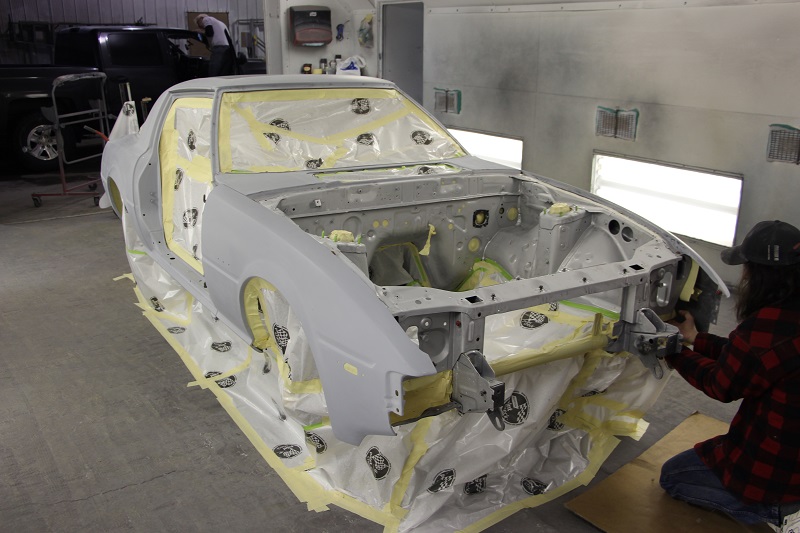
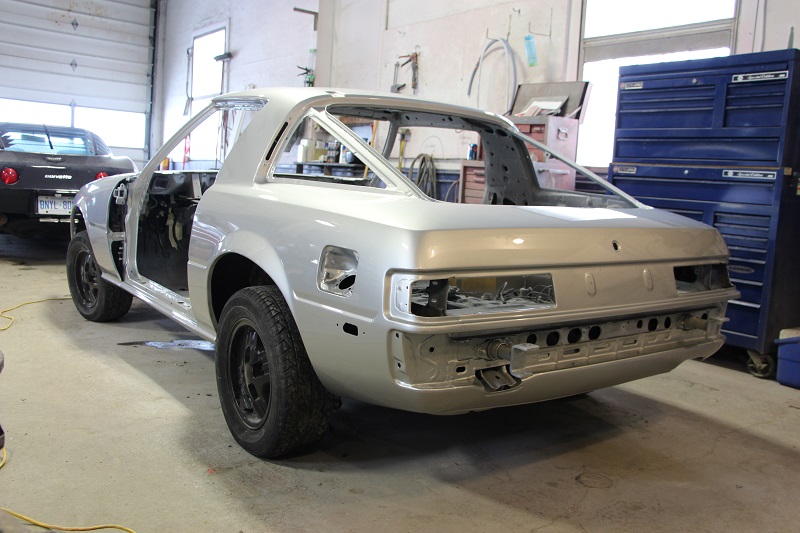
Last we left off, the final bits of metal work had been taken care of, the doors got new skins, and the body was being taken through the stages of filler/sanding/primer to make it ready for paint.
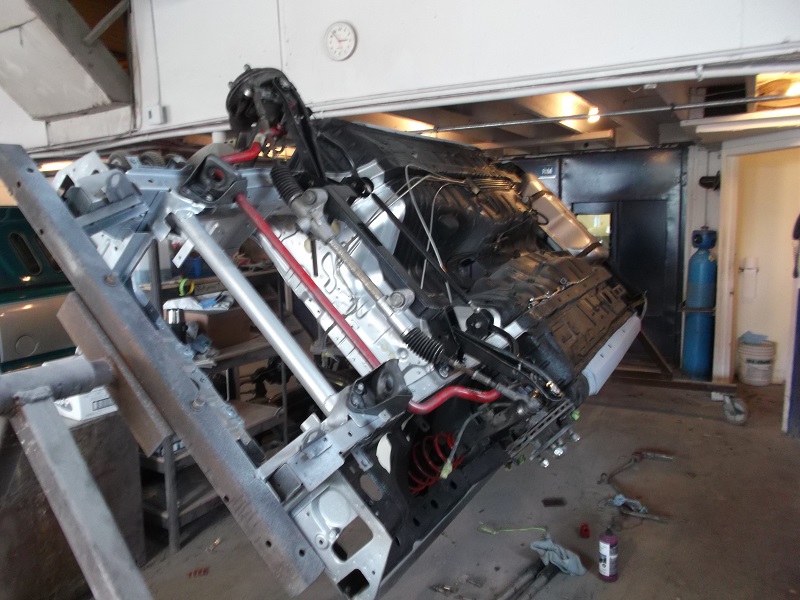
In one of my recent photo updates from Joe I found a great pic of the underside of the car that I didn't have before, and it shows a lot of the completed work there including the gas tank, lines, and all of the suspension, so I thought it was worth including:
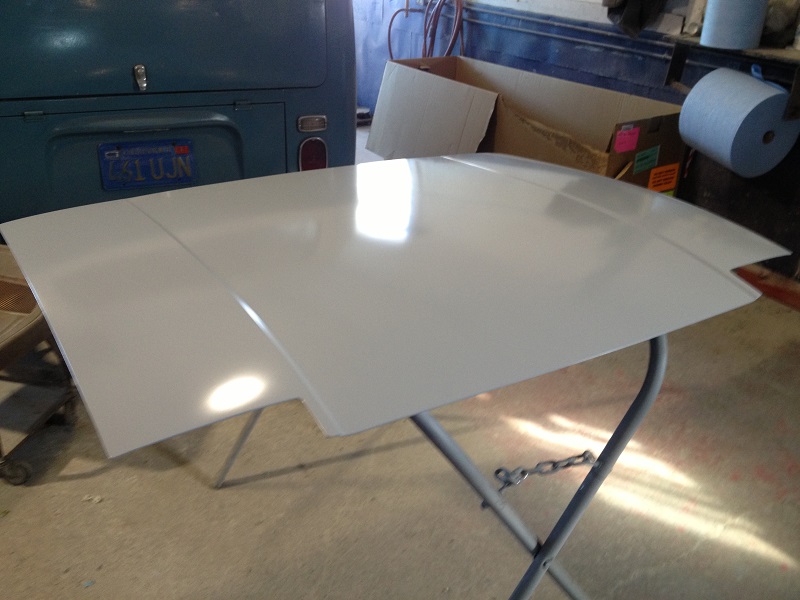
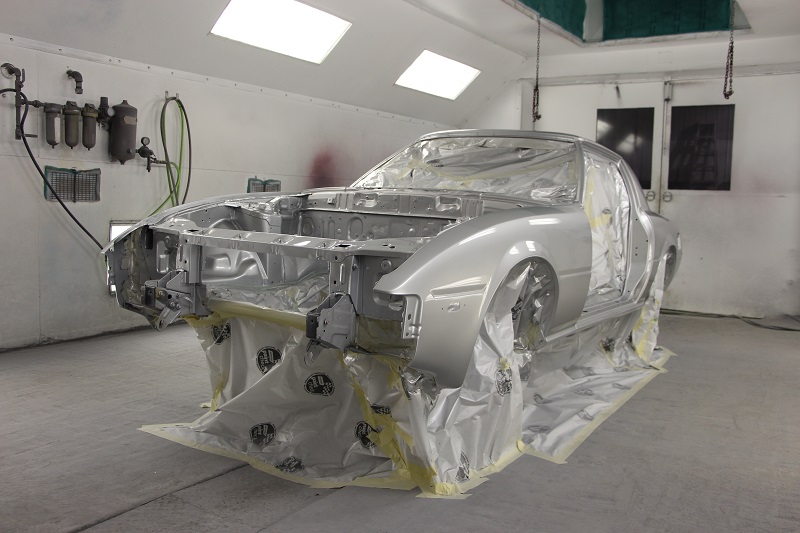
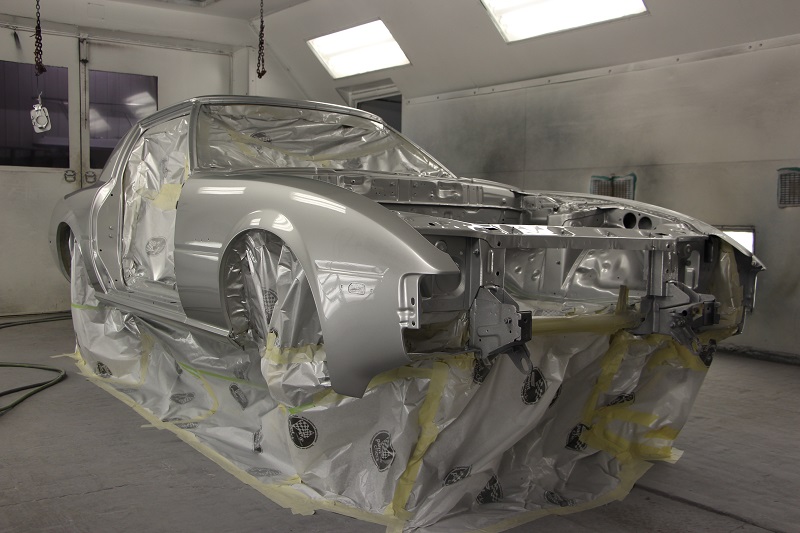
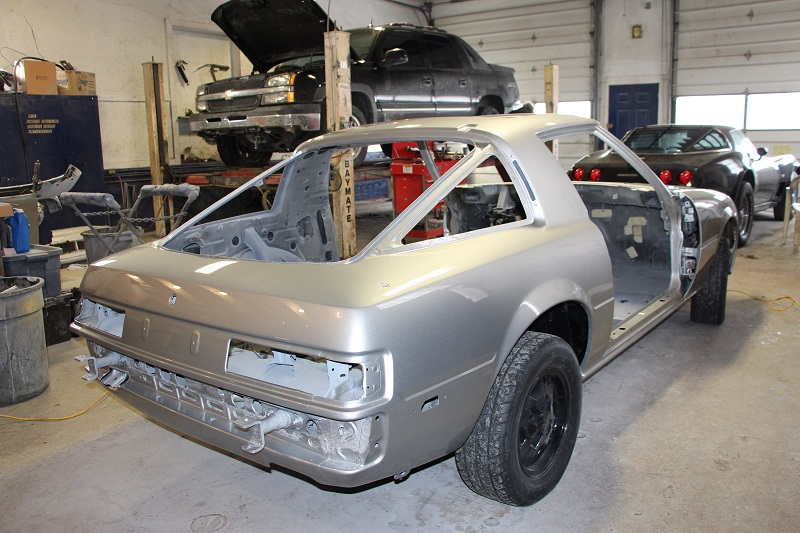
After much work filing and sanding and priming and preparing, things started to look pretty good. Heck, for a while I was starting to like the matte grey colour! Here are a few pics from the end of the primer-and-prep process, and from the paint booth just before paint went down:
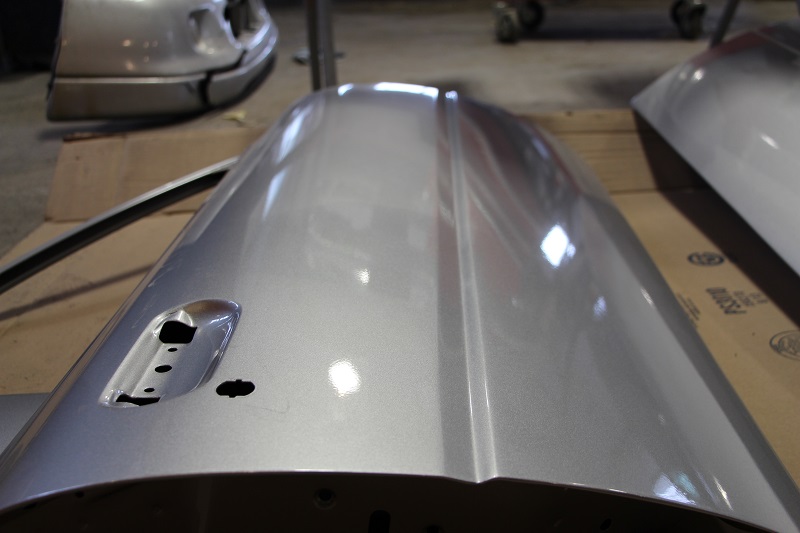
The hood
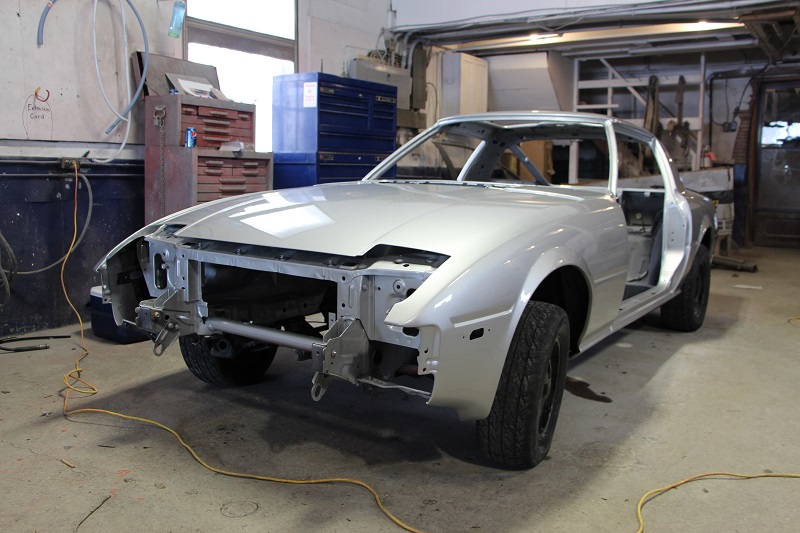
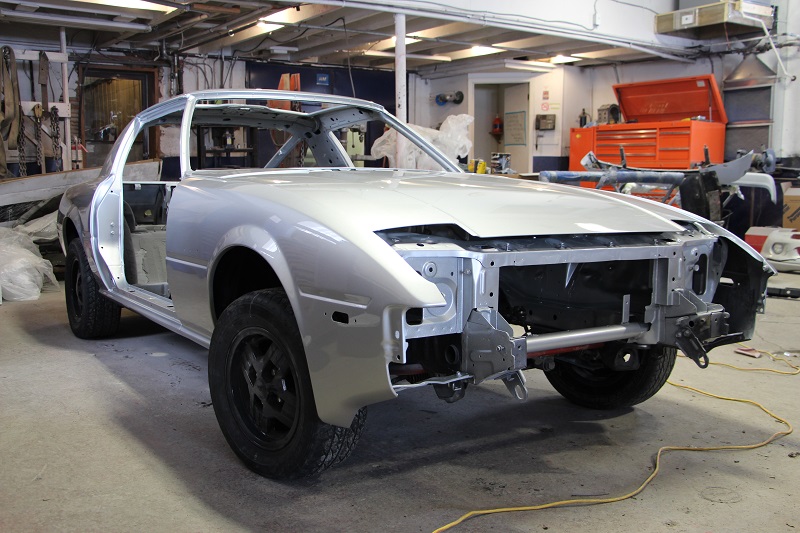
They had hung the doors and fenders to make sure they could get everything perfectly even with the body, though they'd have to come off again later for final paint
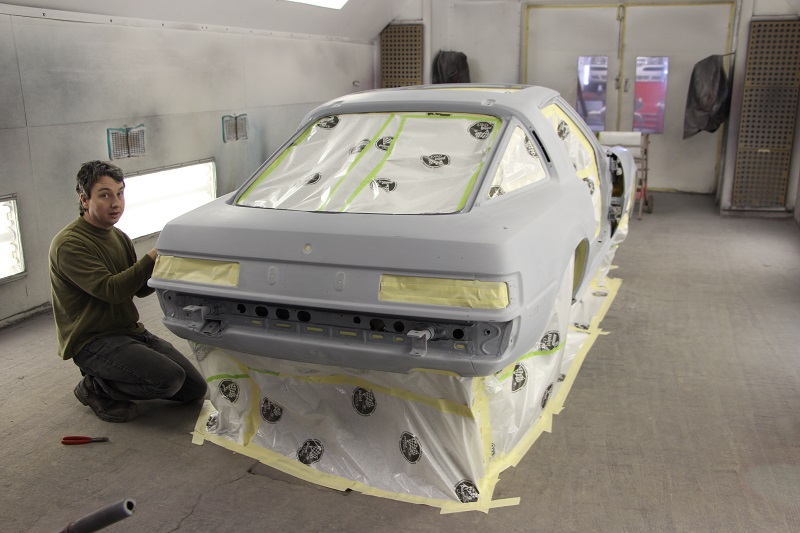
And finally the car was brought into the paint booth this past Friday, put up on stands, masked, and ready for paint!
For anyone looking for the other project threads:
Project Naomi I : New Project on an Old Favourite
Project Naomi II : Giant Rotisserie Pictures Update
Project Naomi III : End of Summer 2010 Update
Project Naomi IV : Almost Off The Rotisserie
Project Naomi V : Finally PAINT!
Project Naomi VI : IT LIVES!
Project Naomi VII : Coming Home
-----
Before we get to the good stuff though, it's been many months since last update, so there are a few intermediate pics to get through first!
Last we left off, the final bits of metal work had been taken care of, the doors got new skins, and the body was being taken through the stages of filler/sanding/primer to make it ready for paint.
In one of my recent photo updates from Joe I found a great pic of the underside of the car that I didn't have before, and it shows a lot of the completed work there including the gas tank, lines, and all of the suspension, so I thought it was worth including:
After much work filing and sanding and priming and preparing, things started to look pretty good. Heck, for a while I was starting to like the matte grey colour! Here are a few pics from the end of the primer-and-prep process, and from the paint booth just before paint went down:
The hood
They had hung the doors and fenders to make sure they could get everything perfectly even with the body, though they'd have to come off again later for final paint
And finally the car was brought into the paint booth this past Friday, put up on stands, masked, and ready for paint!
Last edited by vipernicus42; Aug 23, 2015 at 10:02 PM.
Thread Starter
Joined: May 2002
Posts: 5,972
Likes: 37
From: Ottawa, Soviet Canuckistan
That brings us to Monday/Tuesday of this week and what we've all been waiting for - PAINT!
Here's a walk-around of the car in the paint booth:
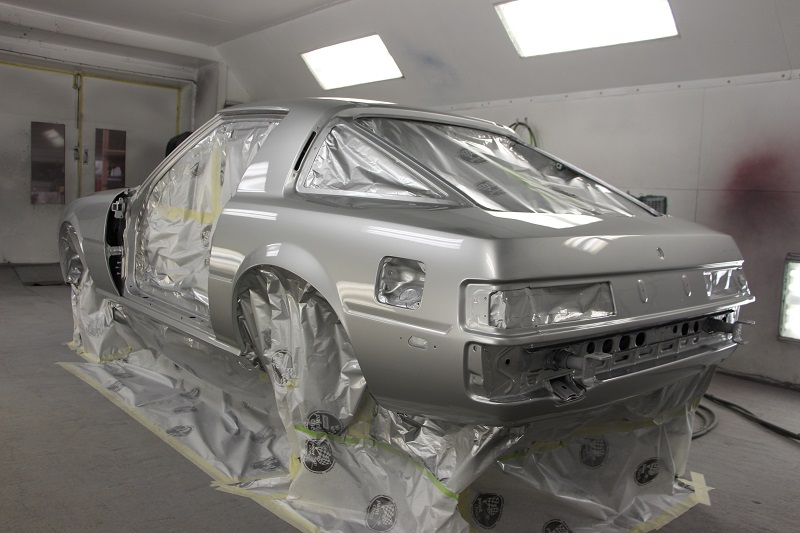

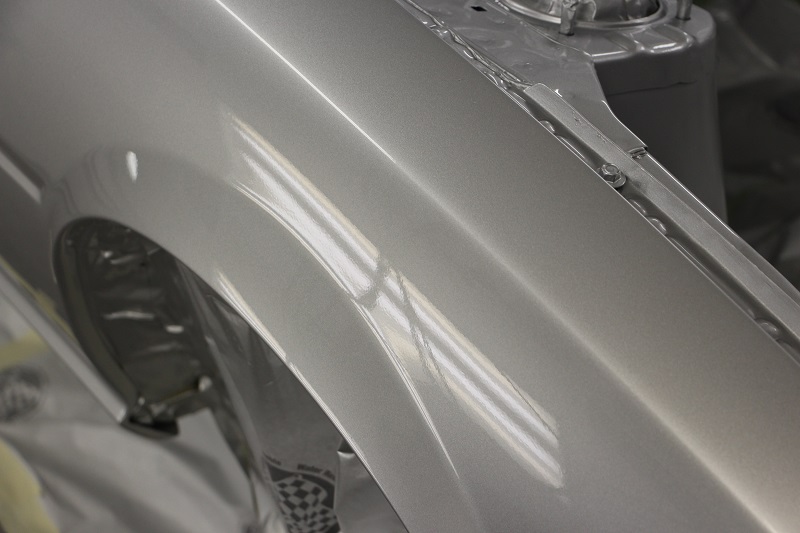
I thought that this close-up of the fender gave a nice view of the new paint
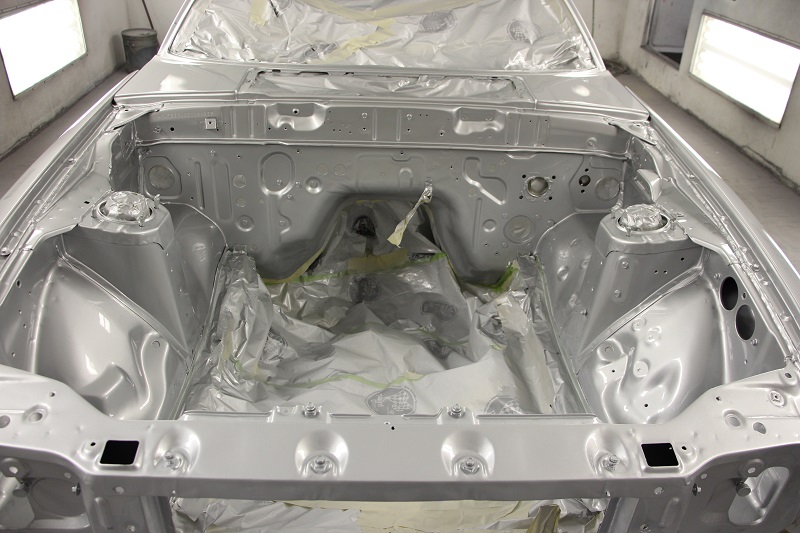
Joe had already done the engine bay, but was standing there looking at it one day last week and thought "You know, this looks good... but it could really look great if I gave it a respray with the rest of the body" - and so he did! Originally I think we were using a flatter paint for the engine bay that was basically the same colour but without the mica. Honestly, I'm glad he decided to do the re-spray, it looks awesome!
Here's a walk-around of the car in the paint booth:
I thought that this close-up of the fender gave a nice view of the new paint
Joe had already done the engine bay, but was standing there looking at it one day last week and thought "You know, this looks good... but it could really look great if I gave it a respray with the rest of the body" - and so he did! Originally I think we were using a flatter paint for the engine bay that was basically the same colour but without the mica. Honestly, I'm glad he decided to do the re-spray, it looks awesome!
Thread Starter
Joined: May 2002
Posts: 5,972
Likes: 37
From: Ottawa, Soviet Canuckistan
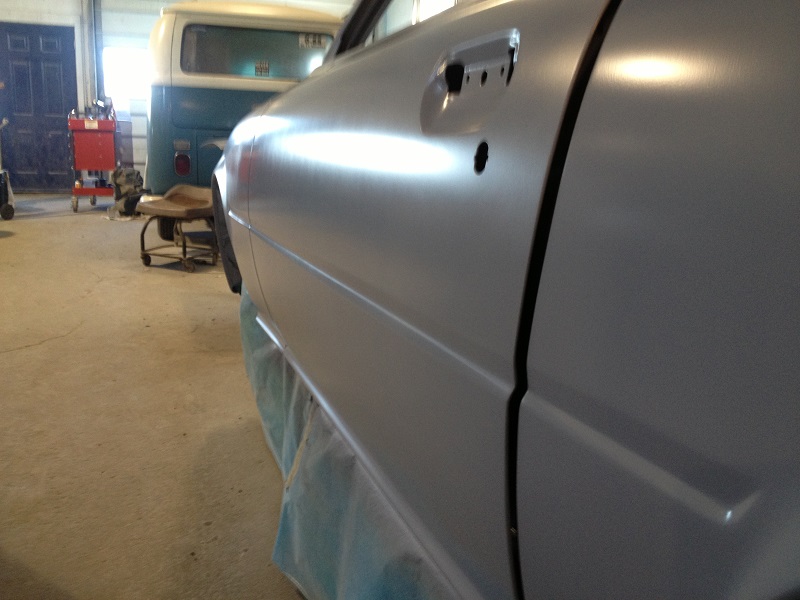
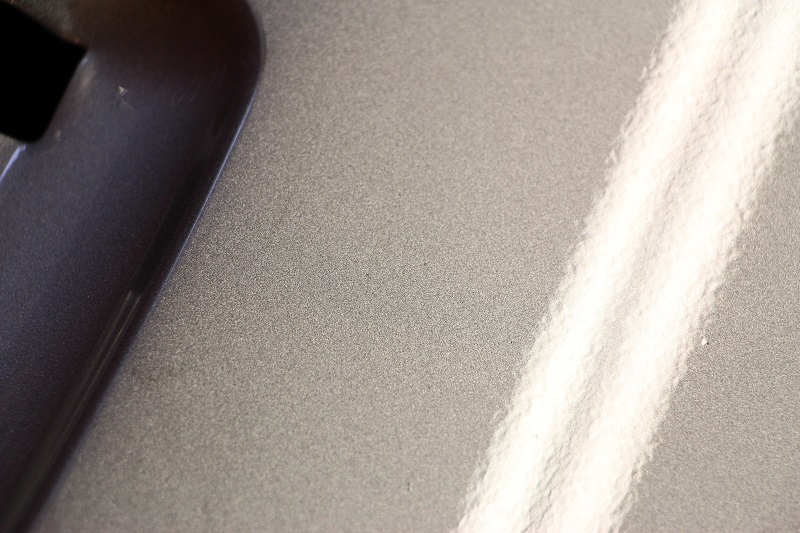
The doors also offered a good opportunity to show off the paint. The second image below is a close-up near the door-handle area. It doesn't show as well in the resized image, but if anyone wants the original 5mb image I'll share my dropbox link to it. With the full-sized one you can really see the detail in the speckle/mica if you zoom in and out.
And finally, another walk-around of the car now that it's out of the paint booth and sitting comfortably back on its wheels. There is still a huge amount of work to be done before it becomes a car again, not the least of which is the interior (dying the dash and seatbacks, installing the sound deadener, installing the new carpet). But this is a major milestone, and it really gets me stoked for how the project will turn out at the end
Good things come to those who wait.


Daaaayyyyyyum! That looks AWESOME! What paint code and brand is that? Is that K3 sunbeam silver? I had been going back and forth about changing mine to black from K3 silver, but seeing this makes me want to keep it silver. Awesome job!
Thread Starter
Joined: May 2002
Posts: 5,972
Likes: 37
From: Ottawa, Soviet Canuckistan
I was always partial to it, but now it looks absolutely amazing!
Trending Topics

Thread Starter
Joined: May 2002
Posts: 5,972
Likes: 37
From: Ottawa, Soviet Canuckistan
Slowly but surely. It's very much the tortoise and the hare - other builds may be going faster, but mine will get there eventually and it'll be freakin' awesome!  (and then we'll see about winning some races... or at least, autocrosses)
(and then we'll see about winning some races... or at least, autocrosses)


Thread Starter
Joined: May 2002
Posts: 5,972
Likes: 37
From: Ottawa, Soviet Canuckistan
For the work Joe is doing (complete teardown, body work, paint, rebuild), that's about $14k, which should take the project to completion give or take.
I also picked up about $3k of parts and misc things - a parts car for bumpers and fenders (that also donated a GSL rear end), new pads, rotors and calipers for that GSL rear, a full polyurethane bushing set, sound deadener, sound absorption matt, a new carpet kit, and a few other misc things that I can't recall right now. I've got a set of rims to refinish, need new tires, and will probably put a new stereo and speakers in it before the project is "done" this phase.
So when all is said and done I should still be under $20k. Most people reading this right now are probably doing a double take, then shaking their heads. Yes, I could have bought an FD for that. I could have done MANY things with that cash, and it probably wasn't the most "responsible" place to spend it. But do I regret it? Not one bit, especially after seeing pictures like this! This car obviously has a lot of sentimental value to me, and while I'd never get even half that cost out of selling it, it doesn't matter. I drove it for many years before, and I hope to drive it for many years after.
Projects like these are not for the faint of heart!
Last edited by vipernicus42; Feb 7, 2014 at 08:25 AM.
Keep up the good work!


Pics look GREAT!!! You know, it is a lot of money to spend on the old FB but the car is in every way priceless. Think of it as if it were one of your children. You spend a lot more than that on raising kids.. and the car doesn't talk back and act like a damn animal at times.
Thread Starter
Joined: May 2002
Posts: 5,972
Likes: 37
From: Ottawa, Soviet Canuckistan
Quick update:
Almost all the sound deadening is in place. For anybody who has never had to install sound deadener before, it's a hell of a job. Cleaning and prepping the surface, cutting the material to fit, then laying it and hammering it into place firmly so that it doesn't peel back and drop off on the first sunny day. It doesn't look like much but it must have taken ages to get done. I did a bunch on a friend's car and between the two of us, after a week it looked like we'd barely done anything!
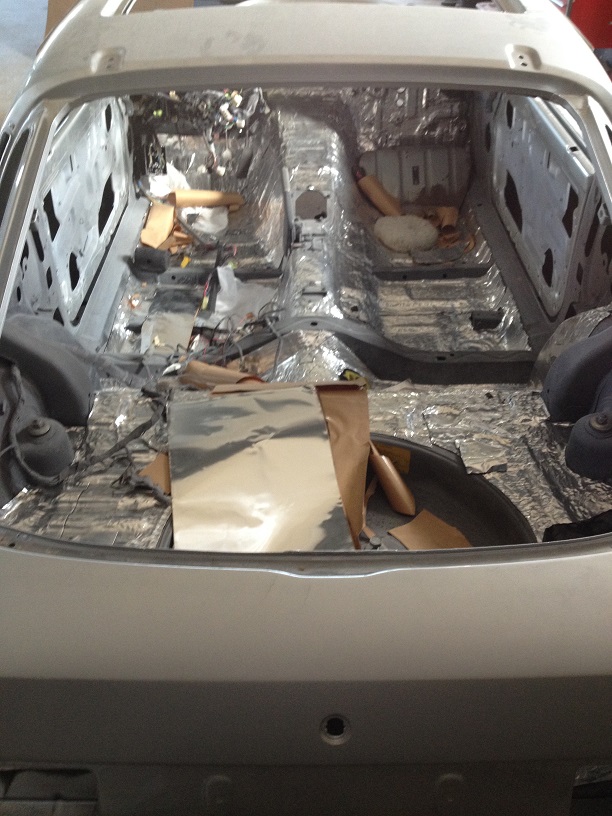
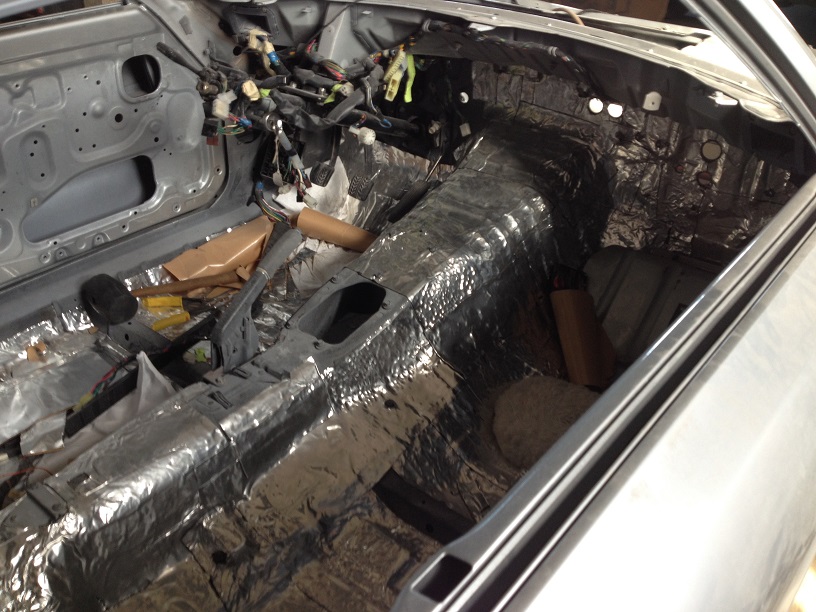
Joe says that the engine should be lowered in place and physically bolted in some time in the near future. Also, the door panels and headliner have been sent off to the upholsterer to get worked over. There's a lot of detail work for the interior pieces coming up - dying, upholstering, and installing of things. As soon as I have more pictures I'll post them up.
Cheers,
Jon
Almost all the sound deadening is in place. For anybody who has never had to install sound deadener before, it's a hell of a job. Cleaning and prepping the surface, cutting the material to fit, then laying it and hammering it into place firmly so that it doesn't peel back and drop off on the first sunny day. It doesn't look like much but it must have taken ages to get done. I did a bunch on a friend's car and between the two of us, after a week it looked like we'd barely done anything!
Joe says that the engine should be lowered in place and physically bolted in some time in the near future. Also, the door panels and headliner have been sent off to the upholsterer to get worked over. There's a lot of detail work for the interior pieces coming up - dying, upholstering, and installing of things. As soon as I have more pictures I'll post them up.
Cheers,
Jon
Last edited by vipernicus42; May 25, 2014 at 08:14 PM.

For anybody who has never had to install sound deadener before, it's a hell of a job. Cleaning and prepping the surface, cutting the material to fit, then laying it and hammering it into place firmly so that it doesn't peel back and drop off on the first sunny day. It doesn't look like much but it must have taken ages to get done.
 I was hoping it was sticky enough to go right over the bare metal and remnants of the old factory sound deadening material...
 But for real, how clean did you need to get your surfaces to apply it? And, what type and thickness of material did you use?
Thanks for the info! Your project looks freakin' amazing! I can't wait to get my K3 Sunbeam Silver metallic done some day.
Thread Starter
Joined: May 2002
Posts: 5,972
Likes: 37
From: Ottawa, Soviet Canuckistan
For both my project and my friend Marc's car, we used Second Skin's Damplifier Pro. It's similar in many ways to the higher end Dynamat products, but when I bought it the cost was about half that of the Dynamat. There used to be a web page where the guy evaluated a whole bunch of sound deadening materials, putting them through all sorts of tests (like heating them in the oven or freezing them to see if they'd melt or unstick) to see how they compare. The only two that came out in the test that I'd bother using were Damplifier Pro or whatever the higher-end Dynamat was (Xtreme? Something like that).
Don't use the cheap asphalt-based ones. One good day in the sun and it'll melt, stick to your carpets, and pool in the bottom of your doors and footwells. That's not something you want to have to deal with!
Excellent, good to know! Thanks for sharing. I'm hoping that that part of my rebuild is just around the corner - installing sound deadening / heat shield. Was thinking 1/2 inch dynamat but I'll check out the Damplifier Pro. Still have some welding to do but thinking ahead.