
Project Naomi VI : IT LIVES!

Thread Starter
Joined: May 2002
Posts: 5,972
Likes: 37
From: Ottawa, Soviet Canuckistan
Project Naomi VI : IT LIVES!
For anyone looking for the other project threads:
Project Naomi I : New Project on an Old Favourite
Project Naomi II : Giant Rotisserie Pictures Update
Project Naomi III : End of Summer 2010 Update
Project Naomi IV : Almost Off The Rotisserie
Project Naomi V : Finally PAINT!
Project Naomi VI : IT LIVES!
Project Naomi VII : Coming Home
-----
There's been a lot of progress since the last thread, and much of it has happened this past week. I'll let these two short videos set the scene before filling in the gaps:
That's right, after five long years of waiting we've finally got it back together enough to fire it up again!
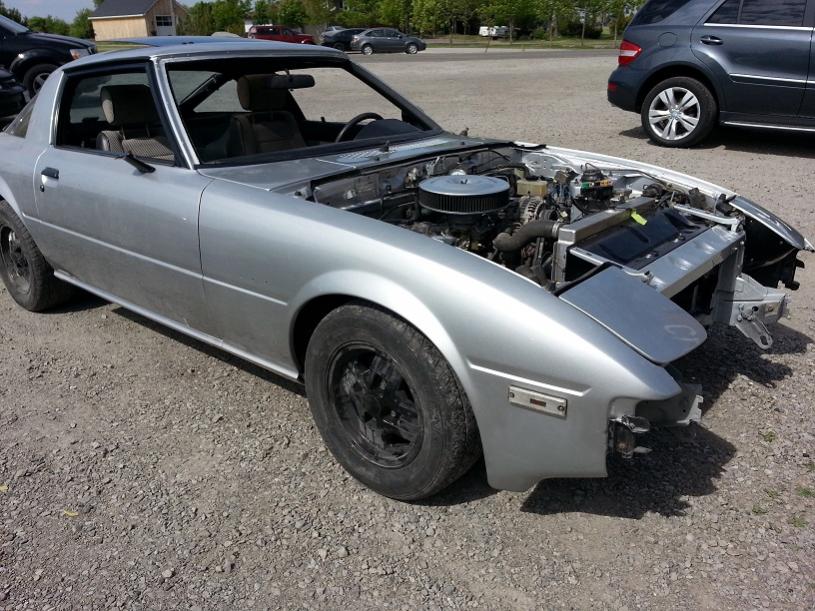
So I mentioned in a post in my last thread that if things were going well I'd head down to ClassicAuto and lend a hand with the mechanical reassembly. Joe really pushed and made a huge amount of progress on the project so this past Saturday I drove down, checked into a local motel and we went to work. When I arrived the engine and tranny were sitting on blocks near the car, still wrapped from storage. It took three days to drop it in, hook everything up, and get it ready to run:
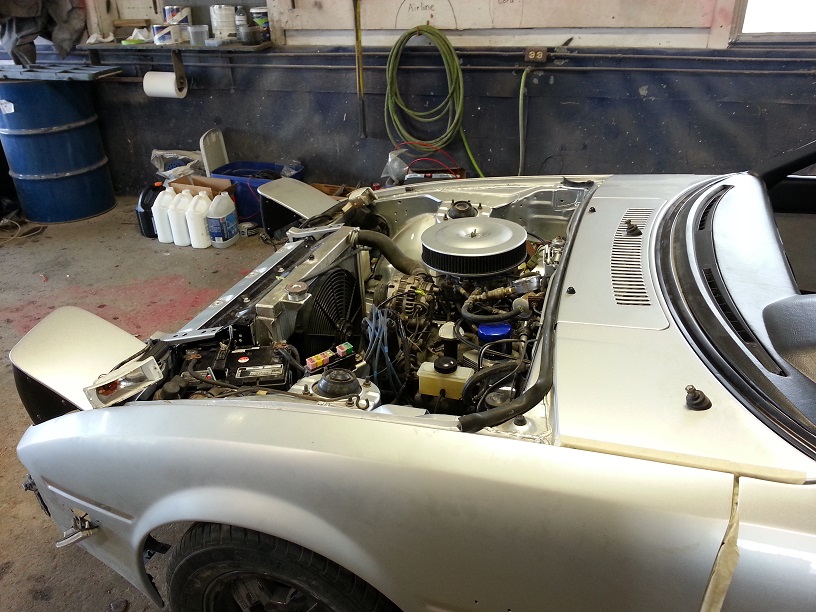
Thankfully we didn't have much trouble with re-assembly of the mechanicals. The worst was a stripped bolt hole for the Clutch Slave Cylinder that we didn't find out about until after everything else was in place. We ended up drilling and tapping it out for a larger bolt, which would have been much easier to do before the engine and tranny were dropped in.
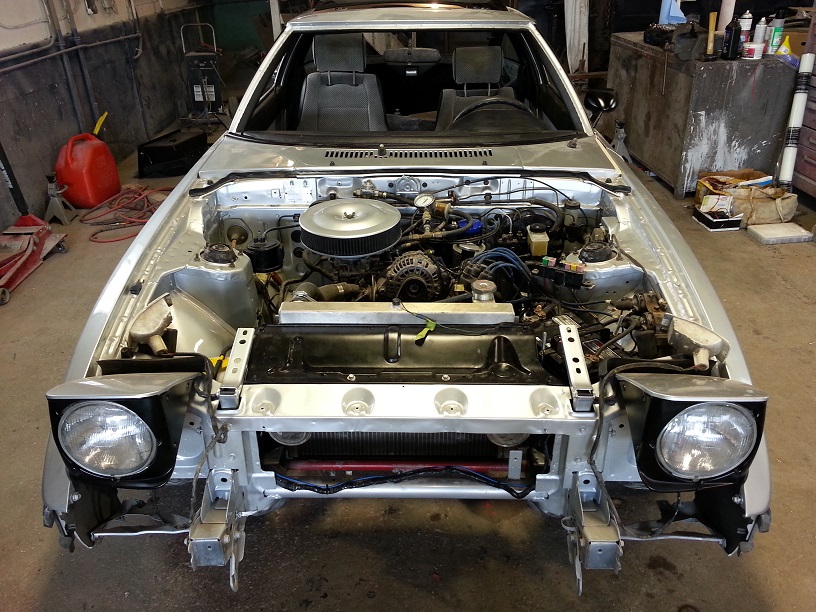
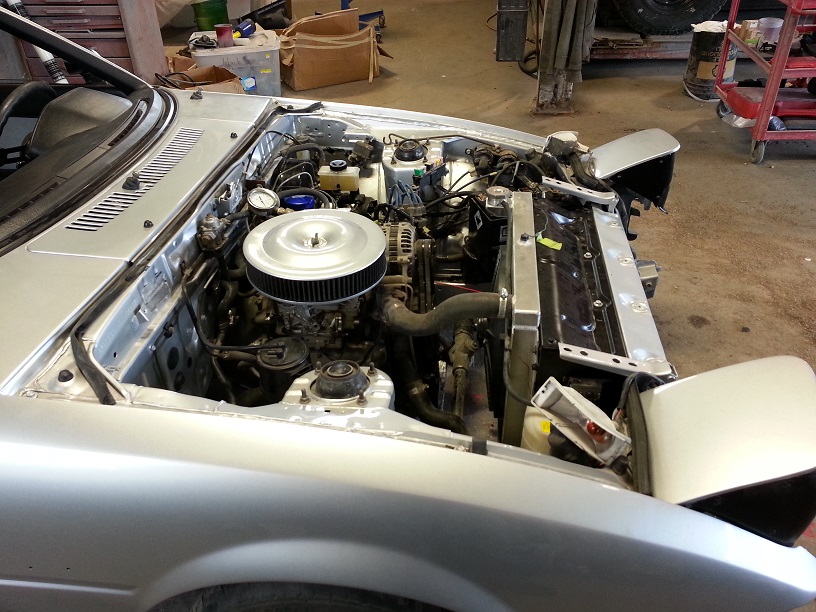
We're SO close now. The engine and tranny are installed, the whole engine bay is connected and wired up, exhaust and driveshaft are installed, and everything in the engine bay and under-side are 100%. We've got all new fluids (RedLine MT-90 for the transmission, RedLine 75W90 with LSD additives for the new rear end, generic 10w30 motor oil and 50/50 coolant, and DOT4 Brake/Clutch fluid round out the list). After a half day of troubleshooting and a bunch of electrical contact cleaner we've got ALL the electricals working too!
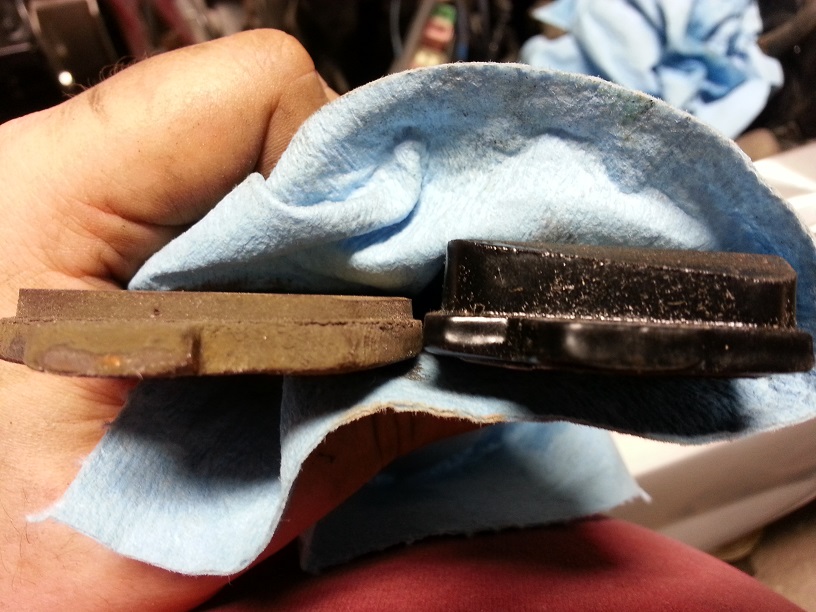
I used a set of these speed bleeders (Home) to make bleeding the clutch and brakes an absolute breeze. I highly recommend them to anybody who does their own brakes and clutch. Once I had them installed I was able to bleed the brakes and clutch all on my own without any trouble. Just attach the tube and bleeder bag, open the valve 1/4 turn, go pump the brake a few times, top up the fluid and repeat! The brakes also got brand new Hawk HPS pads and Stainless Steel lines during reassembly. Check out the difference between the pads that came out and the ones that went in (the Hawk ones taper at the ends in case you're wondering if that's an illusion)
It was a long couple of days but the reward is totally worth it. Yesterday Project Naomi made its inaugural drive! It was only 100m down to the next driveway and back as we're still waiting on the windshield clips to be delivered, but it drives! It starts, warms up, idles, moves, shifts, steers and stops! We even fixed the binding issue that I'd been having from the steering for a few years before the project even started!
Here's a shot of it sitting in the parking lot outside just after it took its first trip down the road and back:
Interior pics to come shortly
Jon
Project Naomi I : New Project on an Old Favourite
Project Naomi II : Giant Rotisserie Pictures Update
Project Naomi III : End of Summer 2010 Update
Project Naomi IV : Almost Off The Rotisserie
Project Naomi V : Finally PAINT!
Project Naomi VI : IT LIVES!
Project Naomi VII : Coming Home
-----
There's been a lot of progress since the last thread, and much of it has happened this past week. I'll let these two short videos set the scene before filling in the gaps:
That's right, after five long years of waiting we've finally got it back together enough to fire it up again!
So I mentioned in a post in my last thread that if things were going well I'd head down to ClassicAuto and lend a hand with the mechanical reassembly. Joe really pushed and made a huge amount of progress on the project so this past Saturday I drove down, checked into a local motel and we went to work. When I arrived the engine and tranny were sitting on blocks near the car, still wrapped from storage. It took three days to drop it in, hook everything up, and get it ready to run:
Thankfully we didn't have much trouble with re-assembly of the mechanicals. The worst was a stripped bolt hole for the Clutch Slave Cylinder that we didn't find out about until after everything else was in place. We ended up drilling and tapping it out for a larger bolt, which would have been much easier to do before the engine and tranny were dropped in.
We're SO close now. The engine and tranny are installed, the whole engine bay is connected and wired up, exhaust and driveshaft are installed, and everything in the engine bay and under-side are 100%. We've got all new fluids (RedLine MT-90 for the transmission, RedLine 75W90 with LSD additives for the new rear end, generic 10w30 motor oil and 50/50 coolant, and DOT4 Brake/Clutch fluid round out the list). After a half day of troubleshooting and a bunch of electrical contact cleaner we've got ALL the electricals working too!
I used a set of these speed bleeders (Home) to make bleeding the clutch and brakes an absolute breeze. I highly recommend them to anybody who does their own brakes and clutch. Once I had them installed I was able to bleed the brakes and clutch all on my own without any trouble. Just attach the tube and bleeder bag, open the valve 1/4 turn, go pump the brake a few times, top up the fluid and repeat! The brakes also got brand new Hawk HPS pads and Stainless Steel lines during reassembly. Check out the difference between the pads that came out and the ones that went in (the Hawk ones taper at the ends in case you're wondering if that's an illusion)
It was a long couple of days but the reward is totally worth it. Yesterday Project Naomi made its inaugural drive! It was only 100m down to the next driveway and back as we're still waiting on the windshield clips to be delivered, but it drives! It starts, warms up, idles, moves, shifts, steers and stops! We even fixed the binding issue that I'd been having from the steering for a few years before the project even started!
Here's a shot of it sitting in the parking lot outside just after it took its first trip down the road and back:
Interior pics to come shortly
Jon
Last edited by vipernicus42; Aug 23, 2015 at 10:01 PM.
Thread Starter
Joined: May 2002
Posts: 5,972
Likes: 37
From: Ottawa, Soviet Canuckistan
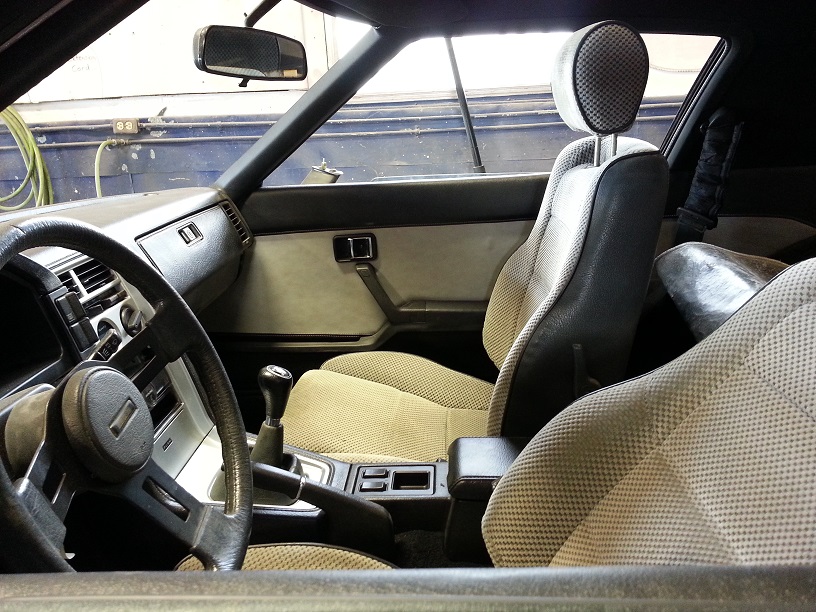
Interior Pics
Joe has been busy lately getting the interior back together. His attention to detail is awesome and everything is tying together quite nicely.
Forgive the picture quality, I forgot to bring my good camera so these were taken on my cell phone.
The black carpet set, the dyed dash, the painted centre console surround, the new door panels and more repainted/dyed plastic parts than we can shake a stick at. It all fits together really nicely.
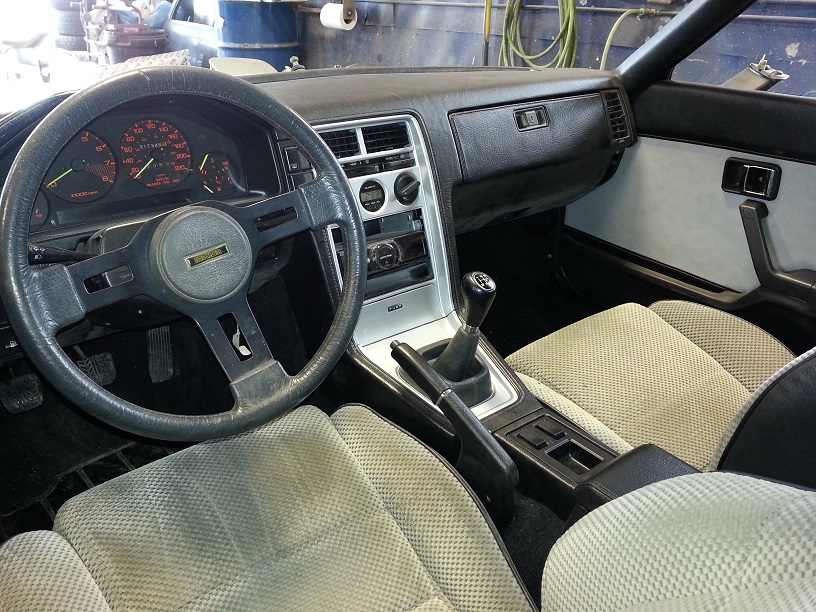
We decided to try outfitting the car with Power Windows as part of the rebuild. So when we had the door panels reupholstered we used a set of power window ones without the hole for the hand crank. We kept the shorter manual-window door pulls though, partly because I prefer the look and partly so that we'd have the ability to revert to manual windows if ever I wanted to. In the end the power window conversion was a success. We swapped the switches into the centre section that the car originally had, so I get to keep the marginally-more-useful change tray instead of the completely useless audio joystick.
Every piece that went back inside was given a full once-over. If it had a hard surface it was painted/dyed. If it had carpet as part of its construction we replaced it with spare carpet that we got along with the carpet kit from stockinteriors.com. Everything from the tops of the storage bins to the rear taillight area cover. I mentioned Joe's attention to detail - he even went and got new button snaps so that the taillight area cover would snap into place just like the stock one!
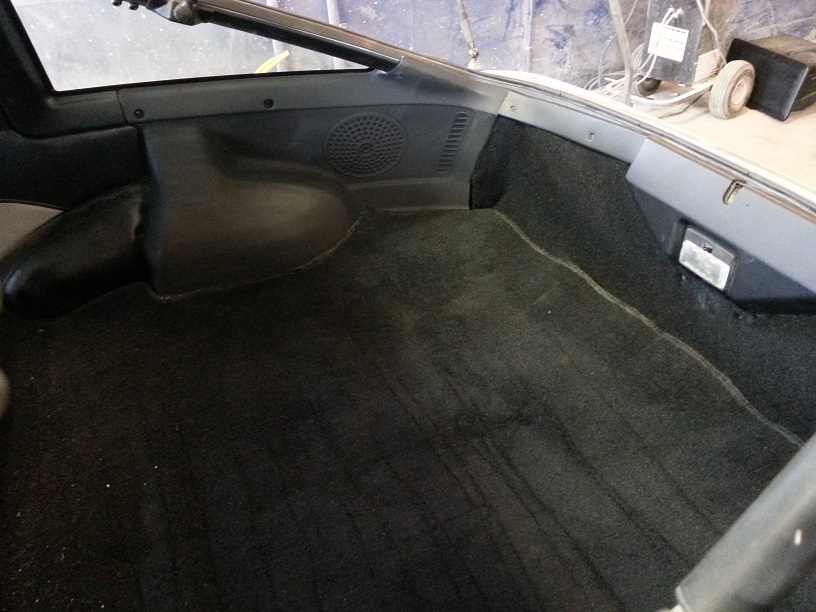
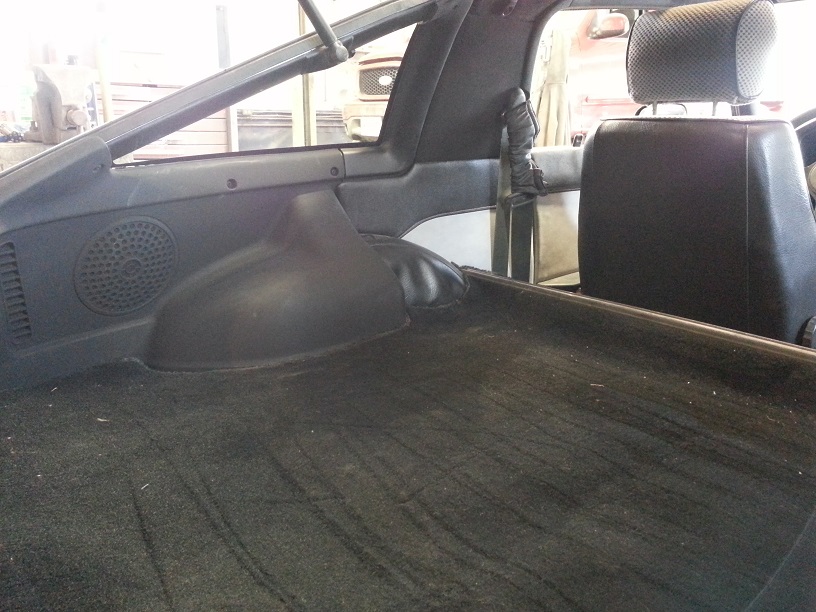
The interior is DONE, and I absolutely love the look. It's very close to stock but has a lot of little refinements that I really like.
So with the interior, underside, engine bay and electrical 100% done, what's left? Well, there are a few body bits left. The front driver's side fender has to be re-clearcoated and buffed, as does the passenger side mirror. The front bumper cover needs its black stripe painted, and all the front end parts (header panel, hood, etc) need to be buffed. The windshield clips should arrive today and we can get that installed along with its trim.
I'll be heading back to Ottawa today and while I can't take it with me yet it's VERY close to being done. I figure another couple of weeks and I'll be able to get a ride down here to pick it up and drive it home.
I'm incredibly excited, this project is 95% done, just have to wrap up the last few bits and we'll be back on the road!
Forgive the picture quality, I forgot to bring my good camera so these were taken on my cell phone.
The black carpet set, the dyed dash, the painted centre console surround, the new door panels and more repainted/dyed plastic parts than we can shake a stick at. It all fits together really nicely.
We decided to try outfitting the car with Power Windows as part of the rebuild. So when we had the door panels reupholstered we used a set of power window ones without the hole for the hand crank. We kept the shorter manual-window door pulls though, partly because I prefer the look and partly so that we'd have the ability to revert to manual windows if ever I wanted to. In the end the power window conversion was a success. We swapped the switches into the centre section that the car originally had, so I get to keep the marginally-more-useful change tray instead of the completely useless audio joystick.
Every piece that went back inside was given a full once-over. If it had a hard surface it was painted/dyed. If it had carpet as part of its construction we replaced it with spare carpet that we got along with the carpet kit from stockinteriors.com. Everything from the tops of the storage bins to the rear taillight area cover. I mentioned Joe's attention to detail - he even went and got new button snaps so that the taillight area cover would snap into place just like the stock one!
The interior is DONE, and I absolutely love the look. It's very close to stock but has a lot of little refinements that I really like.
So with the interior, underside, engine bay and electrical 100% done, what's left? Well, there are a few body bits left. The front driver's side fender has to be re-clearcoated and buffed, as does the passenger side mirror. The front bumper cover needs its black stripe painted, and all the front end parts (header panel, hood, etc) need to be buffed. The windshield clips should arrive today and we can get that installed along with its trim.
I'll be heading back to Ottawa today and while I can't take it with me yet it's VERY close to being done. I figure another couple of weeks and I'll be able to get a ride down here to pick it up and drive it home.
I'm incredibly excited, this project is 95% done, just have to wrap up the last few bits and we'll be back on the road!
Glad to see some progress on this! How did you guys address the binding in that steering? That was my biggest complaint about that kit, and ultimately why I sold both of the ones I had...
Thread Starter
Joined: May 2002
Posts: 5,972
Likes: 37
From: Ottawa, Soviet Canuckistan
So now it turns as smoothly as a hot knife through butter!


Ah ok, I misunderstood what you were talking about. My complaint was with the ackerman angle being too great and causing the tires to scrub, fight each other basically, at higher steering angles, like in a parking lot etc. Anyway, glad you got it sorted out and are happy with it. Looking forward to see this thing all back together and on the road 
It turns out that it was just the middle bar protruding too far into the U-joints. So when the U-joints turned, part of them would impact the bar. On mine we were able to just shift the steering column a few millimeters on the inside, and use the adjusting nuts to make sure the middle bar cleared in both U-joints. On my friend Marc's car I think we'll have to cut a few mm off the bar since it seemed too long to do that. I guess the spacing and tolerances change a bit from car to car, but basically the middle bar is the culprit, when I initially thought it was an issue with one of the U-joints being at too harsh of an angle.
So now it turns as smoothly as a hot knife through butter!
So now it turns as smoothly as a hot knife through butter!
Trending Topics


Thread
Thread Starter
Forum
Replies
Last Post