
Project Naomi II : Giant Rotisserie Pictures Update

Thread Starter
Joined: May 2002
Posts: 5,972
Likes: 37
From: Ottawa, Soviet Canuckistan
Project Naomi II : Giant Rotisserie Pictures Update
For anyone looking for the other project threads:
Project Naomi I : New Project on an Old Favourite
Project Naomi II : Giant Rotisserie Pictures Update
Project Naomi III : End of Summer 2010 Update
Project Naomi IV : Almost Off The Rotisserie
Project Naomi V : Finally PAINT!
Project Naomi VI : IT LIVES!
Project Naomi VII : Coming Home
-----
Hey All,
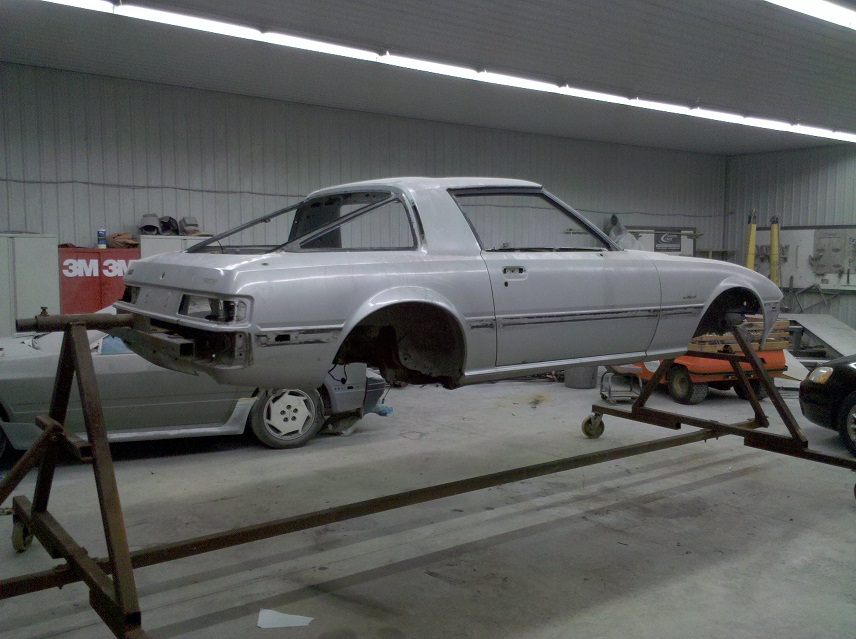
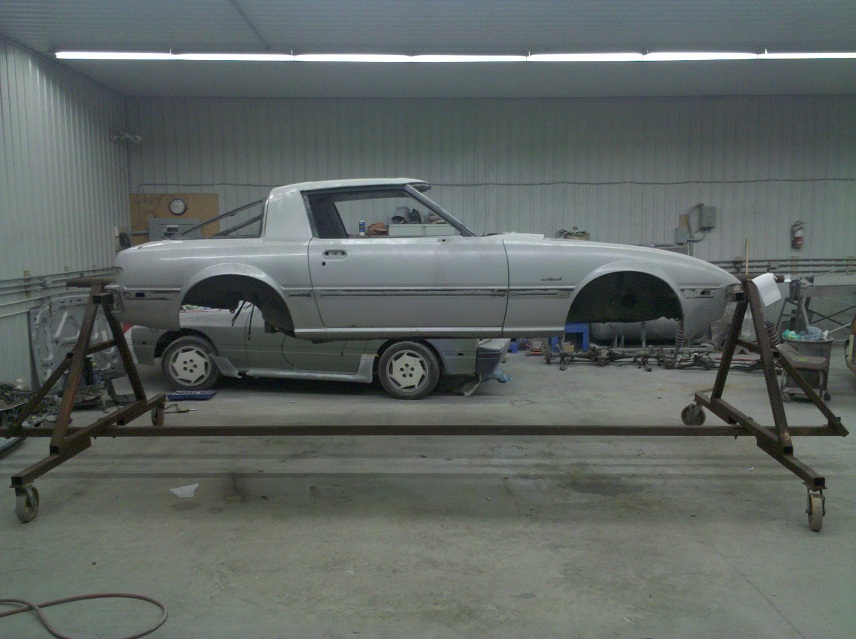
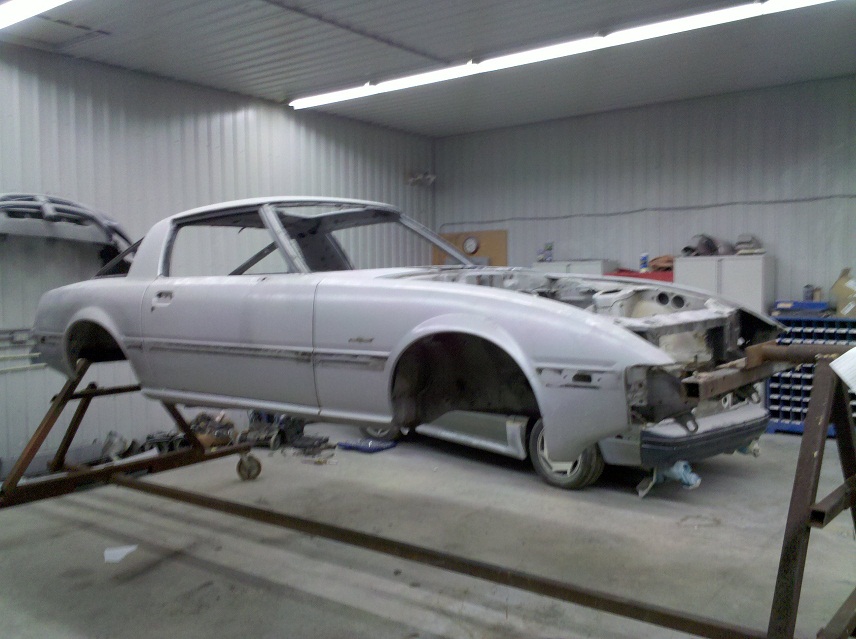
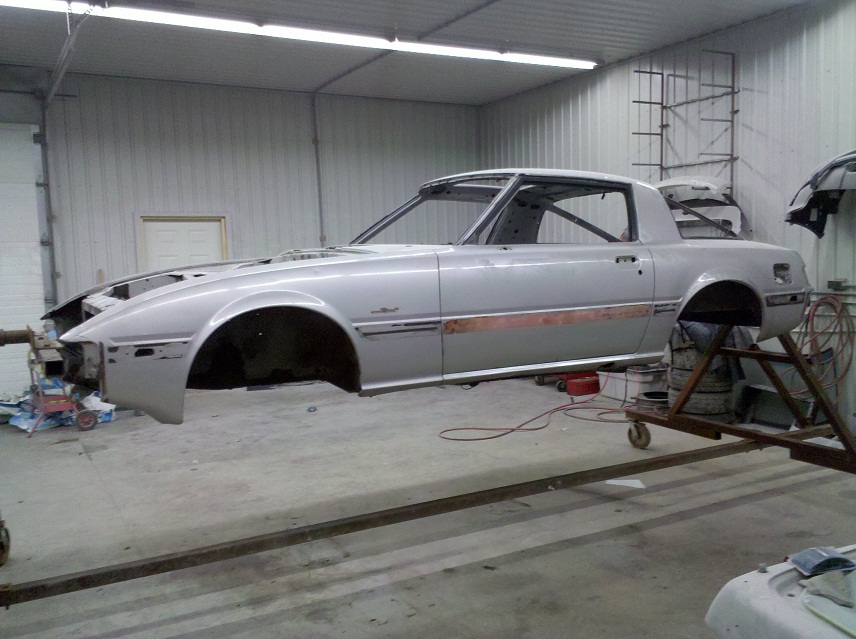
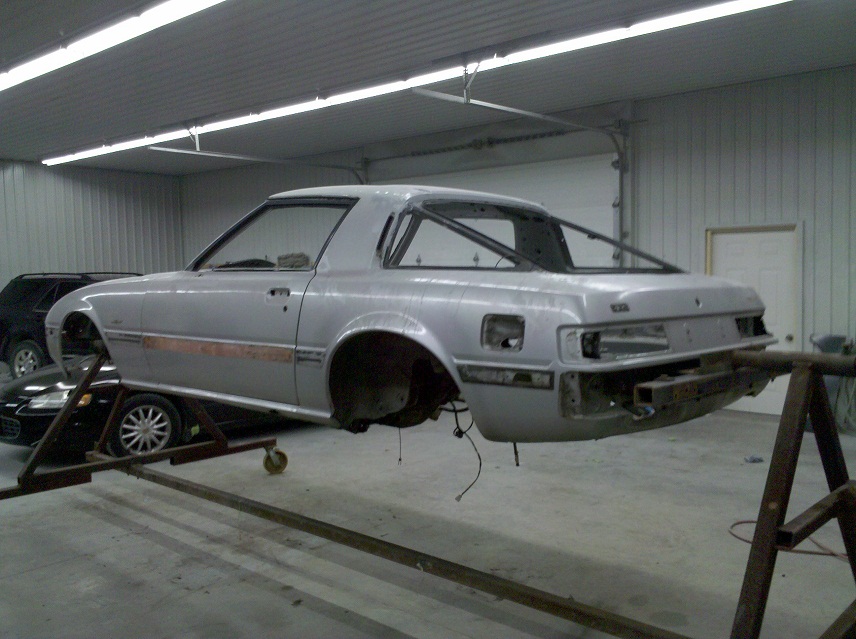
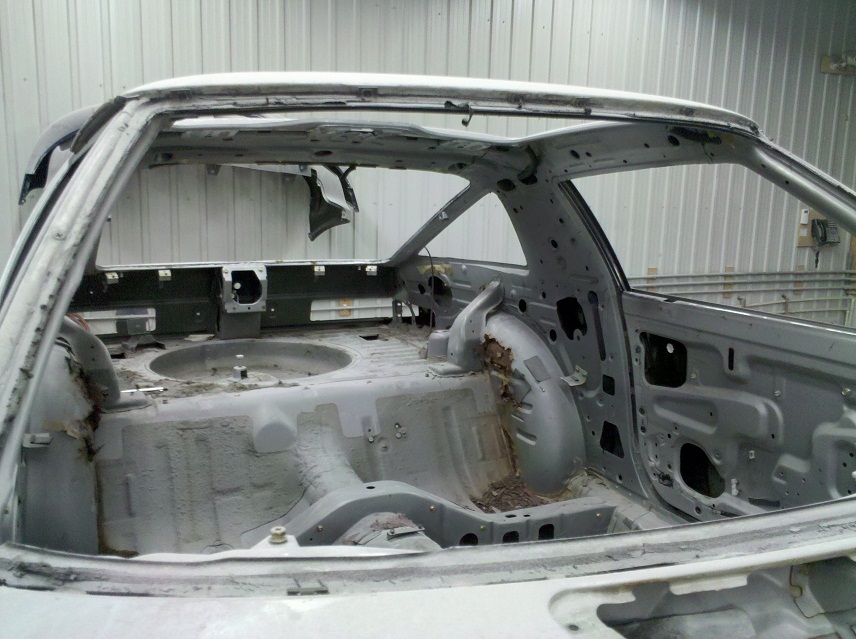
I visited ClassicAuto on the weekend and snapped some 35+ pics of the car as it is right now on the rotisserie. They've stripped the car but haven't started removing the paint, grit and grime from it yet, so this is a great set of pictures showing the base shell that they have to work with.
For a 26yr old Canadian FB, I think she fared pretty well up to this point.
First off, shots of the car from the outside, walking around it as it sits on the rotisserie
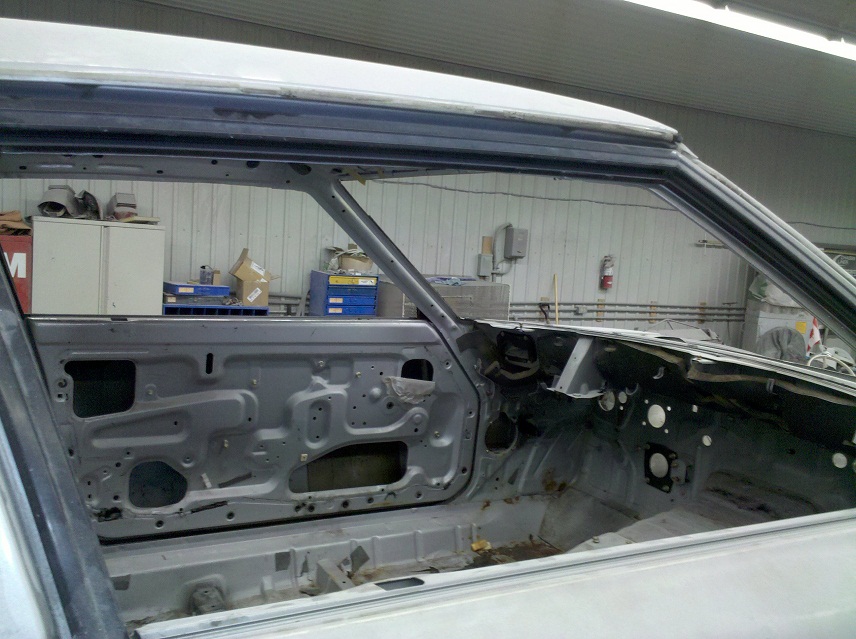
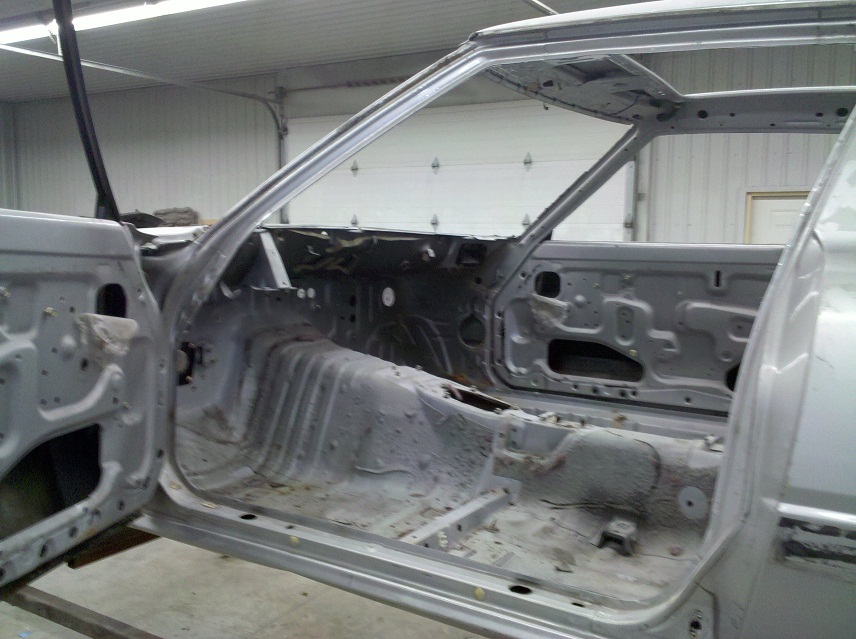
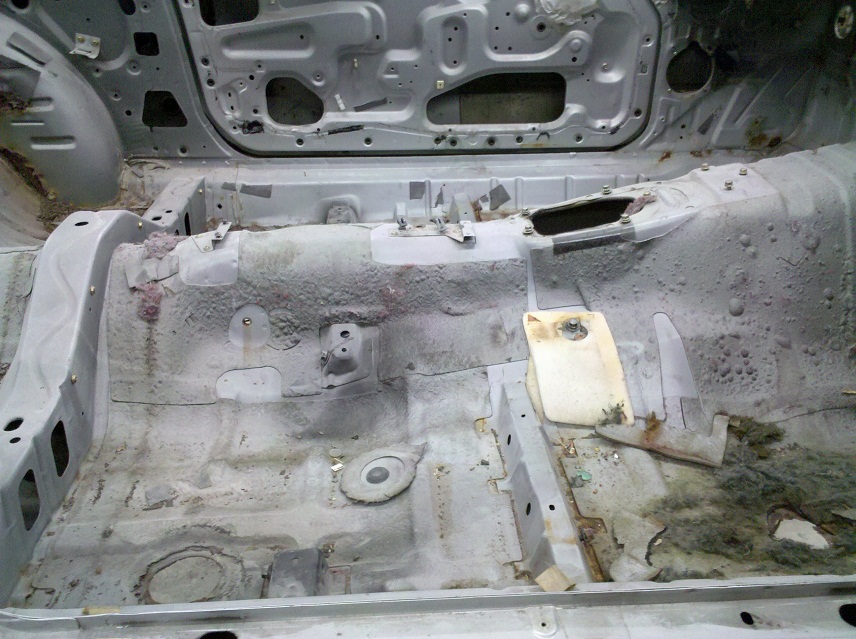
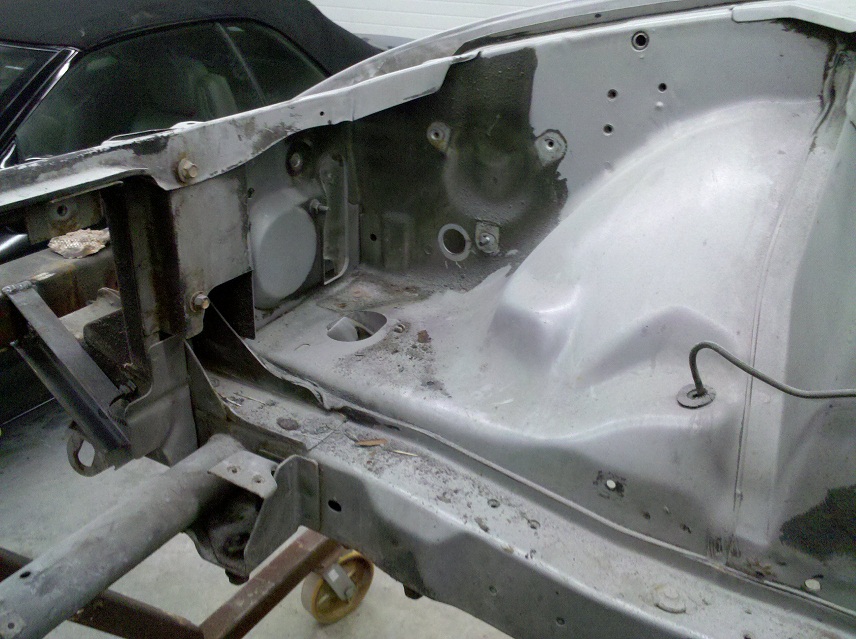
The view in through the passenger's door
Jon
Project Naomi I : New Project on an Old Favourite
Project Naomi II : Giant Rotisserie Pictures Update
Project Naomi III : End of Summer 2010 Update
Project Naomi IV : Almost Off The Rotisserie
Project Naomi V : Finally PAINT!
Project Naomi VI : IT LIVES!
Project Naomi VII : Coming Home
-----
Hey All,
I visited ClassicAuto on the weekend and snapped some 35+ pics of the car as it is right now on the rotisserie. They've stripped the car but haven't started removing the paint, grit and grime from it yet, so this is a great set of pictures showing the base shell that they have to work with.
For a 26yr old Canadian FB, I think she fared pretty well up to this point.
First off, shots of the car from the outside, walking around it as it sits on the rotisserie
The view in through the passenger's door
Jon
Last edited by vipernicus42; Aug 23, 2015 at 10:02 PM.
Thread Starter
Joined: May 2002
Posts: 5,972
Likes: 37
From: Ottawa, Soviet Canuckistan
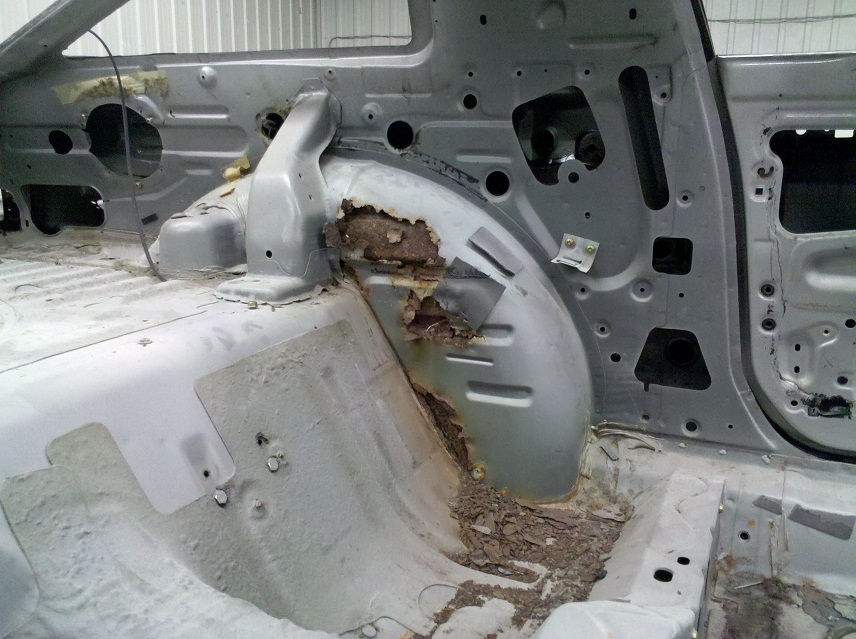
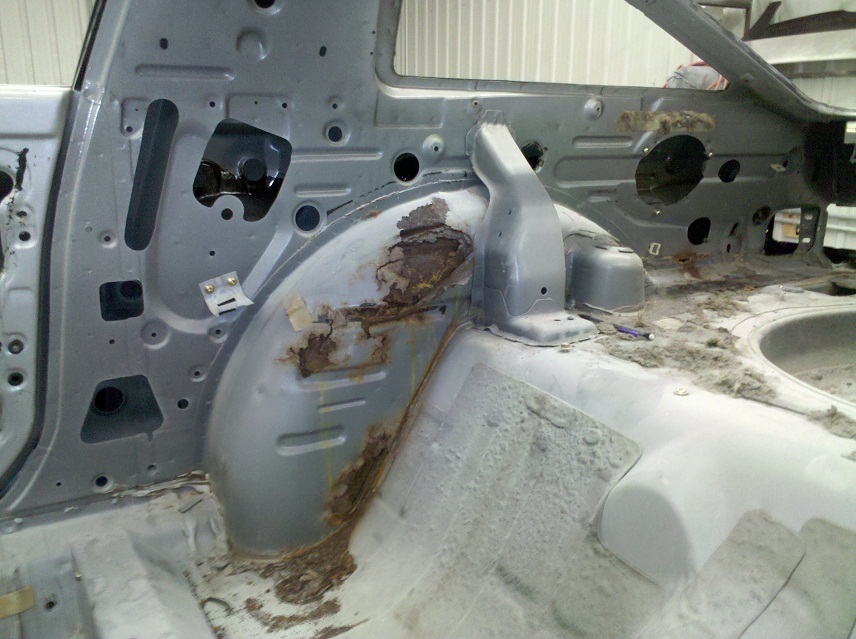
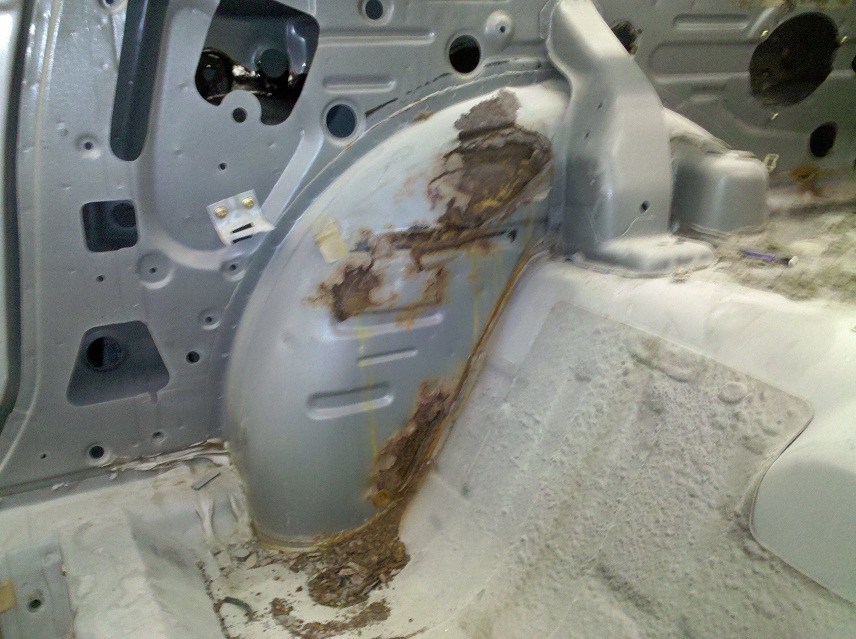
Some pictures of the Right-Side wheel well rust. It loks pretty bad, but none of it perforated straight through. Chances are that after sandblasting it'll be so thin that we'll want to cut-and-weld new metal anyway, but it looks like I caught it at a decent time - before it actually broke through and caused structural damage.
Some pictures of the inside looking in at various angles
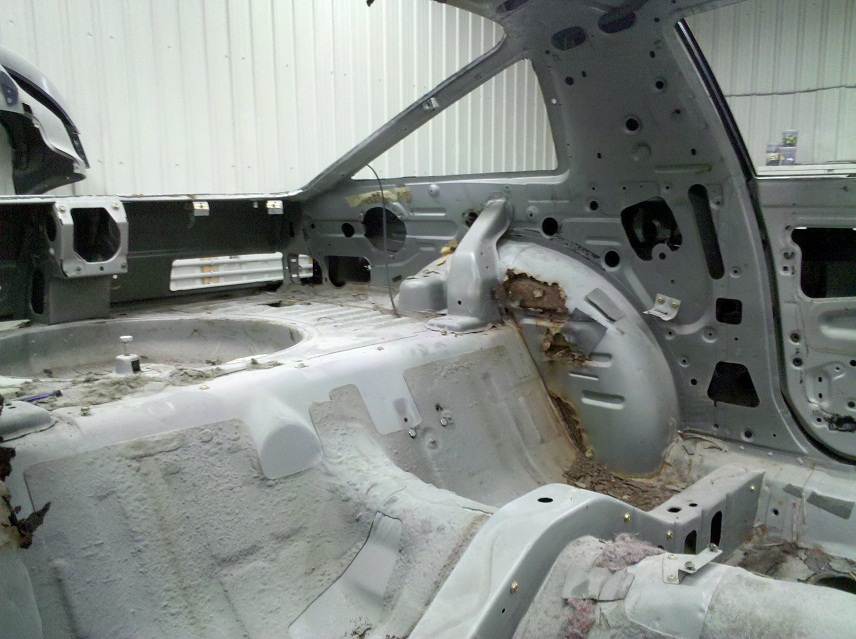
And some pictures of the passenger-side wheel well rust - not as bad off as the driver's side but was definitely pretty bad.
Some pictures of the inside looking in at various angles
And some pictures of the passenger-side wheel well rust - not as bad off as the driver's side but was definitely pretty bad.
Thread Starter
Joined: May 2002
Posts: 5,972
Likes: 37
From: Ottawa, Soviet Canuckistan
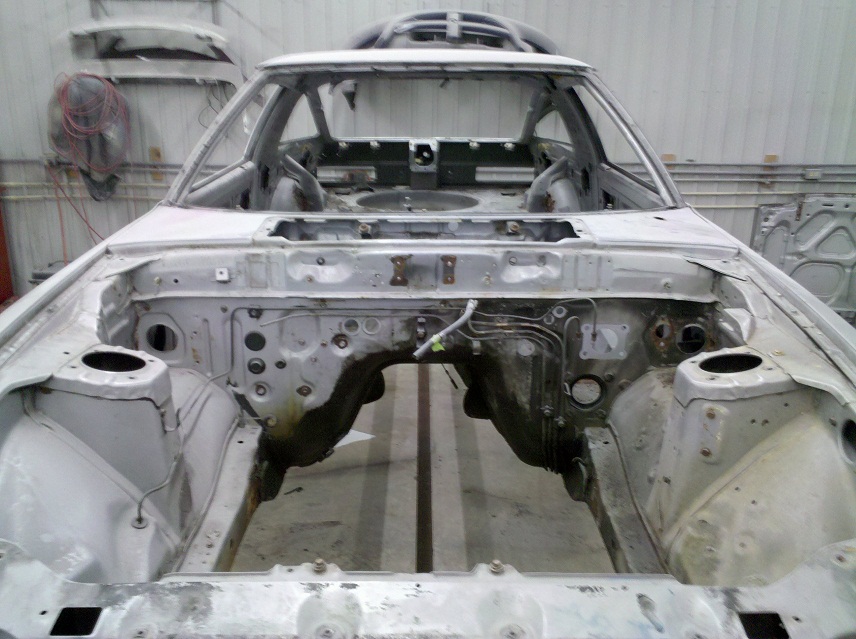
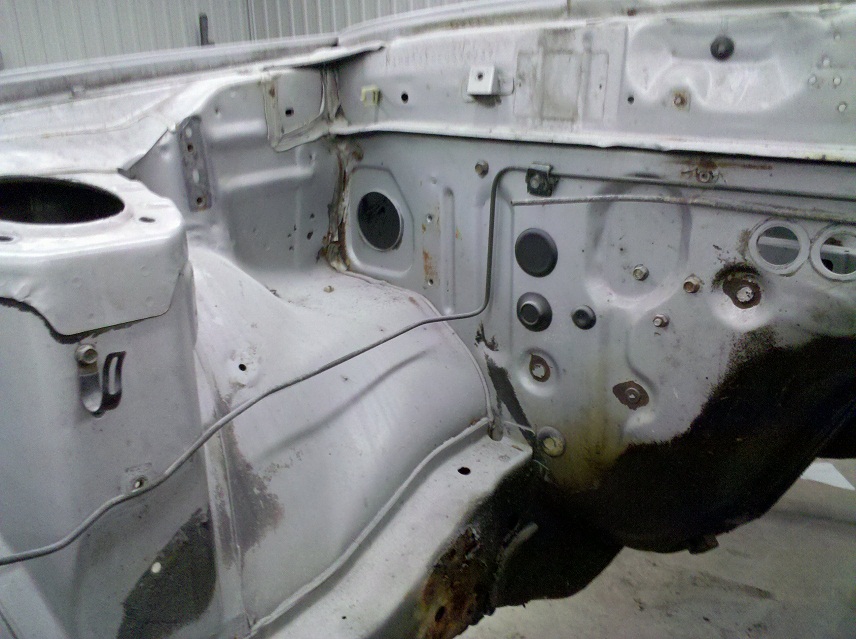
It's hard to see in these pictures, but the floor area on both sides is pushed upwards - the car was jacked from under the floors ages ago before I knew what "load bearing jacking points" were - let's just say I figured that one out the hard way. There's a good pic of it later
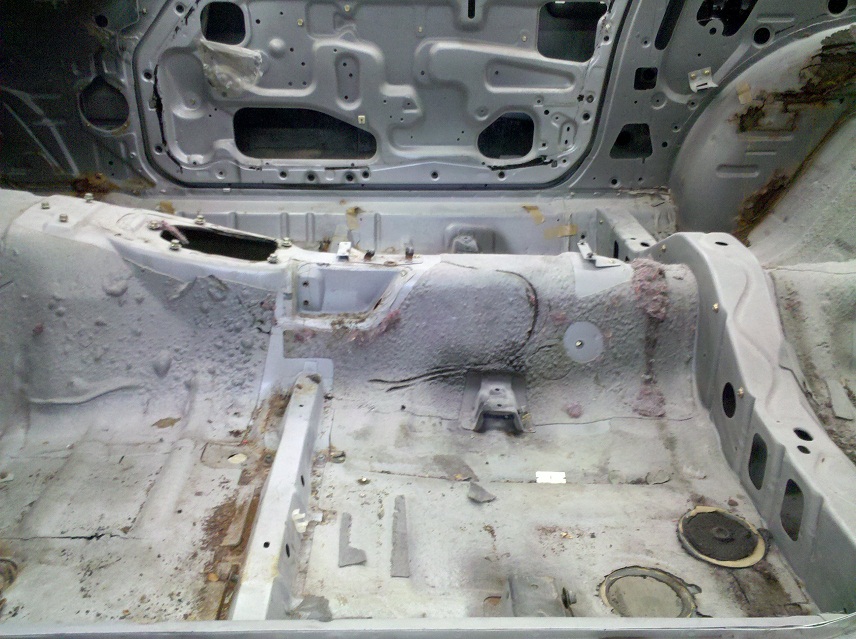
Other than the jack damage to the floors, they look to be in fairly good shape, no major floor rust to speak of, which is the same for the vast majority of the rest of the interior.
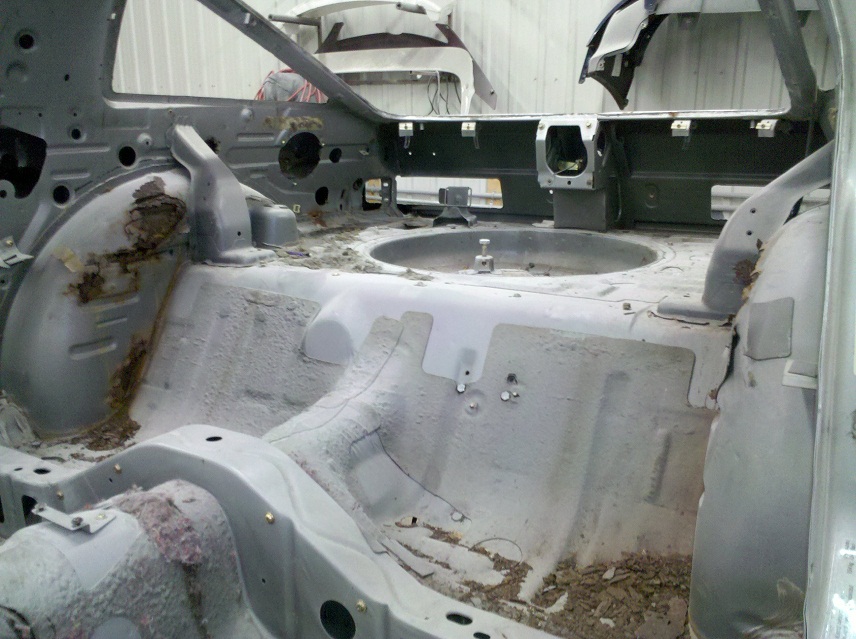
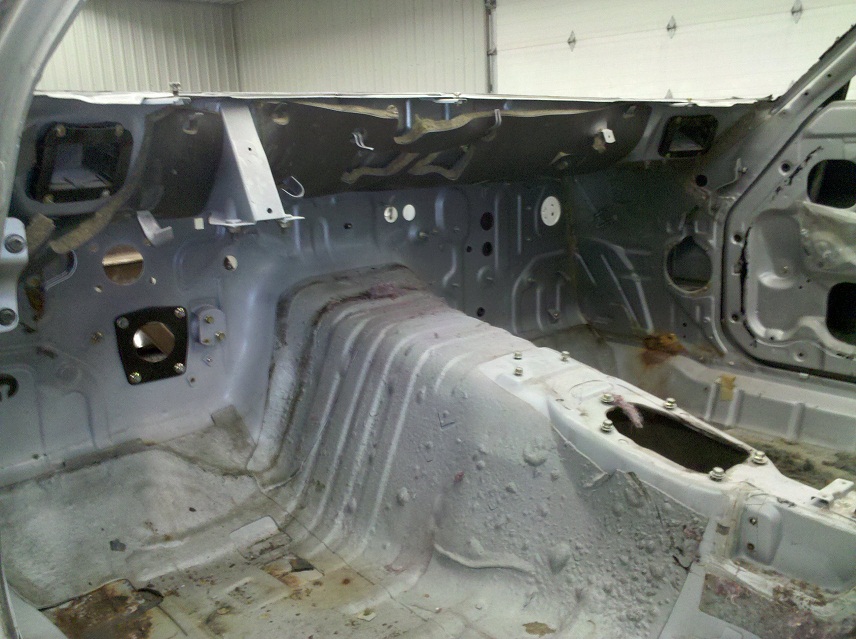
More pictures of the interior - we've got the rear hatch are, the area under where the dash would be, the roof liner area, a view in through the back hatch, and the driver's door
Other than the jack damage to the floors, they look to be in fairly good shape, no major floor rust to speak of, which is the same for the vast majority of the rest of the interior.
More pictures of the interior - we've got the rear hatch are, the area under where the dash would be, the roof liner area, a view in through the back hatch, and the driver's door
Thread Starter
Joined: May 2002
Posts: 5,972
Likes: 37
From: Ottawa, Soviet Canuckistan
Doors also look to be in good shape, and we got two more pics of the front/floor area but fron the passenger's side this time
I took some detail shots while standing in the engine bay to get a good look at the bits of rust there. Mainly it's concentrated in the front area where the battery sits, but there are marks of it along seams in some of the other spots
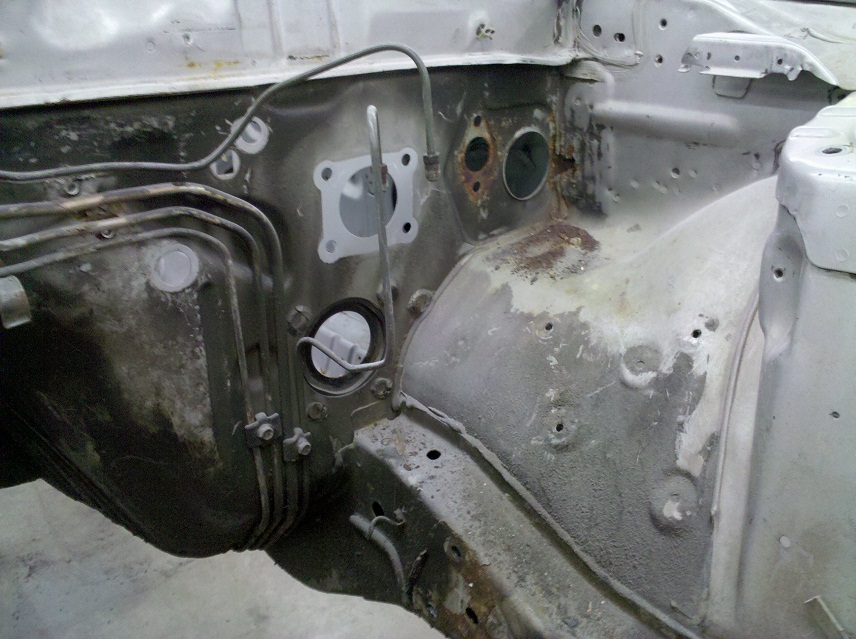
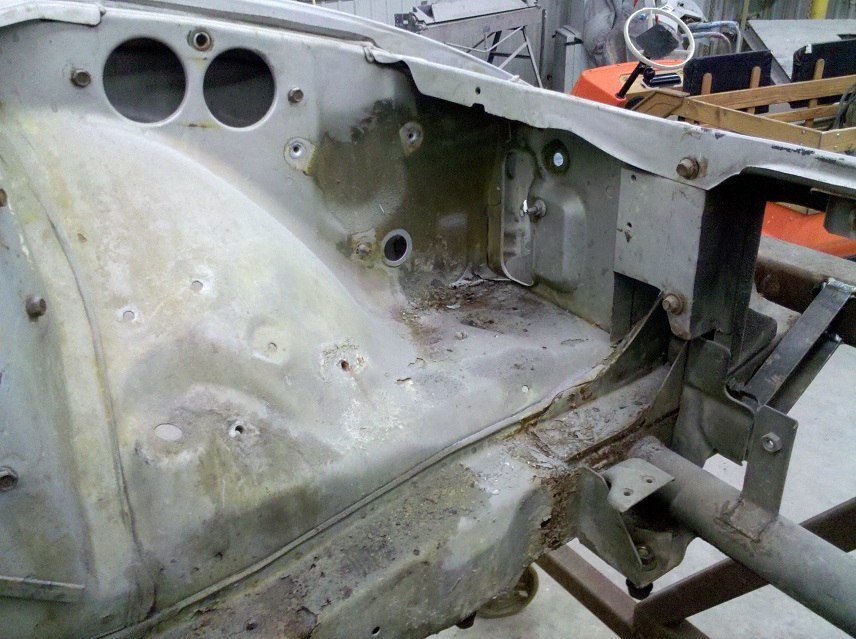
I took some detail shots while standing in the engine bay to get a good look at the bits of rust there. Mainly it's concentrated in the front area where the battery sits, but there are marks of it along seams in some of the other spots
Thread Starter
Joined: May 2002
Posts: 5,972
Likes: 37
From: Ottawa, Soviet Canuckistan
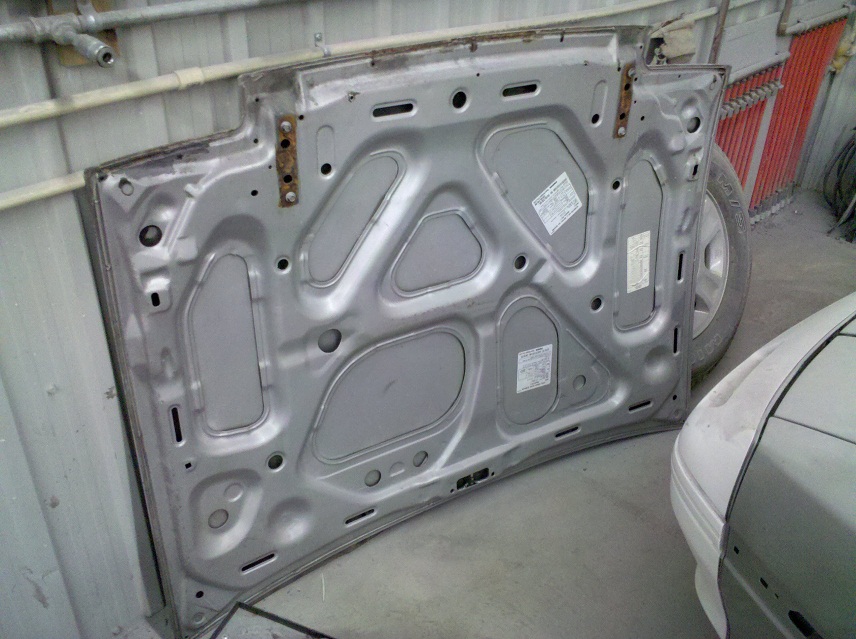
Here's the other side of the engine bay close up shots and one of the hood itself
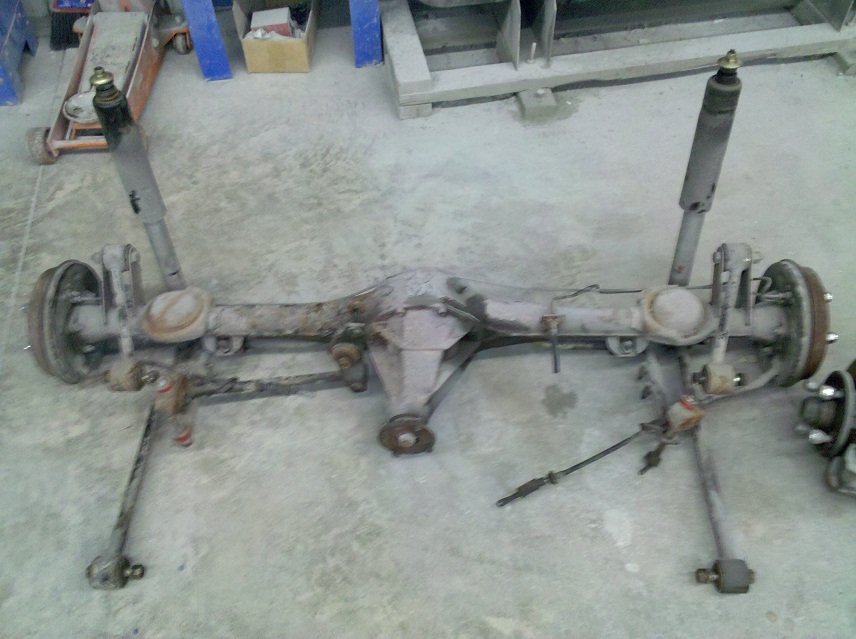
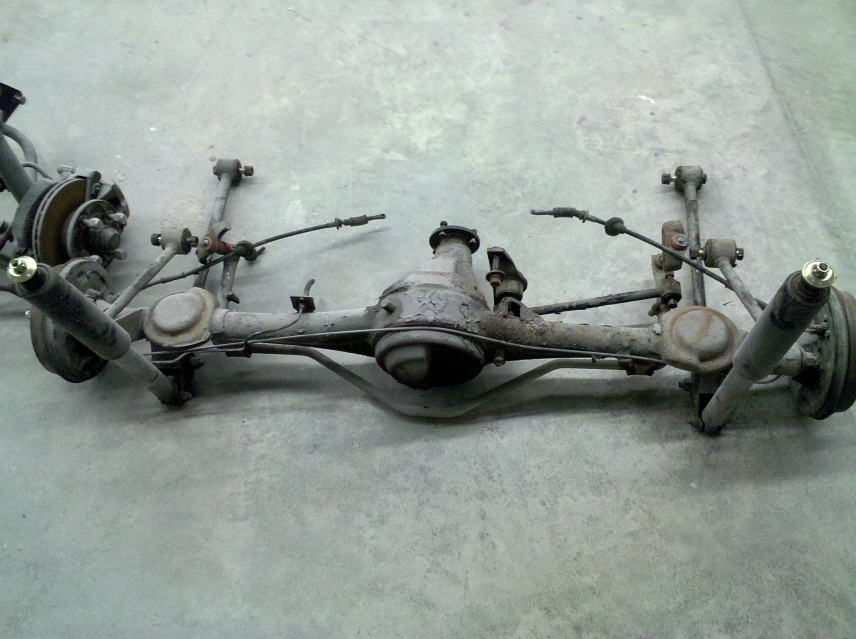
Both my entire front and rear steering/suspension assemblies were together on the ground beside the car so I snapped some shots of those.
You can see the RB springs, KYB shocks, RB sway bars and ReSpeed Steering Kit.
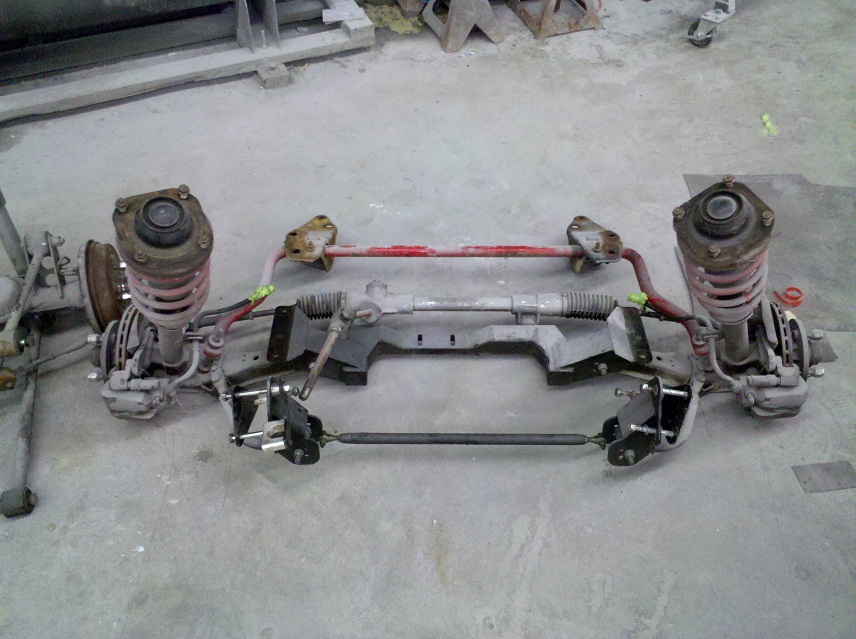
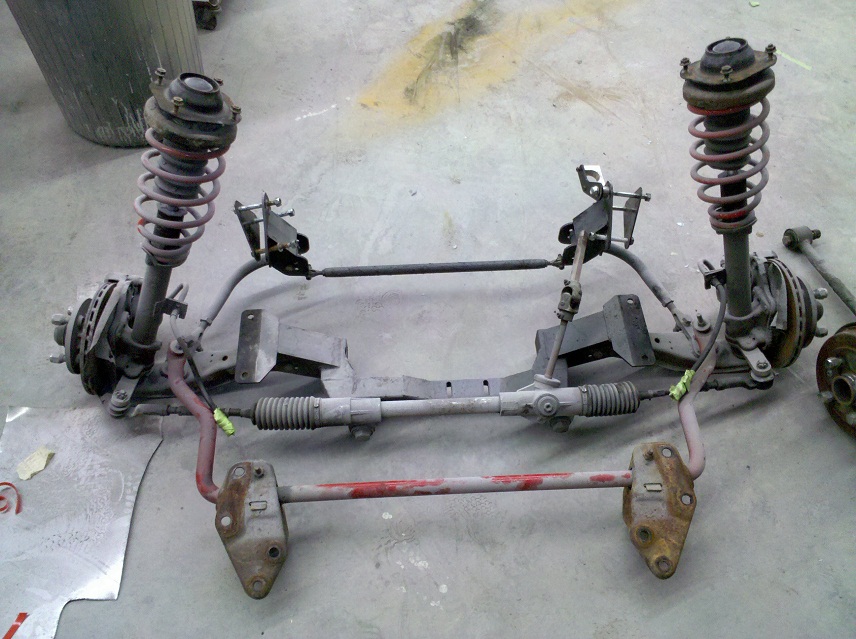
The entire rear end is going to be replaced with the rear end out of a parts car I got this weekend that's a GSL Yay for rear discs and Limited-Slip Diff!
Both my entire front and rear steering/suspension assemblies were together on the ground beside the car so I snapped some shots of those.
You can see the RB springs, KYB shocks, RB sway bars and ReSpeed Steering Kit.
The entire rear end is going to be replaced with the rear end out of a parts car I got this weekend that's a GSL
Yay for rear discs and Limited-Slip Diff!
Thread Starter
Joined: May 2002
Posts: 5,972
Likes: 37
From: Ottawa, Soviet Canuckistan
When the suspension goes back on, it'll be going on with a full set of poly bushings (I'm getting the "full kit" from ReSpeed). With all brand new bushings, Rear Discs, new SS Brake Lines, the ReSpeed Steering kit and existing suspension upgrades, this car is going to drive like a dream.
Here's a good close-up pic of the jack damage on one side. Definitely not good.
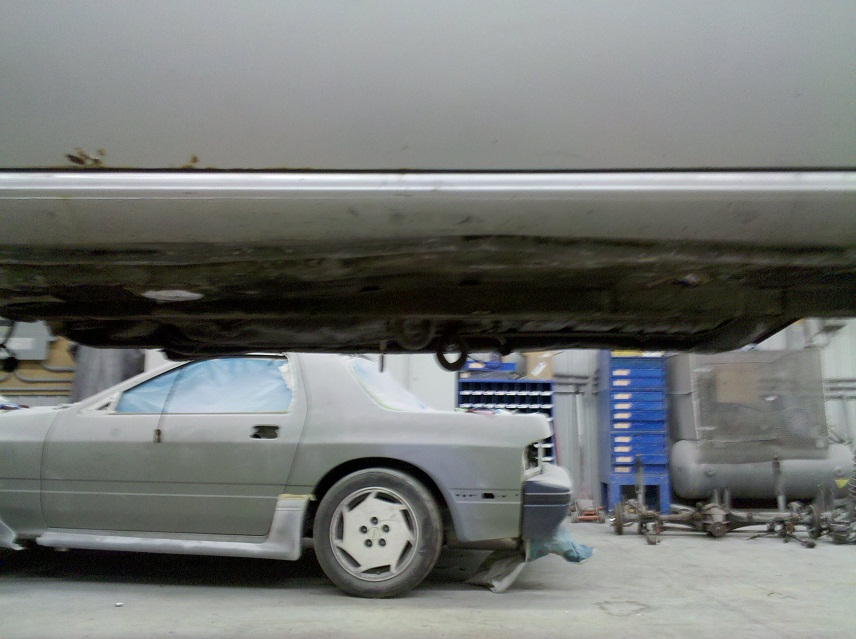
Here's a look down the transmission tunnel. I didn't take many underside pics because my cell phone camera sucks without enough light and there wasn't much to see. We'll see more of it once the sandblasting is done.

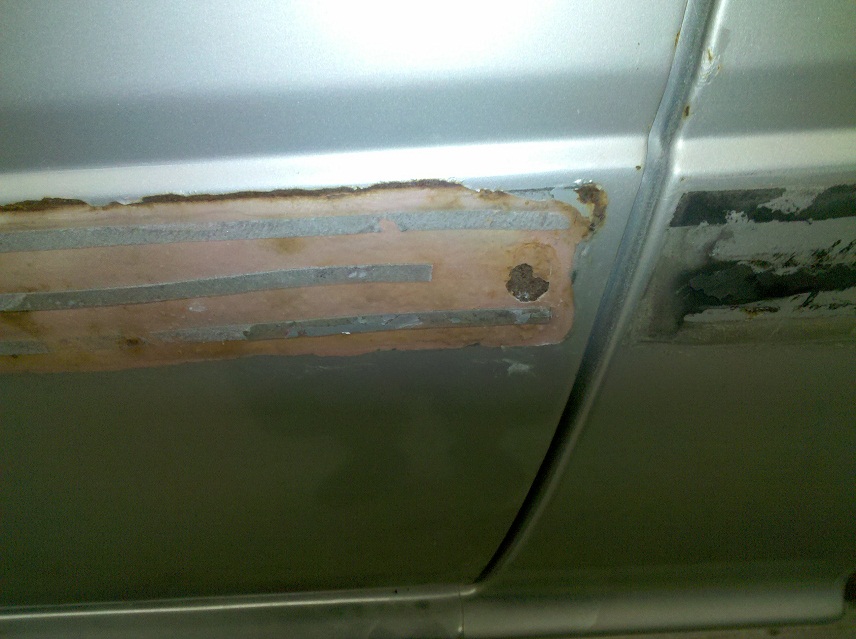
I snapped this one pic of the driver's side door. Under the paint we have some pink bondo-like substance showing, meaning there's been body work on this door before of unknown quality. Also, a small rust spot that was hidden by the rubber moldings.
Here's a good close-up pic of the jack damage on one side. Definitely not good.
Here's a look down the transmission tunnel. I didn't take many underside pics because my cell phone camera sucks without enough light and there wasn't much to see. We'll see more of it once the sandblasting is done.
I snapped this one pic of the driver's side door. Under the paint we have some pink bondo-like substance showing, meaning there's been body work on this door before of unknown quality. Also, a small rust spot that was hidden by the rubber moldings.
Thread Starter
Joined: May 2002
Posts: 5,972
Likes: 37
From: Ottawa, Soviet Canuckistan
So as I mentioned, I also bought a parts car on the weekend. I didn't snap any pictures of it because when I got to Dundas it was pouring rain. I just basically took a quick look, made sure that the bumper, valance, passenger's fender and inner door panels were good, then gave the guy the cash, signed the bill of sale, grabbed the key and left. Here's the for-sale thread for it though:
https://www.rx7club.com/canadian-sale-wanted-classifieds-120/85-fb-parts-car-895571/
I still have to look at the wiring diagram to figure out how hard it's going to be to swap the power window setup from the GSL parts car into mine, so that I can use the door panels. I know that the motors are in the doors and the switches are in the centre, but I don't know if my wiring harness on my GS already has the un-used connectors that I just snap into, or if I'm going to have to splice into my harness. I'm not about to pull the dash on the GSL just for the power windows, so I may have to rig something up.
Other upgrades I'm getting from the GSL as I mentioned are the entire rear end (it's an '85 with rear discs and an LSD, mine is an '84 with drums and an open diff, should swap right in). I've bought a set of Stainless Steel brake lines along with the parts I ordered from Black Dragon for the "with rear discs" set, and all new bushings from ReSpeed, so I should be good.
Other things I've ordered
- Black carpet set from stockinteriors.com - "Ultra Plush" with "Mass Backing" and an extra yard of it for the spots where it needs it like between the dash centre console and the transmission tunnel
- 80sq ft of "Damplifier Pro" Sound Deadening material to be used to cover as much of the interior as possible as well as 36sq ft of "Luxury Liner Pro" which is a sound absorbing material that goes over top of the deadener to absorb any sound that is bouncing around in the car.
- All new rubber for the doors and windows, run channels, weatherstripping, etc...
This week I have to order new discs for the rear, Hawk pads all around, and a replacement for the set of Racing Beat rear end links that I bent, as well as all the connectors and wire I'm going to need to re-do the wiring harness.
This project is really starting to look like it's moving! Let's hope we can keep up the pace.
Jon
Trending Topics
Joined: Jun 2008
Posts: 8,376
Likes: 30
From: Chino Hills, CA
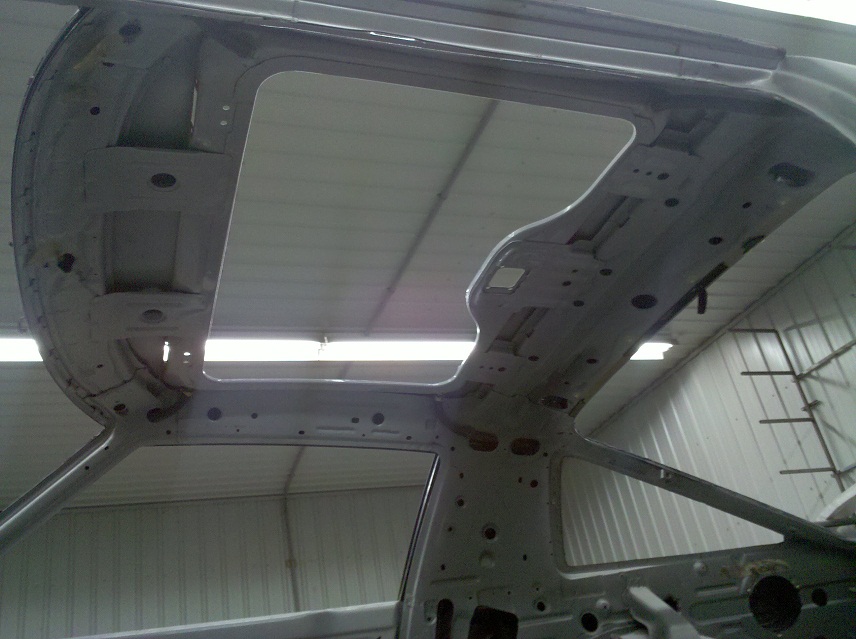
Very good reference pix, Jon... especially this one:
...because it shows the sunroof gutter drains & roof structure that most people never see.
Gonna take a pretty big fire to roast that beast!
...because it shows the sunroof gutter drains & roof structure that most people never see.
Gonna take a pretty big fire to roast that beast!
Thread Starter
Joined: May 2002
Posts: 5,972
Likes: 37
From: Ottawa, Soviet Canuckistan
Yeah it has definitely been interesting to get a look underneath all the bits like the roof liner and the dash to find out what the shell of the car itself looks like.
Just put in a few more parts orders. Only two more to go. So far I've ordered
- Carpet Set from Stockinteriors.com
- Sound Proofing (in two shipments, Damplifier Pro first because they had it in stock and Luxury Liner later when they get it) from Wheel Class
- Door Rubbers and SS Brake Hoses from BlackDragon
- Brake Discs and Hawk Pads from Mazdatrix
- Poly Bushing Kit from ReSpeed
So the only things I'm missing are:
- Rear End Links from Racing Beat
- Connectors, spades and wire for the wiring harness
I bought a set of Racing Beat front and rear sway bars about 2 years ago and bent the end links on them. They were much better than stock end links so I've emailed them to see if they'll sell me a set of end links on their own. They don't list them separately on their website.
I still haven't opened up the box with my wiring harness in it yet. I'll probably do that tomorrow night and start peeling the old tape off it, tracing and labeling wires and connectors, and figuring out how many of what type of connectors, spades and colours/types of wire I'll need.
Jon
Joined: Feb 2006
Posts: 3,162
Likes: 1
From: London, Ontario, Canada
Your going to love the poly bushing kit. For such a small cheap upgrade it does wonders for the ride and handling. Same goes for the SS brake lines. Does a world of good for pedal feel and confidence. I can't wait to see how this turns out.
This is great to see these pictures... I always wanted to know what the car looked like without the dash in it.
If I ever decide to go to "FP" class in Autocross, I was gonna gut the interior totally!!
If I ever decide to go to "FP" class in Autocross, I was gonna gut the interior totally!!
Thread Starter
Joined: May 2002
Posts: 5,972
Likes: 37
From: Ottawa, Soviet Canuckistan
If I went serious into autocross I'd strip it like this first, then find all the lightest parts to put it back together. One race seat, steering wheel, ignition switch replaced with a smaller button switch, and just an aftermarket tach. Nothing else for interior. Fuel Cell. Lightest wheels I could find (like those panasport-like ones that aren't rated for the road), and see how light I could keep it as I put things back together. Plexi instead of glass, and hell I'd even run it without bumpers, fenders and a hood if they'd let me! But like I said, that's only if i had an autocross-only car that I took to events on a trailer.
Jon
Last edited by vipernicus42; Jul 20, 2010 at 08:30 PM.
Joined: Jun 2008
Posts: 8,376
Likes: 30
From: Chino Hills, CA
Old frined of mine used to race Rabbits in SCCA-IT class; they acid-dipped their naked chassis and got some ridiculous amount of weight out of it.
Totally invisible weight loss.
Yeah if I ever got to that point I'd get a second rx7. This one's definitely for road driving and casual autocross. The weight I'm adding with the new sound deadening and carpet alone will add a second to my best runs.
If I went serious into autocross I'd strip it like this first, then find all the lightest parts to put it back together. One race seat, steering wheel, ignition switch replaced with a smaller button switch, and just an aftermarket tach. Nothing else for interior. Fuel Cell. Lightest wheels I could find (like those panasport-like ones that aren't rated for the road), and see how light I could keep it as I put things back together. Plexi instead of glass, and hell I'd even run it without bumpers, fenders and a hood if they'd let me! But like I said, that's only if i had an autocross-only car that I took to events on a trailer.
Jon

Thread
Thread Starter
Forum
Replies
Last Post
Engine stand ready
Comments and Suggestions Archive
2
Aug 28, 2015 11:59 PM
alfa, car, close, diagramssteer, engine, front, giant, images, large, naomi, pictures, project, rotisserie, rx7, suspension