My 83 GSL
 08-18-12, 04:15 PM
#476
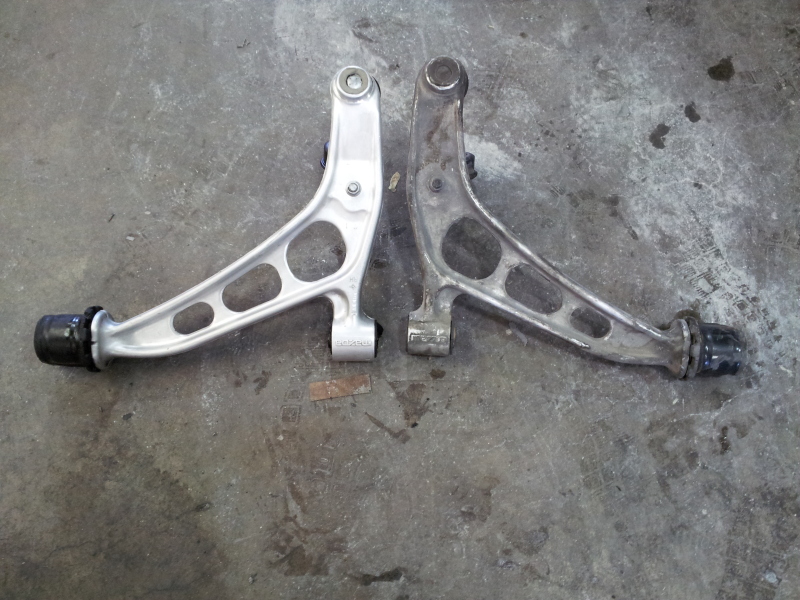
Here's the FC parts that are going into the car.
Clean vs dirty control arm. I couldn't believe how well these cleaned up. New mazdaspeed poly bushings not installed in control arms in these pics.
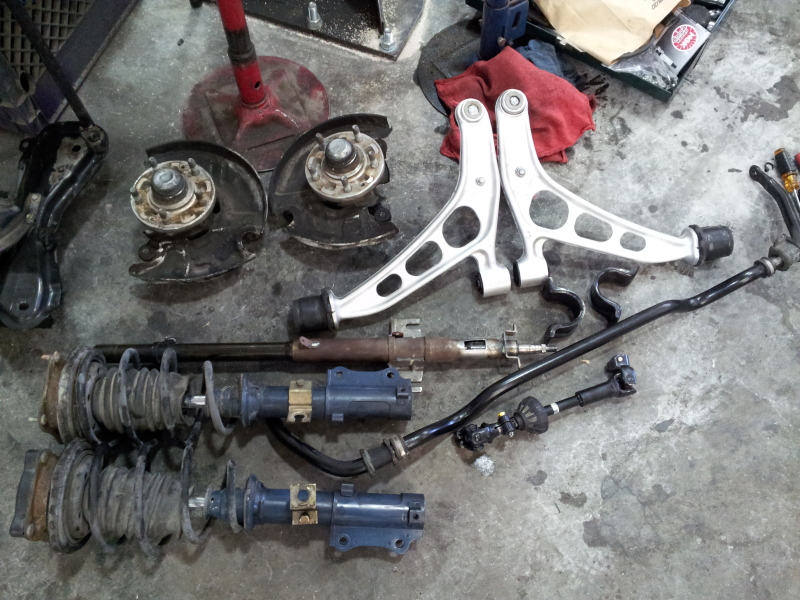
FC struts, sway bar, hubs, FC steering shaft/housing.
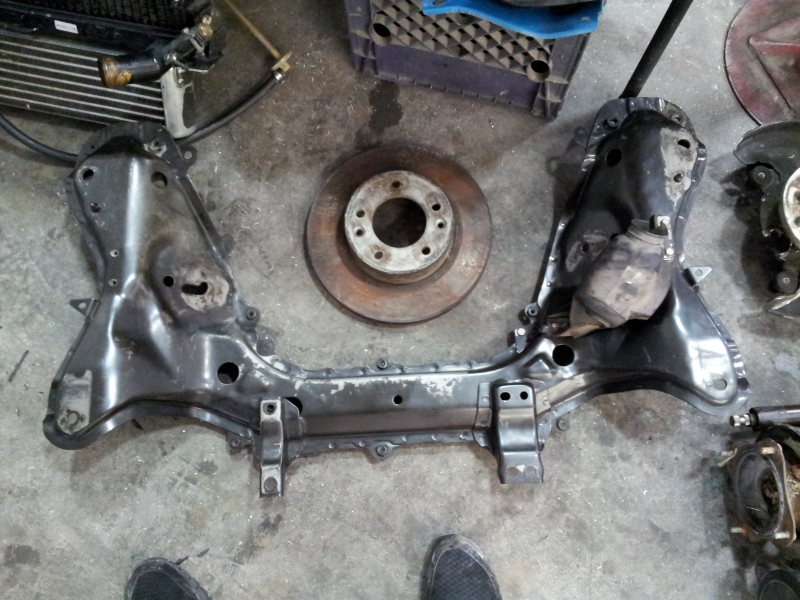
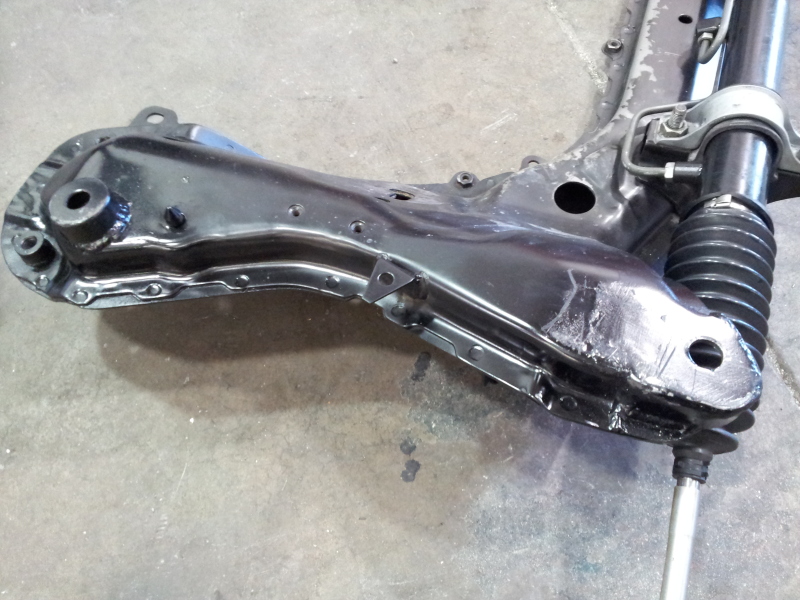
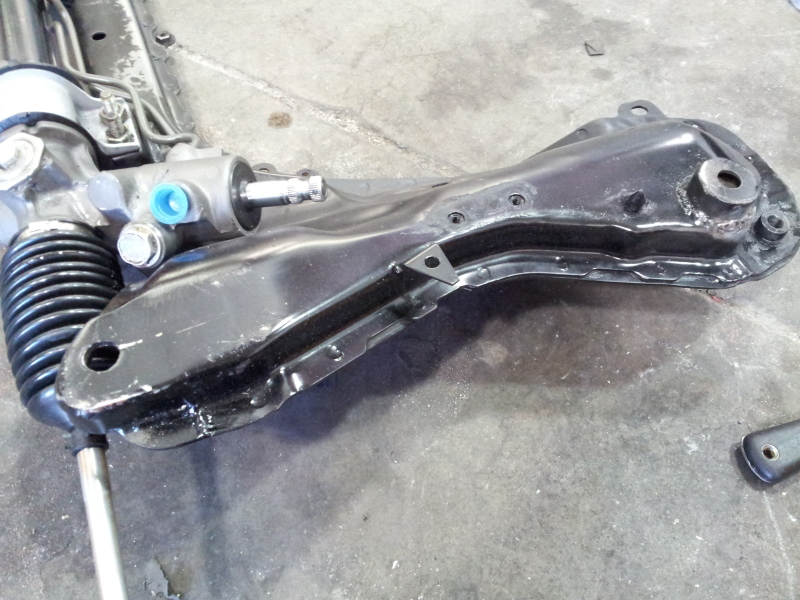
and the subframe... with a old rotor
Kyle Leblanc from DDS performance is doing the swap for me. I know he will knock this out. Should be working on it all day today.
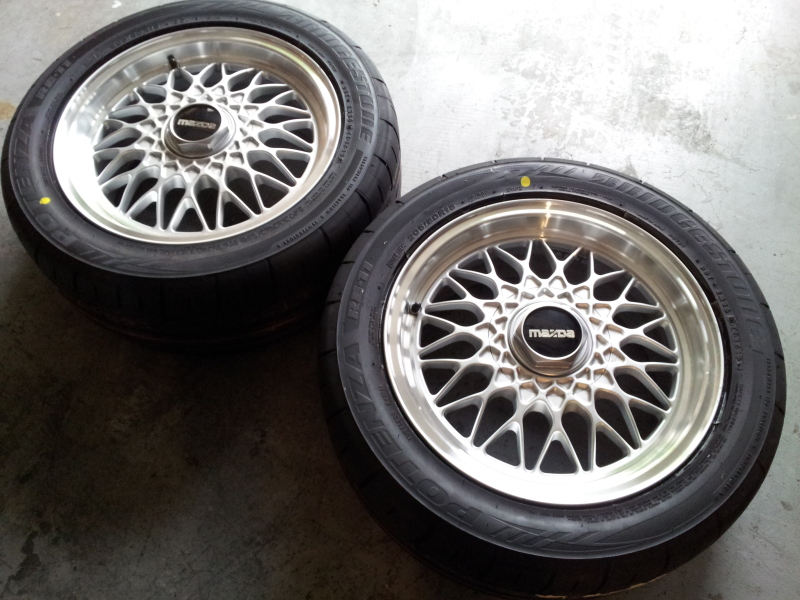
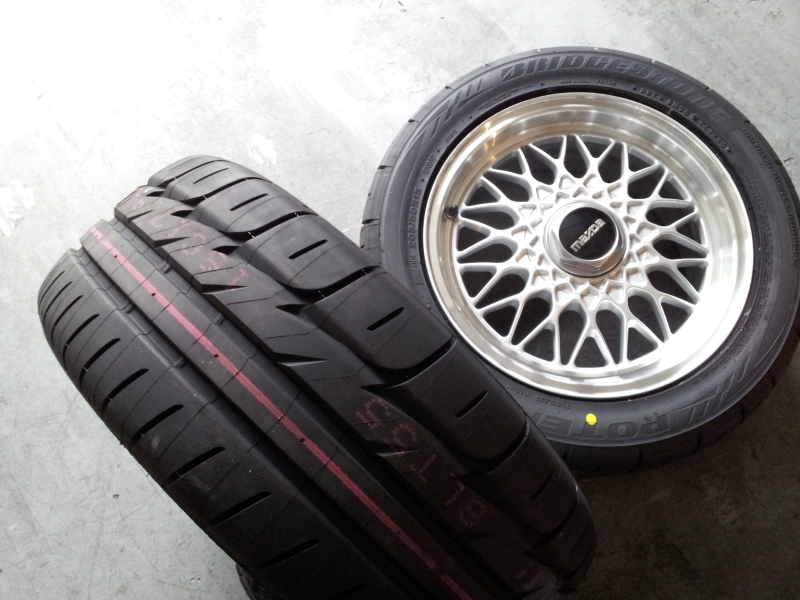
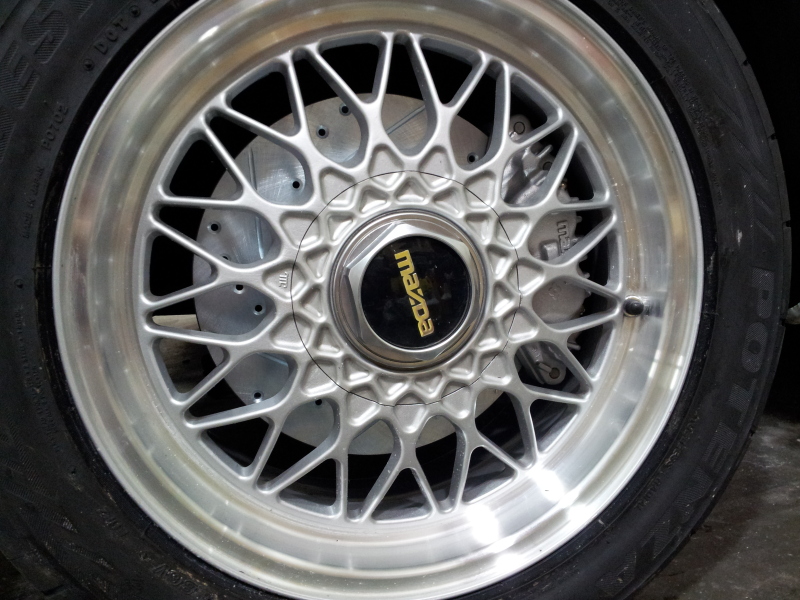
I have new Bridgestone Potenza RE-11 tires coming in to go on the vert wheels on monday. Will be nice to have some great tires on the car instead of just normal street tires that don't grip. Unfortunately since the vert wheels are only 6.5" wide I'll be running 205/50/15 all around.
More to come soon.
Clean vs dirty control arm. I couldn't believe how well these cleaned up. New mazdaspeed poly bushings not installed in control arms in these pics.
FC struts, sway bar, hubs, FC steering shaft/housing.
and the subframe... with a old rotor
Kyle Leblanc from DDS performance is doing the swap for me. I know he will knock this out. Should be working on it all day today.
I have new Bridgestone Potenza RE-11 tires coming in to go on the vert wheels on monday. Will be nice to have some great tires on the car instead of just normal street tires that don't grip. Unfortunately since the vert wheels are only 6.5" wide I'll be running 205/50/15 all around.
More to come soon.
 08-22-12, 07:20 PM
#477
Still doing work on the car. He's been busy working on other cars getting ready for formula drift.
He is moving right along though and should be done soon.
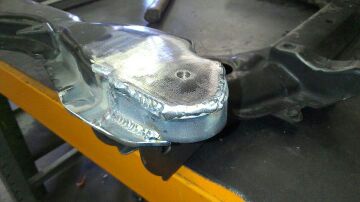
Front of the subframe where he extended it to work with original subframe stud..
I'll have more pics of the swap. This is all I got from him for right now.
Tires in and mounted. Bridgestone Potenza RE-11 205/50/15 all around.
Waiting for the call saying he's done lol
He is moving right along though and should be done soon.
Front of the subframe where he extended it to work with original subframe stud..
I'll have more pics of the swap. This is all I got from him for right now.
Tires in and mounted. Bridgestone Potenza RE-11 205/50/15 all around.
Waiting for the call saying he's done lol
08-23-12, 08:28 AM
#478
You went with my method! lol. One of these days I'll box my extension piece in more like he did on yours, but it's been holding up really well either way.
Is he going to make a bracket to bolt it to the steering box/idler arm mounts in the rear, or put a new bolt down through the frame?
Is he going to make a bracket to bolt it to the steering box/idler arm mounts in the rear, or put a new bolt down through the frame?
 08-23-12, 02:26 PM
#480
You went with my method! lol. One of these days I'll box my extension piece in more like he did on yours, but it's been holding up really well either way.
Is he going to make a bracket to bolt it to the steering box/idler arm mounts in the rear, or put a new bolt down through the frame?
Is he going to make a bracket to bolt it to the steering box/idler arm mounts in the rear, or put a new bolt down through the frame?
I believe he went with a bolt through the rear.. I told him to do whichever way he thought was best. I think he also forgot though I wanted it mounted the way you mentioned(like adsy has it), but I trust his work and know it'll be fine. I didn't really even tell him much. He knows all about suspension and how the caster and camber should be. He is actually done with everything. I have to go put the engine back in the car and I'm good to go
 .
. You didn't have any issues with the driveshaft right? Shortening or lengthining? He said it looks like the engine should be in the exact same place though. Just mentioned it incase it didn't work.
Thanks sir! I decided on going water injection soon for the engine. I want safety for the engine and if I can add 4-6 psi and be safe why not
 . Hope to have water injection with new tune before sevenstock. 300+rwhp will happen with the water injection lol. Or it better lol.
Off to the shop. Hopefully get the car home tonight.
08-24-12, 07:55 AM
#481
Yeah it looks like he does nice work, so whatever way he did it should be just fine 
No issues with the driveshaft thankfully, although in my case it did move the engine forward a bit. BUT I was previously using a set of custom made engine mounts I had built back in 2008 or so, which were, I'll admit, not very good and didn't have the engine in there right where I wanted it anyway.
Really the only issue I had was having to add a small section of pipe to my Cat to make the exhaust work (like real small, 1/4" or so, it was just enough that the exhaust wouldn't work lol)
So the short answer is: no you shouldn't have to make any changes to get the engine back in there.
08-24-12, 12:12 PM
#482
Yeah it looks like he does nice work, so whatever way he did it should be just fine
No issues with the driveshaft thankfully, although in my case it did move the engine forward a bit. BUT I was previously using a set of custom made engine mounts I had built back in 2008 or so, which were, I'll admit, not very good and didn't have the engine in there right where I wanted it anyway.
Really the only issue I had was having to add a small section of pipe to my Cat to make the exhaust work (like real small, 1/4" or so, it was just enough that the exhaust wouldn't work lol)
So the short answer is: no you shouldn't have to make any changes to get the engine back in there.
Well, the engine isn't in yet. I'm going to the shop now to do that. Was busy last night painting...
Some more pics of subframe...
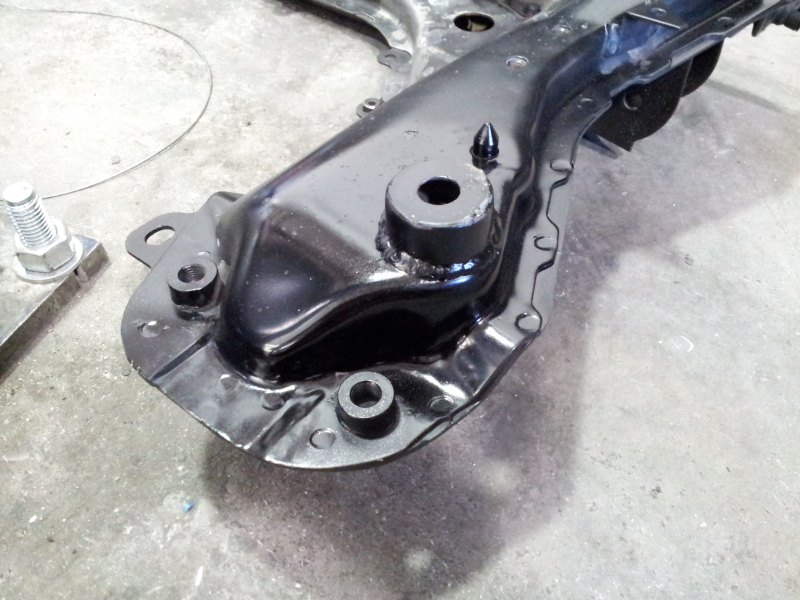
Here's the rear reinforcement and stud through the framerail to bolt up the rear of the subframe.
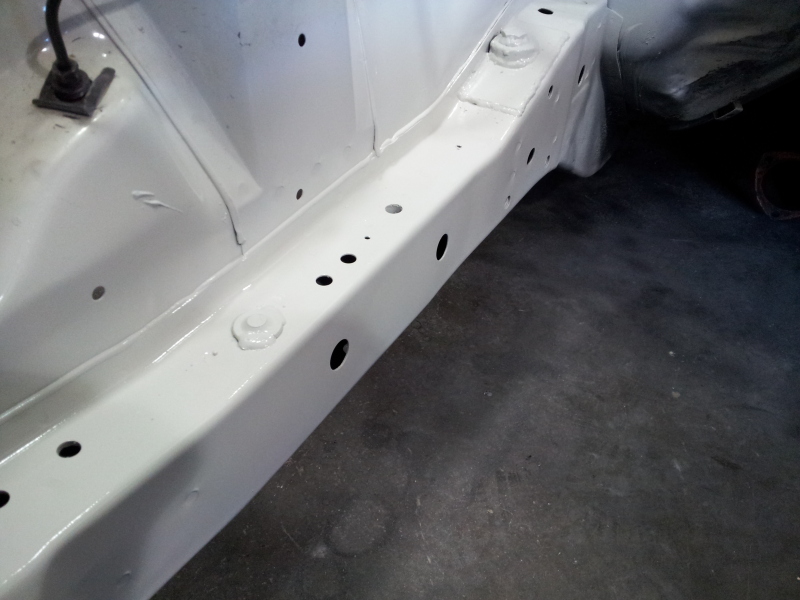
Seeing the fresh framerails and how good the color matched lead to this...
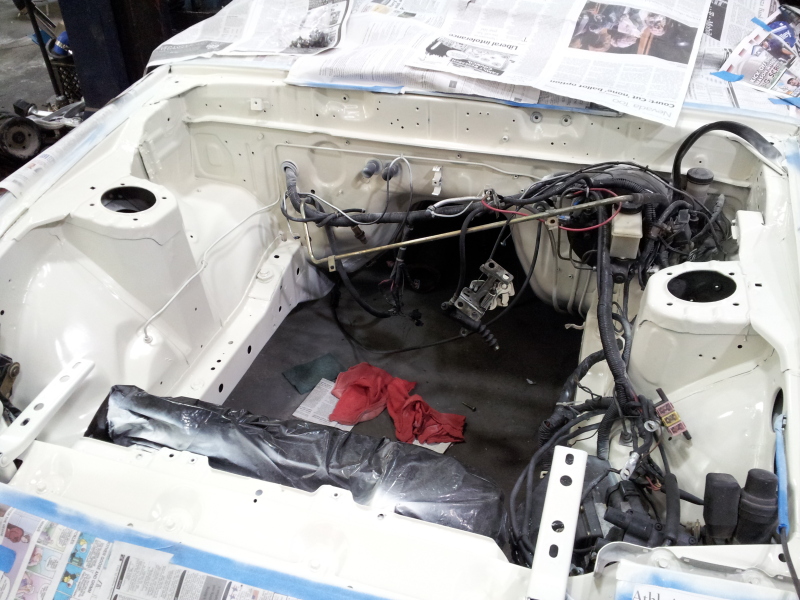
The paint is actually autobody paint matched into a spray can. Stuff is amazing! Let it dry overnight. Hopefully everything lines up and then a matter of bolting everything back together. Struts, spindles, brakes, etc.
Can't forget the custom FB/FC mixed struts...
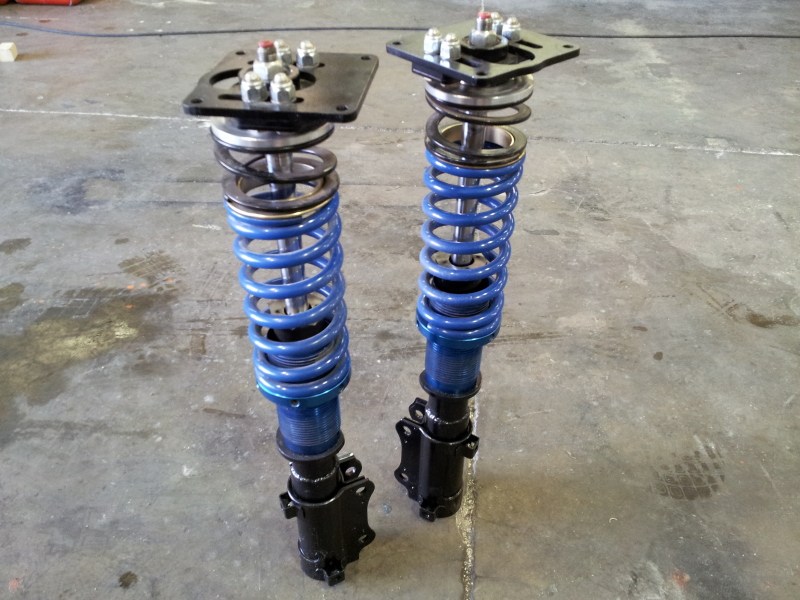
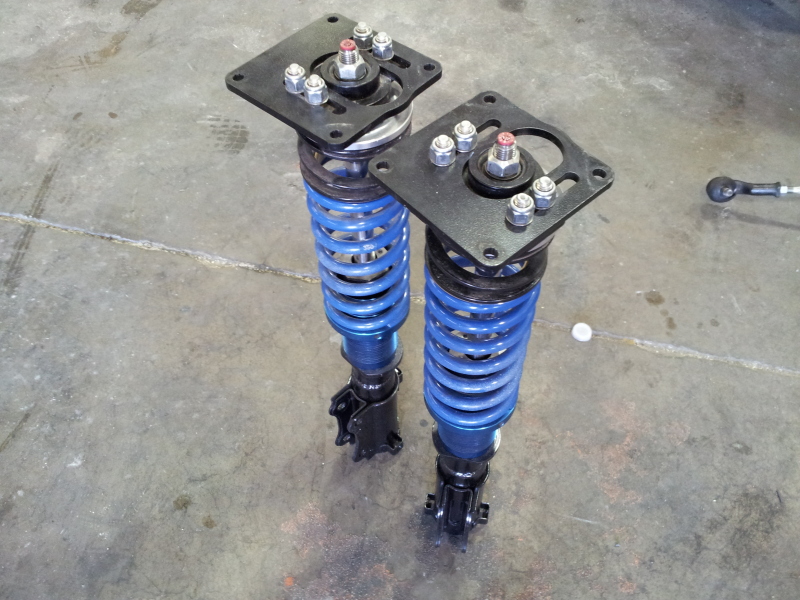

You can see there is a "helper sping" I guess you can call it. I don't know the actual term. What Kyle was telling me is that before the whole coilover sleeve/spring could move around on the perch. With these and just a little bit of pressure it will stay solid in place and not move at all. Plus, it's the correct height we need on everything and the shocks won't be compressed too much..
08-26-12, 01:51 AM
#488
probably take half a day or so to do the WI, tuning i will have to work out a time with Johnny since he changed to real stripper hours on friday and tends to come in at 11pm now... no other dynos within a decent radius and that's the only day i work late when he's in.
09-04-12, 10:43 PM
#491
Sounds good Ben. Know any real good polishing shops in town? Intake...
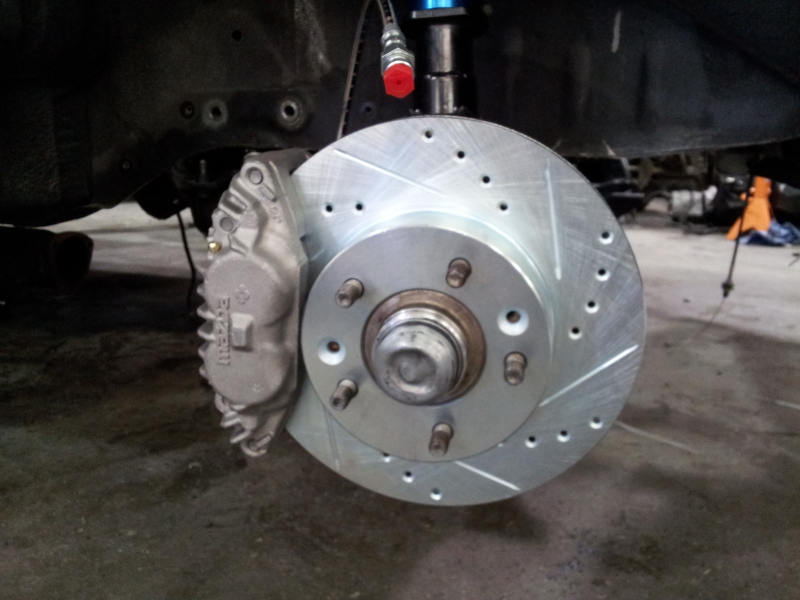
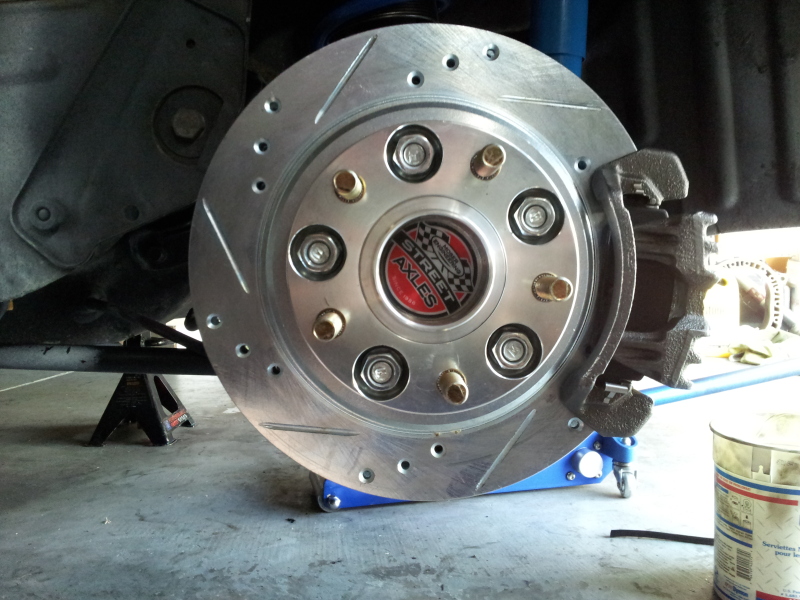
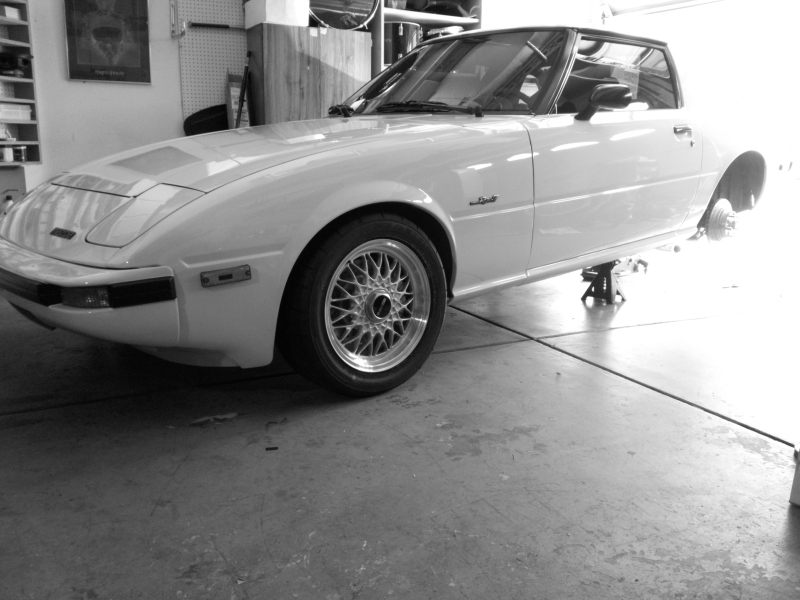
So, the car has been done for awhile. I've just been enjoying it haha. I got to say this FC subframe swap and the brakes that come with it are absolutely amazing! I'm very glad I did this swap. I do miss the autobahns though ...
...
The car drives like a dream though! No steering slop or wondersteer whatsoever! You put input in the steering wheel and the car does what you want. High speed braking isn't scary at all. Brakes are atleast twice as good as they were before. Huge improvement in braking. Also, the tires are much more grippy..
I have to agree with Sean(82transam) that the 17:1? power steering rack from the FC converted to manual and depowered is about as perfect as it's going to get. I haven't tried the other rack ratios, but never will because of how nice this rack feels.
We ended up having one issue with the steering shaft length. With the steering wheel on there is a 1/4" or so gap between the back of the wheel and the cluster. So, my horn doesn't work and the auto cancel blinker mechanism doesn't work either.
I'll take it back to him to fix real quick when I make time.
Other than that everything went great. I'm still using the factory FB sway bar up front still. The mounts were cut off, turned 90 degrees, welded back on, and it mounts perfectly to the FC stock swaybar mount on the control arms.
Time for some pics..
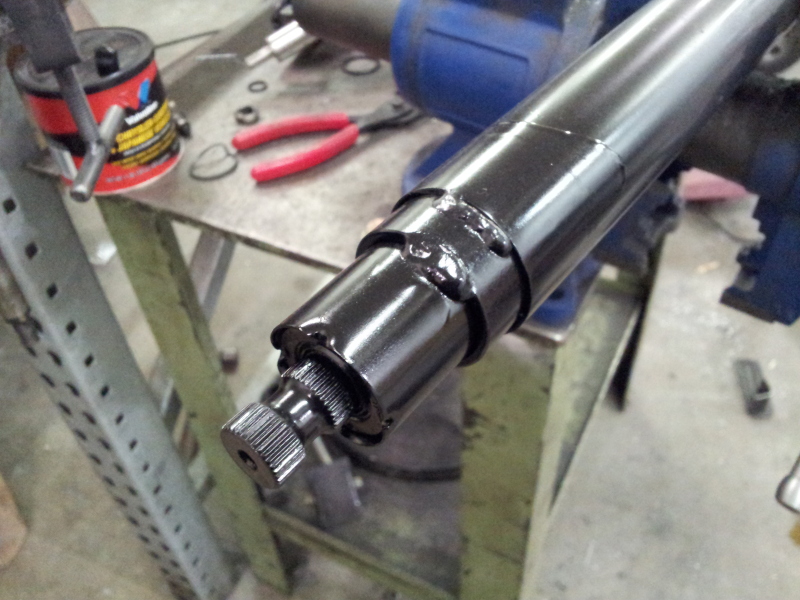
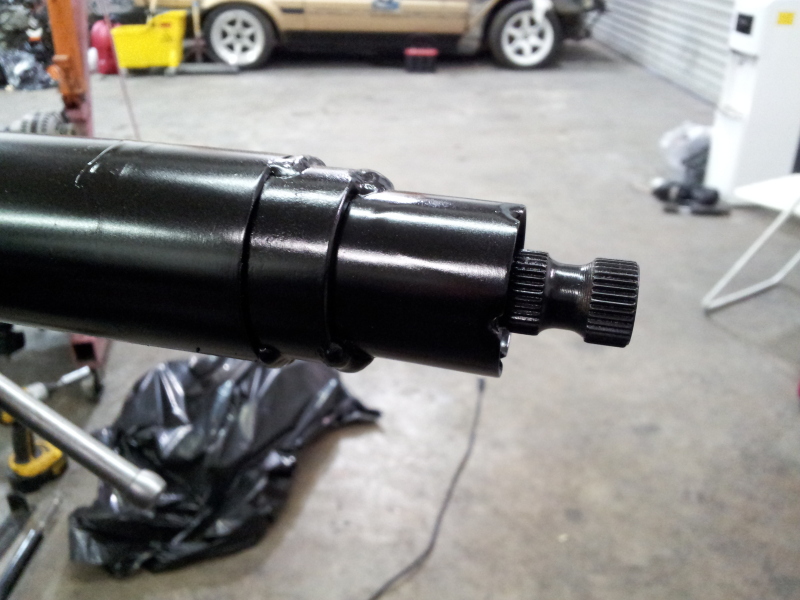
Steering shaft housing..

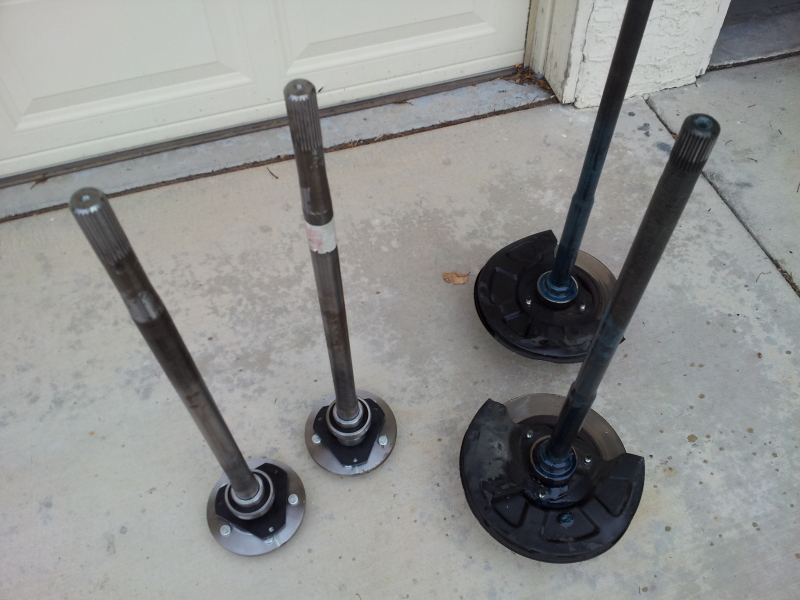
Moser axles and old big bearing axles
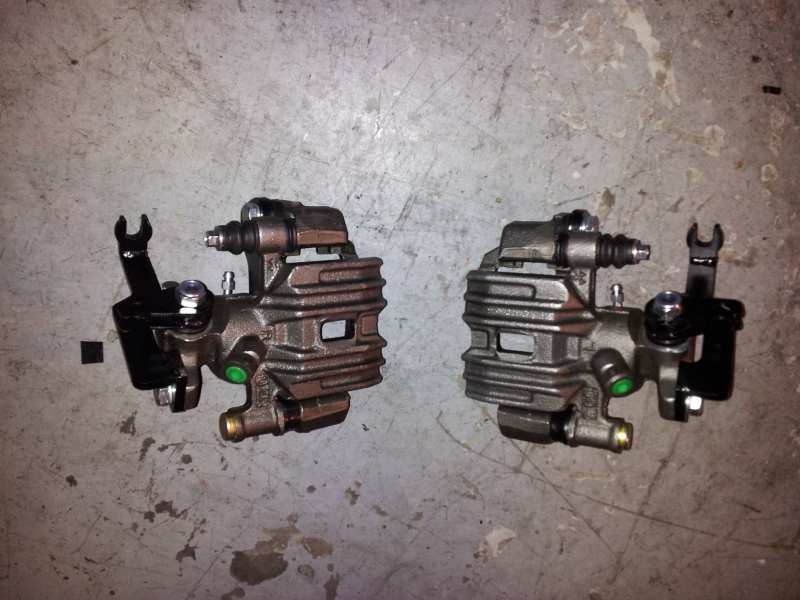
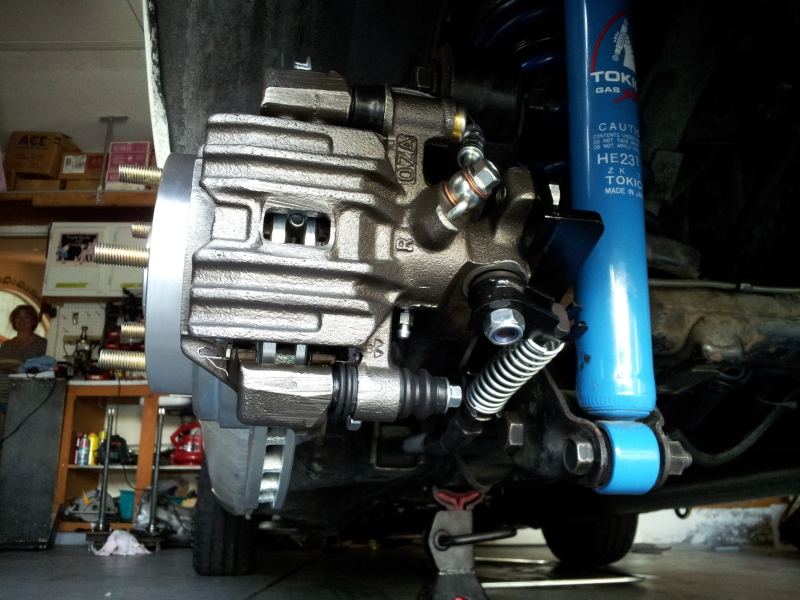
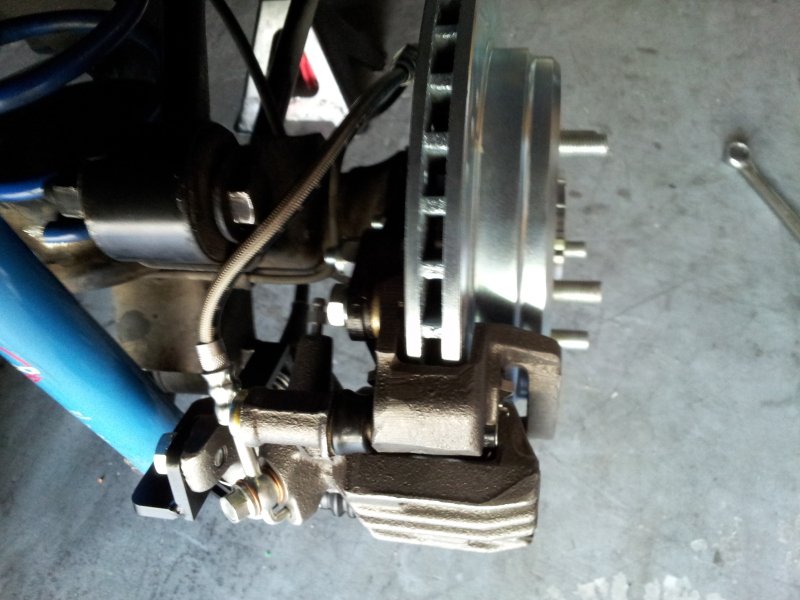
Re-speed rear bb brackets on the rear turbo calipers. This makes right caliper go on left side and left caliper go on right side.
So, the car has been done for awhile. I've just been enjoying it haha. I got to say this FC subframe swap and the brakes that come with it are absolutely amazing! I'm very glad I did this swap. I do miss the autobahns though
...The car drives like a dream though! No steering slop or wondersteer whatsoever! You put input in the steering wheel and the car does what you want. High speed braking isn't scary at all. Brakes are atleast twice as good as they were before. Huge improvement in braking. Also, the tires are much more grippy..
I have to agree with Sean(82transam) that the 17:1? power steering rack from the FC converted to manual and depowered is about as perfect as it's going to get. I haven't tried the other rack ratios, but never will because of how nice this rack feels.
We ended up having one issue with the steering shaft length. With the steering wheel on there is a 1/4" or so gap between the back of the wheel and the cluster. So, my horn doesn't work and the auto cancel blinker mechanism doesn't work either.
I'll take it back to him to fix real quick when I make time.
Other than that everything went great. I'm still using the factory FB sway bar up front still. The mounts were cut off, turned 90 degrees, welded back on, and it mounts perfectly to the FC stock swaybar mount on the control arms.
Time for some pics..
Steering shaft housing..
Moser axles and old big bearing axles
Re-speed rear bb brackets on the rear turbo calipers. This makes right caliper go on left side and left caliper go on right side.
09-04-12, 10:50 PM
#492
I also converted...
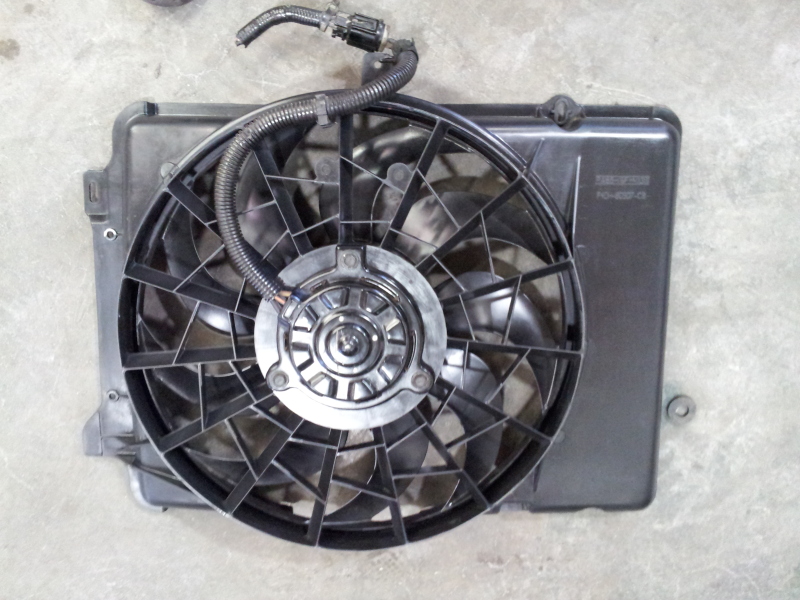
Ford Taurus efan. Wired to run at all times with ignition in on position on low speed. It does run a little hotter than the clutch fan...
Going to install 160 thermostat to run with it. If it doesn't cool it enough I will wire it up to full speed with another relay.
A few more projects to cross off the list...
09-05-12, 07:47 AM
#494
Glad you like it! I knew you would  Amazing how much better the brakes are isn't it?
The 17:1 does feel about perfect.
Clever use of the stock sway bar btw
I'm glad it all worked out for you, that steering column shouldn't take too much to fix.
Amazing how much better the brakes are isn't it?The 17:1 does feel about perfect.
Clever use of the stock sway bar btw
I'm glad it all worked out for you, that steering column shouldn't take too much to fix.
Last edited by 82transam; 09-05-12 at 07:50 AM.
09-07-12, 09:21 AM
#495
It really is. The brakes are just awesome. Just having the front done and driving the car home to do the rear there was a huge braking difference. The rears just added to it
Yupp, that was Kyles idea. Looks like it was meant for the sway bar to mount like that.
I'll drop the car off or just pull the steering shaft/housing and have him fix it right quick. He said it shouldn't take him long at all..
There was another issue that it seems all the FC subframe swap guys have or did have. The shocks bottoming out. I'm as low as I can go on my re-speed coilovers. The shock is near full compression also :/. Trying to think of other ways to solve this. I don't want to cut out the strut tops and raise them. I can though.
Possible to get custom made shocks lenghts? Have the same length housing so the shock bolts into the strut housing, but shorter shaft length so it wouldn't be compressed already. Or am I thinking this over wrong?
When Kyle was building the front struts/coilover setup he said the president of a coilover company was there and asking what he was doing. Kyle said he could make custom coilovers to solve this issue. I'm not sure how, but I should do something.
09-07-12, 11:40 AM
#496
As you know I raised the towers, but another option is to cut the bottom of the FC strut housing out and basically lower it. There is an inch or two between the bottom of the FC strut housing and the top of the ball joint, you could lower the strut down a bit which would give it more travel. I think Adsy did that in his build thread...
Might want to consider that before having custom parts built.
Edit: here is what i'm talking about (see post 6): https://www.rx7club.com/build-thread.../#post10945763
Might want to consider that before having custom parts built.
Edit: here is what i'm talking about (see post 6): https://www.rx7club.com/build-thread.../#post10945763
Last edited by 82transam; 09-07-12 at 11:45 AM.
09-07-12, 03:12 PM
#497
As you know I raised the towers, but another option is to cut the bottom of the FC strut housing out and basically lower it. There is an inch or two between the bottom of the FC strut housing and the top of the ball joint, you could lower the strut down a bit which would give it more travel. I think Adsy did that in his build thread...
Might want to consider that before having custom parts built.
Edit: here is what i'm talking about (see post 6): https://www.rx7club.com/build-thread.../#post10945763
Might want to consider that before having custom parts built.
Edit: here is what i'm talking about (see post 6): https://www.rx7club.com/build-thread.../#post10945763
Doing that though I would have to have the part where the shock screws down into the strut housing lowered too yeah?