
Adsy's S2 Rx-7 - ongoing Project - S4 Subframe - 13bT - GT35/82r - LPG

Thread Starter
ACBron Motorsport
Joined: Aug 2001
Posts: 608
Likes: 0
From: Melbourne Australia
Adsy's S2 Rx-7 - ongoing Project - S4 Subframe - 13bT - GT35/82r - LPG
I've been playing with this car for the past 2 years. Its had two major change of direction in that time, but it is now on a steady path so I thought i'd better share with you guys.
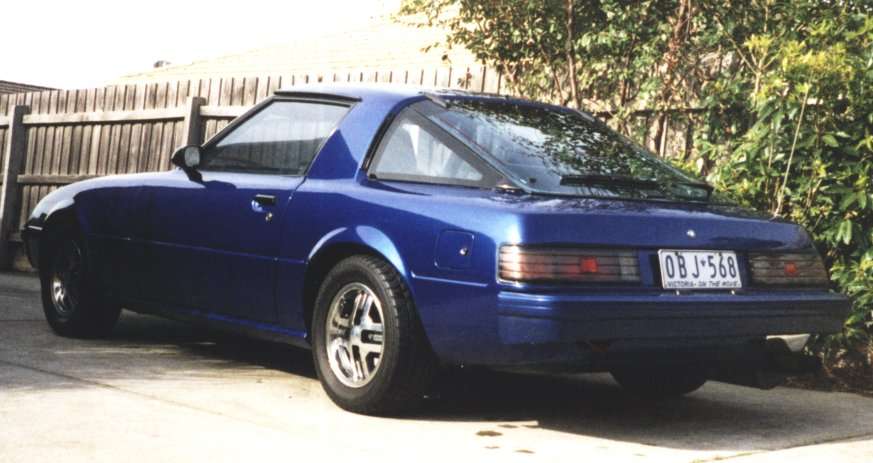
This is how i got it in 2009.
It looked pretty tidy, but had its hidden issues.


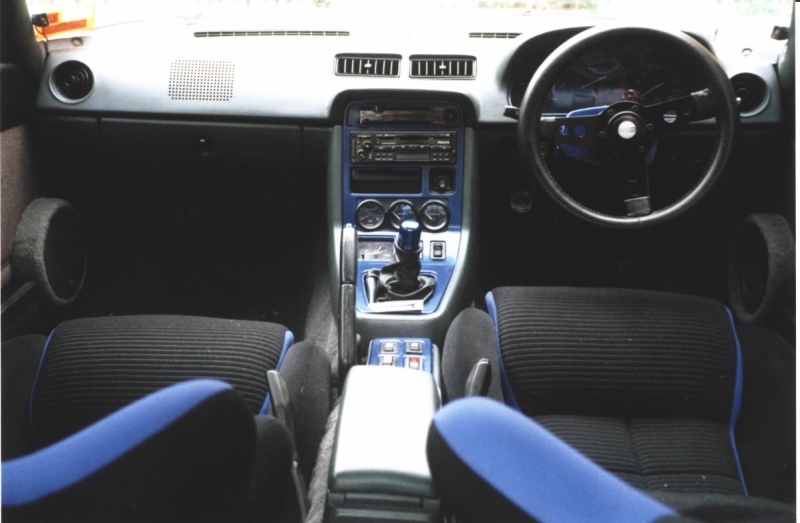
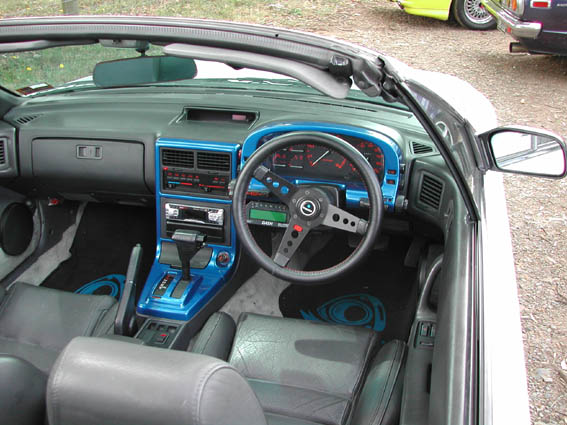
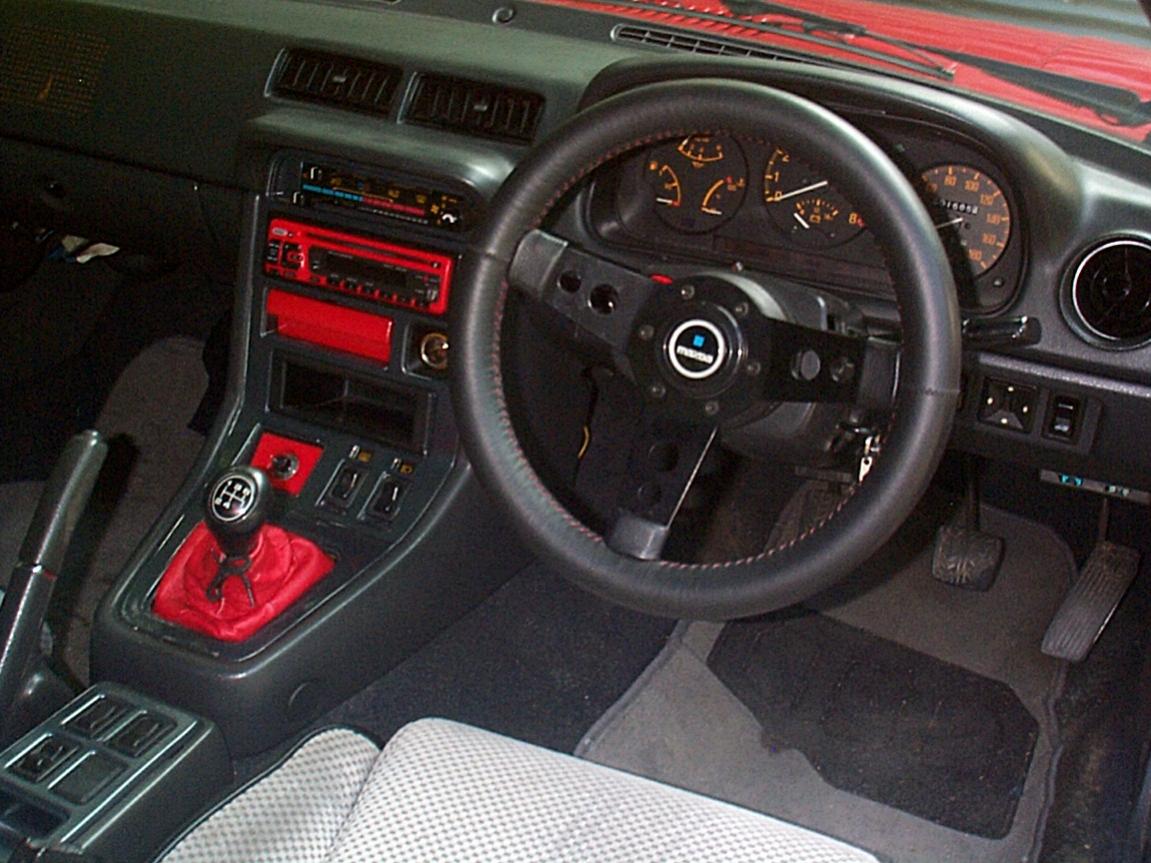
and interior pics (prior to being detailed)


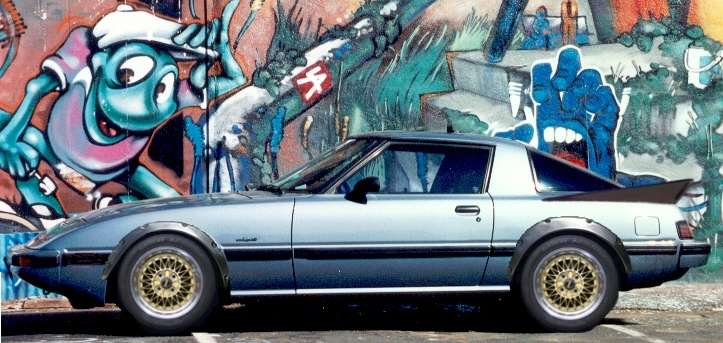
This was the first plan i had for the car....photoshoped with flares and simmons
i was going to keep it old school with bp 12A ect...
i'll skip the details on the first round of mods, but a s3 suspension conversion was done to fit the simmons and ended up looking like this...


there where a few set backs ect to get the car to that stage and it was still sporing the std 12a, allbeit with nice exhaust and racing beat headers
This is how i got it in 2009.
It looked pretty tidy, but had its hidden issues.


and interior pics (prior to being detailed)


This was the first plan i had for the car....photoshoped with flares and simmons
i was going to keep it old school with bp 12A ect...
i'll skip the details on the first round of mods, but a s3 suspension conversion was done to fit the simmons and ended up looking like this...
there where a few set backs ect to get the car to that stage and it was still sporing the std 12a, allbeit with nice exhaust and racing beat headers
Thread Starter
ACBron Motorsport
Joined: Aug 2001
Posts: 608
Likes: 0
From: Melbourne Australia
ok fast forward to the final plan...
for several reason i chopped and changed my direction a few times before coming back to my roots, so to speak.
The photo is from august 2000, it was my Rx7.. it had a 12aT, interior and suspension mods
Some of you may remember that i had a busted wrist at the time of building that car and ended up selling it shortly after that pic was taken. I've had a another 3 1st gens scince then and 2nd gen 'vert that a few of you older members might remember.
Anyway, today im older, wiser, fatter and slightly richer so i decided to build this car with the bext parts from all the others ive build plus some stuff i've always wanted to do.
The planned spec list...
full respray in nissan moody blue mica
s4 subframe conversion
s4/5 brakes front and rear
BBS rims
S5 13bt block, extend ported dowled decent seals ect...
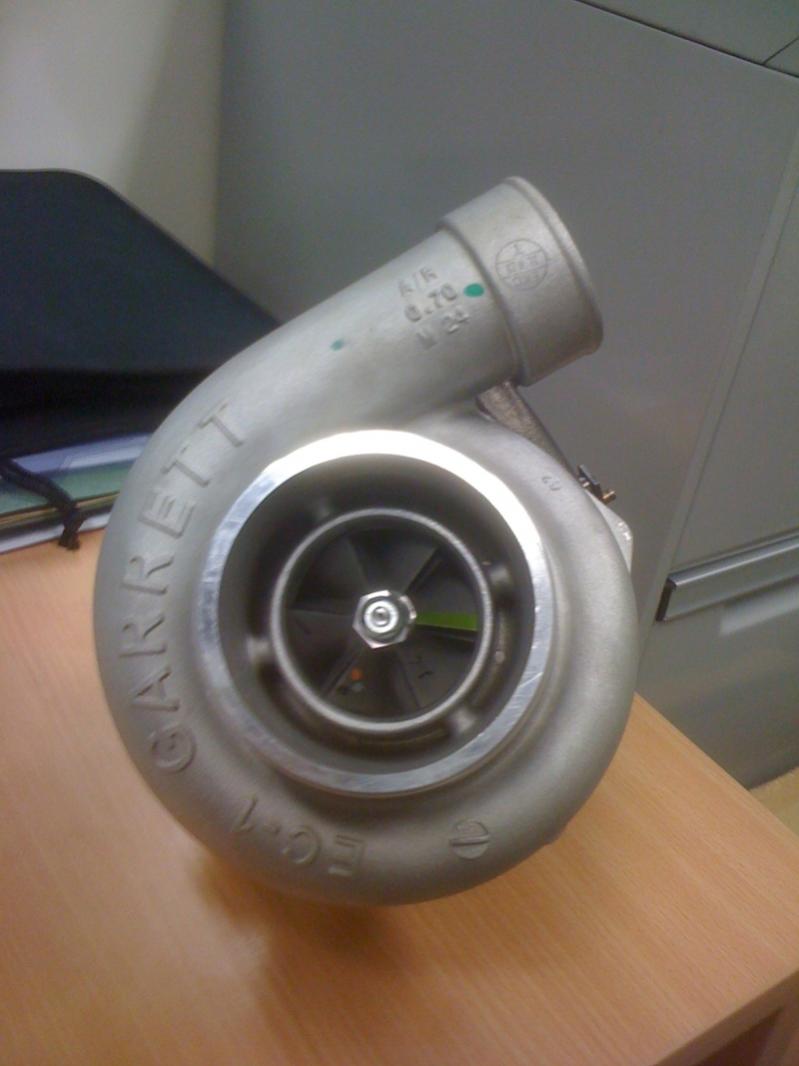
garret gt3582r, internal wastegate 1.06 rear
S5 gearbox
S3 LSD diff
Moser axles from RE-speed
RX8 front seats
custom trim (a modern fresh-up)
suspension mods ect......
a haltech sport 1000 ECU and dash
all this will be running on straight LPG (propane) with a system that will support over 500hp.
The EPA are extremly strict and what we can do here, most people just do what they want and hope they dont get caught.... with the LPG i can be 100% leagal and cheap to run.
for several reason i chopped and changed my direction a few times before coming back to my roots, so to speak.
The photo is from august 2000, it was my Rx7.. it had a 12aT, interior and suspension mods
Some of you may remember that i had a busted wrist at the time of building that car and ended up selling it shortly after that pic was taken. I've had a another 3 1st gens scince then and 2nd gen 'vert that a few of you older members might remember.
Anyway, today im older, wiser, fatter and slightly richer so i decided to build this car with the bext parts from all the others ive build plus some stuff i've always wanted to do.
The planned spec list...
full respray in nissan moody blue mica
s4 subframe conversion
s4/5 brakes front and rear
BBS rims
S5 13bt block, extend ported dowled decent seals ect...
garret gt3582r, internal wastegate 1.06 rear
S5 gearbox
S3 LSD diff
Moser axles from RE-speed
RX8 front seats
custom trim (a modern fresh-up)
suspension mods ect......
a haltech sport 1000 ECU and dash
all this will be running on straight LPG (propane) with a system that will support over 500hp.
The EPA are extremly strict and what we can do here, most people just do what they want and hope they dont get caught.... with the LPG i can be 100% leagal and cheap to run.
Thread Starter
ACBron Motorsport
Joined: Aug 2001
Posts: 608
Likes: 0
From: Melbourne Australia
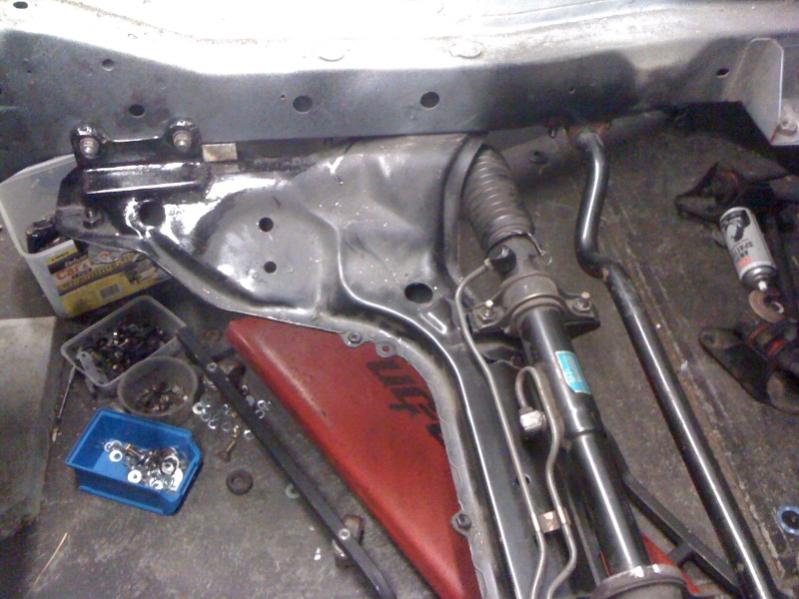
The first work done with the new plan in hand was to stich weld in the shocker mounts and the spring bearing plate and braces.
I also tagged the shock towers to the spring bearing brace, then i made a "tower" brace, that ties in the two braces together as well as well as doubling as a harness mount if i need it later on.


I then got into the wiring, by removing all of the engine bay wiring loom and pulling it through into the cabin, so it can be sorted into whats needed and what's not and then be re-routed and hidden etc...


I then went on to get the car to this stage.....


Next was the rear floor and mounting the LPG tank
I firstly got to use my new favourite tool, my ryobi phenmatic hacksaw... it's even rotor shaped!!!! i can't belive i put off getting one of these things.... it took only a few mins to cut out my wheel well and then trim it.

you get a good look at the panhard rod that was fitted earlier here too.

After that i was able to test fit the tank, which i forgot to get a photo of..
but to to give you and idea, the LPG tank sits more central than the std fuel tank. it sits between the rails and slightly off centre to the passenger side, to allow for as much muffler clearance as i can. The leading edge of the tank will be about 10mm behind the solid cross bar on the panhard rod.
i then started on tacking up the mount for it (no i didn't tack it on the LPG tank)

This shows how flush it will sit with the new floor not that the LPG bracket has bolt in to get complience

I also tagged the shock towers to the spring bearing brace, then i made a "tower" brace, that ties in the two braces together as well as well as doubling as a harness mount if i need it later on.
I then got into the wiring, by removing all of the engine bay wiring loom and pulling it through into the cabin, so it can be sorted into whats needed and what's not and then be re-routed and hidden etc...
I then went on to get the car to this stage.....
Next was the rear floor and mounting the LPG tank
I firstly got to use my new favourite tool, my ryobi phenmatic hacksaw... it's even rotor shaped!!!! i can't belive i put off getting one of these things.... it took only a few mins to cut out my wheel well and then trim it.
you get a good look at the panhard rod that was fitted earlier here too.
After that i was able to test fit the tank, which i forgot to get a photo of..
but to to give you and idea, the LPG tank sits more central than the std fuel tank. it sits between the rails and slightly off centre to the passenger side, to allow for as much muffler clearance as i can. The leading edge of the tank will be about 10mm behind the solid cross bar on the panhard rod.
i then started on tacking up the mount for it (no i didn't tack it on the LPG tank)
This shows how flush it will sit with the new floor not that the LPG bracket has bolt in to get complience
Thread Starter
ACBron Motorsport
Joined: Aug 2001
Posts: 608
Likes: 0
From: Melbourne Australia
This is how the floor ended up, it's got bitumen sheets deadener on it as well as a coat of waterbased spray on deadener (as well as underneath).
sorry about the crappy phone pics...


I then stripped out the rest of the engine bay and started to fill in most of the holes and some seam welding...


Who's that fat balding old dude?
Well the welds don't look like much as the weld slag is still there (gasless mig).
I've just painted the etch primer to cover the welds until i could start dressing the welds and grinding the filled holes.
Thers about three hours work there, not that it looks it, I ended up filling about 30 holes all up!
I've left about 4 threaded holes on the passeger side rear section, where the LPG stuff will go, everything else that wasn't needed has been filled. There's about another day's worth of just finishing/dressing them, then the normal paint prep can start.
Other than the seam welds, you wont see any of the work once its finshed. But even the seam welds, will still have seam sealer around them, so they wont be that noticable if at all too.
sorry about the crappy phone pics...
I then stripped out the rest of the engine bay and started to fill in most of the holes and some seam welding...
Who's that fat balding old dude?
Well the welds don't look like much as the weld slag is still there (gasless mig).
I've just painted the etch primer to cover the welds until i could start dressing the welds and grinding the filled holes.
Thers about three hours work there, not that it looks it, I ended up filling about 30 holes all up!
I've left about 4 threaded holes on the passeger side rear section, where the LPG stuff will go, everything else that wasn't needed has been filled. There's about another day's worth of just finishing/dressing them, then the normal paint prep can start.
Other than the seam welds, you wont see any of the work once its finshed. But even the seam welds, will still have seam sealer around them, so they wont be that noticable if at all too.
Thread Starter
ACBron Motorsport
Joined: Aug 2001
Posts: 608
Likes: 0
From: Melbourne Australia
It was around this time these showed up....

and that this was fitted
Then i started making my new strut bodies. \ /
/
They're a mix of the 1st gen and 2nd gen items, allowing me to use my 1st gen koni shocks and coils and mount them to a 2nd gen stub axle. (thanks to 83transam for the pointers on how he did his)
Here's the 1st gen strut body, with the stub and and brake line bracket cut off.

The lower section of my 2nd gen struts after removing the sealed strut and cutting it just above the brake line bracket. (i'm using 2nd gen brake lines).

The base of the 2nd gen strut;
Before :

and after:

put the two together and....

That stut has the same distance from the centre of the stub axle to the spring seat as a 1st gen strut, this is so i keep the same ride height and travel as a 1st gen strut.
and that this was fitted
Then i started making my new strut bodies. \
/ They're a mix of the 1st gen and 2nd gen items, allowing me to use my 1st gen koni shocks and coils and mount them to a 2nd gen stub axle. (thanks to 83transam for the pointers on how he did his)
Here's the 1st gen strut body, with the stub and and brake line bracket cut off.
The lower section of my 2nd gen struts after removing the sealed strut and cutting it just above the brake line bracket. (i'm using 2nd gen brake lines).
The base of the 2nd gen strut;
Before :
and after:
put the two together and....
That stut has the same distance from the centre of the stub axle to the spring seat as a 1st gen strut, this is so i keep the same ride height and travel as a 1st gen strut.
Thread Starter
ACBron Motorsport
Joined: Aug 2001
Posts: 608
Likes: 0
From: Melbourne Australia
the two 2nd gen lowers ready to go

the fit of the 1st spring seat to the 2nd gen lower

the strut insert in its proper position

the extra distance required to fit 1st gen strut inserts

i could of trimmed the "dick" off the shock, but in keep it and therefore keeping the 1st gen legnth, means i can easily replace the inserts later if required.
the new strut bases


and the assembled strut ready for tack welding

i've only tack welded them at this stage so i can put them in the car to get it mobile again and dummy fit the engine so i can make the turbo manifold.
the fit of the 1st spring seat to the 2nd gen lower
the strut insert in its proper position
the extra distance required to fit 1st gen strut inserts
i could of trimmed the "dick" off the shock, but in keep it and therefore keeping the 1st gen legnth, means i can easily replace the inserts later if required.
the new strut bases
and the assembled strut ready for tack welding
i've only tack welded them at this stage so i can put them in the car to get it mobile again and dummy fit the engine so i can make the turbo manifold.
Thread Starter
ACBron Motorsport
Joined: Aug 2001
Posts: 608
Likes: 0
From: Melbourne Australia
now this is around july 2011....

the car is on its wheels (for now) and the engine is in for dumming fitting and fabricating everything \/
the to do list is something like this:
fit gearbox & tailshaft
fabircate the turbo manfiold & dump pipe
fit inlet manifolds and lpg carby
fab mounts for gas convertors
mount rad and oil cooler
mount FMIC
fab intercooler pipes
fab a air box
fit all ignition coils and ECU sensors (fab brackets)
pretty much everything except the wiring and some of the hoses, then i'll pull it all apart and paint the bay, get the engine and gearbox rebuilt, then put it together for real..... it's going to be a long time in the making but well work the effort :thrust:
Next was mounting the gearbox...
I started with these two gearbox crossmembers. the top on is a S2 one, the bottom one is what came with my S4 gearbox. Yes it was bolted up through those oversizes holes.

and ended up with this to sit the mount about 35mm lower.


And in the car


I also modified the S2 mount to fit the S4 box. i had to trim the RH side of the steel (not shown) to clear the crossmember.

I'm guessing some people are now thinking, why go to this effort? Well, I wanted to utilize the pressed in rubber mounts of the 2nd crossmember (s3??), but i also wanted it all to bolt in like factory and use the S2 gearbox mount. So i cut and shut the two, then reinforced them to make what you see above.
I'll grind back the welds when the gearbox comes back out (it's getting rebuilt) and i'll paint it a bit better too, then it should look factory.
While im very happy with how it turned out, it's strong, it all lines up at the floor and the gearbox perfectly with no slotted holes etc... I wouldnt make one like this again. It's far easier to make one from scratch.
the car is on its wheels (for now) and the engine is in for dumming fitting and fabricating everything \
/ the to do list is something like this:
fit gearbox & tailshaft
fabircate the turbo manfiold & dump pipe
fit inlet manifolds and lpg carby
fab mounts for gas convertors
mount rad and oil cooler
mount FMIC
fab intercooler pipes
fab a air box
fit all ignition coils and ECU sensors (fab brackets)
pretty much everything except the wiring and some of the hoses, then i'll pull it all apart and paint the bay, get the engine and gearbox rebuilt, then put it together for real..... it's going to be a long time in the making
but well work the effort :thrust:Next was mounting the gearbox...
I started with these two gearbox crossmembers. the top on is a S2 one, the bottom one is what came with my S4 gearbox. Yes it was bolted up through those oversizes holes.
and ended up with this to sit the mount about 35mm lower.
And in the car
I also modified the S2 mount to fit the S4 box. i had to trim the RH side of the steel (not shown) to clear the crossmember.
I'm guessing some people are now thinking, why go to this effort? Well, I wanted to utilize the pressed in rubber mounts of the 2nd crossmember (s3??), but i also wanted it all to bolt in like factory and use the S2 gearbox mount. So i cut and shut the two, then reinforced them to make what you see above.
I'll grind back the welds when the gearbox comes back out (it's getting rebuilt) and i'll paint it a bit better too, then it should look factory.
While im very happy with how it turned out, it's strong, it all lines up at the floor and the gearbox perfectly with no slotted holes etc... I wouldnt make one like this again. It's far easier to make one from scratch.
Trending Topics
Thread Starter
ACBron Motorsport
Joined: Aug 2001
Posts: 608
Likes: 0
From: Melbourne Australia
August 2011
I finally got the turbo mounted, i threw on the the inlet manifold just to see what it would look like... it's sitting up as its a s4 upper on a s5 lower (i'll most likely run the s5 items).
crappy phone pics..... I'll buy myself a new camera once i put it back together after its painted
The turbo finally mounted to the engine...

Note that the steering coloumn isn't on it's normal angle, it actually sits further of the rail and futher back from the turbine housing.


Next is to mount up the gas gear and the FMIC as well as fabricate a air box of some sort. lots of work to do!!!!
Here's today's efforts, the mount for the twin gas convertors. i went a little nuts :mrgreen:
Again, sorry for the crappy phone pics


My goal goal with these was to mount the as close to the engine and as low and far back as i could.
I did this as i want to have as much exposed panel/painted areas of the firewall and inner gaurds as possible.


I finally got the turbo mounted, i threw on the the inlet manifold just to see what it would look like... it's sitting up as its a s4 upper on a s5 lower (i'll most likely run the s5 items).
crappy phone pics..... I'll buy myself a new camera once i put it back together after its painted
The turbo finally mounted to the engine...
Note that the steering coloumn isn't on it's normal angle, it actually sits further of the rail and futher back from the turbine housing.
Next is to mount up the gas gear and the FMIC as well as fabricate a air box of some sort. lots of work to do!!!!
Here's today's efforts, the mount for the twin gas convertors. i went a little nuts :mrgreen:
Again, sorry for the crappy phone pics
My goal goal with these was to mount the as close to the engine and as low and far back as i could.
I did this as i want to have as much exposed panel/painted areas of the firewall and inner gaurds as possible.
Thread Starter
ACBron Motorsport
Joined: Aug 2001
Posts: 608
Likes: 0
From: Melbourne Australia
December 2011
yay, finally a update....
Firstly here's my new rims 16x7 BBS rims, they're in 5 x 114.3 ET38. I got these a few weeks ago now.
The guards are lipped and pumped to ensure there is clearaence through the full suspension range. I can drop the guard right over the tyre (not that i will).


Notice the varying ride height, theres actually no springs in the front of the car so i could check the clearance...
If the tyres look large, it because they are, with the s4 front end i'm running a s4 size tyre 8)
yay, finally a update....
Firstly here's my new rims 16x7 BBS rims, they're in 5 x 114.3 ET38. I got these a few weeks ago now.
The guards are lipped and pumped to ensure there is clearaence through the full suspension range. I can drop the guard right over the tyre (not that i will).
Notice the varying ride height, theres actually no springs in the front of the car so i could check the clearance...
If the tyres look large, it because they are, with the s4 front end i'm running a s4 size tyre 8)
Thread Starter
ACBron Motorsport
Joined: Aug 2001
Posts: 608
Likes: 0
From: Melbourne Australia
sealing the body work
Here's how it started... what a mess! 8-[

grrr rust, luckliy this wasent hard to remove and treat...

Part way throught the rub back. the white is etch primer from when i welded the bay up from 6 months or so ago... the grey looking patches are the orginal rust protection from the factory.


and on with the red primer...
what rust?

ahhh much better, no repairs have been done yet, just sealing up the bare metal.


Then onto todays efforts, the roof in bare metal with the deoxidiser on it

the rear... the bit around the hatch is going to be takien back to bare metal when i get around to welding in some (patch peices


NOTE, i've since decied to re-do the rear arches, they will be a more standard looking arch to suite the BBS rims
Here's how it started... what a mess! 8-[
grrr rust, luckliy this wasent hard to remove and treat...
Part way throught the rub back. the white is etch primer from when i welded the bay up from 6 months or so ago... the grey looking patches are the orginal rust protection from the factory.
and on with the red primer...
what rust?
ahhh much better, no repairs have been done yet, just sealing up the bare metal.
Then onto todays efforts, the roof in bare metal with the deoxidiser on it
the rear... the bit around the hatch is going to be takien back to bare metal when i get around to welding in some (patch peices
NOTE, i've since decied to re-do the rear arches, they will be a more standard looking arch to suite the BBS rims
Thread Starter
ACBron Motorsport
Joined: Aug 2001
Posts: 608
Likes: 0
From: Melbourne Australia
Almost upto date.......
Jan 16th 2012
i made some good progress to day. 3 coats of hi-fill \/


excuse the messy garage, need a big clean up before i paint the colour. :flame:
As time is marching on before my third child is born (due mid march), im just focusing on getting the bay painted at this point in time as that will allow me to do a stack of work during the year.
I'm going to replace the rear wheel arches (again). The BBS rims i've got are a more positive offset than i was originally going to run, so i should be able to run near standard rear arches, just pumped slightly (like the front ones but a bit more i think). I've already got some replacement arches to weld in, but i'm still waiting on my rear axles to show from RE-Speed.
if i can sort that out in the next few weeks, i still might be a chance to paint the car before the baby comes... if not i think i'll be waiting to next spring/summer (the USA winter).
Jan 16th 2012
i made some good progress to day. 3 coats of hi-fill \
/ excuse the messy garage, need a big clean up before i paint the colour. :flame:
As time is marching on before my third child is born (due mid march), im just focusing on getting the bay painted at this point in time as that will allow me to do a stack of work during the year.
I'm going to replace the rear wheel arches (again). The BBS rims i've got are a more positive offset than i was originally going to run, so i should be able to run near standard rear arches, just pumped slightly (like the front ones but a bit more i think). I've already got some replacement arches to weld in, but i'm still waiting on my rear axles to show from RE-Speed.
if i can sort that out in the next few weeks, i still might be a chance to paint the car before the baby comes... if not i think i'll be waiting to next spring/summer (the USA winter).
Thread Starter
ACBron Motorsport
Joined: Aug 2001
Posts: 608
Likes: 0
From: Melbourne Australia
Jan 20th 2012


I got a few runs in the clear, not bad considering i haven't painted for about 10 years... it was also the first time with a HVLP gunand the first time i've painted 2k colour.
there ya go, two and bit years in a few posts..... i'll update as progress is made.
I got a few runs in the clear, not bad considering i haven't painted for about 10 years... it was also the first time with a HVLP gunand the first time i've painted 2k colour.
there ya go, two and bit years in a few posts..... i'll update as progress is made.


Thread Starter
ACBron Motorsport
Joined: Aug 2001
Posts: 608
Likes: 0
From: Melbourne Australia
Thanks guys,
Percentage, There's a guy on ausrotary that's selling fc coil overs without the hub mounts, so you can weld on the 1st gen hubs...
J9fd3s. Mine was a U6 misty blue, not the U2 Startdust. The blue guard in the bbs shot is the U2 colour. They're very similar.
I've got a 4 day weekend next week, so I'm hoping to get a fair bit done.
Joined: Mar 2001
Posts: 31,857
Likes: 3,243
From: https://www2.mazda.com/en/100th/
Thanks guys,
Percentage, There's a guy on ausrotary that's selling fc coil overs without the hub mounts, so you can weld on the 1st gen hubs...
J9fd3s. Mine was a U6 misty blue, not the U2 Startdust. The blue guard in the bbs shot is the U2 colour. They're very similar.
I've got a 4 day weekend next week, so I'm hoping to get a fair bit done.
Percentage, There's a guy on ausrotary that's selling fc coil overs without the hub mounts, so you can weld on the 1st gen hubs...
J9fd3s. Mine was a U6 misty blue, not the U2 Startdust. The blue guard in the bbs shot is the U2 colour. They're very similar.
I've got a 4 day weekend next week, so I'm hoping to get a fair bit done.
Thread Starter
ACBron Motorsport
Joined: Aug 2001
Posts: 608
Likes: 0
From: Melbourne Australia
It's a early '83, chassis #SA22C-666xxx
Our exhaust noise laws change from 96db to 91db in late '83 which will help when making the exhaust legal.
U2 seems to be much more common than U6 (stupid Bono lol).
Our exhaust noise laws change from 96db to 91db in late '83 which will help when making the exhaust legal.
U2 seems to be much more common than U6 (stupid Bono lol).

Joined: Mar 2001
Posts: 31,857
Likes: 3,243
From: https://www2.mazda.com/en/100th/
lol, bono.... 96DB shouldn't be too hard, but 91 would be! jeez. its a little different but at laguna seca they run a 92db limit, although its on the straight after turn 5, but anyways STOCK cars don't always pass sound!

Thread Starter
ACBron Motorsport
Joined: Aug 2001
Posts: 608
Likes: 0
From: Melbourne Australia
thanks again guys... i'm stoked with the colour! i keep heading out to the shed to look at it whenever i get the chance 
as for the interior, it's not 100% planned yet. It will be mostly black... dash, carpet, the Rx-8 seats ive got are black/grey, if i run the rear seats i'll get them trimmed the same.
I'll be doing all the piller and rooflining trims in black microsuede.i do have some dark blue suede too i may use.
I'm wanting to use a little carbon wrap in there if i can and most likely there will be some of the body color some where inside as most of my other cars have had.
Respecognize!
Joined: Sep 2004
Posts: 4,106
Likes: 73
From: Anchor Bay, CA
before i went to more custom 40mm bilstein setup, i used the 2nd gen strut with FB springs and tops. Seemed to work well.
since the s4 crossmember, if you use the original front FB mount, moves the axle centerline. The S4 steering column was too short. I cant see your pictures from work, but ill look to see if you did something to lengthen it. I just used a steering quickener (1.5:1) to make up the difference. I ended up with about 2.1 turns lock to lock. Perfect for rally!
since the s4 crossmember, if you use the original front FB mount, moves the axle centerline. The S4 steering column was too short. I cant see your pictures from work, but ill look to see if you did something to lengthen it. I just used a steering quickener (1.5:1) to make up the difference. I ended up with about 2.1 turns lock to lock. Perfect for rally!