
'80 with 6-port engine


Thread Starter
Full Member
Joined: May 2013
Posts: 62
Likes: 9
From: Florence, Italy
'80 with 6-port engine
Hi, I'm new here: I'm Dario and I'm from Italy: english is not my first language so please be patient, I'll do my best to be comprehensible.
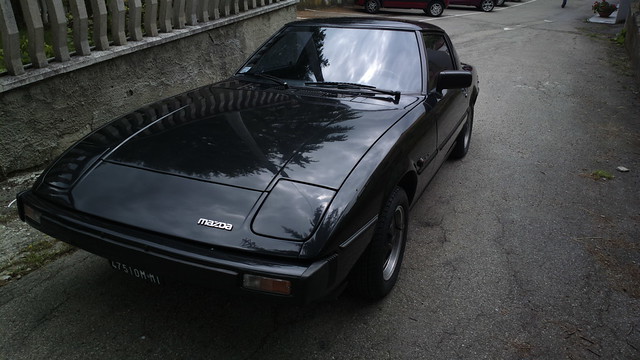
in july 2013 I bought an '80 RX7: at first look it was to avoid it at all costs: engine swapped years ago here in italy, no information about it, no real mileage, no history, many cheap mods, not original paint, water temp not working, many electrical issues, and on top of all this it was almost undriveable because it had an holley carb kit (but with unknown components) with the worst tuning I have ever seen (and I've seen it all!).
..but I was feeling that it had "potential" and also it was cheap, at least for Italy standards: here it's truly a rarity and generally vintage cars costs a lot more here than the price I see usually in USA/Australia or even UK and Germany.
Also here for a rotary owner it's basically a nightmare about maintenance and parts.
so of course I bought it.
After that I had to drive it for few hundreds miles to where I live (Florence) and I tested of course all the bad things about it. I don't even want to know what mileage it had with that carburetion!

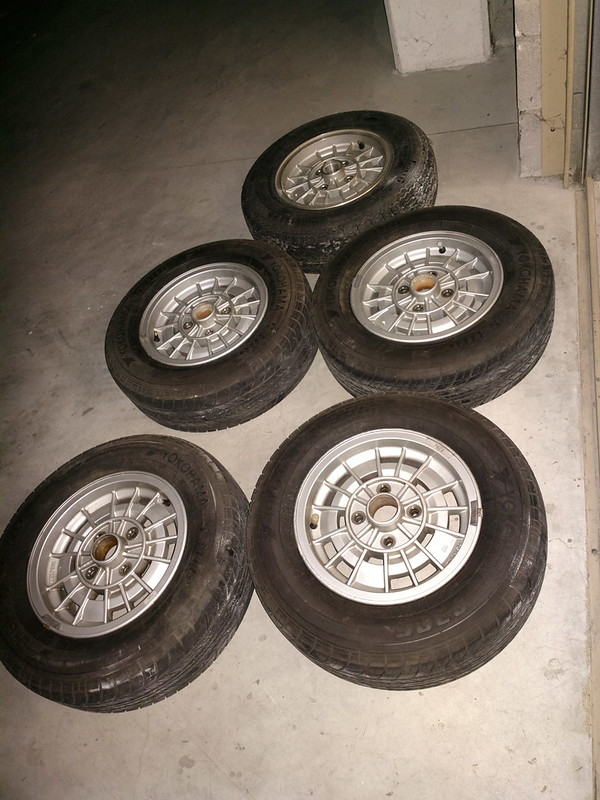
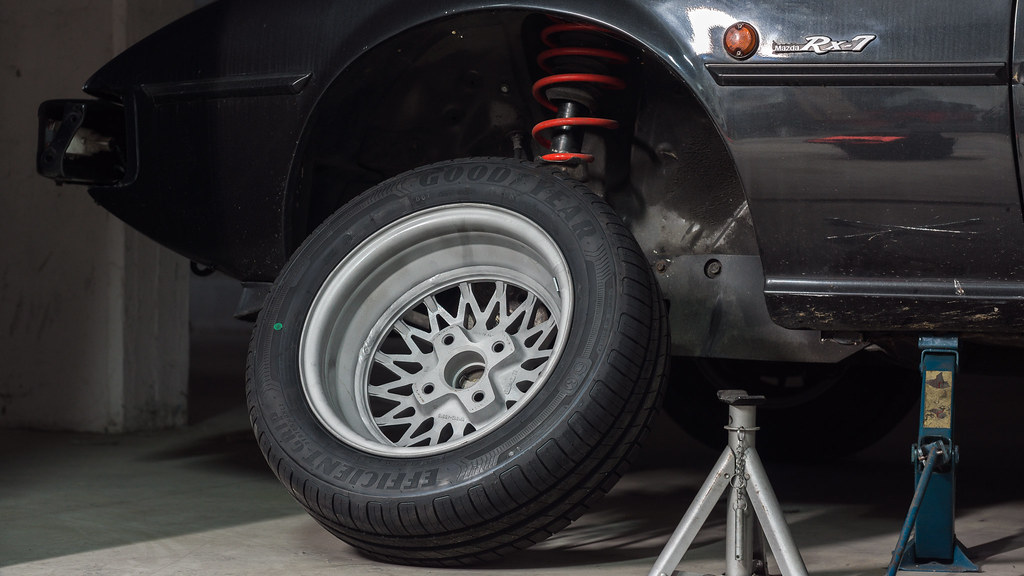
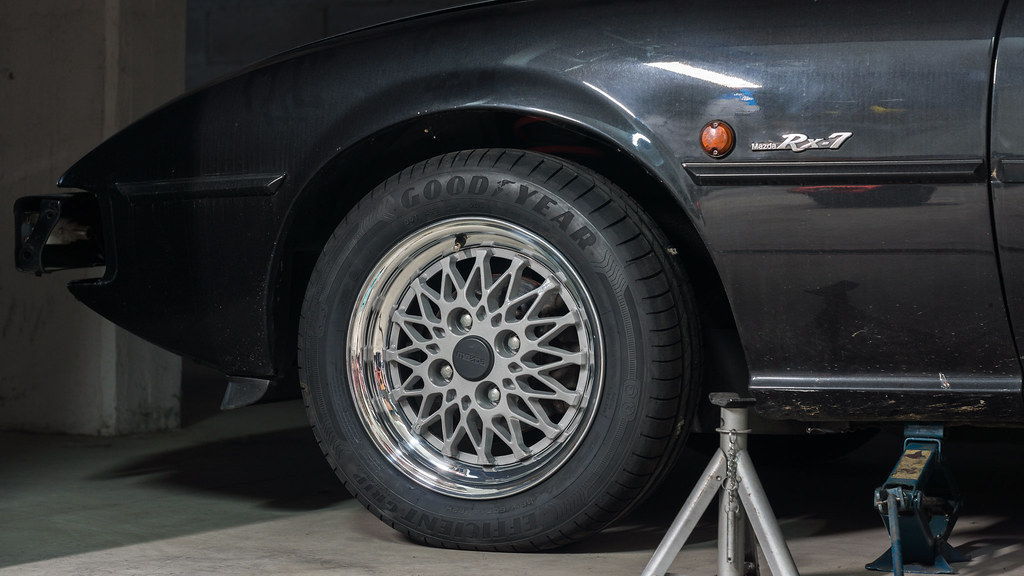
The car came with two sets of tyres and two sets of seats. Here you can imagine my bafflement when I saw this:
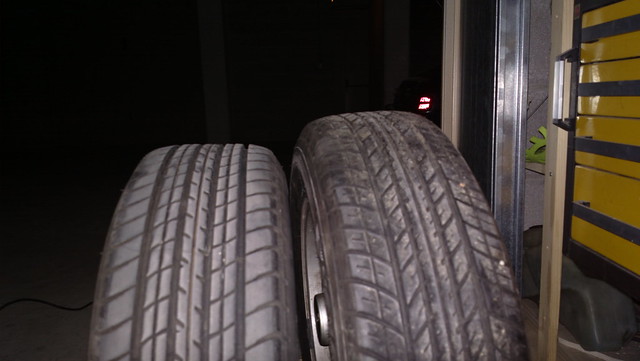
No wonder the speedometer didn't match the GPS (it had the smaller set of tyres mounted) !
Few days after there was a big meeting for japanese cars (probably the only one worth seeing in italy) so I wanted to bring my Rx7! That meant that I had to work day and night (actually only night because of my day-job) to make the car presentable for the meeting:
I managed to take off all the awful "hi fi" and alarm equipment, together with tons
of unexplainable cables and in that occasion I realized about how much of a hack-job was that car... I replaced the stereo with a spare one I had, I changed the wheels with the waffle ones (with the original tyres), polished the body, and off I went to another trip just few days after the purchase, but here comes the crazy part: not only I was driving thousands miles alone in an "hacked" car, not knowing any of the problems it had, but I was driving it to a TRACKDAY!

...but at the end it all went well. I didn't push the car too much and I had the opportunity to really see what problems it had. By the way, of course I was the slowest one on the track, but I didn't care.
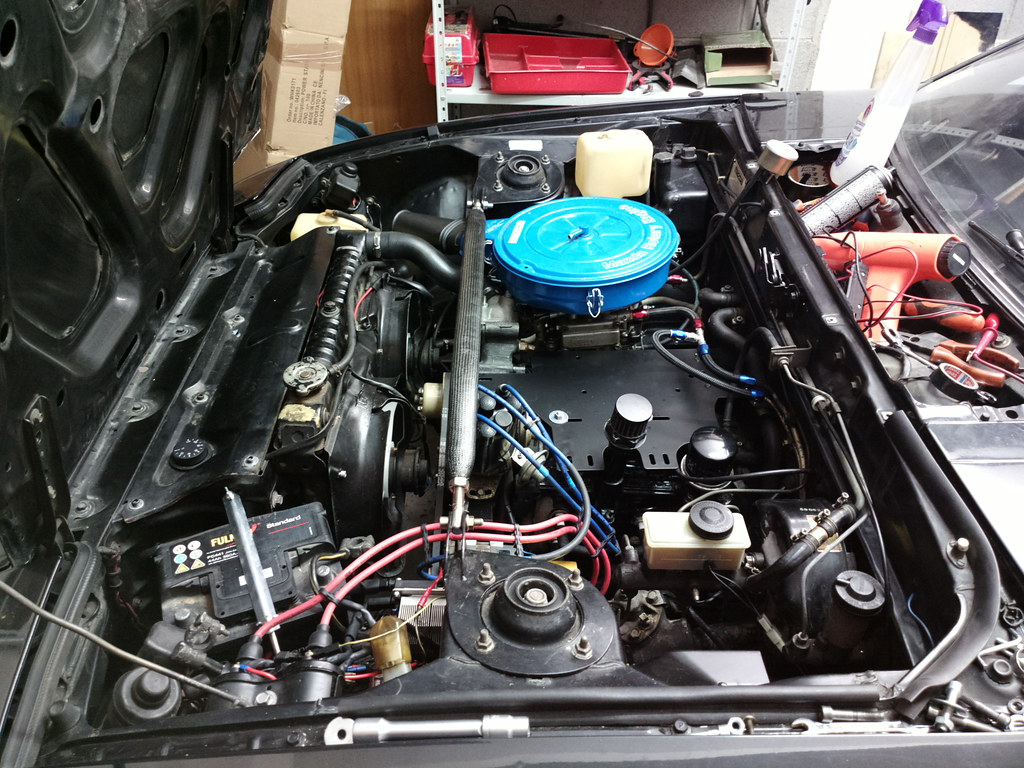
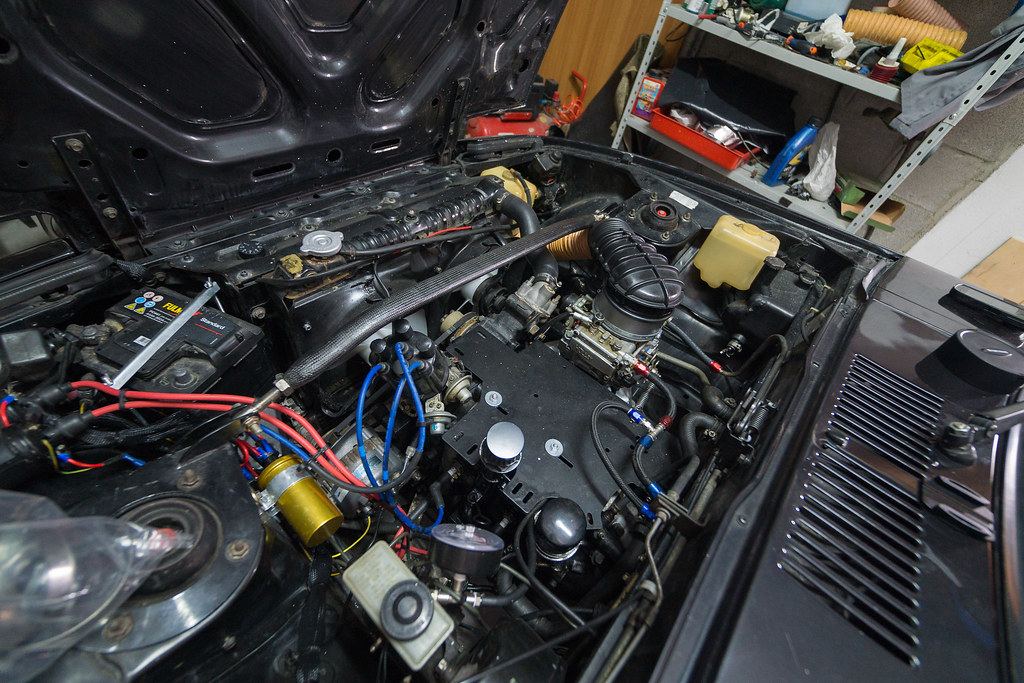
Back home I started to take apart the car to find more about that engine and the carb:
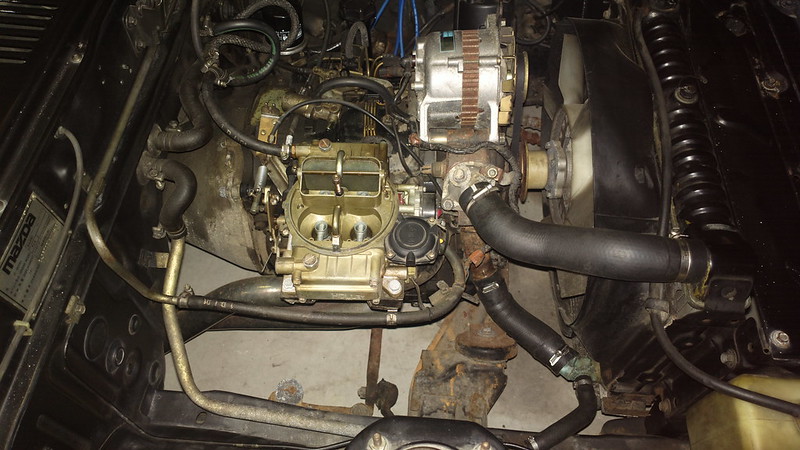
the engine is from a gsl-se, probably imported from Germany, or something.. I can't imagine the trouble it must have been through the owner who did it, before the internet, in a rotary-less country.. but the Holley kit didn't actually match with the engine: it was in fact a kit for marine applications of the 4-port engine, so you can't find a similar one anywhere on the internet, and also probably because the marine engine is mounted at a different angle, they had to make an angled spacer to get the carb horizontal.. Also I don't understand how they managed to fit the engine without modifying the motor mount: I was told it was impossible.
As you can see also the carb is a marine one, with anti-corrosion coating, without any vacuum ports and with the pipes on top pointing downward in the engine.
It had all the rat-nest still mounted but not functional, and probably the alternator was from a 323 or something similar.
The exhaust manifold is a RB "street", then adapted to the original microscopic pipe afterwards.
This is the moment I find out about the manifold:
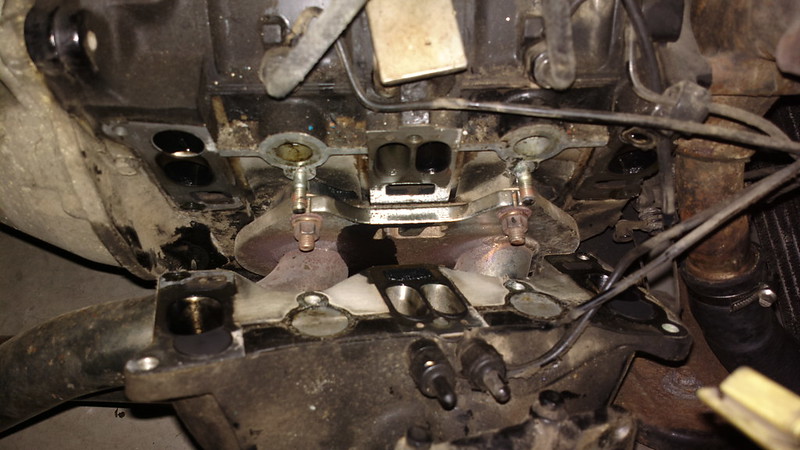
You can clearly see the ports not matching but IT'S NOT ALL!
it even had the rotating ports mounted!

I didn't know if to feel good or bad about it.. I mean.. the car had a good amount of power even with only 4 (incredibly low profile) ports active (the previous owner dynoed at 140HP) so I was excited to try the car with the 6 ports all breathing! but also I was depressed knowing that the mechanics that worked on the engine before CLEARLY didn't know anything about rotary engines, or probably engines in general..
[continues]
in july 2013 I bought an '80 RX7: at first look it was to avoid it at all costs: engine swapped years ago here in italy, no information about it, no real mileage, no history, many cheap mods, not original paint, water temp not working, many electrical issues, and on top of all this it was almost undriveable because it had an holley carb kit (but with unknown components) with the worst tuning I have ever seen (and I've seen it all!).
..but I was feeling that it had "potential" and also it was cheap, at least for Italy standards: here it's truly a rarity and generally vintage cars costs a lot more here than the price I see usually in USA/Australia or even UK and Germany.
Also here for a rotary owner it's basically a nightmare about maintenance and parts.
so of course I bought it.
After that I had to drive it for few hundreds miles to where I live (Florence) and I tested of course all the bad things about it. I don't even want to know what mileage it had with that carburetion!
The car came with two sets of tyres and two sets of seats. Here you can imagine my bafflement when I saw this:
No wonder the speedometer didn't match the GPS (it had the smaller set of tyres mounted) !
Few days after there was a big meeting for japanese cars (probably the only one worth seeing in italy) so I wanted to bring my Rx7! That meant that I had to work day and night (actually only night because of my day-job) to make the car presentable for the meeting:
I managed to take off all the awful "hi fi" and alarm equipment, together with tons
of unexplainable cables and in that occasion I realized about how much of a hack-job was that car... I replaced the stereo with a spare one I had, I changed the wheels with the waffle ones (with the original tyres), polished the body, and off I went to another trip just few days after the purchase, but here comes the crazy part: not only I was driving thousands miles alone in an "hacked" car, not knowing any of the problems it had, but I was driving it to a TRACKDAY!
...but at the end it all went well. I didn't push the car too much and I had the opportunity to really see what problems it had. By the way, of course I was the slowest one on the track, but I didn't care.
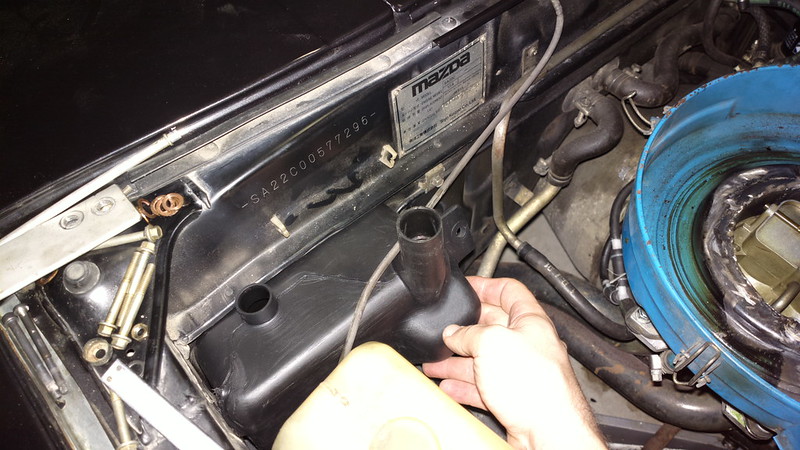
Back home I started to take apart the car to find more about that engine and the carb:
the engine is from a gsl-se, probably imported from Germany, or something.. I can't imagine the trouble it must have been through the owner who did it, before the internet, in a rotary-less country.. but the Holley kit didn't actually match with the engine: it was in fact a kit for marine applications of the 4-port engine, so you can't find a similar one anywhere on the internet, and also probably because the marine engine is mounted at a different angle, they had to make an angled spacer to get the carb horizontal.. Also I don't understand how they managed to fit the engine without modifying the motor mount: I was told it was impossible.
As you can see also the carb is a marine one, with anti-corrosion coating, without any vacuum ports and with the pipes on top pointing downward in the engine.
It had all the rat-nest still mounted but not functional, and probably the alternator was from a 323 or something similar.
The exhaust manifold is a RB "street", then adapted to the original microscopic pipe afterwards.
This is the moment I find out about the manifold:
You can clearly see the ports not matching but IT'S NOT ALL!
it even had the rotating ports mounted!
I didn't know if to feel good or bad about it.. I mean.. the car had a good amount of power even with only 4 (incredibly low profile) ports active (the previous owner dynoed at 140HP) so I was excited to try the car with the 6 ports all breathing! but also I was depressed knowing that the mechanics that worked on the engine before CLEARLY didn't know anything about rotary engines, or probably engines in general..
[continues]
talking head
Joined: Apr 2008
Posts: 2,775
Likes: 15
From: Perth, WA, OZ
best way forwards form here ( regarding lack of stock parts to draw parts from )
would be to remove the aux sleeves and buy a weber ( 48 IDA ) manifold that will suit the 6 port
and then go for one of the empi or old car co reproduction weber 48 IDA carbs
( check prices both australia and US )
it may take a little mucking with the fuel and air jets to settle down
( if you dont you end up with a sneeze as it jumps between low and high speed circuits, but free of most of the other holley carb vices )
but they do produce excellent results for top end power
about 160-180 rwhp is not unreasonable from a 6 port engine given long extractors and free flowing exhaust
i am assuming the vehicle already runs electronic ignition , and if it is all good, leave it
if there are faulty parts in the ignition, replace them with bosch HEI components and a DLIDIFS setup
PS.. you have the breathers for the inlet manifold OMP oilers blanked over
these should be drawing from purge air ( bit hard on a carb without vac nipples )
best bet is to steal the little breathers off the solenoids on the old rats nest, and place them on top of the OMP oilers so they can still "breathe" and allow the check valves to operate
Thread Starter
Full Member
Joined: May 2013
Posts: 62
Likes: 9
From: Florence, Italy
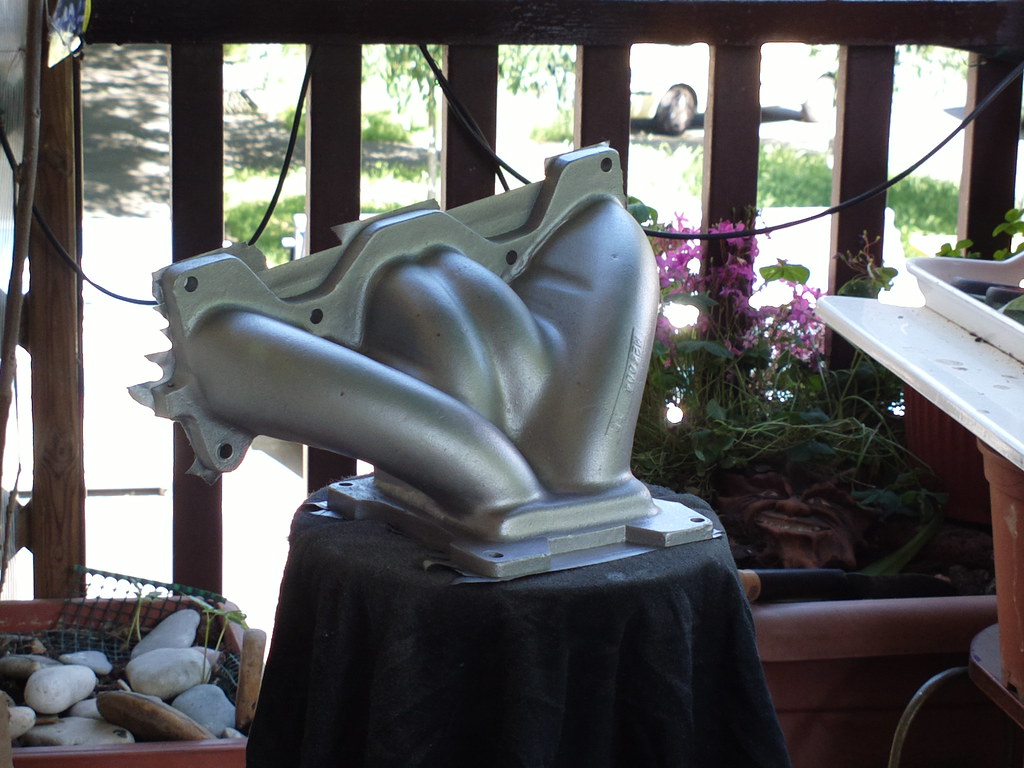
I started porting the manifold to match the ports on the engine:
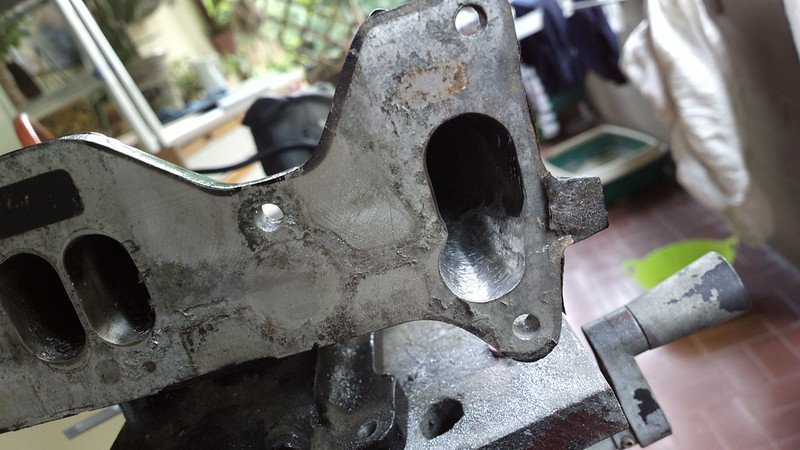
and this was at the final steps of the porting:
it was a really bad casting and I didn't manage to make a perfect fit, but I guess it was the next best thing from buying an entire new manifold from USA...
Then I started to experiment to see what direction to take with the carb, I even tried without the inclined spacer to see the difference but I knew that first of all I had to read everything about Holley carbs (of which I knew nothing about) to limit my mistakes.
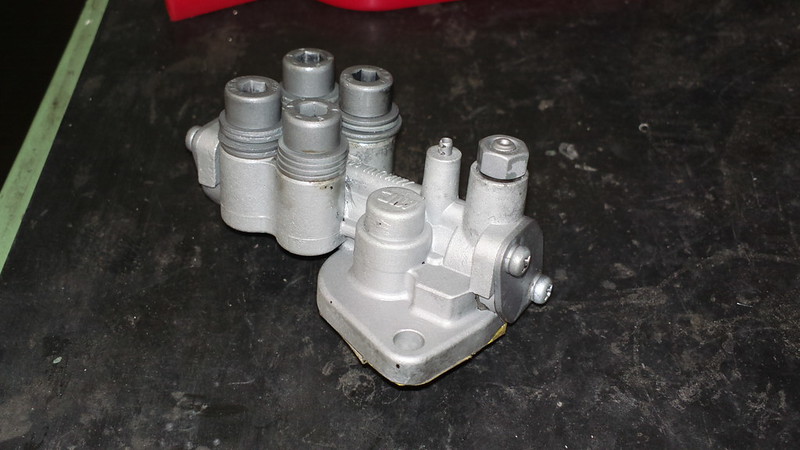
Also I did a thing I always wanted to do to a rotary even on my previous car ('93 fd) but I never managed to do before: separate the OMP from the engine oil and run 2 stroke oil for burning, and synthetic oil for the crankcase.
here it's the OMP after i sanded (yes I know.. I'm a fool... but I masked all the holes really well!)
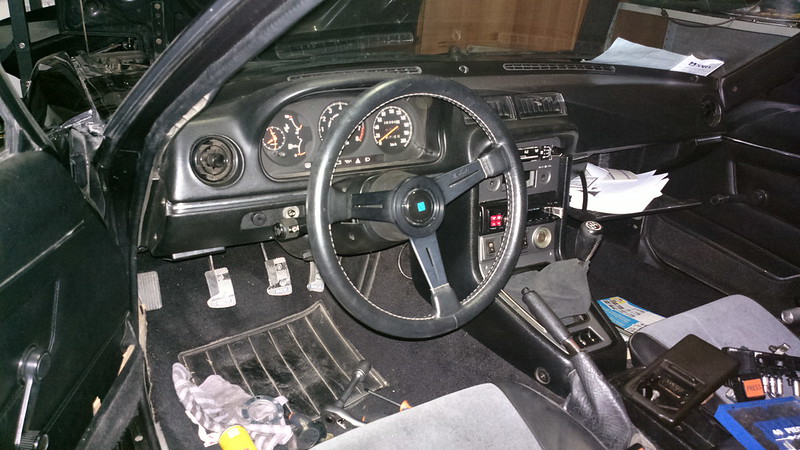
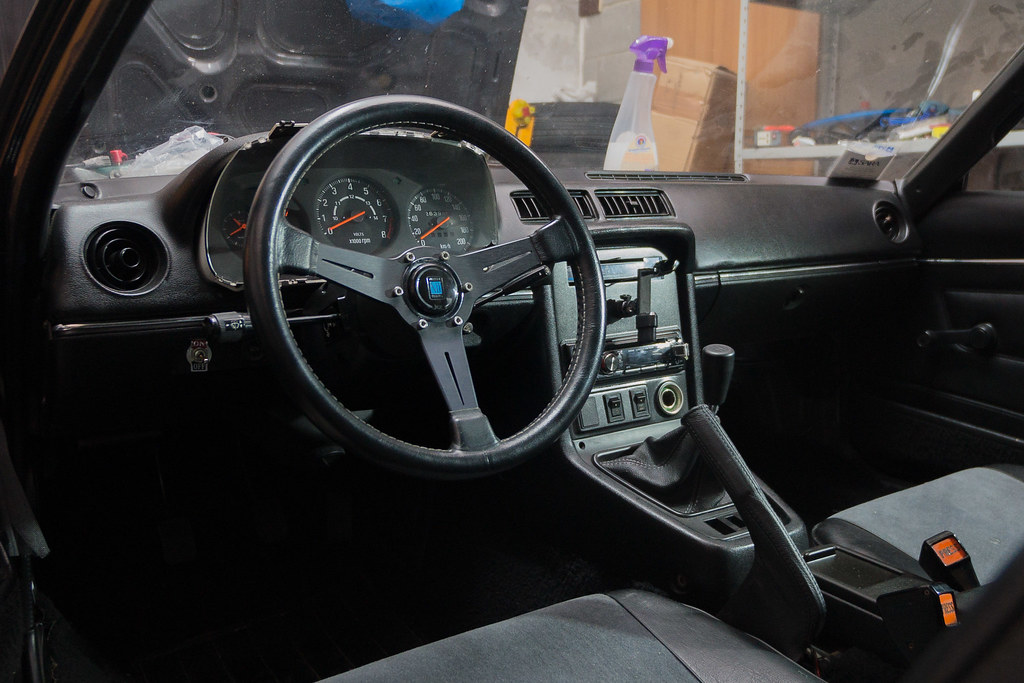
in the meantime I bought a hub for a Nardi wheel I already had:

It came in the original box from the '80s! amazing.
I had to make a custom puller for the original wheel because it was impossible to take it off even with the normal puller jigs
here it is the interior in all its crustyness, with the new wheel
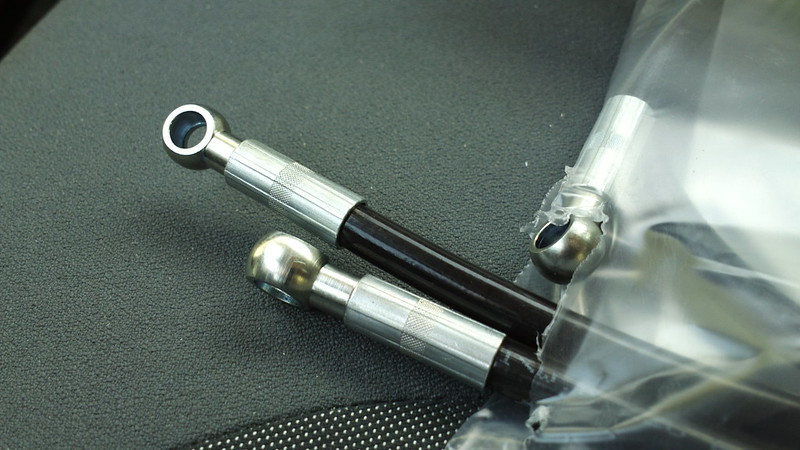
I had made the hoses for the OMP to the "injectors", maybe a bit overkill...
and here is the ported OMP

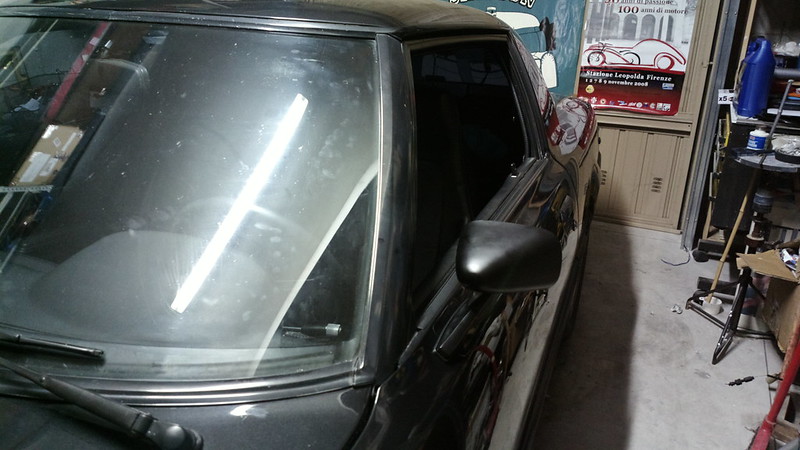
In the meantime, the holley rebuild kit, some jets, and other things arrived, including mirrors.
Old:
new:
[continue]
and this was at the final steps of the porting:
it was a really bad casting and I didn't manage to make a perfect fit, but I guess it was the next best thing from buying an entire new manifold from USA...
Then I started to experiment to see what direction to take with the carb, I even tried without the inclined spacer to see the difference but I knew that first of all I had to read everything about Holley carbs (of which I knew nothing about) to limit my mistakes.
Also I did a thing I always wanted to do to a rotary even on my previous car ('93 fd) but I never managed to do before: separate the OMP from the engine oil and run 2 stroke oil for burning, and synthetic oil for the crankcase.
here it's the OMP after i sanded (yes I know.. I'm a fool... but I masked all the holes really well!)
in the meantime I bought a hub for a Nardi wheel I already had:
It came in the original box from the '80s! amazing.
I had to make a custom puller for the original wheel because it was impossible to take it off even with the normal puller jigs
here it is the interior in all its crustyness, with the new wheel
I had made the hoses for the OMP to the "injectors", maybe a bit overkill...
and here is the ported OMP
In the meantime, the holley rebuild kit, some jets, and other things arrived, including mirrors.
Old:
new:
[continue]
Thread Starter
Full Member
Joined: May 2013
Posts: 62
Likes: 9
From: Florence, Italy
Then I had to find a tank for the two stroke oil, so after some days I found a scooter with just the right shape of tank:
For anyone that needs to know, it's from a two stroke engined Gilera "Runner" (here we lack rotary engines or big v8's but we can't get enough of scooters for some reason..).
Here scrapyards basically don't sell to the public and even if you find someone, it's impossible to search for anything on your own: you have to go there with the exact part number, and they keep almost only new vehicles, so it's always a nightmare to find a piece when you don't know exactly what you want.
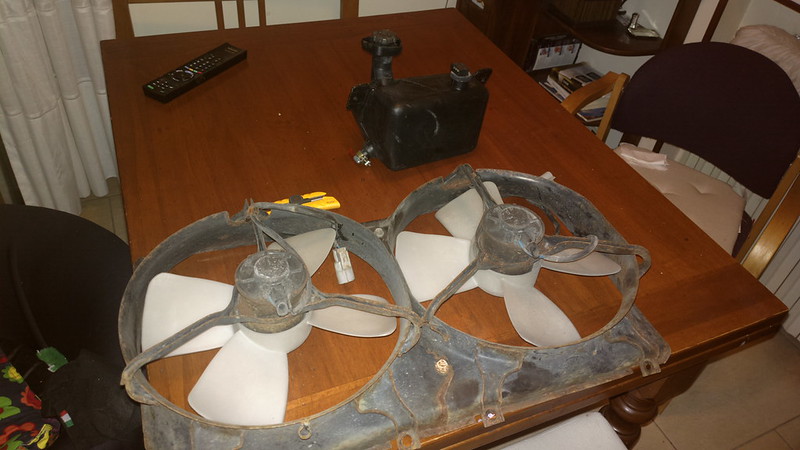
In the meantime I read about some people that adapted MR2 radiator fans to the RX7, so I bought those fans to convert it to electric, because the original fan had a stuck clutch and was always on (and was impossible to find a replacement)
Then also other things arrived:
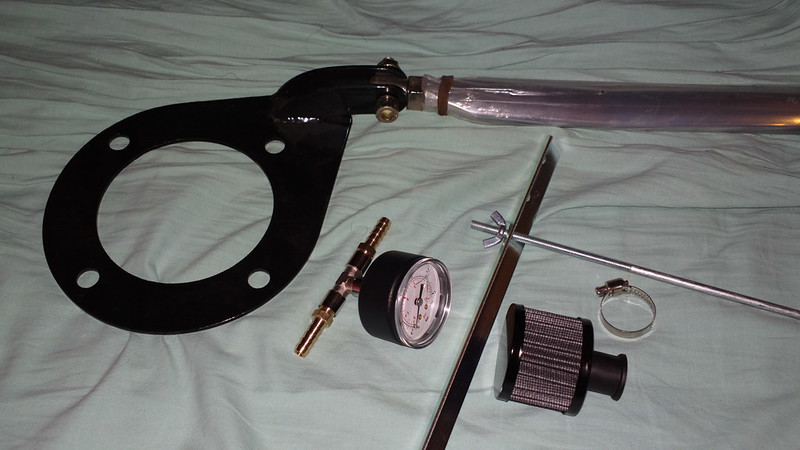
A strut bar from an FC (I read it was an easy fit), a breather for the oil (because I always found the white milky stuff in the engine) and other stuff to check the engine.
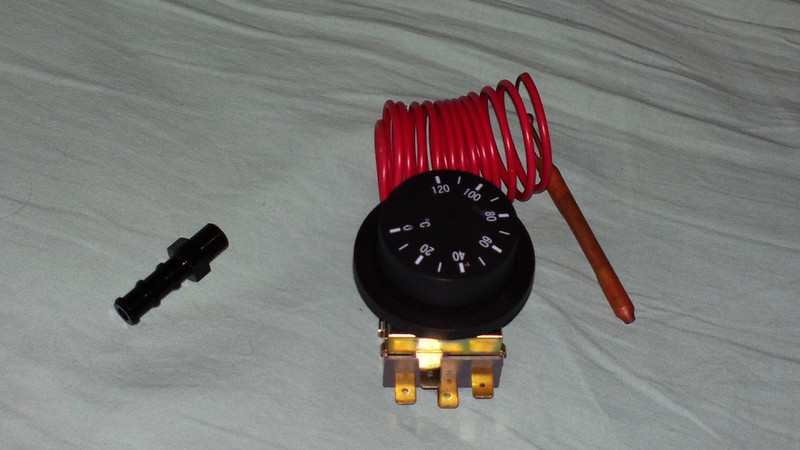
I bought a thermostat for the electric fans: I needed a way to setup the exact temperature needed to start the fans without spending months trying with different sensor, resistors etc.. So as you can see I bought one, let's say not exactly what you expect to find on a car...
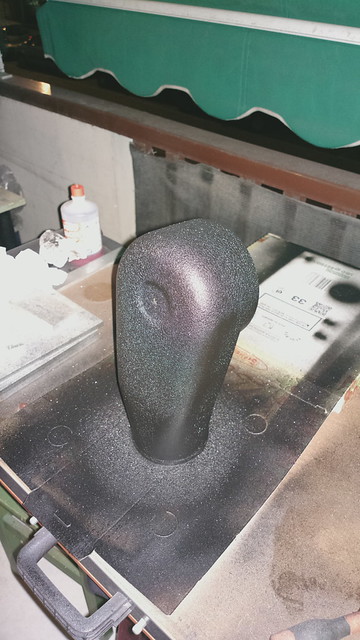
I work with CNC machines so I wanted to make a shift **** from scratch, because I didn't find the one with a style that matched the car, so I did it on the lathe, in plastic.
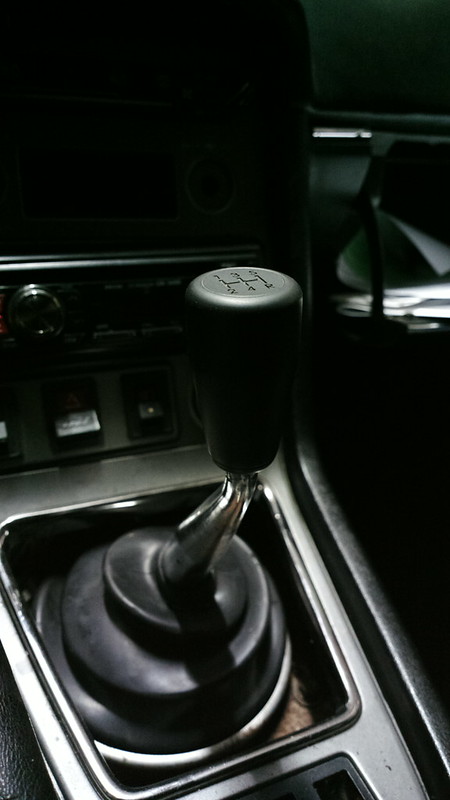
Then I laser-engraved the pattern on top:
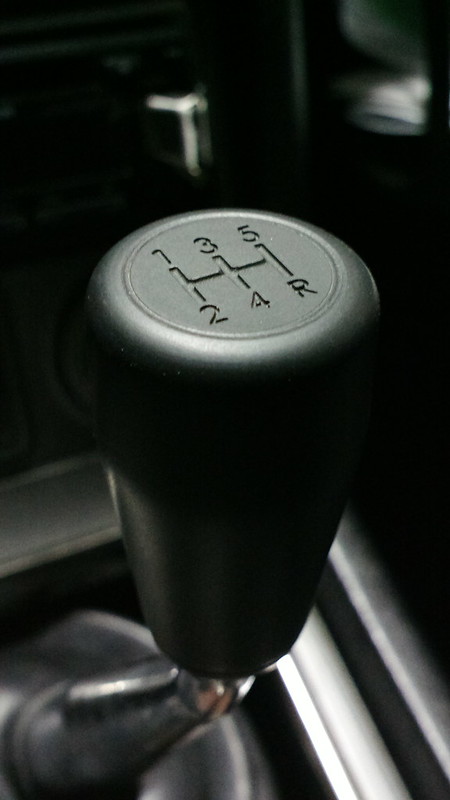
It came out almost exactly as I wanted.
Then I tested "offline" the OMP before mounting it on the car, using a drill:
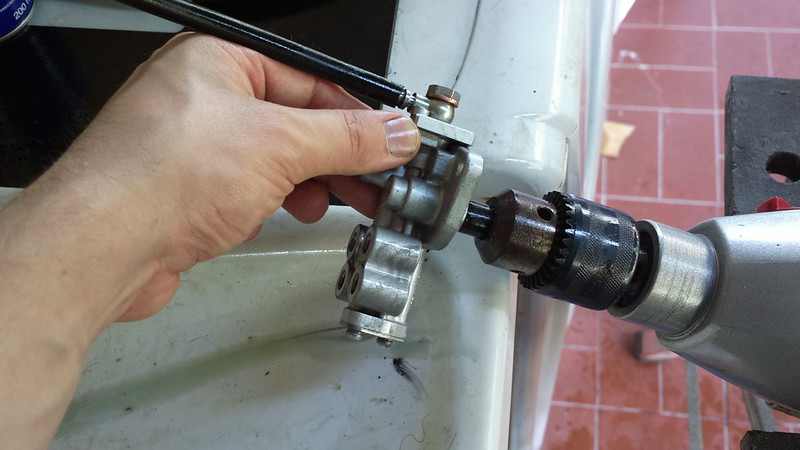
It went well, after some initial doubts.
Then I found a place to mount the thermostat:
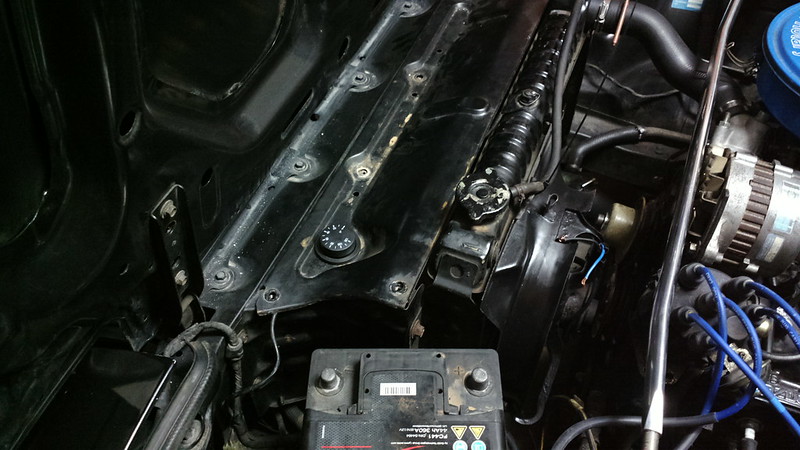
It seems a perfect fit, almost to good to be true!
In this picture also you can see I was experimenting with the fans...
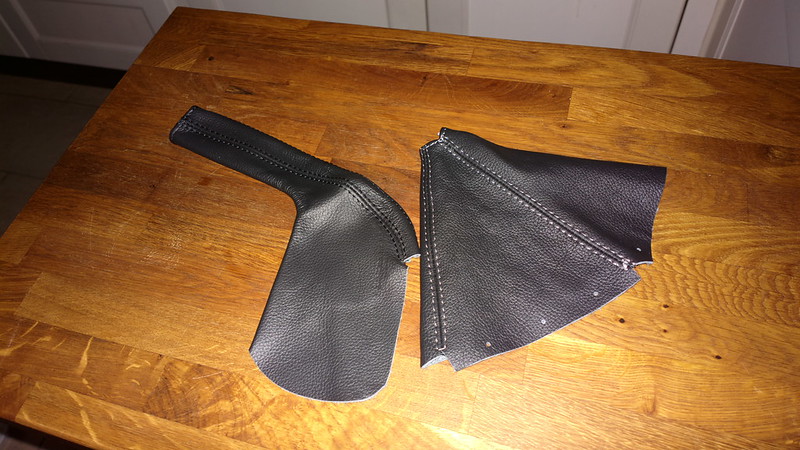
then I bought some leather parts: the hand brake thing actually is for the FC but I figured it would fit well also on the first-gen (and it did)
Then, while I was on vacation I did this:
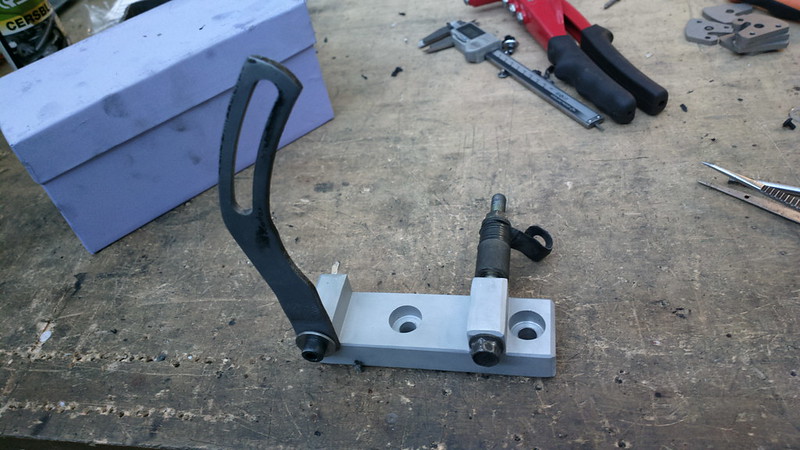
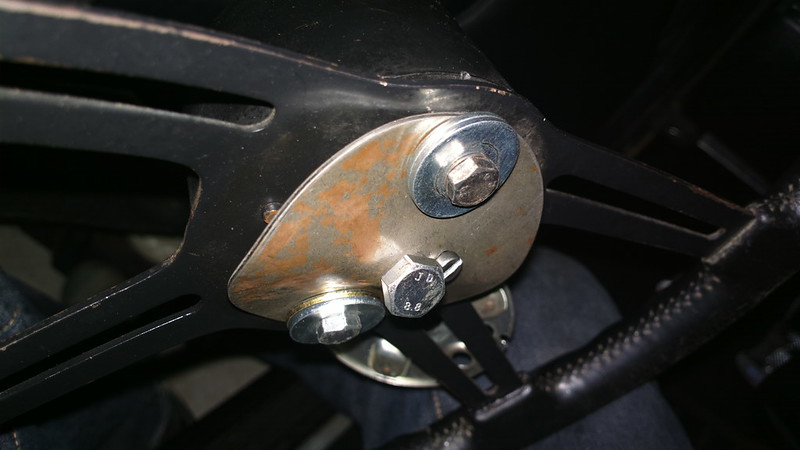
I machined on the CNC a bracket for side-mounting the alternator: the car hasn't A/C, power steering, air pump, or anything: only the water pump and alternator, so it seems a waste to keep the alternator there on top, and I wanted to have a different look. Also it was preventing me to mount the strut brace because the 13b is longer and I couldn't make the strut bar to stay in front of the alternator...
...But it wasn't ended with the strut bar: I know that the bar in most case doesn't do anything to the handling, at least it's never essential, but I really wanted also to achieve a certain look for the engine, something in between the group B engine and the 252i, and the bar was needed for that.
to actually fit it, the alternator wasn't enough, it still clashed with the distributor, and the only solution, apart from an electronic ignition, was to bend the bar: at that point I realized how much bad the bar was: I bended it just with my hands!
I needed to do something about it, so to remain in the 252i theme, I decided to reinforce it with carbon fiber.
here the bended bar:
[CONTINUES]
As you can see, instead of making the thread as I go, I'm telling a story already happened, and the pictures are already all on Flickr, so if you are impatient you can go there and see them all: LINK
That's all for today , I will continue to write in the next days/weeks until I keep up to present day.
Of course if you have questions I'm here to answer!
For anyone that needs to know, it's from a two stroke engined Gilera "Runner" (here we lack rotary engines or big v8's but we can't get enough of scooters for some reason..).
Here scrapyards basically don't sell to the public and even if you find someone, it's impossible to search for anything on your own: you have to go there with the exact part number, and they keep almost only new vehicles, so it's always a nightmare to find a piece when you don't know exactly what you want.
In the meantime I read about some people that adapted MR2 radiator fans to the RX7, so I bought those fans to convert it to electric, because the original fan had a stuck clutch and was always on (and was impossible to find a replacement)
Then also other things arrived:
A strut bar from an FC (I read it was an easy fit), a breather for the oil (because I always found the white milky stuff in the engine) and other stuff to check the engine.
I bought a thermostat for the electric fans: I needed a way to setup the exact temperature needed to start the fans without spending months trying with different sensor, resistors etc.. So as you can see I bought one, let's say not exactly what you expect to find on a car...
I work with CNC machines so I wanted to make a shift **** from scratch, because I didn't find the one with a style that matched the car, so I did it on the lathe, in plastic.
Then I laser-engraved the pattern on top:
It came out almost exactly as I wanted.
Then I tested "offline" the OMP before mounting it on the car, using a drill:
It went well, after some initial doubts.
Then I found a place to mount the thermostat:
It seems a perfect fit, almost to good to be true!
In this picture also you can see I was experimenting with the fans...
then I bought some leather parts: the hand brake thing actually is for the FC but I figured it would fit well also on the first-gen (and it did)
Then, while I was on vacation I did this:
I machined on the CNC a bracket for side-mounting the alternator: the car hasn't A/C, power steering, air pump, or anything: only the water pump and alternator, so it seems a waste to keep the alternator there on top, and I wanted to have a different look. Also it was preventing me to mount the strut brace because the 13b is longer and I couldn't make the strut bar to stay in front of the alternator...
...But it wasn't ended with the strut bar: I know that the bar in most case doesn't do anything to the handling, at least it's never essential, but I really wanted also to achieve a certain look for the engine, something in between the group B engine and the 252i, and the bar was needed for that.
to actually fit it, the alternator wasn't enough, it still clashed with the distributor, and the only solution, apart from an electronic ignition, was to bend the bar: at that point I realized how much bad the bar was: I bended it just with my hands!
I needed to do something about it, so to remain in the 252i theme, I decided to reinforce it with carbon fiber.
here the bended bar:
[CONTINUES]
As you can see, instead of making the thread as I go, I'm telling a story already happened, and the pictures are already all on Flickr, so if you are impatient you can go there and see them all: LINK
That's all for today
, I will continue to write in the next days/weeks until I keep up to present day. Of course if you have questions I'm here to answer!
Last edited by the thing; Dec 14, 2014 at 07:09 PM.
Thread Starter
Full Member
Joined: May 2013
Posts: 62
Likes: 9
From: Florence, Italy
best way forwards form here ( regarding lack of stock parts to draw parts from )
would be to remove the aux sleeves and buy a weber ( 48 IDA ) manifold that will suit the 6 port
and then go for one of the empi or old car co reproduction weber 48 IDA carbs
( check prices both australia and US )
it may take a little mucking with the fuel and air jets to settle down
( if you dont you end up with a sneeze as it jumps between low and high speed circuits, but free of most of the other holley carb vices )
but they do produce excellent results for top end power
about 160-180 rwhp is not unreasonable from a 6 port engine given long extractors and free flowing exhaust
i am assuming the vehicle already runs electronic ignition , and if it is all good, leave it
if there are faulty parts in the ignition, replace them with bosch HEI components and a DLIDIFS setup
PS.. you have the breathers for the inlet manifold OMP oilers blanked over
these should be drawing from purge air ( bit hard on a carb without vac nipples )
best bet is to steal the little breathers off the solenoids on the old rats nest, and place them on top of the OMP oilers so they can still "breathe" and allow the check valves to operate
would be to remove the aux sleeves and buy a weber ( 48 IDA ) manifold that will suit the 6 port
and then go for one of the empi or old car co reproduction weber 48 IDA carbs
( check prices both australia and US )
it may take a little mucking with the fuel and air jets to settle down
( if you dont you end up with a sneeze as it jumps between low and high speed circuits, but free of most of the other holley carb vices )
but they do produce excellent results for top end power
about 160-180 rwhp is not unreasonable from a 6 port engine given long extractors and free flowing exhaust
i am assuming the vehicle already runs electronic ignition , and if it is all good, leave it
if there are faulty parts in the ignition, replace them with bosch HEI components and a DLIDIFS setup
PS.. you have the breathers for the inlet manifold OMP oilers blanked over
these should be drawing from purge air ( bit hard on a carb without vac nipples )
best bet is to steal the little breathers off the solenoids on the old rats nest, and place them on top of the OMP oilers so they can still "breathe" and allow the check valves to operate
You'll see as I continue to tell the story, but to make a short answer, I kept the holley because I did find a way to set up the carb (after a lot of reading) and the weber was too expensive given that I already have everything I need to make it work well.. I mean, the holley has more problems (mainly because of the low air-speed ) but it's not bad.. About the OMP, you'll see what I did, it's something I never saw on the internet and I think it's a good compromise.
About the ignition, yes, in the end I did a DLIDIFS setup: also a good compromise that also matched the style I wanted for the restoration: I didn't want to use technology that wasn't available at the time of the car's era.
Thread Starter
Full Member
Joined: May 2013
Posts: 62
Likes: 9
From: Florence, Italy
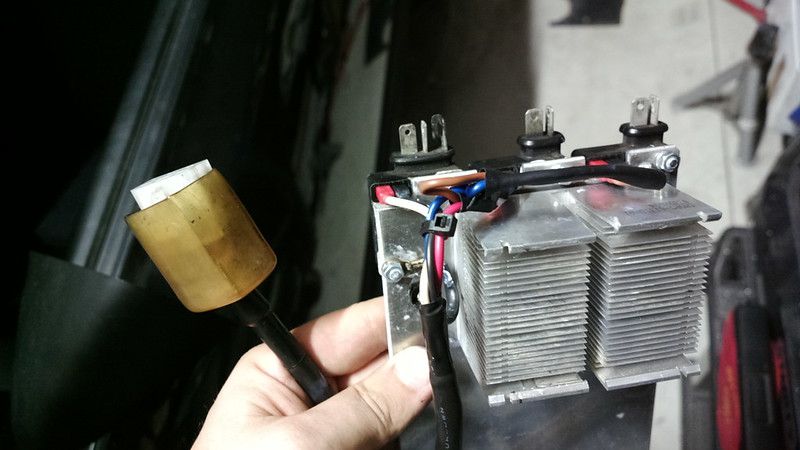
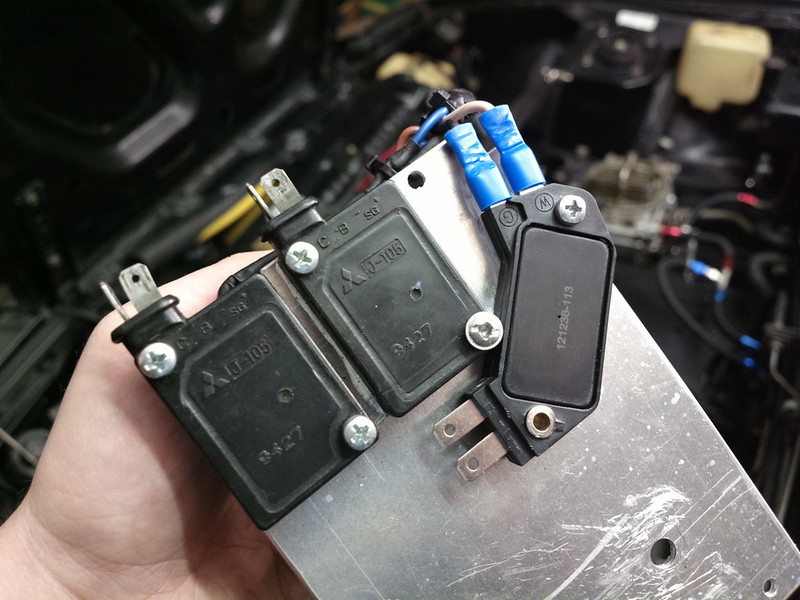
At the same time of all that I ALSO started to work on the electrical system, and the DLIDIFS:
As I said, I didn't want to mod the car with too recent technology, so I tried a setup with j-109s and a 105
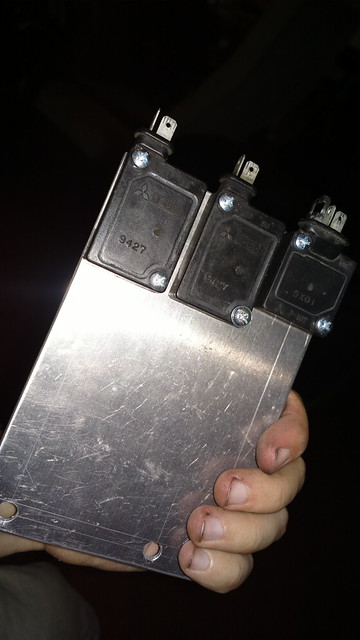
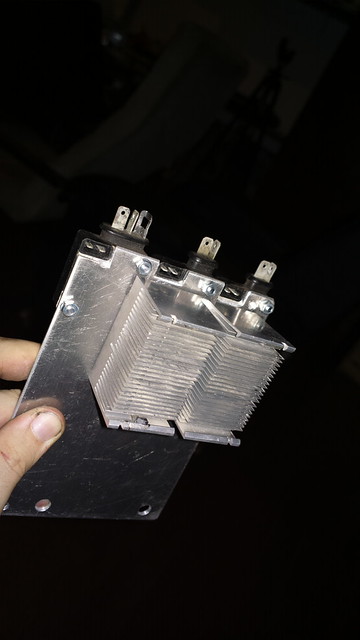
with a CPU cooler on the back from some old computer.
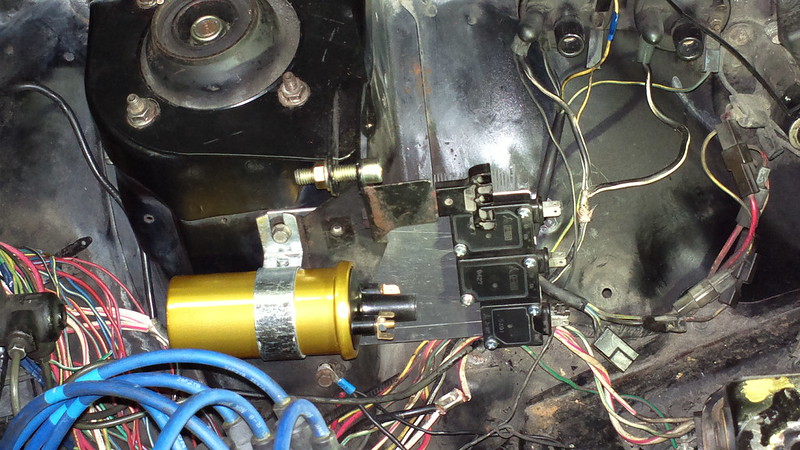
Stock coils plus a Bosch one
here is the custom harness:
But even with all that done I couldn't start the car for many more weeks because I was waiting for other carb parts, so I continued with the electrical system.
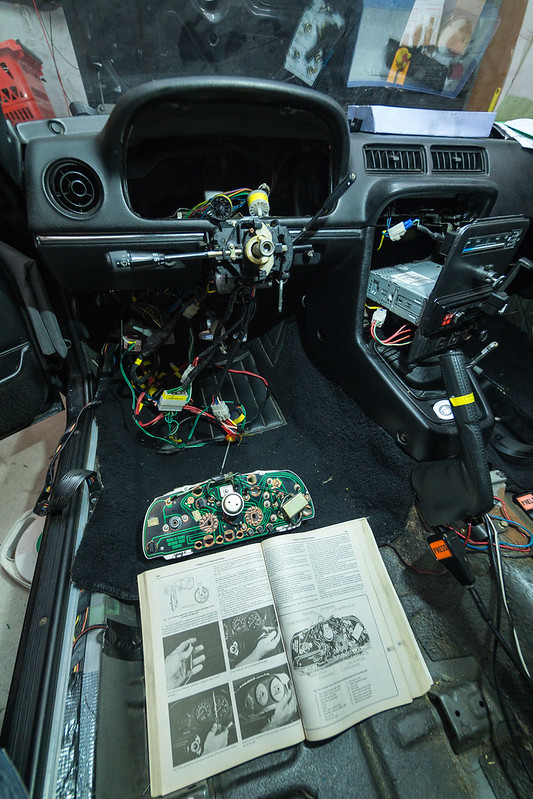
This car had the original electric system, combined with the one from the gsl-se, combined with many "custom" modifications (...) so, being my first S1 rx7 I basically went crazy trying to decipher the true electrical diagram using the Haynes manual: I started following every wire to see the matching on the book, and almost NOTHING matched. it was INSANE.
but at that time I couldn't even imagine the size of the work I had ahead..
Still during vacation, I started to work on the parts that I took off from the car:
Here is the original, broken, center console
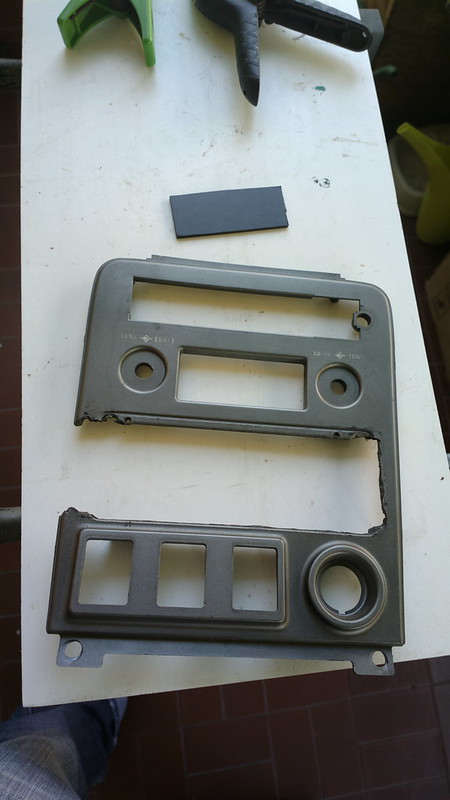
Using patches of PVC, resin, carbon fiber and filler, I managed to do this:
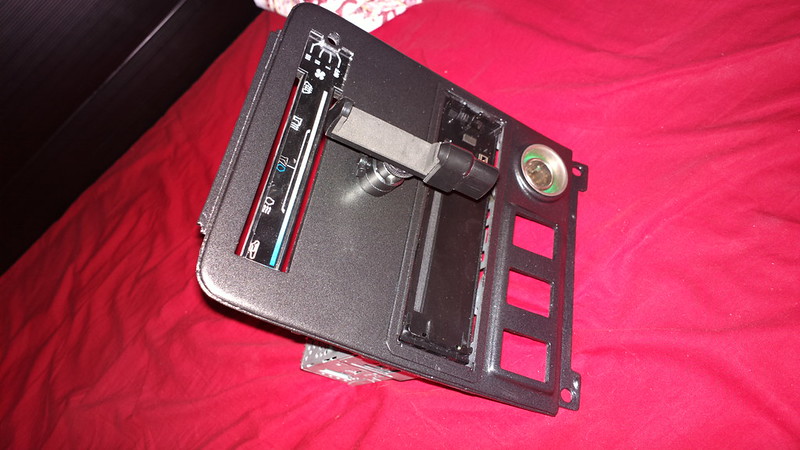
I know, the smartphone holder is ugly, but what can I do, I need it for navigation.
Then it was the strut bar's turn; i wrapped it in unidirectional carbon fiber(after studying the shape and the applied force I realized it was the solution with the most stiffness) and then a final layer of carbon mesh to compress everything and giving a more pleasing look:
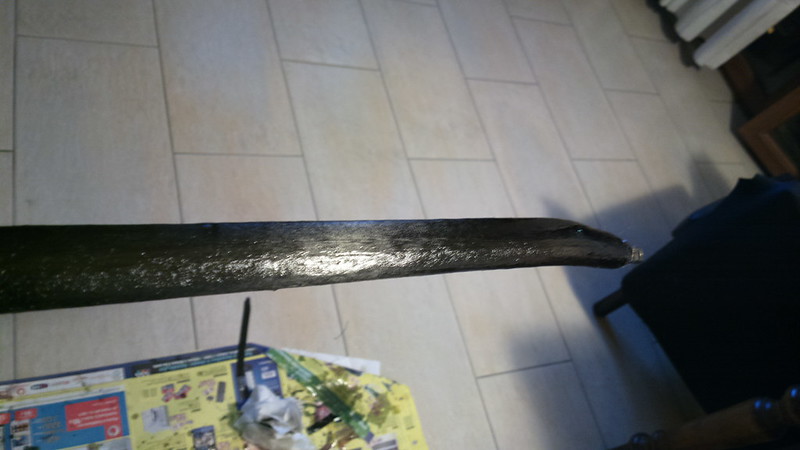
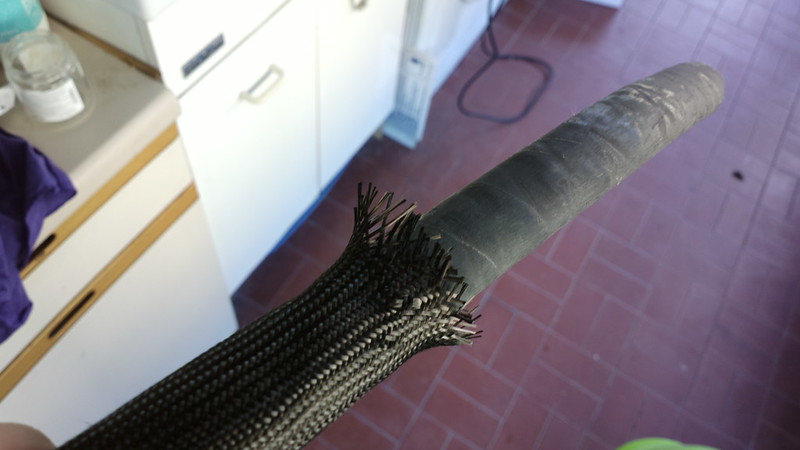
Unfortunately I now realized I never took a picture of the finished bar, but you can see it later together with the finished engine bay. I didn't give it a clear coat on top so it looks raw and not very smooth (almost like a big snake) but it's not bad and probably the single most rigid strut bar on the planet.
[CONTINUES]
As I said, I didn't want to mod the car with too recent technology, so I tried a setup with j-109s and a 105
with a CPU cooler on the back from some old computer.
Stock coils plus a Bosch one
here is the custom harness:
But even with all that done I couldn't start the car for many more weeks because I was waiting for other carb parts, so I continued with the electrical system.
This car had the original electric system, combined with the one from the gsl-se, combined with many "custom" modifications (...) so, being my first S1 rx7 I basically went crazy trying to decipher the true electrical diagram using the Haynes manual: I started following every wire to see the matching on the book, and almost NOTHING matched. it was INSANE.
but at that time I couldn't even imagine the size of the work I had ahead..
Still during vacation, I started to work on the parts that I took off from the car:
Here is the original, broken, center console
Using patches of PVC, resin, carbon fiber and filler, I managed to do this:
I know, the smartphone holder is ugly, but what can I do, I need it for navigation.
Then it was the strut bar's turn; i wrapped it in unidirectional carbon fiber(after studying the shape and the applied force I realized it was the solution with the most stiffness) and then a final layer of carbon mesh to compress everything and giving a more pleasing look:
Unfortunately I now realized I never took a picture of the finished bar, but you can see it later together with the finished engine bay. I didn't give it a clear coat on top so it looks raw and not very smooth (almost like a big snake) but it's not bad and probably the single most rigid strut bar on the planet.
[CONTINUES]
Thread Starter
Full Member
Joined: May 2013
Posts: 62
Likes: 9
From: Florence, Italy
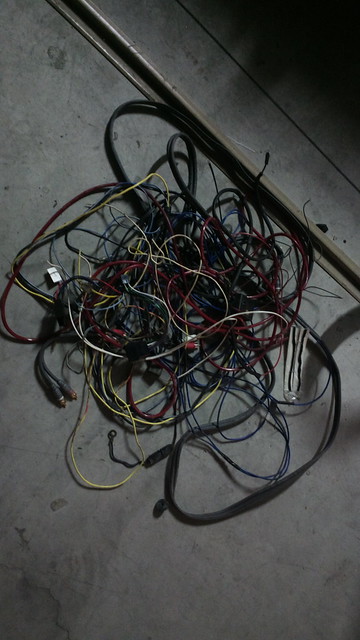
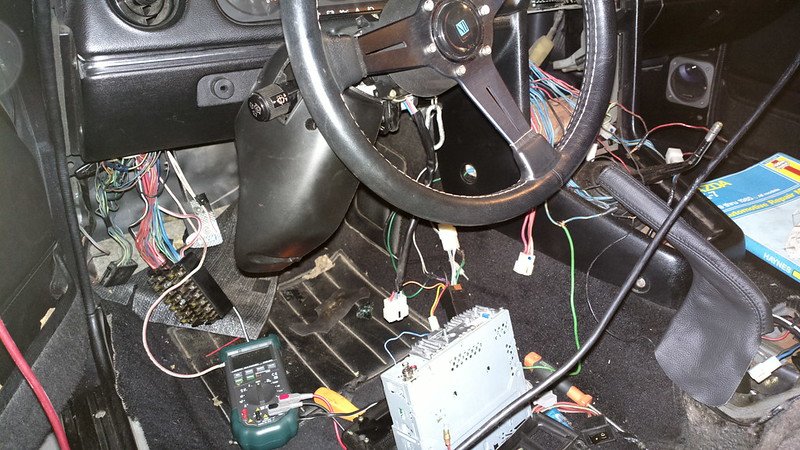
I continued with the wires trying to make sense of the electrical diagram and delete every wire that the car didn't need anymore. On the left is the removed electrical tape, on the right some of the wires.
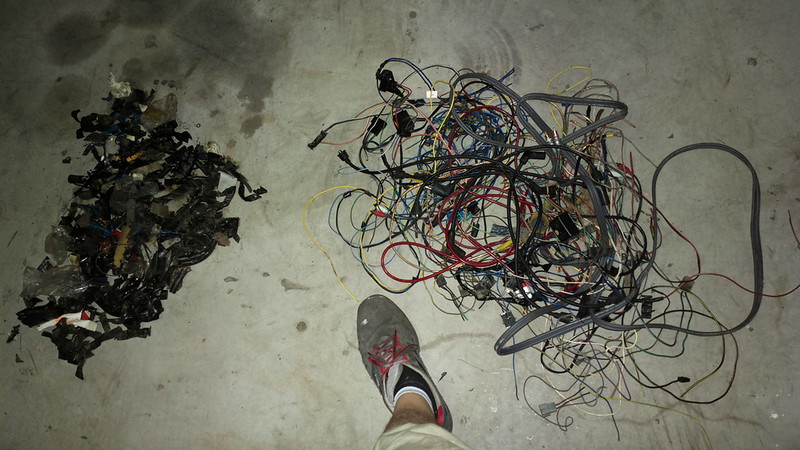
This was the mess I came to every evening after work: a pile of old wires. My back and my neck were killing me with pain, but i HAD to sort it out!
...so I bought a label printer, and started labeling everything:
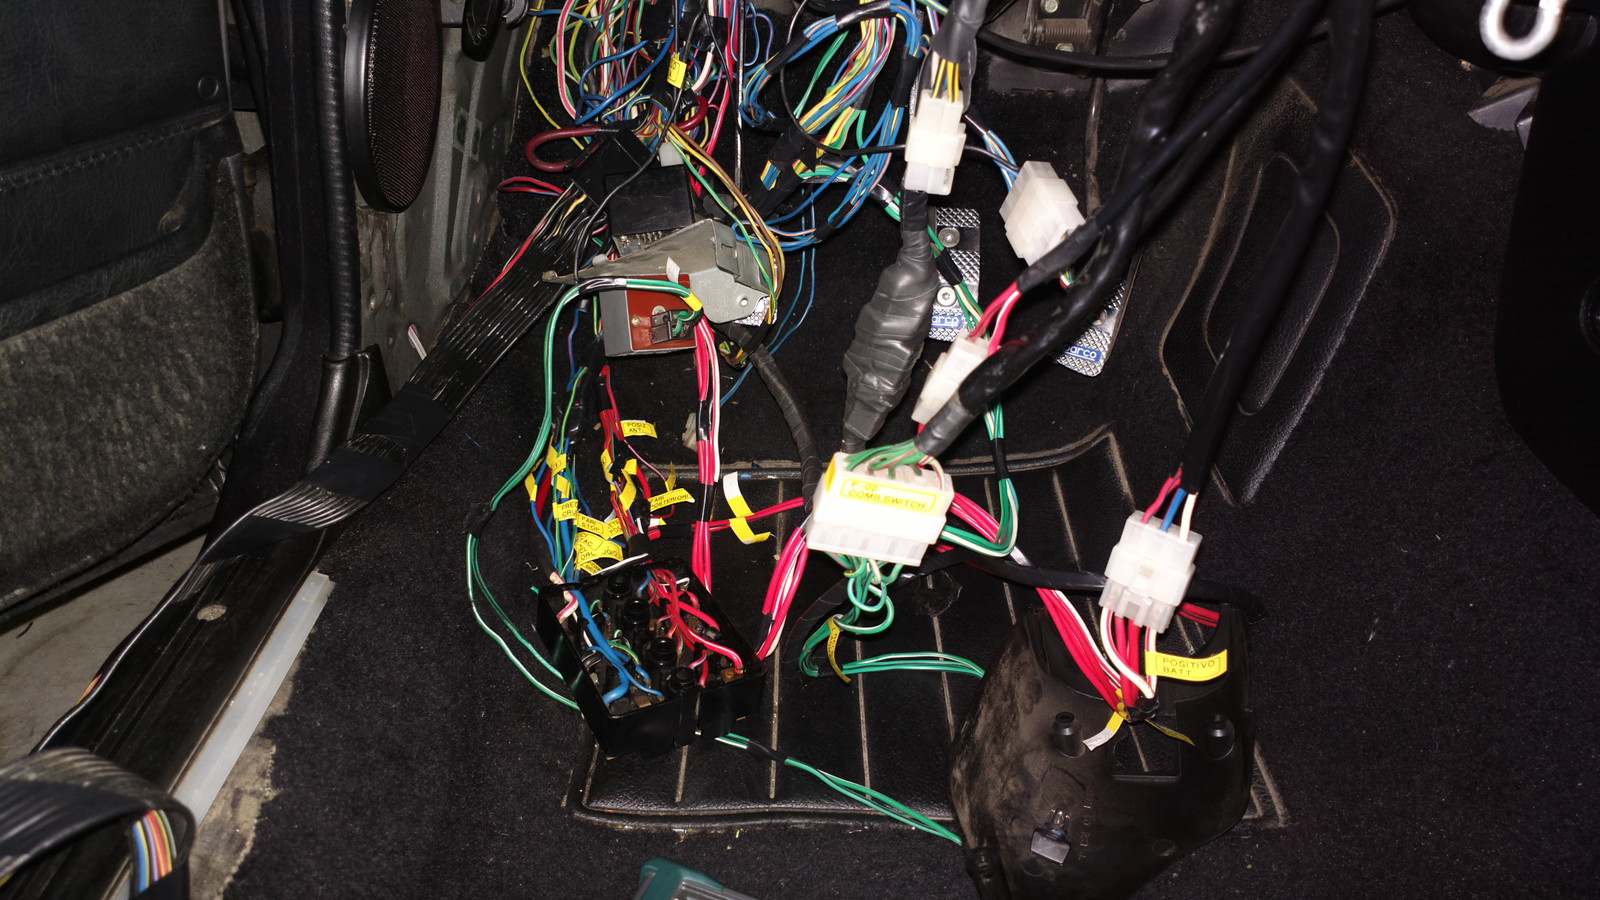
As you can see, it started to go in the right direction.
Remember when i said I wanted to stay period-correct? well, forget that, because there was one thing I wanted to try: LED lights on a vintage car. I think they look good if done right and most of all I liked the instantaneous blink of the brake and turning signal.
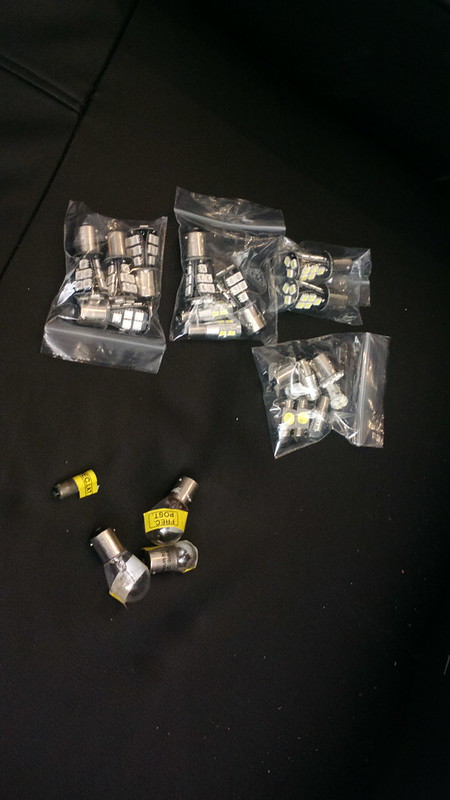
I converted ALL the lights in the car (dashboard and everything..) with LEDs
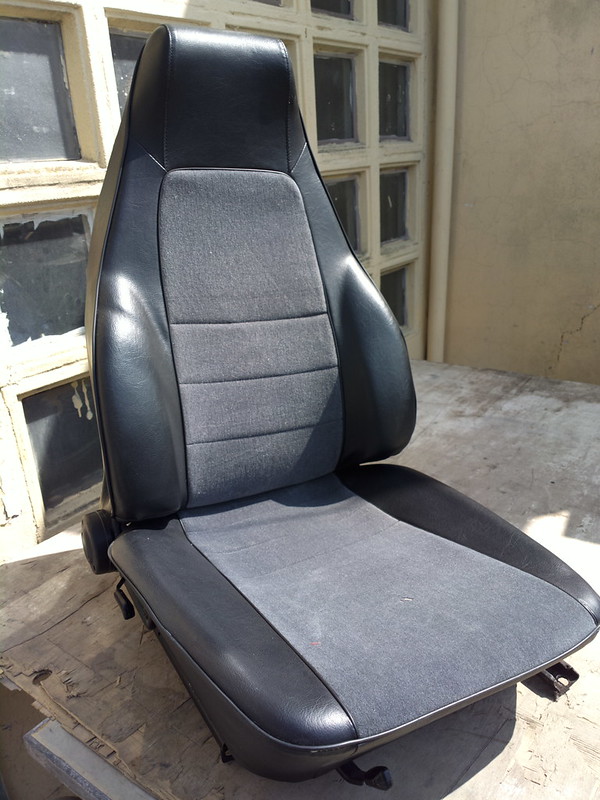
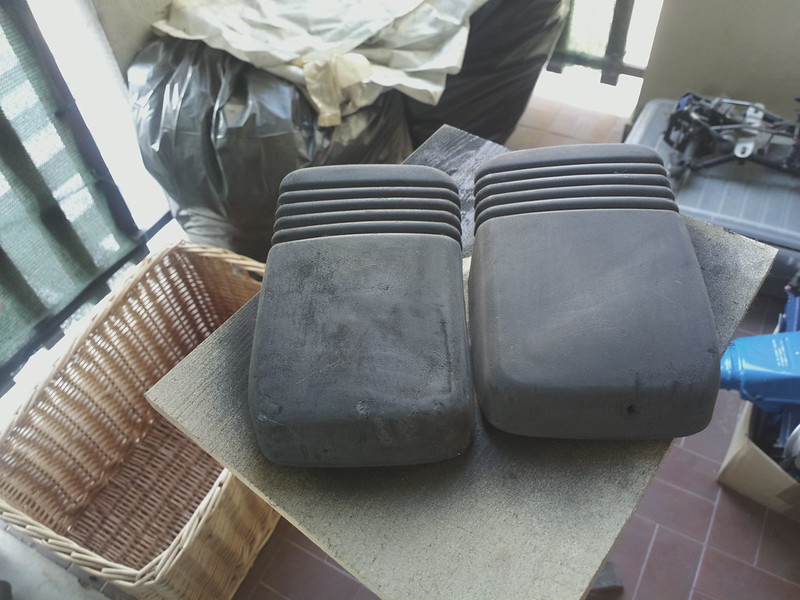
While I was working in the interior of the car I removed the seats to make room, so instead of having them always in the way, I sent them to wash:
this is after:
Meanwhile some hoses arrived in the mail:
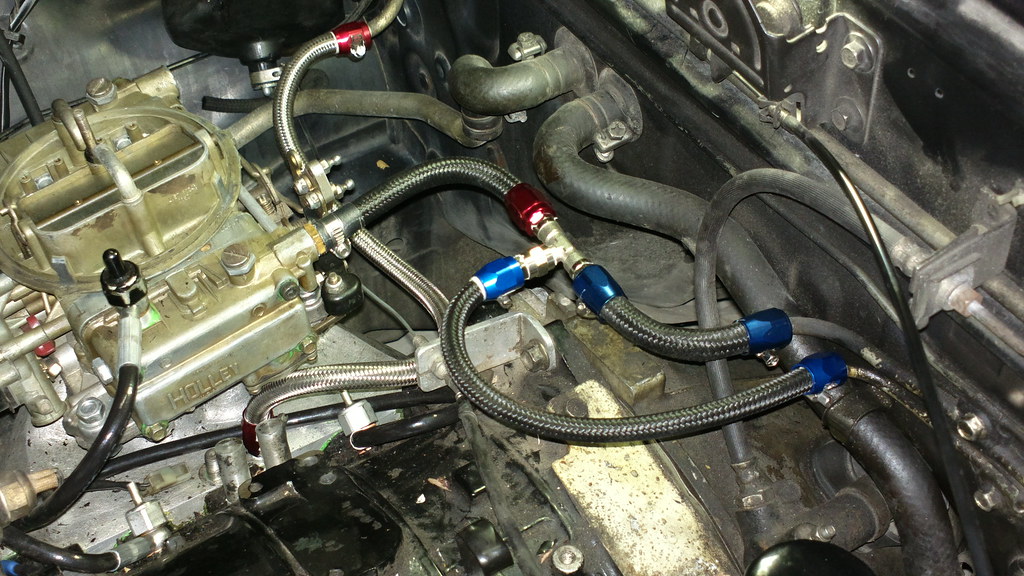
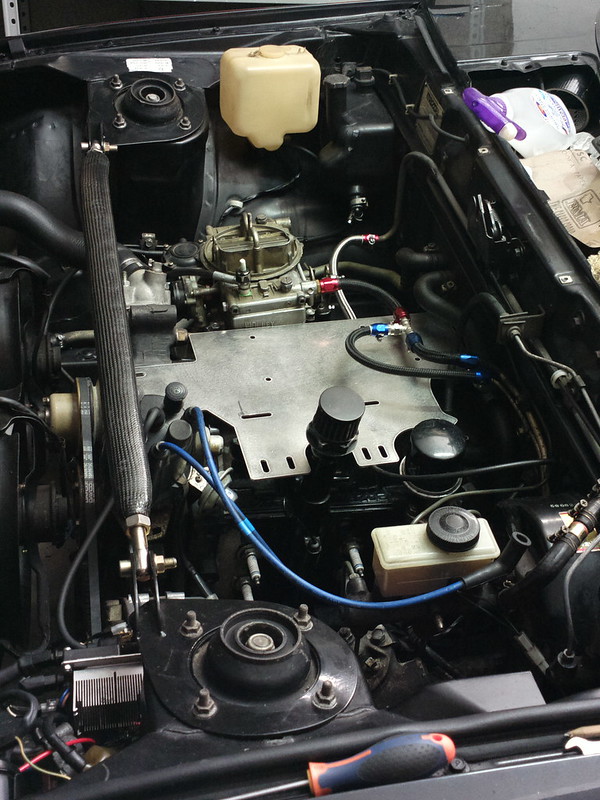
You can see not only the braided hoses, but also the hybrid OMP: one injector directly in the primary bowl of the carb, and two on the rotor housings (the fourth one is blocked)
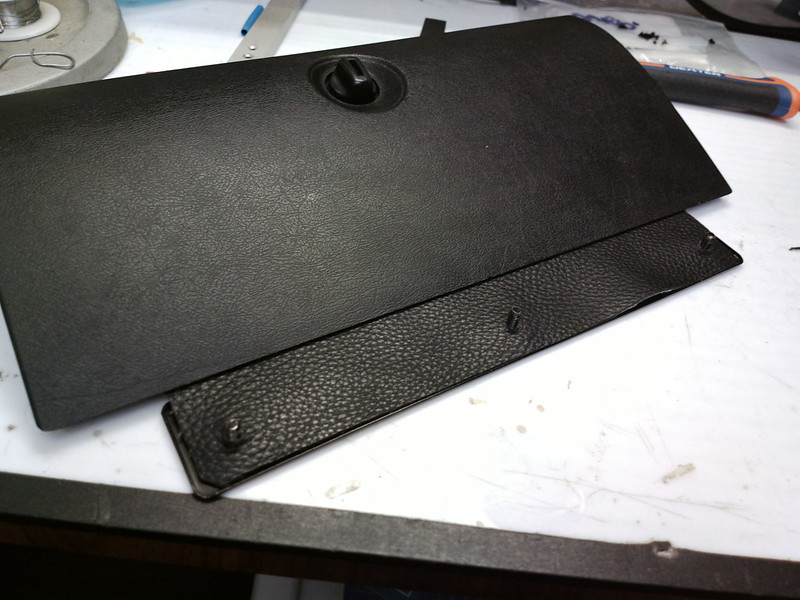
Having so few things to do at the same time, I managed to work on some other secondary things, like repairing the stupid glove box using some thick fake leather I had (I don't know why they didn't use normal hinges..)
And also did this (!)
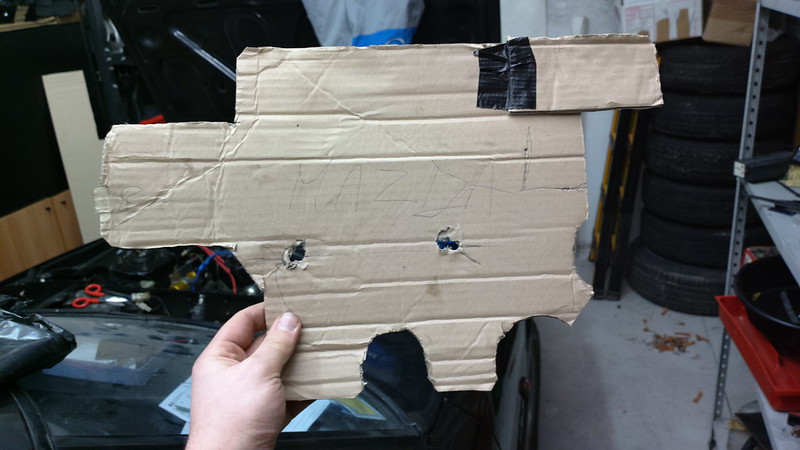
..which became this:
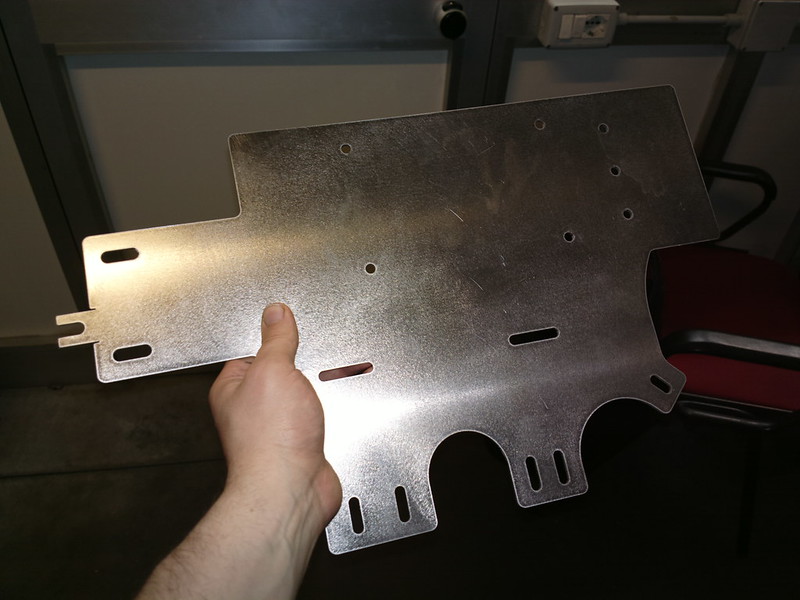
...which then became this:
(but in this picture was still not properly mounted)
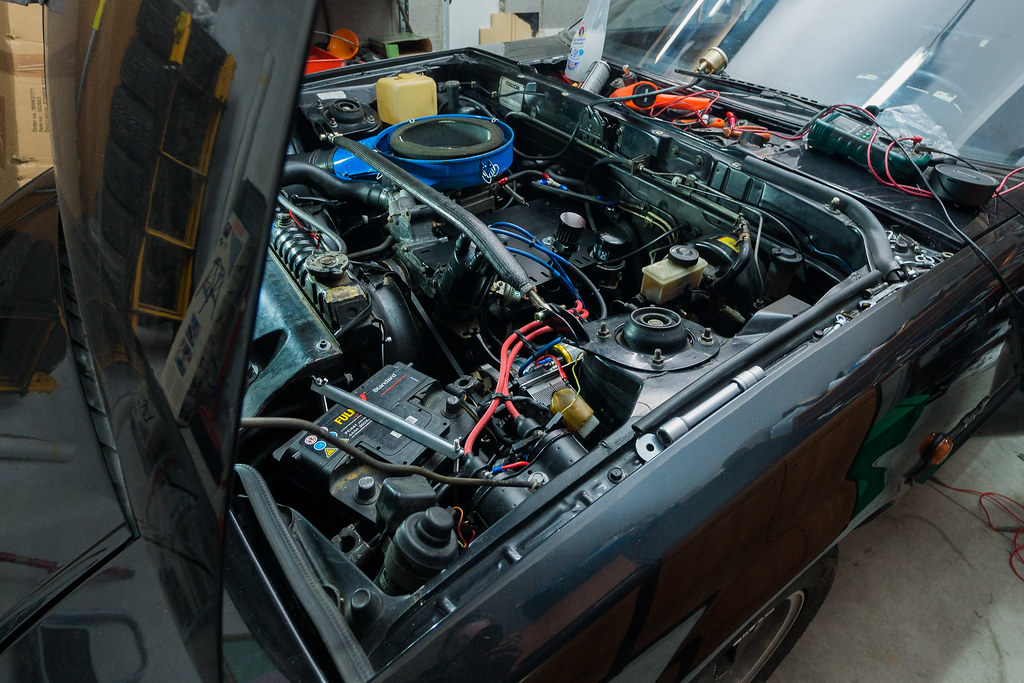
Don't ask me why I did it, ok? I thought it looked cool. I wanted a clean look and that helped a lot to give the right feeling to the engine bay, Also the holes are useful to fix any future component to the engine.
(btw, It's laser cutted from a CAD file. Tell me if you need the drawing )
)
In the picture you can also see:
-the side-mounted alternator
-the finished carbon fiber strut bar
-the MR2 electric fans mounted
-the OMP tank mounted
-the modified oil cap with the breather
-engine bay cleaned with oven cleaner (it does MIRACLES)
-the ignitor plate with CPU cooler mounted on the strut
[CONTINUES]
This was the mess I came to every evening after work: a pile of old wires. My back and my neck were killing me with pain, but i HAD to sort it out!
...so I bought a label printer, and started labeling everything:
As you can see, it started to go in the right direction.
Remember when i said I wanted to stay period-correct? well, forget that, because there was one thing I wanted to try: LED lights on a vintage car. I think they look good if done right and most of all I liked the instantaneous blink of the brake and turning signal.
I converted ALL the lights in the car (dashboard and everything..) with LEDs
While I was working in the interior of the car I removed the seats to make room, so instead of having them always in the way, I sent them to wash:
this is after:
Meanwhile some hoses arrived in the mail:
You can see not only the braided hoses, but also the hybrid OMP: one injector directly in the primary bowl of the carb, and two on the rotor housings (the fourth one is blocked)
Having so few things to do at the same time, I managed to work on some other secondary things, like repairing the stupid glove box using some thick fake leather I had (I don't know why they didn't use normal hinges..)
And also did this (!)
..which became this:
...which then became this:
(but in this picture was still not properly mounted)
Don't ask me why I did it, ok? I thought it looked cool.
I wanted a clean look and that helped a lot to give the right feeling to the engine bay, Also the holes are useful to fix any future component to the engine.(btw, It's laser cutted from a CAD file. Tell me if you need the drawing
)In the picture you can also see:
-the side-mounted alternator
-the finished carbon fiber strut bar
-the MR2 electric fans mounted
-the OMP tank mounted
-the modified oil cap with the breather
-engine bay cleaned with oven cleaner (it does MIRACLES)
-the ignitor plate with CPU cooler mounted on the strut
[CONTINUES]
Last edited by the thing; Dec 15, 2014 at 02:26 PM.
Trending Topics
Thread Starter
Full Member
Joined: May 2013
Posts: 62
Likes: 9
From: Florence, Italy
then new springs arrived: cheap ones from Germany. This was only because the previous owner mounted lowered RB springs on the rear but didn't change the front ones (he was afraid about the heavier engine), so I really needed only the front ones to level the car.
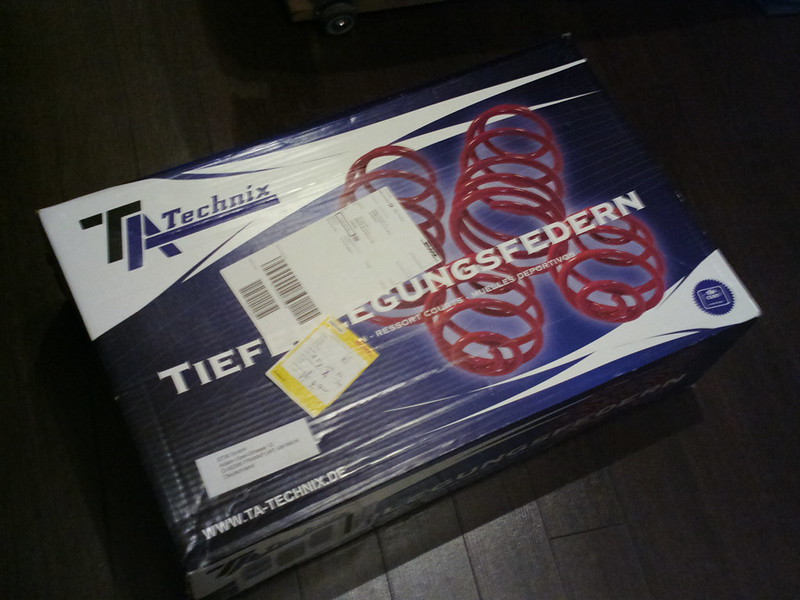
By the way, the dampers were already changed with KYB ones.
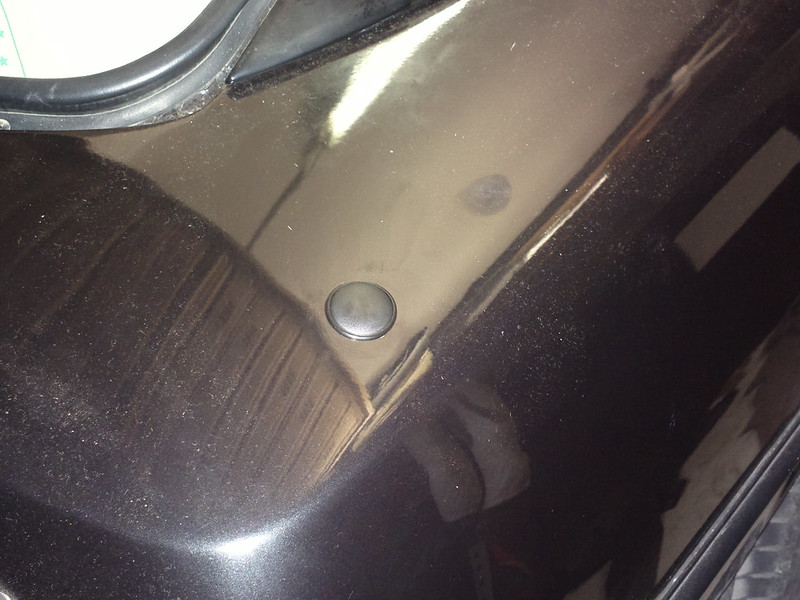
I hate radio. I can't stand it, so when it came to decide about the antenna it was a no brainer: I simply removed it and covered the hole with a plastic cap.
Then I bought some cleaning products:
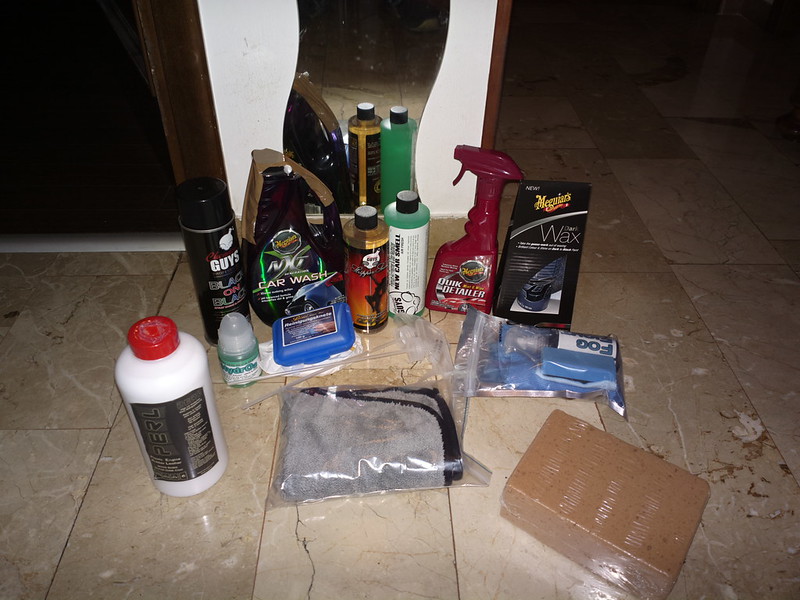
some of them, like the perfumes were only for the curiosity...
I couldn't find any cool pedals for the car instead of those ugly ones that the previous owner mounted, so I made them using coarse heavy duty sandpaper:
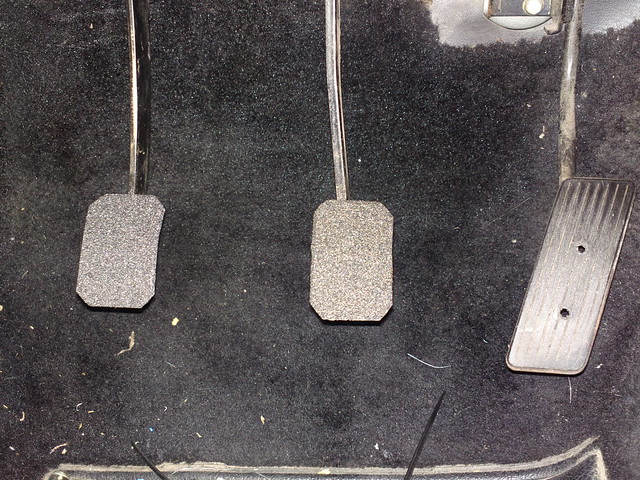
They look very DIY from closeup, but at normal distance you can't even notice them, and also they are far more grippy than any aftermarket ones.
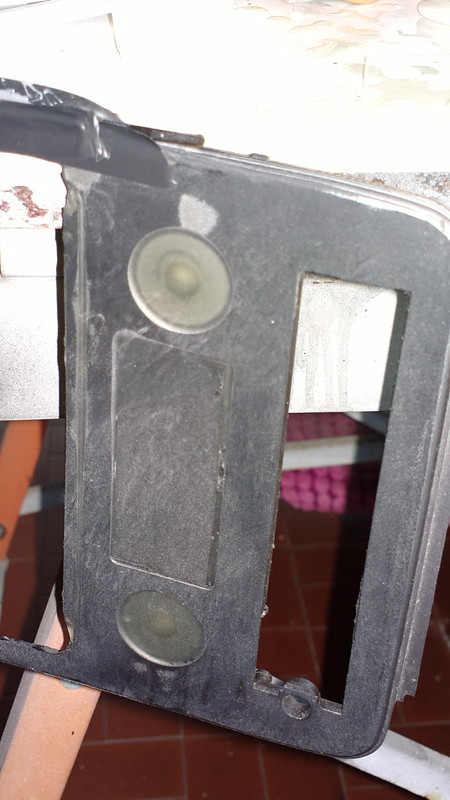
I started to try some of the cleaning products and also the various plastic dressers to see what's the best technique. This I believe it was the first try, using 25% PERL, but I'm not sure.
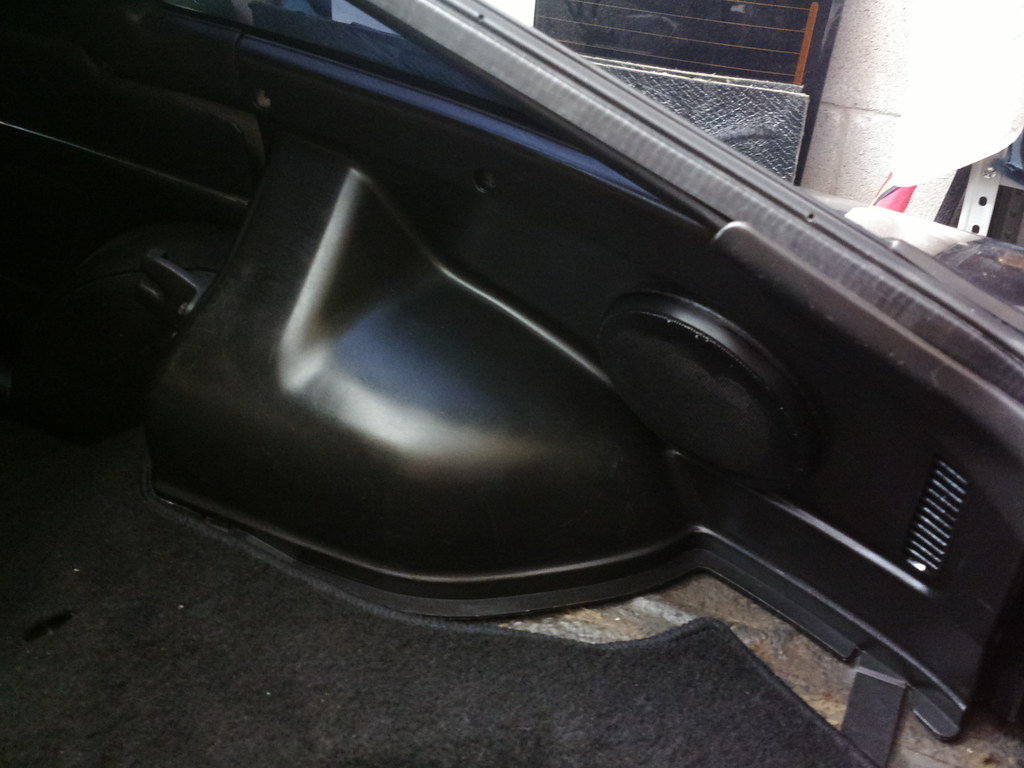
You can see the speaker grille, I adapted it because the previous owner had the wonderful idea to mount huge JBL speakers, DIRECTLY on the plastic thing, and not on the chassis under it, also cutting a huge hole in place of the original grille. That was my attempt to cover the holes (and of course now the rear speaker are mounted on the proper chassis).
While doing this I managed to make the car drivable, to test the ignition, fuel, etc..
The first thing I did was to understand the difference between ignitors (I was having problems with the mod) using a portable scope:
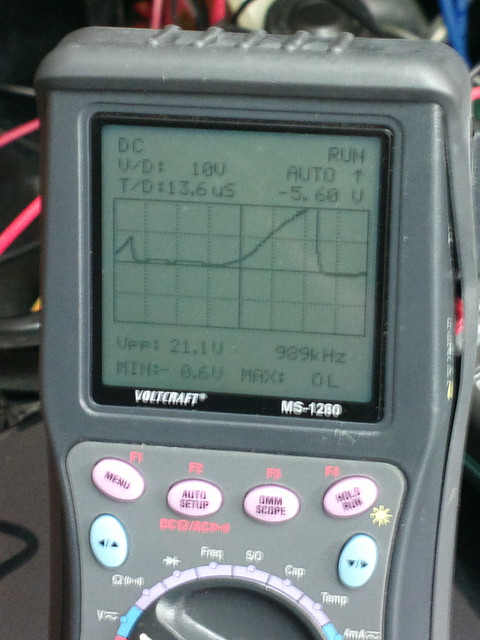
(this should be the signal coming from the pickup in the distributor, if I remember correctly)
My conclusion was to throw away the j-109 ignitors in favor of some serious ones.
The car at that point had all sorts of problems related to my mods so I was a bit depressed, but then it was mostly an intake leak fault (lean mixture, glowing headers after few minutes at idle, huge explosions from the exhaust, leaking fuel, boiling water... everything..)
The car also had an internal water leak that I manage to stop, but at that point I was so concerned with ignition, fuel, OMP, interiors.. that I didn't check the oil from the day I bought the car (not the level, I mean the quality of the oil), so, during one of these first drives with the new ignition, 6 ports, new carb tune,I was driving basically with MUD instead of oil in the cranckcase, but I didn't find out until much later.
One day the car started to lose power and then stopped. after many tries I managed to start again but I really struggled to return home, at like 10 mph, with huge bangs from the exhaust, but was solved with the new ignitor, the J109 was dead:
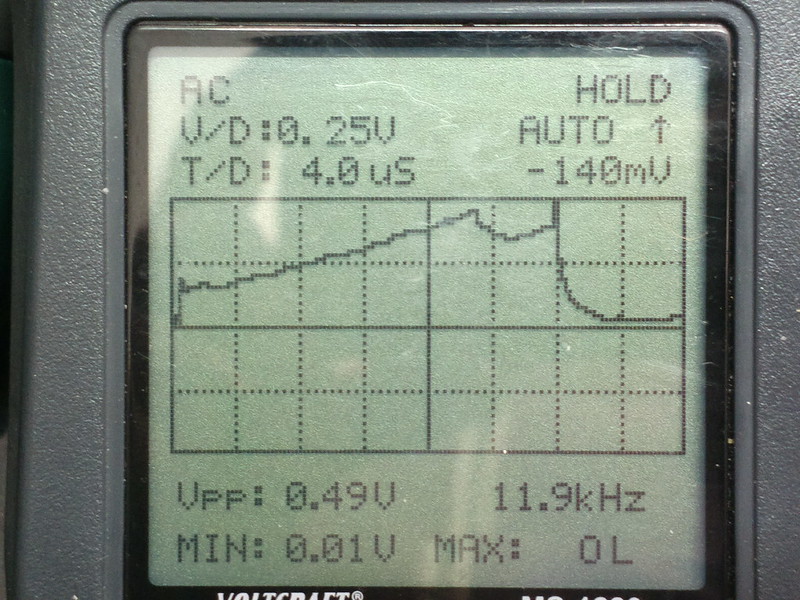
(If I remember this should be the wave coming out of the ignitor)
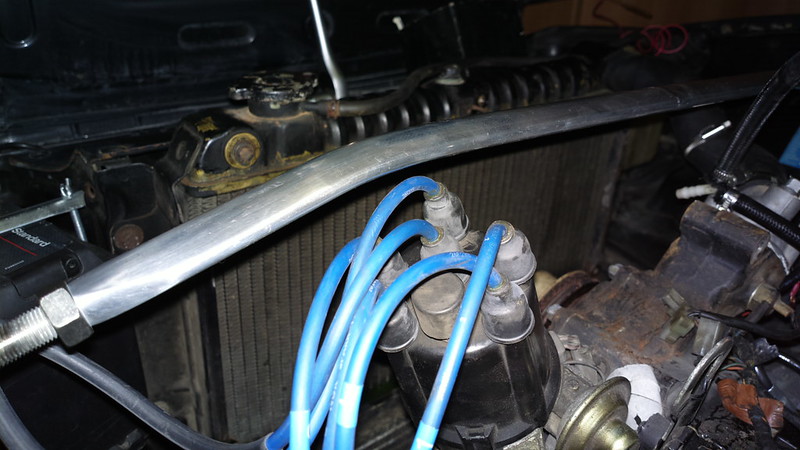
Here I was trying the carb without the spacer, because i wanted to actually fit the mazda air filter under the bar, but of course it was impossible to level the bowls, so the car was not very drivable:
you can also see the top plate now black powder coated and some minor improvements.
now some bonus pictures:
[CONTINUES]
By the way, the dampers were already changed with KYB ones.
I hate radio. I can't stand it, so when it came to decide about the antenna it was a no brainer: I simply removed it and covered the hole with a plastic cap.
Then I bought some cleaning products:
some of them, like the perfumes were only for the curiosity...
I couldn't find any cool pedals for the car instead of those ugly ones that the previous owner mounted, so I made them using coarse heavy duty sandpaper:
They look very DIY from closeup, but at normal distance you can't even notice them, and also they are far more grippy than any aftermarket ones.
I started to try some of the cleaning products and also the various plastic dressers to see what's the best technique. This I believe it was the first try, using 25% PERL, but I'm not sure.
You can see the speaker grille, I adapted it because the previous owner had the wonderful idea to mount huge JBL speakers, DIRECTLY on the plastic thing, and not on the chassis under it, also cutting a huge hole in place of the original grille. That was my attempt to cover the holes (and of course now the rear speaker are mounted on the proper chassis).
While doing this I managed to make the car drivable, to test the ignition, fuel, etc..
The first thing I did was to understand the difference between ignitors (I was having problems with the mod) using a portable scope:
(this should be the signal coming from the pickup in the distributor, if I remember correctly)
My conclusion was to throw away the j-109 ignitors in favor of some serious ones.
The car at that point had all sorts of problems related to my mods so I was a bit depressed, but then it was mostly an intake leak fault (lean mixture, glowing headers after few minutes at idle, huge explosions from the exhaust, leaking fuel, boiling water... everything..)
The car also had an internal water leak that I manage to stop, but at that point I was so concerned with ignition, fuel, OMP, interiors.. that I didn't check the oil from the day I bought the car (not the level, I mean the quality of the oil), so, during one of these first drives with the new ignition, 6 ports, new carb tune,I was driving basically with MUD instead of oil in the cranckcase, but I didn't find out until much later.
One day the car started to lose power and then stopped. after many tries I managed to start again but I really struggled to return home, at like 10 mph, with huge bangs from the exhaust, but was solved with the new ignitor, the J109 was dead:
(If I remember this should be the wave coming out of the ignitor)
Here I was trying the carb without the spacer, because i wanted to actually fit the mazda air filter under the bar, but of course it was impossible to level the bowls, so the car was not very drivable:
you can also see the top plate now black powder coated and some minor improvements.
now some bonus pictures:
[CONTINUES]
Last edited by the thing; Dec 15, 2014 at 04:01 PM.
Thread Starter
Full Member
Joined: May 2013
Posts: 62
Likes: 9
From: Florence, Italy
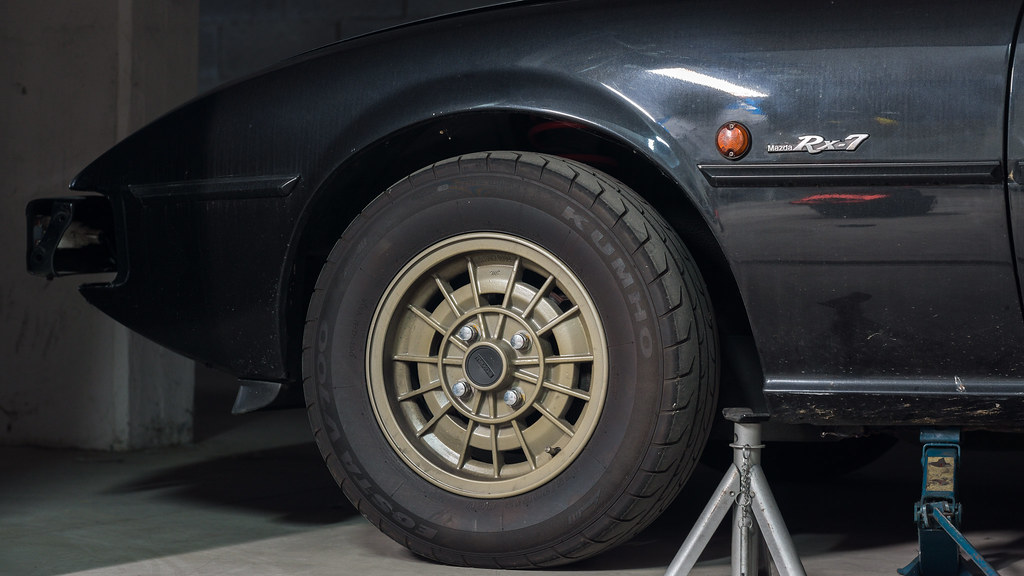
Then these came in the mail:

Can you believe Kumho makes these in the original stock size for the RX7? I just HAD to buy them.
I dunno about you but here in italy you can't even THINK to find 4x110 rims around, it simply impossible. so I did the best I could do with what I had and call it a day.
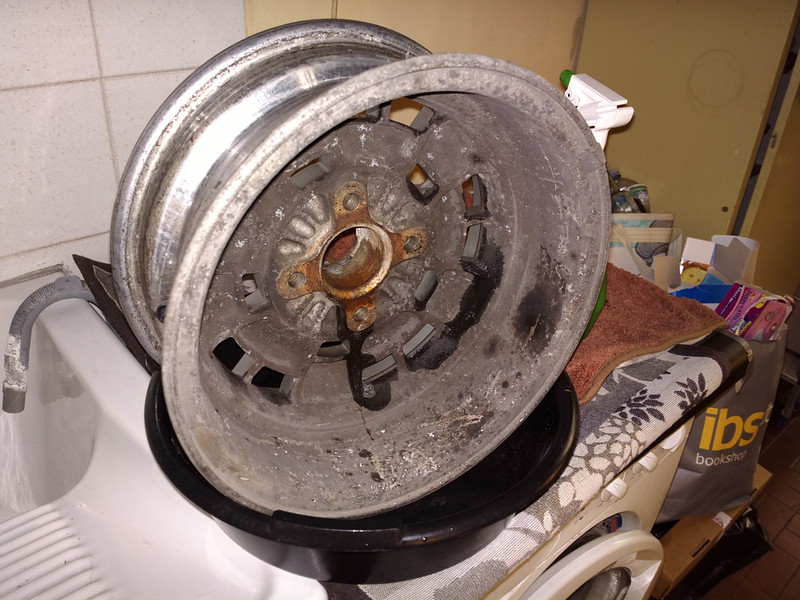
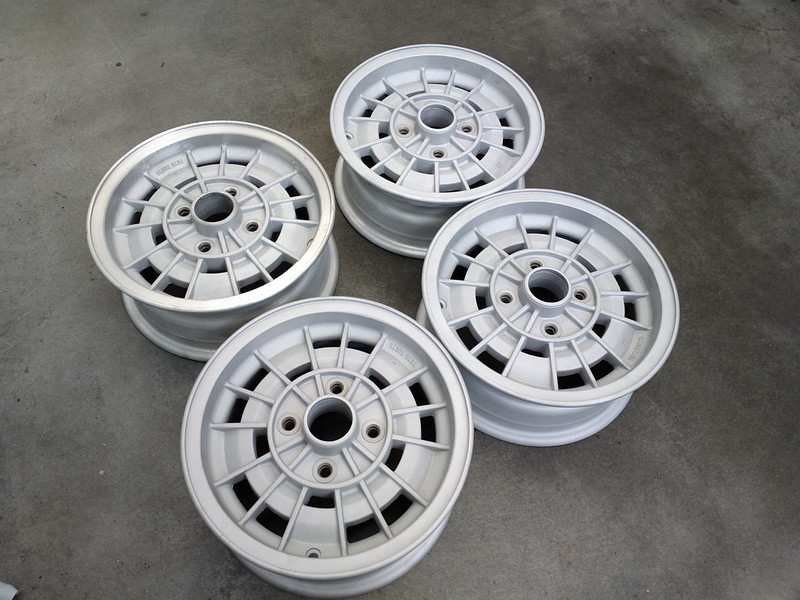
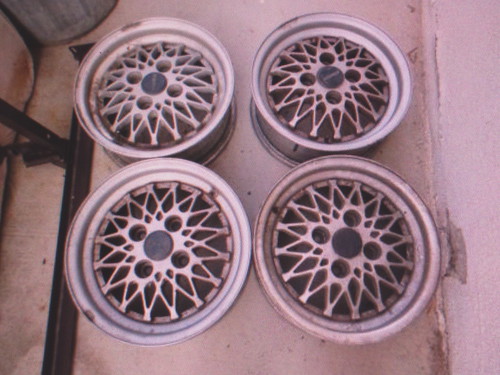
these waffles were the candidates for the tyres.
At first look they seems good, but they were re-painted over oxidized bare aluminium, and only on the outside face...
This was the inside...
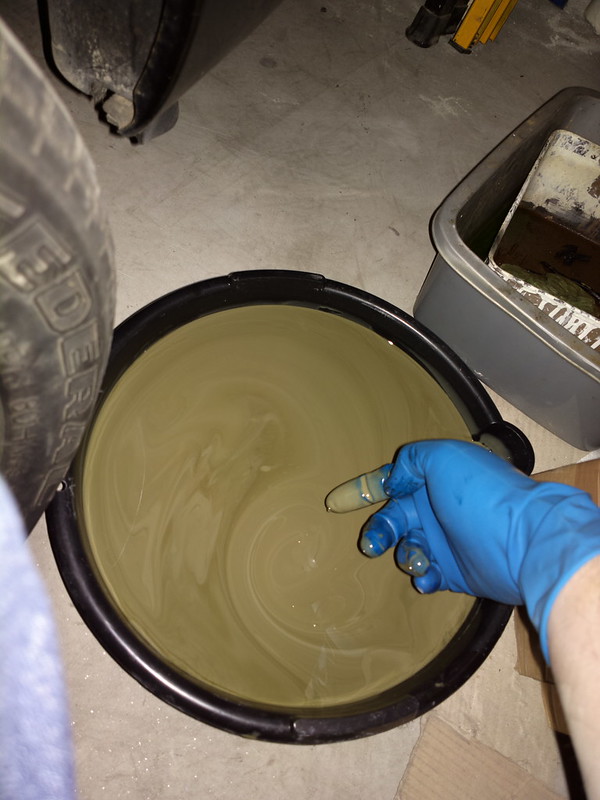
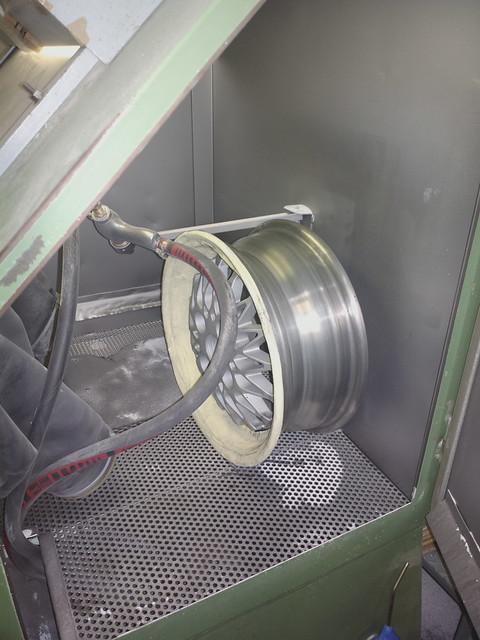
so i started a treatment with oxalic acid:
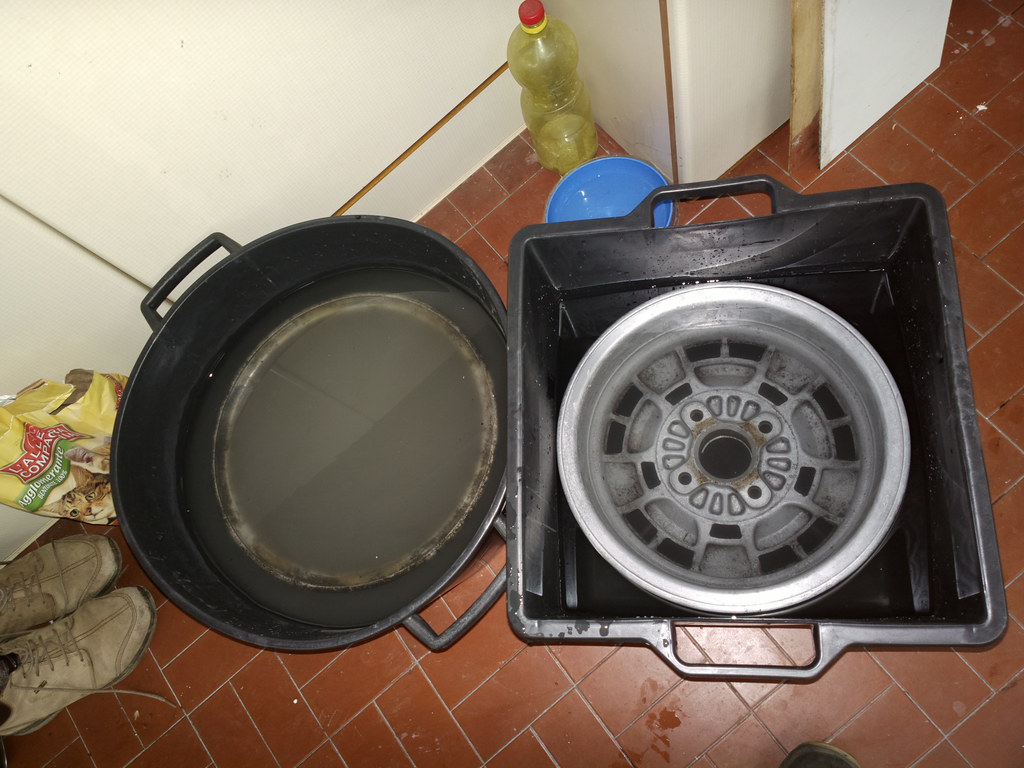
dirt wheel in the acid on the left, treated wheel in basic water after acid on the right.
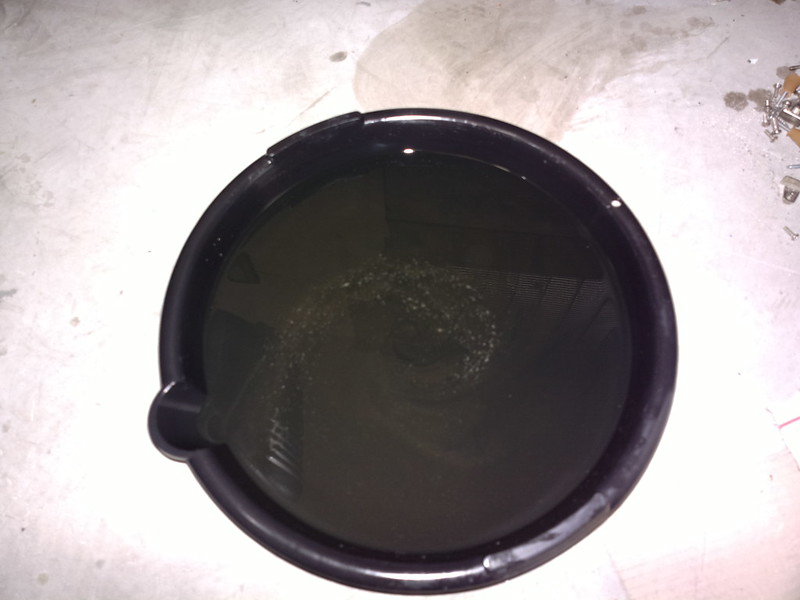
Pretty good indeed.
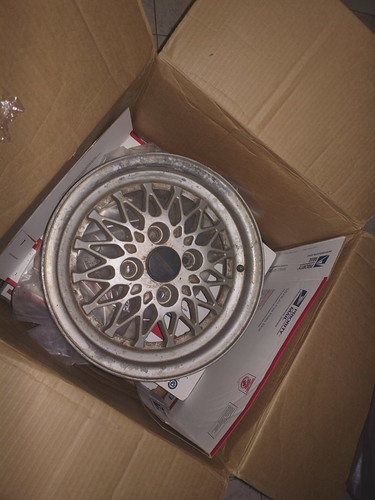
then I used paint stripper for the painted faces, but it wasn't enough and I was working too much to clean them, so I sandblasted them:
and waited to find someone who could powdercoat them.
In the meantime, driving the car, trying to tune the carb, it started to boil. remember when I said I never saw the oil before? now I was seeing brown water coming out of the boiling reservoir.. I thought immediately of some blown gasket, so I emptied the oil from the engine and THIS came out:
Long story short, nothing happened: the brown water was rust in the radiator, and the brown oil was from the internal water leak it had before (and now didn't). So after some time with new (and this time synthetic, since I have the separate OMP) oil, this was the result:
So fortunately it was a false alarm caused by my negligence.
But in the end I STILL didn't managed to make it run really properly: I blamed the holley like everyone does, but at that time I still didn't have time to really tune the carb from the ground up, only changing a couple of jets, tuning the air screws and changing the cam...
So, after few hours of videos, and few days reading on the internet, I bought a full rebuild kit for the carb to do it seriously once for all.
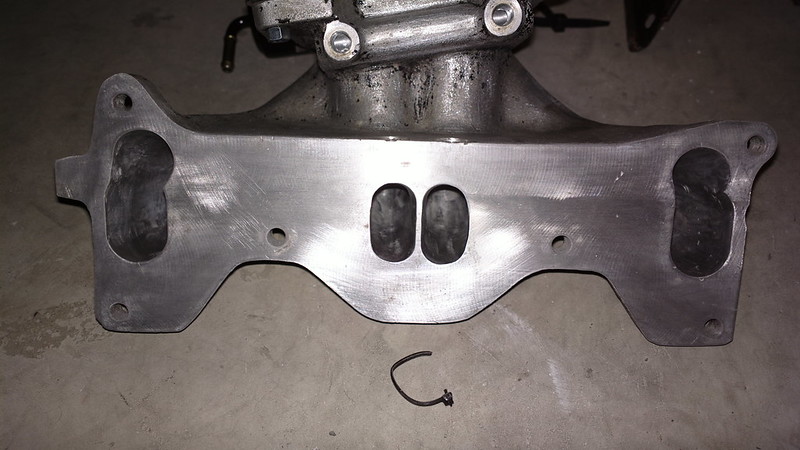
I also figured that it probably still leaked air in the manifold somehow, and I blamed the damned ports that the gsl-se engine has on the central plate, from the exhaust to the intake manifold, the ones for the emission control, so I stared to double seal everything, with the best gaskets possible, also shielding heat to prevent gaskets to burn, and while I was there, I finished my work on the intake manifold:
and "shielded"
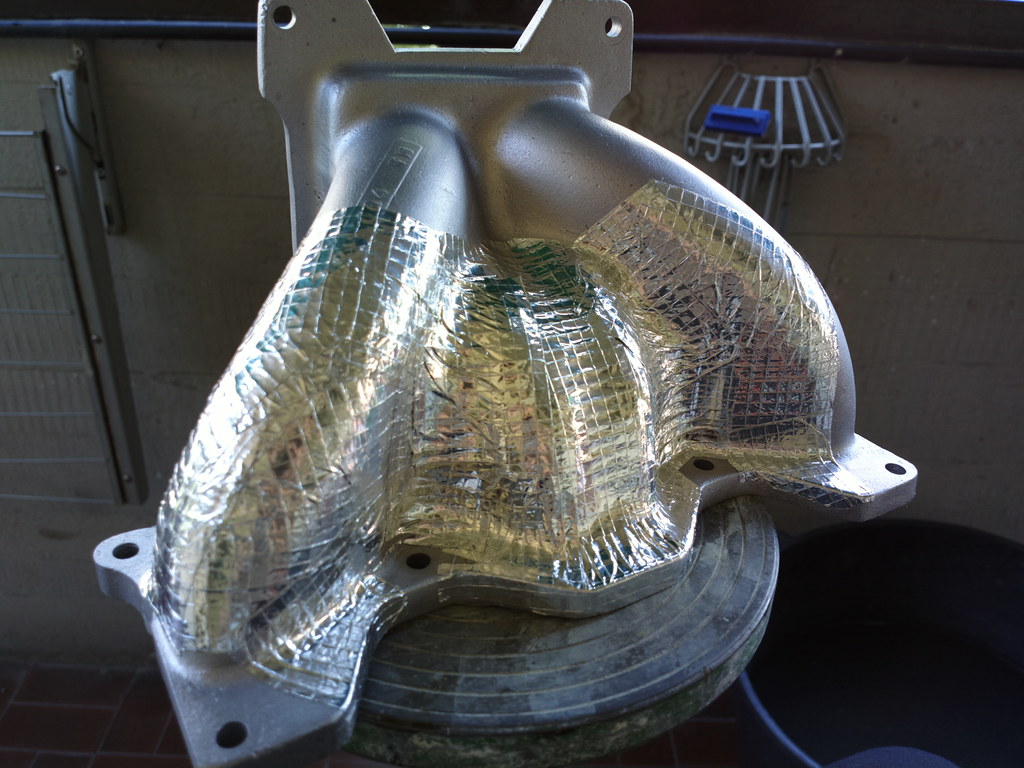
And of course also the exhaust is wrapped in titanium.
[CONTINUES]
Can you believe Kumho makes these in the original stock size for the RX7? I just HAD to buy them.
I dunno about you but here in italy you can't even THINK to find 4x110 rims around, it simply impossible. so I did the best I could do with what I had and call it a day.
these waffles were the candidates for the tyres.
At first look they seems good, but they were re-painted over oxidized bare aluminium, and only on the outside face...
This was the inside...
so i started a treatment with oxalic acid:
dirt wheel in the acid on the left, treated wheel in basic water after acid on the right.
Pretty good indeed.
then I used paint stripper for the painted faces, but it wasn't enough and I was working too much to clean them, so I sandblasted them:
and waited to find someone who could powdercoat them.
In the meantime, driving the car, trying to tune the carb, it started to boil. remember when I said I never saw the oil before? now I was seeing brown water coming out of the boiling reservoir.. I thought immediately of some blown gasket, so I emptied the oil from the engine and THIS came out:
Long story short, nothing happened: the brown water was rust in the radiator, and the brown oil was from the internal water leak it had before (and now didn't). So after some time with new (and this time synthetic, since I have the separate OMP) oil, this was the result:
So fortunately it was a false alarm caused by my negligence.
But in the end I STILL didn't managed to make it run really properly: I blamed the holley like everyone does, but at that time I still didn't have time to really tune the carb from the ground up, only changing a couple of jets, tuning the air screws and changing the cam...
So, after few hours of videos, and few days reading on the internet, I bought a full rebuild kit for the carb to do it seriously once for all.
I also figured that it probably still leaked air in the manifold somehow, and I blamed the damned ports that the gsl-se engine has on the central plate, from the exhaust to the intake manifold, the ones for the emission control, so I stared to double seal everything, with the best gaskets possible, also shielding heat to prevent gaskets to burn, and while I was there, I finished my work on the intake manifold:
and "shielded"
And of course also the exhaust is wrapped in titanium.
[CONTINUES]
Last edited by the thing; Dec 15, 2014 at 05:23 PM.
Thread Starter
Full Member
Joined: May 2013
Posts: 62
Likes: 9
From: Florence, Italy
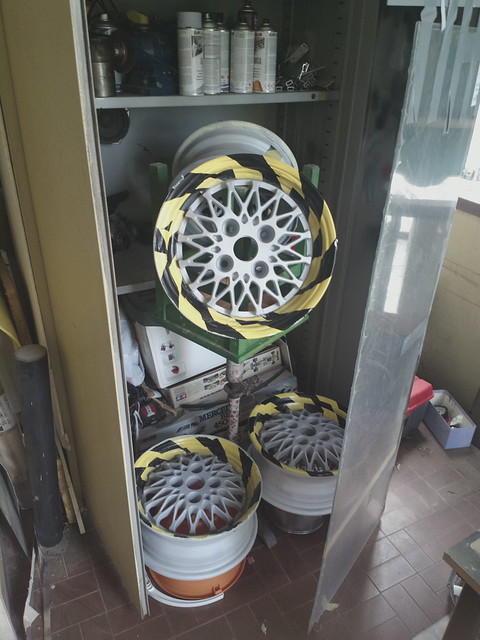
For the wheels I've choosen a really unusual color, it worked well in my mind, but the powdercoating-guy didn't understand or didn't want to spend much time with this job, so they came out like this:
In full sunlight they are not bad, but when there's no bright light shining on them they look like beige plastic form 80's computers... well at least they are very original.
Then I took the car to a guy with the car-lift to change all the rubber bushes on the suspension with a full kit (you can imagine at what price..) from powerflex:
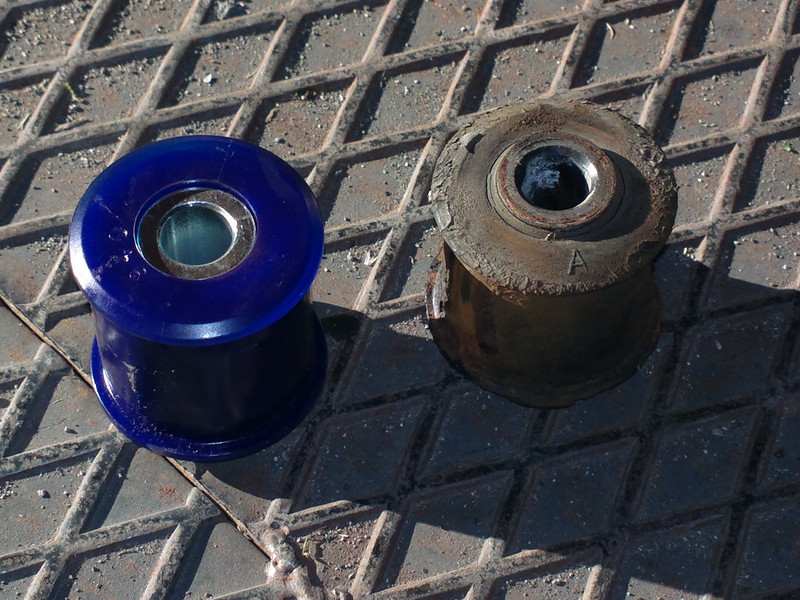
and also all the arm joints:
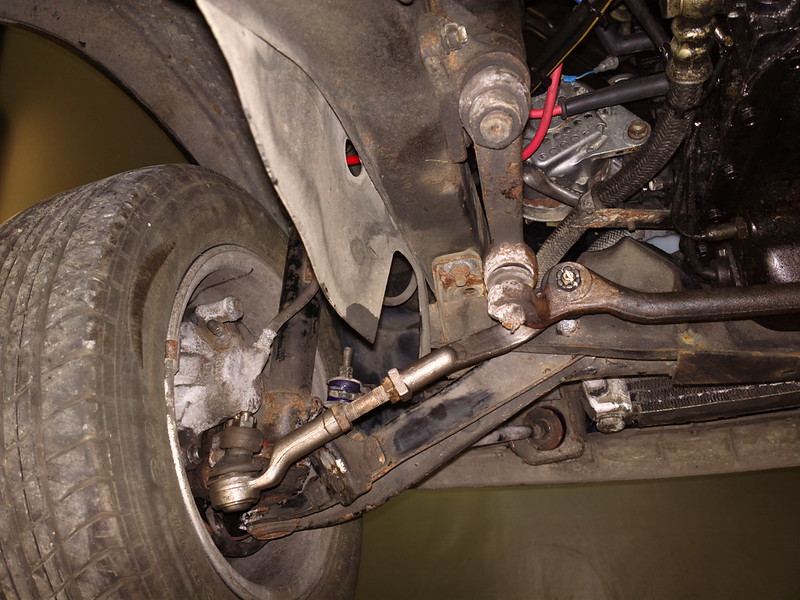
(the white stuff is rust converter..)
BTW, the rear sway bar was removed just after the trackday because of oversteer.
Now I had a great knowledge on american carbs, and I managed to do a proper tuning: it was all fault of the power valve: it was completely wrong from the beginning, the rest I was doing correctly, but it didn't work because of the damned power valve. Now it burns gas and oil like a swiss clock !
With the Holley again on its leveling spacer I couldn't mount the air filter and I had to invent something: Here you can't find parts for american engines and I didn't manage to find a ready-to-go manifold like I wanted (now I do, but not at that time) so I built my own: here in Europe there are some cars from the '80s with K-jetronic mechanic injection: some of those have an intake very near the 4" of the Holley, so I bought a rubber manifold from a Porsche 924, joined with a 4" stainless tube using epoxy and other methods, and this was the result:
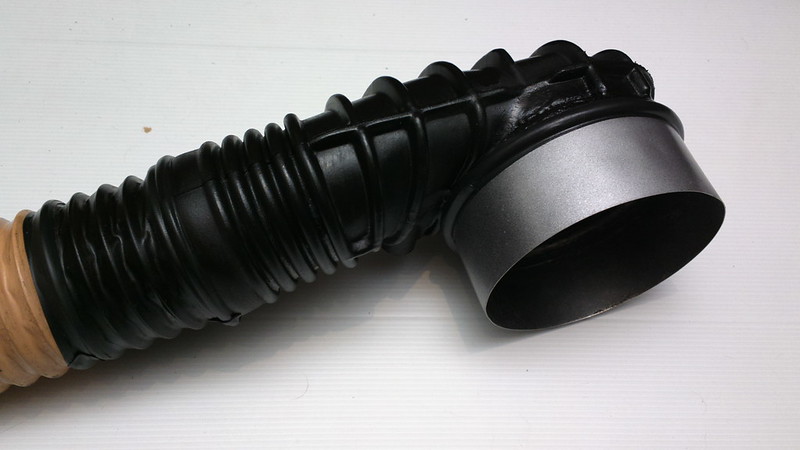
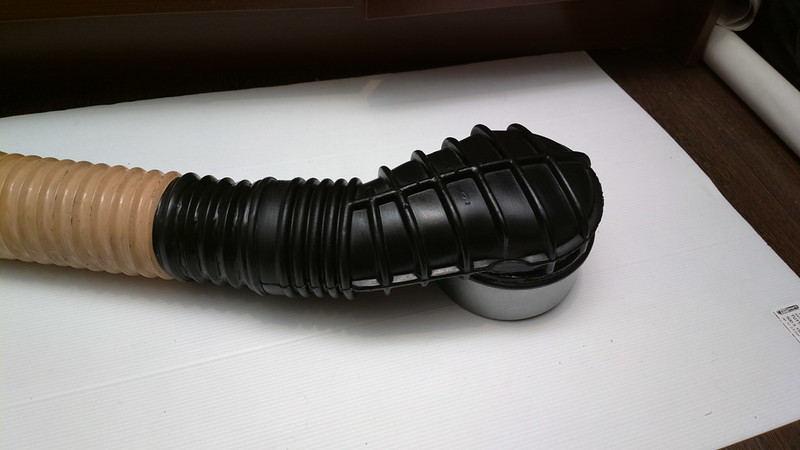
Almost stock-looking, like I wanted, but I dunno.. I never managed to make a perfect sealing all around the carb, and between joints, so just now I bought a proper intake from Spectre Performance: I'll post pictures when it comes in the mail...
Here it is mounted on:
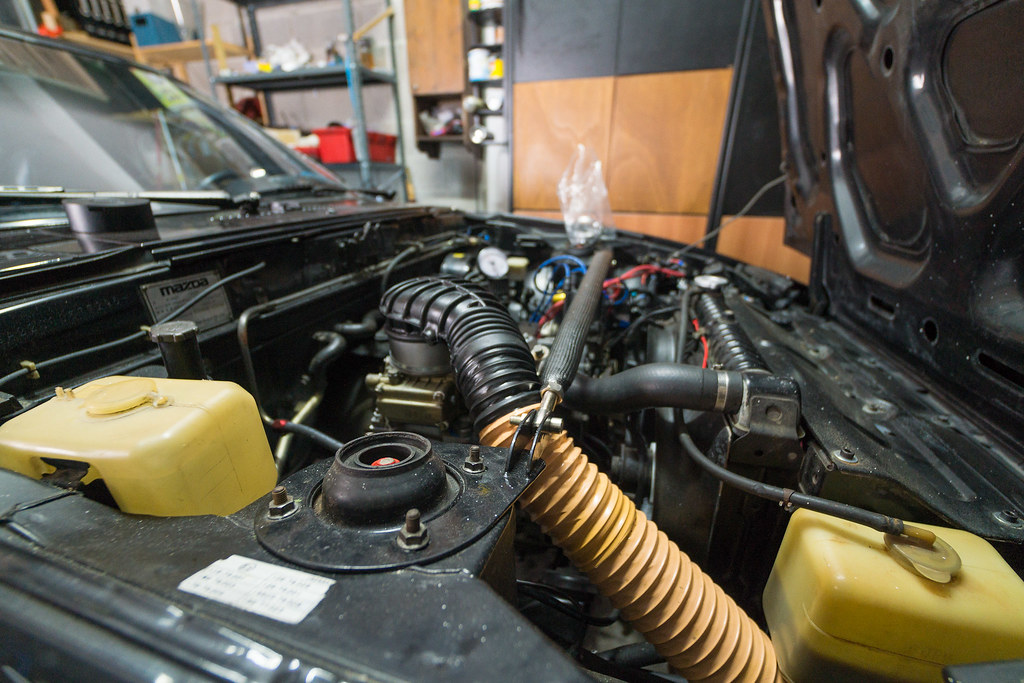
It still not had an air filter.
...and here it is, after exactly one year of the purchase, and after the first crazy trackday, here I am again at the meeting.
I tried to race again on the track but I almost crashed because of the tyres, and because I'm stupid. Also I flooded the car after going off-track, and I wasn't realizing that while trying to restart the car, i was making huge flames from the exhaust and then came the safety truck.. but at the end I managed to restart on my own and going back in the paddock with my tail between my legs...
..but it was fun.
Then I finally found the Italian factory who makes Racing Beat mufflers, and I managed to buy a new stainless catback at a really good price (compared to buy it from RacingBeat, from UK or USA. I have the pictures but I never actually uploaded them to Flickr.
Maybe next time.
...any thoughts?
In full sunlight they are not bad, but when there's no bright light shining on them they look like beige plastic form 80's computers... well at least they are very original.
Then I took the car to a guy with the car-lift to change all the rubber bushes on the suspension with a full kit (you can imagine at what price..) from powerflex:
and also all the arm joints:
(the white stuff is rust converter..)
BTW, the rear sway bar was removed just after the trackday because of oversteer.
Now I had a great knowledge on american carbs, and I managed to do a proper tuning: it was all fault of the power valve: it was completely wrong from the beginning, the rest I was doing correctly, but it didn't work because of the damned power valve. Now it burns gas and oil like a swiss clock !
With the Holley again on its leveling spacer I couldn't mount the air filter and I had to invent something: Here you can't find parts for american engines and I didn't manage to find a ready-to-go manifold like I wanted (now I do, but not at that time) so I built my own: here in Europe there are some cars from the '80s with K-jetronic mechanic injection: some of those have an intake very near the 4" of the Holley, so I bought a rubber manifold from a Porsche 924, joined with a 4" stainless tube using epoxy and other methods, and this was the result:
Almost stock-looking, like I wanted, but I dunno.. I never managed to make a perfect sealing all around the carb, and between joints, so just now I bought a proper intake from Spectre Performance: I'll post pictures when it comes in the mail...
Here it is mounted on:
It still not had an air filter.
...and here it is, after exactly one year of the purchase, and after the first crazy trackday, here I am again at the meeting.
I tried to race again on the track but I almost crashed because of the tyres, and because I'm stupid. Also I flooded the car after going off-track, and I wasn't realizing that while trying to restart the car, i was making huge flames from the exhaust and then came the safety truck.. but at the end I managed to restart on my own and going back in the paddock with my tail between my legs...
..but it was fun.
Then I finally found the Italian factory who makes Racing Beat mufflers, and I managed to buy a new stainless catback at a really good price (compared to buy it from RacingBeat, from UK or USA. I have the pictures but I never actually uploaded them to Flickr.
Maybe next time.
...any thoughts?
Last edited by the thing; Dec 15, 2014 at 06:26 PM.
talking head
Joined: Apr 2008
Posts: 2,775
Likes: 15
From: Perth, WA, OZ
the issue with the igniters comes when you mix j105 and j109../ each require .. or where designed for,, opposite tooth profiles in the pickup
i find that one of them will require the signal wire polarity reversed to the others so that they fire on the same trigger edge and get full dwell
since the dizzy is series one,, you would have had to reverse the green and red connectors for the j109
( or flip the pickup rotor upside down and reverse the trigger wiring for the j105's )
hence why i hinted to go for the bosch igniters, and getting everything on the same trigger edge and polarity
talking head
Joined: Apr 2008
Posts: 2,775
Likes: 15
From: Perth, WA, OZ
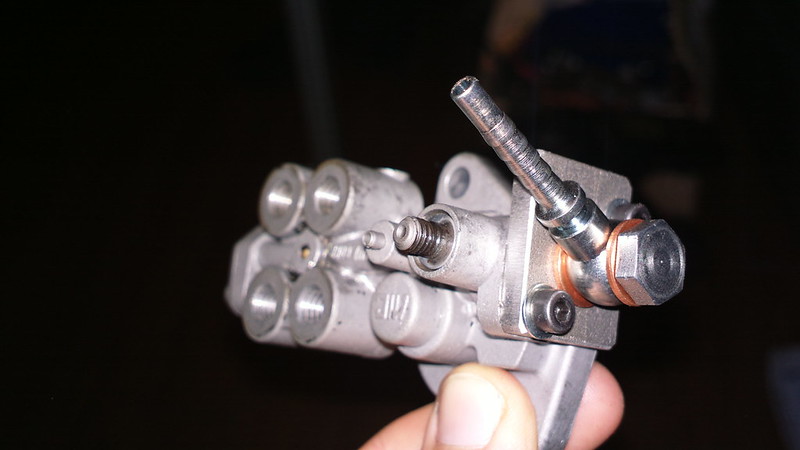
PS.. uncap that nipple on the OMP injector.. it needs a breather cap on it
( in lieu of a purge air or filtered air source )
else the internal check valves will not shut,, and your OMP lines will continue to flow after shutdown until they equalize
( in lieu of a purge air or filtered air source )
else the internal check valves will not shut,, and your OMP lines will continue to flow after shutdown until they equalize


Thread Starter
Full Member
Joined: May 2013
Posts: 62
Likes: 9
From: Florence, Italy
thank you,
no the dizzy is S3 of course, all the engine is from a GSL-SE. To be honest I don't remember what I did at the time about the polarity, I have to check in the photo archive, but I remember I knew about the different polarity from one series to the other.
About the nipples: I know there are many different theories about what to do with them and even debates about how it actually works.. Now I drive without them and the injector on the carb's bowl is actually "shaved" (you can barely see it in the last picture of the engine): that was to fit the original mazda air filter on top.
In the beginning I drove with the closed nipple on that injector because for some strange backward logic I figured it was the highest point of the engine, even above the oil tank, and it didn't matter (and I didn't want an open hole to the bowl).
Thread Starter
Full Member
Joined: May 2013
Posts: 62
Likes: 9
From: Florence, Italy
Here I am, updating after a long pause...
It's been a lot of work, but the main thing has been the new set of wheels, and a new air filter:
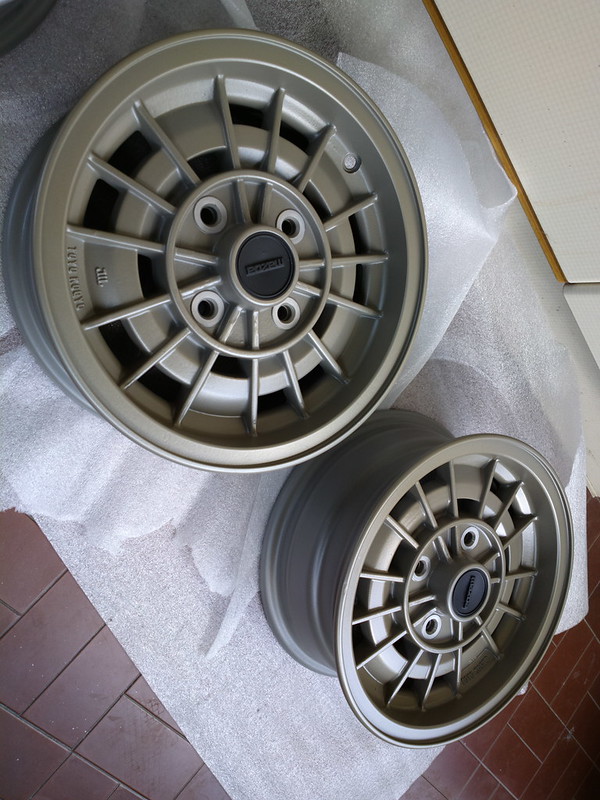
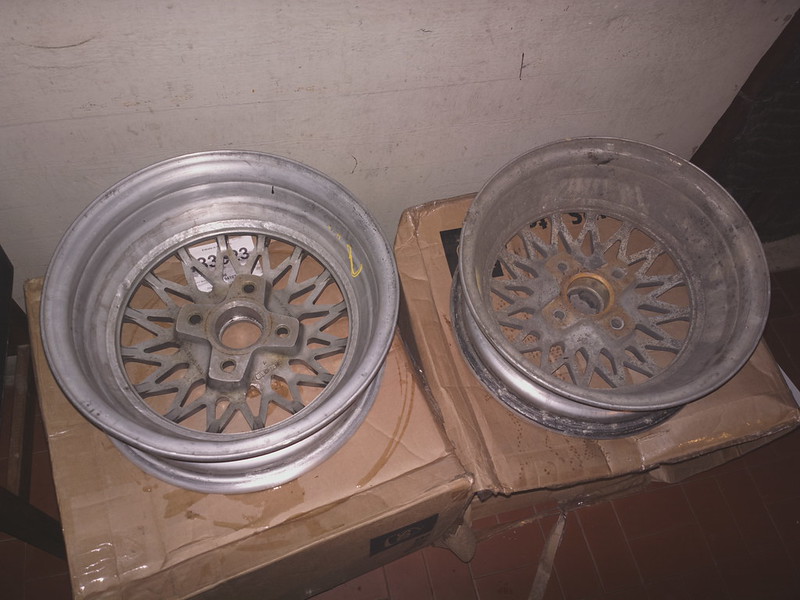
Here you absolutely can't find 4x110 wheels and I didn't want to buy/make wheel adapters, so after months and months of searching I found these on ebay, from USA:
As you may have guessed, those are 1983 Limited Edition wheels. The seller didn't want to sell me the wheels because it was too expensive to ship them to Italy, but I had no alternatives, so I convinced him, and few weeks and few hundreds of dollars later...
And in the meantime, also from USA...
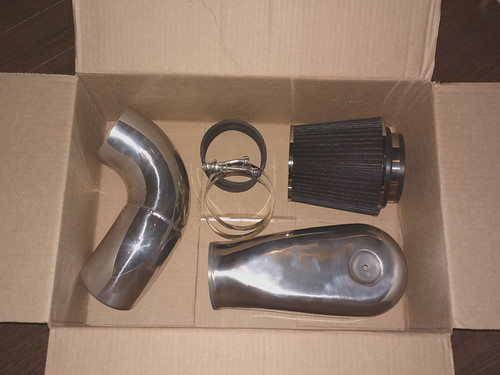
an air filter adapter for holley carbs.
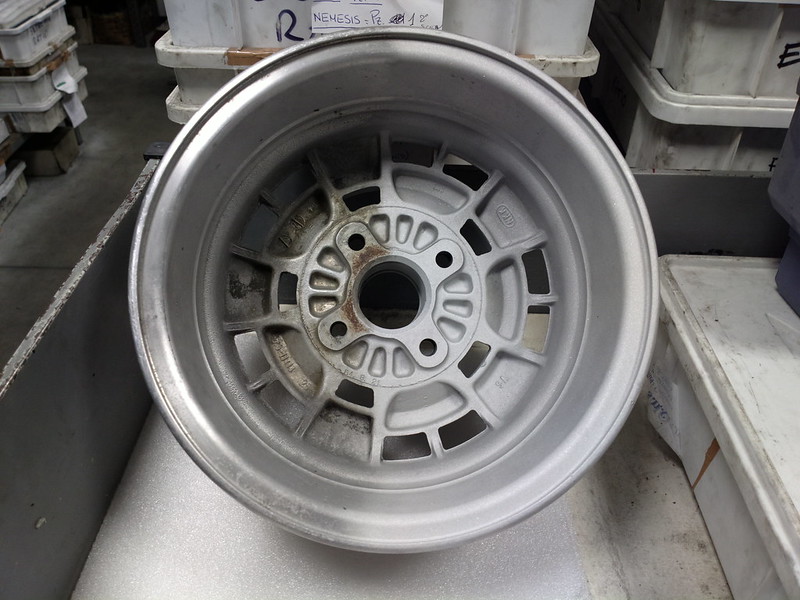
Anyway, the wheels were "well used": not as bad as the last ones but I had to fully restore them; here you already can see the difference before and after a bath in oxalic acid:
I then decided I wanted to have a polished lip, and painted center, so I began to search for the best way to do it, so I came up with an adapter for my car polisher, to accomodate the matal polishing wheels that I already had:
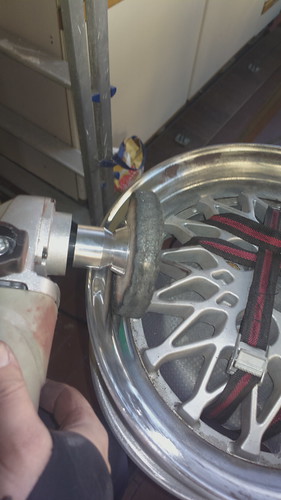
After a bit I realized I wasn't reaching the level of quality that I wanted, so I started experimenting: I always do these kind of things, most of the times are useless but I always learn something along the way; My solution was a semi-automatic wheel polisher, that would help me reduce the time I was spending polishing the wheels, and maybe set up something for polishing wheels for other people:
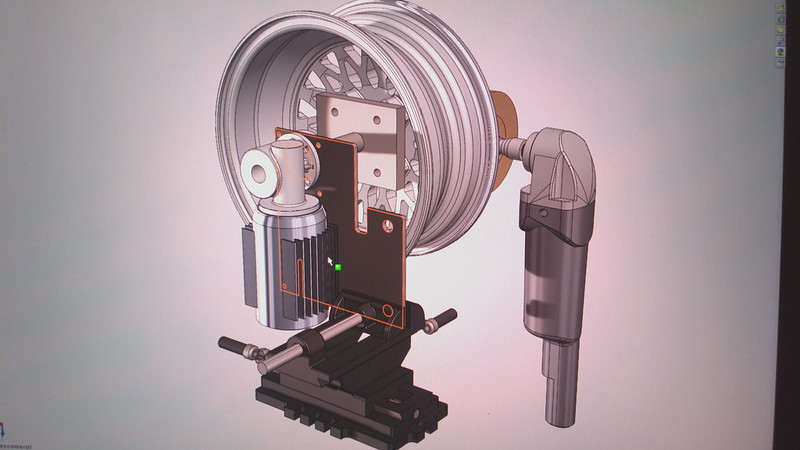
I built the rig and the new adapter for the polishing wheels, and I started from the sandpaper, to get rid of the big stuff first, and to make it even more effortless, I managed to make it almost automatic.
Here's a video in action (is it possible to embed videos?):
https://www.youtube.com/watch?v=v-yK2Vor310
I continued to make progress but I wasn't happy, so i bought new polishing paste and wheels, and also safety equipment:
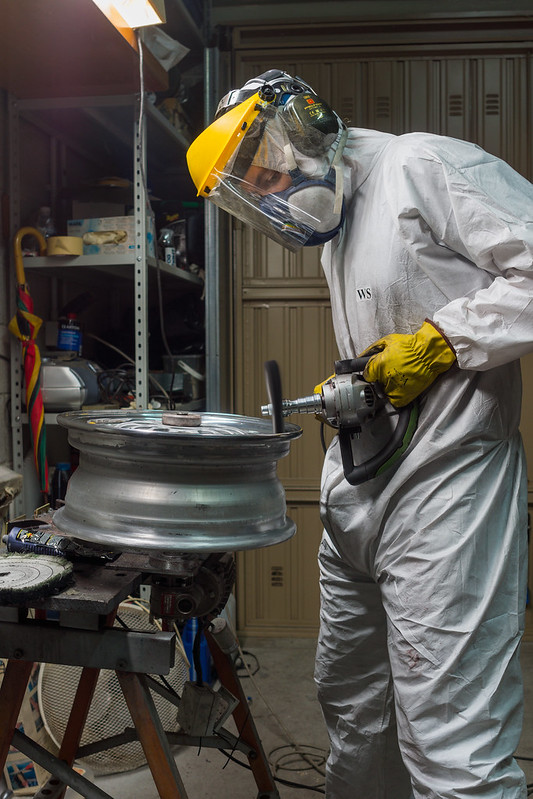
At this point I learned almost everything about polishing metals, and I figured the way to do it... after maybe the third time that I was starting over from scratch! Very frustrating but you get the reward when you then see the perfect mirror surface..
I wanted to paint only the centers, and because all the complications about masking the wheels and send them to paint, I decided to experiment by sandblasting the centers, and then spray "2K" clear glossy paint over. I had to sandblast in two phases: first the main blasting (masking the lip), then I polished the lip, then masked again and re-sandblasted the centers to get rid of the marks made with the polishing wheels on the inside.
and this is the ghetto spraying room that I made for the occasion, just to avoid the dust:
after all that, this is the result, with mounted tires:
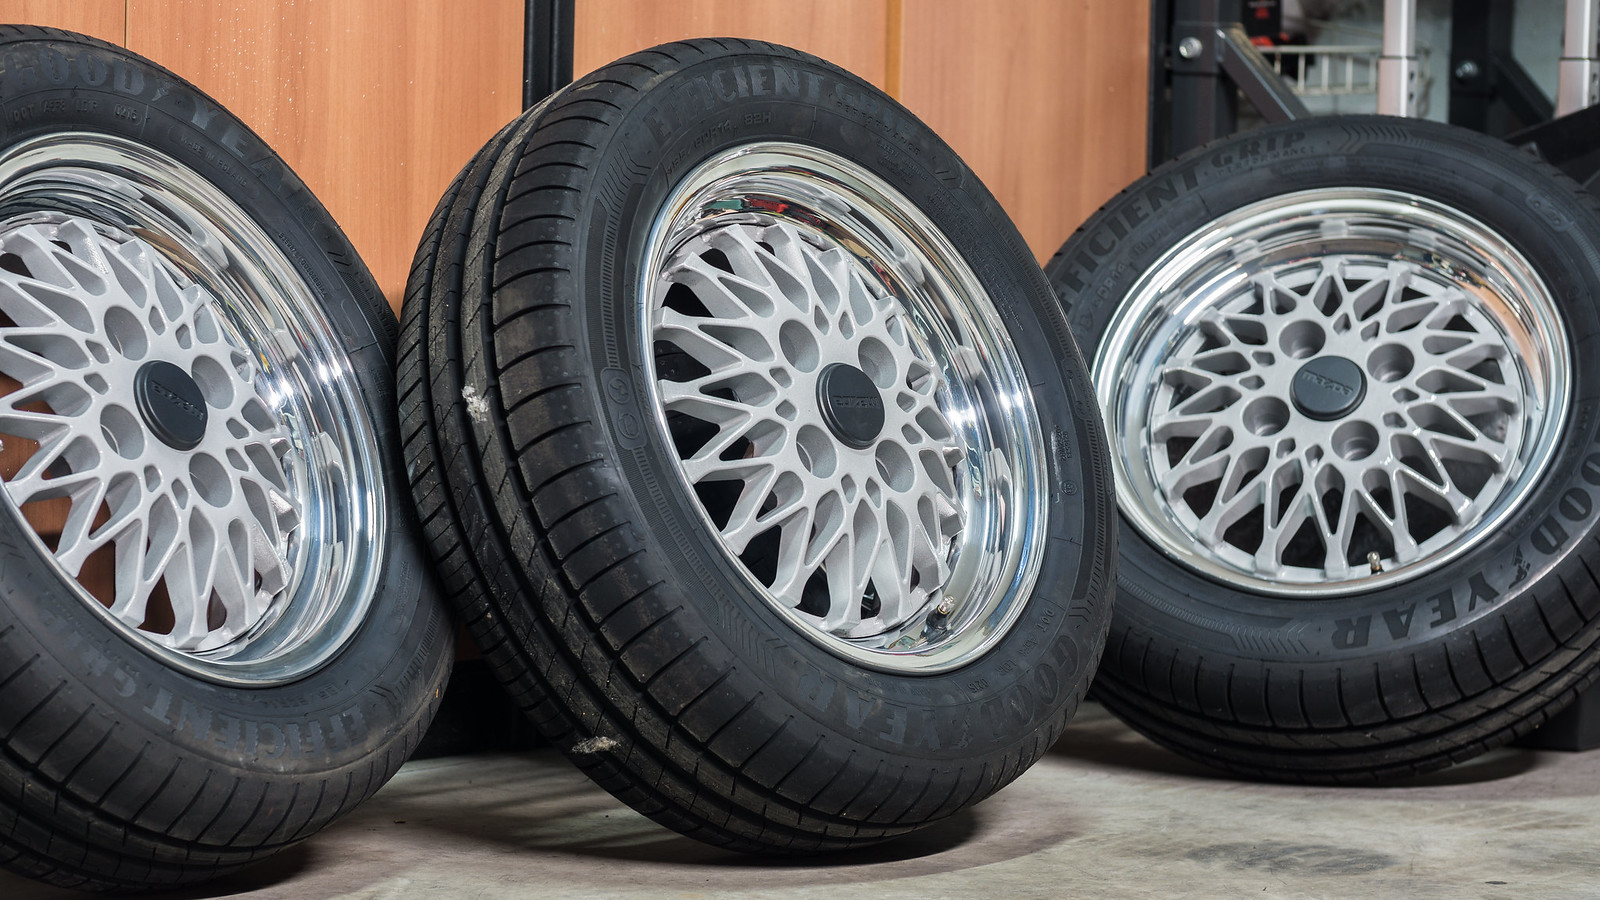
As you can see, perfect mirror! I'ts been very difficult but I learned something, and the wheels look cool! to protect the surface right now I'm not doing much.. I just coated everything with a extremely thick coat of wax (not car wax, but a solid smelly wax, I don't know the english name for it). Most of the people don't recognise the difference of effort between a polished two-piece wheel and a single piece wheel... well, now I sure know the difference!
[continue]
It's been a lot of work, but the main thing has been the new set of wheels, and a new air filter:
Here you absolutely can't find 4x110 wheels and I didn't want to buy/make wheel adapters, so after months and months of searching I found these on ebay, from USA:
As you may have guessed, those are 1983 Limited Edition wheels. The seller didn't want to sell me the wheels because it was too expensive to ship them to Italy, but I had no alternatives, so I convinced him, and few weeks and few hundreds of dollars later...
And in the meantime, also from USA...
an air filter adapter for holley carbs.
Anyway, the wheels were "well used": not as bad as the last ones but I had to fully restore them; here you already can see the difference before and after a bath in oxalic acid:
I then decided I wanted to have a polished lip, and painted center, so I began to search for the best way to do it, so I came up with an adapter for my car polisher, to accomodate the matal polishing wheels that I already had:
After a bit I realized I wasn't reaching the level of quality that I wanted, so I started experimenting: I always do these kind of things, most of the times are useless but I always learn something along the way; My solution was a semi-automatic wheel polisher, that would help me reduce the time I was spending polishing the wheels, and maybe set up something for polishing wheels for other people:
I built the rig and the new adapter for the polishing wheels, and I started from the sandpaper, to get rid of the big stuff first, and to make it even more effortless, I managed to make it almost automatic.
Here's a video in action (is it possible to embed videos?):
https://www.youtube.com/watch?v=v-yK2Vor310
I continued to make progress but I wasn't happy, so i bought new polishing paste and wheels, and also safety equipment:
At this point I learned almost everything about polishing metals, and I figured the way to do it... after maybe the third time that I was starting over from scratch! Very frustrating but you get the reward when you then see the perfect mirror surface..
I wanted to paint only the centers, and because all the complications about masking the wheels and send them to paint, I decided to experiment by sandblasting the centers, and then spray "2K" clear glossy paint over. I had to sandblast in two phases: first the main blasting (masking the lip), then I polished the lip, then masked again and re-sandblasted the centers to get rid of the marks made with the polishing wheels on the inside.
and this is the ghetto spraying room that I made for the occasion, just to avoid the dust:
after all that, this is the result, with mounted tires:
As you can see, perfect mirror! I'ts been very difficult but I learned something, and the wheels look cool! to protect the surface right now I'm not doing much.. I just coated everything with a extremely thick coat of wax (not car wax, but a solid smelly wax, I don't know the english name for it). Most of the people don't recognise the difference of effort between a polished two-piece wheel and a single piece wheel... well, now I sure know the difference!
[continue]
Thread Starter
Full Member
Joined: May 2013
Posts: 62
Likes: 9
From: Florence, Italy
...
here the old wheel, with the semi-slick tire
mounting the new one..
you can see they are restored, sandblasted and painted also on the inside.
new wheel mounted:
This was the first time I mounted the wheels on the car.
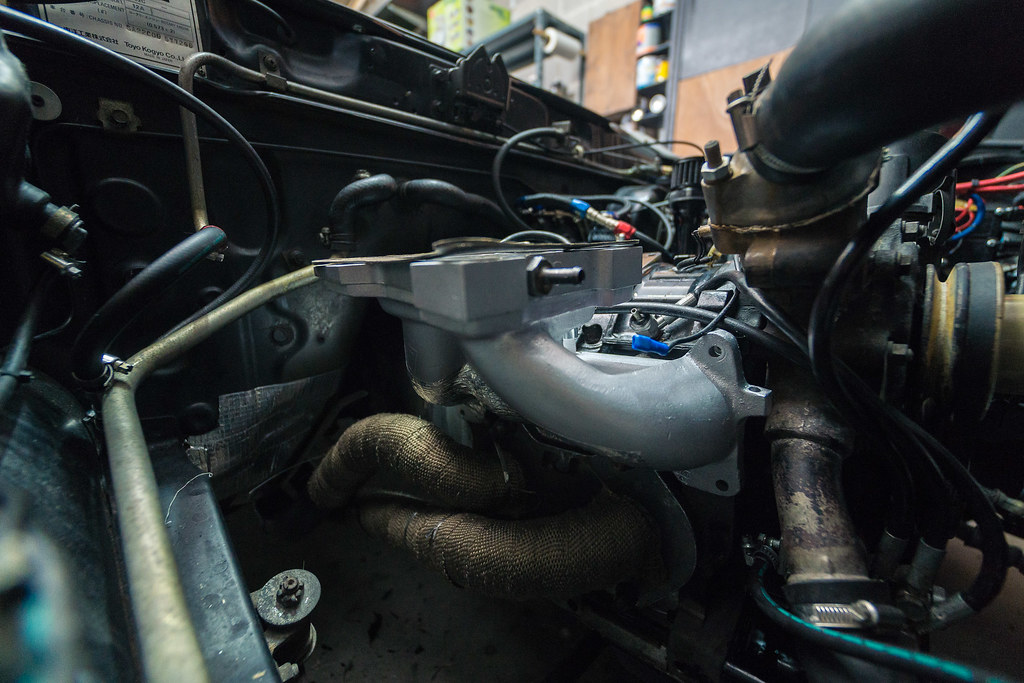
In the meantime I finished the air filter, painting the manifold with black wrinkle paint:
I realize now that I forgot to take a picture of the engine bay with the air filter on..
Anyway.. the last thing I had in my list was to restore the rubber ends of the bumpers, since they were very scratched and scuffed. on the left in the picture you can see an attempt I did to fill the deepest scratches and holes melting pvc in them.. it worked but I wanted to find a better solution(btw, in this picture they were already sandblasted for better adhesion)
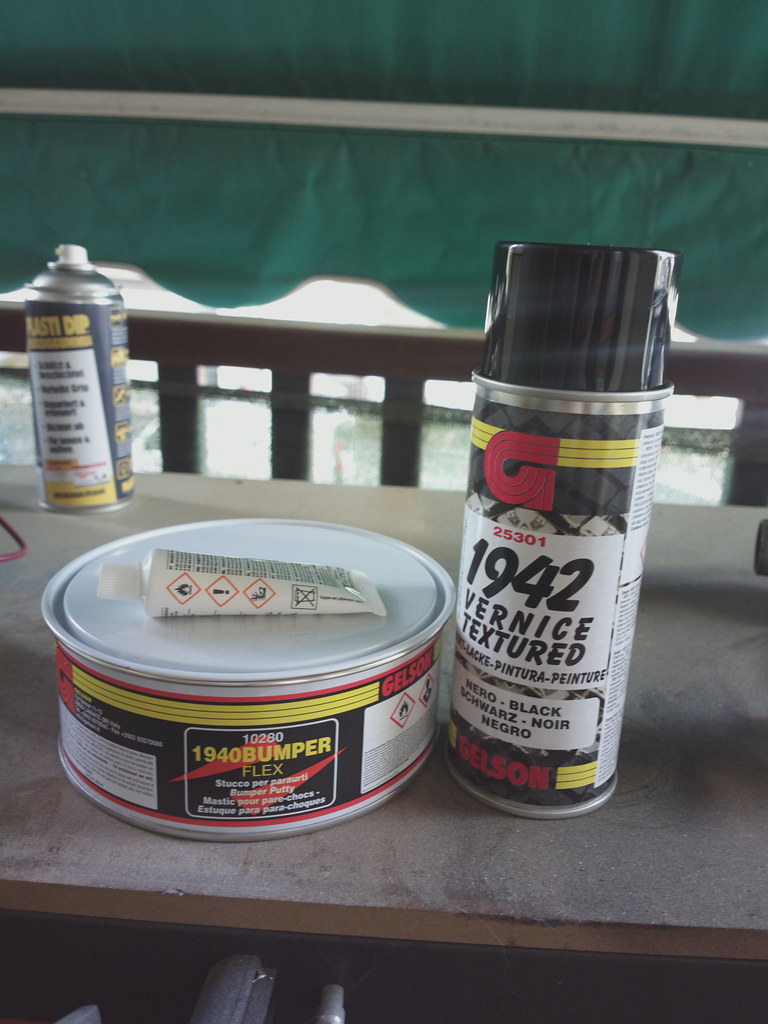
I went to the paint store and I bought bumper putty and paint: they are not made especially for rubber but they are flexible enough:
..and after restoration here's how they looked:
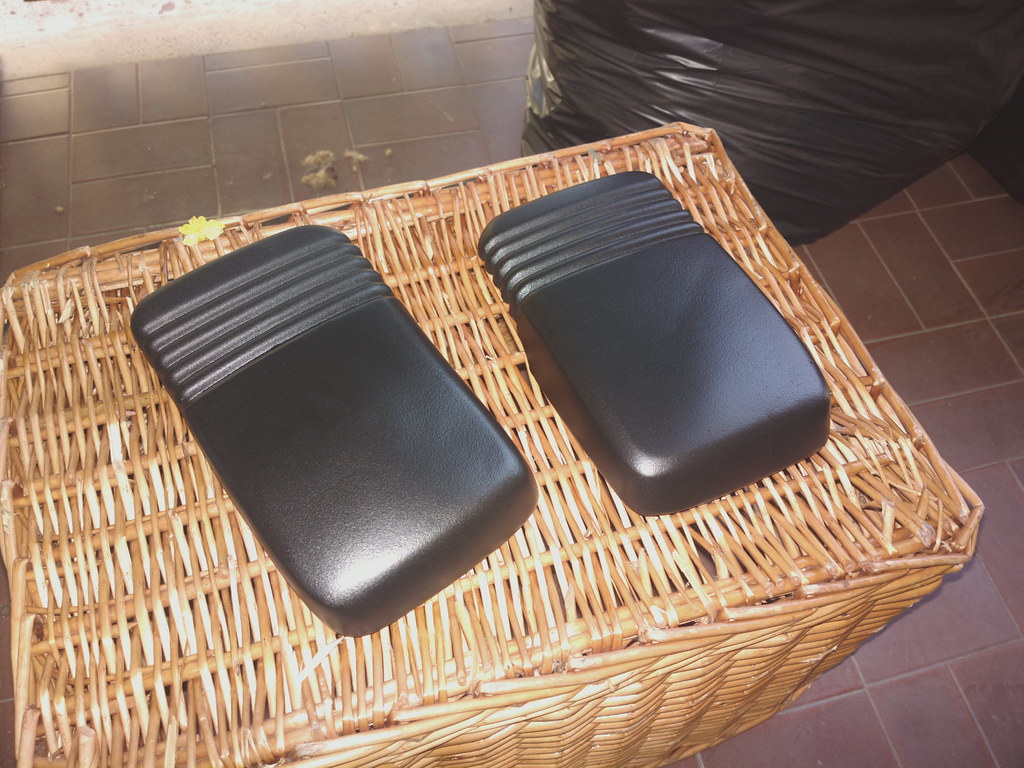
ALMOST new! I'm very pleased with the result.
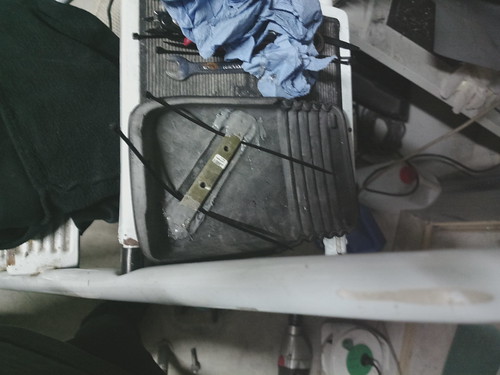
One of them was also damaged on the inside, so with some metal, some epoxy and some plastic straps I managed to fix it:
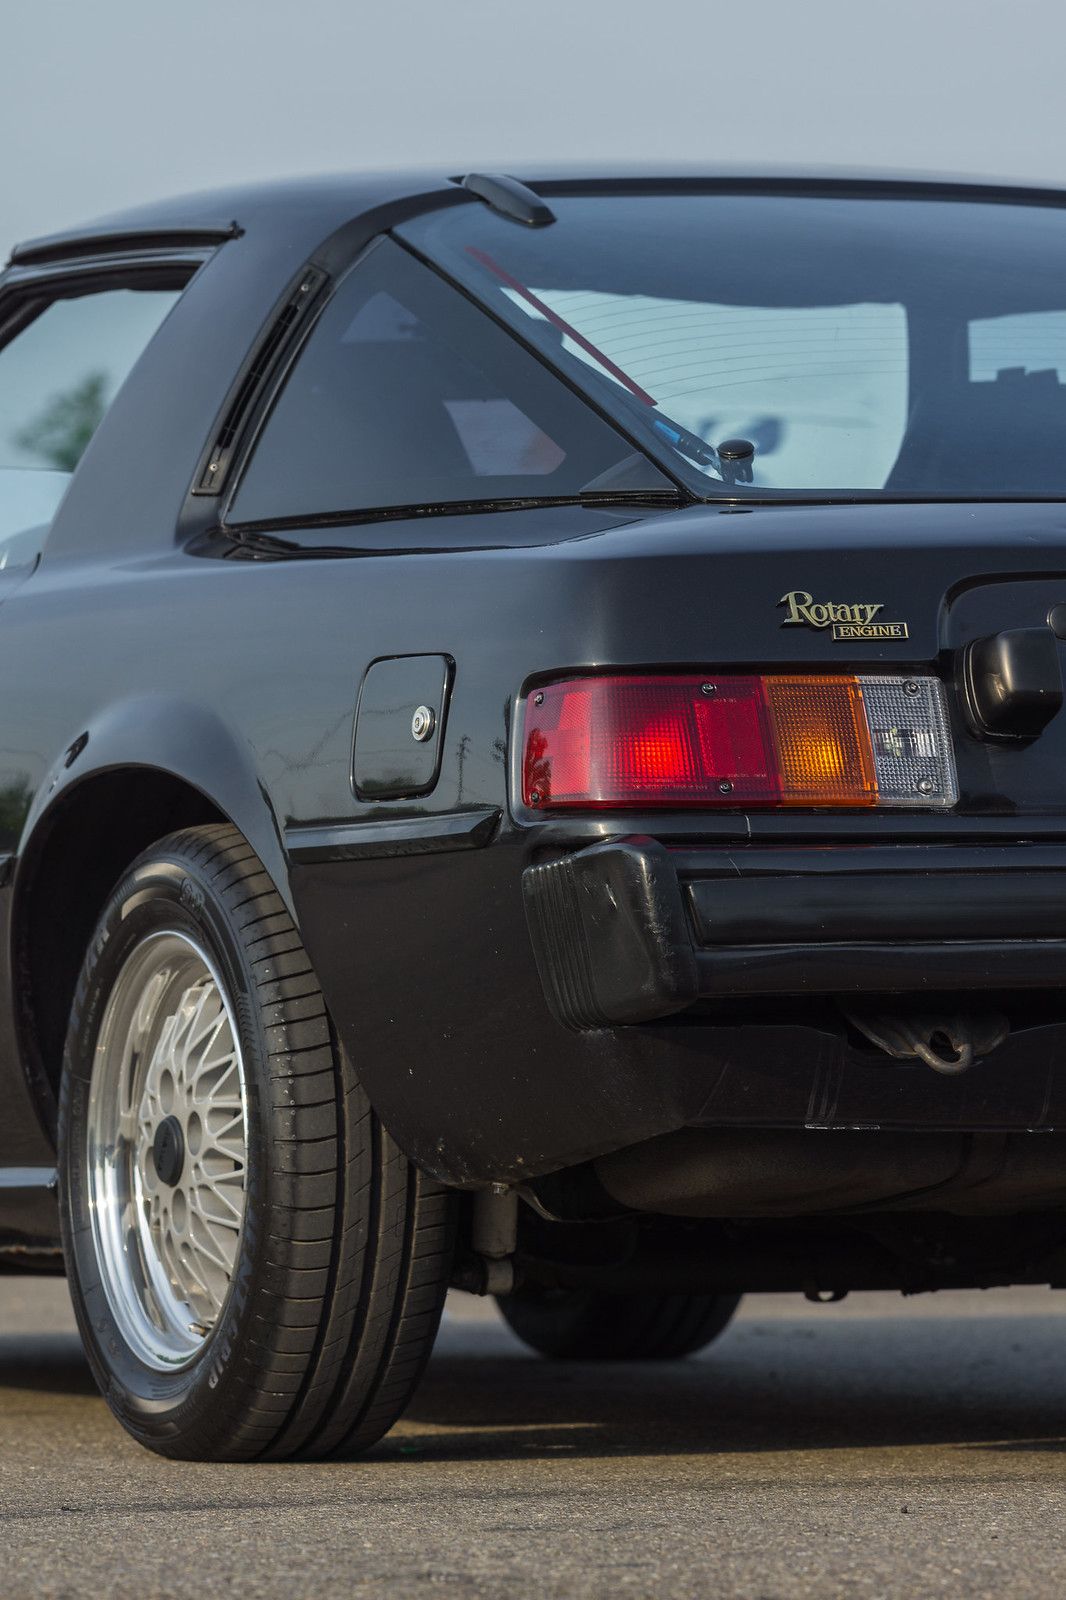
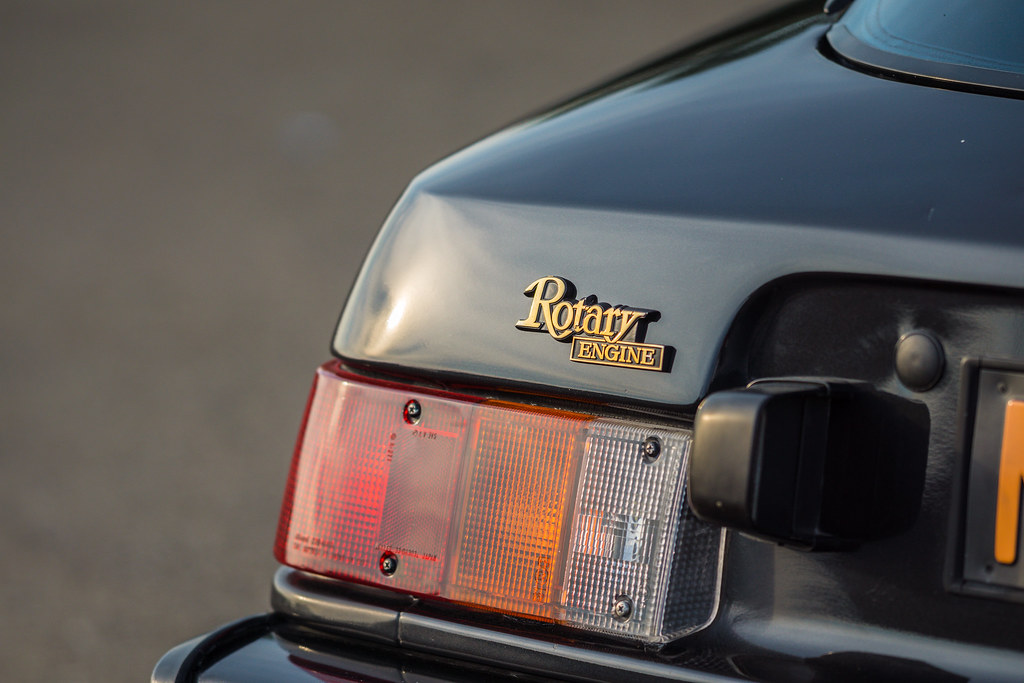
Some months ago I bought the "rotary engine" emblem from Australia, since my car didn't have it because of the larger license plate. So I mounted it above the tail light:
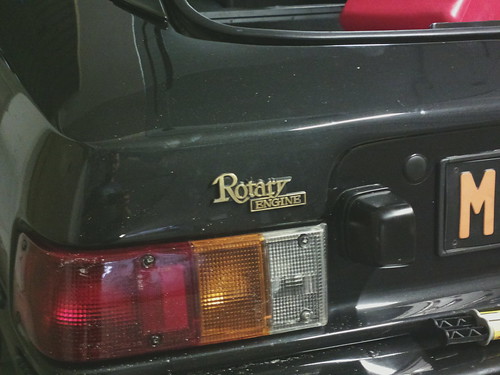
I also damaged it while mounting it, but it's barely visible.
[continue]
here the old wheel, with the semi-slick tire
mounting the new one..
you can see they are restored, sandblasted and painted also on the inside.
new wheel mounted:
This was the first time I mounted the wheels on the car.
In the meantime I finished the air filter, painting the manifold with black wrinkle paint:
I realize now that I forgot to take a picture of the engine bay with the air filter on..
Anyway.. the last thing I had in my list was to restore the rubber ends of the bumpers, since they were very scratched and scuffed. on the left in the picture you can see an attempt I did to fill the deepest scratches and holes melting pvc in them.. it worked but I wanted to find a better solution(btw, in this picture they were already sandblasted for better adhesion)
I went to the paint store and I bought bumper putty and paint: they are not made especially for rubber but they are flexible enough:
..and after restoration here's how they looked:
ALMOST new! I'm very pleased with the result.
One of them was also damaged on the inside, so with some metal, some epoxy and some plastic straps I managed to fix it:
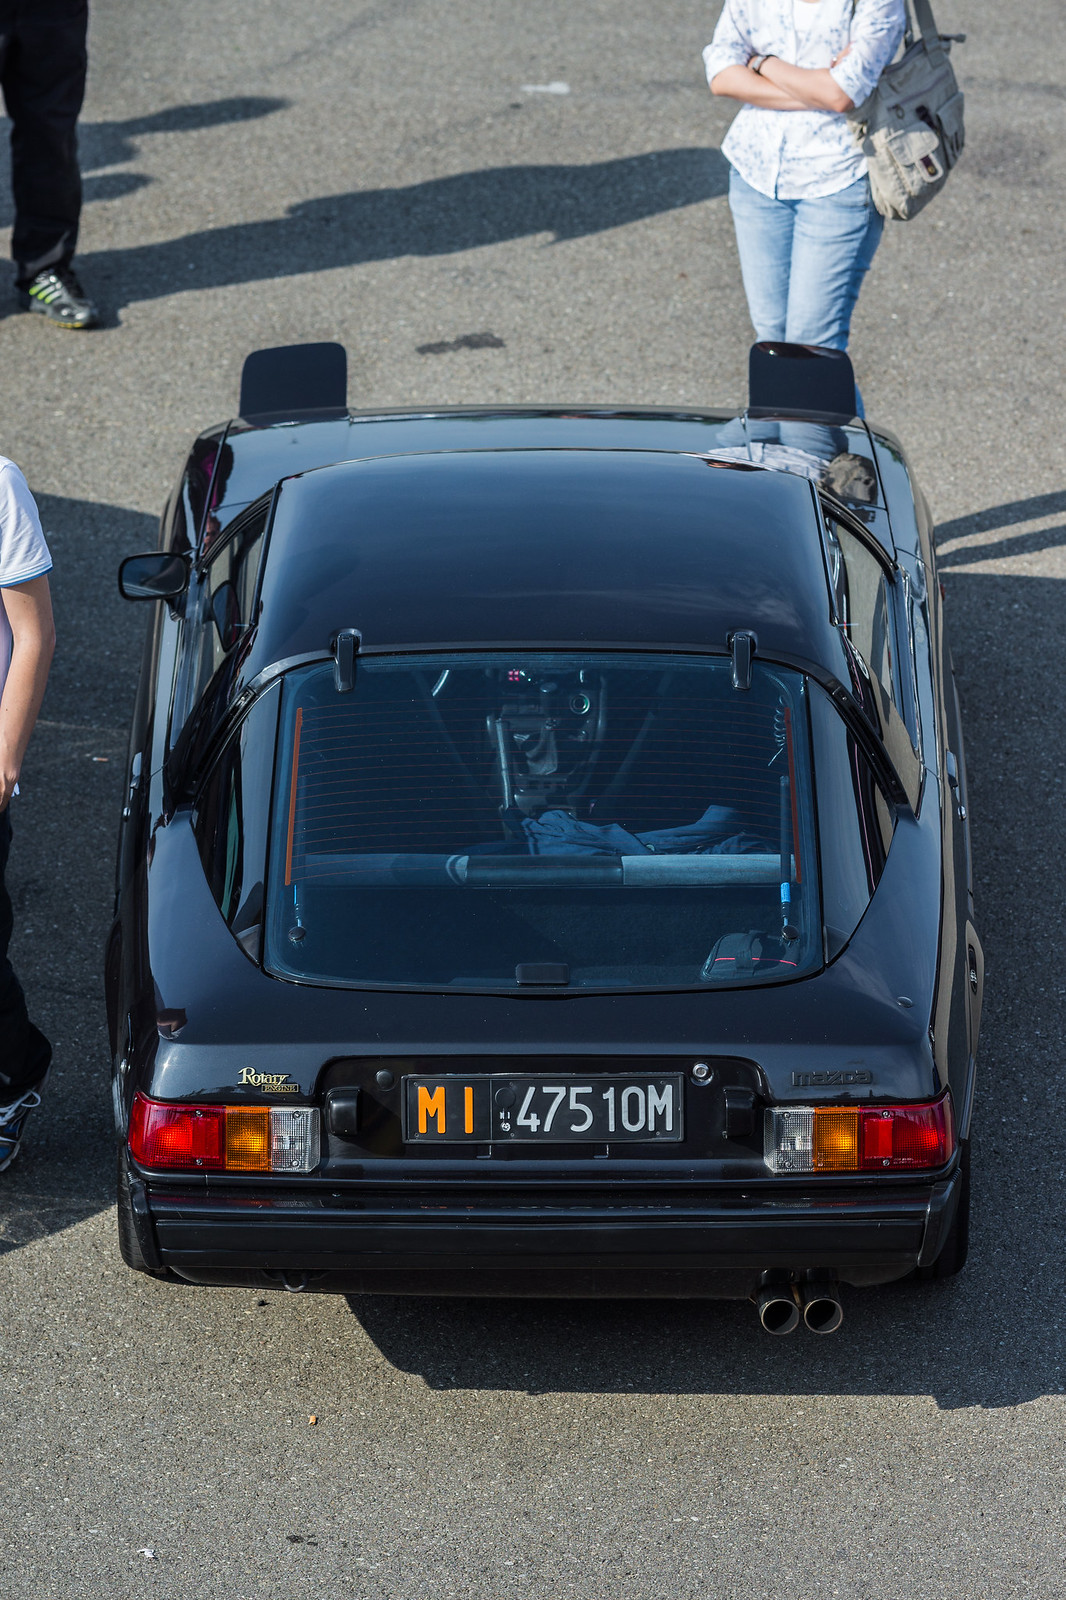
Some months ago I bought the "rotary engine" emblem from Australia, since my car didn't have it because of the larger license plate. So I mounted it above the tail light:
I also damaged it while mounting it, but it's barely visible.
[continue]
Thread Starter
Full Member
Joined: May 2013
Posts: 62
Likes: 9
From: Florence, Italy
...
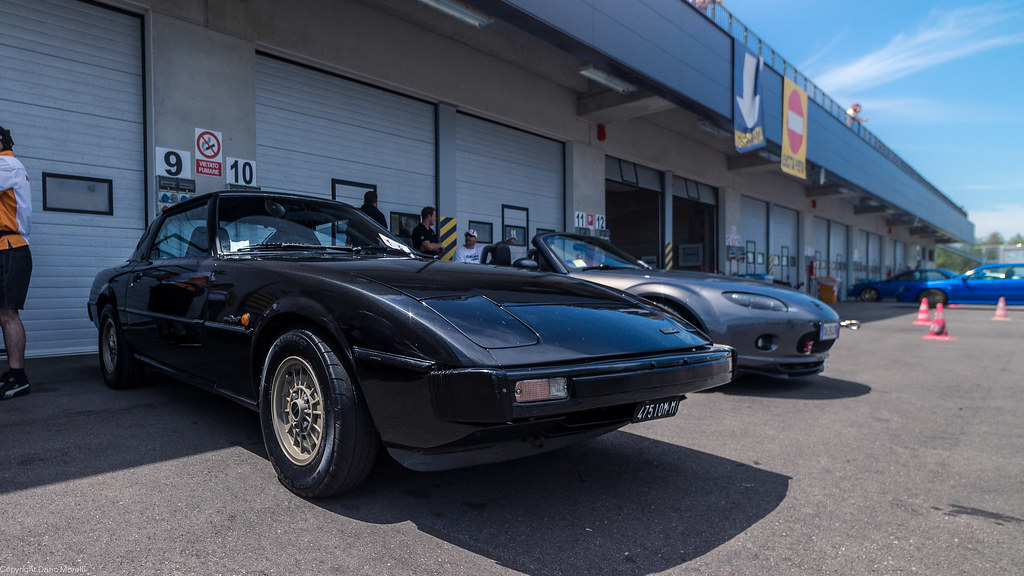
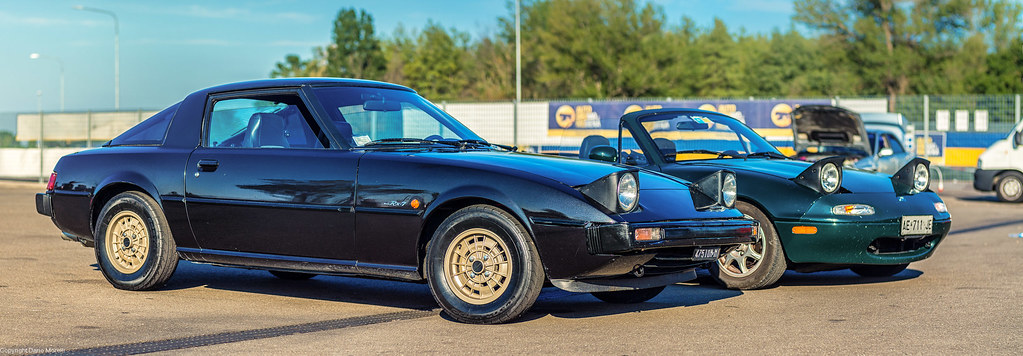
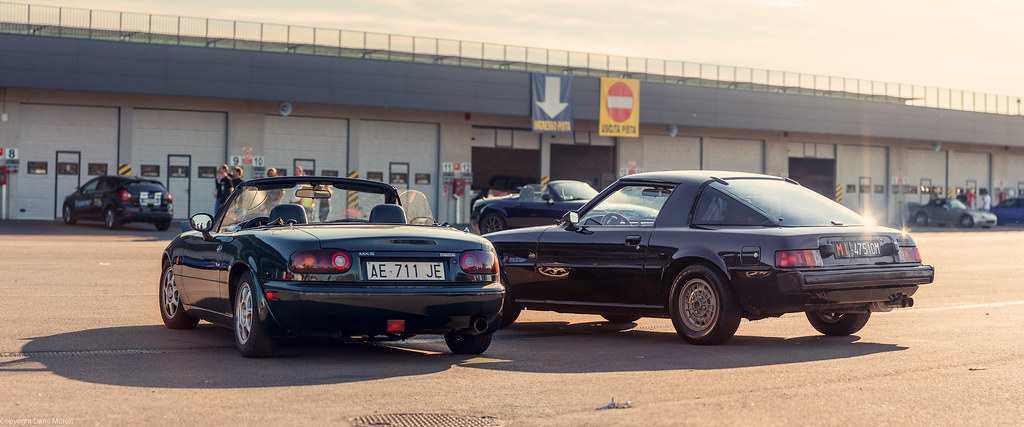
Then, like every year since I bought the car, I went to the biggest japanese car meeting here in Italy. It's not big like the american or australian meetings I'm used to see on the internet, but it's better than nothing!
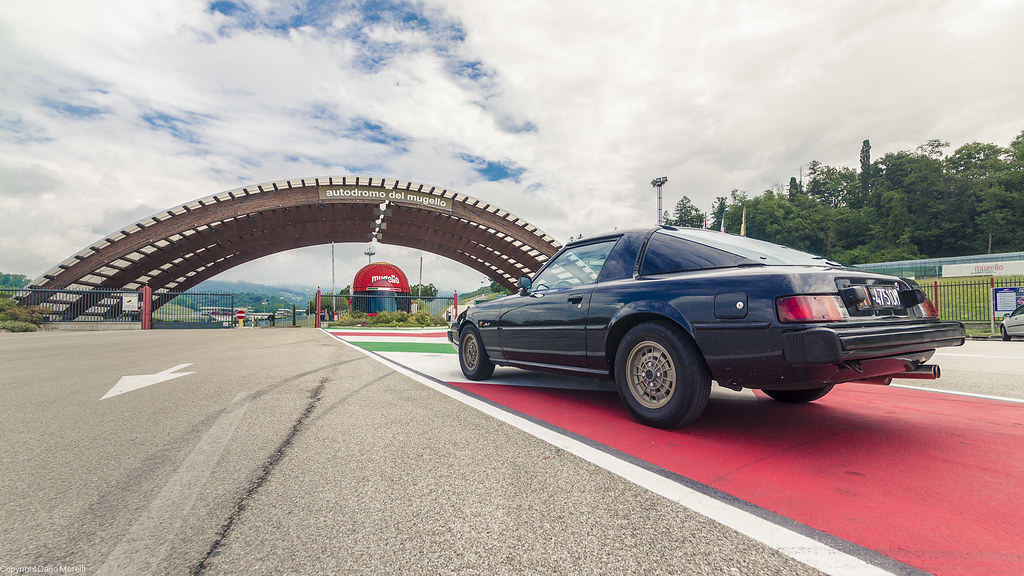
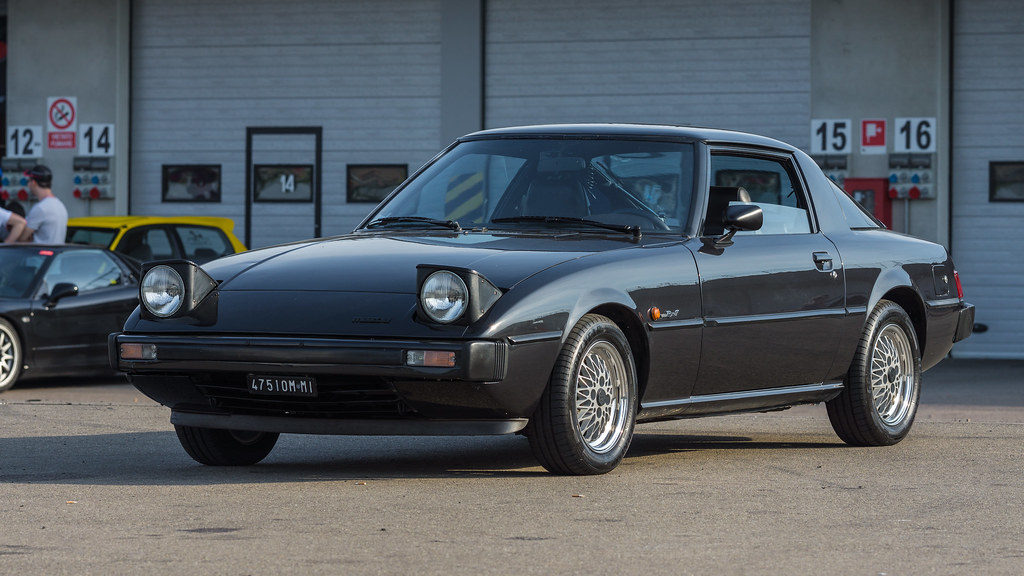
So I present you the car in its actual form, I hope you'll enjoy:
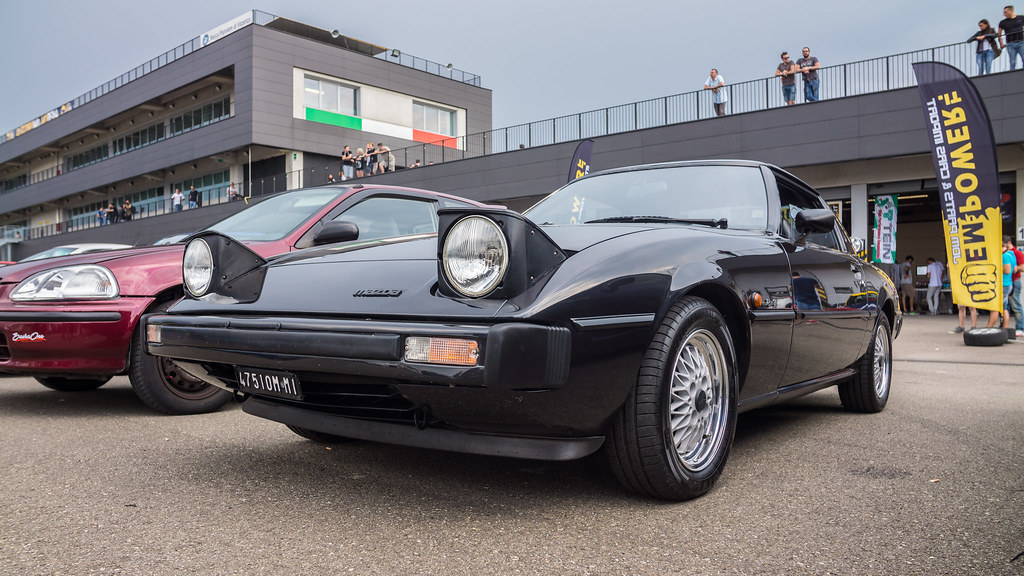

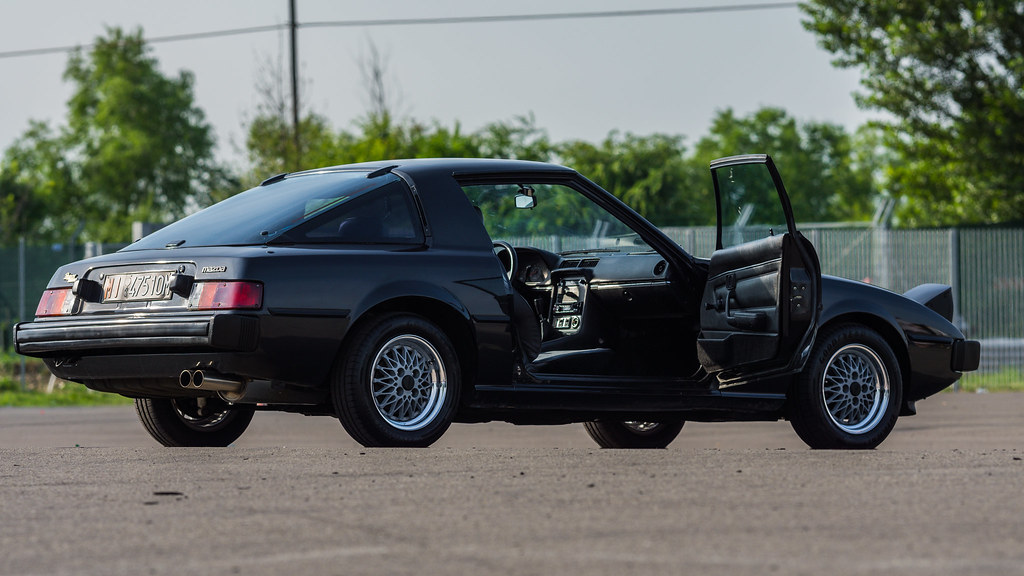
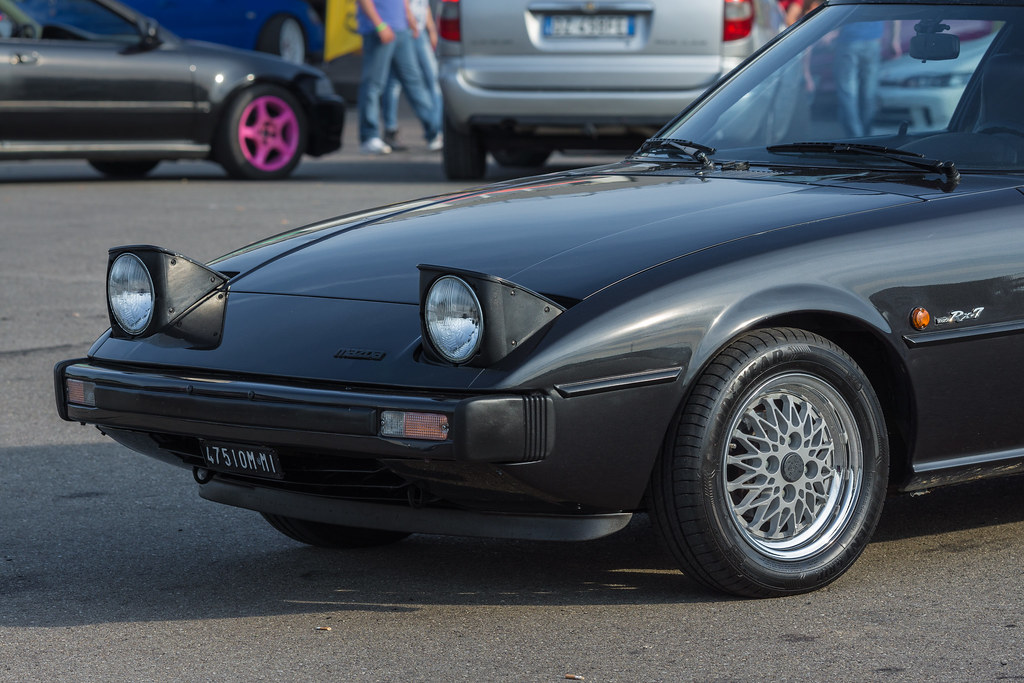
(you can see the rear bumper ends are still to be restored)
And that's it for the moment. Do you like it? what you suggest to do next? any questions?
BTW these are only a little sample of all the pictures I took in the process: you can find all the pictures of every single step of the work here:
https://www.flickr.com/photos/dariom...57635186022443
Then, like every year since I bought the car, I went to the biggest japanese car meeting here in Italy. It's not big like the american or australian meetings I'm used to see on the internet, but it's better than nothing!
So I present you the car in its actual form, I hope you'll enjoy:
(you can see the rear bumper ends are still to be restored)
And that's it for the moment. Do you like it? what you suggest to do next? any questions?
BTW these are only a little sample of all the pictures I took in the process: you can find all the pictures of every single step of the work here:
https://www.flickr.com/photos/dariom...57635186022443
By far my favorite pic of this group. Love the look of the black contrasting with the colors, especially the gold "rotary engine" emblem, giving it a very classy look. I think the other badges done in gold with black trim would really set the car off nicely.
EXCELLENT looking car. Great job!
EXCELLENT looking car. Great job!
Thread Starter
Full Member
Joined: May 2013
Posts: 62
Likes: 9
From: Florence, Italy
thank you all.
exactly: in italy it's a very rare car and even more rare to find one that goes to meeting etc. the only other first gen. that I've seen in my life was when I bought this one, the owner had another one (elford turbo).
About the badges, I have to photoshop them to see if it isn't too tacky having all that gold on the body. also I was thinking instead of the bages, a thin golden pinstripe along the side of the car, but I'm afraid it's "too much"... now it has a clean look that it's very difficult to alter..
I was thinking also about some wheel spacers, since it's a reversible mod... I'll try to photoshop the look and I'll see.
Anyway, I'm glad you people like the car!
Oh, and I'm also searching for a dyno to test the power of the engine, I will post the results If I find someone in my area
Last edited by the thing; Jun 6, 2015 at 05:35 AM.
Wow, you've ton a TON of work on this. Very impressed with what you accomplished with out a source of spare parts. Nice job on refurburshing the bumper ends. Nice ones are hard to find even here in the US. You must get a lot of people asking "what is it?"