
Resurrecting the FD or "How I spent a week's vacation"

Thread Starter


Joined: Nov 2004
Posts: 1,139
Likes: 114
From: Berlin, MD
Resurrecting the FD or "How I spent a week's vacation"
This thread is not so much a build as it is finishing a tear down and reassembling a car that was apart already. There are some small upgrades that are worked in, but this is not a technical thread so this seemed like the appropriate place to post!
Since I got two weeks vacation this year, the wife and I decided it was only right to spend one of them working on the FD. So, I plan to document the progress here.
The original thread when I got this car is located here: https://www.rx7club.com/3rd-generation-specific-1993-2002-16/finally-got-fd-story-pictures-945045/
Here is what I was working with when I got the car
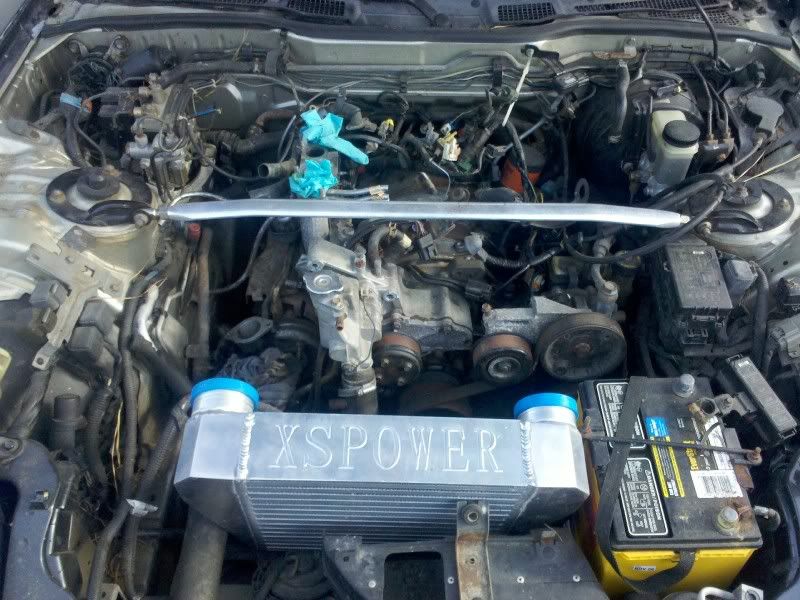
Most of the junk removed under hood:
And I rolled it into the shop today to get a real start on this project.
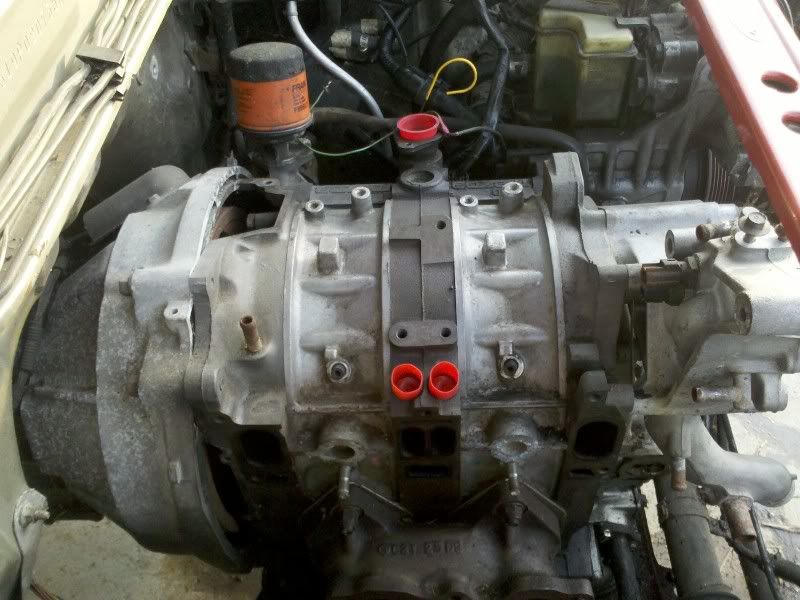
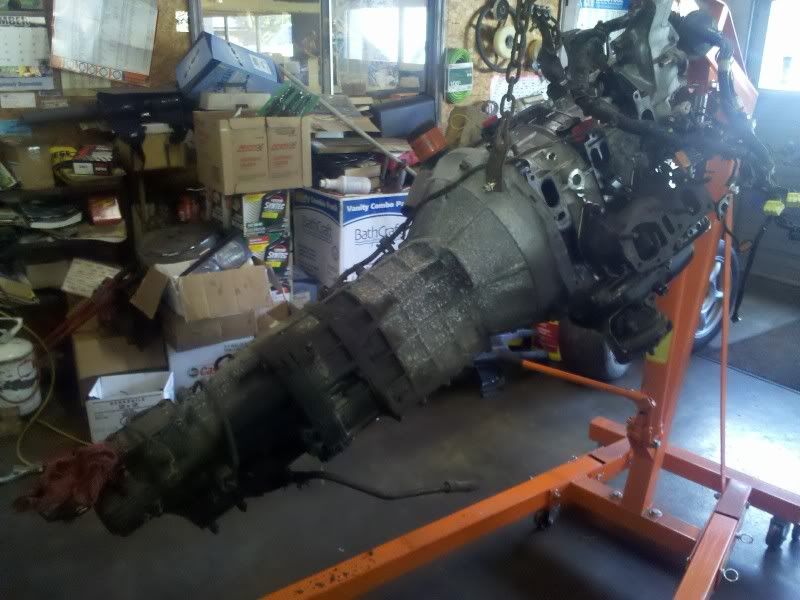
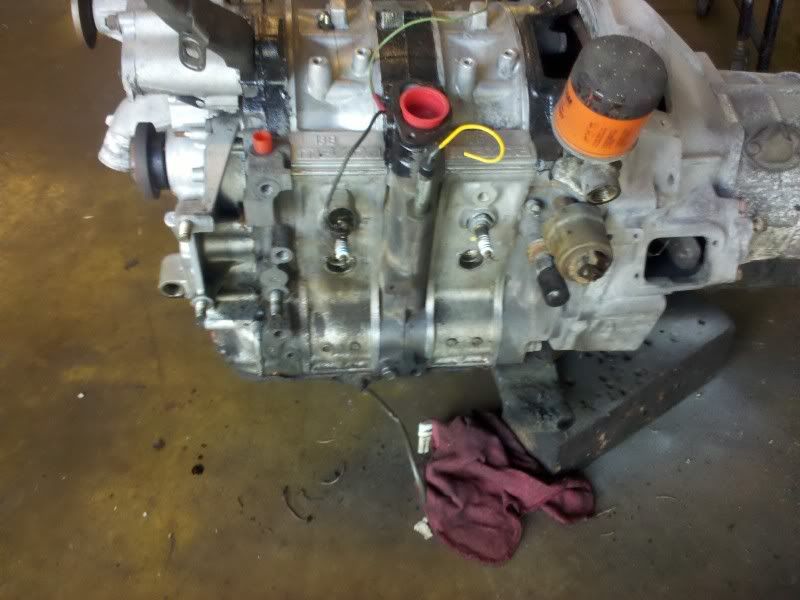
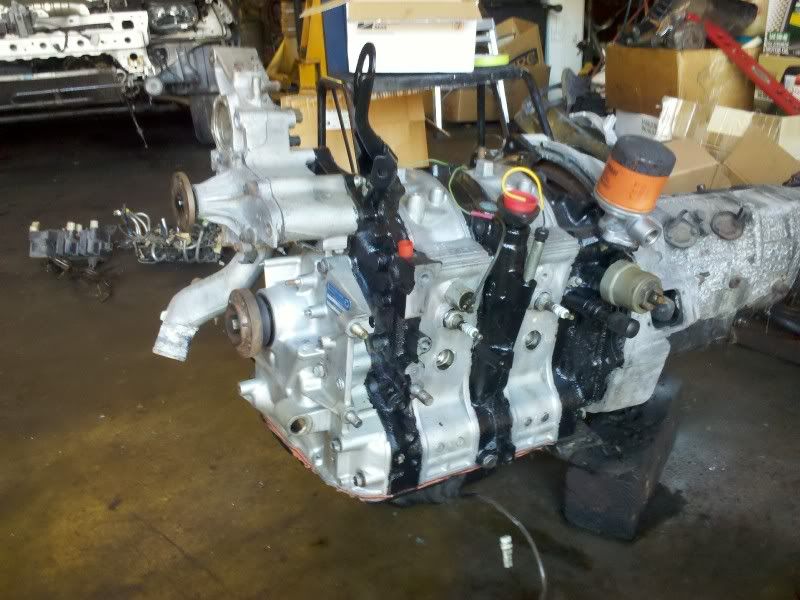
Got the engine out!
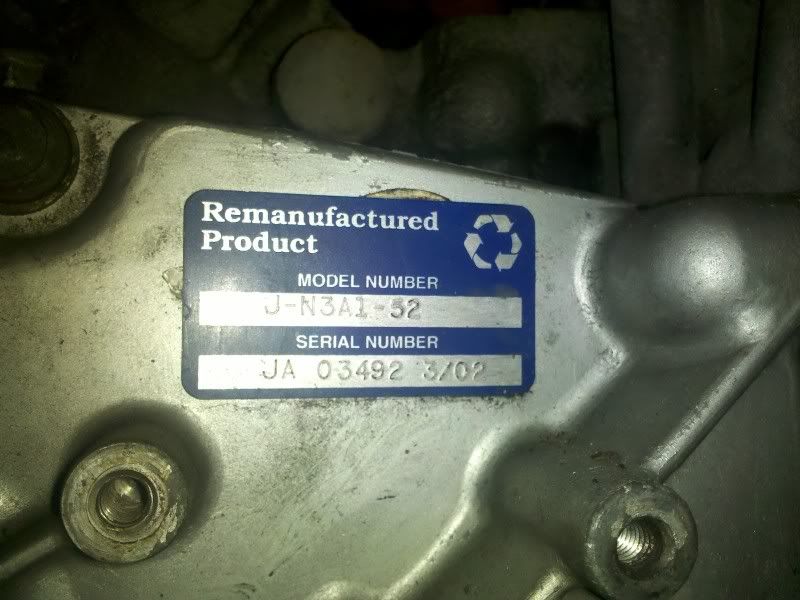
The blue badge that instills confidence:
And I removed this from under the carpet when I was unplugging the engine harness:
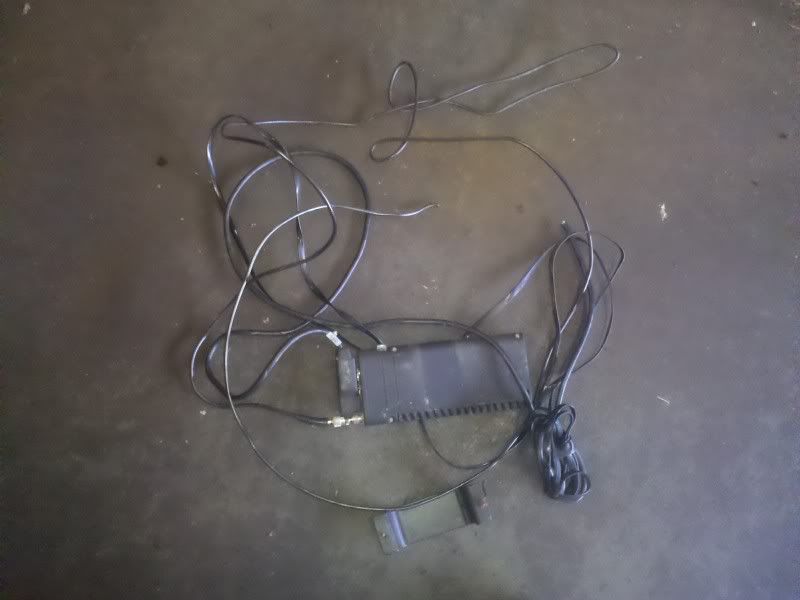
Secret KGB communications device comrade?
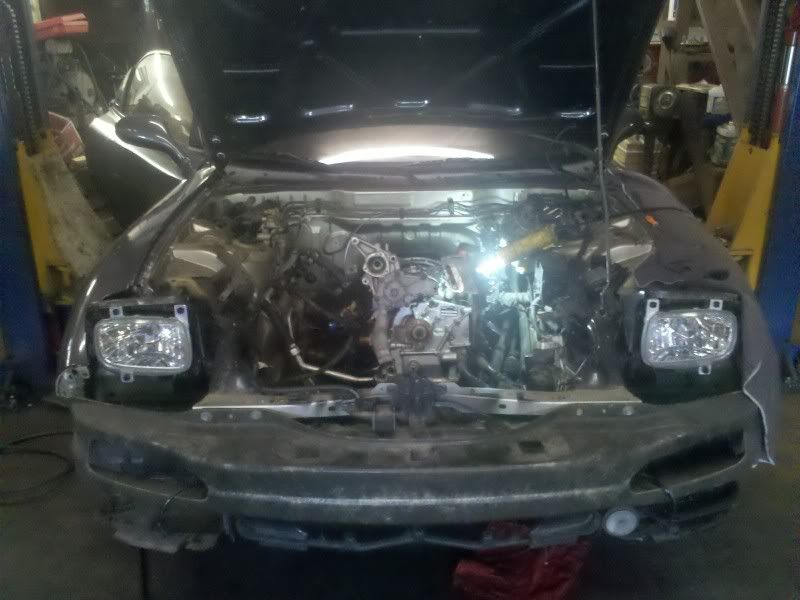
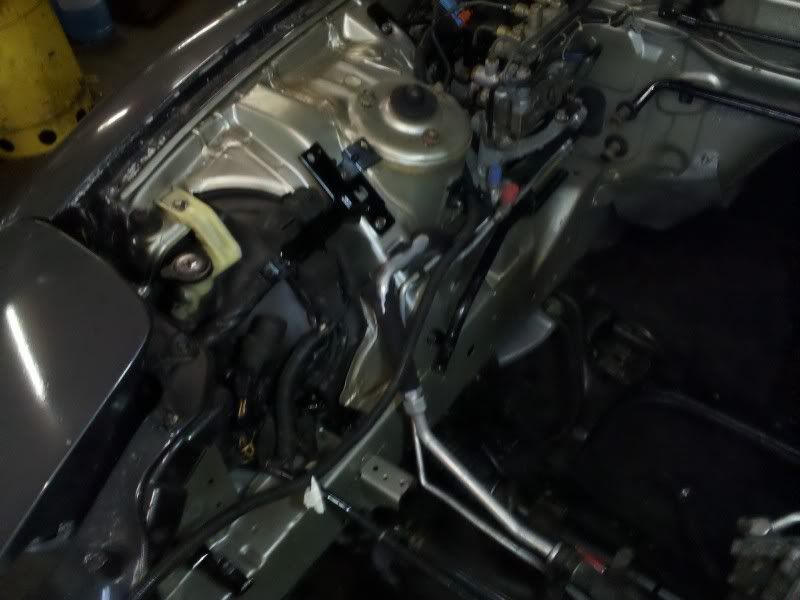
And, finally rolled the shell back outside, degreased, and powerwashed under the hood.
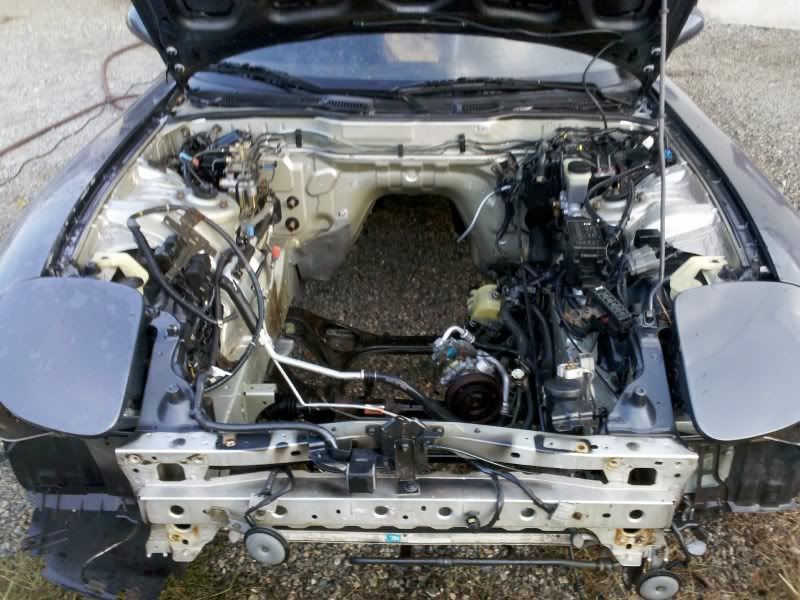
Sparkly bright! Now it is worthy of putting an engine back under there!
Also, bead blasted a few small items so I can paint them.

END OF PROGRESS FOR DAY 1
I don't know how far I'll get this week, but I hope I'll at least have the engine fully dressed and back in the car. If anyone has a driver's side engine mount let me know as mine is no longer one piece
Vince
Since I got two weeks vacation this year, the wife and I decided it was only right to spend one of them working on the FD. So, I plan to document the progress here.
The original thread when I got this car is located here: https://www.rx7club.com/3rd-generation-specific-1993-2002-16/finally-got-fd-story-pictures-945045/
Here is what I was working with when I got the car
Most of the junk removed under hood:
And I rolled it into the shop today to get a real start on this project.
Got the engine out!
The blue badge that instills confidence:
And I removed this from under the carpet when I was unplugging the engine harness:
Secret KGB communications device comrade?
And, finally rolled the shell back outside, degreased, and powerwashed under the hood.
Sparkly bright! Now it is worthy of putting an engine back under there!
Also, bead blasted a few small items so I can paint them.
END OF PROGRESS FOR DAY 1
I don't know how far I'll get this week, but I hope I'll at least have the engine fully dressed and back in the car. If anyone has a driver's side engine mount let me know as mine is no longer one piece
Vince
Thread Starter
Joined: Nov 2004
Posts: 1,139
Likes: 114
From: Berlin, MD
DAY 2
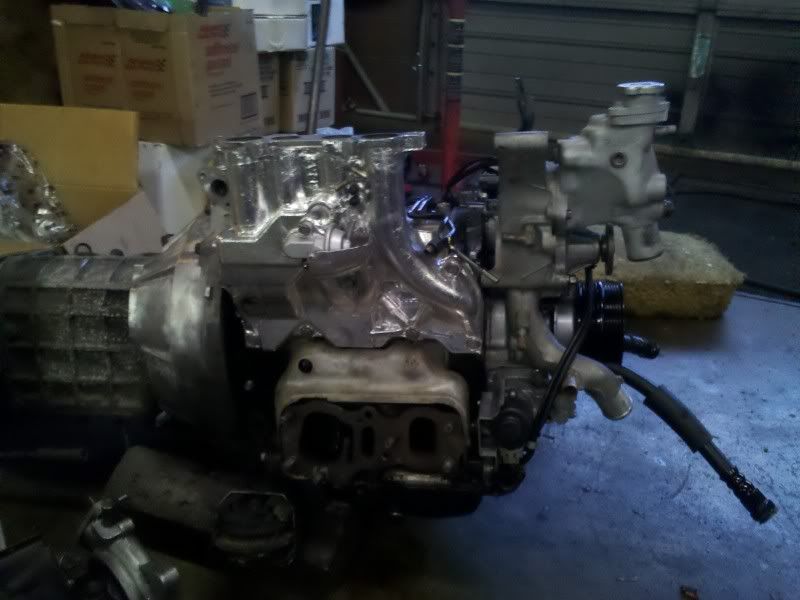
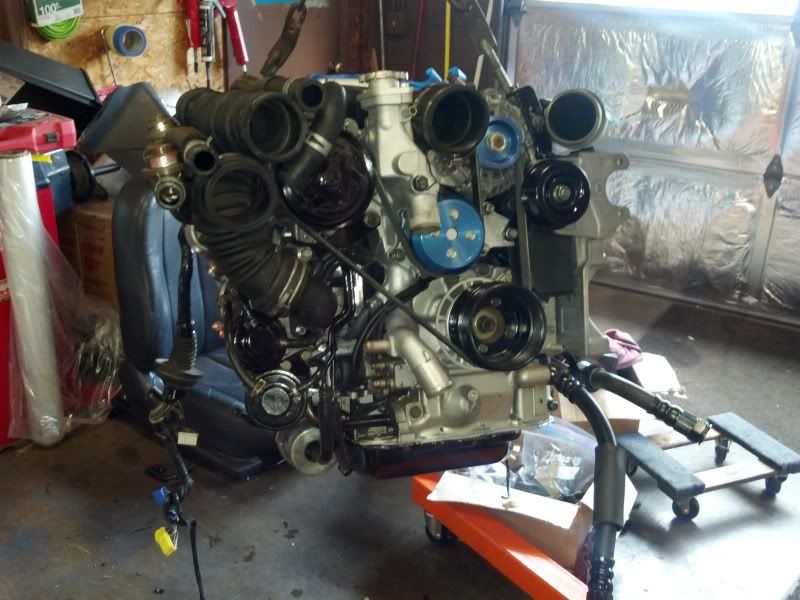
So, I finished removing everything from the DS of the engine:
Then, I cleaned and painted it.
Beadblasted a few brackets.
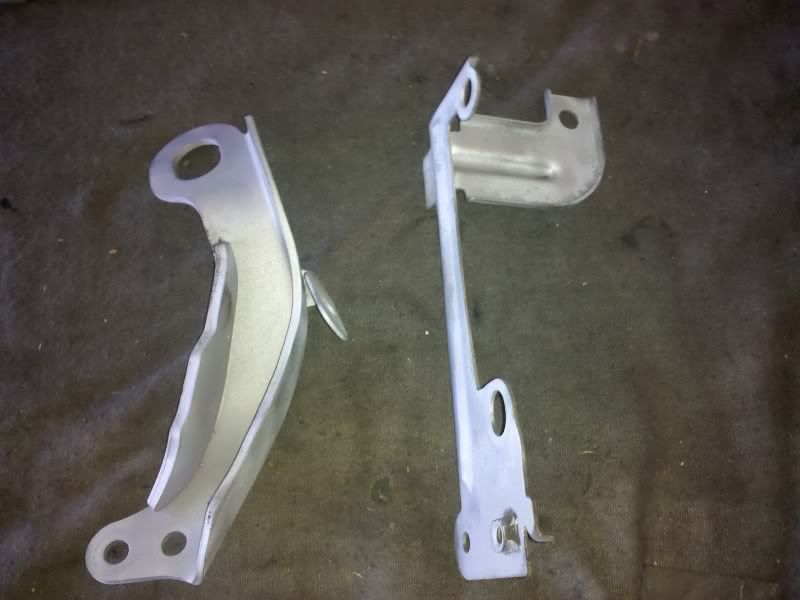
The metal parts of the oil cooler lines looked terrible, so I wire brushed them. The one on top is before and bottom is after.

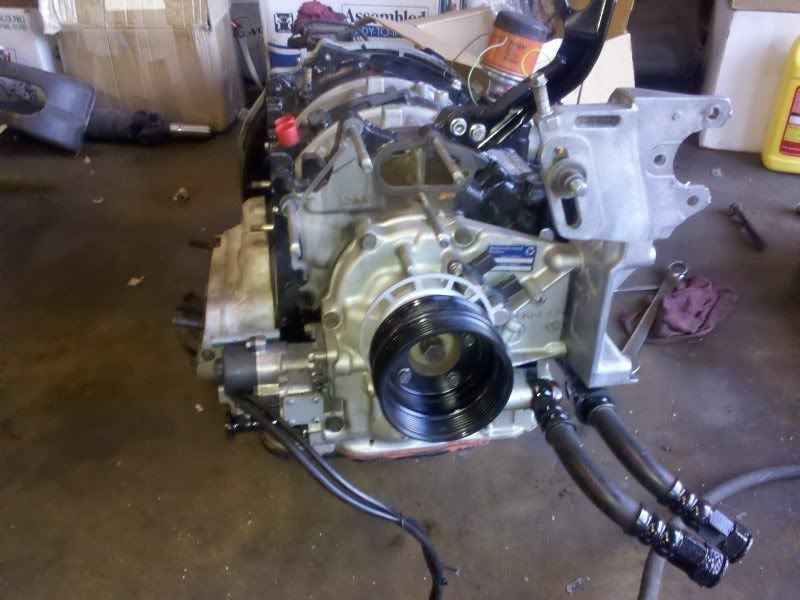
Accesory brackets, oil cooler lines, new spark plugs all installed, and replaced o-rings under oil filter adapter and all crush washers.
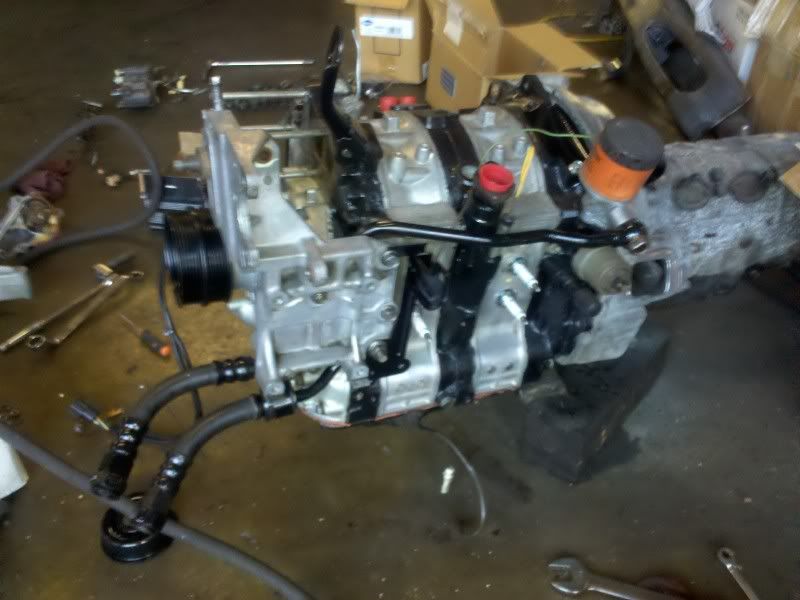
Also installed cleaned and repainted pulleys, the crank sensor, and the OMP.
And lastly, bead blasted and painted all the small rusty brackets on the PS of the engine bay.
END OF PROGRESS FOR DAY 2
Vince
So, I finished removing everything from the DS of the engine:
Then, I cleaned and painted it.
Beadblasted a few brackets.
The metal parts of the oil cooler lines looked terrible, so I wire brushed them. The one on top is before and bottom is after.
Accesory brackets, oil cooler lines, new spark plugs all installed, and replaced o-rings under oil filter adapter and all crush washers.
Also installed cleaned and repainted pulleys, the crank sensor, and the OMP.
And lastly, bead blasted and painted all the small rusty brackets on the PS of the engine bay.
END OF PROGRESS FOR DAY 2
Vince
Thread Starter
Joined: Nov 2004
Posts: 1,139
Likes: 114
From: Berlin, MD
DAY 3
It does not look like I got much done today. Today was mostly spent searching for parts in boxes, cleaning, painting, and referencing the FSM.
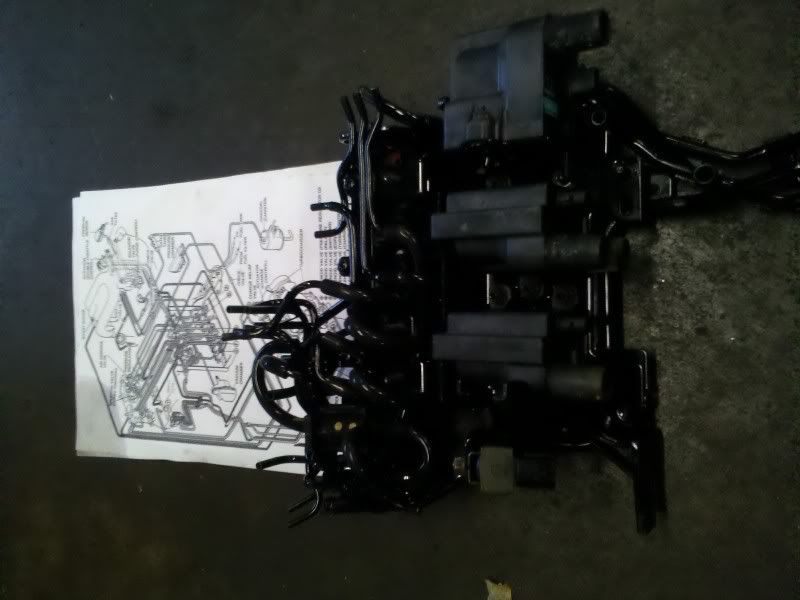
First task was blasting and painting the rats nest, cleaning & testing the solenoids on the rat's nest. Suprising all checked out good. Very time consuming though, hopefully it will save much possible trouble later. Also cleaned the coil packs, blasted and painted their bracket.
Finally reassembled the solenoids, coils and routed new silicone hose from Hose Techniques on the rack.
Also installed the LIM with a new gasket, EGR valve, water pump, FC thermoswitch, new CTS, new thermostat, and replaced the missing heat shield and studs in the exhaust manifold.
Then I noticed that the front oil cooler hose needed to be changed out for the longer one from the R1 oil cooler set. Fixed that!
Lastly, I installed my freshly cleaned injectors (thanks WitchHunter) into some freshly cleaned rails.
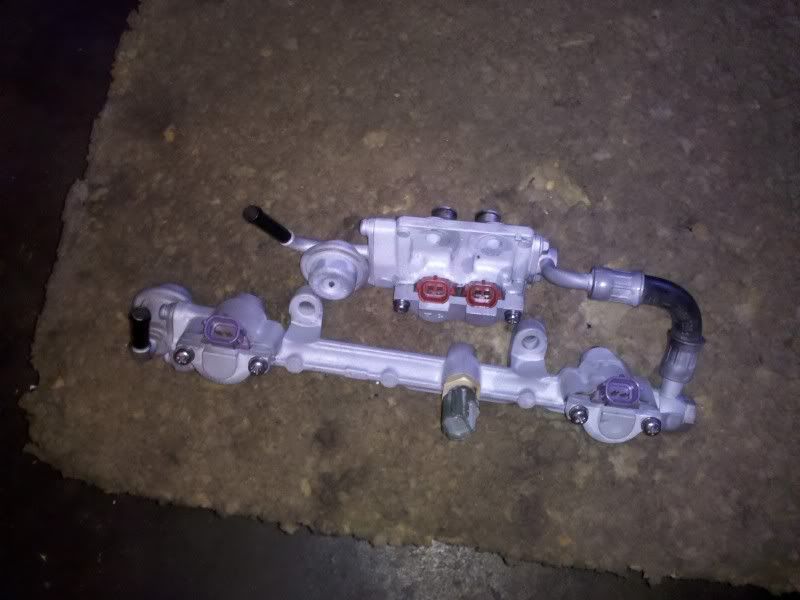
Then, I hit a small roadblock as the spacer for the primary fuel rail is MIA...
Will have to source one of those so I can mount the rails and everything else that goes under the "Surge Tank."
Vince
It does not look like I got much done today. Today was mostly spent searching for parts in boxes, cleaning, painting, and referencing the FSM.
First task was blasting and painting the rats nest, cleaning & testing the solenoids on the rat's nest. Suprising all checked out good. Very time consuming though, hopefully it will save much possible trouble later. Also cleaned the coil packs, blasted and painted their bracket.
Finally reassembled the solenoids, coils and routed new silicone hose from Hose Techniques on the rack.
Also installed the LIM with a new gasket, EGR valve, water pump, FC thermoswitch, new CTS, new thermostat, and replaced the missing heat shield and studs in the exhaust manifold.
Then I noticed that the front oil cooler hose needed to be changed out for the longer one from the R1 oil cooler set. Fixed that!
Lastly, I installed my freshly cleaned injectors (thanks WitchHunter) into some freshly cleaned rails.
Then, I hit a small roadblock as the spacer for the primary fuel rail is MIA...
Will have to source one of those so I can mount the rails and everything else that goes under the "Surge Tank."
Vince

I remember the original thread when u picked up this car.
Looks like your making alot of progress with getting it to road ready conditions. For the primary fuel rail spacer, if you can't source the oem part, you can make one out of some kind of plastic material that can stand up to heat. IIRC its 3/16" thick material.
As for the Mazda reman blue badge, that just brings up horrible memories. My reman lasted 8k miles b4 blowing. I'd recommend compression testing it while at operating temp a few times over some mileage. If you see it start to get low, definitely pull the block and rebuild b4 it blows. The only good thing about mazda remans are they all use brand new rotor housings.
Anyways, keep up the great work and best of luck to you build!
Thread Starter
Joined: Nov 2004
Posts: 1,139
Likes: 114
From: Berlin, MD
^ It's a learning experience for sure on this as it is my first 3rd Gen.
I ordered the spacer from Malloy, only $6.
Will be posting day 4 soon as I get to a PC.
As far as the reman goes, it is from 2002, and has ~20K on it. Cold compression numbers were good even without putting oil into it. Hope.that is a good sign.
With that being said, I will most definitely follow your advice and hopefully prevent a big nasty repair bill.
Vince
Thread Starter
Joined: Nov 2004
Posts: 1,139
Likes: 114
From: Berlin, MD
Well, here it is almost a year later, I have finally got another chance to work on it.
I finally repaired and rewrapped the harness, and laid it onto the engine, removed and painted the water pump housing, water pump, and used 2000F paint on the exhaust heat shield.
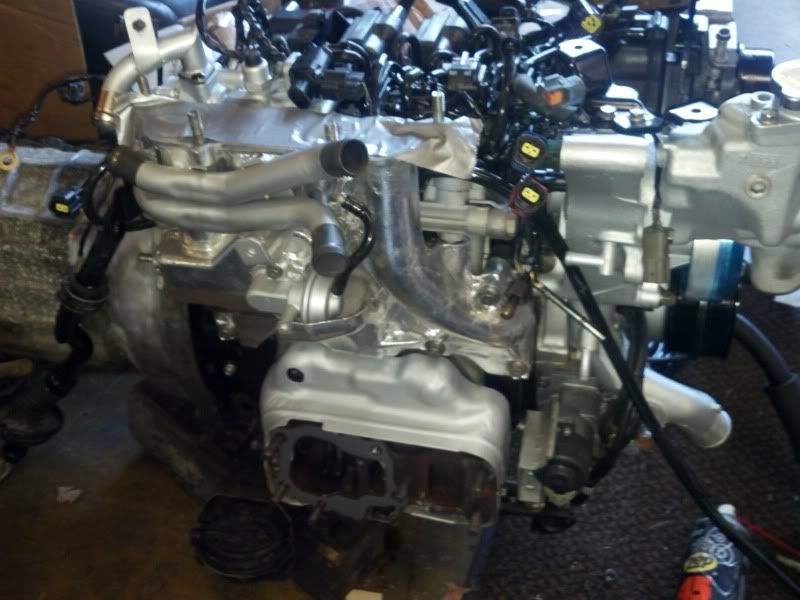
Rats nest mounted, ACV mounted and beginning to run vacuum hoses.
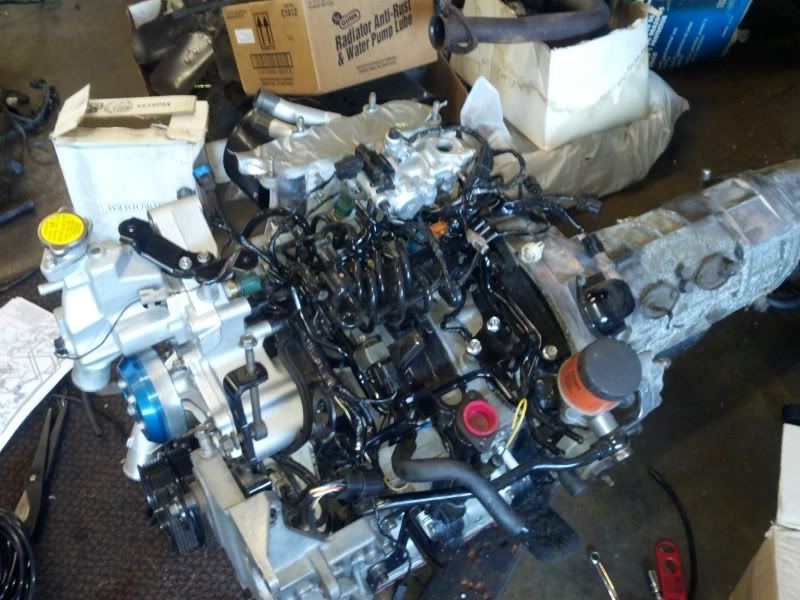
Coils mounted, plug wires routed.
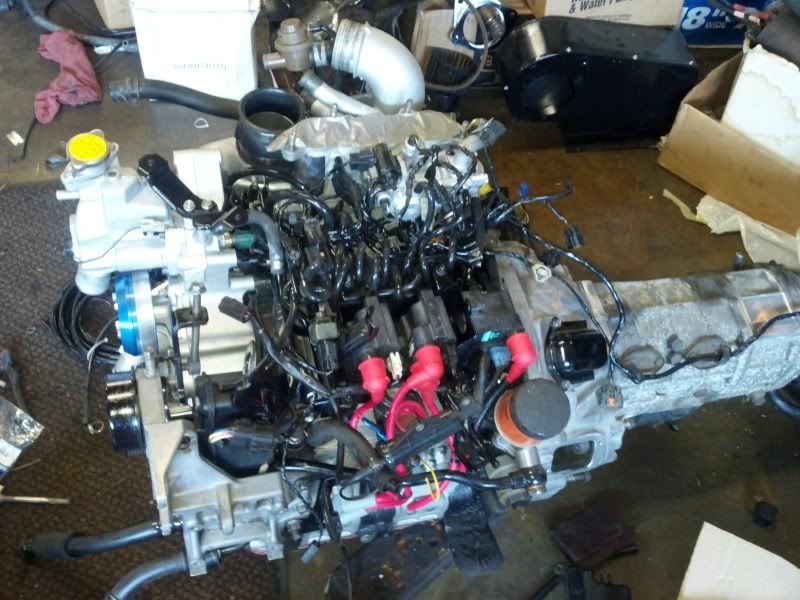
Turbos, y-pipe, actuators, and inlets mounted.
It does not look like much, but that's 2 1/2 days of working on this beast. I should have the engine finished today, then I can pick it up to reseal the oil pan and put on the poly motor mounts.
I do need an oil filler neck if anyone has one, I will post a wanted add if no replies.
Thanks for looking,
Vince
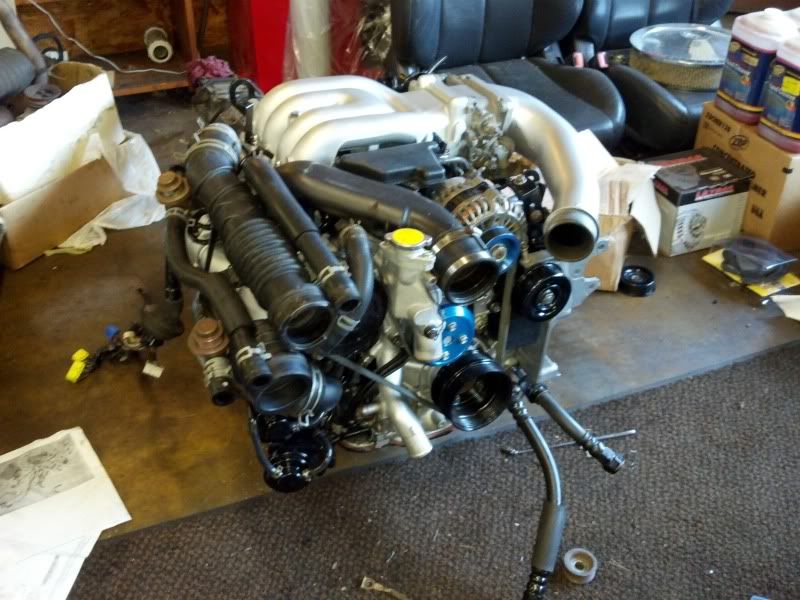
I finally repaired and rewrapped the harness, and laid it onto the engine, removed and painted the water pump housing, water pump, and used 2000F paint on the exhaust heat shield.
Rats nest mounted, ACV mounted and beginning to run vacuum hoses.
Coils mounted, plug wires routed.
Turbos, y-pipe, actuators, and inlets mounted.
It does not look like much, but that's 2 1/2 days of working on this beast. I should have the engine finished today, then I can pick it up to reseal the oil pan and put on the poly motor mounts.
I do need an oil filler neck if anyone has one, I will post a wanted add if no replies.
Thanks for looking,
Vince
Trending Topics
Thread Starter
Joined: Nov 2004
Posts: 1,139
Likes: 114
From: Berlin, MD
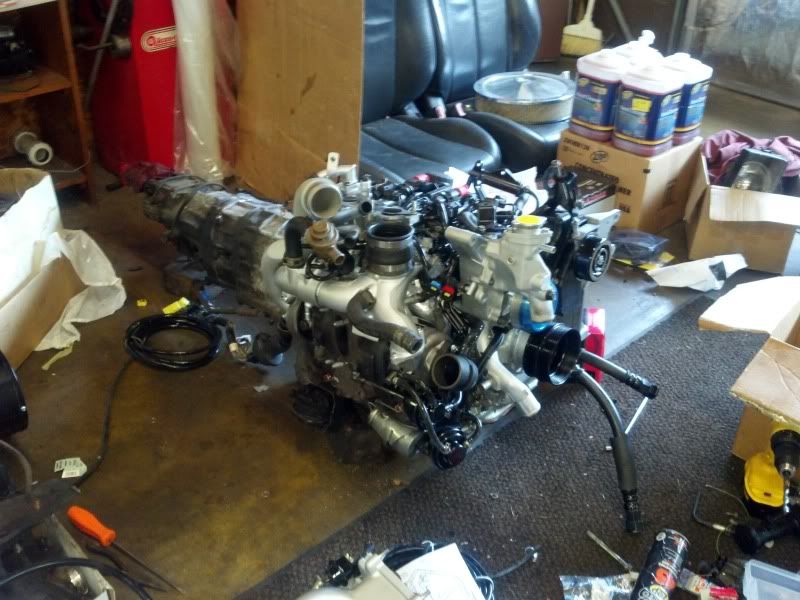
Got the UIM mounted:
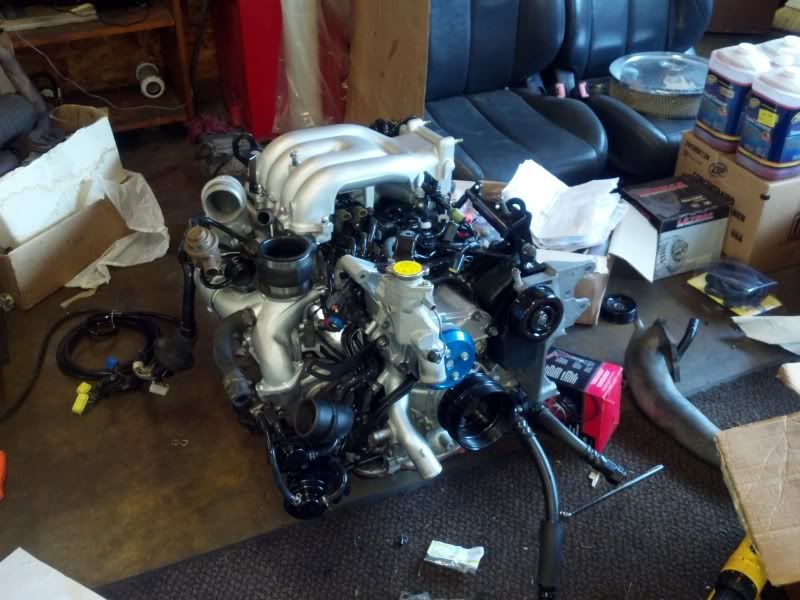
TB, Elbow, Alternator, and assorted tubes and hoses all installed:
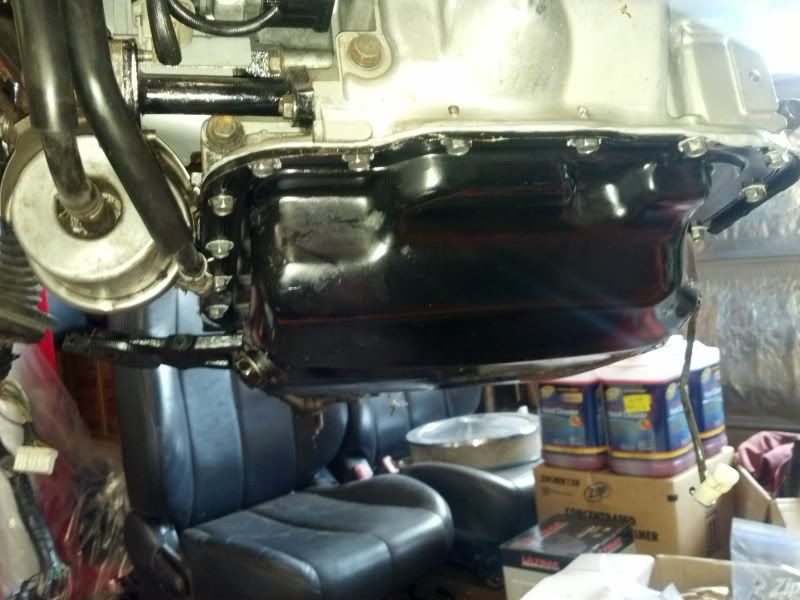
Oil pan cleaned, painted, resealed, and two steel motor mount brackets installed for poly mounts:
On the hoist ready to go back into the car tomorrow!
Vince
TB, Elbow, Alternator, and assorted tubes and hoses all installed:
Oil pan cleaned, painted, resealed, and two steel motor mount brackets installed for poly mounts:
On the hoist ready to go back into the car tomorrow!
Vince

Thread Starter
Joined: Nov 2004
Posts: 1,139
Likes: 114
From: Berlin, MD
^Now you got me wondering... I don't think I got those backwards, because I remember reading that you would need to have the primary rail milled to accept the secondary injectors. Then again, this would not be my first mistake.
Will investigate this further.
PROJECT UPDATE!!
I should probably rename this to the "SLOWEST REBUILD THREAD IN THE HISTORY OF RX7CLUB."
70hr work weeks do not leave much time to work on the 7...
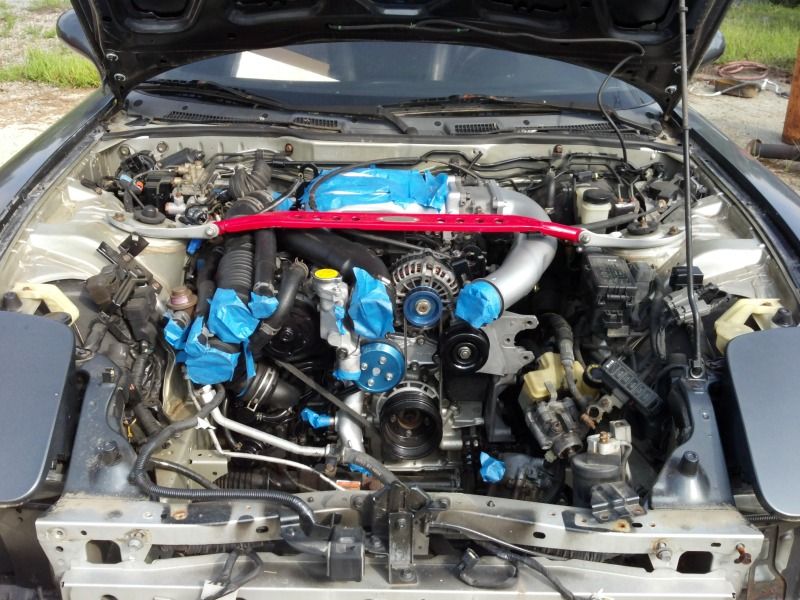
The engine is finally in the car. All the painters tape was to keep stuff out of the engine, and prevent damage hopefully to the paint.
If all goes well, I may have this finished before my birthday in October.
TO DO LIST
Thanks for looking!
Vince
Will investigate this further.
PROJECT UPDATE!!
I should probably rename this to the "SLOWEST REBUILD THREAD IN THE HISTORY OF RX7CLUB."
70hr work weeks do not leave much time to work on the 7...
The engine is finally in the car. All the painters tape was to keep stuff out of the engine, and prevent damage hopefully to the paint.
If all goes well, I may have this finished before my birthday in October.
TO DO LIST
- Blast, paint, install PPF.
- Install driveshaft, braces, heat shields.
- Install exhaust, get catalytic converter andhave extra O2 bung welded in.
- Mount fuel filter, fuel tank and new fuel tank straps.
- Sort out air filters and heat shields.
- Bleed brakes.
- Get tires mounted and balanced.
- Reinstall radiator, mount intercooler & have charge pipes made.
- Mount AC and PS pumps.
- Reinstall shifter, slave cylinder & starter.
- Install R1 oil coolers, replace PS cooler, and reinstall front bumper!
Thanks for looking!
Vince


Thread Starter
Joined: Nov 2004
Posts: 1,139
Likes: 114
From: Berlin, MD

Thread Starter
Joined: Nov 2004
Posts: 1,139
Likes: 114
From: Berlin, MD
ANOTHER MINOR UPDATE
So, time seems to be against me lately with work running 6 days a week and lots of VW mechanic work on the side, there is very little time to work on this project.
Today, my project went in reverse slightly.
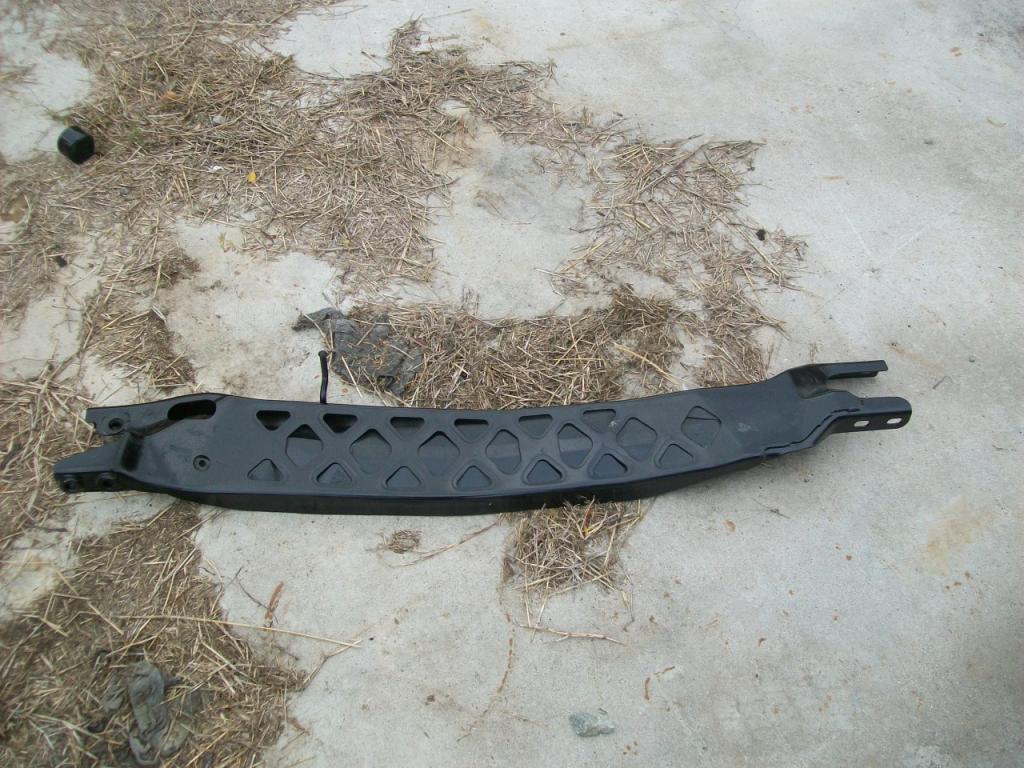
I've got the the powerplant frame brace blasted and painted
Then, I tried to remove the rear subframe today, since it looks like the Titanic wreckage...
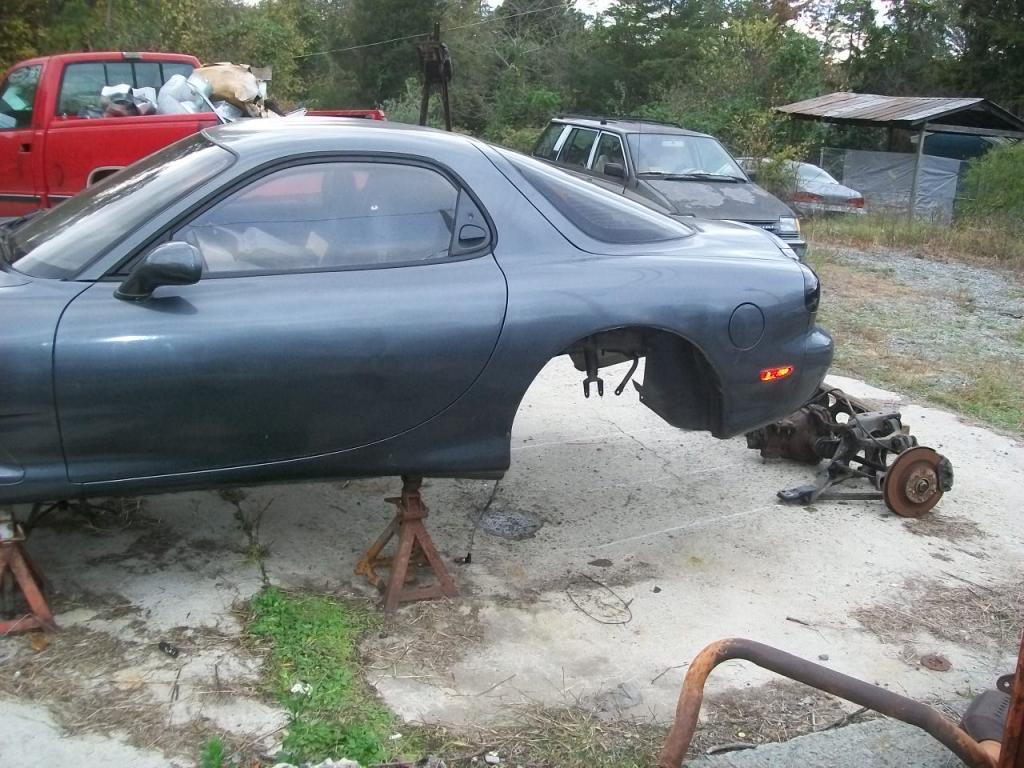
I got it out, with only two casualties: the bolts that hold the rear wheel speed sensors in place. I will blast and repaint this before reinstalling it.
It was too cold to do much outside after that, so I moved onto another project: WHEELS!
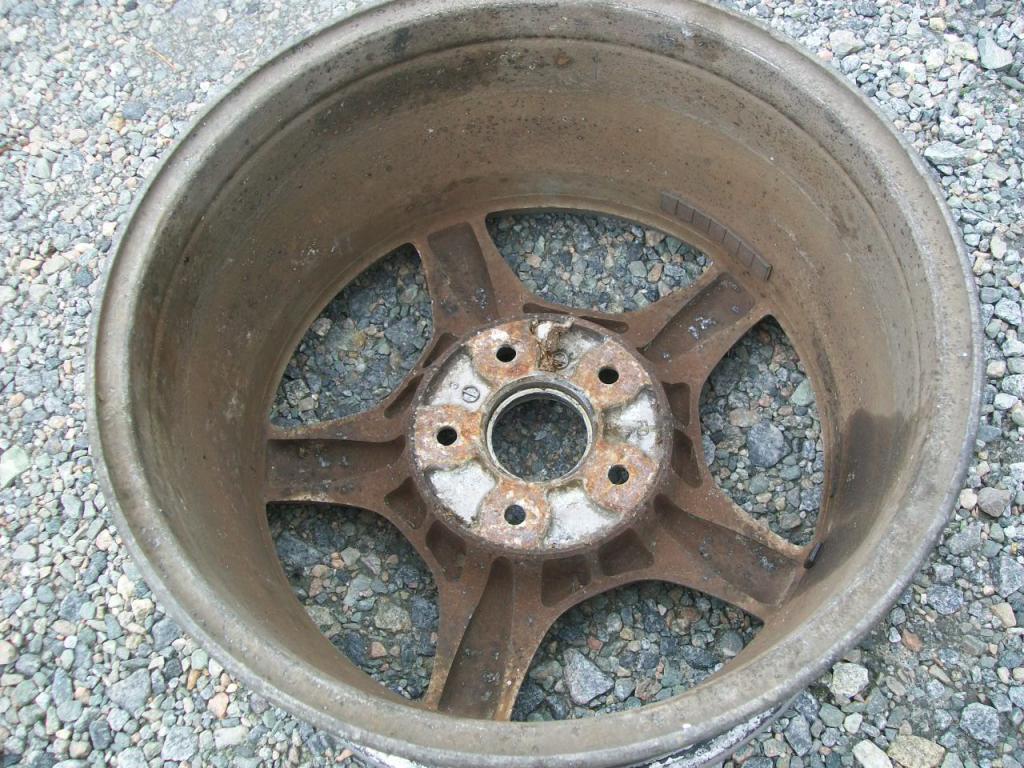
This is what I was working with:
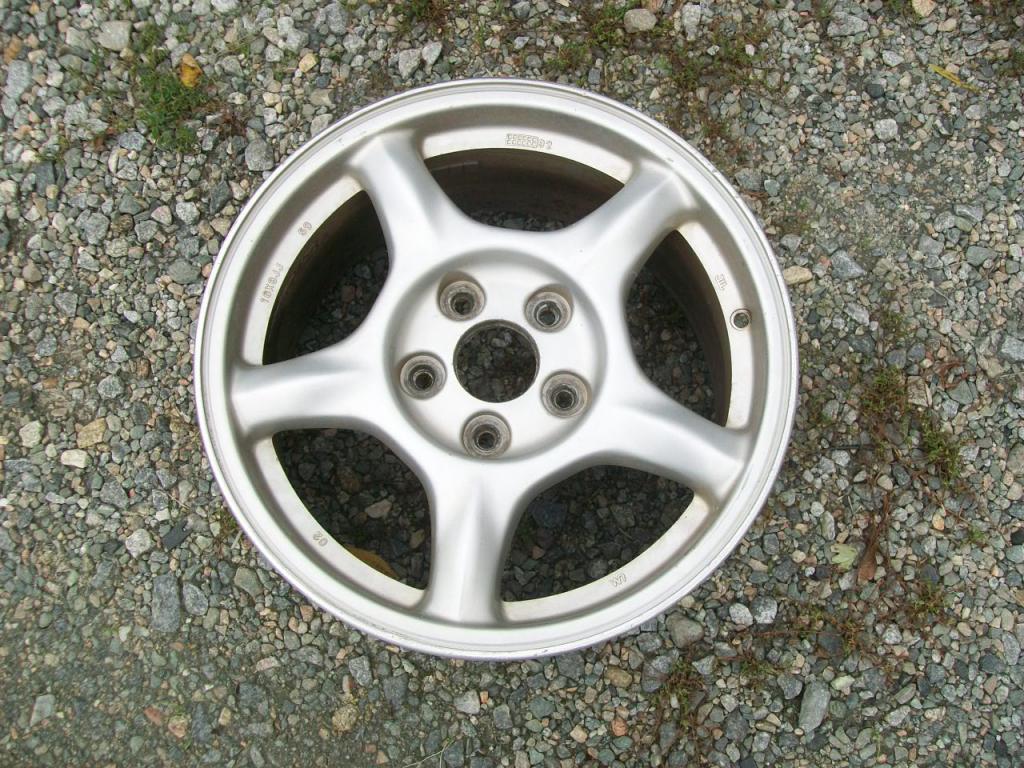
And 19 years of brake dust build up:
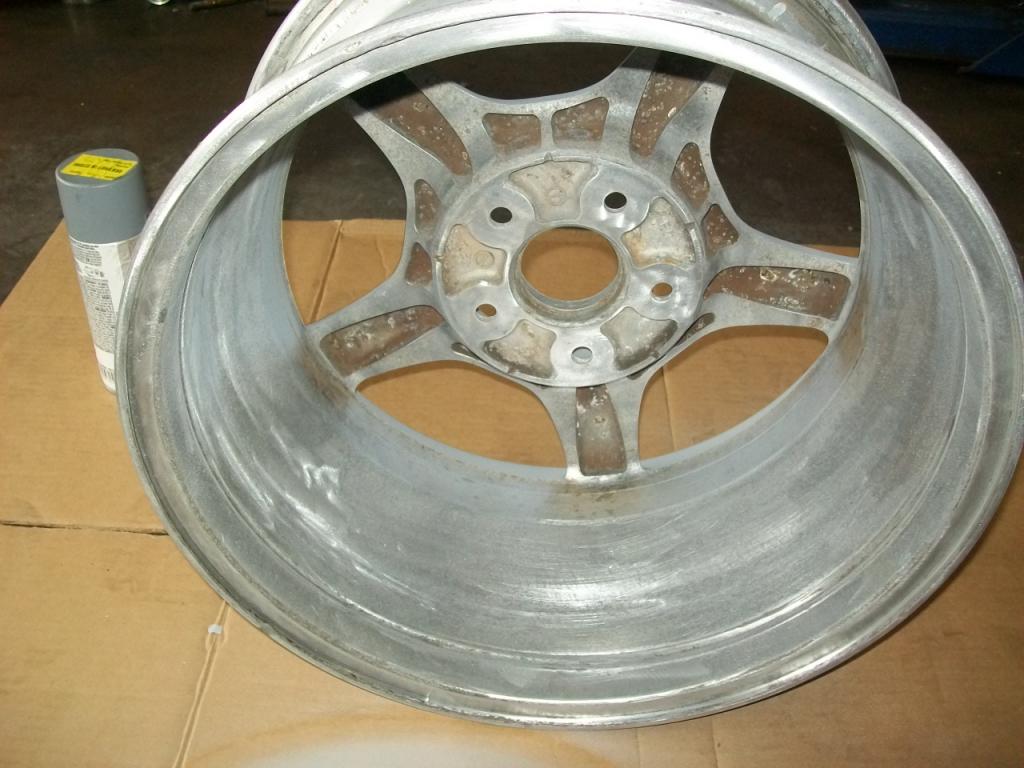
Brake dust removed:
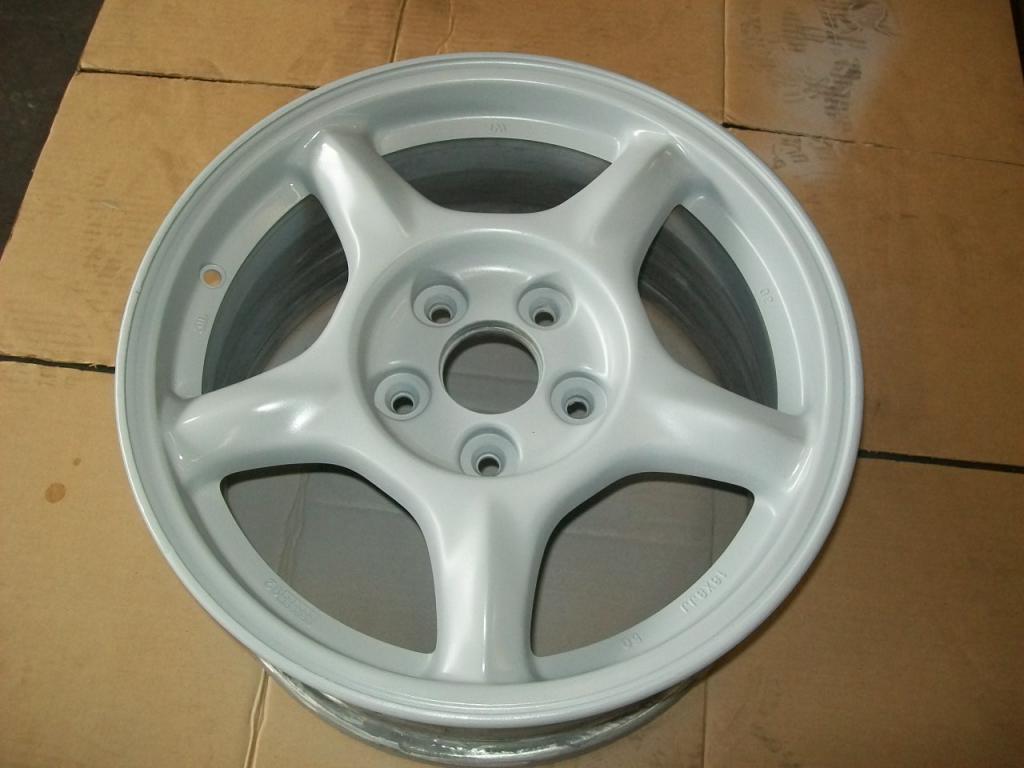
Primed:
Spokes painted black:
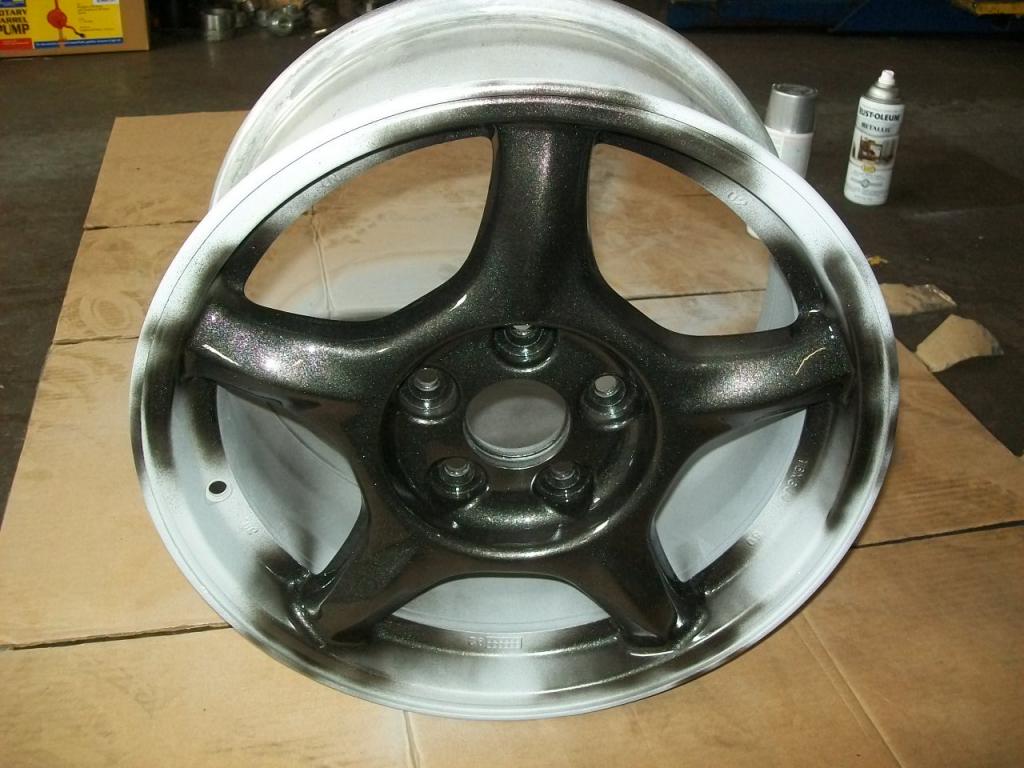
Masked:
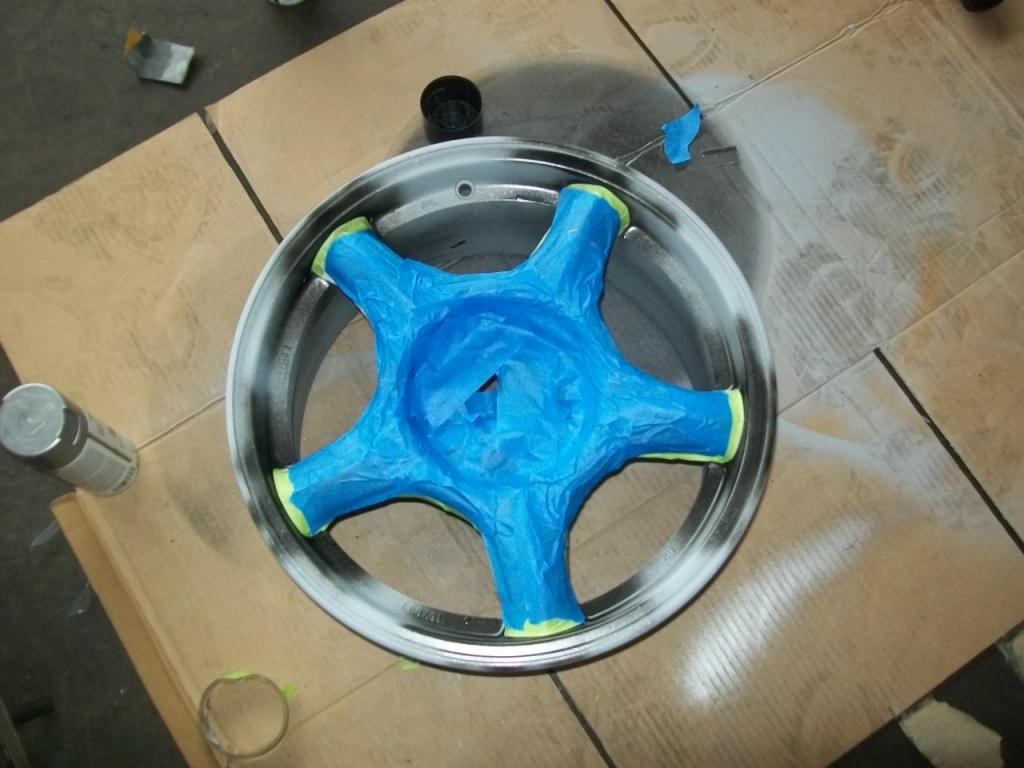
And finished... 3 More wheels to go after this.
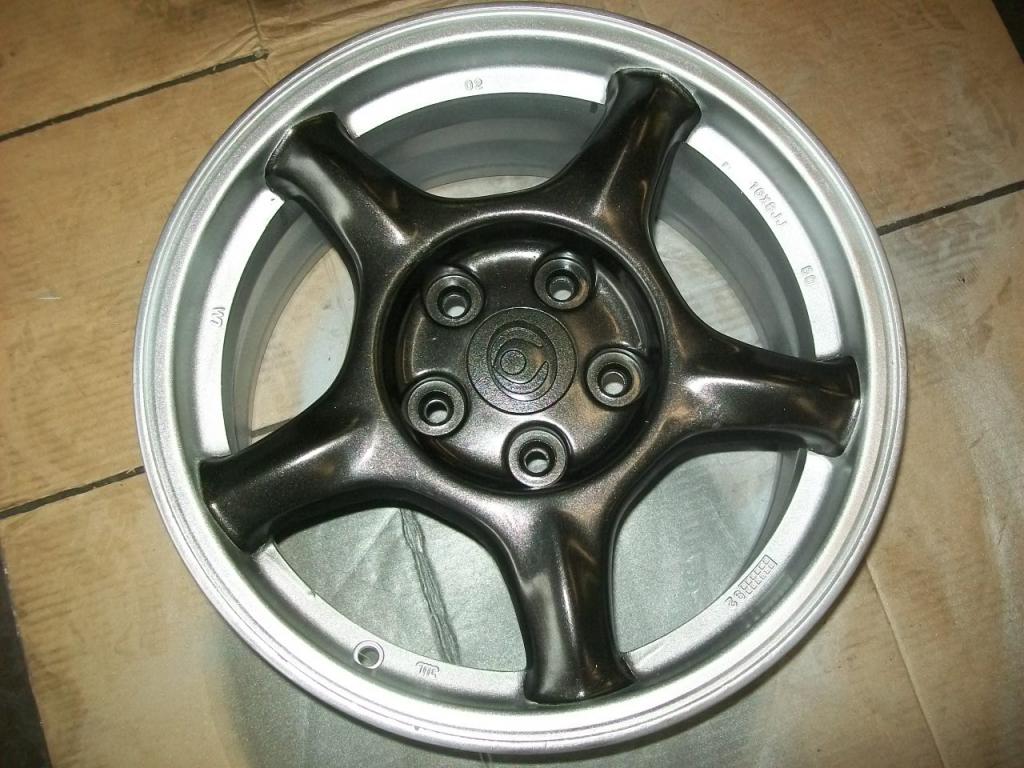
How do you guys like the wheels? I really like all the metallic in the black
Once I finish the rear subframe, I'll be able to reinstall the PPF brace, driveshaft, heat shields, and exhaust. Then the fuel tank & filter, and hopefully the underside will be done.
Vince
So, time seems to be against me lately with work running 6 days a week and lots of VW mechanic work on the side, there is very little time to work on this project.
Today, my project went in reverse slightly.
I've got the the powerplant frame brace blasted and painted
Then, I tried to remove the rear subframe today, since it looks like the Titanic wreckage...
I got it out, with only two casualties: the bolts that hold the rear wheel speed sensors in place. I will blast and repaint this before reinstalling it.
It was too cold to do much outside after that, so I moved onto another project: WHEELS!
This is what I was working with:
And 19 years of brake dust build up:
Brake dust removed:
Primed:
Spokes painted black:
Masked:
And finished... 3 More wheels to go after this.
How do you guys like the wheels? I really like all the metallic in the black
Once I finish the rear subframe, I'll be able to reinstall the PPF brace, driveshaft, heat shields, and exhaust. Then the fuel tank & filter, and hopefully the underside will be done.
Vince
I dont sleep
Joined: Feb 2005
Posts: 159
Likes: 0
From: Smyrna, Georgia (Cumberland)
I'm not a massive fan of the original five spokes but I must say you did great with them!
I like how you painted the spokes a different color. I imagine that getting the paint line taped where each spoke meets the rest of the wheel was a tad tedious.
I like how you painted the spokes a different color. I imagine that getting the paint line taped where each spoke meets the rest of the wheel was a tad tedious.
Thread Starter
Joined: Nov 2004
Posts: 1,139
Likes: 114
From: Berlin, MD
Yet Another MINOR UPDATE
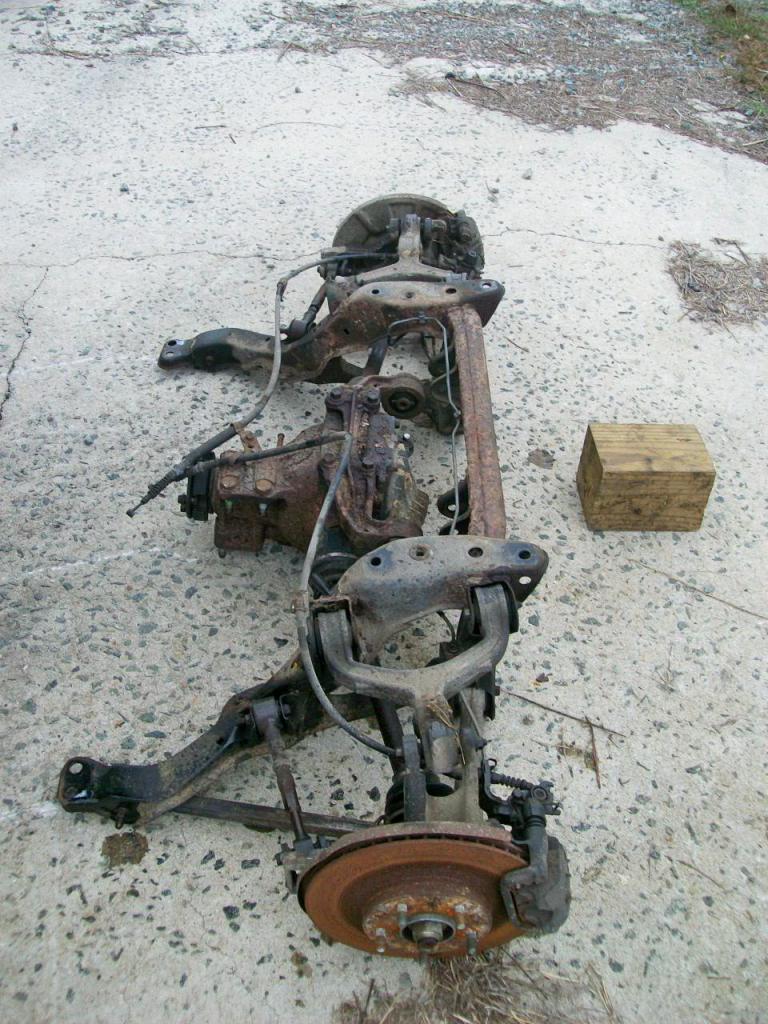
I had some free time for once before I had to go to work, so I almost completely disassembled the rear suspension. The only thing I could not get off were the lower control arms, because the camber adjustment bolts are not budging!
Also, one of the axles would not come out of the hub. A hammer could not persuade it, so I will have to revisit that.
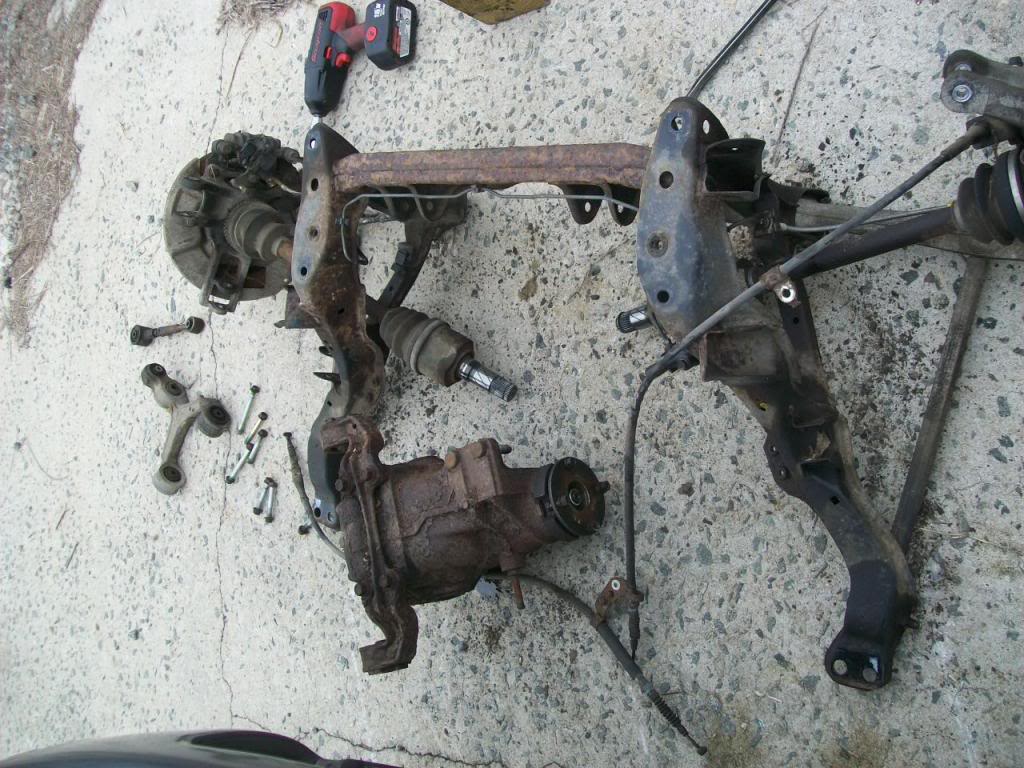
Here is a before:
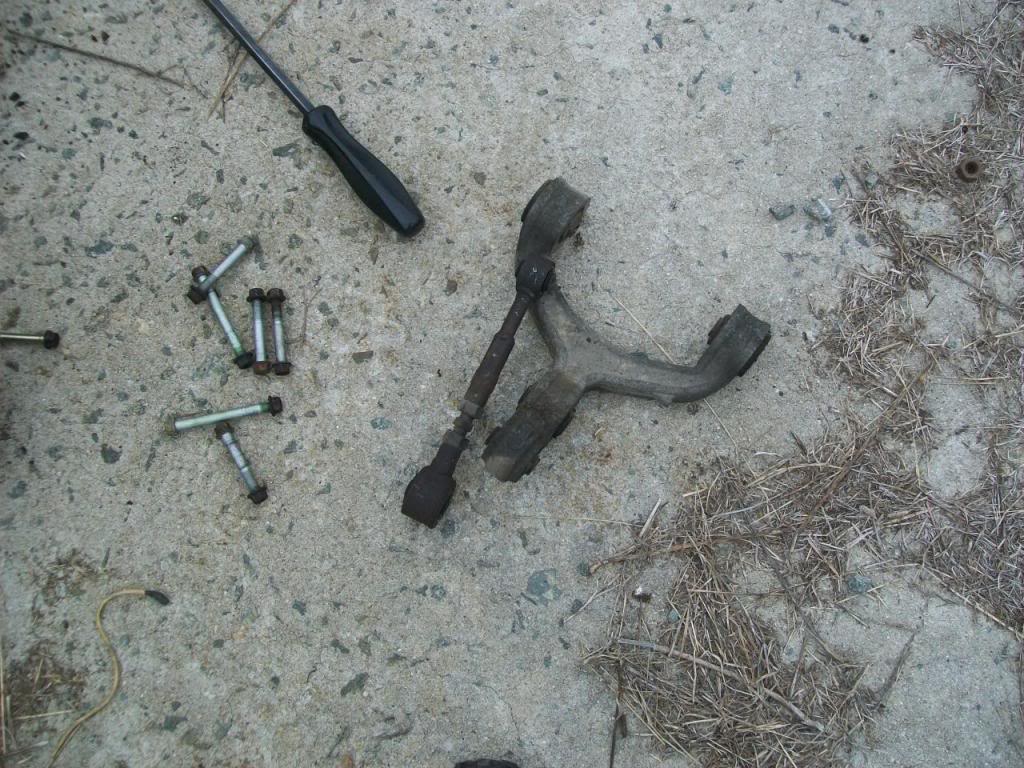
AND AFTER:
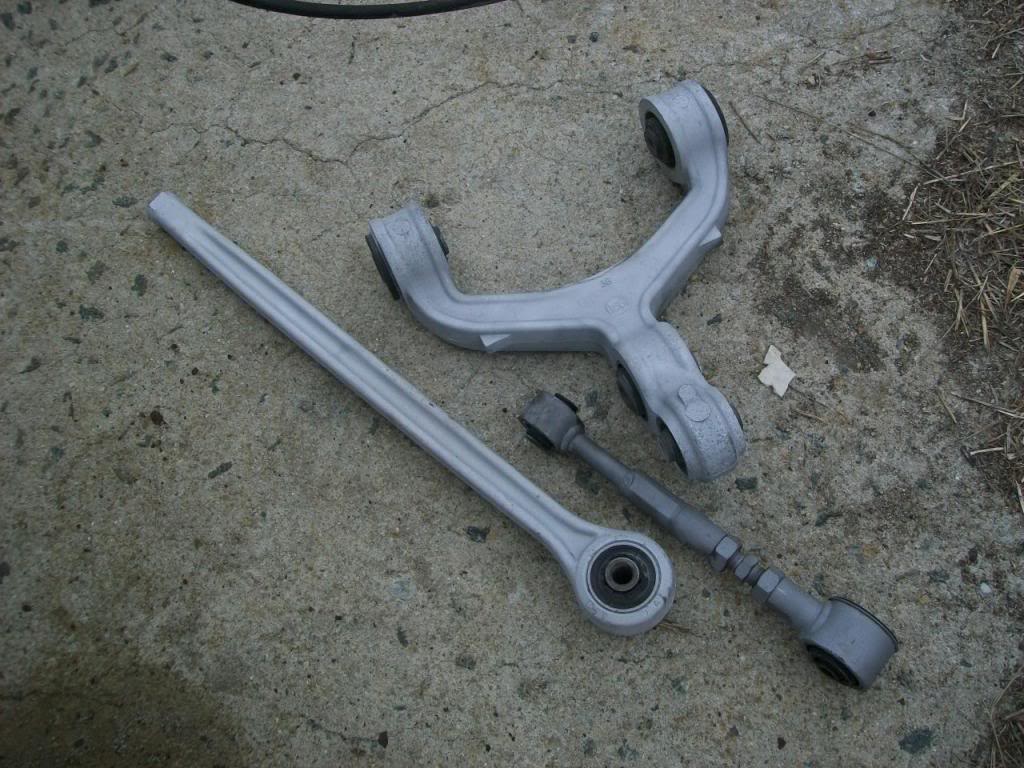
Once I get the lower control arms off I can bead blast the whole subframe and paint it.
Then I can put this mess back under the car and reassemble the rest!
Vince
I had some free time for once before I had to go to work, so I almost completely disassembled the rear suspension. The only thing I could not get off were the lower control arms, because the camber adjustment bolts are not budging!
Also, one of the axles would not come out of the hub. A hammer could not persuade it, so I will have to revisit that.
Here is a before:
AND AFTER:
Once I get the lower control arms off I can bead blast the whole subframe and paint it.
Then I can put this mess back under the car and reassemble the rest!
Vince
looking good. i've been wanting to take off many of the parts and blast them myself. unfortunately i've only got access to a sandblast cabinet so i won't be able to do any big parts i don't think. been thinking of getting replacement bushings for the suspension and all so i can replace everything while all the parts are pulled. just don't wanna fork out the $700 for superpro right now while i've got so much more that's needed.