
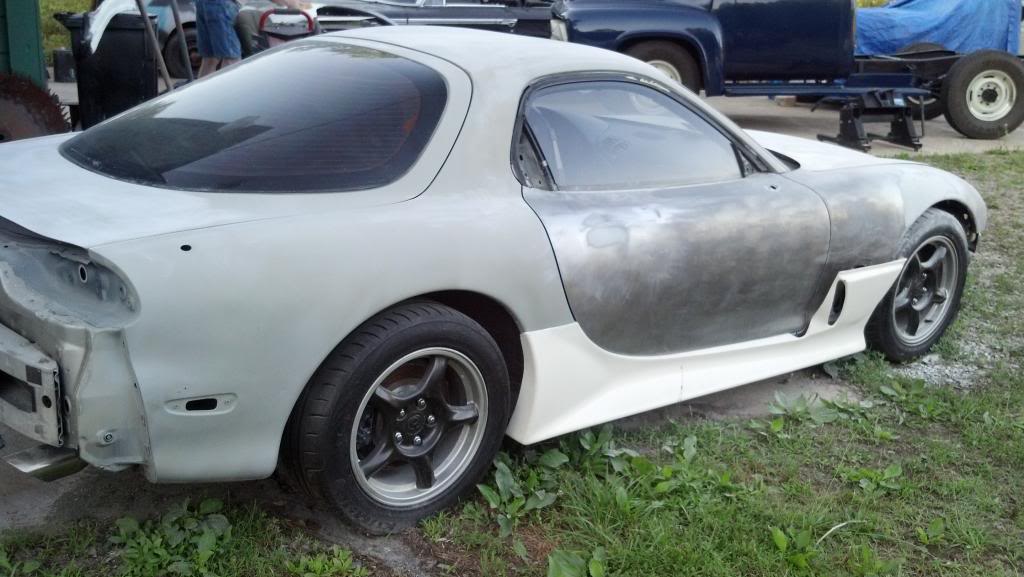
Resurrecting the FD or "How I spent a week's vacation"

Thread Starter


Joined: Nov 2004
Posts: 1,139
Likes: 114
From: Berlin, MD
^Thanks for the compliments.
The pace is slow, only having Saturday available to work on it "weather permitting" and the car being 1 hour away. But it is satisfying to do it all yourself.
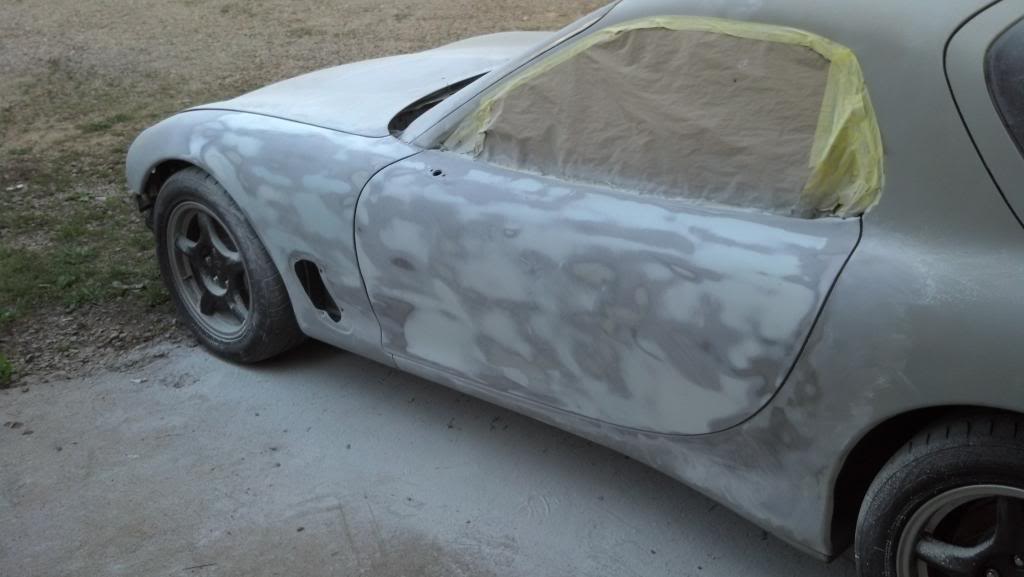
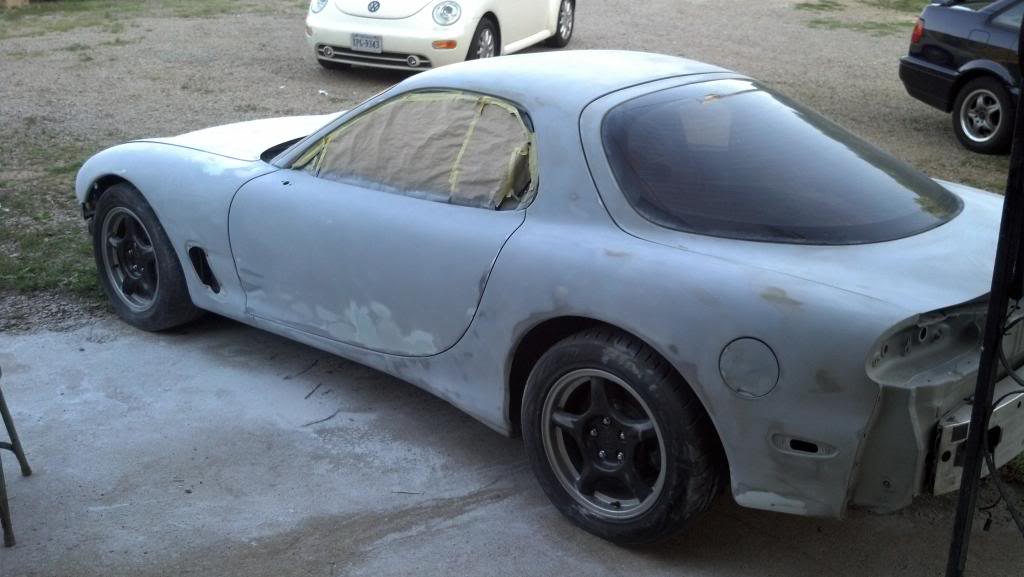
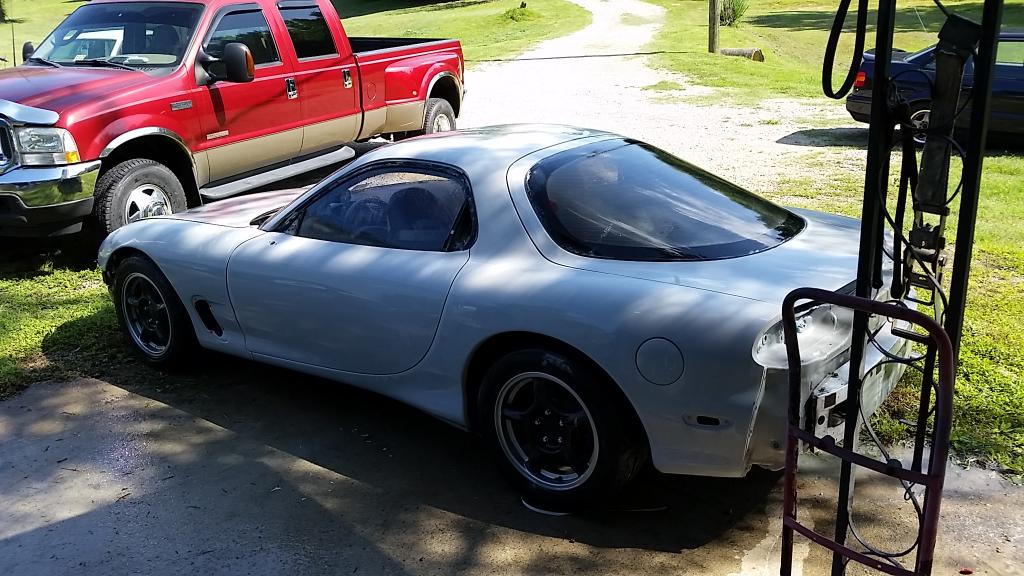
Fender and door actually done, I think. Did a final skim coat of some type of thinner kind that fills the sanding scratches and what not with a finer grade of sandpaper.
Feels smooth as glass now!
Vince
The pace is slow, only having Saturday available to work on it "weather permitting" and the car being 1 hour away. But it is satisfying to do it all yourself.
Fender and door actually done, I think. Did a final skim coat of some type of thinner kind that fills the sanding scratches and what not with a finer grade of sandpaper.
Feels smooth as glass now!
Vince
Recovering Milkaholic
iTrader: (7)
Joined: Jan 2002
Posts: 8,206
Likes: 0
From: Budds Creek, Maryland
Not that I need to tell you but make sure you block sand it all otherwise it will show in the clear coat.
I missed a fee minor spots on mine because I didn't skim the entire car with lacquer fill.
I missed a fee minor spots on mine because I didn't skim the entire car with lacquer fill.
Thread Starter
Joined: Nov 2004
Posts: 1,139
Likes: 114
From: Berlin, MD
^Most definately. All of this so far has been with various sanding blocks. This is all a learning experience for me as it is my first attempt at any type of body work. Any tips and tricks are GREATLY APPRECIATED!
My buddy (the experienced body man ) said that once all of this is done and primed, we'll be doing extensive blocking to make sure there are no ripples hopefully. Being that the car is almost entirely made of curves it is interesting trying to do anything with it.
Vince
My buddy (the experienced body man
) said that once all of this is done and primed, we'll be doing extensive blocking to make sure there are no ripples hopefully. Being that the car is almost entirely made of curves it is interesting trying to do anything with it.Vince
Recovering Milkaholic
iTrader: (7)
Joined: Jan 2002
Posts: 8,206
Likes: 0
From: Budds Creek, Maryland
^Most definately. All of this so far has been with various sanding blocks. This is all a learning experience for me as it is my first attempt at any type of body work. Any tips and tricks are GREATLY APPRECIATED! My buddy (the experienced body man ) said that once all of this is done and primed, we'll be doing extensive blocking to make sure there are no ripples hopefully. Being that the car is almost entirely made of curves it is interesting trying to do anything with it. Vince
) said that once all of this is done and primed, we'll be doing extensive blocking to make sure there are no ripples hopefully. Being that the car is almost entirely made of curves it is interesting trying to do anything with it. VinceWhat about a sealer coat, are you using a sealer or going straight from primer to base color coat?
Thread Starter
Joined: Nov 2004
Posts: 1,139
Likes: 114
From: Berlin, MD
There will be a sealer, but I don't know when it will be put on. I'm guessing after all the major part of the body work is done. All the paint products are Valspar, supposedly very good quality
I will not be spraying the car though. As much as the paint costs, I'm going to let my buddy (the experienced painter) do that part. I will be spraying another car over there that uses some CHEAP paint to get some practice though!
Originally Posted by tt7hvn
Looks good buddy. I'm always astonished about how much paint you removed from that body. It's amazing.
Looking forward to the paint pics. What color you going with?
Looking forward to the paint pics. What color you going with?
AKA Spirit R color or here in the US it was used on a special edition Miata.
Vince
Recovering Milkaholic
iTrader: (7)
Joined: Jan 2002
Posts: 8,206
Likes: 0
From: Budds Creek, Maryland
We started with an etching primer on the bare metal and regular primer over that for what you see so far. There will be a sealer, but I don't know when it will be put on. I'm guessing after all the major part of the body work is done. All the paint products are Valspar, supposedly very good quality I will not be spraying the car though. As much as the paint costs, I'm going to let my buddy (the experienced painter) do that part. I will be spraying another car over there that uses some CHEAP paint to get some practice though! 25G - Titanium Gray Metallic AKA Spirit R color or here in the US it was used on a special edition Miata. Vince
I'm familiar with the Valspar brand. I use some of their finishes in my furniture business. It's not top end but far from low end which would be Nasom.
You sold on that gray paint? I always though that color never did a 3rd gen justice. I like color on a sports car.
Anyway, sealer would be after all your body work is done. It will help keep any body filler spots from showing through the base coat.
Regardless of what color you go with the car will look awesome if you guys get the body work right.

^Most definately. All of this so far has been with various sanding blocks. This is all a learning experience for me as it is my first attempt at any type of body work. Any tips and tricks are GREATLY APPRECIATED!
My buddy (the experienced body man ) said that once all of this is done and primed, we'll be doing extensive blocking to make sure there are no ripples hopefully. Being that the car is almost entirely made of curves it is interesting trying to do anything with it.
Vince
My buddy (the experienced body man
) said that once all of this is done and primed, we'll be doing extensive blocking to make sure there are no ripples hopefully. Being that the car is almost entirely made of curves it is interesting trying to do anything with it.Vince
Thread Starter
Joined: Nov 2004
Posts: 1,139
Likes: 114
From: Berlin, MD

Originally Posted by Fd3BOOST
You sold on that gray paint? I always though that color never did a 3rd gen justice. I like color on a sports car.

I was a little indecisive at first on the color, Innocent Blue/Stormy Blue, CYM, Some version of white. I did not want RED or Black or SSM. But I kept coming back to this one. I like that it is understated, but it is not exactly boring. The paint in the can looks pretty good, a good mix of metallic and pearl effect. I expect it will look great.
IRL the color falls somewhere between Honda's Polished Metal Metallic and that dark charcoal color Toyota Magnetic Grey Metallic, best I can figure. It does look slightly darker than the one pictured above, but that probably doesn't mean much as it is still in the can.
It may not be as dramatic as some colors (your AMAZING blue for instance), but my intention is not to draw attention.
Originally Posted by Mazderati
Adjustable flexibility sanders mn,usa
Vince
Recovering Milkaholic
iTrader: (7)
Joined: Jan 2002
Posts: 8,206
Likes: 0
From: Budds Creek, Maryland
The correct description would be Majik blue pearl  but what's a name anyway.
I hear what your sayin. I've seen some go overboard with paint, purple, orange etc... It will look great in the titanium grey I'm sure.
but what's a name anyway.I hear what your sayin. I've seen some go overboard with paint, purple, orange etc... It will look great in the titanium grey I'm sure.
Thread Starter
Joined: Nov 2004
Posts: 1,139
Likes: 114
From: Berlin, MD
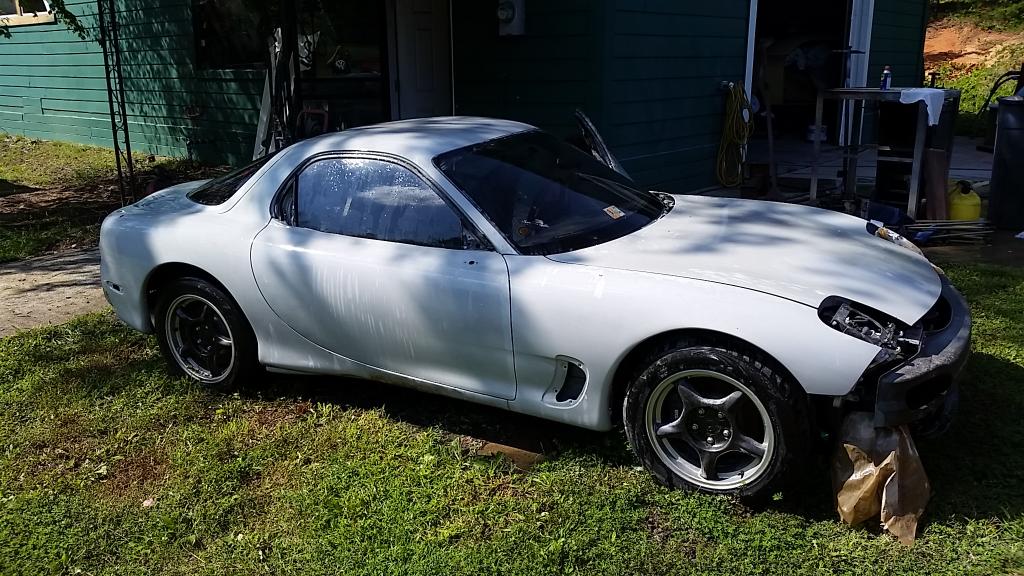
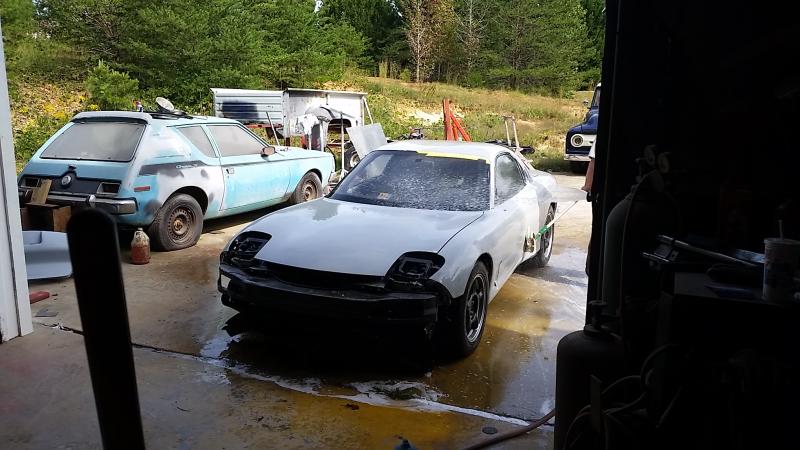
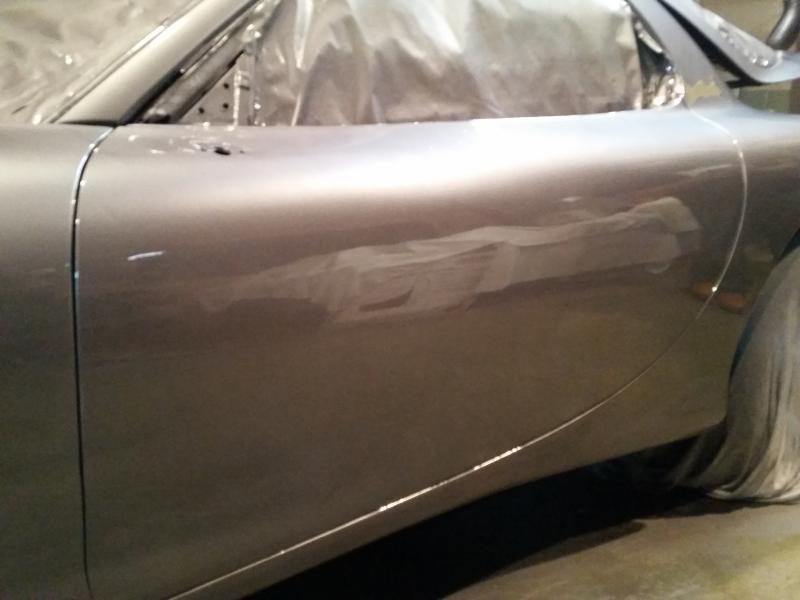
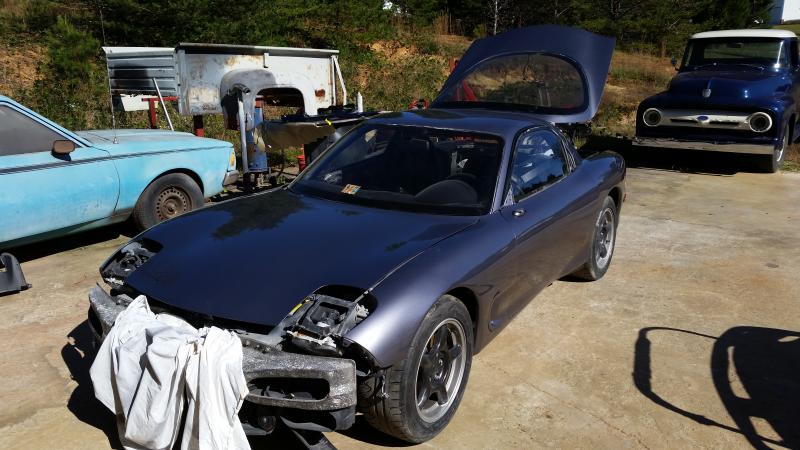
Well, after some more work on the door, fender and quarter, they finally feel done. Maybe. Closer to done. Probably not. I don't know
At least they do feel really smooth now.
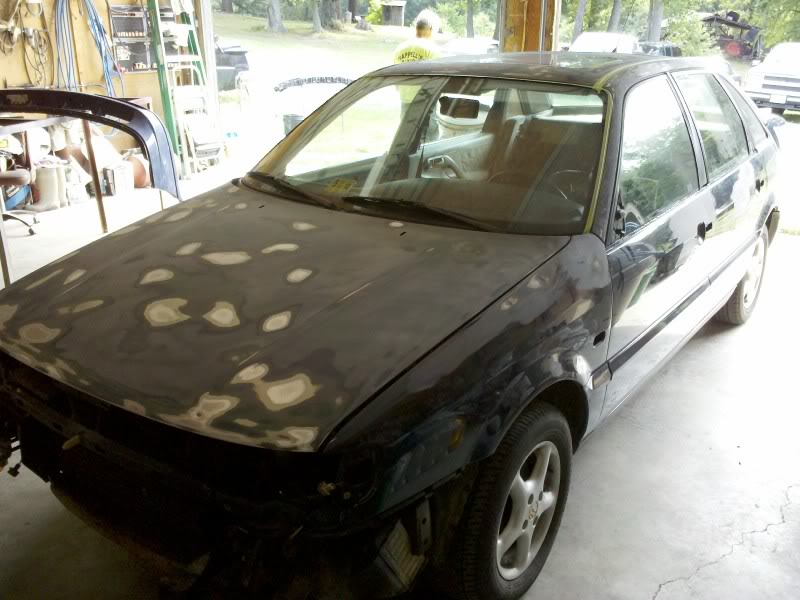
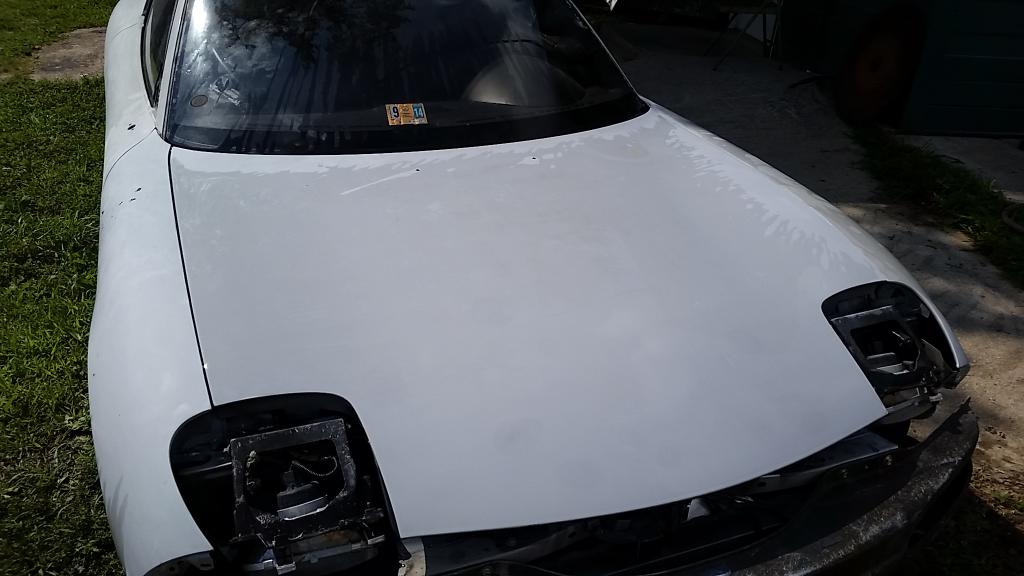
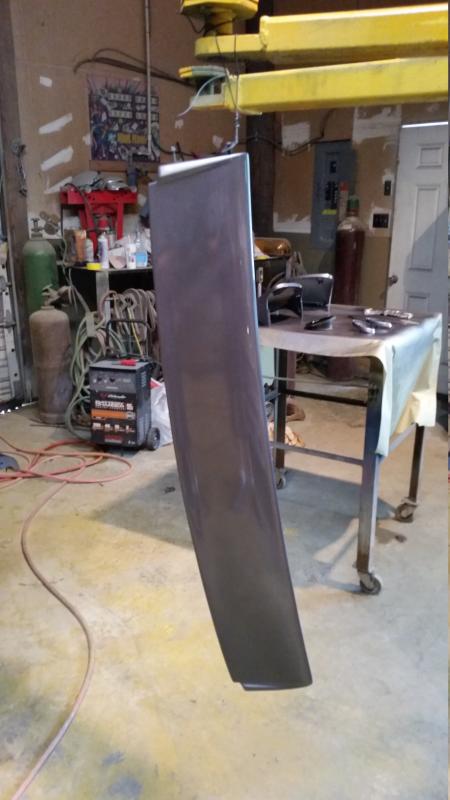
I thought my hood was really good. Then, I started fixing all the dents. Must have been in the same epic hail storm that got my VW long before I got it.
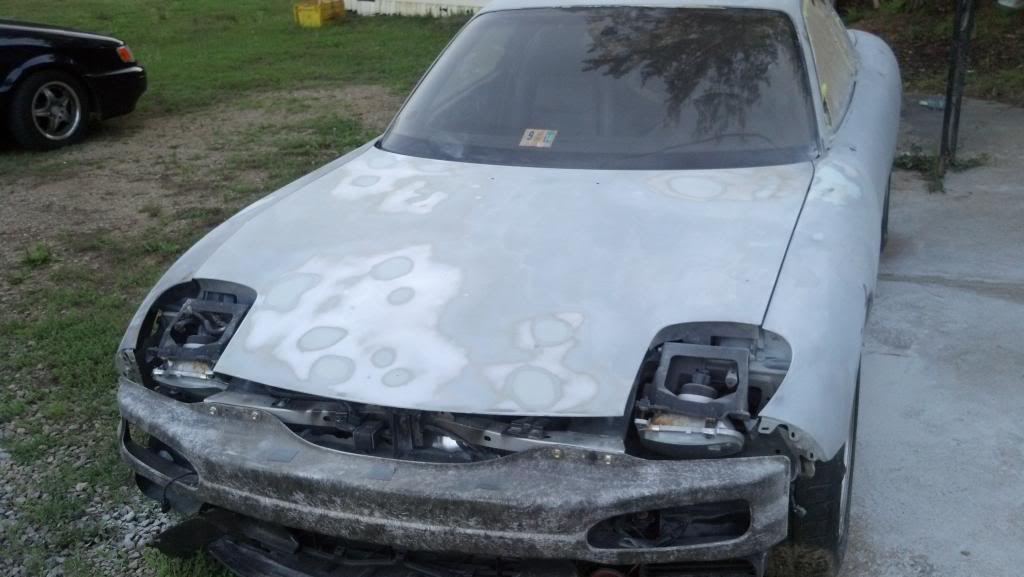
My VW for reference:
Then I started the other "better?" side. Fixed one dent on the door and have one more to go. Started the only dent on the PS fender. Also test fit the side skirts from my buddy Dave. They will be modified slightly, eliminating the vent that covers the fender. Basically cut them straight across the lower line of the door.
Starting to finally see the finish line as far as the body goes. Then, I have to work on the bumpers, mirrors, and spoiler.
Vince
At least they do feel really smooth now.
I thought my hood was really good. Then, I started fixing all the dents. Must have been in the same epic hail storm that got my VW long before I got it.
My VW for reference:
Then I started the other "better?" side. Fixed one dent on the door and have one more to go. Started the only dent on the PS fender. Also test fit the side skirts from my buddy Dave. They will be modified slightly, eliminating the vent that covers the fender. Basically cut them straight across the lower line of the door.
Starting to finally see the finish line as far as the body goes. Then, I have to work on the bumpers, mirrors, and spoiler.
Vince
Thread Starter
Joined: Nov 2004
Posts: 1,139
Likes: 114
From: Berlin, MD
Maybe I'll get it painted one day...
So, progress has been terribly slow lately. It has rained 6 out of the last 8 weekends. Then this last weekend, the heat and humidity were so bad I only got the hood done. Maintaining "Slowest build in 7club history" status...
Onto the progress:
A coat of filler primer and began block sanding with 400 grit!
After tirelessy blocking it with 400 grit, it is very smooth now. However it has revealed a few dings that were missed, and some minor scratches. Next visit these will be addressed and then supposedly a FINAL sanding. Then, paint?
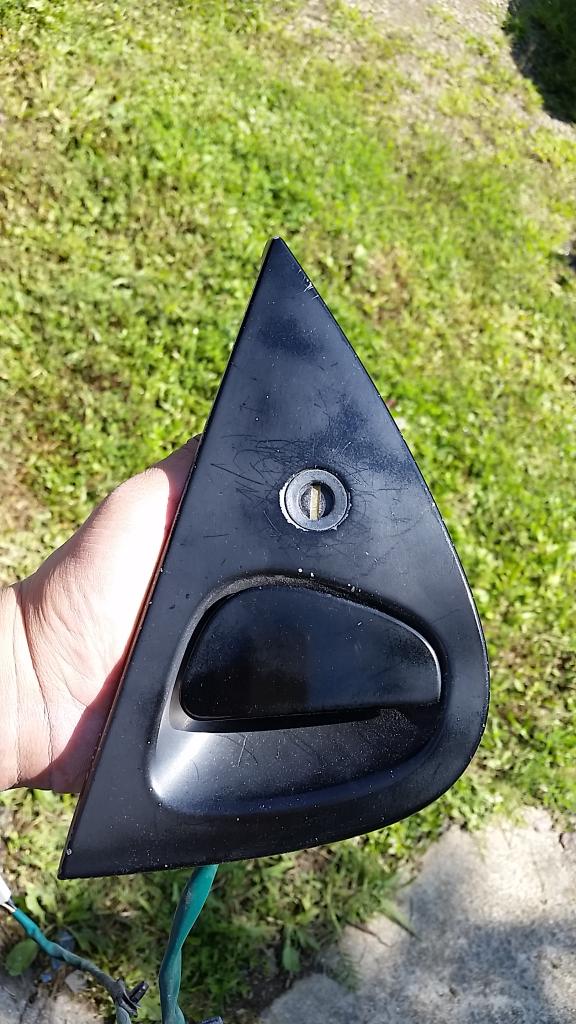
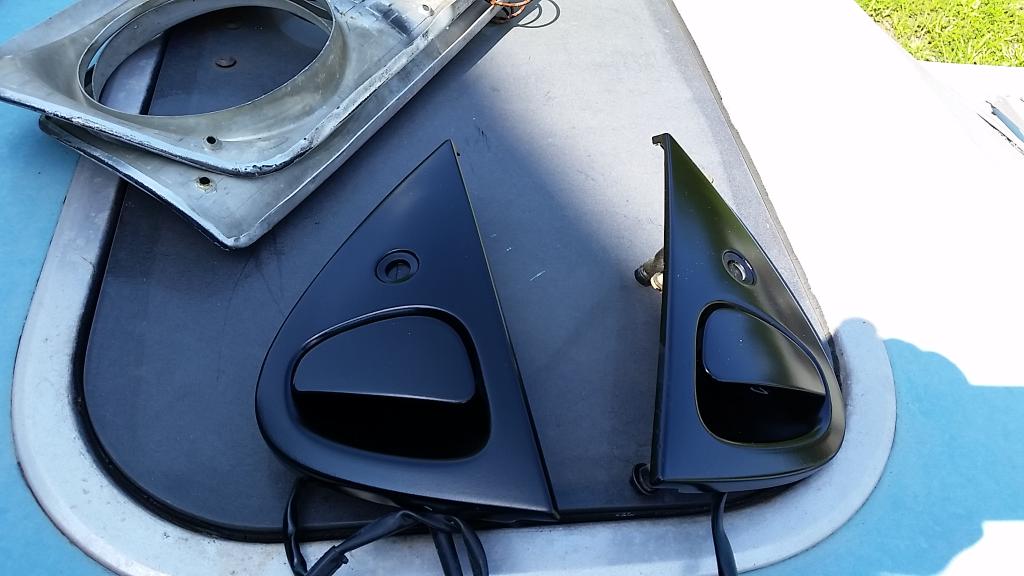
As a change of pace, I turned my attention to the door handles:
BEFORE
AFTER
And, to try and stay motivated, I got these from JASON S group buy!
If you have not done so, do buy a set from him. Well worth the price!!
Maybe if I'm lucky, I'll have this painted before winter. Then I get to start on the interior. I swear this car will be done eventually.
Vince
So, progress has been terribly slow lately. It has rained 6 out of the last 8 weekends. Then this last weekend, the heat and humidity were so bad I only got the hood done. Maintaining "Slowest build in 7club history" status...
Onto the progress:
A coat of filler primer and began block sanding with 400 grit!
After tirelessy blocking it with 400 grit, it is very smooth now. However it has revealed a few dings that were missed, and some minor scratches. Next visit these will be addressed and then supposedly a FINAL sanding. Then, paint?
As a change of pace, I turned my attention to the door handles:
BEFORE
AFTER
And, to try and stay motivated, I got these from JASON S group buy!
If you have not done so, do buy a set from him. Well worth the price!!
Maybe if I'm lucky, I'll have this painted before winter. Then I get to start on the interior. I swear this car will be done eventually.
Vince
Thread Starter
Joined: Nov 2004
Posts: 1,139
Likes: 114
From: Berlin, MD
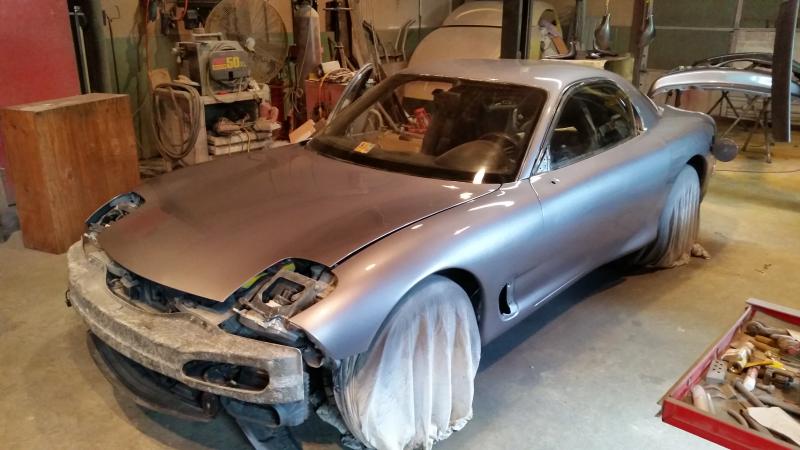
SUPER UPDATE!
Here are some photos from the last 3 weekends of working on it.
All odds and ends sanding and prepped. (don't mind picture, SD card was corrupt!)
Cleaning after wetsanding with 600:
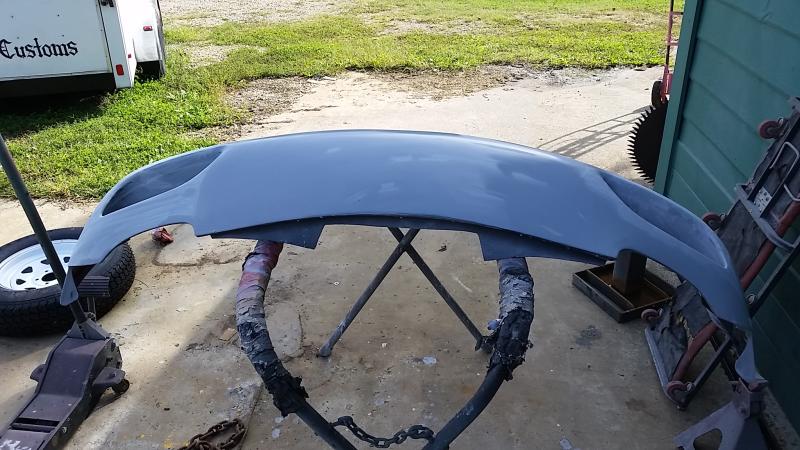
Rear bumper done:
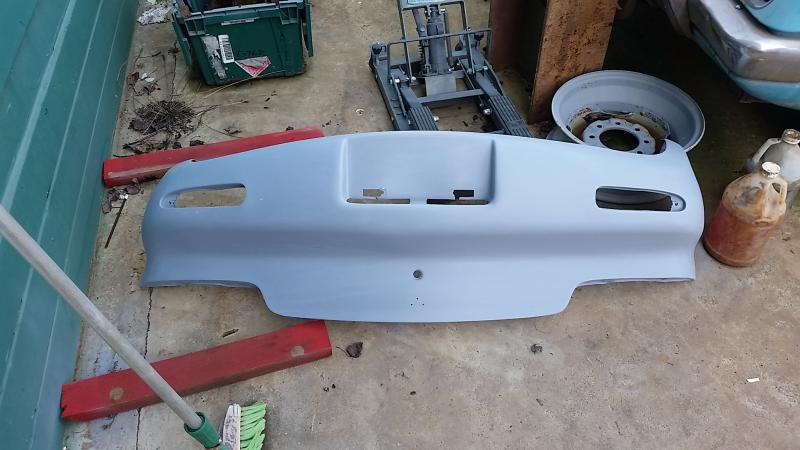
Front bumper done:
Final check/scratch fill with spot putty:
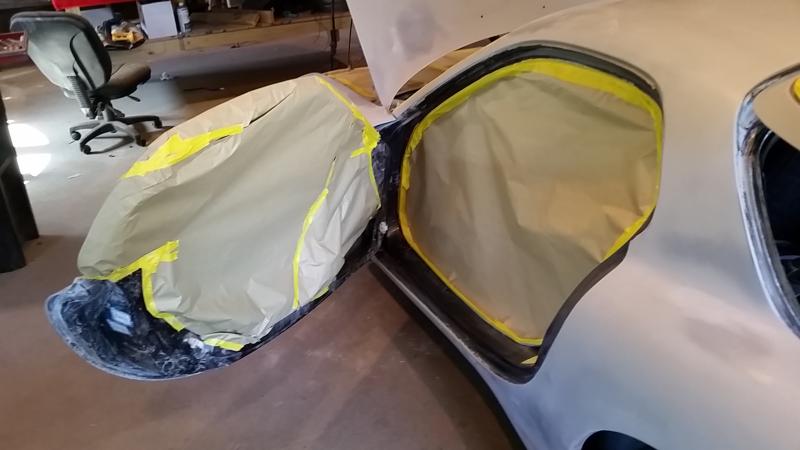
Masking door:

Other side:
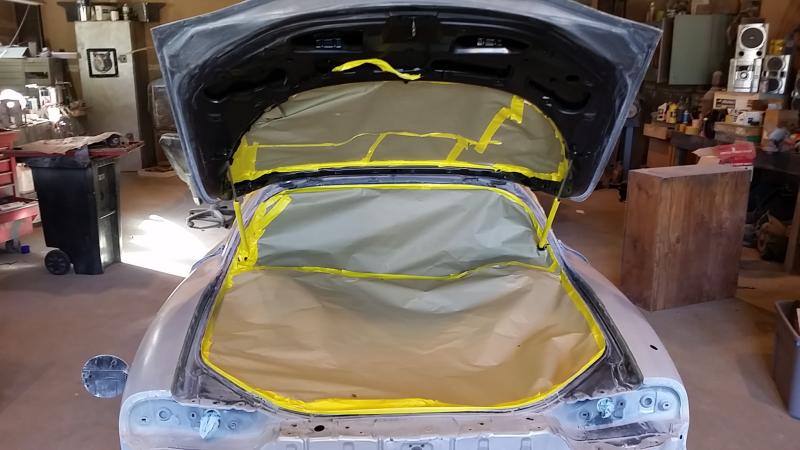
Hatch:
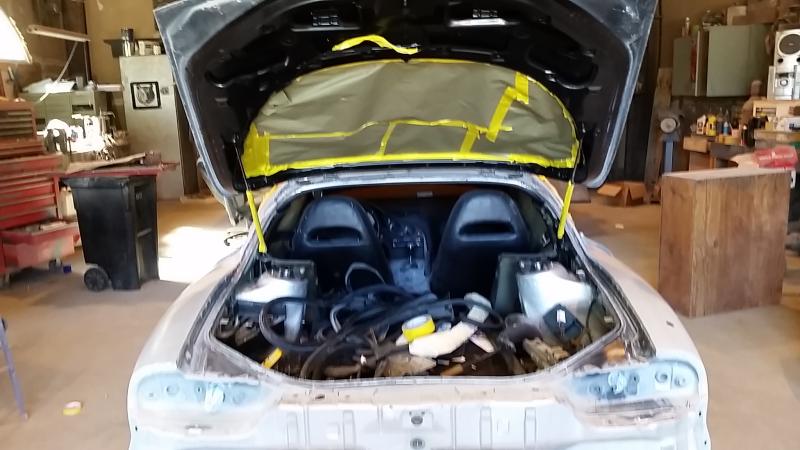
Hatch done:
Not pictured because the SD card died, NEW PS headlamp cover to replace damaged one.
If everything goes well, will be sprayed with sealer, then painted this week.
The next update should be good.
Vince
Here are some photos from the last 3 weekends of working on it.
All odds and ends sanding and prepped. (don't mind picture, SD card was corrupt!)
Cleaning after wetsanding with 600:
Rear bumper done:
Front bumper done:
Final check/scratch fill with spot putty:
Masking door:
Other side:
Hatch:
Hatch done:
Not pictured because the SD card died, NEW PS headlamp cover to replace damaged one.
If everything goes well, will be sprayed with sealer, then painted this week.
The next update should be good.
Vince

Thread Starter
Joined: Nov 2004
Posts: 1,139
Likes: 114
From: Berlin, MD
^ Luckily I have a few friends that have made this possible. Only downside is it is an hour from my house!
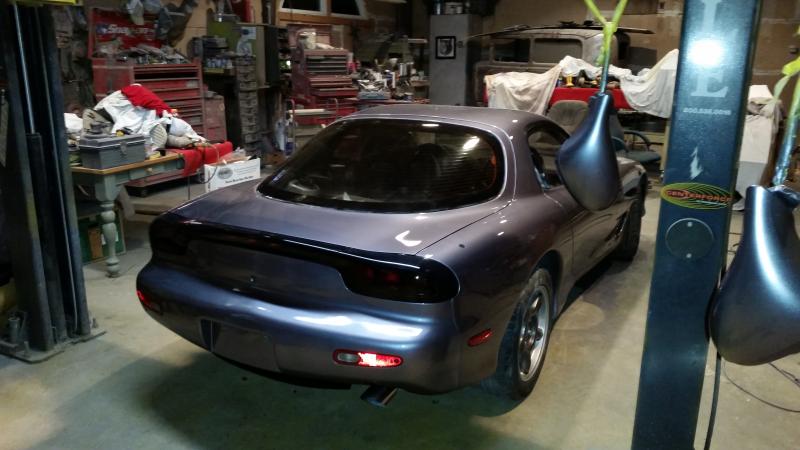
SOMETHING HAS HAPPENED!
Friday night was the big night!
Sealer sprayed!
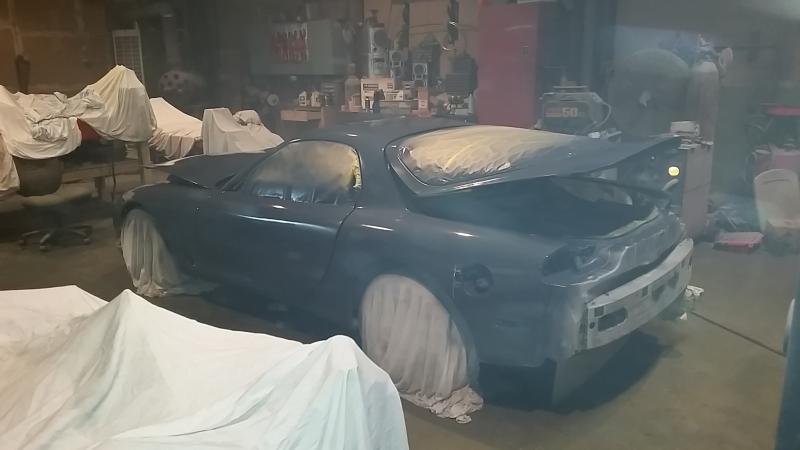
Base color.

1st coat of clear.
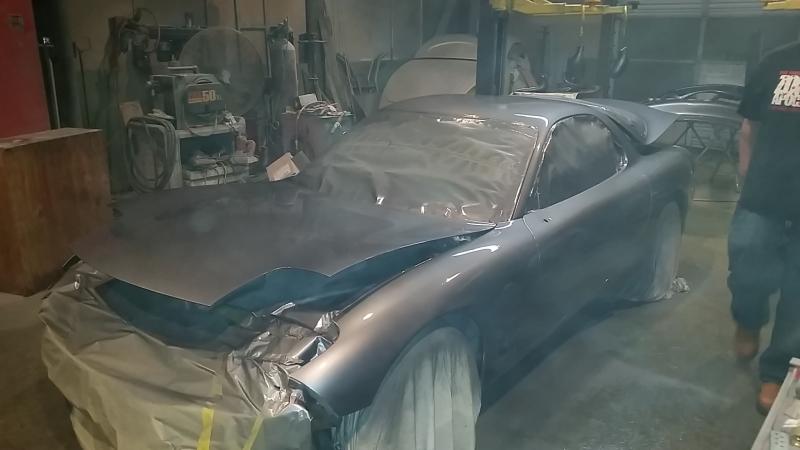
After two more coats of clear.
Various goodies.
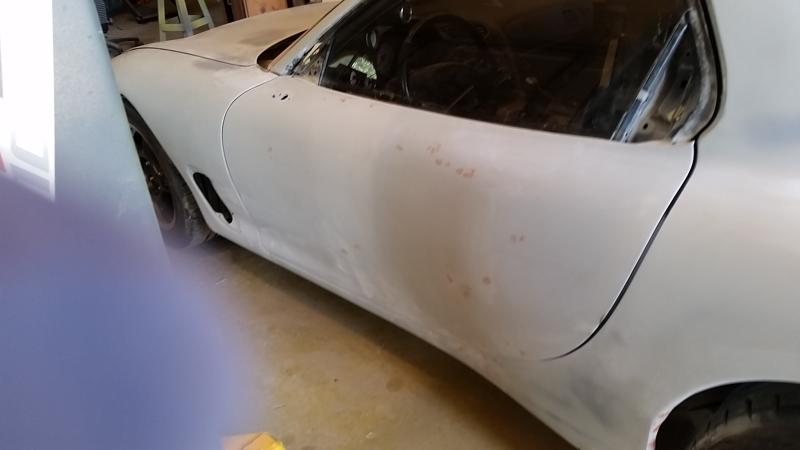
Down side of car to show quality of body work.
Detail of driver's door (worst damaged part of car)
Spoiler
And today after I removed the masking with some sunlight:
Headlight cover out in the overcast weather we had today:
INITIAL REACTION
Holy crap! It looks pretty awesome. I'm hugely satisfied with the color. It looks darker than the pictures show. The low light conditions last night and the overcast today seem to make the camera sad in this respect. It looks more like the color you see in the base color picture than it does in the later photos. The later photos make it seem as bright as the original SSM.
I did miss a few things in the body work and a couple small dings. There are a few inevitable gnats in the paint, but I couldn't afford a spray booth so no complaints! But, it is MILES better than it was. I'm a little impressed with myself considering I have no formal classroom or practical experience.
Once it has had a few days to properly cure, I will begin some reassembly and we will address the flaws/bugs. Will have more pictures then.
Still need to order the emblems and 99 front lip. Should be doing that Monday.
Then the next project is getting it home and cleaning the interior back up, and getting the seats recovered.
Comments welcomed!
Vince
SOMETHING HAS HAPPENED!
Friday night was the big night!
Sealer sprayed!
Base color.
1st coat of clear.
After two more coats of clear.
Various goodies.
Down side of car to show quality of body work.
Detail of driver's door (worst damaged part of car)
Spoiler
And today after I removed the masking with some sunlight:
Headlight cover out in the overcast weather we had today:
INITIAL REACTION
Holy crap! It looks pretty awesome. I'm hugely satisfied with the color. It looks darker than the pictures show. The low light conditions last night and the overcast today seem to make the camera sad in this respect. It looks more like the color you see in the base color picture than it does in the later photos. The later photos make it seem as bright as the original SSM.
I did miss a few things in the body work and a couple small dings. There are a few inevitable gnats in the paint, but I couldn't afford a spray booth so no complaints! But, it is MILES better than it was. I'm a little impressed with myself considering I have no formal classroom or practical experience.
Once it has had a few days to properly cure, I will begin some reassembly and we will address the flaws/bugs. Will have more pictures then.
Still need to order the emblems and 99 front lip. Should be doing that Monday.
Then the next project is getting it home and cleaning the interior back up, and getting the seats recovered.
Comments welcomed!
Vince
Thread Starter
Joined: Nov 2004
Posts: 1,139
Likes: 114
From: Berlin, MD
Thanks for the compliments. Hard to believe it has taken 11 months to get to this point.
Tomorrow when I get off work, I'm going to start reassembling. We'll see how that goes
Vince
Tomorrow when I get off work, I'm going to start reassembling. We'll see how that goes
Vince
Thread Starter
Joined: Nov 2004
Posts: 1,139
Likes: 114
From: Berlin, MD
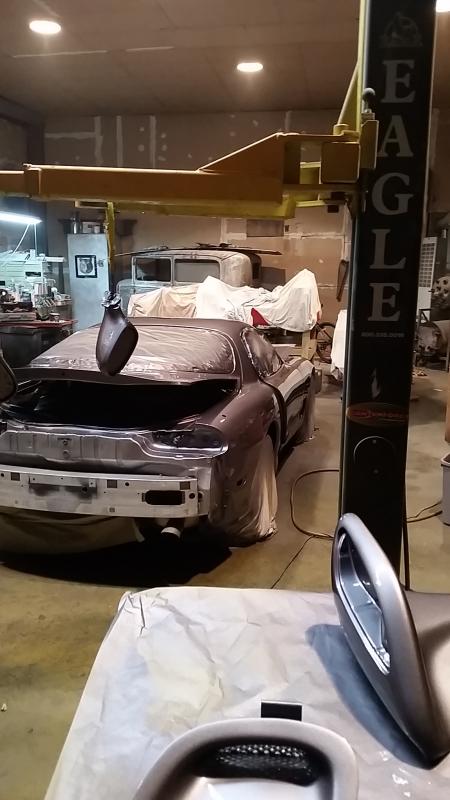
Another Update!
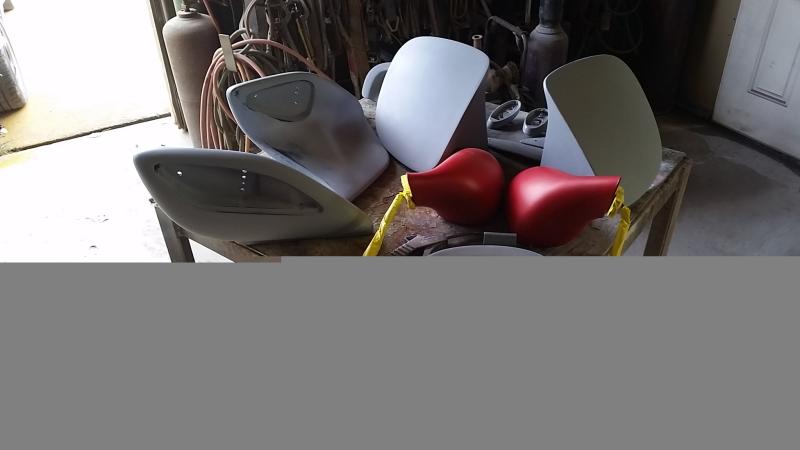
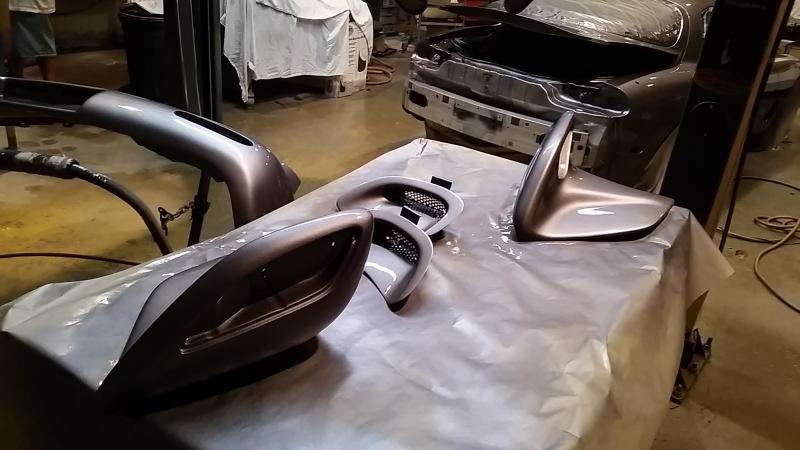
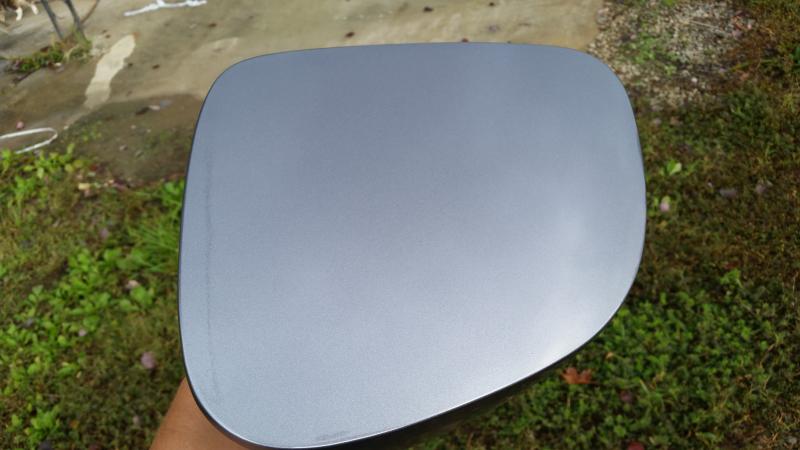
Got a little more done. Got the door and hatch opening weatherstripping, mirror bases, rear markers and fender vents installed.
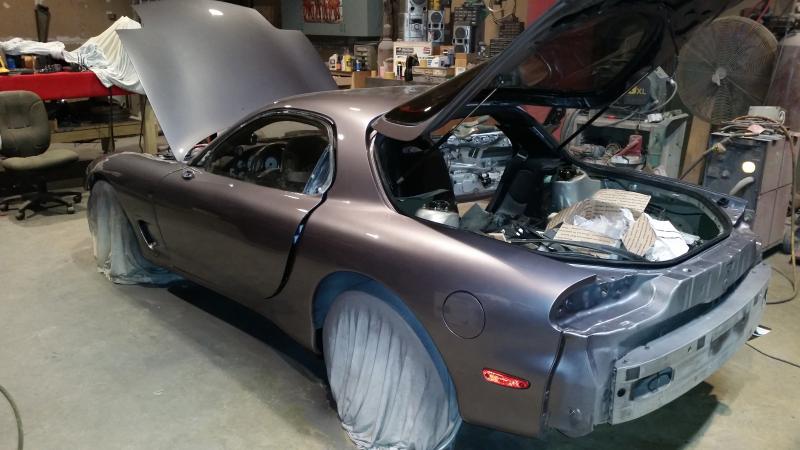
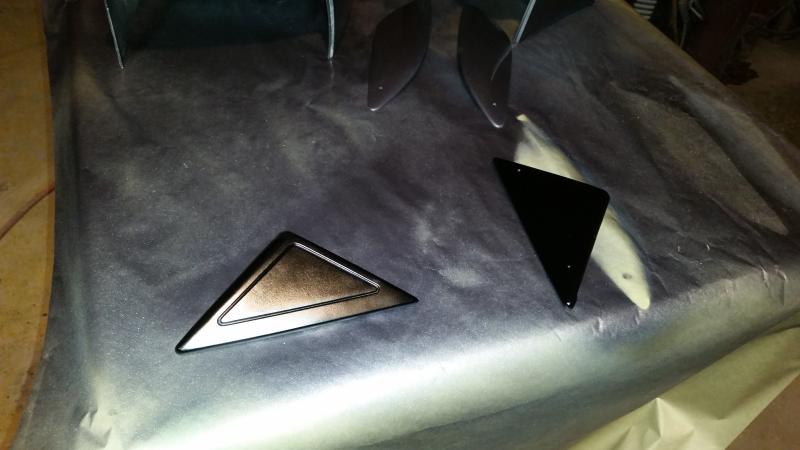
Painted the outer mirror triangles.
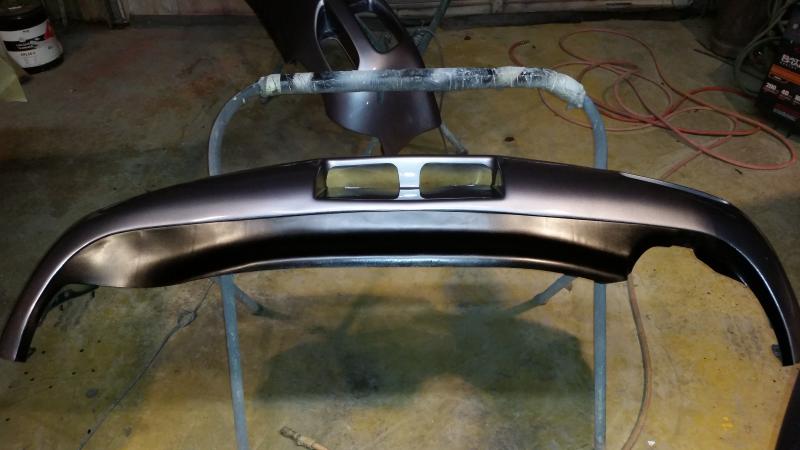
Painted and installed the rear valence with all new clips and screws.
Rear bumper and back up lamps in place.
Also found out that the hatch struts gave up the ghost, must of got overspray on them. They no longer hold the hatch
Ordered a few more fasteners and the rear hatch glass rubber from RAY CROWE.
Vince
Got a little more done. Got the door and hatch opening weatherstripping, mirror bases, rear markers and fender vents installed.
Painted the outer mirror triangles.
Painted and installed the rear valence with all new clips and screws.
Rear bumper and back up lamps in place.
Also found out that the hatch struts gave up the ghost, must of got overspray on them. They no longer hold the hatch
Ordered a few more fasteners and the rear hatch glass rubber from RAY CROWE.
Vince
Thread Starter
Joined: Nov 2004
Posts: 1,139
Likes: 114
From: Berlin, MD
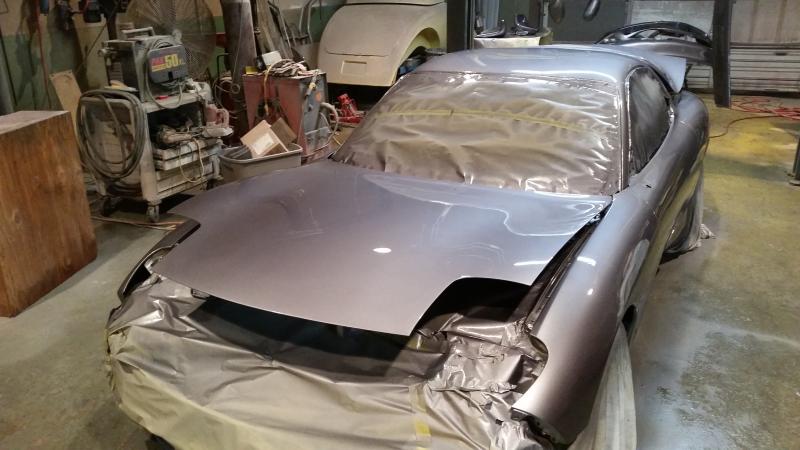
SO CLOSE!
Pushed it outside to see what it looks like in the sun!
It is really a difficult color to photograph. There is a lot of metallic in the paint, and whatever "paint effect" is that is listed on the can None of the pictures really show the actual color.
As a change of pace I cleaned up the door panels and speaker grilles.
Before:
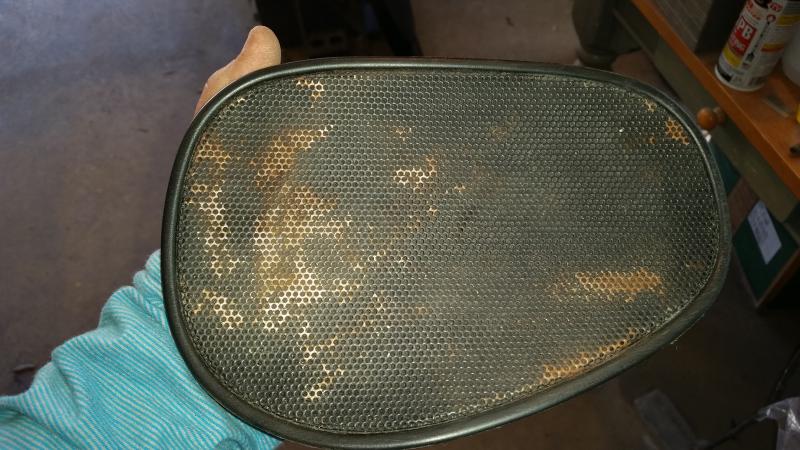
After:

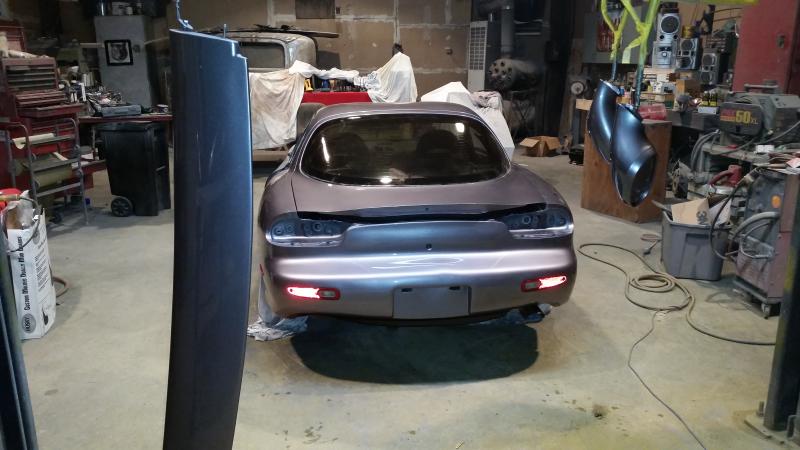
Finished installing the tail lights and painting all the plastic covers behind the tails.
Fit the front bumper and lights:
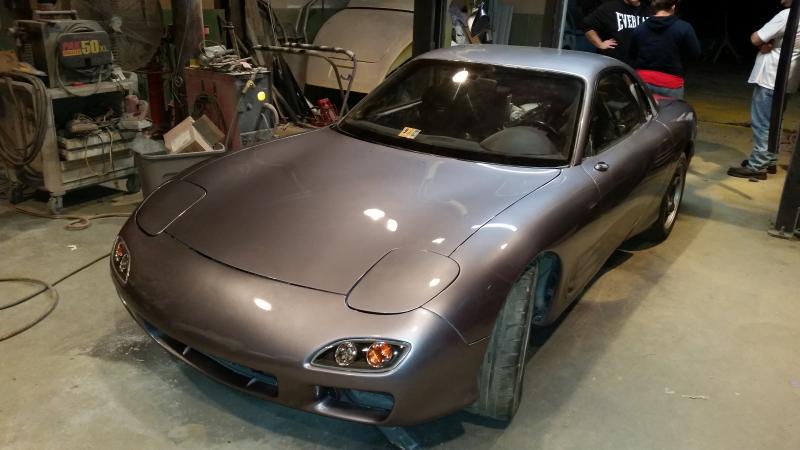
Need to repaint the mirrors and spoiler end caps due to some issues, then they can be installed!
Vince
Pushed it outside to see what it looks like in the sun!
It is really a difficult color to photograph. There is a lot of metallic in the paint, and whatever "paint effect" is that is listed on the can
None of the pictures really show the actual color.As a change of pace I cleaned up the door panels and speaker grilles.
Before:
After:
Finished installing the tail lights and painting all the plastic covers behind the tails.
Fit the front bumper and lights:
Need to repaint the mirrors and spoiler end caps due to some issues, then they can be installed!
Vince
Its getting there! I love to see the transformation of a color change.
The only thing I didnt agree with was cutting corners on not pulling the doors/glass out. But the biggest surprise was not using a down draft booth! But some flat sanding and buffing will take care of any dirt issues.
The only thing I didnt agree with was cutting corners on not pulling the doors/glass out. But the biggest surprise was not using a down draft booth! But some flat sanding and buffing will take care of any dirt issues.
Thread Starter
Joined: Nov 2004
Posts: 1,139
Likes: 114
From: Berlin, MD
If it could have stayed inside the whole time, I probably would have pulled the doors, etc.
But this was a $0 budget paint job. I did all the labor minus the spraying. Luckily, with the amount of making I did there is no evidence of either previous color except under the interior panels where it would never be seen.
All in total between sand paper, etching primer, primer, sealer, base, clear, filler, stripper, razor blades, and tape: $600 in materials.
If it was an option to spray it in a booth, I would have, but I don't have any hook ups on that end or finances at this time. With that being said, I am satisfied with the results. For being a novice, it looks pretty good. It is by no means a show car, but it is no longer sad looking. Best of all, since it is not perfect, I will not be as sad when someone inevitably damages it.
Thanks for the comments!
Vince
Thread Starter
Joined: Nov 2004
Posts: 1,139
Likes: 114
From: Berlin, MD
IT"S NEVER GOING TO MAKE IT TO DGRR UPDATE
So, 5 month later, here's where things stand:
I had the car towed to the house so I can at least look at it. The SNOWPOCALYPSE and rain have prevented being able to do anything with it.
Still waiting on the mirrors and spoiler to be resprayed.
Started cleaning the interior up.
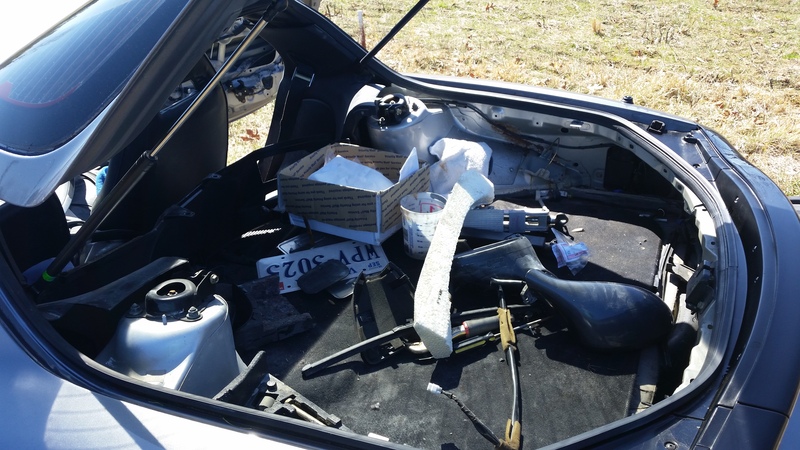
State of the hatch area:
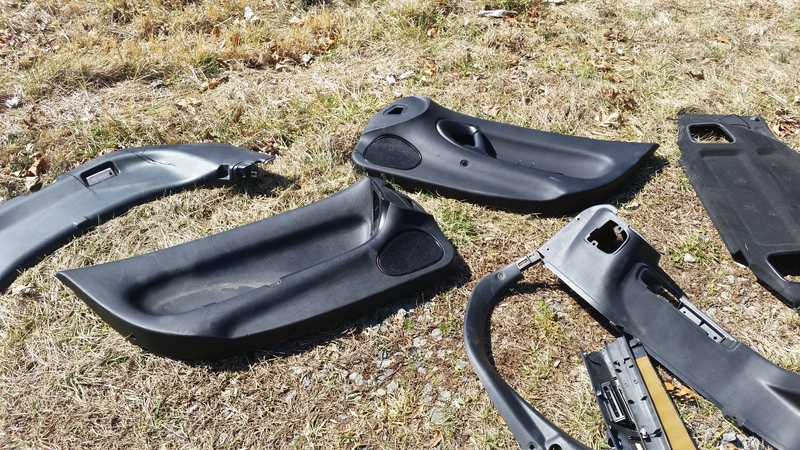
Cleaning all the interior panels:
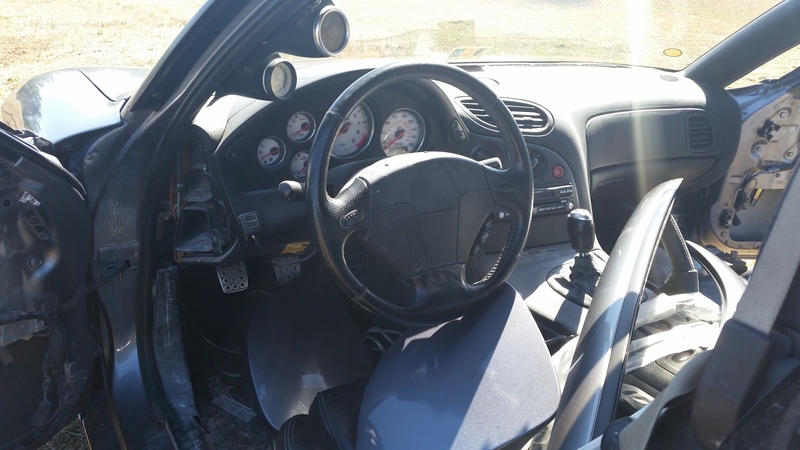
How the dash looked:
Then I pulled the gauge cluster so I could swap clusters:
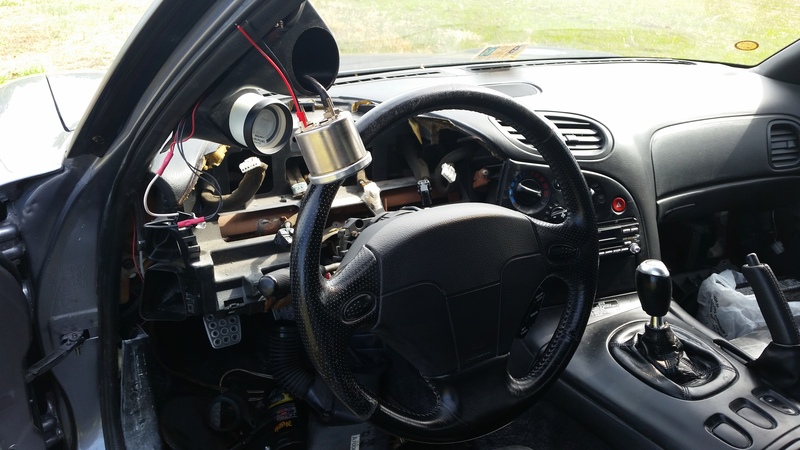
I swapped the mileage chip per DALE CLARK last night. I'll have to hook it up and make sure it still works
The gauge hood did suffer slightly on removal, I've repaired the cracks, now I need to said and paint it.
Also plan to repaint the rest of the dash plastics at this time, but I can't decide between charcoal gray like the Spirit R or just black. Leaning towards charcoal gray.
Ideally, I should have the seats recovered in the next week and that will be a big hurdle out of the way.
Vince
So, 5 month later, here's where things stand:
I had the car towed to the house so I can at least look at it. The SNOWPOCALYPSE and rain have prevented being able to do anything with it.
Still waiting on the mirrors and spoiler to be resprayed.
Started cleaning the interior up.
State of the hatch area:
Cleaning all the interior panels:
How the dash looked:
Then I pulled the gauge cluster so I could swap clusters:
I swapped the mileage chip per DALE CLARK last night. I'll have to hook it up and make sure it still works
The gauge hood did suffer slightly on removal, I've repaired the cracks, now I need to said and paint it.
Also plan to repaint the rest of the dash plastics at this time, but I can't decide between charcoal gray like the Spirit R or just black. Leaning towards charcoal gray.
Ideally, I should have the seats recovered in the next week and that will be a big hurdle out of the way.
Vince