
Resurrecting the FD or "How I spent a week's vacation"

^Now you got me wondering... I don't think I got those backwards, because I remember reading that you would need to have the primary rail milled to accept the secondary injectors. Then again, this would not be my first mistake.
Will investigate this further.
PROJECT UPDATE!!
I should probably rename this to the "SLOWEST REBUILD THREAD IN THE HISTORY OF RX7CLUB."
70hr work weeks do not leave much time to work on the 7...
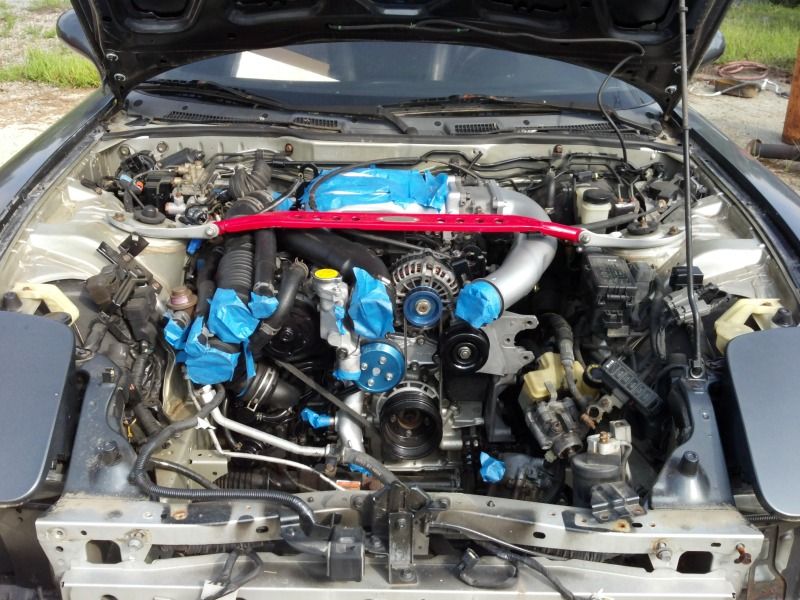
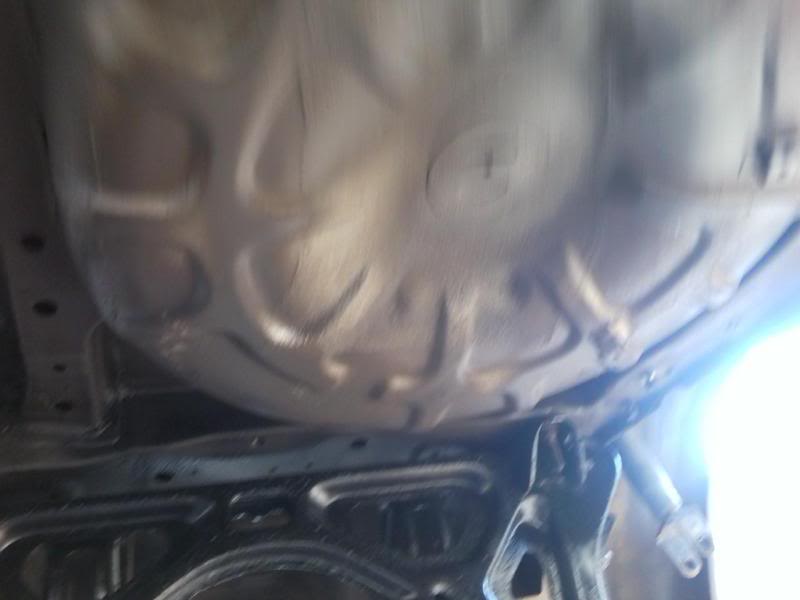
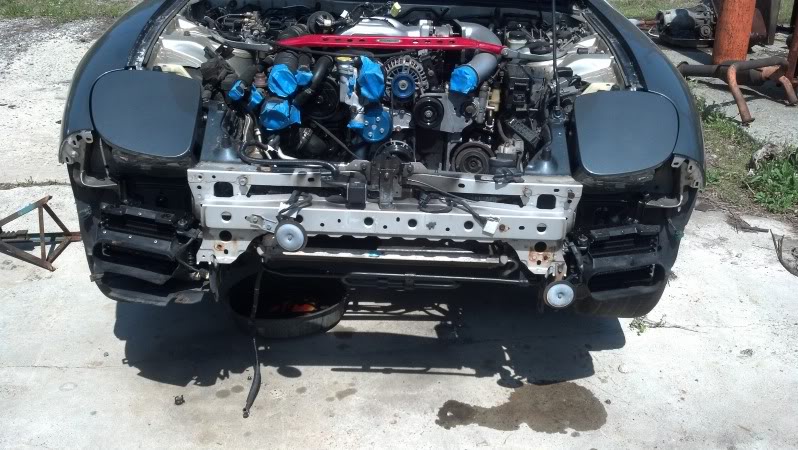
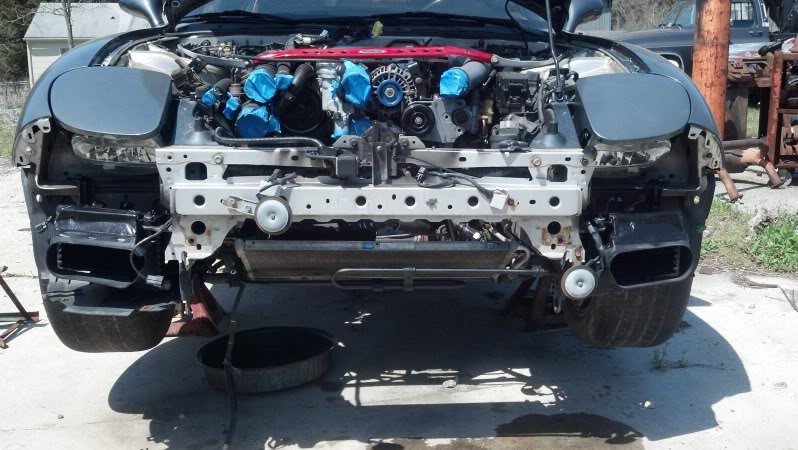
The engine is finally in the car. All the painters tape was to keep stuff out of the engine, and prevent damage hopefully to the paint.
If all goes well, I may have this finished before my birthday in October.
TO DO LIST
Thanks for looking!
Vince
Will investigate this further.
PROJECT UPDATE!!
I should probably rename this to the "SLOWEST REBUILD THREAD IN THE HISTORY OF RX7CLUB."
70hr work weeks do not leave much time to work on the 7...
The engine is finally in the car. All the painters tape was to keep stuff out of the engine, and prevent damage hopefully to the paint.
If all goes well, I may have this finished before my birthday in October.
TO DO LIST
- Blast, paint, install PPF.
- Install driveshaft, braces, heat shields.
- Install exhaust, get catalytic converter andhave extra O2 bung welded in.
- Mount fuel filter, fuel tank and new fuel tank straps.
- Sort out air filters and heat shields.
- Bleed brakes.
- Get tires mounted and balanced.
- Reinstall radiator, mount intercooler & have charge pipes made.
- Mount AC and PS pumps.
- Reinstall shifter, slave cylinder & starter.
- Install R1 oil coolers, replace PS cooler, and reinstall front bumper!
Thanks for looking!
Vince

Thread Starter


Joined: Nov 2004
Posts: 1,139
Likes: 114
From: Berlin, MD
^ I had a motor that would not fully rotate because a ziptie had fallen down the intake, and one time when I was working on my old GXL I accidentally dropped a nut down an intake runner and or took me 2 hours to get it out.
Needless to say I'm more careful now
As far as sandblasting the larger parts, I bought a portable blaster from Harbor Freight that looks like a bucket that its open on the top and you put the blasting media in the top.
I haven't tried it out yet but have heard good reviews on it. It was cheap, 35 with a coupon and $25 for 25lbs of glass media.
Vince
Thread Starter
Joined: Nov 2004
Posts: 1,139
Likes: 114
From: Berlin, MD
MORE DONE!
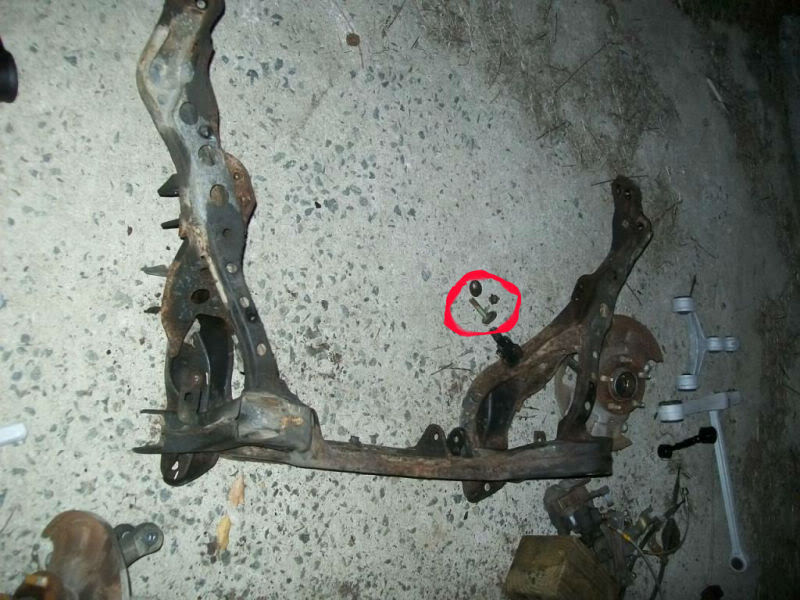
I finally got the lower control arms off, but had to break one of the camber bolts to get them off... Another part to add to the list!
Bare rear subframe, broken camber bolt circled in red:
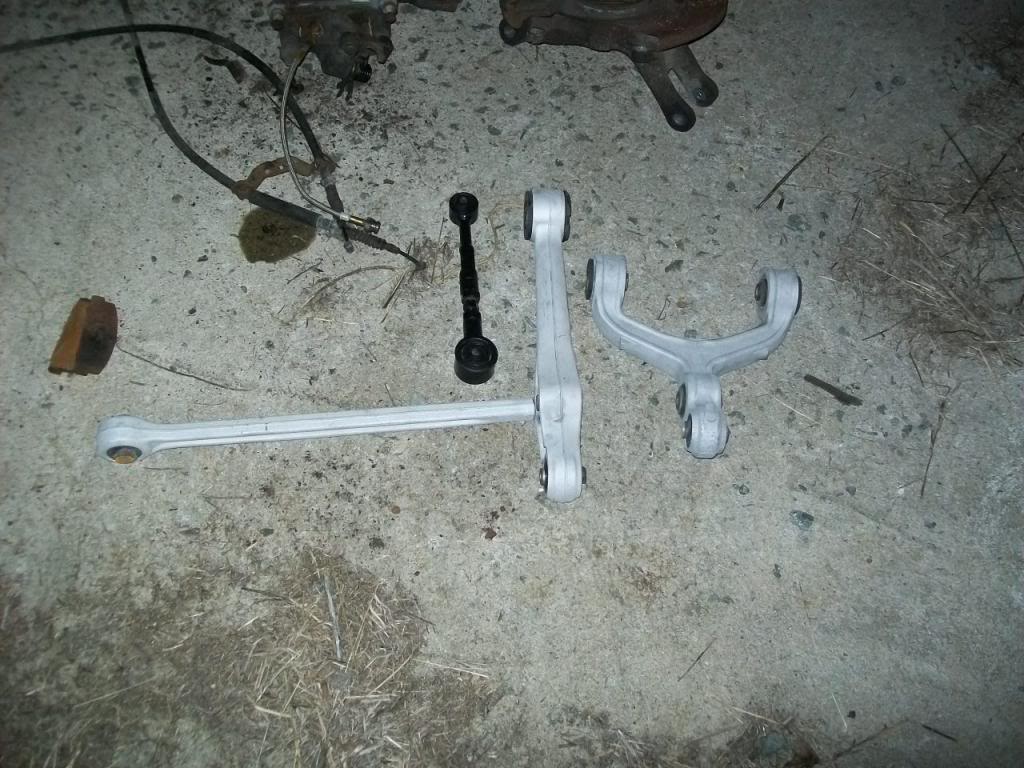
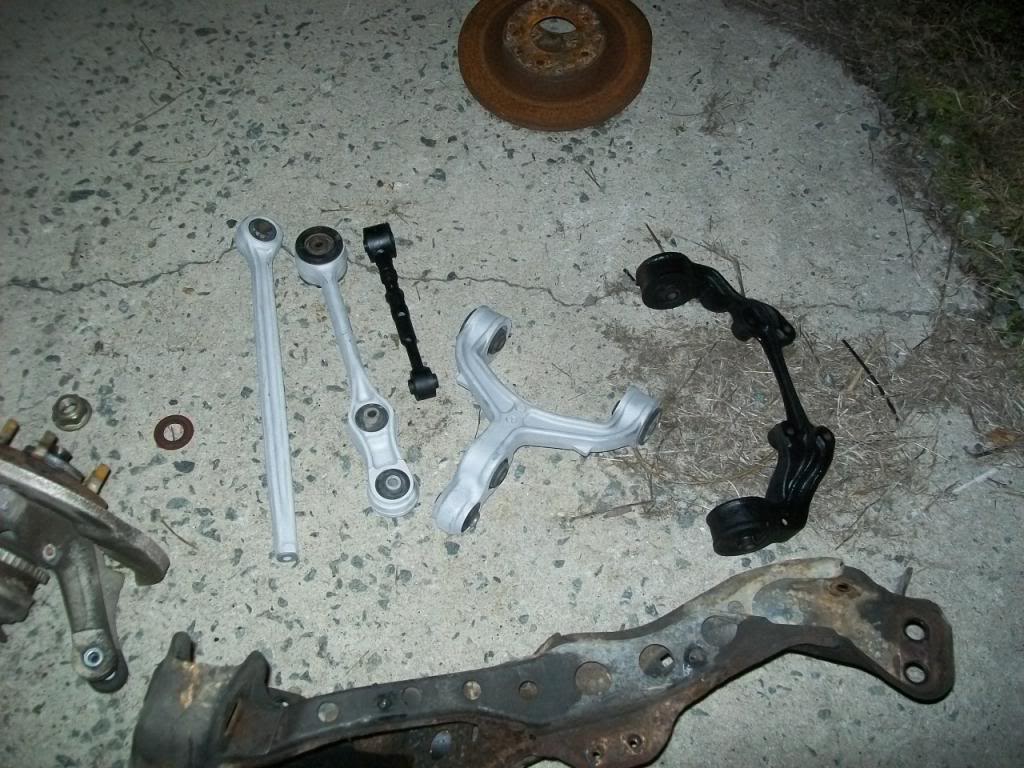
I finished blasting all the control arms!
And wire brushed all the heavy rust off of the differential:

Tuesday, I'm going to blast the subframe, rear, hubs, and calipers. If all goes well, I'll be able to paint the subframe and reinstall in under the car.
Vince
I finally got the lower control arms off, but had to break one of the camber bolts to get them off... Another part to add to the list!
Bare rear subframe, broken camber bolt circled in red:
I finished blasting all the control arms!
And wire brushed all the heavy rust off of the differential:
Tuesday, I'm going to blast the subframe, rear, hubs, and calipers. If all goes well, I'll be able to paint the subframe and reinstall in under the car.
Vince
Thread Starter
Joined: Nov 2004
Posts: 1,139
Likes: 114
From: Berlin, MD
MORE PROGRESS!!
So, here is the rig I bought to glass bead the rear subframe.
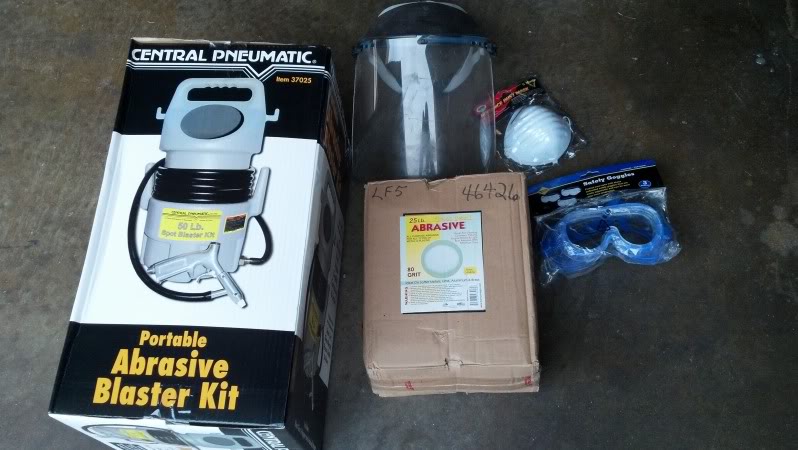
The blaster, media, goggles, and masks came from Harbor Freight. The face shield I already had. The only thing not pictured is welding gloves to protect you from the media.
PRECAUTIONS FOR MEDIA BLASTING
Wear long sleeves, and long pants. Wear as much protection as possible. Do it an area where it cannot damage other things.
Never point the gun at anyone/thing or yourself.
Differential cleaned and painted!
Differential mount installed:

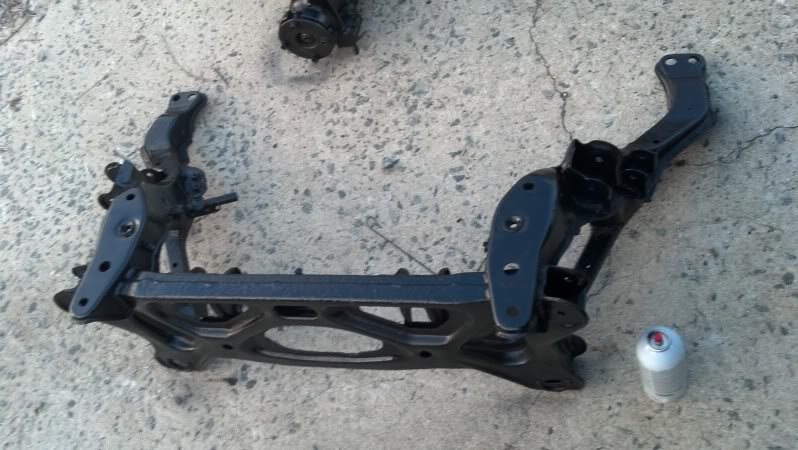
Rear subframe painting in progress:

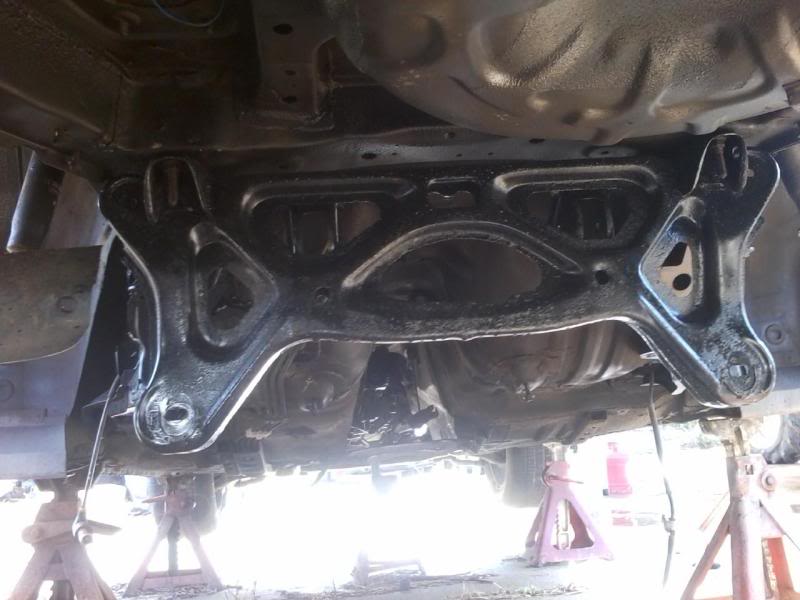
Rear subframe finished!
REVIEW OF HARBOR FREIGHT MEDIA BLASTER
The rig worked pretty well, although the hose that attaches to the bucket was kinked. I just cut off the kinked end and problem solved. Other than that it worked well, although the media I bought was not aggressive enough for the rusty subframe. I had some steel grit left over and it removed the rust almost instantly.
As far as durability is concerned, I did not see any noticeable wear on the ceramic tip, but I only put 25lbs of media thru it.
But for $35, it works well enough, and I would have paid at least that to have somebody blast it for me.
PARTS NEEDED AFTER TEAR DOWN
Rear brake pads - Old ones were nearly to backing plate
Hardware kit for rear pads - v-clips were missing
Rear rotors - Old ones were below minimum thickness
Vince
So, here is the rig I bought to glass bead the rear subframe.
The blaster, media, goggles, and masks came from Harbor Freight. The face shield I already had. The only thing not pictured is welding gloves to protect you from the media.
PRECAUTIONS FOR MEDIA BLASTING
Wear long sleeves, and long pants. Wear as much protection as possible. Do it an area where it cannot damage other things.
Never point the gun at anyone/thing or yourself.
Differential cleaned and painted!
Differential mount installed:
Rear subframe painting in progress:
Rear subframe finished!
REVIEW OF HARBOR FREIGHT MEDIA BLASTER
The rig worked pretty well, although the hose that attaches to the bucket was kinked. I just cut off the kinked end and problem solved. Other than that it worked well, although the media I bought was not aggressive enough for the rusty subframe. I had some steel grit left over and it removed the rust almost instantly.
As far as durability is concerned, I did not see any noticeable wear on the ceramic tip, but I only put 25lbs of media thru it.
But for $35, it works well enough, and I would have paid at least that to have somebody blast it for me.
PARTS NEEDED AFTER TEAR DOWN
Rear brake pads - Old ones were nearly to backing plate
Hardware kit for rear pads - v-clips were missing
Rear rotors - Old ones were below minimum thickness
Vince

Joined: Dec 2006
Posts: 2,859
Likes: 13
From: Sterling Heights, MI
great build!  I have a similar philosophy going on with my FC, ie; before buying all kinds of fancy new stuff, first focus on restoring and fixing what's already there.
Thread Starter
Joined: Nov 2004
Posts: 1,139
Likes: 114
From: Berlin, MD
YET ANOTHER MINOR UPDATE!
I wire brushed all of the rust off the underside, primed, and undercoated the entire underside of the rear of the car.
After 2 1/2 hours of the above, I was finally able to bolt the rear subframe to the car.
Here is a before of this disaster:
And AFTER:
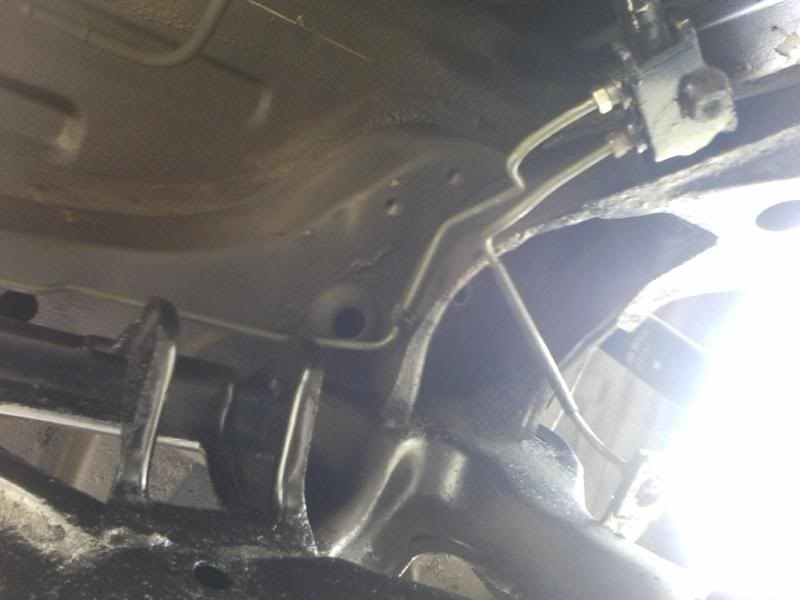
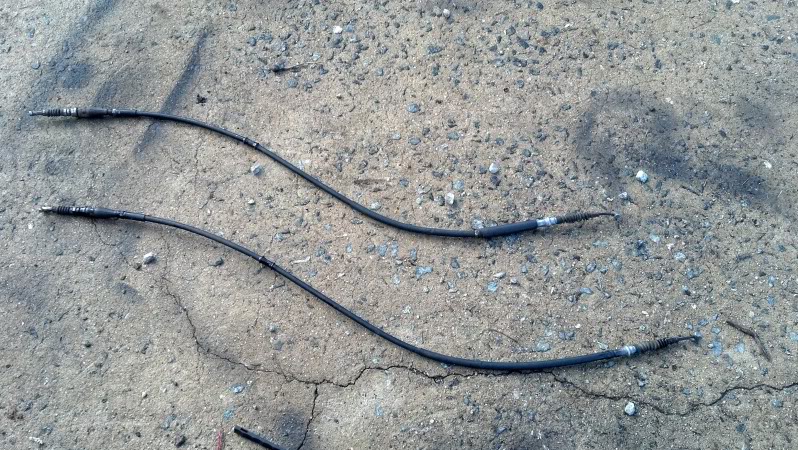
A before of the brake lines:
And AFTER!
Maybe I'll get some more time to work on this soon and have a MAJOR update soon!!
Vince
I wire brushed all of the rust off the underside, primed, and undercoated the entire underside of the rear of the car.
After 2 1/2 hours of the above, I was finally able to bolt the rear subframe to the car.
Here is a before of this disaster:
And AFTER:
A before of the brake lines:
And AFTER!
Maybe I'll get some more time to work on this soon and have a MAJOR update soon!!
Vince

Thread Starter
Joined: Nov 2004
Posts: 1,139
Likes: 114
From: Berlin, MD
Thanks for the compliment.
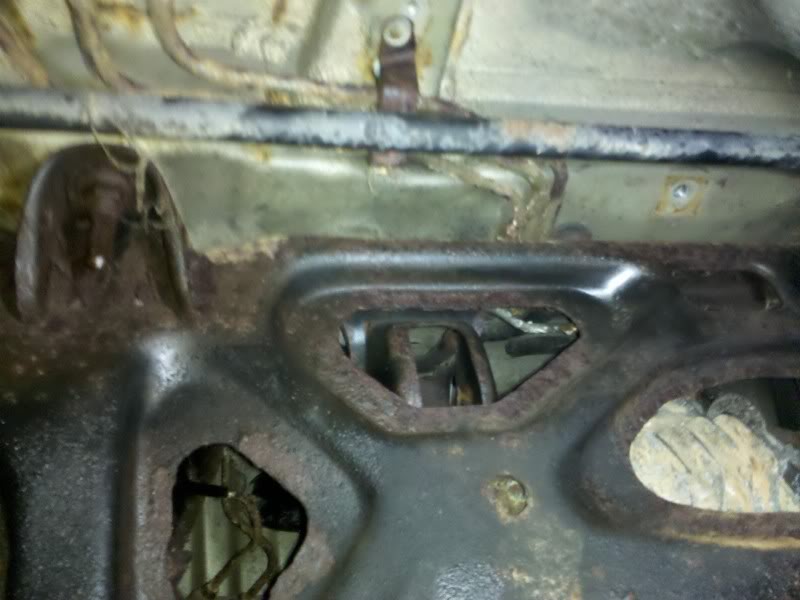
No, it was not underwater, but spent the majority of its life in Pennsylvania or new Jersey. Apparently it was daily driven even in snow. The body it self had almost no rusty parts, just minor surface rust. The brake and fuel lines were a total loss, and the subframe was pretty bad.
When i looked thru the service records, the factory muffler was replaced twice due to rust and the rear calipers once.
My travel plans have changed slightly this week, so if the weather permits, I may work on it this week.
Vince
Thread Starter
Joined: Nov 2004
Posts: 1,139
Likes: 114
From: Berlin, MD
MAJOR UPDATE!!!!
So, I actually had some time to work on my car today and this is what I accomplished.
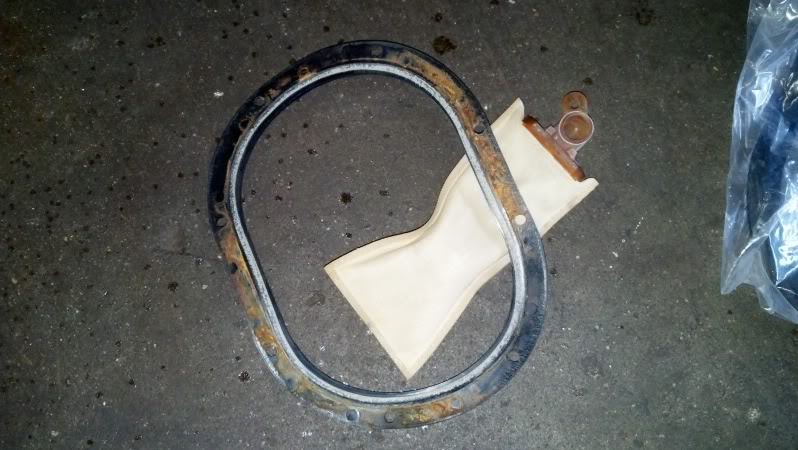
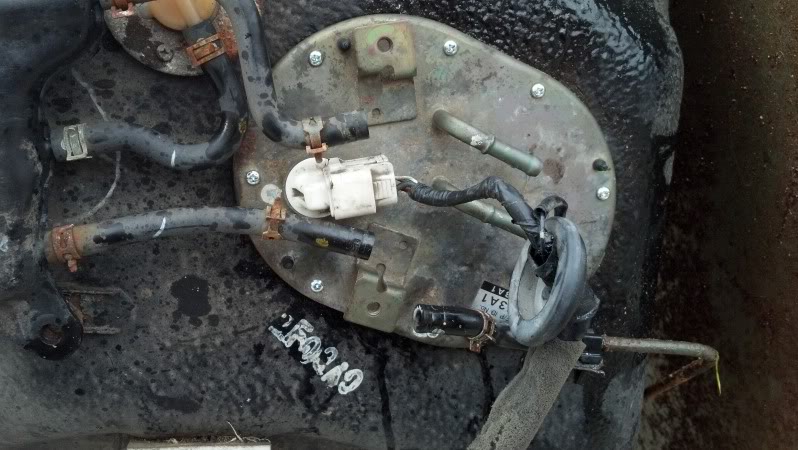
Swapped the newest pump onto the best hanger and installed a new fuel pump sock.
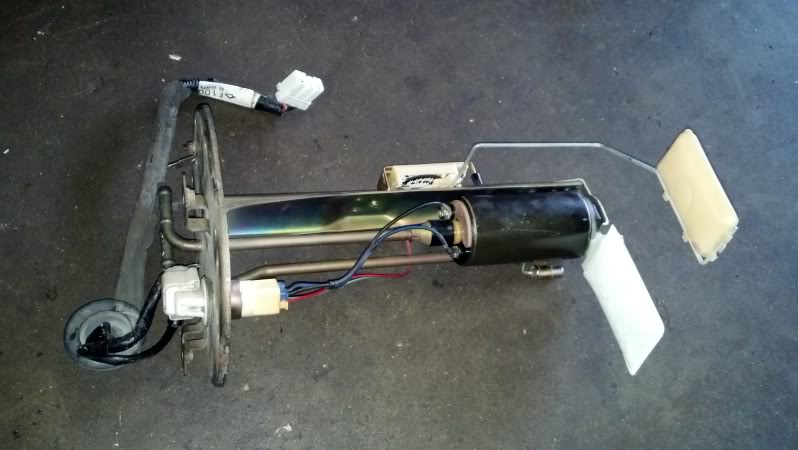
Replaced these old gasket and sock!
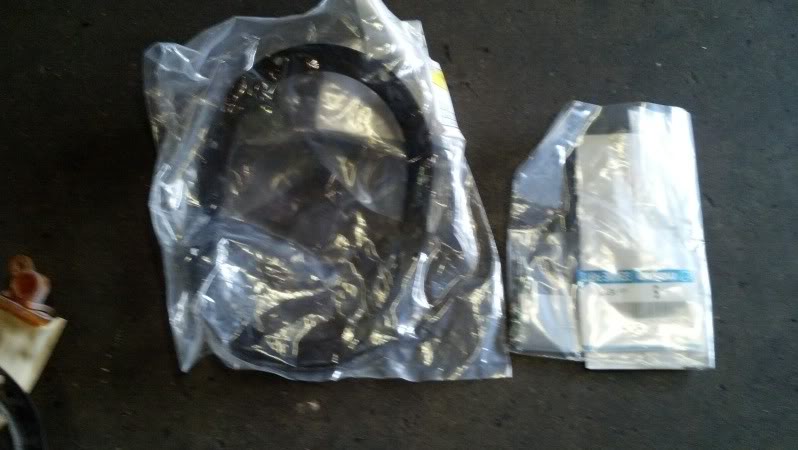
NEW Gasket and screws!
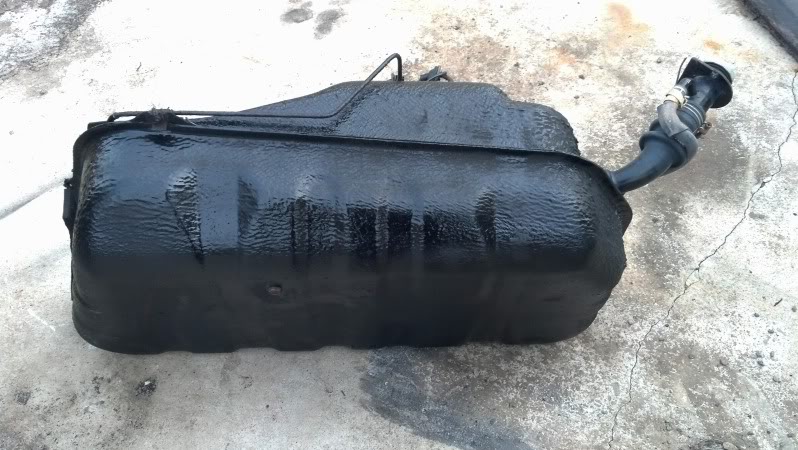
Cleaned fuel tank and installed the pump assembly:
And finally put a coat of black paint on the tank:
Then I sanded and painted the rear swaybar, and beadblasted/painted its brackets:

Put all the control arms back on the car:

<continued in next post>
So, I actually had some time to work on my car today and this is what I accomplished.
Swapped the newest pump onto the best hanger and installed a new fuel pump sock.
Replaced these old gasket and sock!
NEW Gasket and screws!
Cleaned fuel tank and installed the pump assembly:
And finally put a coat of black paint on the tank:
Then I sanded and painted the rear swaybar, and beadblasted/painted its brackets:
Put all the control arms back on the car:
<continued in next post>
Thread Starter
Joined: Nov 2004
Posts: 1,139
Likes: 114
From: Berlin, MD
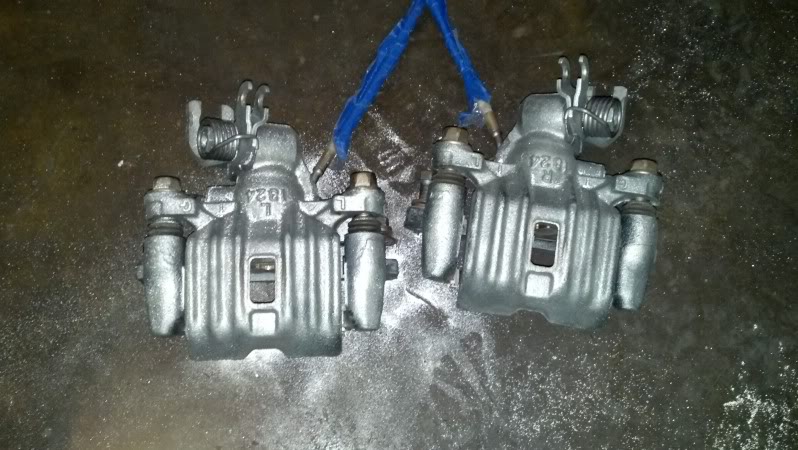
Beadblasted the rear calipers.
Before/after:
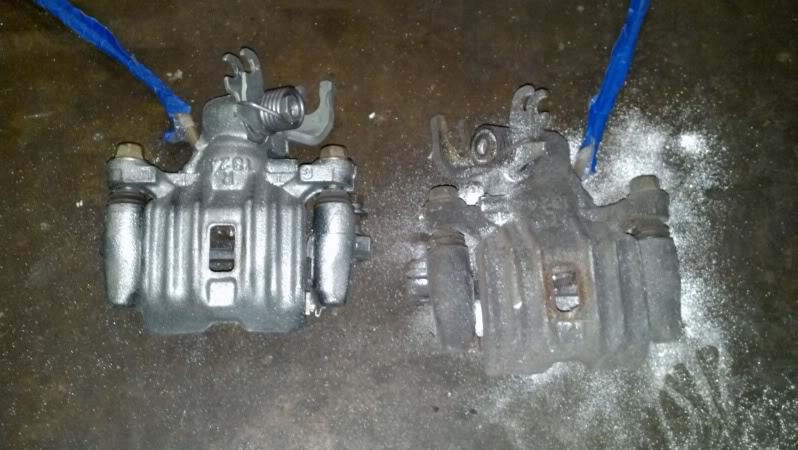
Both done:
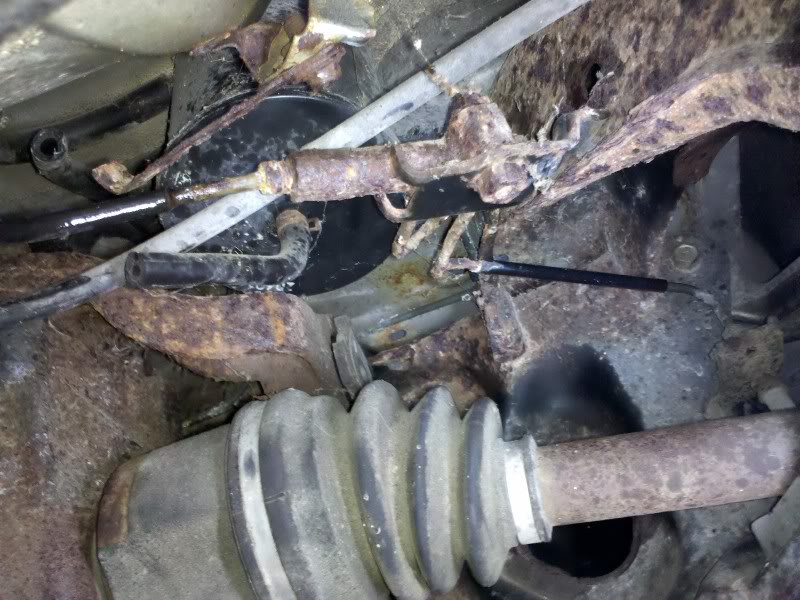
Then, I finally got that stuborn CV shaft out of the hub.
TECH TIP! If you have a slide hammer with a hub attachment (goes on wheel studs and uses lugnuts to hold on), put the part on the hub with the lugnuts, and BORROW the pointed insert from a puller tool set. Put that into the theaded shaft of the slide hammer and SCREW in into the attachment. The pointed part fits into the end of the CV axle, and just screw that in until it forces the CV axle out the back side!!
And this is the repair of the damage I did to it trying to persuade it with a hammer!

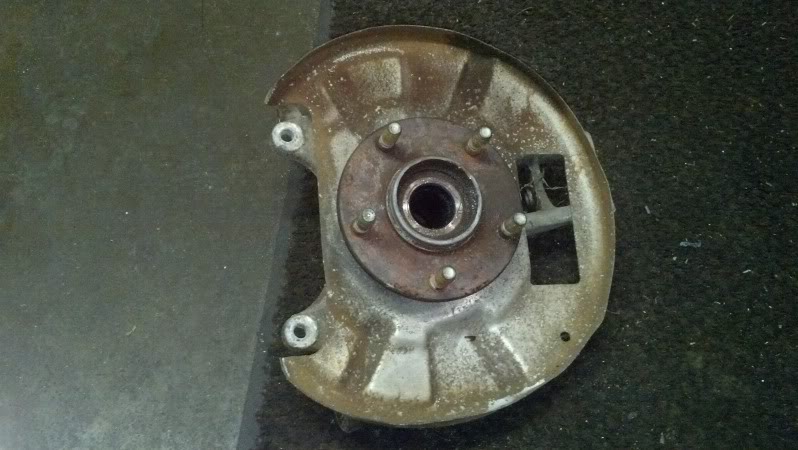
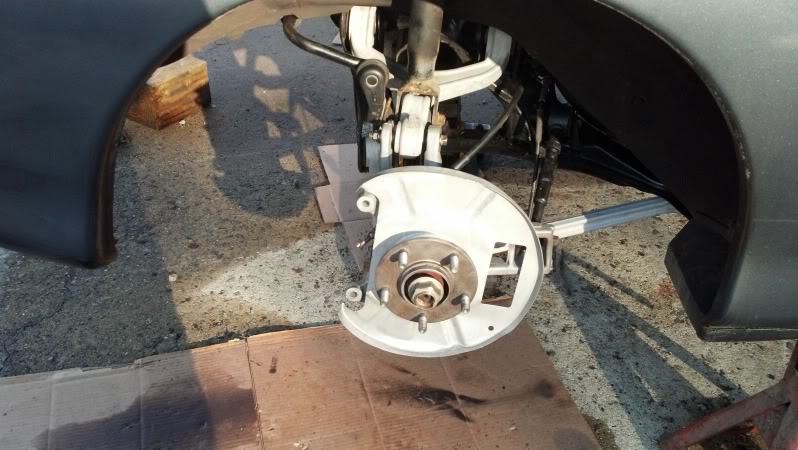
Rear hub BEFORE:
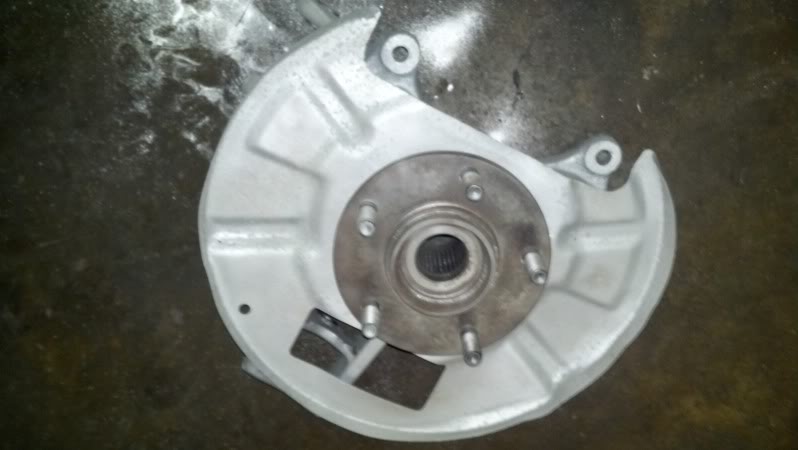
Rear hub AFTER:
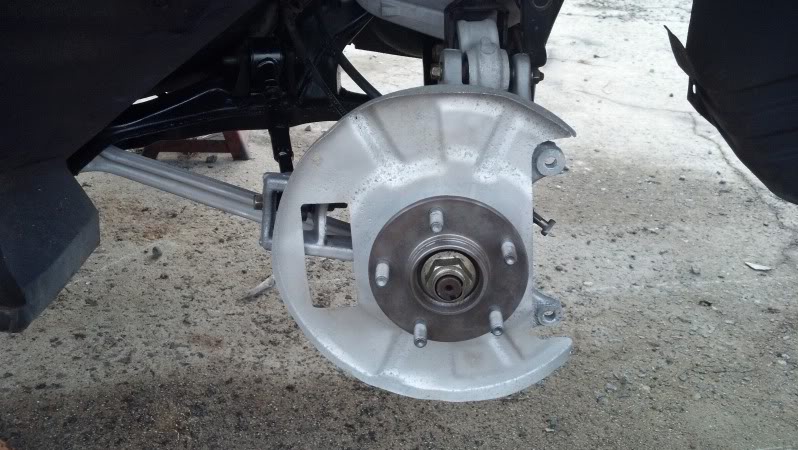
BEFORE:
AFTER:
AND the part that is holding me from reinstalling the hubs:
Tomorrow, I will tackle the bolts that broke for the rear wheel speed sensors. Once they are out, I can reinstall the differential, axles, and hubs. And the rear sway bar.
Still need to get the brake rotors/pads/hardware.
At least parts are starting to go back ON the car now
Vince
Before/after:
Both done:
Then, I finally got that stuborn CV shaft out of the hub.
TECH TIP! If you have a slide hammer with a hub attachment (goes on wheel studs and uses lugnuts to hold on), put the part on the hub with the lugnuts, and BORROW the pointed insert from a puller tool set. Put that into the theaded shaft of the slide hammer and SCREW in into the attachment. The pointed part fits into the end of the CV axle, and just screw that in until it forces the CV axle out the back side!!
And this is the repair of the damage I did to it trying to persuade it with a hammer!
Rear hub BEFORE:
Rear hub AFTER:
BEFORE:
AFTER:
AND the part that is holding me from reinstalling the hubs:
Tomorrow, I will tackle the bolts that broke for the rear wheel speed sensors. Once they are out, I can reinstall the differential, axles, and hubs. And the rear sway bar.
Still need to get the brake rotors/pads/hardware.
At least parts are starting to go back ON the car now
Vince
Thread Starter
Joined: Nov 2004
Posts: 1,139
Likes: 114
From: Berlin, MD
More Done TODAY!
I managed to remove both broken bolts from the hubs!! Getting them out of something aluminum without ruining the part is very difficult.
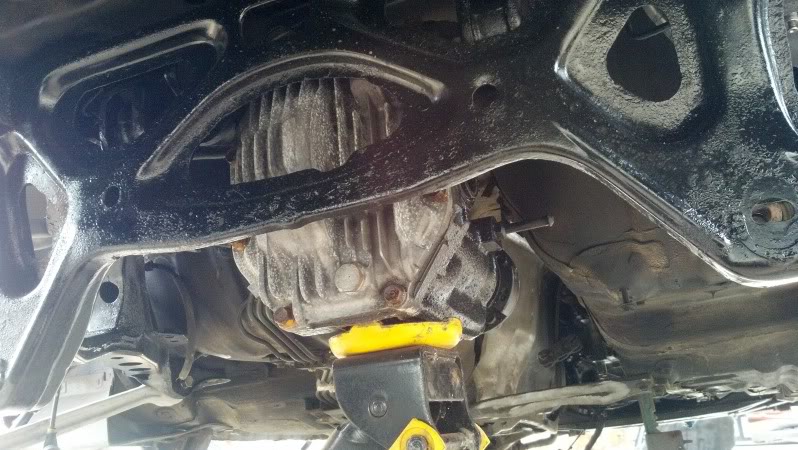
Got the differential mounted:
Rear swaybar mounted:
Cleaned and lubed the brake cables:
RH side completed minus brake caliper/rotor:
LH side completed minus brake caliper/rotor:
And I mounted the PPF, but realized the upper bolts on the transmission go in from the top!
I will have to get those in and then I can properly adjust and install the PPF, and the driveshaft.
And once the rotors arrive, I can mount the rear calipers and wheels.
Vince
I managed to remove both broken bolts from the hubs!! Getting them out of something aluminum without ruining the part is very difficult.
Got the differential mounted:
Rear swaybar mounted:
Cleaned and lubed the brake cables:
RH side completed minus brake caliper/rotor:
LH side completed minus brake caliper/rotor:
And I mounted the PPF, but realized the upper bolts on the transmission go in from the top!
I will have to get those in and then I can properly adjust and install the PPF, and the driveshaft.
And once the rotors arrive, I can mount the rear calipers and wheels.
Vince
Thread Starter
Joined: Nov 2004
Posts: 1,139
Likes: 114
From: Berlin, MD
MINOR UPDATE
I've got most of the other parts I needed to put this rear end back together.
Since the weather has been uncooperative, I decided I'd do something I that could be done inside on the couch.
My buddy with the red FD gave me his old Borla exhaust, and I polished that stainless up.
Before of pipe:

After:
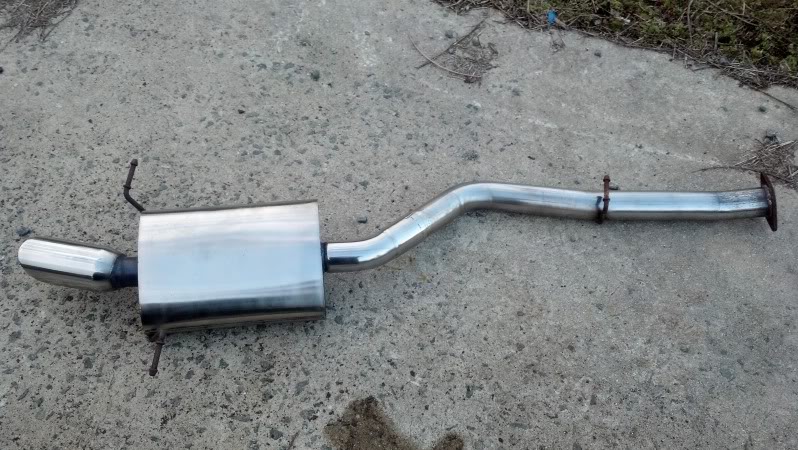
I still have to clean and paint the hangers, and get a 2.5" band clamp where the pipe joins the muffler.
Hopefully, the weather will soon cooperate and I'll be able to reinstall the rear brakes, PPF, etc.
Vince
I've got most of the other parts I needed to put this rear end back together.
- New Rotors
- New brake hardware, Front & Rear
- Replacement OEM camber bolts
- New rear pads
- Braided front brake lines
Since the weather has been uncooperative, I decided I'd do something I that could be done inside on the couch.
My buddy with the red FD gave me his old Borla exhaust, and I polished that stainless up.
Before of pipe:
After:
I still have to clean and paint the hangers, and get a 2.5" band clamp where the pipe joins the muffler.
Hopefully, the weather will soon cooperate and I'll be able to reinstall the rear brakes, PPF, etc.
Vince

Thread Starter
Joined: Nov 2004
Posts: 1,139
Likes: 114
From: Berlin, MD
^ A combination of a wire wheel mounted on a drill, and 3M rust removal disc on an angle grinder

MINOR UPDATE!
Time and weather have not been on my side, so I have had very little time to work on this car.
I did get the rear brakes back together:
And I finished sanding and priming another wheel:
Maybe, I will get this thing finished before summer...
Vince
MINOR UPDATE!
Time and weather have not been on my side, so I have had very little time to work on this car.
I did get the rear brakes back together:
And I finished sanding and priming another wheel:
Maybe, I will get this thing finished before summer...
Vince
Thread Starter
Joined: Nov 2004
Posts: 1,139
Likes: 114
From: Berlin, MD
Yet another UPDATE!
So, I finally got the upper bolts for the PPF into the transmission. Which is a little difficult in the car:
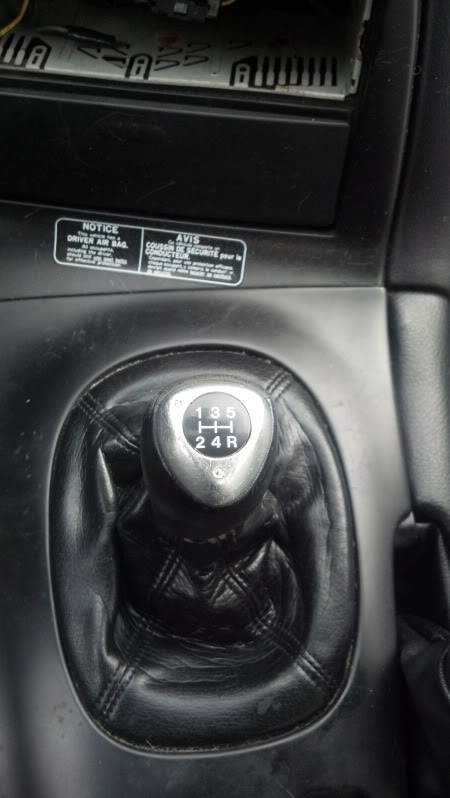
Installed the mystery short throw shifter that came with the car:
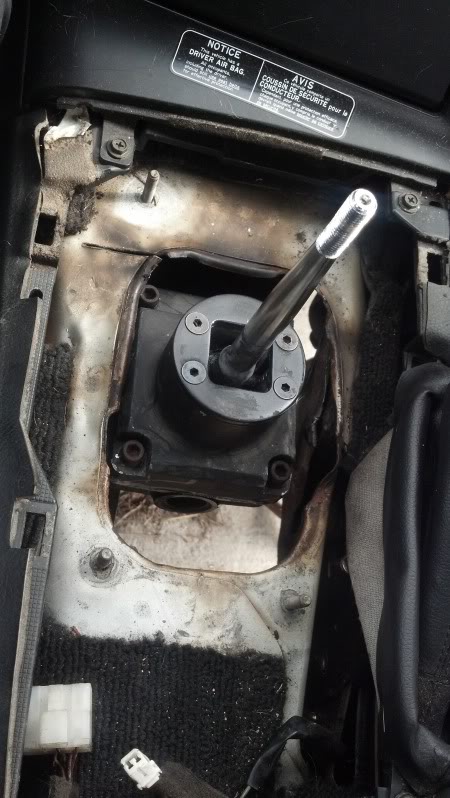
And then the RX-8 5-speed ****:
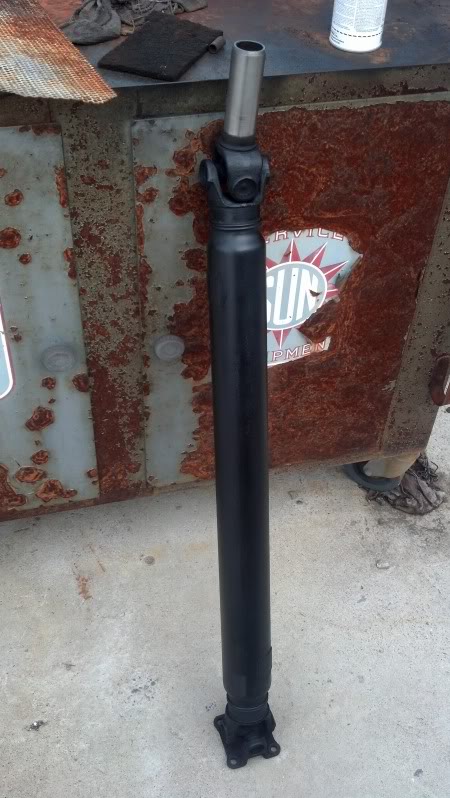
Cleaned and painted the driveshaft:
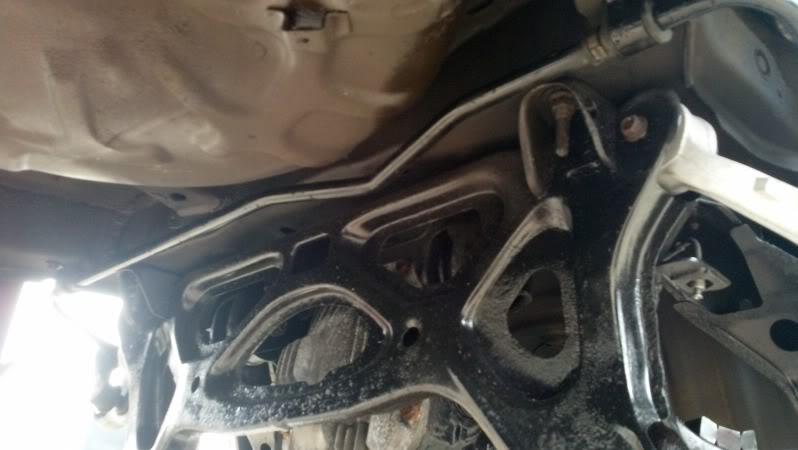
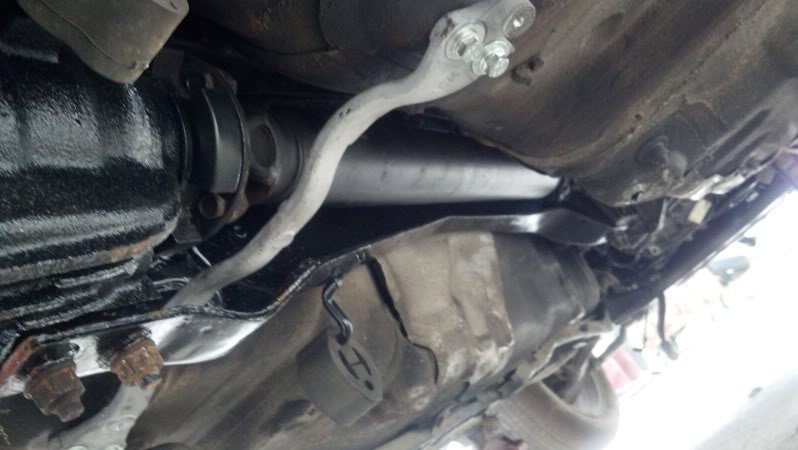
Adjusted and installed PPF, driveshaft and rear tunnel brace:
I also reinstalled the charcoal canister, and replaced the fuel filter (no picture).
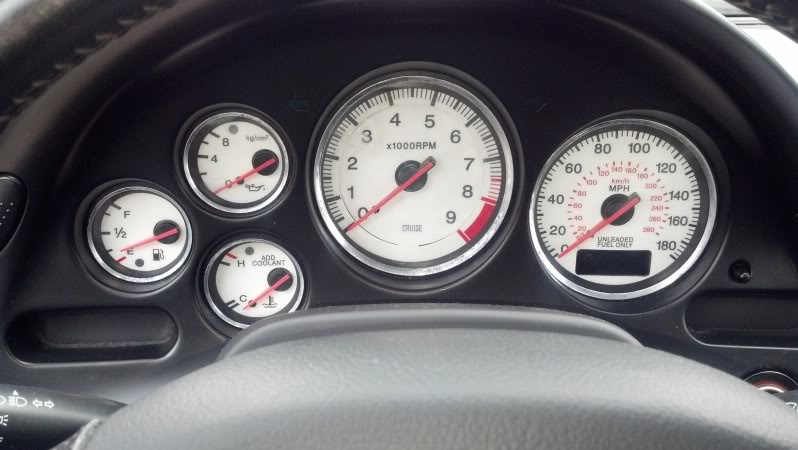
Lastly, a picture of the mystery white face gauges:
I do hope to get a chance to work on it more soon, but I've been too busy working on cars collecting as much "tax refund" money as I can.
Thanks to ZE Power MX6 for the ****, and Crispy for the PPF hardware.
Vince
So, I finally got the upper bolts for the PPF into the transmission. Which is a little difficult in the car:
Installed the mystery short throw shifter that came with the car:
And then the RX-8 5-speed ****:
Cleaned and painted the driveshaft:
Adjusted and installed PPF, driveshaft and rear tunnel brace:
I also reinstalled the charcoal canister, and replaced the fuel filter (no picture).
Lastly, a picture of the mystery white face gauges:
I do hope to get a chance to work on it more soon, but I've been too busy working on cars collecting as much "tax refund" money as I can.
Thanks to ZE Power MX6 for the ****, and Crispy for the PPF hardware.
Vince

Thread Starter
Joined: Nov 2004
Posts: 1,139
Likes: 114
From: Berlin, MD
And, YET ANOTHER UPDATE!
So, I finished a timing belt job early today, and decided to take advantage of the fantastic spring weather.
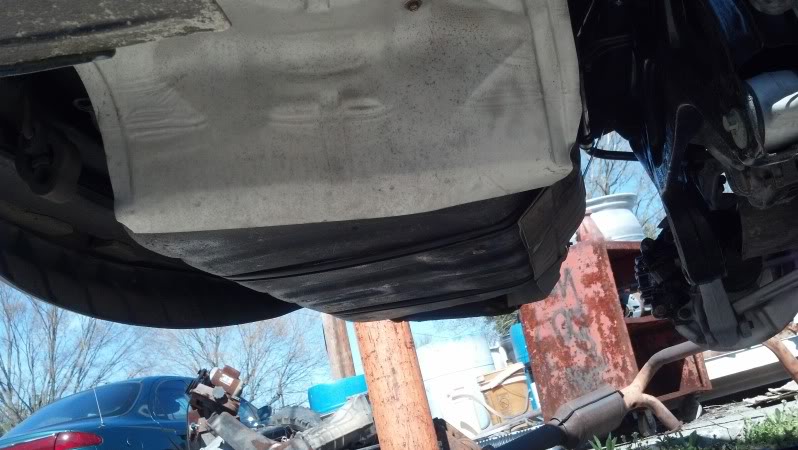
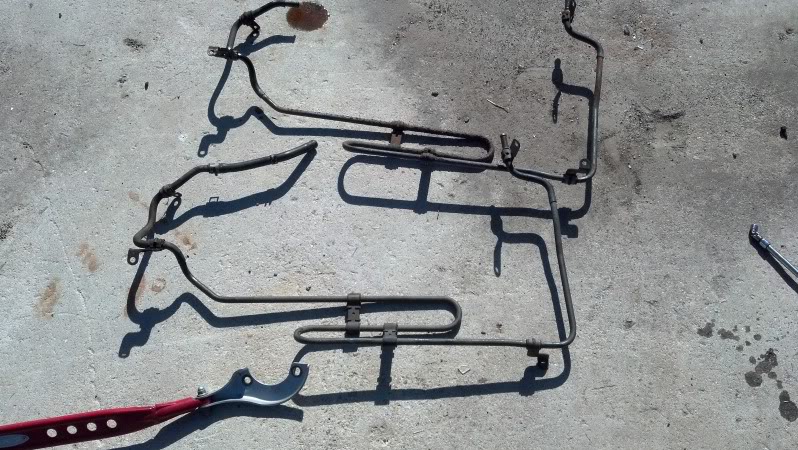
I finally mounted the fuel tank with the NEW straps, fastened all the hoses, and the muffler heat shield:
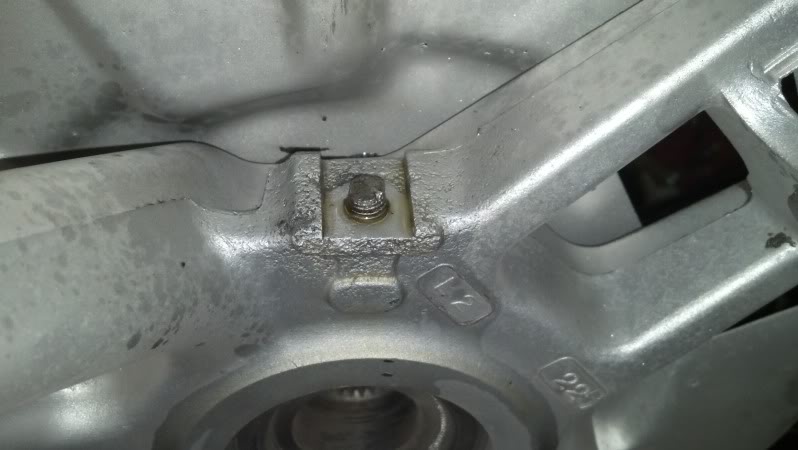
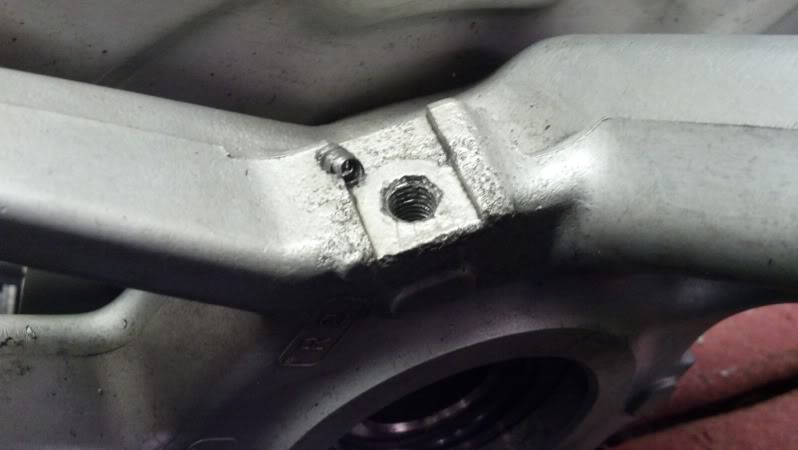
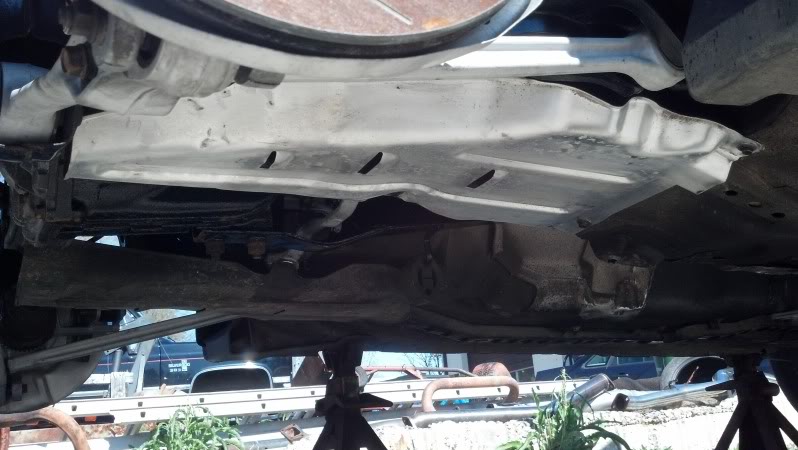
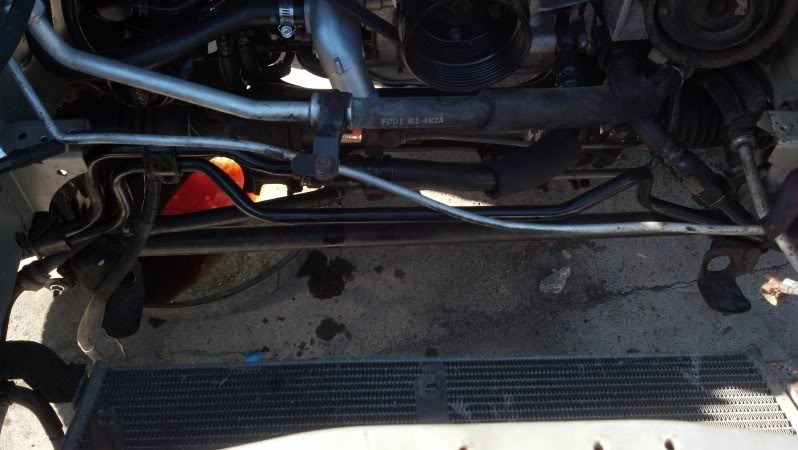
Mounted both undertrays? and the braces that go from the subframe to the body:
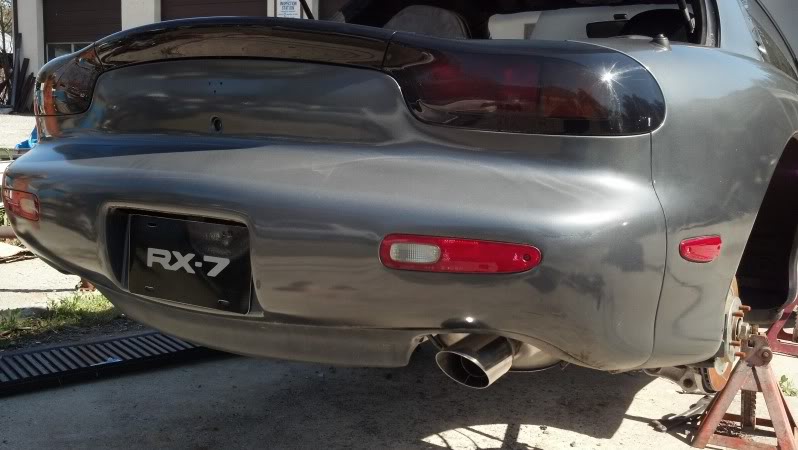
Hung the BORLA catback, still need a band clamp for it:
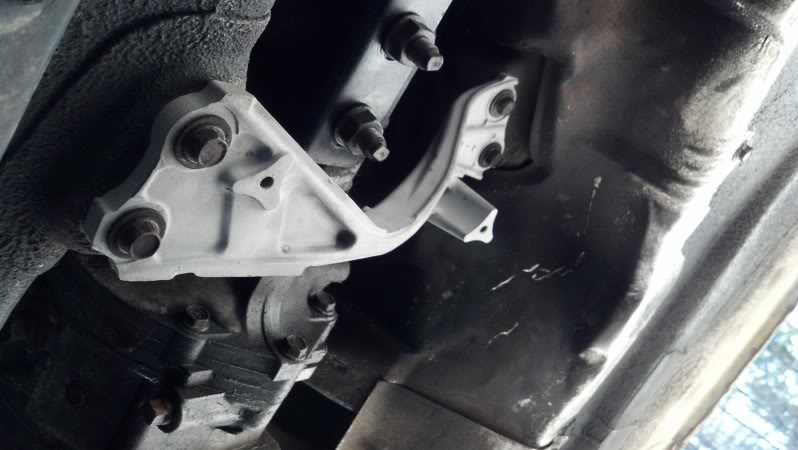
Mounted the front transmission tunnel brace, still need to get a middle brace as mine is damaged...
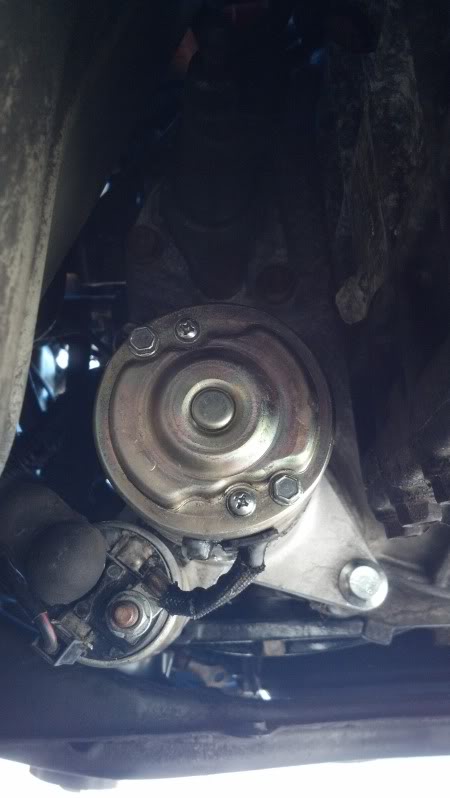
Mounted the starter and slave cylinder:
Exchanged the rusted and rotted PS cooler for a good one:
And, mounted:

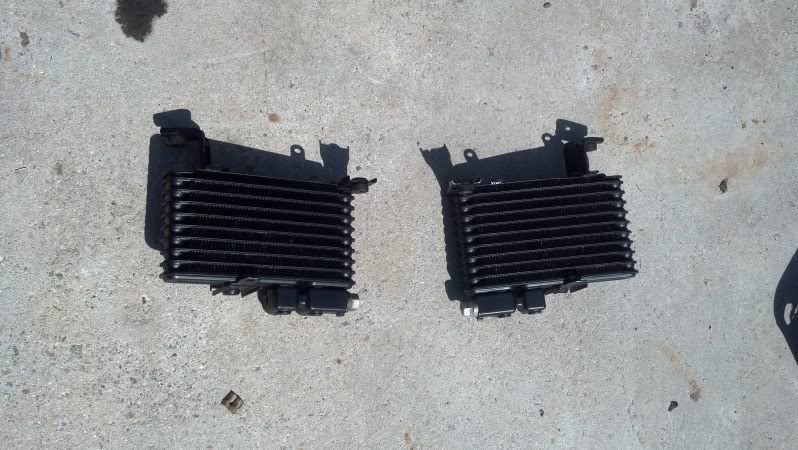
R1 dual oil cooler hard lines mounted and connected:
And lastly the coolers themselves need some attention as the fins are mostly bent!

So, I finished a timing belt job early today, and decided to take advantage of the fantastic spring weather.
I finally mounted the fuel tank with the NEW straps, fastened all the hoses, and the muffler heat shield:
Mounted both undertrays? and the braces that go from the subframe to the body:
Hung the BORLA catback, still need a band clamp for it:
Mounted the front transmission tunnel brace, still need to get a middle brace as mine is damaged...
Mounted the starter and slave cylinder:
Exchanged the rusted and rotted PS cooler for a good one:
And, mounted:
R1 dual oil cooler hard lines mounted and connected:
And lastly the coolers themselves need some attention as the fins are mostly bent!
Thread Starter
Joined: Nov 2004
Posts: 1,139
Likes: 114
From: Berlin, MD
HOLY CRAP, PARTS ARE GOING ON THE CAR!!!
After several hours of straightening the fins, degreasing, finally a coat of lo-gloss black, the oil coolers are ready to go back on the car!
I had to make the bracket for the PS oil cooler as I did not have one, and installed them with the ducts:
AND at that point I realized there used to be rubber filling the gap in the oil cooler ducts... So black duct tape to the rescue!
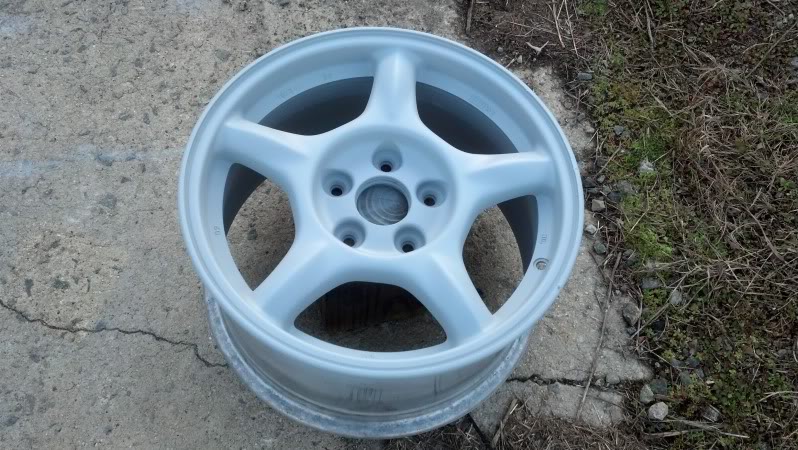
Then as a change of pace, I painted the spokes black yesterday, then today masked them off and painted the silver portion:
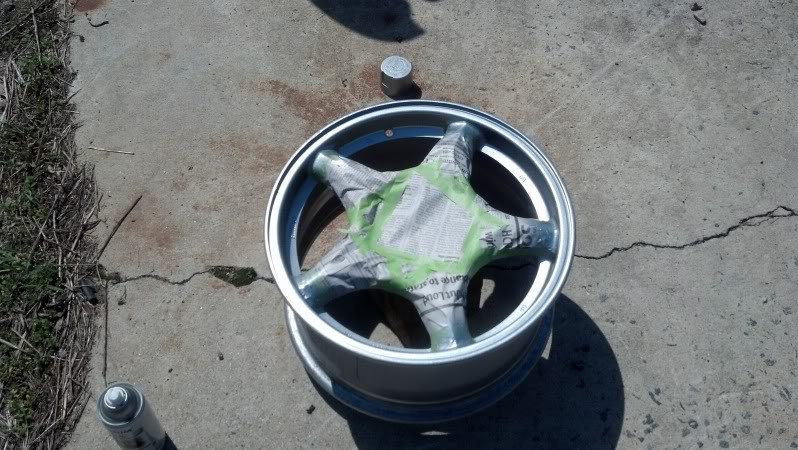
And then 3 coats of clear:
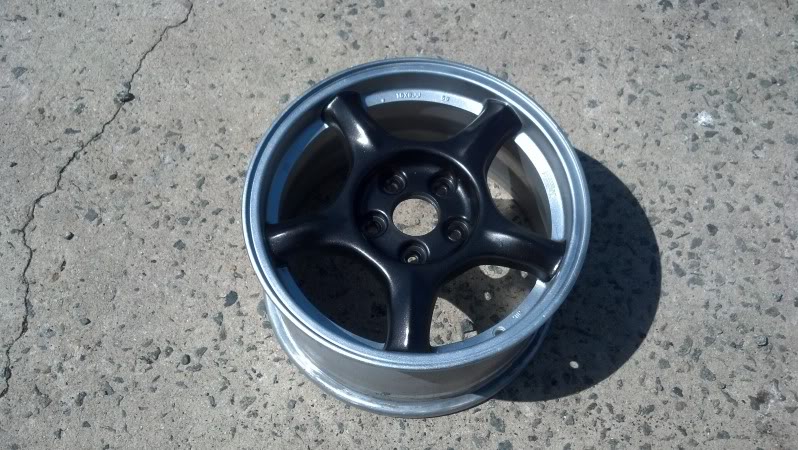
And on the car as a preview:
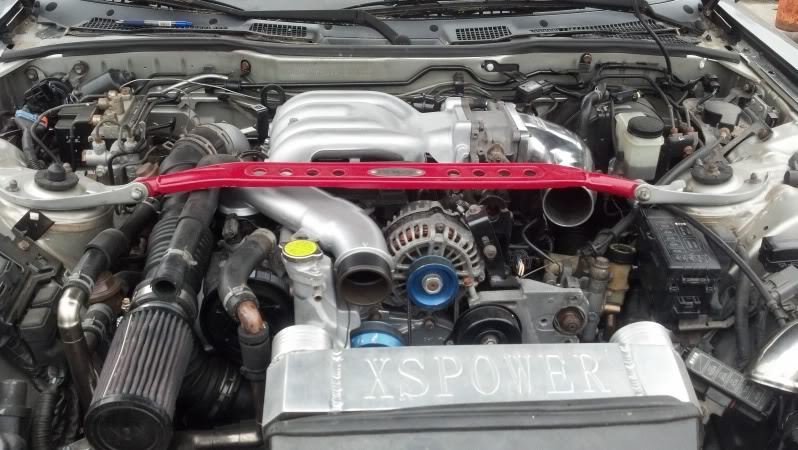
Installed radiator, hoses, brace, and M2 intercooler duct:
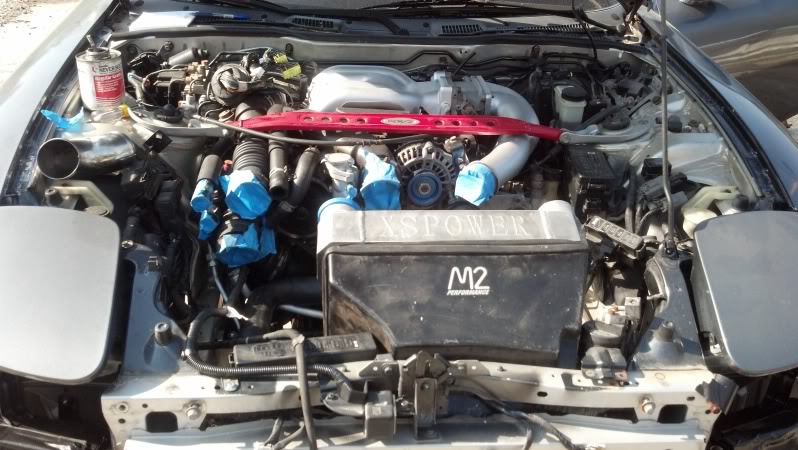
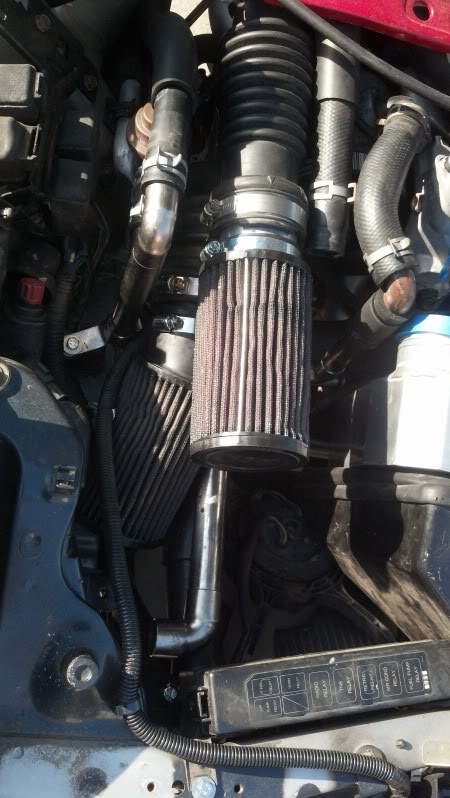
Lastly, installed the Pettit intake kit (still need to make the heat shield and get the breather for the metal pipe):
Things still left to do:
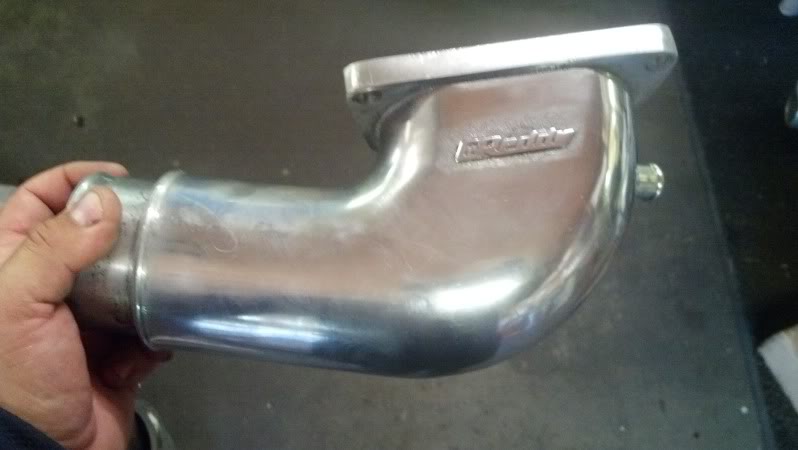
Get a Greddy elbow.
Have intercooler pipes made.
Mount AST.
Swap injectors.
Mount AC and PS, and belt.
Route engine harness inside car and reinstall computer.
Install exhaust, catalytic converter, and O2 sensor.
Install front SS brake lines, rotors, and pads.
Bleed brakes.
Vince
After several hours of straightening the fins, degreasing, finally a coat of lo-gloss black, the oil coolers are ready to go back on the car!
I had to make the bracket for the PS oil cooler as I did not have one, and installed them with the ducts:
AND at that point I realized there used to be rubber filling the gap in the oil cooler ducts... So black duct tape to the rescue!
Then as a change of pace, I painted the spokes black yesterday, then today masked them off and painted the silver portion:
And then 3 coats of clear:
And on the car as a preview:
Installed radiator, hoses, brace, and M2 intercooler duct:
Lastly, installed the Pettit intake kit (still need to make the heat shield and get the breather for the metal pipe):
Things still left to do:
Get a Greddy elbow.
Have intercooler pipes made.
Mount AST.
Swap injectors.
Mount AC and PS, and belt.
Route engine harness inside car and reinstall computer.
Install exhaust, catalytic converter, and O2 sensor.
Install front SS brake lines, rotors, and pads.
Bleed brakes.
Vince

Thread Starter
Joined: Nov 2004
Posts: 1,139
Likes: 114
From: Berlin, MD
HOLY CRAP! IT'S NOT ON JACKSTANDS ANYMORE!
Made some progress today.
Got a Greddy elbow, and added the missing fitting to mirror the stock part:
Greddy elbow installed and crossover pipe exchanged for one that still has bracket on it:
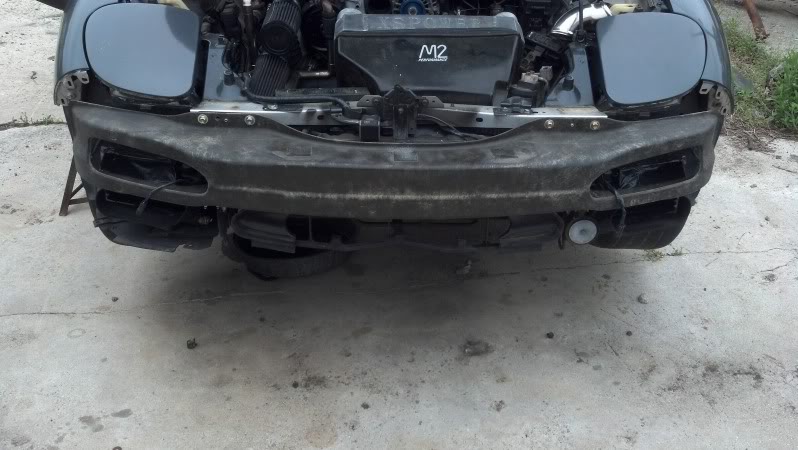
Front bumper support installed:
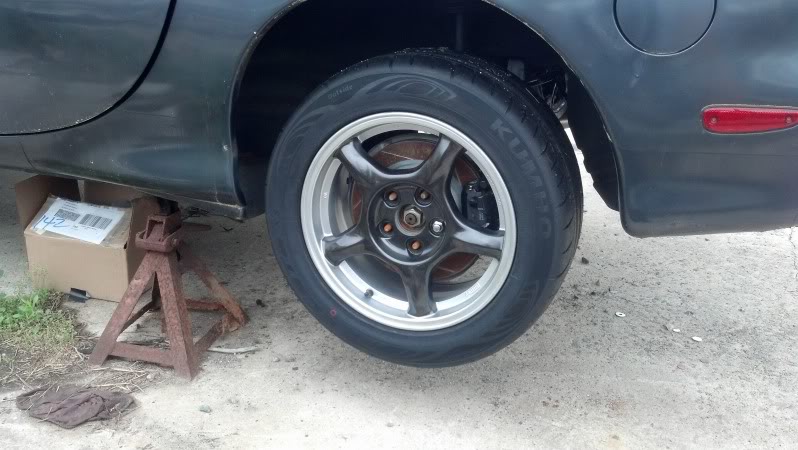
Got the rear tires mounted and balanced:
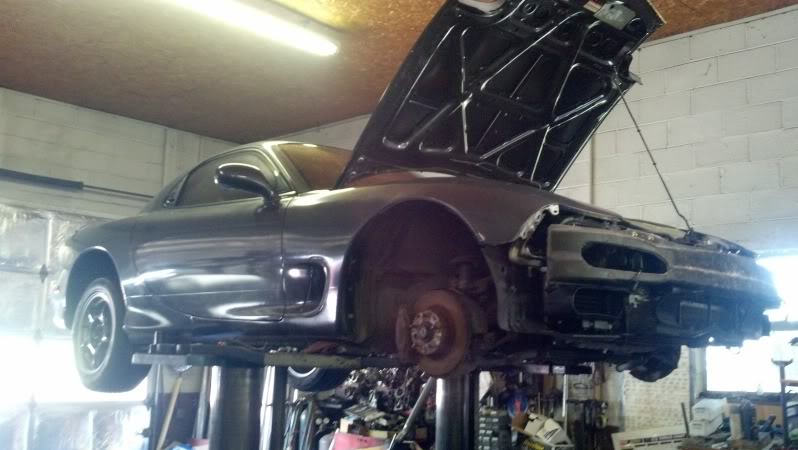
And into the shop to put it on the lift!
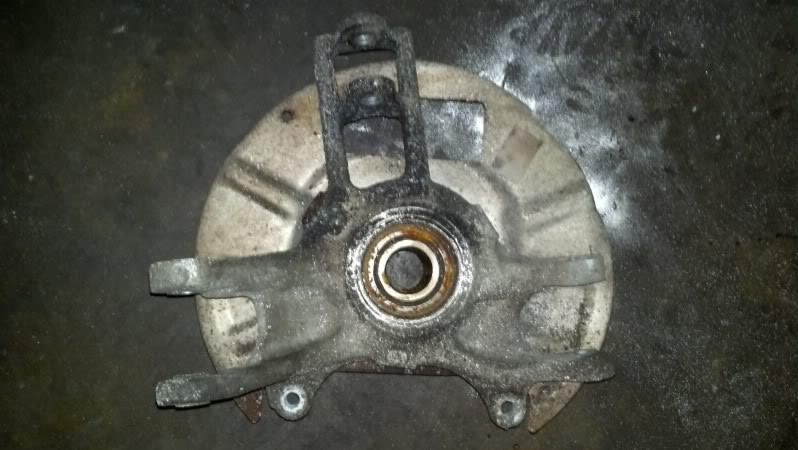
This is what I was working with on the front brakes
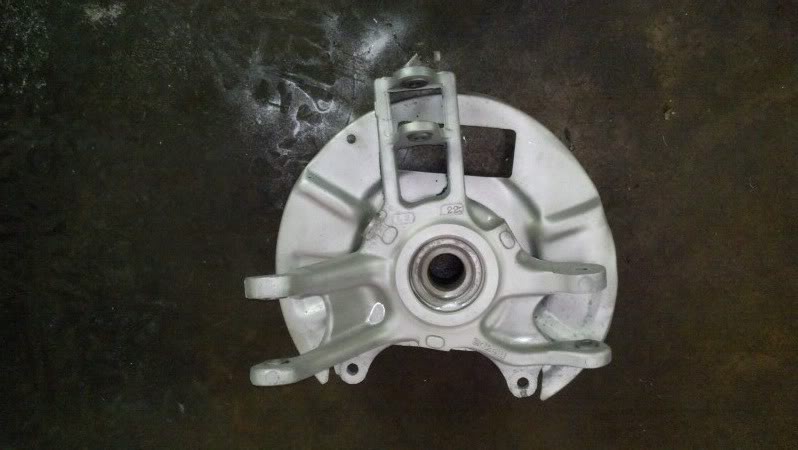
And after sandblasting, painting and polishing the MAZDA logo:
With new pads and hardware (except the pins: wrong ones in kit....)
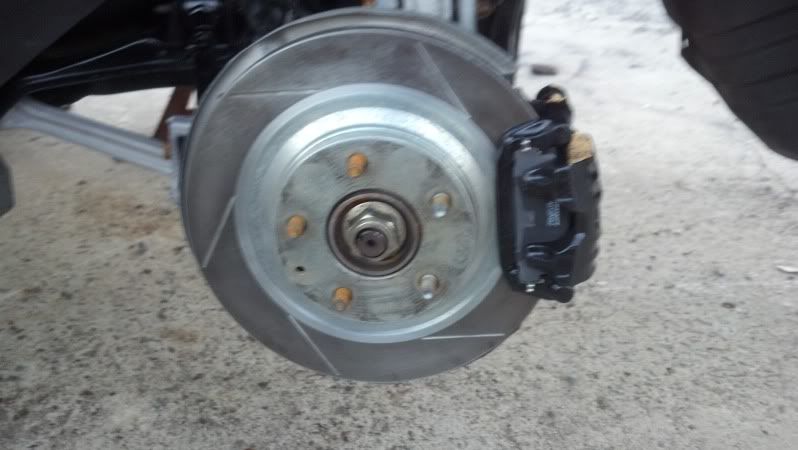
AND on the car with the slotted rotors:

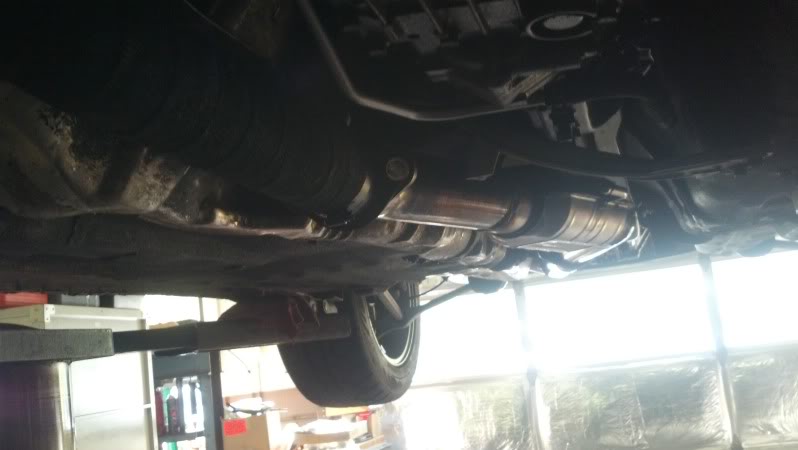
Added O2 bung to downpipe, wrapped with DEI titanium wrap, sealed with the silicone coating. Then, mounted, added converter to midpipe, and put band clamp on catback. Still have to make up AIR pipe to go from converter to check valve:
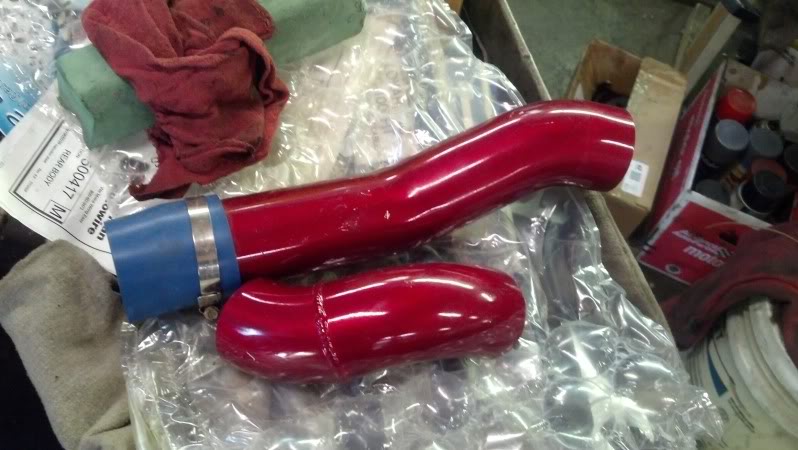
Lastly, I rediscovered these intake hard pipes. I think they will undergo a color change before being installed.
Made some progress today.
Got a Greddy elbow, and added the missing fitting to mirror the stock part:
Greddy elbow installed and crossover pipe exchanged for one that still has bracket on it:
Front bumper support installed:
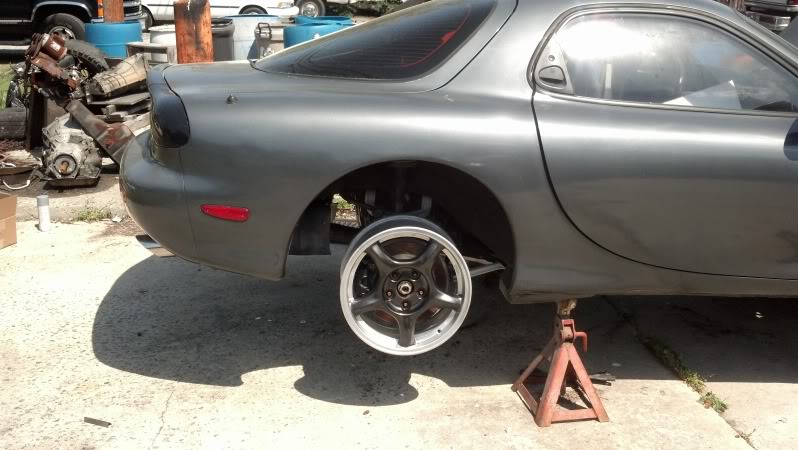
Got the rear tires mounted and balanced:
And into the shop to put it on the lift!
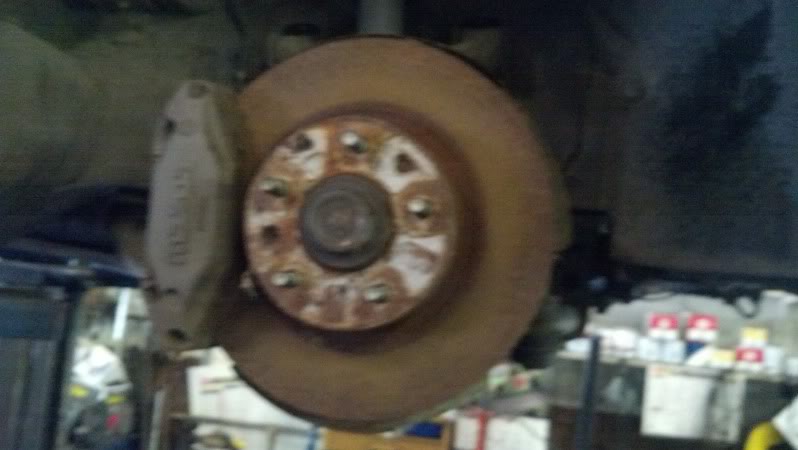
This is what I was working with on the front brakes
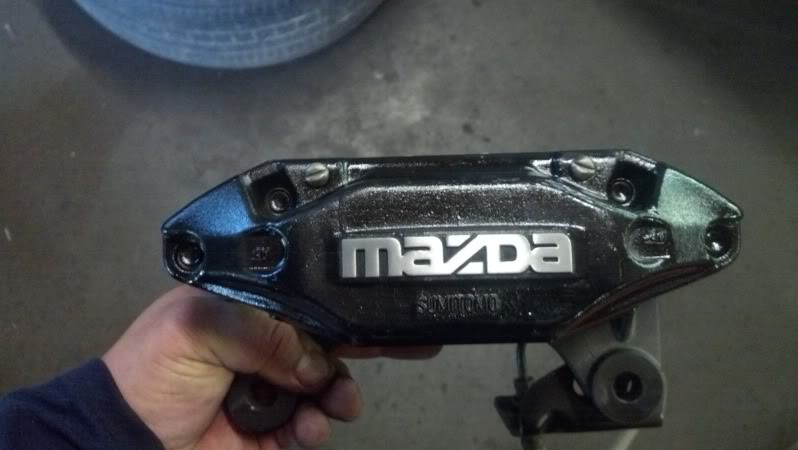
And after sandblasting, painting and polishing the MAZDA logo:
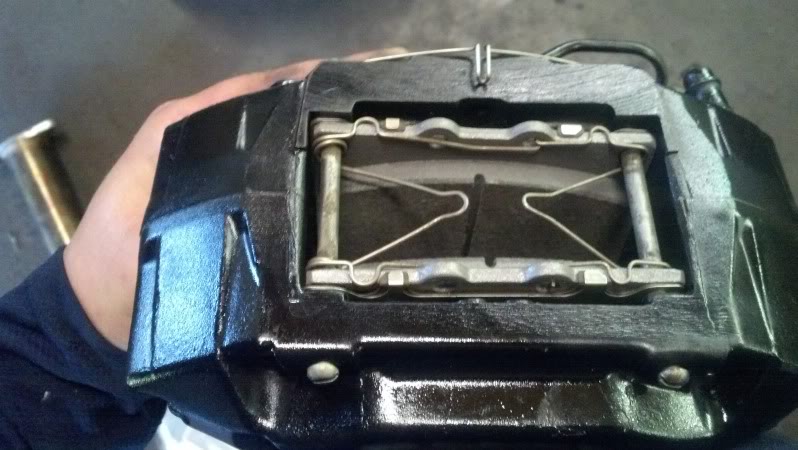
With new pads and hardware (except the pins: wrong ones in kit....)
AND on the car with the slotted rotors:
Added O2 bung to downpipe, wrapped with DEI titanium wrap, sealed with the silicone coating. Then, mounted, added converter to midpipe, and put band clamp on catback. Still have to make up AIR pipe to go from converter to check valve:
Lastly, I rediscovered these intake hard pipes. I think they will undergo a color change before being installed.