
RENESISFD's Robust Build: Powered by Pepperoni Pizza and Chikken Nuggets


Surgaring is not the only problem from not back purging. The entire heat affected zone will oxidize, which weakens the weld/surrounding material. Some materials are more affected by this than others IE titanium, but doing it the right way is never "over-kill"

Do you have more progress on your IQ3 dash mounting?
I'm trying to figure out how to mount mine, and your idea seems to be a nice solution (maybe I have to steal it)
do you have more pictures/progress?
I'm trying to figure out how to mount mine, and your idea seems to be a nice solution
(maybe I have to steal it) do you have more pictures/progress?
Thread Starter
Joined: Feb 2008
Posts: 2,979
Likes: 9
From: Long Island NY 11746
^ I am currently working on it. It is taking a lot of time due to me having to wait for the fiberglass resin to dry. So I am making one or 2 applications and then an hour is wasted. This weekend I should have some more progress pics of it .
.

Junior Member
Joined: Mar 2013
Posts: 9
Likes: 0
From: Dublin, Ireland
Loving this build. Much respect!!
Fantastic attention to detail and heaps of top quality craftsmanship at every turn
Also, your garage is epic! Looking forward to watching this project progress
Fantastic attention to detail and heaps of top quality craftsmanship at every turn
Also, your garage is epic! Looking forward to watching this project progress


Can't wait to see this thing on track again this year.
Last edited by SakeBomb Garage; Mar 14, 2013 at 10:46 PM.

Thread Starter
Joined: Feb 2008
Posts: 2,979
Likes: 9
From: Long Island NY 11746
I got it from onlinemetals.com this time. Much cheaper and longer lengths, I can get up to 8ft lengths. I originally planed to bend up new hardlines front to rear but am considering not doing that yet due to time constraints because of DGRR. Are you going this year?
Thanks for the compliments.
I don't know what to make of this post  ,. Thanks Ihor.
I cant wait to get back on track as well. I definitely want to make it to more track days this year.
I am trying but it is a PITA to take pics with my camera when I am covered in dust. I don't want to ruin my expensive camera. I am taking pics of the important things though. I am thinking I am going to mount the dash differently from what I originally planned. I am thinking of mounting it directly to the cluster surround as opposed to the white plastic cluster housing. I will post some progress pics later today of that.
,. Thanks Ihor.I am trying but it is a PITA to take pics with my camera when I am covered in dust. I don't want to ruin my expensive camera. I am taking pics of the important things though. I am thinking I am going to mount the dash differently from what I originally planned. I am thinking of mounting it directly to the cluster surround as opposed to the white plastic cluster housing. I will post some progress pics later today of that.
Yea hardlines are on my to-do list... We'll see when I actually get to them

Yea I'll be at DGRR, sans FD unfortunately. Been spending too much time helping others build their damn cars
I look forward to seeing it in person, and drooling over your wiggins clamps 
I
I am trying but it is a PITA to take pics with my camera when I am covered in dust. I don't want to ruin my expensive camera. I am taking pics of the important things though. I am thinking I am going to mount the dash differently from what I originally planned. I am thinking of mounting it directly to the cluster surround as opposed to the white plastic cluster housing. I will post some progress pics later today of that.
I am trying but it is a PITA to take pics with my camera when I am covered in dust. I don't want to ruin my expensive camera. I am taking pics of the important things though. I am thinking I am going to mount the dash differently from what I originally planned. I am thinking of mounting it directly to the cluster surround as opposed to the white plastic cluster housing. I will post some progress pics later today of that.
 Thanks in advance for pic's
Thread Starter
Joined: Feb 2008
Posts: 2,979
Likes: 9
From: Long Island NY 11746
^ As promised, here are some pics. Some of them were taken with my phone so the quality is not as nice. I hate this project. I hate sanding.
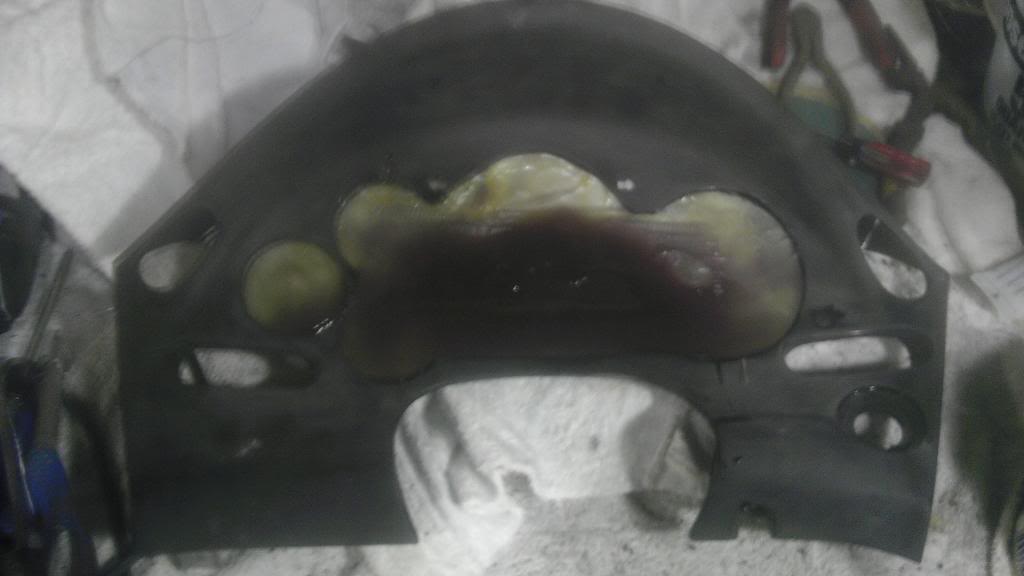
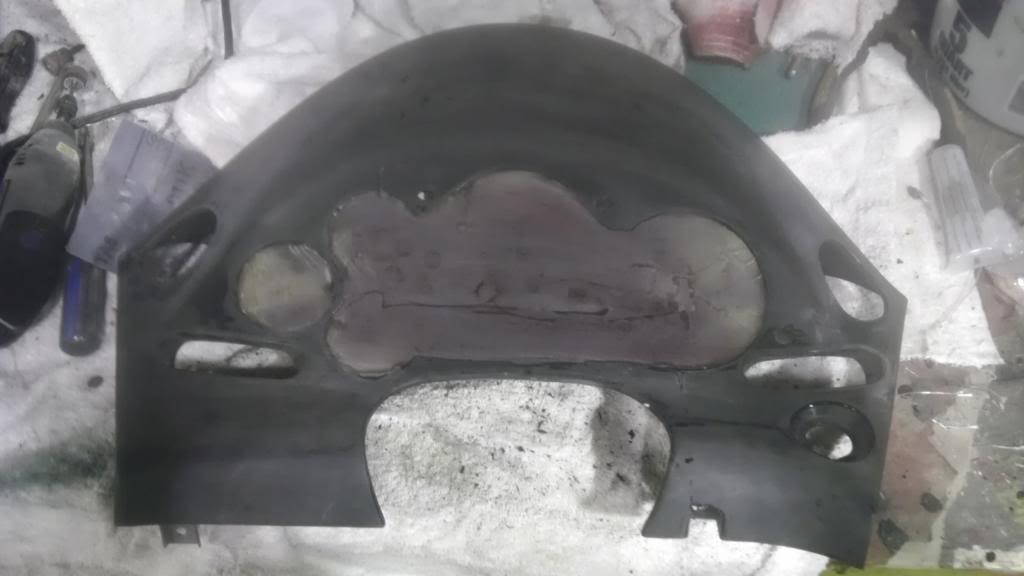

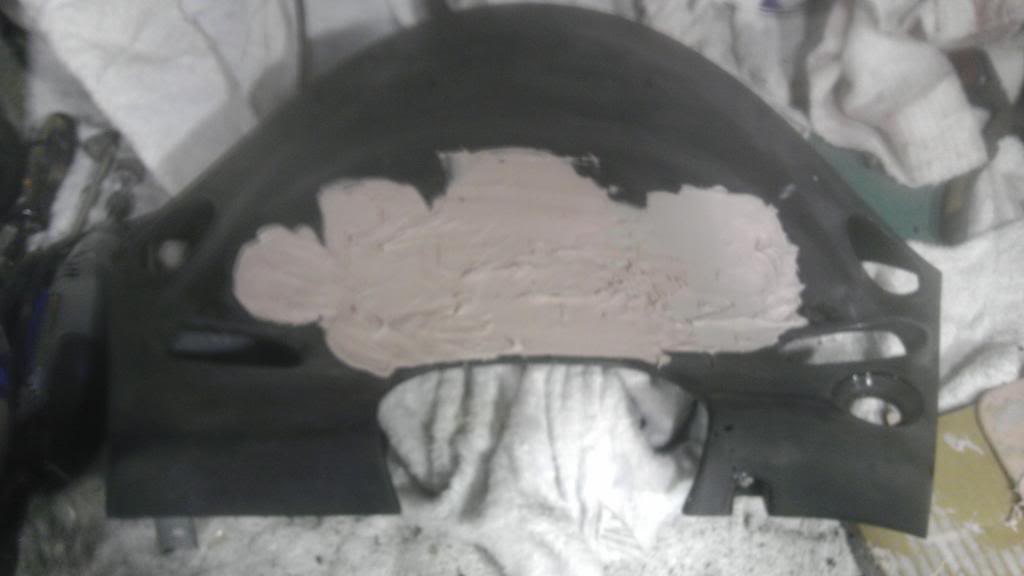
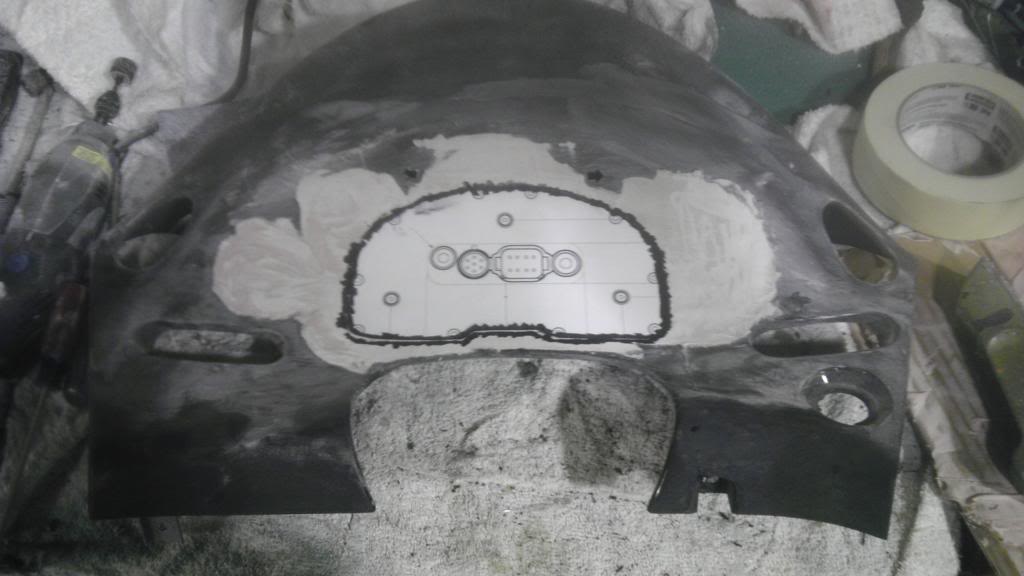
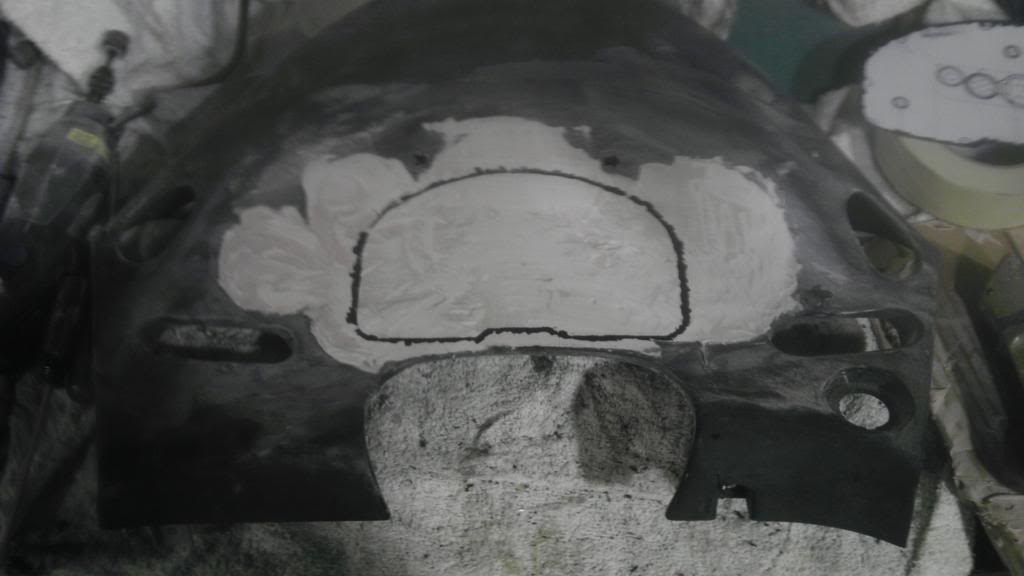


I have some small gaps to fill in on the sides of the dash so it looks more professional. Then I will be working on the mounting portion and then paint.
I have some small gaps to fill in on the sides of the dash so it looks more professional. Then I will be working on the mounting portion and then paint.
Last edited by RENESISFD; Mar 15, 2013 at 05:57 PM.
Thread Starter
Joined: Feb 2008
Posts: 2,979
Likes: 9
From: Long Island NY 11746
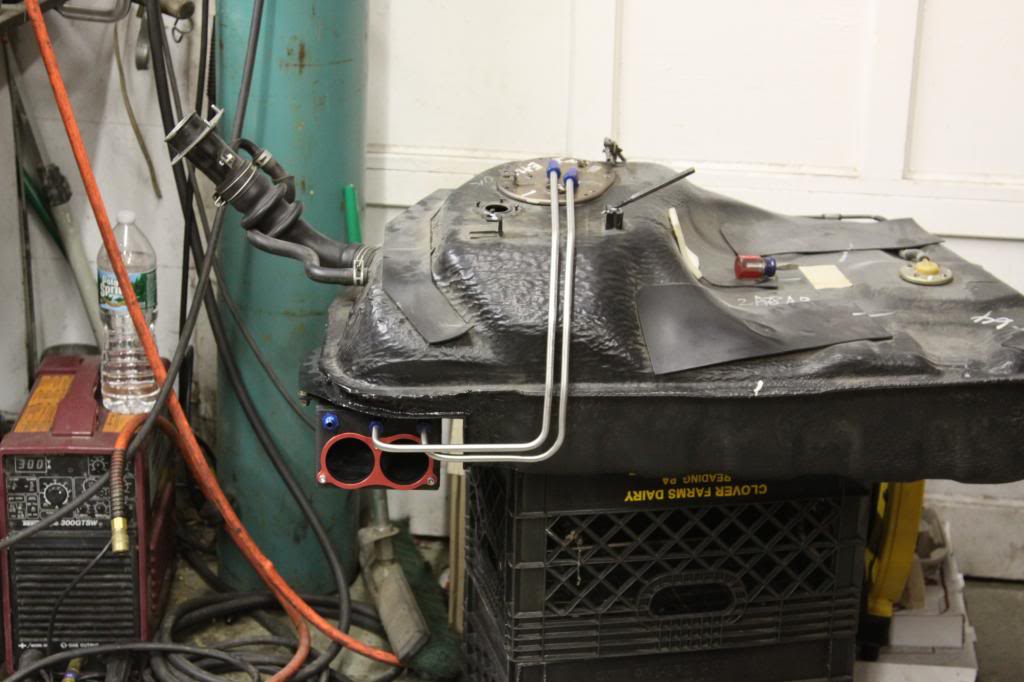
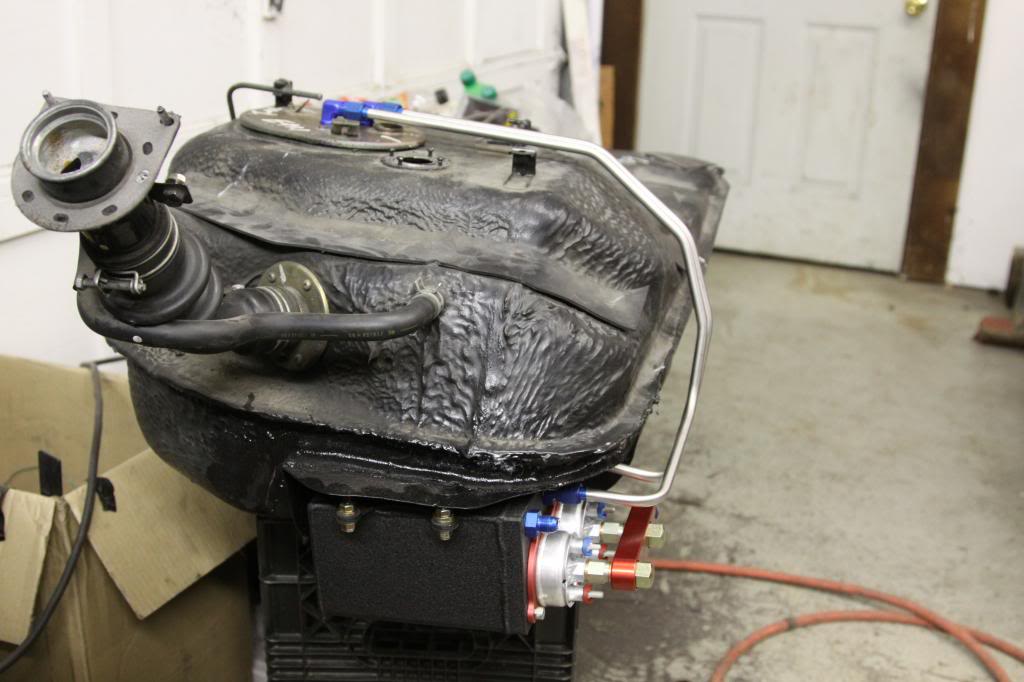
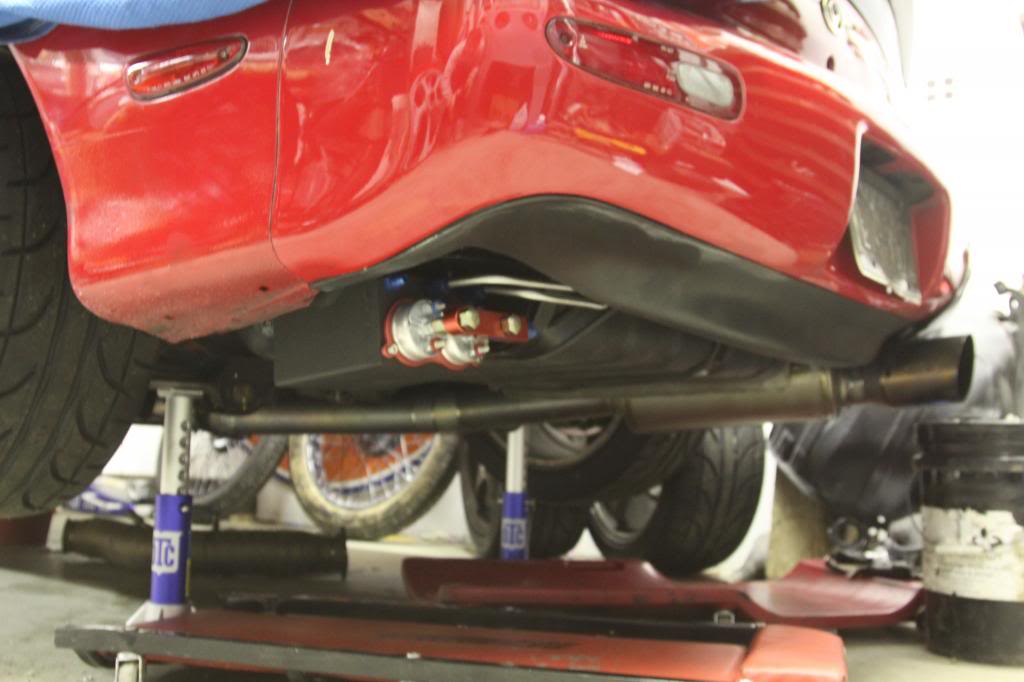
Working on the hardlines as well.
When I am not sanding and bitching to myself about why I decided to mount the racepak into the dash I am working on the hardlines.
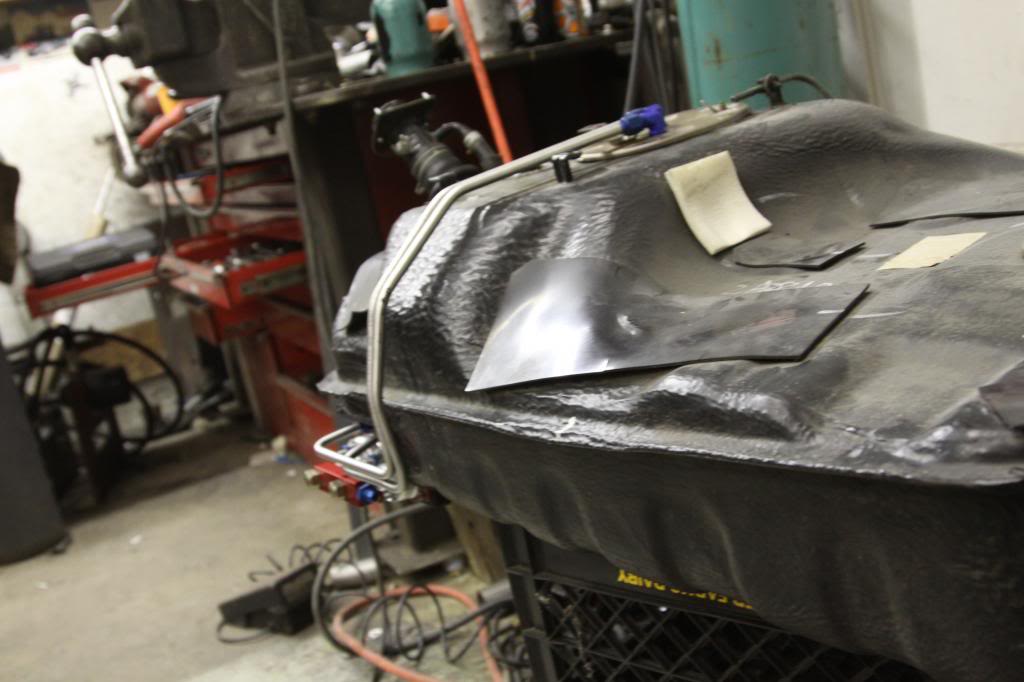
Obviously I still have a ways to go with this project as well.
Obviously I still have a ways to go with this project as well.
^ Oh ok.
I used this bender.
Mastercool 70069-A 4-in-1 Tube Bender 70069-A: Amazon.com: Industrial & Scientific
The thing pictured above in post 236 third photo down is a mastercool flaring tool set.. It is hydraulic and works so well.
Mastercool Universal Hydraulic Flaring Tool Kit - Amazon.com
but to do AN fittings you need the 37 degree adapters.
Mastercool (MAS71098) 37 Degree Flaring and Double Flaring Adapter Set - Amazon.com
If all you want to do is AN fitting flares you can use this set.
37 Degree Hydraulic Flaring Kit - Amazon.com
I can not stress how easy it is to flare with this tool, Much easier than a manual flaring tool. The only problem I see with it is how much room you need to do a flare, it makes it hard to make a tight 90 degree bend close to the fitting.
If you never bent tubing before..... all I can say is good luck. It takes some practice, because of bend take up.
I am a member of amazon prime so I buy everything I can from them because of the free 2 day shipping on eligible orders. They even sell the stainless tubing need for this job.
John
I used this bender.
Mastercool 70069-A 4-in-1 Tube Bender 70069-A: Amazon.com: Industrial & Scientific
The thing pictured above in post 236 third photo down is a mastercool flaring tool set.. It is hydraulic and works so well.
Mastercool Universal Hydraulic Flaring Tool Kit - Amazon.com
but to do AN fittings you need the 37 degree adapters.
Mastercool (MAS71098) 37 Degree Flaring and Double Flaring Adapter Set - Amazon.com
If all you want to do is AN fitting flares you can use this set.
37 Degree Hydraulic Flaring Kit - Amazon.com
I can not stress how easy it is to flare with this tool, Much easier than a manual flaring tool. The only problem I see with it is how much room you need to do a flare, it makes it hard to make a tight 90 degree bend close to the fitting.
If you never bent tubing before..... all I can say is good luck
I am a member of amazon prime so I buy everything I can from them because of the free 2 day shipping on eligible orders. They even sell the stainless tubing need for this job.
John
just ordered my tool! thanks for the link... what size tubes did you end up using and what size for what purpose (i.e. 3/16 - Vac lines , 1/2 - coolant lines, etc.... )
nice job. hardlines loook dope. you're gonna be the reason why i redo all of mine to hardlines "eventually" as long as i can sourcer black or silver fittigns lol...
nice job on the gauge cluster... just some advice for the future (if you hate sanding as much as me) pony up a little extra $$ and get "rage gold" body filler, its the lime green color... that stuff sands SOOOOOOOO much easier.. its worth the extra money you'll save in time and sandpaper (doesnt clog the sandpaper as quick)
ps you can get the cheap bondo at harbor freight for $20 a gallon + 20% coupon = $16 plus tax (for future reference!)
Thread Starter
Joined: Feb 2008
Posts: 2,979
Likes: 9
From: Long Island NY 11746
Thanks.
nice job. hardlines loook dope. you're gonna be the reason why i redo all of mine to hardlines "eventually" as long as i can sourcer black or silver fittigns lol...
nice job on the gauge cluster... just some advice for the future (if you hate sanding as much as me) pony up a little extra $$ and get "rage gold" body filler, its the lime green color... that stuff sands SOOOOOOOO much easier.. its worth the extra money you'll save in time and sandpaper (doesnt clog the sandpaper as quick)
ps you can get the cheap bondo at harbor freight for $20 a gallon + 20% coupon = $16 plus tax (for future reference!)
nice job on the gauge cluster... just some advice for the future (if you hate sanding as much as me) pony up a little extra $$ and get "rage gold" body filler, its the lime green color... that stuff sands SOOOOOOOO much easier.. its worth the extra money you'll save in time and sandpaper (doesnt clog the sandpaper as quick)
ps you can get the cheap bondo at harbor freight for $20 a gallon + 20% coupon = $16 plus tax (for future reference!)
Thanks for the tip on the rage gold, if I do more bondo work I will look into it.
You can probably make a custom order or something and get the color you want. Or chemically strip the anodizing off and coat them yourself, or have a company do it.

are you going to have to repaint all of your plastics to match the new cluster surround? Or are your other plastics already painted? (can't remember if you have a 93 or not)

Thread Starter
Joined: Feb 2008
Posts: 2,979
Likes: 9
From: Long Island NY 11746
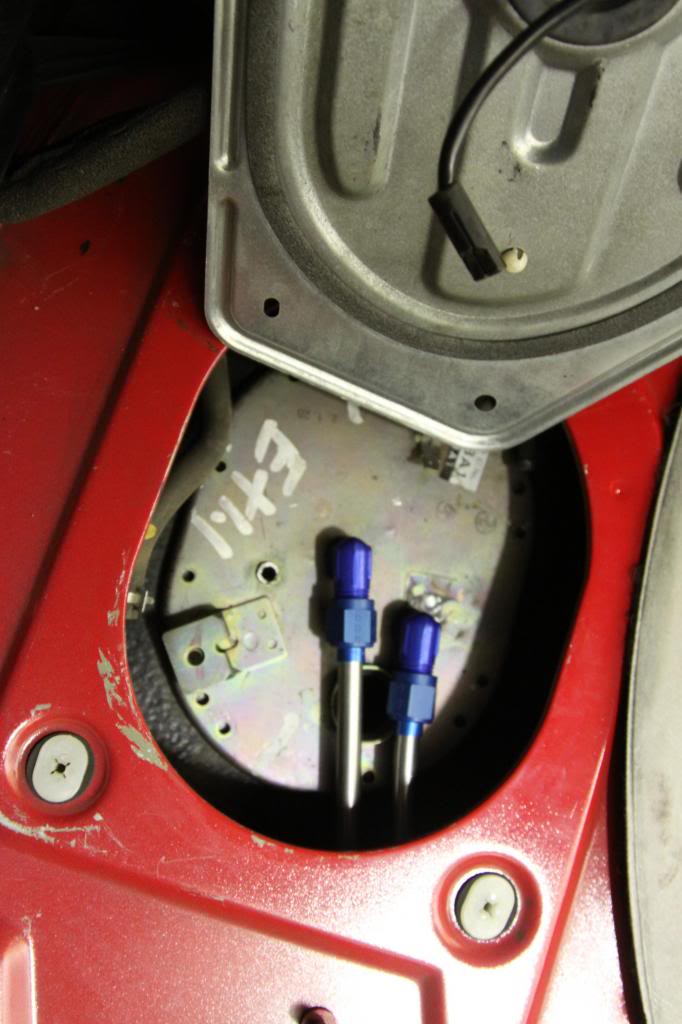
-4 for wastegate control and for wastegate cooling. -6 was used for turbo coolant and for fuel lines.
Thank you.
If by stack you mean racepak, thanks
.Yea it is, unfortunately it is not color display so I have trouble identifying the fish.