
PandazRX-7: Dedicated FD Time Attack Build!

Thread Starter
Joined: Nov 2003
Posts: 1,223
Likes: 4
From: SoCal
Stock fuel hardlines flared for 5AN tube nut for 5AN to 6AN adapter. Then I'm thinking 45 degree hose ends would work nice.
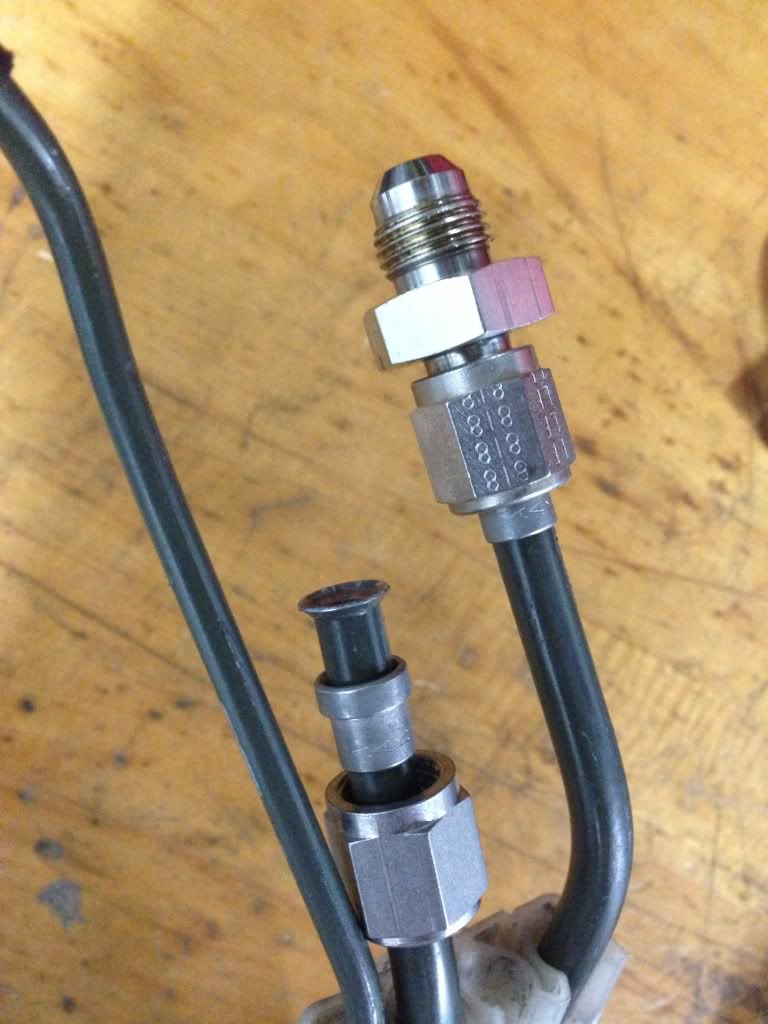

Also had 6AN stainless males welded on the stock fuel pump hanger. Pressure tested up to 30 psi so will be fine at 0psi as my pick up pump for the surge tank.
Also dropped the whole rear suspension and diff last weekend. Unbelievably greasy and filthy and looked like those bolts/nuts had never been opened up since 93!! Will be pressing out the stock bushing before sandblasting and powdercoating all the arms.... I'm thinking clear powder would be pretty clean. Then press in the new SuperPro bushings. Will post pics soon.
Also gettin some ideas on lightening up the PPF... Since a trans and diff brace will be installed I figure I can sacrifice some PPF strength for lightness. Chop the center out and replace with lighter tubes?? We'll see.
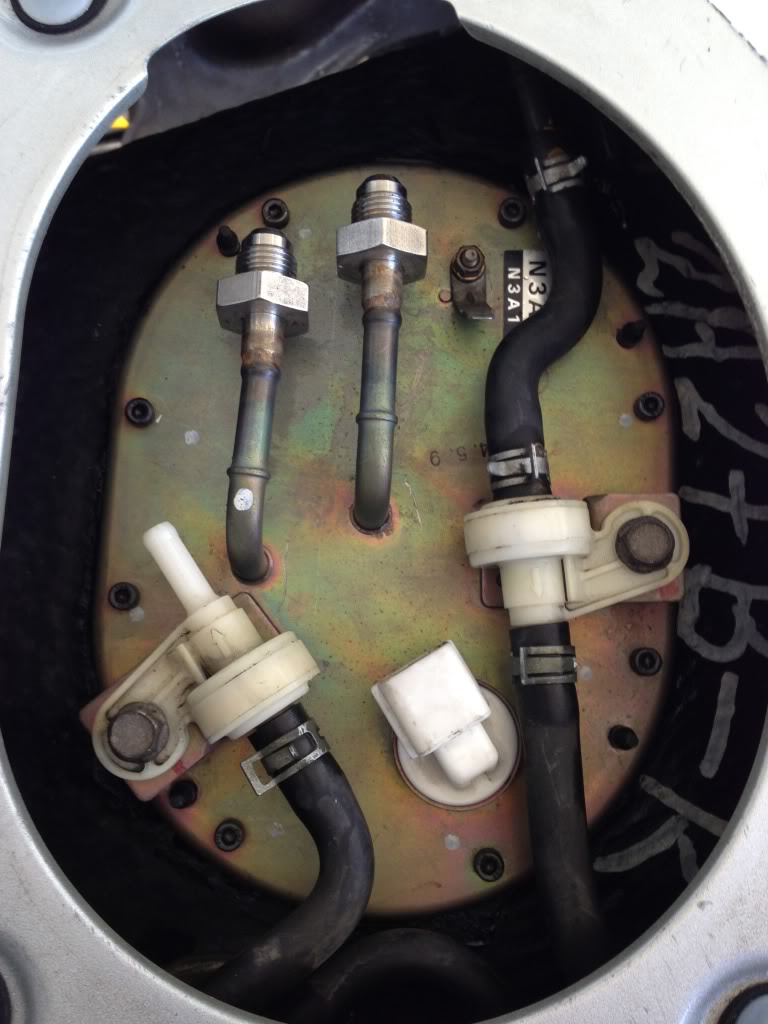
oooooooooooohhhh yeaaaaa... WHere exactly do the two check valved lines sitting on top of your pump hanger go? I know one goes to the charcoal canister...but the other? My car smells like gasoline at all times LOL
Thread Starter
Joined: Nov 2003
Posts: 1,223
Likes: 4
From: SoCal
There's one check valve for each side of the gas tank... the passenger side connects to the driver side and then to the charcoal canister. I'll be installing the canister back but keep in vented from there I guess. How do you have it now?
are you using the non-teflon stainless AN hose? (rubber innards)
i've experienced these having hairline cracks on the inner section of hose and stinking like gasoline.

Thread Starter
Joined: Nov 2003
Posts: 1,223
Likes: 4
From: SoCal

Thread Starter
Joined: Nov 2003
Posts: 1,223
Likes: 4
From: SoCal
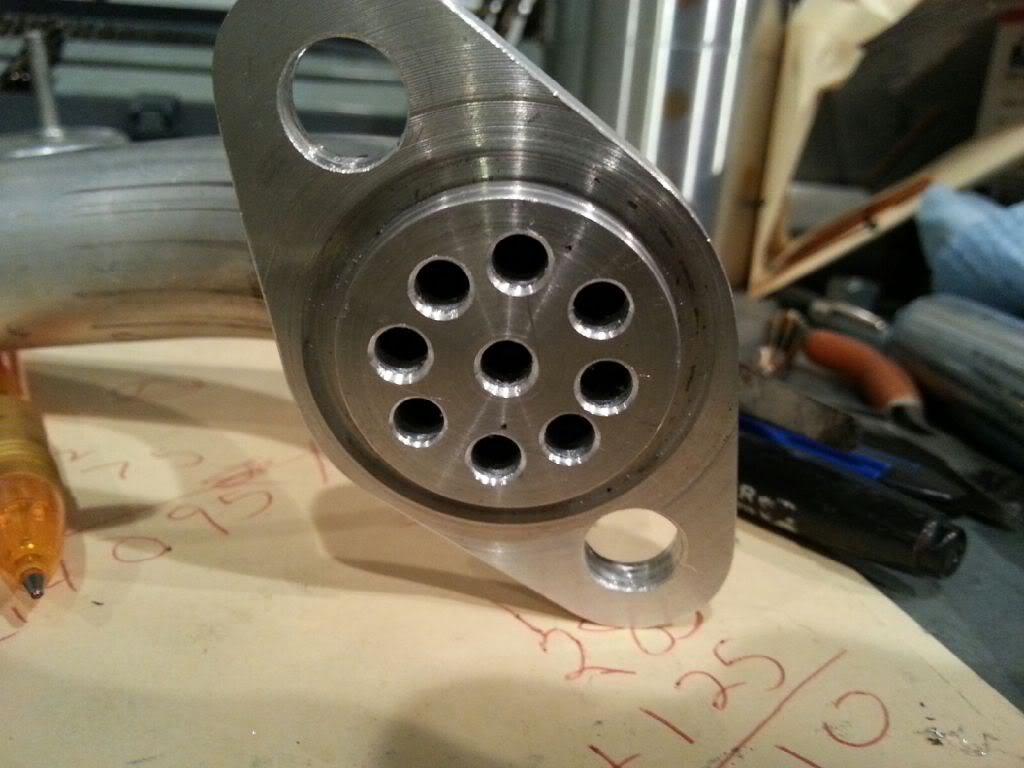
Almost finished with making the oil filler neck out of aluminum... here's a shot of the bottom piece my friend machined with O-ring groove just like stock. The top part will be machined soon to match stock threads. We might make a few of these...


In for two as long as the price is reasonable.

Thread Starter
Joined: Nov 2003
Posts: 1,223
Likes: 4
From: SoCal
Wow, didn't think the demand was that high... I'll post pics of my finished neck as soon as it's done. I'm having it clear everything using the Xcessive LIM and welding on a -6 AN fitting for my catch can...then powder coating all semi-gloss black.
Thread Starter
Joined: Nov 2003
Posts: 1,223
Likes: 4
From: SoCal


Joined: May 2001
Posts: 2,390
Likes: 2
From: San Francisco, CA
What is the purpose of the holes drilled into the inlet portion on the bottom of the filler neck. I hope this isn't an attempt to eliminate oil puking out under boost due to blowby.
Thread Starter
Joined: Nov 2003
Posts: 1,223
Likes: 4
From: SoCal
I decided to drill holes as a baffle because it can't hurt to help in high G force right turns... but we all already know the real fix is venting both sides of the motor. One off the oil neck and the other off the rear iron oil drain port. That method has only accumulated 2oz of oil in my catch can after 5 track days in the past.
Joined: May 2001
Posts: 2,390
Likes: 2
From: San Francisco, CA
I decided to drill holes as a baffle because it can't hurt to help in high G force right turns... but we all already know the real fix is venting both sides of the motor. One off the oil neck and the other off the rear iron oil drain port. That method has only accumulated 2oz of oil in my catch can after 5 track days in the past.
Fantastic build btw and glad I found your thread.